Page 1 of 1
Another side of boat building
Posted: Thu Dec 07, 2006 9:27 am
by Dimitris
Hello everybody.
I have been following this forum for quite a long time, but did not start a builder's thread, mainly because I do not build a "Bateau". However, I do build a boat and I do like this community so here I am to share my experience with you.
The other side of boatbuilding where I am is plywood on frames boatbuilding. I build the TINA 9, a Hartley dinghy - training sailboat. I started last March, I have put some effort on and you can see how far it has gone in my gallery.
I will try to keep this thread posted as I progress through the build.
You can visit my gallery at
http://gallery.bateau2.comindex.php?cat=15358
Regards to all of you from Greece.
Dimitris
Posted: Thu Dec 07, 2006 10:06 am
by jacquesmm
Saw it.
It is interesting to see the differences between plywood on frame and stitch and glue.
Could you please make a note at the beginning of your gallery to expalin that it is not one of our designs? I don't want potential builders to be scared away.
Posted: Thu Dec 07, 2006 11:02 am
by Dimitris
Done it. You are right, it looks scary.
D.
Posted: Thu Dec 07, 2006 11:05 am
by jacquesmm
Not scary in this case because you do it right. You are doing a good job but I don't want builders to be confused.
Thank you.
Posted: Thu Dec 07, 2006 11:50 am
by kiwi
And of course we talk about non bateau.com plans and builds over at amateurboatbuilding.com every day

Tony
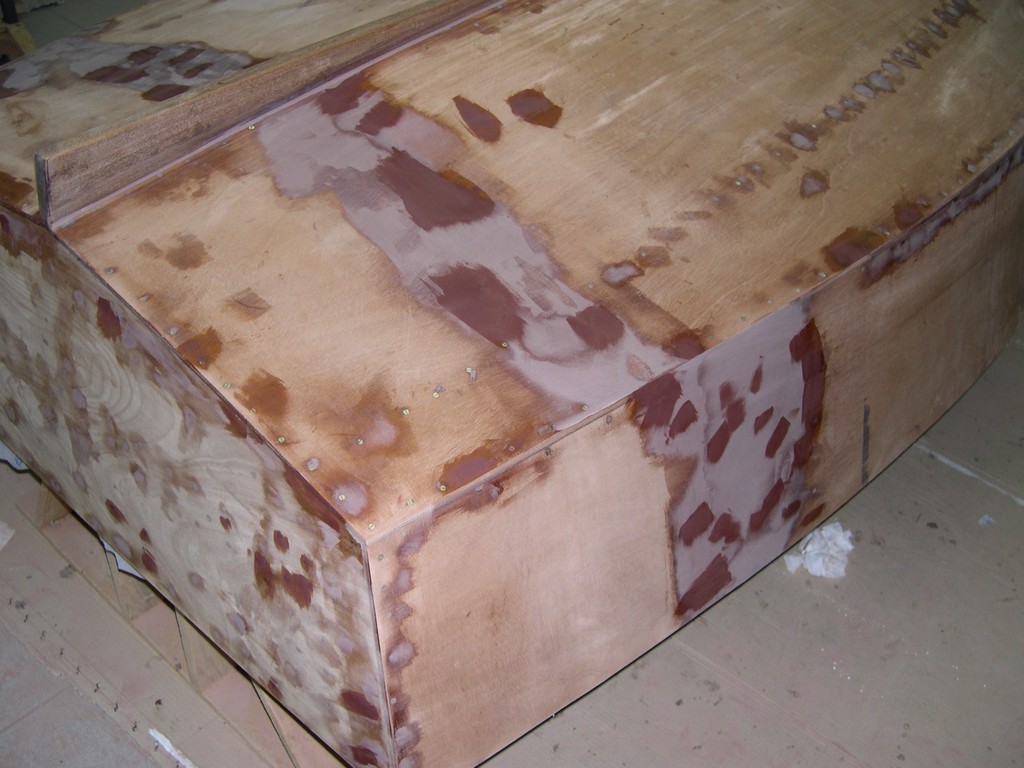
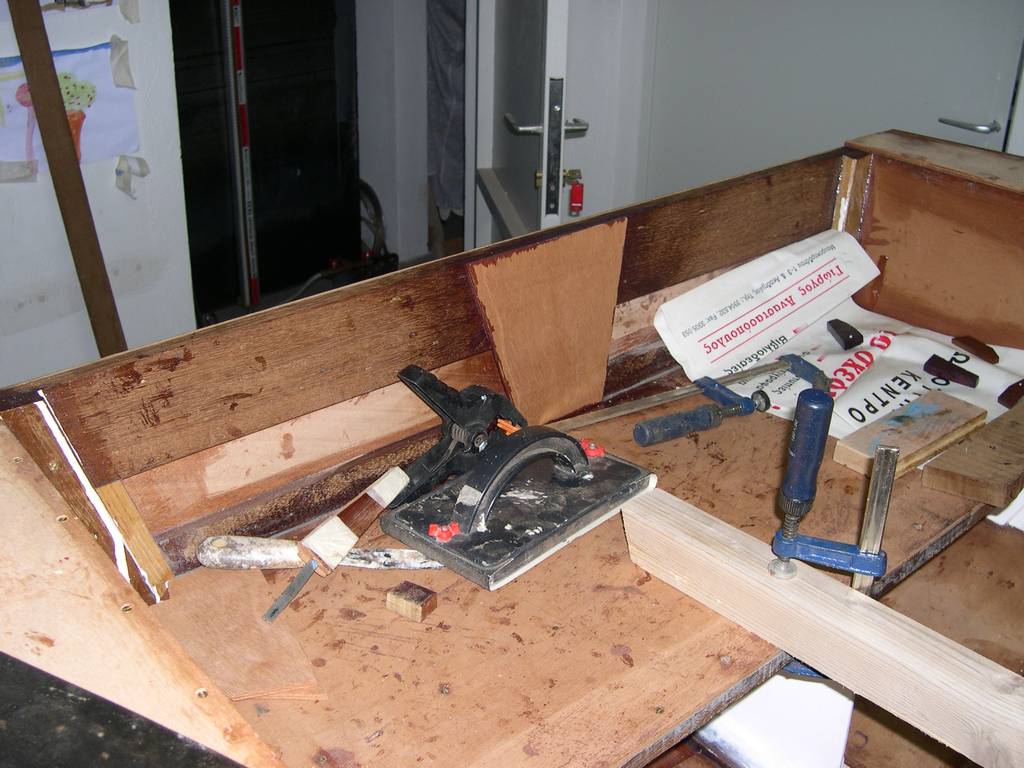
Bottom ready for glueing. Sanding.
Posted: Fri Dec 22, 2006 5:01 pm
by Dimitris
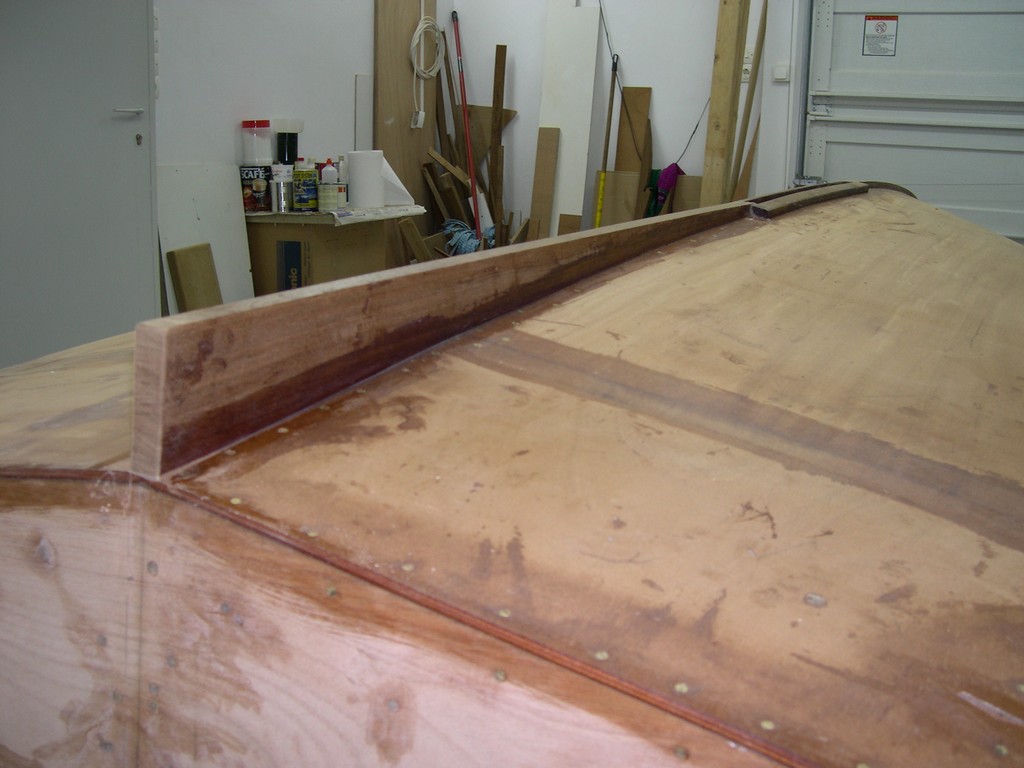
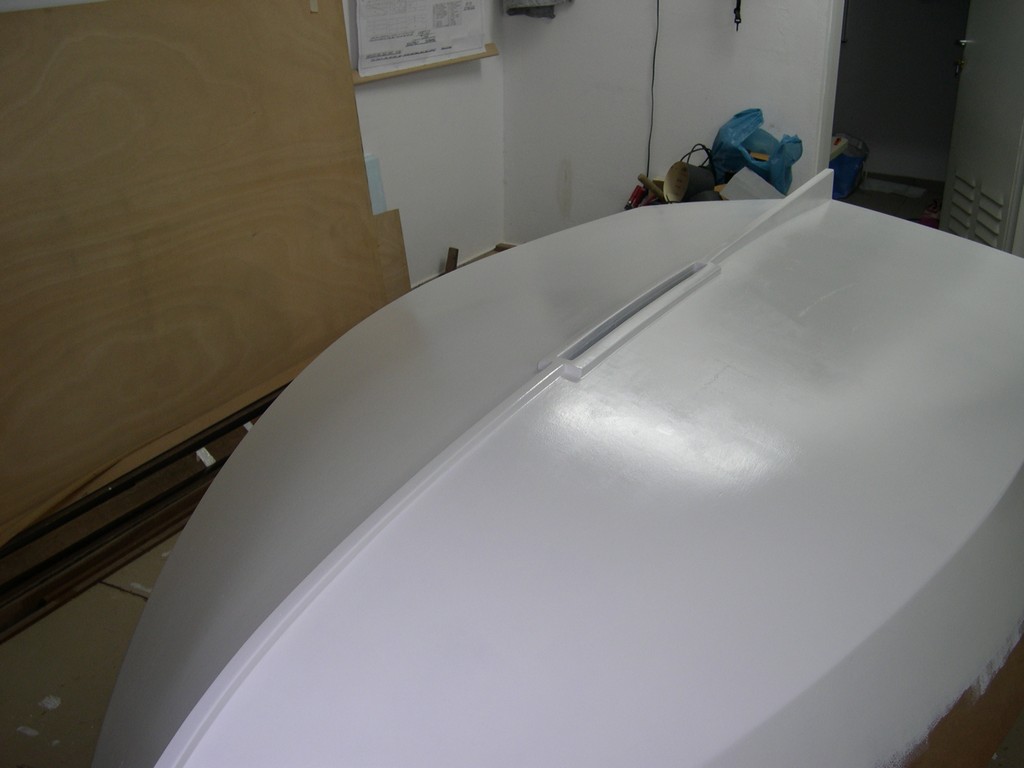
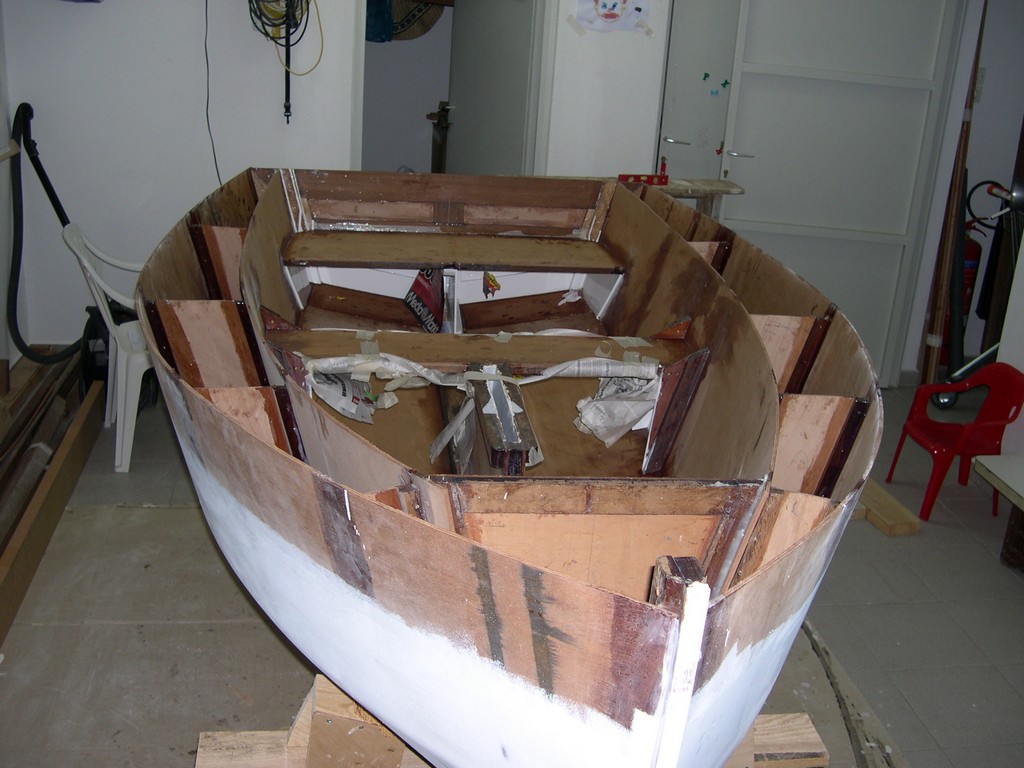
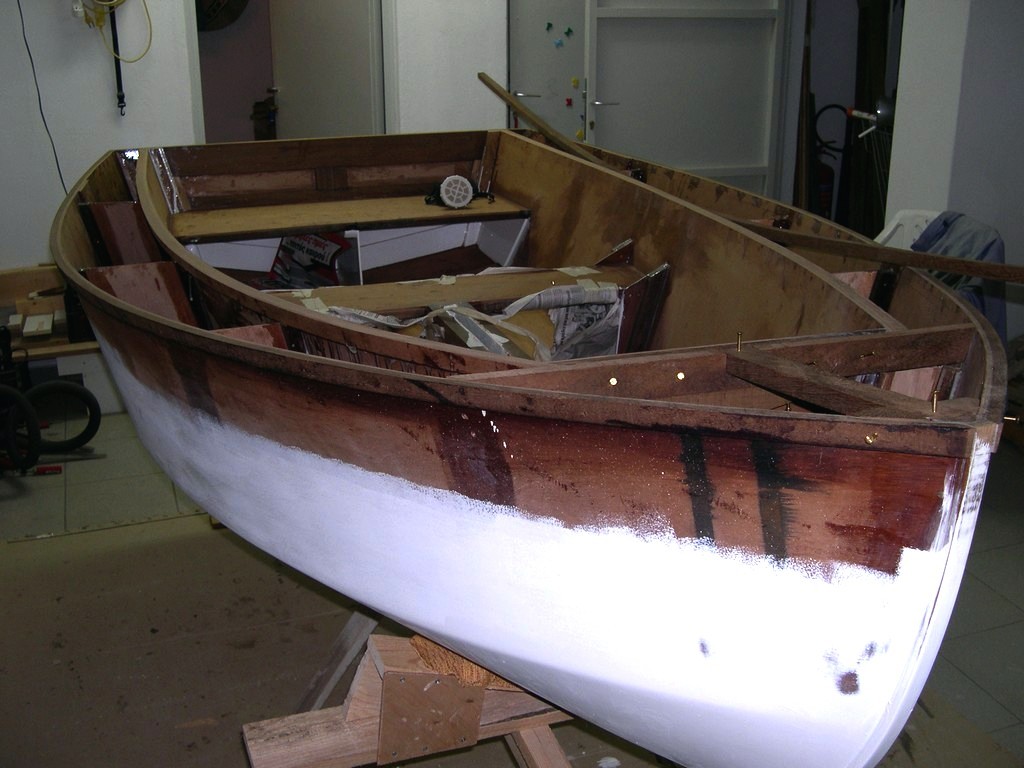
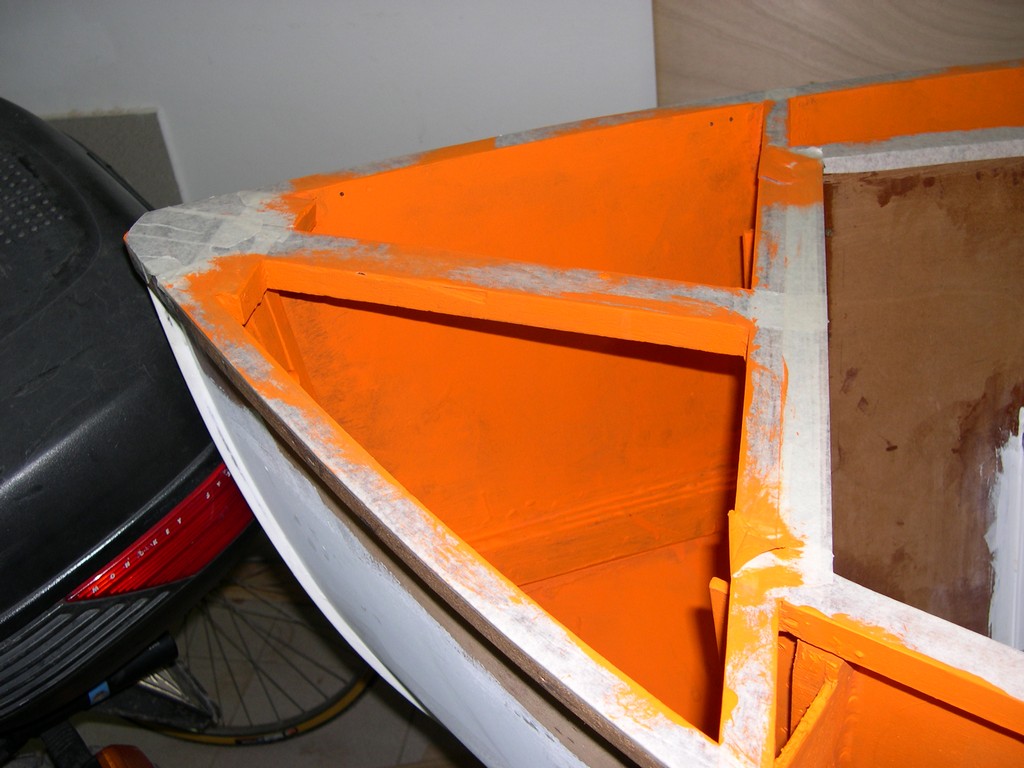
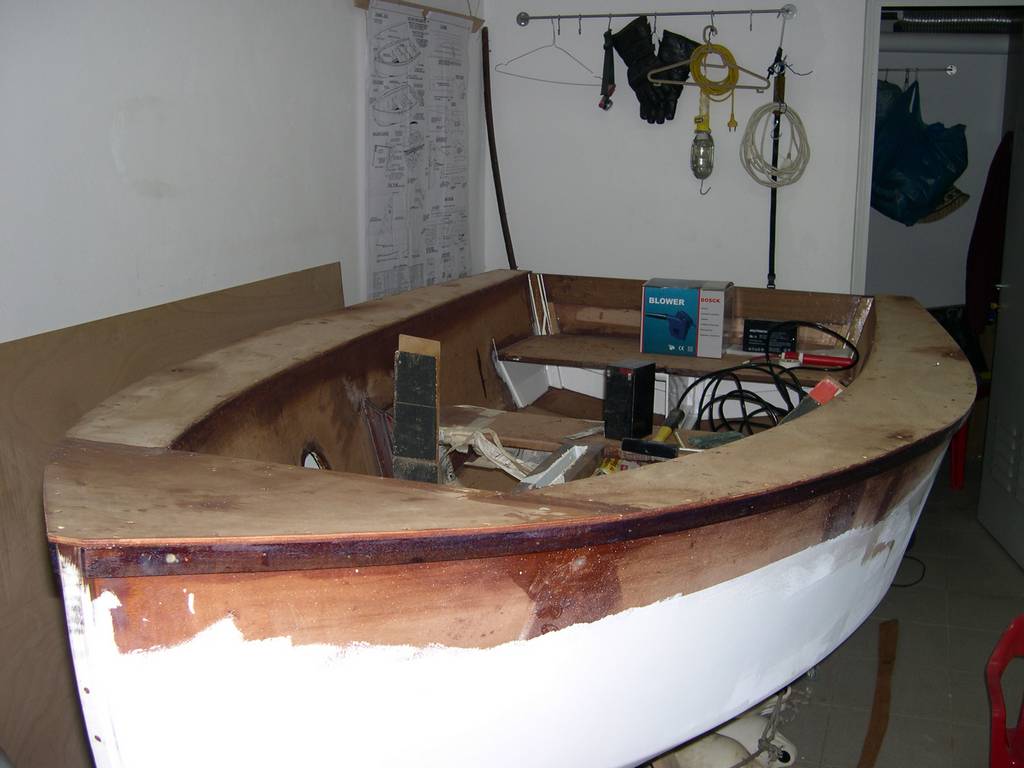
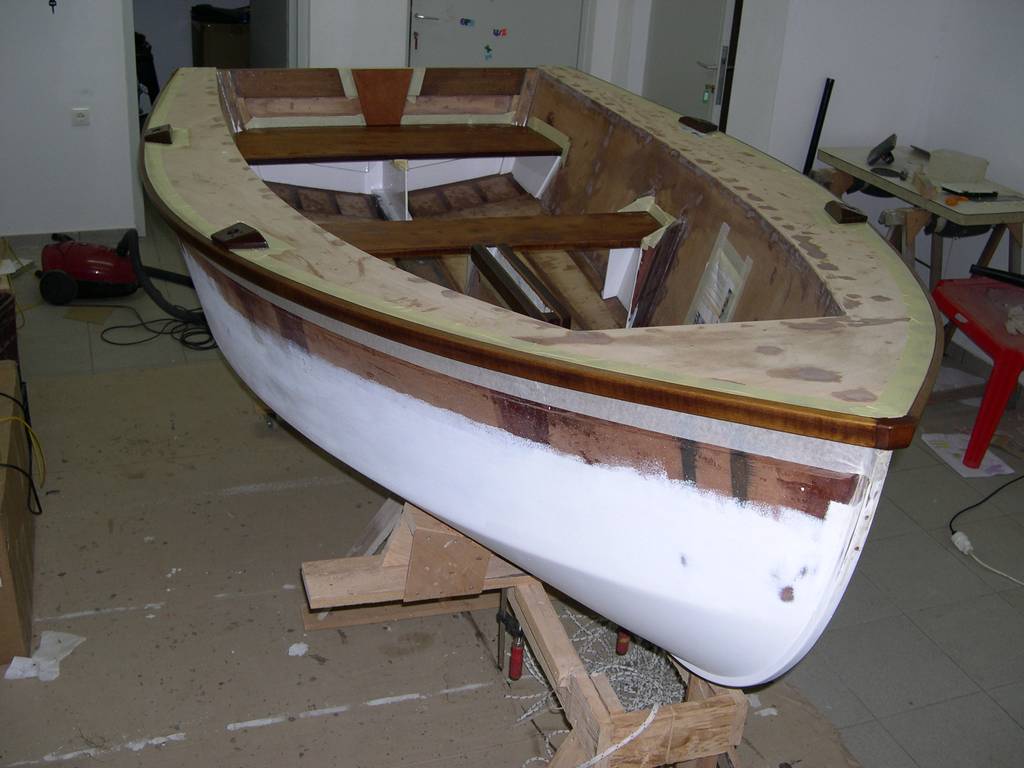
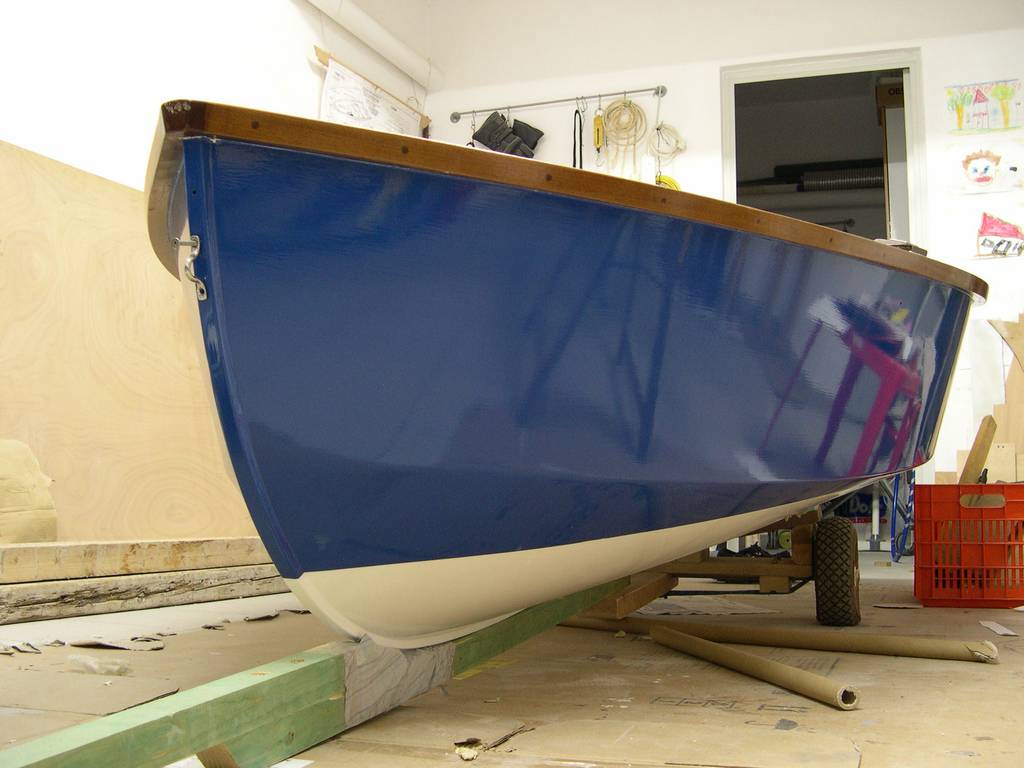
It has been a while since my last post. During this time I finished with the bevelling of the port side, so now both sides are ready. I also fitted the pannels on the boat, and I enjoyed, after months of work, the first full view of her, which I share with you


Another look from the bow with I wide-angle lens. She looks gorgeous.
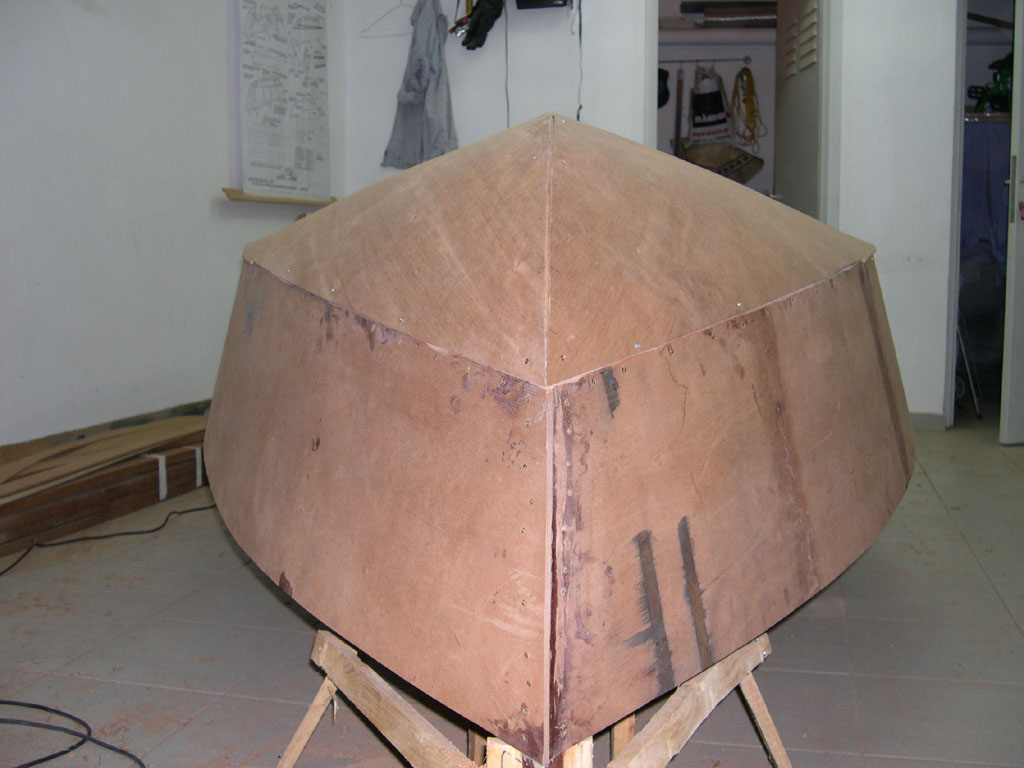
Unlike stitch-and-glue boatbuilding, it takes a long time to get there with conventional methods with frames.
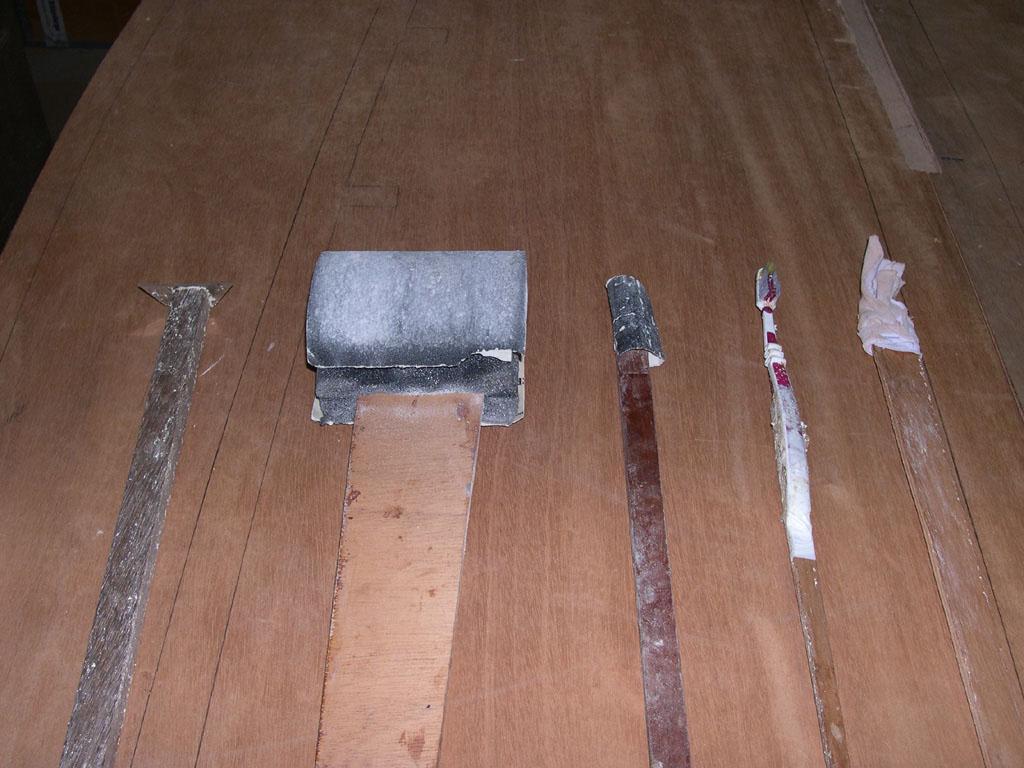
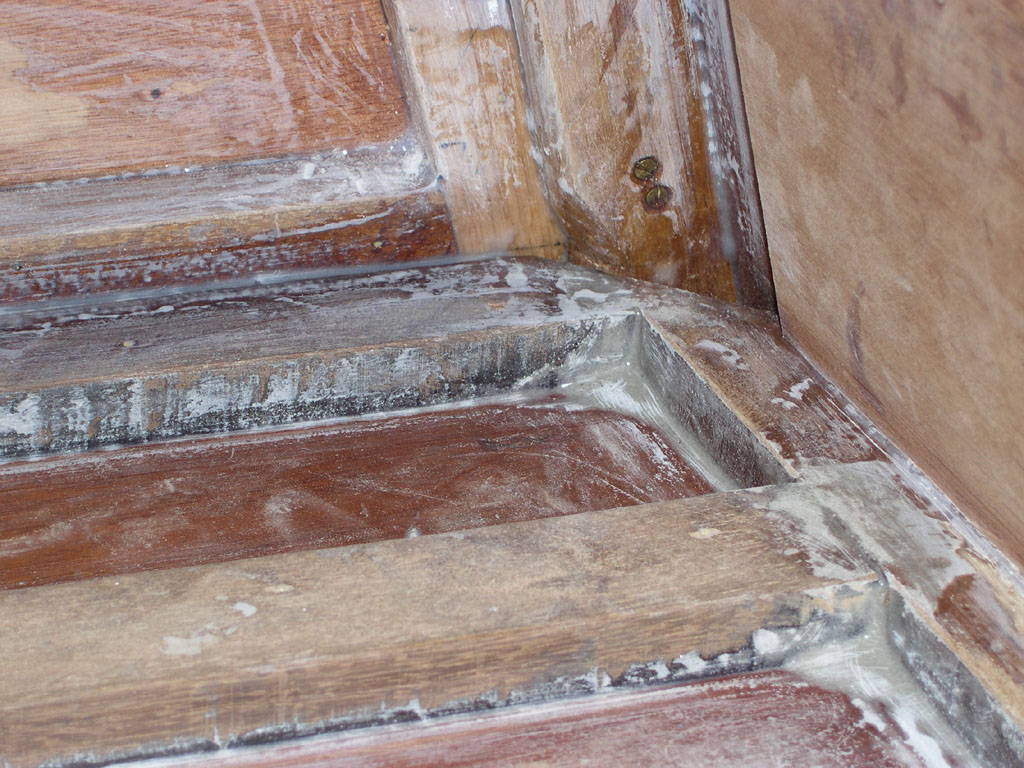
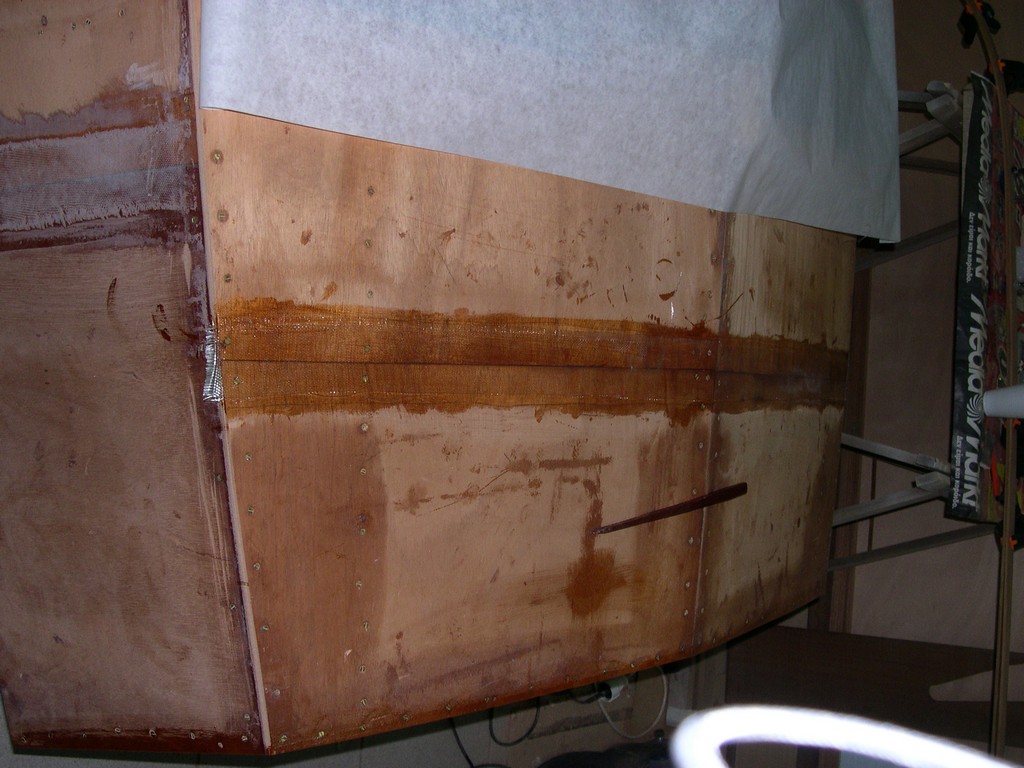
After dry-fitting everything, I removed the pannels and started to think of the preparatory work I had to do before glueing. At first it occured to me that such a beauty deserved a better paint than the conventional alkyd paint that I have used inside the ceterboard case. So I started to remove it. I used paint remover, which I applied with a toothbrush. Then I scrapped it with a blade that I mounted at the end of a glue and sanded the remains with self-made sanding devices. You can see the result here. It took me two afternoons to remove it. There are still some traces of paint. They will be removed after I flip her.
These are my improvised tools. Under the tools, you can see the bottom pannels with the chines marked on them. Holes will be opened on the panels for screwing before glue is applied on them over the chine marks.
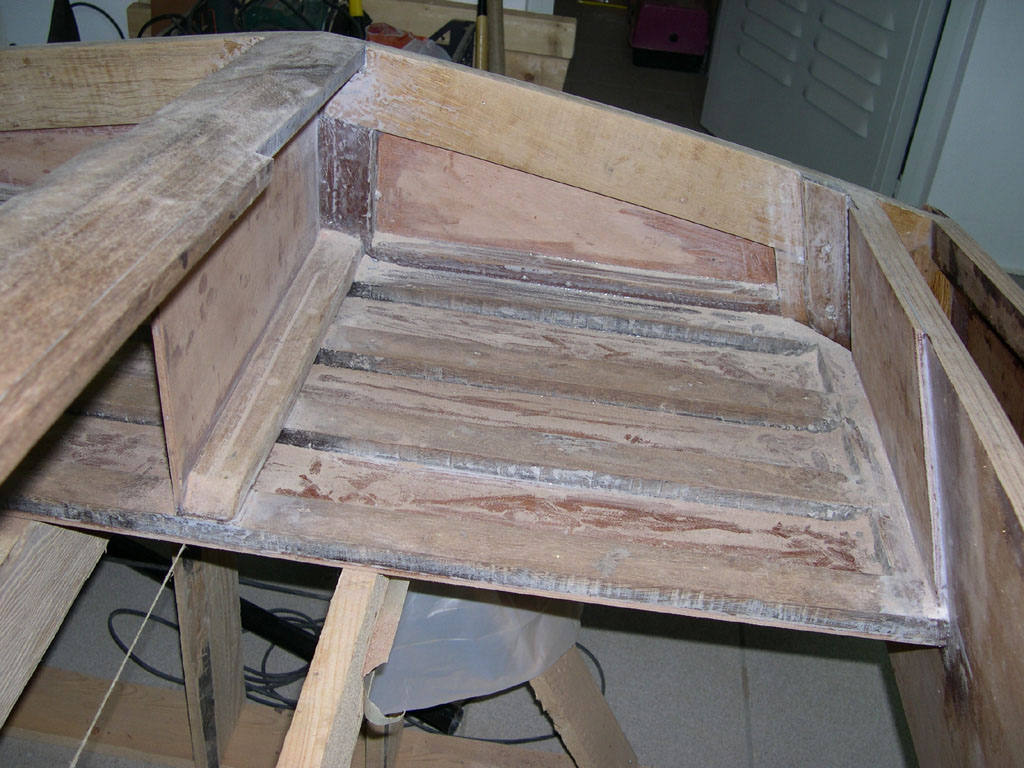
Then, I thought that everything under the benches sould be ready for painting before the pannels are glued. It is much easier to access these areas now. Hopefully, these areas will be invisible, but I want them to be fair to the hands. Of couse, all of you know what it takes to prepare for painting. It is ....
Sanding!!!
Getting there, I realised that boat building is like software development. If you want quick results at the begining, you are going to pay for it at the end. At the early stages I did not take care at all about epoxy sreading around and falling everywhere. Now, I have to remove all these spills. I started to sand by hand, and this is a picture of the mess that I am into.
I find it especially difficult to sand the corners. After a long time sanding they are still glossy. Any idea how to deal with it?
I wish you all a Merry Christmass and a Happy New Year, good health to all of you and you families and may you all splash your boats soon.
Regards
[/b]
Posted: Fri Dec 22, 2006 5:33 pm
by baba101
Large surface : Random Orbit sander, smaller corners etc you need a mouse sander....and for really tight corners try using these attachments with your standard drill (pictures attached)........and if you really wanna go crazy...buy a rotary tool (not really needed) with all the fine sanding attachments....
Good Luck and happy holidays...


But if you want to go Retro...use these attachments for tight spots and a long board sander for the flats...good luck

Posted: Fri Dec 22, 2006 10:50 pm
by ks8
Ahh... the 'ol 407...
It's looking mighty fine D. Thanks for the update.

Posted: Thu Dec 28, 2006 6:22 am
by Dimitris
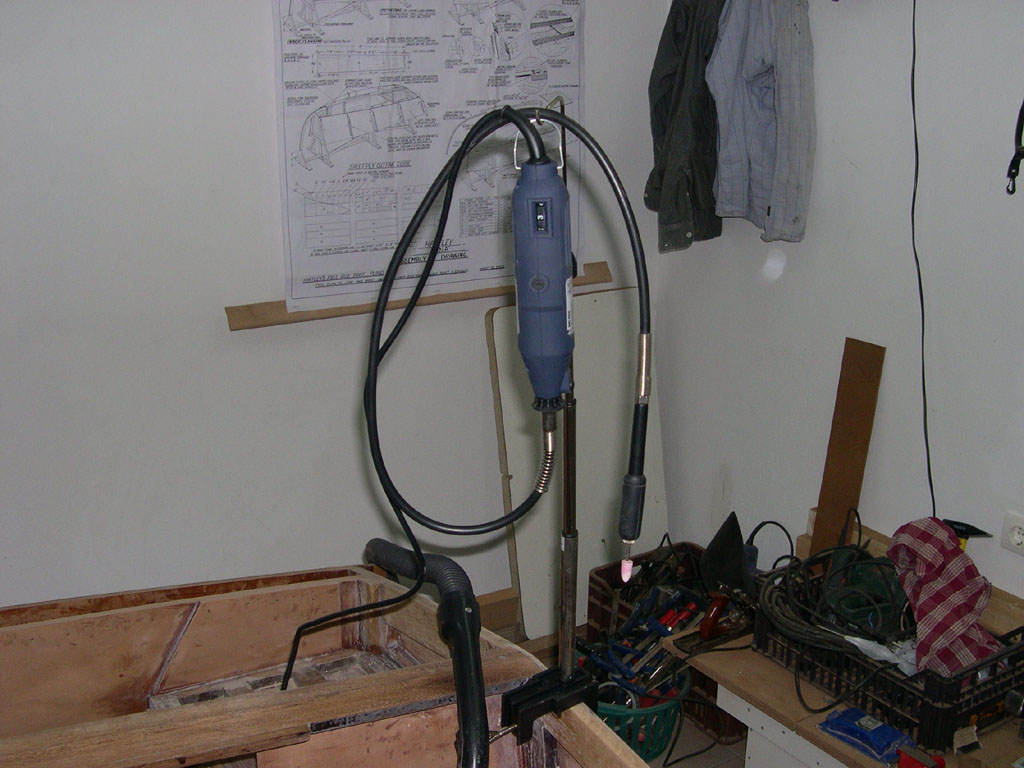
I made a Christmass present to myself and bought a Dremel look-alike for 20 euros. It came with an assortment of tools, including a 407. I was amazed how much material can be removed with such a low power tool. I guess it's because it spins at 35000 rpm. I think it worths its money. If it ever breaks down I may buy a real Dremel.
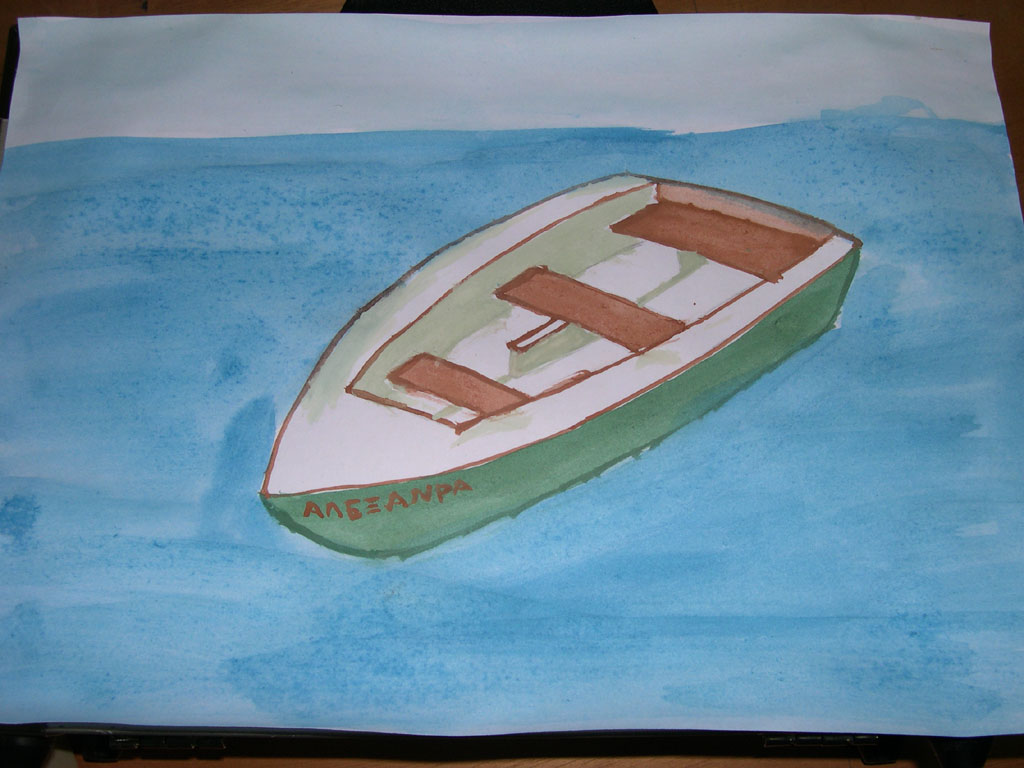
For the time I am just sanding all areas that will be inaccessible after I install the bottom panels. To keep my moral high, I painted an aquarella of her while playing with my daughter. Please, enjoy
Regards
Posted: Thu Dec 28, 2006 8:49 am
by MadRus
Dimitris,
Nice. From dream to reality and back to dream. It's nice to see that you have fun with the kids too.
The look-alike is probably still made by Dremel- you know how that goes.
Building update
Posted: Mon Feb 19, 2007 12:31 pm
by Dimitris
It has been long since I last posted something. All this time I was mostly sanding. Well, here is my progress.
I have painted under all the benches and the inner side of the transom. I used one coat of epoxy, epoxy filler to fill screw holes, 3 coats of LPU surfacing primer and 2 coats of LPU boat paint. I used materials from local, Greek factories as they are much cheaper than imported ones (International, Hempel, etc). I paid 10 euros per kilo for the primer and 14 euros per kilo for the paint. Imported paints were at three times the price. Time will prove if I was right or wrong. Here are some pictures of this work.
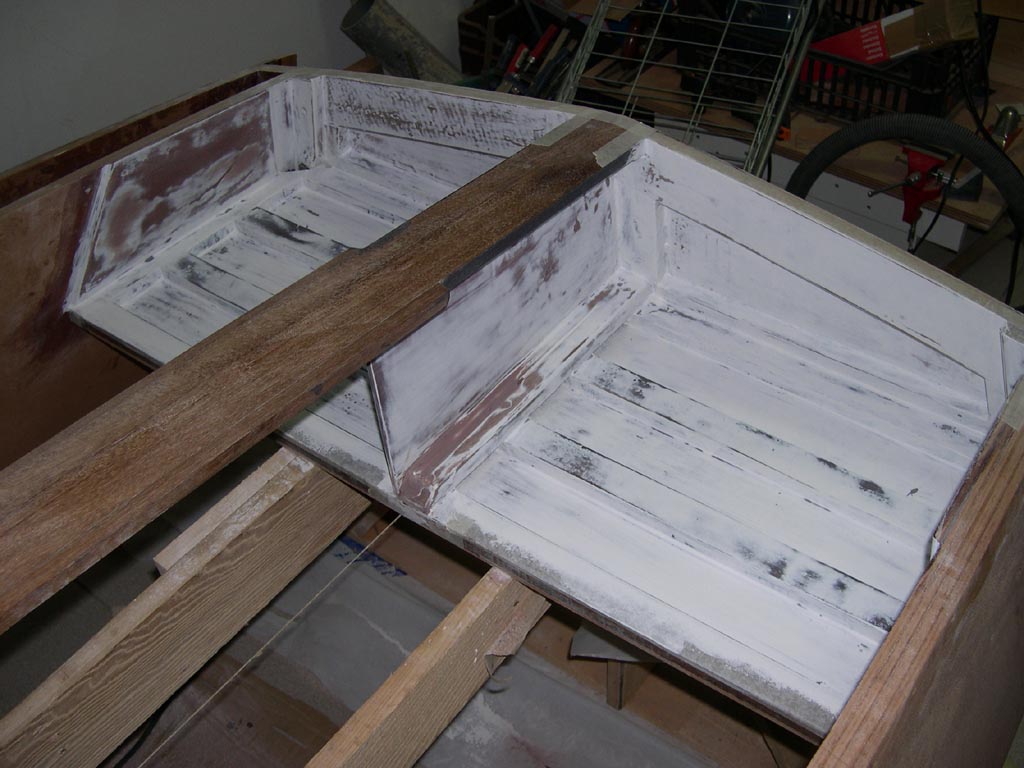
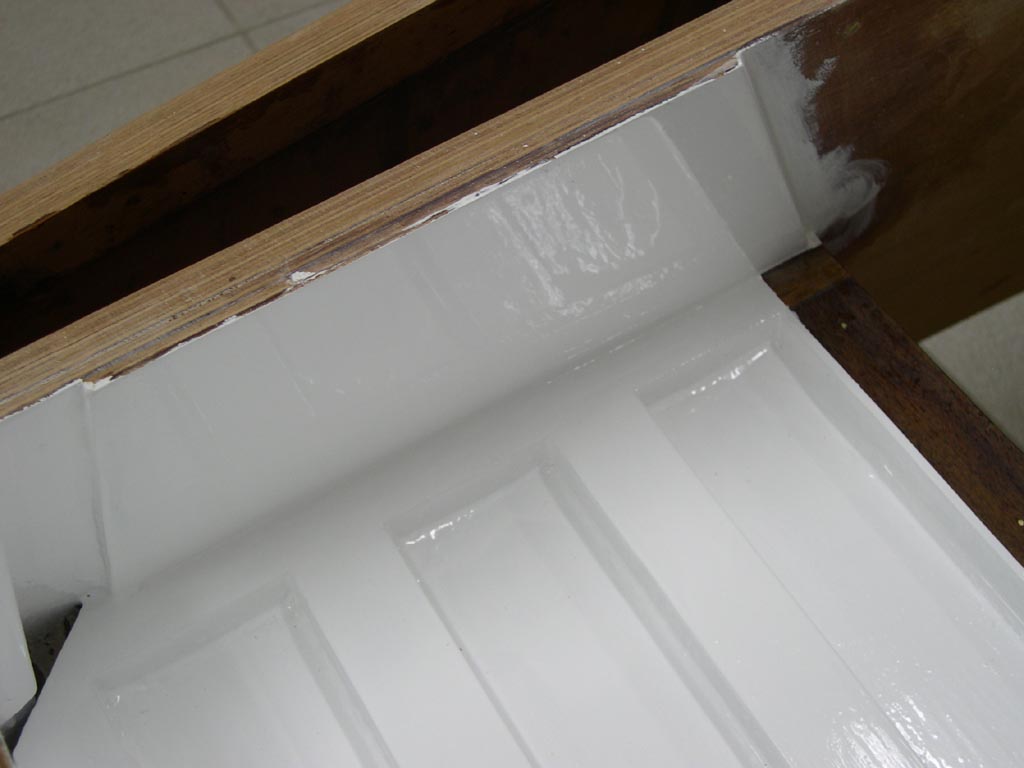
Shiny things these LPU paints. This was the first time that I have used them. They are indeed watery, difficult to use, smell bad and pronounce every little fault, dirt, dust, etc. But they are shiny.
All this sanding, priming and painting has got her thus far. I think the most difficult sanding has passed by. No I only have large fair surfaces to work with.
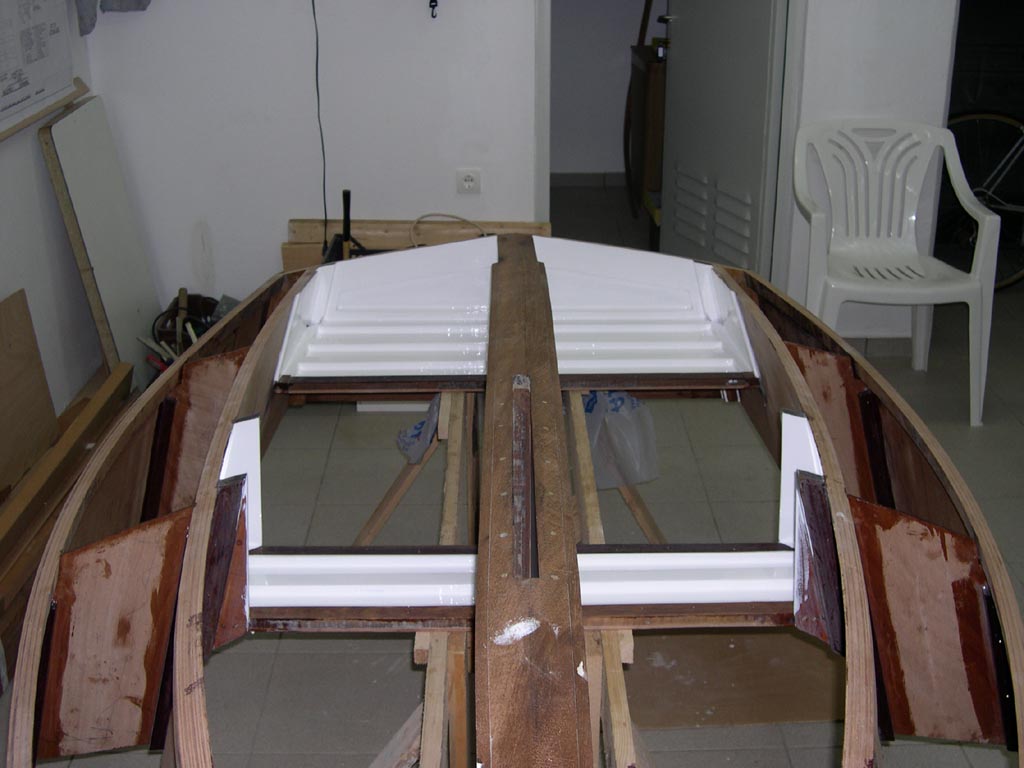
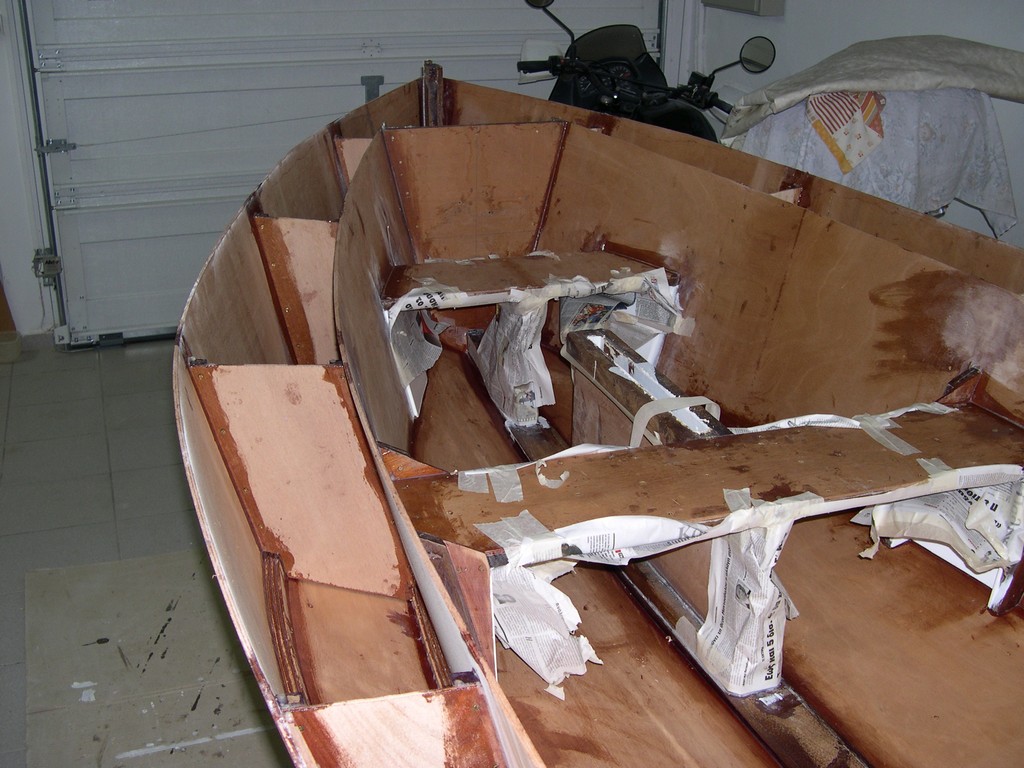
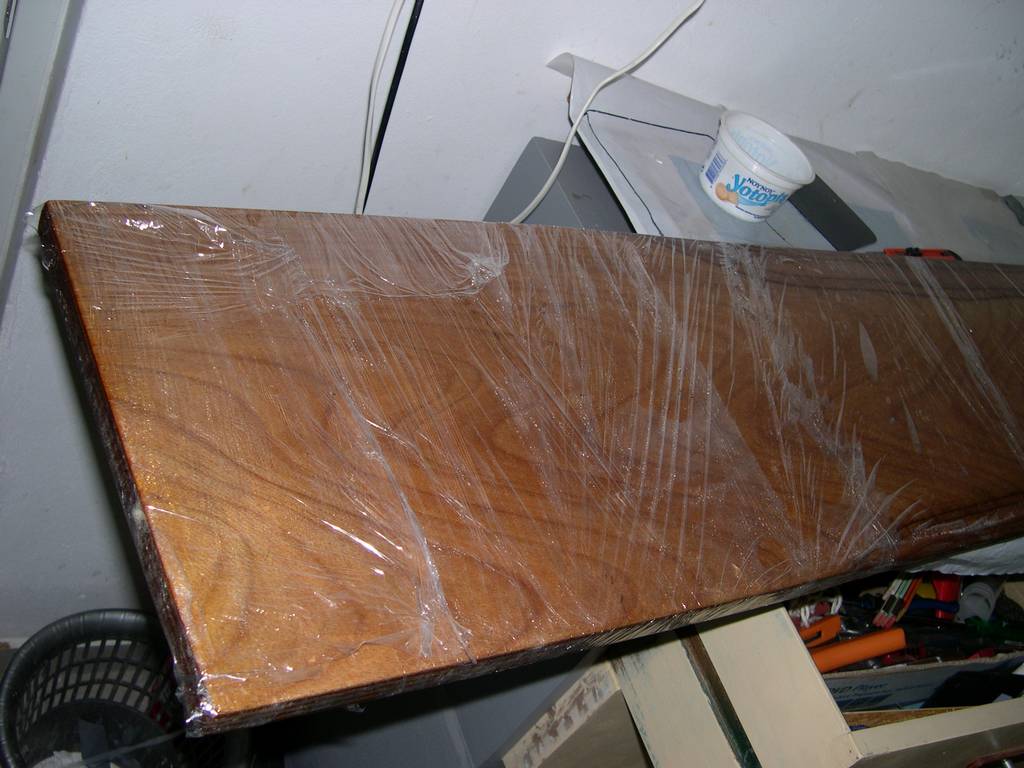
After having admired her shiny benches I wrapped them all with newspapers to protect them from the messy weekend that would follow. I could now glue the bottom planks.

Before glueing with epoxy I had to precoat the mating surfaces. I did this late at night the day before I would glue, so by next morning epoxy has hardened enough to stop soaking but would still be active to get a primary bond. I have also covered with masking tape all areas where I did not want epoxy to go (again in search for a primary bond) but I found that epoxy was sneaking under the tape.
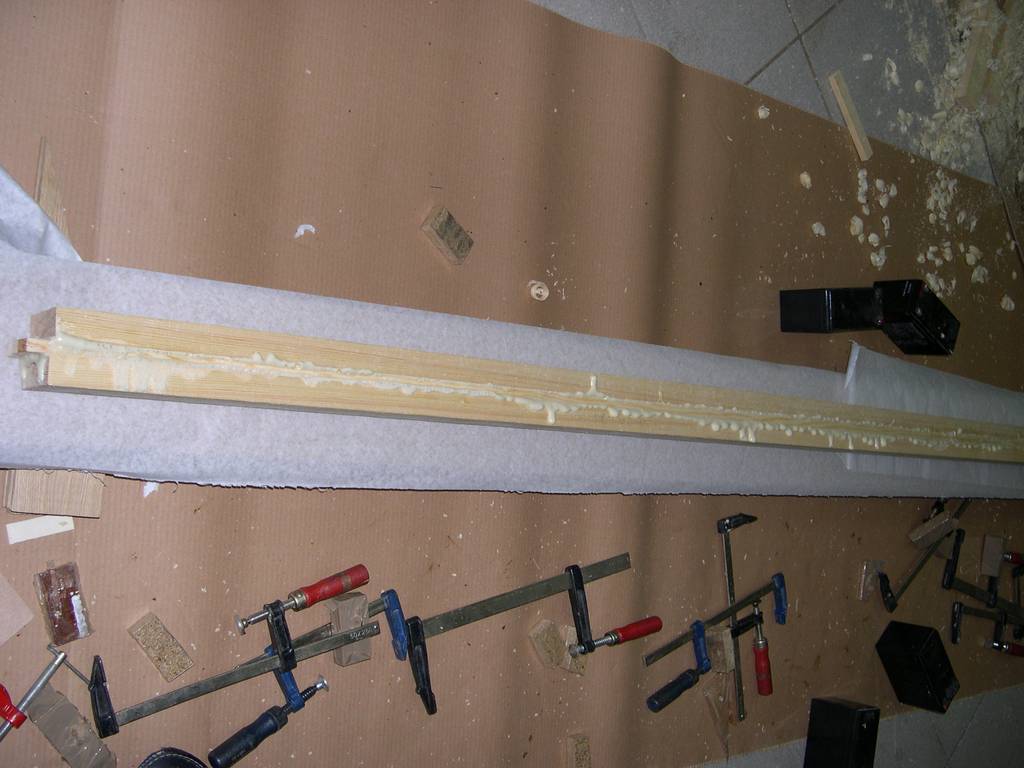
Next came the actual glueing. I took 4 hours to glue each of the bottom planks. I did the left one on Saturday and the right one on Sunday. There are aproximately 190 screws pressing each of them against the skeleton of the boat. Each screw required a pivot hole with two different diameters, one for the shank and one for the threads. These holes have all been opened during these 4 hours. There are two sizes of screws, so I used three different drills for opening holes, three batteries for the electric screwdriver to drive them in and ten pairs of gloves for each side.
This has been the most intense operation on the boat yet and was all done with very slow hardeners. Nevertheless, I had to mix two batches for each side (plus one for precating the previous night). It took 300 grams of resin for each side (about 10 oz).
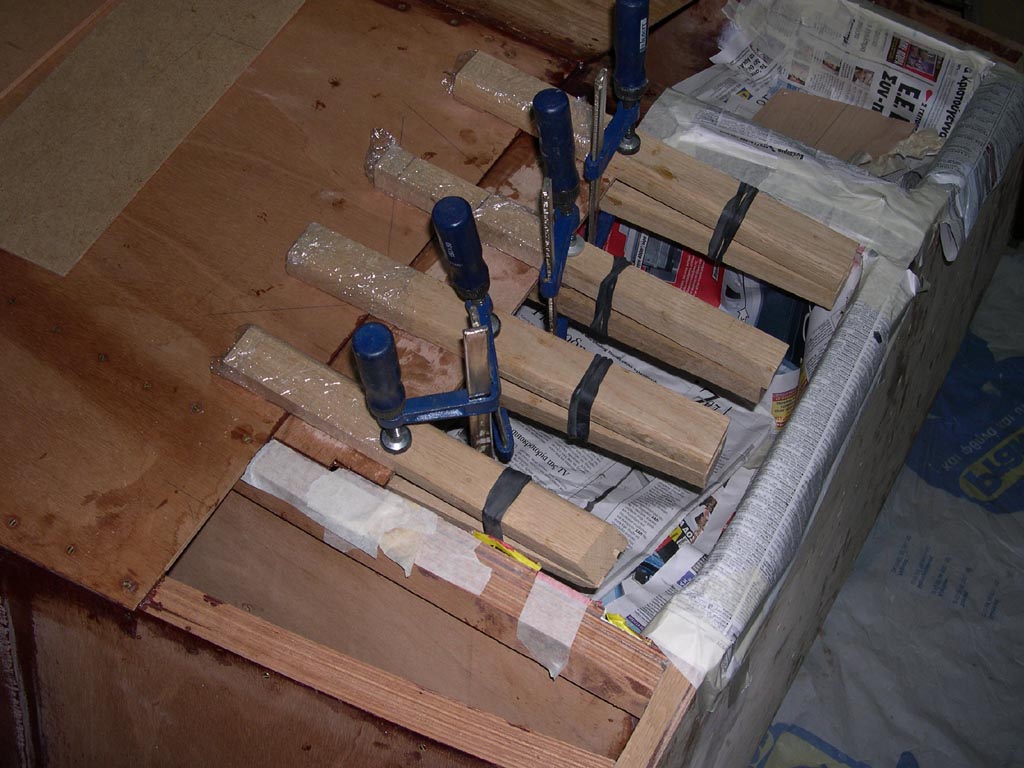
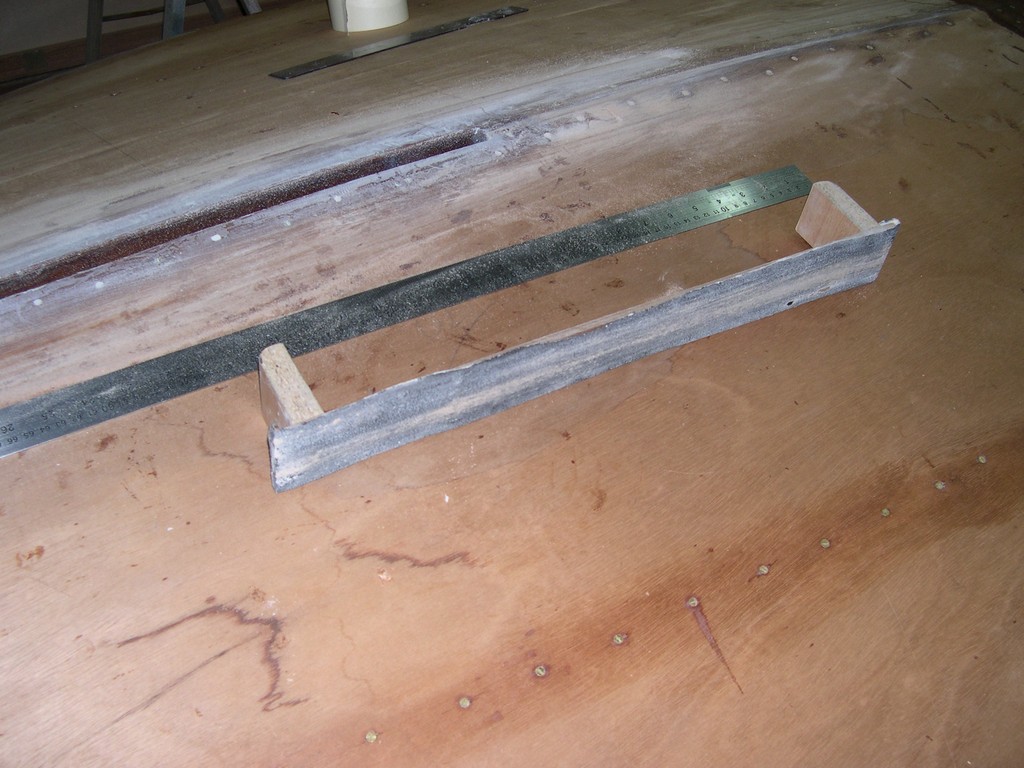
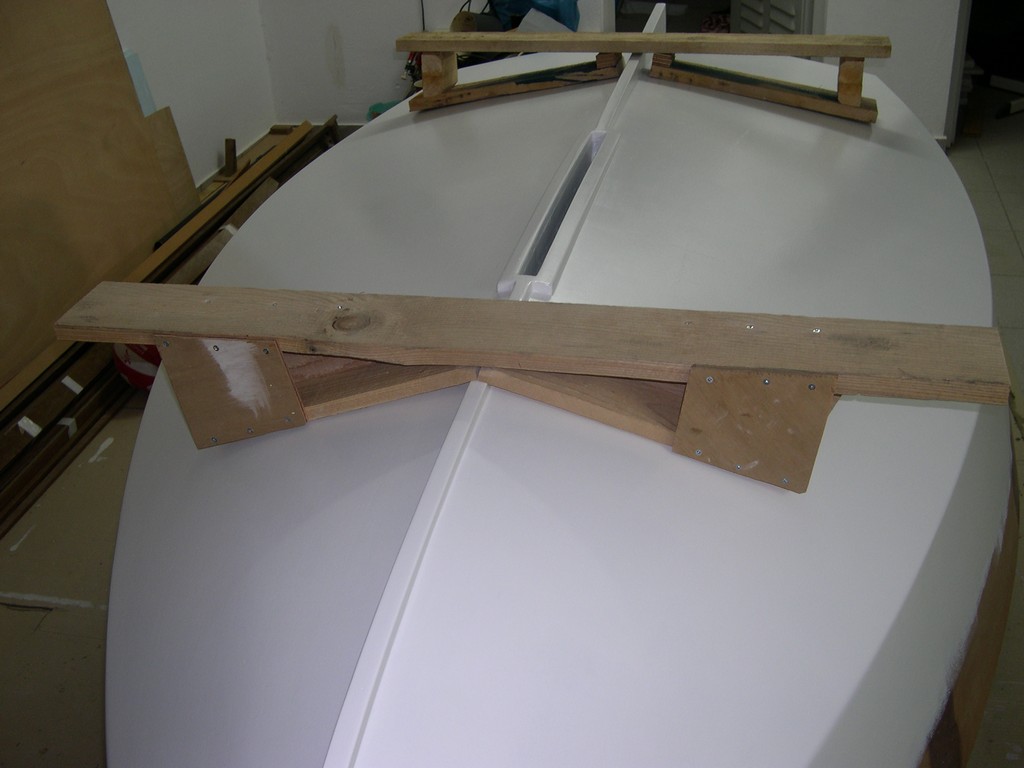
Well, planking is almost complete. I have two small patches to add at the bottom, near the transom. They are not visible at the previous picture. But before this I had to improvise some clamps that would keep the butt in position.
Here is the first butt block that gets glued under the plank. You can see my improvised clamps as well. I have just finished the second one. Two more pieces of wood and she would float!
Regards to all of you
Major milestone reached
Posted: Fri Mar 23, 2007 6:11 am
by Dimitris
I have reached a major milestone
. No more wood working until I flip her. Let's go strait to the pictures.
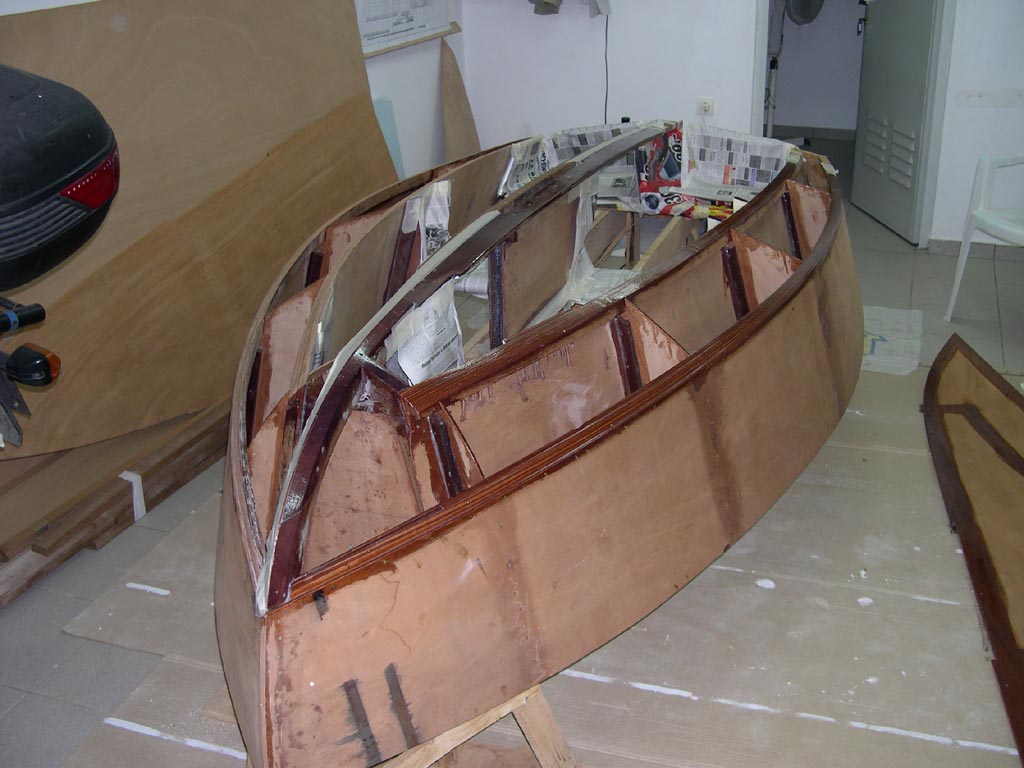
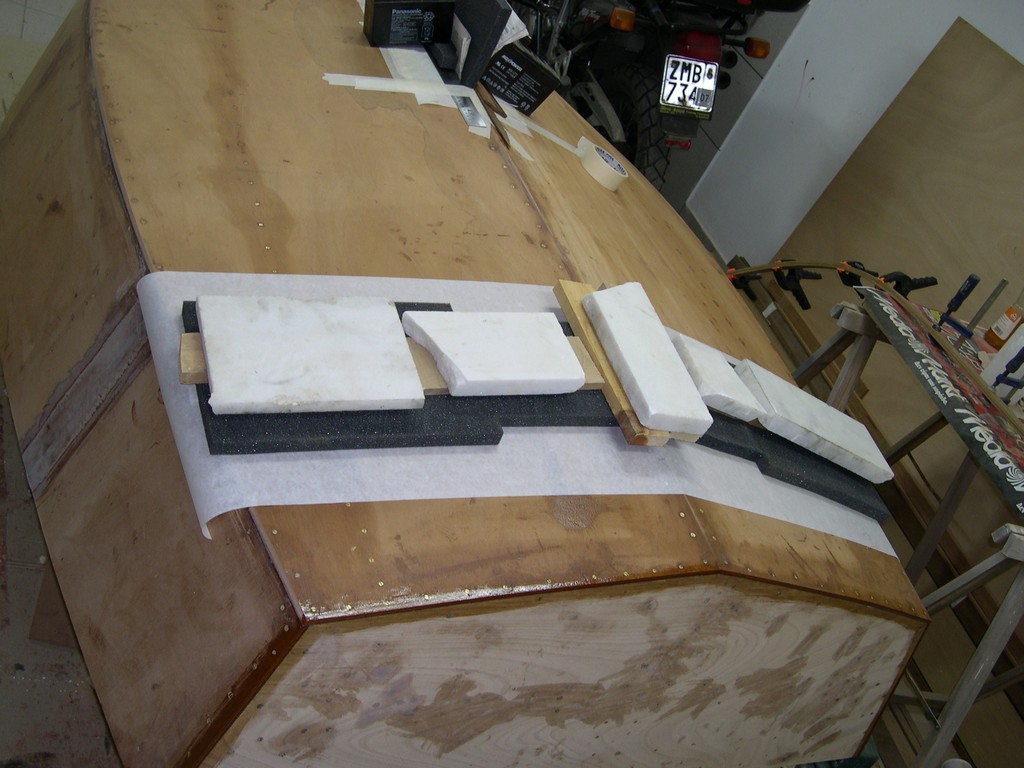
The last pieces of the bottom planks are glued on. The batteries and the marble press the planks on the underlying butt. Small pieces of wood are bent under the butts pressing them up towards the planks.
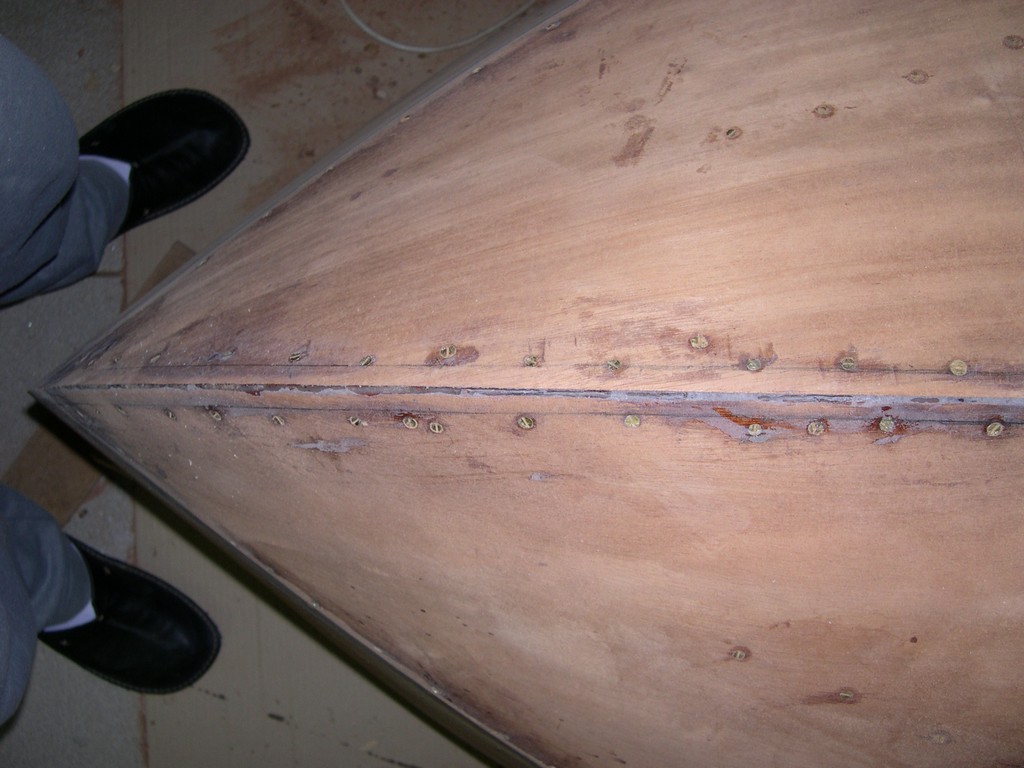
All planks are glued in position now. They have also been trimmed around the chine using a block plane. The corners are very sharp right now. I will round them using abrasive paper. A glass tape will be glued on the seams of the bottom planks to prevent cracking.
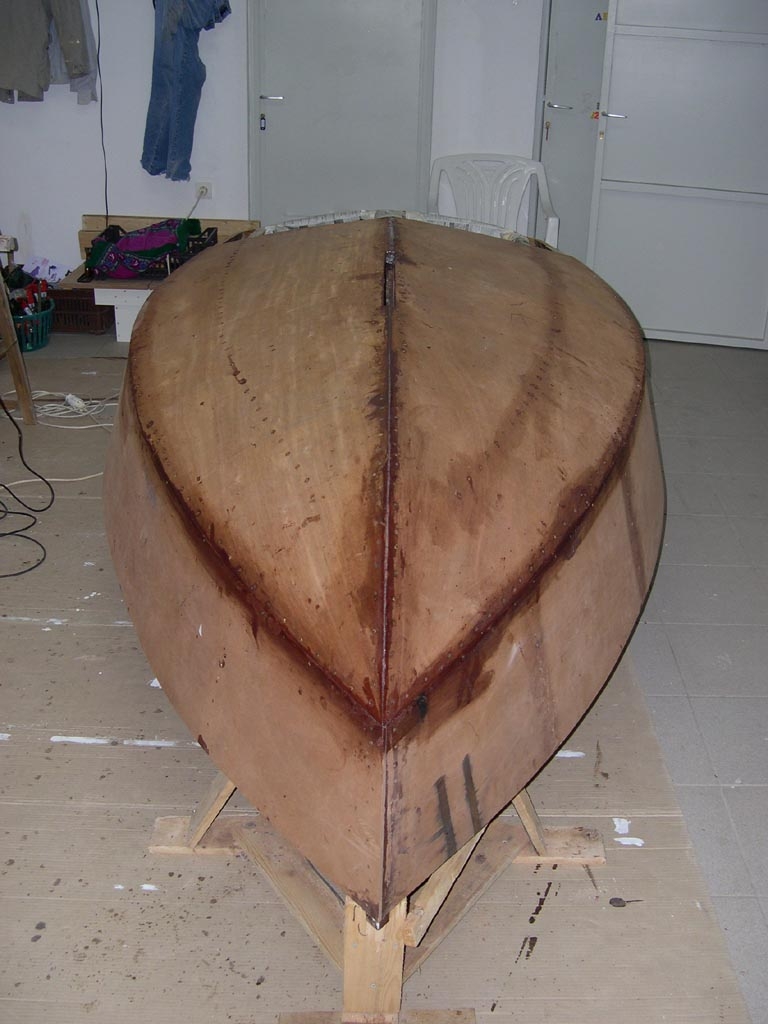
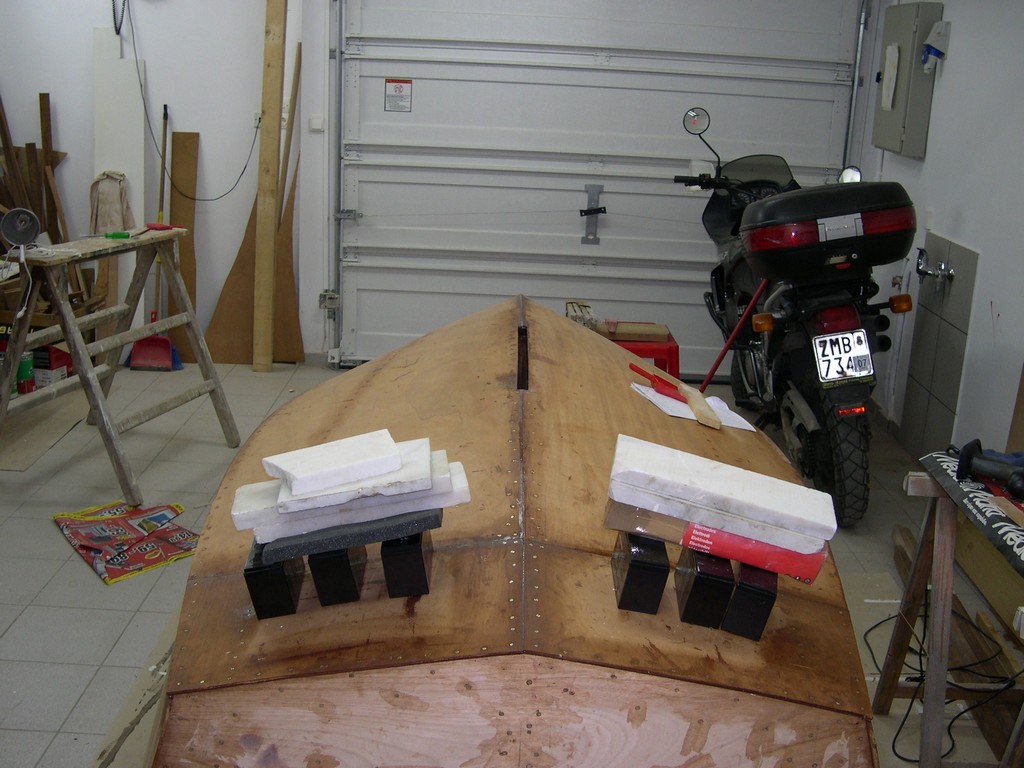
This is a plan view of the bow. The port plank is exactly on the center line, the stbd has a gap. You can see pencil lines that define the area where the outer stem will rest. This area will be planed off. These lines have been drawn using a spacer to keep two pencils at a constant distance. The spacer had a groove where the sharp angle of the bow slotted in. Final fairing of the lines was done using my eye as a guide.
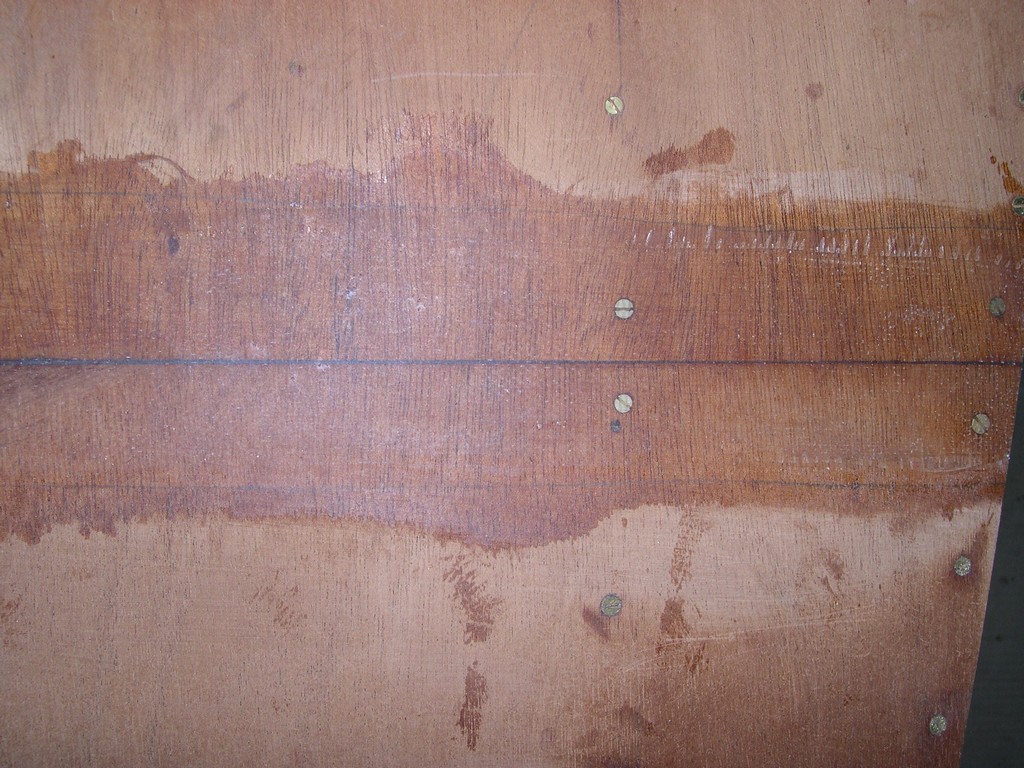
I have laid a 3-inches wide piece of glass on the bottom seams to prevent cracking and give some strength. I tried hard to do a good job, however in one place I overworked and the resin foamed. It's a small spot only, I do not think it will affect the overall bond to the plywood.
This is the material that I choose to lay over the glass tape to minimize fairing later. Baking paper. It provides a very good surface if pressed on the glass. It does have absolutely no adhesion to the epoxy. Unfortunately, I do not have a picture of the result. I promise to take one and post it soon.
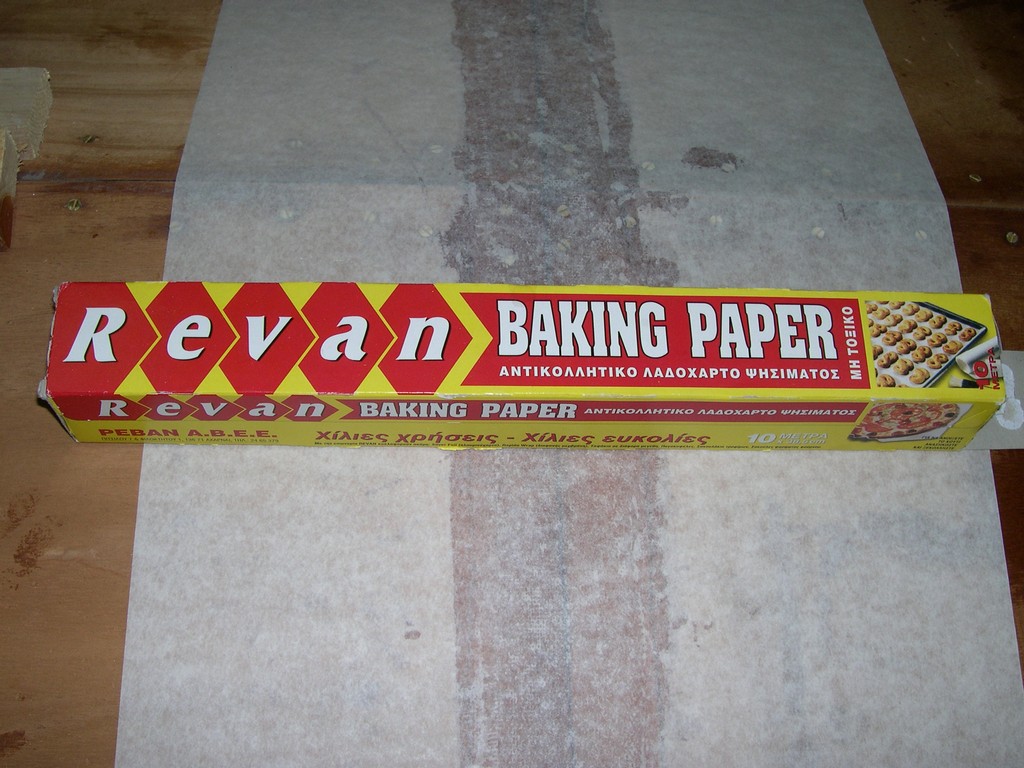
That's how I pressed the baking paper on the glass. The black material is sponges from a router (the networking one) packaging.
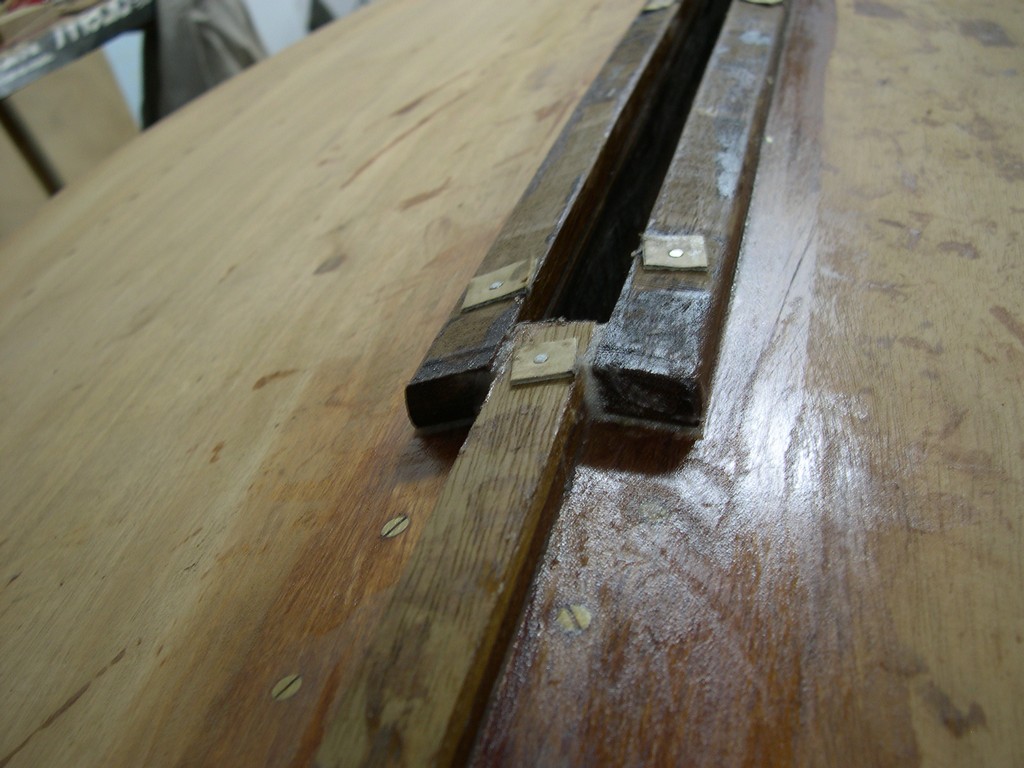
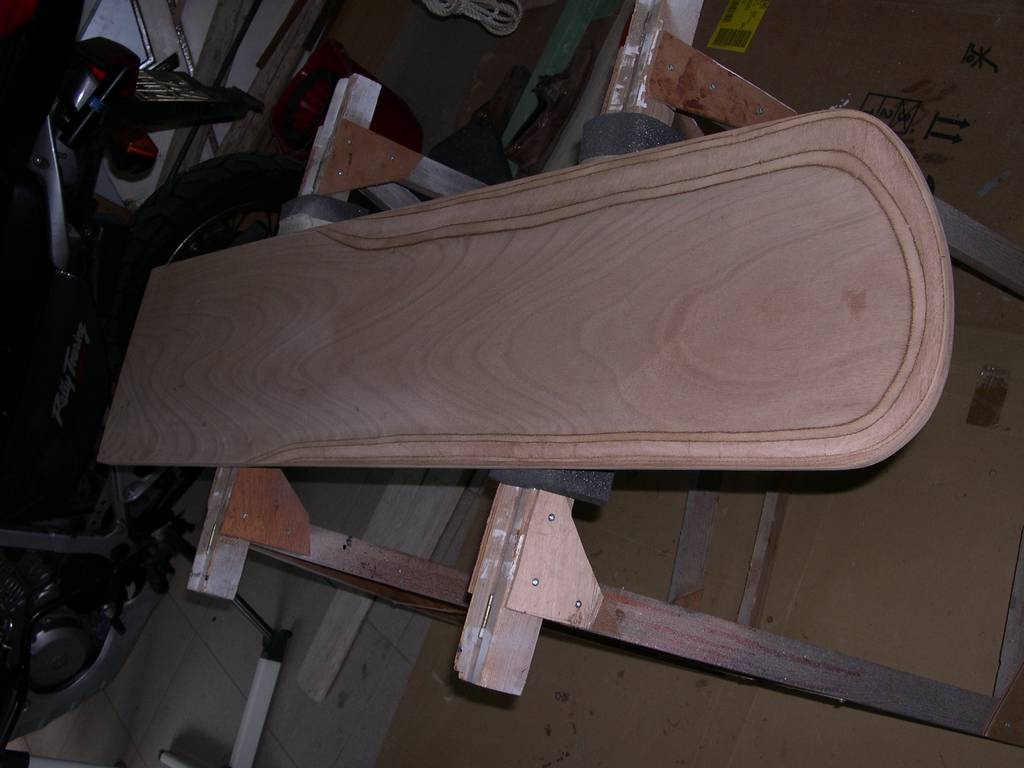
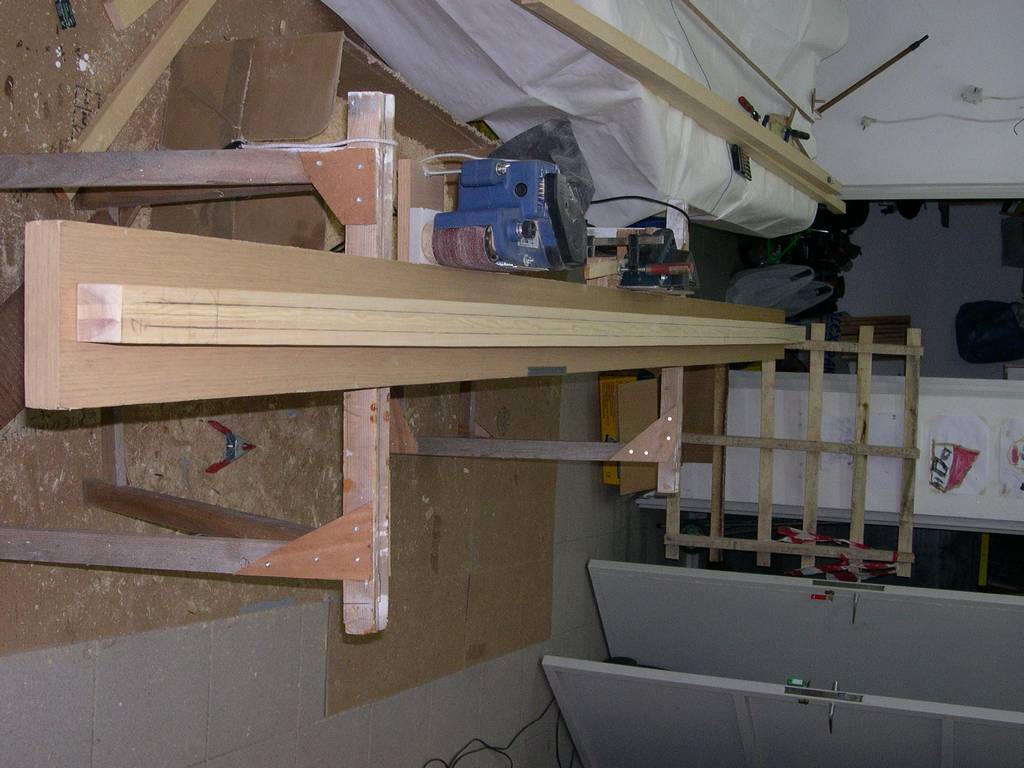
The sharp bow has been planed off to create a flat surface on which the outer stem wil get glued. The outer stem is a lamination of two iroko pieces, each 6mm thick. You can see the two pieces in the back of the picture. They were pre-bent using hot water and clamps on the stem before the stem was even on the jig.
This is the fairing board that I used for the stem area. It is 6mm (1/4) plywood and only 5 cm (2") wide to take easily the sharp curve of the stem. Sandpaper has been turned around the ends stapled on the back. I'm getting better with inches, don't I?
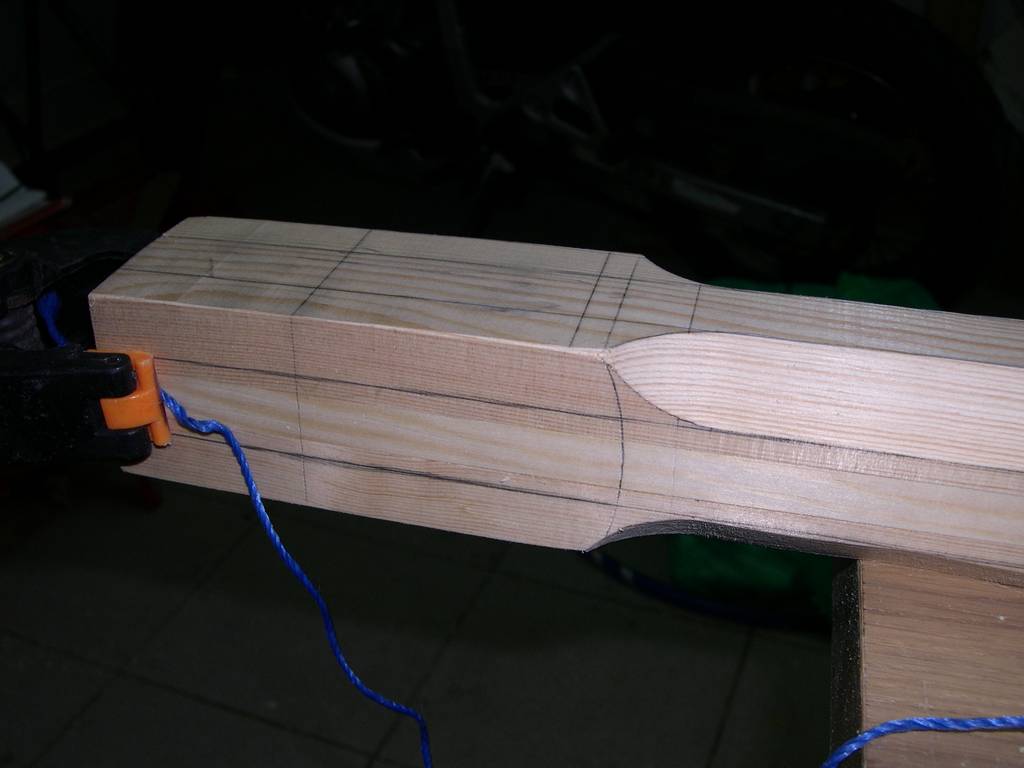
Here, i use a tight string to check that everything is symmetric relative to the center line. The string is fixed on the center of the transom and passes above the boat without touching anywhere. I use small brads to move the outer stem a little to the left or right to center it properly.
It was easy to see the line on the center but really difficult to photograph it. I took 20 shots to manage this one. For sure, it couldn't happen on film.
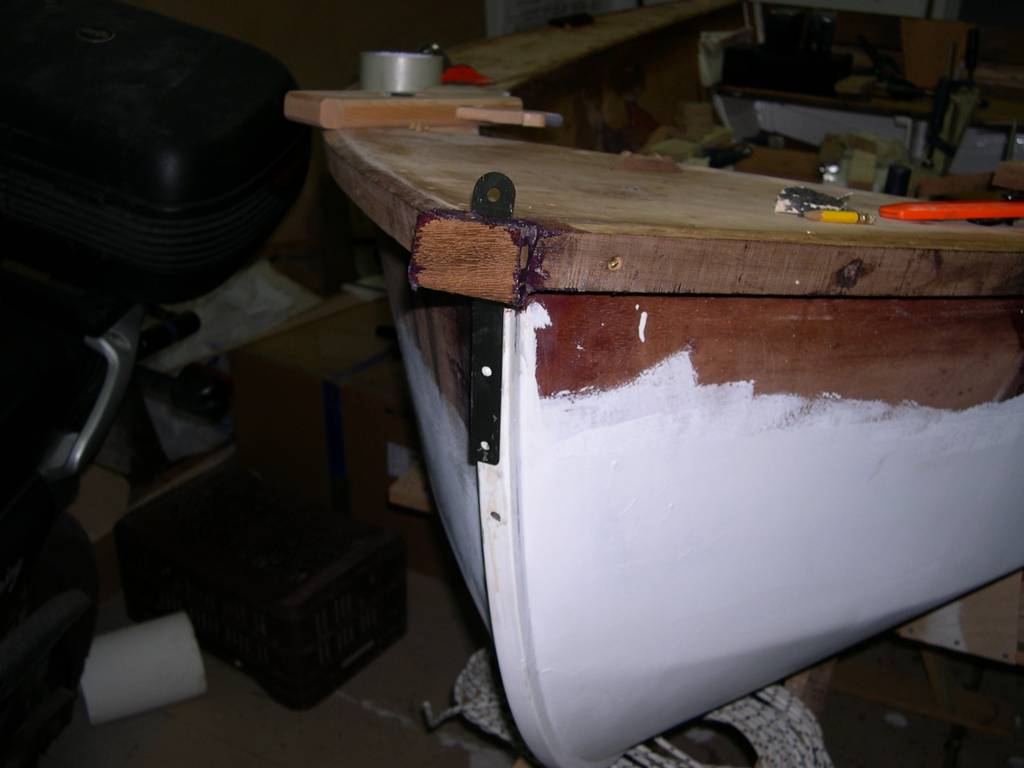
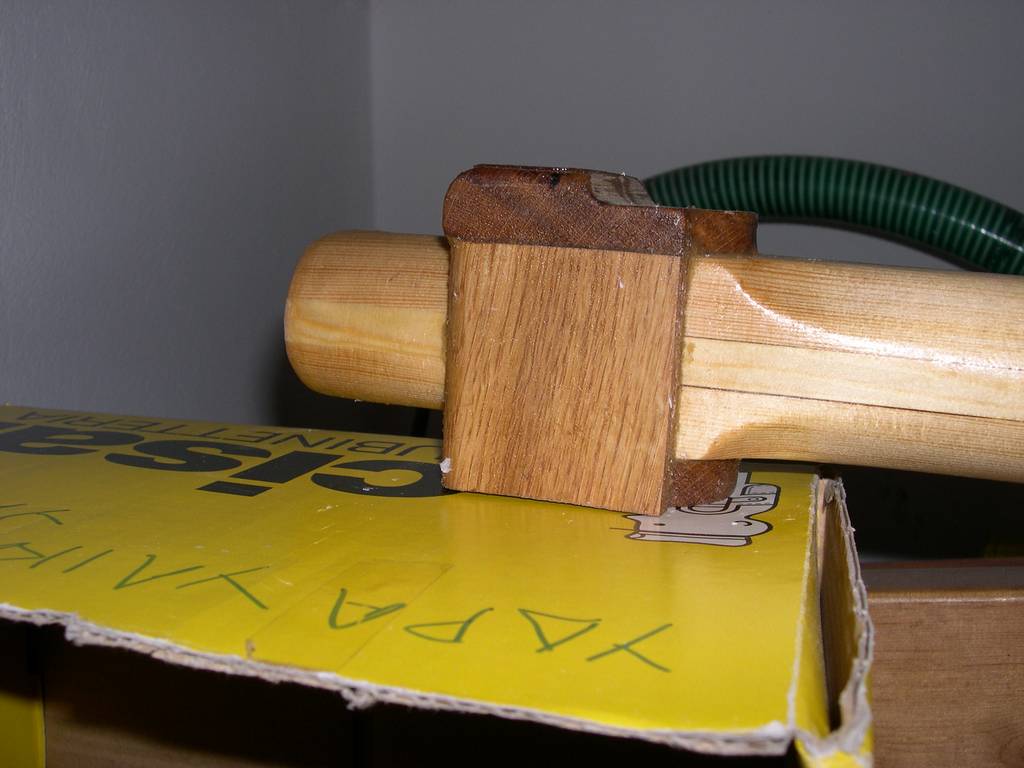
I used nails to clamp the outer stem and the CB case guards in position until the glue hardens. Later, I removed them. I put a piece of cardboard under the head of each nail to be able to catch and pull it out. The skeg has been screwed from the inside through the keelson.
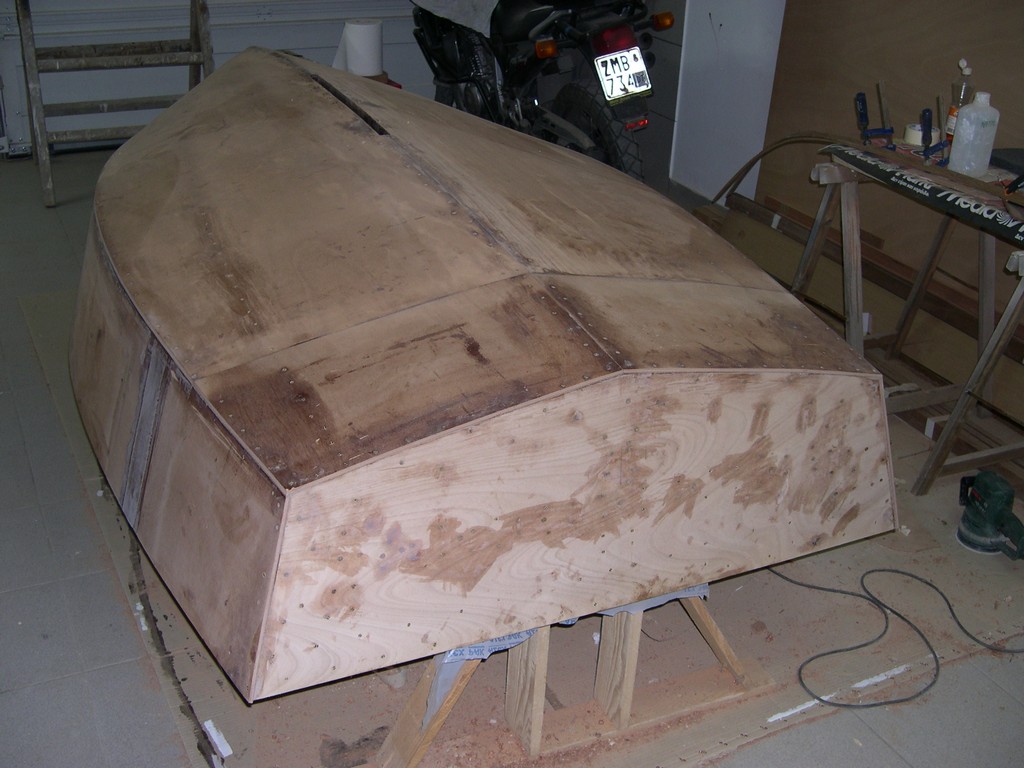
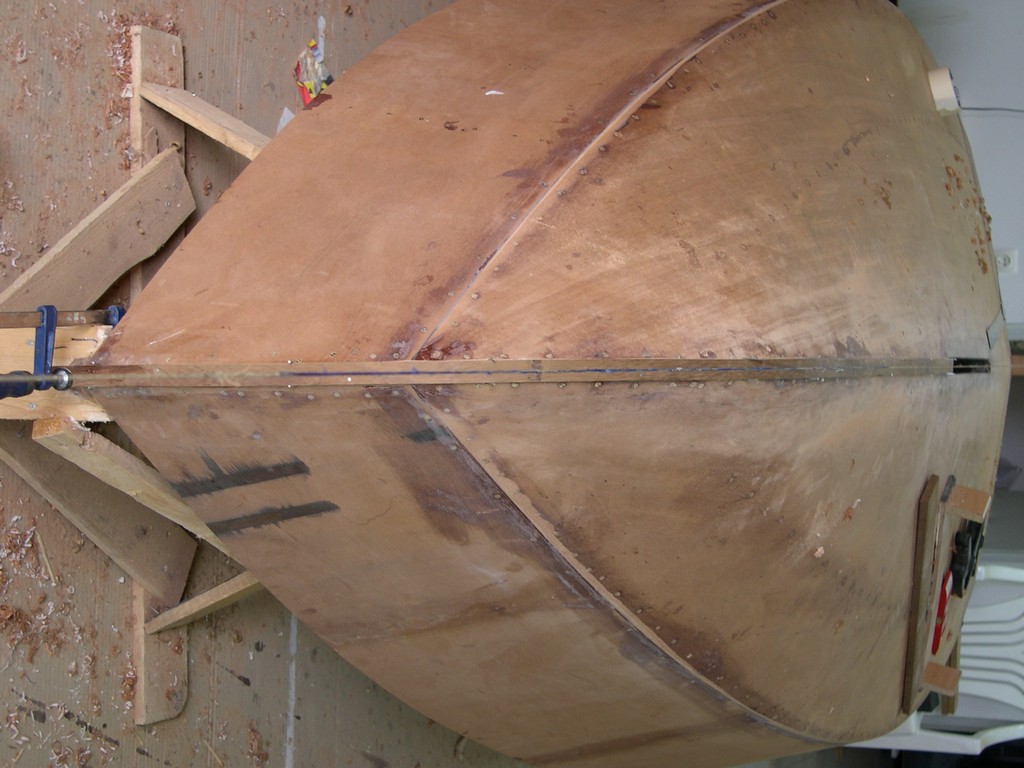
I glued on one session the outer stem, the rub rails around the CB slot and the skeg. The skeg is barely visible at this photo. I owe you one shot from the stern. Here is the major milestone. All wood working on the bottom is over. Now I have to fair her and then flip her
By the way, does anybody recognize the wood species of my plywood? I know that it is Shelmarine plywood which got wet and warped a little bit, so it could not be sold as marine plywood. It is not okume. Shelman makes marine plywood out of okume, khaya and sapele, so it must be either khaya or sapele. Of course the stamps have been scratched away. When I cut it it smells like my mahogany guitar.
Keep on building.
Posted: Fri Mar 23, 2007 6:35 am
by Q
I'm thinking Red Sapele....which we just call Meranti here in the states. Originally Phillipine, or Malaysan Mahogany, methinks. It does give off a delightful odor when cut...doesn't it??
Posted: Fri Mar 23, 2007 6:39 am
by Q
Oh, and by the way....that hull is looking gorgeous!
I especially like the keel!
Posted: Fri Mar 23, 2007 10:15 am
by Cracker Larry
Really nice work, Dimitris! Thanks for sharing.
Posted: Fri Mar 23, 2007 10:34 am
by Dimitris
Thanks for the encouragement.
I really like the smell of my plywood when I cut it but sometimes it makes me sneeze. The best smell comes from some oak parts I used, especially when hand-planning them.
The worst is iroko. When you cut it with power tools it becomes pulverized and soon the whole workshop is in a brown cloud that smells bad and causes coughing even with a mask. The good side is that iroko does not rot. Like teak. I have a piece of it for 7 years under some flower pots in my garden and it is still as new.
Getting primed
Posted: Tue May 08, 2007 4:51 am
by Dimitris
I've got paint on her
Here's the story
This is the skeg. It's a shot that I forgot to post. It is a solid piece of iroko, screwed from the inside. More screws will be driven in after turning her over as it is really difficult to work under her now.
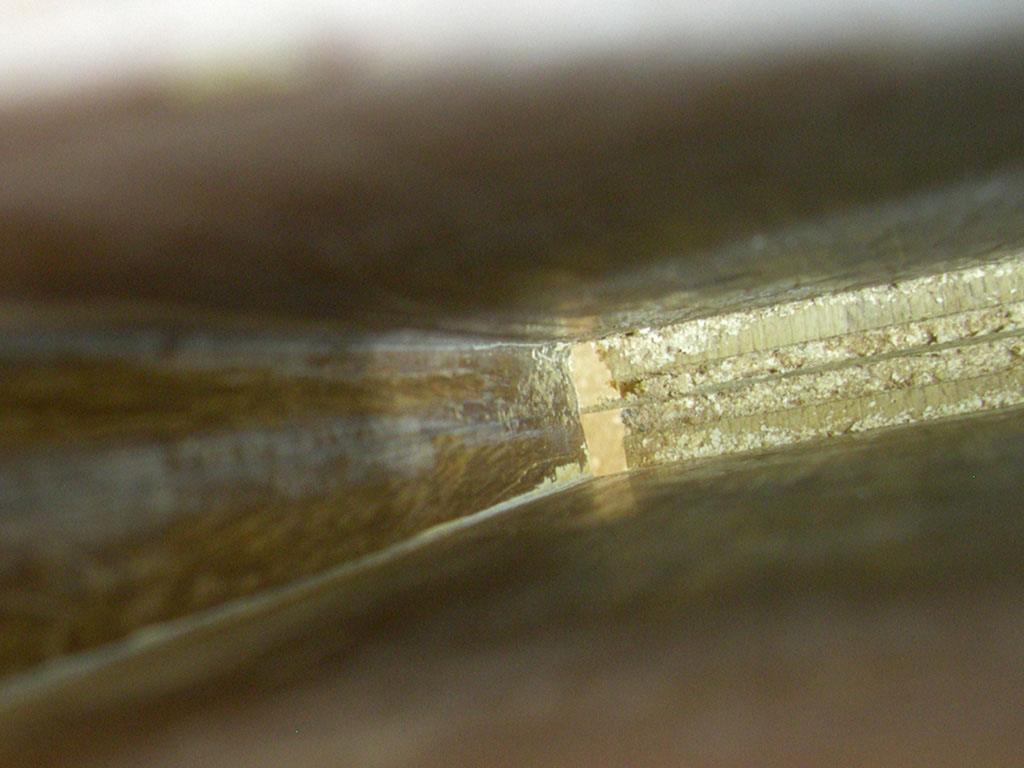
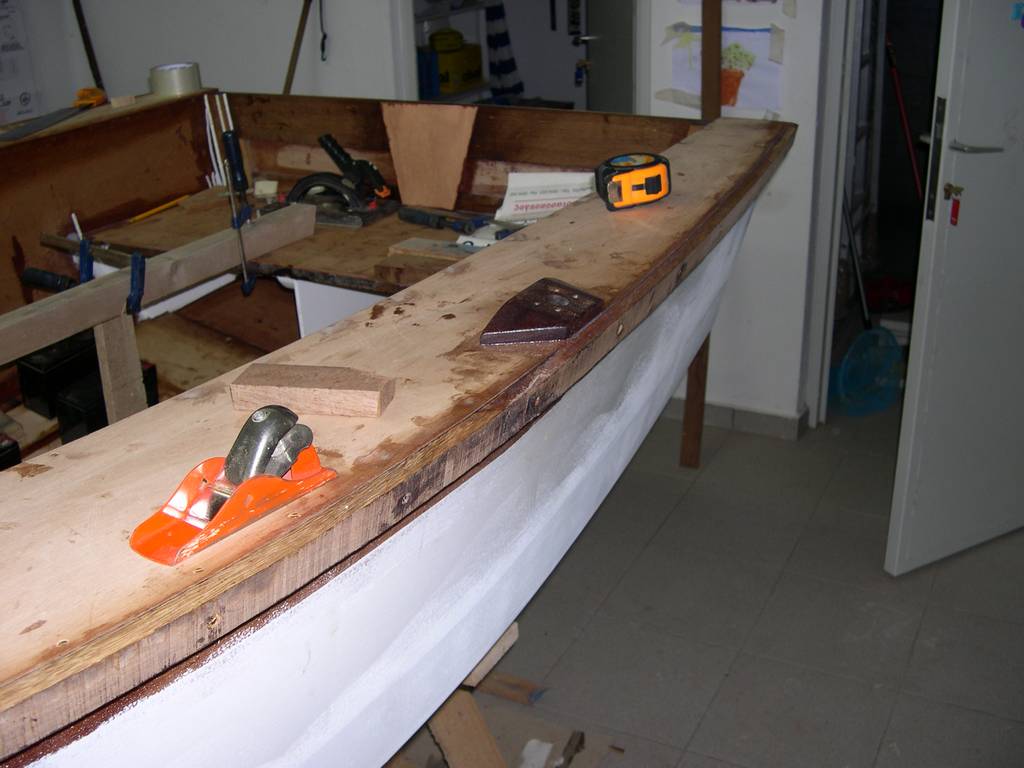
This is the glass surface as I removed the baking paper. Although you can fill a step at the glass edges, there is no feel of weave at all. I have sanded the plywood wood to create a recess for the tape. Nevertheless, it needed heavy fairing.
Before fairing, I gave all areas that would receive fairing compound a priming coat with epoxy.
Then, I applied a thick coat of fairing compound over all screws and joints. Screws cause unfairness. Here is a pronounced case. It is caused by one of the positioning screws that helped keep the panel in place while I was gluing it. Many screws compressed the plywood a little bit and are now covered under a "lake" of fairing compound.
Fairing was an incremental process. I applied a layer of fairing compound, then after two days I sanded with the long board. Low spots were identified by not being sanded. It took four cycles to get the final fully faired surface. I did all the sanding with various long boards that I build myself from scrap plywood and 60 grit silicon carbide paper from rolls. I would say that I enjoyed this sanding, but I didn't really have much to do.
After the fairing finished, I rounded all the corners with a block plane and 80 grit paper and applied a flow coat of epoxy on the fairing compound and the plywood edges. I decided to skip on flow coating all the plywood with epoxy, as I will use an epoxy primer which is sufficiently water proof itself. In fact, the primer had exactly the same smell with my epoxy.
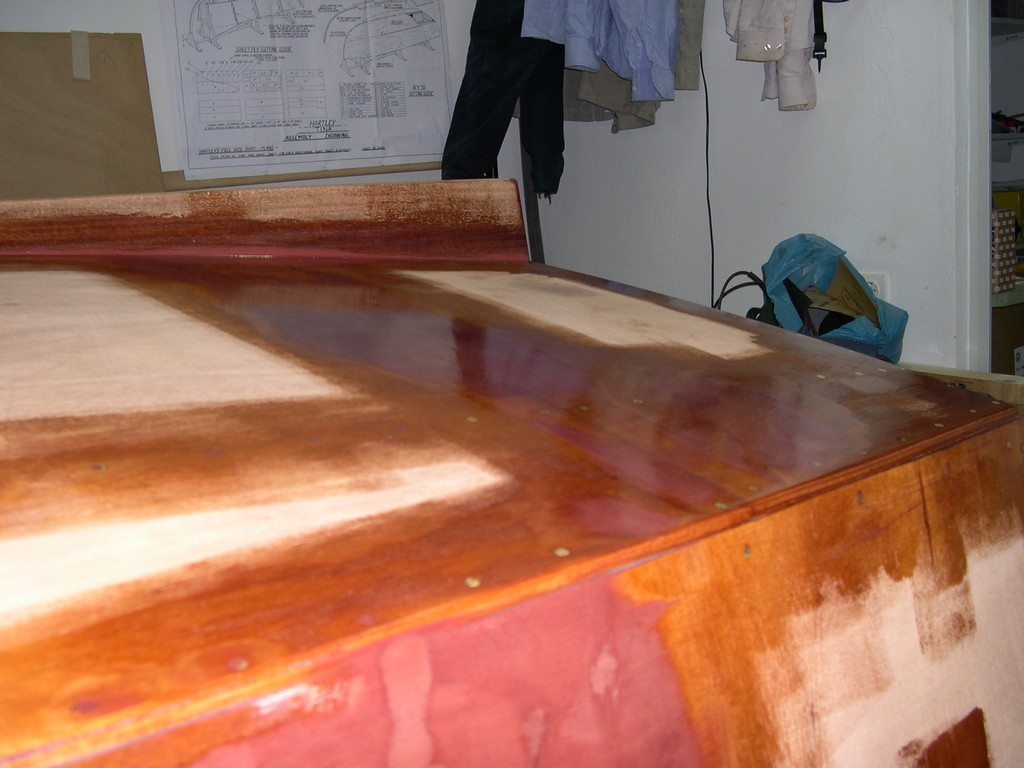
After cleaning blush with isopropyl alcohol and sanding plywood and epoxy with 80 grit paper I applied two coats of white high-build epoxy primer. The first coat was absorbed by wood as much epoxy would be. The second one created some build up. I think that I need at least another layer, may be two, to hide wood texture. But this is a wooden boat, so why hide wood texture?
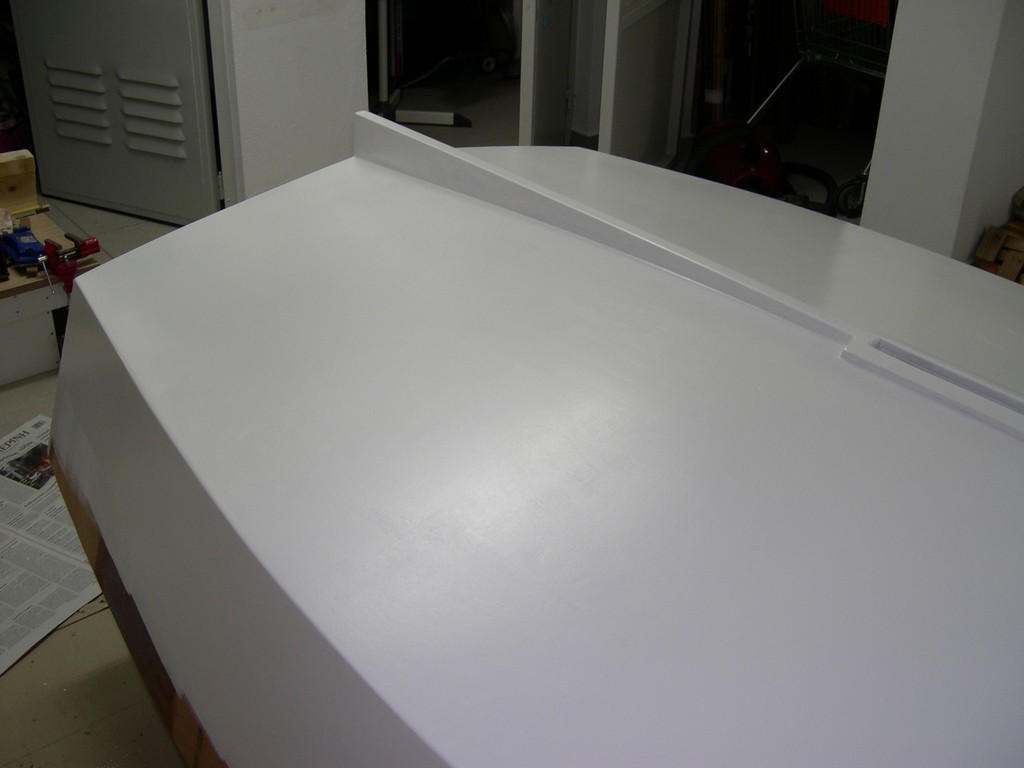
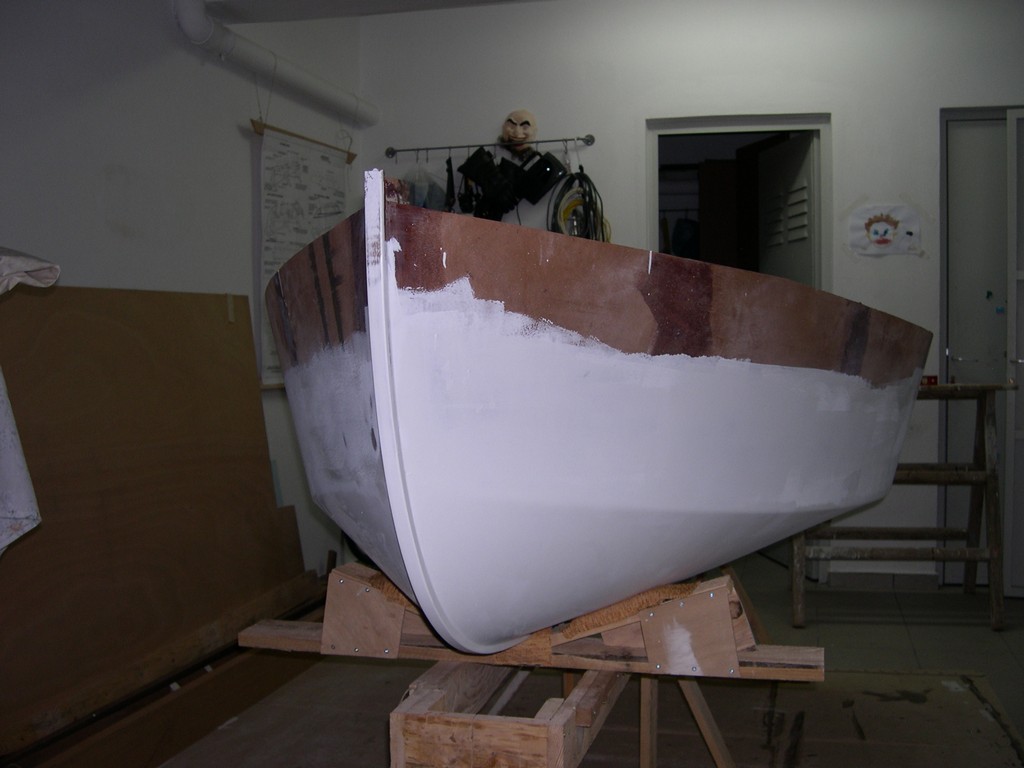
This is a view of the primed stern. This primer really covers up very nicely all minor faults.
In preparation for flipping, I built these two cradles to support her. I used salvaged wood for this. I will line up with rugs the areas that touch the bottom.
I made two serious mistakes at priming stage

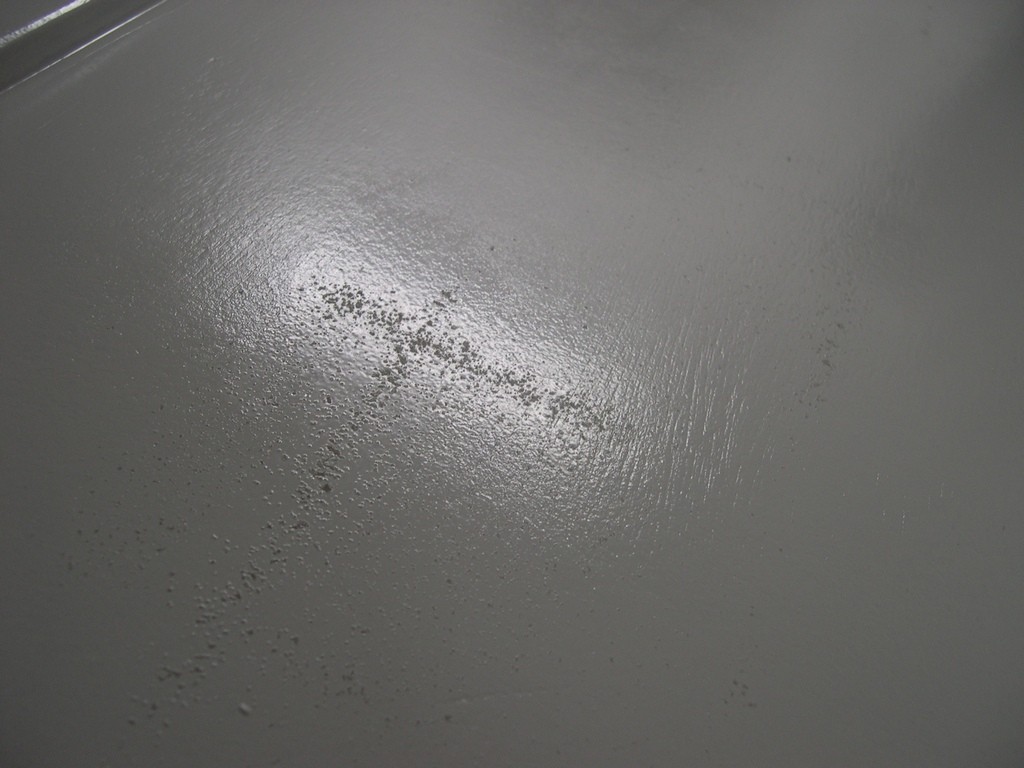
First, I used the same paint tray twice. At the end of the second coat, the primer has attacked that old dry layer (that was not completely cured yet) and the roller was lifting flakes of it from the tray and laying them on the boat

Second, I tried to touch up an area that was almost dry. Well, the litterature says never to try that, but I learn better by my mistakes

The foam roller glued to the almost dry primer and left back small parts of itself. You can see it at the next picture.
I hope sanding will cure both mistakes.
I used a short hair roller for the first coat and a foam roller for the second. I realy liked much more the short hair roller. It left back some hair during the first two strokes but nothing after that and it gave a very consistent thickness of paint. Next time I will "break" in the roller.
I plan to stop priming now and flip her to work on the topsides. I will need to glue the sheer rails and rub rails to glue the side decks, so I could not prime the sides up to the sheer. After the topsides are ready, I will flip it once more and finish the bottom.
There are still some minor dings in the wood that the primer could not fill. How can I fill them without causing too much trouble

I tried to mix some primer with fairing mix (the purple stuff) between the two coats but it was too coarse. I may also try talc.
Is there any trick for salvaging the paint trays? I do not like to create much garbage. May be lining it with something before pouring paint in?
Regards to all of you and keep building
Posted: Tue May 08, 2007 6:14 am
by Q
There are still some minor dings in the wood that the primer could not fill. How can I fill them without causing too much trouble
In a tutorial by Joel (Shine) on his use of System 3's high build primer he mentioned that he sometimes would lay a "blob" of primer on some rough spots, or even go back over an area with the fairing compound again, then primer again....both are epoxy and hence compatible....
Your shots of the primered hull look great! I can only hope my boat turns out as well!
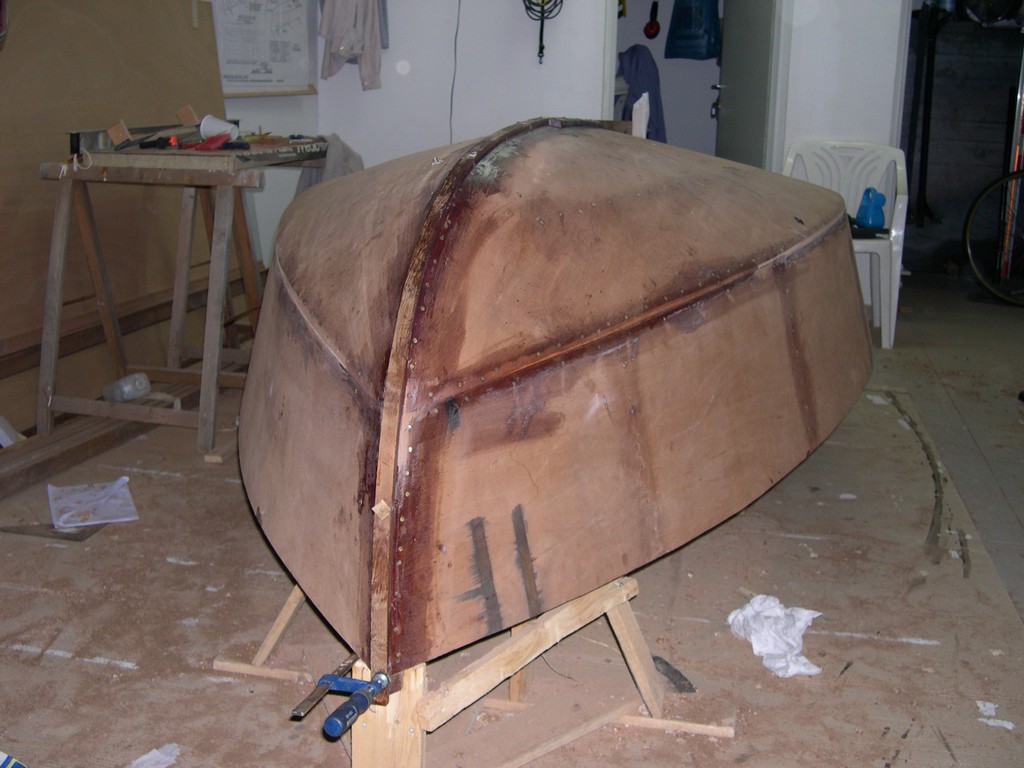
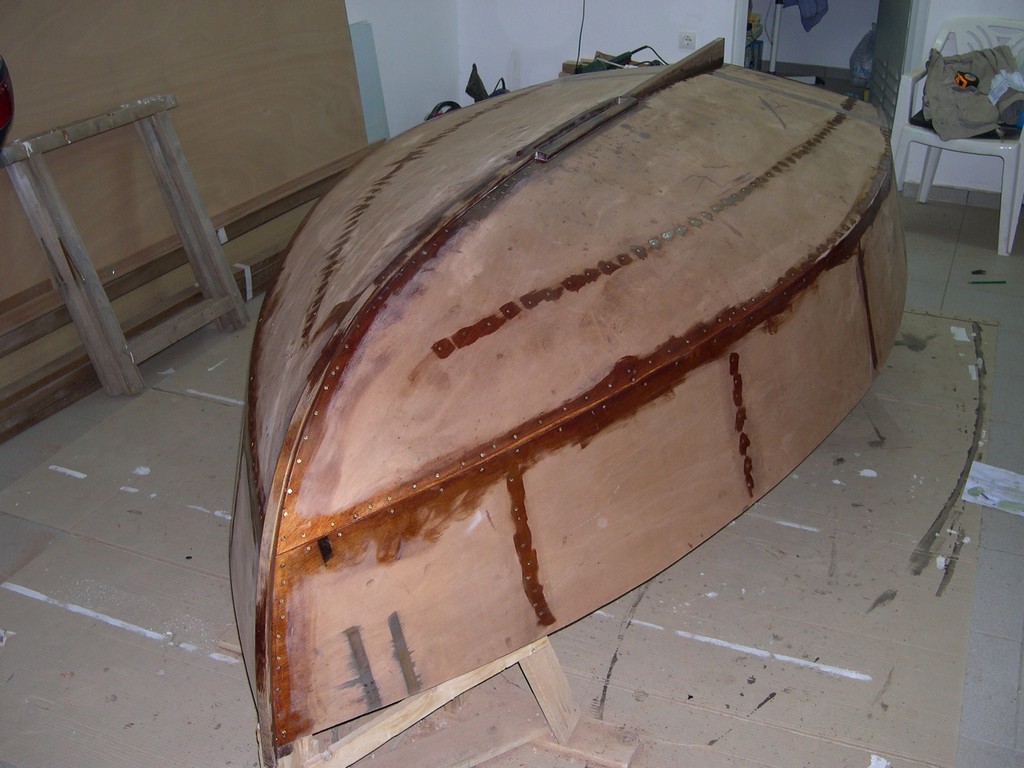
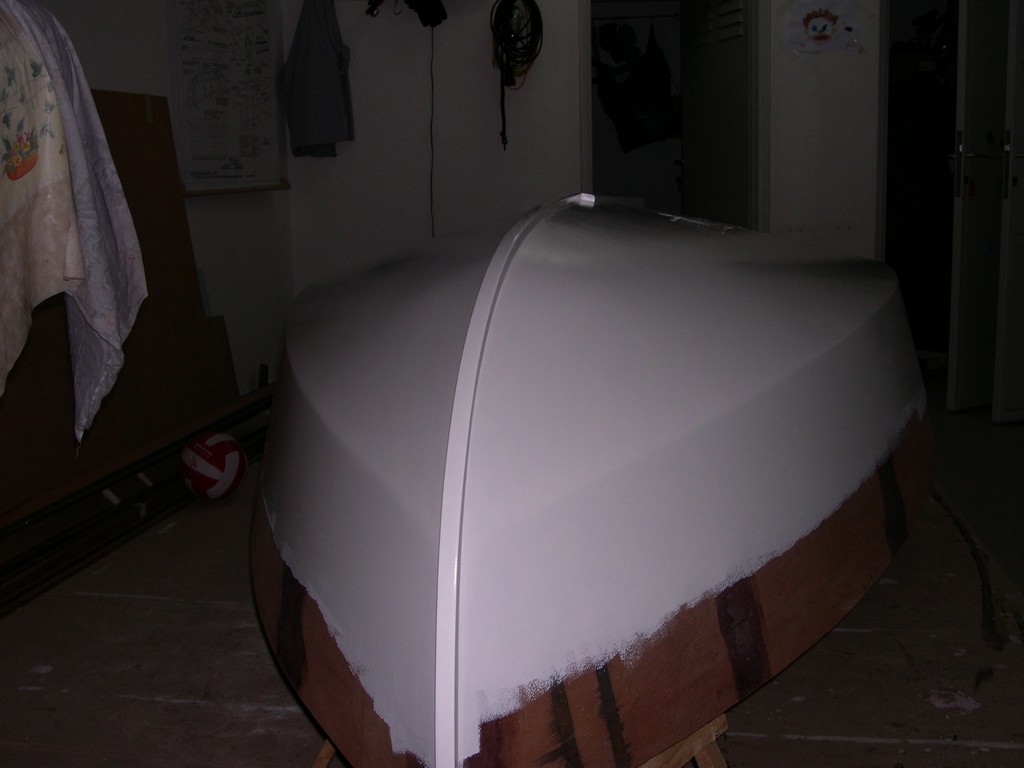
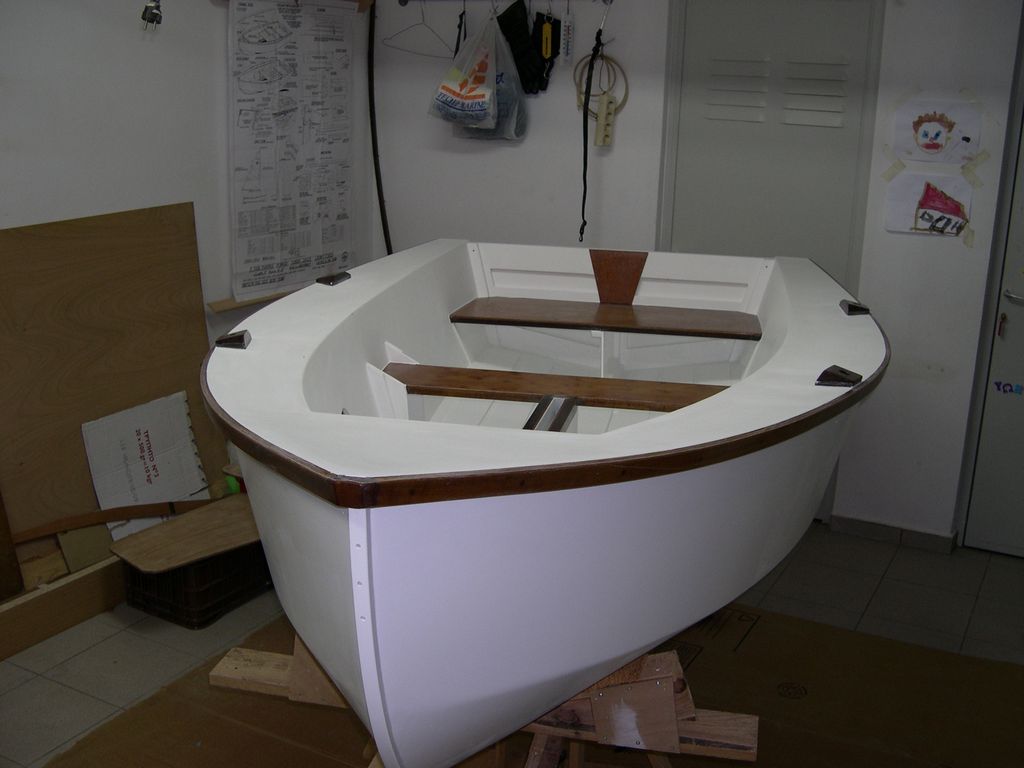
I flipped her.
Posted: Tue May 22, 2007 4:18 am
by Dimitris
Major milestone reached. I flipped her yesterday night
Alone, just me and her, all the family was sleeping. It was not difficult at all, she is not heavy and she is already very strong. Now she rests on her cushioned cradles. Next steps are leveling her again and glassing the bottom plywood joints inside the flotation chambers. Here are the first upright pics of her.
Regards to all of you
Posted: Tue May 22, 2007 11:06 am
by TomW
Well done Dimitris. Looking good. Nice white paint.
Tom
Posted: Tue May 22, 2007 3:20 pm
by ks8
Getting closer! Nice progress Dimitris. I'm about ready to make some small cradles also so the larger cradles will go away when I flip for the skeg install and CB case glassing. Nothing like trying to *fix* a coating after it has already begun to set up. Enjoy....
Posted: Tue May 22, 2007 6:45 pm
by DrBones
As to the paint trays - Here's what I do: I line the paint tray first with newspaper (this to get rid of the ridges...often left in the roller to be transfered to the painted edge!) and then I cover that with aluminum foil (from the kitchen).
That way you can easily re-use the paint tray every time by replacing the aluminum foil and/or newspaper (if necessary).
Good building by the way!

Posted: Wed May 23, 2007 3:04 am
by Dimitris
I think I'll do the trick with the aluminum foil next time.
Thanks
Building update
Posted: Tue Jun 05, 2007 7:22 am
by Dimitris
OK, works goes on, I want to splash her in the summer. Here is an update.
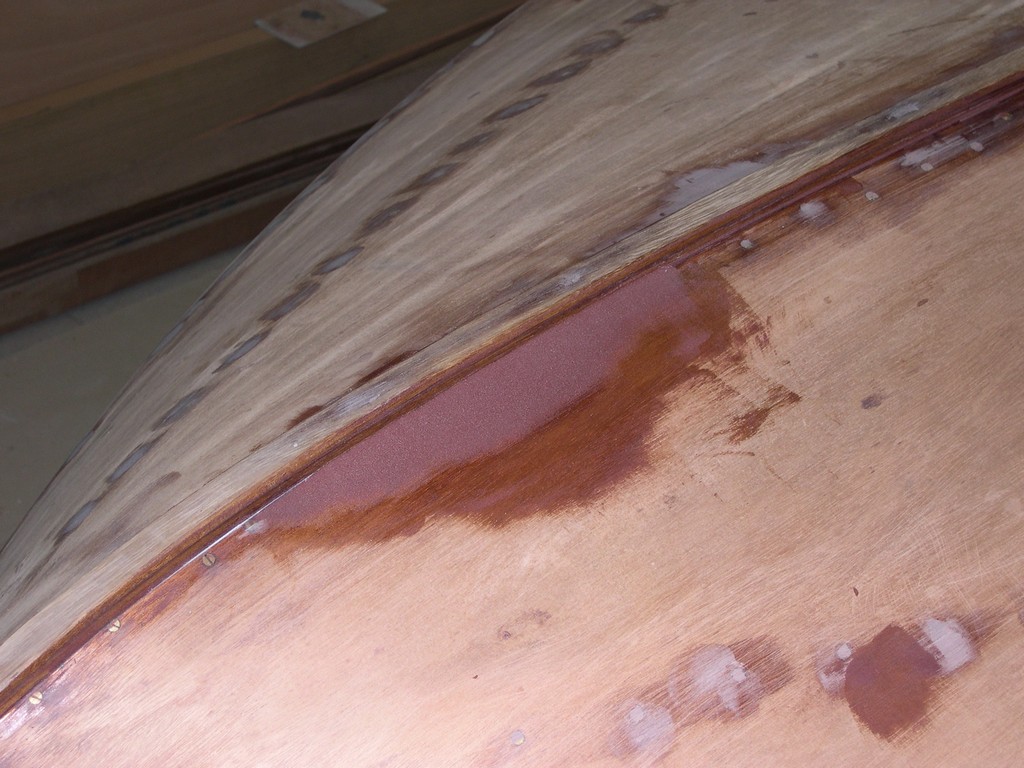
After turning I had to install butts at the bottom joints inside the flotation chambers. I decided to install glass butts.
This is the aft port flotation chamber, where the bottom plywood panels meet. A glass splice has been installed. There are the fillets that round the two chines and four layers of 225 gm/m2 (approx 7 oz) glass, each layer covering the previous one plus 1 inch. So we have 1 layer of 3 inches, 1 of 5, 1 of 7 and 1 of 9 inches. There is also one layer of glass on the outter side. The fillets are from iroko sawdust. Everything was done wet on wet.
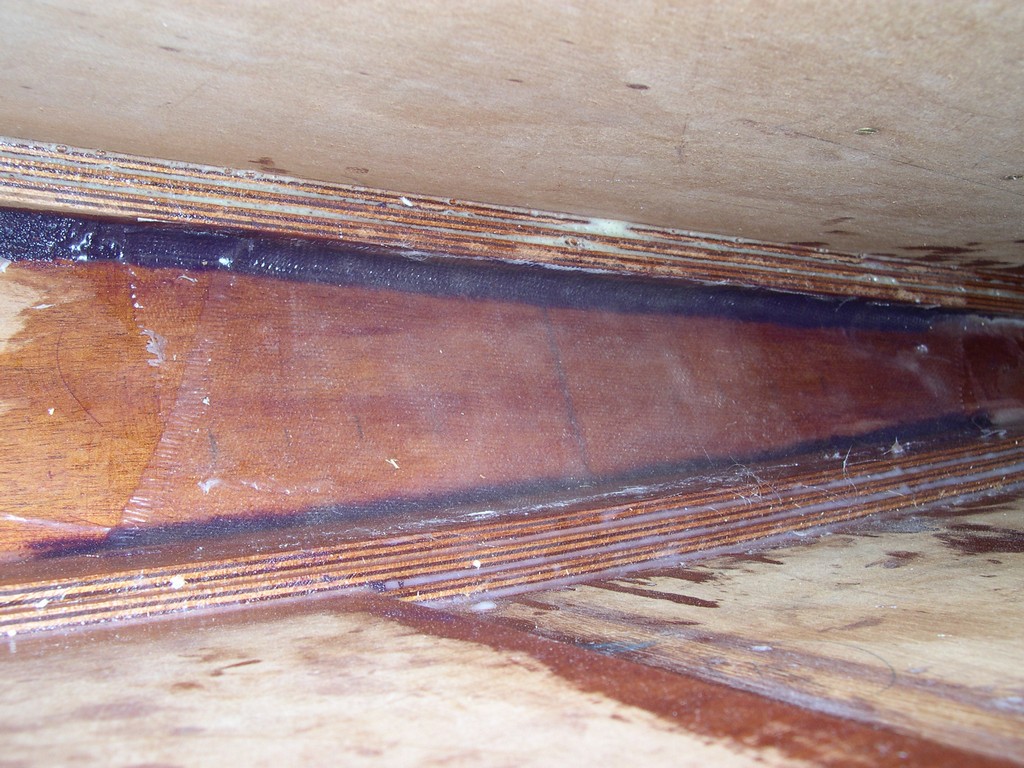
I think there is enough glass there to keep me afloat
Can anyone please comment on this?
Then I installed the deck cleats on the outer planking, and then on the inner planking. There are pictures in the gallery. After the glue set I have to start fairing the deck cleats. This was difficult because all 4 side planks had to be on a straight line atwartships. I tried hard to keep the outer cleats level and only had to bevel them and only remove excess on the inner cleats. A picture of the fairing work in progress follows. More pictures in the gallery.
The I cut and dry fitted the deck supports at the bow area. This was a very entertaining part of the work. These parts will be glued after I finish all work inside the flotation chambers.
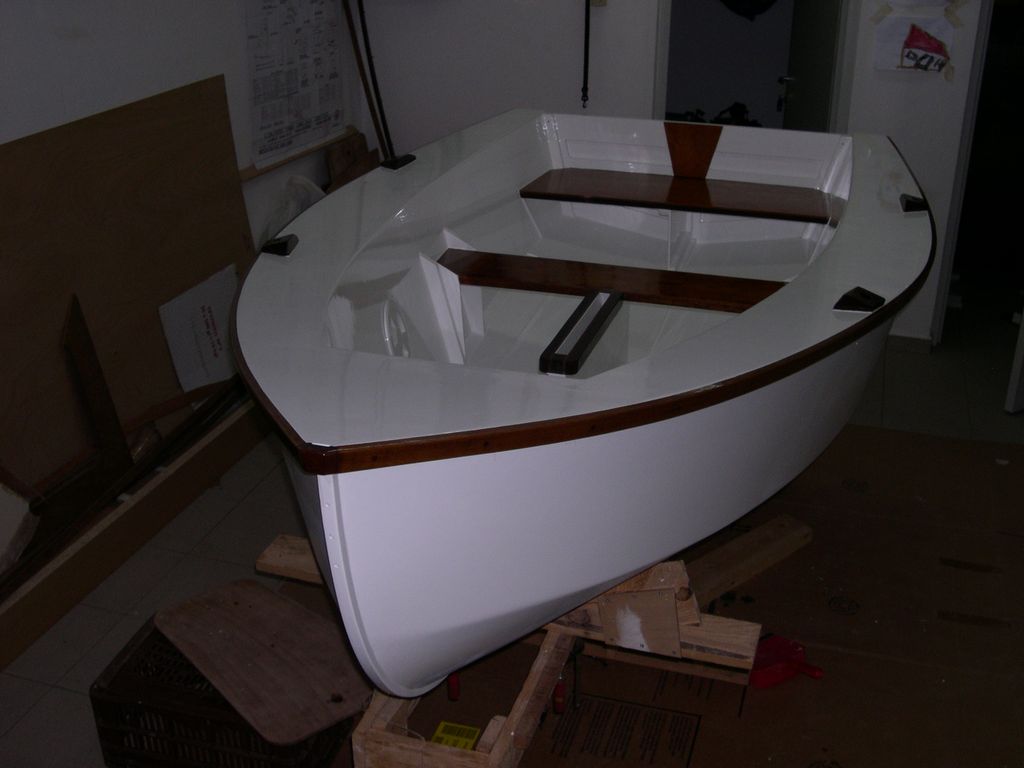
The following picture shows her as she is now.
I also bought the first hardware. More on the next update.
This is a link to my gallery
http://forums.bateau2.comindex.php?cat=15358
Keep building
Posted: Thu Dec 13, 2007 7:30 am
by Dimitris
It has been very long since the last update, there has been some progress but overall I slowed down because I now also have the sailboat to work on.
So here is the story.
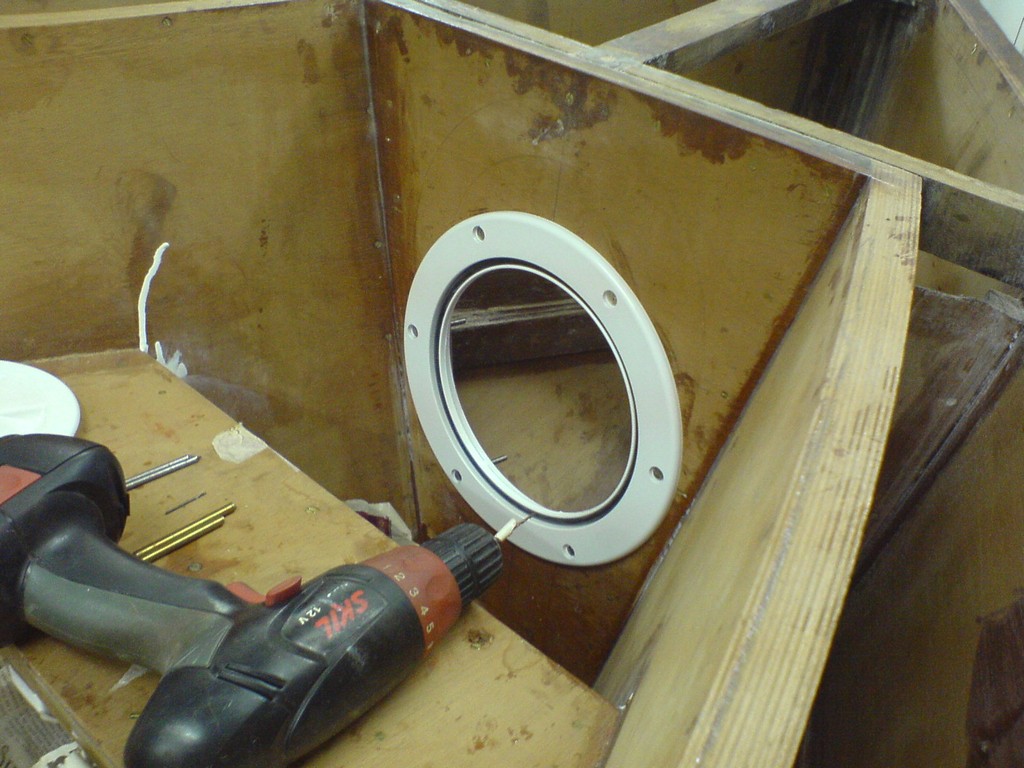
First I dry fitted access portholes, for storage inside the flotation chambers and ventilation. There is one porthole at each side and one in the bow. I plan to install a net inside the flotation chambers to hold stored items from banging around. Cutting these holes has been really stressing.
In the back you can see the oarlock support that has been laminated on the outer skin. There are 8 layers of 6 mm plywood.
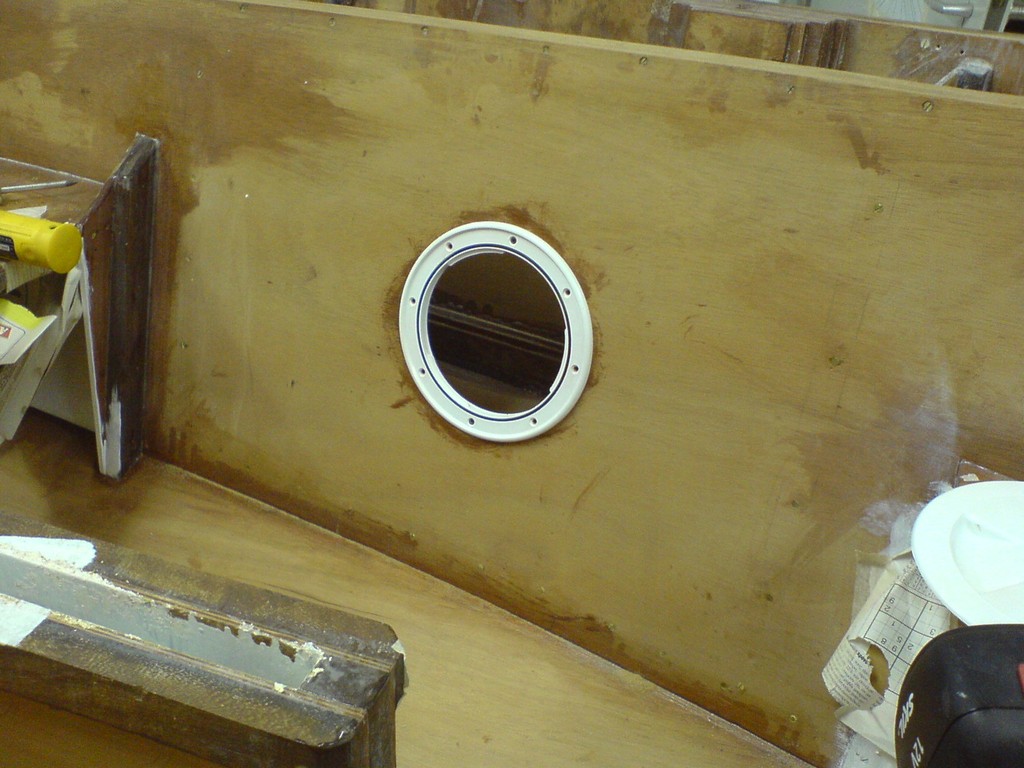
This is a view of the bigger bow porthole.
Next, I cut the deck pannels. I decided to cut the side deck panels without making a patter on paper first. I placed the plywood on top of the boat and marked the trace of the outer skin. To mark the inner skin (which was not accessible as the plywood was wider than the boat) I use a technique called 'spilling' to generate it. You use a pair of compasses to transfer triangles from the boat to the panel. You take two points on the outer skin and tranfer them to its trace on the plywood using the compasses. Then you choose a random point in the inner skin, somewhere between the two other points and using the compasses transfer it to the plywood. People that build glued lapstrake boats use it extensively to trace the planking.
Oarlock supports are from solid iroko. They are cut so that the oarlock is parallel to the side panel.

This is the first piece of hardware that I fitted on her. Hand cutting the oarlock supports has been a very rewarding woodworking experience. There is also oarlock support inside the flotation chamber (8 lams of 6 mm plywood). The hole for the oarlock stops before reaching the flotation chamber and drains overboard through a small hole on the side planking (not visible here, probably I had not opened it yet).
I decided to paint the flotation chambers using traditional materials. I put two coats of red lead primer (shown here) and 3 coats of alkyd paints. Red lead primer has been the primer of choice for all wooden boats in Greece, I think because of its high toxicity and resistance to water. It is very soft though. The same treatment was given to the deck panels.
This is a link to my gallery
http://forums.bateau2.comindex.php?cat=15358
Regards to all of you
Posted: Tue Dec 18, 2007 11:24 pm
by misett
"Paint trays" use the plastic paint trays. they are made from a plastic that paint will not stick too. after the paint dries it will peel off. the thicker the paint the easier to peel. when you are through, dont try and clean tray out. when it is dry it will peel out.
Posted: Wed Mar 19, 2008 12:22 pm
by Dimitris
Major milestone reached
I Finished the wood work for the hull and have already stared to finish her.
Here are some pictures of the progress so far.
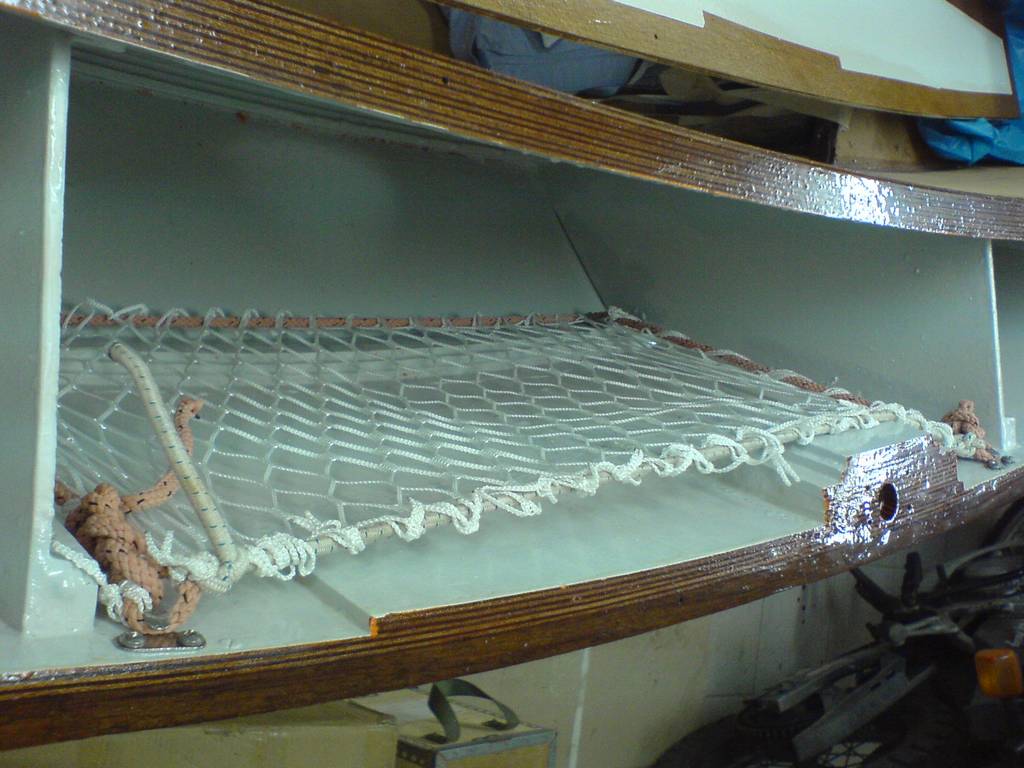
The flotation chambers are painted, 2 coats of red lead primer and 2 more of alkyd enamel. Then I installed nettings that will hopefully help to keep things that are stored in the chambers in place. I want my sandwiches dry
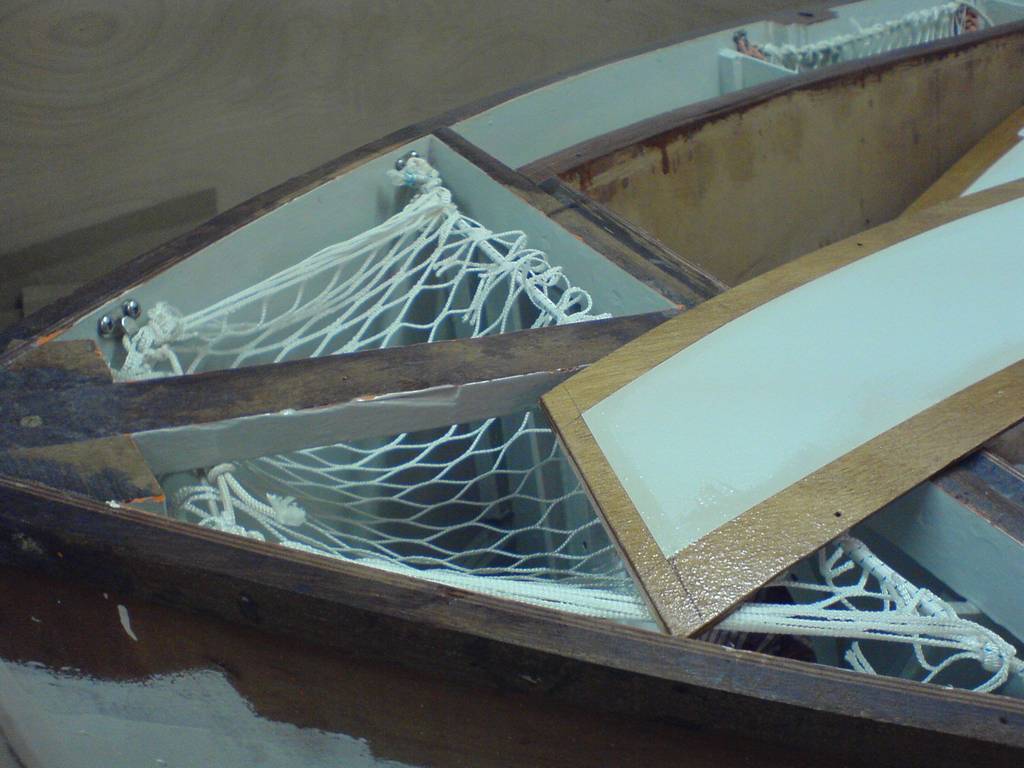
This is the netting in the port flotation chamber. There is a similar in the starboard one.
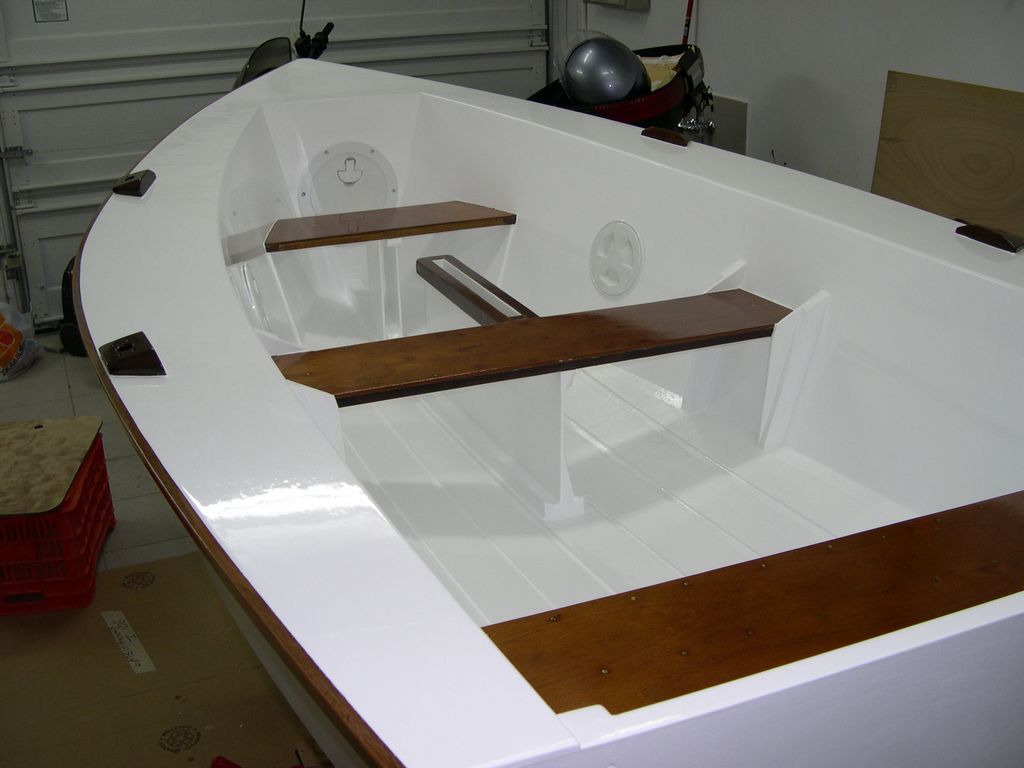
All decks are now installed, glued and screwed in position. A trimming all around is required.
The rub rails have been installed flush with the deck. The are two parts each, with a scarf joint at about the 2/3rds of their length.
The wooden blocks that will accept the oarlocks have also been glued in place.
This is the last piece of the rub rail. I glued it in place while the bow chainplate was resting on the stem, wrapped in plastic. After epoxy set, I removed the chainplate. It will be installed again after the painting is complete. Notice how much trimming the last piece of wood needs!
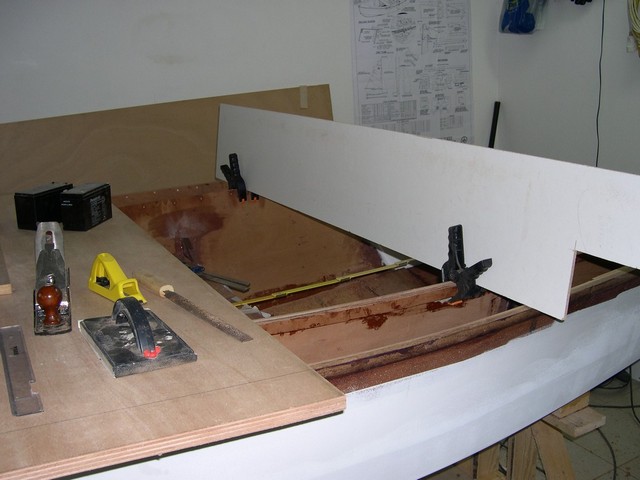
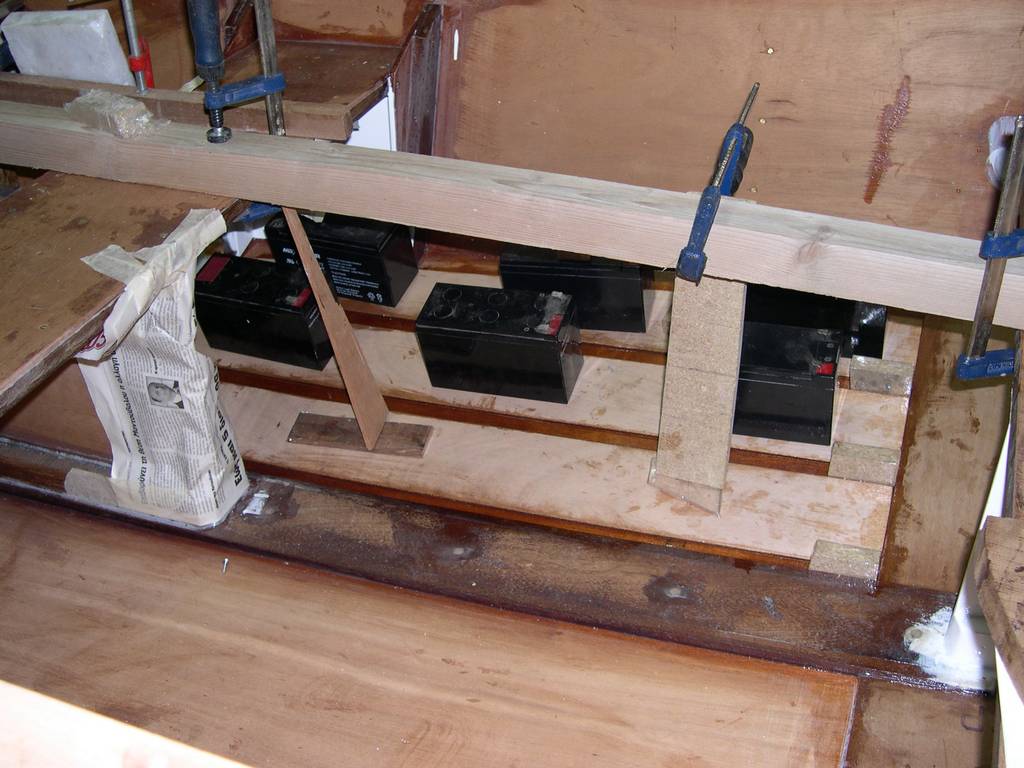
3 strips of plywood, each 10 cm wide, was epoxy glued on each side of the bottom. This is the setup that pressed them on the floor. Notice the wrapped spacers that keep the strips form slipping to the center of the boat. Old UPS batteries are really handy for boat building.
The gusset at the transom is the last piece of wood glued on the boat. This is the end of the wood work and the beginning of the finish work. Sanding strikes back
This image shows how nice the flooring strips look.

There she is, all holes filled and corners rounded. She is sanded, ready to receive high build primer on the inner side but first I will prime all the bright areas with three to four coats of varnish to protect them from spills, paint runs, etc.
The rub rails, the seats, the oarlock blocks, the transom gusset and the upper cleats of the centerboard case will be finished bright. The rest will be painted.
Regards to all of you.
Posted: Wed Mar 19, 2008 2:12 pm
by donk
Dimitris,
And I thought stitch and glue was difficult. You have built something to be proud of.
I remember the colorful fishing boats when I spent time in Athens while in the Navy. Your pictures brought back many memories.
don
Posted: Thu Jun 19, 2008 5:15 am
by Dimitris
A quick update.
Here she is, ready to receive paint. There are 4 coats of high-build primer, hand sanded to a smooth surface plus four coats of one component polyurethane varnish on the bright areas. She is realy smooth.
Now she is coated with 4 coats of LPU paint rolled and tipped and 7 coats of varnish brushed. It looks great at the picture but this is deceiving. The is much dust and plenty of brush strokes.
I really found the LPU paint very difficult to use. It dried so fast that I could not even blend the new paint with the old during rolling. I used a slow reducer, reduced to the maximum degree allowed (35%, suggested for spraying), but apparently I was not fast enough.
The results are far from my expectations.I like much more the smooth flat finish of the primer.
It's nice that this picture shows my avatar reflected on the boat.
The plastic covers are just laied on the holes to get a better view. It is difficult to see but there is an antiskid texture on the flooring strips. It is a mixture of fillite pearls and LPU paint. Fillite is a dust of inert hollow small spheres. I read somewhere that it is the same as Blakes (Hempel) antiskid additive. It gave a nice, non abrasive surface that hid all imperfections.
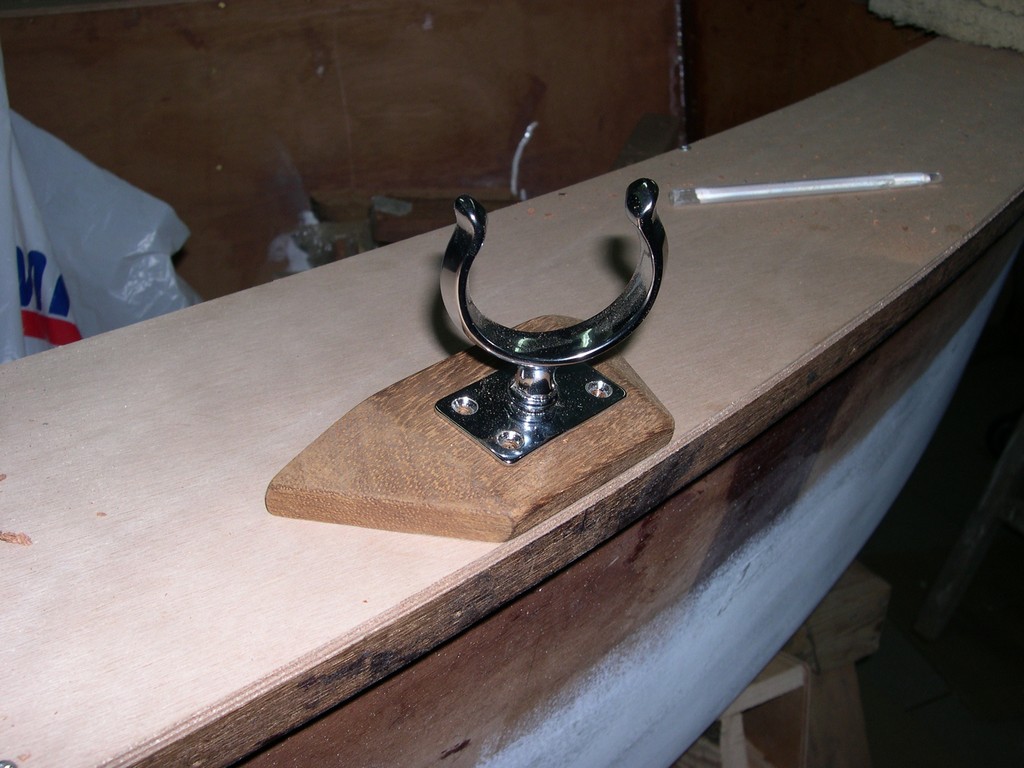
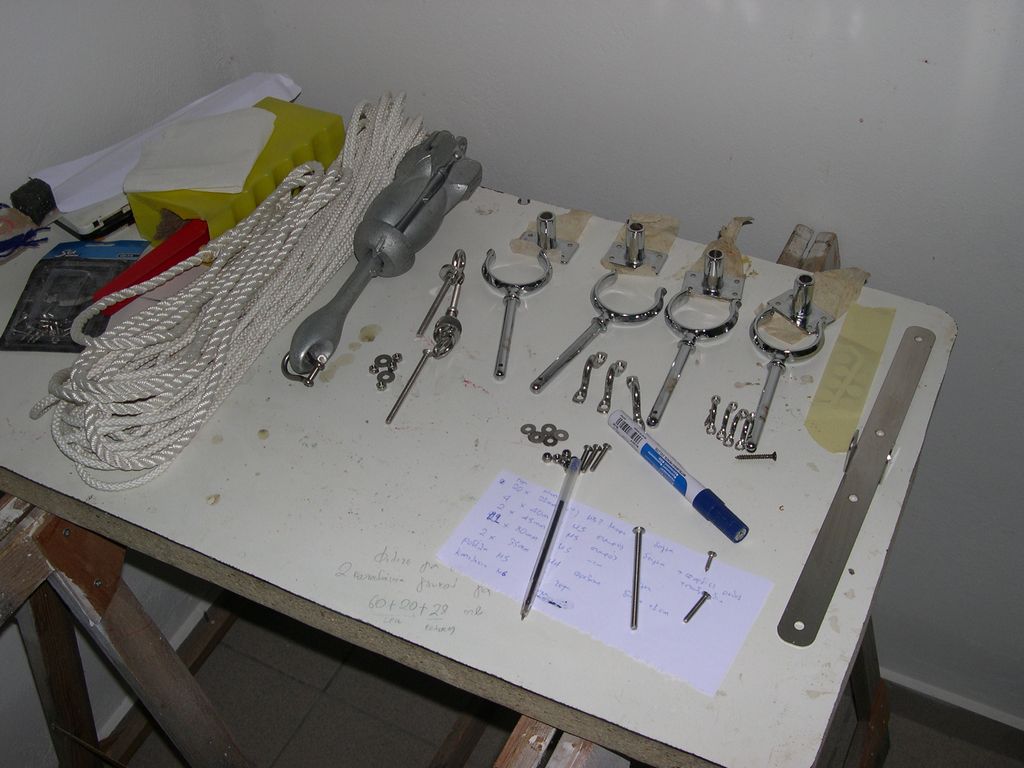
This is hardware, waiting to be fitted. I have to buy more suitable screws to continue.
I plan to splash her to mark the waterline. I will use the aluminum oars of my rib for the first splash. Then, she will be painted on the outside, blue LPU above the waterline and white epoxy paint bellow. The next project will be to build a nice pair of oars for her. Then spars, centreboard, rudder, sail, ...
Regards
Posted: Thu Jun 19, 2008 8:37 am
by TomW
Very nice Dimitris.
Tom
Posted: Sat Jun 21, 2008 8:24 am
by eshell
Dimitris,
could you email me offline?
eshellswell@hotmail.com
Thanks,
Ernie
Posted: Mon Jul 07, 2008 7:12 am
by Dimitris
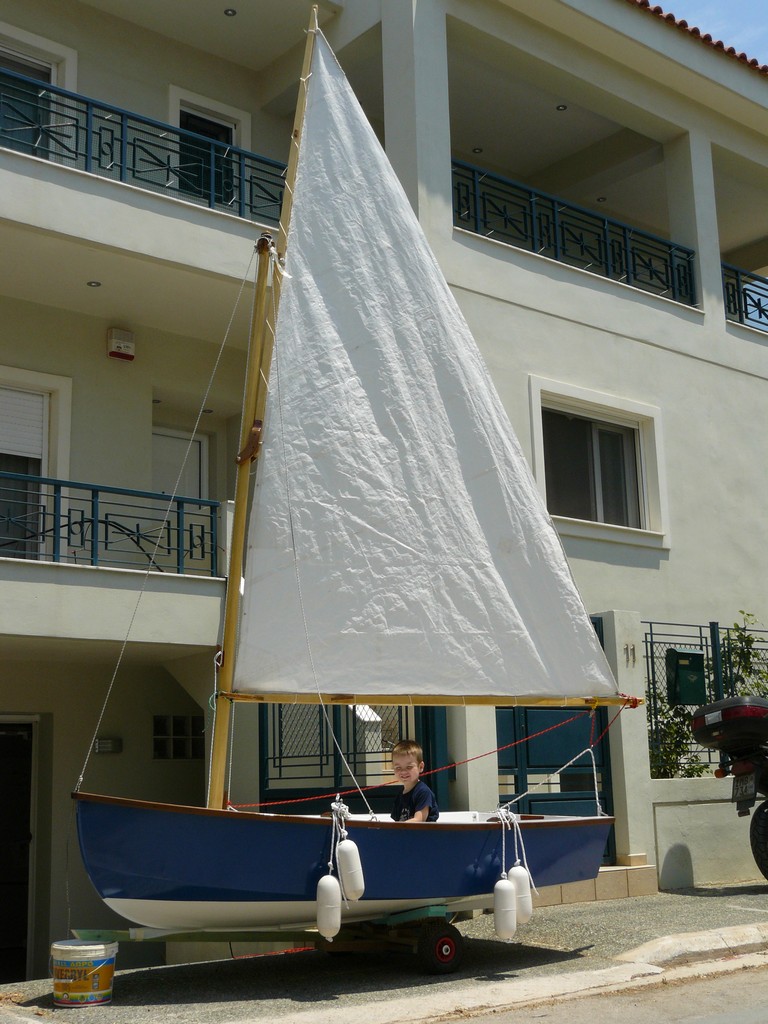
Another major milestone reached. All hardware has been fitted and she is ready for a splash.
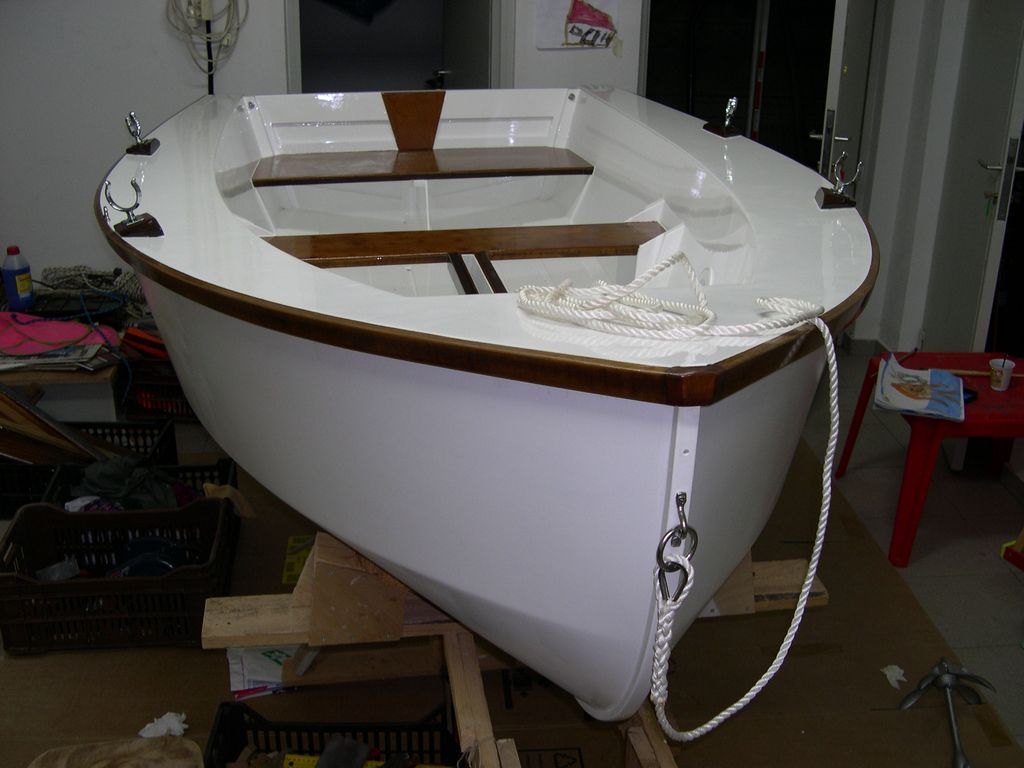
I plan to use her this summer, mark the waterline and paint during the winter time.
Any ideas on how to carry her? Do you think cartopping is feasible? Tonight I will weigh her but I estimate she is about 60 kilos (130 pounds).
Regards
Posted: Mon Jul 07, 2008 10:59 am
by gk108
Beautiful boat!
Posted: Mon Jul 07, 2008 5:05 pm
by topwater
Very very nice...!!!!
Get a small trailer you dont want to scracth that boat

Posted: Mon Jul 07, 2008 6:11 pm
by Cracker Larry
Wow
No way would I car top that masterpiece
Posted: Mon Jul 07, 2008 10:31 pm
by robbiro
She is a beauty Dimitris
I agree with the others, put her on a trailer, don't try to cartop her. You do superb work,
Keep on Buildin,
Robbie
Posted: Tue Jul 08, 2008 3:54 pm
by Dimitris
Thank you for your compliments. The truth is that the paintwork is not that great if seen from a close distance.
I decided to use the trailer of my inflatable boat to carry her to our summer house where she will spend most of her life. I will also build a small trolley (the optimist style) to move her around and launch her. But I have to repair the steering system of the inflatable first :roll Unfortunatelly, I do not have room to store another trailer.
Regards
Posted: Tue Jul 08, 2008 5:09 pm
by MadRus
Wow! I really like this little boat, she's a beauty! Congratulations Dimitris. Let's see her on the water soon.
Posted: Thu Sep 04, 2008 5:15 am
by Dimitris
~~~ S P L A S H ~~~
Yes, it's true, I splashed her and I love it. Here's the story.
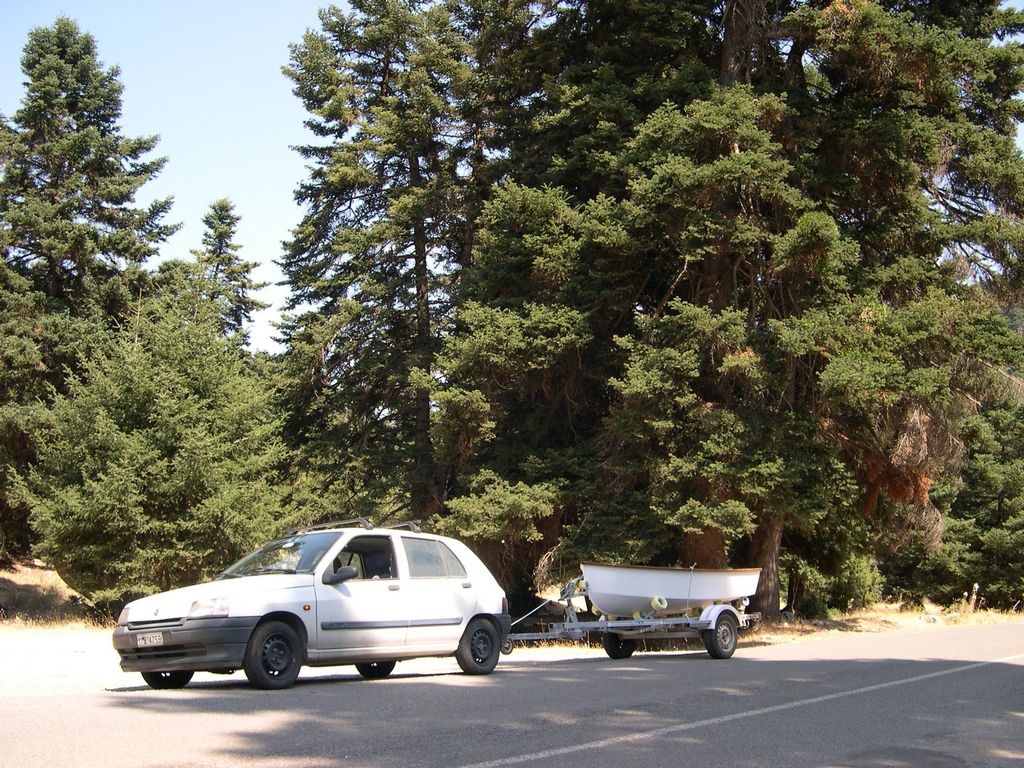
There she is loaded on the modified trailer of my RIB. No cartopping, it sounds like a joke. She weights around 80 kilos, heavier than I expected. I towed her to Galaxidi for launch. We have a summer house there and I would spend one week there for vacations. Notice that I wrapped all the rollers of the trailer with foam cut out of a carry-mat, to make the softer for my baby.
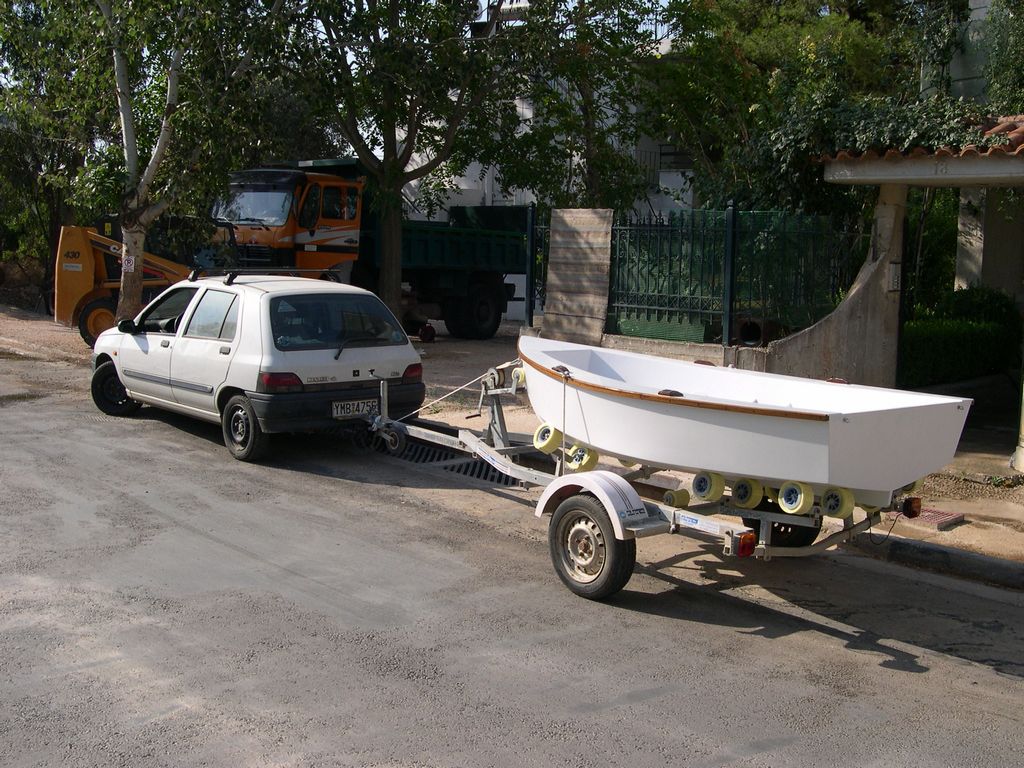
Getting to the sea Involved driving high on the mountains. Here I stopped to tight the ropes and straps that tied her on the trailer. The kept on becoming loose. The foam pads around the rollers have already started to fly away. Only the front ones survived the journey.
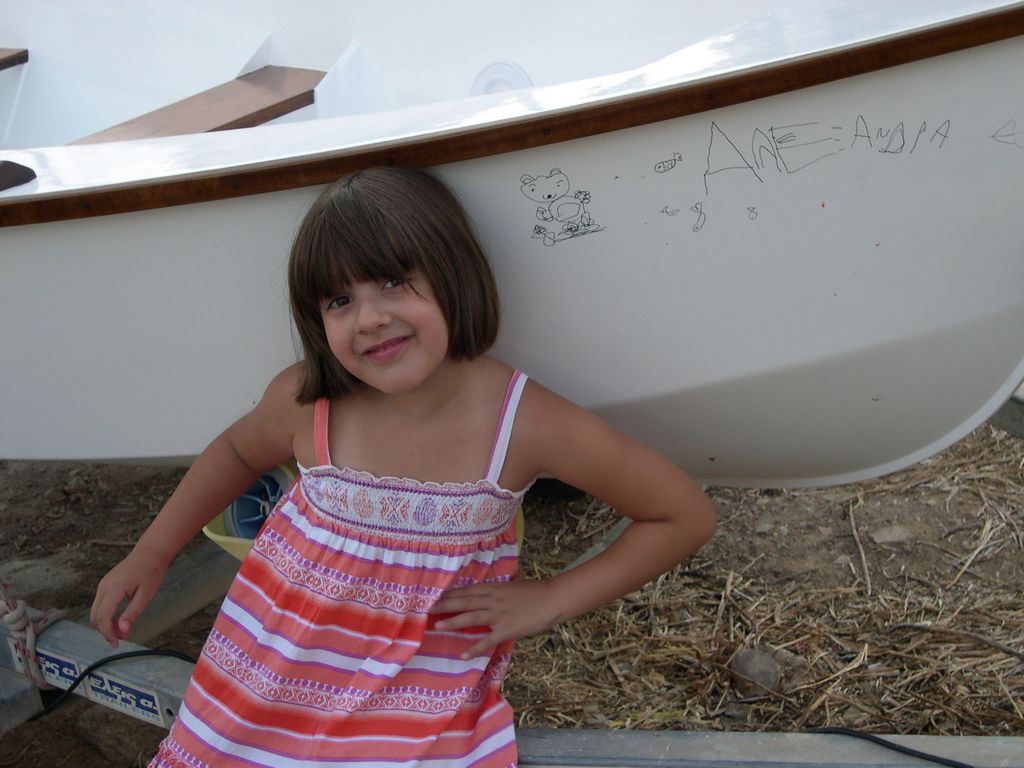
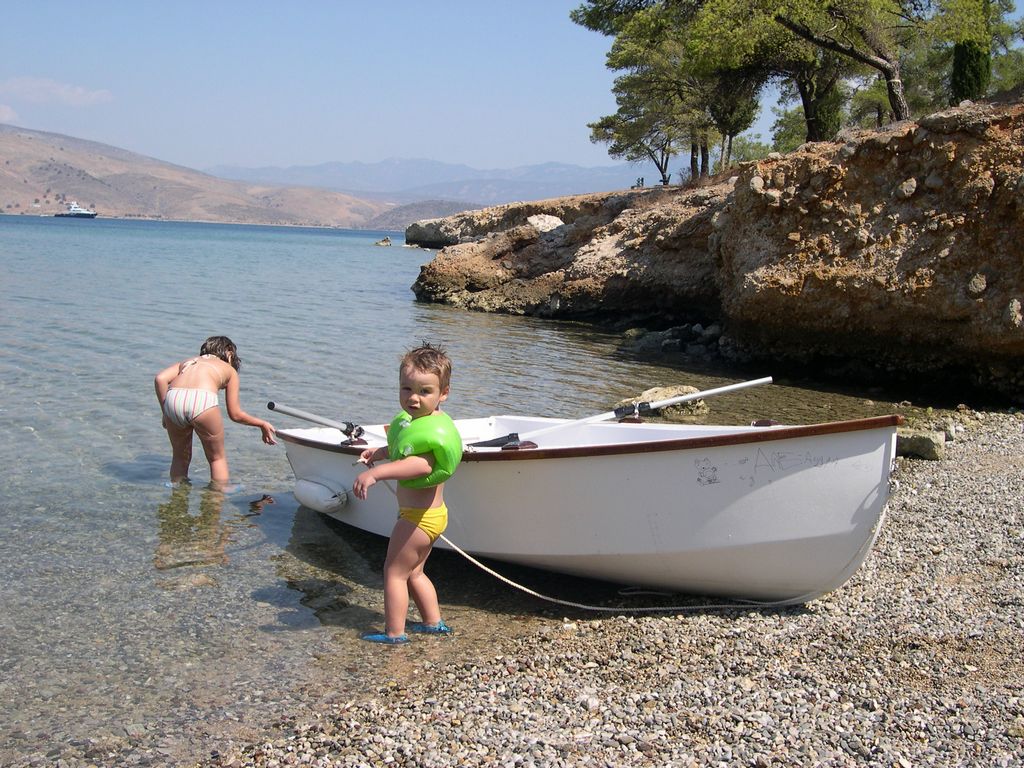
The boat was named after my muse, my doughter Alexandra. She wrote her name herself and then insisted on decorating her with fish and a bear. Here she poses proudly before her work.
The boat was presented to her as a gift a few days later for her name day (St' Alexander's day, 30-Aug). Have I menthioned that I also have a son

Finally, 2 years and 5 months after the first sawcut, she is splashed. This is her first photo in the water.
The joy of me and my doughter was incredible.
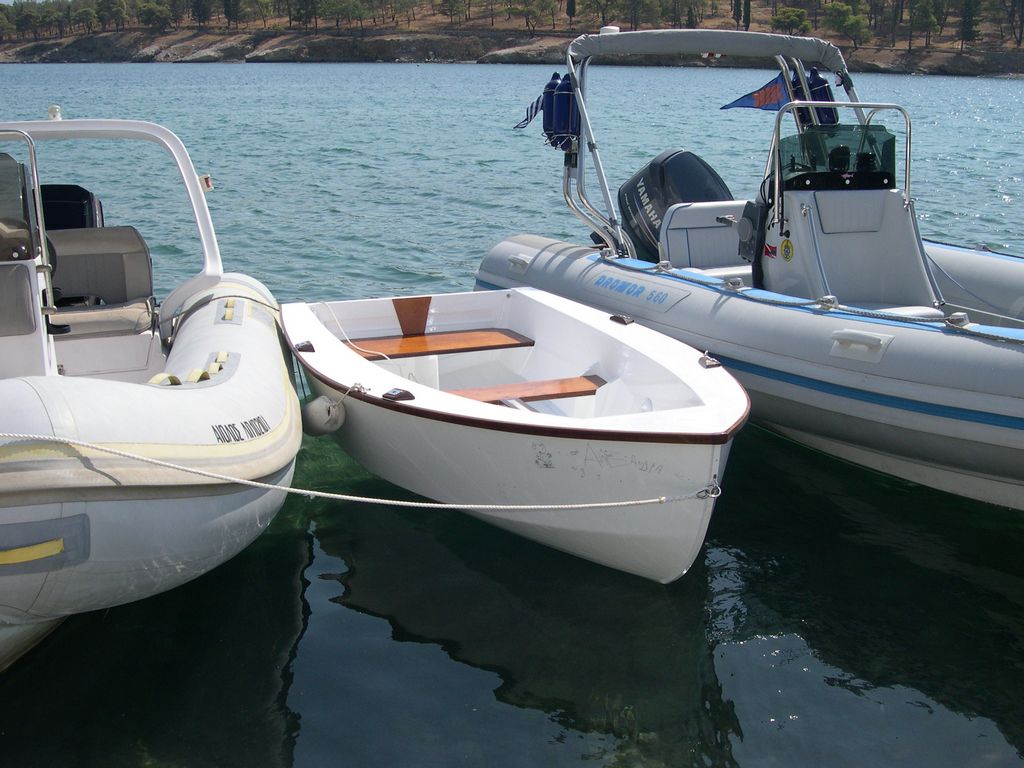
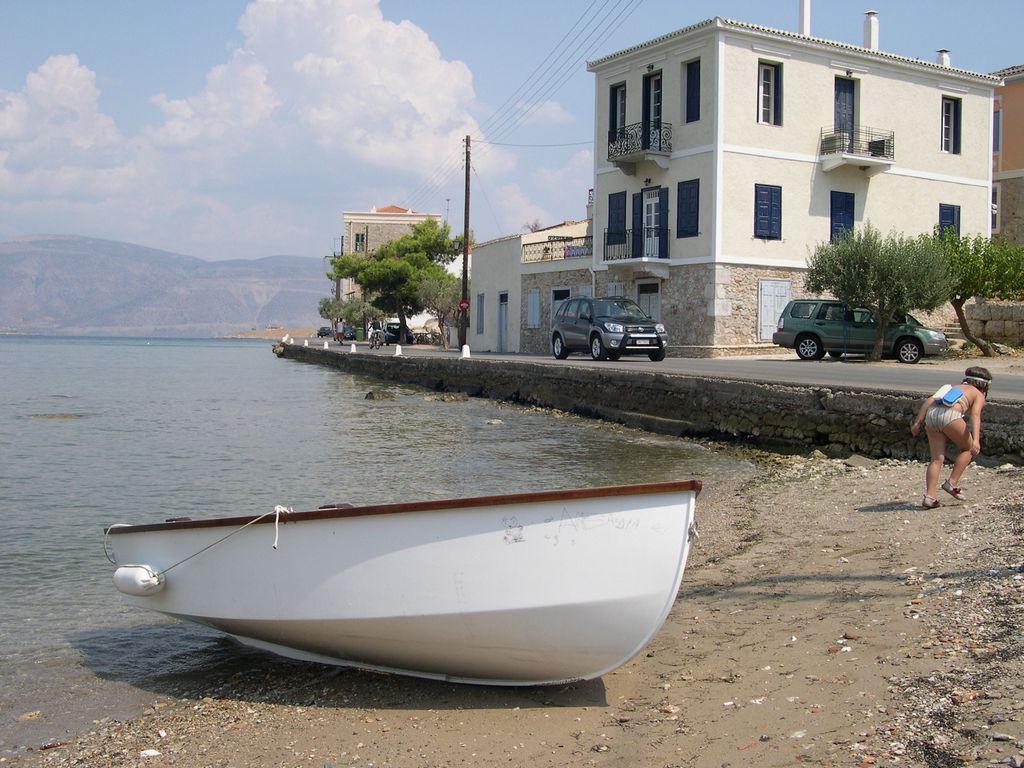
Resting at her home port, tied next to my RIB.
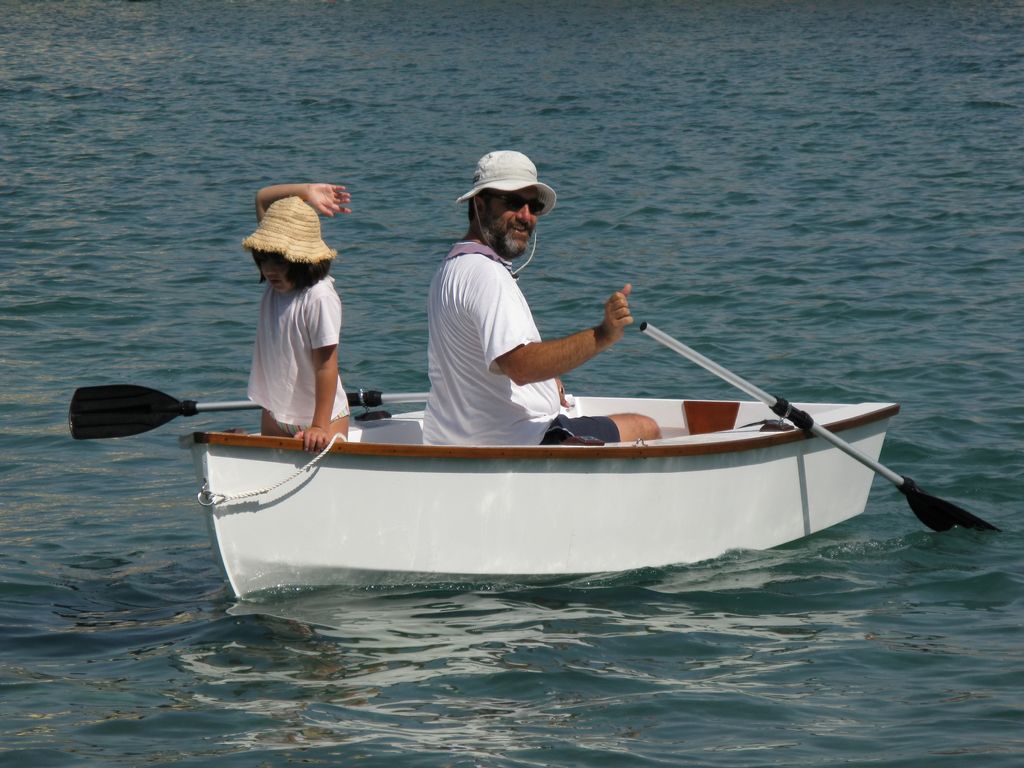
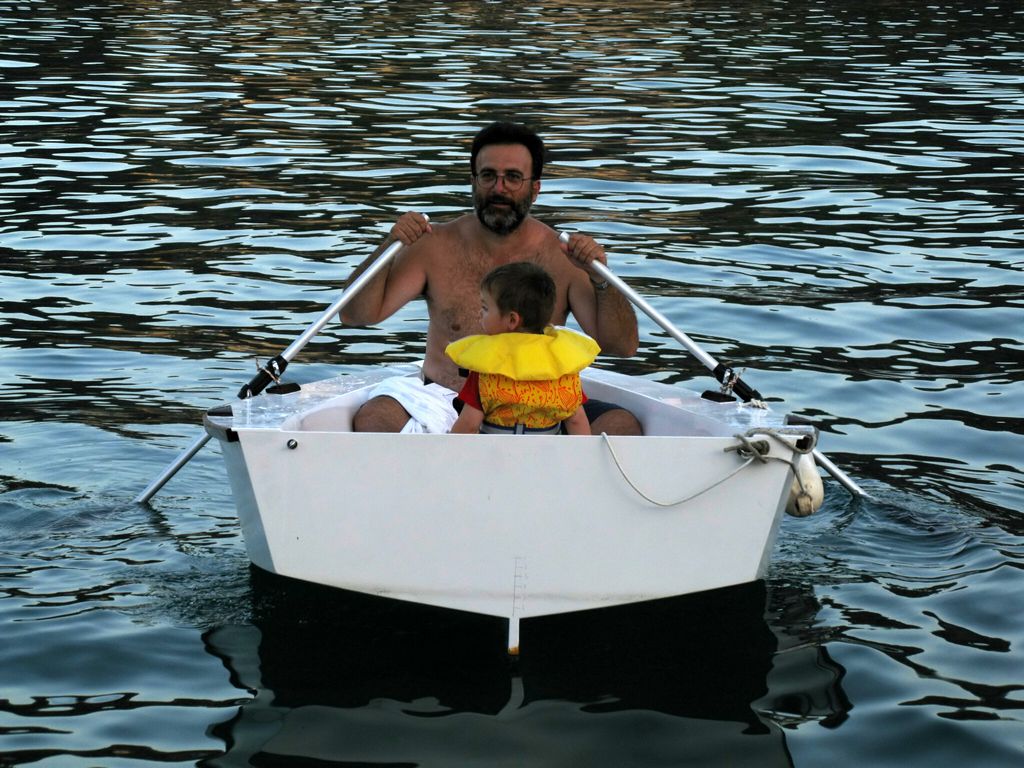
Going a beer at the the other side of the port. These aluminum oars are a disgrace to her and totally inadequate for the job. First thing to follow is a nice pair of long oars.
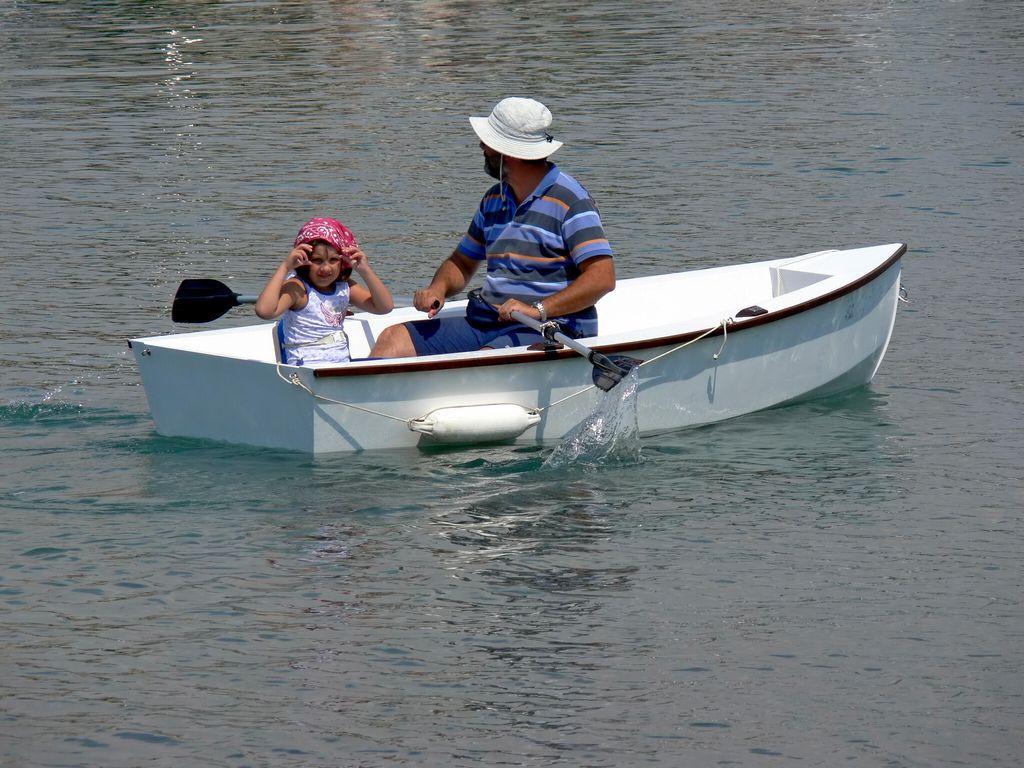
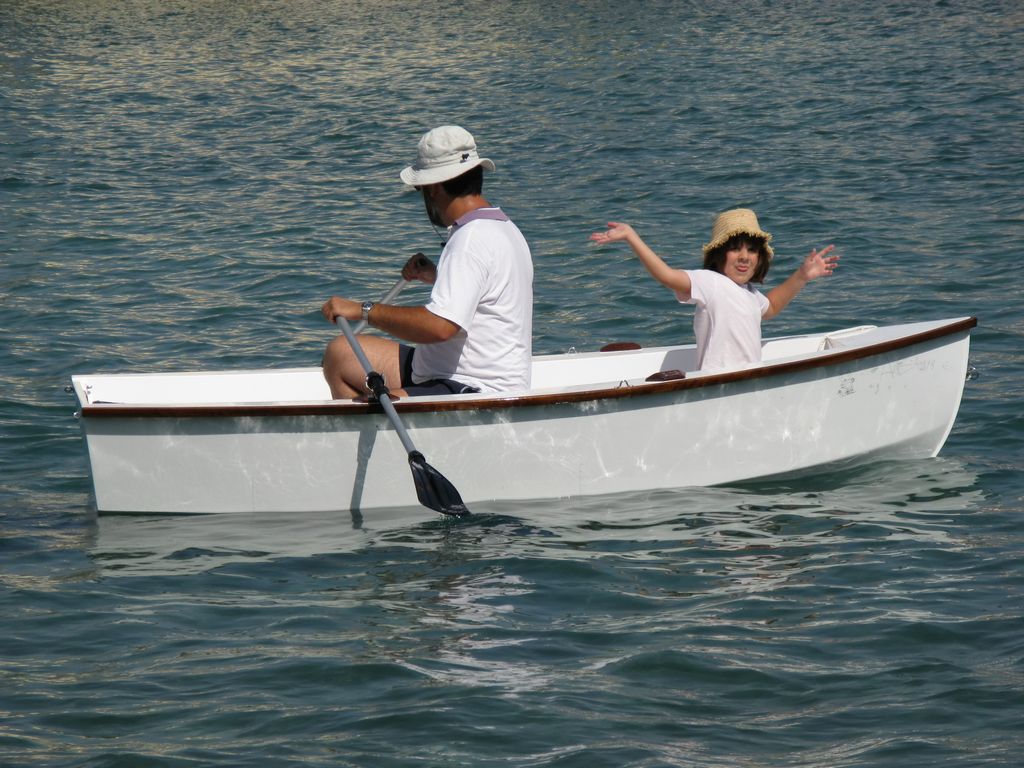
My son is enjoying a ride. Here I sit on the front bench and she got so badly trimmed that the skeg got out of the water. It was realy difficult to keep direction with the skeg out of the water.
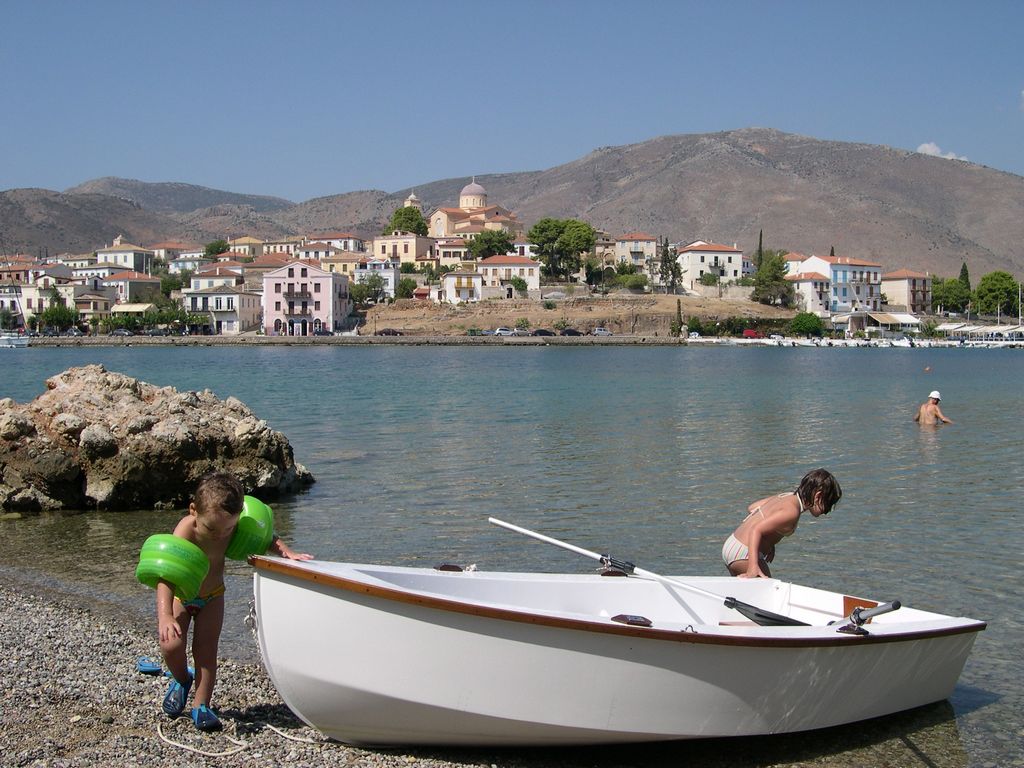
From a short excursion for a swim. The kids loved it.
Pulled out for recovery and towing back to Athens. After one week in the water there was not a single crack or scratch on the paint. There is only a nice waterline mark of dirt around her so no guessing is required when I paint her.
The next projects will be a pair of oars, then the sailing gear (mast, boom, centreboard, rudder, stays, ooops that's some work
. I will paint her during the winter. I think low temperatures will make the task easier.
Regards
Posted: Thu Sep 04, 2008 9:31 am
by Cracker Larry
Fantastic report Dimitris
Your boat and your family are beautiful, as is your location. Very nice job
My wife is from Greece BTW, her name is Theodora and she has a brother named Dimitris.
Posted: Thu Sep 04, 2008 1:17 pm
by Murat Ozkan
Congratulations Dimitris. Great boat and great launch. I will be sailing my V12 in Ayvalik across Lesvos next year and plan to visit Greece(not by sailing V12 though
But a ferry may work to take it to island )
Murat Ozkan
Posted: Thu Sep 04, 2008 3:20 pm
by MadRus
I've been watching your progress all along. Excellent work, and congratulation! I only wish you weren't living in such an awful location. It must suck waking up there every morning.
I love the hand written bow. It reminds me of my daughters' furniture in their bedroom, which we let them handpaint.
And beautiful kids too.
Posted: Thu Sep 04, 2008 9:39 pm
by gk108
Very nice! She looks right at home at the swimming hole.
Posted: Thu Sep 04, 2008 11:12 pm
by ks8
I lost track of this build for awhile. Beautiful boat Dimitris, and family.
I'm not Greek, do not have a Greek wife or children, do not live in Greece, but I enjoy a good gyro!
Thanks for updating the build progress. Maybe I should forget about custom lettering, as I'm getting the CV16 ready for a splash, and let my niece have at it with a marker pen... ? hmmm...
Is Alexandra looking forward to sailing her?
Posted: Fri Sep 05, 2008 3:57 am
by Dimitris
Thank you all. Visiting this forum has been an inspiration and a great support to keep on building.
Galaxidi is really beautiful but I can only spend there a few weeks every year. The rest of my life is in the big city.
Alexandra was really excited with the boat and the lettering. She was talking to everybody in the neighborhood about her new boat, that her daddy built it, etc. She tried a little bit of rowing but having me in the boat made it too heavy for her. Next year I will try sailing with her.
Most excited, however, was my son, two years and 3 months old. Every time I crossed the doorstep he was thinking that we were going to the boat and was running after me crying "boat, boat".
Lunch time, I am going for a gyro
Posted: Fri Sep 05, 2008 3:10 pm
by topwater
Dimitris what boat are you going to build for youre son
beutiful location and great pic's of the kids and boat.
Makes it all worth while .
Posted: Mon Sep 08, 2008 4:14 am
by Dimitris
Dimitris what boat are you going to build for youre son
Next project will be either the restoration of a 23 feet sailboat that lays on my backyard or a Vagabond type of boat. I will soon have to make decisions...
Posted: Sun Feb 22, 2009 11:22 am
by Dimitris
Hello, everybody. I have been busy building but very lazy posting.
After the summer splash, I had to continue with oars, the sailing gear and painting her. I started with the rudder and the centreboard.
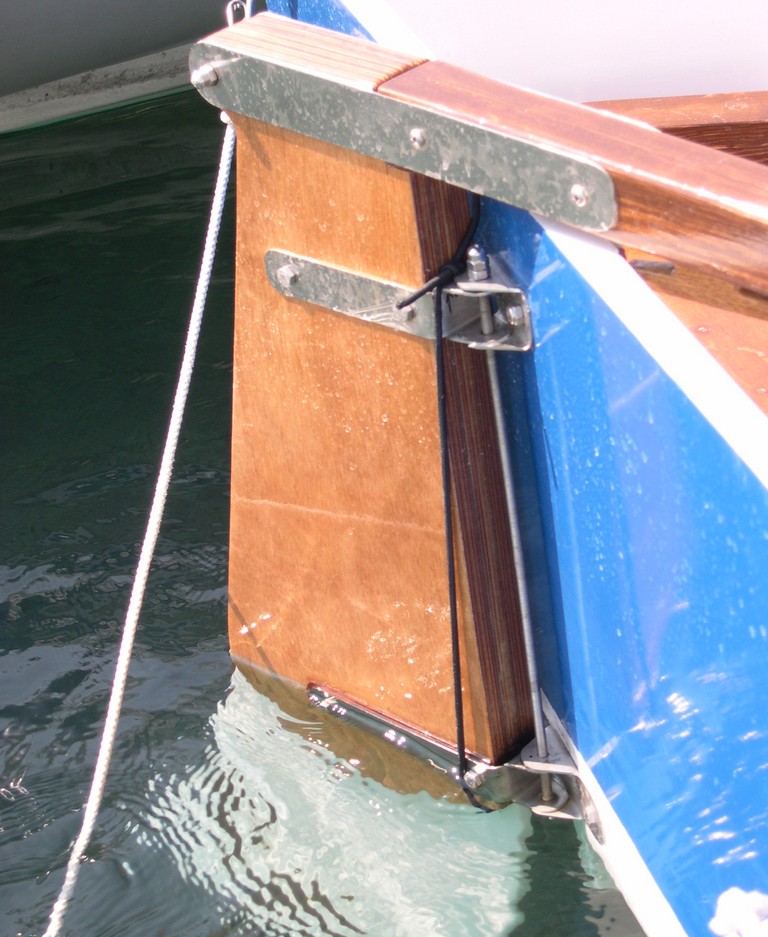
These are the three layers of the upper rudder. There are two cheeks and the a filler in middle the thickness of the blade. I glassed the inner sides of the cheeks and both sides of the filler to provide abrasion resistance and some space for the paint layers that will follow.
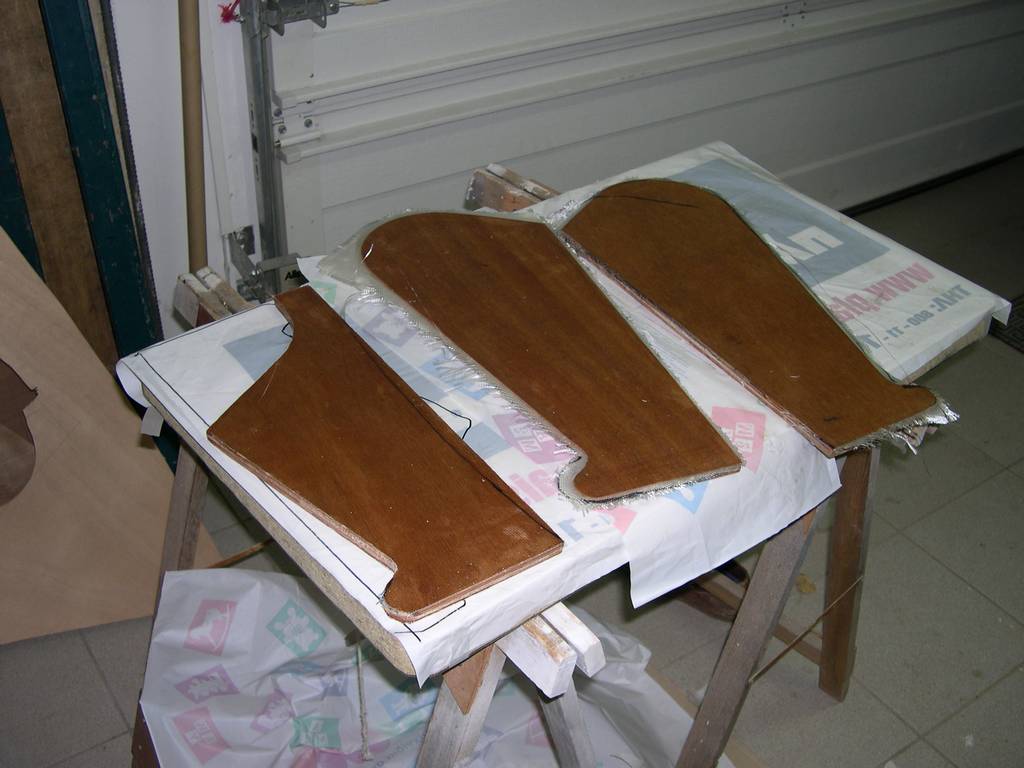
Here the cheeks and the filler are glued together. The holes for the gudgeon bolts are already there to help the alignment of the parts.
Here is the upper rudder and the blade.

The centreboard is built by 4 layers of 5 mm plywood, glued together and glassed.
Here is the C/B glassed with one single piece of glass and wrapped around with shrink-wrap polyethylene film (originally intended to wrap sandwiches)
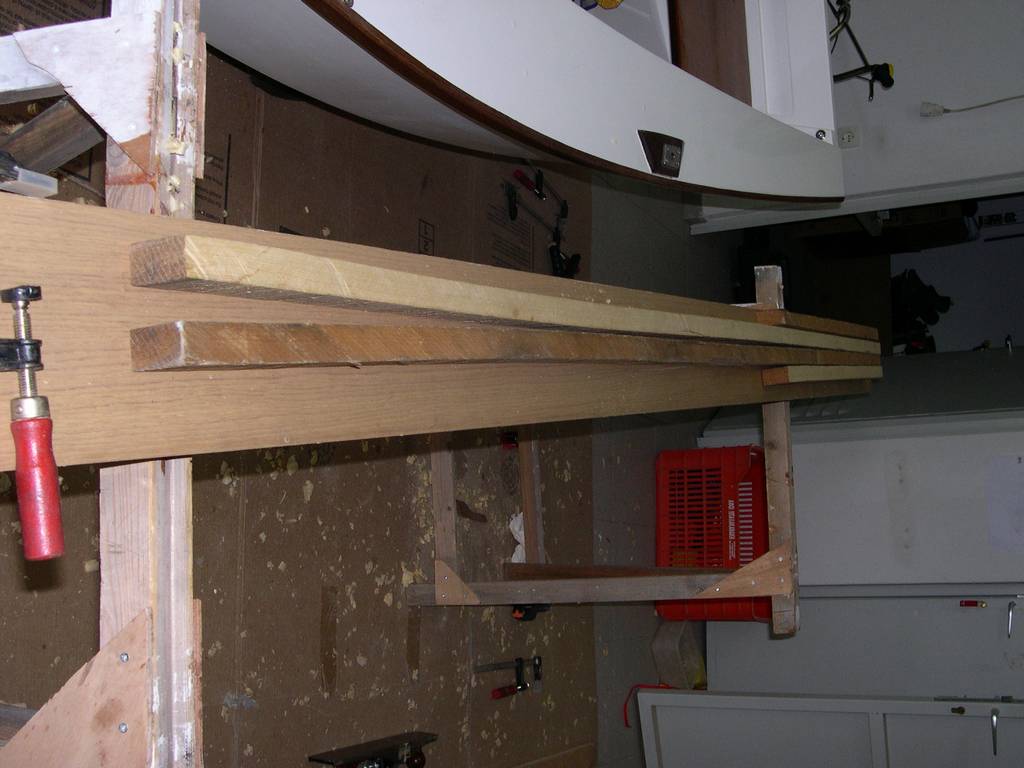
Oars have been an exercise to mast-making. They are made from construction quality pitch-pine (very low quality indeed), after the Jim Michalak plans, adapted for more length. Here are two 2-inch wide and 1 inch thick planks that will be glued. The blade is formed by two more 1-inch thicknesses glued at each side. This amounts to a 4 inch wide blade. The true thickness is somewhat more (about 11 centimetres) which is rather small. On the other hand the blades are long.
After gluing oars, i made a rough cutting of the blade tapering. These were the biggest hand-cuts I ever made.
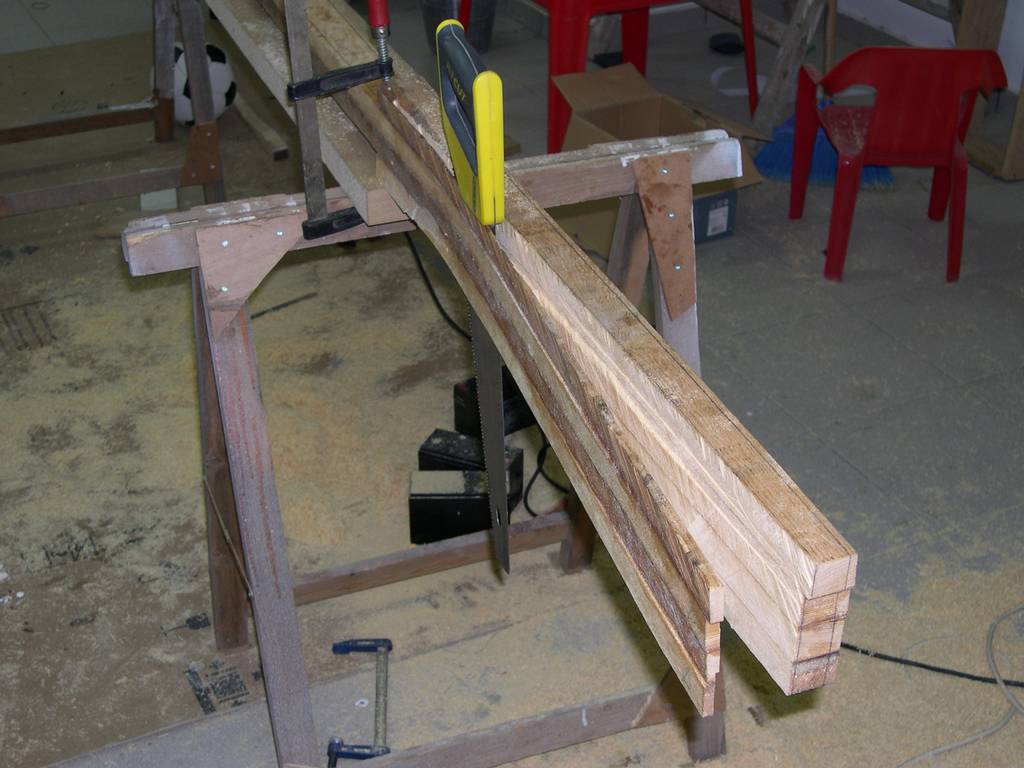
The next step was to mark the oar shape and then cut to shape. I use a paper template to transfer the oar shape to the wood, then used the jig-saw to cut the blade. I shaped the looms using the power planner and the belt sander.
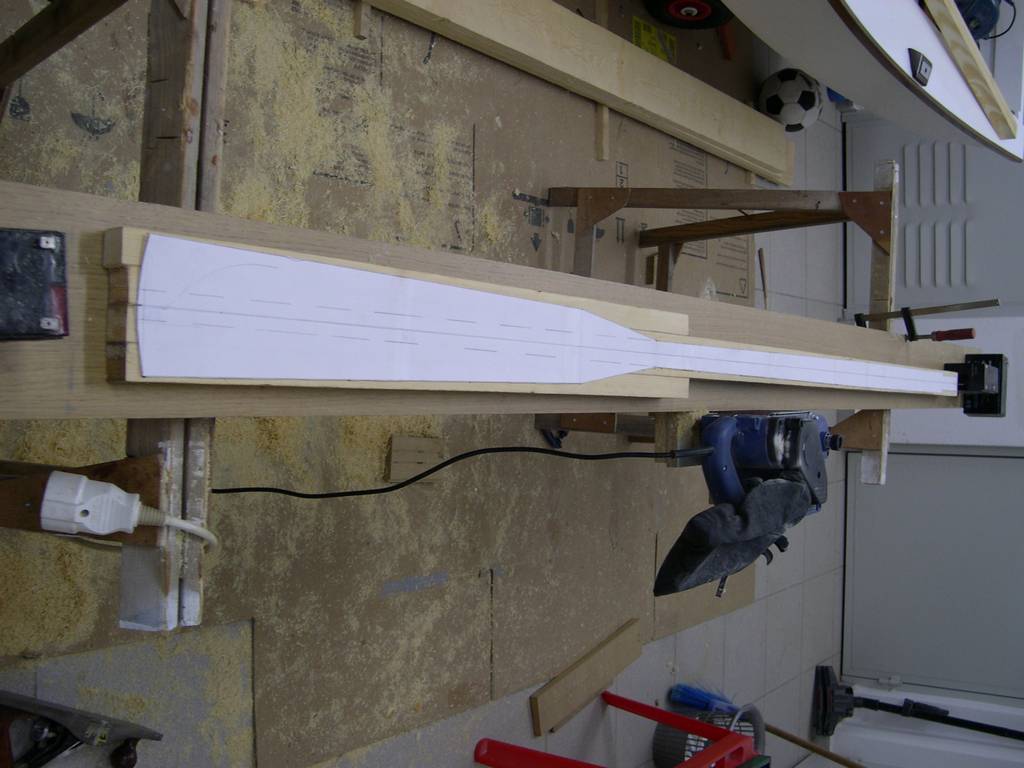
Here is an oar, just before shaping of the loom and the handles. The blade has been shaped like a very flat rhombus using the power planer, the belt sander, the hand planer, the spokeshave and hand sanding. This has been the most tiring venture of the whole project.
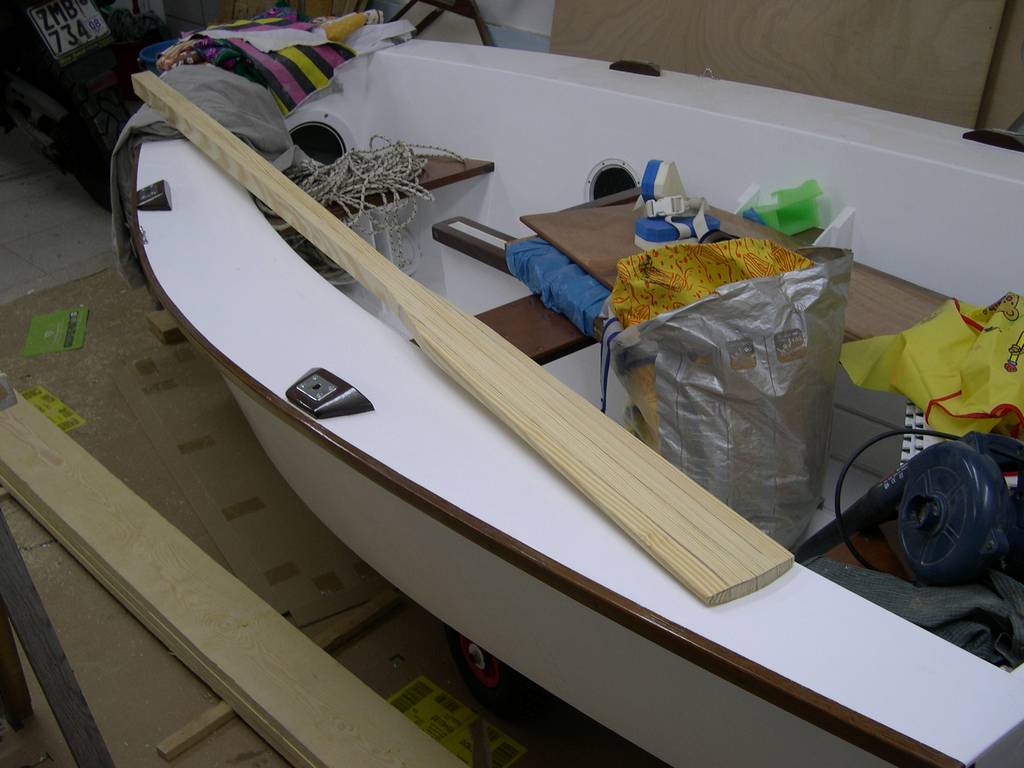
This is the final result, with the loom rounded.
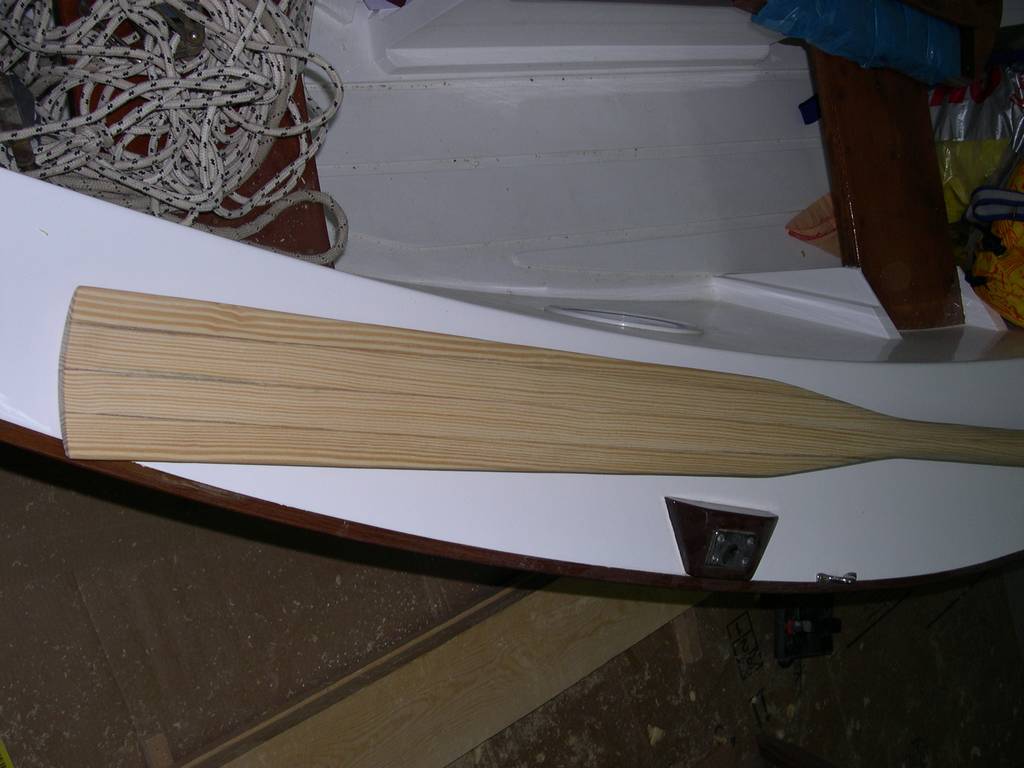
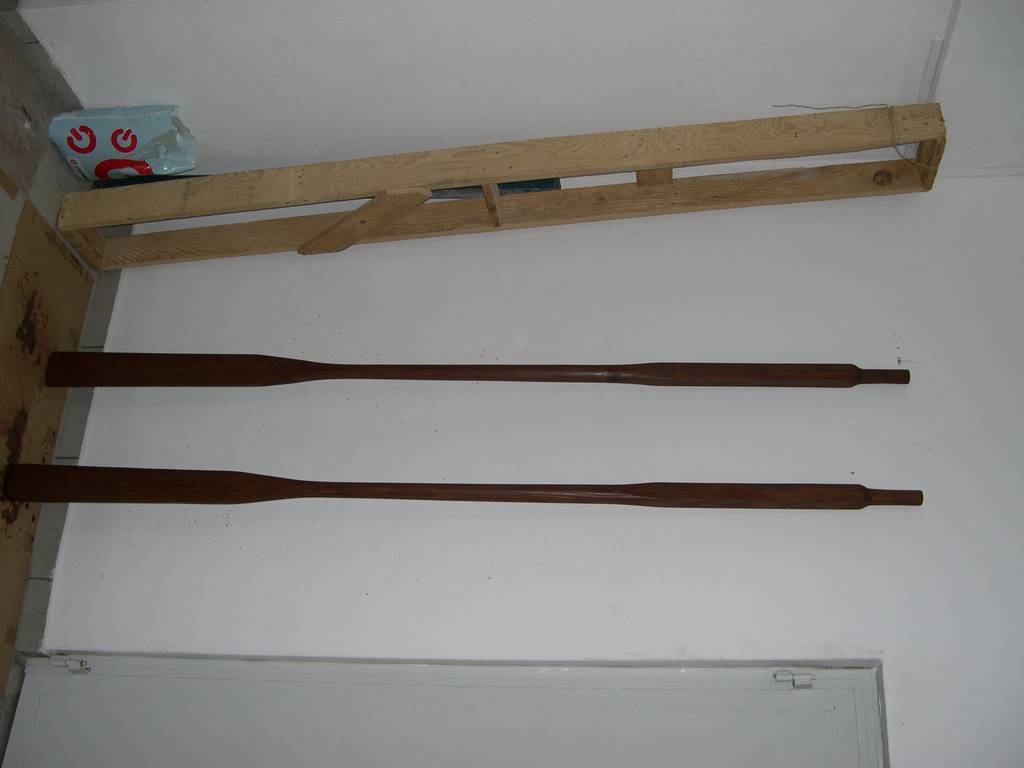
Here they are, tinted to an iroko colour. The area around the oarlocks will be served with thick cotton twine. I may also serve the handles. The twine will be varnished in place.
After finishing the oars, it was the turn of the spars. Spar making prooved as satisfying as boat building, if not more.
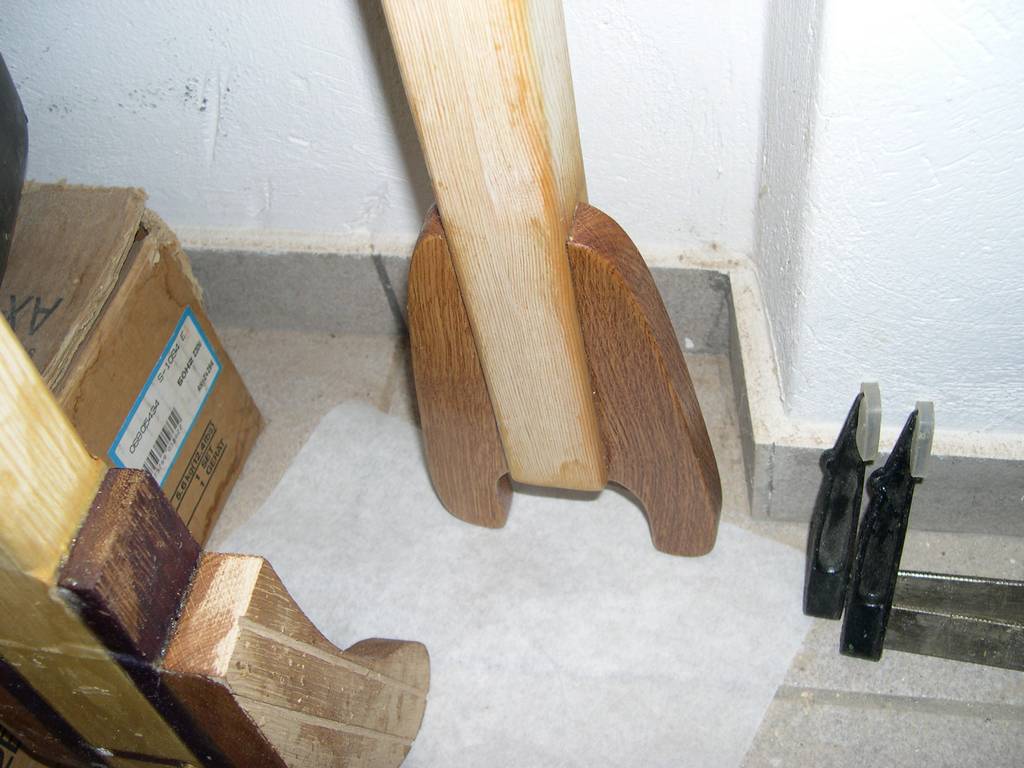
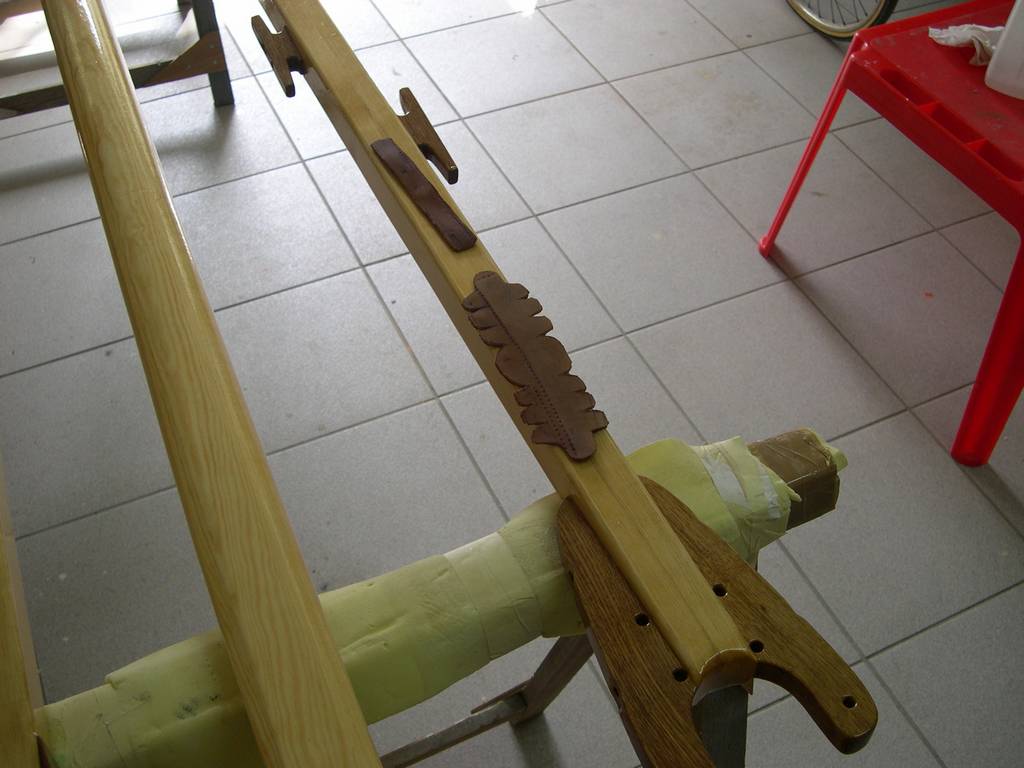
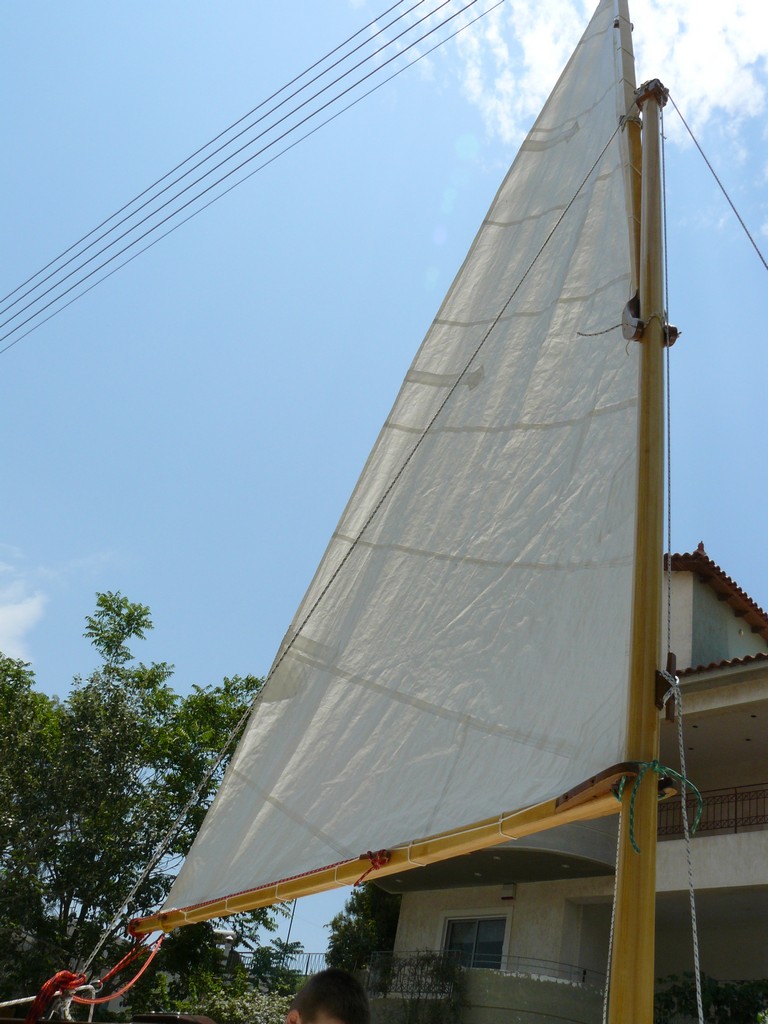
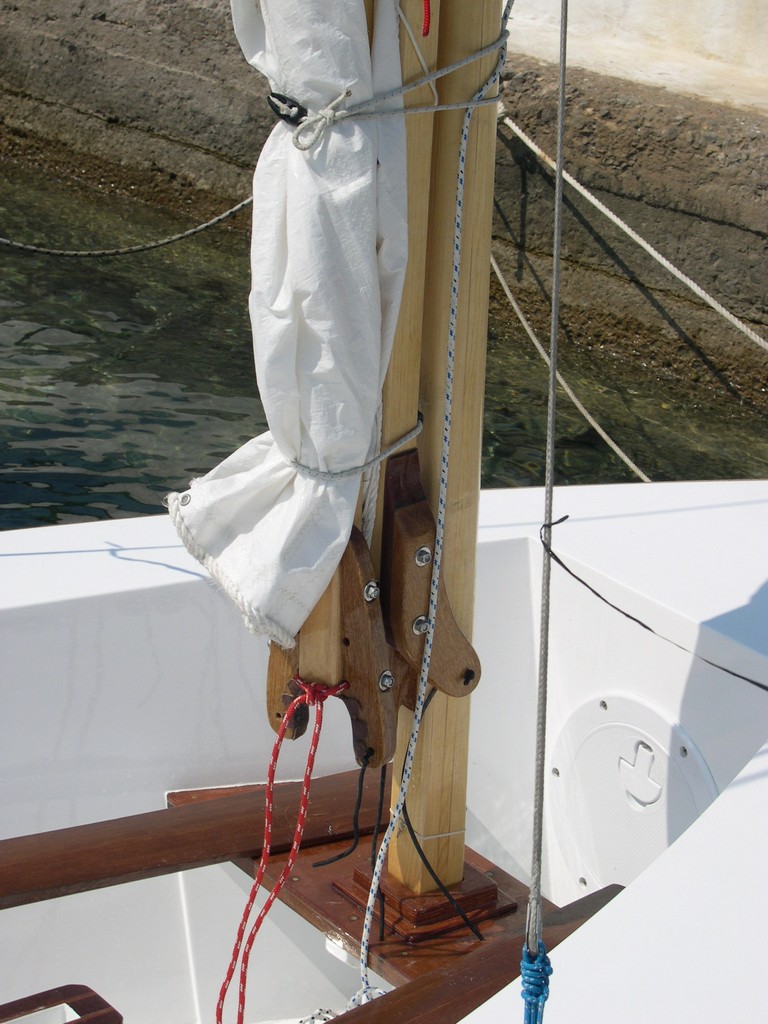
This is my mast. I opted for a gunter rig, which I designed myself after the original marconi rig. The original mast would be 15 feet long and very difficult to tow and store. The gunter mast will be 10.5 feet long and the yard 8.5 feet long. I kept the sail size and position exactly the same to maintain the balance. Spars are made from straight grain european pine and were sized following the rules in the Iain Oughtred book.
The mast is ready for rounding. The step will be left square to prevent it from rotating. You can see the jigs that I made to keep the belt sander and the planner stationary. I couldn't have made the job without them.
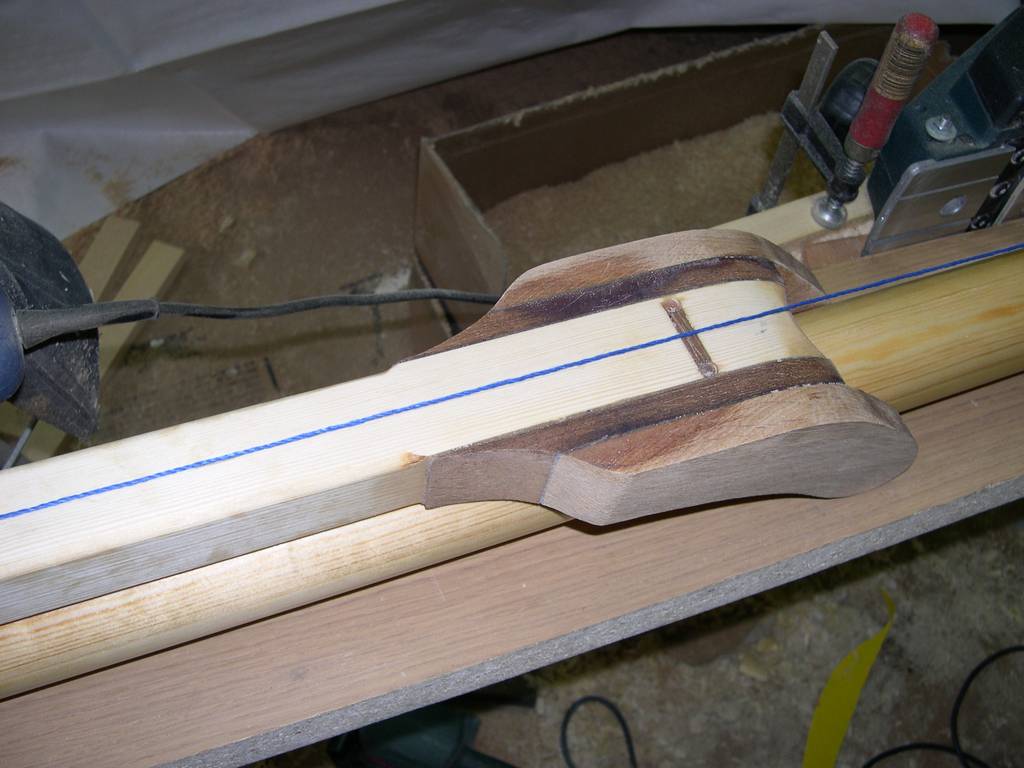
The masthead would have a square section were four small oak hounds will be glued. Above the hounds the mast would be round again.
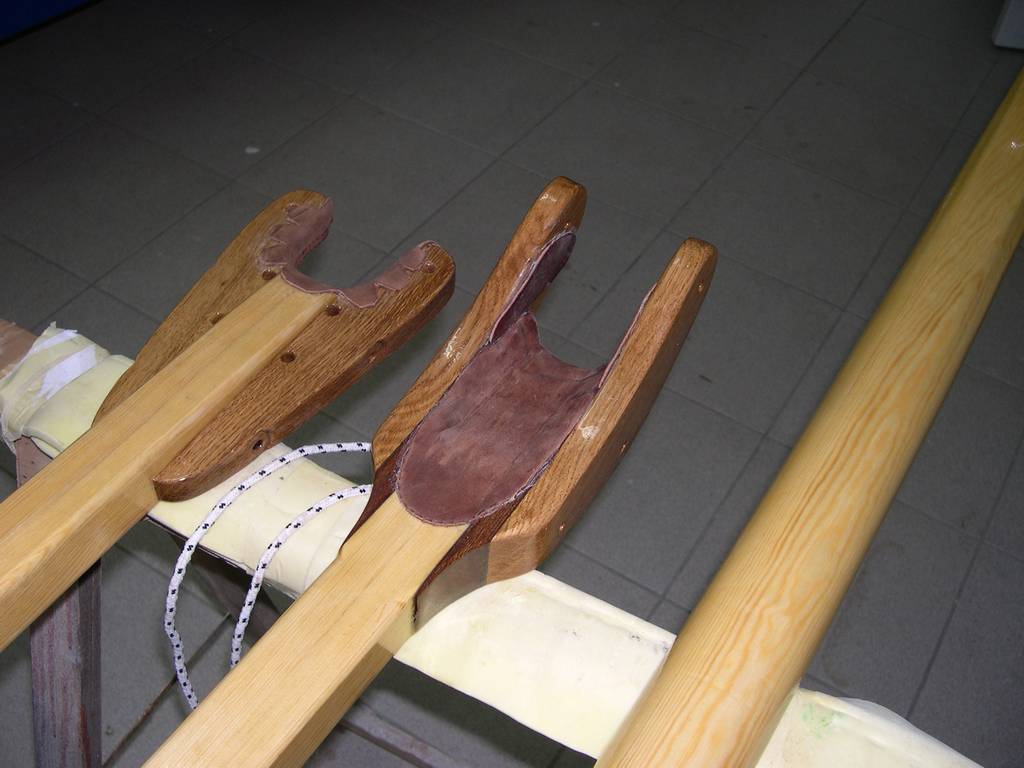
This is the finished masthead. The stays will be server with twine and looped around the mast. A leather collar will be installed to protect the spar.
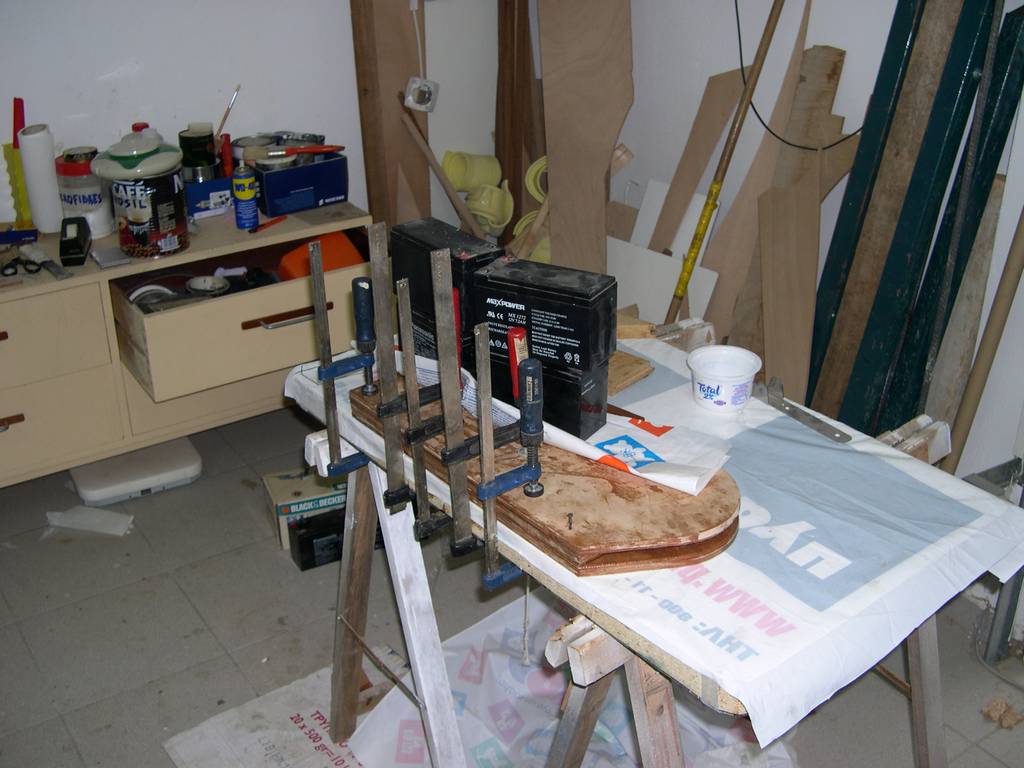
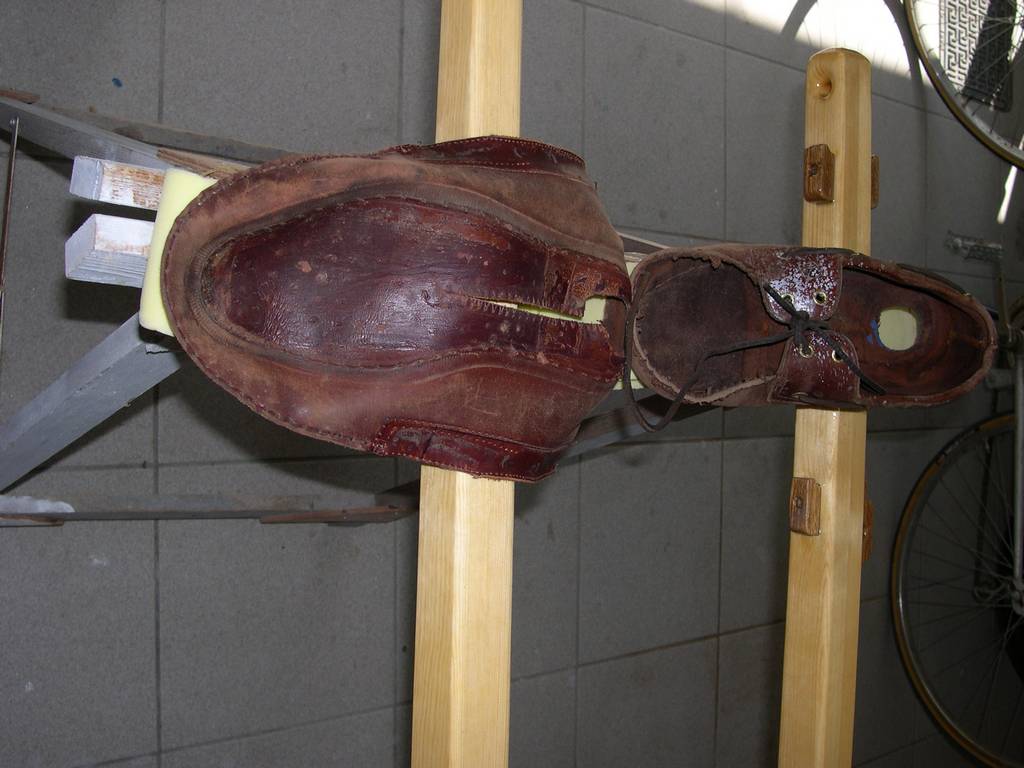
I decided to use boom jaws instead of a gooseneck. The jaws are made from leftovers of the oak flooring in my home. They will be through bolted with M6 stainless rod.
Opening these long holes has been very stressing. They should enter in the middle of the jaws and exit in the middle. It take a very small mistake to destroy a boom and a pair of jaws. Fortunately, everything ended up OK.
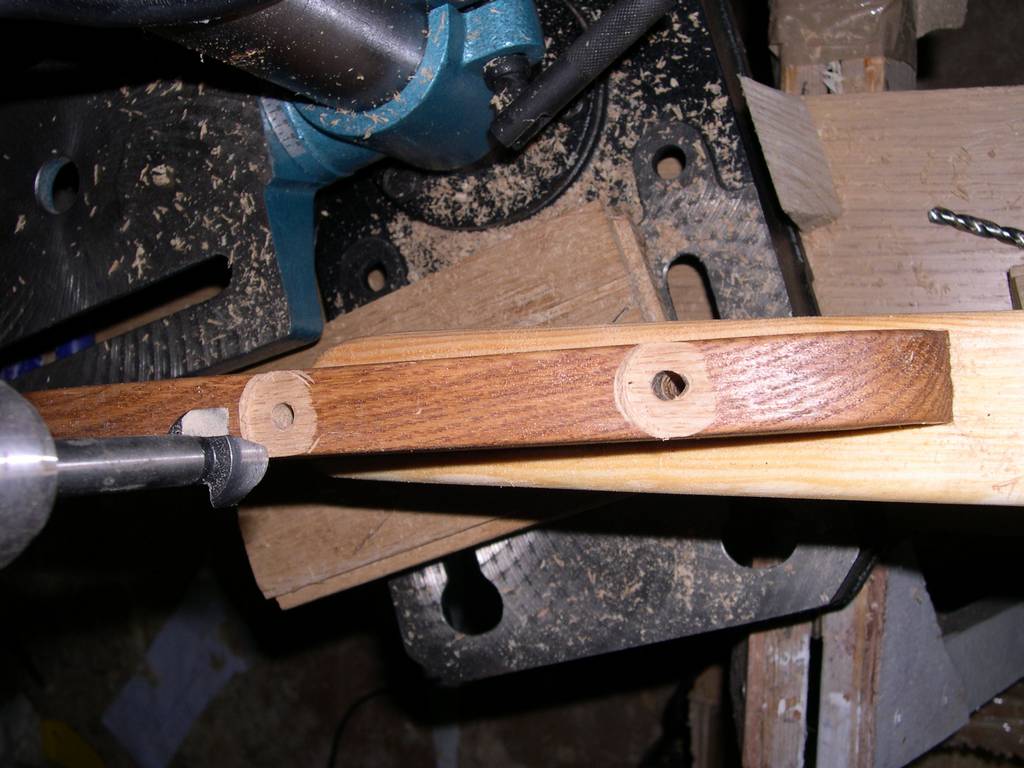
Here are the yard jaws. They are make from the leftover oak flooring planks and two iroko packers. I like the alternation of dark and light colors that resulted. The jaws will be trough bolted and lined with leather. The same is true for the boom jaws.
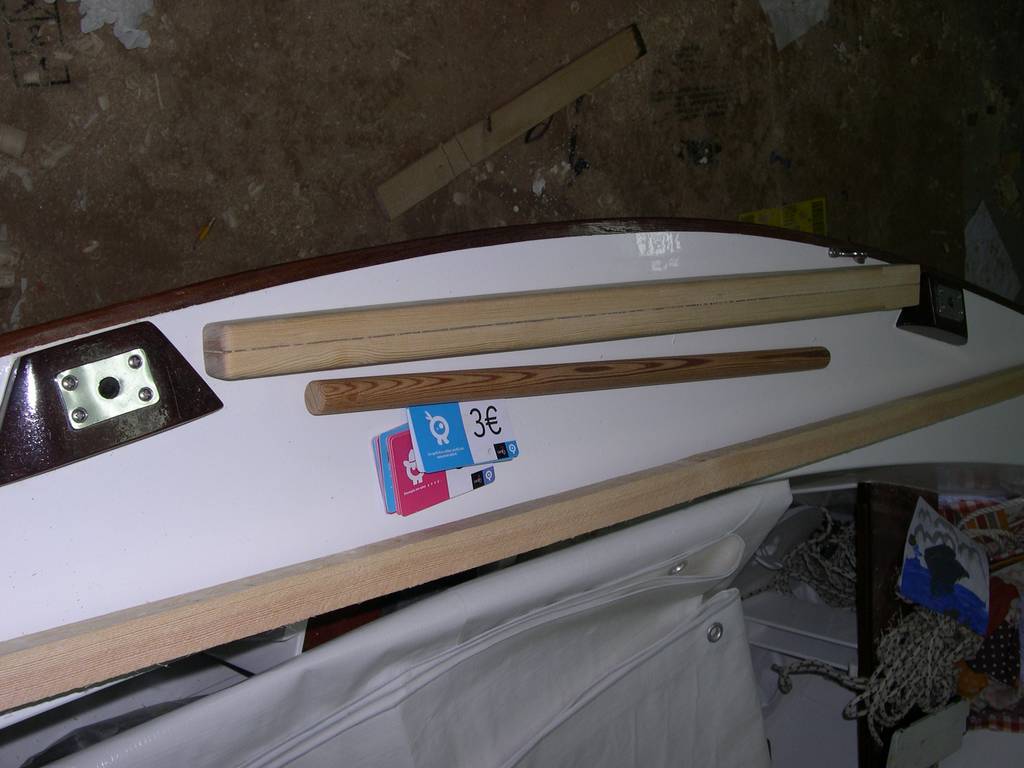
The tiller is made from pitch pine leftovers from the oars. Tiller extension is sized according to the plans but looks rather short to me. We'll see in the summer how it will work. It is cut from a broken broom handle so it is very easy to build a longer one.
The hull will be blue above the water line and white below. I will use an LPU paint above the waterline and an epoxy paint below. Here is the hull will only one layer of blue LPU. It has proven as difficult to work with as the white one, in the summer. There are a lot of brush marks. The blue paint does not flow as well as the white and in not as glossy either.

That's all up to now. I am getting close. I also plan to buy a used trailer to carry her around.
Regards to all of you
Posted: Sun Feb 22, 2009 1:38 pm
by topwater
You have been busy.
there is alot of detail work on youre boom and mast.
everything looks real nice, i like the dark and light
wood together.
Posted: Sun Feb 22, 2009 3:16 pm
by ks8
Thanks for the update.
Looking forward to pictures this spring or summer with the new rig and oars. I've been planning a similar rig that I can stow when fishing, in case of engine problems. I know what you mean by those holes in the boom jaws. Had the same issue lately with the holes in the tiller cheeks and rudderhead. It worked out, but one day, maybe, we'll get that drill press.

Posted: Mon Feb 23, 2009 10:53 am
by gk108
That's some nice looking details.
Posted: Mon Feb 23, 2009 11:10 am
by Cracker Larry
Very nice work Dimitris
Re: Another side of boat building
Posted: Sun Apr 26, 2009 8:40 am
by Dimitris
My first post in the new forum just when another major milestone was reached. All work on the hull has finished. This is the result of 3 coats of LPU on the sides and 2 coats of epoxy paint on the bottom. I followed the instructions on the can but it proved that I did not reduce the first coat of the LPU enough and I had brushmarks and uneven flow. I tried to remove as much brushmarks as I could, but as you can see I did not remove them all. The next 2 coats were reduced to 50% and the result was much much better. The light brushmarks that are here are all horizontal and, I think, serve to hide other imperfections, like dust, bugs, etc. Anyway, this is wooden boat, remeber
My son, next to the boat. When I started building, he was not even born.
The mast step is made from 3 laminated layers of 1/4 plywood, glued on another 1/4 layer and then on top of the front bench.
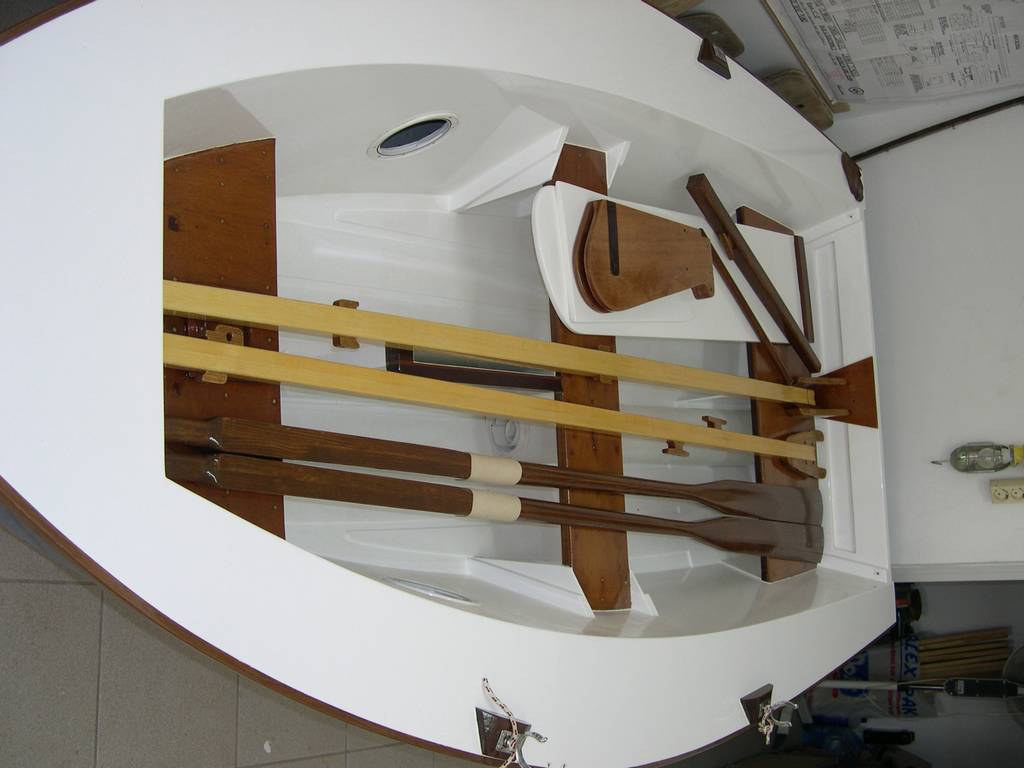
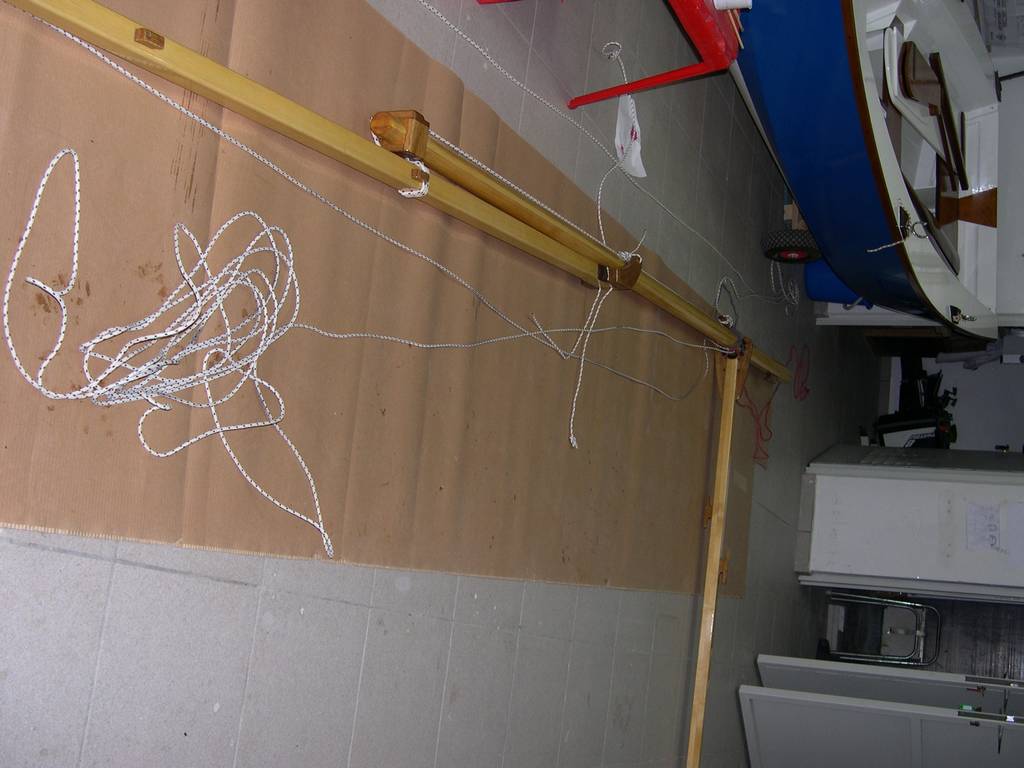
Here are all the sailing and rowing hardware, except the mast. The oars have been served in cotton string in the oarlock area. The string haw been varnished and is now hard and stable.
A free source of leather that will line the boom and yard jaws.
There are two layers of leather at the boom jaws. The smaller part is the thickness of the jaws. The other layer goes on top. They were both glued with contact cement. More leather was applied on the yard jaws.
After leathering I made a trial fit of the rig on the floor. I also took measurements for the sail. All hardware for the mast and the boom were made of oak and glued and screwed on the mast.
Here is a detail of the boom-mast joint. I find the result aesthetically pleasant. I hope that it will be functional as well. Notice the the jaws are not in line with the boom, so that they will be perpendicular to the mast once the sail is hoisted.
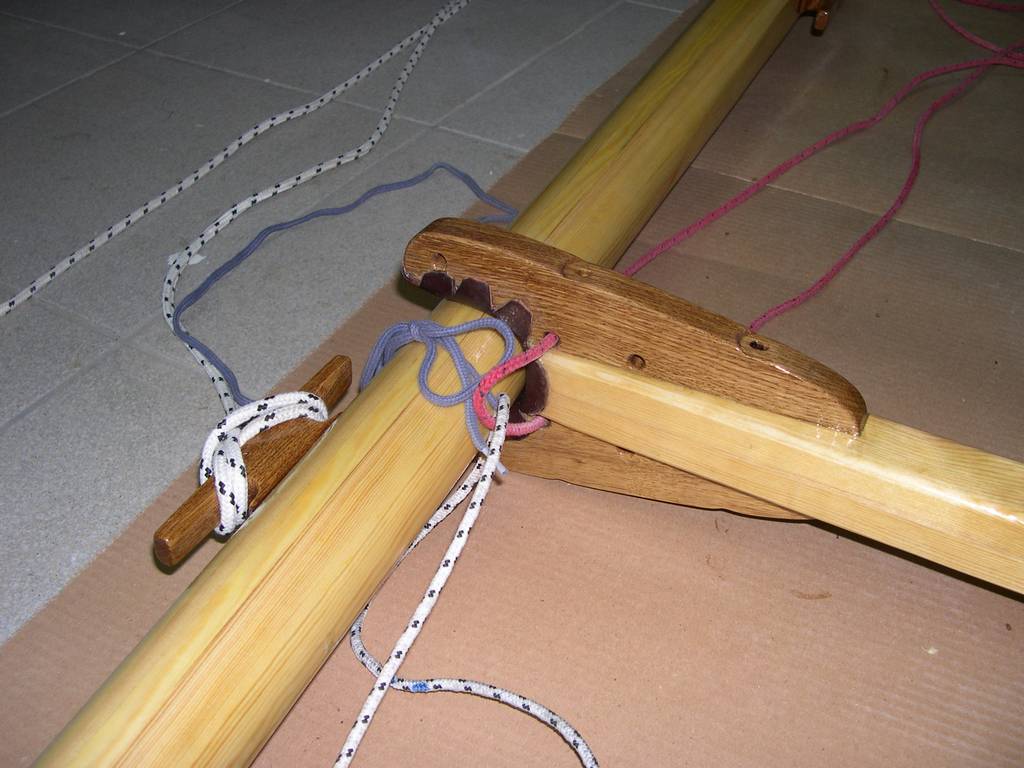
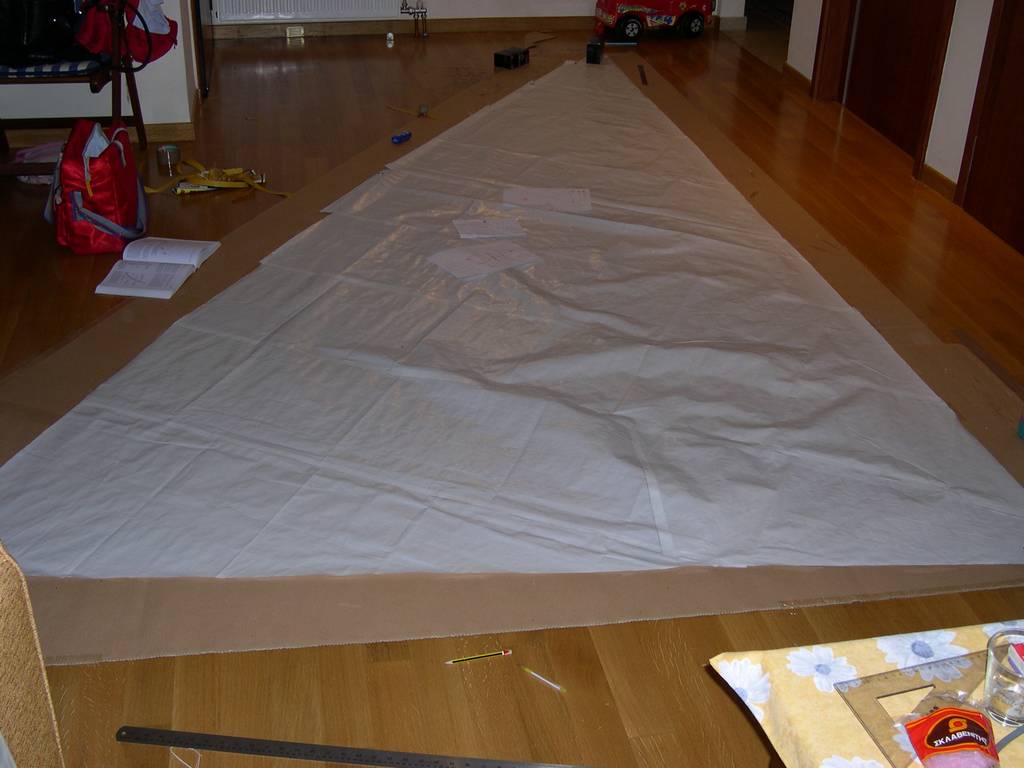
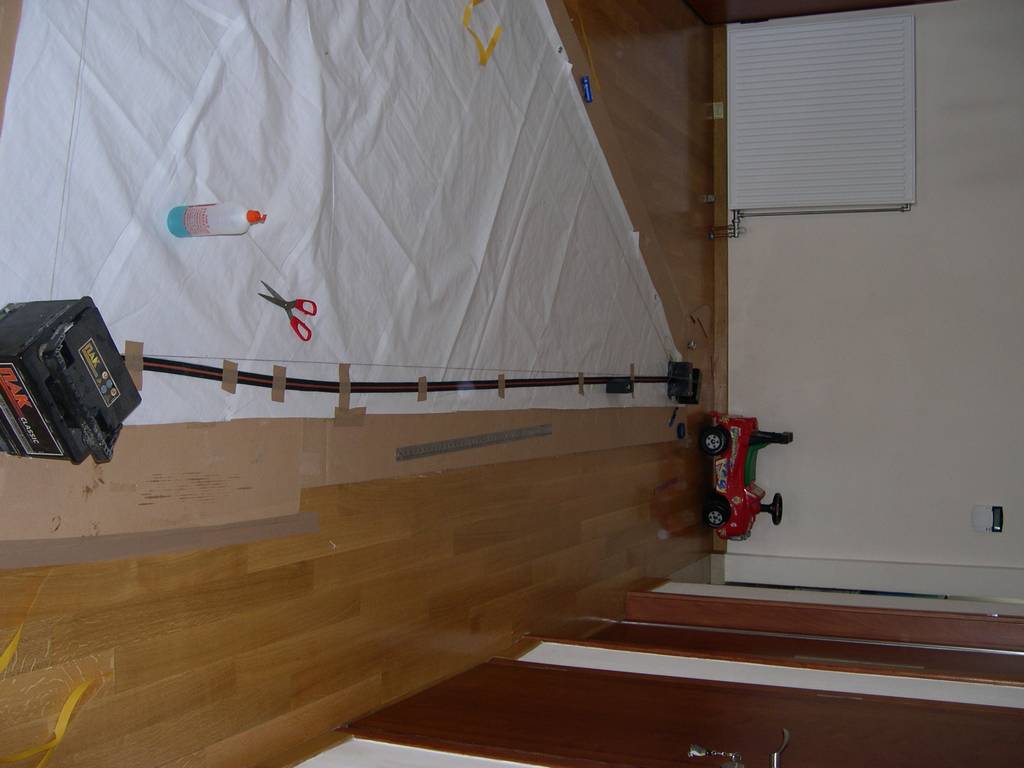
Time to make a sail. I used cheap white polytarp material that I cut to 18" strips as dacron sailcloth would be. Although the material is cheap, I will not use cheap techniques. I will use traditional sailmaking techniques from the Emiliano Marino book "Sailmaker's apprentice". I consider this sail as an excercise in sailmaking. If things work out I will make a real dacron sail later.
Marino's book is simply excellent for traditional sailmaking.
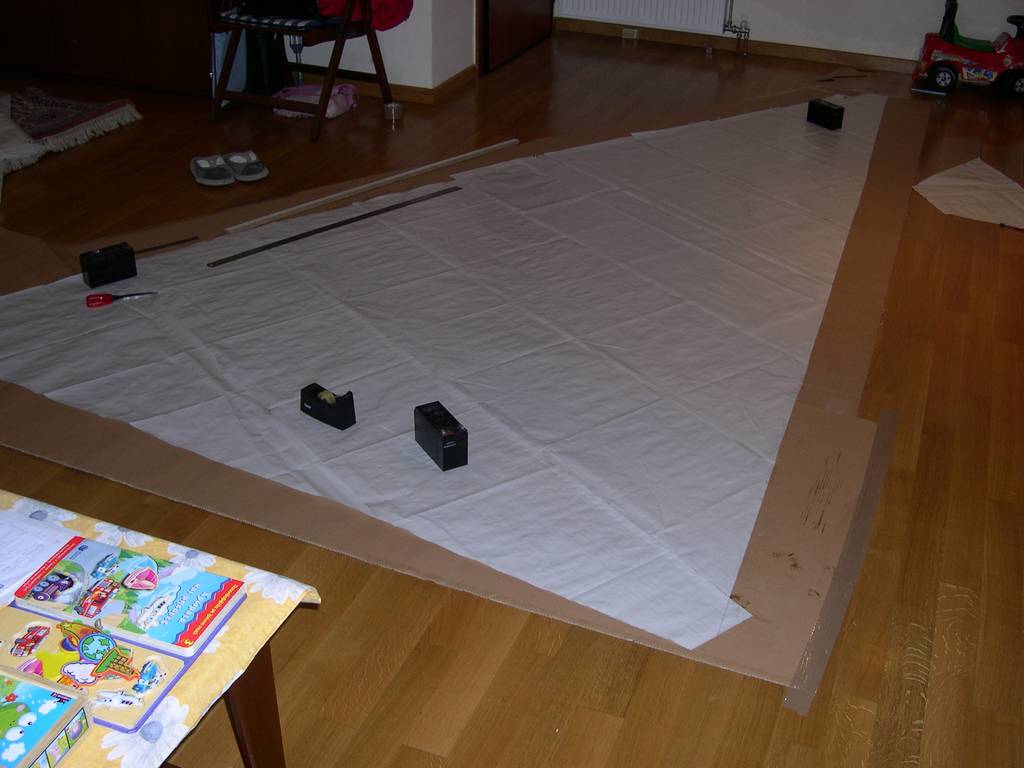
The sail after the broadseams were glued with carpet tape. Notice how the belly of the sail has started to develop. The sail is not flat any more. I gave little fullness to the sail in anticipation of stretch in polytarp material.
I used the webbing method to draw the luff and foot curves because I did not have such a long batten. The batteries are used instead of spikes to keep the webbing tight.
That's all for the moment. Now, I'm going to oil my sewing machine.
Regards to all of you.
Re: Another side of boat building
Posted: Sun Apr 26, 2009 10:45 am
by ks8
Very nice! Looking forward to the sail being filled and fulfilled.
Regards to the family, and enjoy the first sail!
Re: Another side of boat building
Posted: Sun Apr 26, 2009 5:38 pm
by gk108
That looks good! I learned a lot about what I needed for my dacron sail by making one out of inexpensive material first.
Re: Another side of boat building
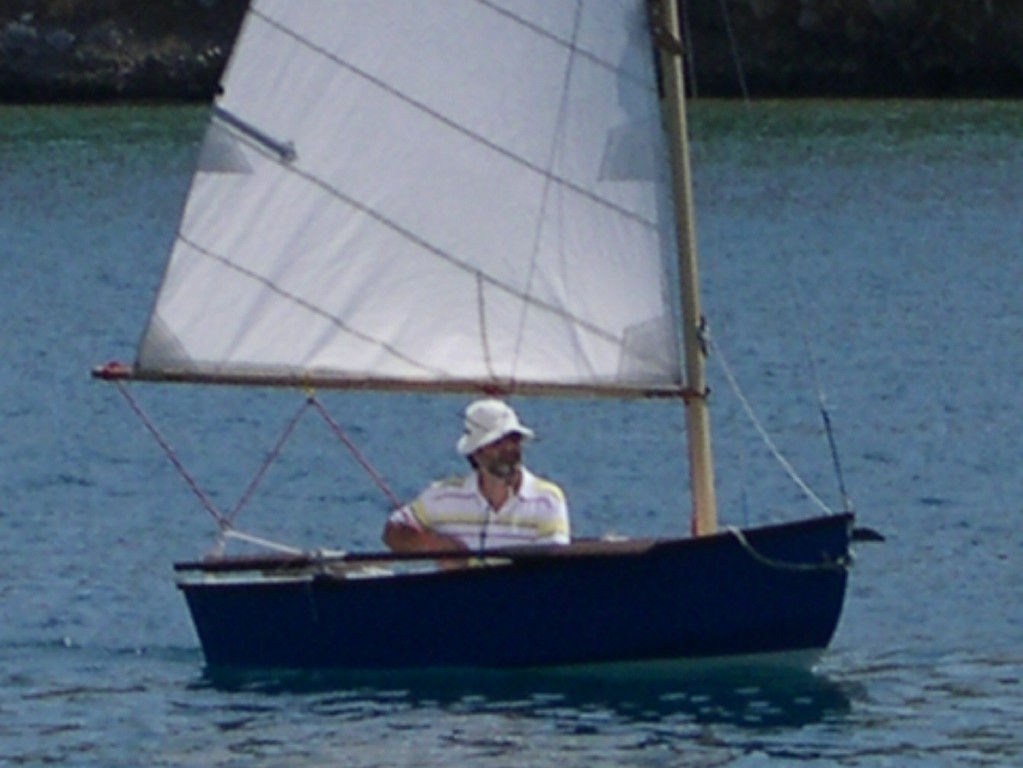
Posted: Thu Aug 06, 2009 3:52 am
by Dimitris
I was planning to post a lot of pictures, but the photos are trapped inside the camera. I can't find neither the card reader nor the USB cable. So here's just one picture that a friend of mine has taken that shows her fully rigged.
Since then, I have finished the installation of the rudder, the tiller, battens for the sail, spectra shrouds. I will try to post some more pictures next week.
Vacations and hopefully dinghy sailing start at August 15.
[[ EDITED ]]
I found another one that shows nicely the polytarp sail that I sewed.
Regards to all of you
Re: Another side of boat building
Posted: Thu Aug 06, 2009 8:33 am
by Cracker Larry
That's some fine work Dimitris
Re: Another side of boat building
Posted: Thu Aug 06, 2009 8:46 am
by gk108
Yes it is! That second picture is good enough to see the broadseaming on the sail. Vacation certainly will be fun this year.
Re: Another side of boat building
Posted: Mon Aug 31, 2009 7:03 am
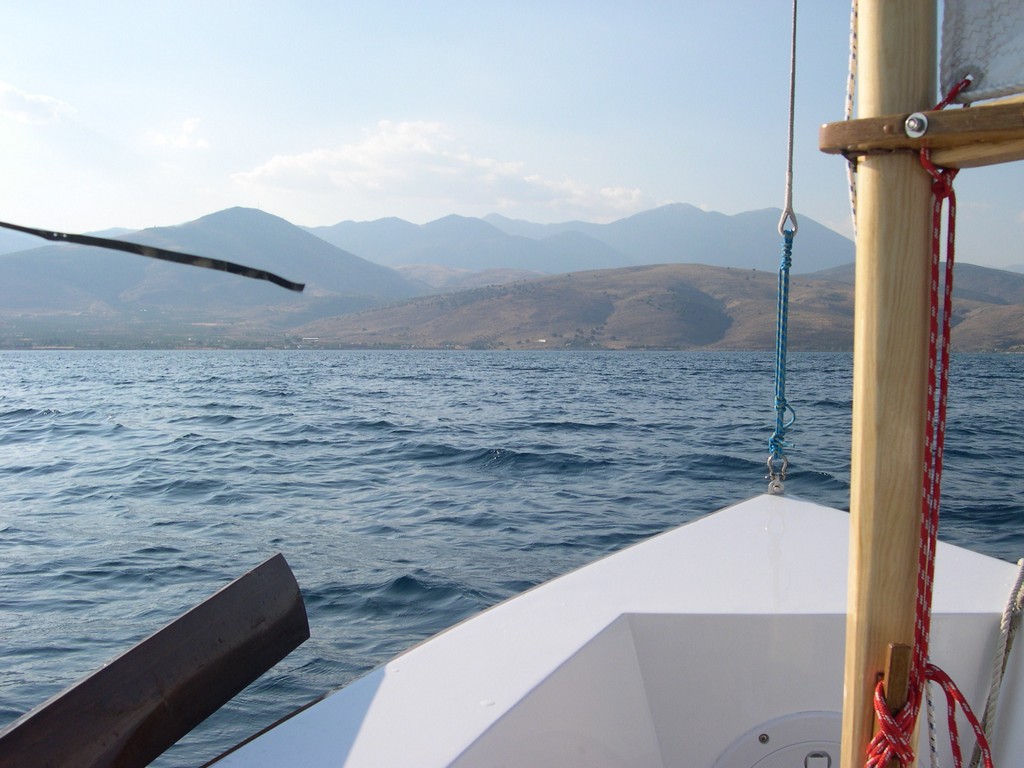
by Dimitris
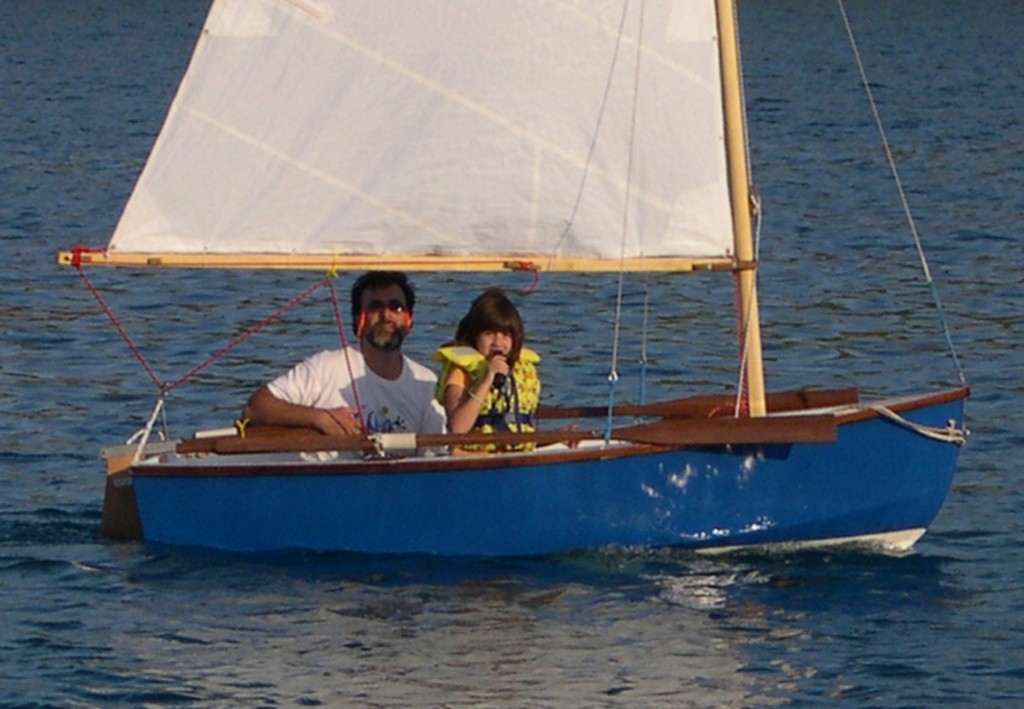
Back from holidays with the first sailing miles on Tina. It was my first dinghy sailing experience and I found it really very satisfying. Everything work properly, no accidents or serious mishaps and the air was easy most of the times.
The boat could easily handle my size (6 feet) and weight (220 pounds) but I found it rather difficult to move my weight around fast enough when jibing. Se was well balanced and developed only a slight weather helm under all conditions. She pointed well, although I think the sail was shallow and was depowered when I beat too hard.
I sailed totally about 30 n.m. during these fifteen days. I GPSed about half of them. The maximum speed I was was on a run during a 4 scale wind, 4.1 knots. Beating in this wind involved moving all my weight on the gunwale to avoid the capsize. In slow winds it was hard to point higher that 55 degrees, tacking at 110 degrees. In stronger winds I could easily tack at 100 degrees, without loosing speed.
I almost capsized once during a jibe in a 20 knots breeze. Everything went so fast that I didn't realize what happened, except that I just tried to prevent the capsize. After the boat came to irons I realized it was full of water and I had the bailing bucket inside the flotation chamber. Fortunately, I managed to sail her back to her berth, even full of water. Another day, I made a capsize drill, only to find out that the capsized boat without my weight in it would not take any water and was very easy to upright.
Here are some photos. The technical ones first.
This is a detail of the rudder setup. The outer bolt of lower gudgeon also serves as the pivot for the blade. The tiller pivots around an axle at the rear of the ruuder. Some times I dropped it in the water when rowing because it interfered with the oars. I think the tiller is long for my size.
This is the stowage arrangement for the spars and sail. It takes some time to tidy everything up but the boat is stable and it is not difficult to tidy up everything or raise the sail.
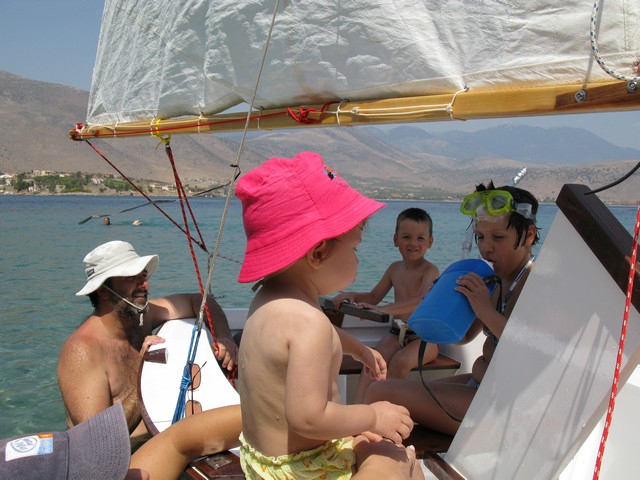
First hoisting of the sail with my daughter inside. I had made some practice during the previous days, when the wind was stronger.
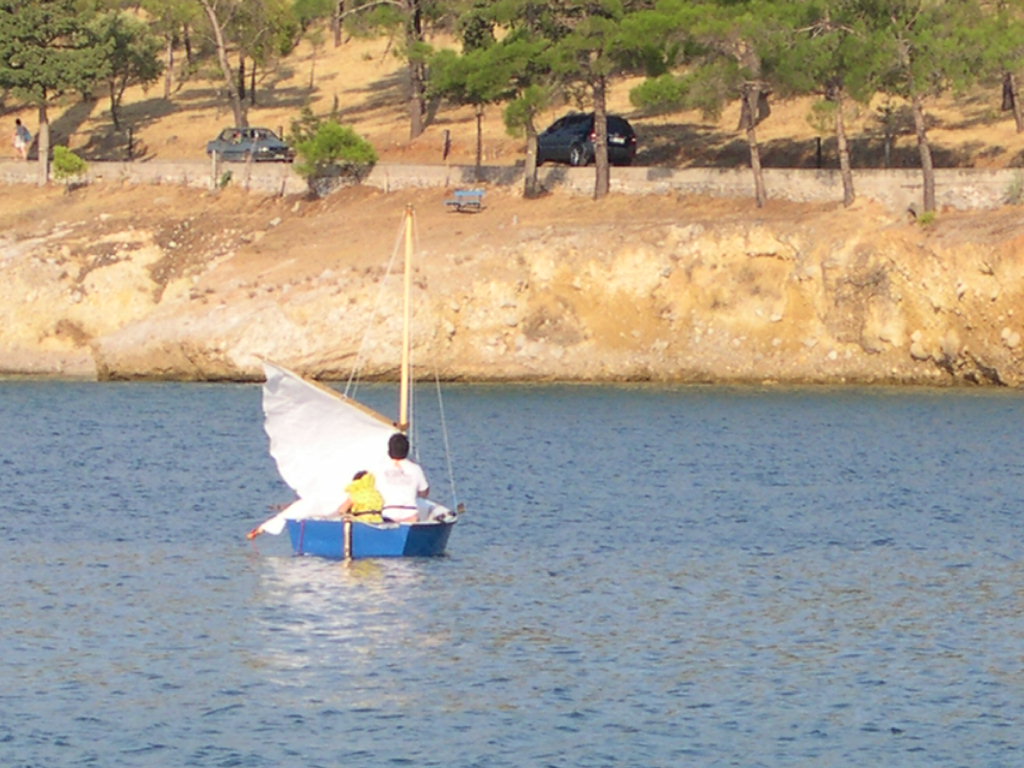
Sailing with my daughter

A closer view
Rowing with both kids sitting at the aft bench. She lists aft. It would be better if I sent the kids to the bow.
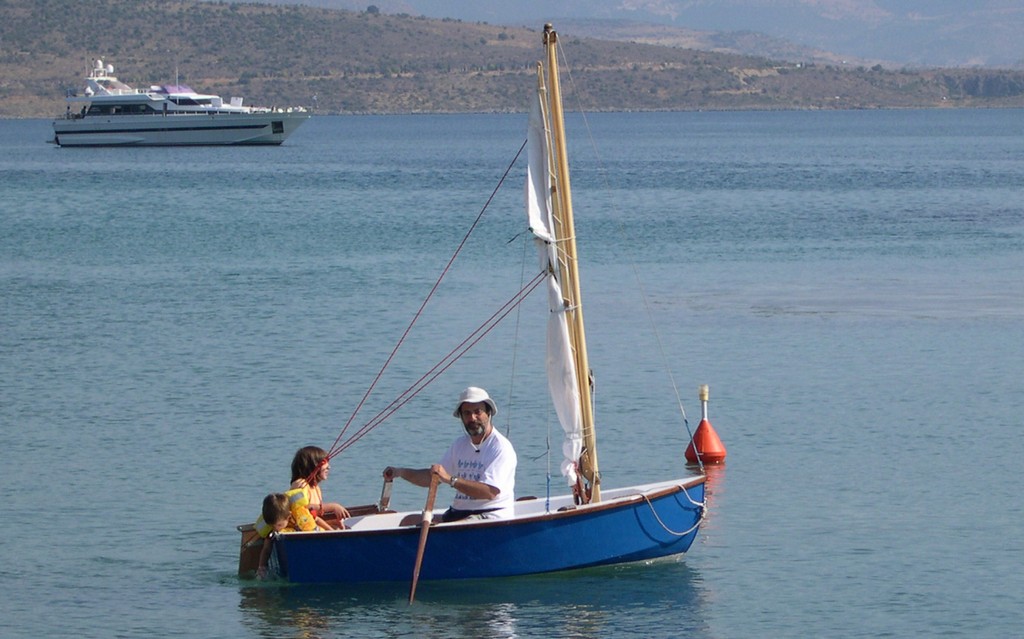
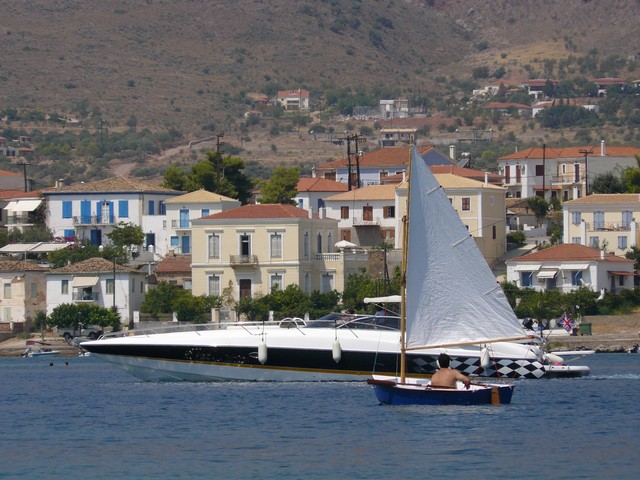
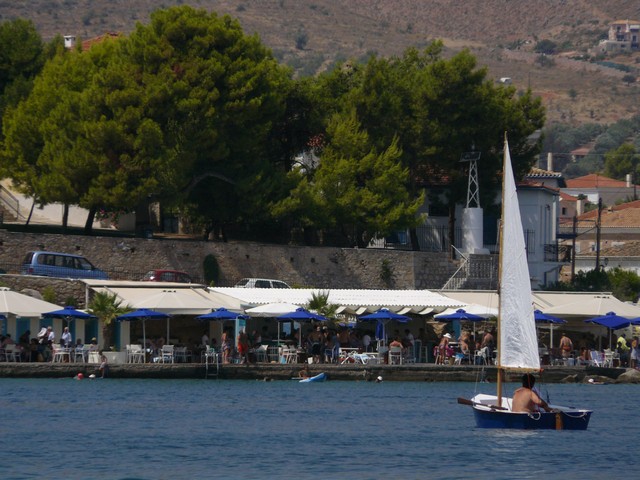
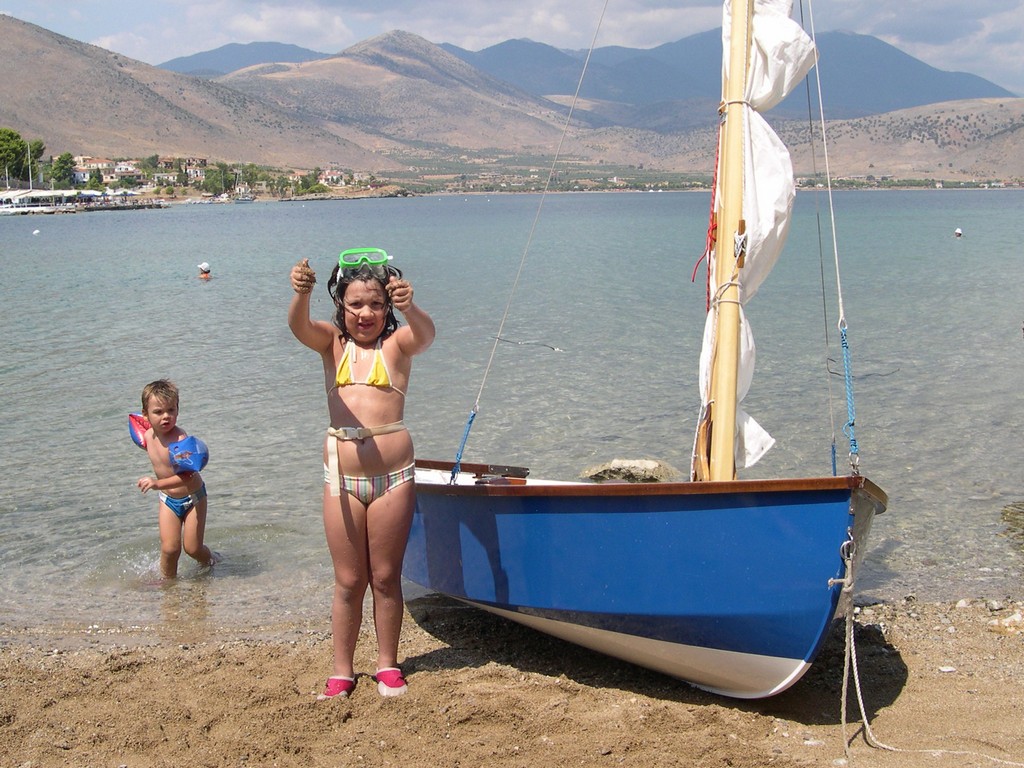
From a swimming excursion
A view from the cockpit
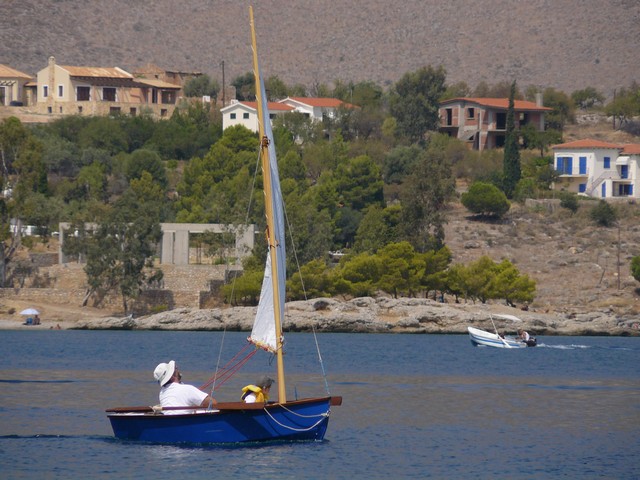
Two pics showing the full sail.
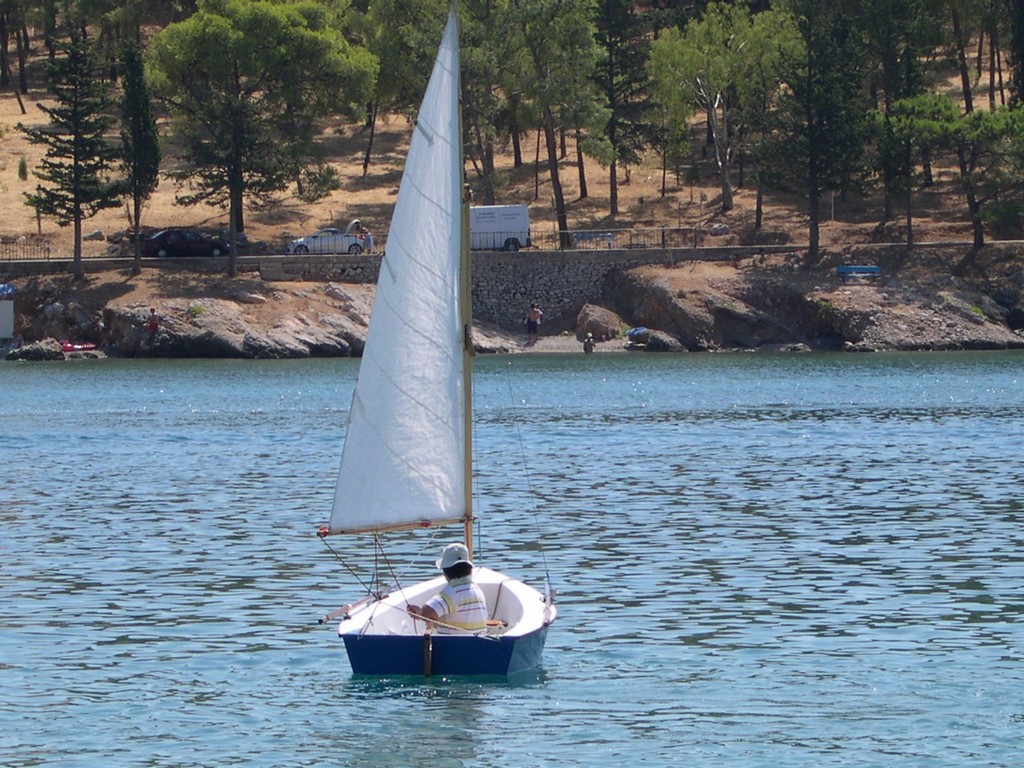
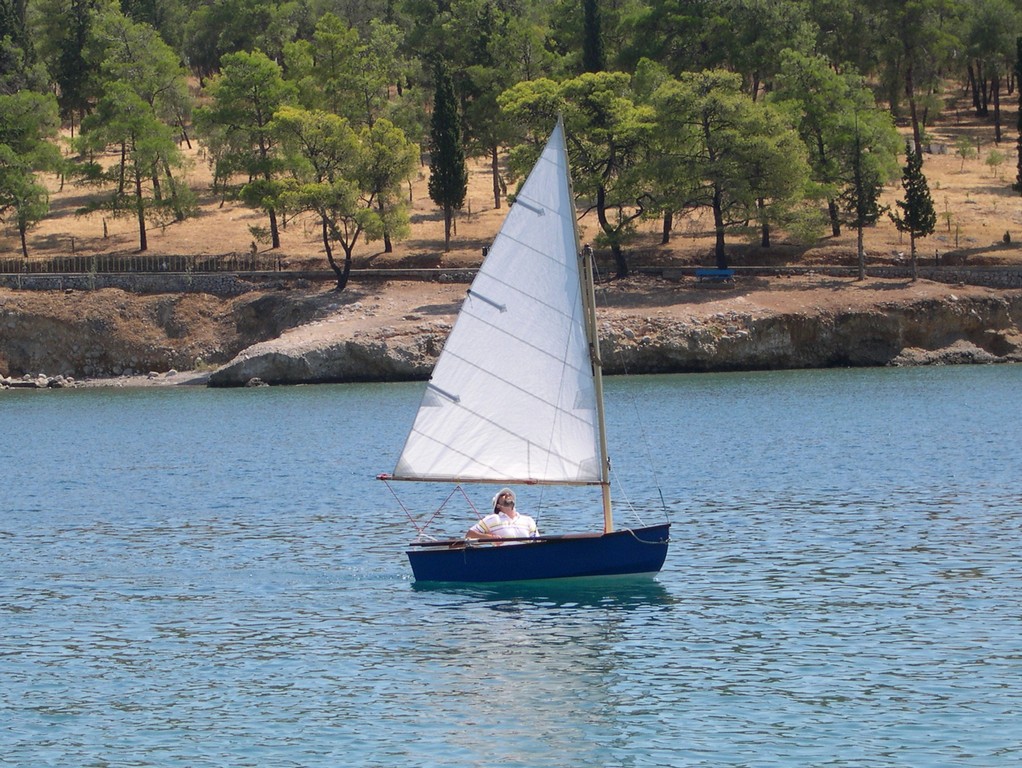
Heading back to port.
She is now back at the safety of my garage.
Regards to all of you.
Dimitris
Re: Another side of boat building
Posted: Mon Aug 31, 2009 7:20 am
by cape man
Looks like she is all you wanted her to be! Congrats!
Re: Another side of boat building
Posted: Mon Aug 31, 2009 8:34 am
by gk108
She looks great on the water and it sounds like a well behaved boat. Sometimes my V10 doesn't come around so well when tacking in light winds. I learned that when that happens, I can grab the boom and push it to back the sail for a few seconds and she swings right around. Sail on.
Re: Another side of boat building
Posted: Mon Aug 31, 2009 9:19 am
by TomW
Well done, enjoy her with your family for a long time.
Tom
Re: Another side of boat building
Posted: Mon Aug 31, 2009 9:47 am
by topwater
Looks real nice, good to hear she sails well.
The more time you spend in her the better you will get, you will figure out what she likes.
Re: Another side of boat building
Posted: Tue Sep 01, 2009 4:55 am
by Dimitris
Thank you all for your kind words.
I would also like to thank all the community on this forum for the encouragement, the inspiration and the know-how during these three years of building.
Thank you all, again.
Summer 2010 report
Posted: Wed Oct 06, 2010 5:19 am
by Dimitris
Re: Another side of boat building
Posted: Wed Oct 06, 2010 8:48 am
by Larry B
Re: Another side of boat building
Posted: Thu Aug 04, 2022 2:44 pm
by Dimitris
It’s been 15 years since the first splash! The kids have grown up, the boats I mess with have sized up, but the joy that this little boat gives me every time I sail her remains the same!
Thanks again to all the community in boatbuilder central for the inspiration and the encouragement!

Re: Another side of boat building
Posted: Thu Aug 04, 2022 9:51 pm
by ks8
Great update! Thanks!
ks8
Re: Another side of boat building
Posted: Fri Aug 05, 2022 6:29 am
by cape man
Nice post. Says it all.
Re: Another side of boat building
Posted: Fri Aug 05, 2022 8:42 am
by fallguy1000
Fair winds!