Page 1 of 1
GV13 Build Progress
Posted: Fri May 23, 2008 5:05 pm
by ScottE
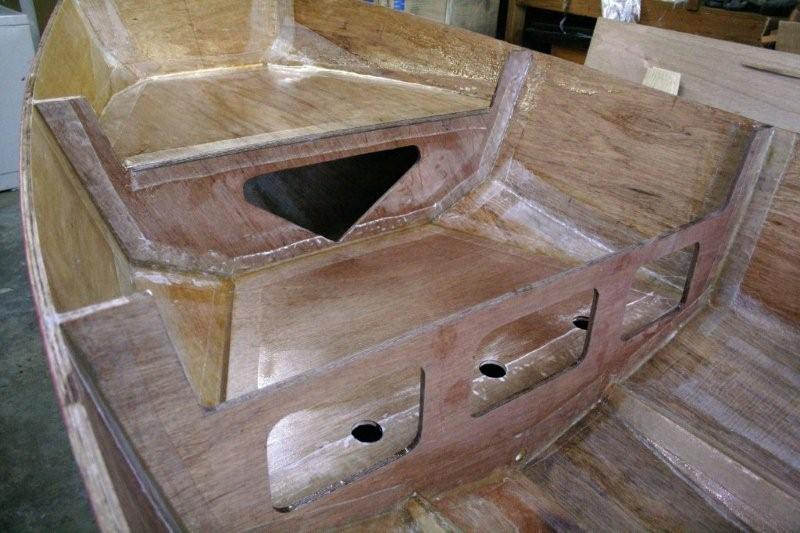
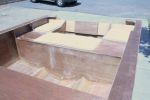
Been getting lots of inspiration from other builders, thought I'd post some progress pics to share. I can see that finishing the interior will take more planning and patience than the hull!
I'm planning to add soles in the cockpit and forward areas, with additional center stringers to be added next.

I plan to box the rear quarters at the same height as the rear seat. I'll route the steering and control cabling along the starboard gunwale (also to be added), to simplify bends. I'll post more pics after I get the hollow stringers foamed and finish inside glassing.
Posted: Fri May 30, 2008 9:50 am
by mecreature
Cool boat and nice pics.. Seems like it will be solid and strong.
For some reason this boat has started to interest me. Maybe I am becoming a realist on the waters I have available to me. And why I am using the boat.
I checked out your gallery. It is nice to have a visual to questions going thru the mind..
Keep us updated..
Posted: Fri May 30, 2008 10:18 am
by MadRus
Two thumbs up, it looks great! I like the color-

Posted: Fri May 30, 2008 11:44 am
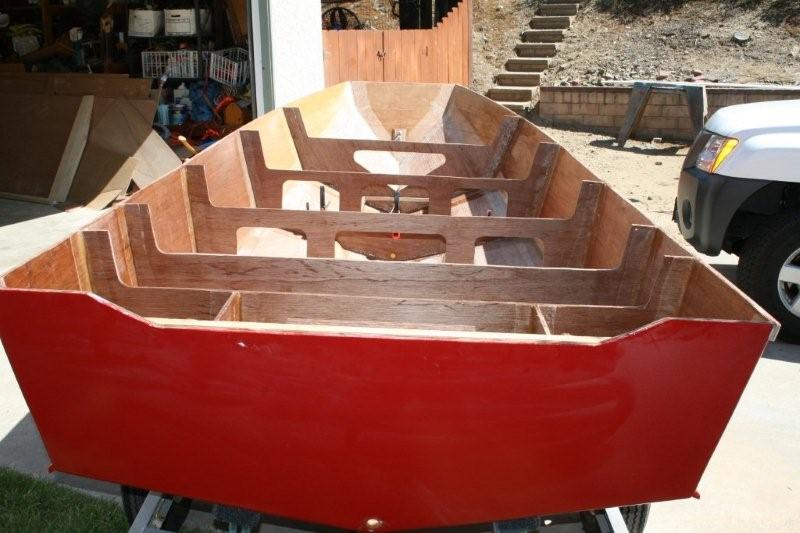
by ks8
Sharp.

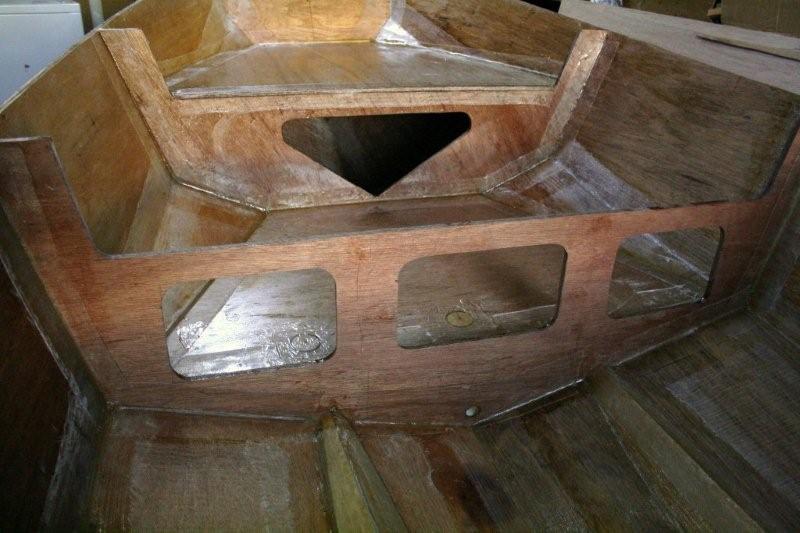
And a good picture showing the triangular stringers and framing.
Posted: Fri May 30, 2008 1:23 pm
by mecreature
How many designs call for those stringers? Is it a smaller boat thing?
They look very efficient nice big footprint on the hull.
Posted: Sun Jun 01, 2008 7:01 pm
by ScottE
More progress photos, MadRus' influence is everywhere...

Installing drain from anchor locker to motorwell, under sole thet will be foamed
I'll be boxing in the stern quarters at seat height, and adding ~4-5" gunwales.
I wish I would have waited to paint the hull until I'd finished the interior work as I'm dinging it (paint scratched), almost every work session...
Thanks for the feedback folks, I can't wait to get this thing wet!
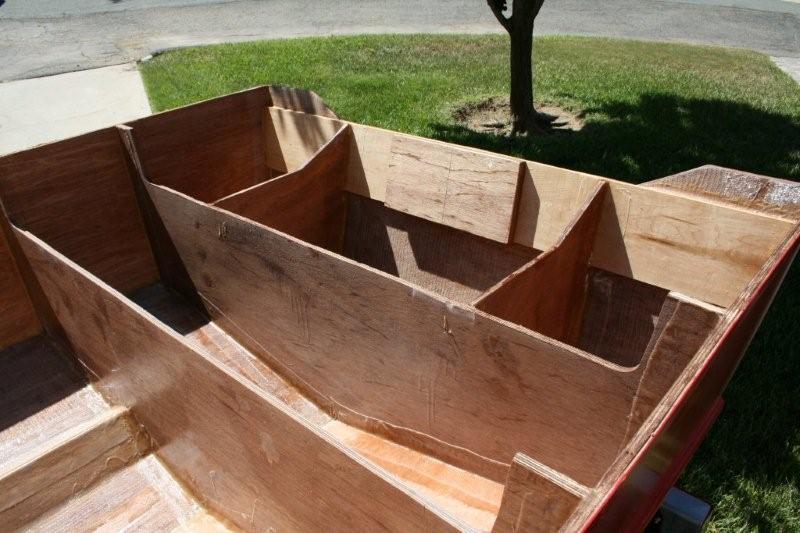
Posted: Sat Jun 07, 2008 3:06 pm
by ScottE
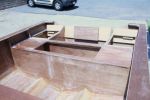
Sole addition behind anchor locker..
is now foamed....
and I'm working on boxing in the rear seat for a Tempress hatch to access center storage (after foaming remaining compartment)...
I'll post more pics once the seats are in...
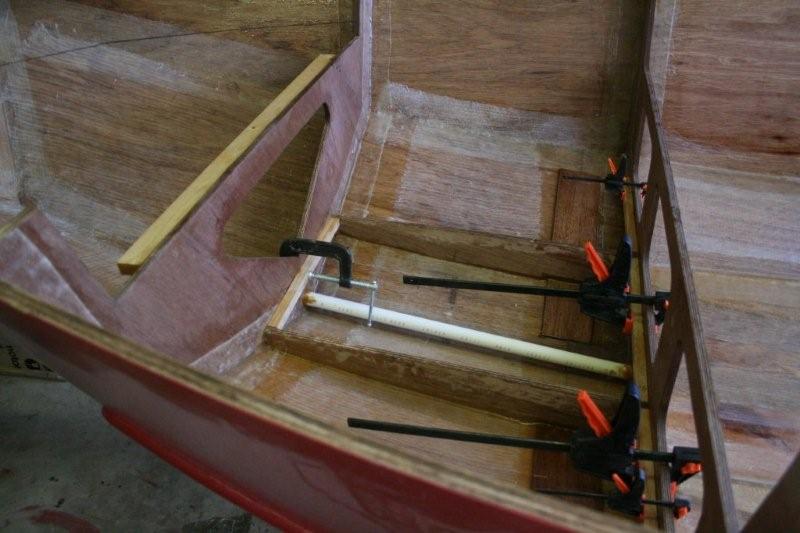
Posted: Sat Jun 07, 2008 3:20 pm
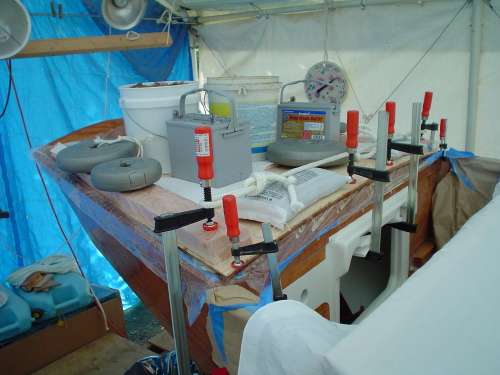
by ScottE
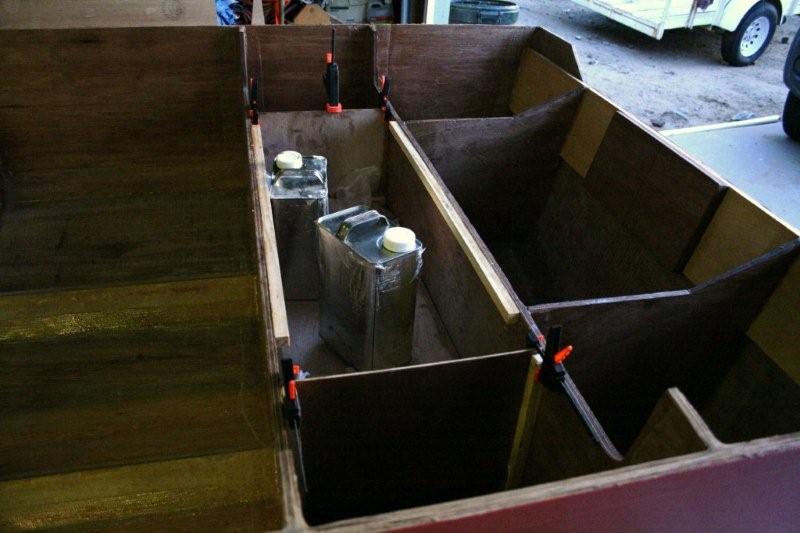
Rear seat foamed and compartment blocked for hatch..
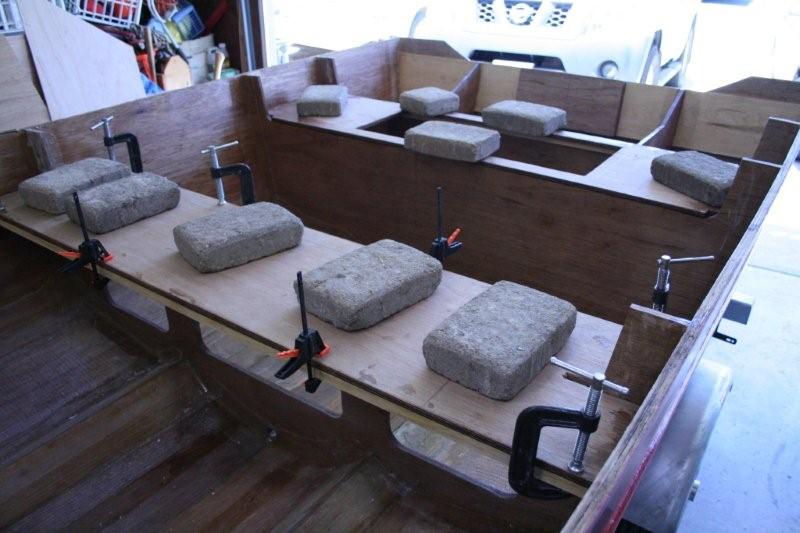
High tech clamping in use...[/img]
Posted: Sat Jun 07, 2008 11:19 pm
by ks8
Nice consistency in your hi-tech clamping.... unlike this...

Posted: Sun Jun 08, 2008 1:53 am
by chicagoross
I just use the official Boat Builders Central weights - the twenty or so empty gallon epoxy jugs, refilled with water...
Posted: Sun Jun 08, 2008 5:36 pm
by ScottE
Very impressive clamping techniques, gentlemen. KS8, are those buckets of dirt in your photo? Dirt has a great denseness to it for clamping!
Chicagoross, isn't it scary when you total up the number of containers you've emptied? It's probably best that you throw them away and get rid of the reminders.....
Posted: Mon Jun 09, 2008 12:38 am
by Fred in Wisc
I think it's best to throw them away before your wife figures out how much you have spent on epoxy.
That's why I order 6 at a time, there are never that many in the workshop to raise questions.
Nice looking GV. That's what I would have built if I had a way to get it out of the basement workshop.
Fred in Wisc
Posted: Mon Jun 09, 2008 9:08 am
by mecreature
Looks pretty cool.. that is one big 13 ft boat
Posted: Mon Jun 09, 2008 9:20 am
by MadRus
Sweet! Makes me wish I was building one all over again. Keep up the nice work.
Posted: Sun Jul 06, 2008 3:52 pm
by ScottE
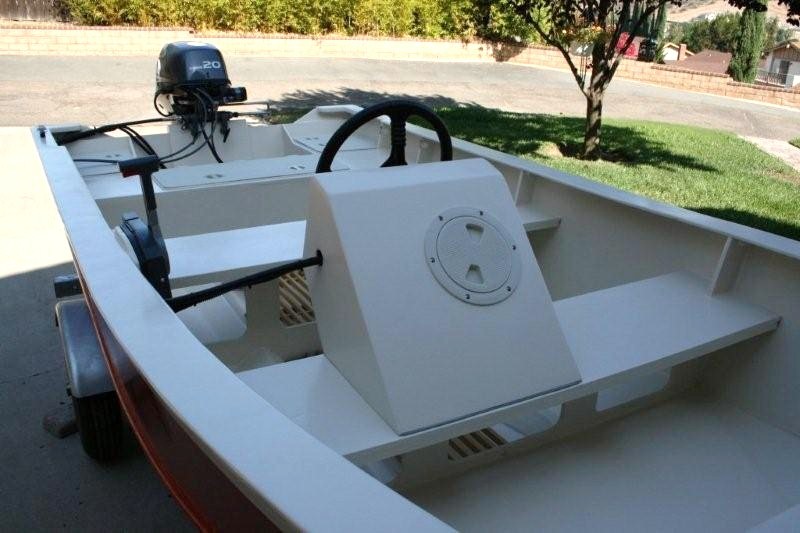
Made some progress, got gunwales and quarter panels sorted out..
Dry fit Tempress hatches in rear seat and quarter panels..
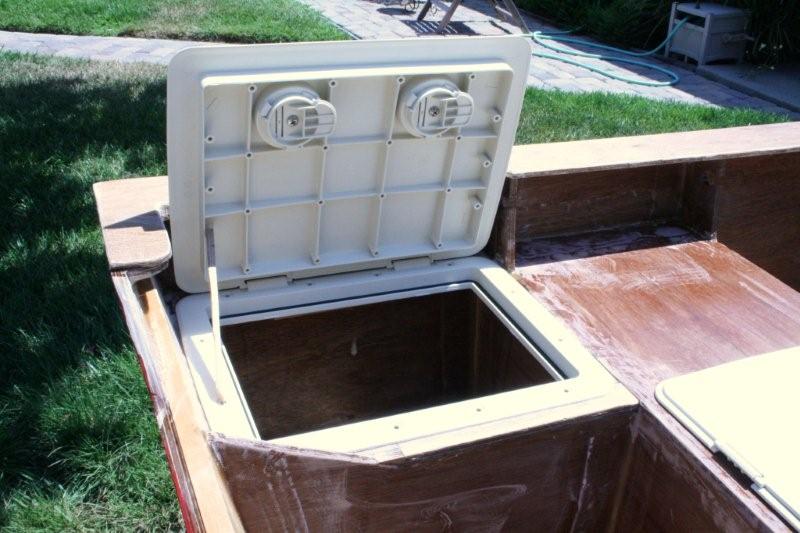
Overall view, hope to keep plugging along to get on the water by late August/early September (need to get all shaken out by lobster season..)
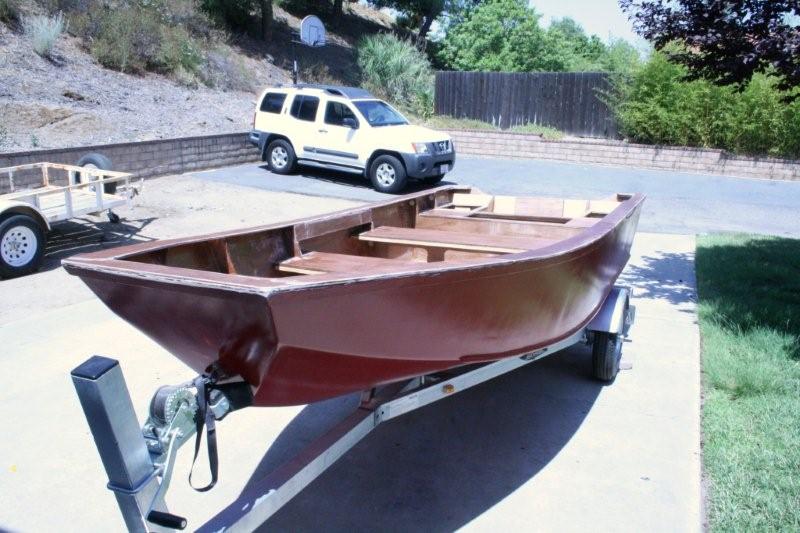
Gunwales were made of 2 thicknesses of 4mm marine ply with glass sandwiched between, final layer of glass on top. This makes for very strong, very light gunwales!
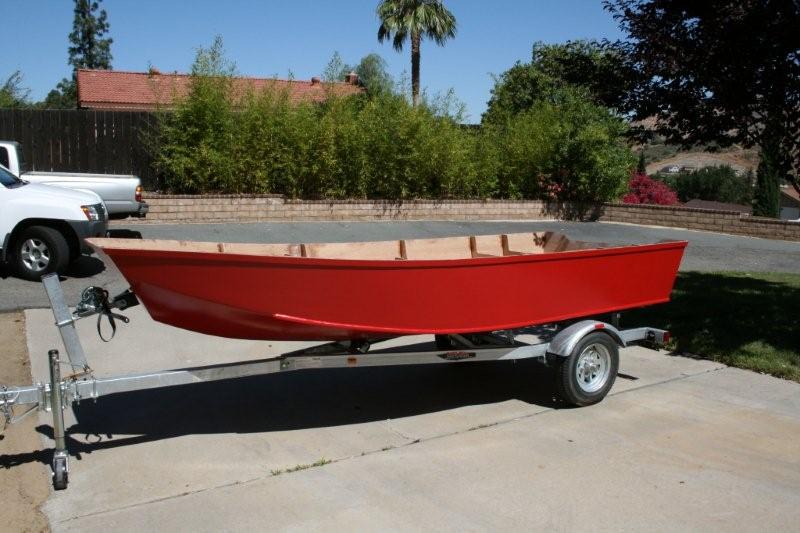
Ready to Launch
Posted: Sun Sep 07, 2008 2:00 pm
by ScottE
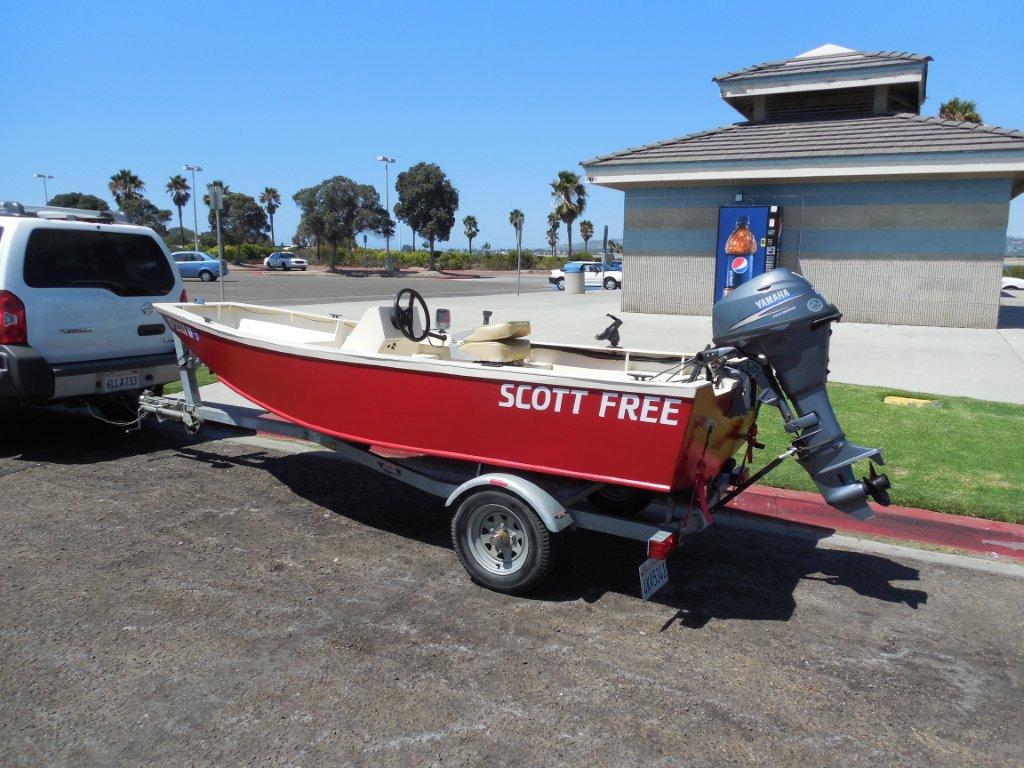
I'm hauling to the DMV this week to register my boat! There are a few last minute details to attend to (always), but it should be "official" soon.
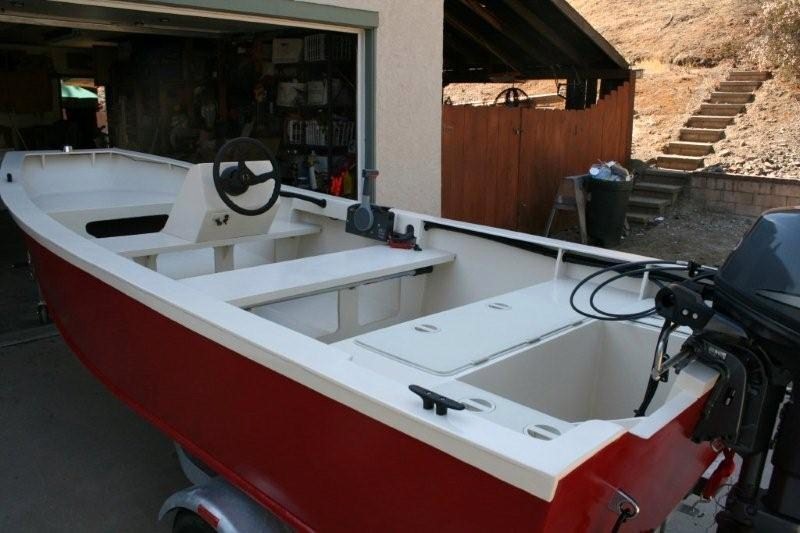

I took full advantage of all the great ideas on the other building sagas on the site (thanks MadRus!), and other's creativity.
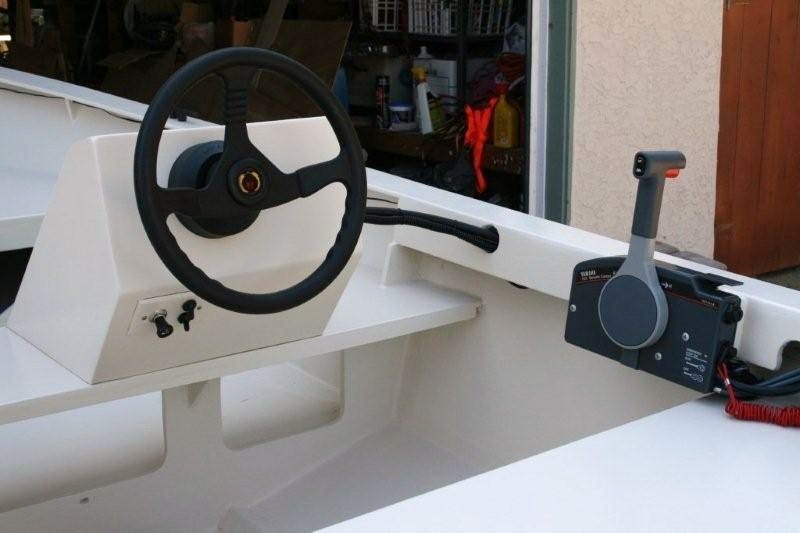
As you can see, I modified the console slightly and lifted the wooden grate flooring idea.
I'll post more pics, once we're on the water.
Posted: Sun Sep 07, 2008 2:42 pm
by K-1
What a beauty ! Congrats on an outstanding build ... can't wait to see the pics of her on the water
Posted: Sun Sep 07, 2008 4:56 pm
by Pat4
looks great! she's a real beauty!!
Posted: Sun Sep 07, 2008 8:44 pm
by jbo_c
Nice. I'm thinking about building an FS14 and doing the interior very similar to this.
Jbo
Posted: Mon Sep 08, 2008 3:33 am
by Dimitris
Very very clean. I like the grate very much.
Posted: Mon Sep 08, 2008 5:26 am
by MadRus
Awesome! I love the mods. She should be relatively light weight, quick and nimble. Pics on the water would be great.
Posted: Tue Sep 16, 2008 12:28 pm
by JerryF
I always did like the floor grate idea.
Posted: Tue Sep 16, 2008 1:12 pm
by mecreature
that is an eye catcher for sure.
I cant wait to see it in the water. and get some performance numbers too.
Posted: Tue Sep 16, 2008 7:32 pm
by K-1
Yeah I am looking forward to the splash report ! I have the GV13 plans and wondered what it would perform like with a 20 HP on it
Posted: Tue Sep 23, 2008 7:28 pm
by brilandboy
This build is a real inspiration for me as a prospective first timer - thanks for sharing.
How much foam/flotation were you able to fit in?
Nina's been enticing me but I want a simpler first project that can also be useful. I plan to take any shortcut this first time, plywood kit, resin kit (think BoatBuilderCentral will make a SilverTip Epoxy Kit for the GV13?), even a epoxy toolkit if they'll put one together (rollers, brushes, measurers, etc. ... have no idea really, and really starting from scratch, except a few household tools) - although I have many years of small to mid boating use.
Questionable idea - my son (15) and I (way too old to bounce in a small boat like I used to
) may want to go through some chop to nearby islands (Bahamas), but if I had a higher seat where I could stand quickly for a good smack and sit back down, maybe a small jetski / motorbike type seat on top of the bench seat and protruding a bit forward?? And one for him on the port side with a grab rail in front as he won't have a steering wheel to hold onto. Of course he will mutiny in short order and be in the captain's seat.
With the various angles underfoot, what's the simplest non-slip solution for this boat?
Les.
Launched
Posted: Wed Sep 24, 2008 11:50 am
by ScottE
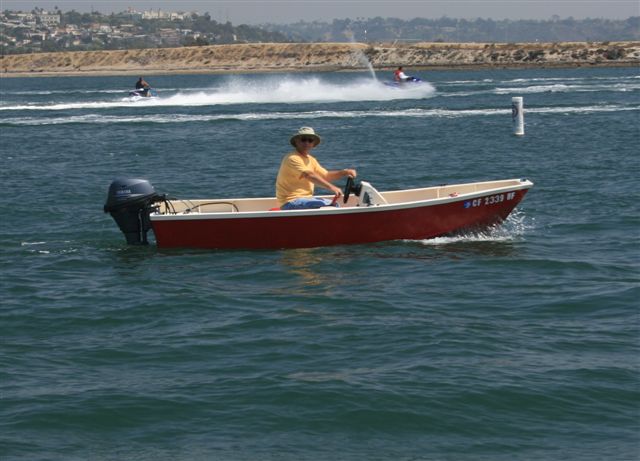
I launched 2 weeks ago and I'm very pleased with this design!
After a 4 hour break in, the Yamaha performed flawlessly with this hull and performance is great! I'll measure top speed on my next outing (GPS) and report as soon as I'm able (and post on the water pics.)
Brilandboy, I highly recommend this design for it's flexibility and stability. I'm also not going to use the floor grate in front of the driver's seat after all, as the center of gravity is better without it and the flooring is non-slip (non-slip added to the final coat of paint), and the stringers provide lateral footing stability that is actually quite nice in the chop!
The MarineEpoxy was a pleasure to use and us first timers are pleased with the results. Buy LOTS of chip brushes and latex gloves, I went through 2 boxes (100 count) easily!
Launched
Posted: Wed Sep 24, 2008 11:53 am
by ScottE
First Launch and motor break-in, more to follow soon!
Posted: Wed Sep 24, 2008 1:44 pm
by mecreature
great job ScottE.. And dont forget the performance reports. Let us know anything you do to get the COG adjusted to your liking...
Great boat.
Posted: Wed Sep 24, 2008 1:48 pm
by MadRus
Look at that fiiiine lookin' vessel! Very nice. Congratulations.
Posted: Wed Sep 24, 2008 2:28 pm
by Cracker Larry
She looks real nice in the water. Sweet lines and she looks to be in good trim. Very nice

Posted: Wed Sep 24, 2008 3:31 pm
by Aripeka Angler
Mighty nice looking boat Scott. I know you were happy to be on the water. Now all you need is a deck gun to take care of those pesky jet skis
Richard
XF-20 "Red Alert"
Performance Update
Posted: Sat Mar 14, 2009 12:21 pm
by ScottE
Well I finally got to check performance with my GPS, top speed is 25.2 MPH, with 1 person aboard. This is with a Yamaha 20hp 4 stroke engine. At speed, there are no problems with hard turns or attitude. I did learn that offshore chop (San Diego) can really slow you down (after all, this is not a deep V hull!) All in all, this boat has performed flawlessly and I highly recommend it to new builders considering an all purpose, light to tow, versatile design.
Re: GV13 Build Progress
Posted: Sat Jul 02, 2011 10:50 am
by ScottE
After finding that my boat struggled to haul more than 2 people, I'm trying a shallower pitch prop on my Yamaha 20hp motor. Factory prop is 12" pitch and I'm switching to a 10" pitch. Results to follow, anyone have any experience with this?
Re: GV13 Build Progress
Posted: Mon Jul 18, 2011 8:01 pm
by ScottE
Well the 10" pitch Solas, 3 blade aluminum propeller did the trick. I can easily bring the hull to plane with a full load, and I only sacrifice ~3mph on the top end, with 2 people aboard. The Yamaha 20hp 4 stroke motor loves this prop and feels a lot more powerful.
Re: GV13 Build Progress
Posted: Mon Jul 18, 2011 9:58 pm
by gstanfield
Cool, thanks for the report
Re: GV13 Build Progress
Posted: Tue Sep 03, 2013 7:57 pm
by ScottE
I thought I'd post a "5 years of Ownership" report for reference. This GV13 has served me well and looks to keep serving me well for a long time to come. I have no complaints or failures in 5 years of salt and fresh water fishing, lobster hoop netting, and general boating (goofing around.) The boat's structure and performance is as good as the first day she was launched. I've added some small bells and whistles (folding removable seat, pole holders, additional electrical sockets for accessories), and kept the boat covered and dry when not in use.
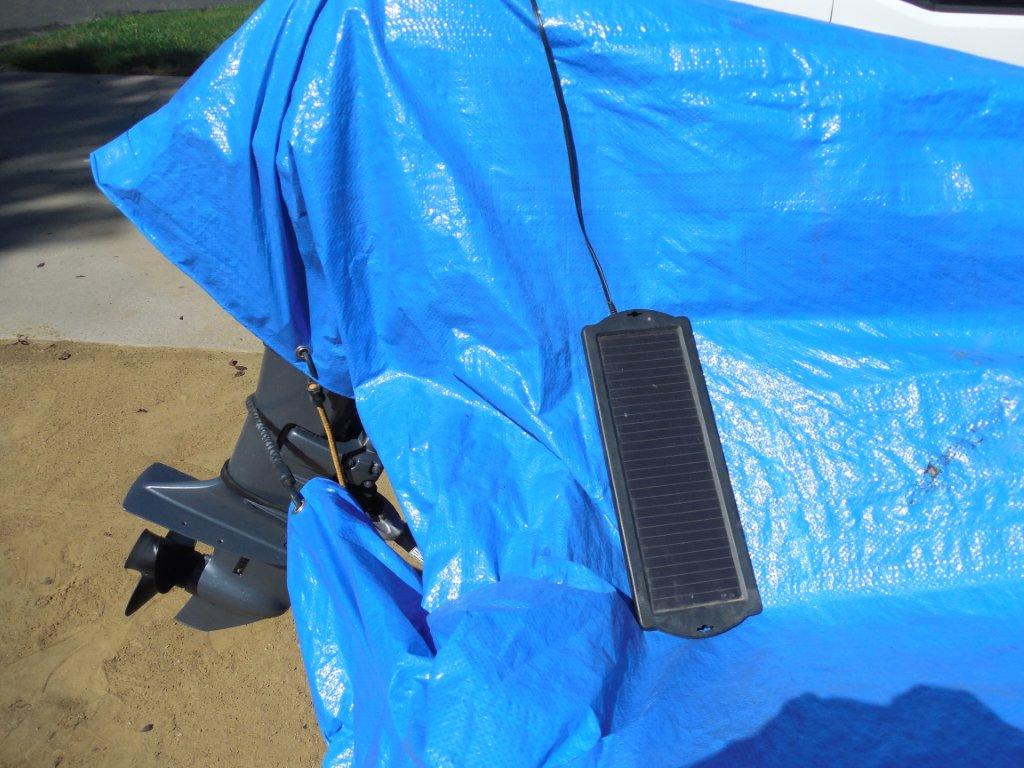
The Yamaha 20 hp motor has operated flawlessly, needing only one carb cleaning and regular oil changes. I keep a Harbor Freight solar trickle charger on it year round and I'm still on my original battery!
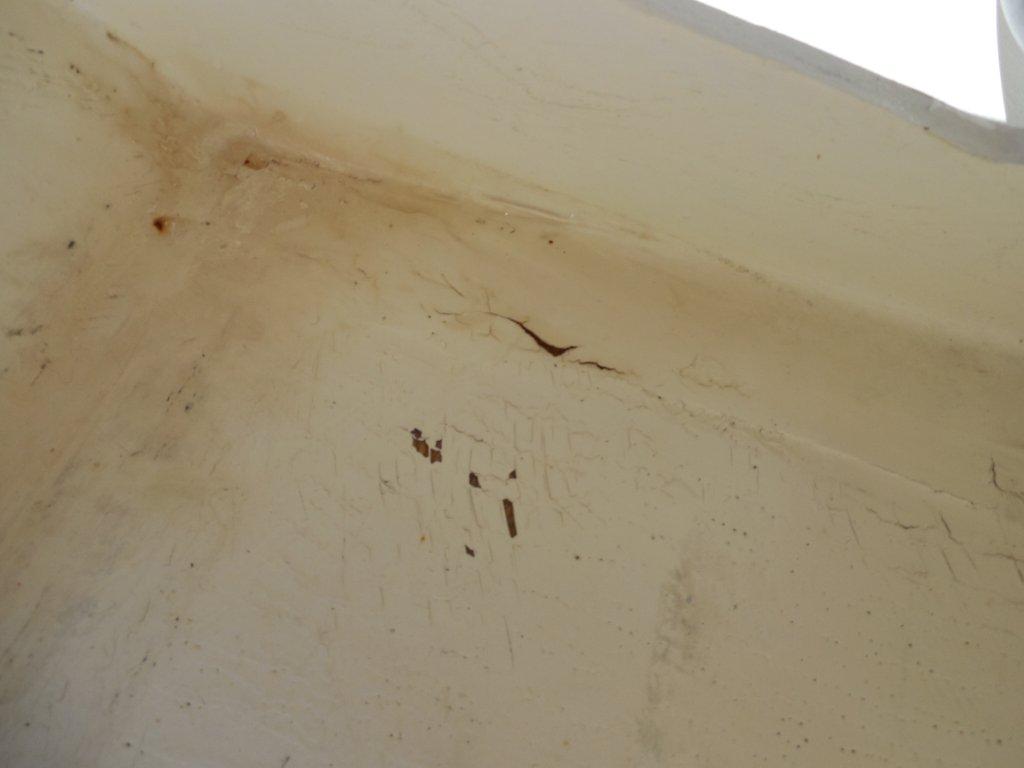
I do have some small cracks in the paint that I'm going to sand and re-paint (any advice on doing this is appreciated.
)
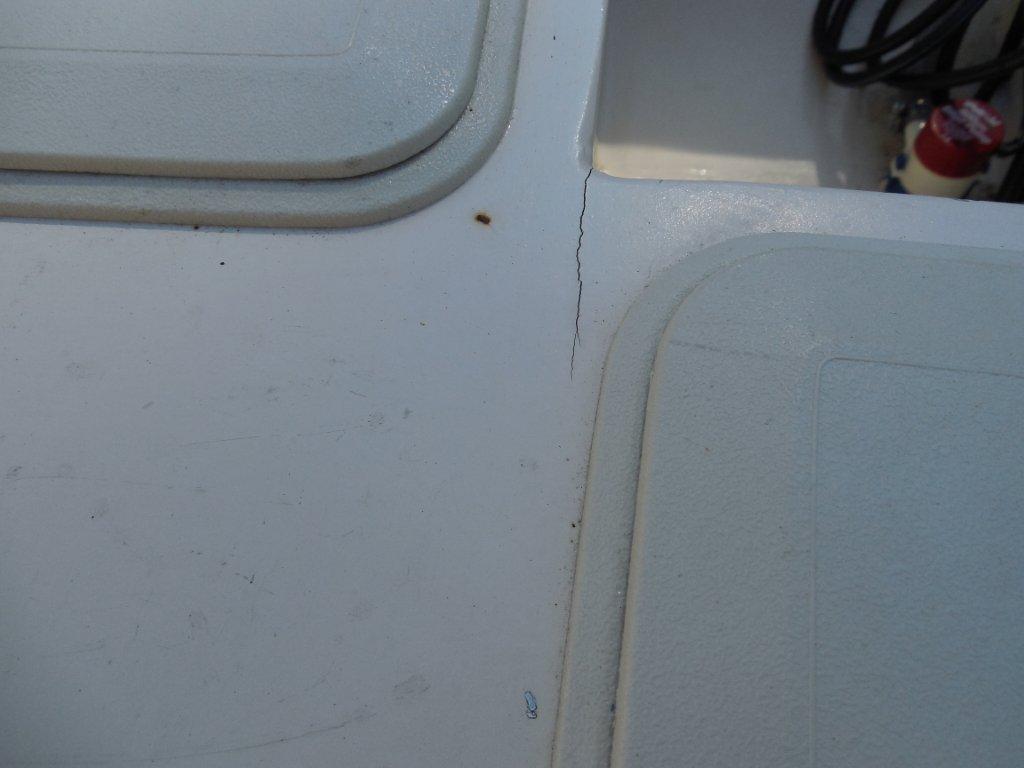

I do need to adjust the motor trim manually when I have more than 2 people aboard (I wish I'd sprung for the power trim/tilt !), as the boat rides nose high if I'm not well trimmed. I can highly recommend this design for an easy to transport, incredibly useful and long lasting, FUN boat!
Thanks!
Scott
Re: GV13 Build Progress
Posted: Tue Sep 03, 2013 9:50 pm
by gstanfield
Thanks for the long term report! Good to hear that you have been happy with her
Re: GV13 Build Progress
Posted: Thu Jan 05, 2017 2:39 pm
by tcason
Can you provide a 10 year update?
Would you suggest a larger motor?
really nice build!
another GV 13 builder
Re: GV13 Build Progress
Posted: Sun Jan 08, 2017 9:35 am
by ScottE
My boat is still performing perfectly. I may paint the hull and interior, just for cosmetics, as the finish and structure are still sound. If I were to build this craft again, I would consider a larger motor. The motor I used is perfect for 1 or 2 people but struggles if you carry 4 adults around the bay. Granted, this boat was not designed to be a ferry but the reality is that we build our boats for multipurpose use. Overall, I would not change anything in the assembly or finishing details, I'm impressed that the boat is still a kick in the pants!
Recommendations for a new builder:
Buy a galvanized trailer, it is worth the extra money!
Don't rush the build. Sand and finish with care.
Don't skimp on primer/paint and touch up spots and dings when they appear.
Keep your boat completely covered to reduce UV damage (this is really important!)
If you'd like to build your own boat, take the first step and DO IT, don't just think about it. Life is too short!