fukes GV13

To help other builders, please list the boat you are building in the Thread Subject -- and to conserve space, please limit your posting to one thread per boat.

Please feel free to use the gallery to display multiple images of your progress.
User avatar
fukes
Active Poster
Active Poster
Posts: 319
Joined: Wed Feb 20, 2008 3:58 pm
Location: Jacksonville, FL

fukes GV13

Post by fukes »

I'm waiting on e-boats to get a shipment of meranti 1088 in so I can go pick it up. With luck in will hvae come in today or early tomorrow so I can go get it, otherwise I will have to wait til next wednesday. I havent been sitting idle, however.

My build space has been covered for about a week or so now. I just ran a tarp from the eave of the roof to the fence to cover the patio. TomW, thanks for the plans on building an enclosure but my wife wasn't really feeling it and this seems to be working so far. I havent noticed any water blowing underneath the tarp but I could probably just hang another tarp off the edge if I have to.
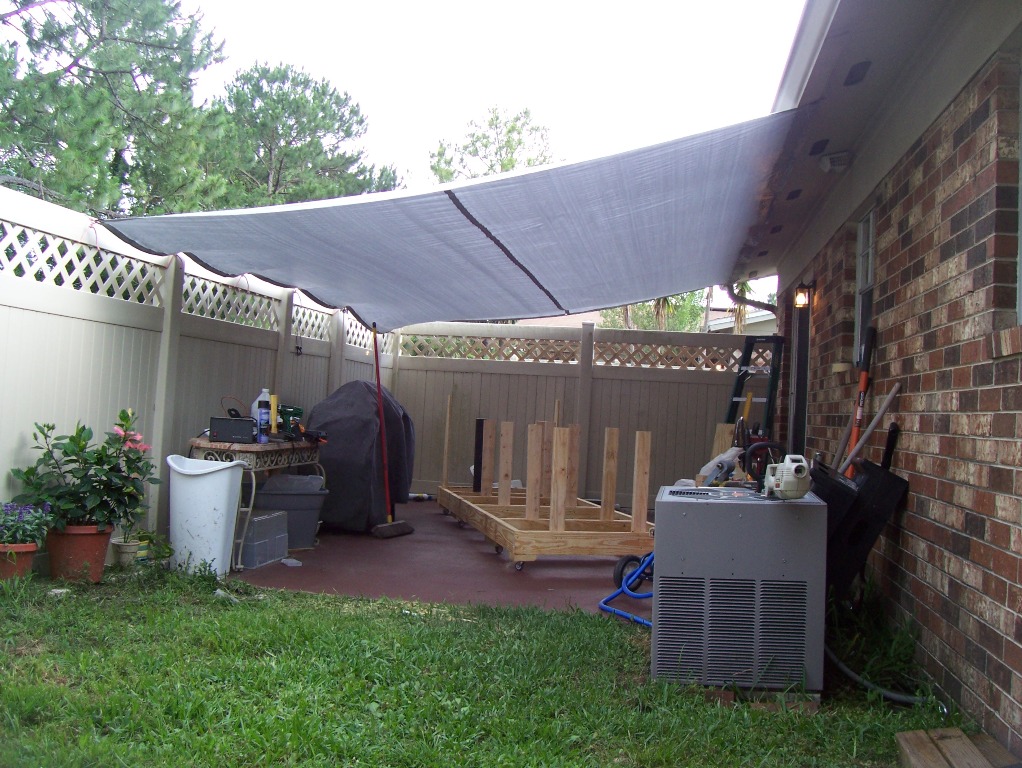
Image

Hopefully you guys dont think my pictures are too big. I like to be able to see detail, personally, but I can make them smaller if that is the consensus.

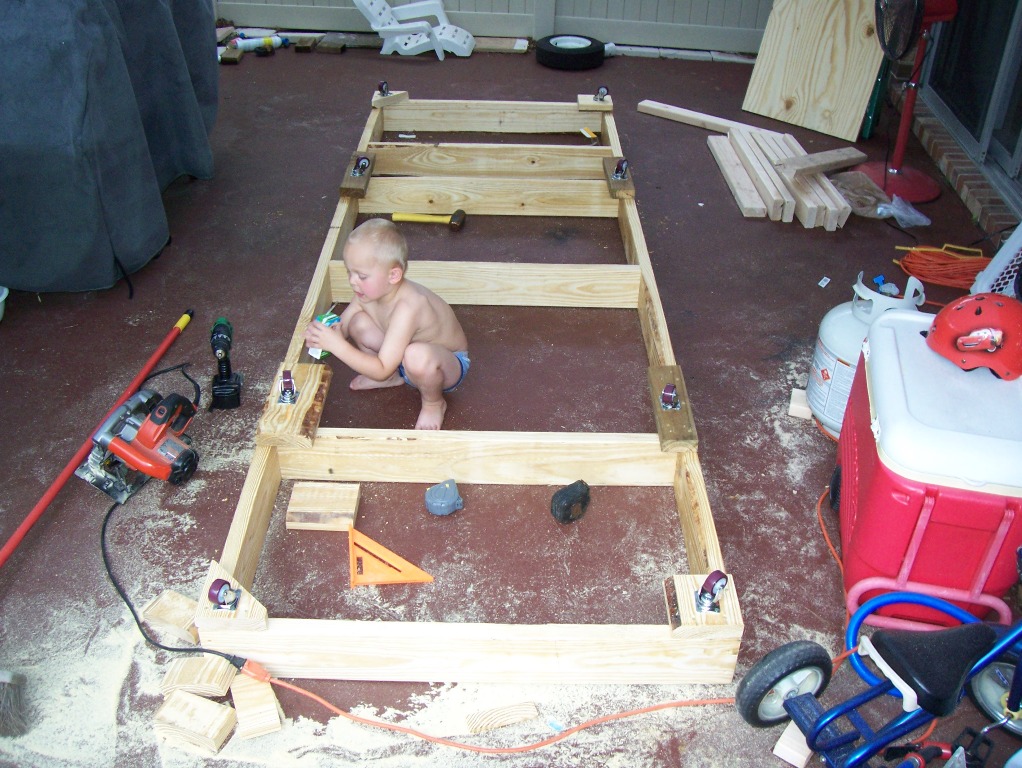
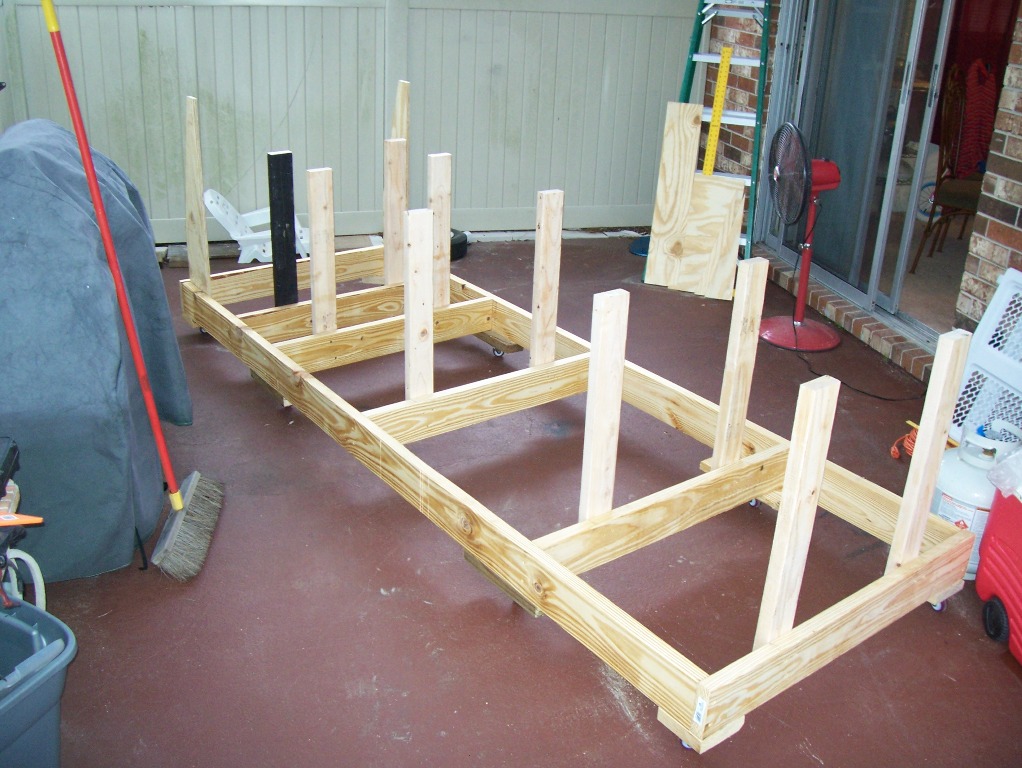
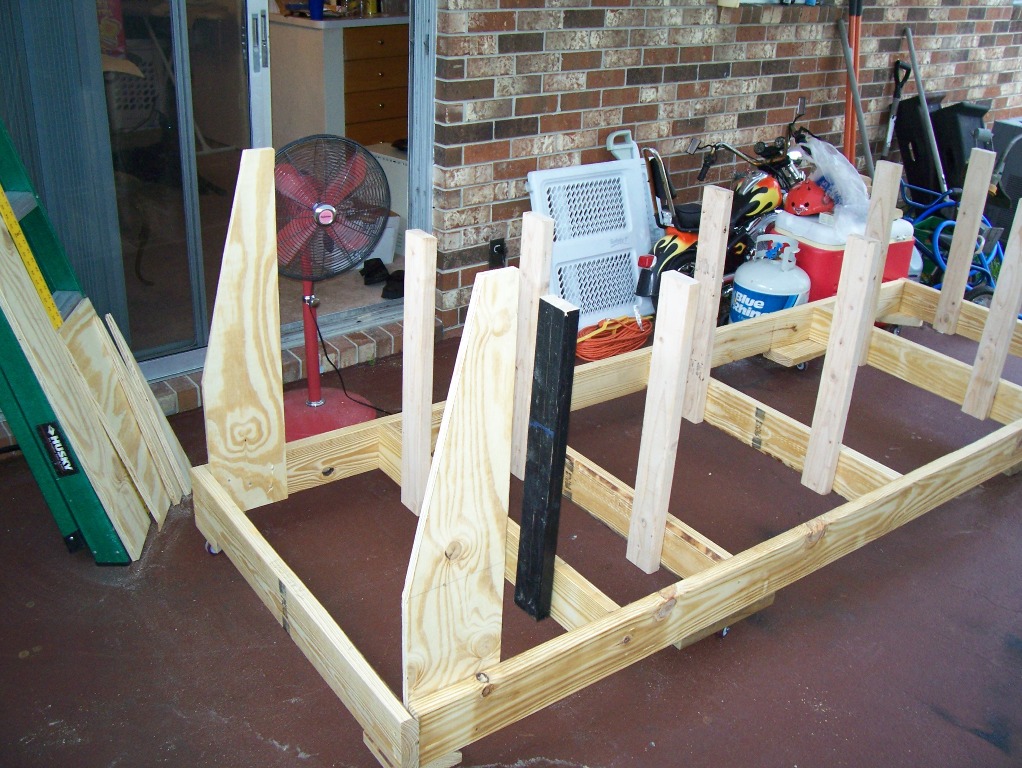
I have also built the strongback, with the help of my son. (He's 3.) I miscalculated and got the 10 foot 2x6 when I should have gone with 12', but I did manage to get all the frame supports spaced properly. The plans showed the long 2x6 extending past the last frame support but I didnt see any reason that would be required. I had to screw the end cross members to the ends of the long pieces, adding an esxtra 3 inches to the overall length, and then the middle cross members were cut to fit in between the long sides. It all worked out. The transom mounts were made of 3/4" plywood. I didnt see any specification on the plans of what it should be made of but they definitely didnt look like 2x4s and I figured it needed a little meat to screw into. There were also no measurements on the plans for how far apart the frame supports should be, but the illustration looked like it had them under the stringers which would place them at 24" apart measuring from the outsides. I put 2 inch casters on the bottom for ease of mobility. You'll notice in the last picture one of the frame supports is different from the rest. Some of the illustrations in the plans left out the A frame (I guess because it is so close to B that it would looked crowded) so I miscalculated how many 2x4s to get. The black one was a scrap piece from an old job that was in the back of my truck. I will say, it had been back there for over a year and was still in good shape. That black paint really sealed out the elements. :)
Image

Image

Image

Now you may have noticed him already, but I cant forget to mention daddy's little helper. Aside from rolling around on the floor in the sawdust and wanting to ride on the strongback after the wheels were installed, he also helped hold the tape measure and bring me screws. He liked using that hammer too. :help: I was just waiting for it to fall on his toes, but luckily it didnt happen.

Image

So this is the start of my new boat. I will continue to update this thread with my progress as soon as I get the plywood and epoxy.

Also, when I called to check on my plywood order a guy with what sounded to me like a french accent answered the phone. I haven't noticed anyone in the forum with a french accent. :doh: Has anybody else? :wink:
GV13, one day something a little bigger hopefully.

User avatar
chicagoross
* Bateau Builder *
* Bateau Builder *
Posts: 1927
Joined: Wed Aug 29, 2007 3:42 am
Location: Guam, USA, middle of the Pacific Ocean

Re: fukes GV13

Post by chicagoross »

Let the fun begin! Does your helper show up for work everyday on that chopper?

User avatar
fukes
Active Poster
Active Poster
Posts: 319
Joined: Wed Feb 20, 2008 3:58 pm
Location: Jacksonville, FL

Re: fukes GV13

Post by fukes »

He's actually afraid to ride it. :) It goes pretty fast for a battery powered child's toy. I guess that's lucky for me since I would have to run to keep up otherwise.
GV13, one day something a little bigger hopefully.

User avatar
fukes
Active Poster
Active Poster
Posts: 319
Joined: Wed Feb 20, 2008 3:58 pm
Location: Jacksonville, FL

Re: fukes GV13

Post by fukes »

I have a thread going in the Power boats section for technical help but I will go ahead and update this one to show my progress.

I've finished putting the frame together. It took awhile and a little tweaking but I think I have everything in line properly. I ran into a little snag when I realized I was measuring from the wrong reference point on the transom. Lucky for me the only thing really effected by it is the distance between the transom and frame A. I lost a 1/4" but Evan said to just cut the motorwell sides shorter to fit. For the other frames I didnt measure from the reference point but instead measured from the previous frame so they are all spaced correctly in relation to each other. I guess my boat will just be 1/4" shorter then planned. :)

Image

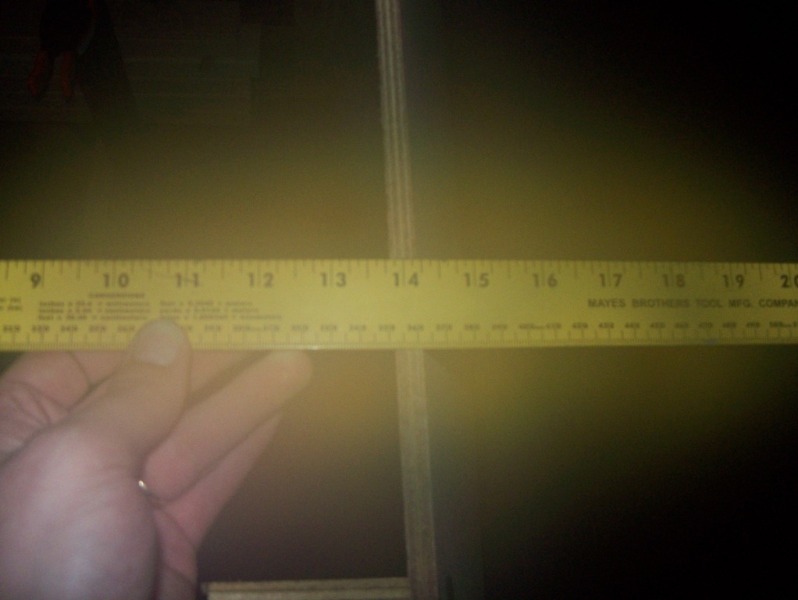
This should be at 14" to the inside, not 13 3/4".

Image

Now that the frame is finished I started gluing my long panels together. My space is limited so I could only fit two panels side-by-side on the patio floor. I started with the bigger lower panels with the butt blocks.

Image

Then I folded my plastic sheet over them and layed the upper panels on top to do the fiberglass splice.

Image

For the fiberglass splices, I used small garbage bags to make my own "peel-ply". I placed scrap ply on top of that and then put my weight on top of the ply. This way nothing stuck to each other and I was assued a flat even surface between the two connecting panels. I was told I should wait 24 hours before flipping to do the other side, but I was impatient, plus it is supposed to rain this afternoon (I did all this yesterday) so after about 3 or 4 hours, when the epoxy didnt see tacky in some spots, I decided to flip them. The process went okay accept for one of the upper panels. It started to hing at the seam while I was moving it. Nothing came apart so I figured with epoxy filling the seam and another splice on the other side it should be fine. I hope I was right. I used the same stacking method, but this time all panels were just getting tape. I did the lower panels first, covered with the garbage bag, and then folded my plastice sheet over them. The I stacked the upper panels on and did the same thing. I lined up the seams for all the panels so the weight would be applied to all of them at once. One thing I noticed (and didnt get a picture of) was when I flipped the lower panel with the butt block, apparently some glue had seeped through the seam. Since the plastic wasnt perfectly flat underneath i had a few raised "ripples". There were "gummy" at the time so I just used my pocket knife to scrape them off so I would hvae a relatively flat surface to put the new tape on.

Here is a pcture showing my taping job. I assume I did it right. This was on one of the upper panels after flipping it.

Image

So that is where I stand for now. Everything has been setting for about 15 hours at least so hopefully it is cured enough that I can start drilling the holes for stitching.
GV13, one day something a little bigger hopefully.

User avatar
fukes
Active Poster
Active Poster
Posts: 319
Joined: Wed Feb 20, 2008 3:58 pm
Location: Jacksonville, FL

Re: fukes GV13

Post by fukes »

Here is then link to my album. I planned on documenting every step with pictures, but that has turned out to be harder than expected. Once I get working I'm not thinking about pictures. :) Here is what I've got though.

http://gallery.bateau2.com/thumbnails.php?album=1004
GV13, one day something a little bigger hopefully.

Post Reply

Who is online

Users browsing this forum: No registered users and 3 guests