Page 1 of 1
MGuel FL12 Build!
Posted: Sat Jun 06, 2009 9:25 pm
by mguel
Hello everyone,
I'm definately a novice at boat building...well, building anything at all. I've been interested in getting a small boat to fish lakes, streams, and maybe small bays, but the wife just wouldn't give me the okay to shell out the big bucks for a brand new boat. I was browsing the web and came across bateau's site. When I saw the FL12 I immediately felt a something inside me say, "you can do that!"
I ran it by the wife, told her it would be a whole lot cheaper than a new boat, and she gave me the okay. She did say it would be part of my father's day present, so I think I got the better end of the deal

! At the moment I am waiting for my epoxy, resin, wood flour, glass, and other supplies to arrive. I will be honest, I ordered from Raka.com. I hope this doesn't get me hate replies from here! I live about 45 minutes south of Houston, Texas and only after ordering did I find a place in Houston that carries all those supplies!

Anyways, after spending HOURS reading the forum I found myself debating on the ply. Should I use the cheap stuff, or go with marine ply...?!?
I wrestled with that question for 2 days. I read everyone's opinions on this site. I want to be as cost effective as possible..but I also want my boat to last longer than a couple of years. I ended up biting the bullet and searching for marine ply in houston. I found a Houston supplier in one of the posts here..Houston Hardwoods. They had Aquateck Meranti in stock for a reasonable price. So, me and the wife headed off to Houston this morning and picked up my ply! I was so excited.
Excitement is an understatement. Since I ordered my plans this project has been actually keeping me awake at night! I don't know what's wrong with me. My wife is sick and tired of hearing about my project and I havn't even started it! But she's being a trooper. She came along with me, and even helped me load the ply!

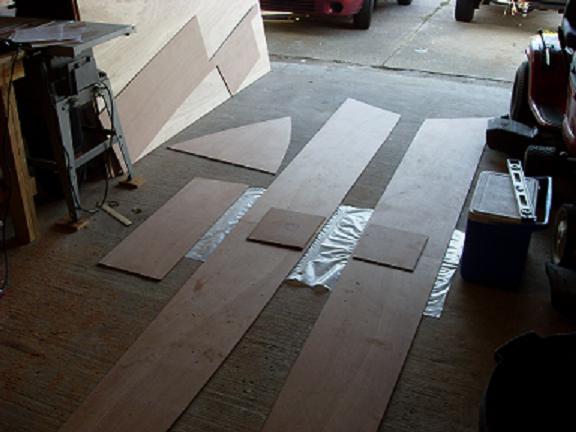
I got home and began measuring and making sure I followed the nesting by heart. I didn't have a pvc pipe for the arcs to trace the chines and I didn't feel like going to the hardware store, so I searched and found a long piece of trim in my garage. It worked beautifully. I ended up using a jig saw to make the cuts for fear that my skill would tear up the ply. It's such beautiful ply..too pretty to mess up

I think i did okay on the cuts. Only a few got away from me.
So, at the moment, (my first day) I have the chines, side butts, the bottom butts, and the bow seat cut out. Tomorrow I'll work on the transom, the tops, and the bottom. I did want to ask for some advice. The notes say to go ahead and measure/cut the bottom now. I read a few posts where they recommend waiting untill you flip the assembly and then tracing the bottom on the ply. I'd love to hear your thoughts on which method you think works best.
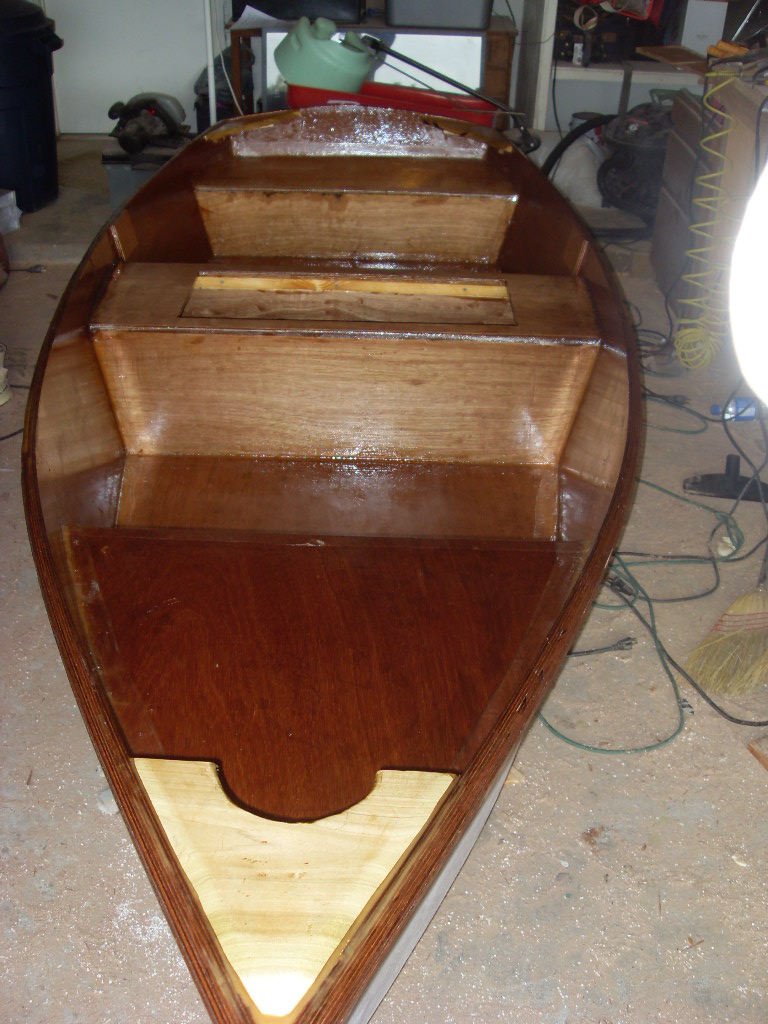
Here are my first pics on the project! Glad to have this very informative forum to use. It's really making the process much easier. I almost feel like it's second nature, and I have very little wood working experience!!!!

Just waiting for my supplies to come in!
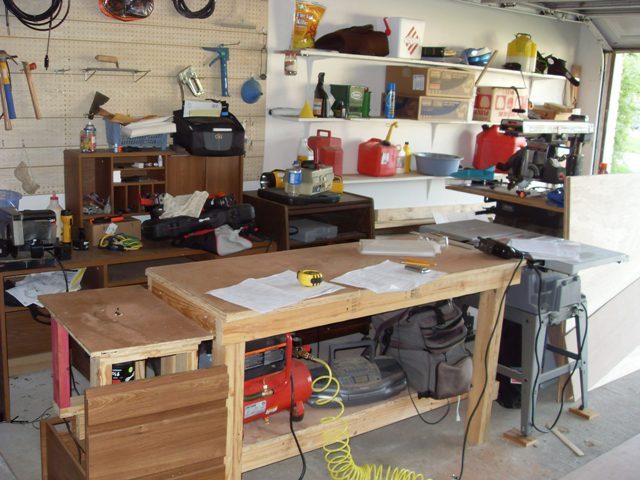
Where the magic happens!
Re: MGuel FL12 Build!
Posted: Sat Jun 06, 2009 9:56 pm
by wegcagle
Congrats on getting started. That "keeping you up at night" that your refer to is called Boat building virus (BBV). I hate to break it to you, but you got it bad

Don't feel bad, we all do. I am already contemplating and tinkering with my next build. I'm probably 4-6 months away from being done with this one

It only gets worse, but it sure is fun. I loved the part of the build where you are. You go from plywood to instant boat in only a couple of days. Enjoy it.
Will
Re: MGuel FL12 Build!
Posted: Sun Jun 07, 2009 11:36 am
by Cracker Larry
Welcome aboard! You're off to a good start

You'll never regret buying the good plywood
By the way, BBV seems to be an incurable malady. I've just started S&G boat number 4
Re: MGuel FL12 Build!
Posted: Sun Jun 07, 2009 8:44 pm
by mguel
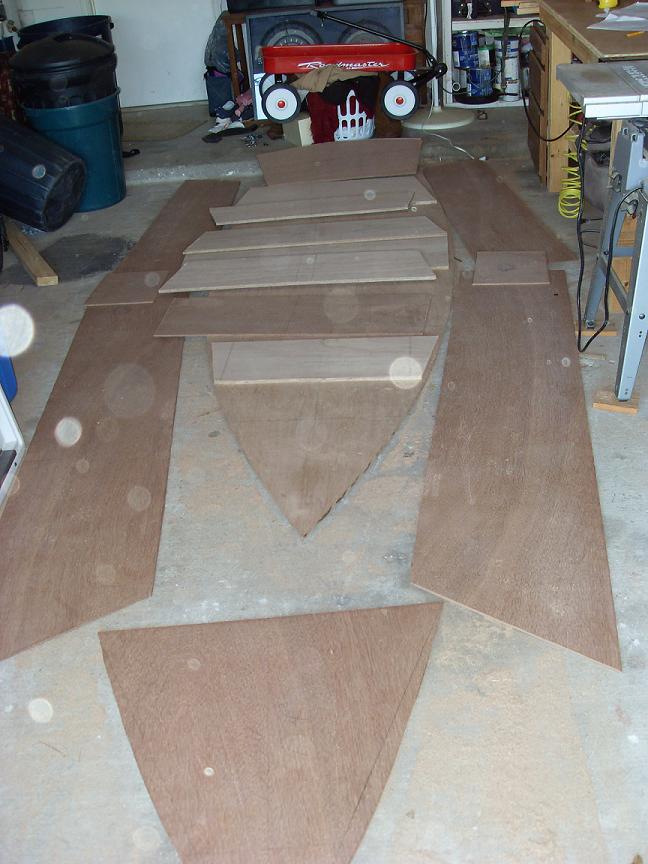
Went to church, thanked God for my meranti ply, and came on home. Several hours later I finished cutting out all the pieces. This time I decided to follow the tip in the notes on adjusting the skill blade just slightly past the thickness of the ply. That worked wonderfully. It also went a lot faster than using the jig saw! I'll never doubt the notes/tutorials again.
I really hope Raka.com sends me my epoxy soon. I'm ready to keep going. I need to finish this boat this summer. I'm in grad school and once classes start in September my wife isn't going to let me do anything but study!!!

Here's a pic of my pretty meranti ply all cut up. Sorry about the ghostly orbs in the pic...haha
Re: MGuel FL12 Build!
Posted: Tue Jun 09, 2009 9:16 pm
by mguel
My supplies finally came in. Epoxy, glass tape and cloth, some tubs, mixing sticks, etc. I was still too chicken to try and glue my butt blocks for the chines and bottom. I ordered from Raka and the instructions are online, so I downloaded them to read later tonight. I want to be sure I read up on mixing before I get started. I want to make as few mistakes as possible. I ordered 3 gallons and I want to be sure I don't need to order any extra due to stupid mistakes.
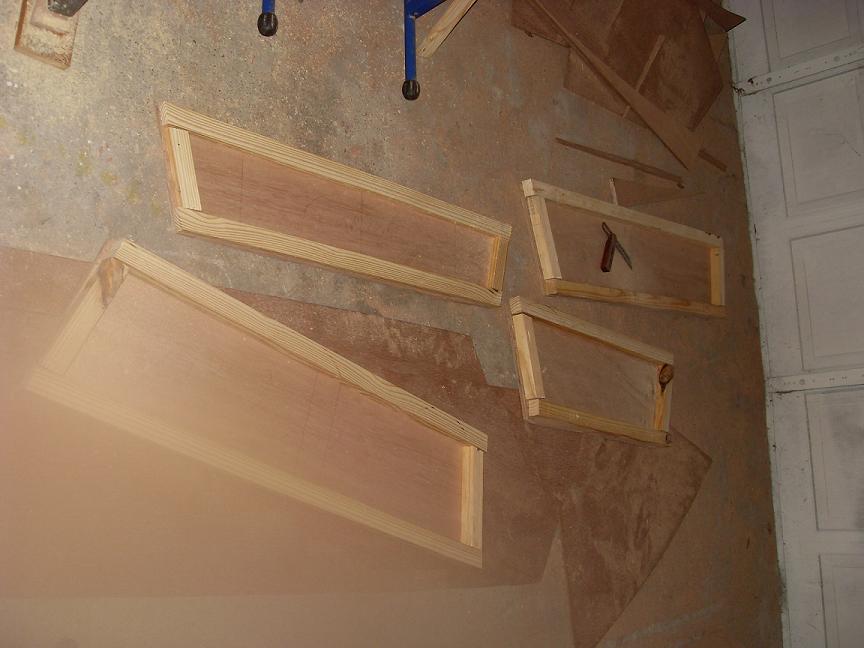
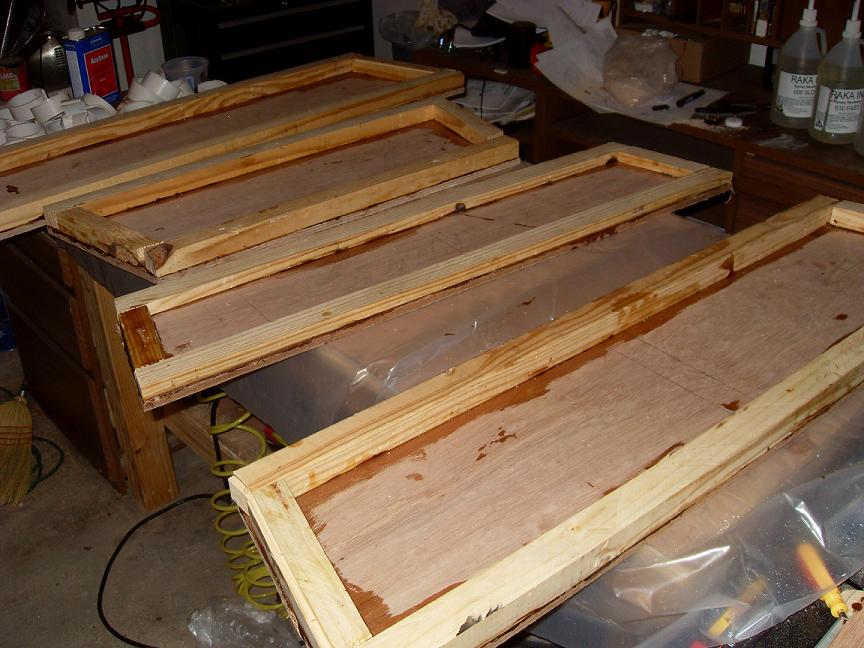
To not spend the day doing nothing I decided to work on the batten frames. I ripped some pine 2x4's I had lying around. Finished those up pretty fast. Also went by lowes and purchased some supplies for applying the resin, some glue, duct tape, and more. This boat was supposed to be cheap!! WHAT HAPPENED!!! LOL
I should be ready to glue the butt joints. Ketchup consistency I believe. I ordered 2 gallons of resin and it comes with 1/2 gallon of fast hardner and 1/2 of slow. I don't want to end up having only fast at the end when I fiber the entire bottom of the boat, so I'm thinking about mixing the two. I hate to have to do that for fear of mixing wrong. But i purchased the pumps so I should be okay....i hope!
I'm using maple wood flour. I wish I had an idea of how many scoops to put in 3 oz mix. But i guess as long as it's ketchup i'll be fine. Wish me luck tomorrow!! I'm hoping to get those joints cured by Friday so i can start the stitch assembly!!
Picture of my frame work
Battens and first Mistake!
Posted: Fri Jun 12, 2009 9:20 am
by mguel
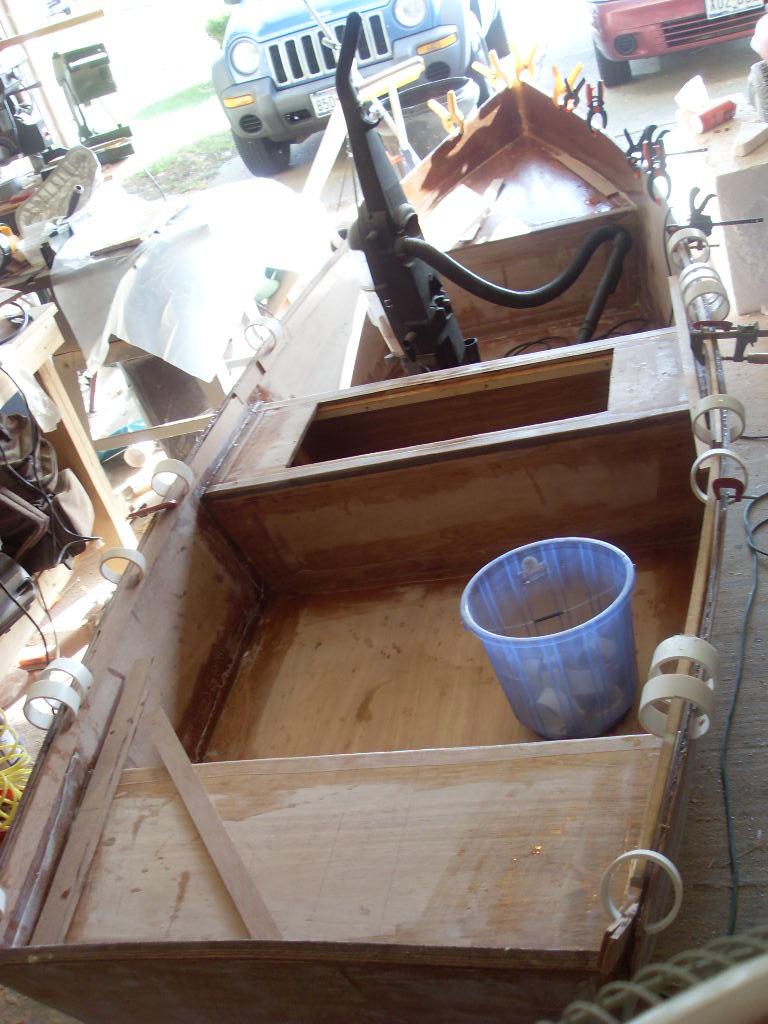
Well, I finished glueing all the frames. Very interesting process getting the pvc clamps to not move the battens around. But it just took a little jiggling.
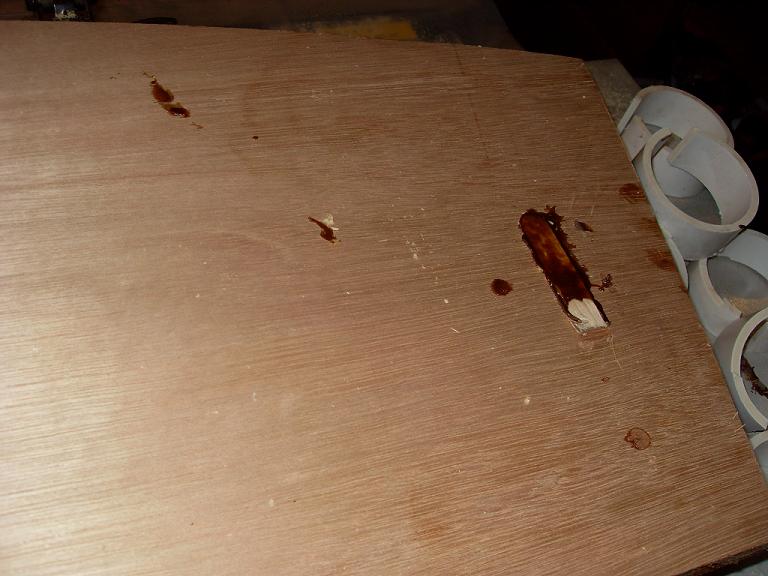
Unfortunately, I had my first mistake.
Nothing major...or I don't think. I accidently left a gluey mixing stick on the plastic and then proceeded to glue the transom on top of the mixing stick..so needless to say, I have a mixing stick glued to my transom!

Re: MGuel FL12 Build!
Posted: Fri Jun 12, 2009 11:08 am
by wegcagle
That's nothing alittle grinding and sanding can't take care of
Everything is looking great so far.
Will
Re: MGuel FL12 Build!
Posted: Fri Jun 12, 2009 2:51 pm
by Cracker Larry
That's nothing alittle grinding and sanding can't take care of
For sure that's minor. Wait until the cat get's glued to the boat. They don't like grinders
Re: MGuel FL12 Build!
Posted: Sun Jun 14, 2009 7:29 pm
by mguel
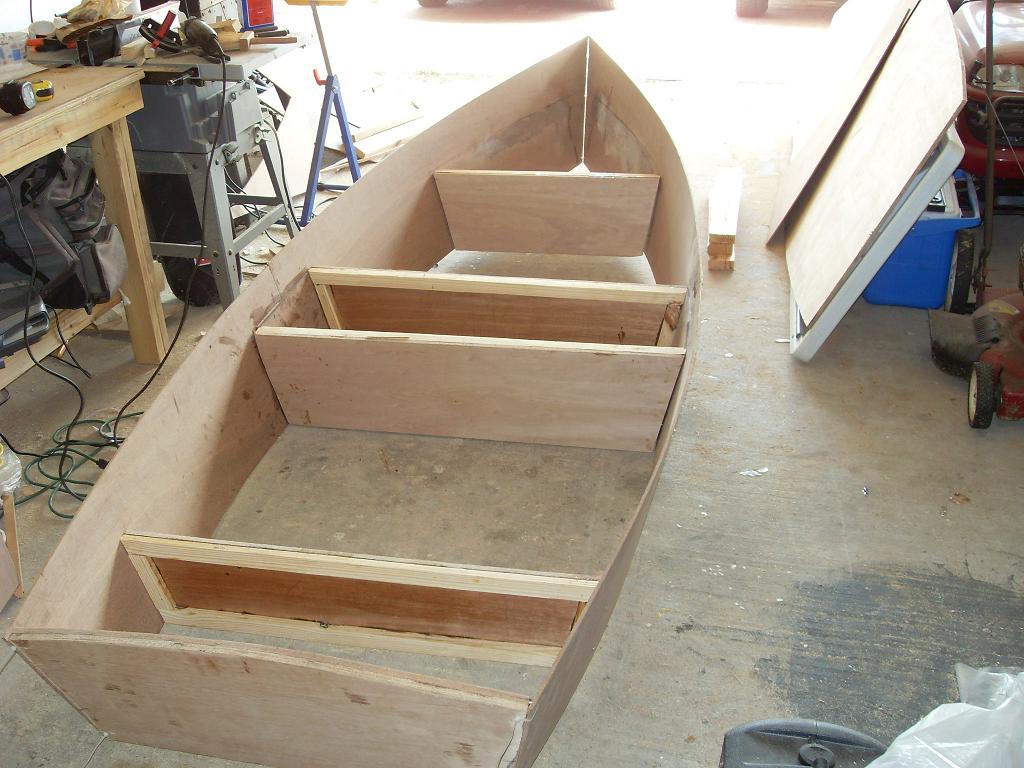
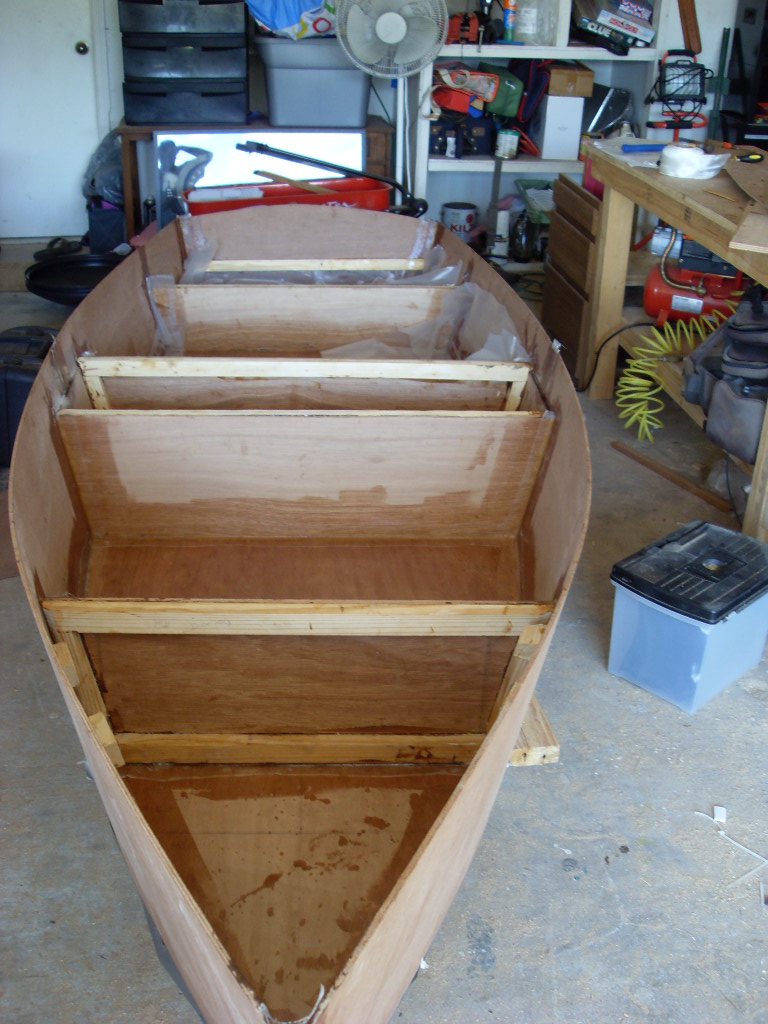
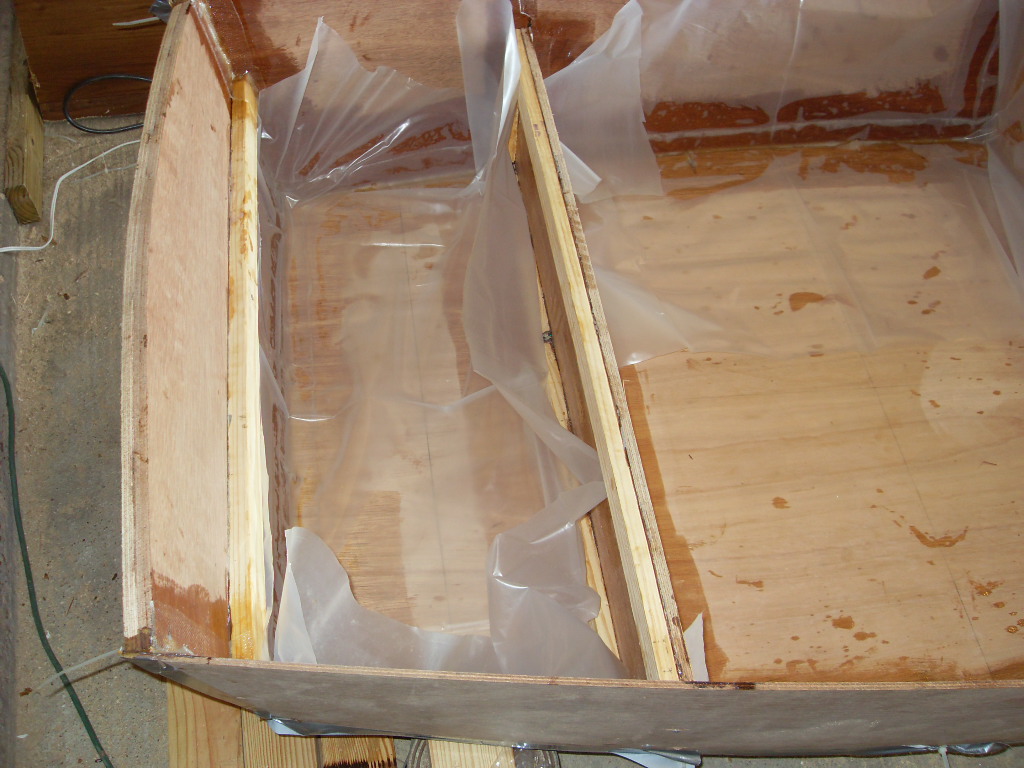
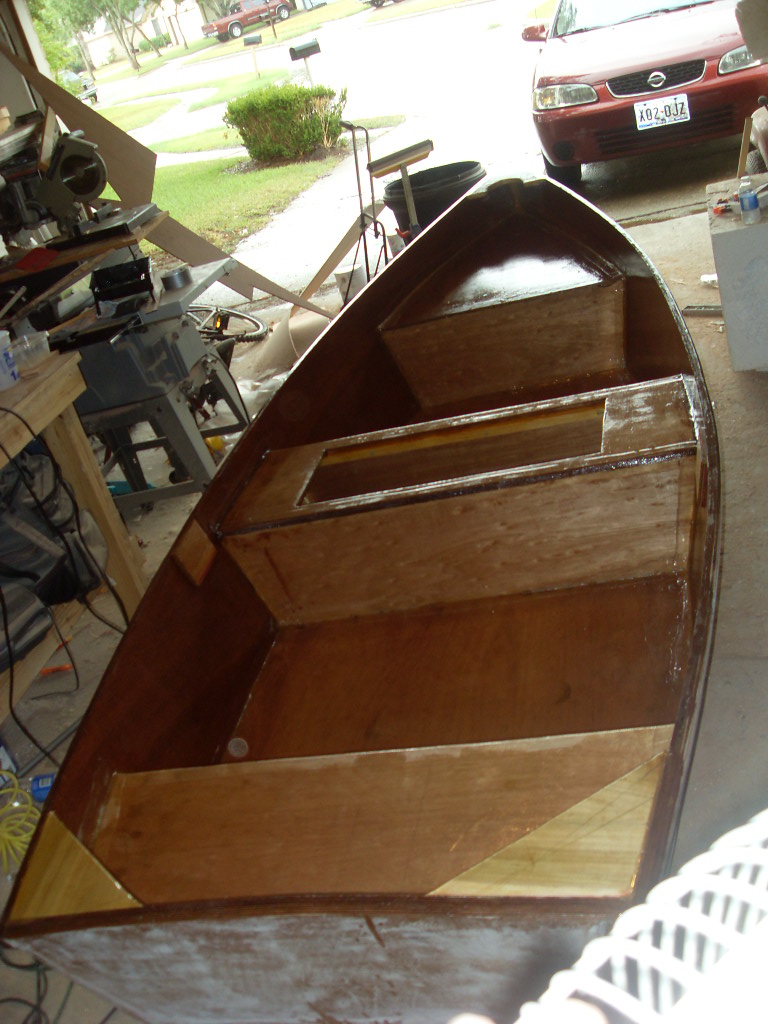
The weather today here near Houston was in the 90's. And even though i was in the garage...i felt it. Nevertheless, I got lots done!!!. I'd like to know how many of you tackled the fl12 all on your lonesomes...It's a heck of a lot heavier than i expected and flipping it over alone was a ....well, not a fun experience. But i somehow managed once I got the frames in there with some screws.
I hope that this was the most difficult part of the whole boat building process because by golly was i
by the end of the day. I really didn't have a problem with the boat not curving well..I just had a problem with the gaps from the bottom of the boat and the chines. I finally gave in and stiched the bottom to the chines. It worked well and I can't really see any flat spots. I place the tops on and they just needed a little adjusting to fit flush. Some will take a lil sanding to be perfectly flush..but the majority of that is me cutting a lil under.
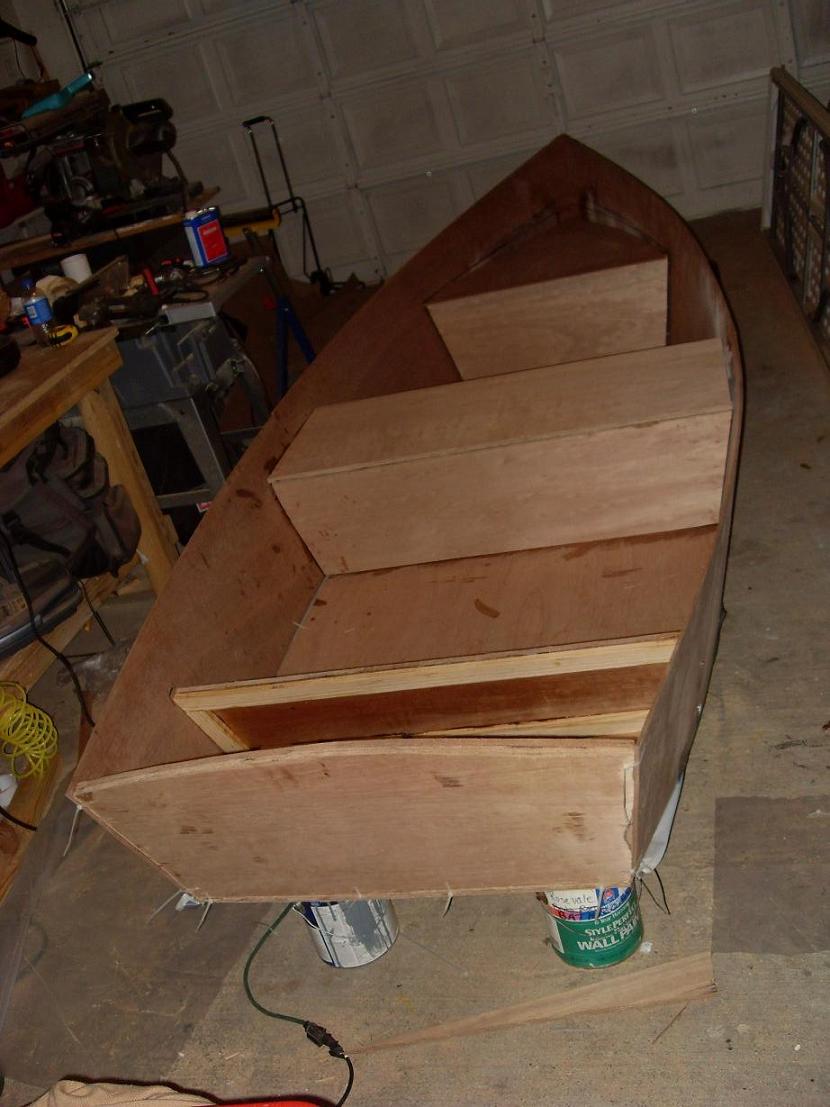
I still need to retape the bottom. I put a few stiches on bottom and they brought the chines in a little more, but the previous tape job had come untaped. That means FLIPPING AGAIN...I hope I can find a neighbor...or maybe the wife can help...yeah right!

I need to add the cleats for the bow seat and then I'll start filling and taping during the week! I am glad I read these boards before my build...it really helped me solve many issues i came across.
Began the glassing!
Posted: Sat Jun 20, 2009 12:48 pm
by mguel
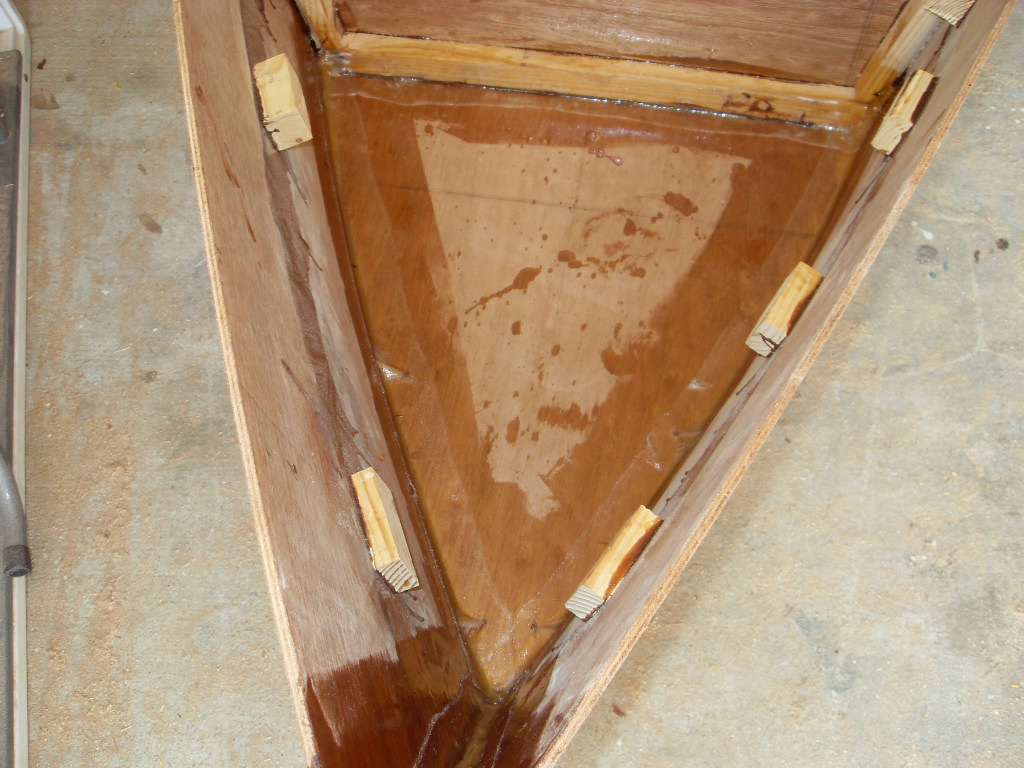
Another hot day in the Gulf Coast of Texas. Temp is probably near the mid to high 90's. During the week I glued the frames in place. There were a few gaps here and there but I finally decided I could live with them instead of trying to make it perfect. So, today I decided it was time to face my fear and tackle some fiberglassing.
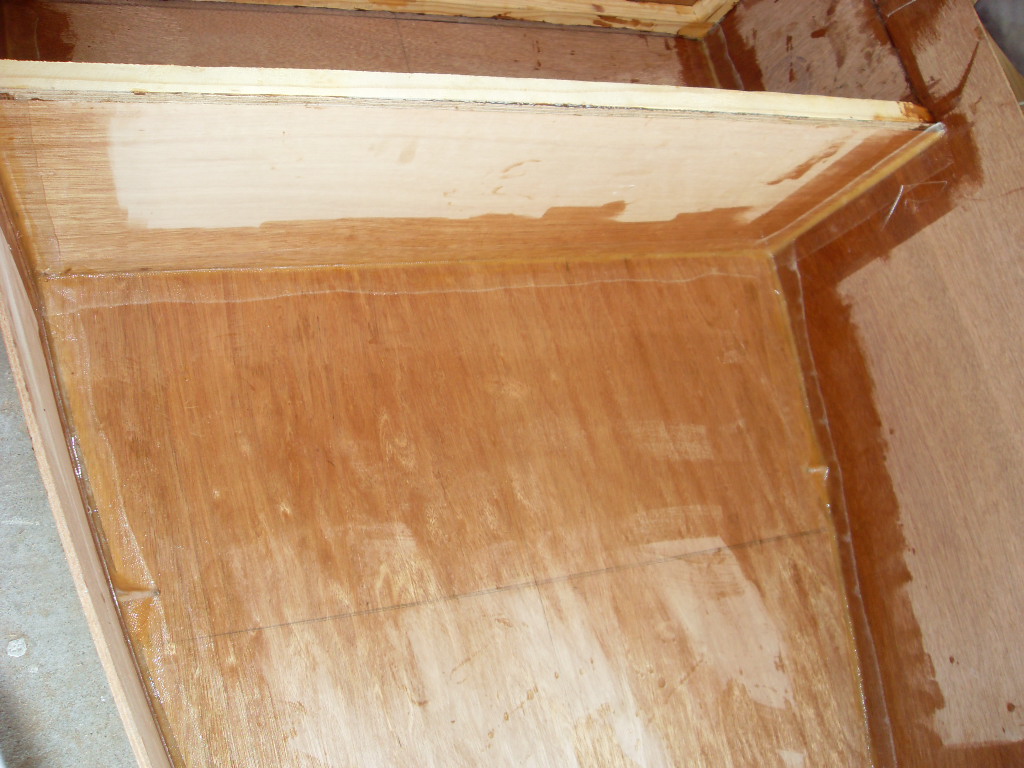
I cleaned my garage really well. I had too many tools scattered all over the place and it was making the job difficult. So, after putting everything in it's place I cut the tape to the appropriate sizes. I originally was using maple wood flour for glue and I was going to use it for filler. But, I began to run low and I ordered pine from here. As I was making the filler it sure did feel like I didn't have to use nearly as much pine flour as I did maple. I used a 2 tablespoon scoop to add the wood flour to the epoxy mix and the pine sure did seem to thicken a lot faster.

Well, the filling went well. All except with the pesky stitches. I didn't know how to tackle the stitches. If I should fill under and over or simply under. I ended up filling up to the stitch. So, I finished all the seams. It's not a perfect job, and I know there were some, not many bubbles. I ran out of plastic and decided I really didn't care because this is going to be a fishing boat not a show boat. I did add some extra tape on some of the frames, just to make myself feel better because of some of the gaps I mentioned from the glueing.
Next on the list...the dreaded rubrails...
Re: MGuel FL12 Build!
Posted: Tue Jun 23, 2009 12:36 pm
by Arawak
Looking good!
How did you feel the plastic went? I thought it was awesome when I did the outside seam around the middle, but on all the rest it created such an orange peel effect wherever there was a bend that I found it wasn't worth it. 3M bubbles plus epoxy resin made a great, easy-to-sand fairing/filling compound for me.
Re: MGuel FL12 Build!
Posted: Tue Jun 23, 2009 2:01 pm
by mguel
The plastic was so-so. I think I should have cut the plastic into strips instead and place those on top of each seam, instead of placing the entire sheet on the box. That may have eliminated a lot of those bends and creases. Thanks for that fairing/filling compound tip. I bought the smallest batch of quickfair but I really would like to try and mix my own to keep the costs down. I read that the forum or website has recipes for mixing your own fairing, but I couldn't find them! I purchased 3 gallons of resin/epoxy so I should have plenty.
I decided to wait on the rubrails. I flipped her over and rounded the edges. There were a few low spots that I filled with filler. Tonight I'll sand those down. I will probably wait till saturday to glass the bottom and bottom seams. I know it's gonna take time and I don't want to stay up late doing it during the week. I'm gonna try to find a second set of hands to help with the fiber cloth on the bottom.

Re: Glassed outside!
Posted: Mon Jun 29, 2009 9:31 am
by mguel
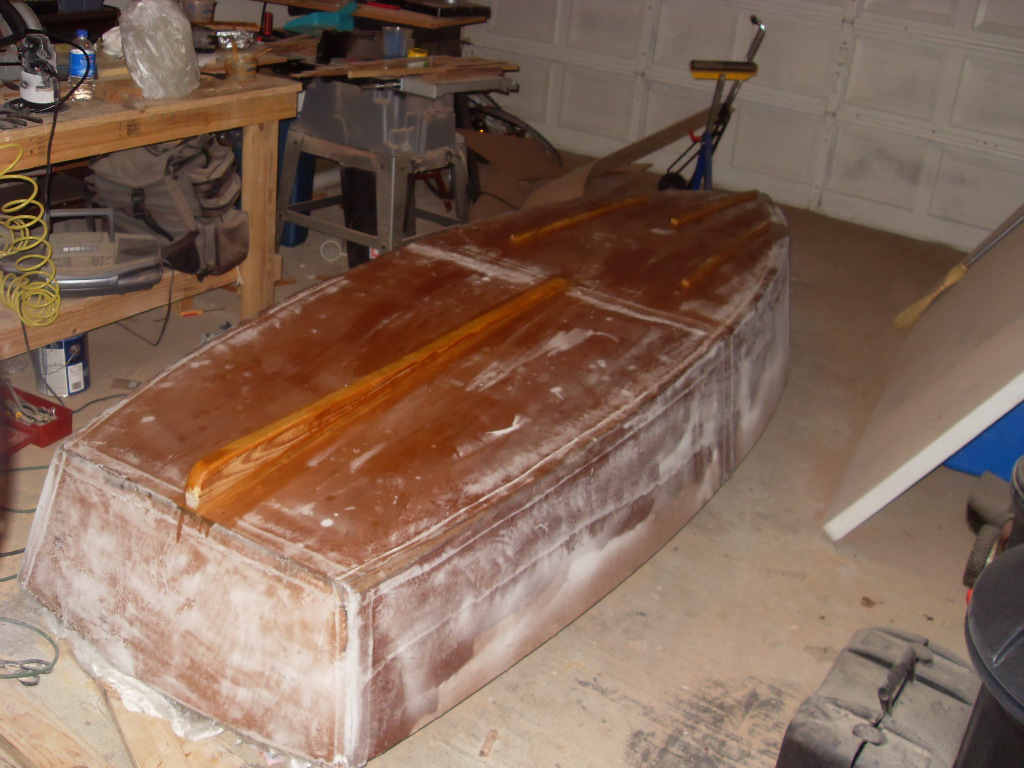
I was able to get some more work on the boat done this weekend. I decided to wait on the rubrails till after I glass the bottom. I glassed the seams first wich was pretty easy and I had almost no bubbles. I then placed a glass cloth over the entire bottom. I thought I would get a lot of bubbles as I was doing it alone, but once again it wasn't too bad. The only spots where there were bubbles was at the spots where the glass tape from the seams met with the cloth. I used poor man's ply and checked it later that evening. I really wished I wouldnt have used the poor man's ply, or at least straightened the plastic out as much as possible. It left lots of indentations and lines all around. I lightly sanded most areas smooth, and I will give it another coat of epoxy over it just to be safe, maybe two.
Sunday, I sanded down the area where the skeg would go and wiped it down, in case of blush. The skeg gave me some problems. My skill saw skills weren't the best and it wasn't laying on the boat bottom as well as I would have liked. I used as many weights as possible but I couldn't get it to lay flat allt he way through. I finally decided to just add as much glue as possibe, and once dry I filled the gaps with filler. I also added a few strips to the bow to keep the bottom from scratching. Once dry i'll sand the ends down of those strips down to make it a little more pleasing to the eye.
This week i'll flip her over and work on the rubrails. I'm really enjoying this build. I'm really looking forward to taking her on her first expedition!!
Re: MGuel FL12 Build!
Posted: Tue Jul 07, 2009 10:35 pm
by Steve7776
Great post, thanks. I just ordered the same plans and hope they arrive soon so I can get started on it myself. Your post gave me some good tips and some stuff to think about before getting started.
Cant wait until the plans arrive.
Steve
Latest update!
Posted: Sat Jul 11, 2009 9:52 am
by mguel
Well, it's been a while since i posted the progress on my fl12. It's still been very hot here in Houston. My wife is coming down with boat envy. Not that she wants to build one, but that I spend too much time on it.
So I decided to take a break from boat building and take the wife out for a few days. I sure was having boat withdrawals!
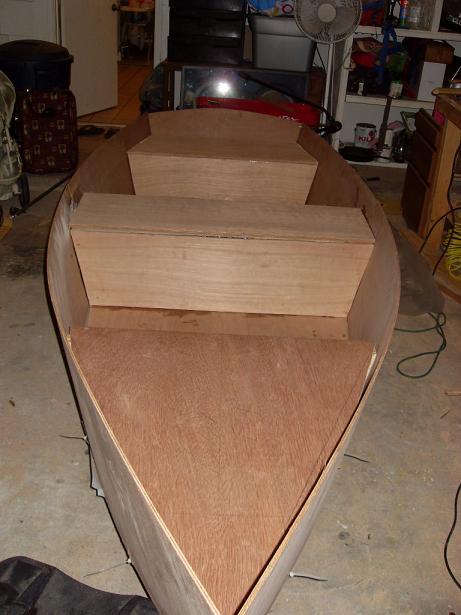
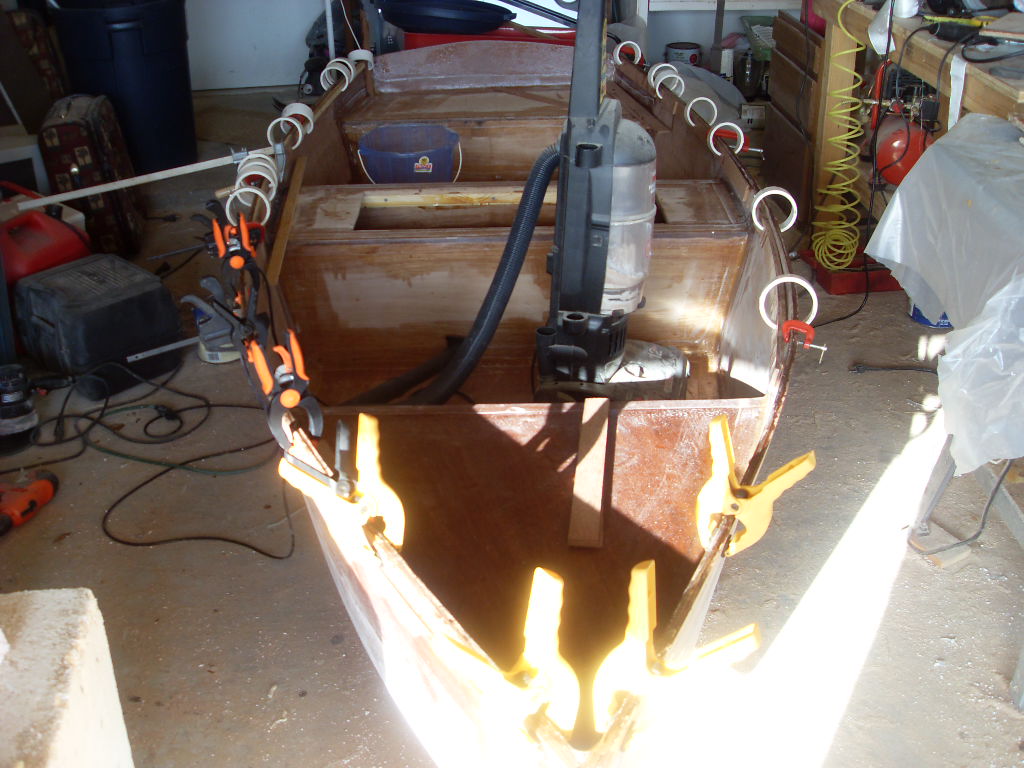
Anyways, I flipped her over and filled the bow and transom compartments with foam. A buddy of mine had some left over from a repair build of his so it cost me NOTHING!!
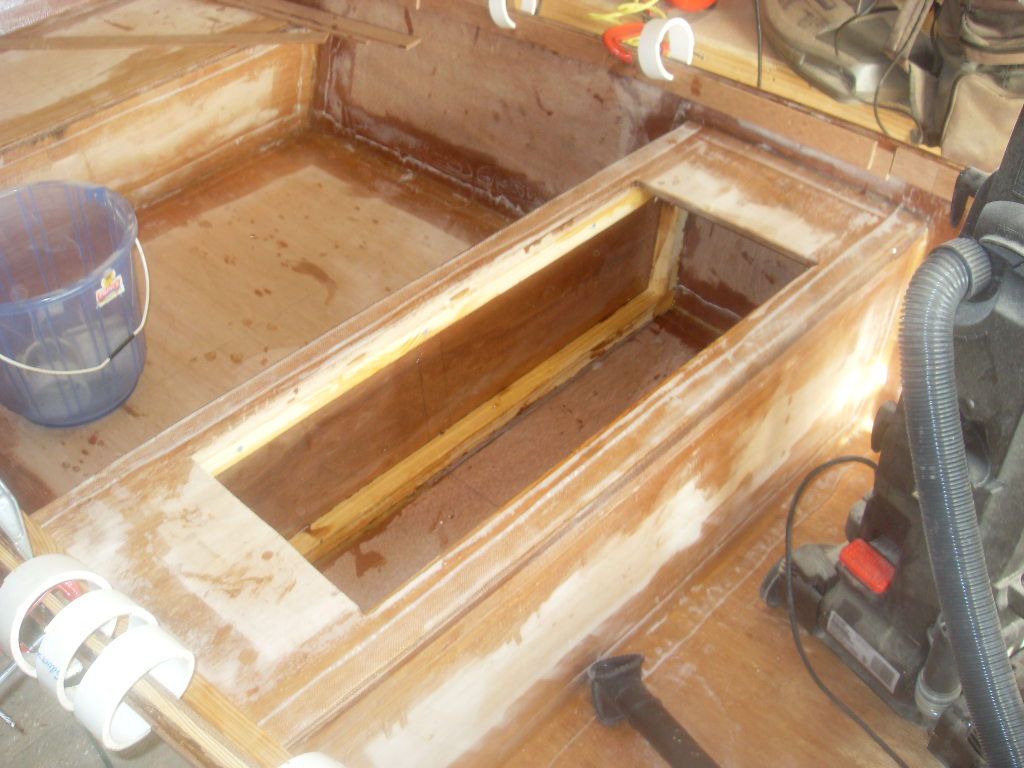
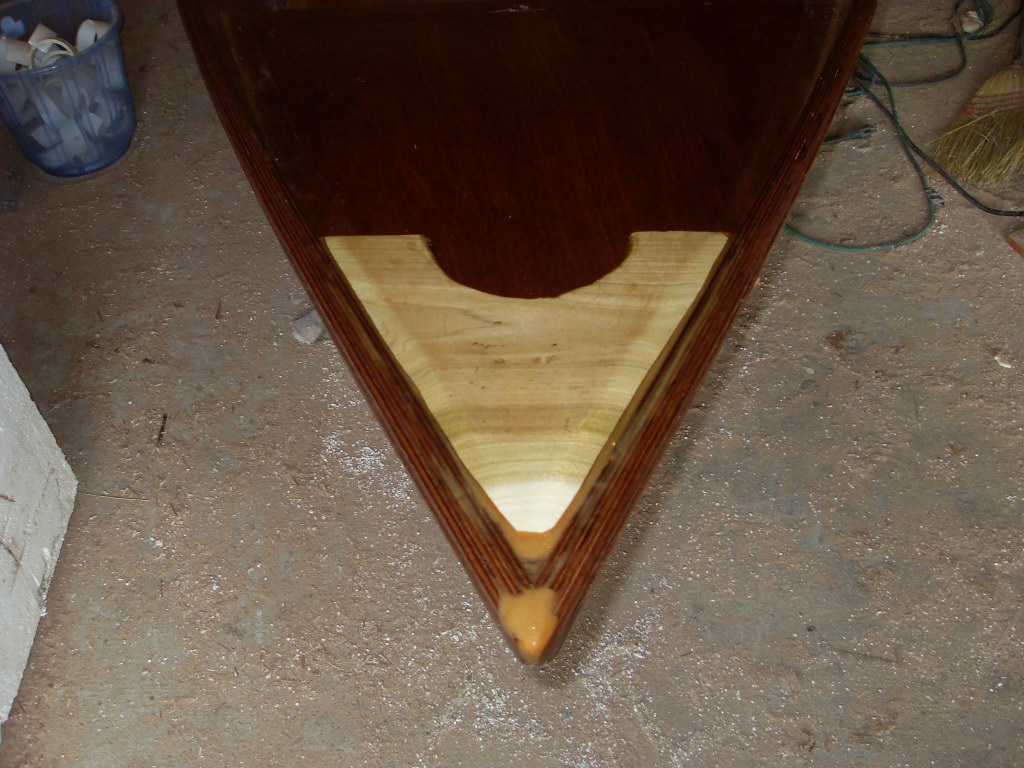
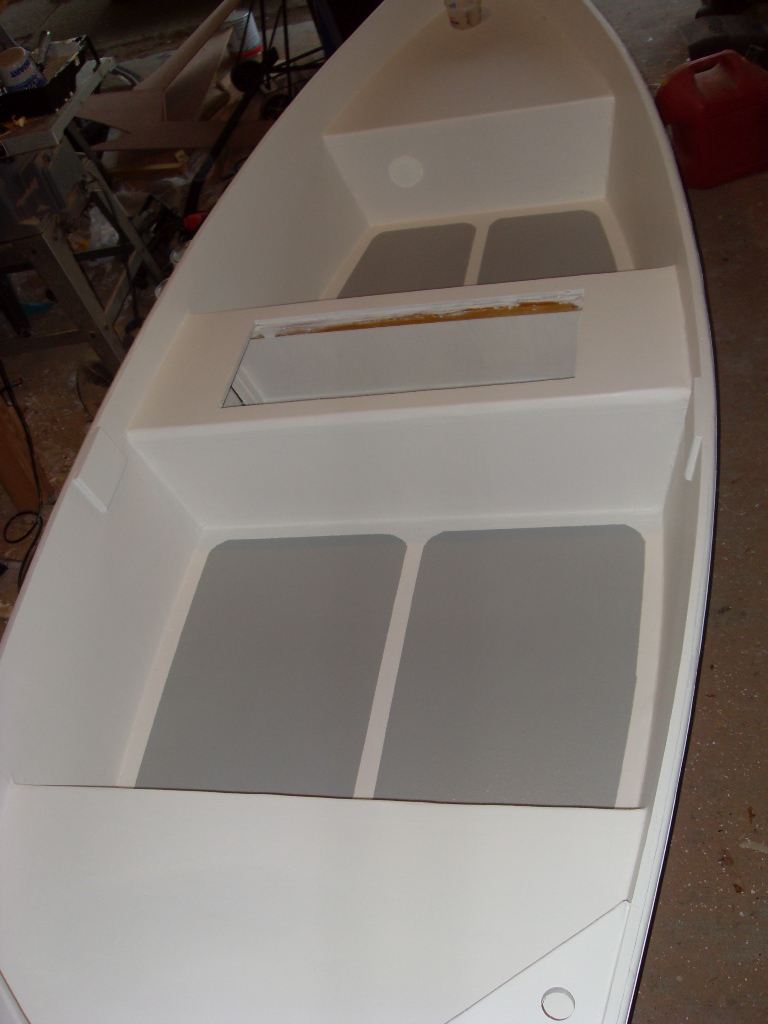
I then sanded the edges to the seats a lil bit to make them fit flush. I ended up rounding them off a lil bit and fiberglassing the outside edges. I cut out the hatch for the middle seat. That was an interesting process. I ripped two 1x1 battens of a 2x4 i had. I epoxy glued them to the batten on the frame and put 3 coated deck screws in them just to be safe. I really want my the hatch to have the hinges inside and not outside. Any ideas sure would be appreciated!
I had my first major mistake last week. I glued, filled, and glassed the bow seat...and totally forgot to install the bow eye! I had already drilled the hole and sanded the bow for a nice fit. I filled the hole and fibered it twice. I can't believe I did that. I guess I'll just place the eye between the seat top and the breast plate. It maybe better that way in case it ever gets damaged or loose, then I have easy access to it.
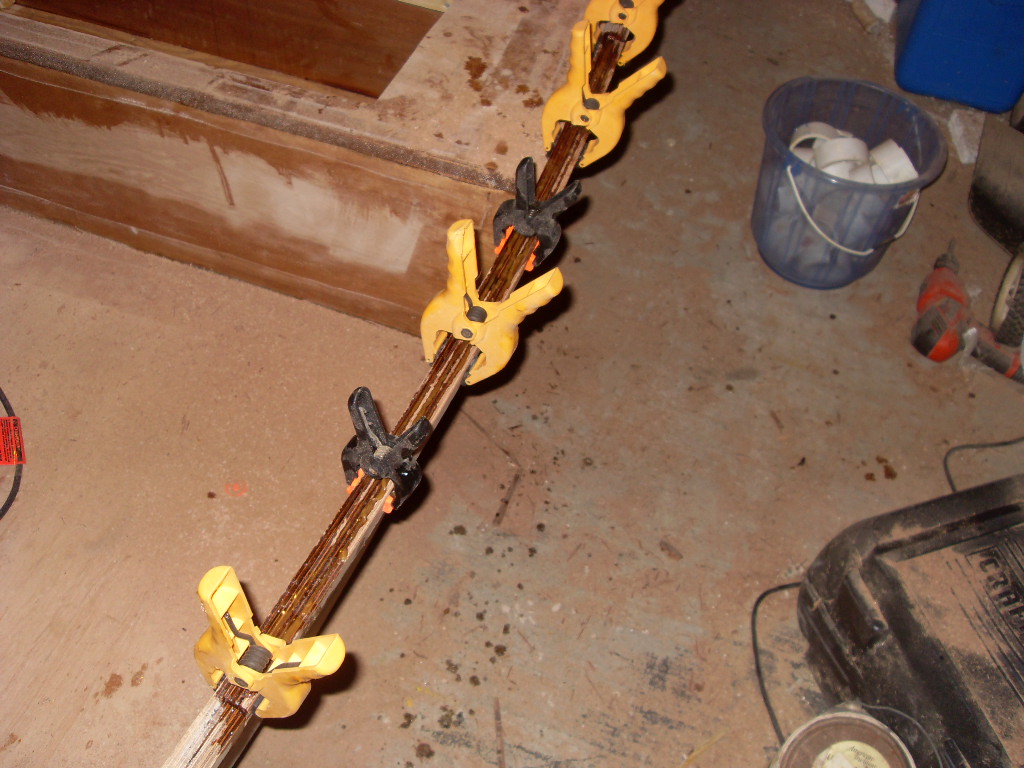
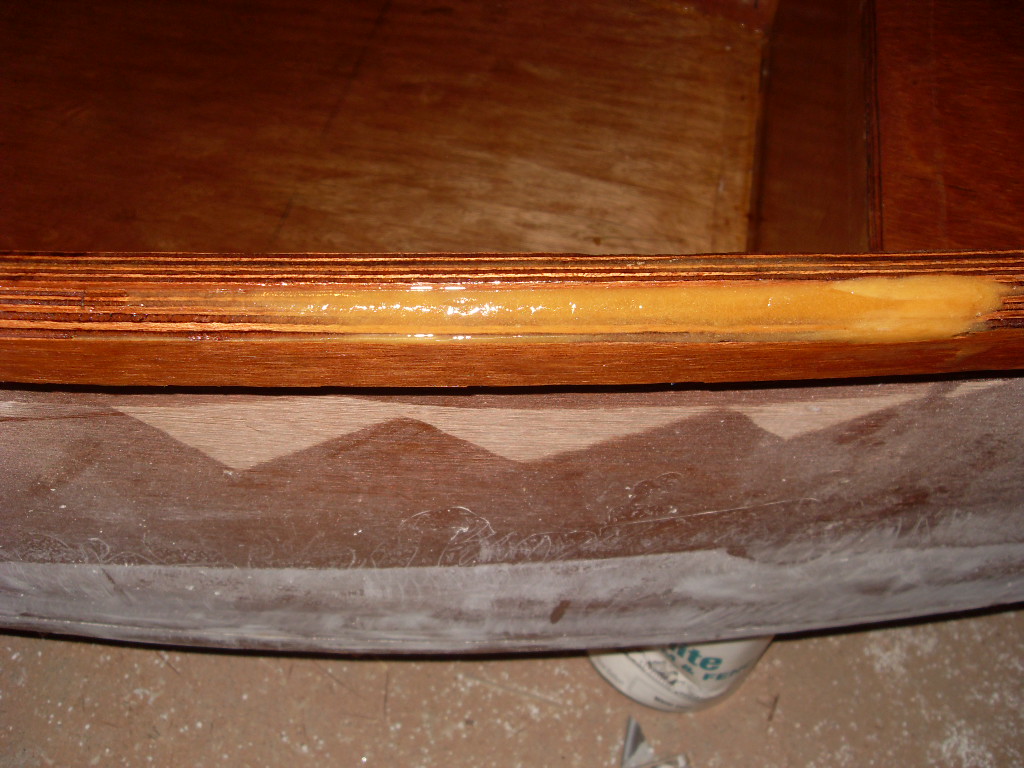
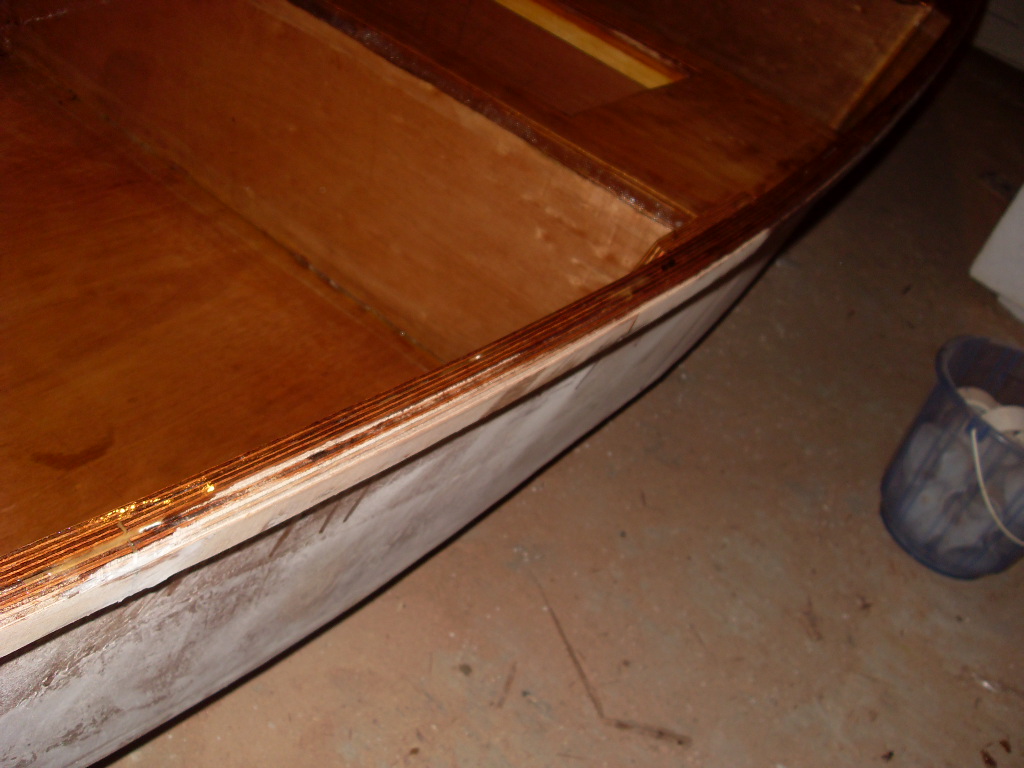
Today I placed the first layer of rubrail on. It wasn't as bad as i thought it would be. Didn't need to use any screws or dowels either. I sort of made the openings on my pvc clamps a little wide, so I had to improvise a bit to have them snug the rubrail strips a little. See the pic and you'll get it.
I bought a small case of quickfair. Probably will use it on the outside seams. I also bought a few bags of mixed blended for fairing the inside. I'm not looking at making this a show boat, but i do want it to be something I can show off to some buds.
In a few hours I'm going to head to Houston and checkout some primer and paint from the ONLY local hardware store that carries Duralux Marine products. They're very affordable, so I have my suspicions.
I cant believe i'm nearing the end stage! Two more layers of rubrails, glue on the blocks for the oar mounts, the breasthook and knees, then prime and paint.
Below you can see my high dollar shop vac. My wife doesn't know about that!
Re: MGuel FL12 Build!
Posted: Sat Jul 11, 2009 4:54 pm
by topwater
Looks like a ge wind tunnel...... i blew my wifes vac up just like that one....... had to buy her a new one and went out
and bought a shop vac for me...expensive mistake.
Re: MGuel FL12 Build!
Posted: Sat Jul 11, 2009 5:50 pm
by mguel
Wow, Okay i'm getting a shop vac! That's a lot of $$ I can spend on my boat and not a carpet vac! Thanks for the heads up!
Second Major Mistake..
Posted: Wed Jul 15, 2009 12:44 pm
by mguel
Okay, so I posted my first mistake wich was sealing the bow seat without placing the bow eye. Well, today came mistake number two. As you can see above I finished installing the rubrails. Well, Mr. Wants-it-All here really wanted to round off the outside edge of the rubrails with his router. Being a novice to carpentry, I didn't really think it would be much trouble. I place the bit in, tightened it and away I went. The first side was just dandy. No problems there. Second side, about mid way in the rail, i noticed my router was dragging along....hmmm
So, did I stop? NOOO...I kept going...
Well, next thing I know my bit goes flying off, didn't hit me thank goodness. But when I looked at my work I saw the damage. The bit was falling out little by little. And the cut was about half way through the rail by the time the bit fell out.
So my first thought was eh, just fill it...but no, the cut was too deep. So i grabbed my skill saw, cut about a 33" portion off the rubrail..(that's how long the damaged section was) and I replaced it with fresh meranti strips. The only thing that worries me is that the section is place on there without butt blocks. I'm thinking of fibering to help strengthen it some. Oh well...
It started to happen again after I replaced the bit and tightend it EXTRA tight...(or so I thought). But I caught that early and decided to just fill it in a lil and go over it again with the router after it dries.
Moral of the story...TIGHTEN UR BITS ON YOUR ROUTER EXTRA TIGHT! And if you feel something odd...STOP CUTTING!!!
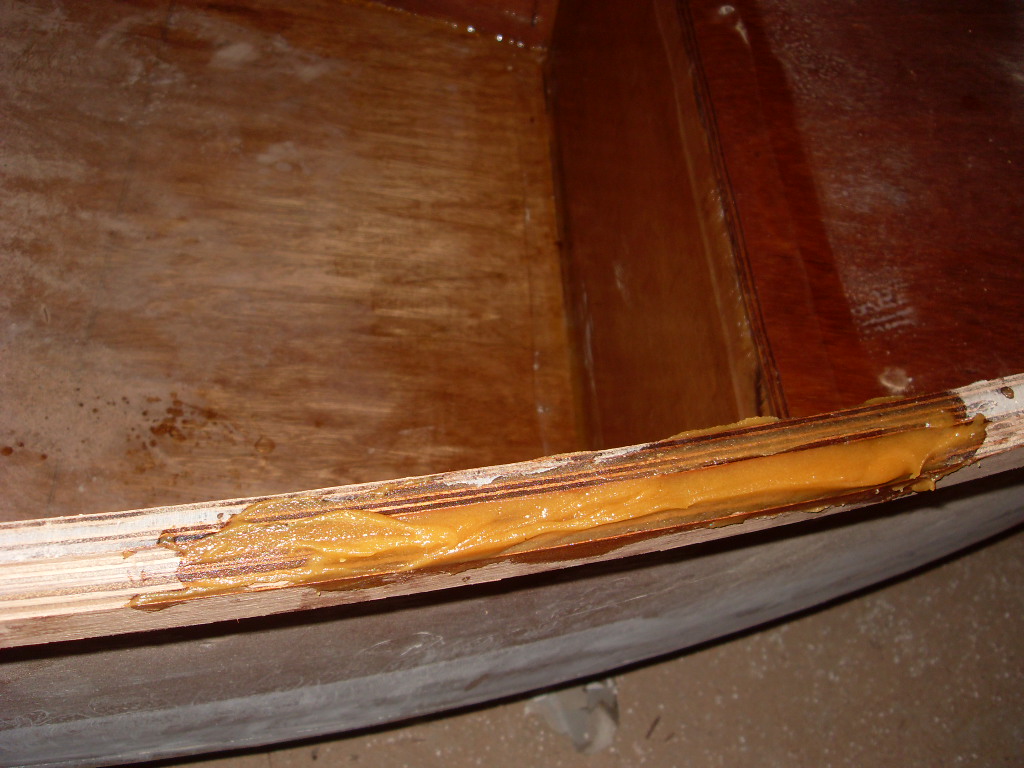
Side view of the filled second cut that was getting away.
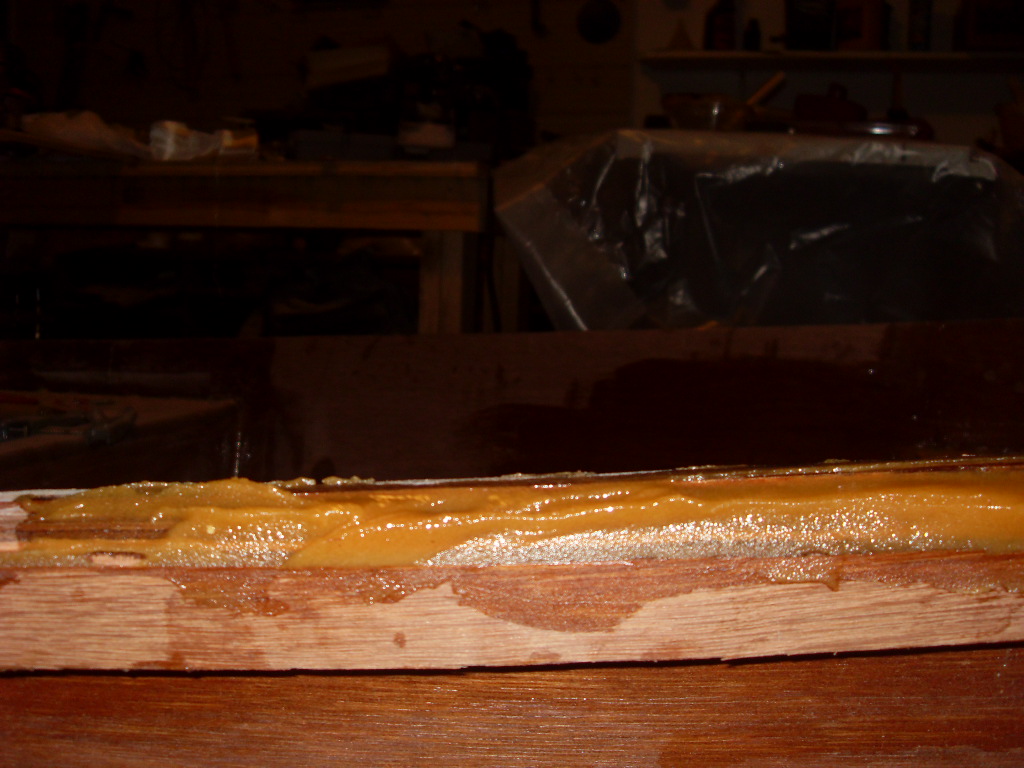
Top view of the filled second cut.
My replacement piece on the rail.
Re: MGuel FL12 Build!
Posted: Wed Jul 15, 2009 1:19 pm
by TomW
M don't know how old your router is but it sounds like your collet may be bad. This is the peice inside that the bit tightens up against. Take the complete nut assembly off the bottom of your router and you will see it in there it should fall out easily if it is frozen up it is what is keeping you from tightening down on your bit. Sometimes just loosening will do the job other times it needs replacement. It looks like a sleeve with 3 slits in it.
Tom
Re: MGuel FL12 Build!
Posted: Wed Jul 15, 2009 1:34 pm
by mguel
Thanks Tom. I got the router from a Pawn shop and now that I think of it the collet does seem a little rusted and worn. I'll defintely replace it before I try and go over the patch job and my filled section!
Looking okay!
Posted: Thu Jul 16, 2009 4:10 pm
by mguel
Well, today I finished rerouting the areas I patched yesterday do to my router problems. They don't look too bad. I also installed the breast hook and knees. I plan on cutting holes in the knees for fishing rods. I expoxied the entire thing. I still found some drips of expoxy glue here and there that i'll have to address after it dries, but other than that I'm pretty happy with the results. I'm really running low on epoxy. I'm sure i'll have enough to make filler for the bottom of the rubrails when I flip her and to epoxy coat the sides (bottom has been already). But I'm not sure i'll have enough to use to fair. (I bought some mixed blend from here).
If it comes down to it I'll just buy the smaller kit. Here's some pics.
filled error on rubrail
another view

33" piece I had to replace on rubrail...really can't notice too bad
Breasthook
Rear view
Front view
Knees

Inside Primed!
Posted: Sun Jul 26, 2009 9:57 am
by mguel
It's been a slow week for boat building. Nevertheless, I was able to get some progress. I cut out rod holes in the knees. I also was able to do some minor finishing work on the inside...resin on some areas of bare wood, sanding down resing drops, etc. During the week I applied Quickfair to the inside seams. I must say I really enjoyed the ease of using Quickfair. I was very happy with the results. I sanded the quickfair down, ran a final coat of resin over it. FInallly, this morning I sandind the whole thing one final time, vacuumed and wiped it down, and placed 2 coats of Duralux Yacht Primer.
The stuff spreads pretty well. I used a roller and I didn't have too much trouble. Word of caution, when this stuff dries not much out there will take it off...I was hoping the white vinegar trick would work on primer on the hands...nope. I used an old tried but true method also good for giving you cancer....washed with Gasoline! DO NOT TRY THAT AT HOME KIDS
Well, after putting on the primer, I saw some minor drops and high/low spots I missed, but nothing that will bother me because they're staying.
Next stop: Filler on the bottom of the rubrail!
Inside Painted!
Posted: Tue Aug 04, 2009 9:11 pm
by mguel
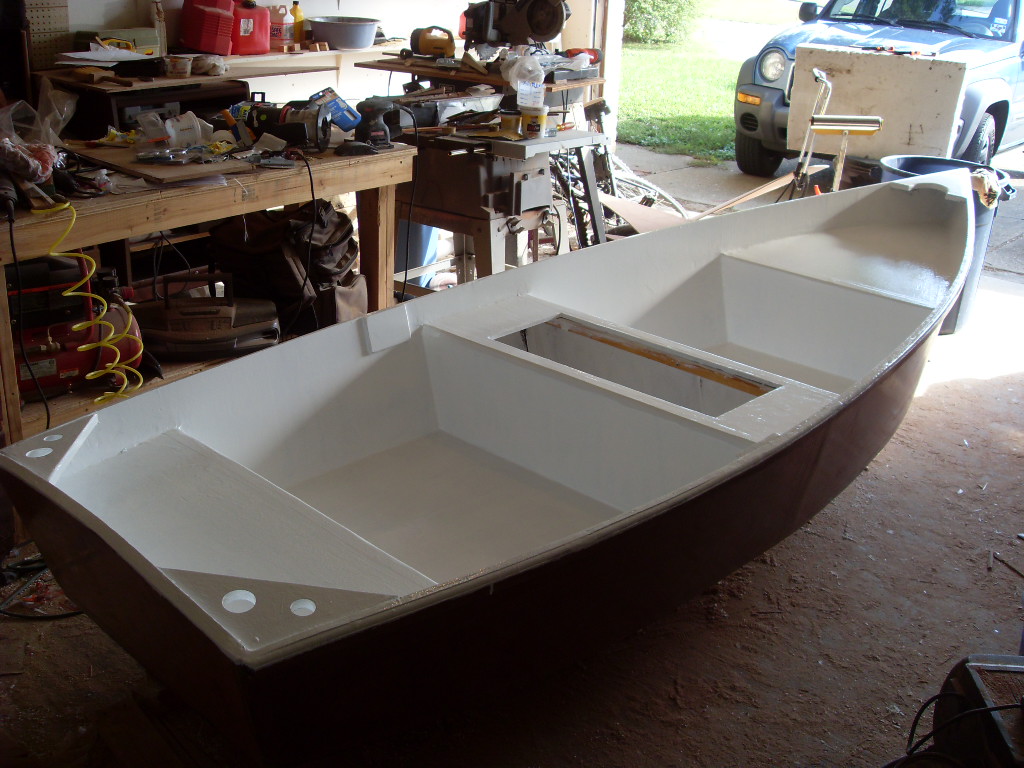
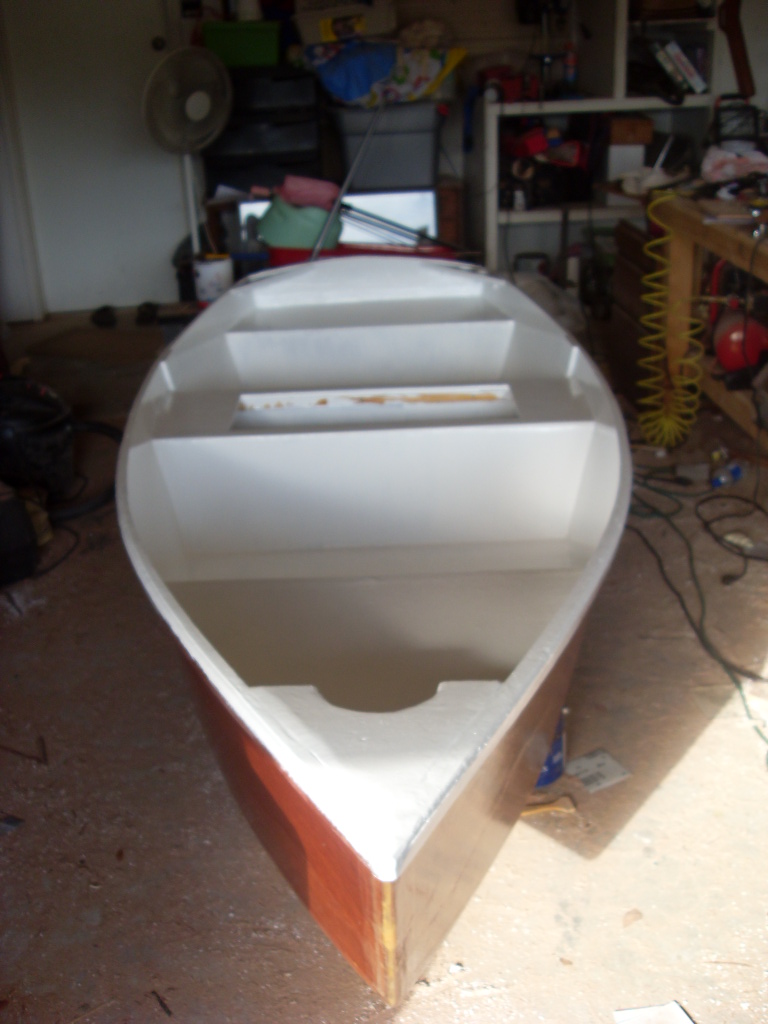
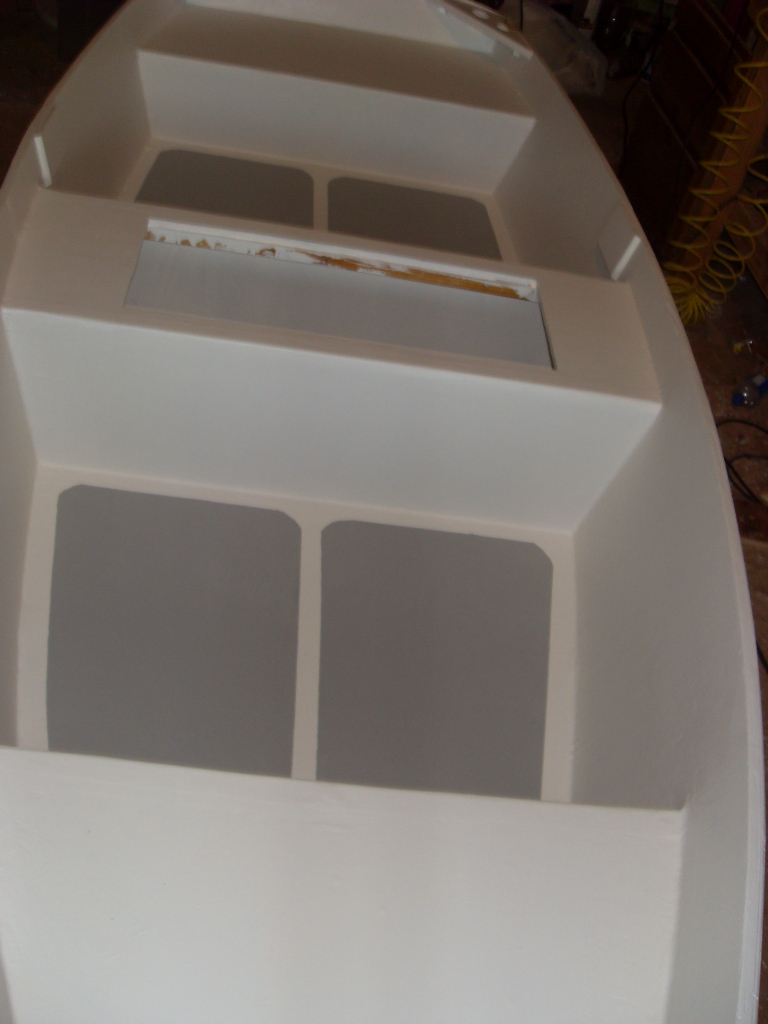
Well, I havn't had much time to devote to the boat. And unfortunately grad school is going to be starting up again this month, so I need to get as much done as possible!!! Painting has been one of the most fulfilling parts of the build. I painted the inside white with duralux paint. I also added nonskid areas on the floors in a lighter gray. Here are some pics.
Re: MGuel FL12 Build!
Posted: Wed Aug 05, 2009 1:25 am
by ks8
Paint is a wonderful thing! She's lookin' purty.

Found a motor!
Posted: Thu Aug 13, 2009 11:58 am
by mguel
So, I havn't had time to work on the FL12. Plus I need her flipped and I havn't found anyone to help me yet
I have been trying to find a used outboard to not much avail. I tried the local classifieds, small shops and retailers, but everyone either sells new or high horsepower engines only. So, I searched the web. This can be scary, especially when shelling out some big bucks. I hit craigslist, but nothing in my price range. So, I decided to place more focus on ebay. I found many outboards for sell. I was looking for a 5 to 10 hp. I didn't care what year just as long as it was either running or easily repairable. Most were running for anywhere between $250 to $600. I was about to place a bid on a 5 hp 1959 Johnson that would start, but had problems with the lower unit for $160.
But then I came across this!
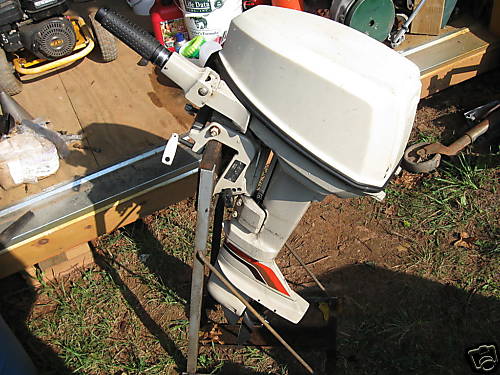
A 1979 Chrysler 7.5 HP motor. According to the seller it's starts easy and runs great. It has forward, neutral, and reverse. He had it up on the first day and was requesting $150 Buy it Now. So, I did. The seller has a great selling track record so that calmed my nerves a bit. It's just crazy that it's a running motor, decent looking, at such a low price. I really hope it runs as good as it looks. I looked online and found some places that can provide parts in case of future problems. The one thing I forgot to ask before I purchased was if it was a short or long shaft!
But I'm hoping that it's a short. If not i'm sure I can sell her for some nice cash after a quick tune-up and cleaning.
I'm really looking forward to getting my FL12 finished and for my outboard to get here and on the boat!
Re: MGuel FL12 Build!
Posted: Thu Aug 13, 2009 1:30 pm
by ks8
Getting close!
You'll probably never need to push that engine past 1/3 throttle.... 1/2 at the most. It will burn less fuel that way anyway, well, actually, that can be a long discussion if we speak of *efficiency*, depending on the curve for which it was designed, but just think 1/2 throttle and she will be more than sufficient. I think that hull only needs 2 or 3 HP to drive her to hull speed.
Re: MGuel FL12 Build!
Posted: Thu Aug 13, 2009 2:37 pm
by mguel
Yes, I read that a 5 hp would be sufficient. I did make this boat a little heavier by glassing the entire bottom and adding some extra glass on some seams on the inside which were not required for on the plans. But thanks for that. I've only been on boats a handful of times and have never driven one on my own. I plan on getting a buddy of mine who's a lot more boat savvy to take her out with and give me some pointers and tips on boating.
Re: MGuel FL12 Build!
Posted: Thu Aug 13, 2009 4:31 pm
by msujmccorm
How thick is your transom? For my fl14 I bought a new mercury 4hp four stroke for $999. The clamps would not tighten up enough so I had to add 3/4" more clamping thickness at the transom.
Re: MGuel FL12 Build!
Posted: Thu Aug 13, 2009 4:51 pm
by mguel
I doubled my transom from what was requested. I also plan on making a block to place on the inside either 1/2 or a 1/4 inch thick not really for strength, but to keep the clamps from denting/scratchin the inside transom
Re: MGuel FL12 Build!
Posted: Mon Aug 17, 2009 12:13 am
by JBing
WOW 7.5 hp! What is the weight? I thought I was pushing it with a 4.5 hp motor with a tripled transom. My Seagull weighs 35 lbs and it scares me to death
Not too long ago I had a dream that my transom tore off, the motor continued on its way as the boat and I began to sink
Thats a great buy on the the outboard though! Running or not they are pretty easy to work on, if I were you I wouldnt worry.
Re: MGuel FL12 Build!
Posted: Mon Aug 17, 2009 9:21 am
by mguel
The motor weighs 49lbs. I haven't had a dream like that...and hope I never will!!! lol. I guess i'll put her on and see how she handles it in a local shallow bay we got here. If she's too heavy, i'll just have to trade her for a smaller engine. But I'm hoping she'll be okay.
Re: MGuel FL12 Build!
Posted: Thu Aug 20, 2009 11:22 am
by slvrlng
Your hull is looking good! I'm thinking of building the same one. How much dollarwise are you into it now?
Re: MGuel FL12 Build!
Posted: Sun Aug 23, 2009 4:50 pm
by mguel
I would have to say I'm probably in a little over $600 in already. The marine ply alone was about $220. Another $200 for 3 gallon kit of epoxy including fb tape, wood flour, etc. Paint was about $150, not including brushes and rollers. And the hardware I bought online. It helps to shop around for everything. But it's been totally worth it.
Oh, and I also fiberglassed the entire bottom and taped some seams in the boat that weren't required in the plans, so that made me use more material than normal.
Re: MGuel FL12 Build!
Posted: Tue Aug 25, 2009 9:28 pm
by JBing
Slvring if you decide to build any boat you will quickly learn that it isn't cheap by any means. However once you start your build the fun you'll have quickly offsets the cost!
Re: MGuel FL12 Build!
Posted: Fri Aug 28, 2009 7:32 pm
by mguel
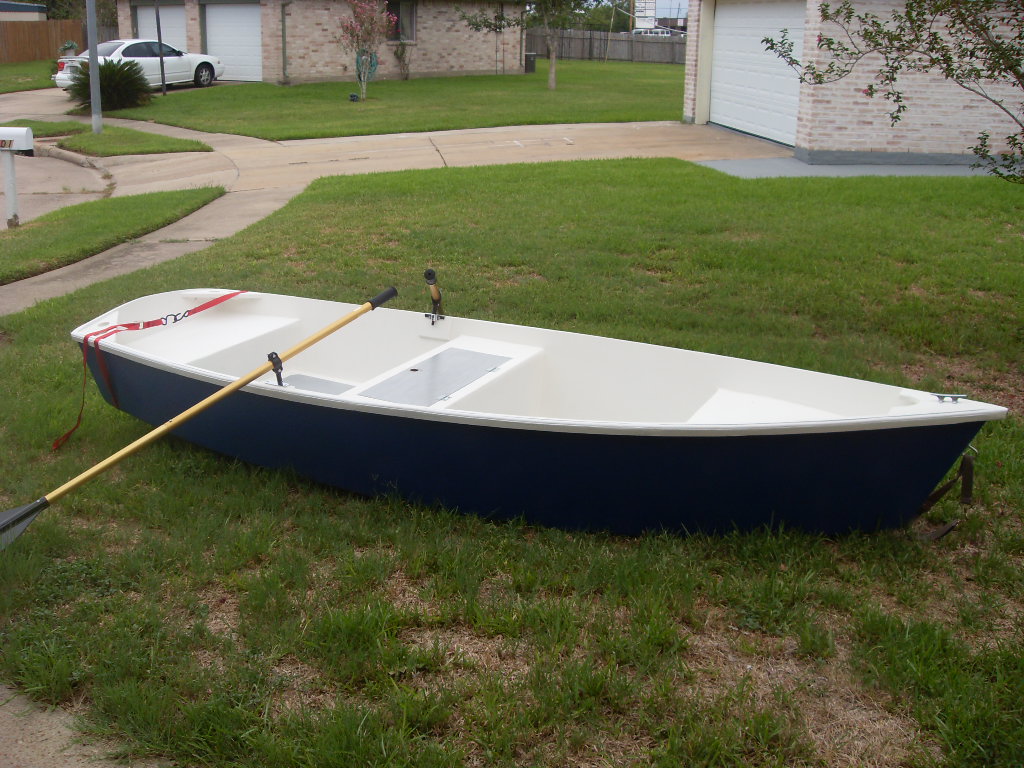
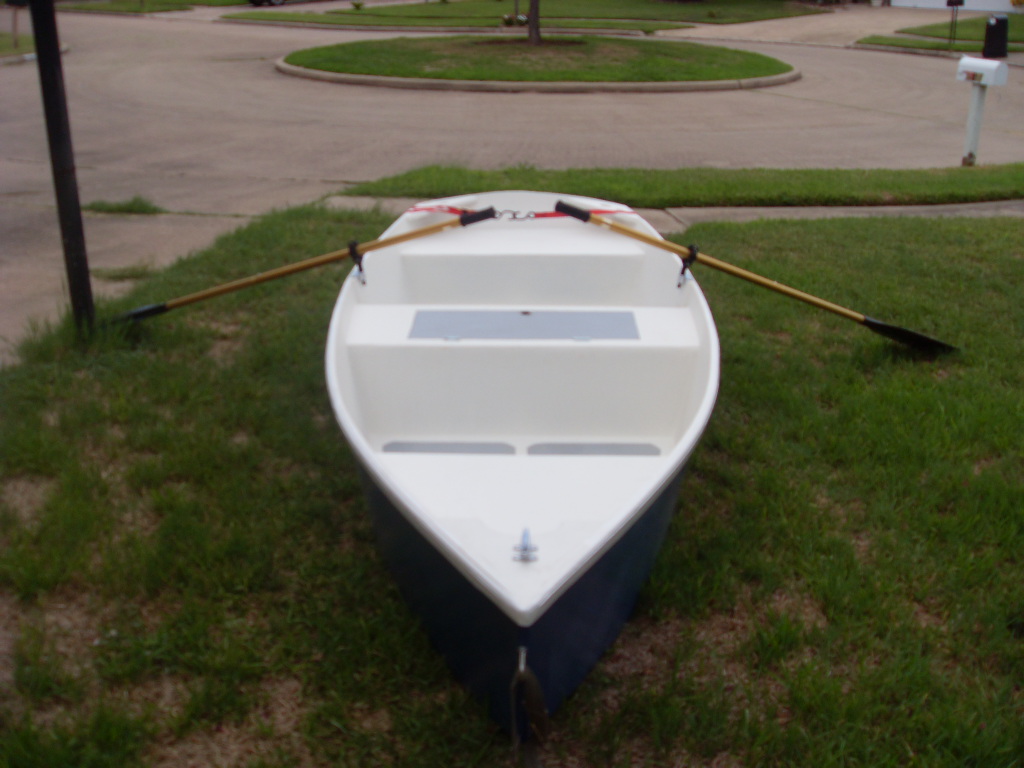
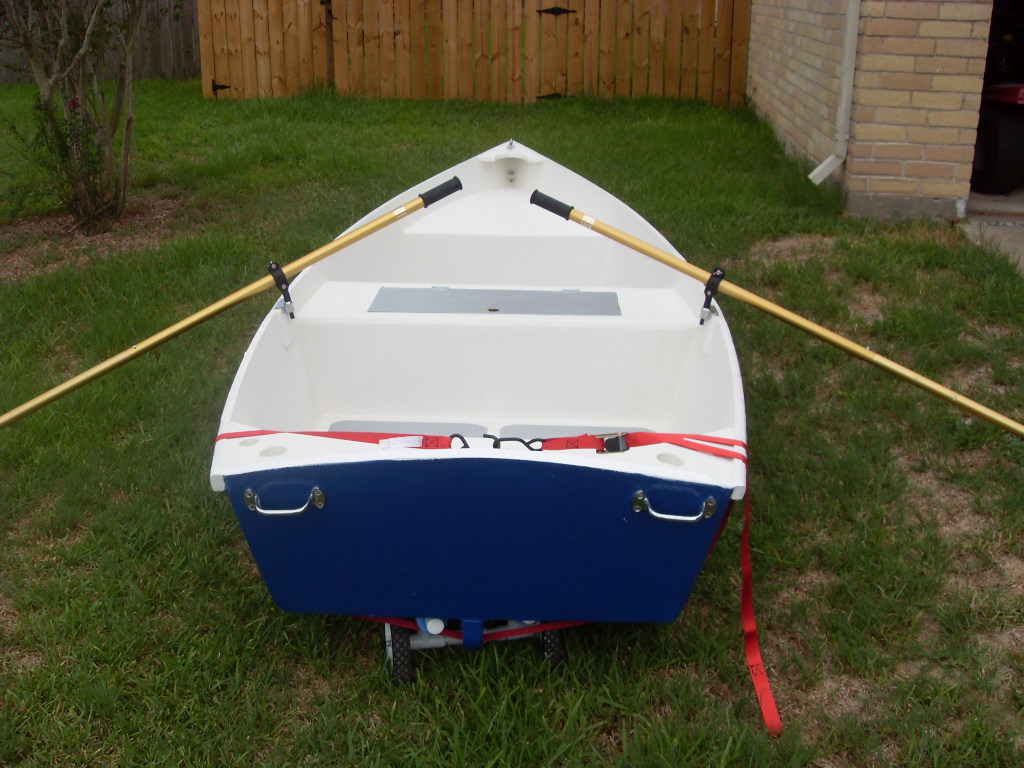
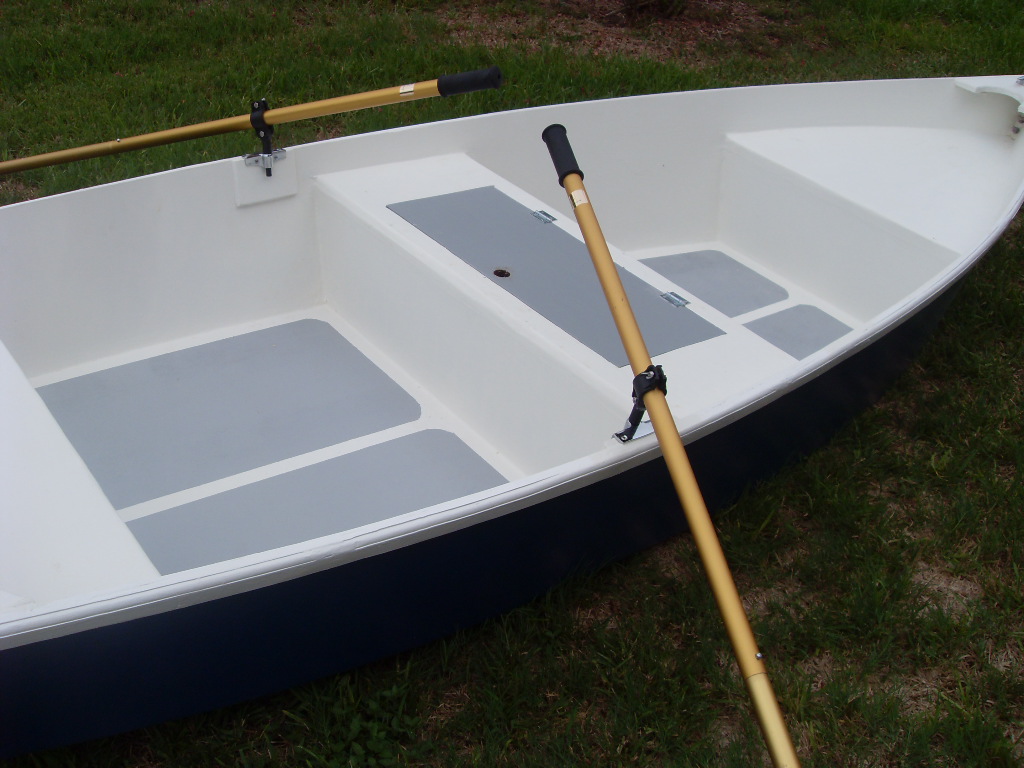
Well I finally am getting at a point to where i'm ready to splash her. I primed and painted after fairing only the edges of the fb tape. If you look closely you can notice some irregularties, but nothing that would bother me much. I installed the hardware, oar sockets, the hinges for the hatch, bow eye, handles on the transom, and a cleat. I found a pair of aluminum oxide oars on ebay for a good price. They are 6.5 feet long. I really wanted 7.5 as per reading a few posts here but I couldn't find them at an affordable price, and I ran really low of my epoxy to make my own. I like the gold color though.
I must say this has been a great build. It was something I never thought I could do. School's starting so my building days are long gone. But fortunately my fishing days are only beginning... I plan on putting her on the water first time Labor Day weekend if the weather permits. I'll be sure to post pics.
Thanks for all your help on here!
Re: MGuel FL12 Build!
Posted: Fri Aug 28, 2009 11:09 pm
by TomW
She looks nice and as long as your happy that is what matters!
Enjoy all your hard work.
Tom
Re: MGuel FL12 Build!
Posted: Sat Aug 29, 2009 10:43 am
by wegcagle
She's beautiful. Congrats.
Re: MGuel FL12 Build!
Posted: Mon Aug 31, 2009 9:41 am
by topwater
Very nice

Re: MGuel FL12 Build!
Posted: Mon Aug 31, 2009 9:51 am
by michaelwpayton
Great job... enjoy!
Re: MGuel FL12 Build!
Posted: Wed Sep 16, 2009 1:02 am
by JBing
she sure did turn out great! quick question for ya. Did you instsall a backing block on the inside of the hull for the bow eye? At first we decided not to install one on ours because we thought we wouldn't need it. But after having it on the road a few times installing one might ease some of my nerves.
Re: MGuel FL12 Build!
Posted: Wed Sep 16, 2009 3:32 pm
by mguel
No, I sure didn't. The eye I have is a two pronged eye. It's pretty sturdy and I did have a LOT of filler in the bow plus double the glass on the outside and inside. So, I'm not too worried..
Re: MGuel FL12 Build!
Posted: Sun Oct 04, 2009 5:20 pm
by mguel
We finally got to put the FL12 on the water this past Saturday! It was tricky not having a boat trailer. We had to transport the boat in my utility trailer with the motor mounted on the trailer frame! We decided to launch her at Bastrop Bayou on the ramp under the bridge down FM 2004 in Angleton, Texas. It's just a few miles near my parents. Once we got her in the water we put the motor on her and rowed her out towards the center. My dad got a little scared so he put on his life vest. Lol, i don't blame him...we don't know anything about boating. We weren't blessed with "sea legs"!
It took me a while to get her started but once she did she was great. We fished for a little bit with no luck but we really just wanted to test the motor out. I was worried the 7.5 hp would be too heavy but it wasn't. She handled it fine. We had to call it a day early cause of the incoming rain. Nevertheless, the boat and motor are awesome!!
I didn't get to take any pictures of the boat while in motion, from a land angle, but I'll try next time!

Dad hadn't fished in YEARS!
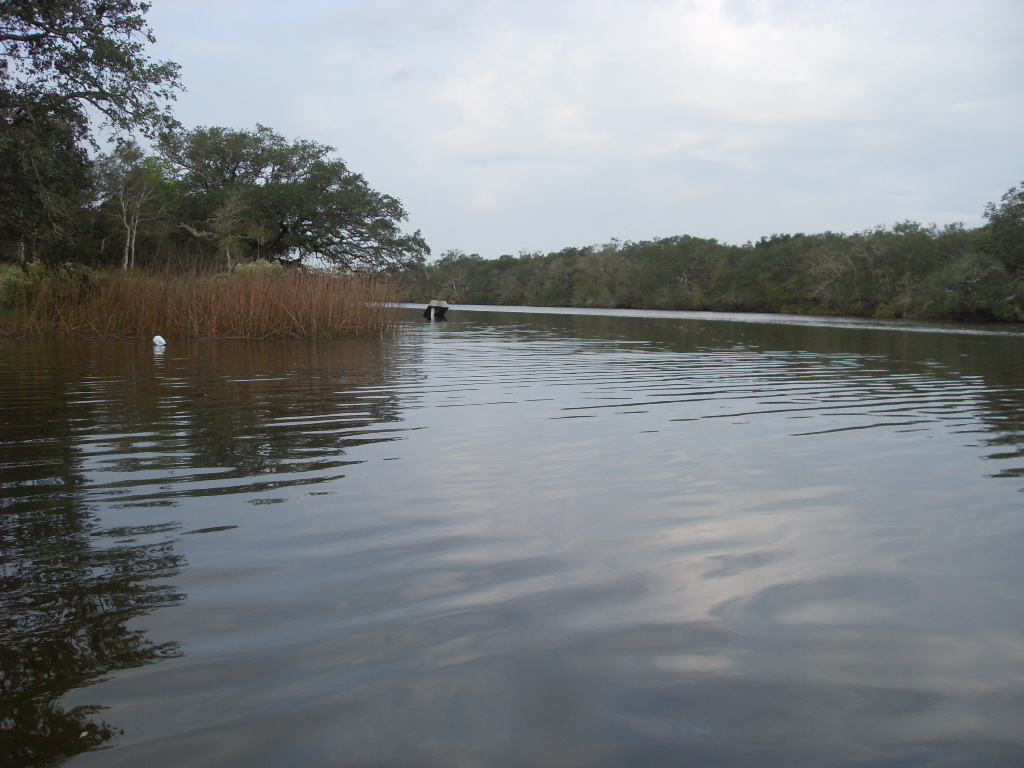
Bastrop Bayou...very beatuiful..but I wouldn't eat the fish!

Me enjoying my FL12, motor, and great company!
Re: MGuel FL12 Build!
Posted: Sun Oct 04, 2009 7:25 pm
by RickW
"Me enjoying my FL12, motor, and great company!"
Amen brother!
perfect combination to explore some of those bayou's and make for some great times. btw, the boat's beautiful, nice job.