Page 1 of 1
Optimist Club Racer
Posted: Mon Nov 02, 2009 4:06 pm
by tech_support
This thread will document the building of our Optimist Club Racer.
UPDATE:
http://www.youtube.com/watch?v=jwVlLMeB ... re=feedbul
I will insert some of the pictures from the Club Racer gallery into this thread, but there are many more pictures here..
http://gallery.bateau2.com/thumbnails.php?album=1096
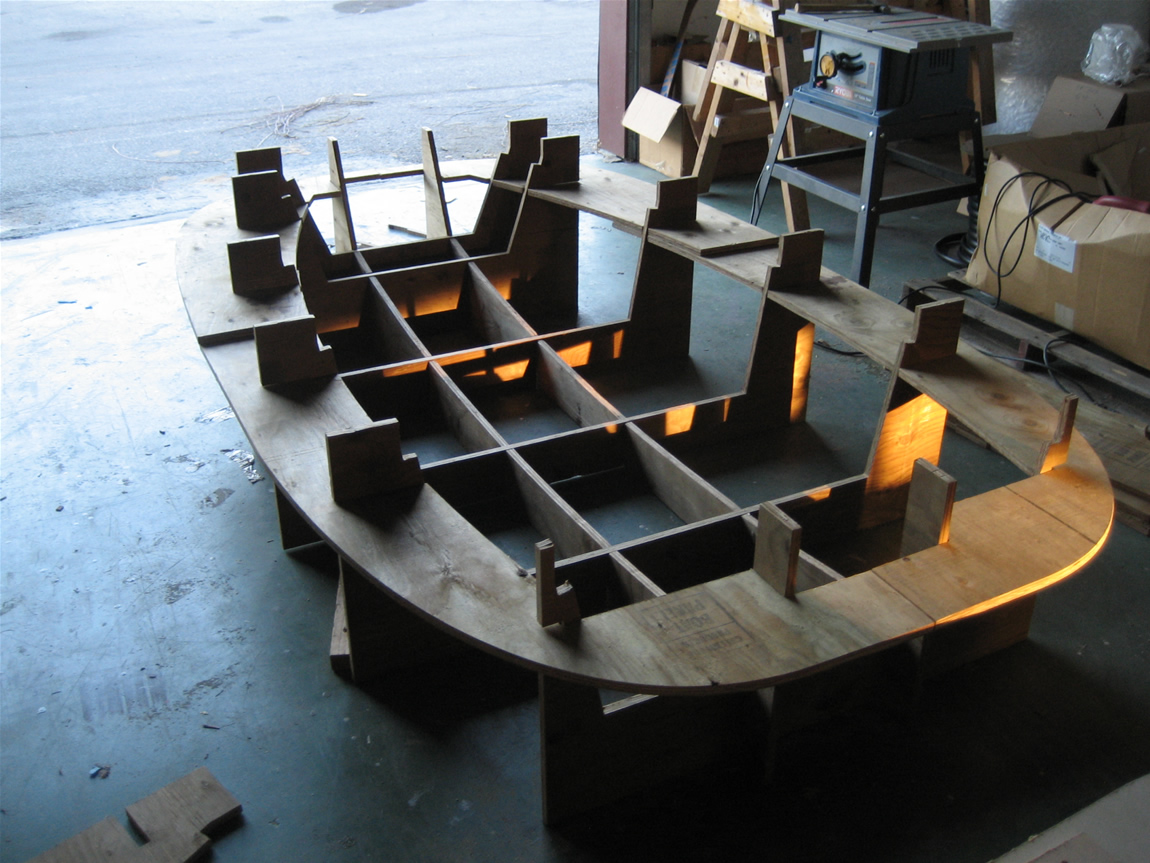
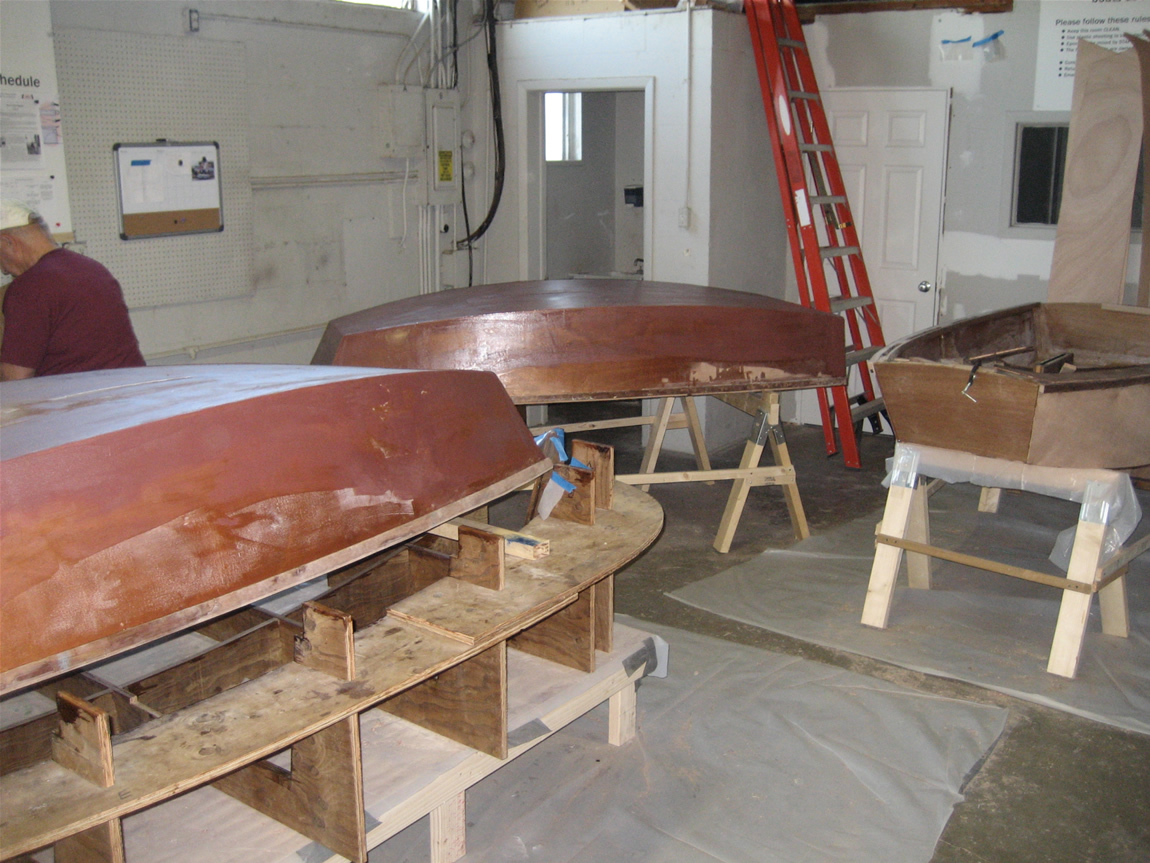
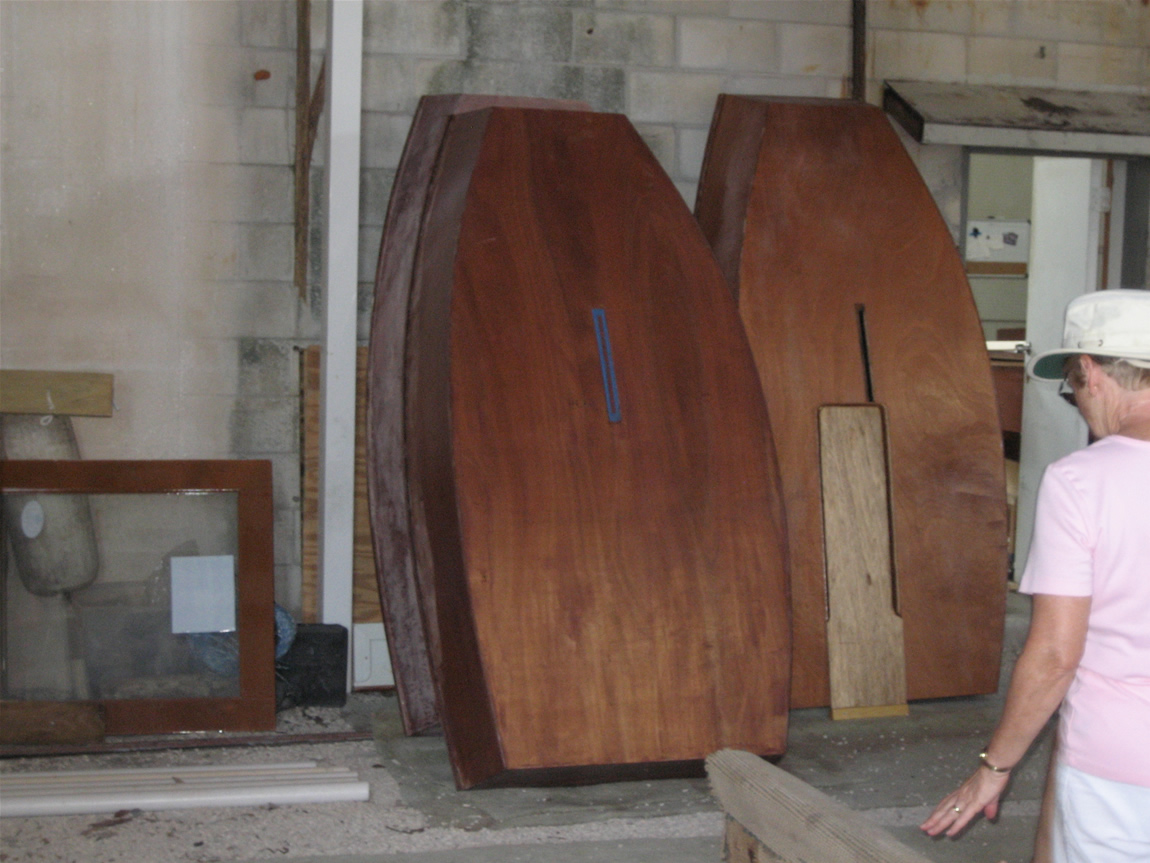
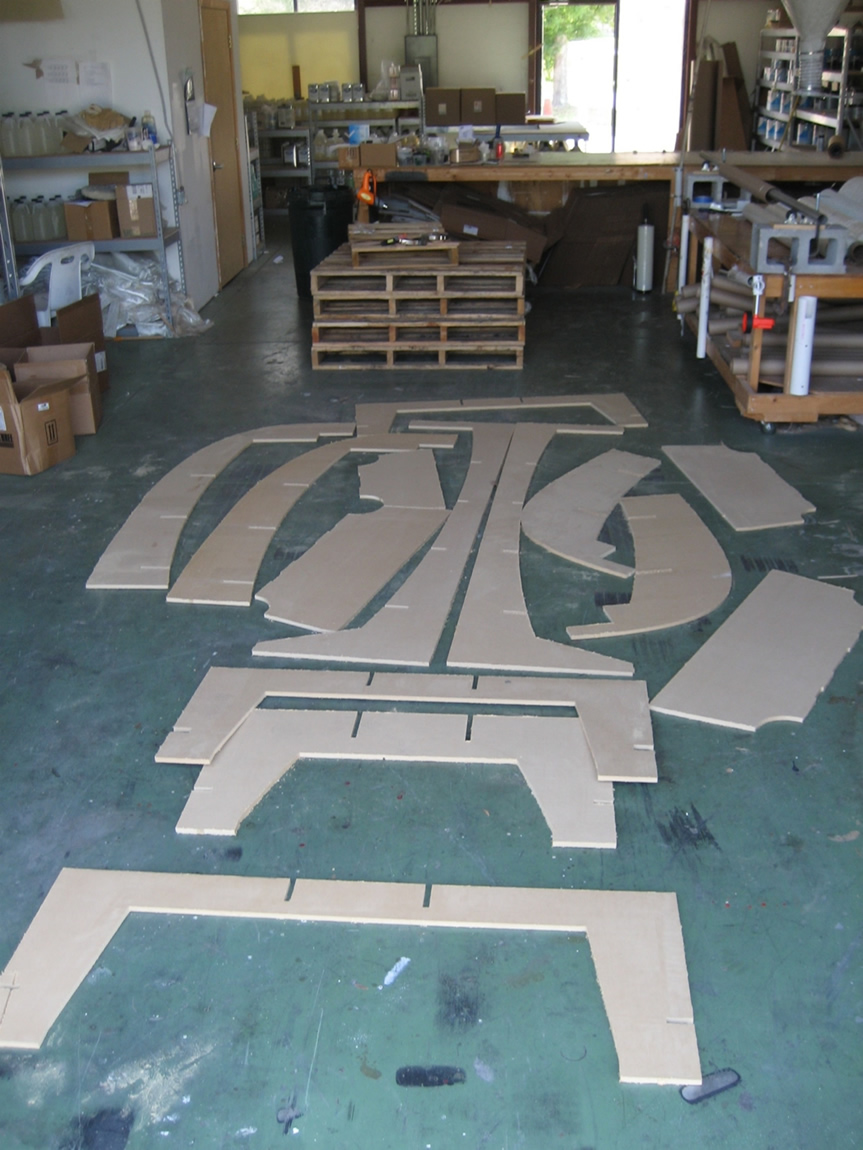
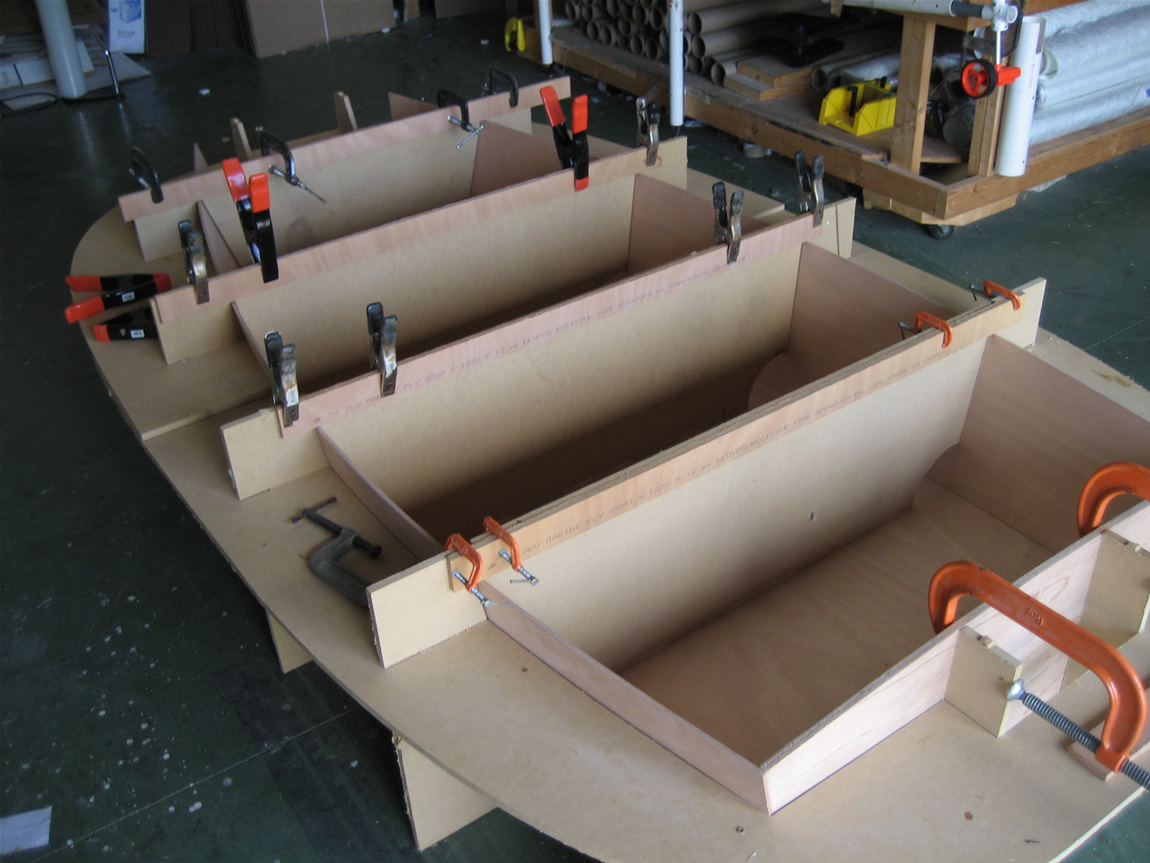
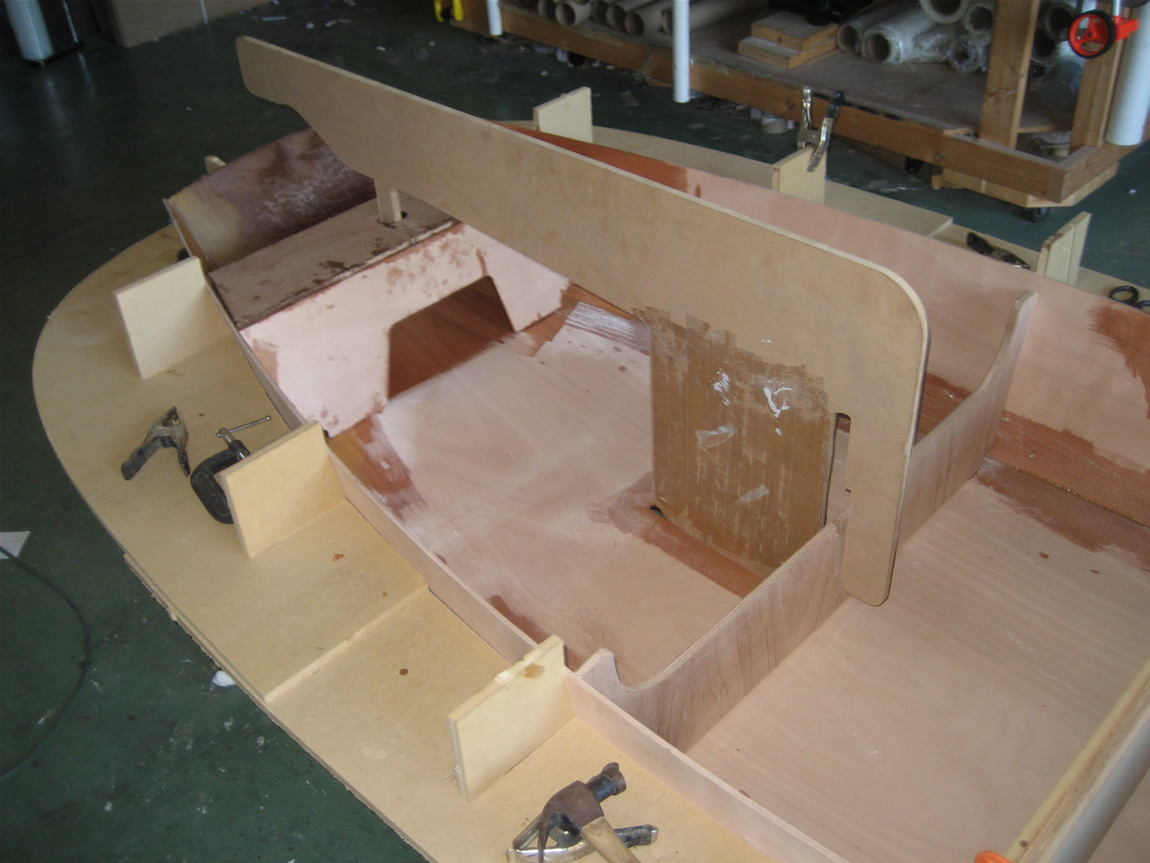
We start with a basket mold which is cut on our CNC machine and is self-aligning. This mold also has inside wolds which force side and bottom panels perfectly into shape. The Club Racer can be built by anyone, and does not require the basket mold. The purpose of the basket mold is to allow sailing clubs or schools to build many boats at a time with minimal setup required. basket mold will be sold separately from the Club Racer Kits.
mold parts
Basket mold assembled (one inside mold for picture)

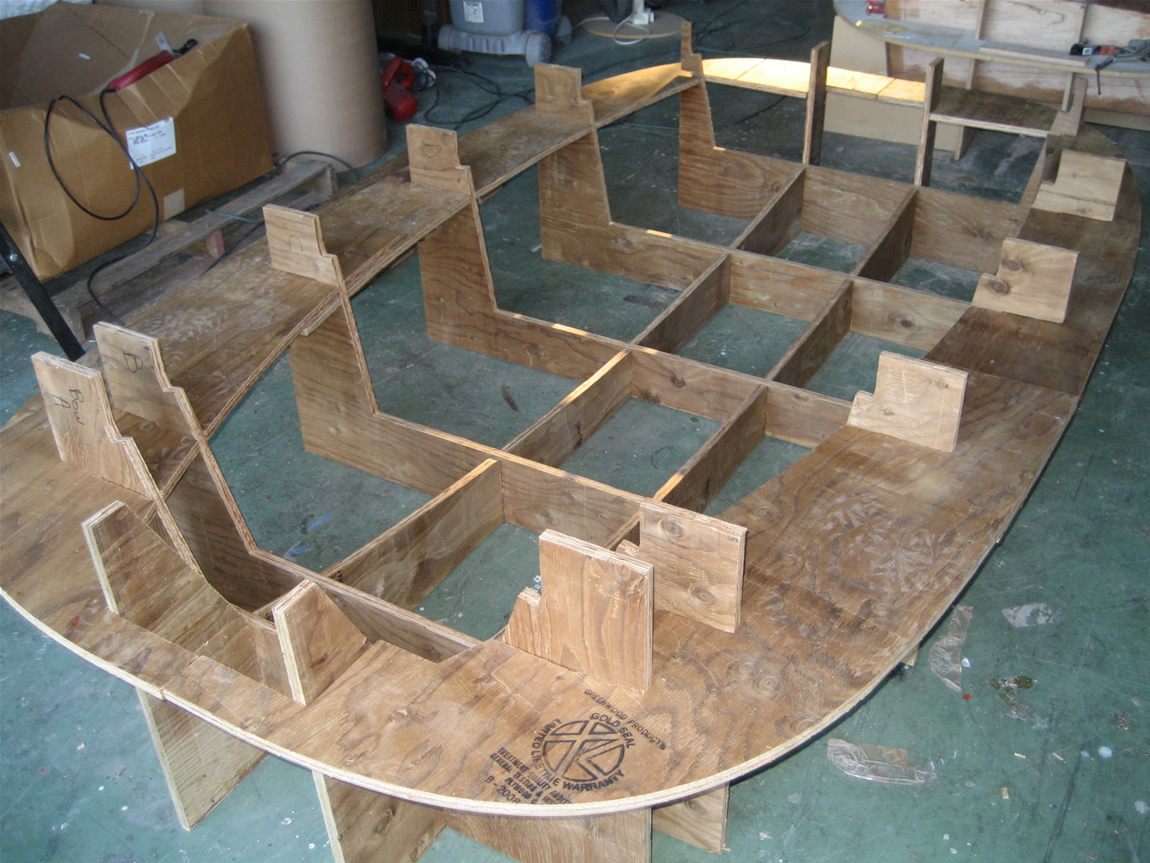
side and bottom panels placed into basket mold
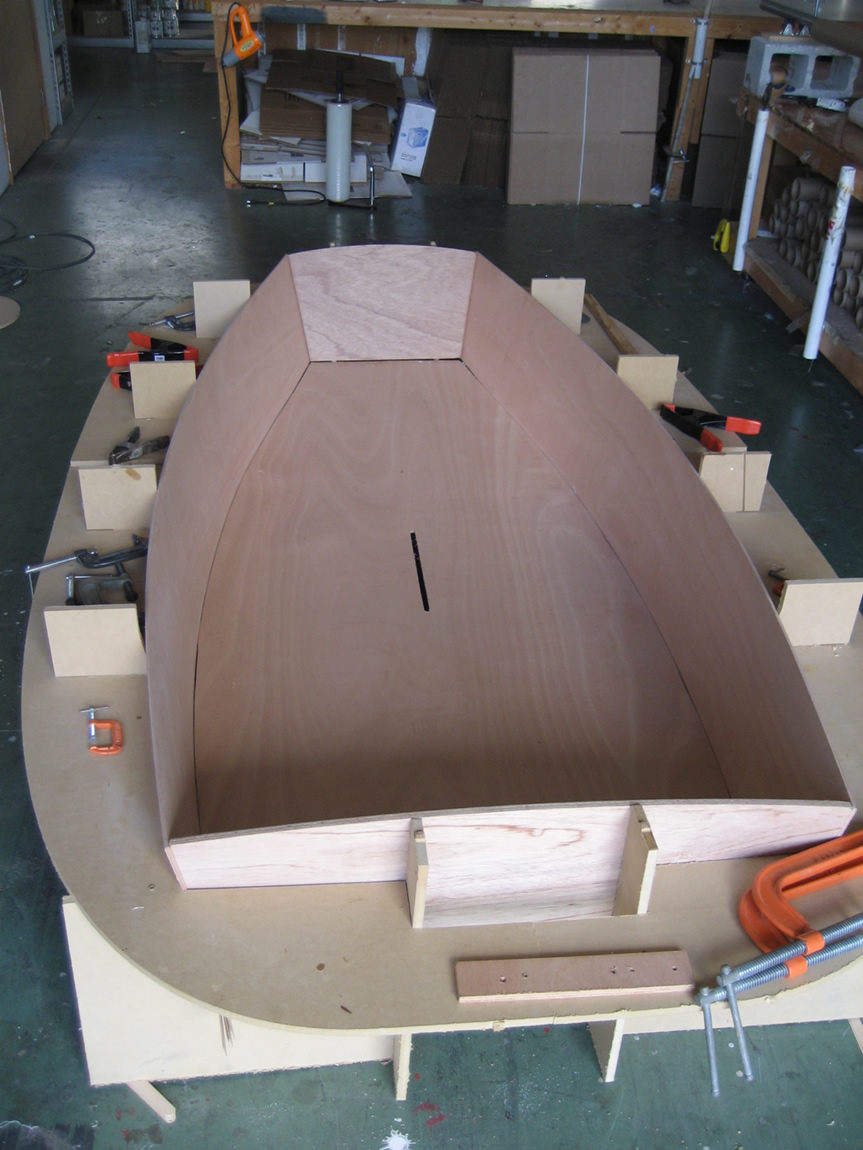
insert male molds
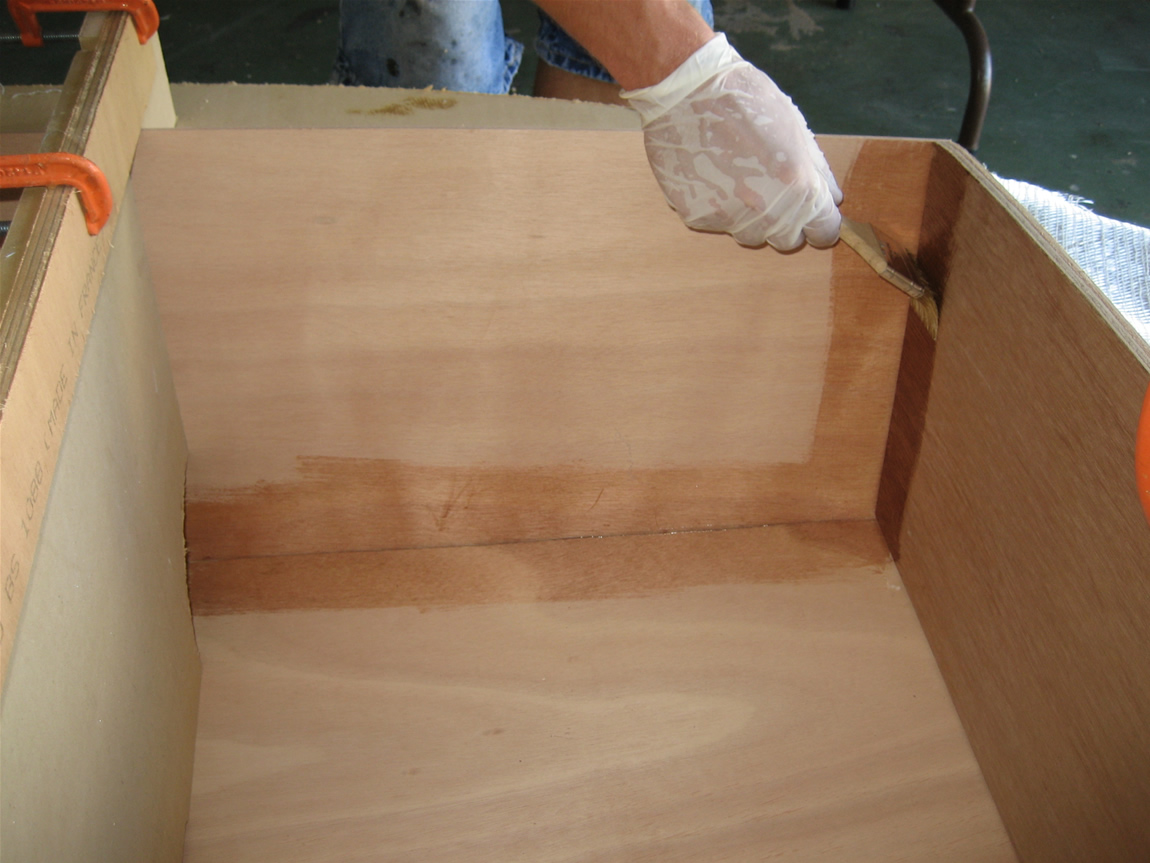
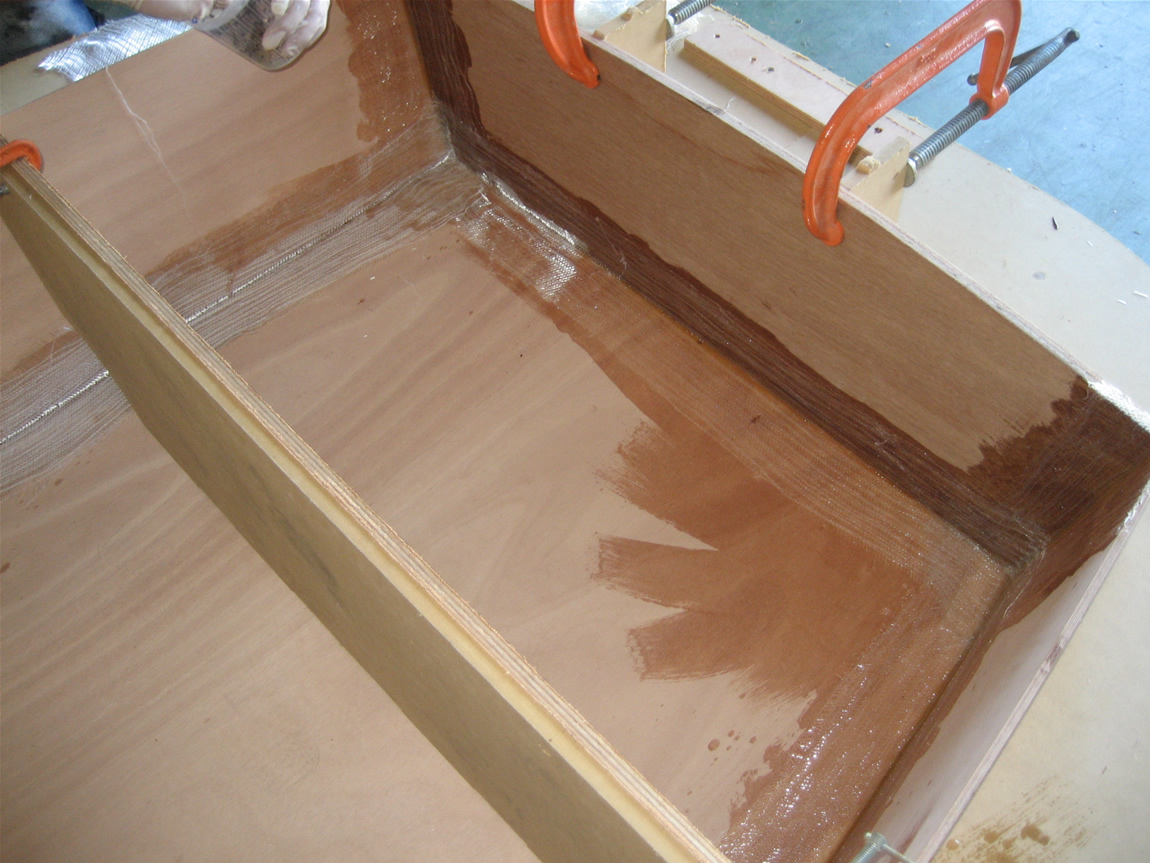
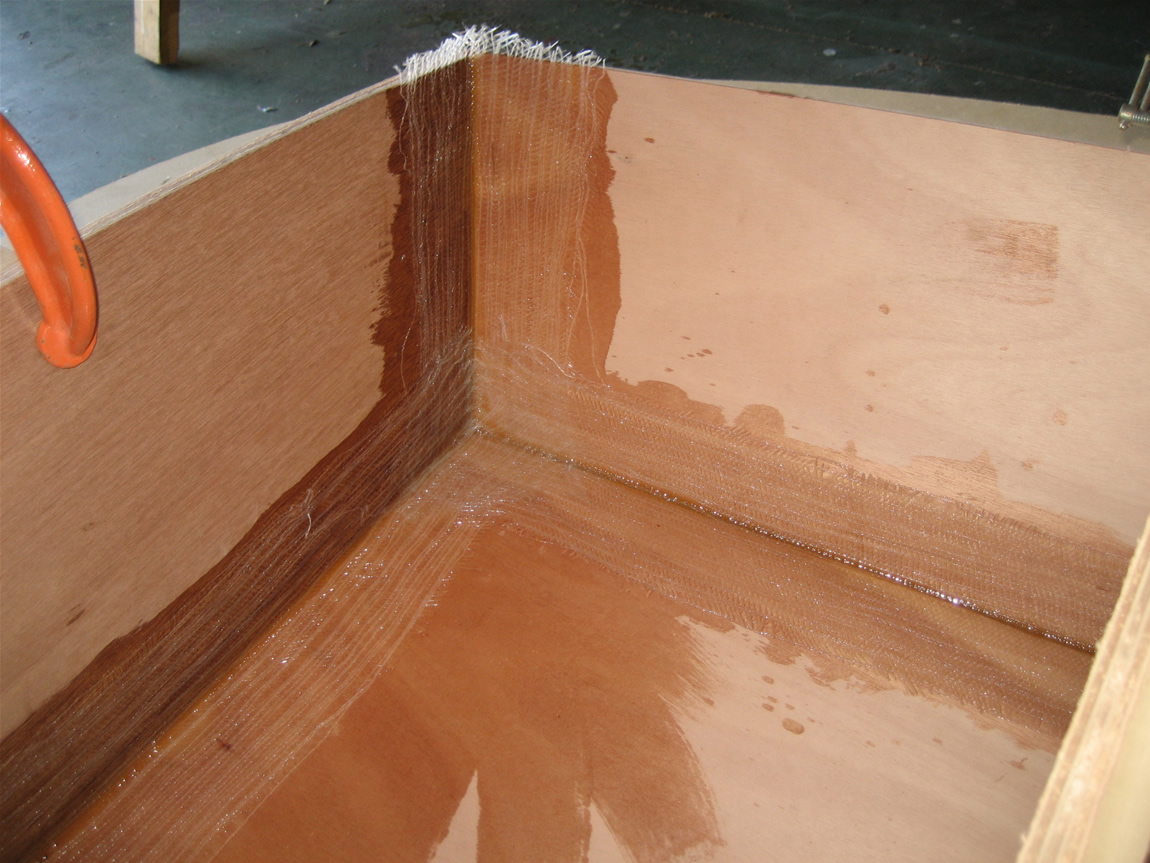
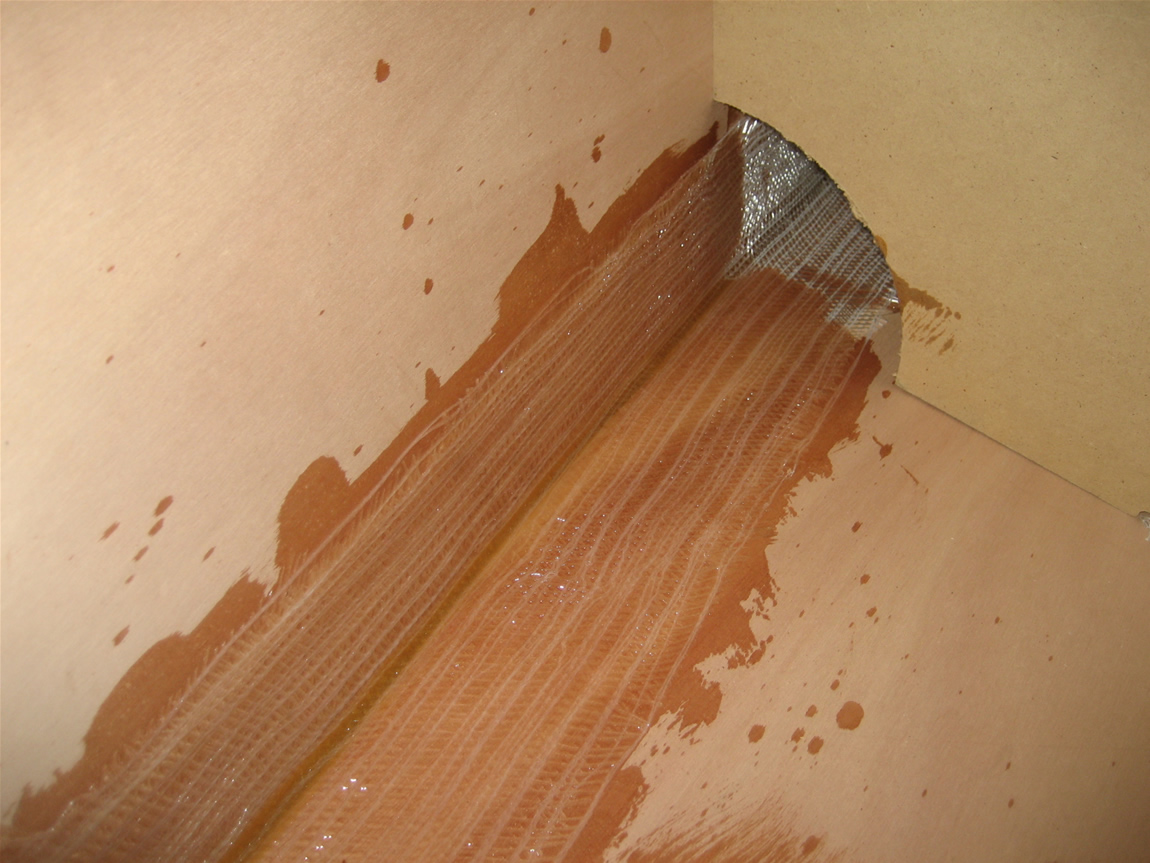
Coat joint area with epoxy before laying down fillet
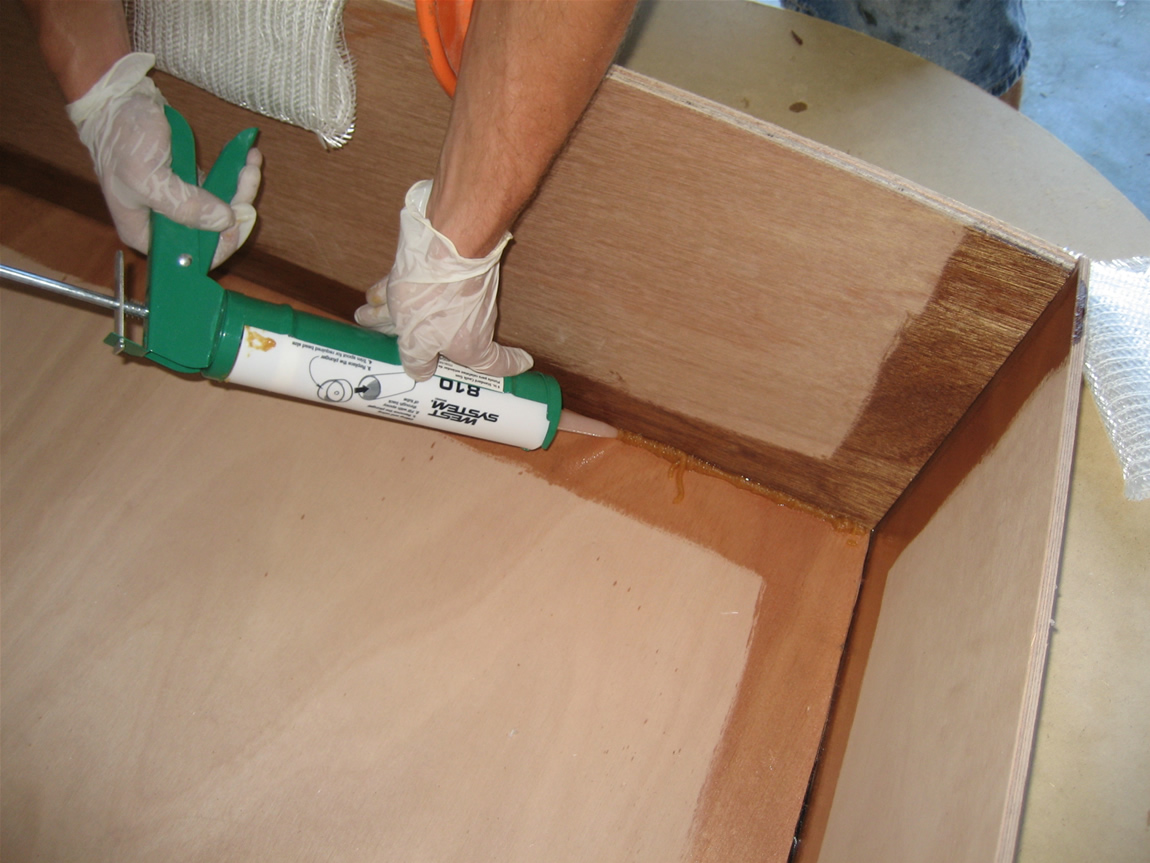
use caulk tube to apply a bead of epoxy fillet putty, immediately smooth out bead into fillet shape using approximately 3/8" radius tool (about the size of a tongue depressor)
While fillet is still malleable (but not soft) lay your biaxial tape into the joints. The holes in the chine corner of the molds allows for tape to be passed from transom to transom

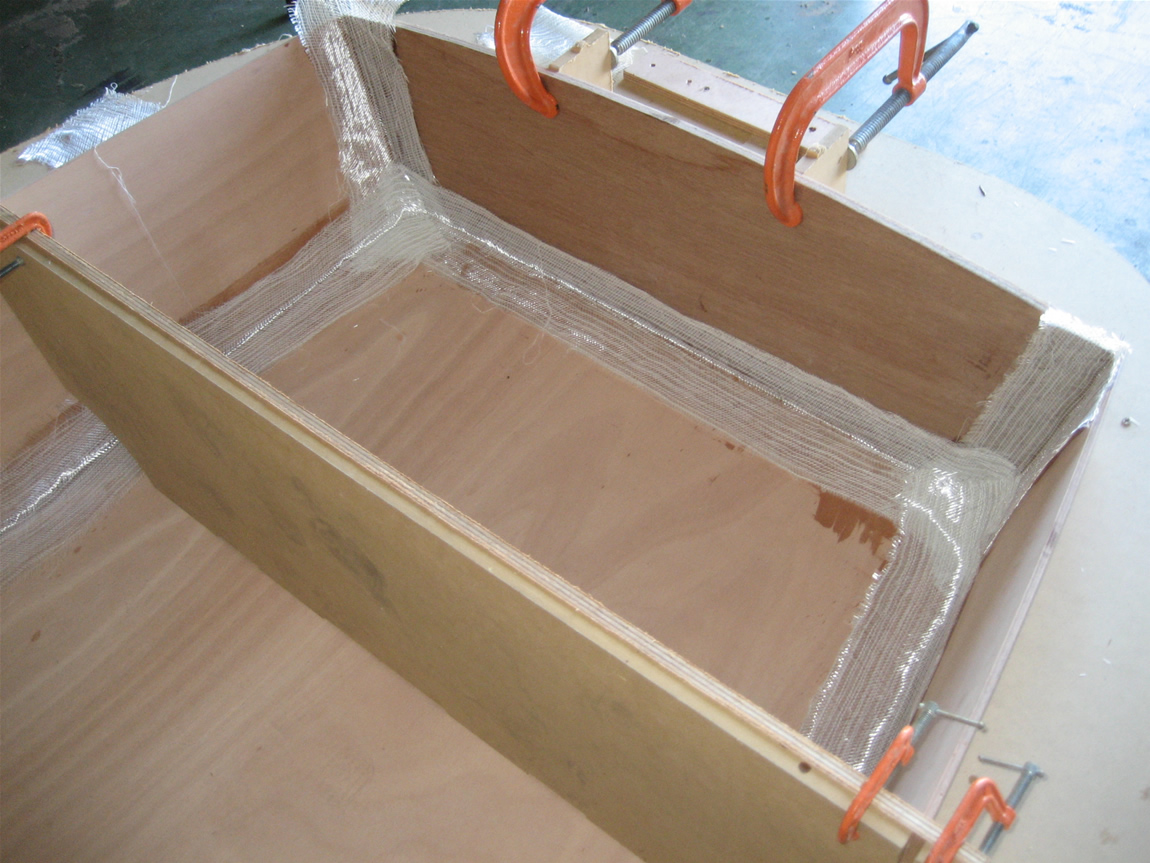
Wetting out the fiberglass tape
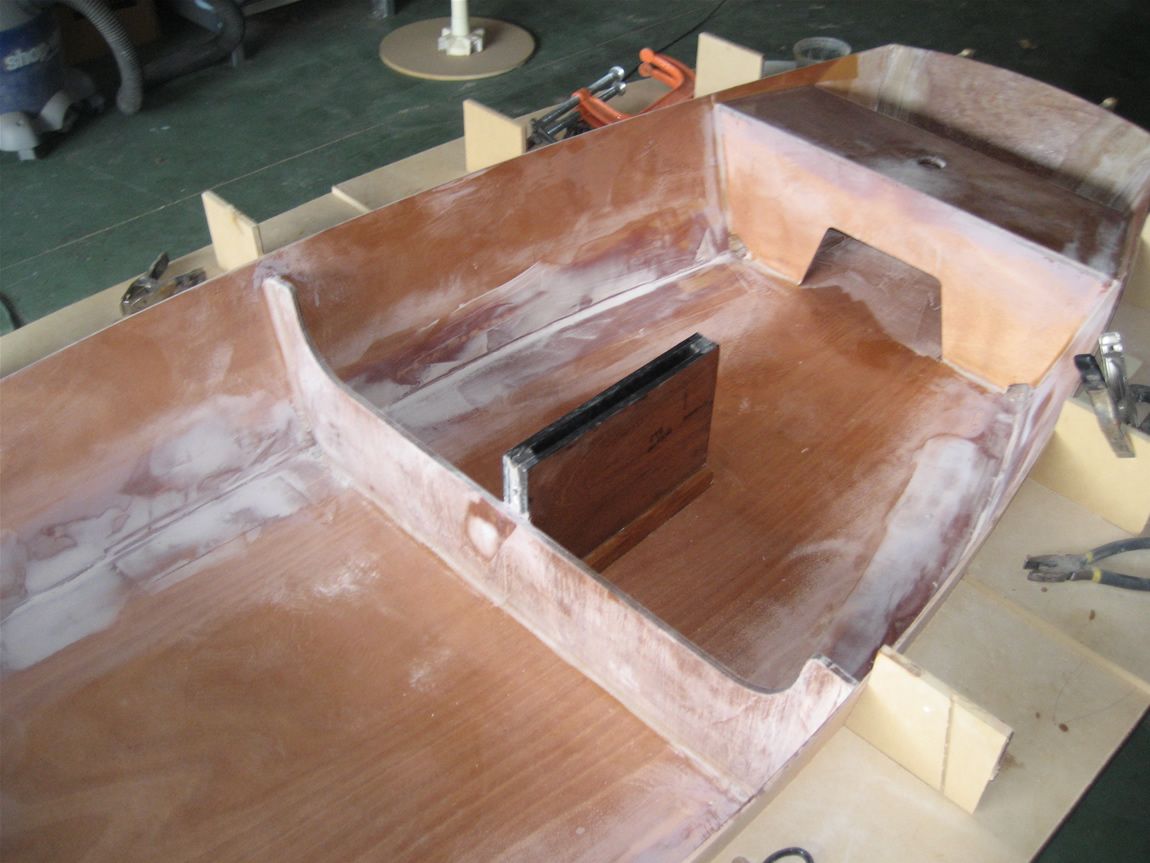
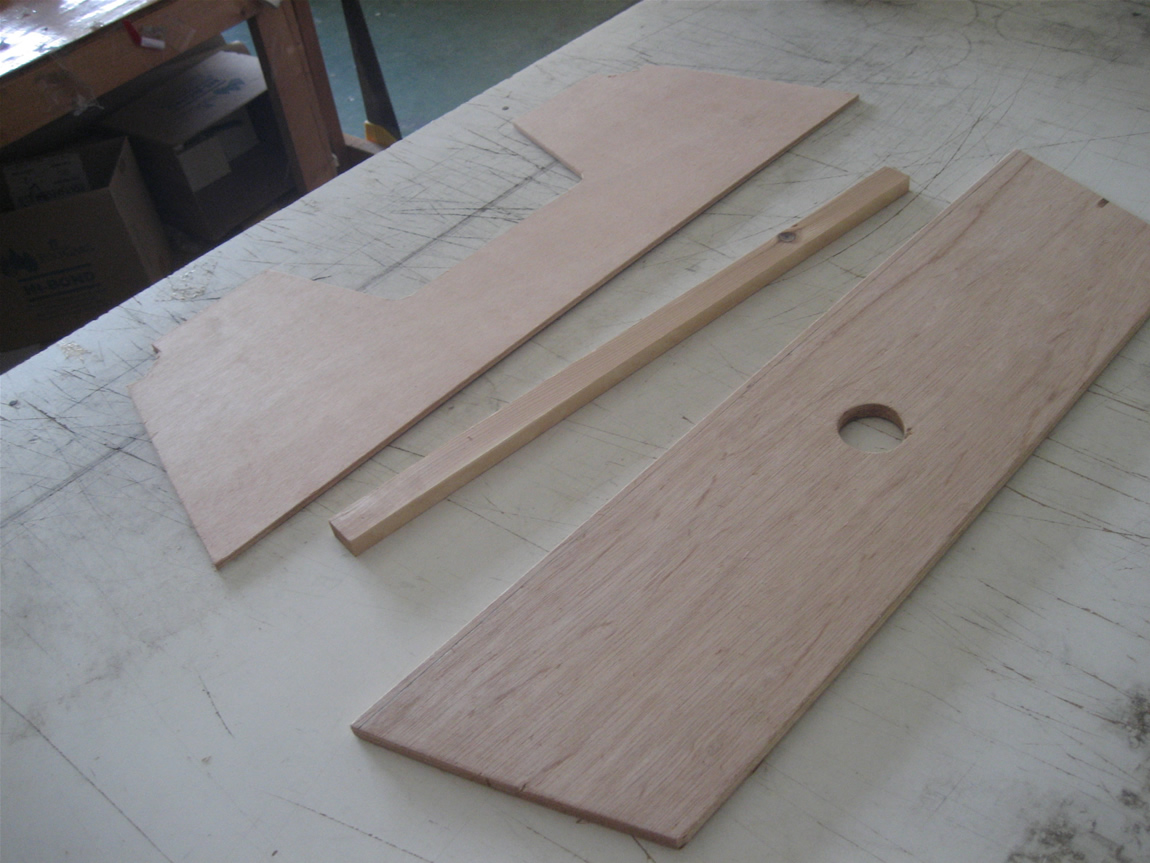
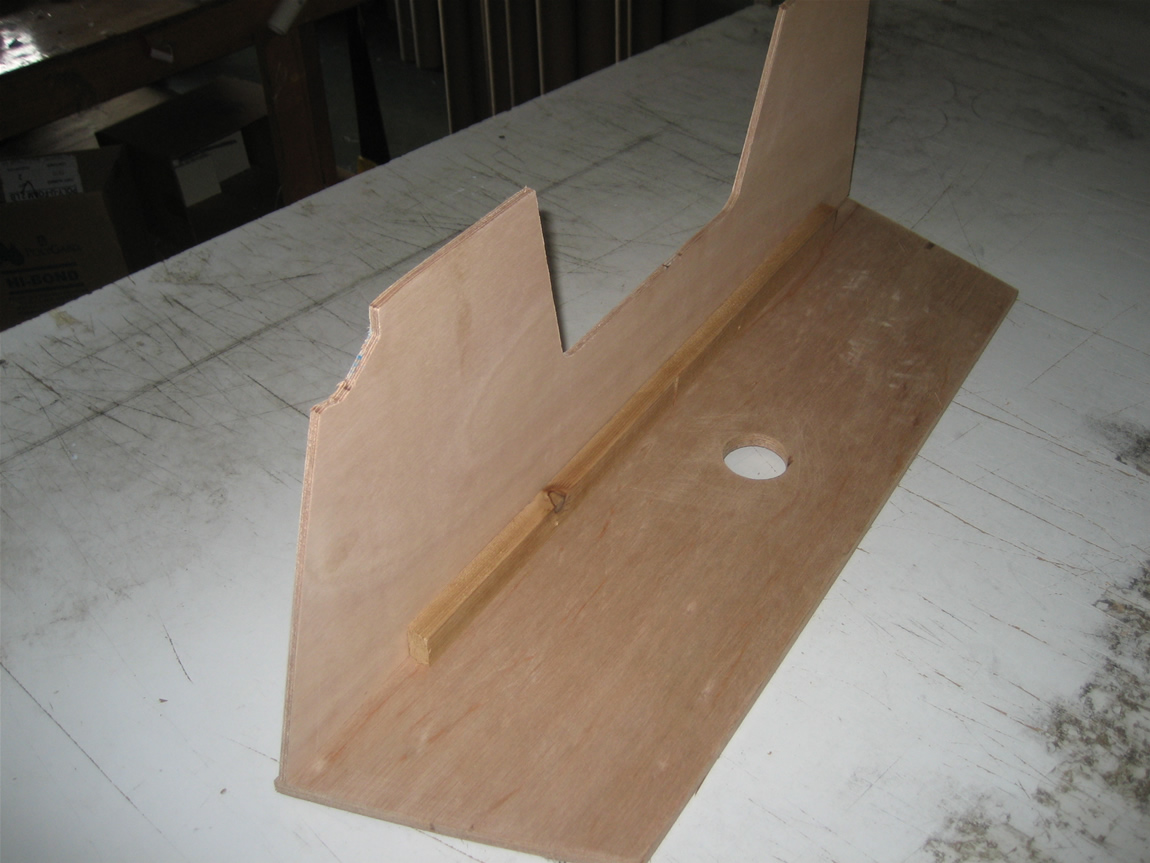
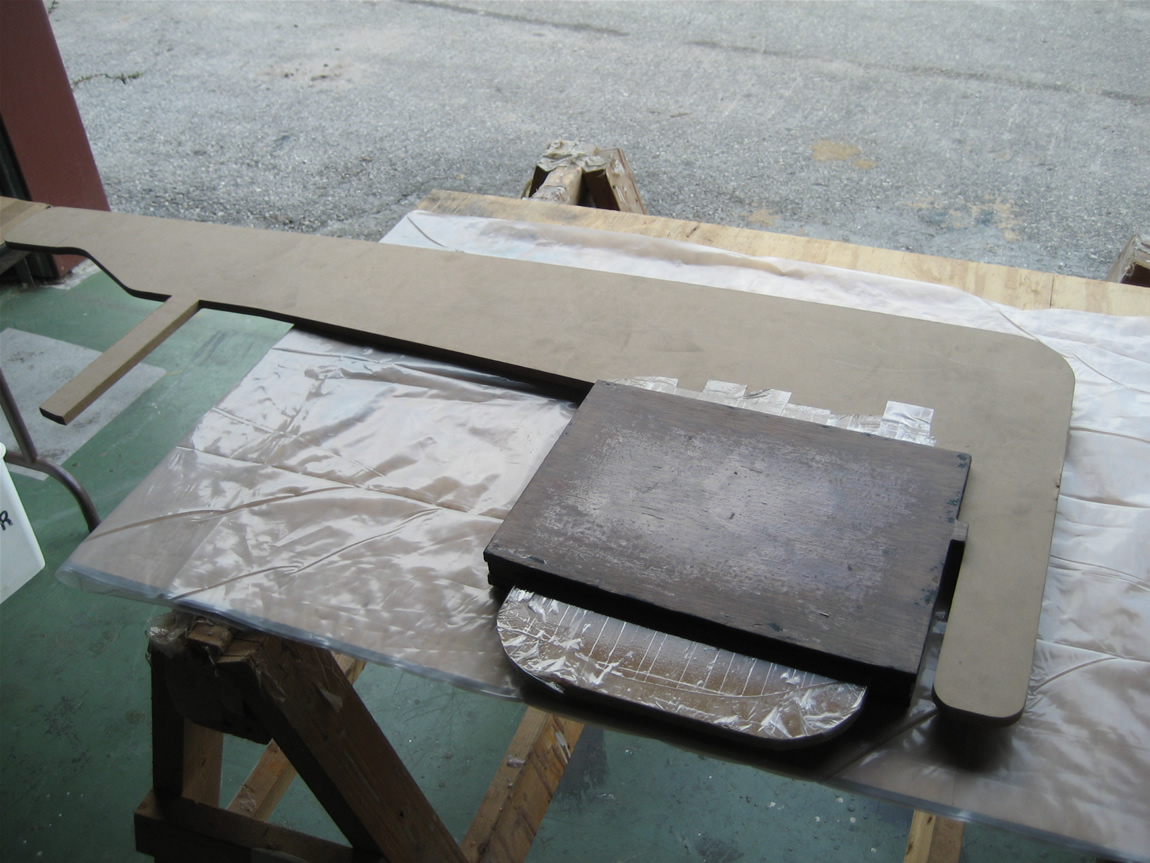
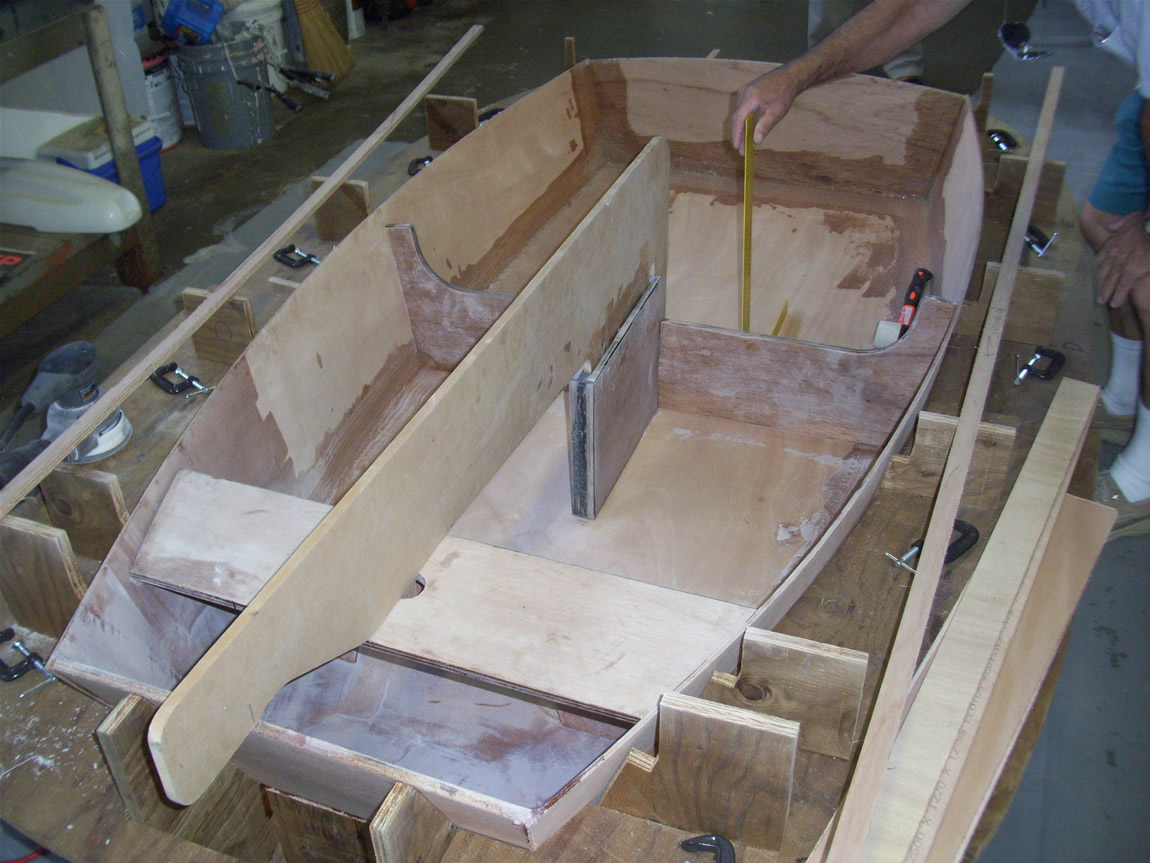
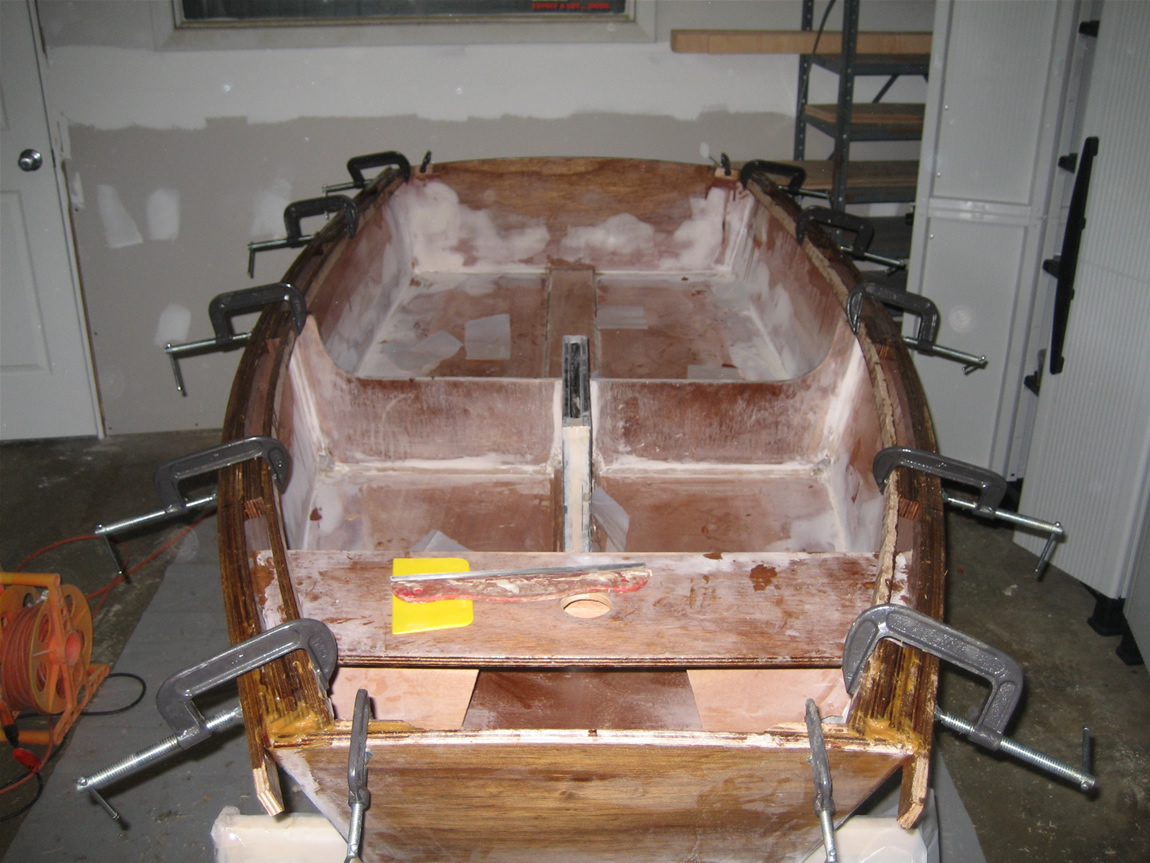
The boat now sits in the mold overnight to allow glass joint to cure. In the mean time we started making the dagger board case and the mast partner frame.
Mast partner frame is three pieces: the partner, frame, and cleat
We dry fit all the parts and hold them together with drywall screws (pre-drill pilot holes so you do not split the plywood)
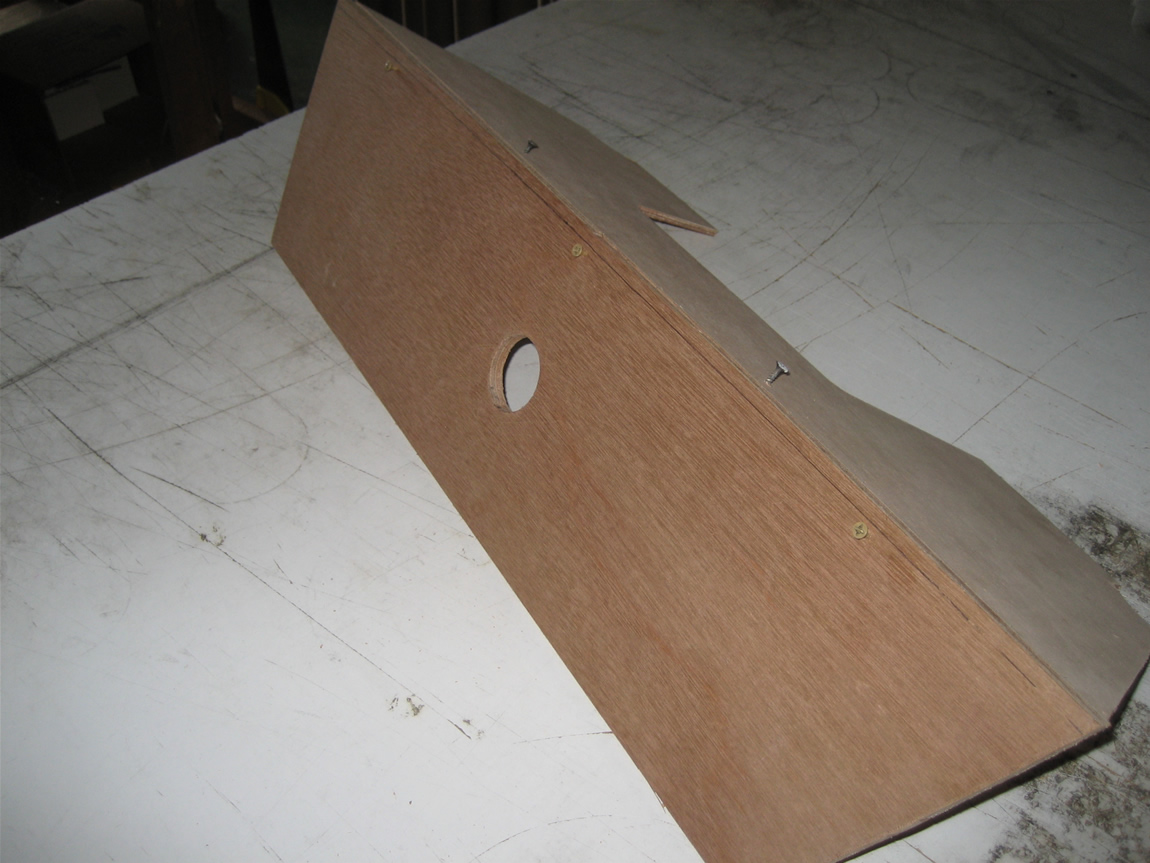
epoxy glued together. we back out the screws once the epoxy cures. Make sure frame and partner are at a 90 degree angle
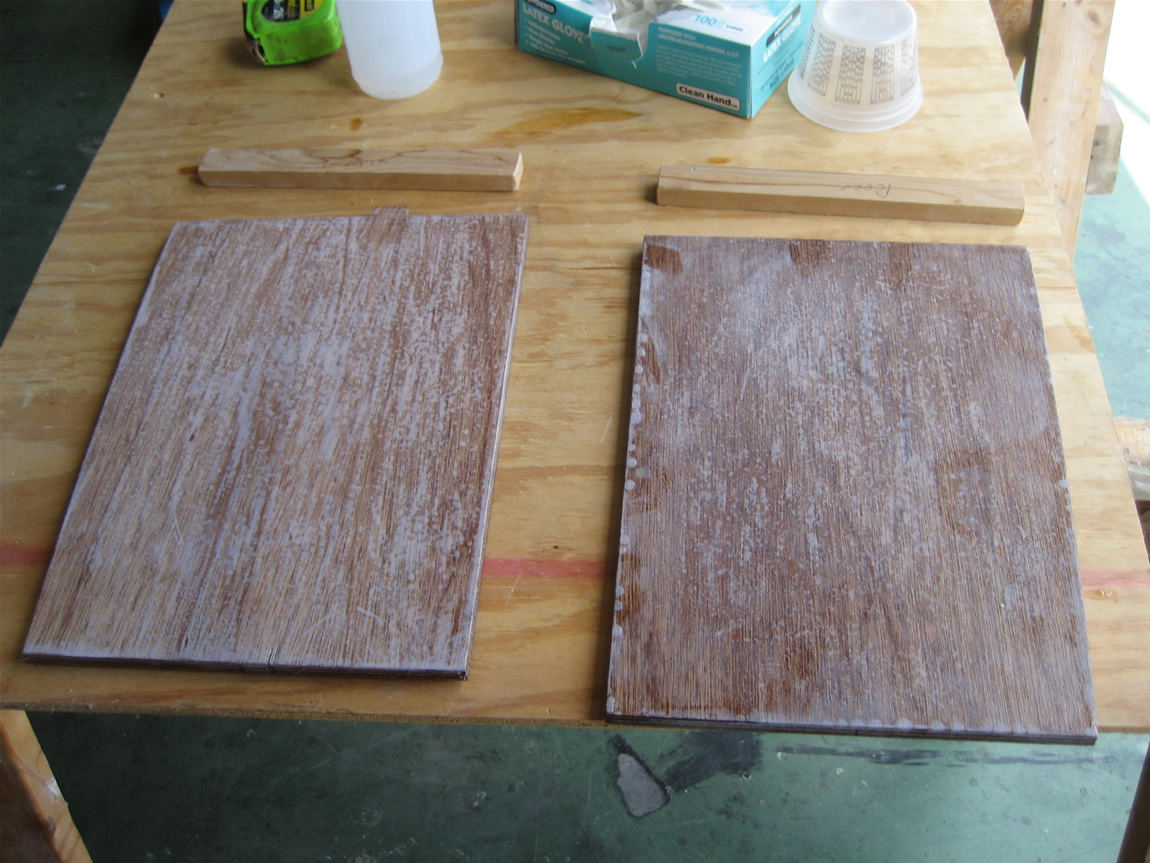
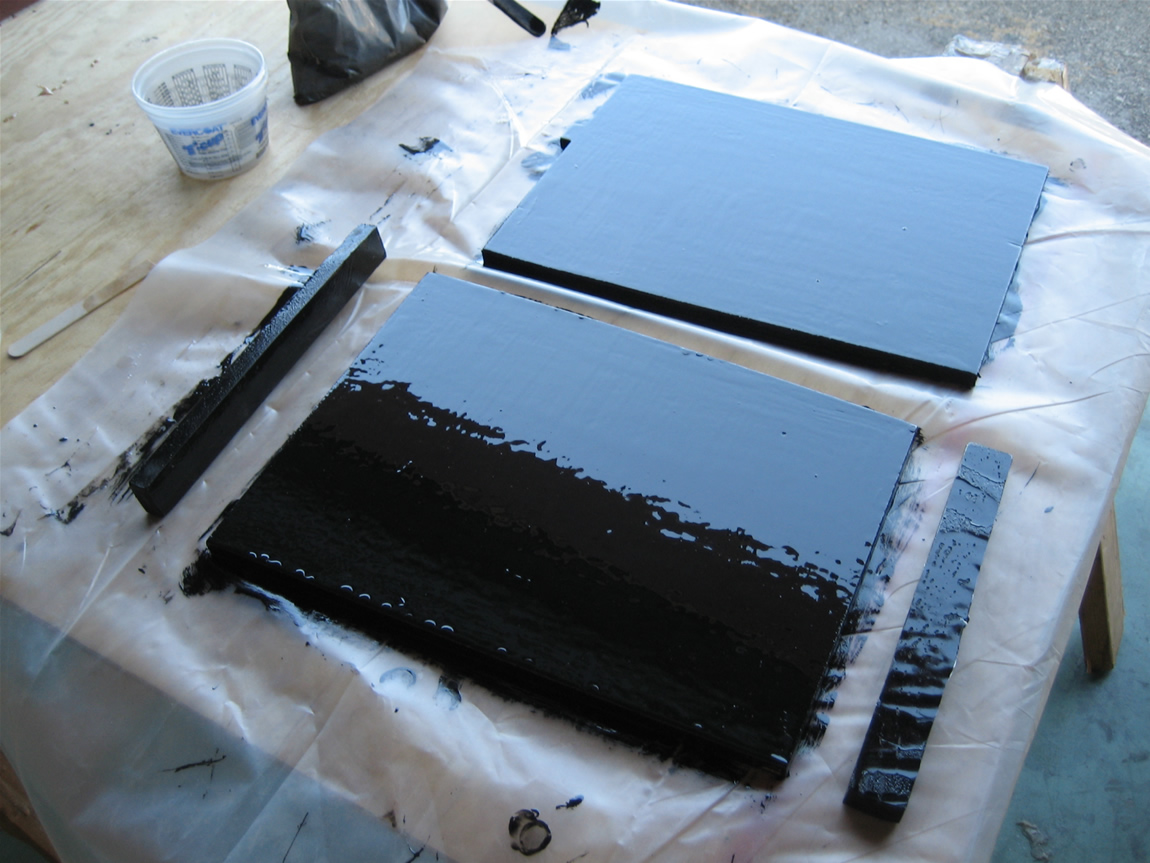
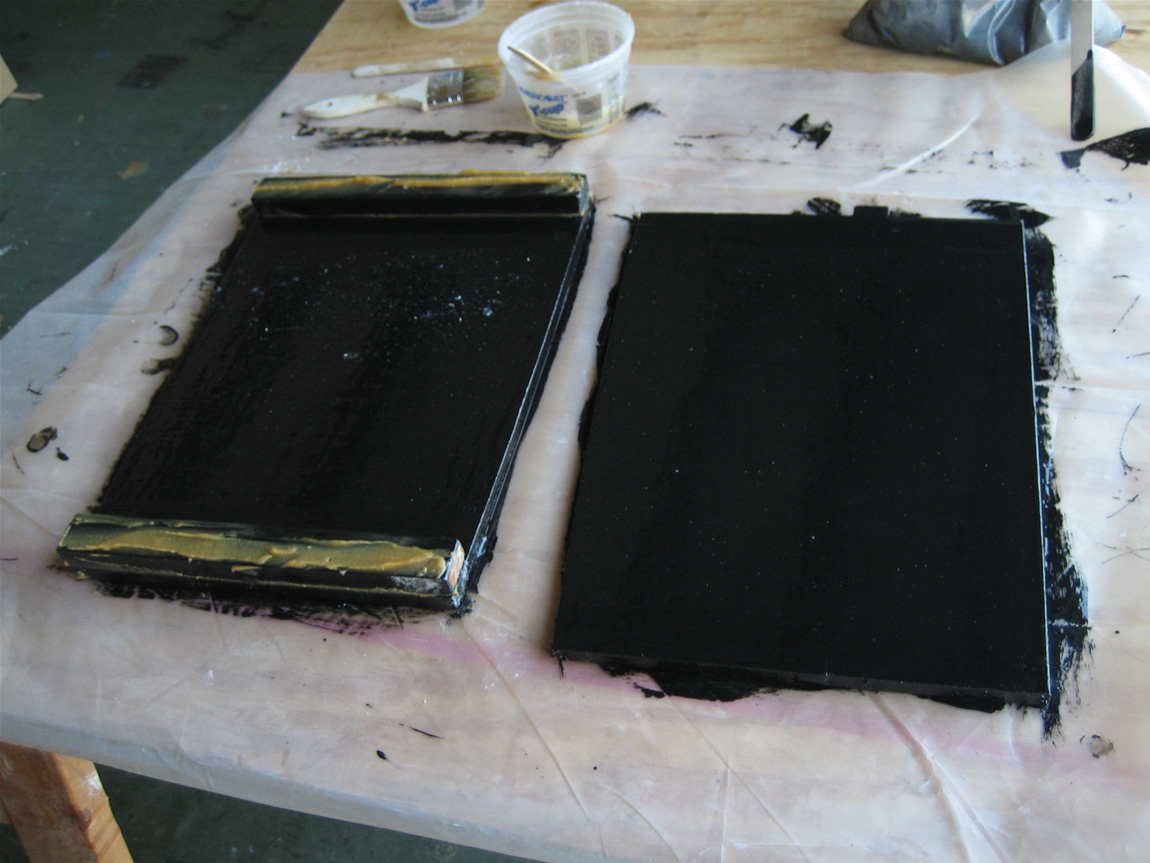
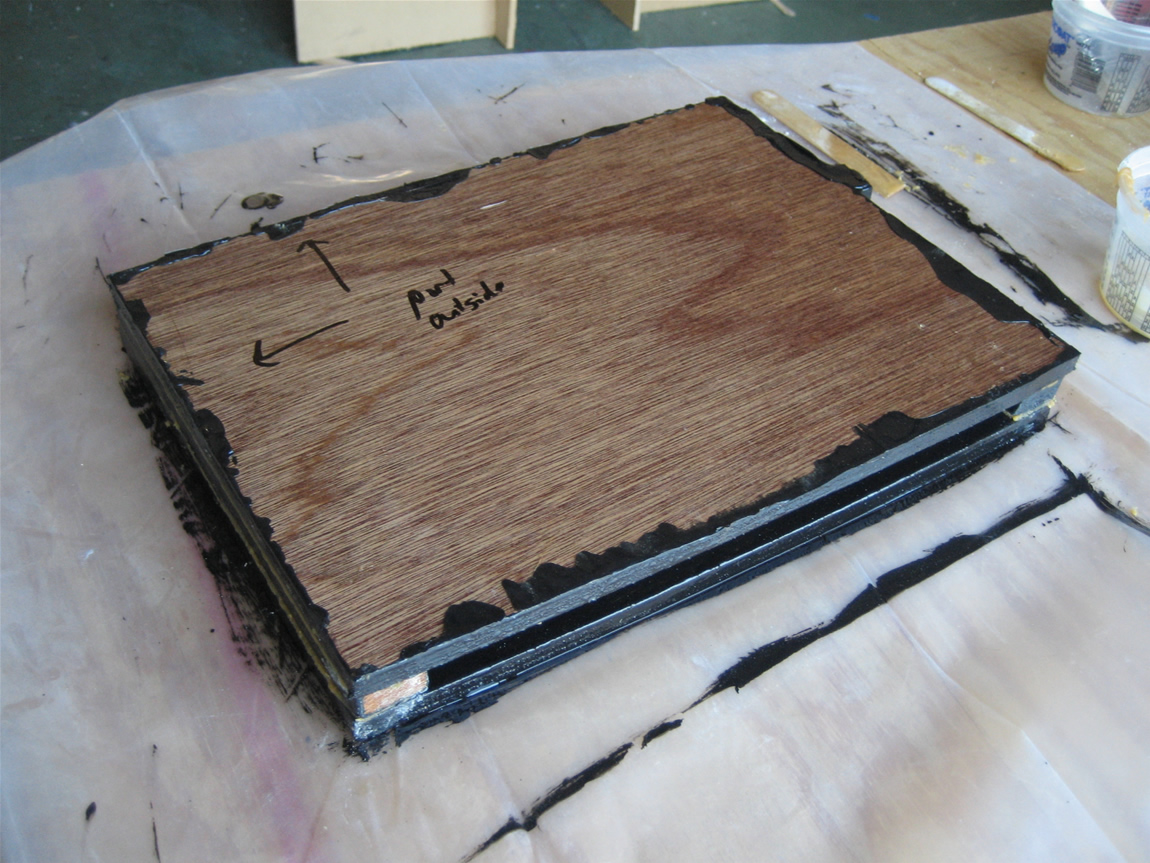
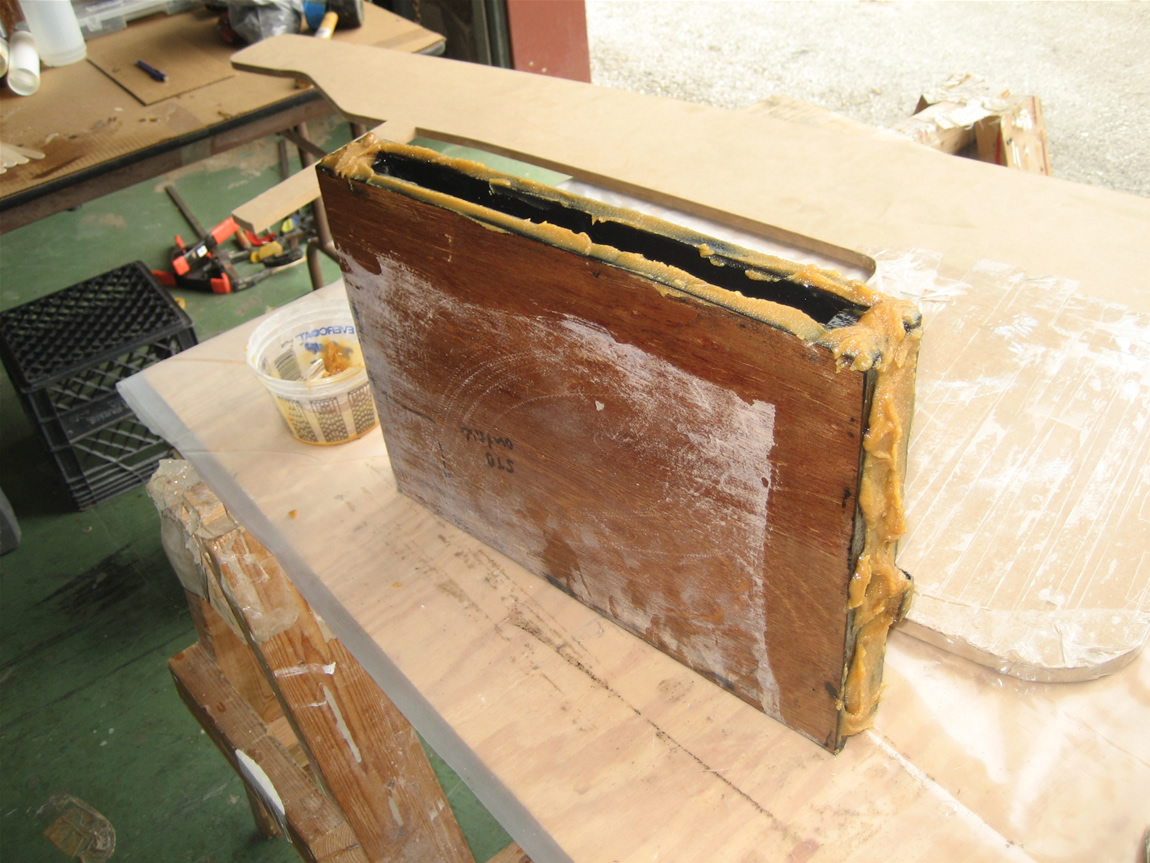
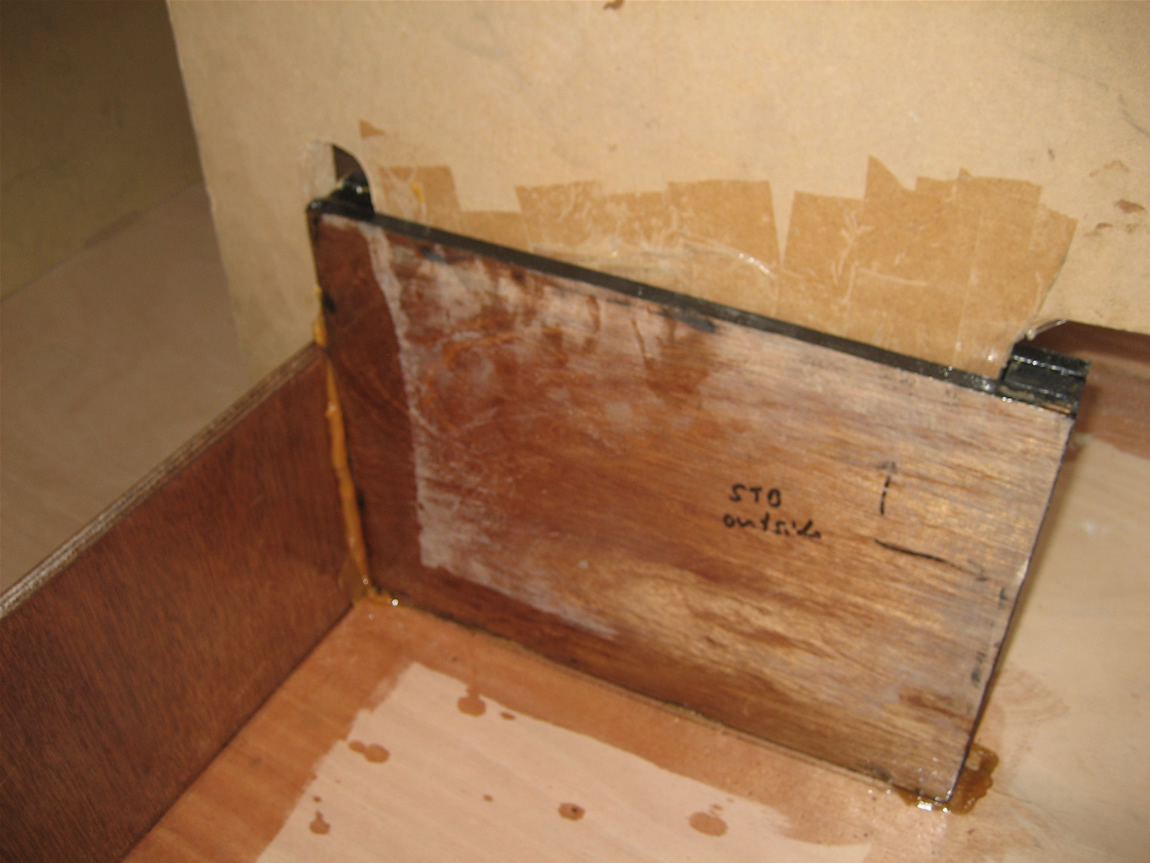
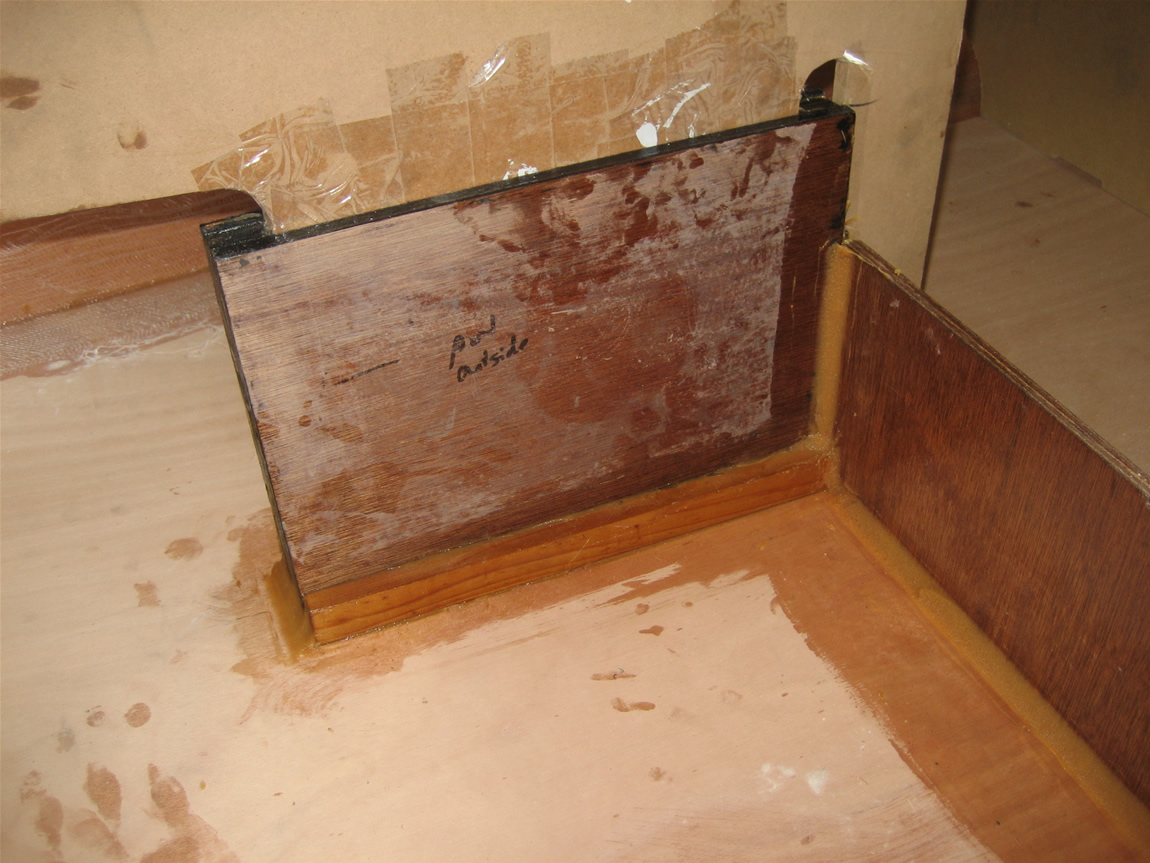
dagger board case:
sides and cleats are epoxy coated, the a second thicker coat of epoxy/graphite is applied to the inside surface (makes case super slick and abrasion resistant)...
Re: Optimist Club Racer
Posted: Mon Nov 02, 2009 5:50 pm
by Justin Pipkorn
The pictures are great...high quality. I think this level of detail will help new builders...and even some old ones.
The idea of coating the inside of the daggerboard trunk with graphite filled epoxy is a good idea. I have a little graphite left over and will use the idea in my new Otter/Lissa build.
Re: Optimist Club Racer
Posted: Wed Nov 04, 2009 2:48 pm
by tech_support
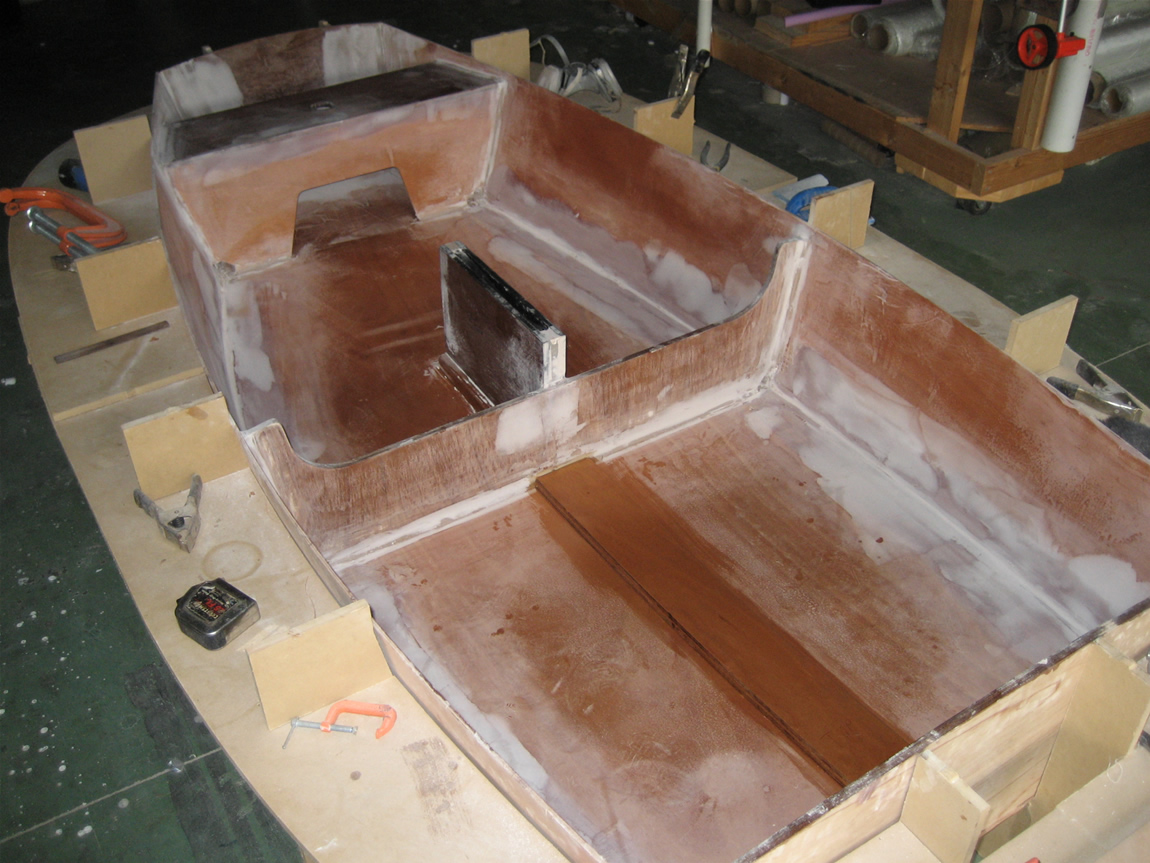
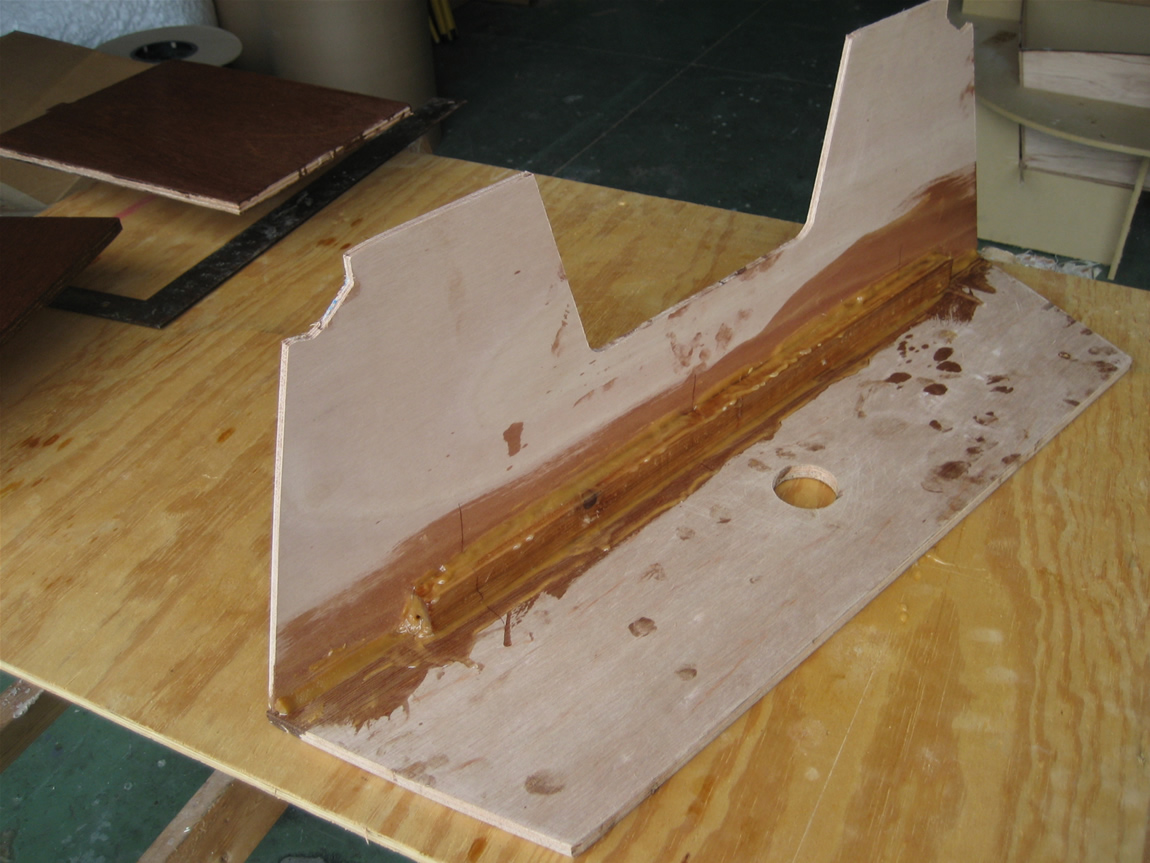
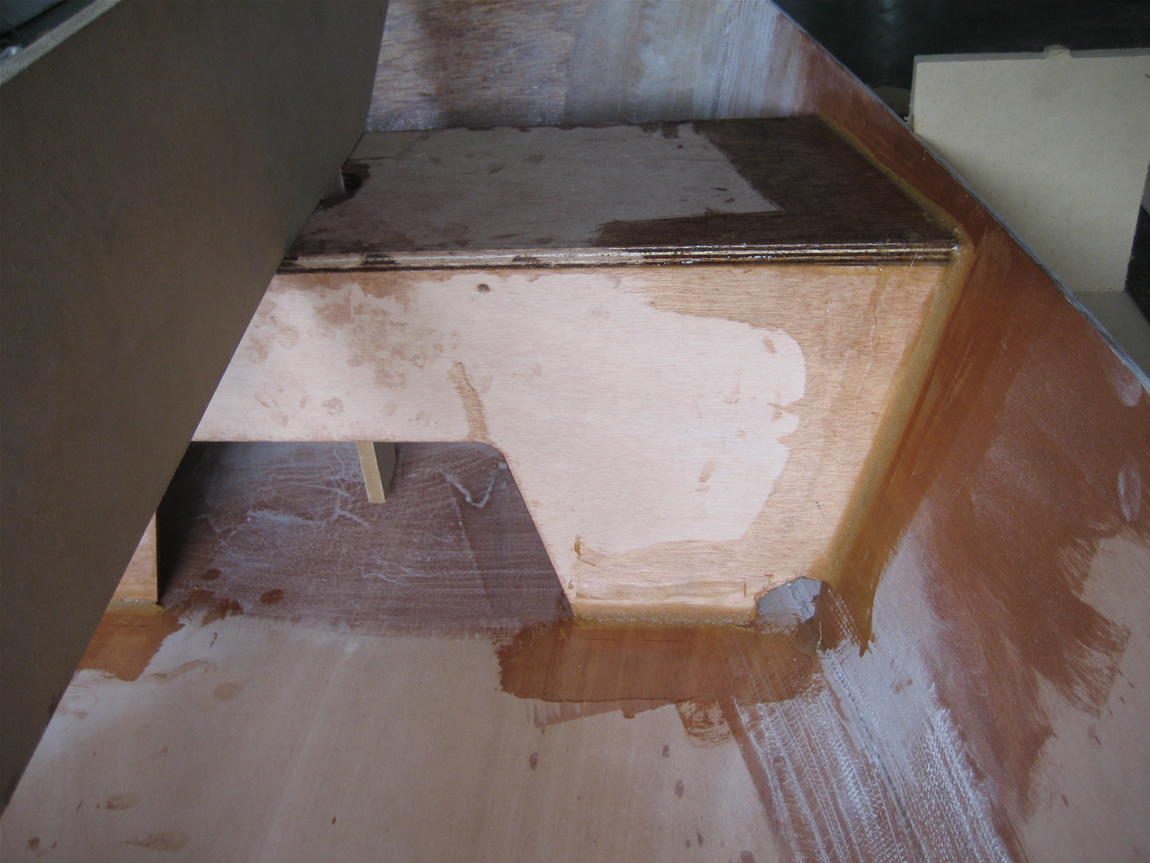
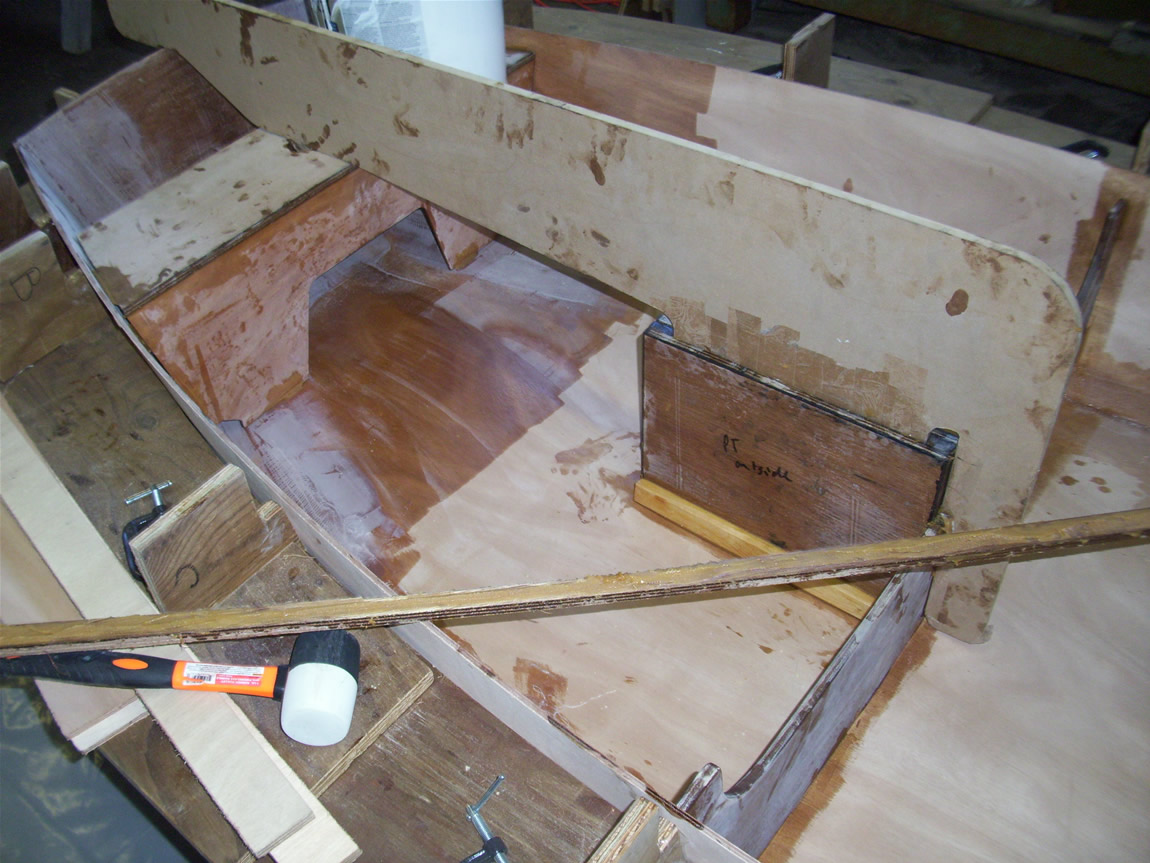
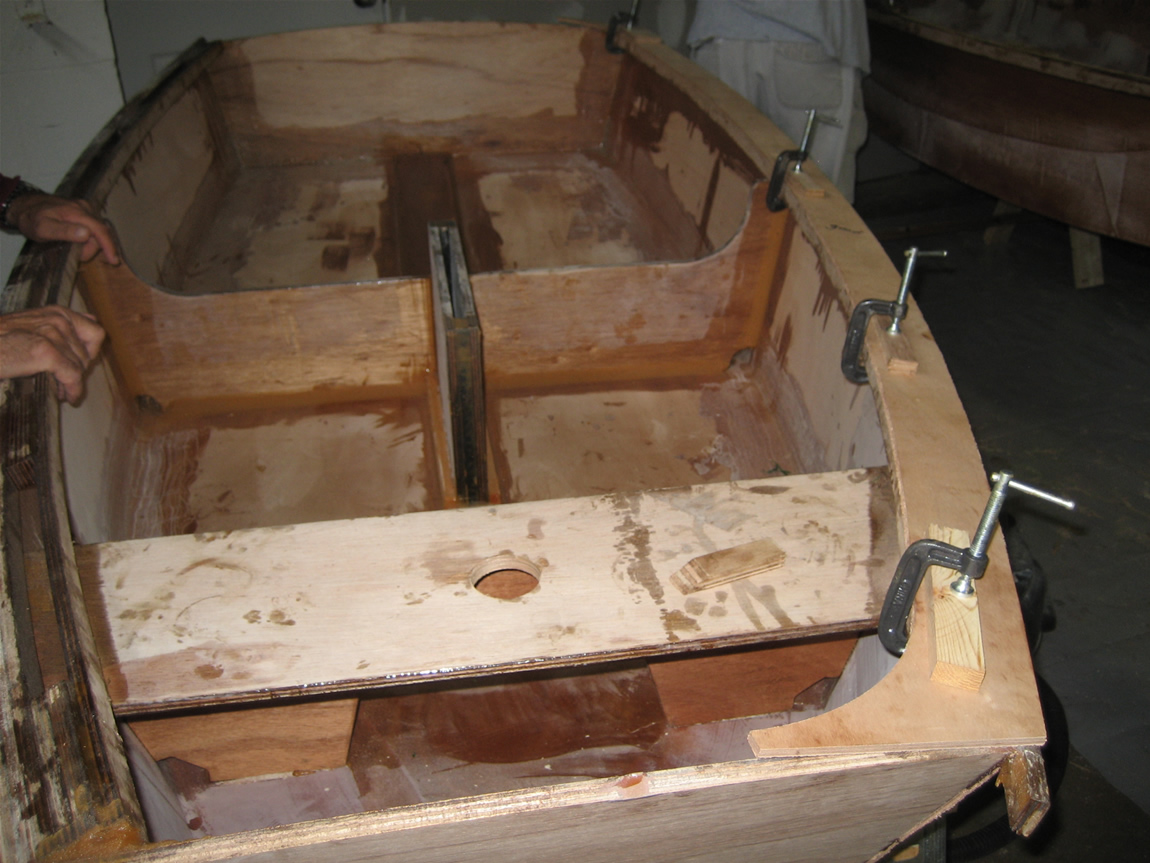
Today we glued and fillet the dagger board case, mid-frame, and mast partner frame.
We have a locating jig that holds all three of these pieces in their correct position
Here is the jig without the dagger board case. We put packing tape on the parts that will come in contact with epoxy, so it will not stick.
this shot shows how the locating jig slides through the dagger board case and then through the slot cut in the bottom of the hull. Also there is a notch cut into the mid-frame that aligns with the little tab on the dagger board case. You really cant go wrong here.
Butter up the dagger board case (pre-coated everything first)
Putting the assembly into the boat, excess epoxy glue squeezes out.
we then glue in 1x2 cleat to the base of the dagger board case, followed by generous fillets (used 1.25" PVC pipe)on the frame and case. We are only filleting the frames on this boat
mast partner frame gets generous fillets also
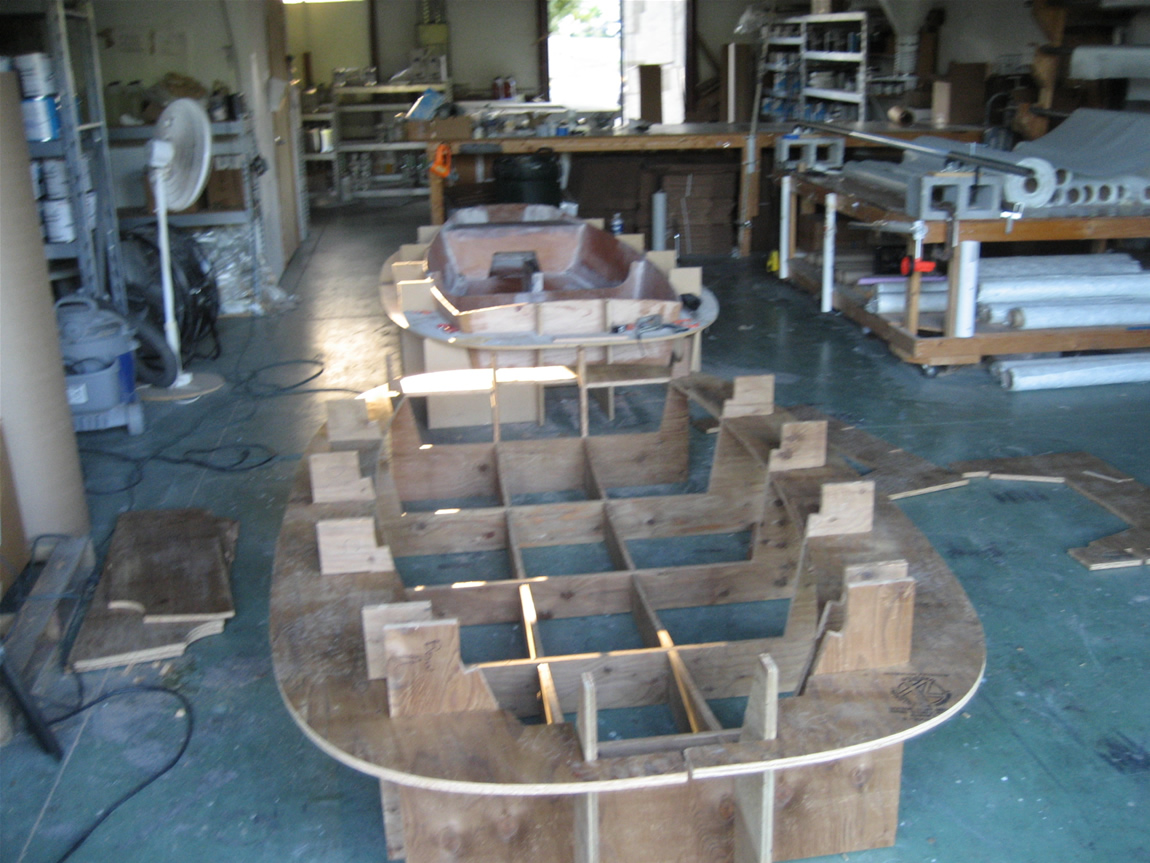
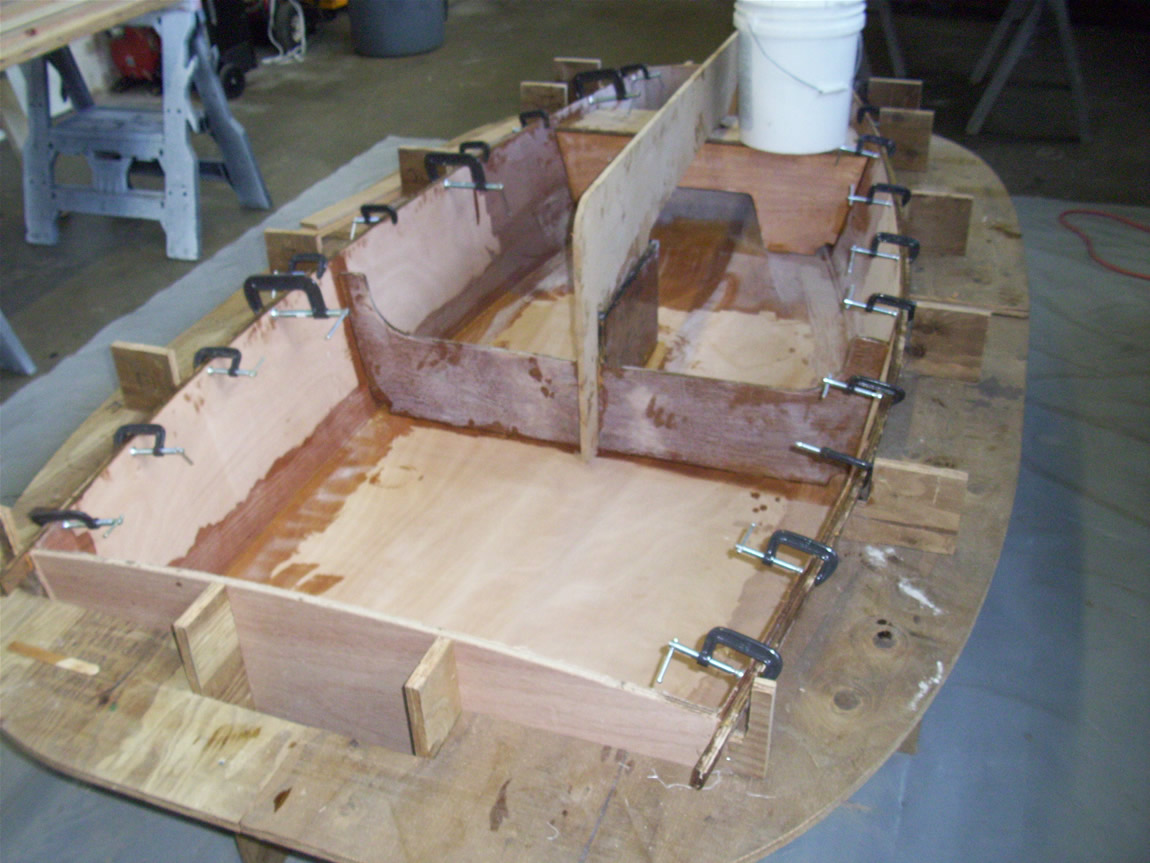
Its very possible to have all the work up to this point completed in two working sessions. Ideally, each boat would only need 2 days in the mold. The boat can be removed and finished after this step. By combining many steps, it is possible to build many hulls with just one mold in a timely manner. (as a contrast; the optimist we built to the class rules spent over 2 weeks in the mold

)
Re: Optimist Club Racer
Posted: Tue Nov 10, 2009 9:12 pm
by JamesT
I was just wanting to inquire about using the caulking gun to lay the fillets in...looks like a much easier, cleaner way than using the sandwich bag.
My question, is that a refillable tube and where can i get one?

Re: Optimist Club Racer
Posted: Wed Nov 11, 2009 12:38 am
by Bowmovement
JamesT wrote:I was just wanting to inquire about using the caulking gun to lay the fillets in...looks like a much easier, cleaner way than using the sandwich bag.
My question, is that a refillable tube and where can i get one?
They can be used for fillets and you can order them here.....
http://boatbuildercentral.com/proddetai ... M_4805_810
Matt
Re: Optimist Club Racer
Posted: Wed Nov 11, 2009 9:30 am
by tech_support
they can be re-used but its not super easy to get the cured putty out. You may use more that $1.55 in your own time to save the tube

, but I can guarantee using it once saves $1.55 in time
Re: Optimist Club Racer
Posted: Wed Nov 11, 2009 9:39 am
by peter-curacao
shine wrote:they can be re-used but its not super easy to get the cured putty out. You may use more that $1.55 in your own time to save the tube
, but I can guarantee using it once saves $1.55 in time
Why not clean it before it cured?
Re: Optimist Club Racer
Posted: Wed Nov 11, 2009 11:19 am
by tech_support
Why not clean it before it cured?
You could. It would be pretty easy to use the same tube over and over during the same sitting, but if your racing against the clock (like gluing down a sole) you better just have several ready so you can get the glue out ASAP
I like to pull out the cured epoxy in one piece, just like the epoxy from a cup. The only thing I clean before the epoxy cures are laminating tools (rollers/spreaders)
Re: Optimist Club Racer
Posted: Wed Nov 11, 2009 12:23 pm
by jbo_c
That's a lot of epoxy in one tight space(the tube). How much can you use at one time without it kicking off on you? That would be my biggest worry.
Jbo
Re: Optimist Club Racer
Posted: Wed Nov 11, 2009 12:33 pm
by tech_support
you empty the tube within minutes, I have never had a batch go off. In fact, because you get it all out so quickly, you have much more time to shape the fillet.
Re: Optimist Club Racer
Posted: Thu Dec 03, 2009 9:58 am
by tech_support
some progress
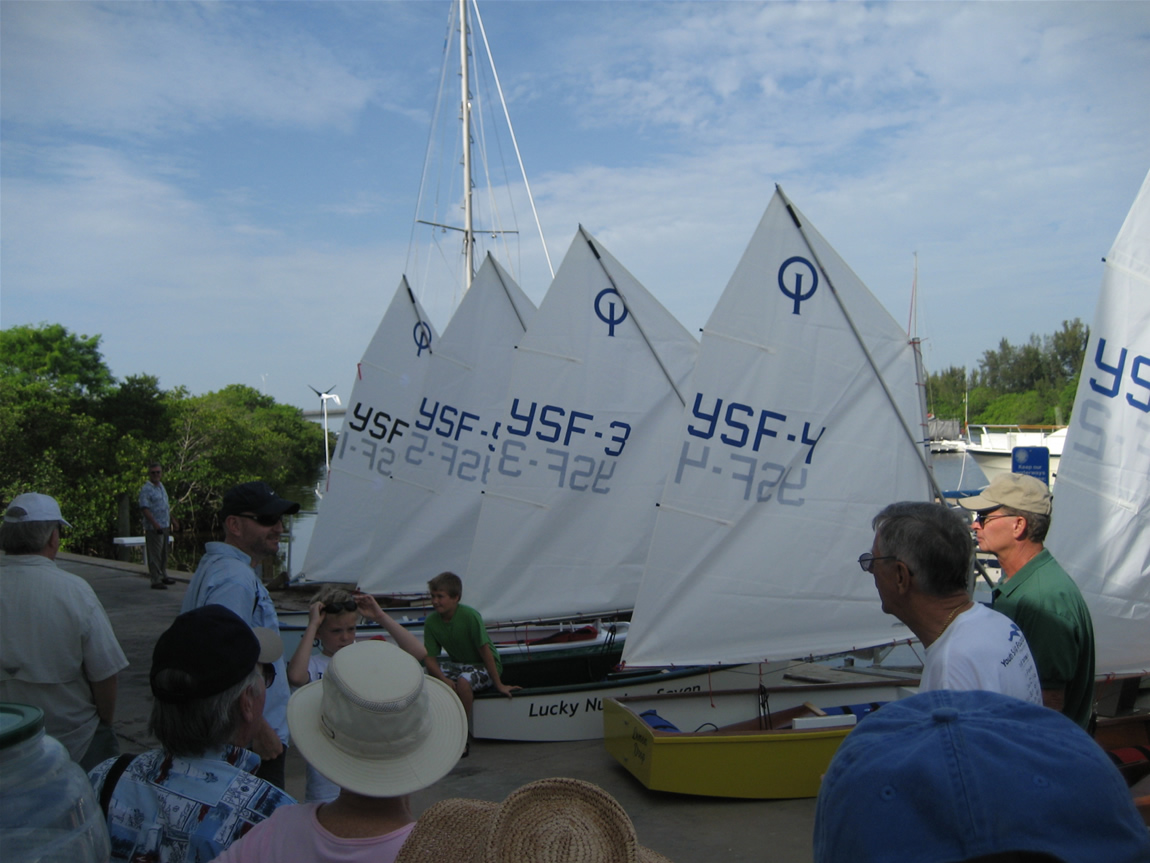
We cut an new permanent mold from3/4" pressure treated marine fir plywood, this is the one we will sell to clubs who want to build a little fleet. We now have two club racers being built locally by volunteers for the Indian River Youth Sailing Club. The molds and boats are in their shop space in our local municipal marina. They are completing the boat with a little help from us

Once the volunteers have built these two, they will bring in the kids to build their own boats.
I will be uploading more pictures today
Re: Optimist Club Racer
Posted: Thu Dec 03, 2009 10:52 am
by ks8
Great!
Re: Optimist Club Racer
Posted: Thu Dec 03, 2009 4:26 pm
by tech_support
Re: Optimist Club Racer
Posted: Thu Dec 03, 2009 4:35 pm
by tech_support
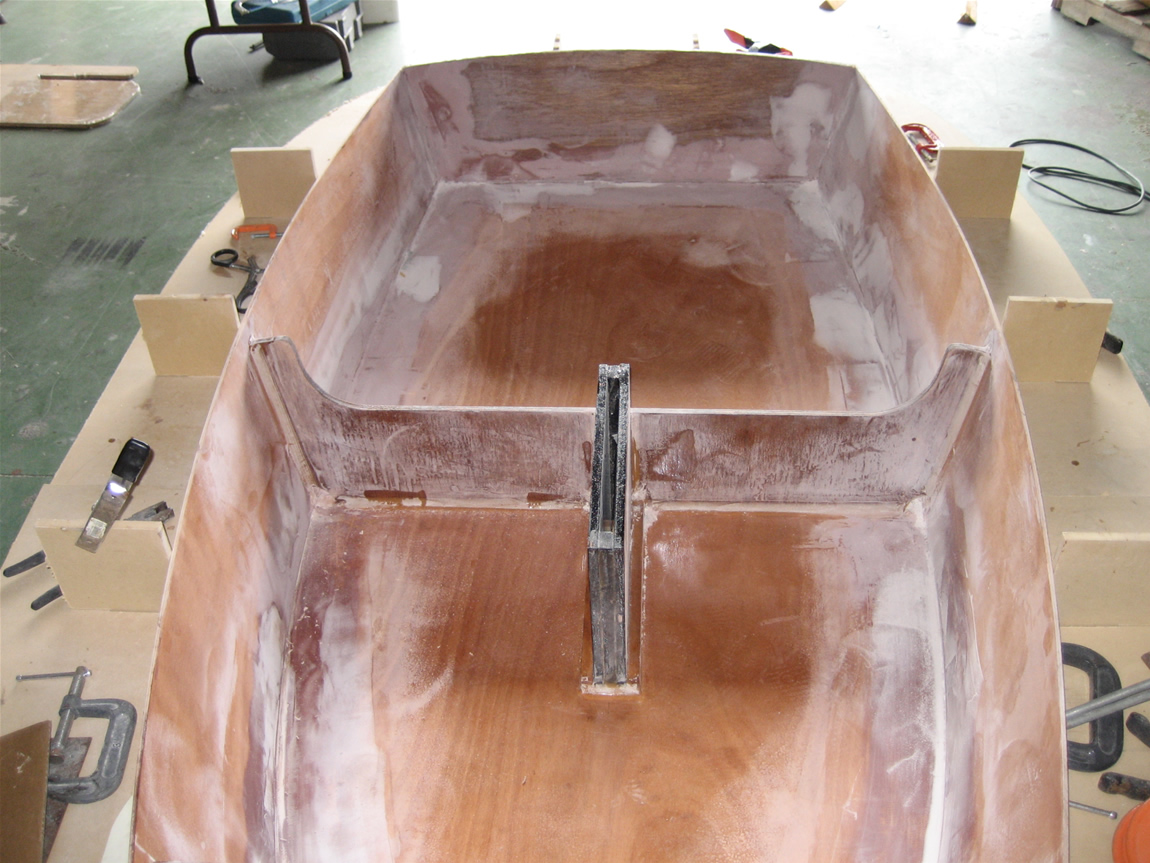
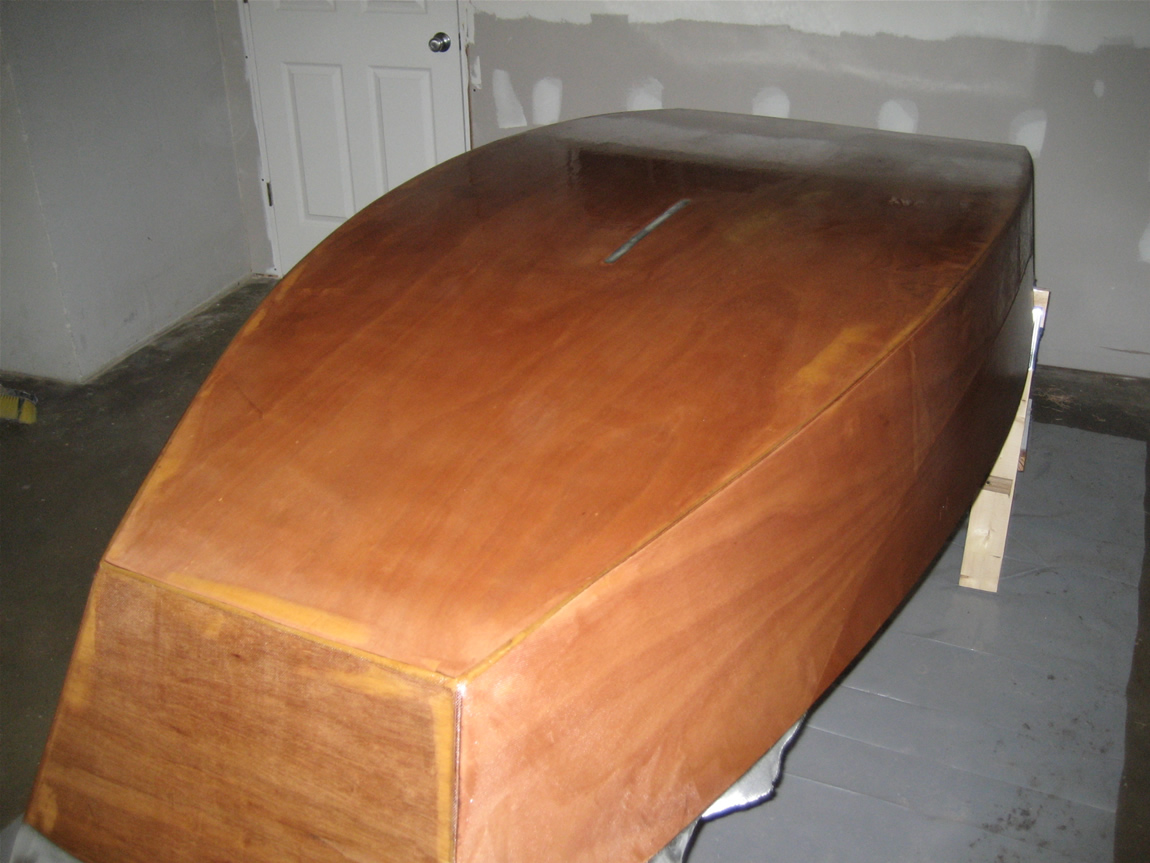
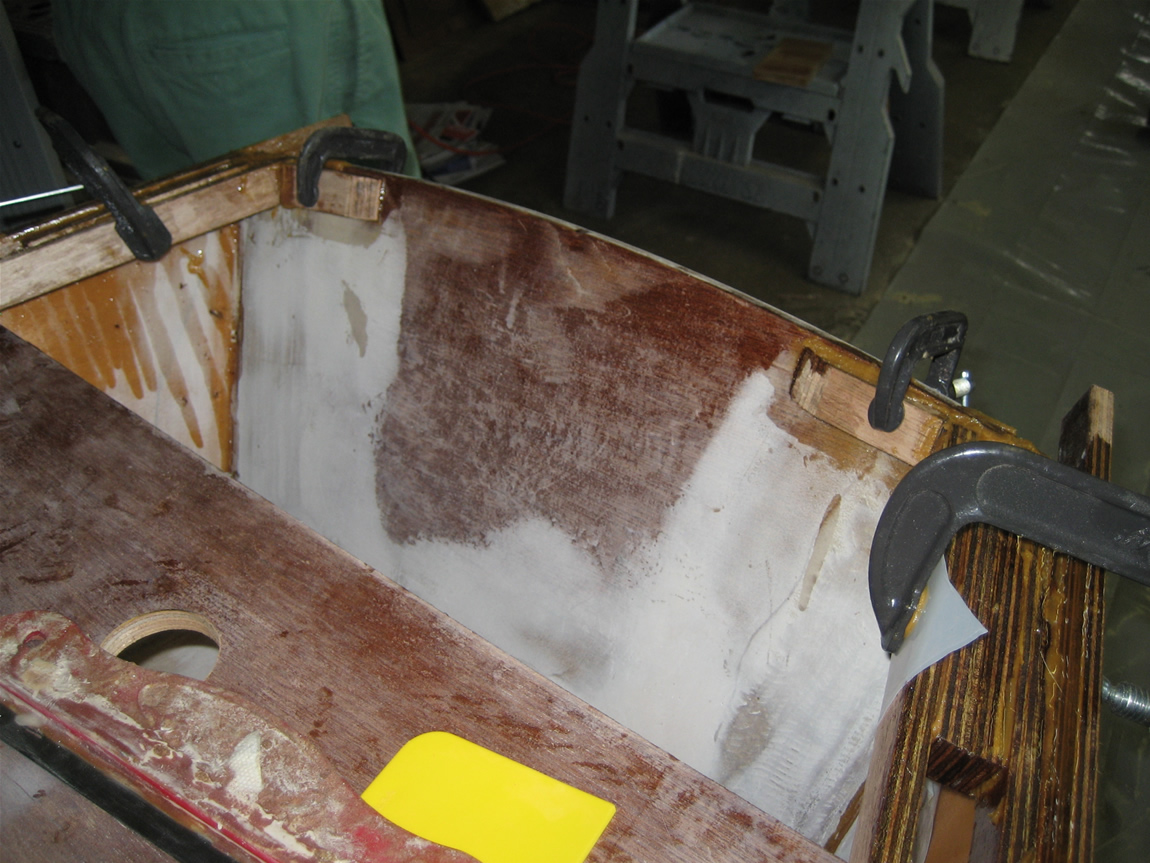
Club Racer #1 was then pulled from the mold and flipped over for bottom glassing. We filled the edges and any small gaps with epoxy putty
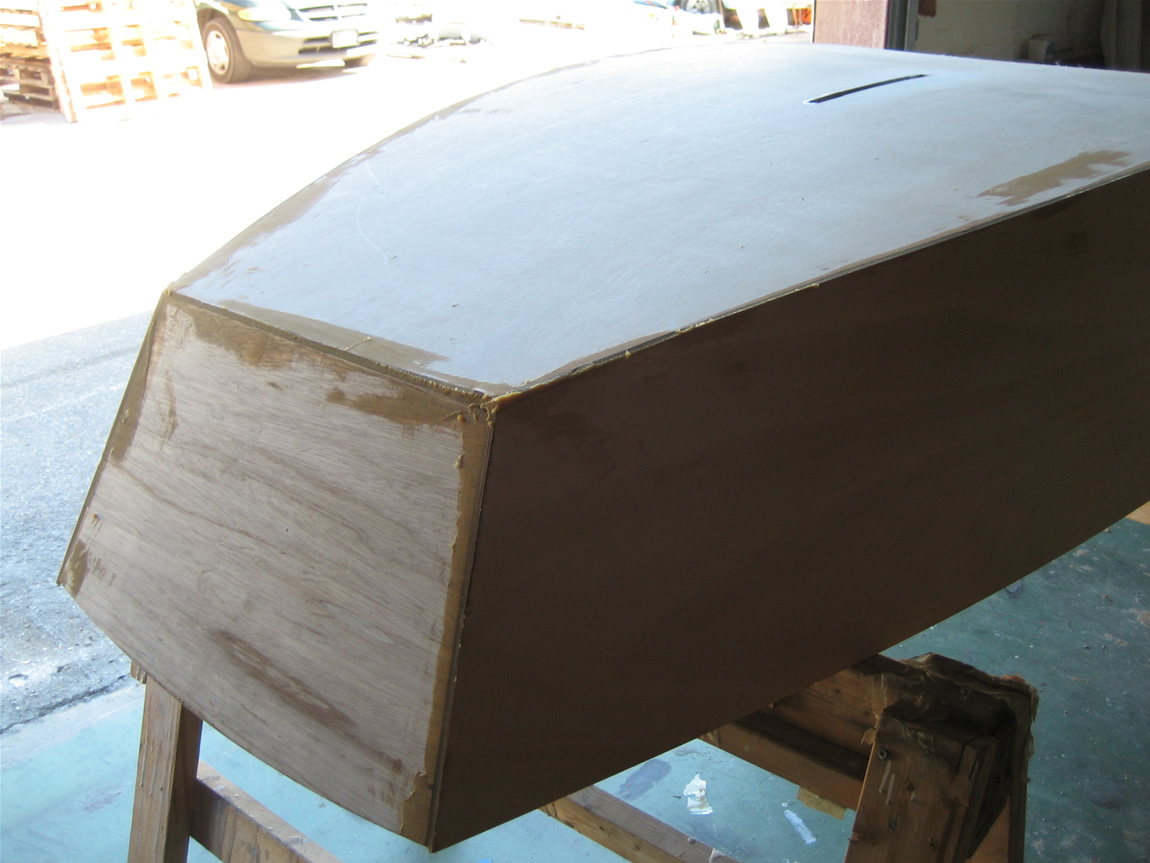
before outside glass, we round all the edges. You only need a very tiny radius for 6 oz. woven cloth. It does not have to be perfectly uniform either, we will later bring back that sharp and uniform edge using fairing putty.
edges rounded
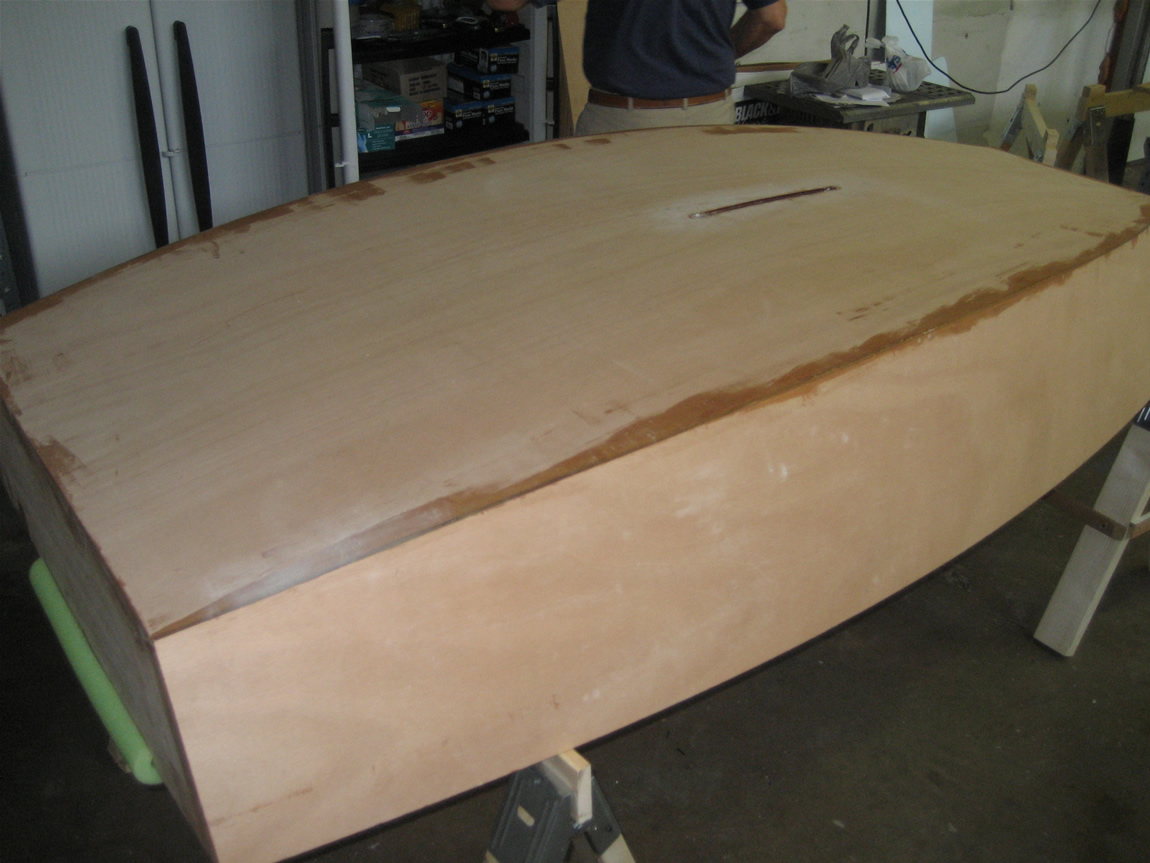
glass laid on dry.
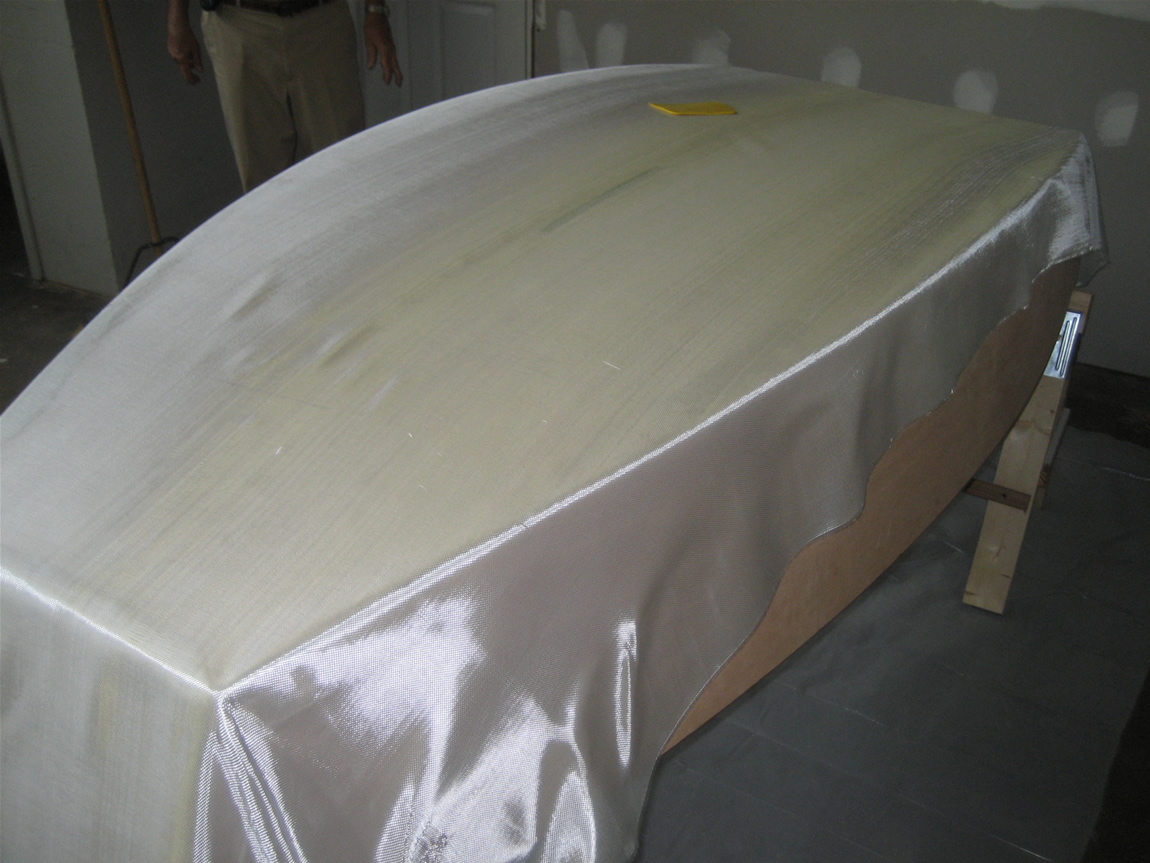
glass and all wood epoxy coated. If you laminate the glass over dry wood (not previously epoxy coated) be sure to use plenty epoxy. Check back after 20 minutes to make sure the wood has not wicked away epoxy from the glass.
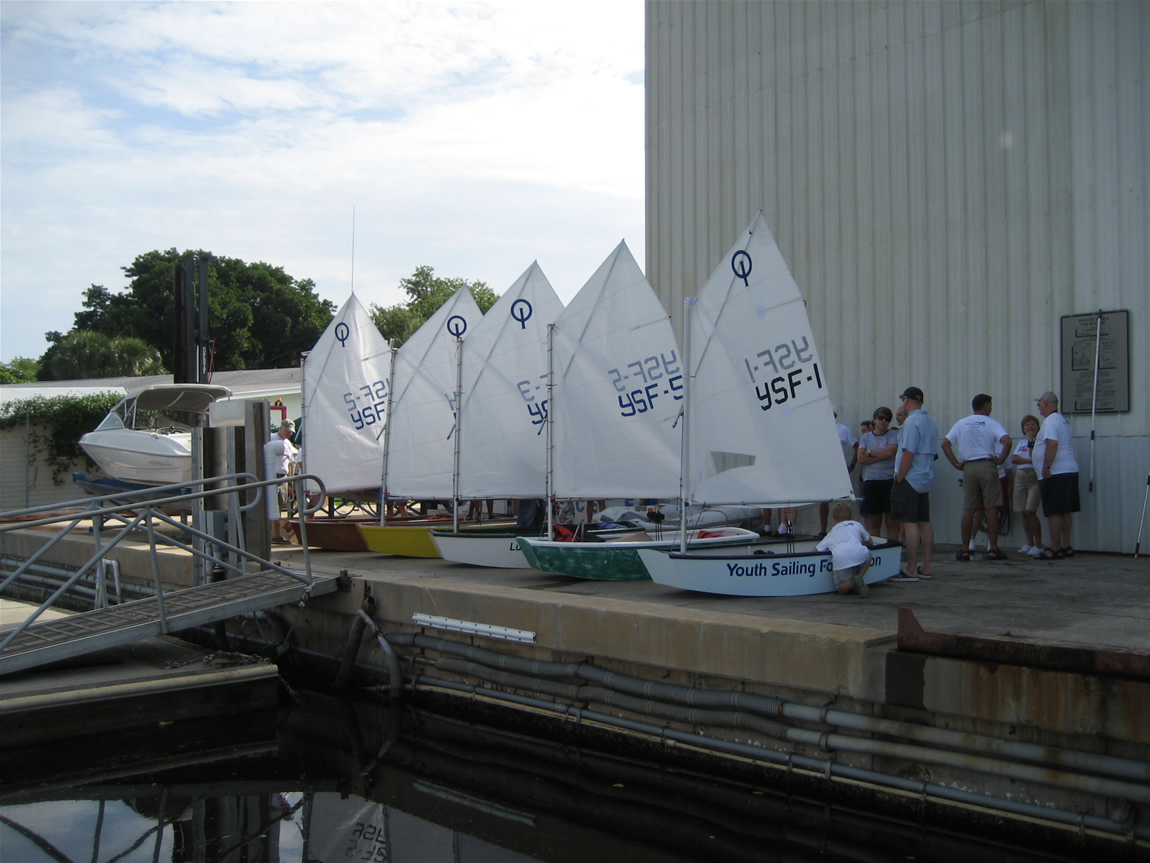
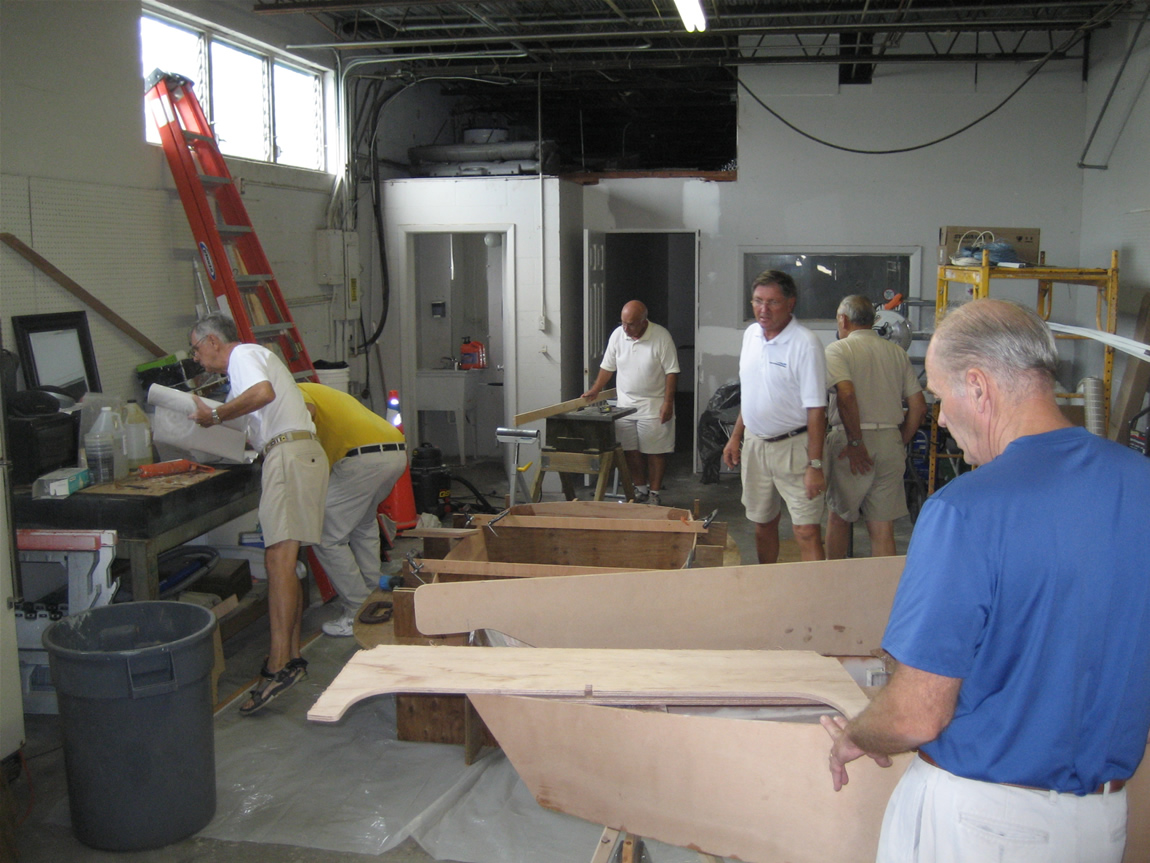
Here is the local opti factory
Re: Optimist Club Racer
Posted: Thu Dec 03, 2009 5:19 pm
by peter-curacao
shine wrote:
Here is the local opti factory
Great but who is who?
Re: Optimist Club Racer
Posted: Wed Dec 09, 2009 4:10 pm
by tech_support
I don't remember all the guys names

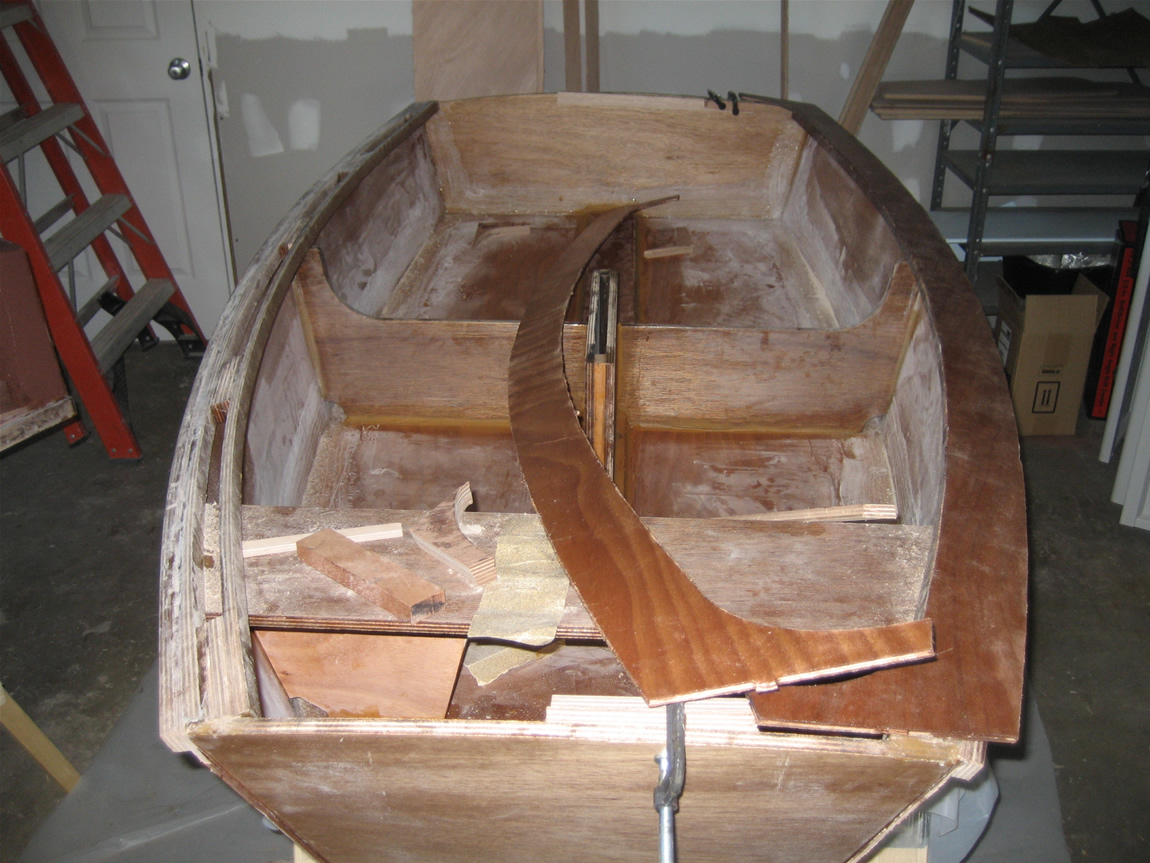
We made more progress this morning. We glued in the mid-frame, the dagger board case, and the mast partner frame. We used the same location jig to glue all these parts in at once. We also glued up the outside rubrail. The gunnels are glued down to the top of this rubrail
parts to be glued in. Notice we faired the forward section of the boat now, because it is just about impossible to reach after we glue in the partner. The the mast partner and forward frame were previously epoxy glued together using a small cleat from the underside.
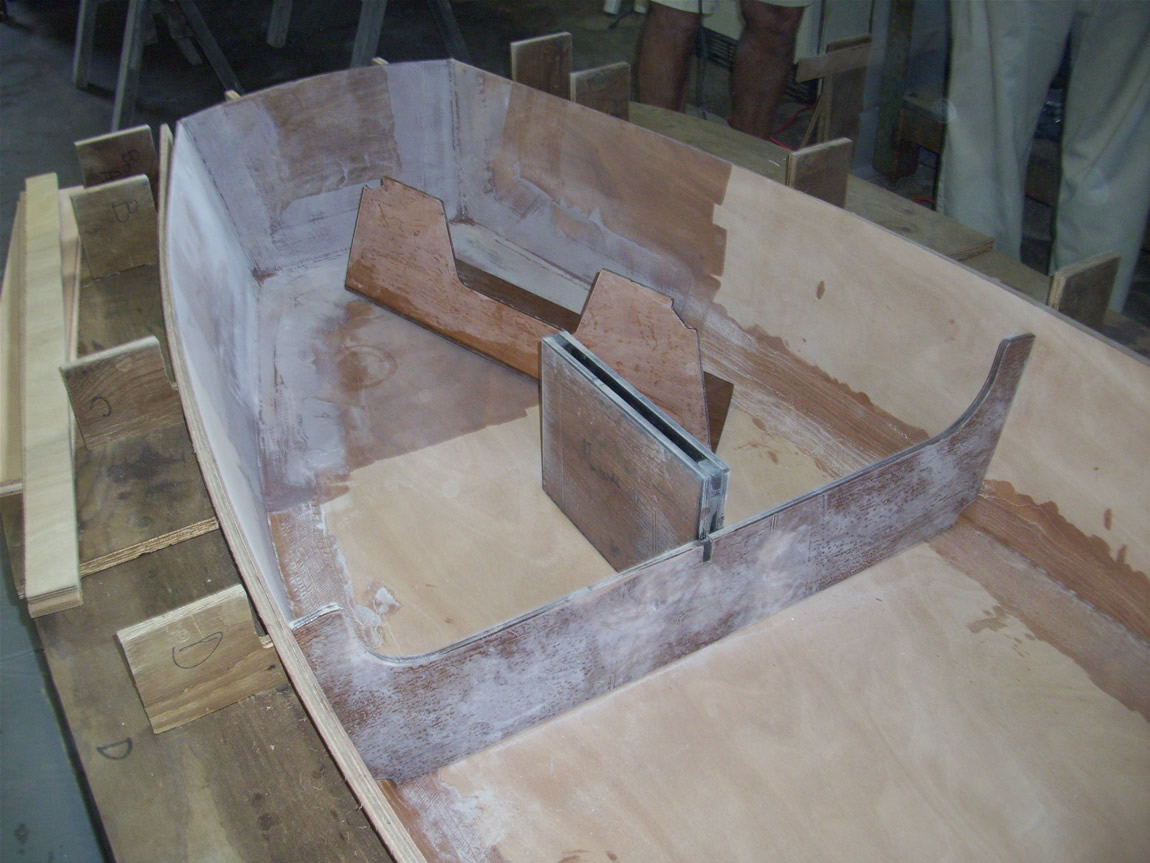
dry fit
everything glued in
rubrail glued on at same time. The molds have notches on the outside so that the rub rail can be laminated while the boat is still in the mold
Re: Optimist Club Racer
Posted: Wed Dec 09, 2009 4:23 pm
by chrisobee
how do you keep from welding your mold to the panels?
Re: Optimist Club Racer
Posted: Wed Dec 09, 2009 4:27 pm
by tech_support
clear packing tape on all those surfaces
Re: Optimist Club Racer
Posted: Wed Dec 09, 2009 5:03 pm
by Cracker Larry
That's a neat assembly method and a great project for the kids and parents. I learned how to sail and row in an optimist. How many builds does it take for a basket mold to be a cost effective building method? It must cost almost as much as 1 hull by itself?
Re: Optimist Club Racer
Posted: Wed Dec 09, 2009 6:00 pm
by Justin Pipkorn
shine, Why did you choose the green pressure treated plywood for the mold?
I did follow your suggestion both for using 3.5 mil plastic sheeting over the fiberglass splices and then wood flour mix to fill any voids. On the first wood flour fills, I just smoothed the mix with a scraper but used plastic on the next set. The plastic over wood flour just created a new set of voids to fill. The "scraped" version came out much better. Lesson learned!
Otter/Lissa is coming along fine. I'll complete the basket mold in the next session.
Re: Optimist Club Racer
Posted: Thu Dec 10, 2009 10:01 am
by tech_support
How many builds does it take for a basket mold to be a cost effective building method? It must cost almost as much as 1 hull by itself?
Depends on the value of your time
We will probably offer a mold set for free when a club/organization buys 10 boat kits, or a discount on the kits equal to the mold. To buy the molds separately would cost a little more than the plywood for one boat. Jacques spent MANY hours on that mold. A basket mold for one of our other designs does not need to be nearly as elaborate as the optimist molds.
Why did you choose the green pressure treated plywood for the mold?
Its stable/thick and will not warp, stored flat it should last decades, plus its readily available. We use
I just smoothed the mix with a scraper
thats the best way, no need for plastic to just fill a weave. The plastic can reduce the amount of weave you have to fill if you squeegee it over wet glass. It compresses the glass/epoxy.
Basket mold cost
Posted: Sat Dec 12, 2009 3:26 pm
by Justin Pipkorn
A basket mold for one of our other designs does not need to be nearly as elaborate as the optimist molds.
I am using a rudimentary basket mold for construction of a 16 foot Otter/Lissa. The mold parts cost about $50. and will take about 8-10 hours to construct. From my experience with the basket mold for the VG20, I believe that much better tolerances can be held even if the mold is used only for one boat. With a small boat like the Otter, I will be able to complete the entire inside of the boat while in the mold. Then roll the boat and finish the outside.
In the case of the VG20, I was able to "recycle" the strongback to make a dolly to hold the boat and move it through the stage when the keel was mated.

Re: Optimist Club Racer
Posted: Mon Dec 21, 2009 3:40 pm
by tech_support
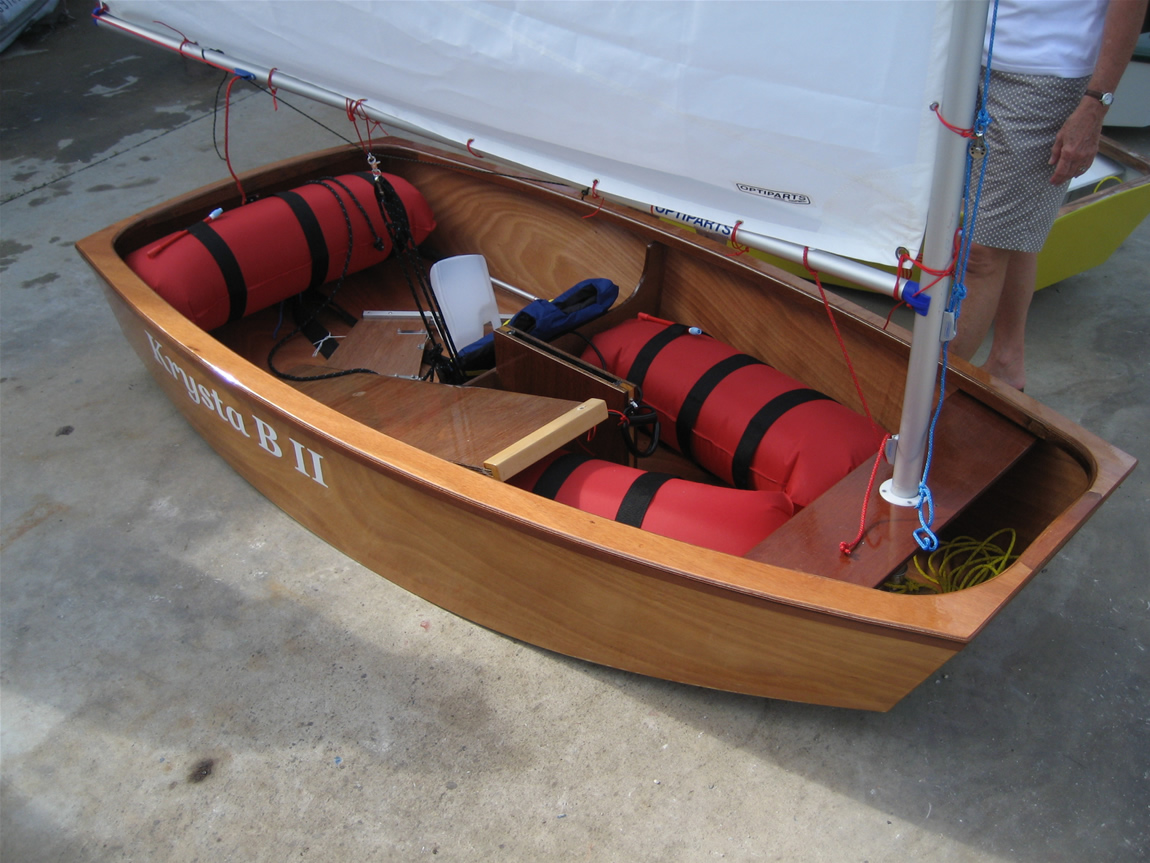
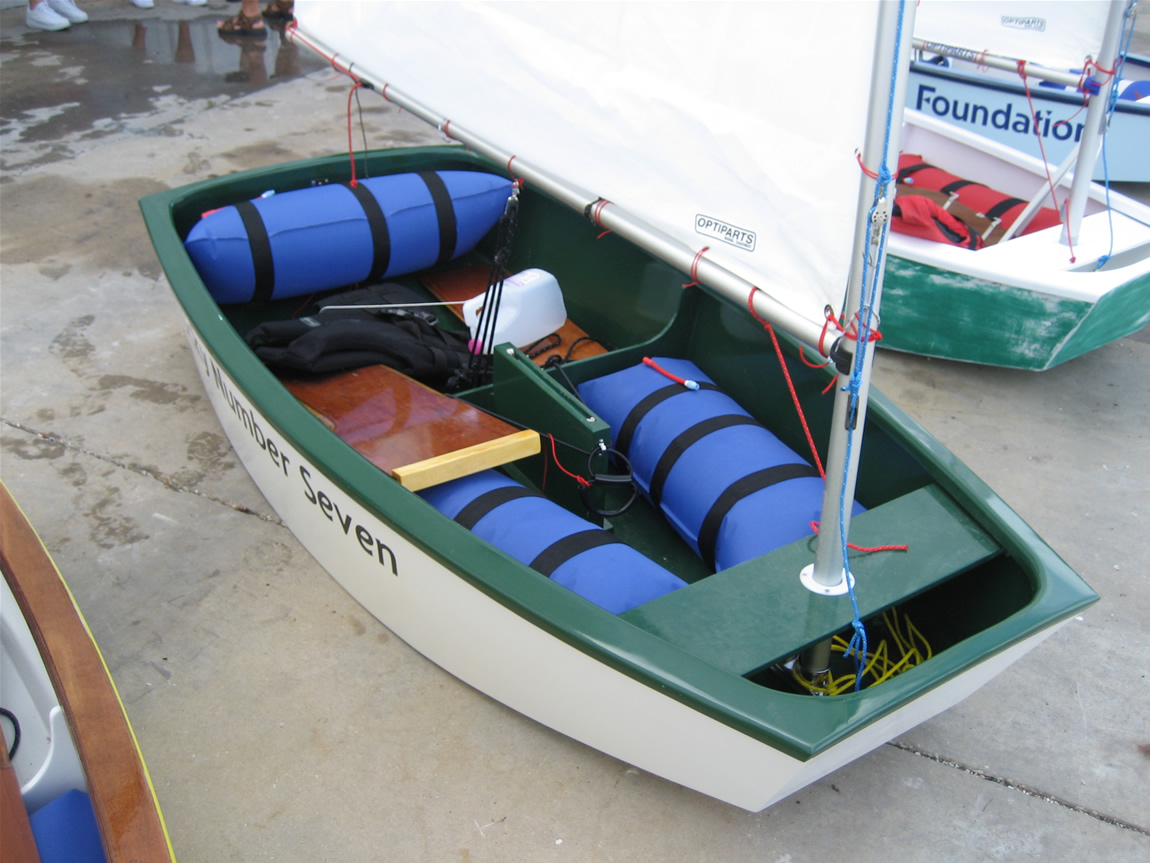
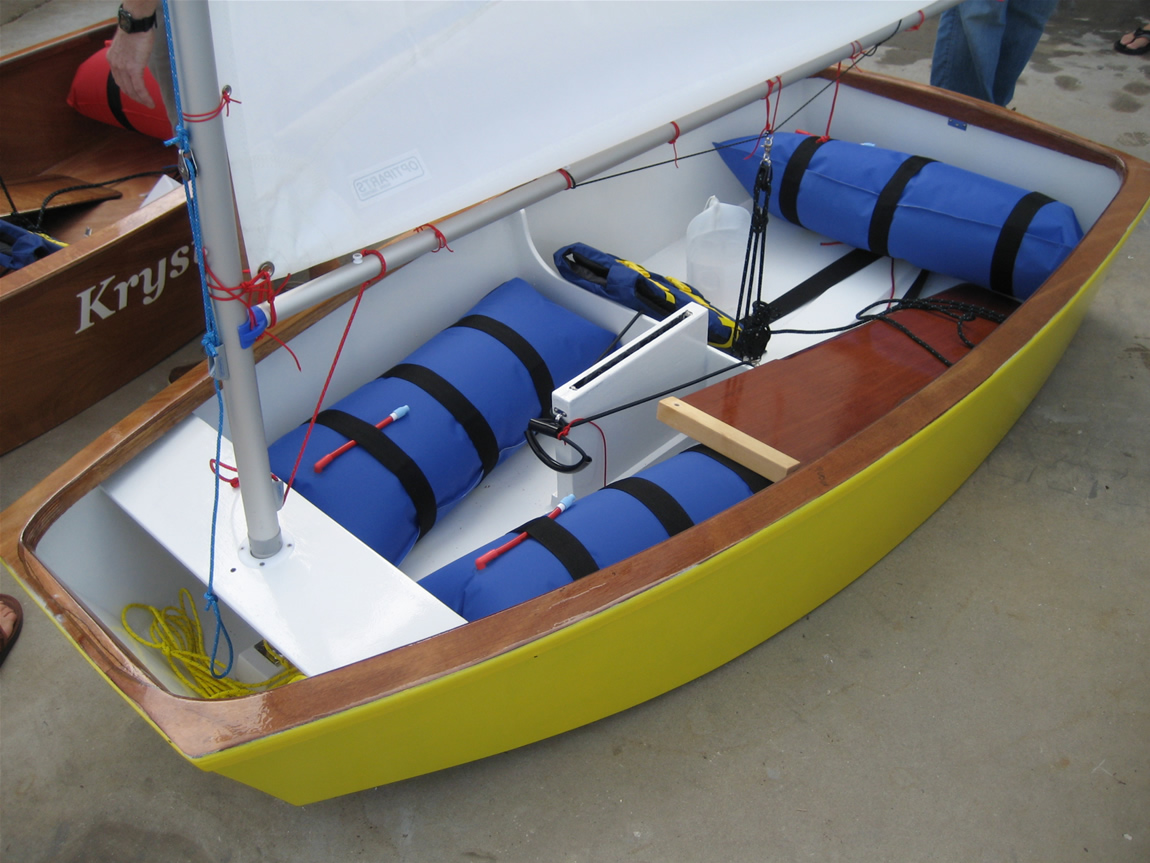
The gunnels are being glued up on the first two Club Racers.
The little deck is glued down to the strips/spacers. It is oversized when glued down, then trimmed to be flush.
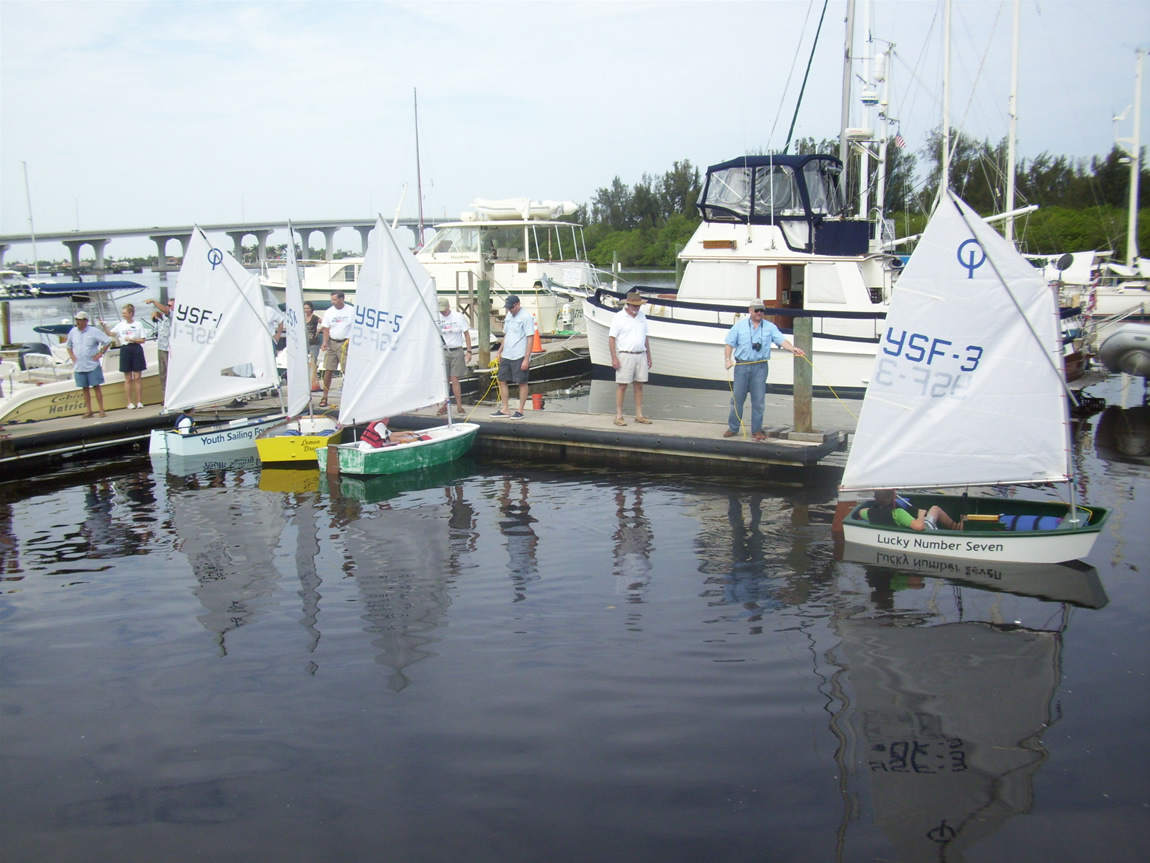
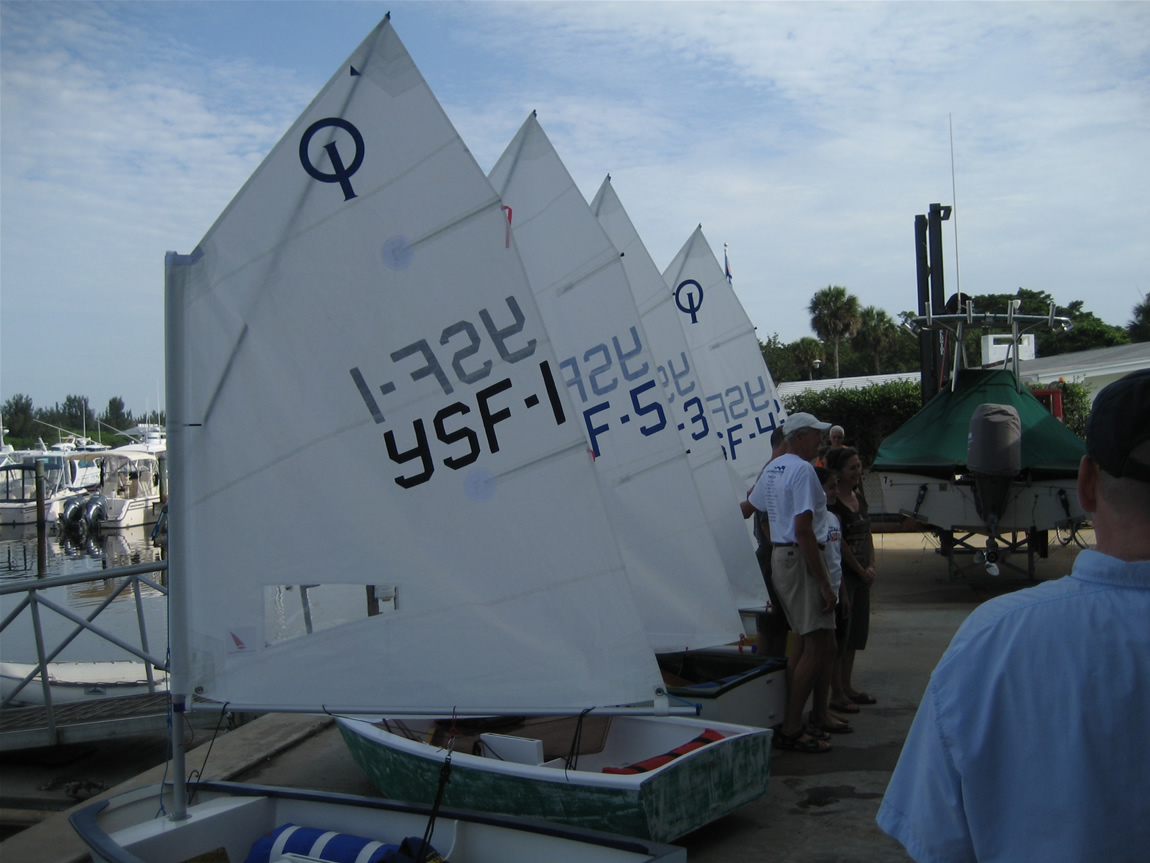
We cut a third kit last week, so the fleet will be four very soon.
Re: Optimist Club Racer
Posted: Wed Feb 03, 2010 3:17 pm
by tech_support
Re: Optimist Club Racer
Posted: Wed Feb 03, 2010 3:40 pm
by chrisobee
Shine, do you think that the Optimist Club Racer is a better sailboat than the D4/D5?
Re: Optimist Club Racer
Posted: Wed Feb 03, 2010 3:53 pm
by jacquesmm
It depends on the use.
The D5 and PK78 are much better dinghies and sail better thanks to their vee bottom but if you want to race against other boats, the Optimist is the best choice.
For a kid that is.
With it's flat bottom, the Optimist slaps a lot in any chop.
Being an old design revised by a committee, the Optimist is more difficult to build. For example, it requires a coaming instead of a simple rubrail.
Re: Optimist Club Racer
Posted: Wed Feb 03, 2010 4:25 pm
by ks8
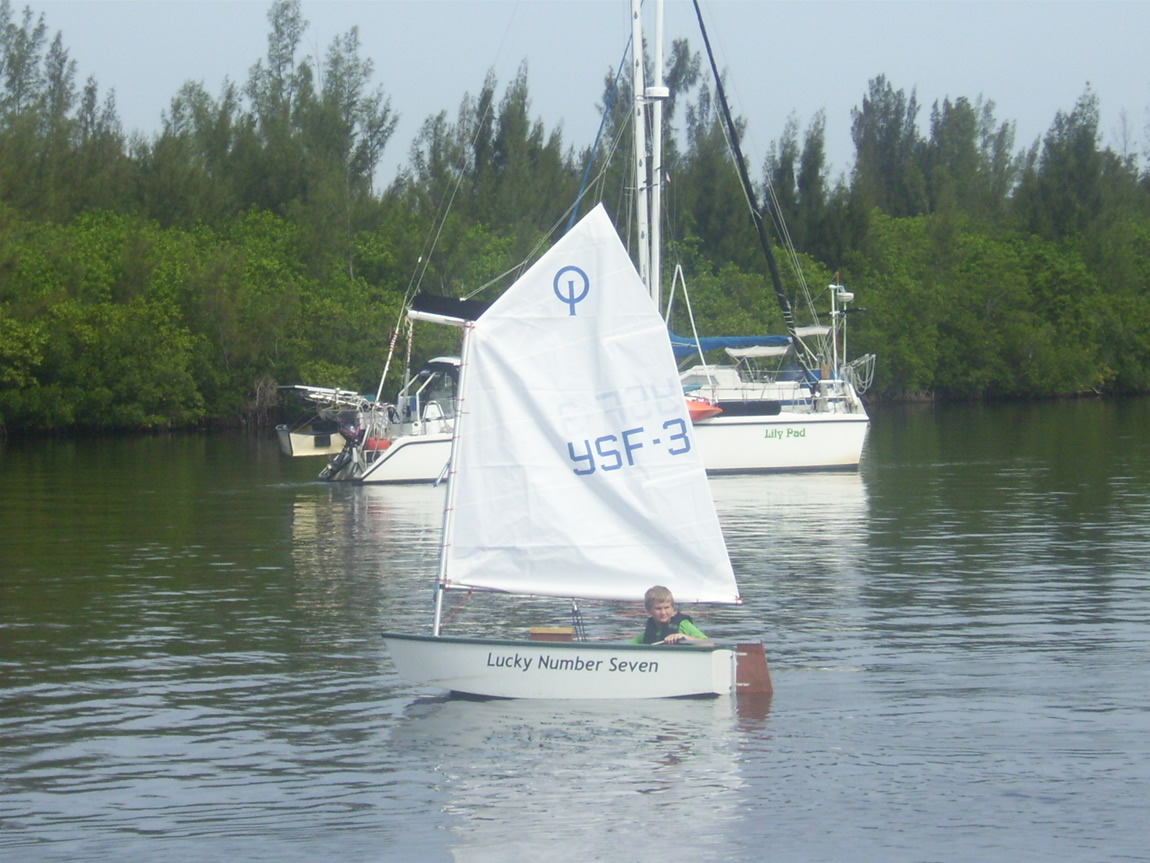
And the hope is that, unlike the D5 or PK78, the Club Racer will be permitted to race against *official* Optimists, at the local level, and maybe even at the Nationals ( ? ). But International is another story, and you'll need a true Optimist there. But look at all the training and fun youth can have on the club racer, locally, inexpensively, to see if they want to step up to that national and international competition level.
When you've got a small fleet rigged, I'd sure like to know how they fare in competition with spec Opti's. How about a match race with someone in a spec Opti, both experienced skippers, first to win (4) races, wins, but, skippers swap boats every race, to make it more of a *boat vs boat*.
Re: Optimist Club Racer
Posted: Wed Feb 03, 2010 4:45 pm
by tech_support
ks8 wrote:When you've got a small fleet rigged, I'd sure like to know how they fare in competition with spec Opti's. How about a match race with someone in a spec Opti, both experienced skippers, first to win (4) races, wins, but, skippers swap boats every race, to make it more of a *boat vs boat*.
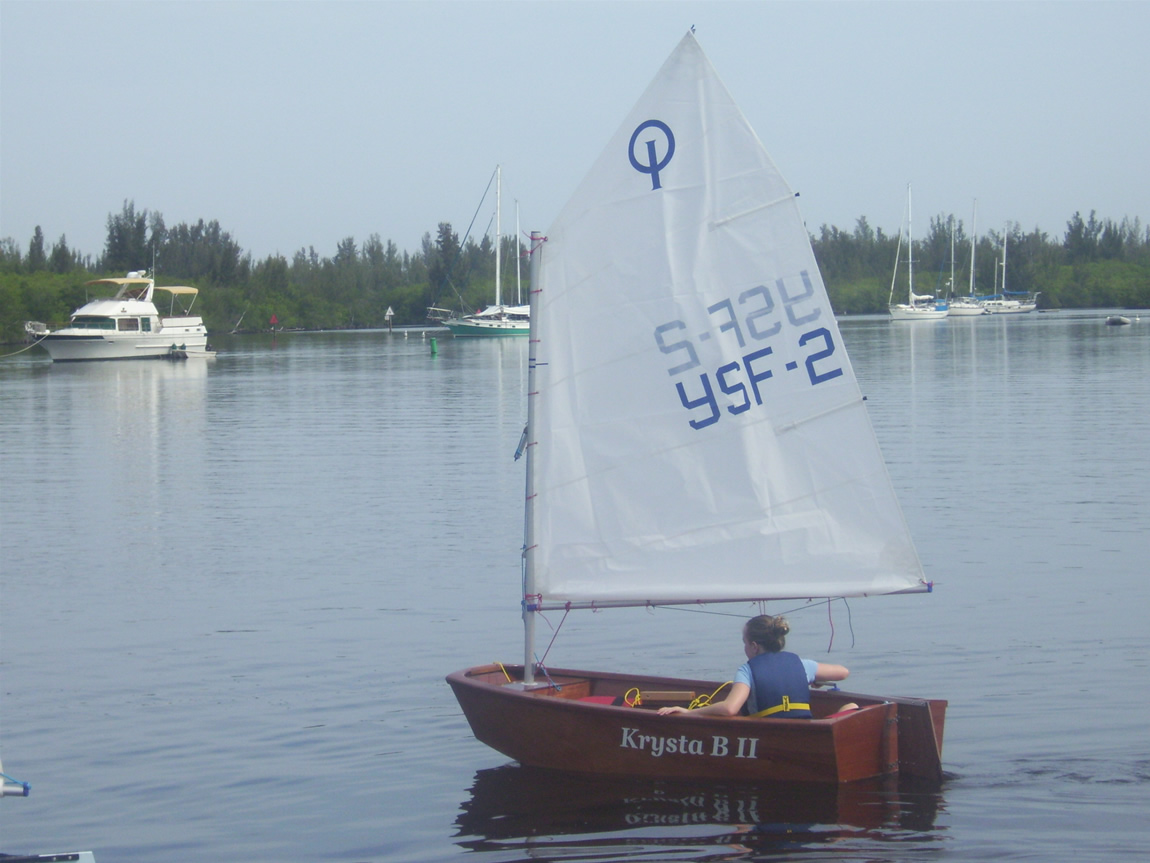
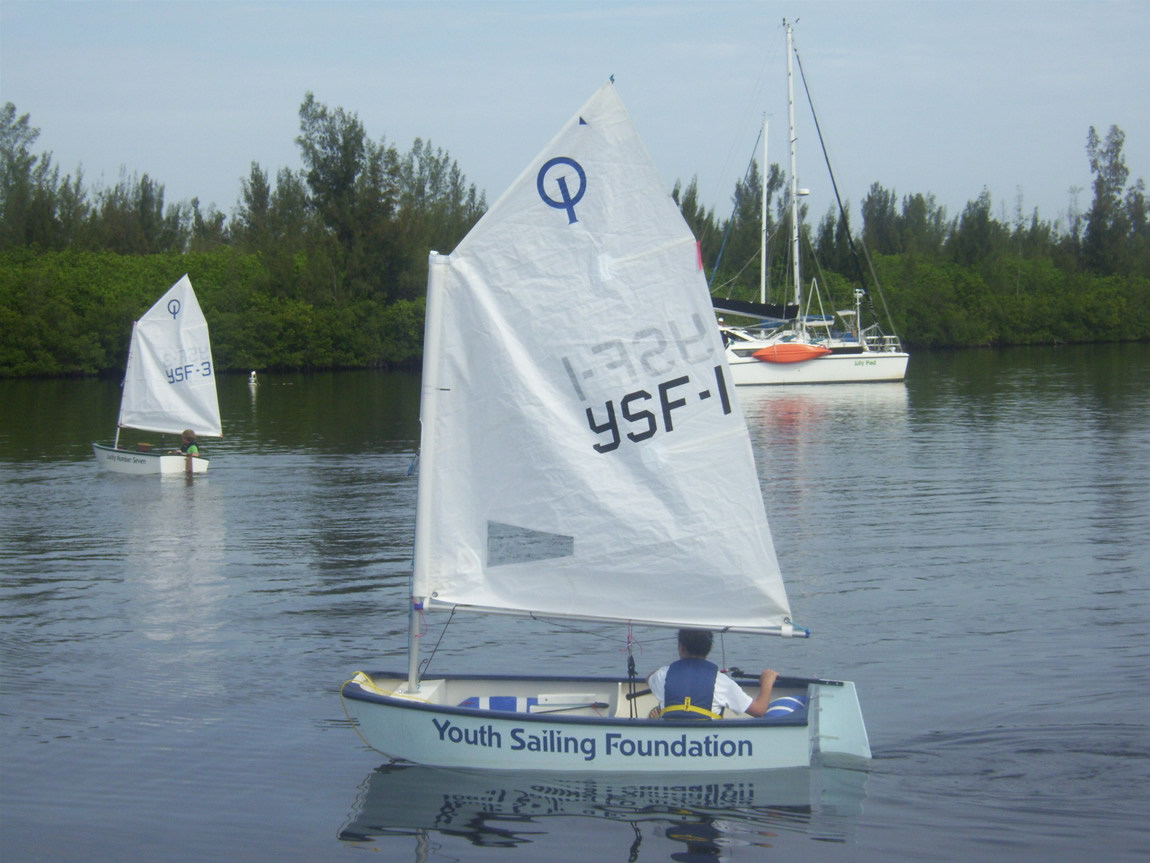
There is a very large Opti fleet just south of us in Jensen Beach, our local club will be racing with them quite a bit. That club has a few wooden optis and about 50 plastic ones. So Im sure we will have a lot of feedback.
Re: Optimist Club Racer
Posted: Mon Jun 07, 2010 12:13 pm
by tech_support
Re: Optimist Club Racer
Posted: Mon Jun 07, 2010 12:16 pm
by ks8
Cool... thanks for posting the update!

Re: Optimist Club Racer
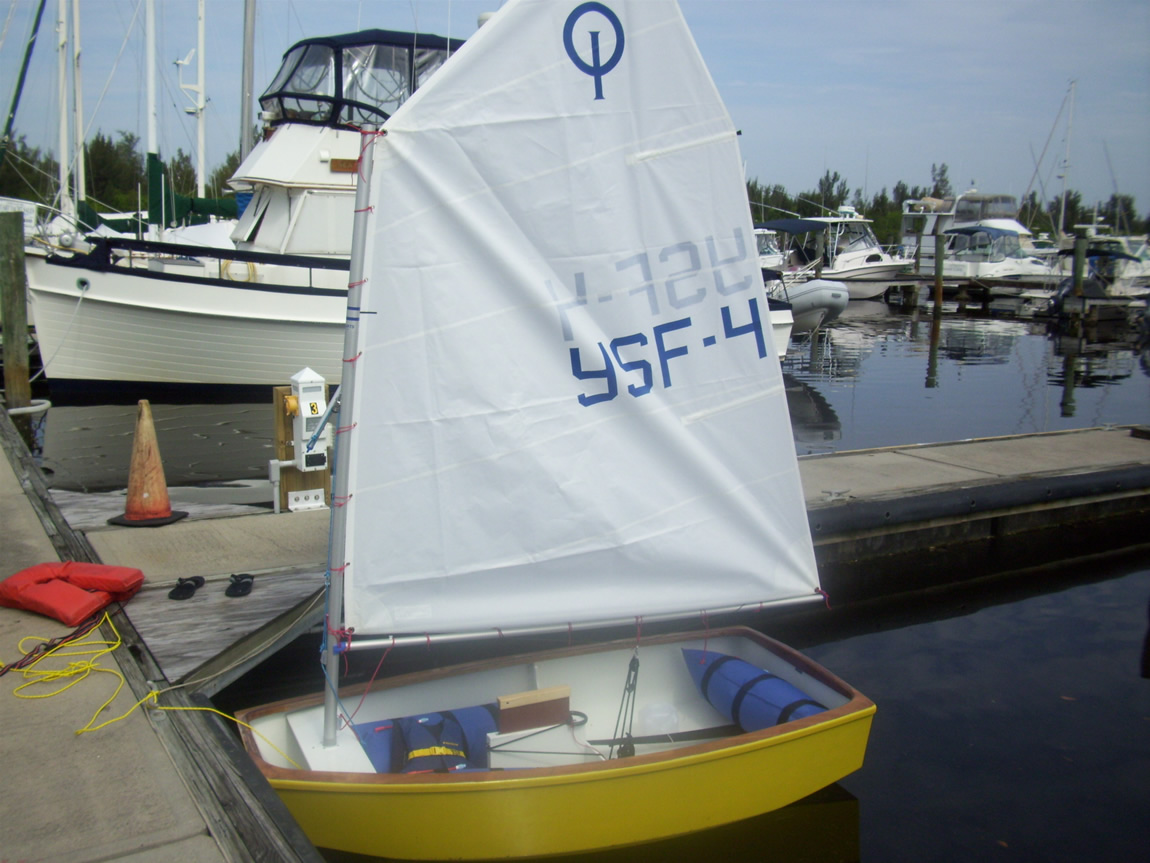
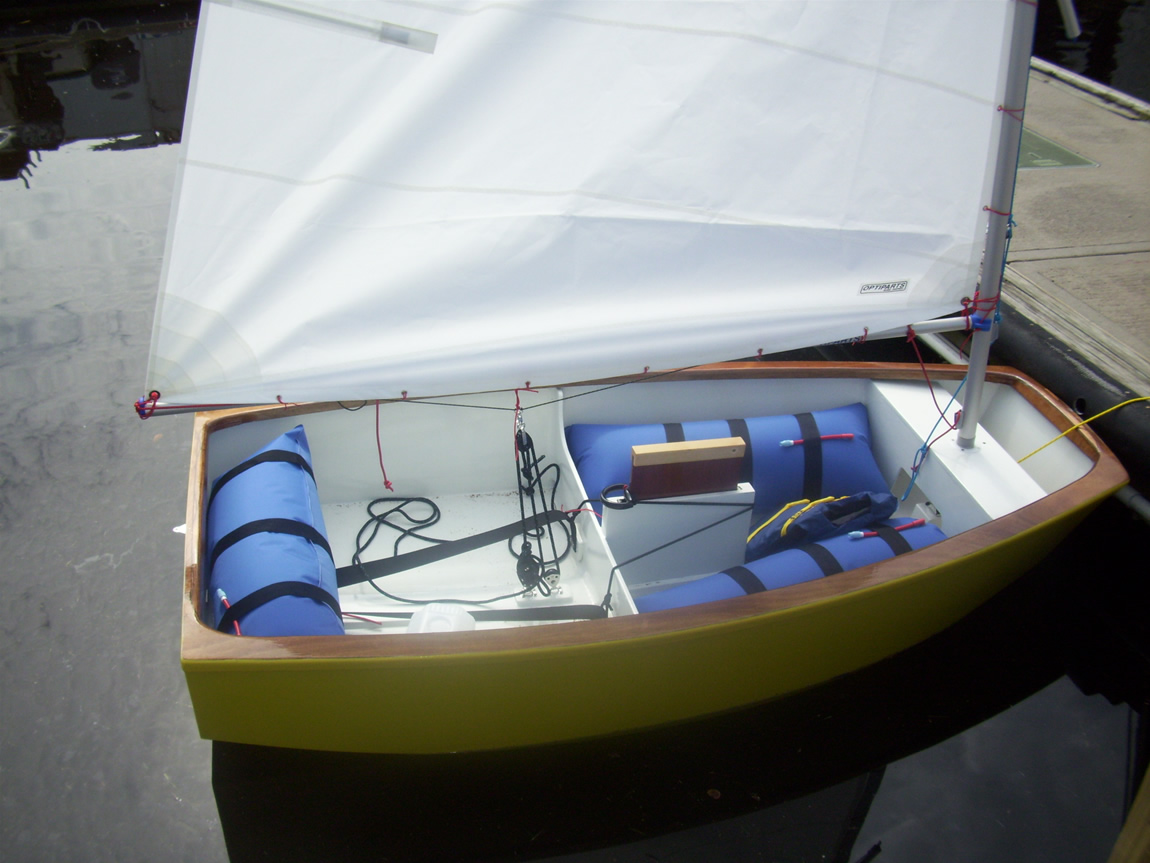
Posted: Fri Sep 16, 2011 3:10 pm
by tech_support
Our local optimist club had a nice write up in the most recent copy WoodenBoat magazine.

Also, here is a video of the opti kits posted at youtube...
http://www.youtube.com/watch?v=jwVlLMeB ... re=feedbul
Re: Optimist Club Racer
Posted: Fri Sep 16, 2011 4:03 pm
by sitandfish
Very nice! Very well done!
And, by the way.... I LOVE the Bateau sticker at the end of the slide show!
Re: Optimist Club Racer
Posted: Wed Feb 29, 2012 12:00 am
by bedege
Hi there
Very interesting thread that gives a lot of details about building the Opti Club Racer.
I've recently started my own Opti and am wondering about the hole in the mast thwart: what diameter should I bore that hole to?
There's no mention of that dimension in the build guide.

Thanks for your help
bedege
Re: Optimist Club Racer
Posted: Wed Feb 29, 2012 9:01 am
by tech_support
We do not cut that hole because some people will use a plastic liner for the hole, or use a different diameter mast, so we just mark the center with dimple
Re: Optimist Club Racer
Posted: Wed Feb 29, 2012 10:58 pm
by bedege
shine wrote:We do not cut that hole because some people will use a plastic liner for the hole, or use a different diameter mast, so we just mark the center with dimple
Understand. But,it sounds like I'd better cut that large hole now, before I start my first layer of thin epoxy, right? So, what typical diameter should I use. I looked the optiparts web site, and the plastic liner they offer is 57mm/1.25in in diameter. Is it the dimension I should use?
Any past experience welcome
Thanks
bedege
Re: Optimist Club Racer
Posted: Wed Feb 29, 2012 11:01 pm
by gstanfield
I know nothing about optis and very little about sailboats, however...
I would not cut ANY hole in a boat of mine withough having the part that goes through it in my hand first. It's no big deal to cut and epoxy the hole after the hull is built and you'd hate to build it and then get your mast only to find out that the mast does not fit the hole you cut for it

Re: Optimist Club Racer
Posted: Thu Mar 01, 2012 9:24 am
by tech_support
If you going to use the plastic liner, then I would get its OD and cut a hole 1/8" bigger. That give 1/16" on each side for epoxy buildup and some play, depending on its size and how far from the hole the screw holes are, you may even drill a 1/4" bigger.
Of course the safe bet it to wait until you have the piece of hardware in your hand.
Re: Optimist Club Racer
Posted: Mon Apr 23, 2012 11:40 am
by bedege
Hi there
Making progress on the built of my Optimist Kit
I have a question regarding the gunwale assembly. Looking at the great instruction guide from YSF (
http://latitude2739.com/club-racer.pdf), it is mentioned that "knees" are used fore and aft to support the gunwale cap.
How are those created? Should I use left over plywood from the kit and create those part "by hand"? In what order would you advise to assemble the different parts: inside hull strake, doublers, knees, and 2nd inside strake?
Thanks for your support!
bedege
Re: Optimist Club Racer
Posted: Mon Apr 23, 2012 3:20 pm
by tech_support
those parts are not needed, they are parts the local group wanted. It does make a nice finish, but they are not needed and just add more work. You can alway make them from scrap 12mm if you like.
Re: Optimist Club Racer
Posted: Mon Apr 23, 2012 3:22 pm
by tech_support
Oh, and I agree with above, if your going to use the little plastic insert for the mast partner then I would wait until you get the part. Make the hole big enough to account for a couple coats of epoxy.