
Hallo Bondo, Did You make this so it fits exactly over the whole length of the centerboard top ? It should also stop the water squirting up I assume. One question about Your beautiful maststep: Did You make different wooden steps like this with different degrees to see which sails better and can You exchange the wooden step by loosening two nuts ? I see two holes next to the metal step.
Greetings Karl
AD 14
-
gonandkarl
- * Bateau Builder *

- Posts: 1202
- Joined: Sat Mar 16, 2013 10:25 am
- Location: Wels,Austria,Europe

Re: AD 14
As usual bondo dose good work and the water splashing up beside the keel is a pain the good part is it keeps the sole clean what he made should work fine I still have a bolt I put through the keel and the keel for traveling. It is good weather so I should be back on the water on Sunday.
Re: AD 14
The holes you see on my mortise block are where the clamping screws were. A bevel is difficult to clamp because it wants to "slide" out of alignment when you put pressure on it. The screws provide the clamping pressure and alignment. The mortise block just sits in the mast step. I will build a different block with the mortise in a different (forward or backward) location if the sailplan needs balancing. I think I can effectively move the mast head about 8" forward, 6" back from the planned 5 degrees.

As for the keyed centerboard cap, this is for a 1 to 1 lift. I'm not sure about this. I may add another knot hole and run the painter down through a block on the centerboard and back up for a 2 to 1 lift. How did/do you handle the centerboard Das Boot?

As for the keyed centerboard cap, this is for a 1 to 1 lift. I'm not sure about this. I may add another knot hole and run the painter down through a block on the centerboard and back up for a 2 to 1 lift. How did/do you handle the centerboard Das Boot?
Re: AD 14
Hi Bondo.
When I build the keel I built an eye bolt into it with 2 nuts on the bottom to give it a hard point. I have a ss cable that comes up to the top from that with a loop on it I slide a short peace on conduit through the top loop and use it as a handle to pull it up and lower it. I have a 1/4 inch bolt that slides through the keel box and the keel to either lock the keel down or to hold it up while on the road simple but it works well.
When I build the keel I built an eye bolt into it with 2 nuts on the bottom to give it a hard point. I have a ss cable that comes up to the top from that with a loop on it I slide a short peace on conduit through the top loop and use it as a handle to pull it up and lower it. I have a 1/4 inch bolt that slides through the keel box and the keel to either lock the keel down or to hold it up while on the road simple but it works well.
-
ks8
- * Bateau Builder *
- Posts: 8403
- Joined: Mon Nov 24, 2003 1:00 am
- Location: NC USA
- Location: Now a much longer sail to Tampa Florida! Back to NC, Youngsville FM05tw
Re: AD 14
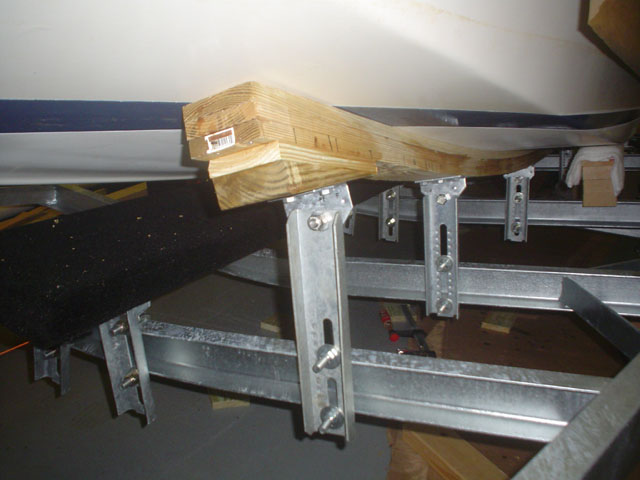
Another option for keeping the board up in the box during road transportation, is to add a keel pad to your trailer. (In the linked picture, the boat is balanced on the keel pad while I shape and build up side bunks). Once the boat is on the trailer, the keel 'painter' can be eased since the trailer's keel pad is then supporting the board. Of course, one should remember to secure the keel painter again, before launching, or there will be troubles to deal with. 

Bear in mind that one day, possibly, you may need to borrow a trailer that has no pad. I added some purchase to make the heavy board much easier to raise or lower, when not in the water. In fact, without purchase, it is near impossible to get the board fully up into the box, on the CV16. With the purchase, no problems. In the water, it is very easy to handle without any purchase. I suspect the AD board, though a bit different, is similar enough that I don't think I've wasted my time or yours.
That's how I did it. Dasboot's method sounds good too, and solid. I wanted it easy to pull up the board when the boat is blocked up , or on a borrowed trailer without a keel pad.
Your centerboard looks nice with paint.
Re: AD 14
Thanks men. I am building per plan. Two holes in the centerboard. One locks the board in a fully retracted position, the other locks the board part-way deployed. When fully retracted, the centerboard protrudes above the trunk slightly. I assumed this was for changing the painter if needed. Whatever the reasoning it means that ultimately one has to man up the centerboard, 1 to 1, without a cover on the trunk, in order to fully retract it.

Re: AD 14
The tip of the CB stick out above the trunk so that you can push a pin through it while towing.
Jacques Mertens - Designer
http://boatbuildercentral.com
http://boatbuildercentral.com

Re: AD 14
I just put down a layer of biaxial on a GF16 in 95F. 3 days ago, we did some fiberglass work at more than 100 F.
When we started, it was 85 but temp. went up fast and we couldn't stop.
I can't work more than 2 hours at a time in that temperature.
When we started, it was 85 but temp. went up fast and we couldn't stop.
I can't work more than 2 hours at a time in that temperature.
Jacques Mertens - Designer
http://boatbuildercentral.com
http://boatbuildercentral.com
Who is online
Users browsing this forum: No registered users and 1 guest