Page 1 of 1
Montana built D5
Posted: Tue Apr 19, 2011 11:21 am
by bratzcpa
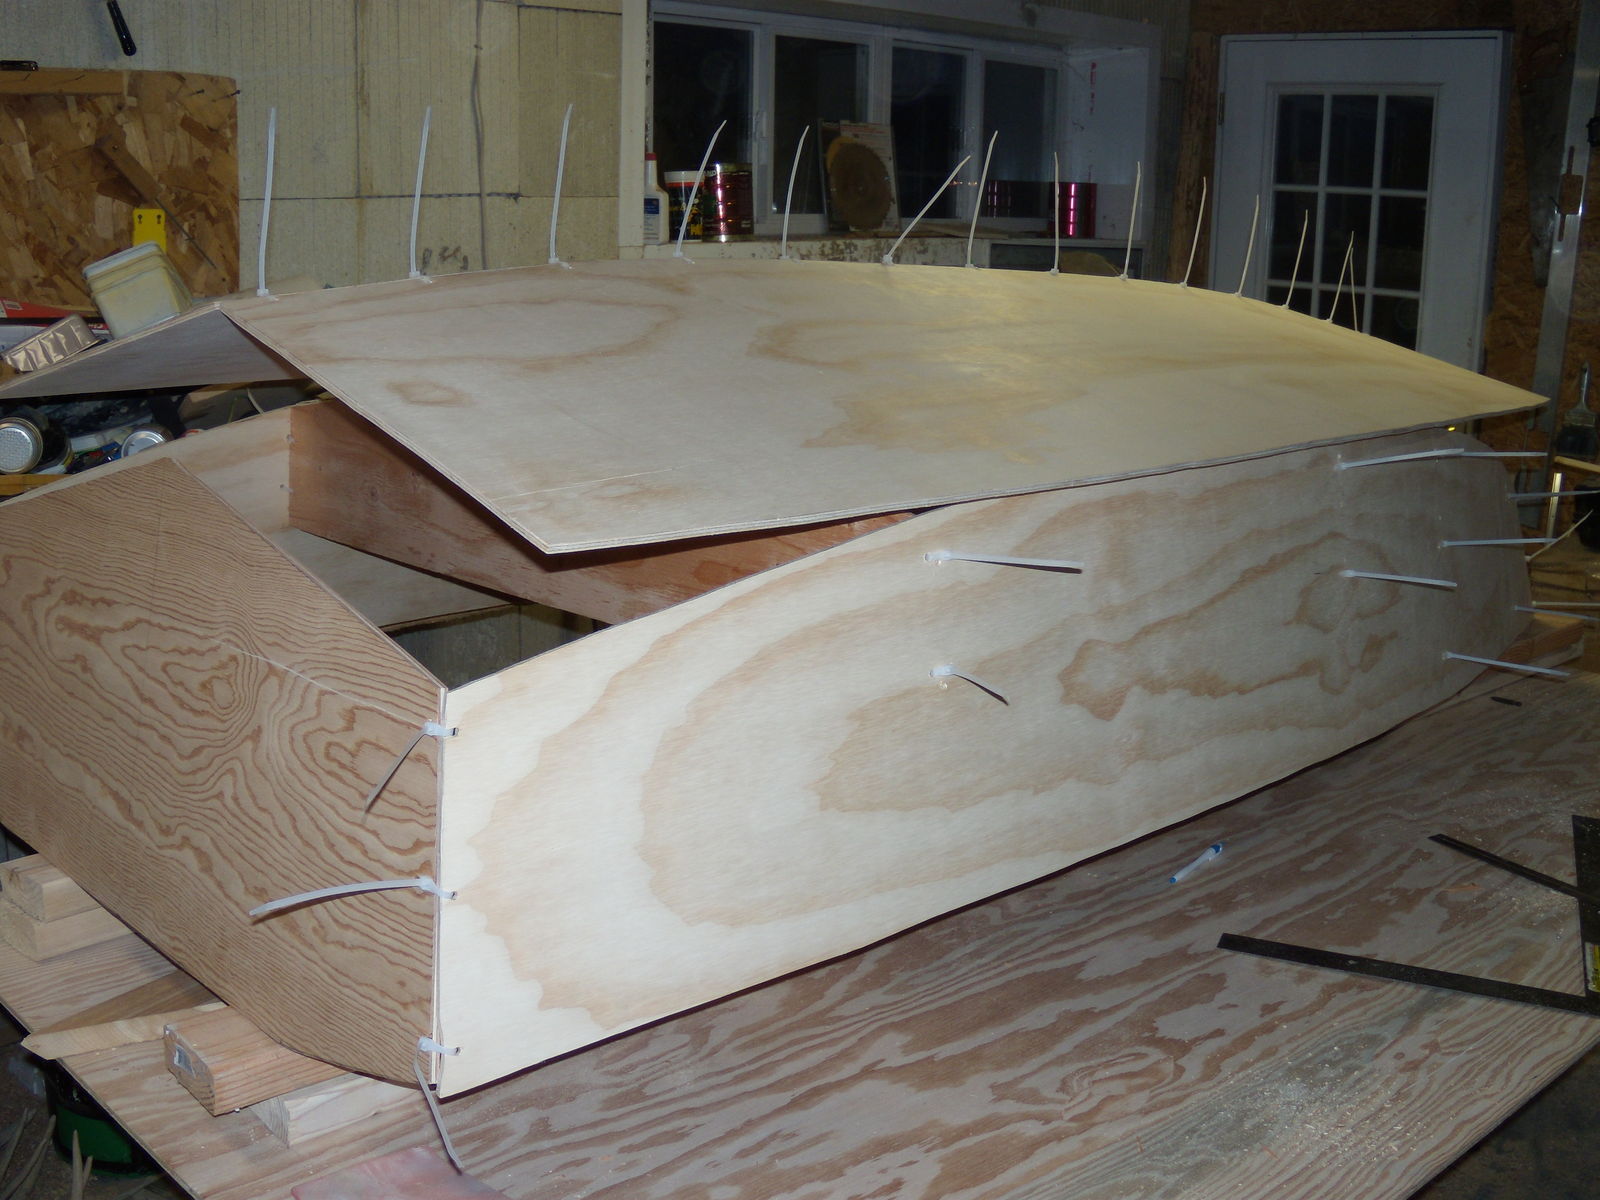
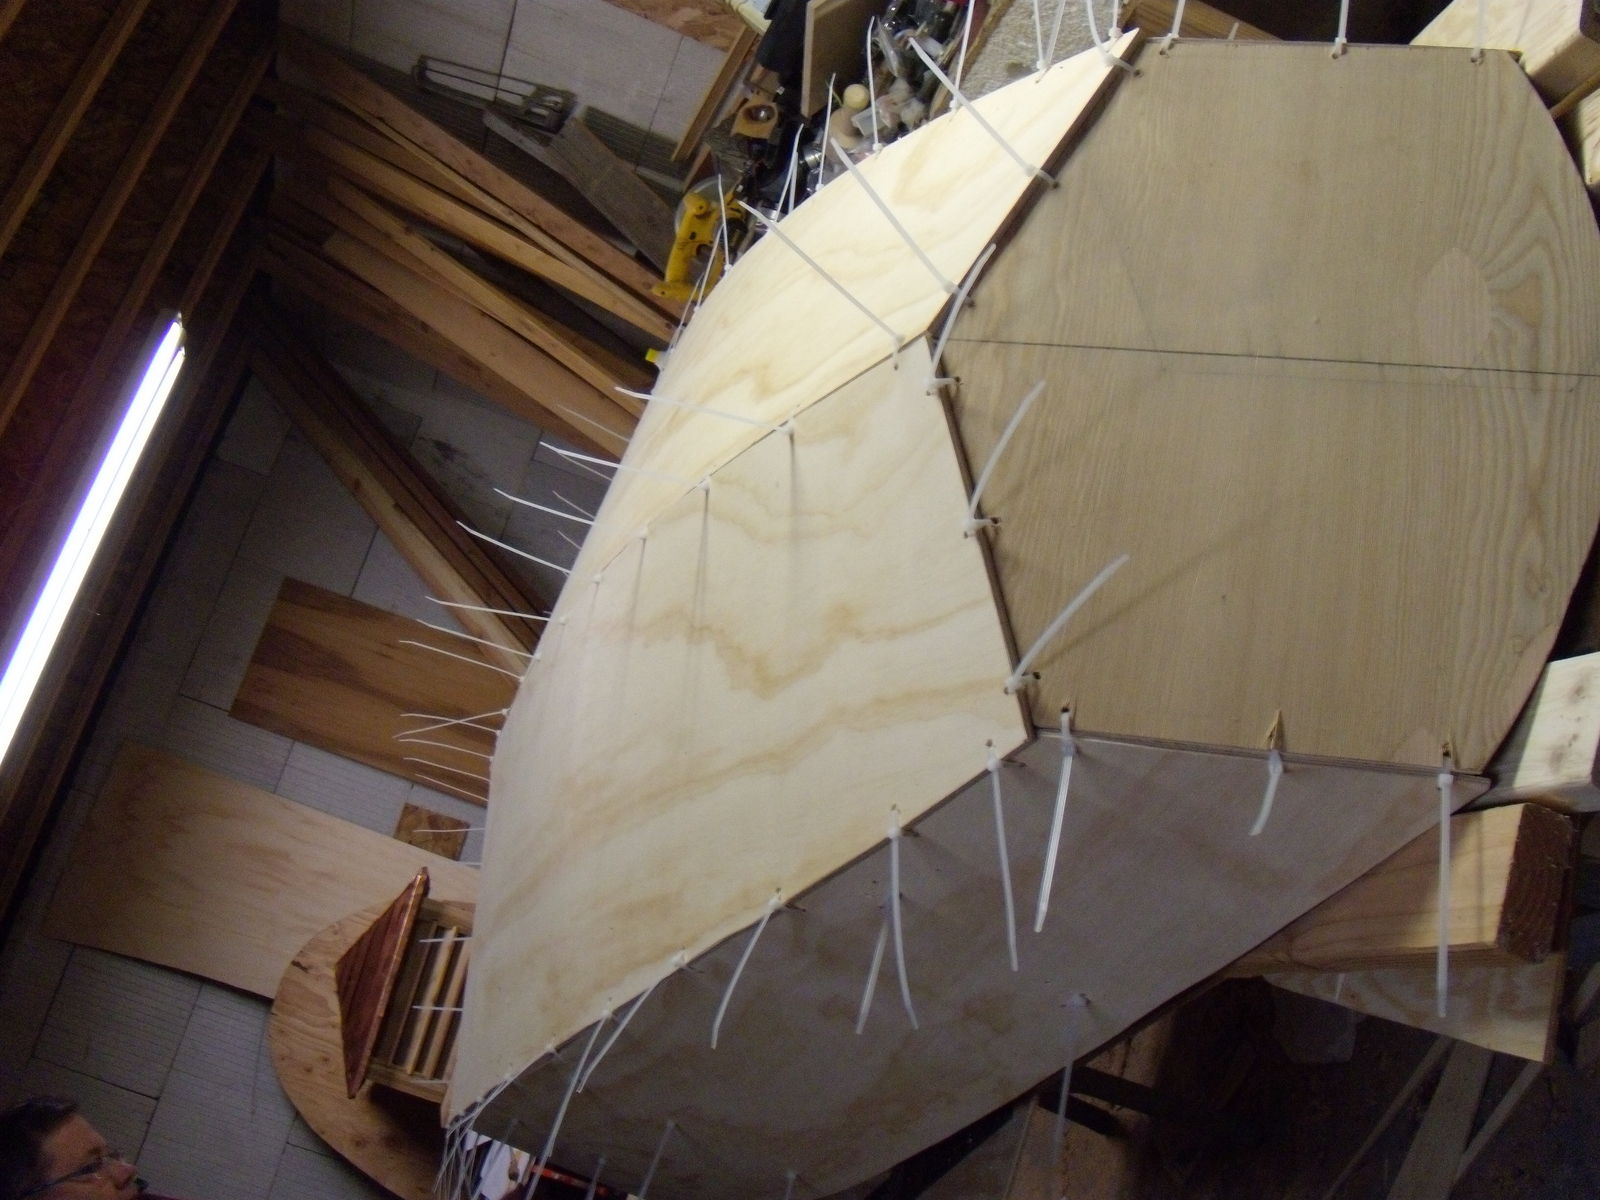
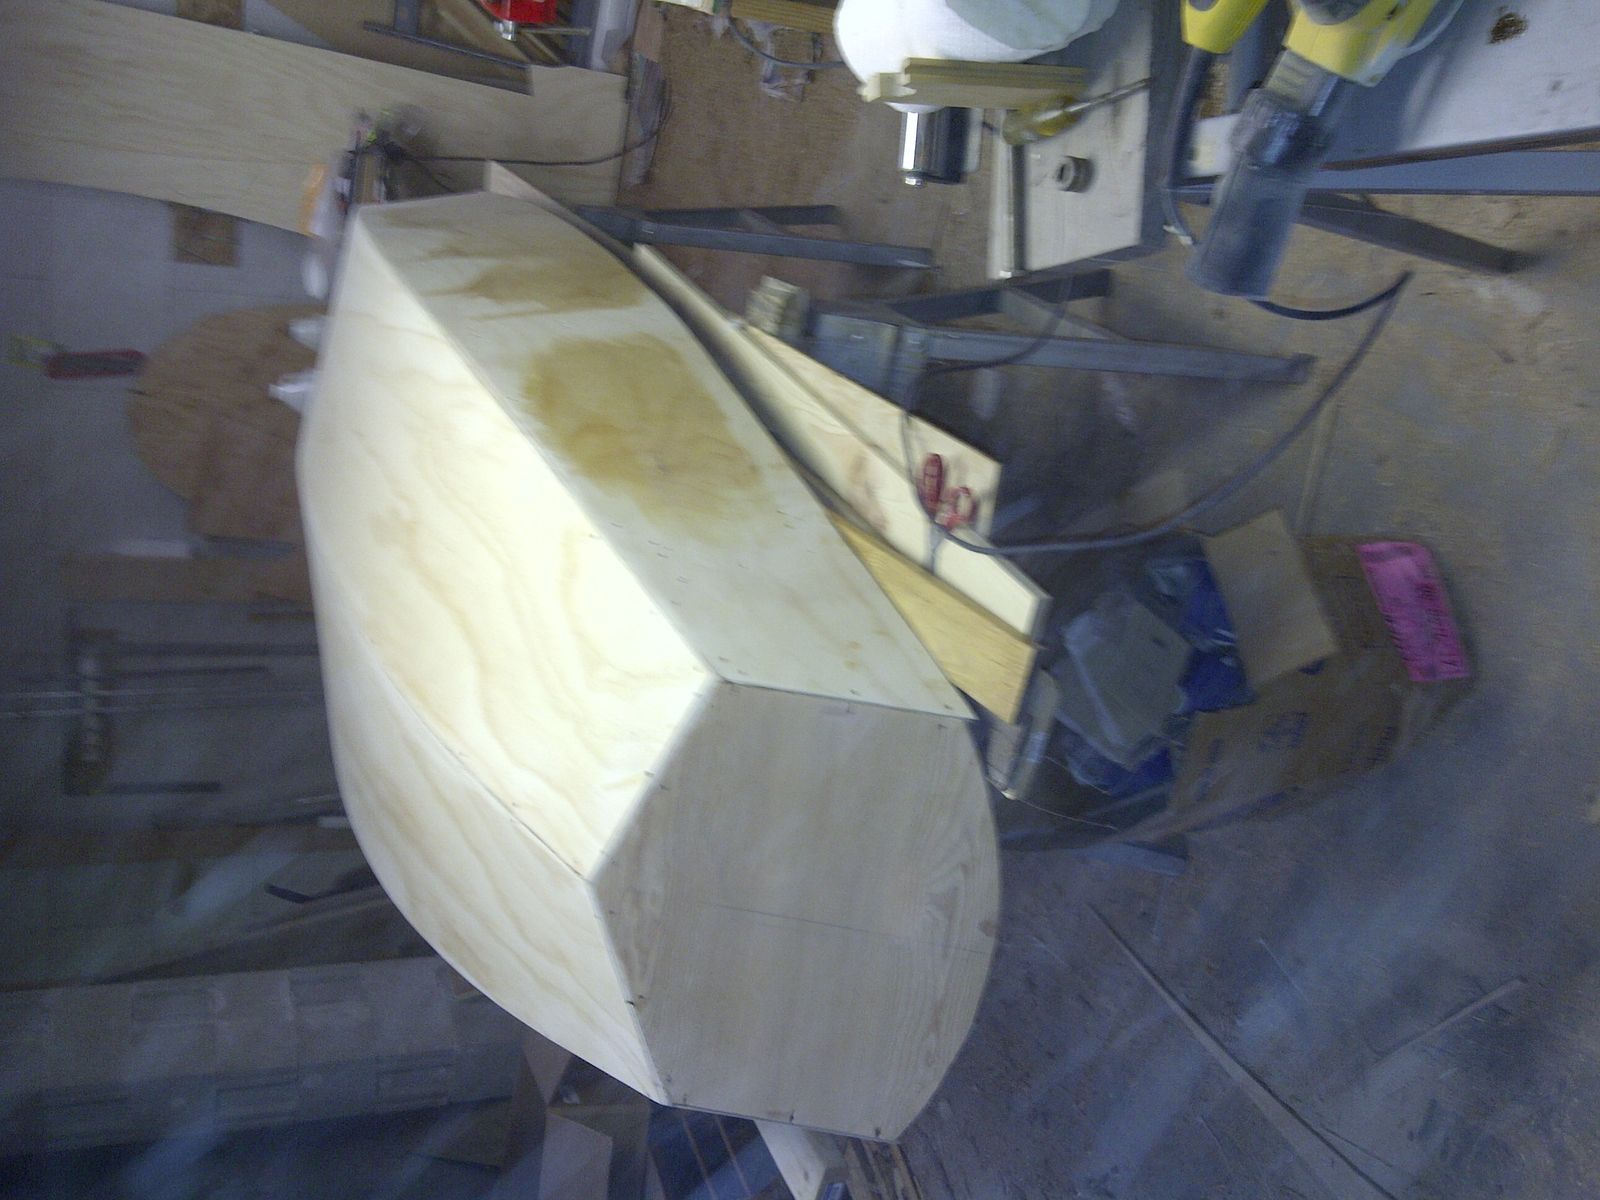
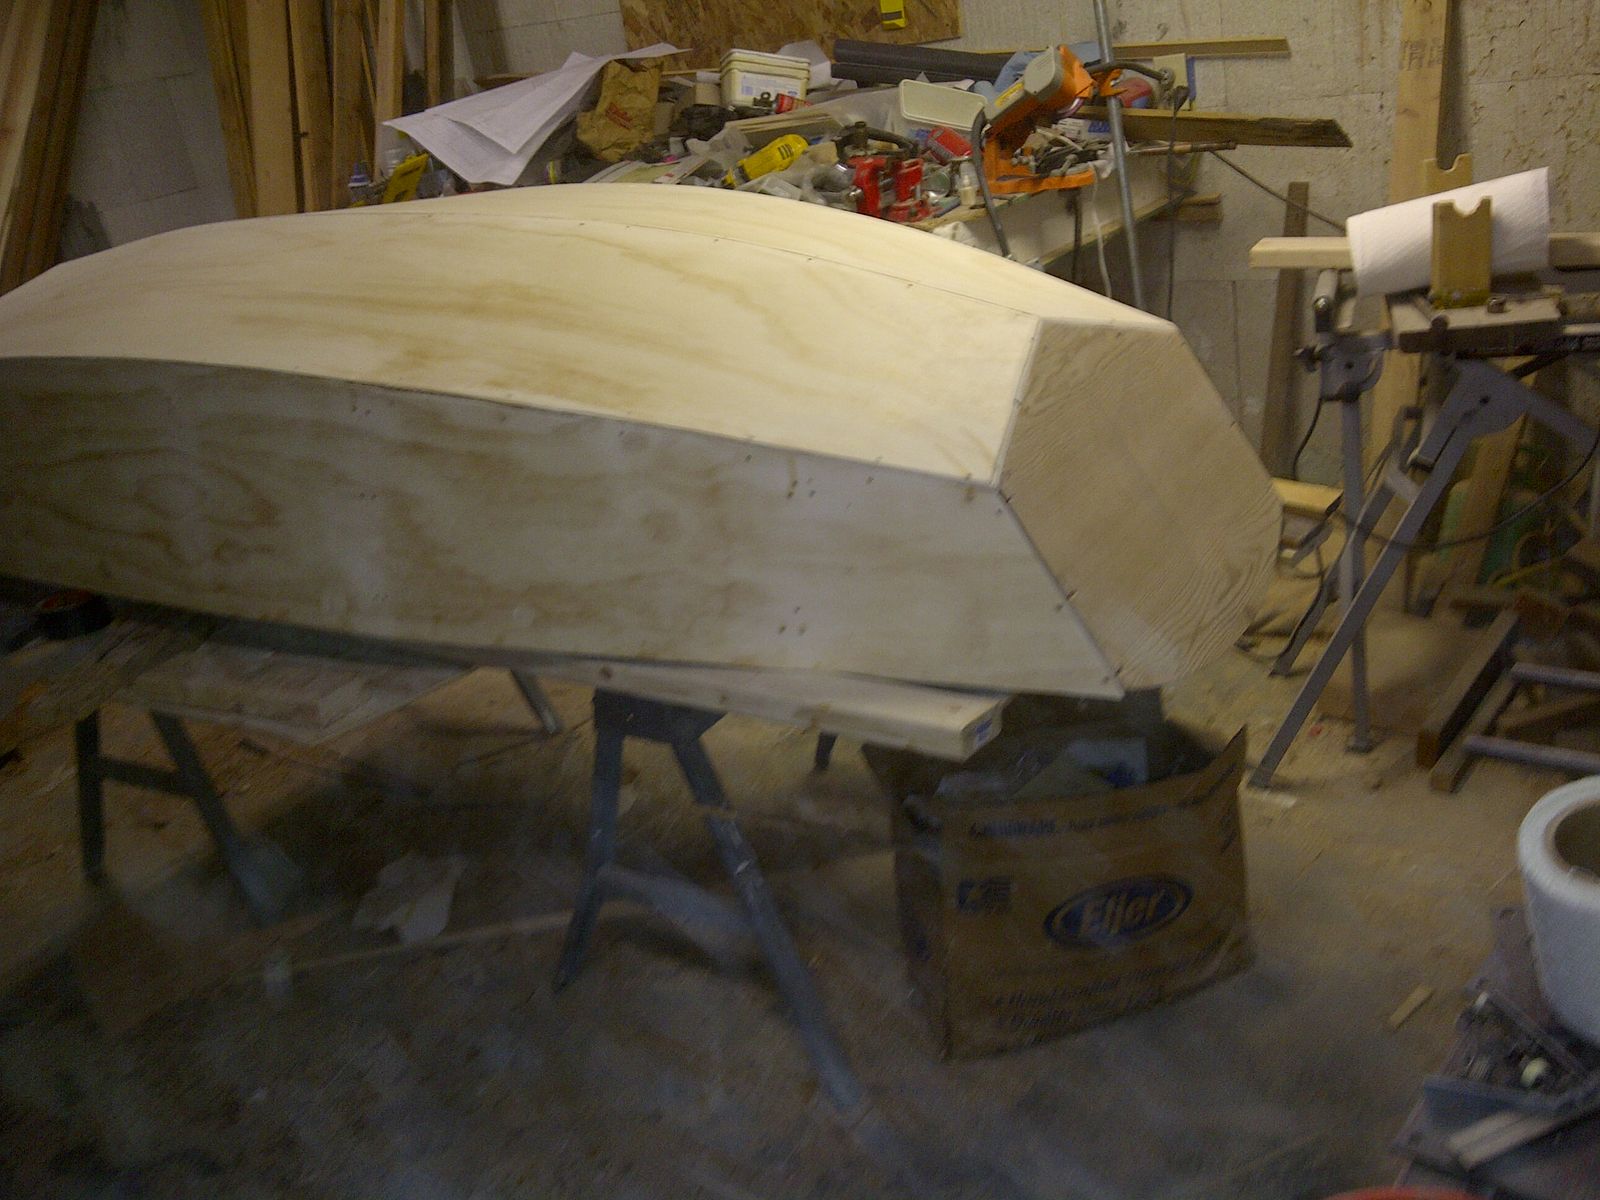
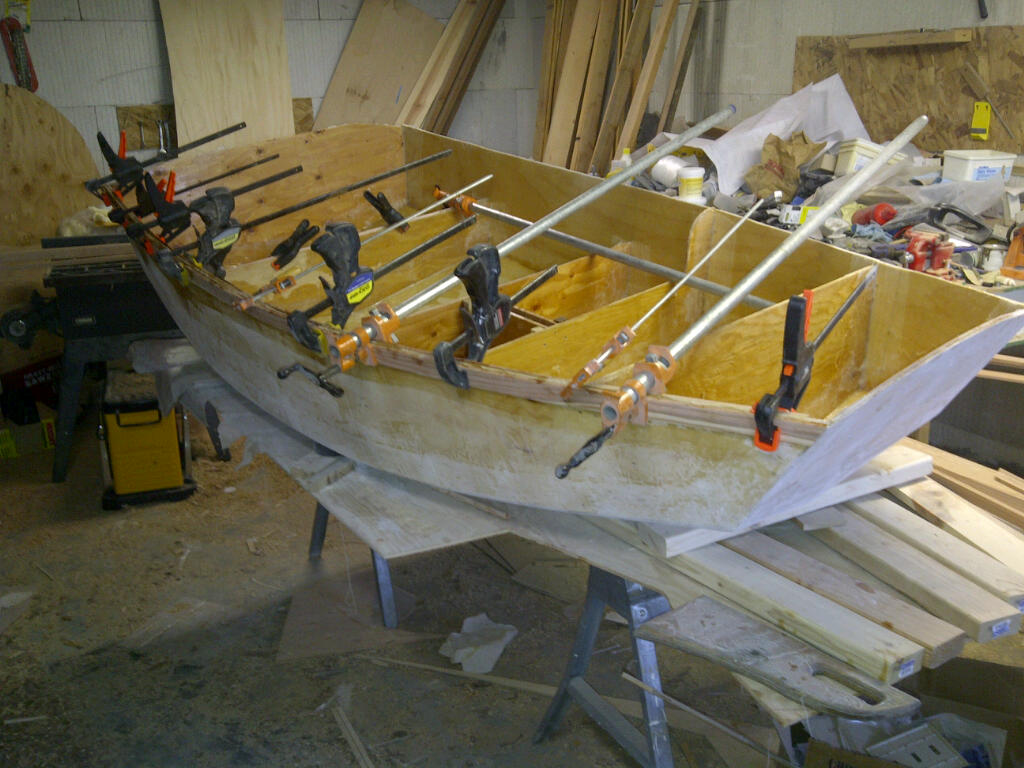
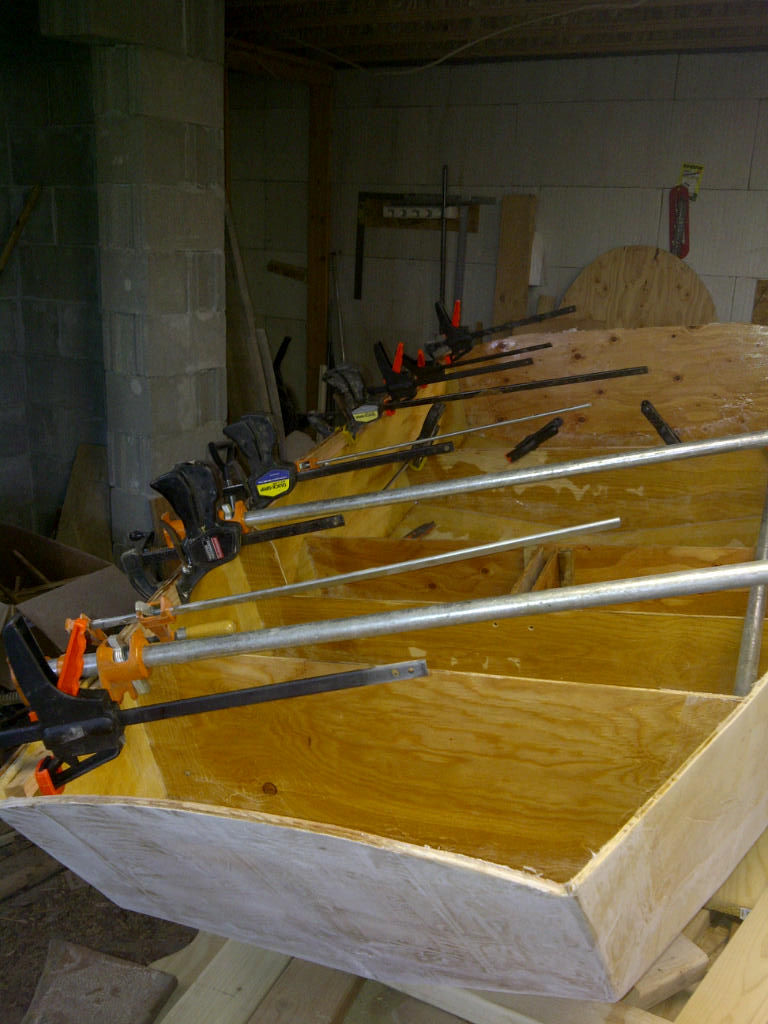
Well . . . some significant progress at last. Instead of just cutting out "seemingly" random shapes, we have the shape of a boat!!! very very interesting how it all comes together.
We had trouble figuring out where to put the seat supports/frames on the inside, but in the end, put them there temporarily and then adjusted as the shape took form.
One very important hint - - DON'T TRY TO DO THIS BY YOURSELF - - - you simply don't have enough hands.

I have pictures, but can't seem to figure out how to attach them!

~markb
Re: Montana built D5
Posted: Tue Apr 19, 2011 11:34 am
by gstanfield
You could e-mail them to me if you want and I'd be happy to post them for you. The other option is to resize them to 640x480 (or anything around there) and host them online either at this site's gallery or a place like photobucket, etc. then select the picture, right click and select properties. Copy the URL for the pic then go to your post. Click the "img" button and then past the url between the set of "img" brackets.
That's the rough and dirty version, but again I'd be happy to help post them if you just want to e-mail them to me.
Re: Montana built D5
Posted: Tue Apr 19, 2011 11:40 am
by bratzcpa
Re: Montana built D5
Posted: Tue Apr 19, 2011 11:55 am
by gstanfield
Looking good! We need a few more rocky mountain guys and we can have a high country builder's meet

Re: Montana built D5
Posted: Wed Apr 20, 2011 11:26 am
by bratzcpa
Hey george - I ran into a guy on here the other day that lives just south of Missoula (in Lolo). So that's 3 of us now so far!!!

mark
Re: Montana built D5
Posted: Wed Apr 20, 2011 1:45 pm
by gstanfield
Sweet! Earlier today I was driving through an alley and saw an empty bucket of "two part marine foam" in some guys backyard. I really wanted to knock on his door and ask but figured it best not to since I was on duty

There's also a fairly large group of builders down in CO, some bateau and some others but still enough for a gathering if we branched out a bit
Re: Montana built D5
Posted: Wed Apr 20, 2011 2:17 pm
by Prarie Dog
The D5 looks like it's coming along nice.
George, are there other Bateau builders in Colorado? It would be cool to have a Rocky Mountain Builders Meet.
Re: Montana built D5
Posted: Wed Apr 20, 2011 3:51 pm
by gstanfield
Paul there's a guy I spoke to in Ft Collins who built a FL12 and another guy on the west slope (Craig I think) who was building an FS17 but he was only on the board for a few days and I havn't heard from him since
As far as I know you built the largest bateau in this area, but then again who knows what ahs been built and not shared on the forum

I've almost convinced the local game warden to build the HC16 canoe, but he's still stalling as of now.
On that note, I found that one of my local lumberyards up in Casper can get marine ply without any extra shipping charges, but it will come on their next truck which may be a week or a month out. It still opens up the possibilities and cuts me down to a 70 mile round trip instead of 500 mile
They have an annual woodenboat messabout in the Boulder area, in fact last eyar they had two of them. While they may not be bateau designs it's still a get together and I'll be at the next one
Re: Montana built D5
Posted: Wed Apr 20, 2011 8:32 pm
by gstanfield
Mark, didn't mean to hijack your build thread. I just got excited about some more builders in this part of the world
Re: Montana built D5
Posted: Thu Apr 21, 2011 11:40 am
by bratzcpa
No worries about the alleged "hijack".
This is supposed to be about fun, and making some new friends, and learning some new things . . . so, all is good as far as I can tell!
I have been wanting to get back to the project, but tons of other junk in the way right now. Currently working on a tiling project in bathroom- putting in a big "soaker" tub. Fortunately (??) it's super crappy outside now, so don't have much of the normal "spring urge" going on. In fact, yesterday, we had a couple of inches of snow.

Not a good thing for late April.
Tomorrow night, I think we'll flip it over and start putting the putty and few inside corners.
I had "wanted" to do it outside on patio so the whole house wouldn't smell so badly (from the resin). I haven't opened up this new batch, but I remember from years ago when I built a cedar strip canoe, the fiberglass resin odor was VERY strong. But being that it's only 40 degrees out that might not be such a "hot" idea!! grin
mark
Re: Montana built D5
Posted: Thu Apr 21, 2011 11:51 am
by Cracker Larry
The epoxy resin is almost completely odorless. You must have used a polyester last time? It's not a problem to use it indoors
Re: Montana built D5
Posted: Thu Apr 21, 2011 2:26 pm
by Fred in Wisc
I use epoxy in my basement shop all the time. A pint of it, all spread out thin laminating cloth, is just barely noticable upstairs. Way less odor than cooking.
But a couple tablespoons of polyester resin would chase you out of the whole house. That stuff is nasty.
It's an entirely different thing. Epoxy is way better in every way.
Enjoy your build.
Fred in Wisc
Re: Montana built D5
Posted: Thu Apr 21, 2011 2:53 pm
by TomW
I have a gallon of resin and 1/2 gallon of slow hardener sitting in my dining room right now fixing some furniture here in the house. There is absolutely no smell from the mixes I'm using. Been puttering at things all winter in the enclosed house and my wife has had no objection and she is allergic to about everything.
Re: Montana built D5
Posted: Thu Apr 21, 2011 2:57 pm
by wegcagle
I did use some MAS epoxy once while building my console. Slow hardener. That stuff smelled pretty strong, but not NEAR as bad as polyester resin. I can barely smell the marinepoxy or the silvertip sold here.
Will
Re: Montana built D5
Posted: Thu Apr 21, 2011 3:10 pm
by gstanfield
The marinepoxy slow hardener smells a little like peanut butter to me, but not so strong that it's an issue. I built my son's boat bed inside with no issues at all, also did all my butt joins on my FL14 in my downstairs living room with no issues.
Ok, excuses are now shot down, time to get to work

Re: Montana built D5
Posted: Mon Apr 25, 2011 11:50 am
by bratzcpa
wow - - - thanks for all the feedback. I guess that kind of "ages" me too. When I built that cedar Strippercanoe, it was 1982, so probably must have been a polyester resin . And yes, it was terribly terribly smelly.
So . . . I will charge on forward - having had my latest excuse stripped away fully.
grin
~markb
Re: Montana built D5
Posted: Wed May 18, 2011 12:28 am
by bratzcpa
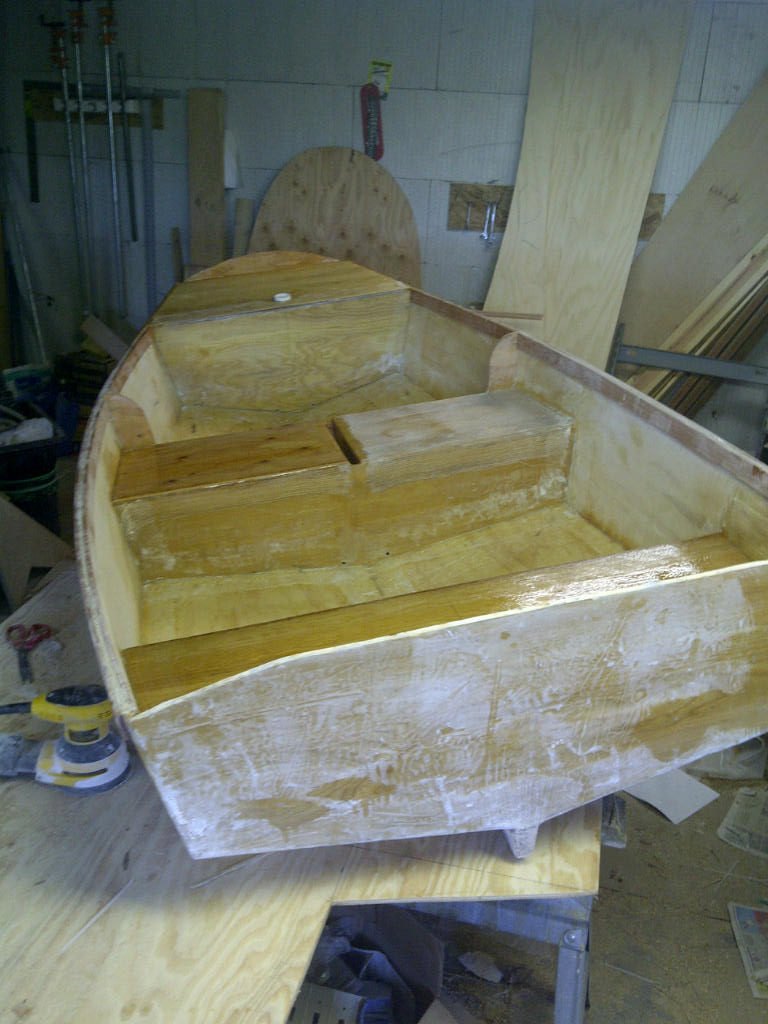
well . . . I'm happy to report PROGRESS!!!!
I have most of the inside seems done. Almost ready to move to the outside.
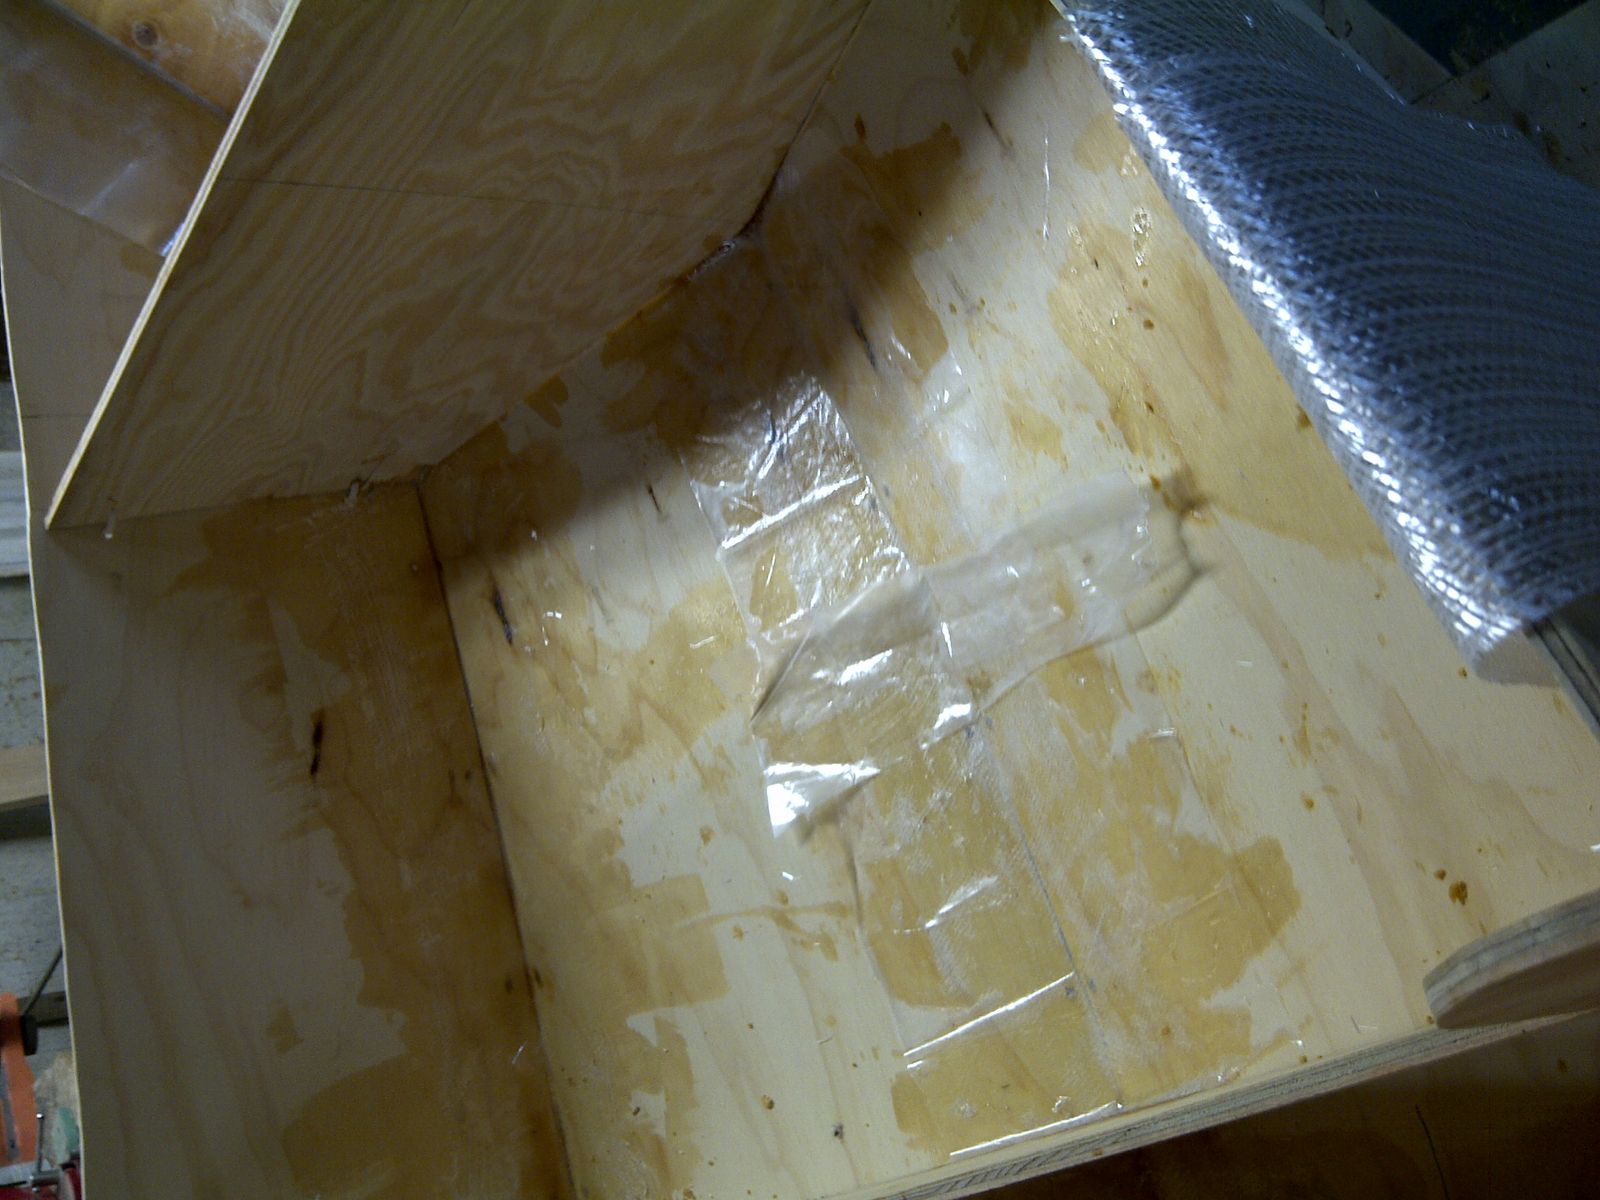
Parts of this were a lot harder than I figured they would be. it all seemed so simple when you read the instructions. But maybe some of that is a learning curve too. AFter the third small 'batch' of mixing and seams, it feels easier too. But here at the things that seem kinda "hard" for meand a few questions too:
- it's messy. I mean the stuff goes all over. I was picturing these nice neat tidy seams, but alas.
- I'm using the 'poor mans peel ply' to try and get things perfectly smooth, but they are a long long ways form perfectly smooth. it sure looks to me like I will have sanding to do. is that normal???
- quantity of epoxy. I seem to be going through the epoxy pretty doggone fast. At this point, i just can't imagine that I could possibly have enough. The plans called for 1-1/2 gallon kit. (1 gallon epoxy, 1/2 gallon hardner). What do you think? is this common to need more epoxy.
- I used "zip ties" to hold this thing together. Despite trying to cut these as flush as possible to the hull, they still protrude out with sharp points a little. Any ideas on how to get rid of that?? or to avoid that problem??
- Somewhere along the line, I noticed that I'm supposed to just "paint" the epoxy on all the surfaces. I'm wondering if I do that after all the seams are done, or perhaps first before doing any seams? I hope it is "after" because that's the presumption I started off using.
- Finally, I am going to put a thin layer of cloth on the bottom. I will be using this as a dinghy boat and will likely be dragging this up on the beach, across coral/rocks/gravel/etc. Somewhere I read to just use a light cloth (3.2 or 4.0 oz). Does that seem right to you?
Thank you, in advance for your input and critique.
Regards,
~markb
Re: Montana built D5
Posted: Wed May 18, 2011 9:28 am
by gstanfield
- it's messy. I mean the stuff goes all over. I was picturing these nice neat tidy seams, but alas.
It takes practice
- I'm using the 'poor mans peel ply' to try and get things perfectly smooth, but they are a long long ways form perfectly smooth. it sure looks to me like I will have sanding to do. is that normal???
Yes, It takes practice
- quantity of epoxy. I seem to be going through the epoxy pretty doggone fast. At this point, i just can't imagine that I could possibly have enough. The plans called for 1-1/2 gallon kit. (1 gallon epoxy, 1/2 gallon hardner). What do you think? is this common to need more epoxy.
Yes, most of us use more epoxy than called for. The key to using less is practice
- I used "zip ties" to hold this thing together. Despite trying to cut these as flush as possible to the hull, they still protrude out with sharp points a little. Any ideas on how to get rid of that?? or to avoid that problem??
I remove them completely
- Somewhere along the line, I noticed that I'm supposed to just "paint" the epoxy on all the surfaces. I'm wondering if I do that after all the seams are done, or perhaps first before doing any seams? I hope it is "after" because that's the presumption I started off using.
After is how I do it
- Finally, I am going to put a thin layer of cloth on the bottom. I will be using this as a dinghy boat and will likely be dragging this up on the beach, across coral/rocks/gravel/etc. Somewhere I read to just use a light cloth (3.2 or 4.0 oz). Does that seem right to you?
I used 6oz on the bottom of my FL14 and it's indestructible! You could save a pound or two and use 4oz and still have some protection though
Congrats on making some progress. As with most things boat building related it takes more time and money than initially planned for

Re: Montana built D5
Posted: Wed May 25, 2011 11:57 am
by bratzcpa
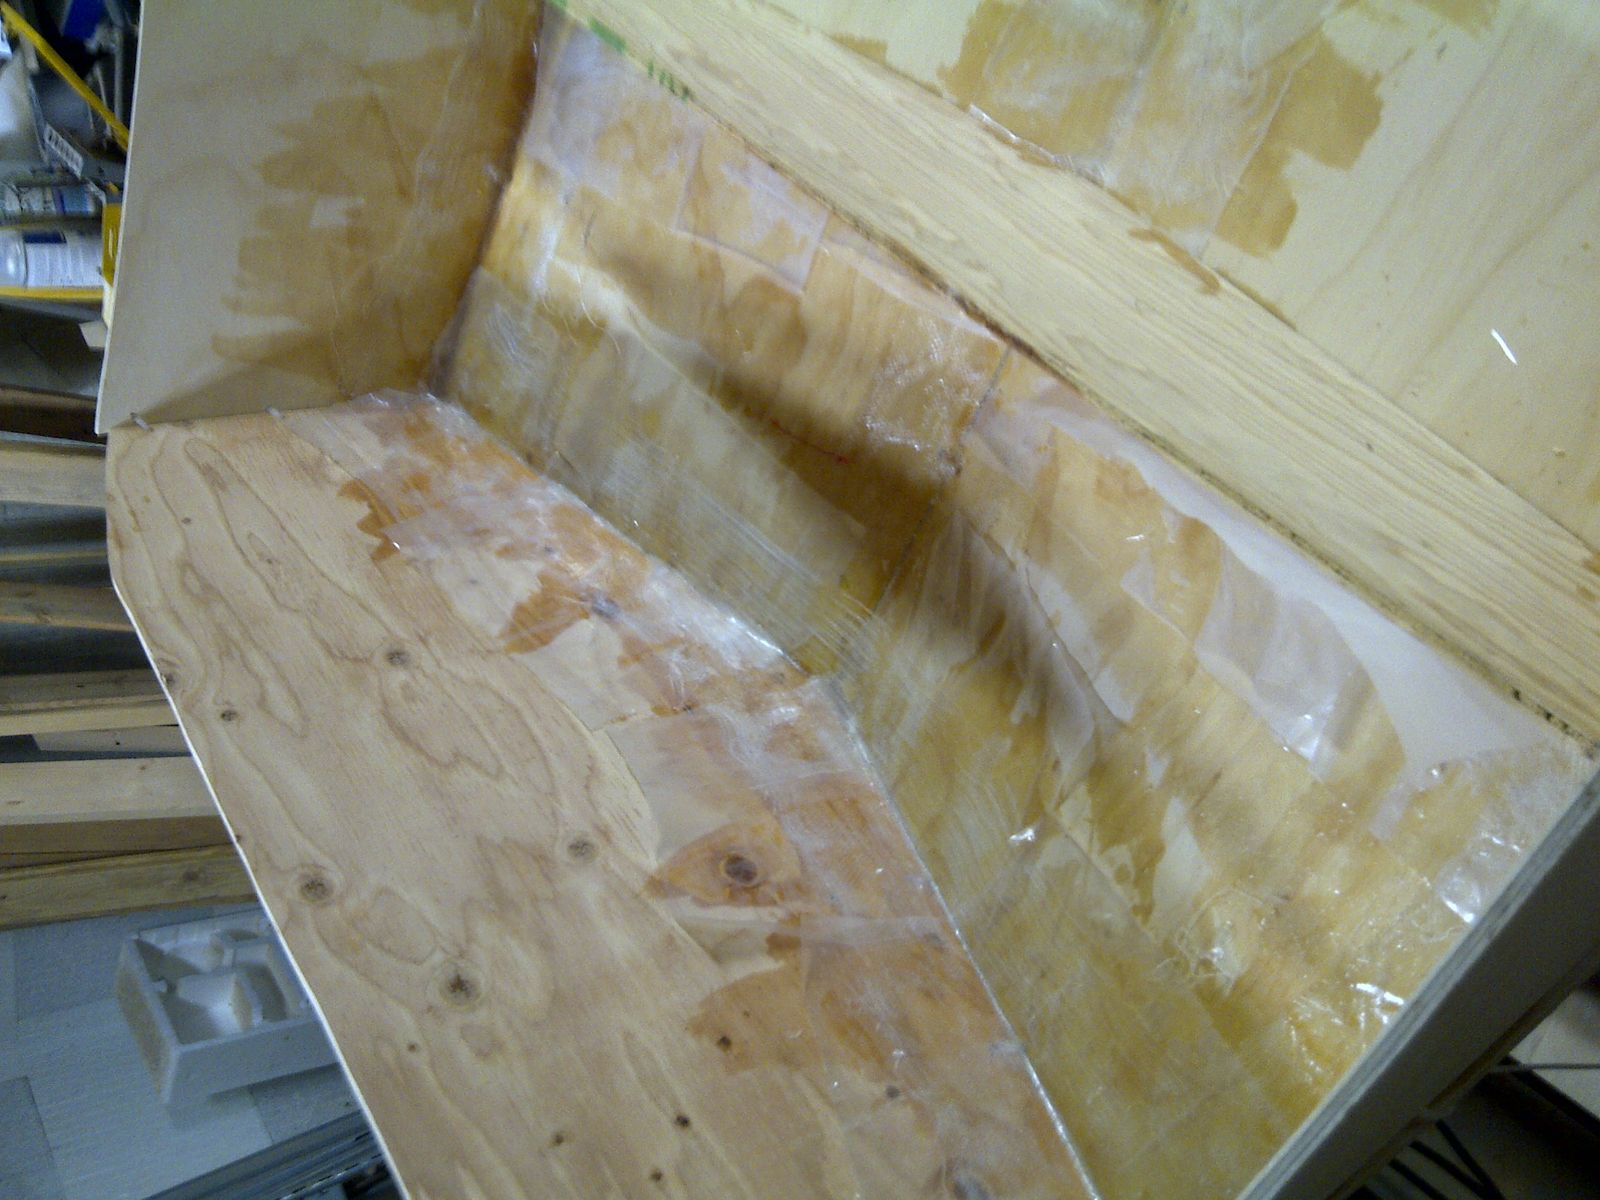
Well . . . . progress on the inside seams continues on. I think I am getting a little better at this, but still not very pretty or tidy!!!
I'm using the peel ply and parts of that end up very very smooth. However, along the edges and ends, it's still quite rough/bumpy. I'm using a piece of lexan and a small flexible plastic card (similar to a credit card) to smooth out the ply and move the epoxy around (underneath the ply). I wonder if this the right approach, or would something like a roller be better?
Also trying to decide if I should get some of the fairing material. This is just a dinghy/tender, but I'd still like it to look "finished" and nice. Also, we'll be climbing in and out in bare feet, etc., so probably need to have it smooth inside so as to not scratch up the kids' feet, etc.
Re: Montana built D5
Posted: Wed May 25, 2011 2:53 pm
by gstanfield
What your doing sounds good. I sometimes pour the epoxy onto the glass and then squegee it around with a small plastic "bondo spreader" and then sometimes I just use a foam roller to spread epoxy on top of it. I'd not worry too terribly bad about getting it perfect, like you said it's not a yacht that needs to be perfect.
You can use some fairing compound to make it pretty or you could just get it pretty good and the put some kiwi-grip on the inside and it would give a nice textured non skid finish and the cost would be about the same as faired and painted, just depends on what you want.
I did some of my FL14 with spray in bedliner material and it has lasted good and gives a textured finish that hides imperfections pretty good. just another option.
George
Re: Montana built D5
Posted: Mon Jun 06, 2011 12:00 pm
by bratzcpa
Good morning - well, got all of the inside seams done this weekend, ready to flip it over tonight and start working on exterior. One minor question in my mind with that, though: I plan to coat the bottom with a layer of light cloth - - - should I do the seams first and then drape cloth over the whole bottom??? Or just do the big single cloth??? Or do the big single cloth and then add a second layer (of 6" biaxial tape) over the seams??
any thoughts or suggestions?
Yikes, I'm hoping this sucker is done before the boating season is done!!!!
~markb
Re: Montana built D5
Posted: Thu Jun 16, 2011 12:27 pm
by bratzcpa
Continuing to make progress.
Just waiting for a shipment from Bateau with more gloves, more epoxy resin/hardner, and the cloth for the bottom.
I also ordered some fairing compound and paint. Not trying to turn this into a "work of art" like some of the BEAUTIFUL projects I see on here . . . but do want to make it at least "sorta" smooth.
So, continuing to work on things on the inside. Last night, I mounted the daggerboard trunk and the mast step. I'm wondering what holds down the daggerboard (keel) when sailing. Just friction fit?? I'm thinking though that the wood for the keel is bouyant and would want to float up??? No big deal, I'm sure a solution will appear when/if that happens.
Still looking for some feedback on the cloth for the outside bottom. Do I put the tape on the seams first and then the big cloth for the bottom . . . of cloth on the bottom first, and then a layer of tape on top of the cloth on top of the seams?
I also made the daggerboard/keel the other day. I had some mahogoney that I had used in a canoe project 25 years ago. Despite the water use for many many years . . . it was in perfect condition. That is some awesome wood. wow. Anyway, planed it down, edged the pieces, epoxied it together, and cut to shape. Also planed off the old finish. Super result.
Also remembered to epoxy a coin into the mast step too!!!
~markb
Re: Montana built D5
Posted: Thu Jun 16, 2011 1:01 pm
by Doc_Dyer
bratzcpa wrote: I'm wondering what holds down the daggerboard (keel) when sailing. Just friction fit?? I'm thinking though that the wood for the keel is bouyant and would want to float up??? No big deal, I'm sure a solution will appear when/if that happens.
~markb
Mark,
JM told me to cut out a whole after the daggerboard is done about 3 or 4 inch holesaw,
on the bottom portion of the daggerboard, place tape or plastic over one side of hole,
take shotgun lead shot and fill with epoxy/lead till the hole is filled, more epoxy to smooth out the top
and there you go
a weighted daggerboard,
PS. I have yet to do this to mine, it floats up just like you suspected. not a huge deal, just push it down when underway and it will stay.
Seams first then after that put on whole cloth bottom
Re: Montana built D5
Posted: Thu Jun 16, 2011 1:04 pm
by Cracker Larry
Also remembered to epoxy a coin into the mast step too!!!
Cool
Did you do that Doc? Maybe that's what it needs to go to windward
Re: Montana built D5
Posted: Thu Jun 16, 2011 1:08 pm
by Doc_Dyer
no never seen that,
please post pictures
I can always add one to mine,
which one Larry,
penny
nickel
dime
quarter
half dollar
one dollar
Re: Montana built D5
Posted: Thu Jun 16, 2011 1:24 pm
by Cracker Larry
A Krugerrand would be best, but an American Eagle $20 gold piece should work OK.
Re: Montana built D5
Posted: Thu Jun 16, 2011 5:22 pm
by bratzcpa
I used a Montana Quarter, by the way. Hope 'Netpune' doesn't fault me for being cheap!!!!
Here are a bunch of other sailing "rules" to worry about:
http://sailing.info4uabout.com/2010/07/ ... tions.html
Have fun, markb
Re: Montana built D5
Posted: Fri Jun 17, 2011 9:52 am
by ks8
Actually, one of the worst faux pas's to do is to be so arrogant as to call the rules of Good Sailing Sense *superstitions*.

Re: Montana built D5
Posted: Sat Jun 18, 2011 11:12 am
by bratzcpa
well, I flipped it over and am working on the outside now. Wow, this is a LOT more fun than all those little crooked angles on the inside around the seats and all that. Way more fun and much faster too.
I was concerned about trying to sand out all the overlaps and unevenness on some of the edge joints, but that actually worked out very very very easy. I used a belt sander to remove stock, than a random orbital sander to smooth it out.
I was also concerned about the "ends" of the zip ties sticking out (even though I tried to cut them flush), but honestly, they just sanded off without any trouble at all - perfectly smooth.
I like this!!!!!
One question though (hope you all don't mind my "rookie" questions) - I am wondering about the waterproofness of the daggerboard/keel trunk. I cut out the "hole" on the hull - it sure looks to me like some water might "sneak by" along the edges of the trunk, or perhaps where the trunk joins the hull. I am thinking about taking a small piece of tape and basically doing that "seam" (1/2 of it on the hull, and the other 1/2 bent into the "hole"). I think I can squeeze my finger into the hole to smooth out that half. I'm not sure I described that very well, but hopefully that makes sense. I would welcome any thoughts on this.
it's coming along - I can sorta see the end?? perhaps??
My order from Bateau arrived yesterday - it included the paint!!! someday, right?
Cheers,
~markb
Re: Montana built D5
Posted: Sat Jun 18, 2011 11:46 am
by ks8
Regarding cloth on bottom.... tape first them cloth over tape. You can even do it wet on wet and save time between laminations, but round your chine and keel edges a little first..

Regarding daggerboard... as far as I know, the tape around the hole into the trunk is usually the way it is done. Of course that means the hole will get smaller due to the thickness of the tape. Also, if there are any obvious gaps between hull bottom edges and daggerboard trunk, that gets filled with an epoxy wood flour blend.
I glued the trunk in from the inside first, so I could work more easily from the outside later, but I had to be careful cutting the slot undersize, and then dremeling it carefully to size, but you can also cut the slot first and fit the trunk into it, either way. Just plan how you will hold and clamp things in place during the initial *get it locked in position* cure.
Trunk is already bonded and taped in on the inside at this point.
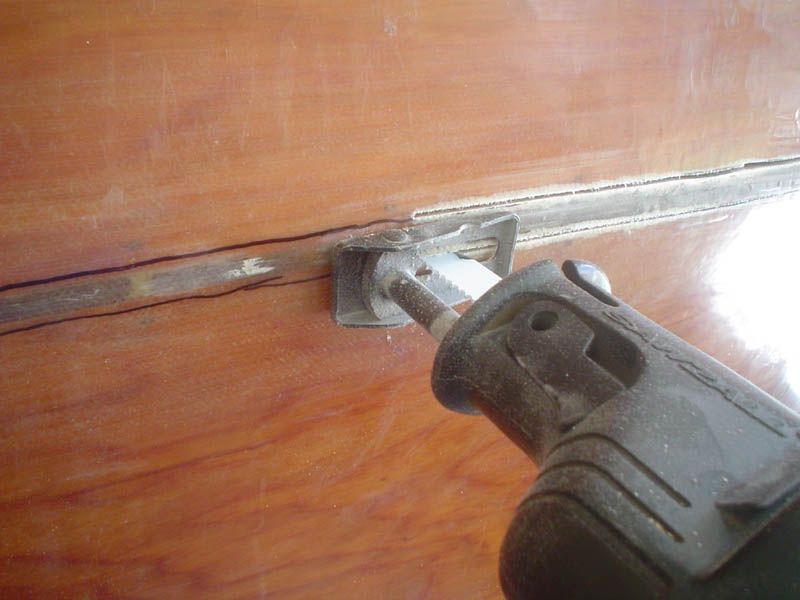
6088
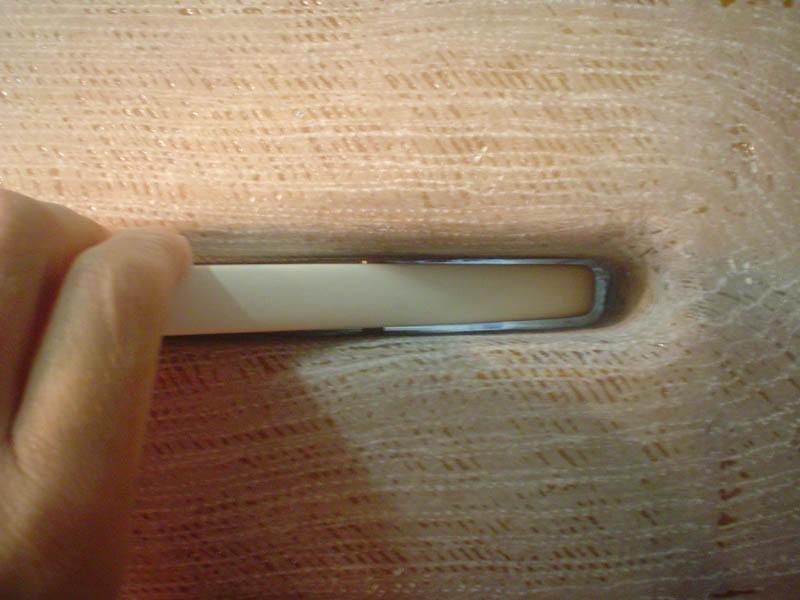
Then the undersize cut gets widened with dremel, then routed. The rounded edge helps the tape take the turn better into the slot.
6104
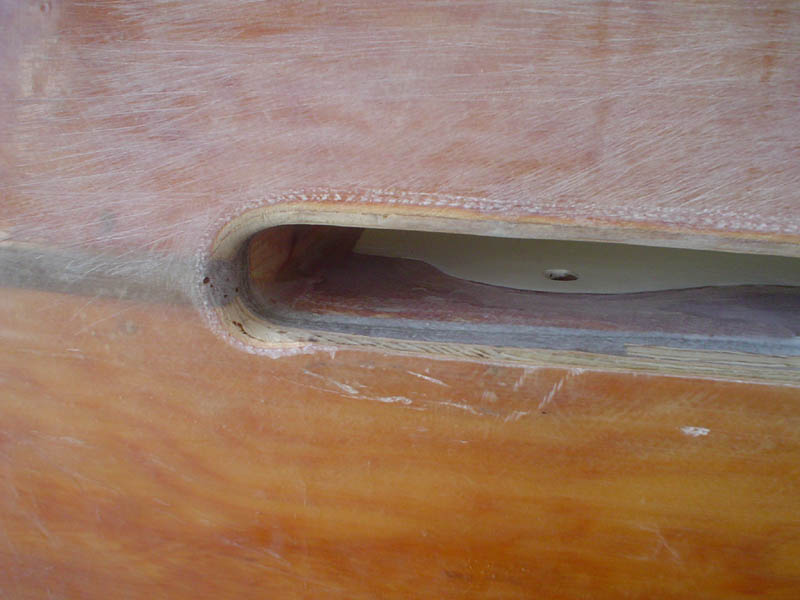
I then biax taped from the hull bottom, around the slot's rounded edge, and up into the slot. Here is has all been scratched up after the biax cure, so I could do a CB test fit. I had planned slot and board dimensions, after all the finish systems, so it would fit with slight room to spare.
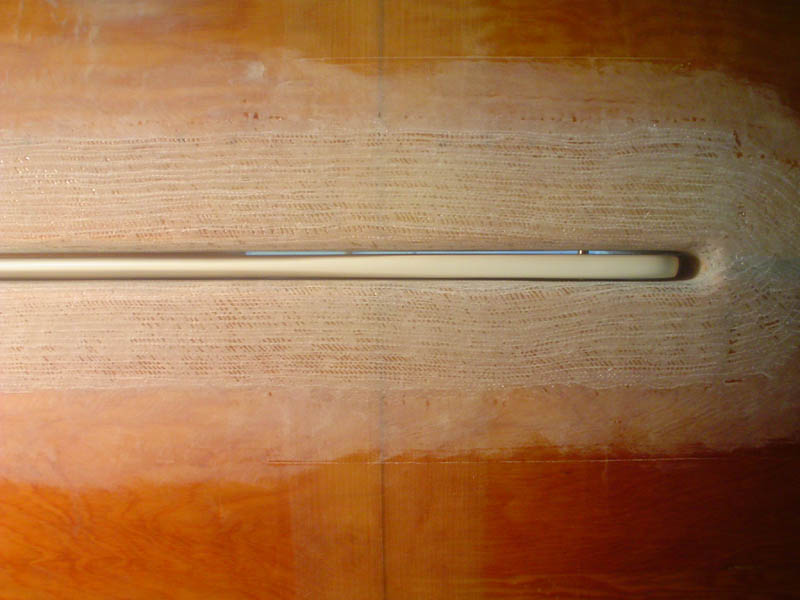
6136
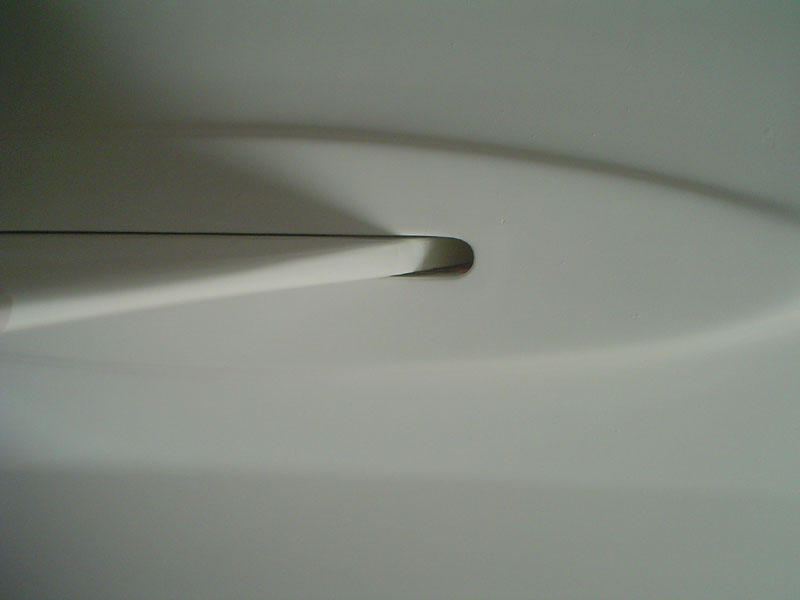
Plenty room before the I added the keel foot and faired and painted.
6138
After all the finish systems, and having added an optional keel foot, I planned a little closer than I'd like, but it does fit and pivot nicely, and doesn't vibrate or hum at all.
7117
The D5 is clearly a very simple boat and your slot and taping can be very simple, but it will be easier if you round that edge for the tape. The trunk can either sit on the bottom panels (like mine), or you can cut the slot wide to insert the entire trunk into the slot for bonding and taping. When all is cured, it is a composite structure anyway with plywood core and fillets and tape on both side of the bond to the hull. Remember to be aware of how the slot thickness will decrease once you tape up in there and fair and paint it.
Have fun fixing that big slot you cut in the bottom of your boat.
Re: Montana built D5
Posted: Tue Jun 21, 2011 5:44 pm
by bratzcpa
ok, so that went pretty well. I used a bunch of putty/fillet material (applied with a long skinny tongue depressor) into the inside "corners" of the daggerboard trunk from the outside of the hull, then put 4 pieces of tape (2 long and 2 short) along the hull and folded the other half into the trunk to 1) secure the trunk to the hull well, and 2) "hopefully" make that joint very watertight.
It's a little rough inside the trunk from the edges/ends of the fiberglass tape, but I think I can figure out a way to smooth/sand that inside - somehow!! I'd like to do that to keep the daggerboard from getting all scratched up.
I picked up some very nice (clear) redwood to use to make the rub rails, bresthooks, skeg, transom support, oarlock supports, etc. - - - at Home Depot, of all places. Cheap too! I was surprised.
Thank you for the idea of weighting (with lead) the daggerboard itself. I hadn't thought of that. I use lead to make my own jigs, downrigger balls, etc, so that should be easy to "cast" inside of a hole.
tomorrow night plans - the big piece of cloth that covers the entire bottom.
~markb
Re: Montana built D5
Posted: Thu Jul 07, 2011 11:39 am
by bratzcpa
sanding the outside of the hull now. sanding sanding and more sanding.
I'm feeling more intimate with my sander than my wife lately! not really, but I'm just whining about sanding.
one quick question if you don't mind. So on the bottom, I have a layer of 6" biaxial tape on the seams. Then I added a layer across the entire bottom of light cloth (3.2 oz???). I am now sandingthis smooth to get rid of the bumps and ridges, etc. What's next? Do I brush on just alight coat of epoxy to seal everything up good. Or is this where I use the QuickFair product?
It's looking good - the end is in sight???
thx.
markb
Re: Montana built D5
Posted: Thu Jul 07, 2011 2:14 pm
by gstanfield
Be careful not to sand through the glass, especially the tape on the seams. I personally laid all my glass then went straight to quickfair and sanded that, but I didn't get much wrinkles in my glass
Re: Montana built D5
Posted: Sat Jul 16, 2011 6:40 pm
by Charlie
How about a picture of your daggerboard turned into a centerboard? I'm interested in how you squeezed it all in.
Re: Montana built D5
Posted: Sun Jul 17, 2011 5:16 am
by ks8
Charlie wrote:How about a picture of your daggerboard turned into a centerboard? I'm interested in how you squeezed it all in.
Me three.
Re: Montana built D5
Posted: Tue Jul 19, 2011 11:35 am
by bratzcpa
ha ha ha ok, so somewhere along the line I must have used the wrong word - daggerboard vs centerboard. Good thing I didn't use Keel in the same sentence or I'd really get "taken to task"!!!!

I picked up the rest of the hardware I needed (cleats, bow eye, two more bow eyes for the transom, oarlocks, etc.) Still need to find a pair of rudder gudgeons somwhere.
I got the skeg put on over the weekend and all smoothed into place.
Last night I flipped it back over and started work on the rails. By gosh, it's starting to look like and feel like a boat more everytime I work on it. Need a few more 1 x 1 cleats for the seats and rails on the other side tonight.
I am planning to put foam in the middle seat and in the front seat for flotation, with drain holes in case then get some water. For the rear seat, I plan to use a removable/sealing hatch plate. My thoughts were to have one 'compartment' that I could store things in that would be watertight and stay dry (e.g., camera, wallet, cellphone, towel, etc.) and yet also be accessible.
Re: Montana built D5
Posted: Tue Jul 19, 2011 12:40 pm
by ks8
Drain holes in a foamed compartment also let water into the compartment.

If you want to vent air pressure in a sealed and foamed compartment, you could use a bolt with a rubber washer, near the upper edge, on one of the sides of the chamber. Install a t-nut inside for it. Crank down on the neoprene washer and you have a sealed compartment. Ease out the bolt and the air pressure gets stabilized. I would oversize drill the hole, fill with epoxy filler blend, redrill to size so the edges of the plywood in the hole are completely sealed. Then put a plywood backing plate inside with the t-nut (the spec'd plywood core alone might not be thick enough for the t-nut).
Whatever you decide, make sure all wood surfaces and holes are completely epoxy sealed against water or humidity. This includes the inner surfaces of any *sealed* compartments. Enjoy!
Re: Montana built D5
Posted: Sun Jul 24, 2011 8:05 pm
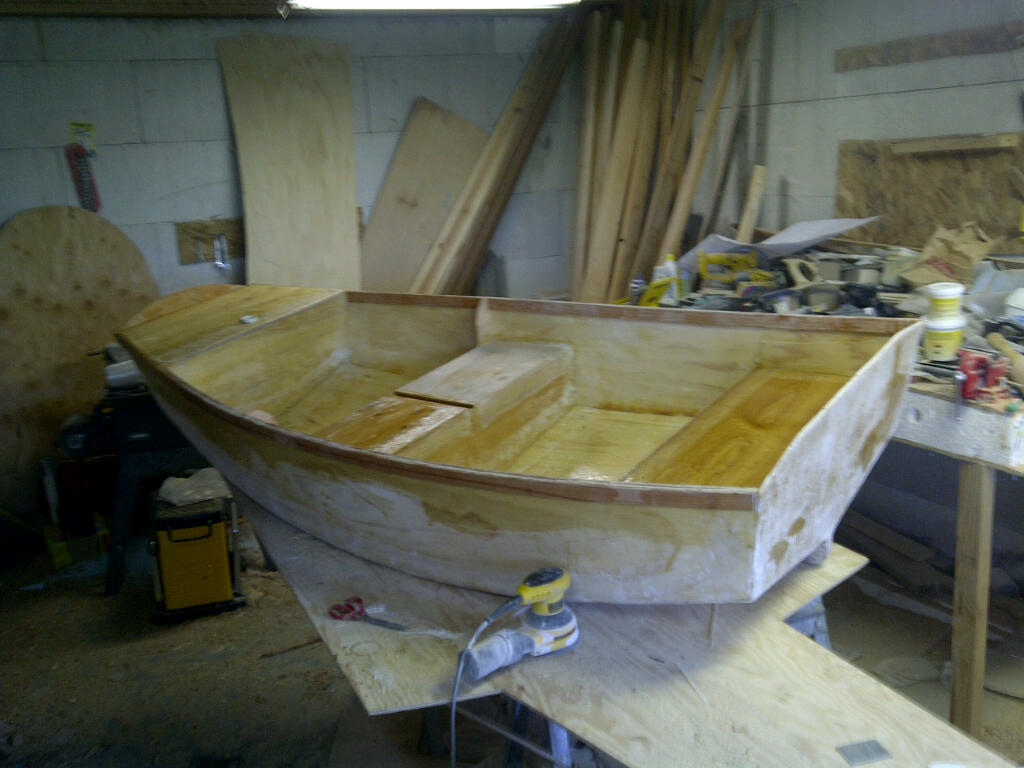
by bratzcpa
ok, seats are all on. I put in blue "extruded" foam in the middle seat and front seat compartments. and a screw in watertight hatch for rear seat.
Oh my gosh - - - it really looks like a boat!!! This boat building thing is really an "experience" - pretty cool.
I expoxied in place a PVC sleeve for the mast to fit into. Right now it just a little bit "proud" of the front deck, but will use the belt sander to make it flush.
Later tonight, plan to flip it over and fair the bottom. paint soon! splash by end of the week???
~markb
Re: Montana built D5
Posted: Mon Jul 25, 2011 9:39 am
by ks8
Look! A boat!
Re: Montana built D5
Posted: Tue Jul 26, 2011 11:21 am
by bratzcpa
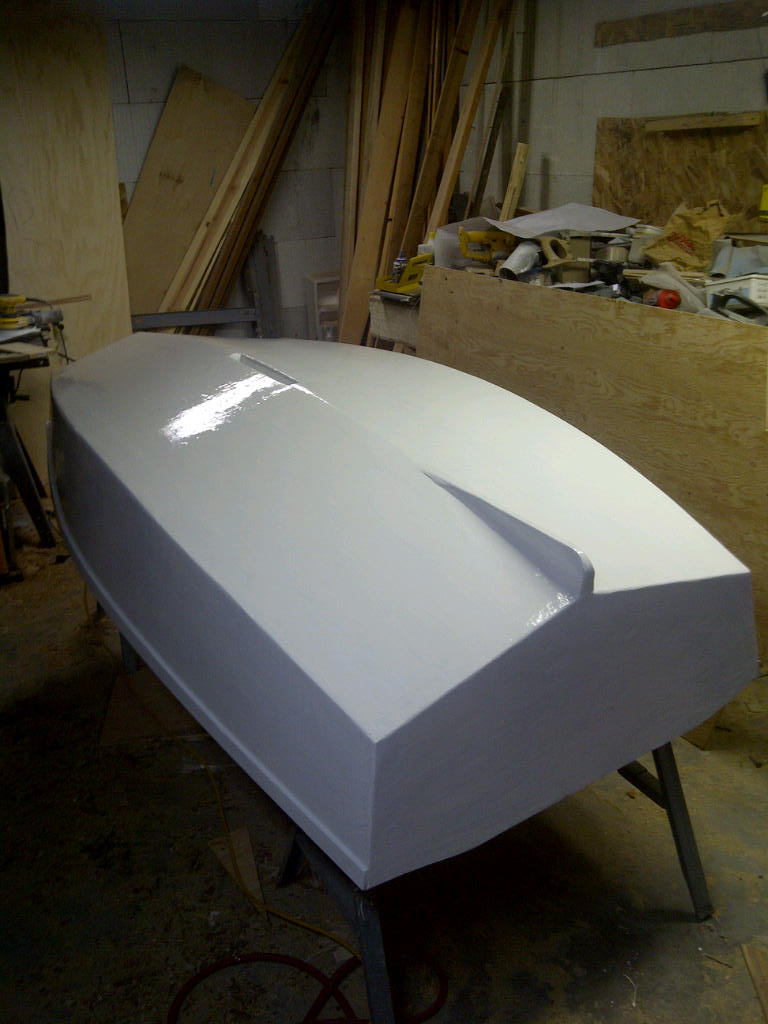
Paint on the outside.
Re: Montana built D5
Posted: Mon Aug 22, 2011 2:50 pm
by bratzcpa
Well - - - - the dinghy is in the water and hard at work. We used it as a tender on our recent trip on the Pacific Ocean - near the town of Tofino, British Columbia, Canada.
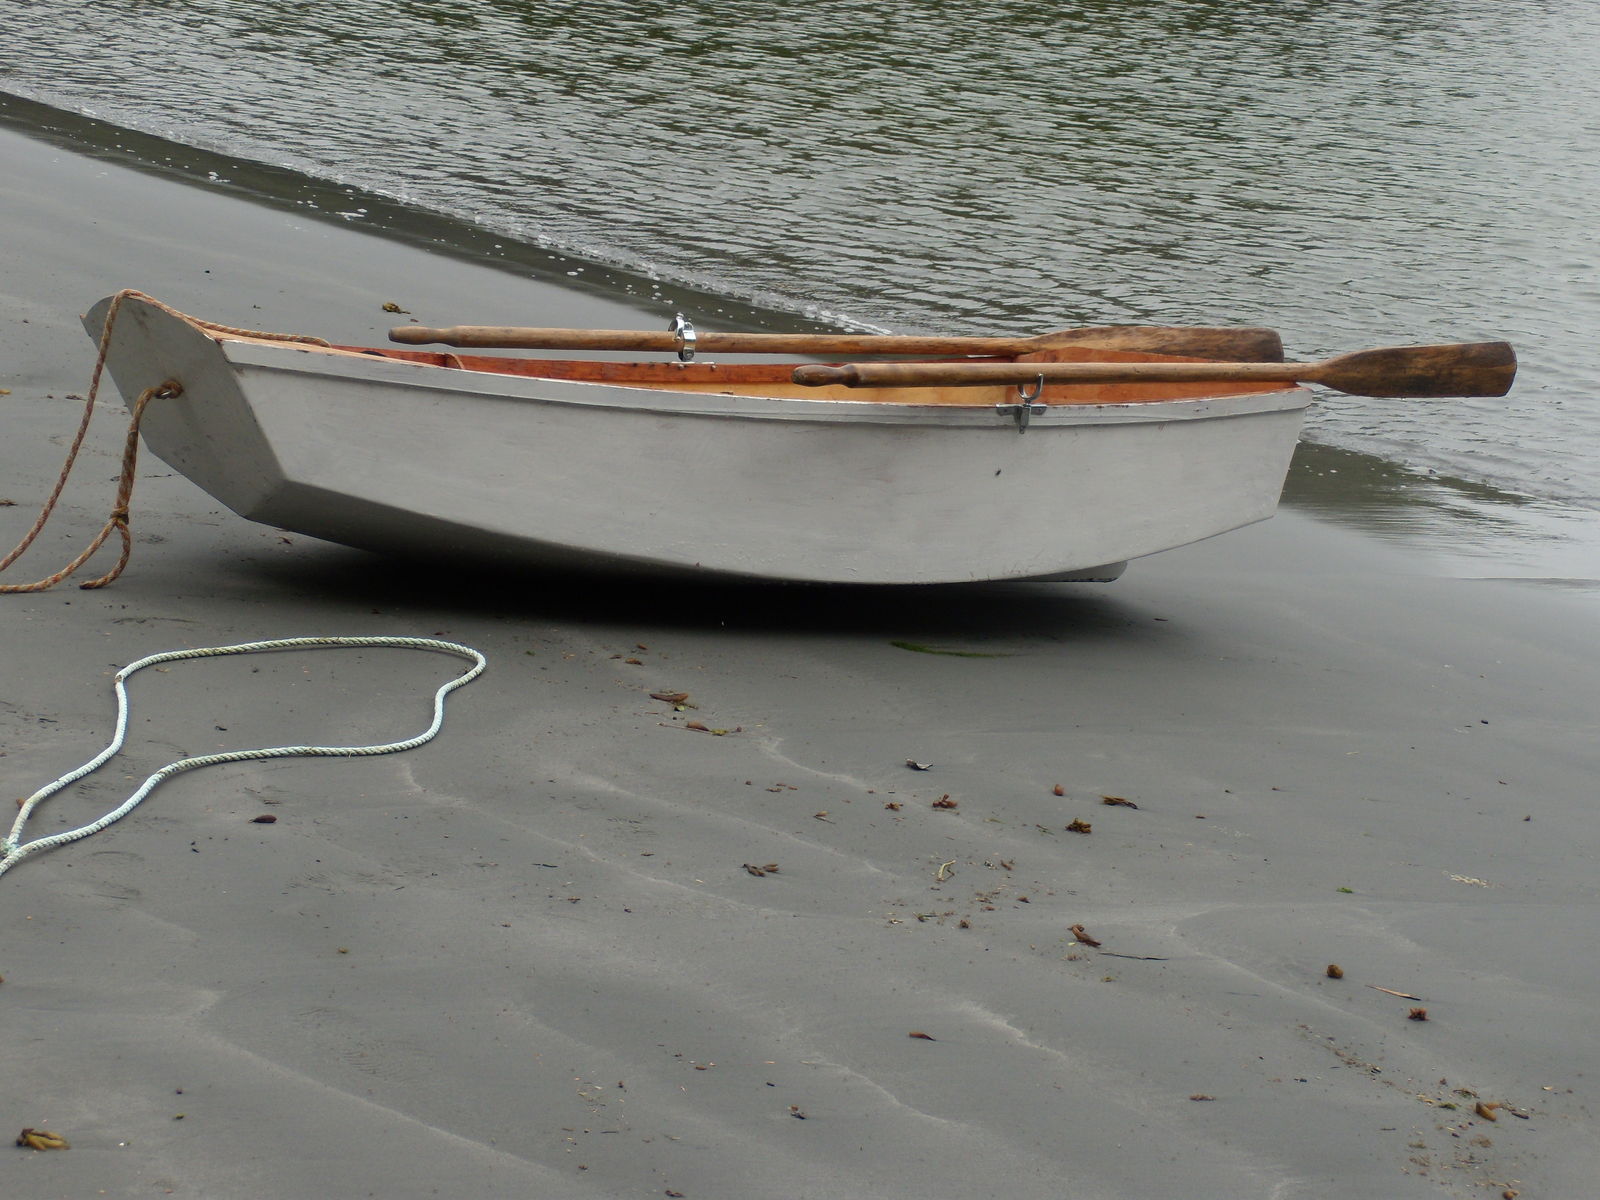
After we got home, I've been working on the rest of the sailing rig. We took it for a test "sail" last night and found that it works great. With the wind over 10 knots, though, it gets pretty wet - lots of splashing from the bow. I'll post some sailing pictures (in action) after this upcoming weekend.
I also have some leakage. I've inspected the outside of the hull very carefully and am (mostly) certain that everything there is super water-tight. I am pretty sure it's coming from the centerboard trunk. It looks very good where the trunk joins the bottom of the hull . . . but I think the problem must be "inside" the little skinny opening where the centerboard slides, probably in one of the corners. I'm planning to mix up a batch of fairly thin (runny) wood flour/epoxy/putty and find some way of applying that in the corners (all four vertical corners).
mark
Re: Montana built D5
Posted: Sun Aug 28, 2011 12:57 pm
by bratzcpa
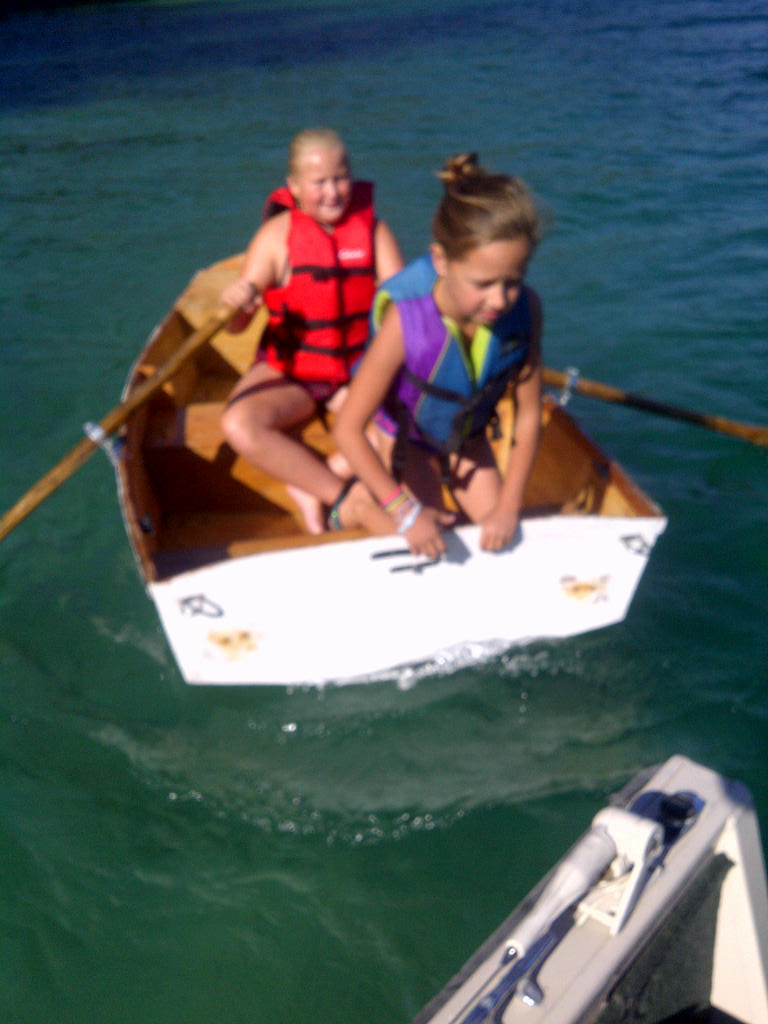
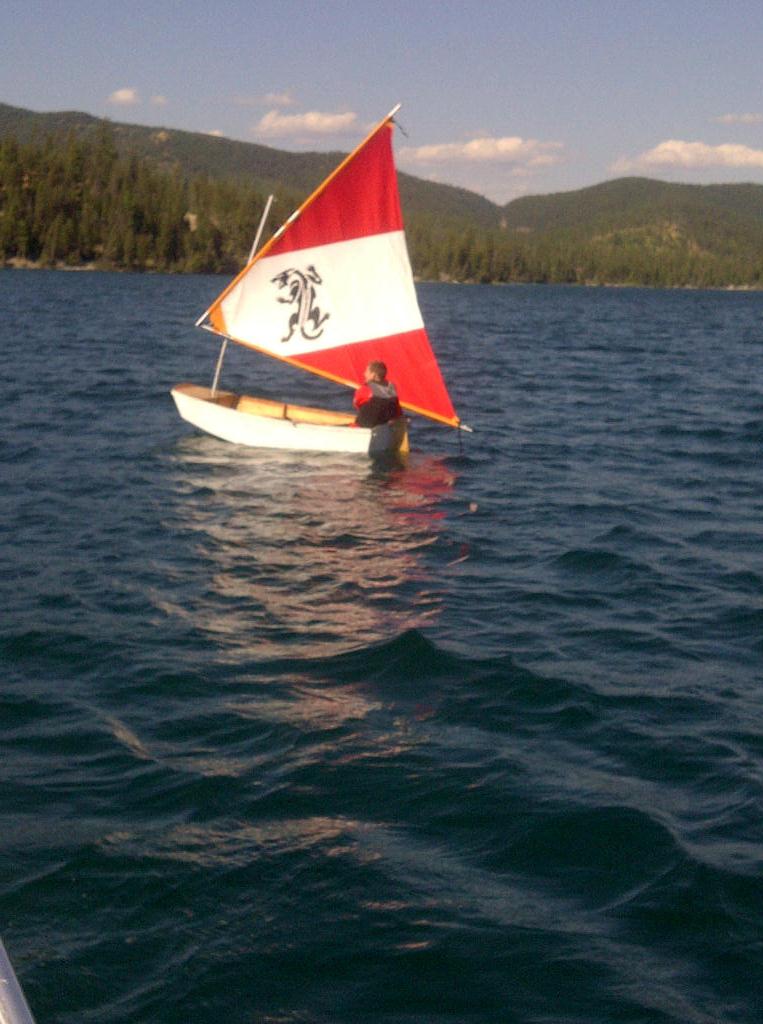
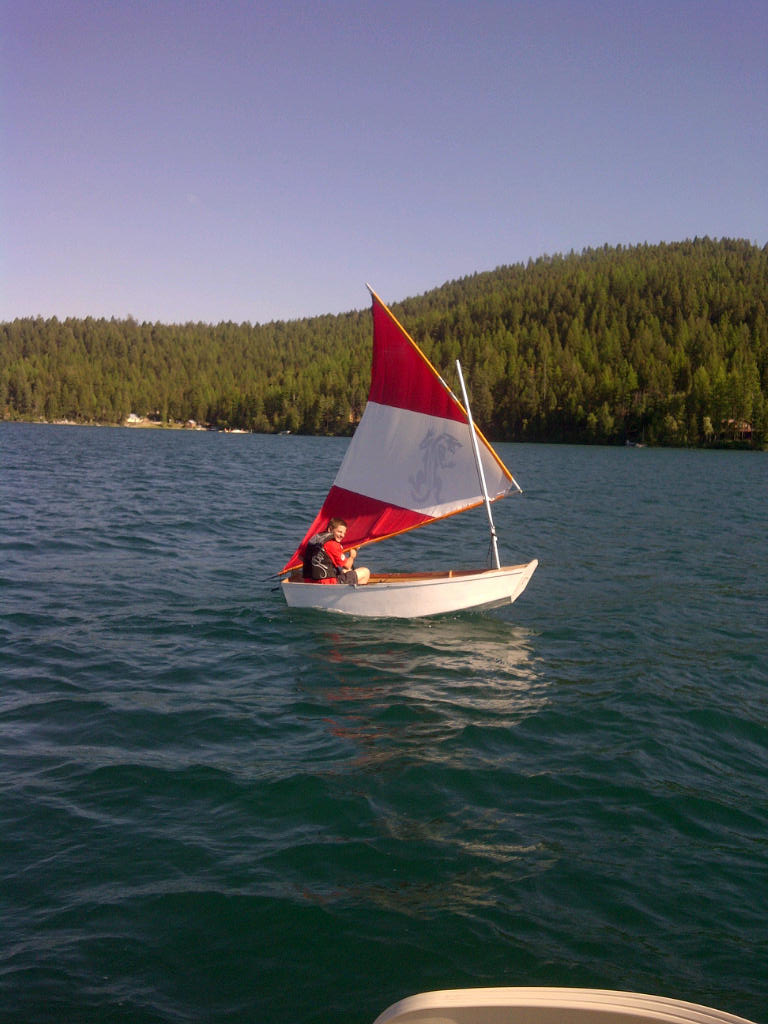
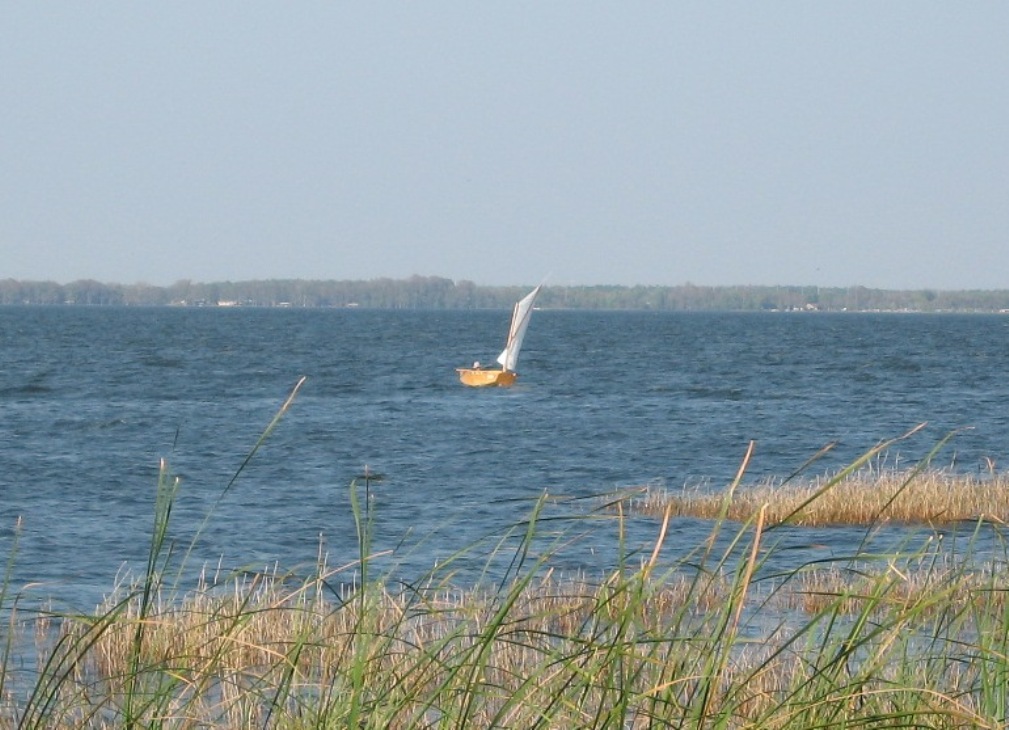
Well - - - out and about with the sailing rig. Yesterday was really quite windy (doesn't look it in the pictures), and the D5 did great. It doesn't (obviously) slice through the water like a typical sail boat would, but rather kinda "plows" through it, or "over" it. Wind was up to 15 mph or so.
Here are a few pictures of the D5 (named "Zingy Dinghy" in action:
Re: Montana built D5
Posted: Mon Oct 24, 2011 9:37 pm
by Charlie
Your sail is positioned so the center of effort is too far to the rear by about one foot.
The pilot should sit in the middle so the boat trims closer to level. The rear transom should be up out of the water as much as possible because it causes drag.
When you get it all together you do this.But you can't be hanging onto the sail cause you have to hang onto the boat.
Re: Montana built D5
Posted: Mon Jan 09, 2012 11:26 pm
by bratzcpa
thanks for the feedback on the sailing position. I didn't notice the way it was tilted back in the water (bow high) when out there, but now that you point it out . . . . it's obvious.
Next spring, I'll try and sit a little closer to the mid seat.
Do you have any more pictures of your sailboat underway?
markb
Re: Montana built D5
Posted: Tue Jan 10, 2012 11:52 am
by Charlie
Here's the whole gallery;
http://gallery.bateau2.com/thumbnails.php?album=343
You have to keep in mind boats this short are slow. They are slow going from A to B and they they lose speed fast when you are manuevering to change tacks. So things like trim become much more impotant than they would in a bigger boat.
Also, you will be very busy if you get caught in a high wind situation. One hand is needed to control the sail and the other the tiller. My sail is much smaller than yours but in a stiff breeze I can be very busy keeping the boat headed for my destination and staying upright. Even with two belays the sheet can pull so hard it cuts off the circulation in my fingers. With your larger sail you'll have to figure out how to hang it and what kind of tackle you'll need to keep control of it. It looks like a Sunfish sail so that woud be a place to look for rigging.