Page 1 of 1
Chenoa 16 build - Splashed
Posted: Thu Oct 13, 2011 1:30 pm
by dbcrx
Ok, so I changed my mind and am going for a 16ft Chenoa instead of 2 cheap canoes.
Anyway, I just got home to see a nice big brown envelope sitting on the sofa waiting for me. Unfortunately, I've now promised my dad I'd take him to see the Superbikes on Sunday so now can't afford the wood! So another couple of weeks to wait until payday, and then maybe I can finally get on with building something. So for now I'm off to look over the plans.
Re: Chenoa plans have arrived
Posted: Wed Oct 19, 2011 4:31 pm
by Jerry-rigged
Congrats!
I really enjoy my Chenoa 14, although I don't get to paddle it nearly as often as I would like.

Re: Chenoa plans have arrived - build starts tomorrow
Posted: Fri Dec 02, 2011 12:28 pm
by dbcrx
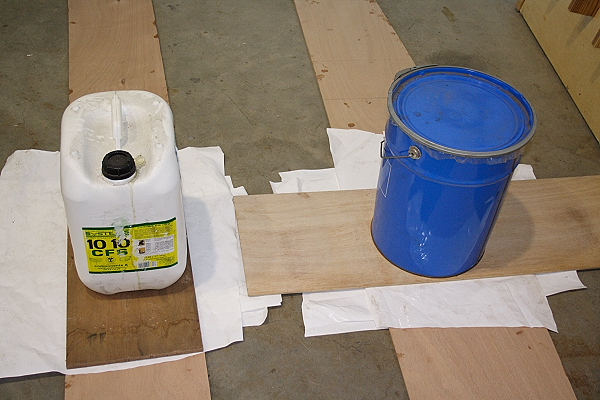
Finally managed to get hold of a couple of sheets of ply, so get to start building tomorrow. I could only get 4mm without paying extortionate amounts so will glass the whole thing in and out rather than just taping the seams, but the glass isn't an issue for me. I also managed to find an odd bit of 6mm which I've cut down into strips ready for the rubrail.
Re: Chenoa plans have arrived - build starts tomorrow
Posted: Fri Dec 02, 2011 12:34 pm
by gstanfield
Congrats on getting the project going. Take plenty of pics to share with us please

Re: Chenoa 16 build
Posted: Sat Dec 03, 2011 1:35 pm
by dbcrx
Progress at last!
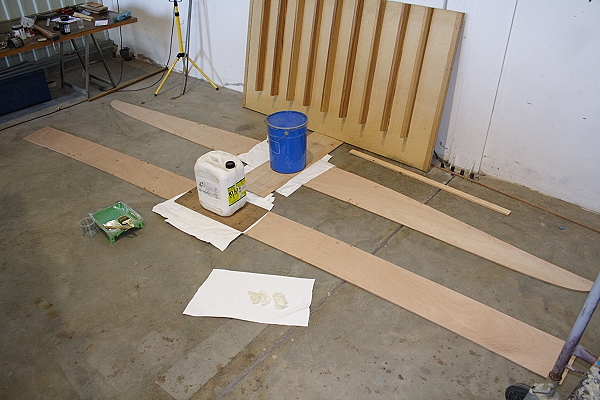
Got the main panels marked out, cut and spliced today.
Have to say, this is the first time in nearly 4 years of doing this sort of thing that I've tried to fibreglass "blind". I've tried to cut down on waiting for epoxy to cure, as I'm doing this at work and didn't want to go in tomorrow just to glass the other side of the joints. So I've done all the splices in one go by laying down plastic, then peel ply, then glass, then laying the pieces on top, then glassing the top side. Because of this you obviously can't see the wood grain showing through the glass when it's properly sat down. I know that theoretically it should be fine because the glass was pre-wet and the wood was pre-coated with epoxy and there's plenty of weight on them, but it still leaves a slight unnerving feeling waiting till tomorrow to see if it's all ok!
Anyway, enough blabbering, here's a few pics.
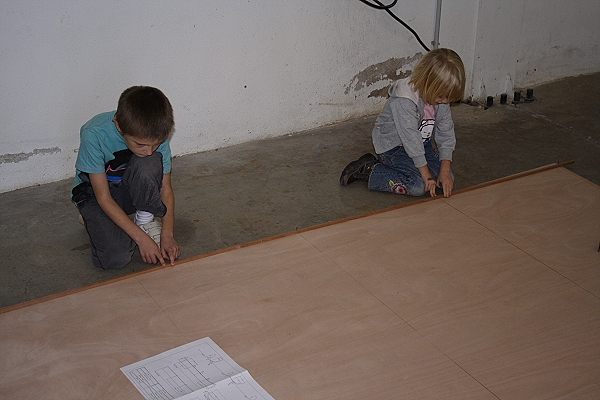
Kiddies helping mark the curved lines:
Splices done:
All the pieces - there are two side panels and two bottom panels there, just stacked on top of each other:
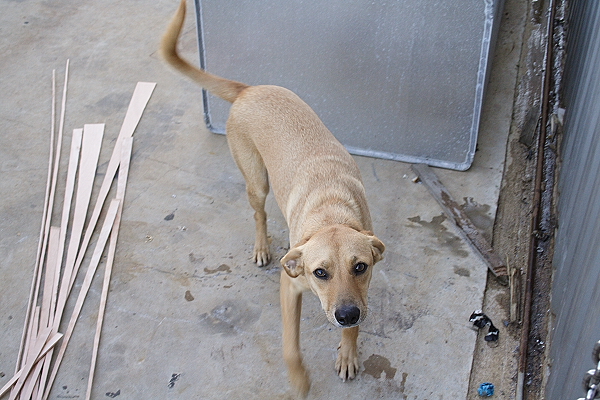
And, yes, aparently I have a boat building dog too. Although he wasn't much help - dumb mutt spent most of the afternoon chasing seagulls or walking over the wood:
And for those of you that like your boat porn, I took some more pics for you whilst at work. See them here -
http://forums.bateau2.com/viewtopic.php?f=12&t=27698
Re: Chenoa 16 build
Posted: Mon Dec 05, 2011 1:35 pm
by dbcrx
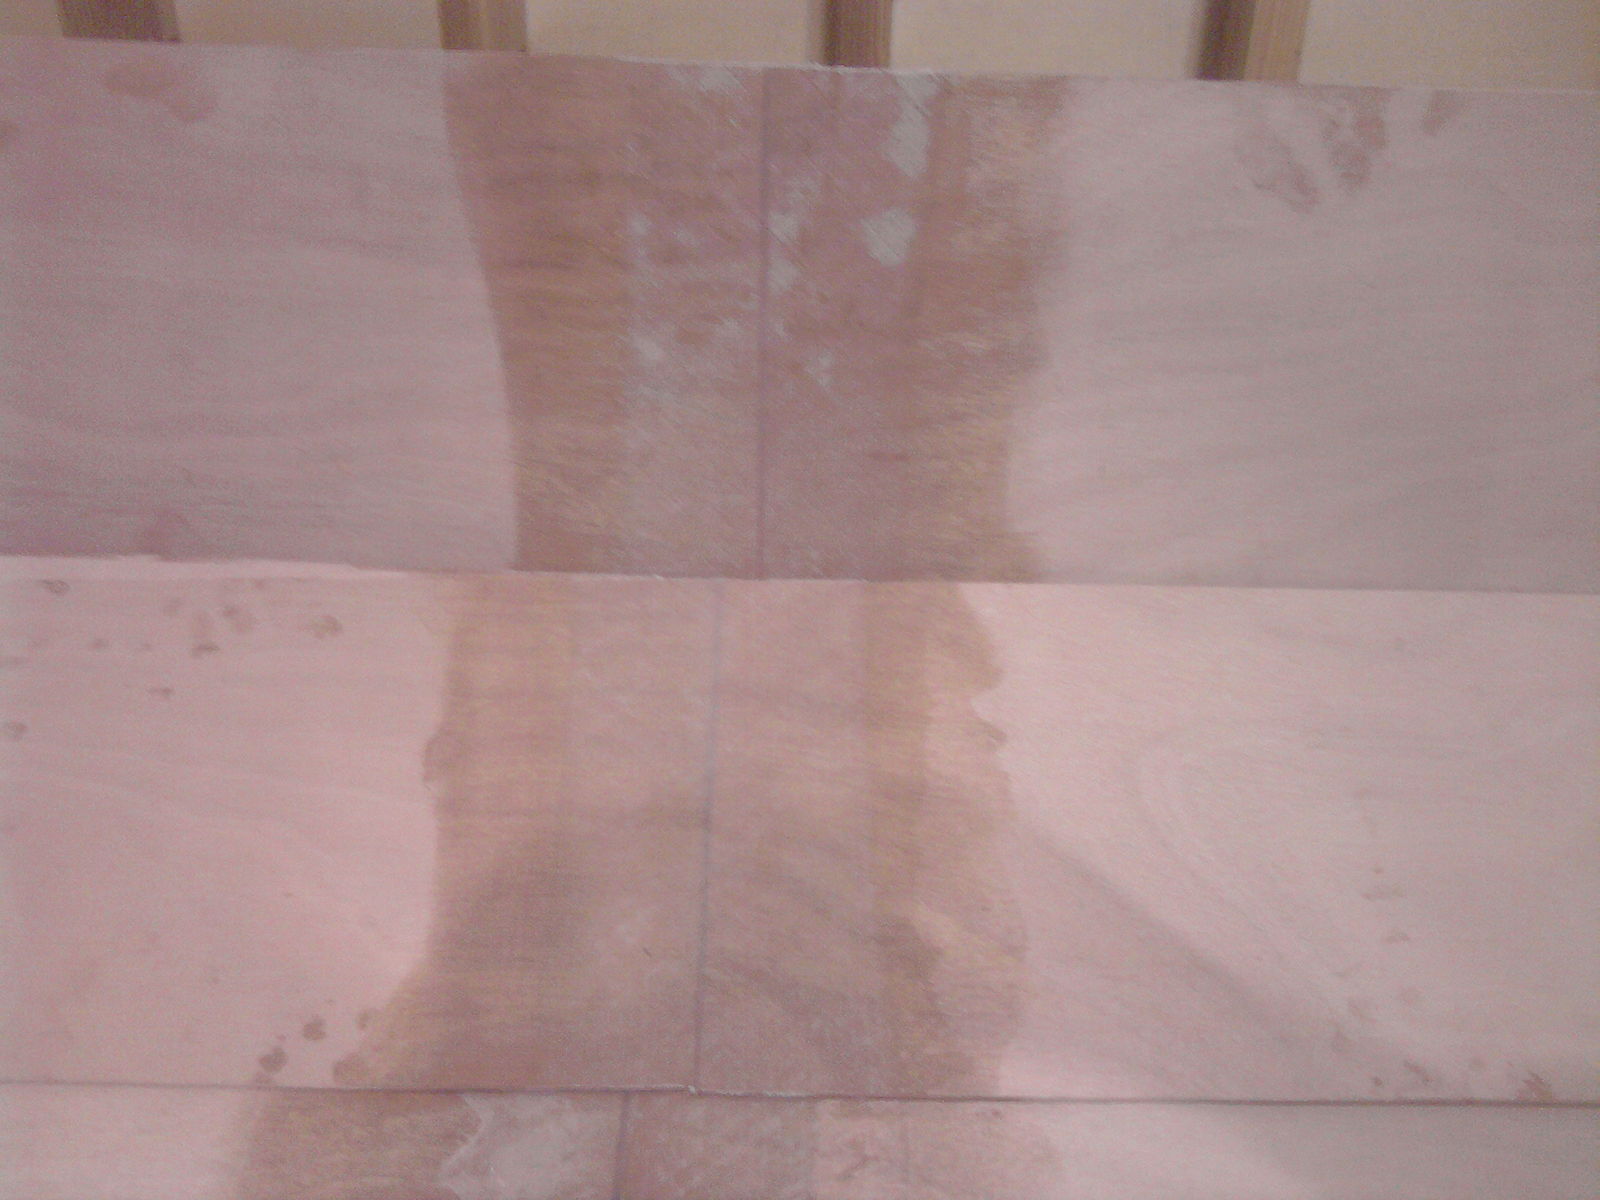
Well, there were a few spots that didn't quite sit down properly. Nothing major and I'm glassing everything anyway so I'll grind them out before I do. But, in the future I'll just do them one side at a time.
Re: Chenoa 16 build
Posted: Mon Dec 05, 2011 2:21 pm
by Cracker Larry
I've tried it both ways and never had good results trying to glass both sides at the same time. It takes twice as long but the joints always comes out better for me if I tape one side, let it cure, then flip and tape the other.
Re: Chenoa 16 build
Posted: Tue Dec 06, 2011 1:43 pm
by dbcrx
Here you can see the bad spots on the top panel, compared to the good splice on the bottom (sorry, only crappy phone pics today).
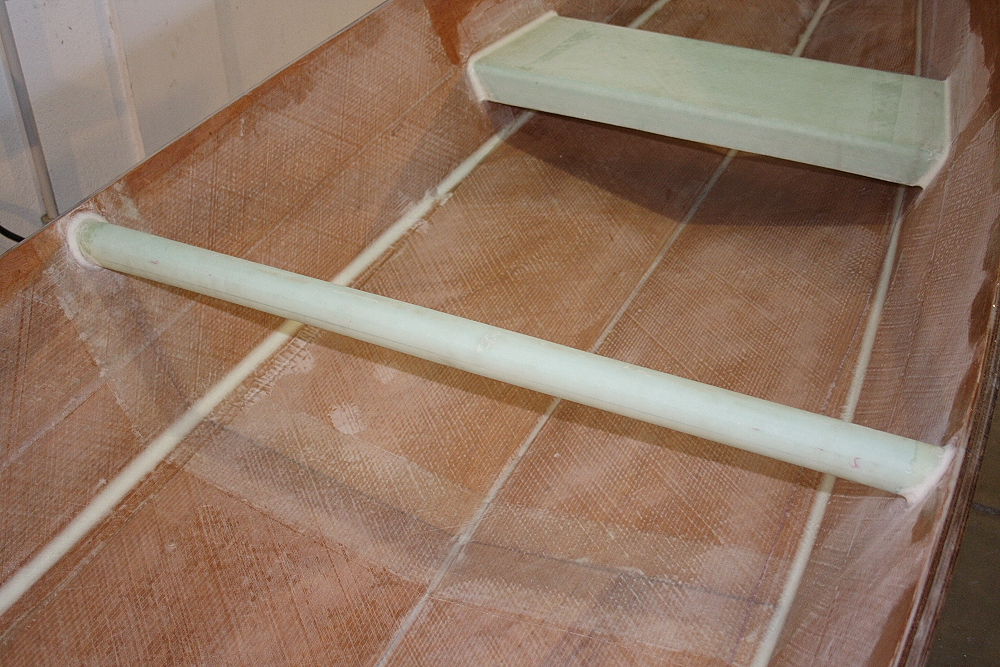
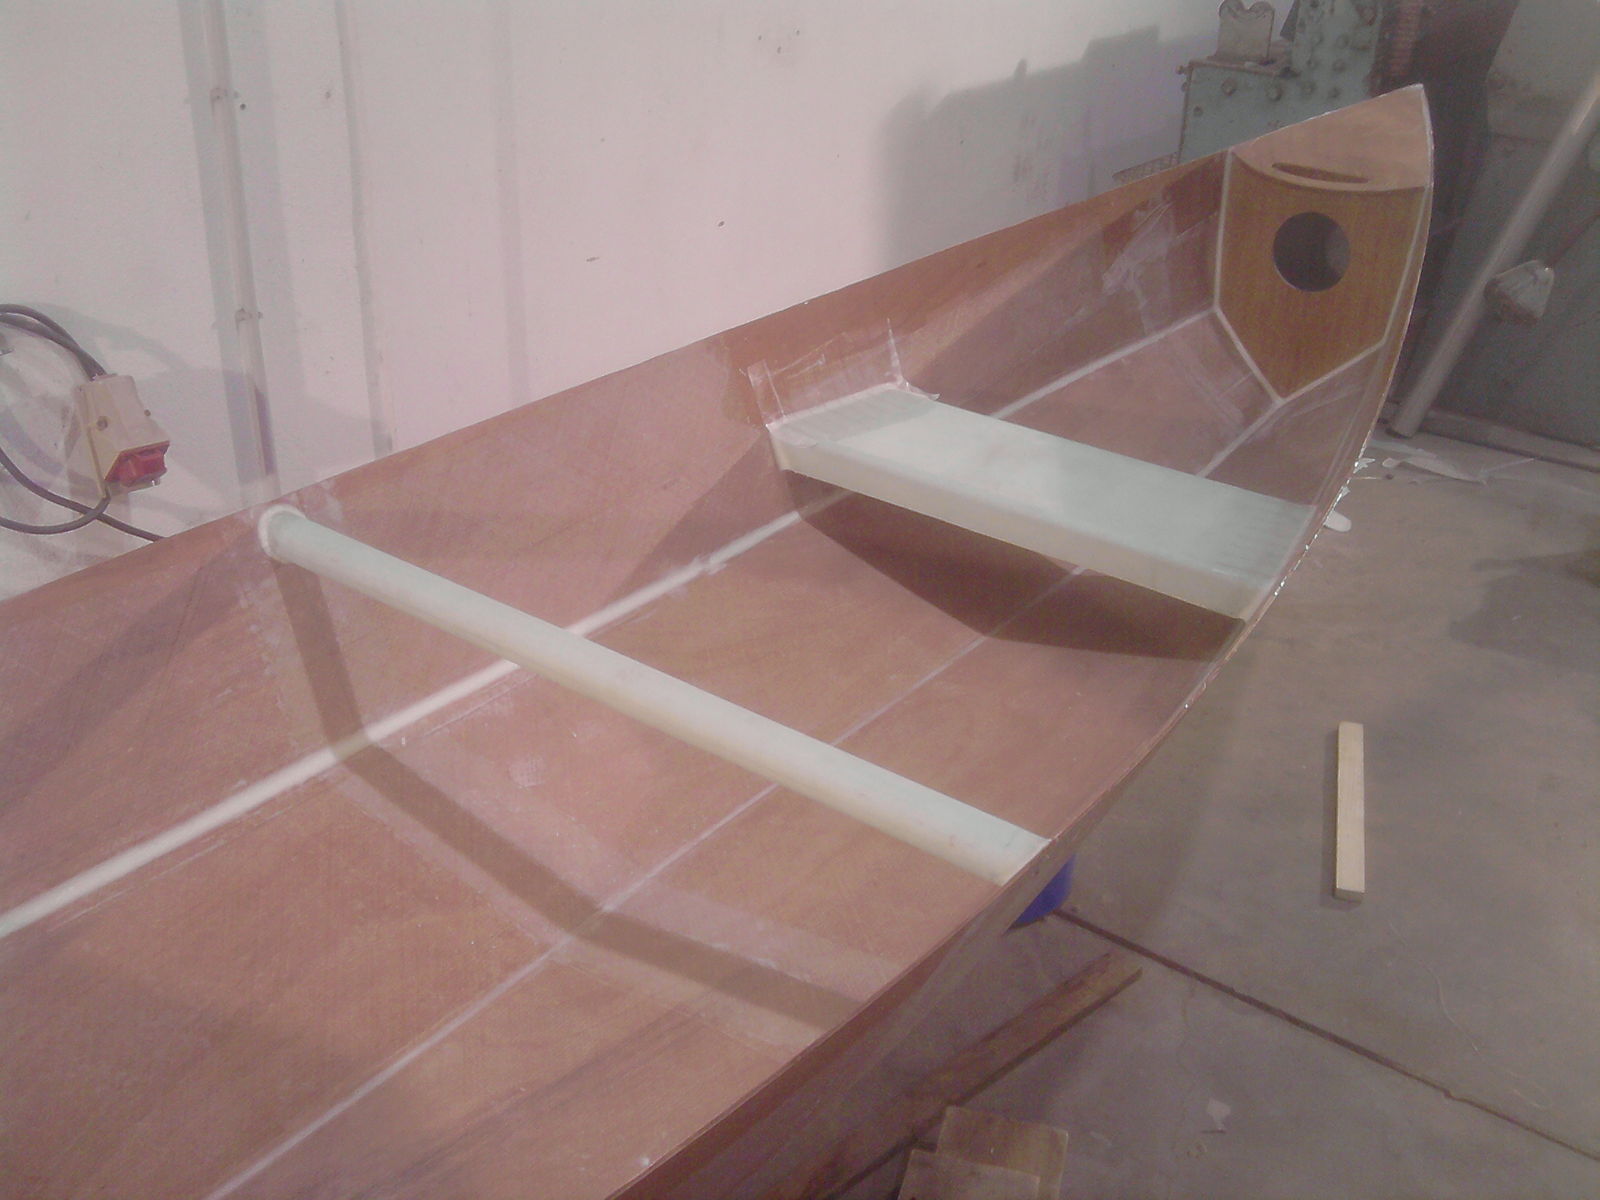
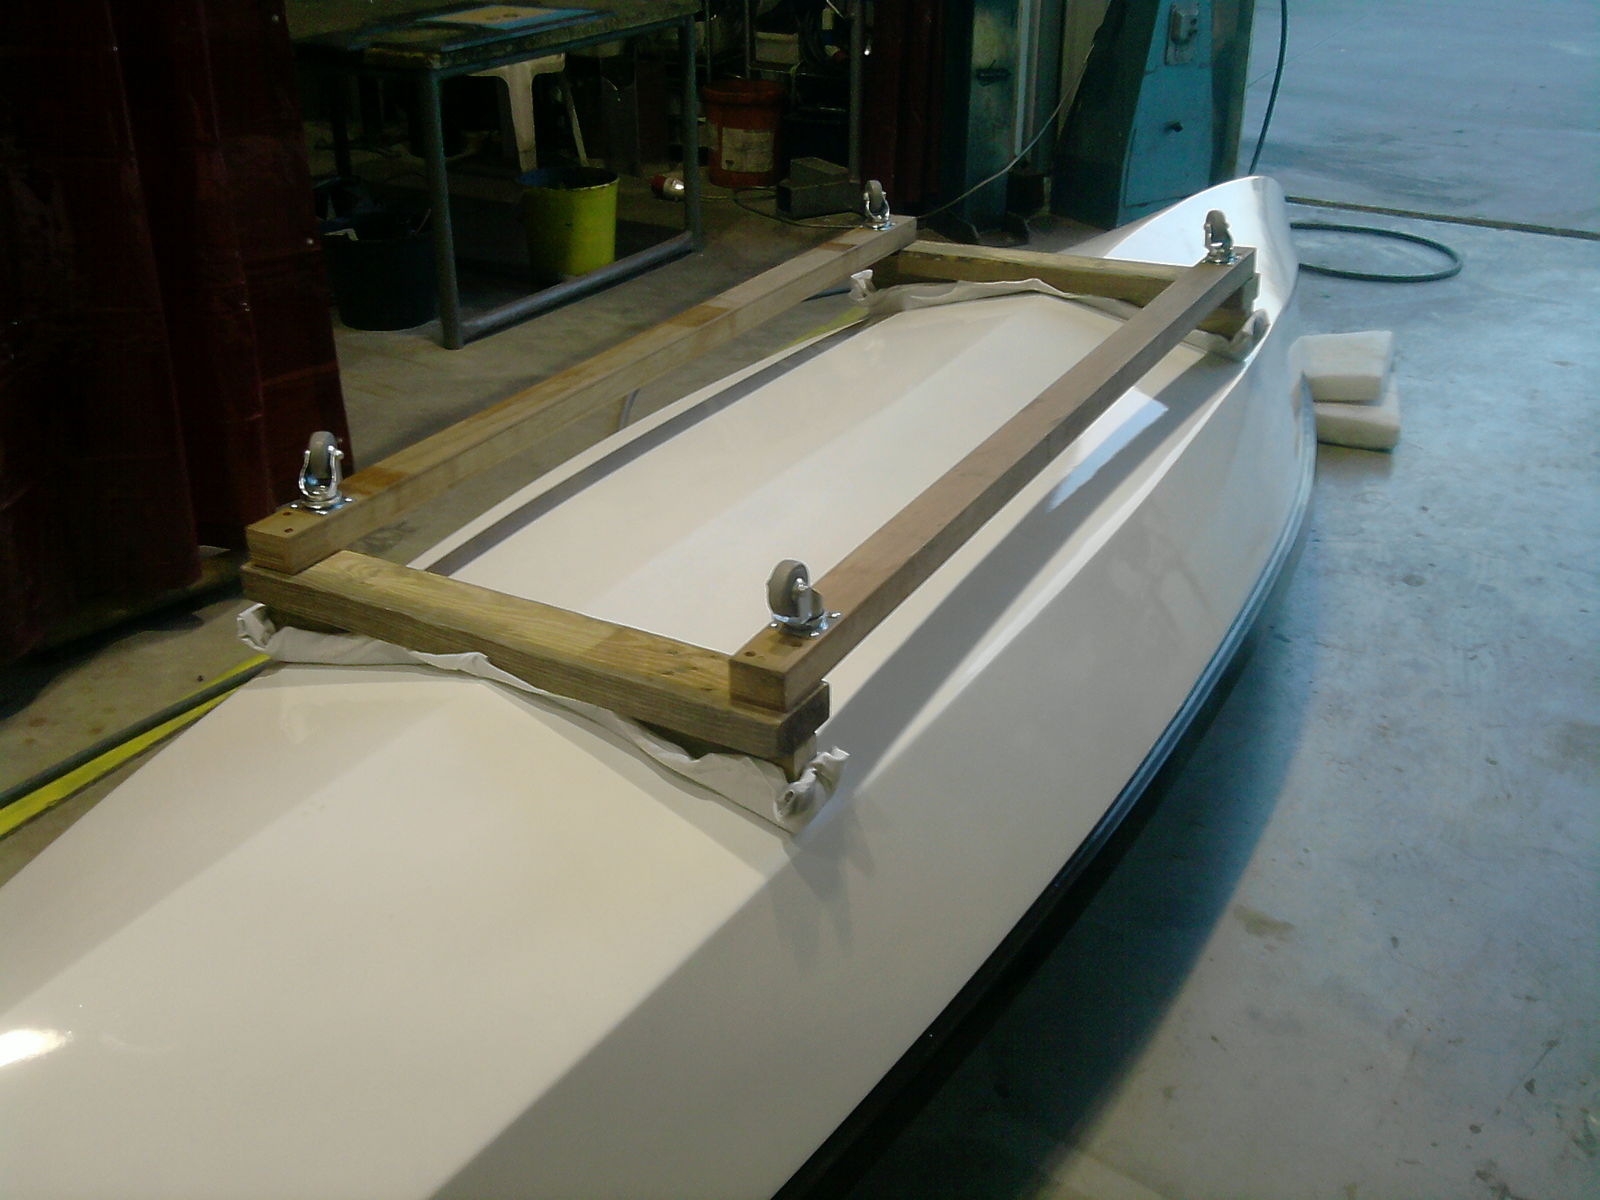
And this is going to be my yoke:
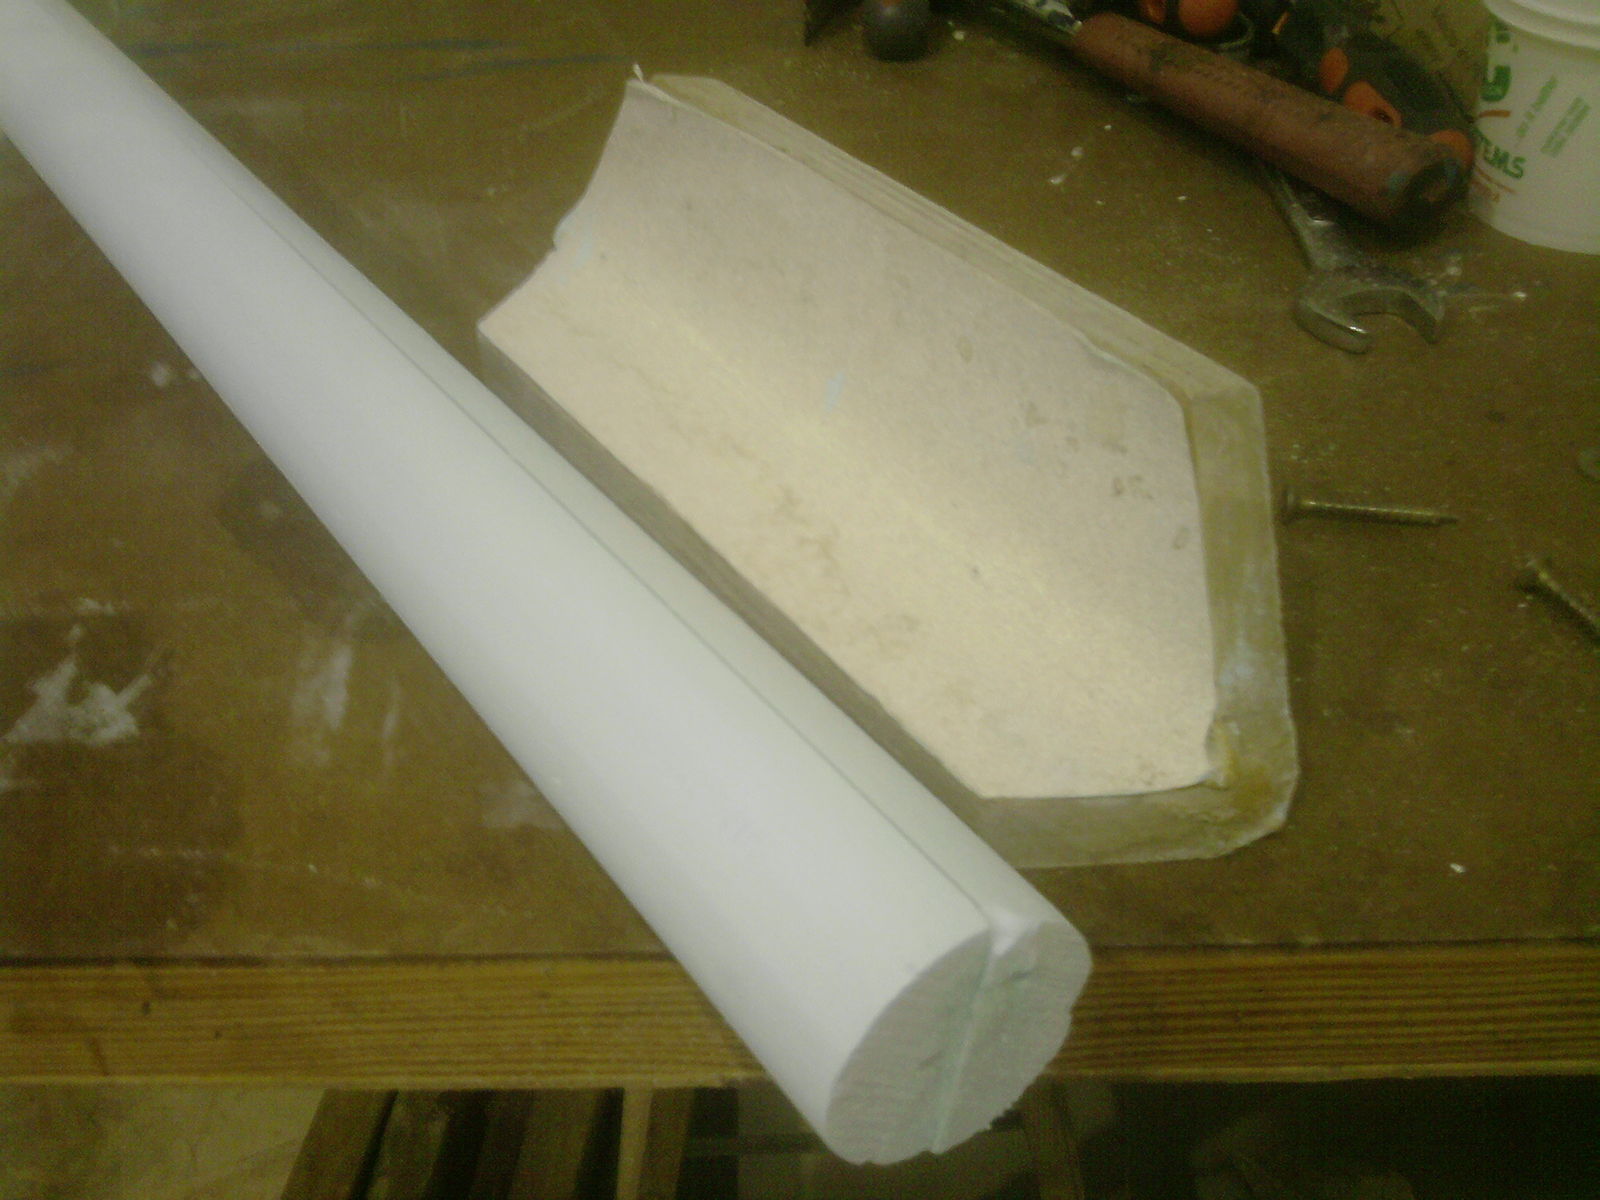
2 strips of foam epoxied together then corners planed off and finished off with "special sanding tool no.17"

I was going to do it with carbon, along with the seats, but I think I'm just going to go for glass and paint. Once it's wrapped, I'll hollow out the ends a bit and fill with epoxy so there's a nice solid plug to attach it with.
Re: Chenoa 16 build
Posted: Thu Dec 08, 2011 1:01 pm
by dbcrx
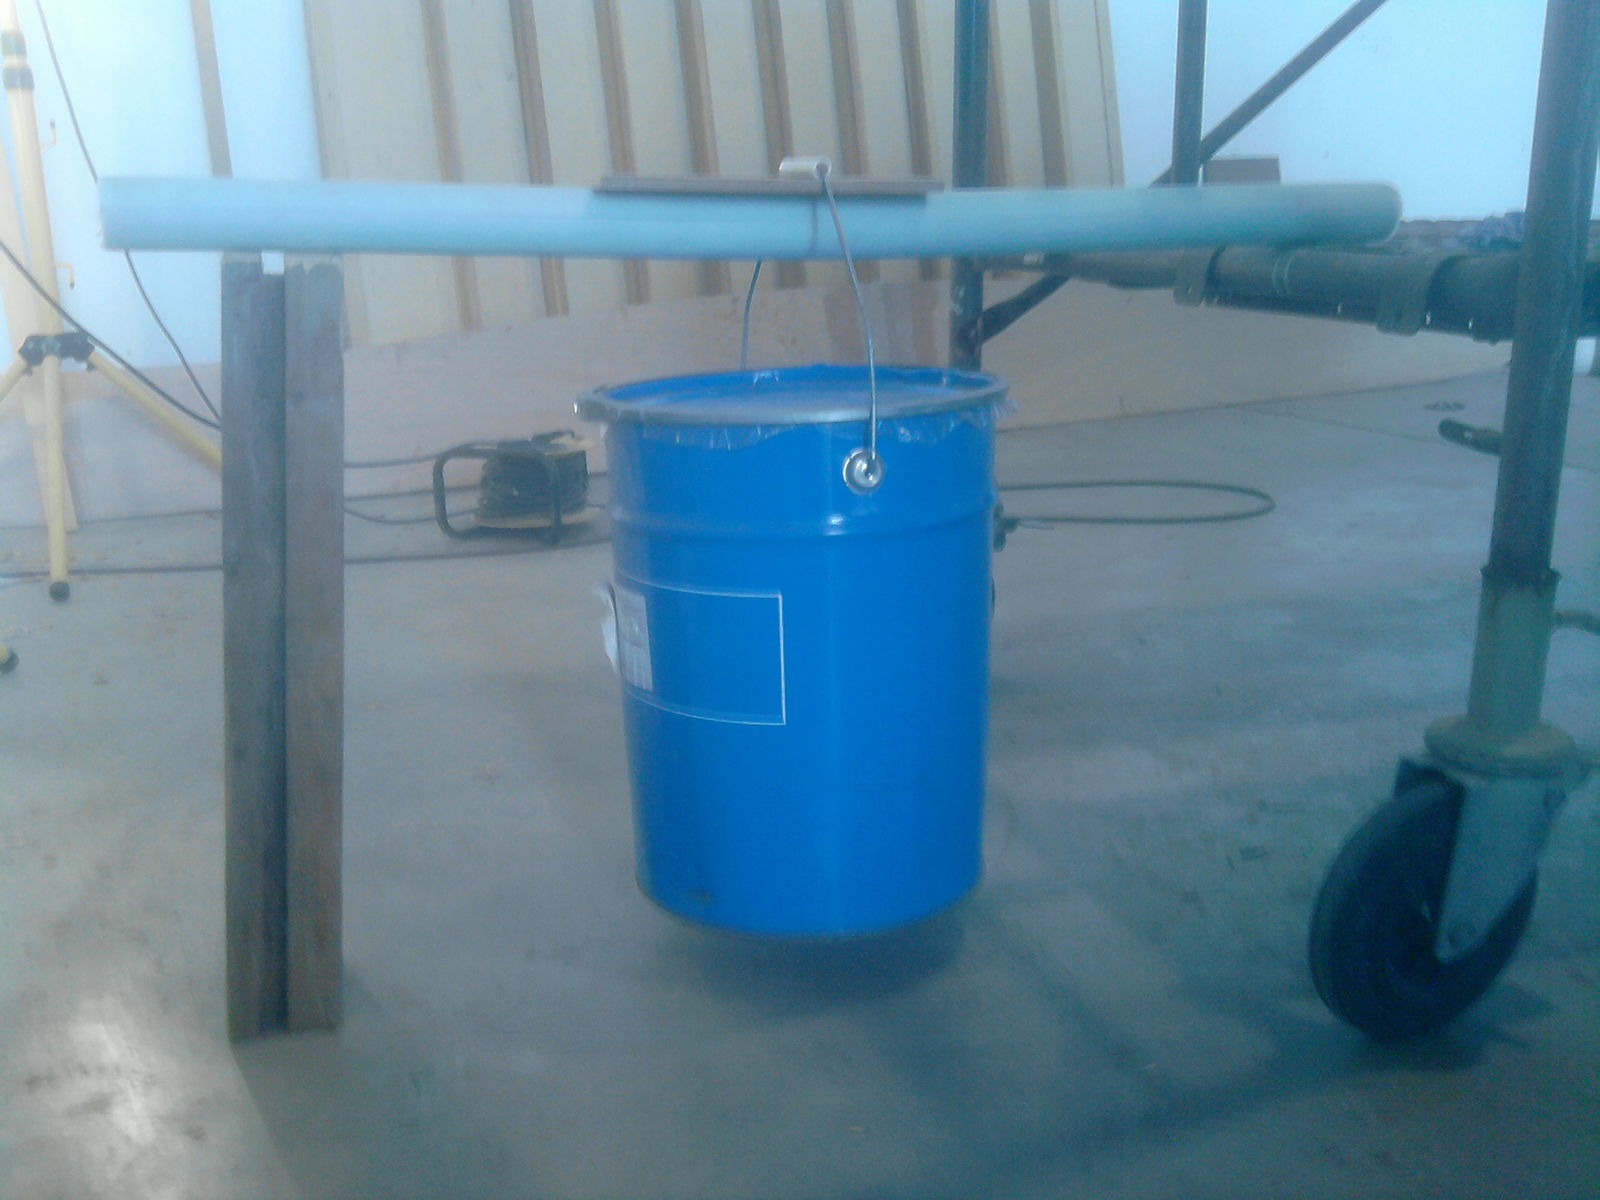
Well I think my yoke should be strong enough. There is a bit of a bend, but that is a full 25kg tin of resin hanging from it!
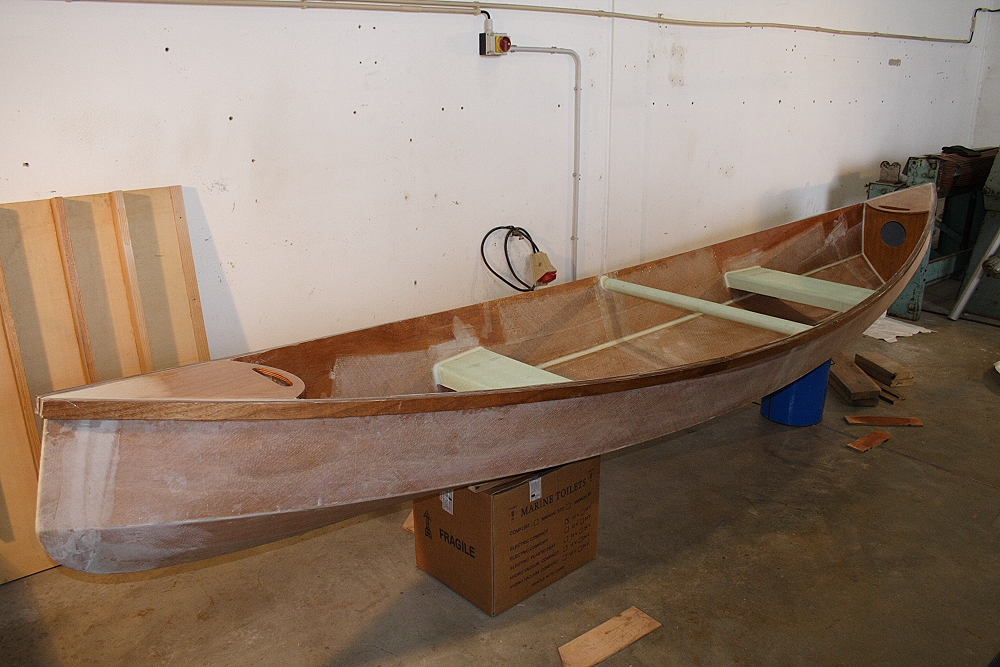
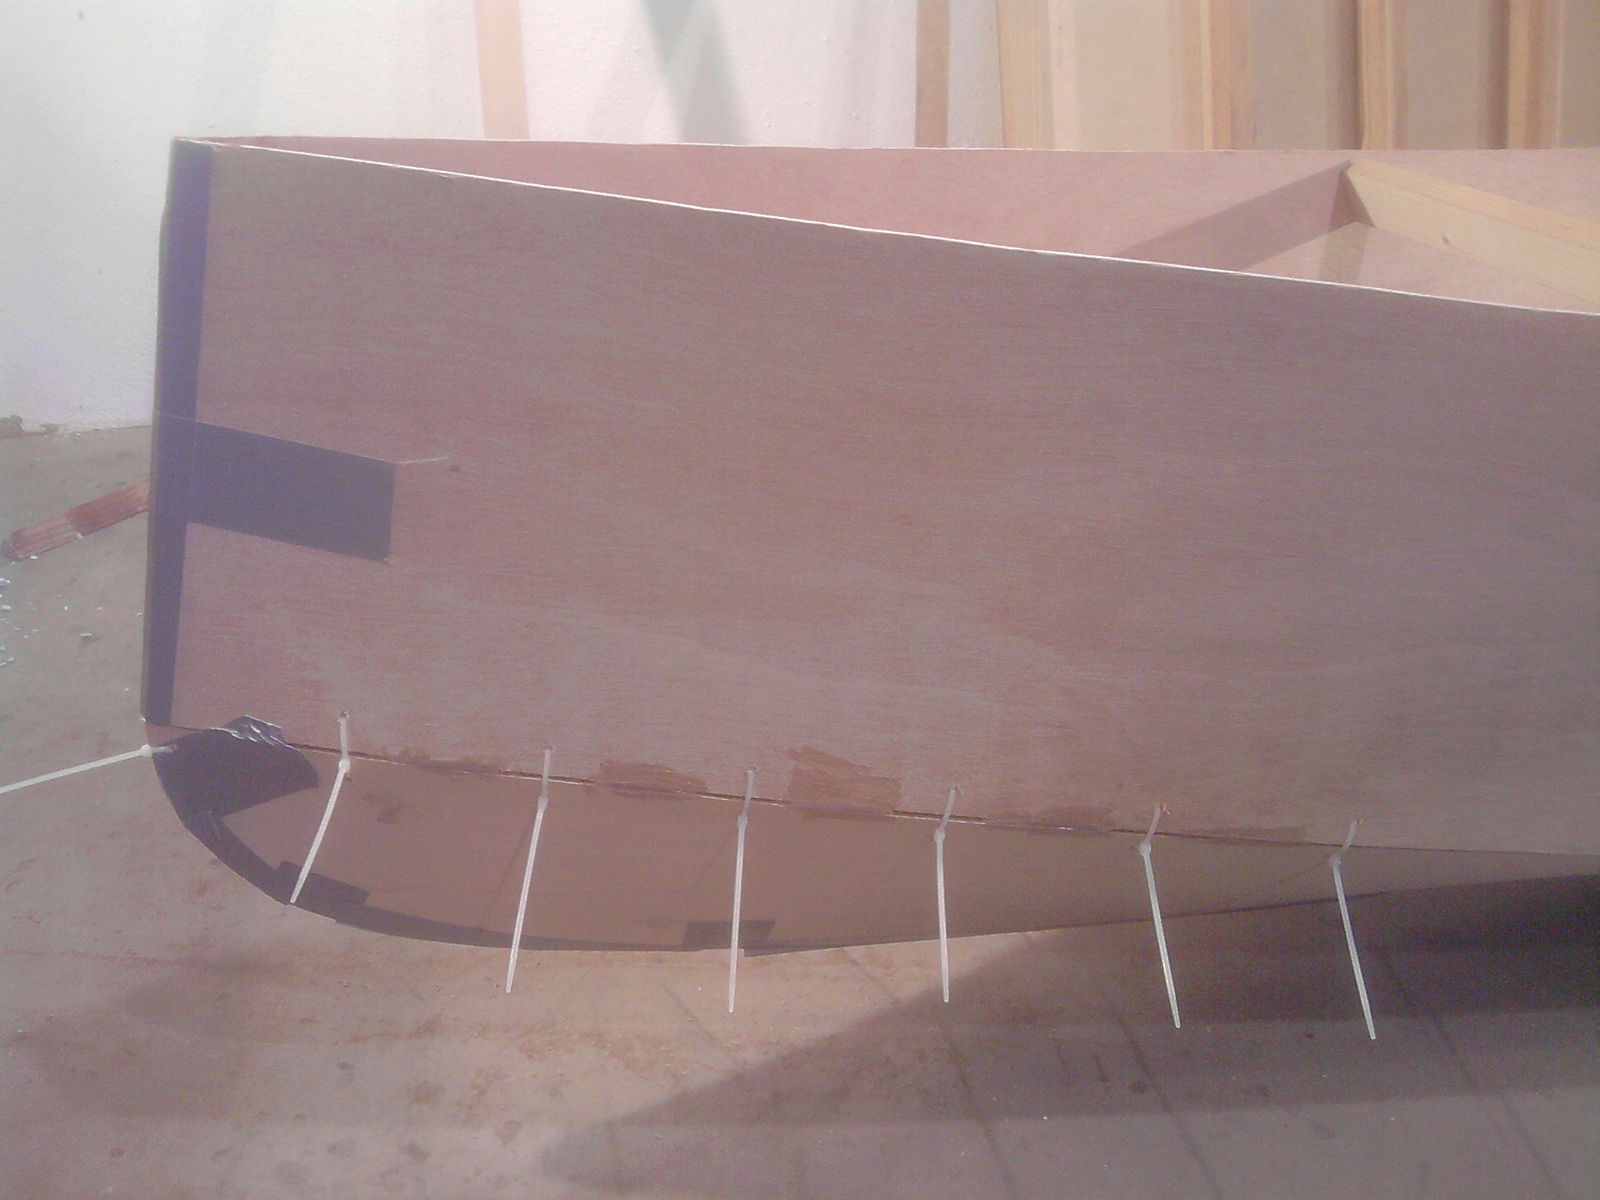
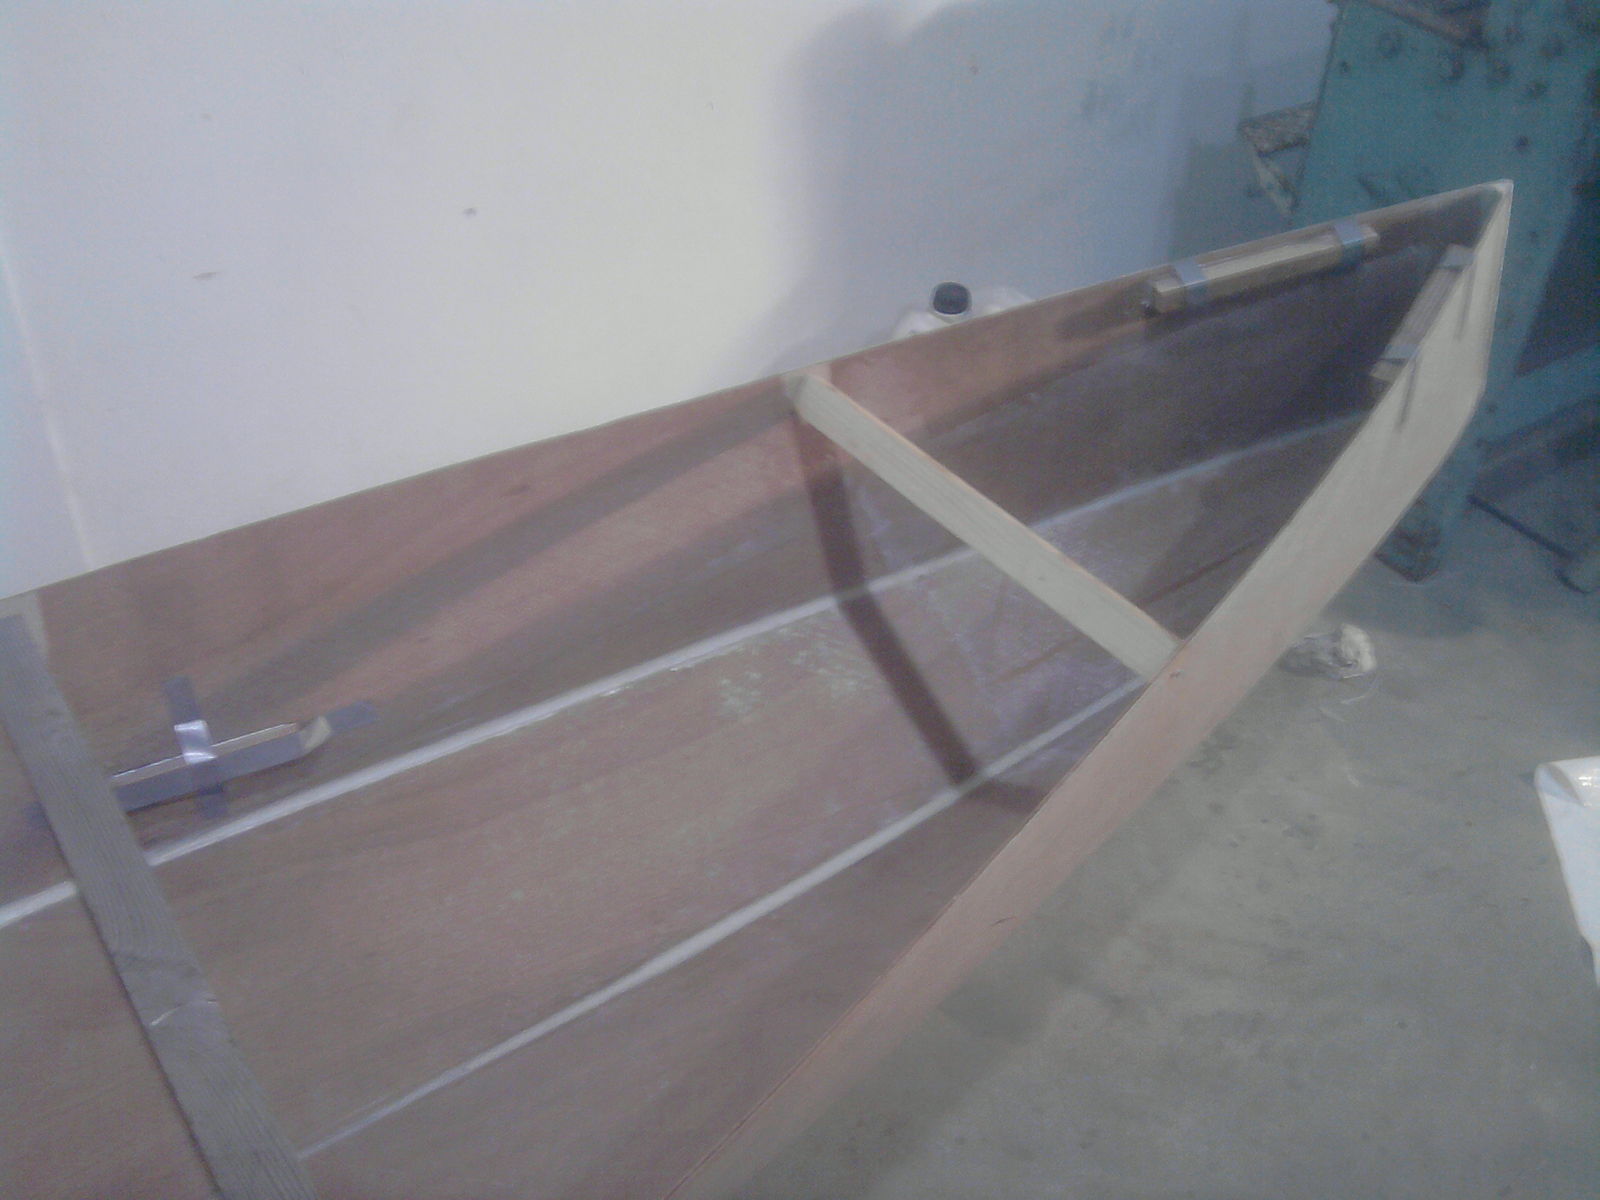
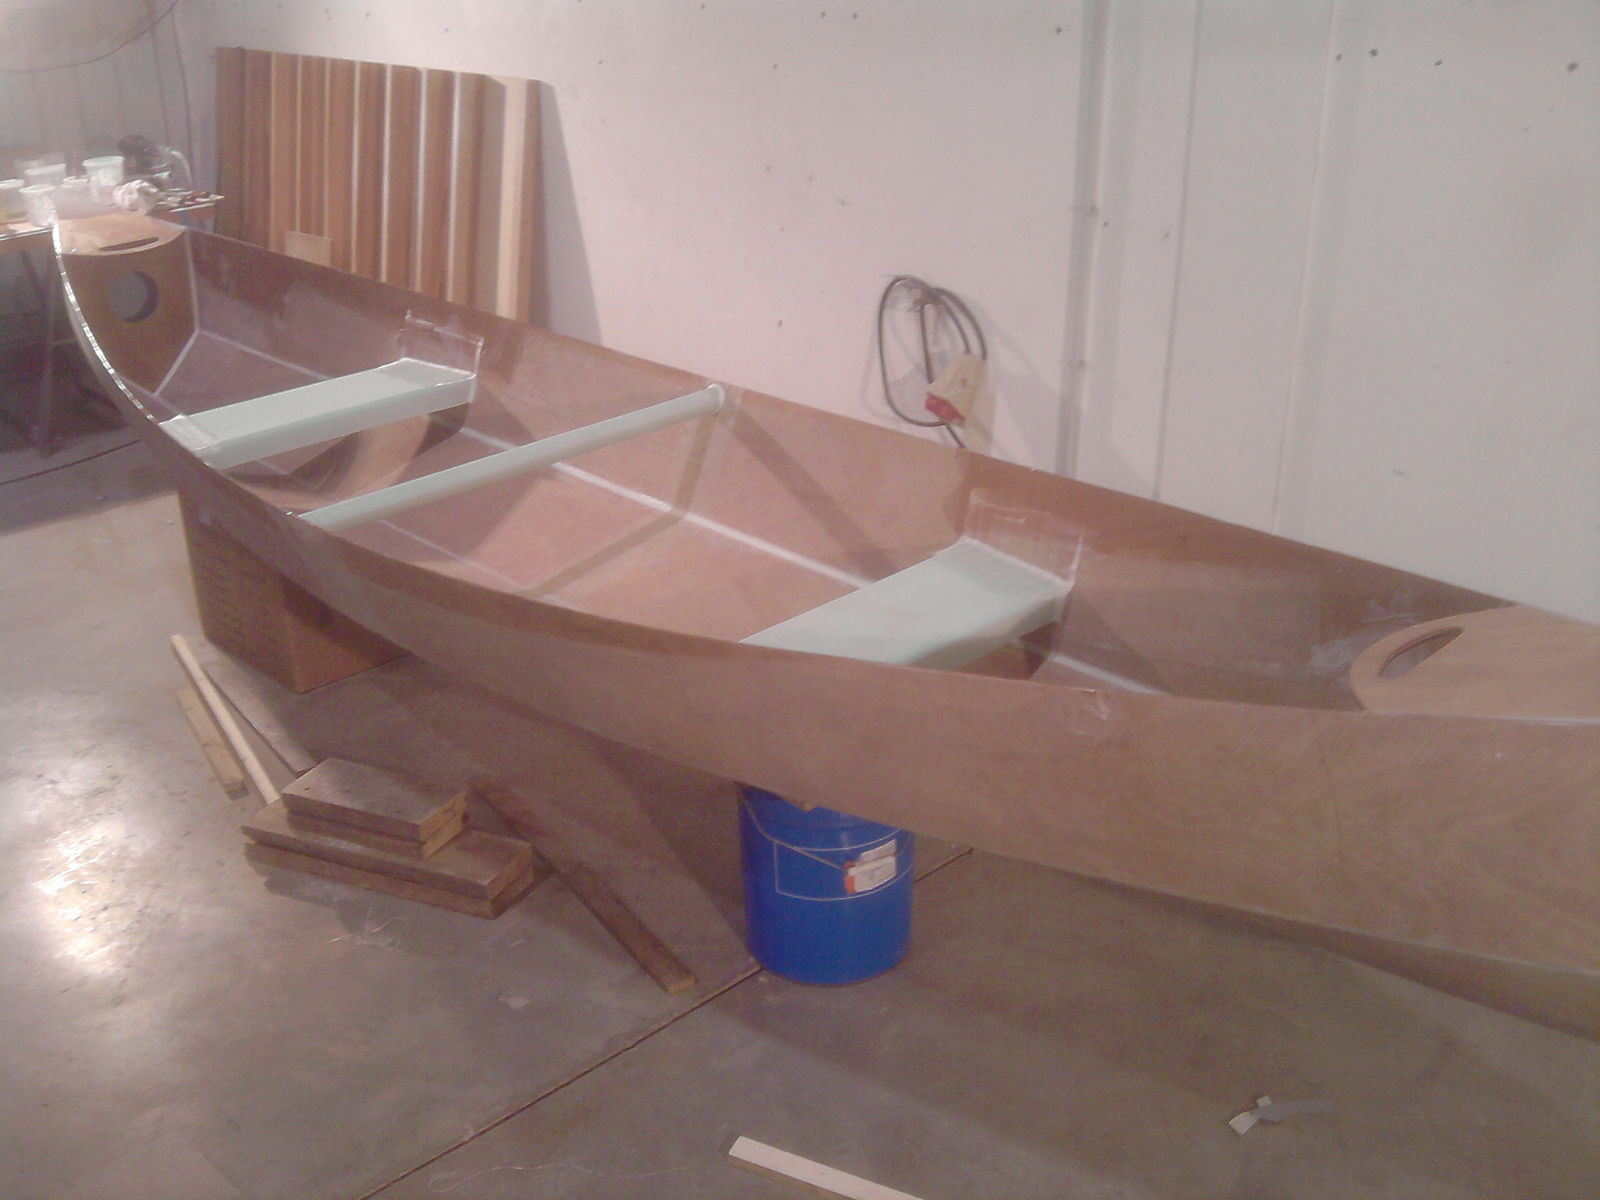
The canoe is starting to look like a canoe now as well:
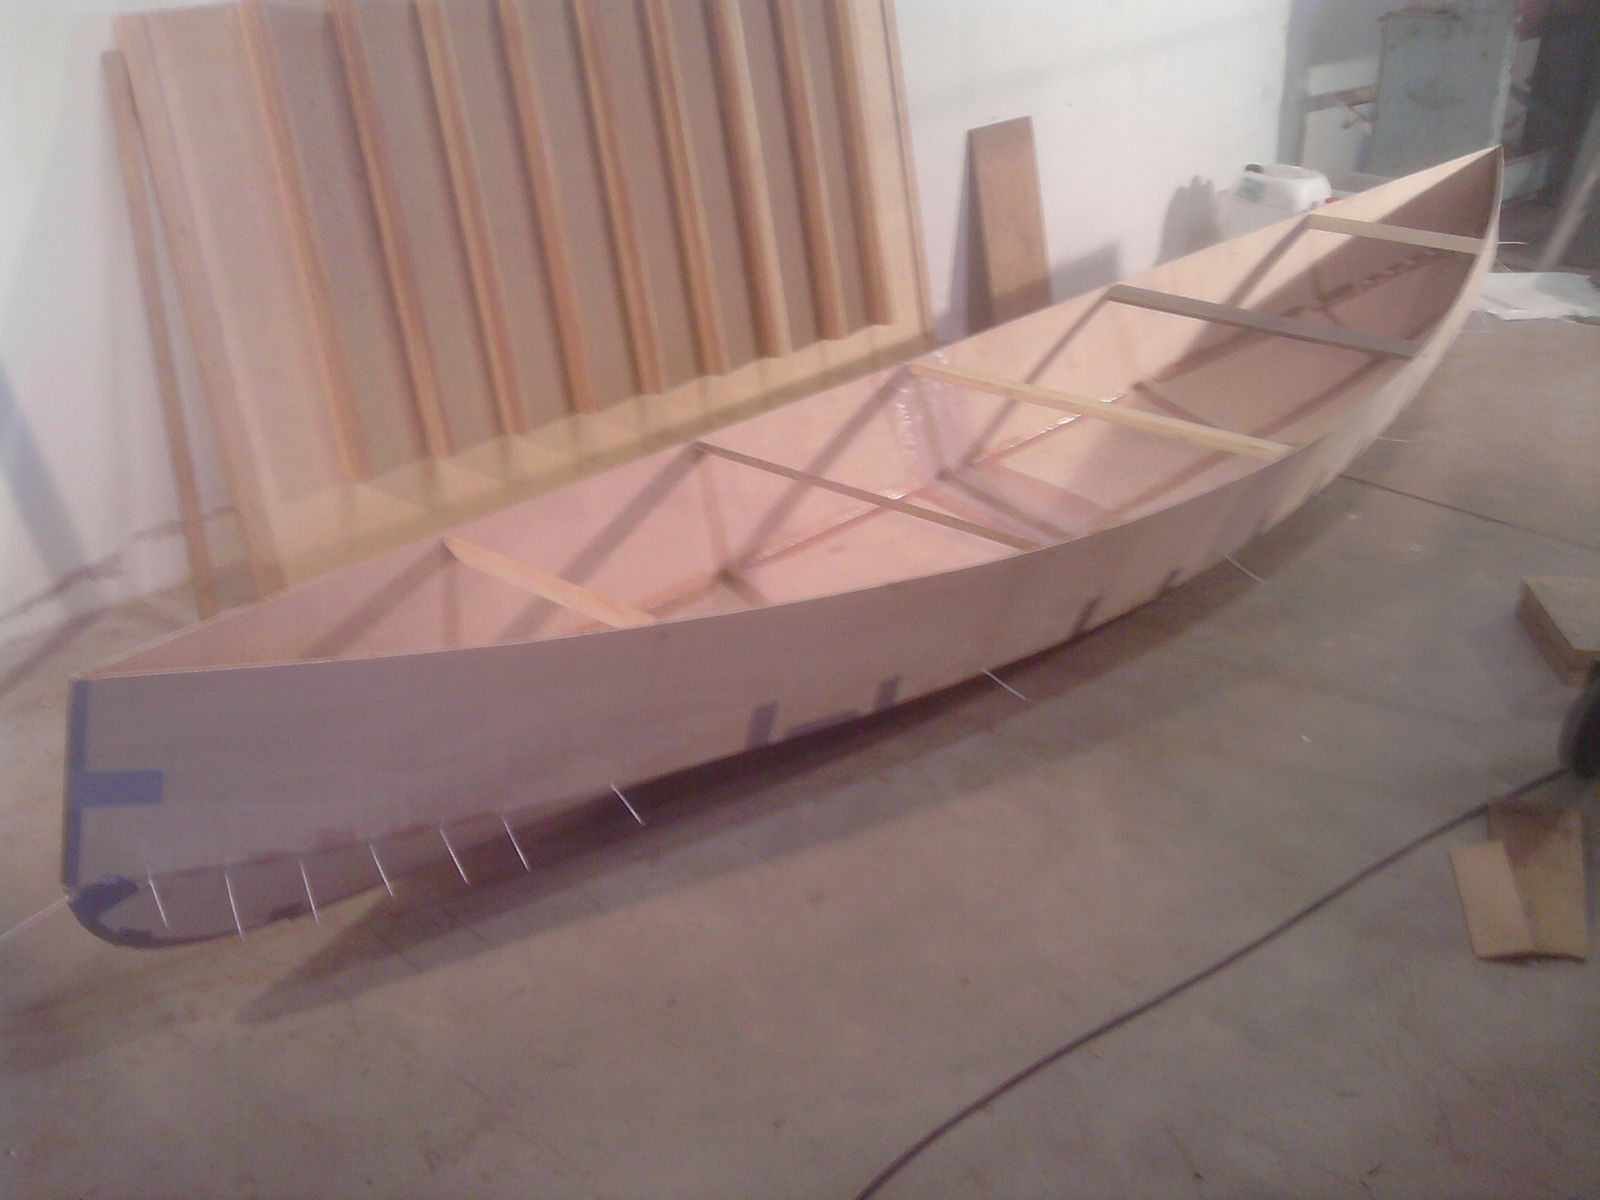
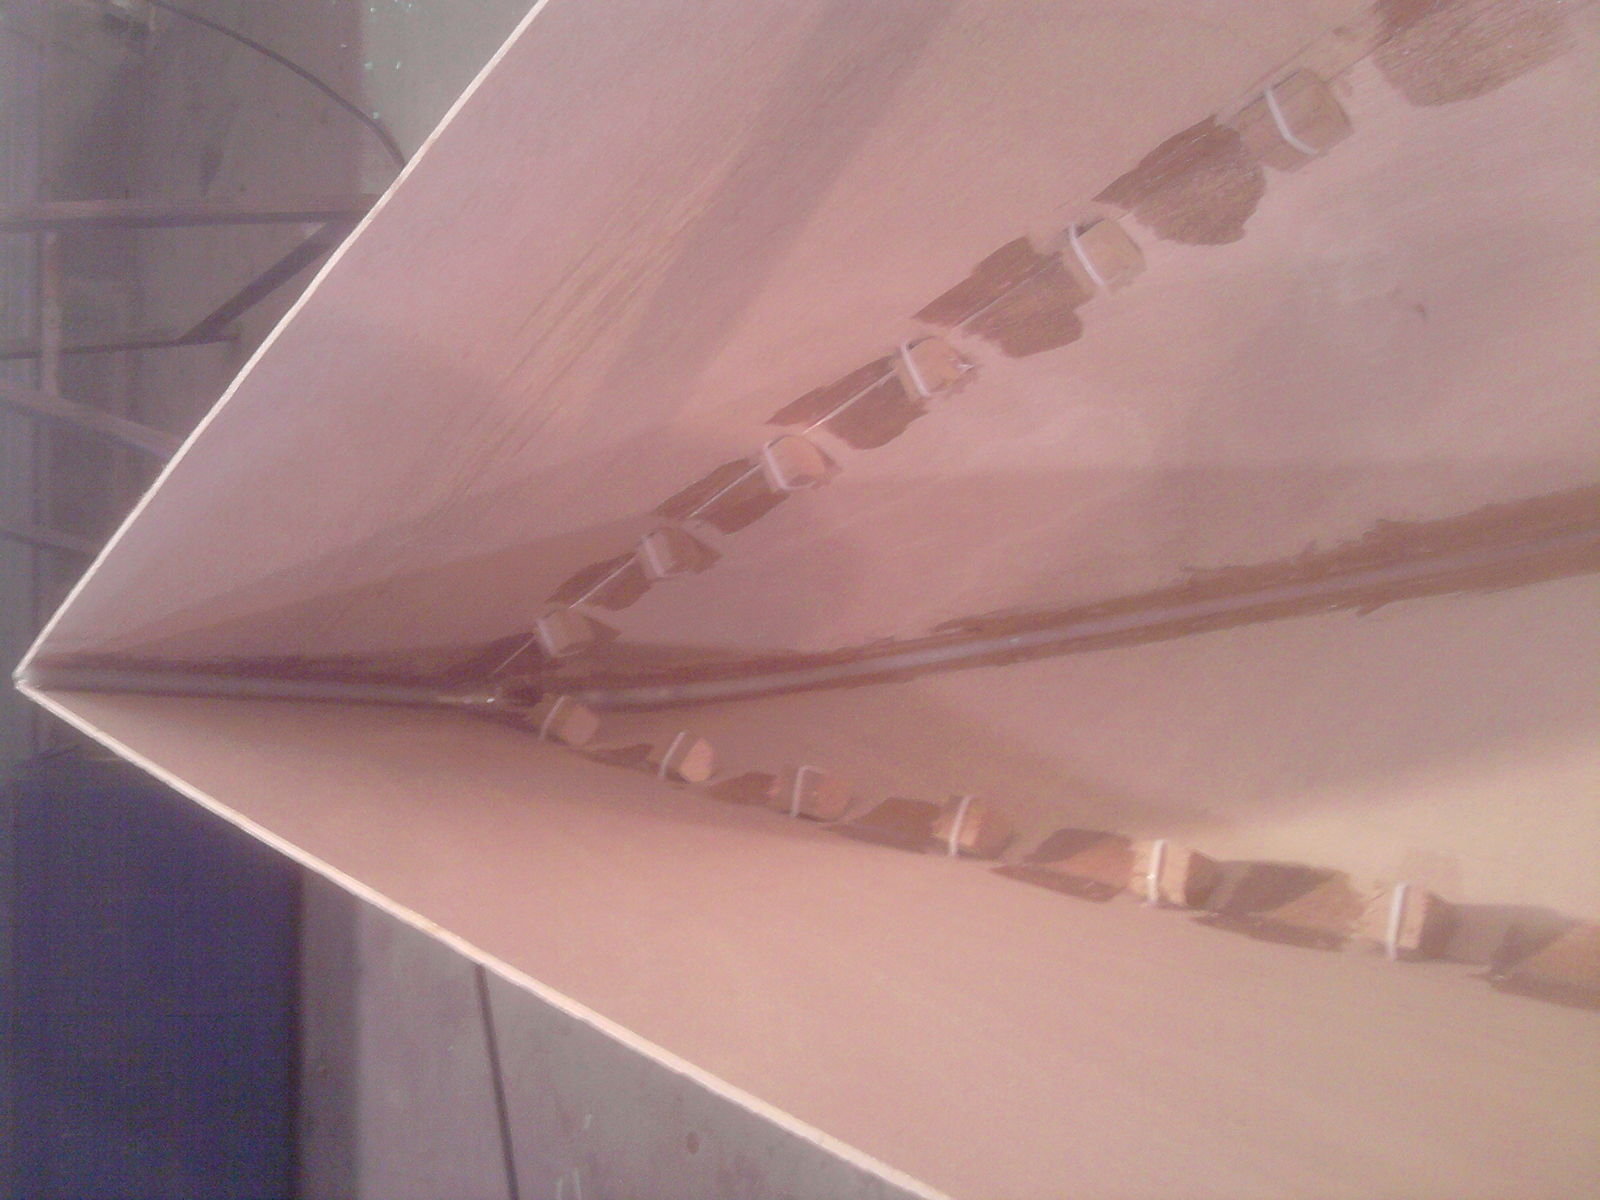
I was trying to do it with just tape to begin with in the hope that I could glass the inside today, but on my own I was getting nowhere. Once I gave in and got the cable ties and spacers out it went together reasonably well. One end is fine, but the other the top panel is about 6 or 7mm too short. Still nothing a bit of filler won't fix!
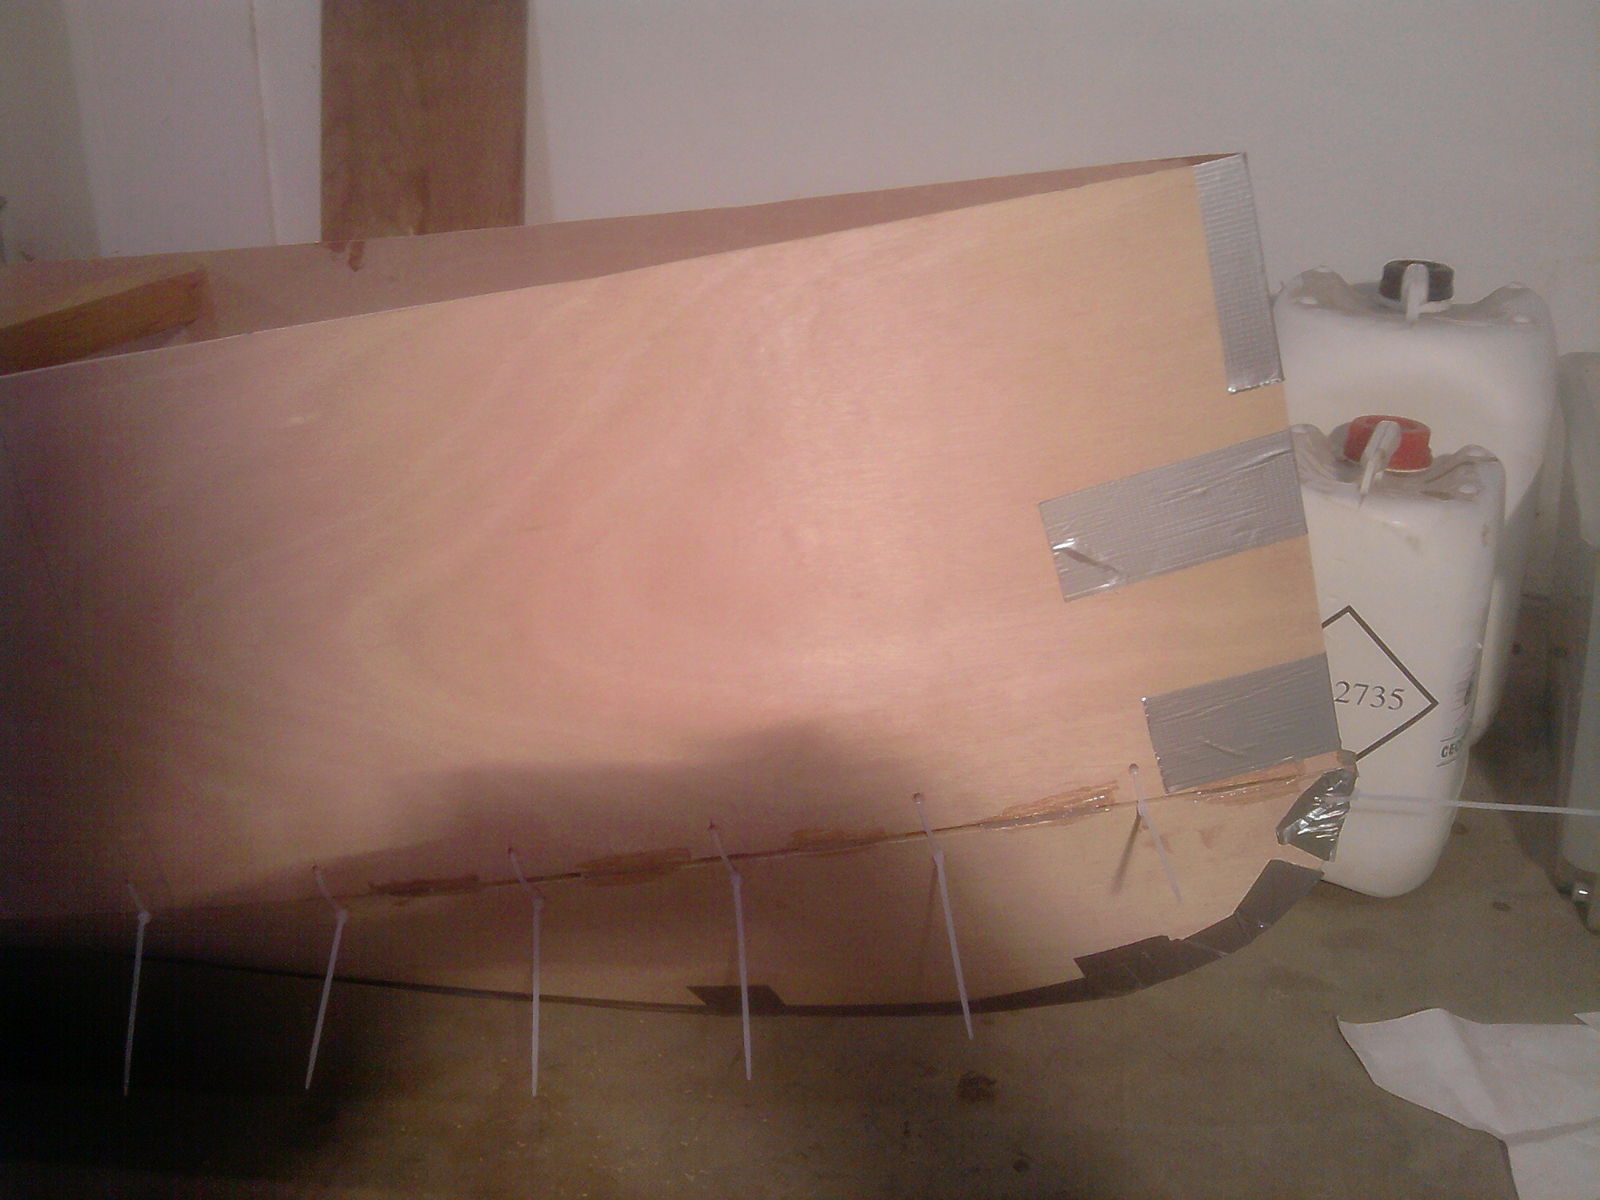
All welded up now ready for interior glassing tomorrow.
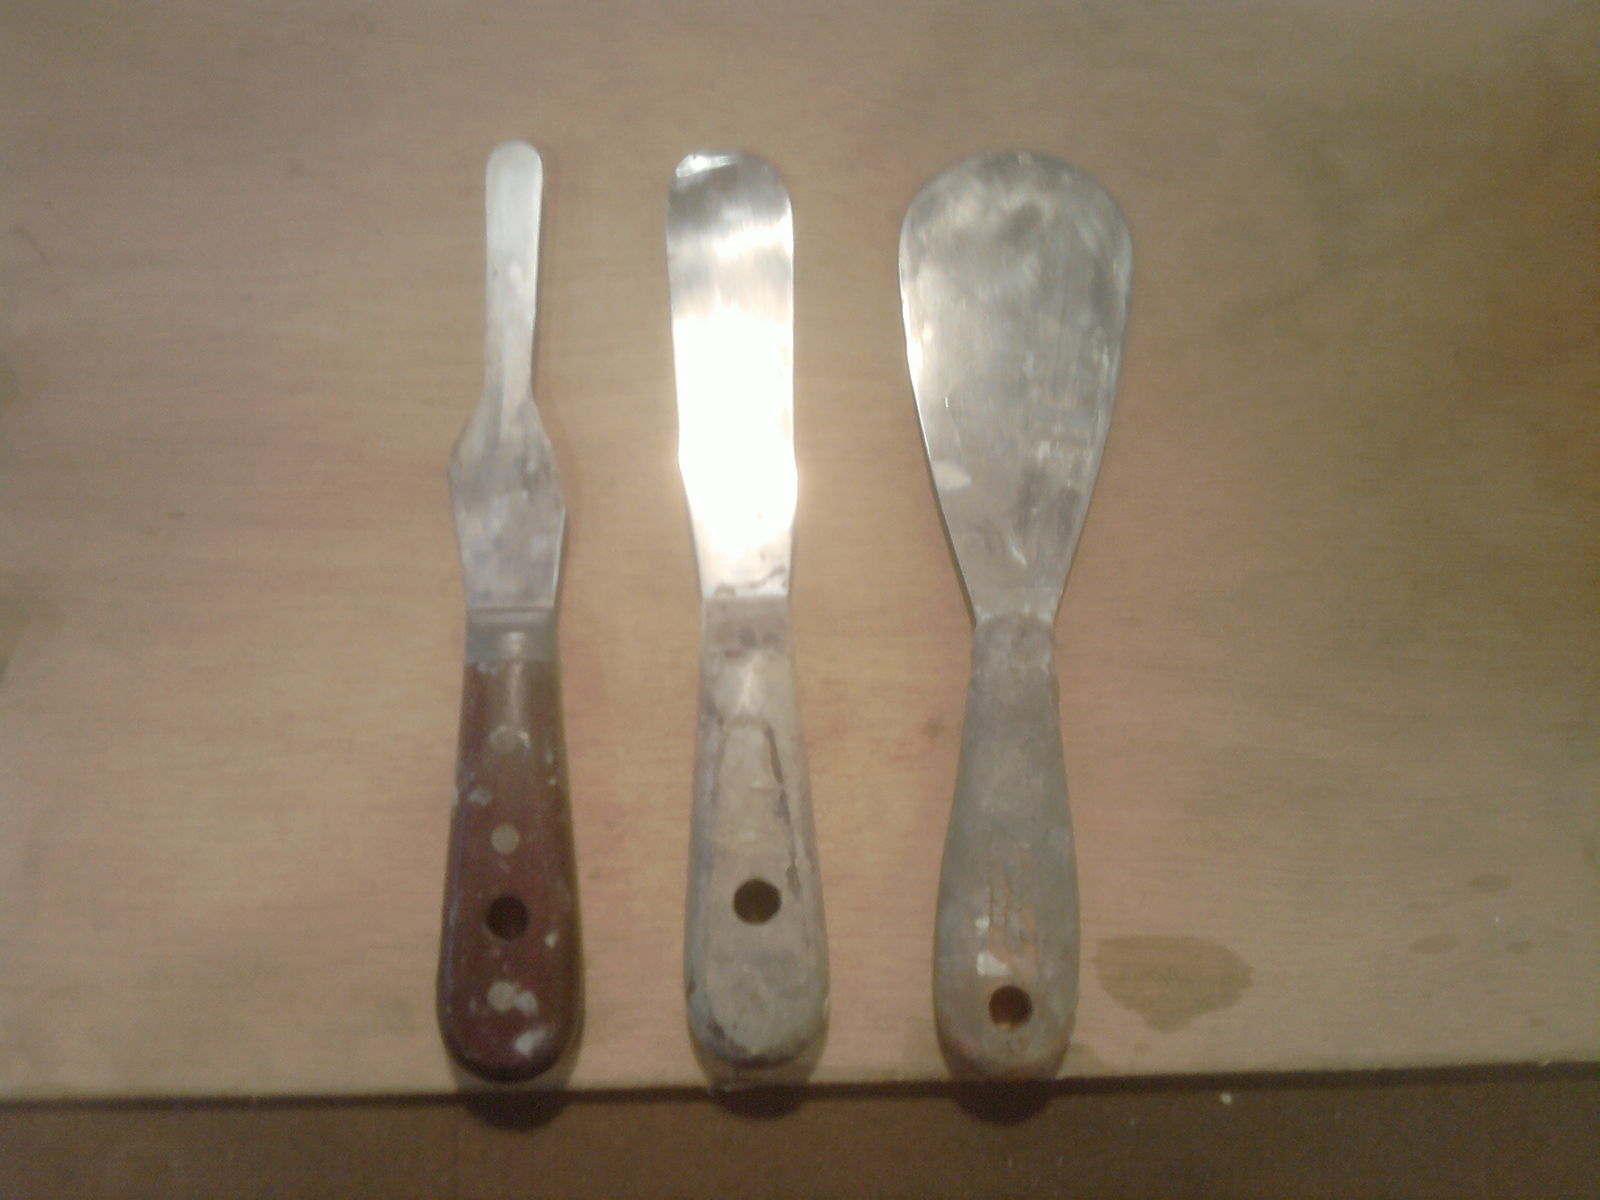
And just for the sake of another pic. here's my trusty filleting tools - we've been through quite a few repairs together!
Re: Chenoa 16 build
Posted: Thu Dec 08, 2011 5:38 pm
by gstanfield
Looking good Dave
Re: Chenoa 16 build
Posted: Thu Dec 08, 2011 5:51 pm
by peter-curacao
gstanfield wrote:Looking good Dave
indeed it does, but where is that yoke for? I looked it up on Wikipedia they tell me it's a device for binding cows heads together

, since you're not building nor mentioned cows , my first guess its an outrigger for a stabilizing hull? you know I have no idea

it looks strong though, so maybe it is for cows

Re: Chenoa 16 build
Posted: Thu Dec 08, 2011 6:36 pm
by Cracker Larry
Same principle Peter, but it goes over your own shoulders, instead of a cows
It's for carrying the canoe on your shoulders.
Re: Chenoa 16 build
Posted: Thu Dec 08, 2011 6:48 pm
by peter-curacao
Re: Chenoa 16 build
Posted: Thu Dec 08, 2011 6:54 pm
by Cracker Larry
Sometimes you've got to carry it from the car to the water, or endure a terrible torture called portage

Peddle boats

Naw, got to paddle them or carry them
Re: Chenoa 16 build
Posted: Thu Dec 08, 2011 7:00 pm
by peter-curacao
Aaahh okay
well that's a lot of effort building a carrying device so my hat is of to dbcrx

Edit:Also happy birthday by the way

Re: Chenoa 16 build
Posted: Thu Dec 08, 2011 10:19 pm
by Cracker Larry
Just messing with you Peter
Your English is much better than I speak any of your 5 or 6 languages, and I struggle with English
Who's birthday is it?
Re: Chenoa 16 build
Posted: Thu Dec 08, 2011 10:27 pm
by Cracker Larry
This is a paddle store, they are peddling paddles
No wonder English is so hard to figure out

Same principle Peter, but it goes over your own shoulders, instead of a cows
It's for carrying the canoe on your shoulders.
It would actually make more sense to let the cow carry the canoe
Re: Chenoa 16 build
Posted: Fri Dec 09, 2011 3:50 am
by dbcrx
Cracker Larry wrote:Sometimes you've got to carry it from the car to the water, or endure a terrible torture called portage
Peddle boats
Naw, got to paddle them or carry them
You do indeed. I don't think the bottom would last long if I paddled it from the workshop to the water!
Cracker Larry wrote:This is a paddle store, they are peddling paddles
No wonder English is so hard to figure out
It is definitely a very strange language.
Cracker Larry wrote:Who's birthday is it?
Was mine yesterday. Spent it at work even though it was a national holiday here.
peter-curacao wrote:Aaahh okay
well that's a lot of effort building a carrying device so my hat is of to dbcrx
Edit:Also happy birthday by the way
Thanks. Fiberglass is "what I do" so it makes sense to me to do things like that instead of searching for or buying the right piece of wood. Thinking of doing the same for the seats as well.
Re: Chenoa 16 build
Posted: Fri Dec 09, 2011 10:17 am
by Cracker Larry
Happy birthday to you
Please excuse my thread derailment.
Re: Chenoa 16 build
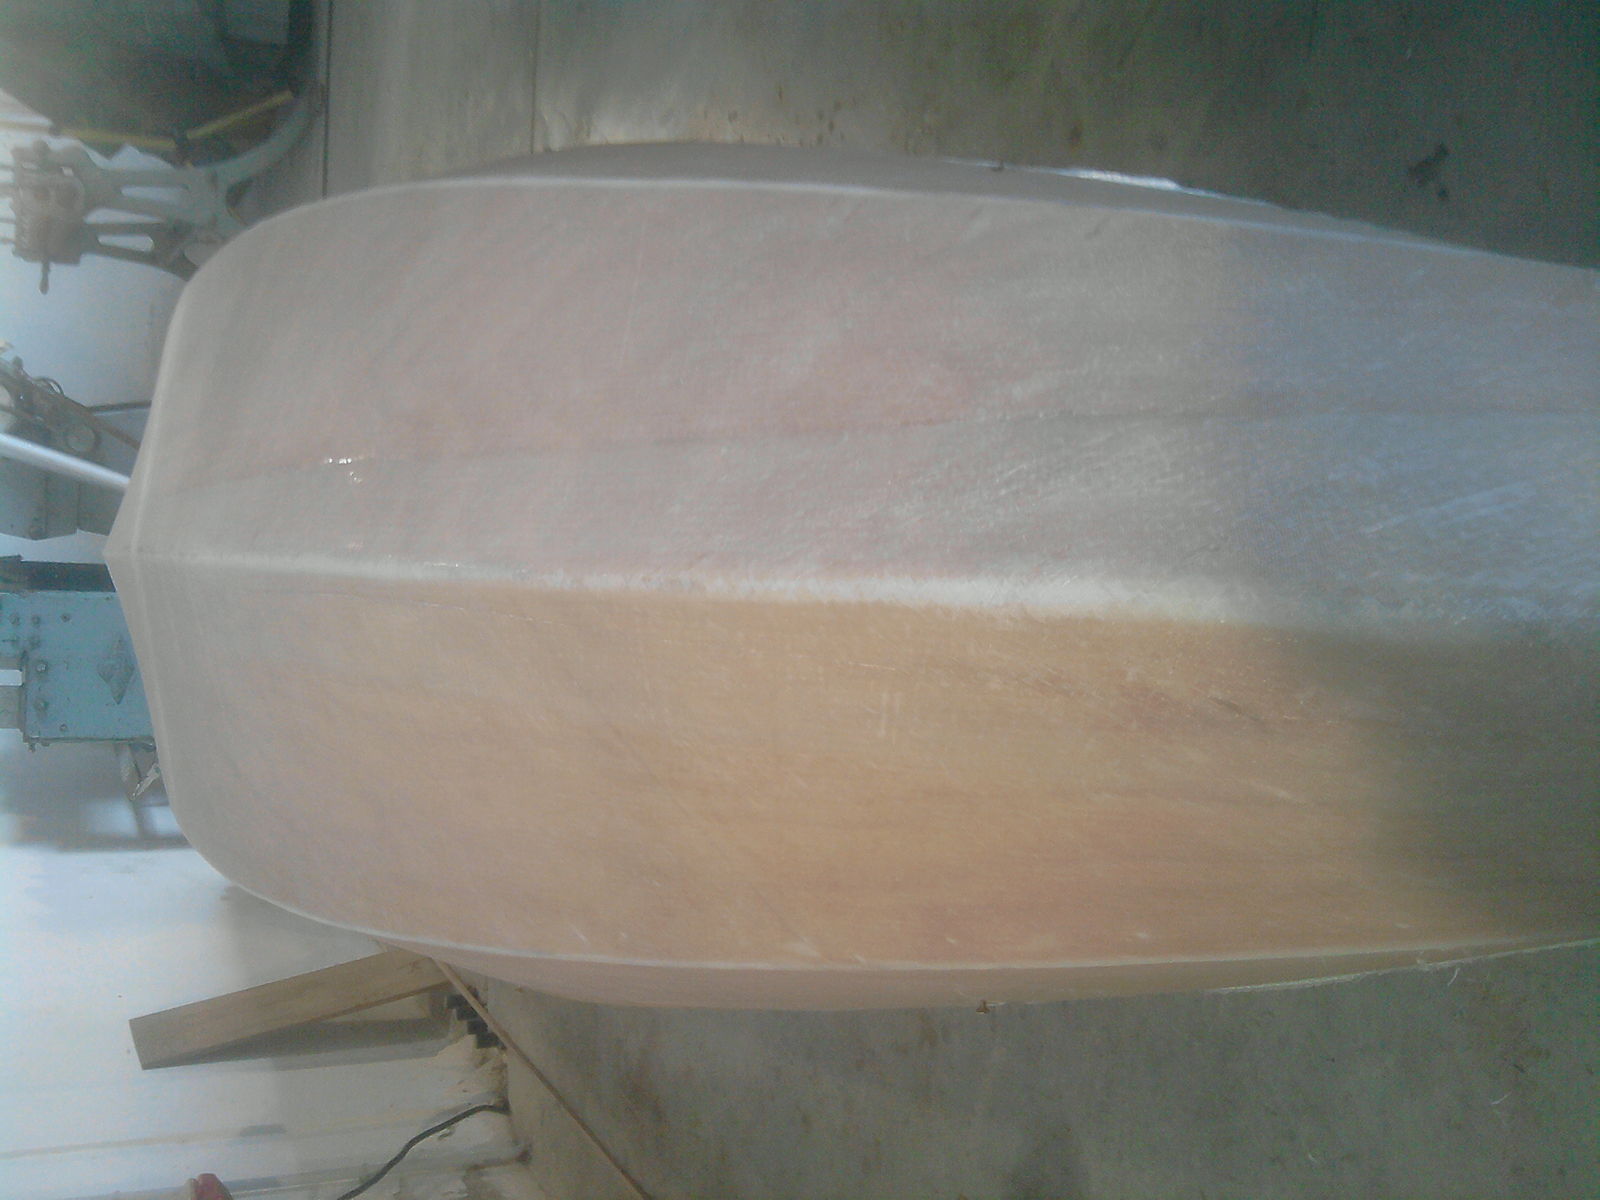
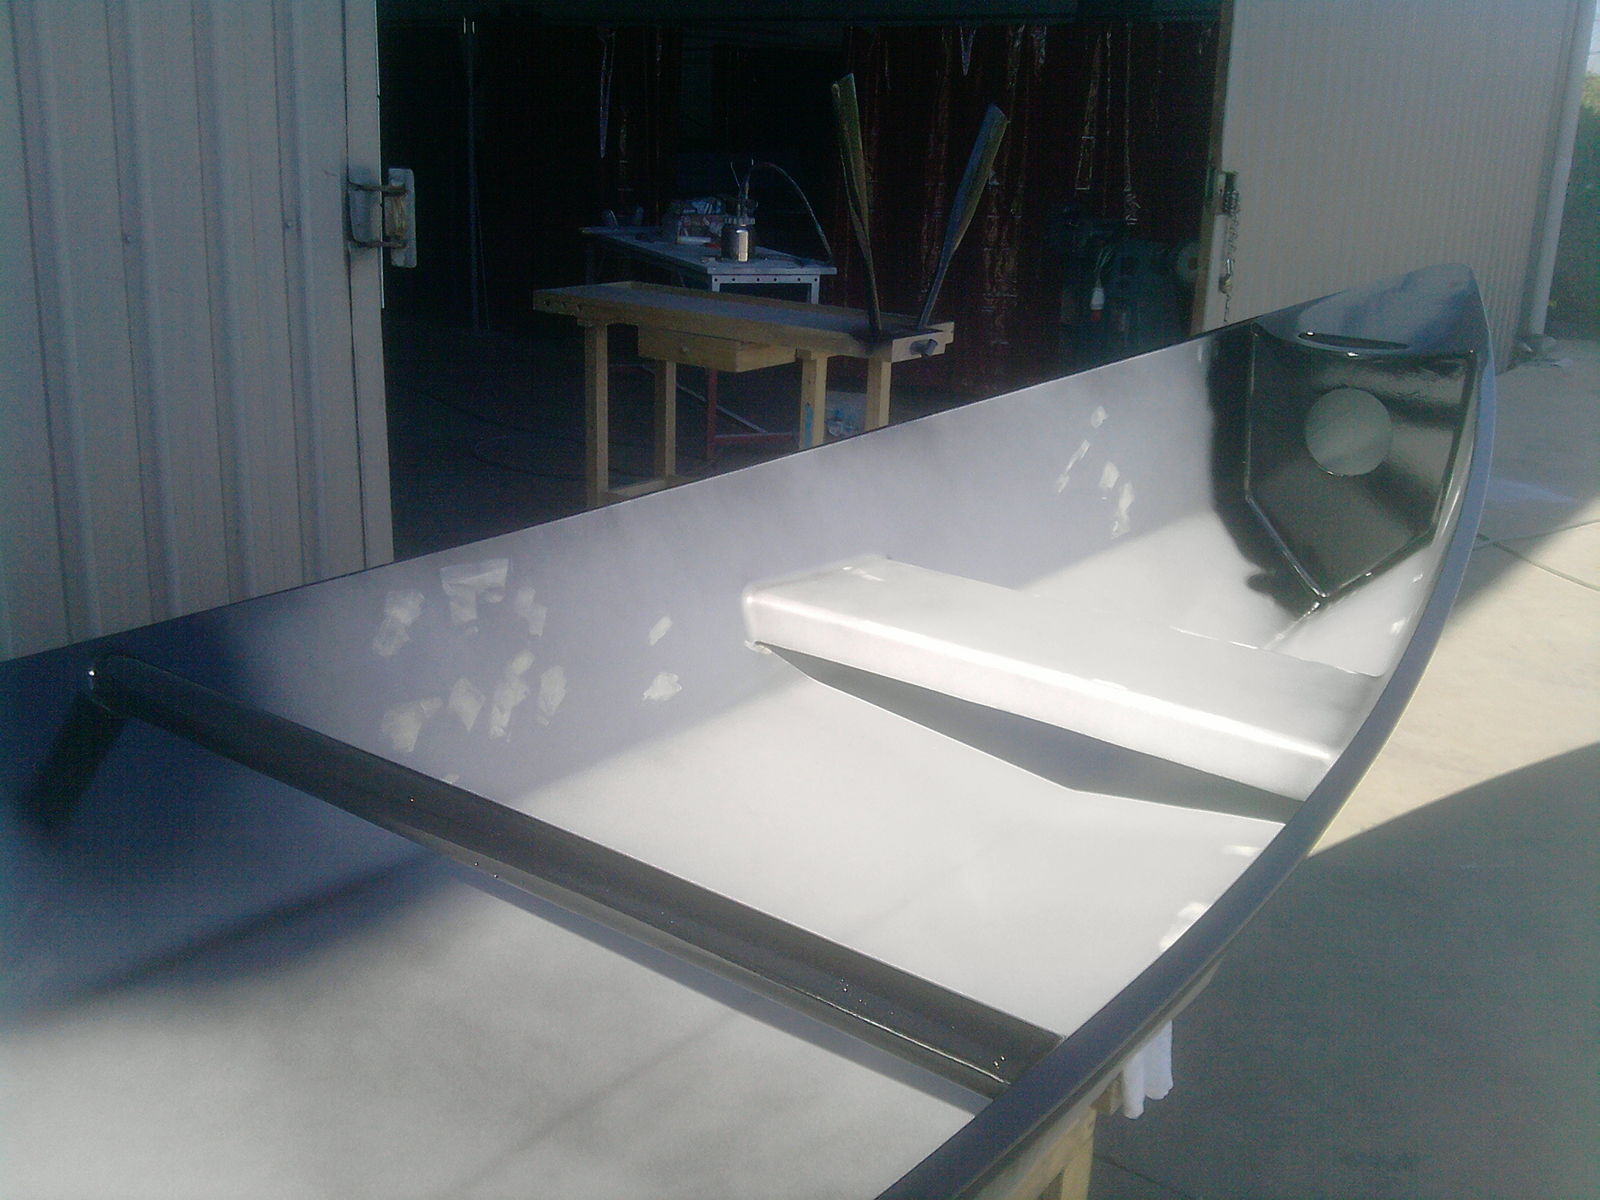
Posted: Sun Dec 11, 2011 10:44 am
by dbcrx
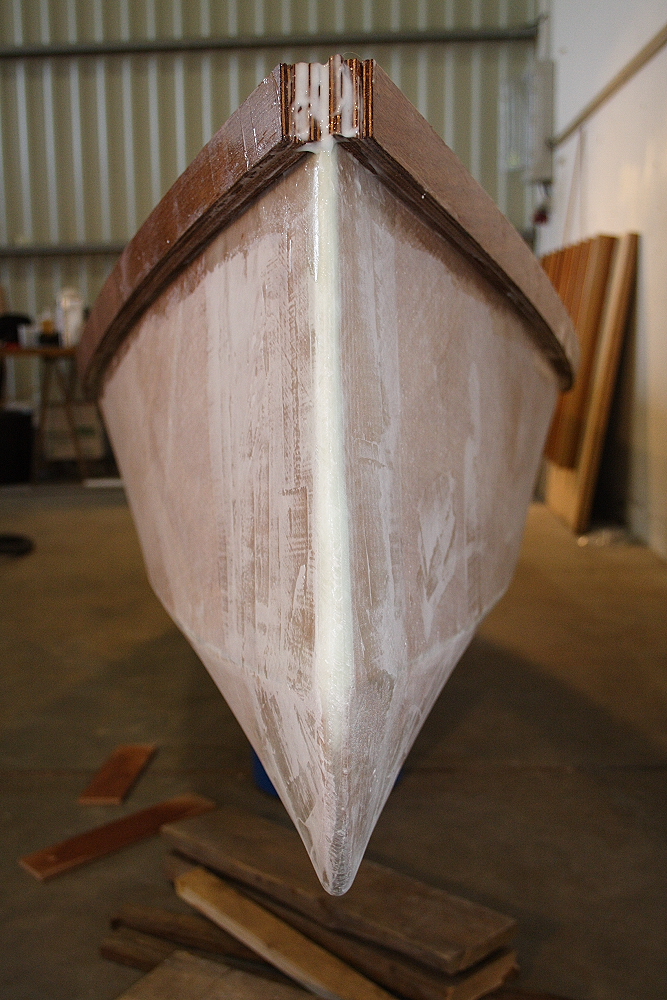
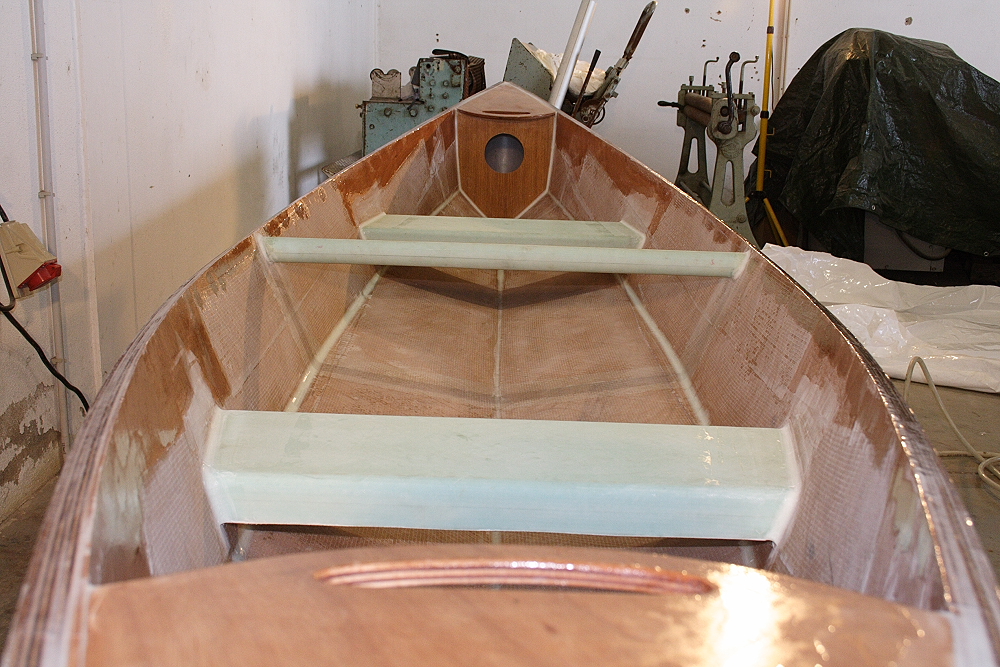
Inside firberglass was done Friday:
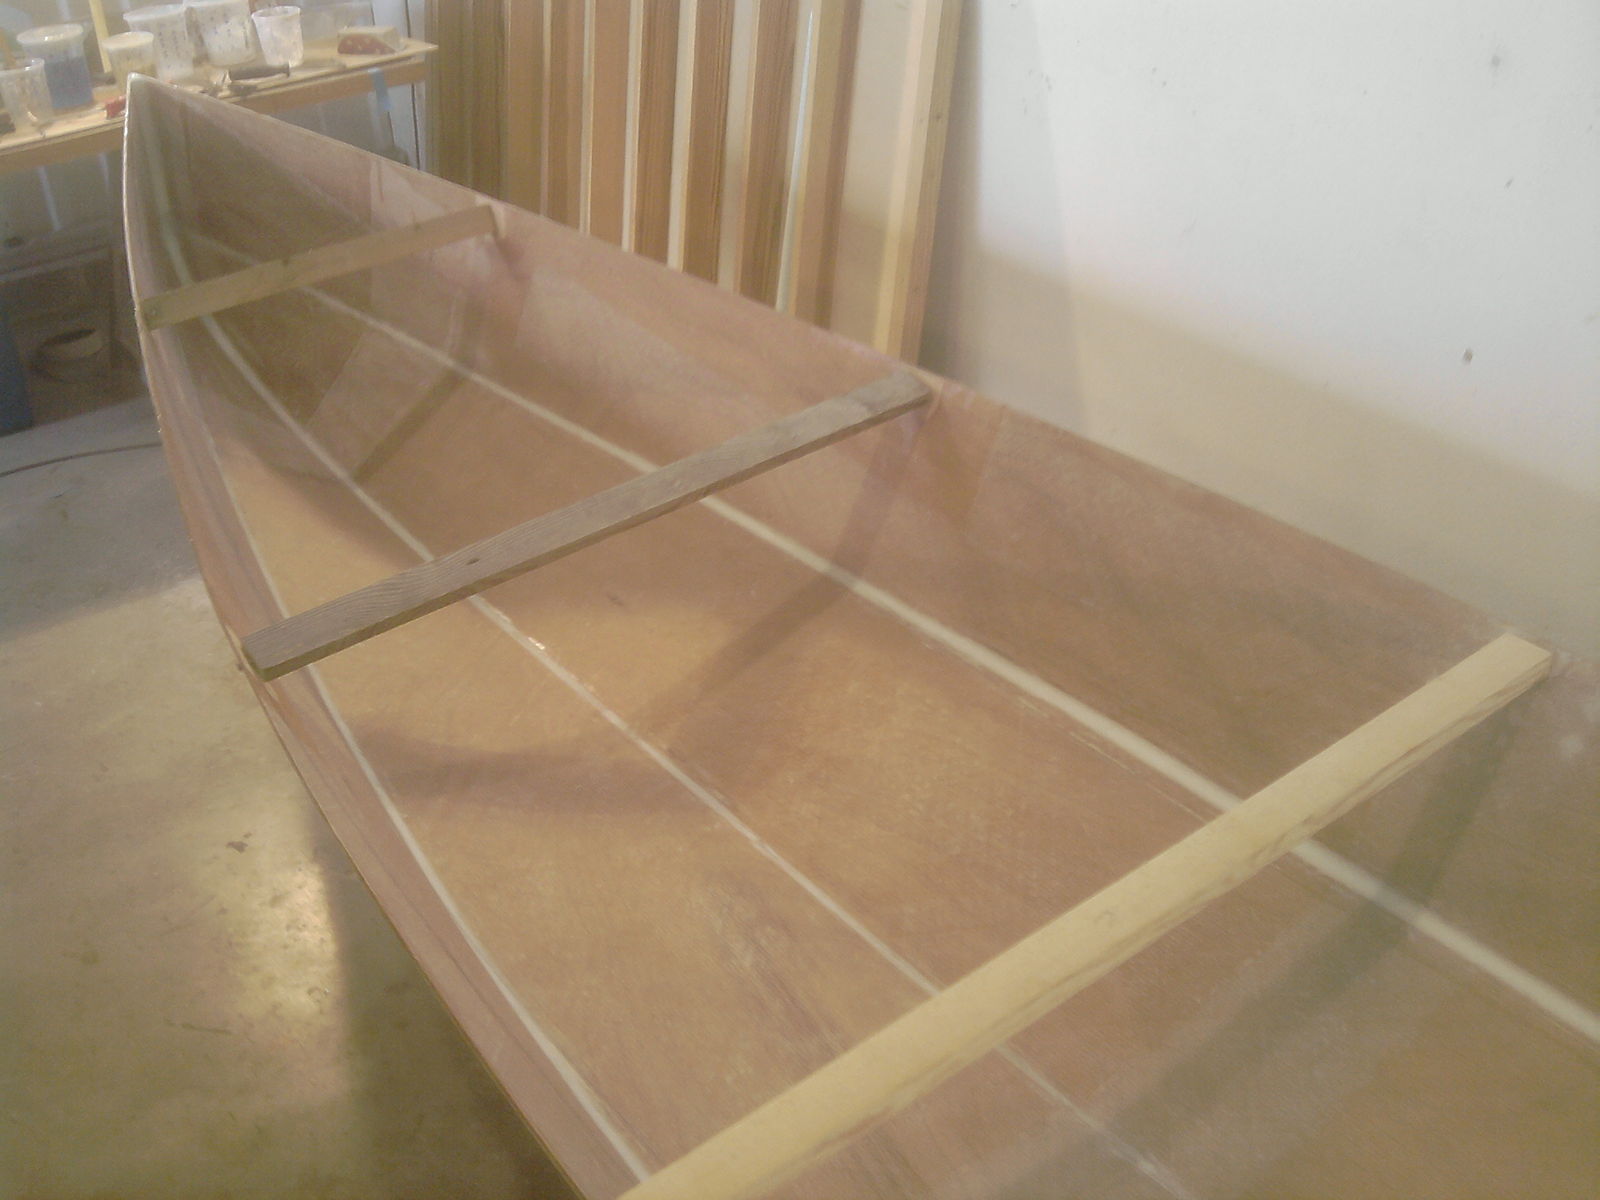
Then the outside yesterday and tucked up for bed:
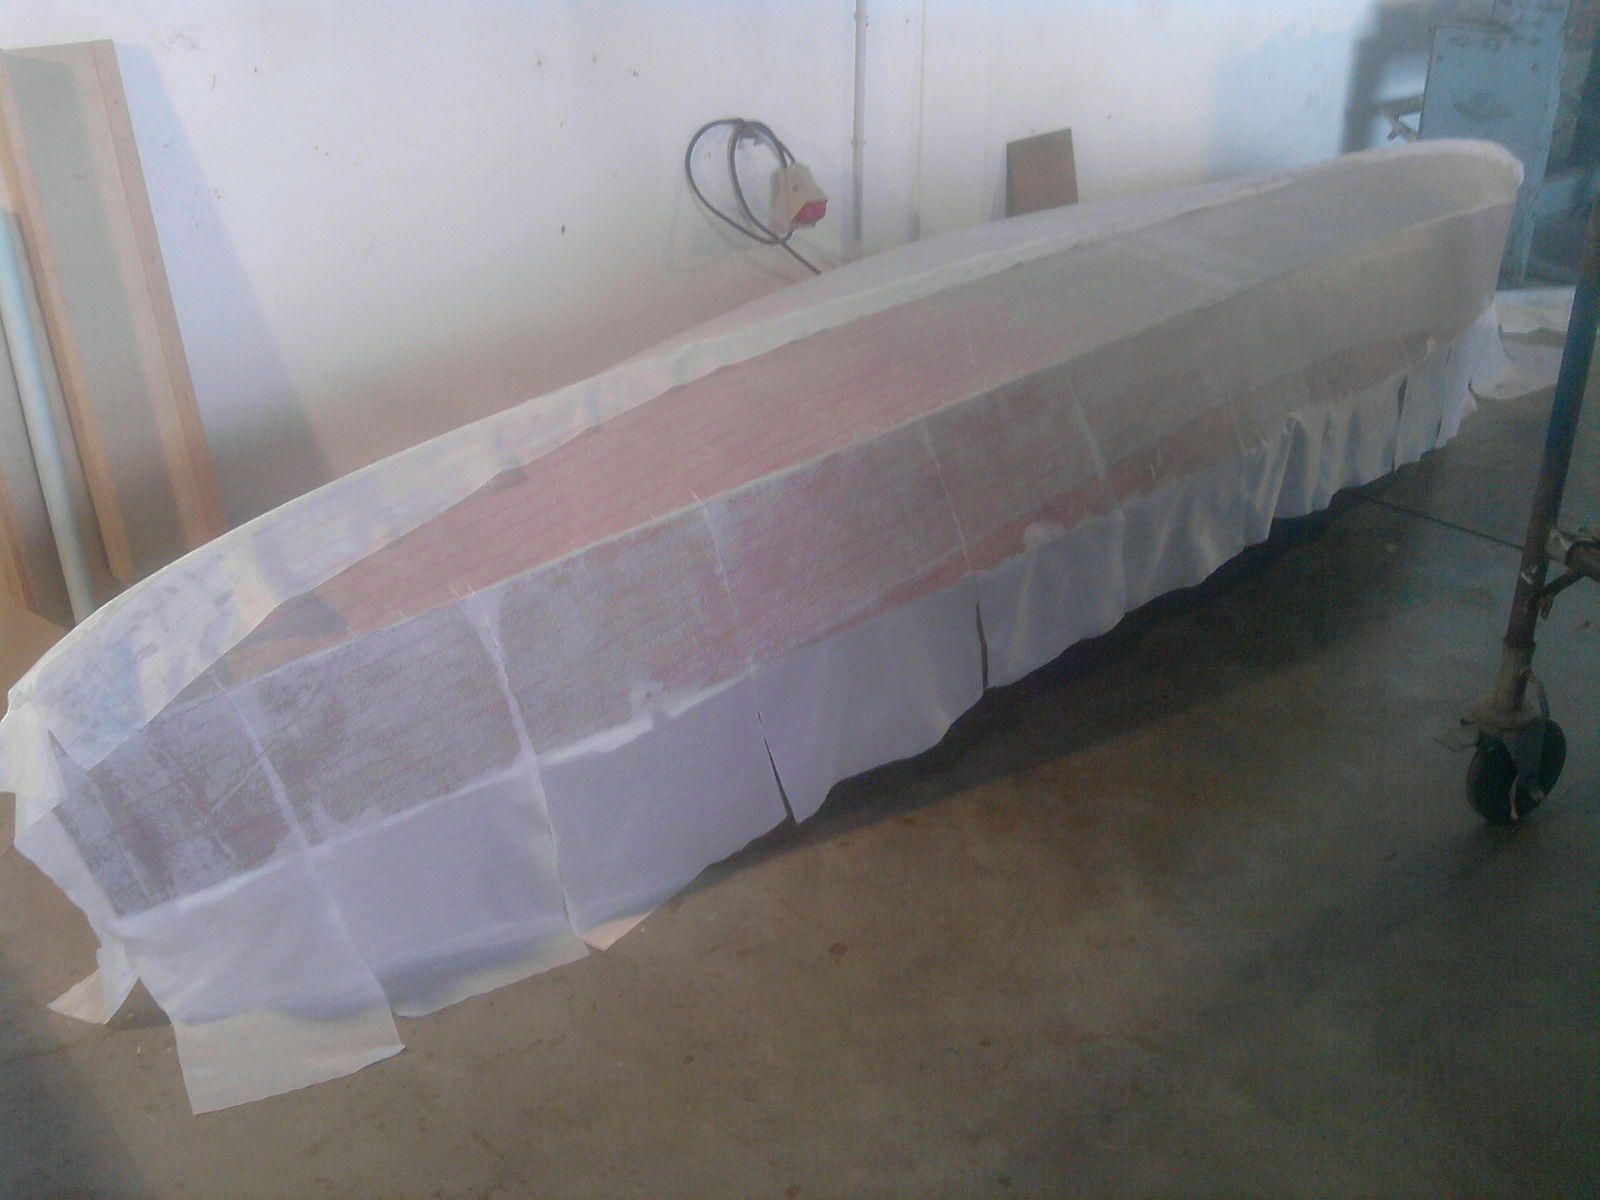
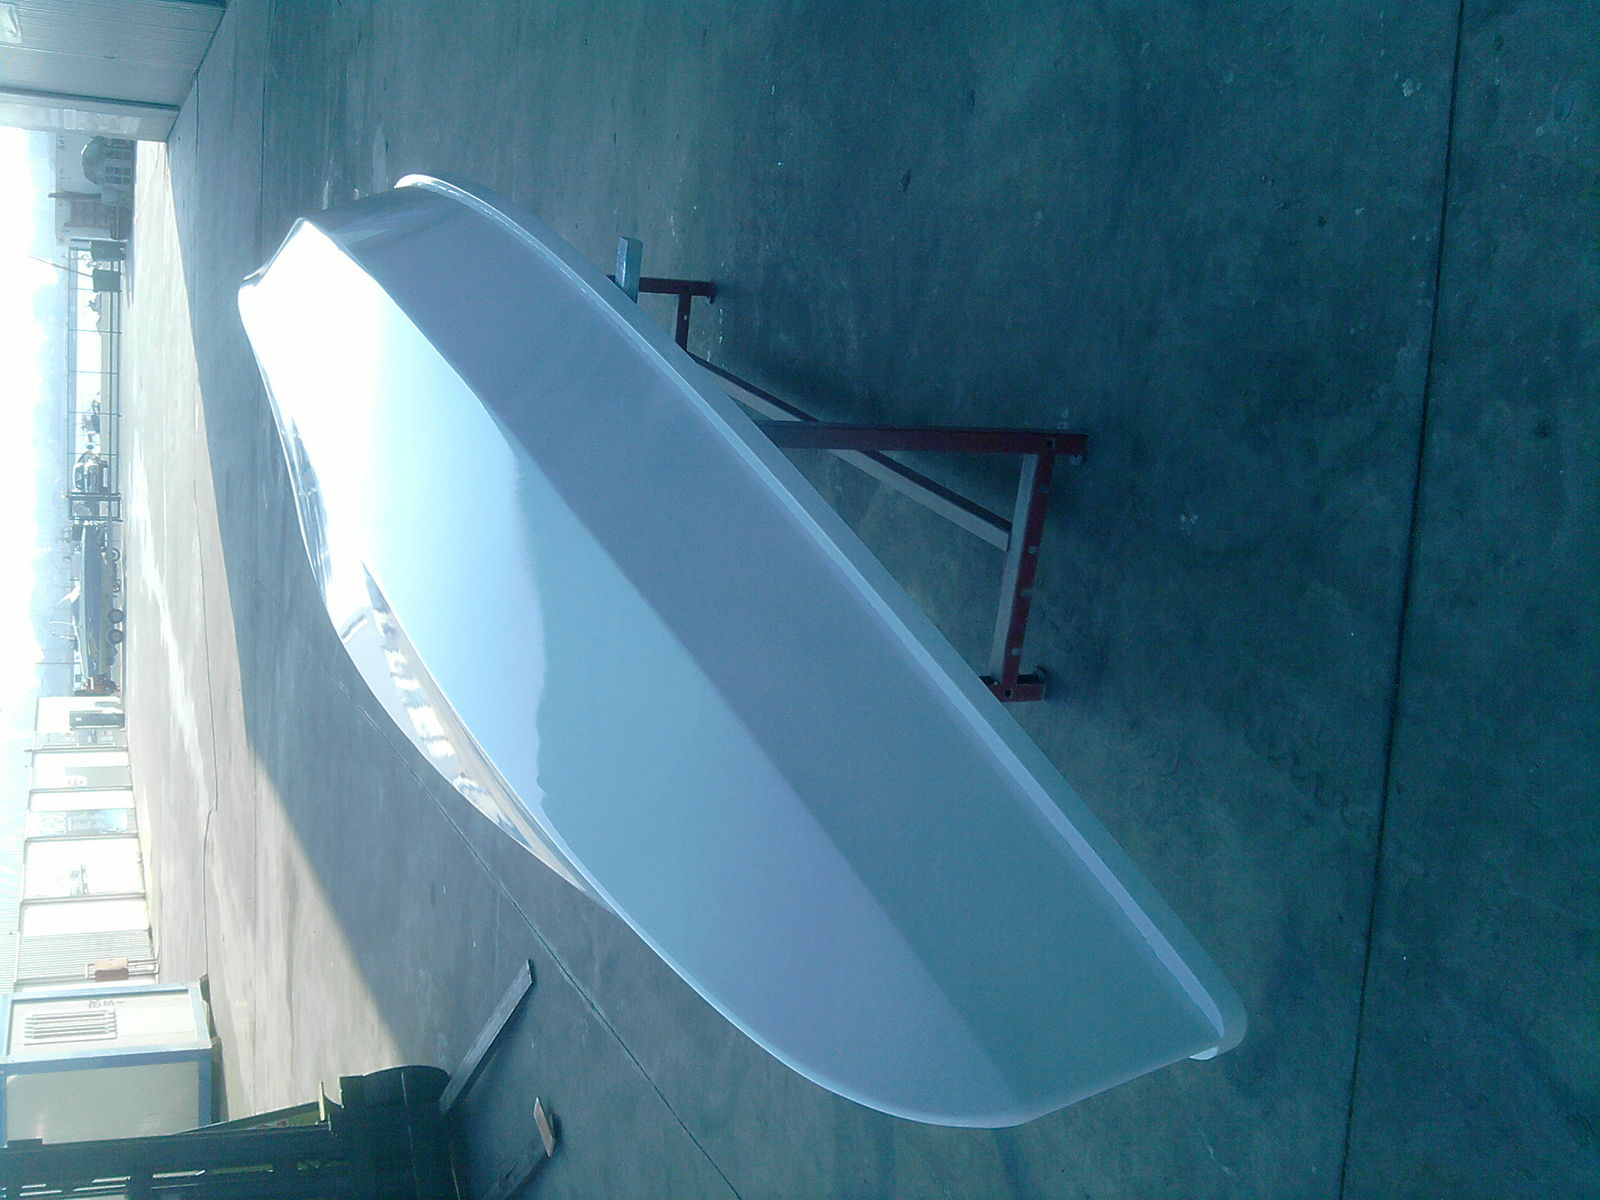
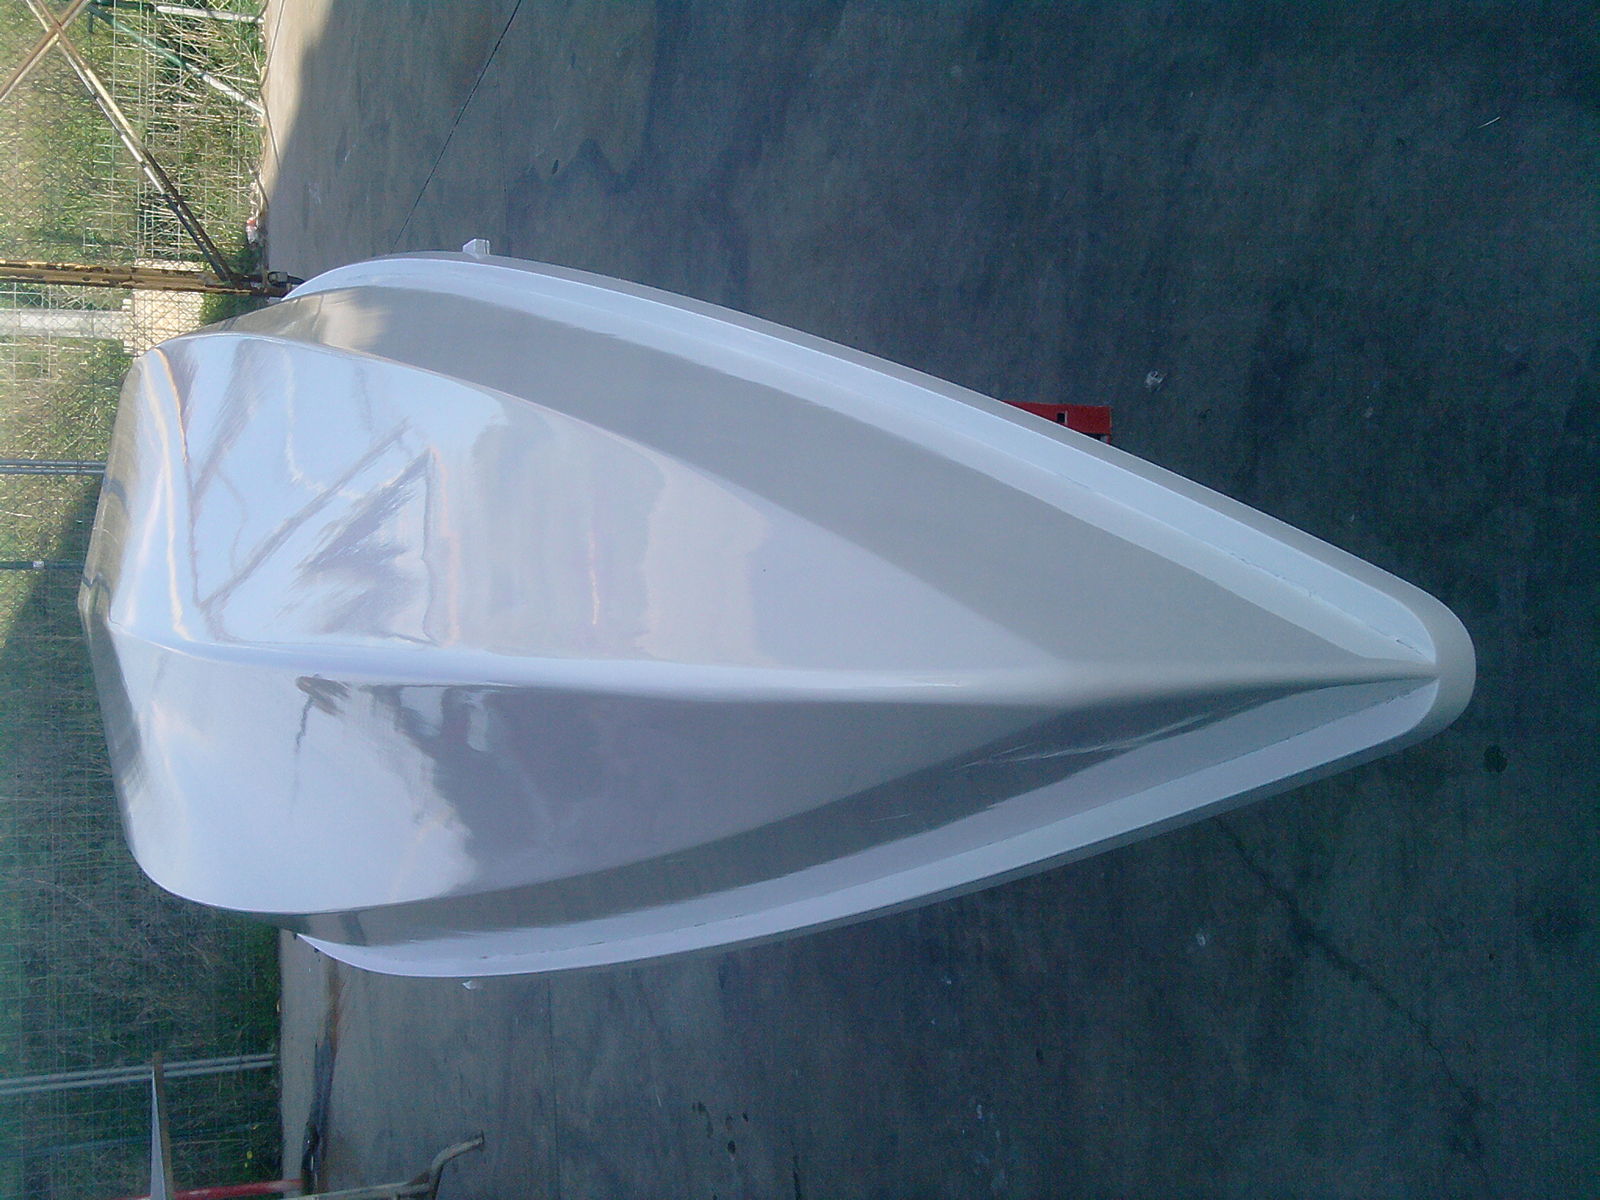
The picture really doesn't do it justice but the bottom and bows have a really nice shape:
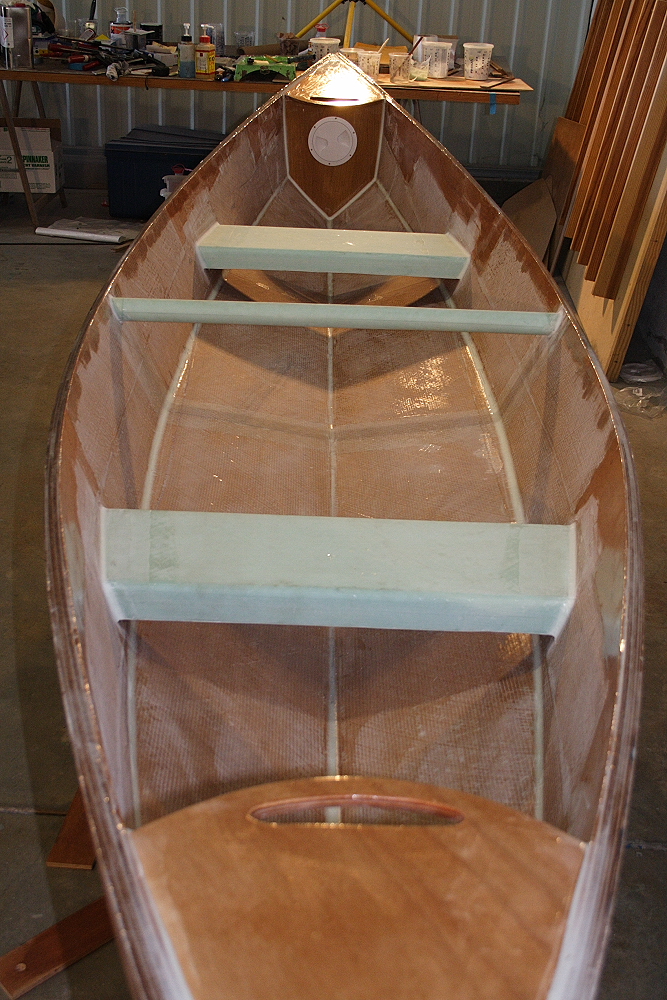
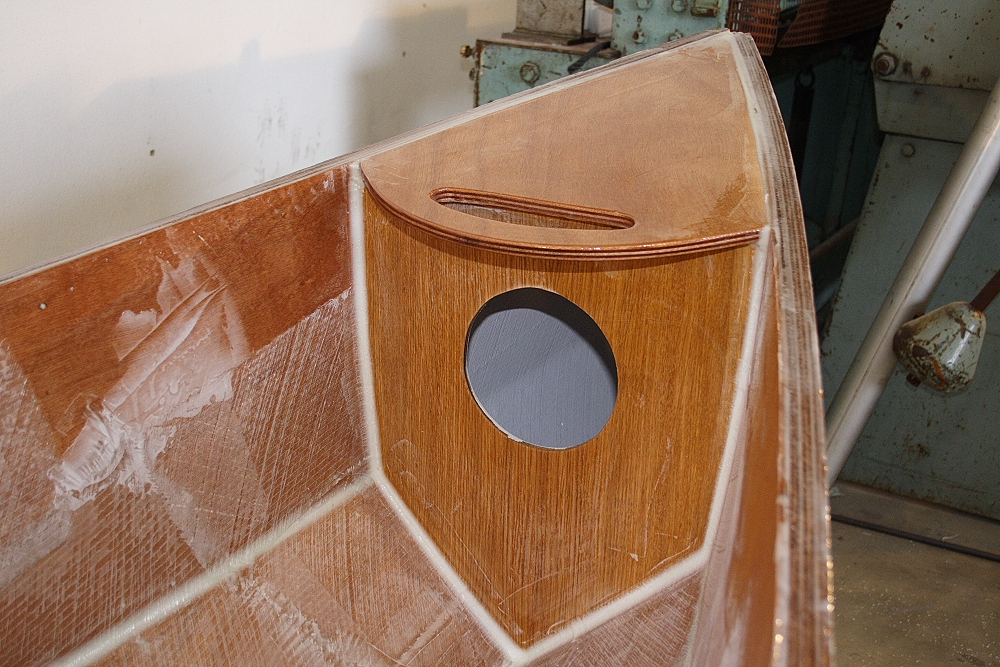
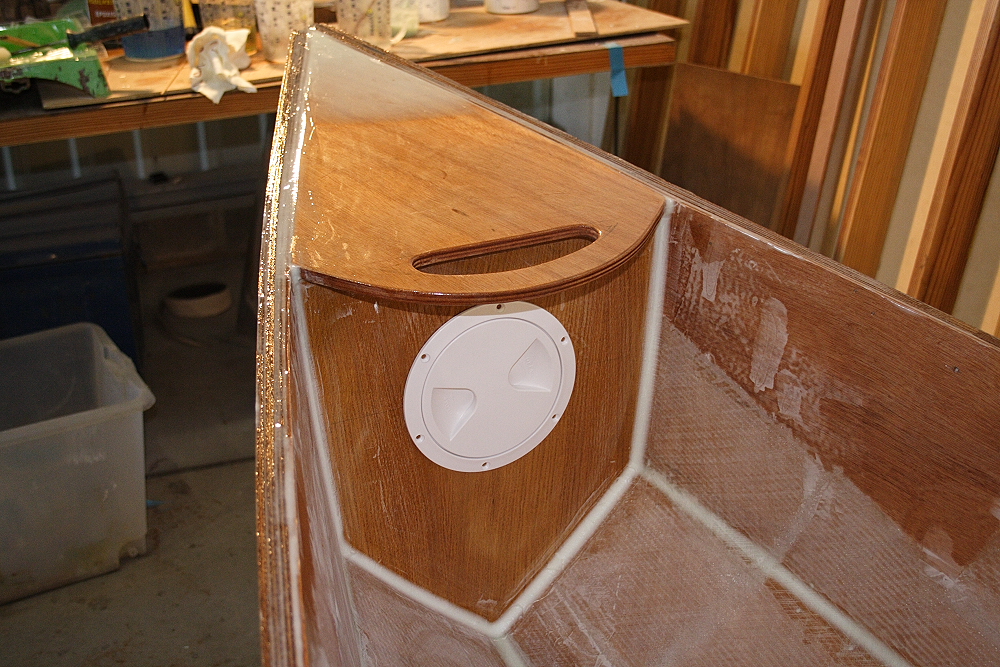
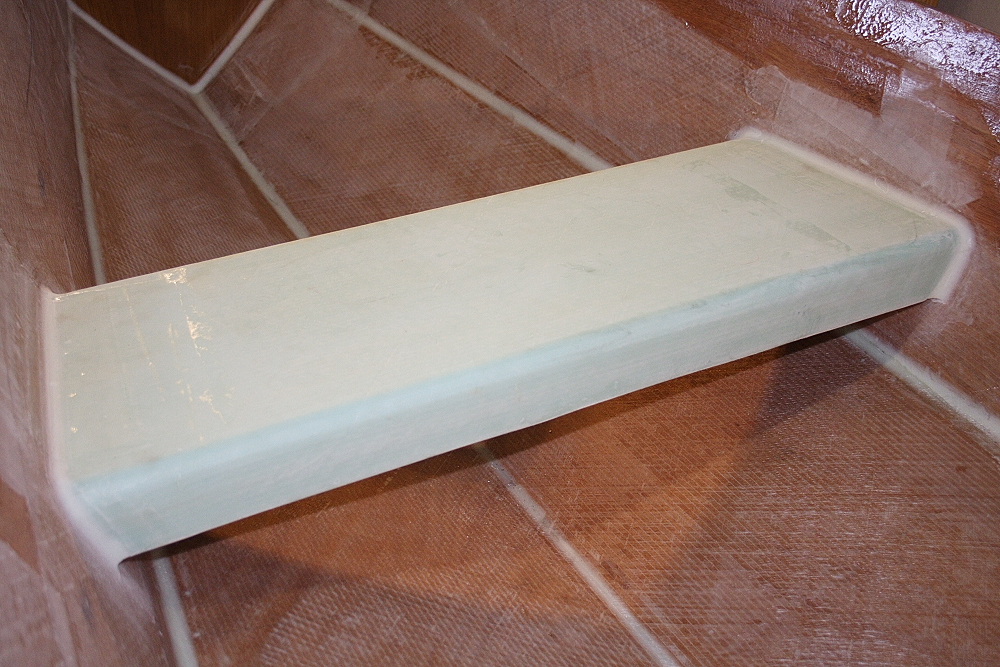
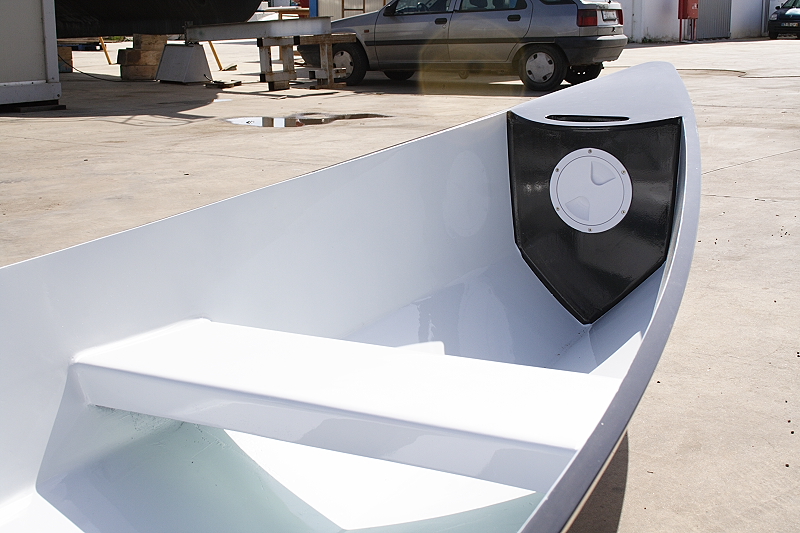
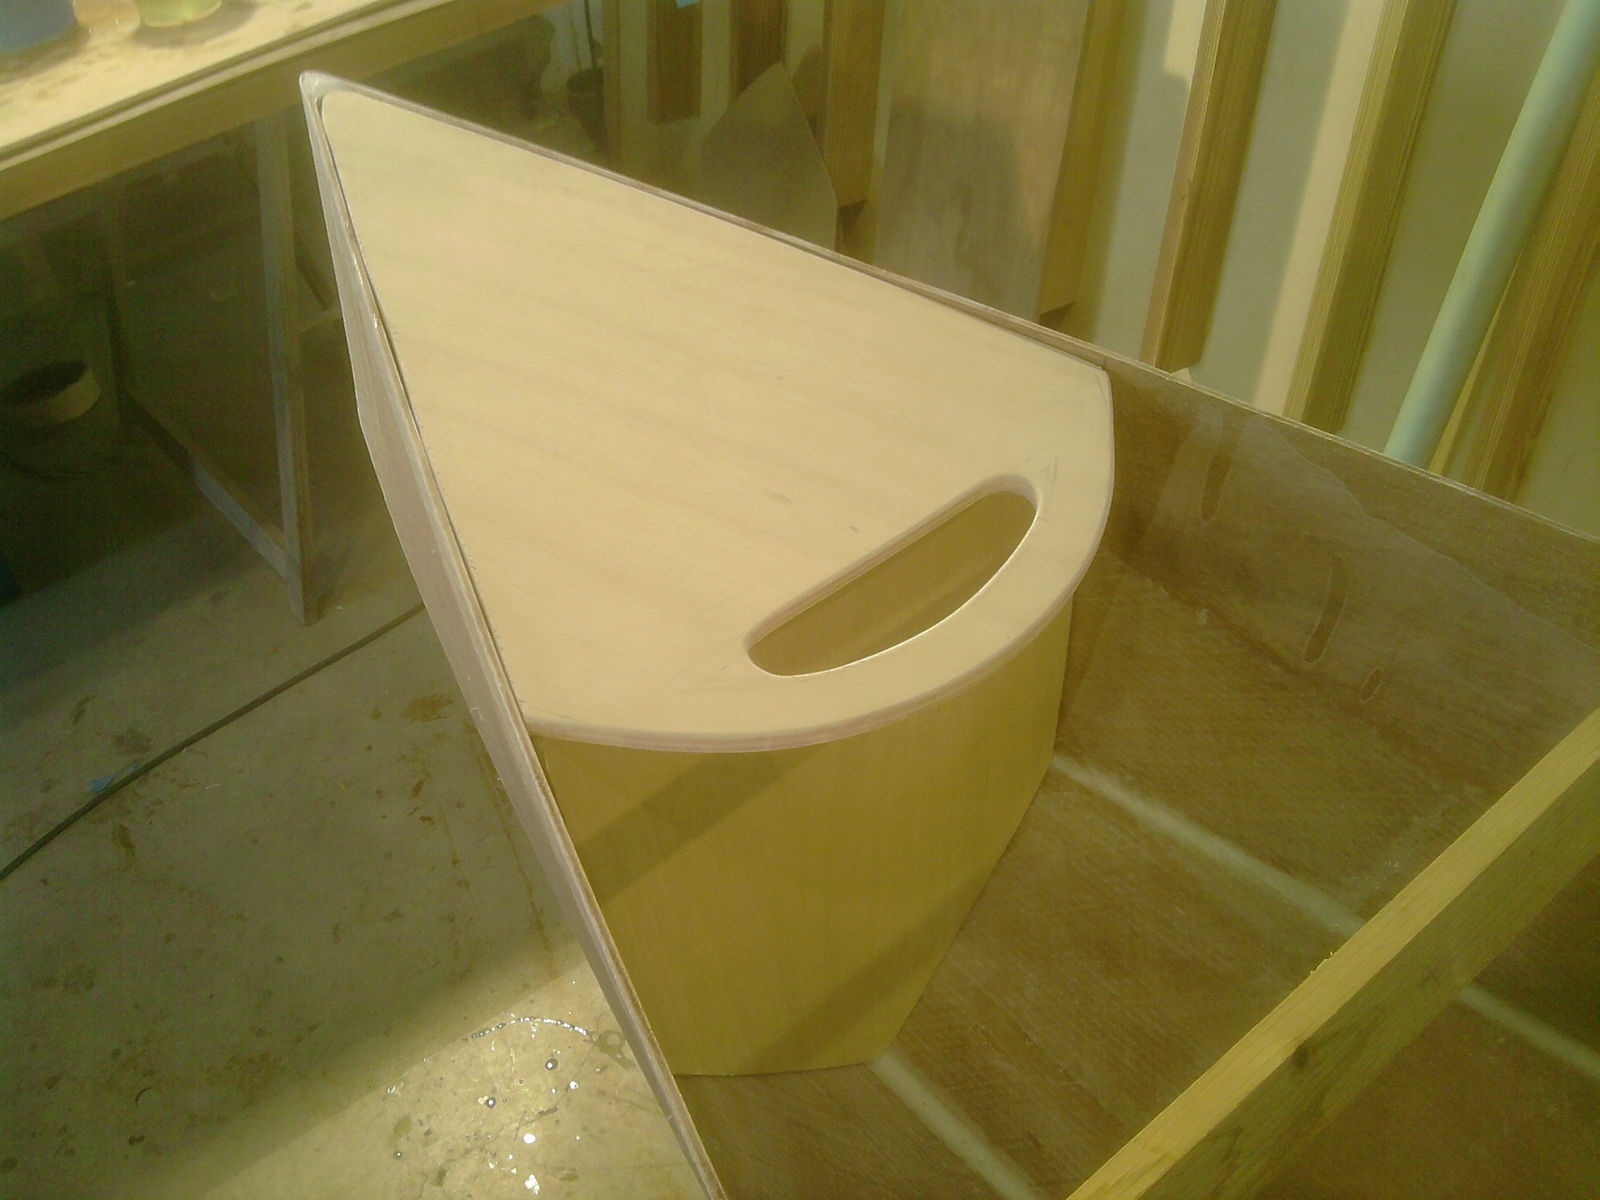
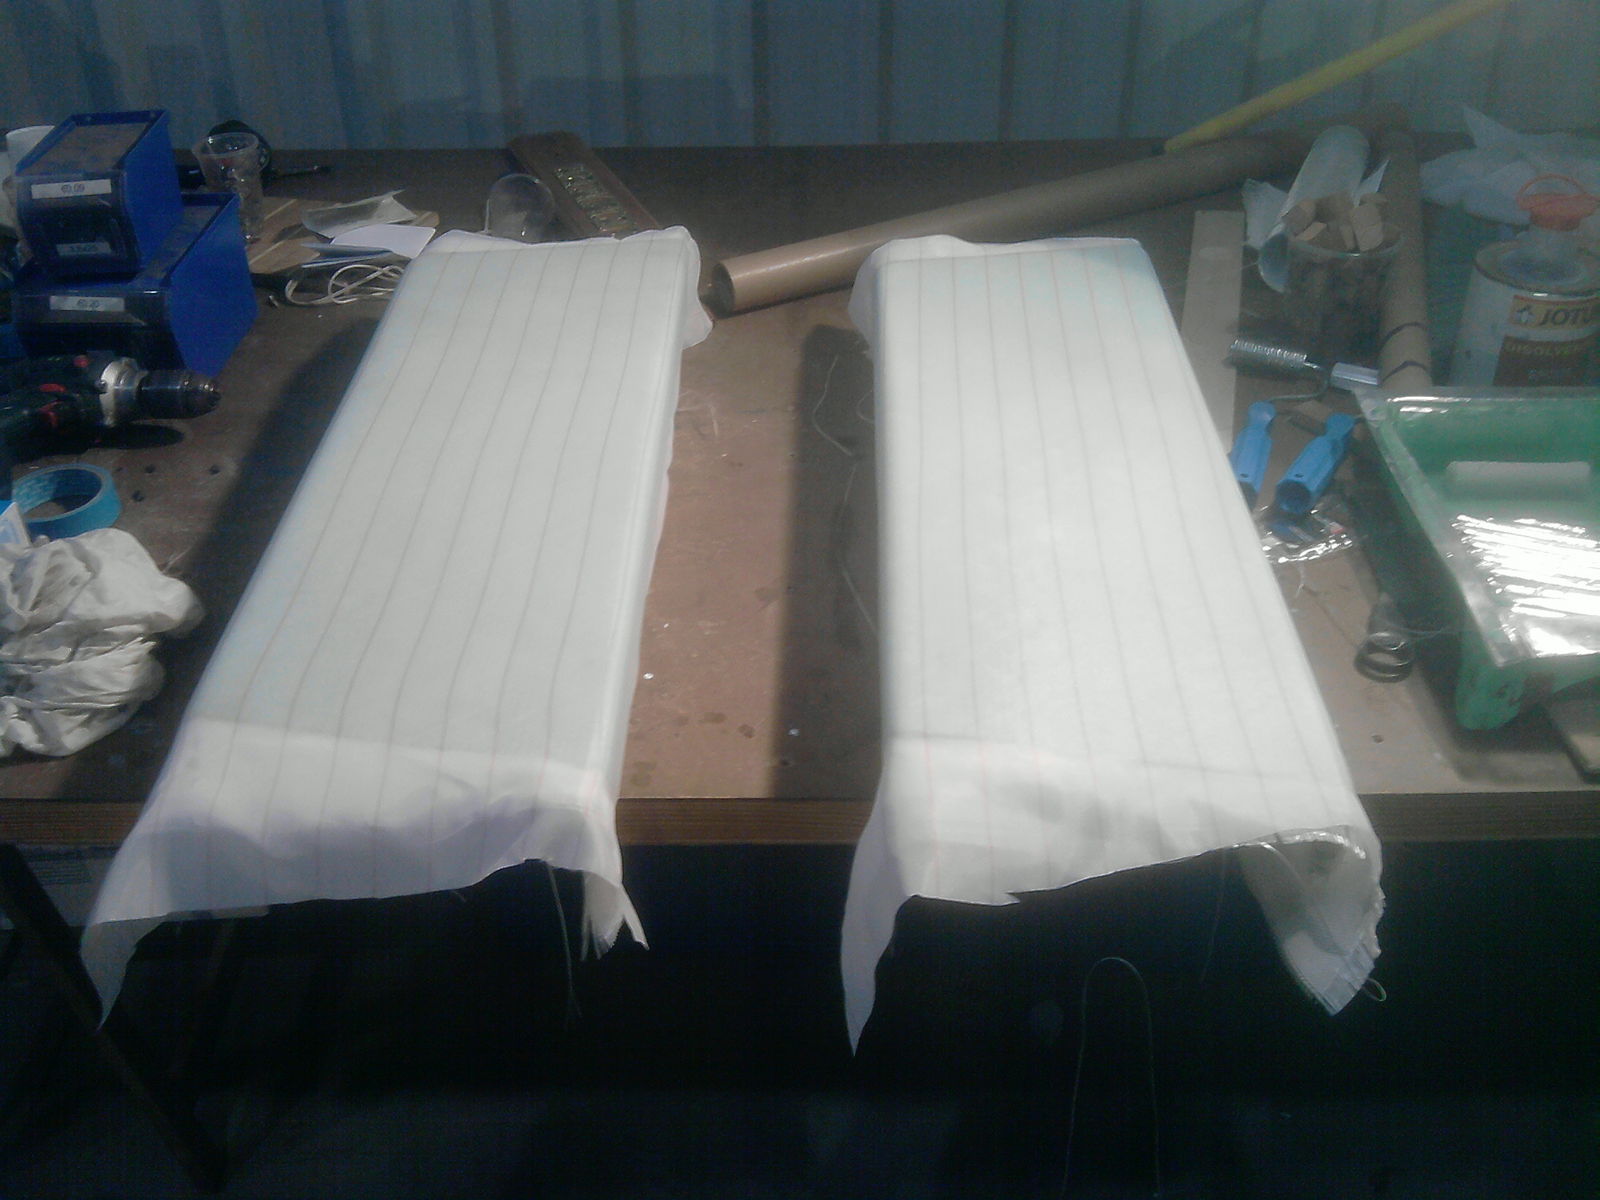
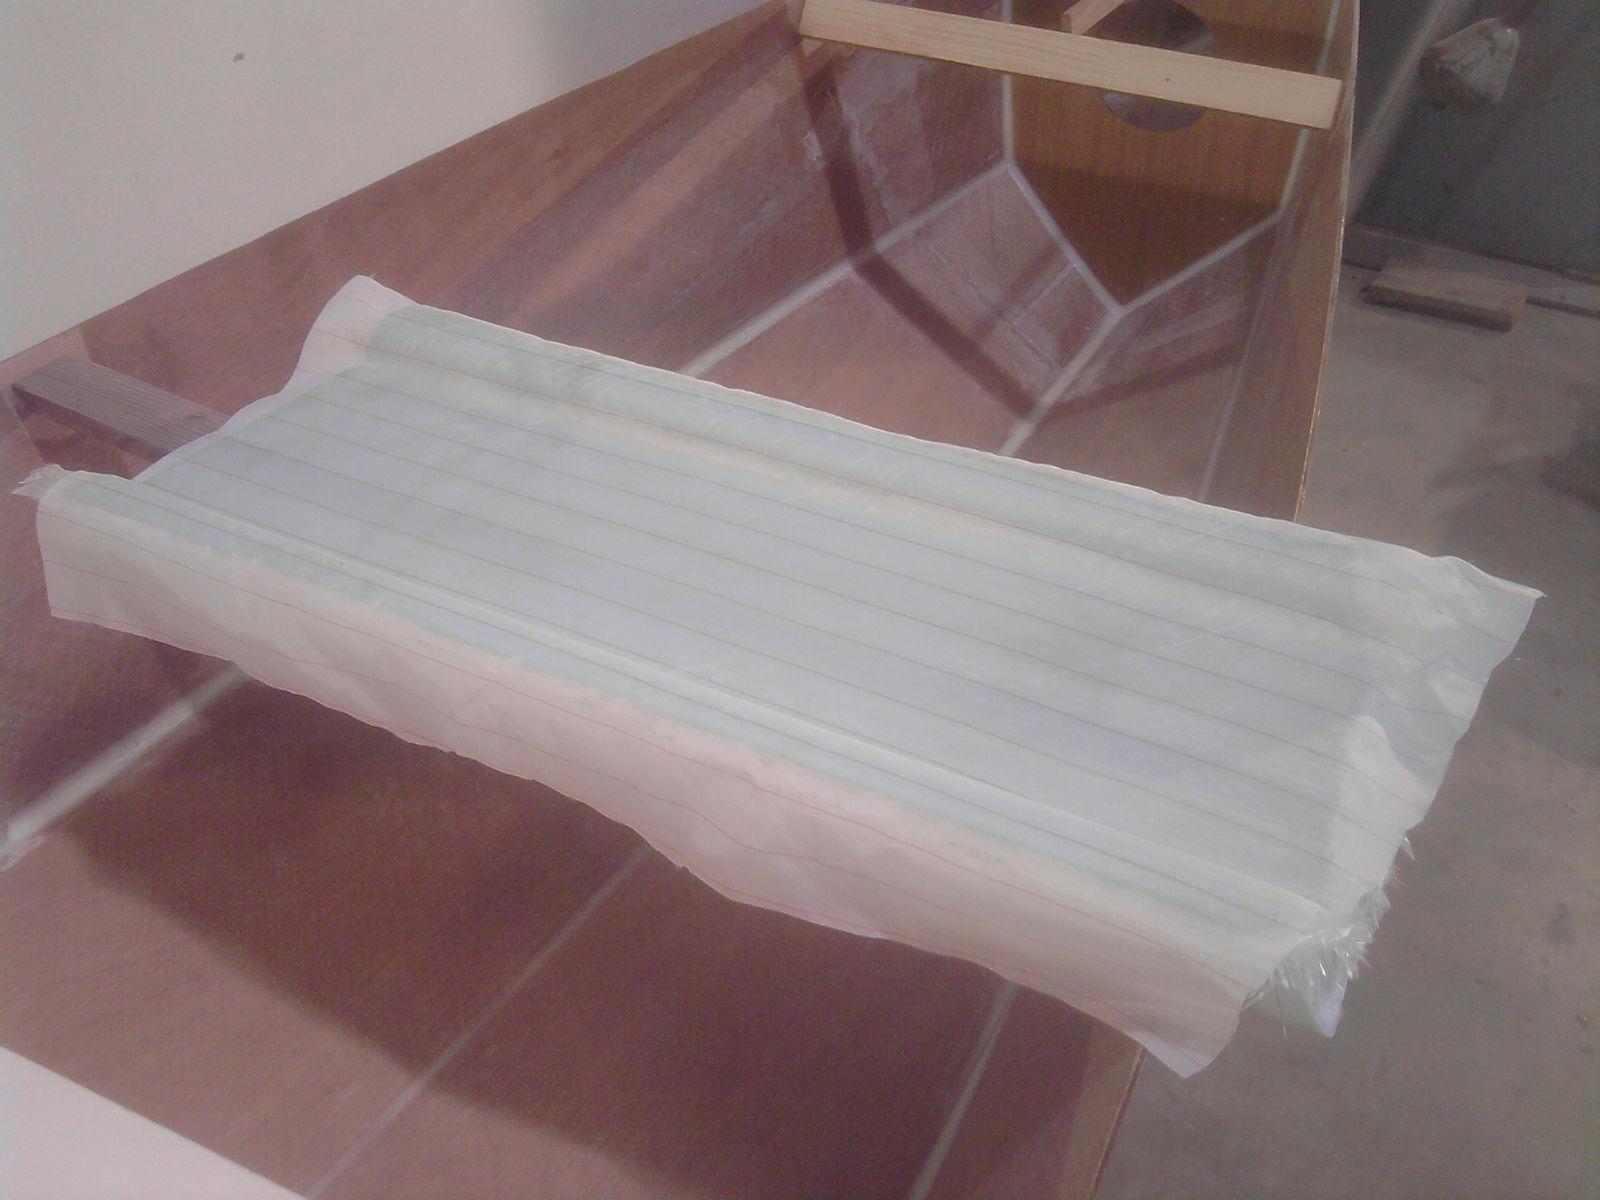
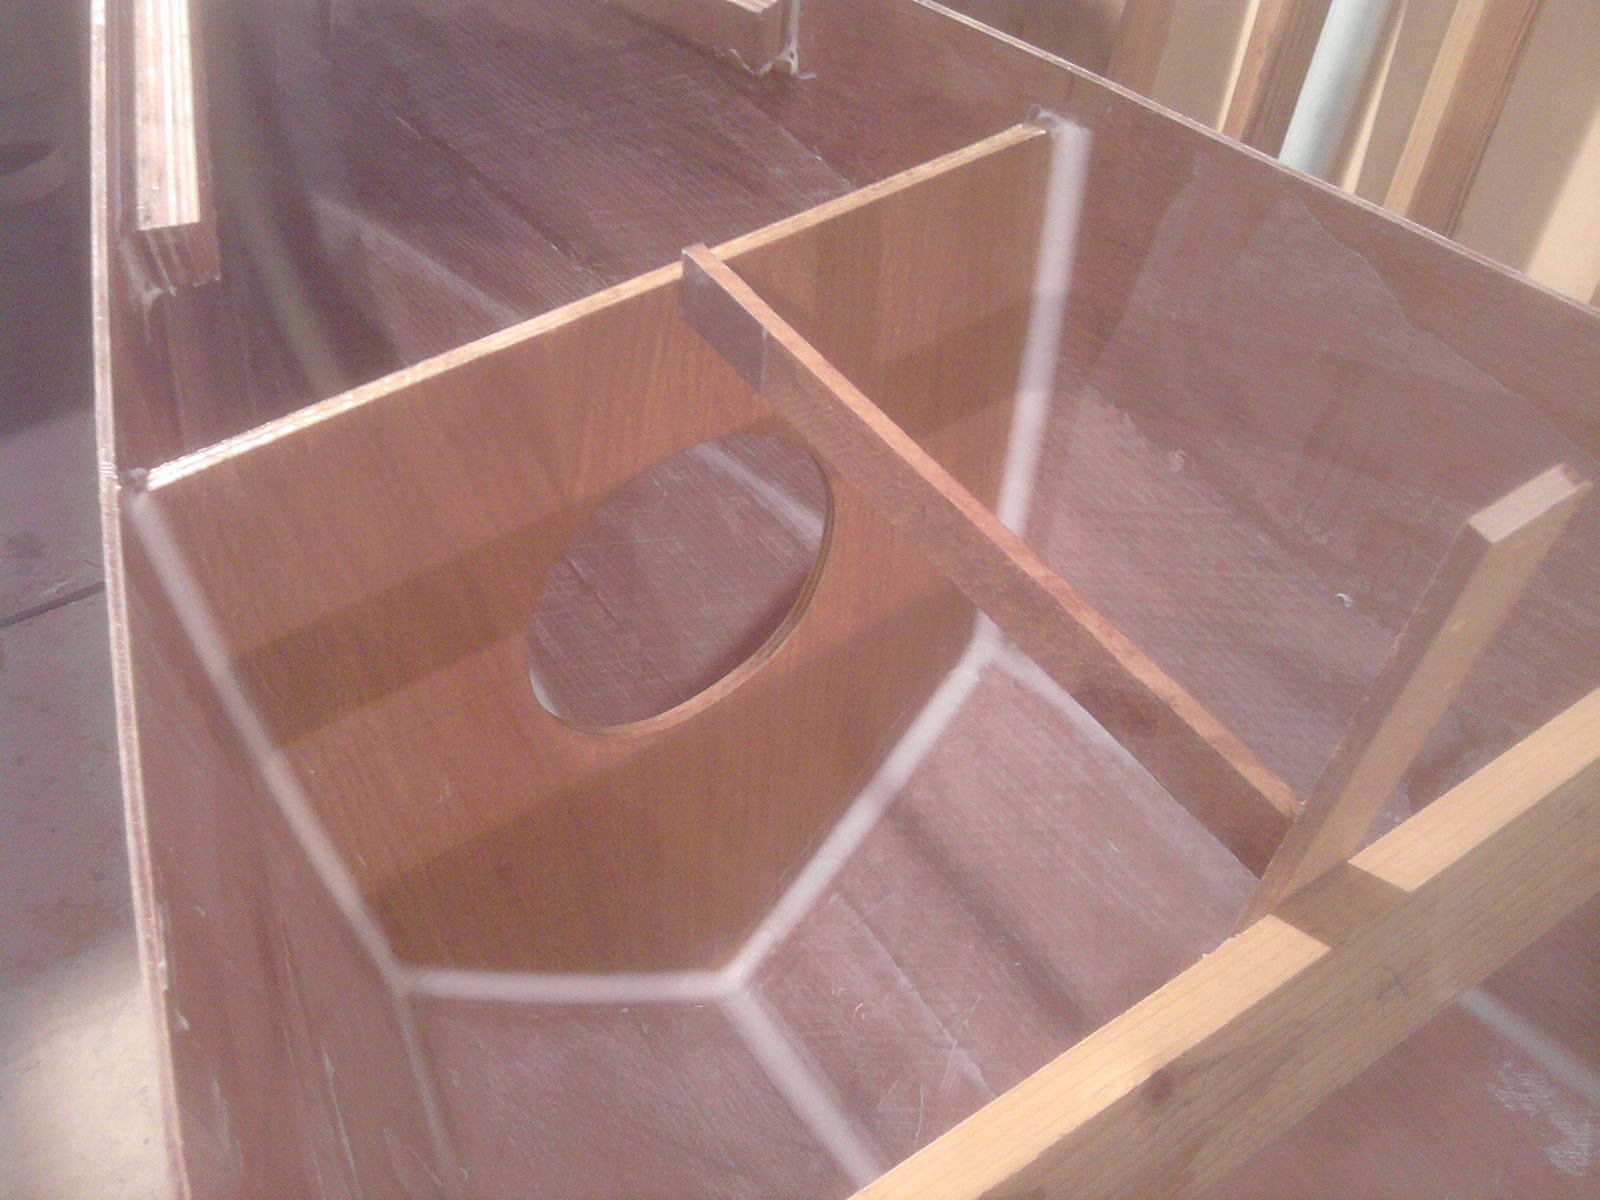
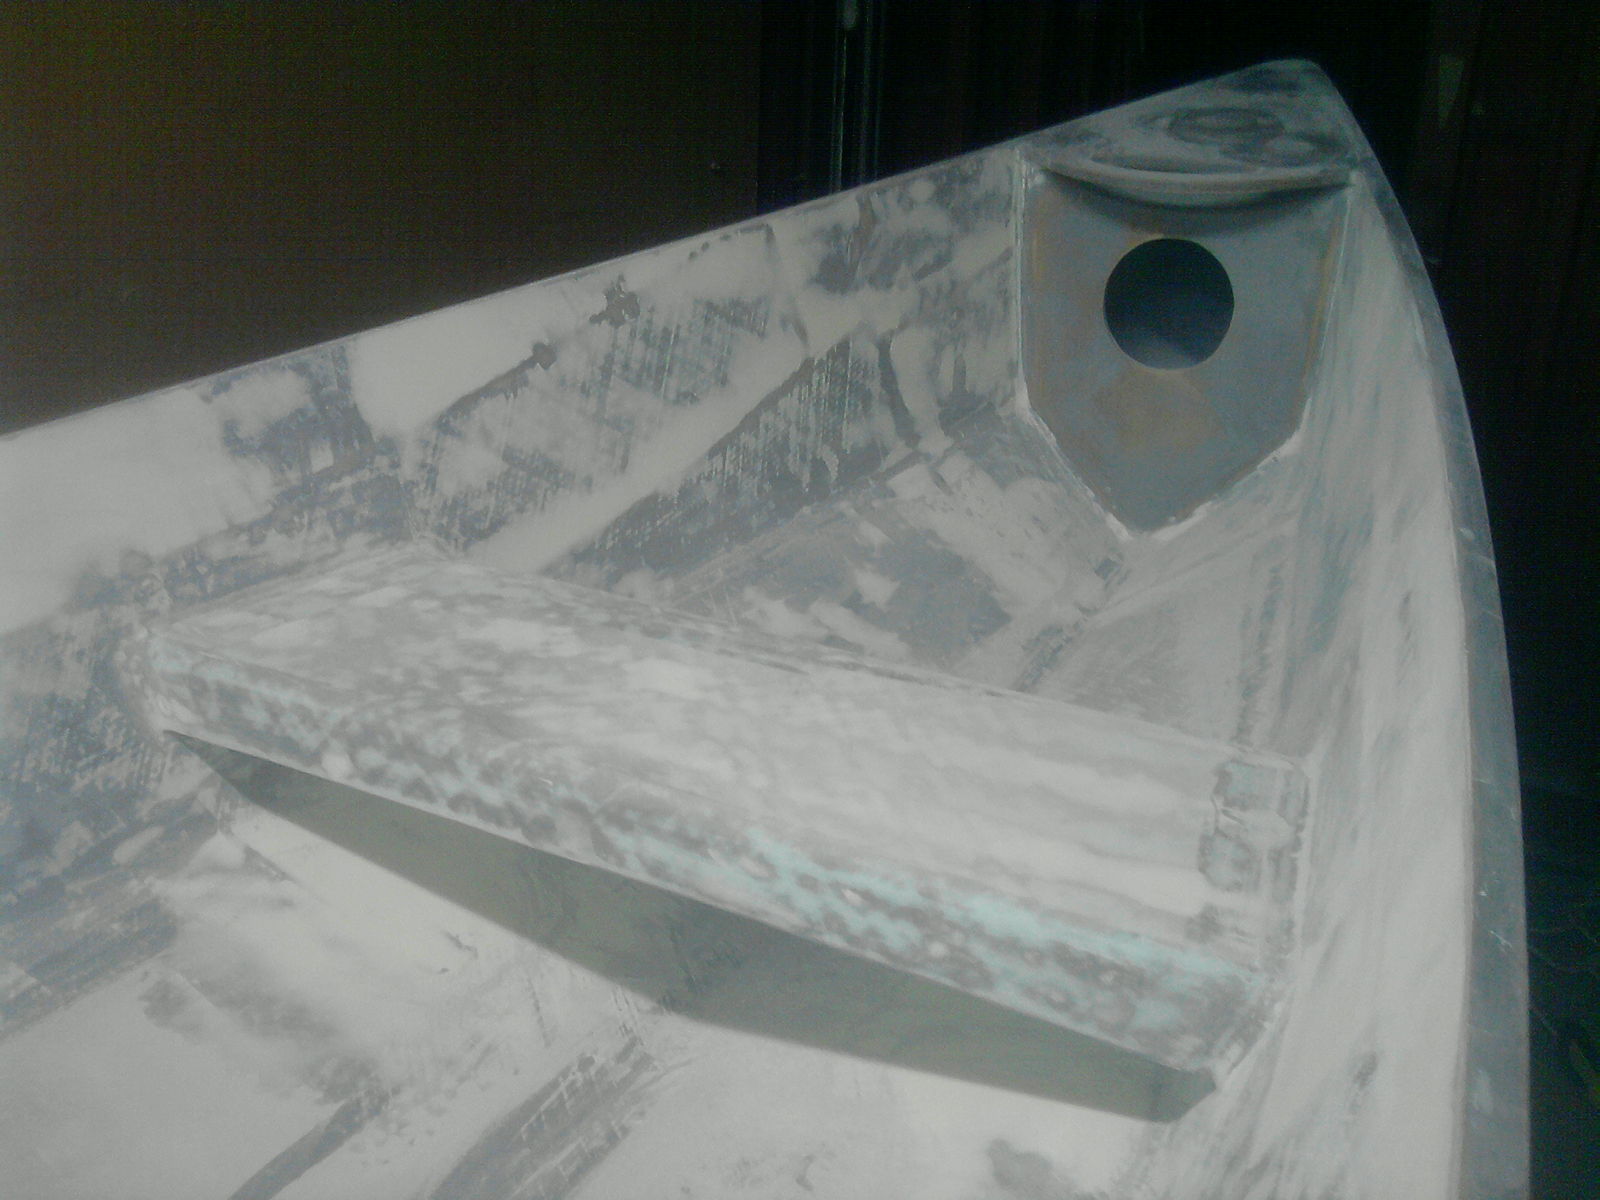
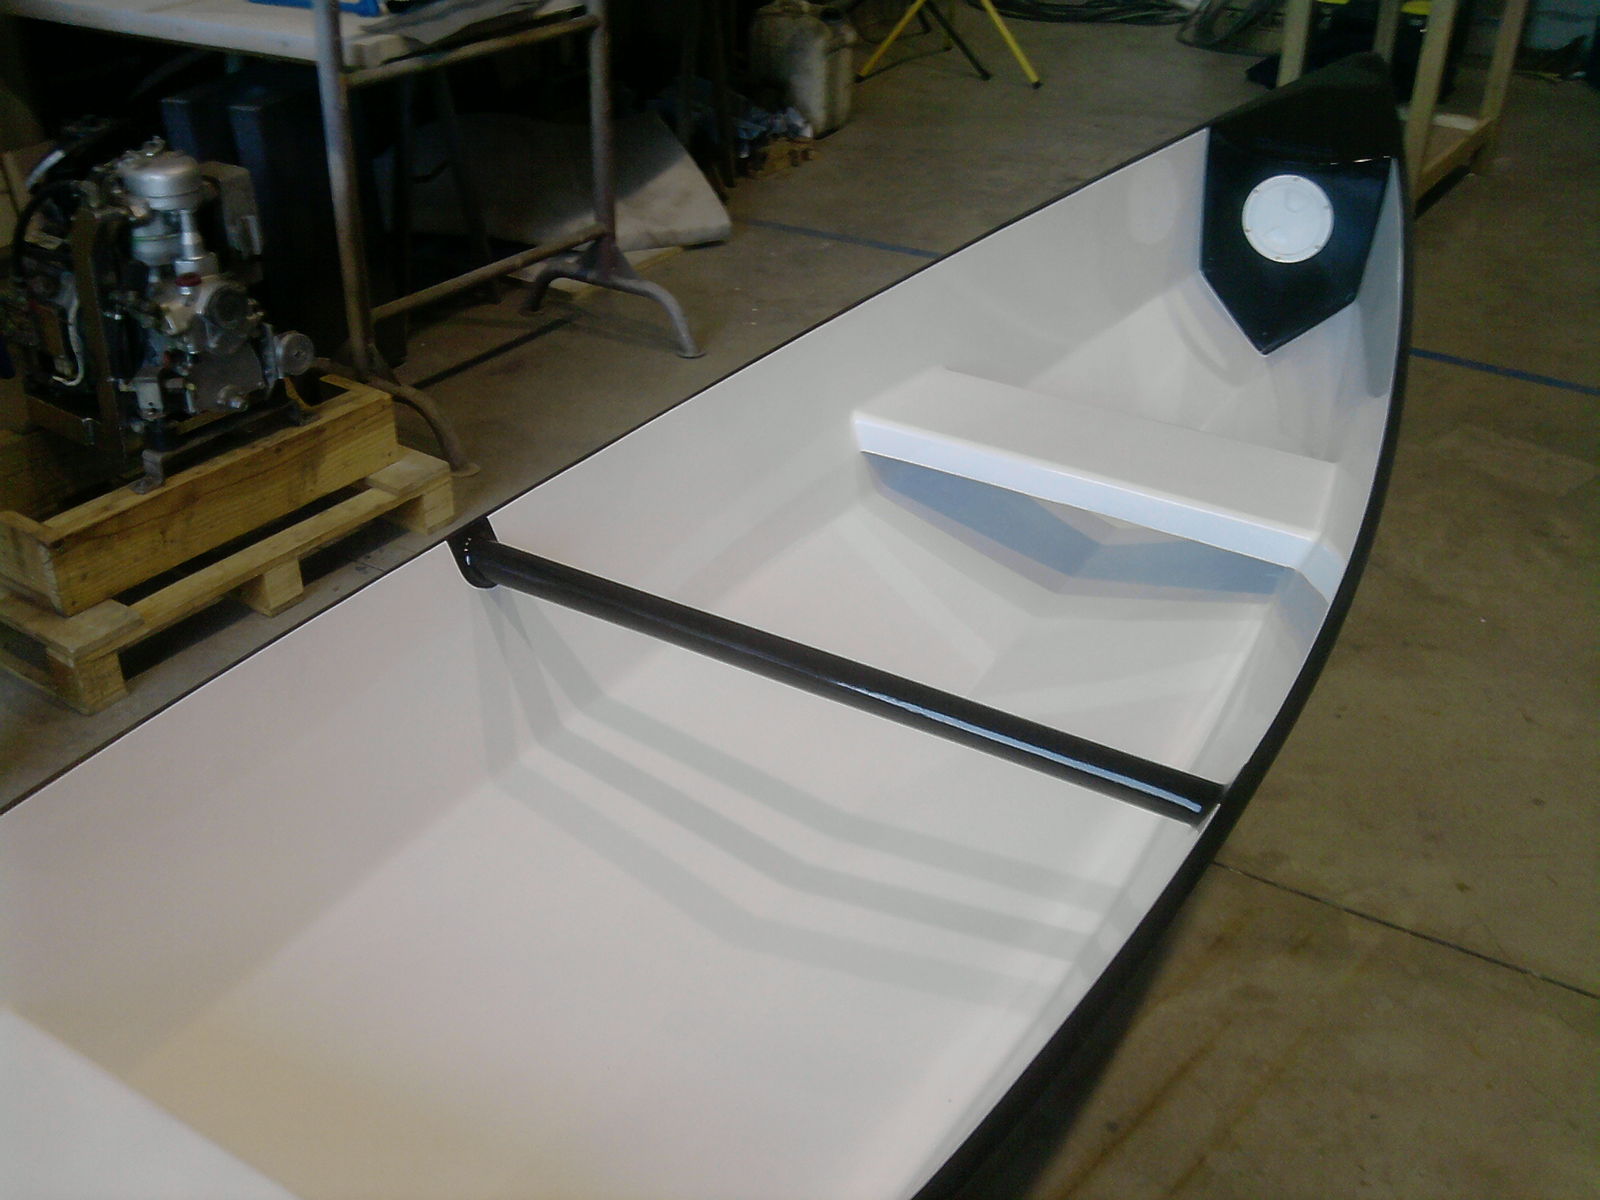
Today I got the bulkheads and custom cheeseboards, no sorry breasthooks, cut and the seat shaped ready for glassing:
Re: Chenoa 16 build
Posted: Sun Dec 11, 2011 11:38 am
by TRC886
dbcrx wrote:
Today I got the bulkheads and custom cheeseboards, no sorry breasthooks, cut and the seat shaped ready for glassing:
That's a neat way to put handholds in the ends
Re: Chenoa 16 build
Posted: Mon Dec 12, 2011 7:59 am
by topwater
You do very nice glass work
Re: Chenoa 16 build
Posted: Mon Dec 12, 2011 1:40 pm
by dbcrx
topwater wrote:You do very nice glass work
Thank you. It is what I do for a living though
and it's making the build take a bit longer. I'm already passed the 20 hours they reckon it can be built in! But I guess that's what I get for being awkward!
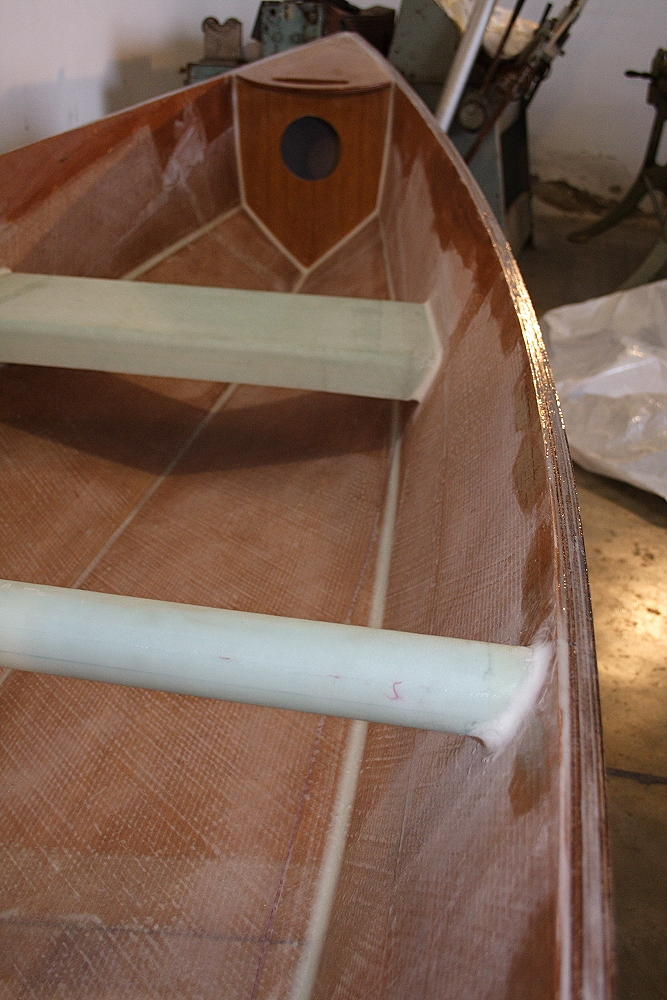
Nothing exciting picture wise tonight. Cleats are glued in for the breasthooks and seats and the top side of the seats are glassed.
Re: Chenoa 16 build
Posted: Tue Dec 13, 2011 1:31 pm
by dbcrx
And the bottom sides glassed:
And the storage b/heads glued in:
Re: Chenoa 16 build
Posted: Wed Dec 14, 2011 1:56 pm
by dbcrx
I think the seats should be strong enough!
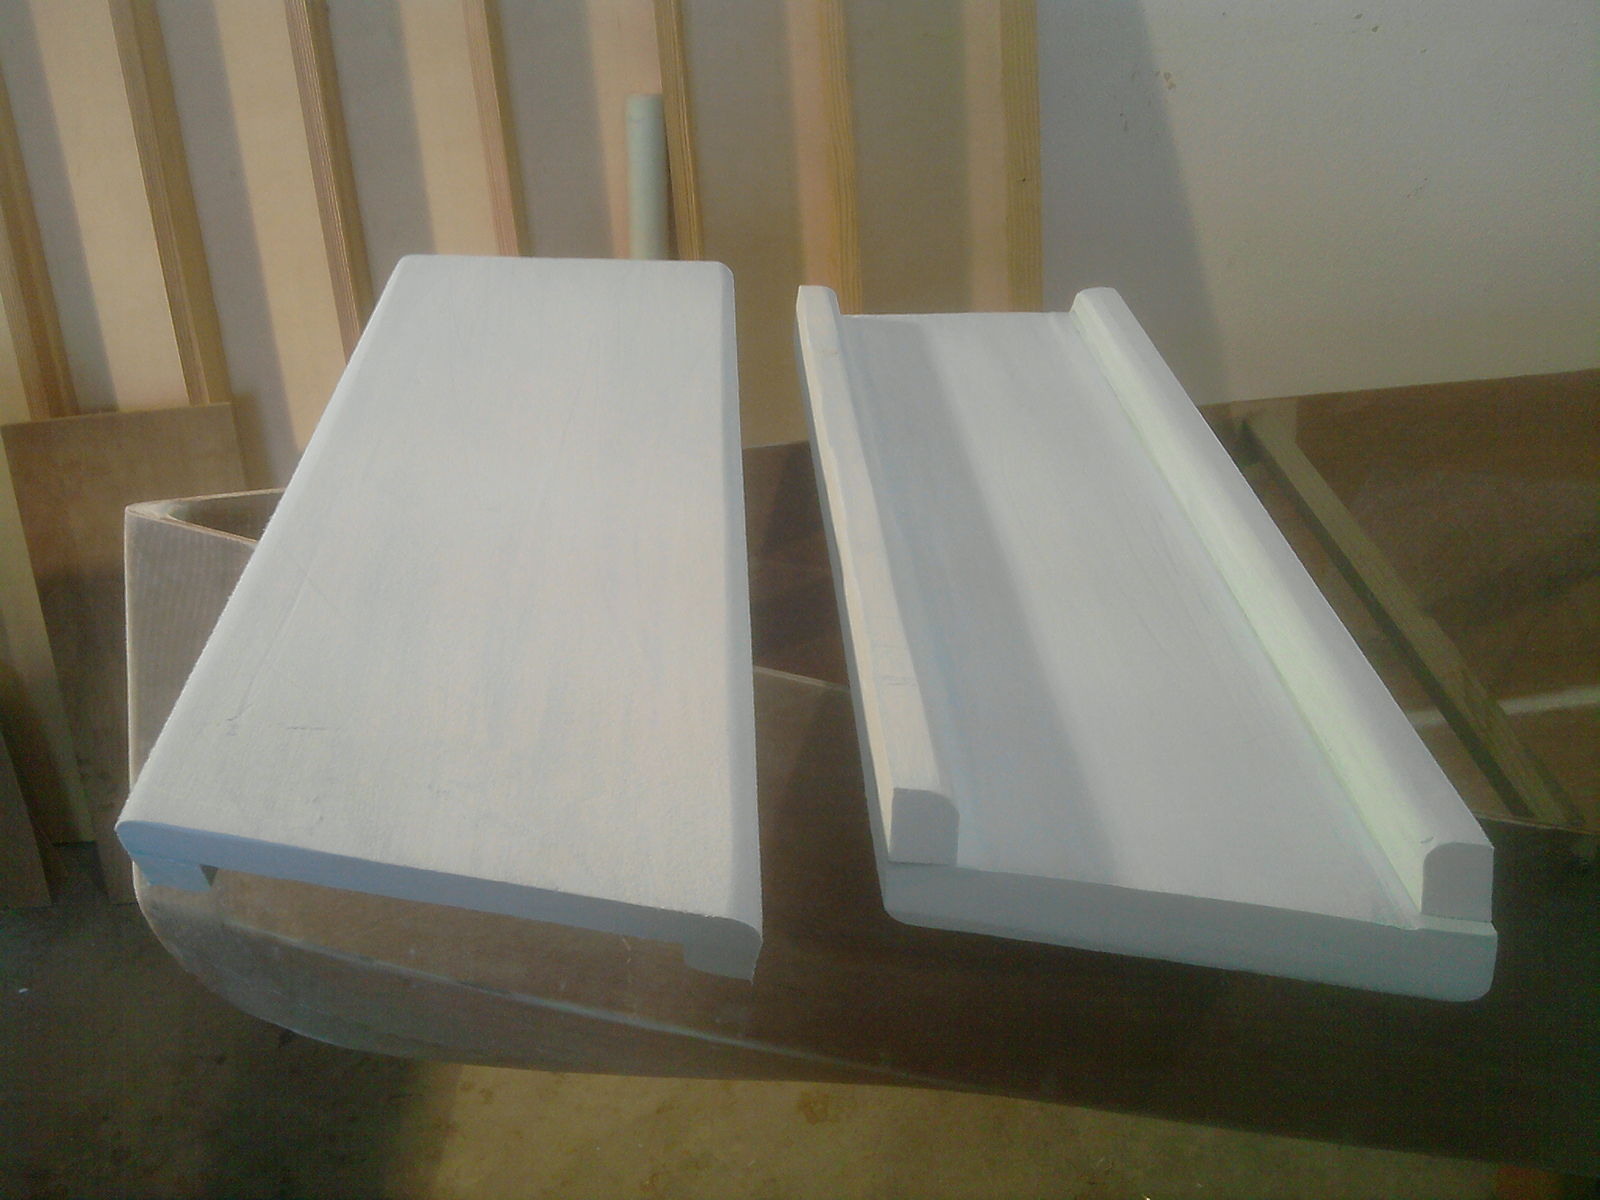
All coming together nicely now. Just the rubrails to glue on, then the construction is finished and on to finishing work.
Re: Chenoa 16 build
Posted: Wed Dec 14, 2011 2:59 pm
by gstanfield
Looking good Dave
Re: Chenoa 16 build
Posted: Wed Dec 14, 2011 4:07 pm
by Jerry-rigged
dbcrx wrote:topwater wrote:You do very nice glass work
Thank you. It is what I do for a living though
and it's making the build take a bit longer. I'm already passed the 20 hours they reckon it can be built in! But I guess that's what I get for being awkward!
Twenty Hours? Heck I took two years for my Chenoa 14...
Yours is looking real nice!
Re: Chenoa 16 build
Posted: Sat Dec 17, 2011 10:43 am
by dbcrx
Re: Chenoa 16 build - better pics today
Posted: Sat Dec 17, 2011 4:04 pm
by gstanfield
Looking good Dave, nice progress. Not that it matters at this point, but what I like to do on the rub rails is to fit them dry with some screws (plain ol drywall screws) and then slather on my thickened epoxy mix and lightly screw them back in place. When the epoxy is cured you just remove the screws and fill the holes. It's a lot easier than trying to fight those rub rails with slimy epoxy sliding them all over the place
Re: Chenoa 16 build - better pics today
Posted: Mon Dec 19, 2011 12:46 pm
by dbcrx
I had quite a nice suprise today. I put the canoe on the scales and it's currently at 31.9kg. Obviously still got filling and painting to go, but it will still hopefully be about the same as on the plans. Built as standard with meranti it should be 34kg.
Also got the rubrail shaped and a coat of high build on the inside, but didn't take any pics.
Re: Chenoa 16 build - better pics today
Posted: Mon Dec 19, 2011 12:54 pm
by jacquesmm
That is a good weight considering you are using meranti and that you glass the whole boat.
Re: Chenoa 16 build - better pics today
Posted: Mon Dec 19, 2011 1:17 pm
by dbcrx
Sorry, that wasn't very clear was it! I'm not building with meranti, I think it's actually okume I've got. But seeing as I'd glassed it all I was just comparing it to the heavier meranti version from the study plans. It is obviously heavier than the eurolite option on the plans which is listed as 27kg
Re: Chenoa 16 build - better pics today
Posted: Mon Dec 19, 2011 4:31 pm
by Jerry-rigged
Weight seems good to me. Mine is Meranti, and only glassed with tape at the seams, and is 65lbs. So you only have about 10lbs extra, with an extra 2' of boat. Great job!
Re: Chenoa 16 build - better pics today
Posted: Wed Jan 25, 2012 12:56 pm
by dbcrx
Re: Chenoa 16 build - better pics today
Posted: Wed Jan 25, 2012 1:18 pm
by gstanfield
Nice progress Dave, she's gonna be a good looking craft when you are finished
Re: Chenoa 16 build - better pics today
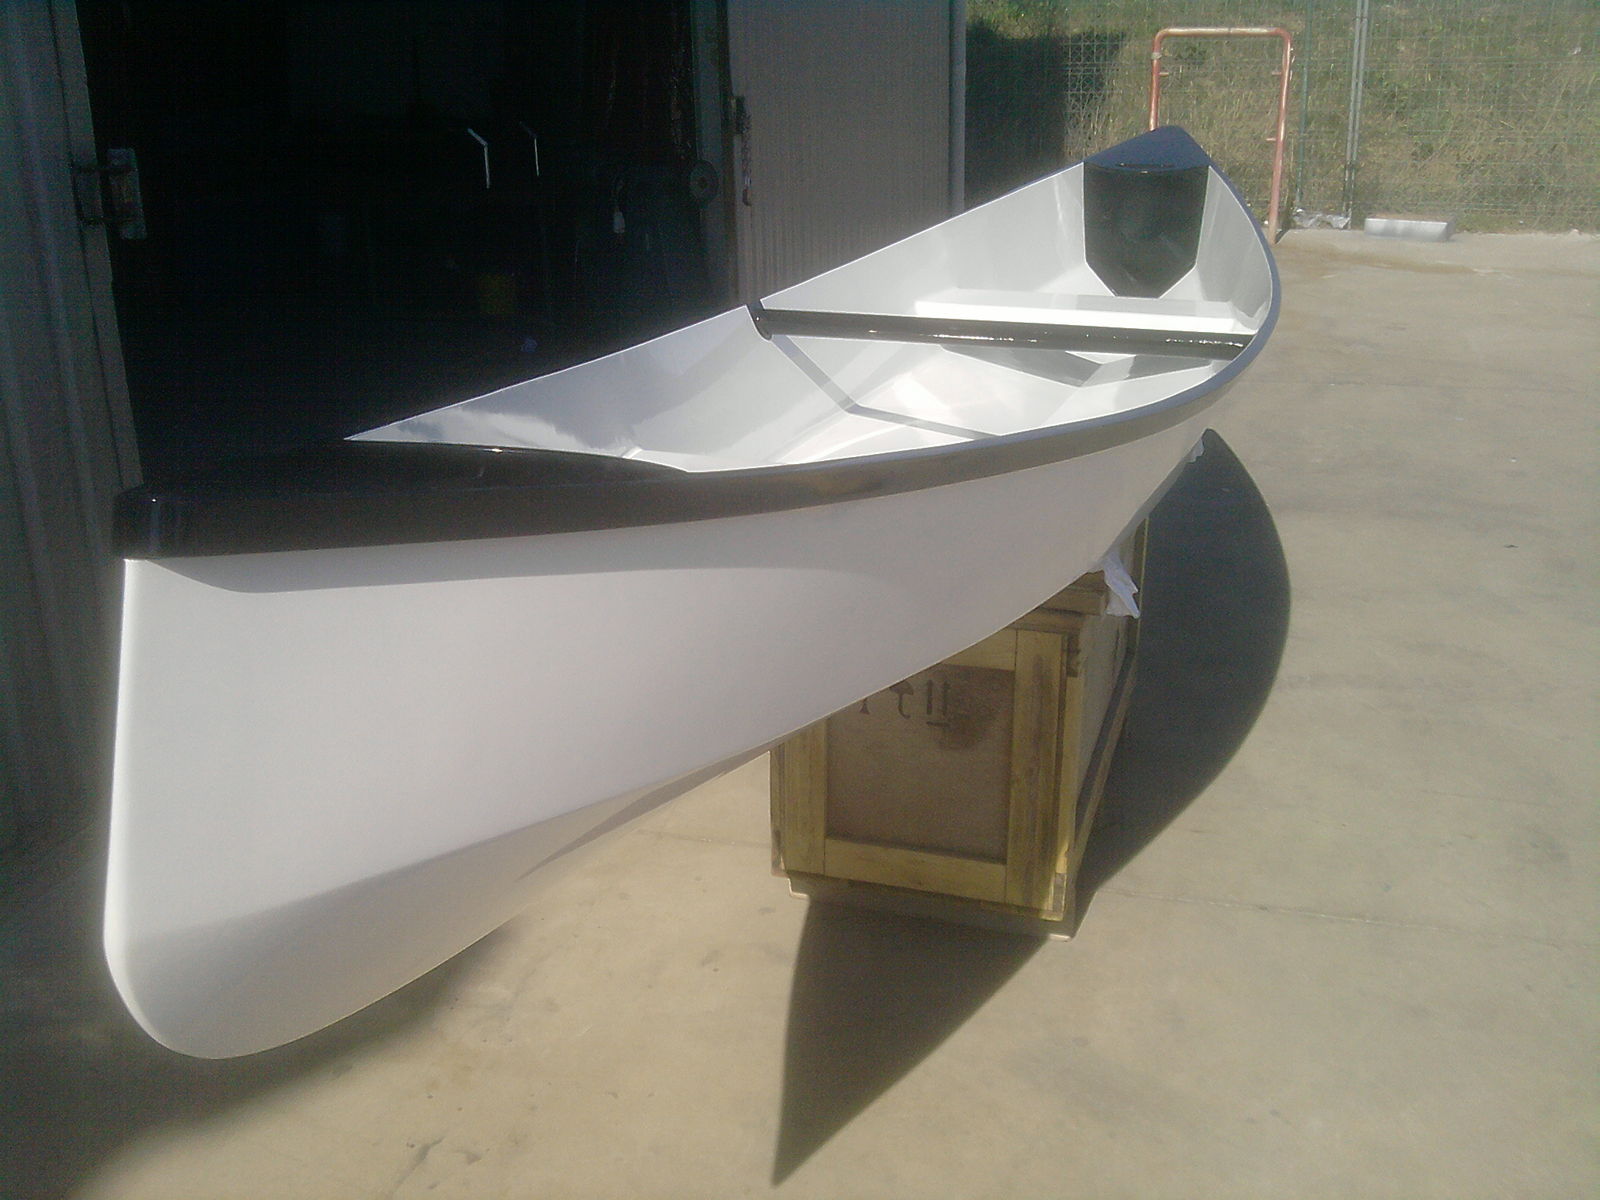
Posted: Sat Jan 28, 2012 11:36 am
by dbcrx
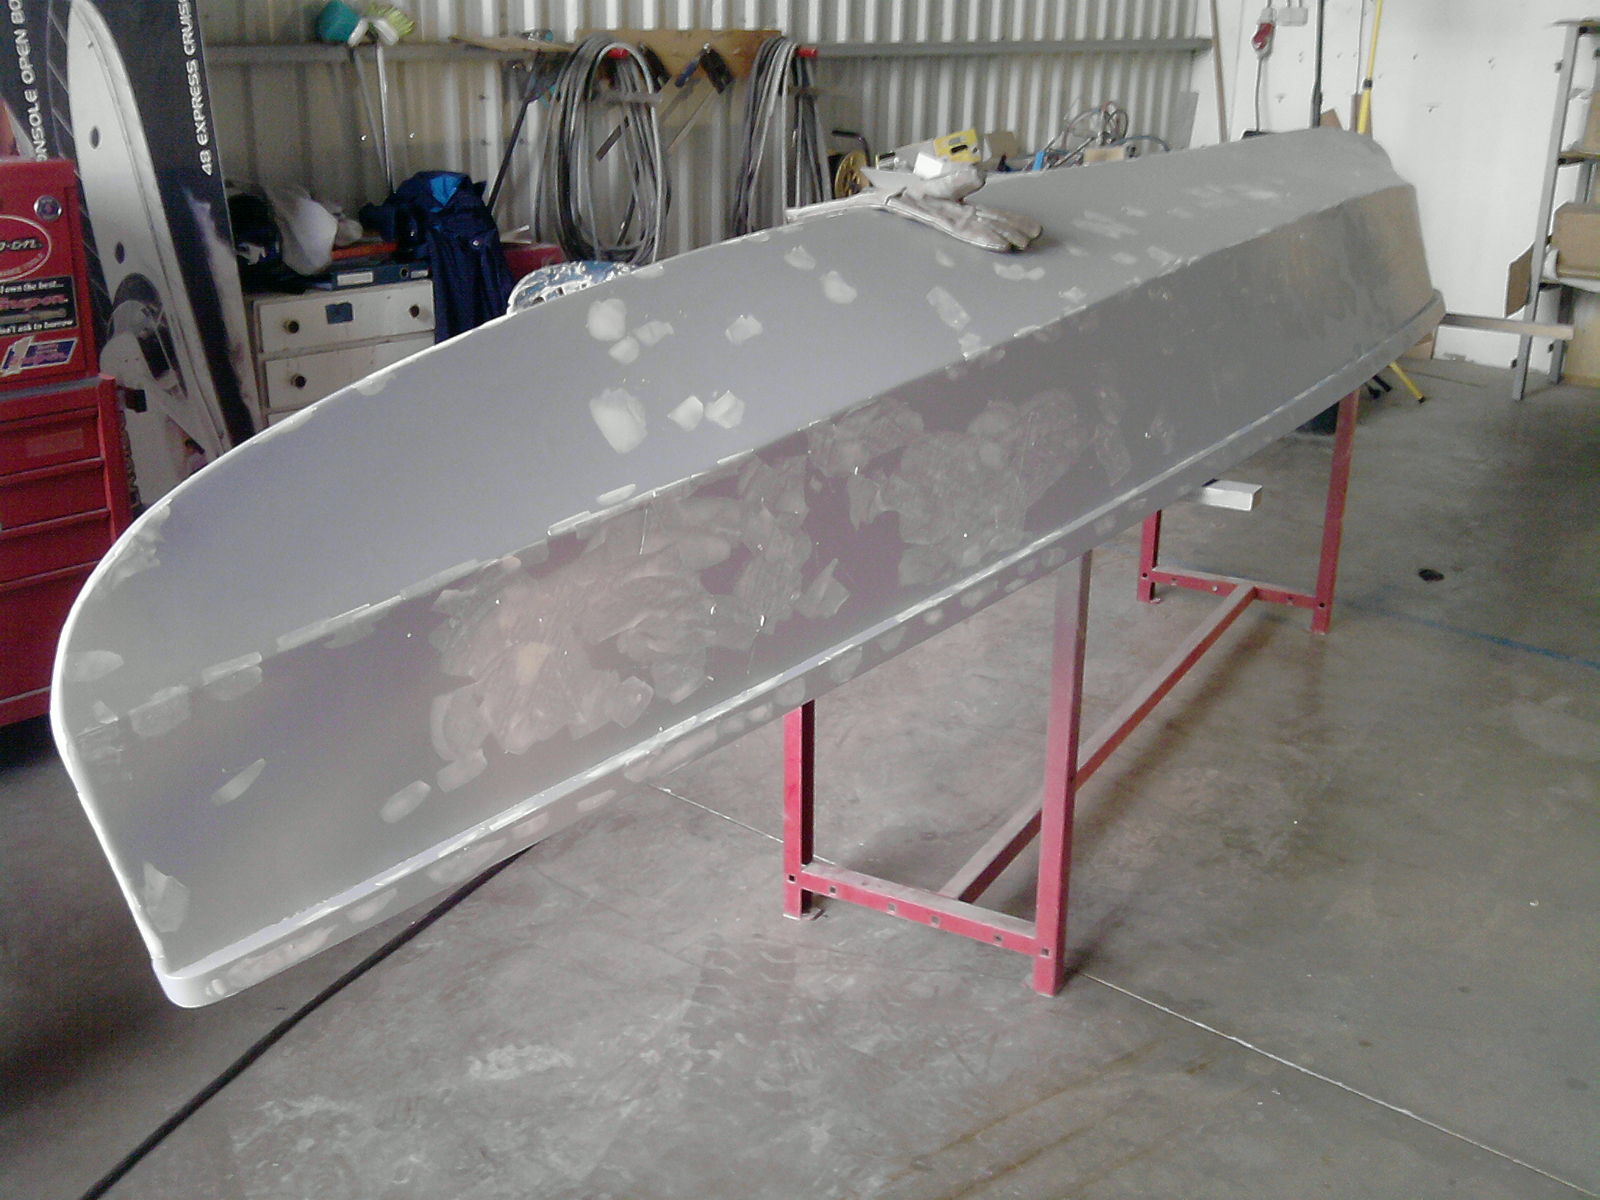
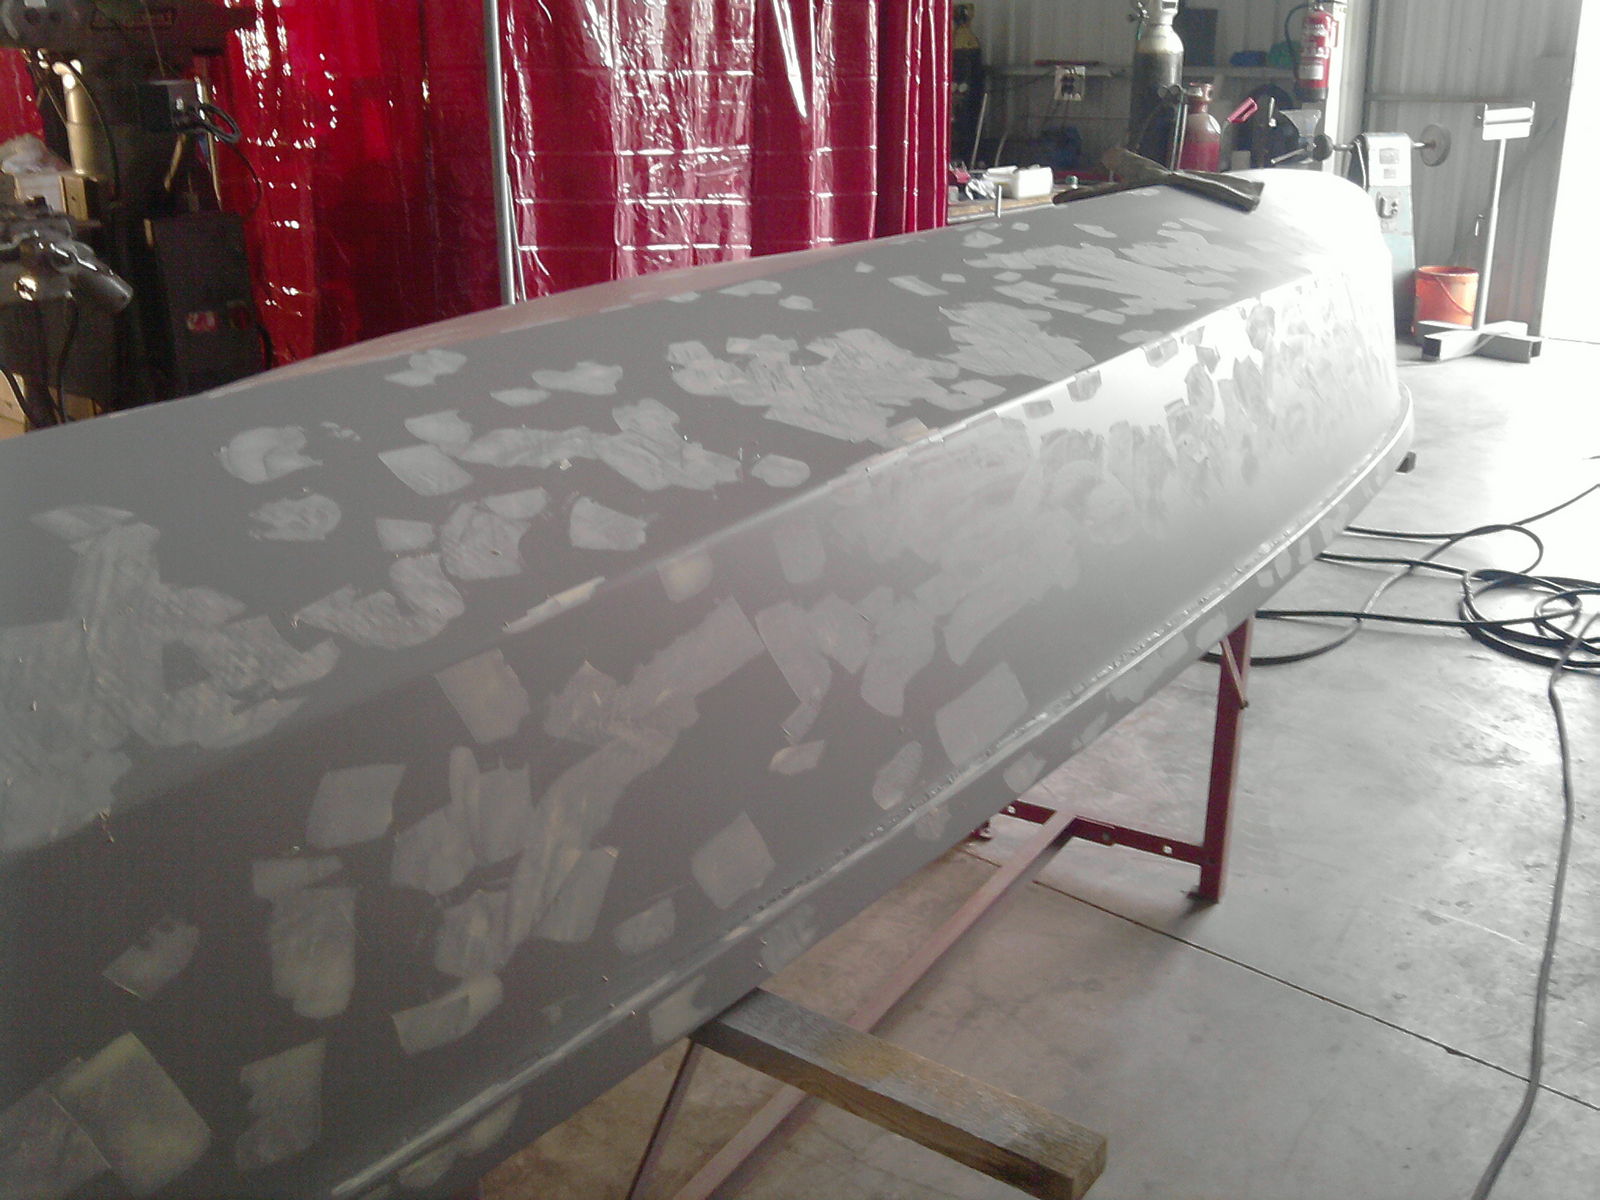
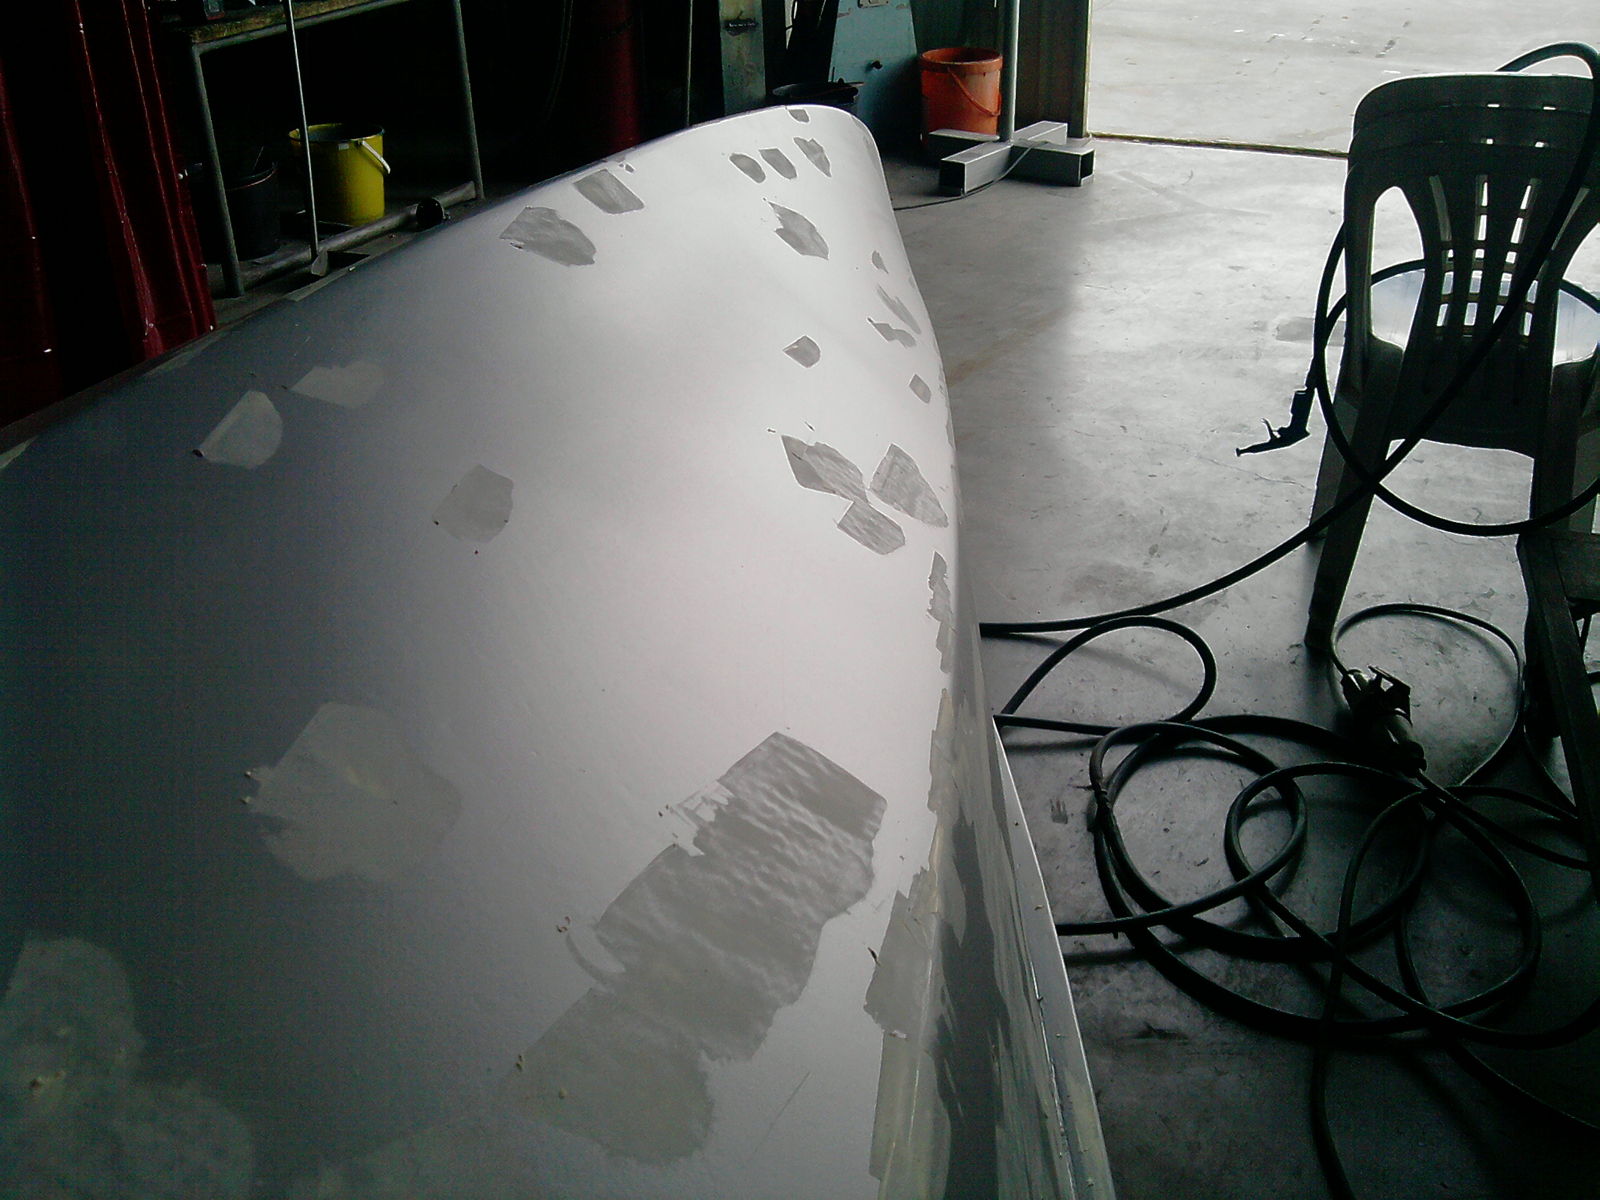
Cheers - and now the outside at least is looking even better!
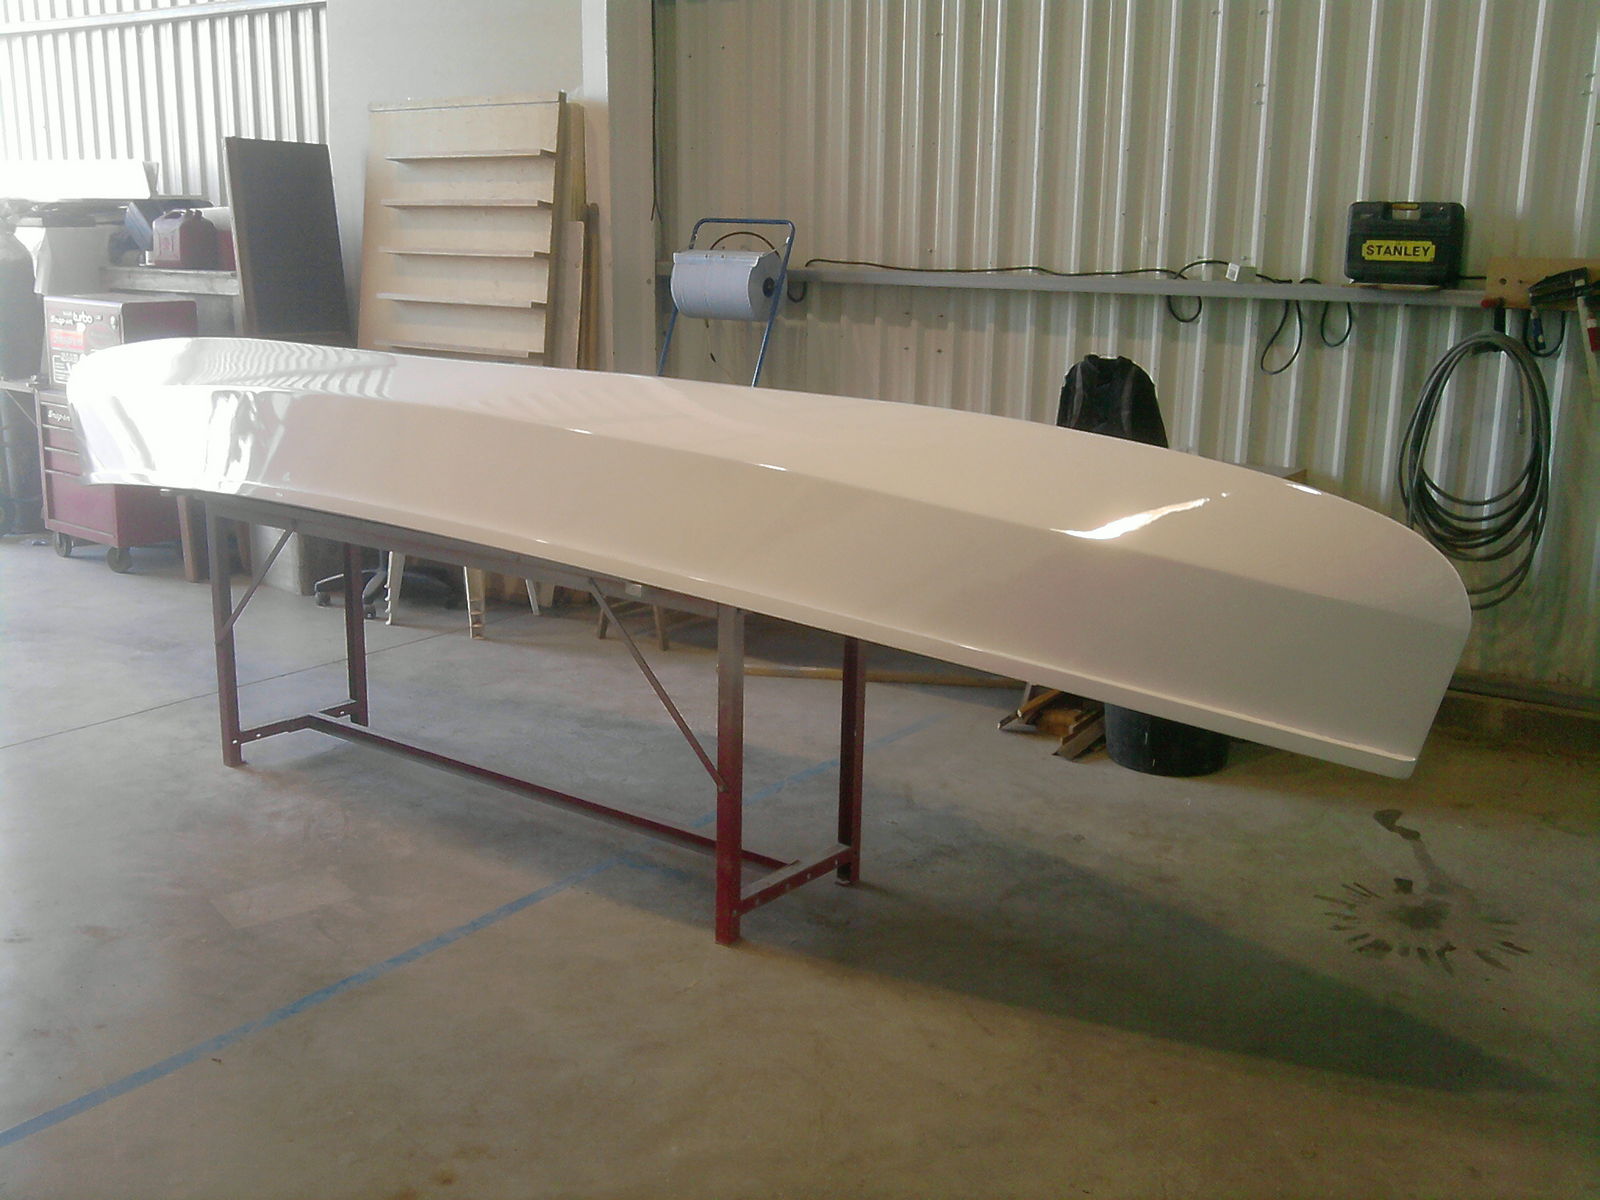
It's still not quite perfect - I missed a few pin holes, plus on the last coat I somehow got some moisture in the air line despite having two water traps! But it will do for now. I may give it a rub down and recoat once I've done the inside, but will probably just end up leaving it for a while.
P.S. I don't know why, but the gallery seems to be rotating the portrait shots to landscape when I upload them

I tried the "crop and rotate" link under the photos when in the gallery but it says I don't have permission!
Re: Chenoa 16 build - outside done!
Posted: Sat Jan 28, 2012 11:51 am
by gstanfield
Nice looking canoe Dave

I have no clue about the gallery, I generally host my pictures elsewhere...
Re: Chenoa 16 build - outside done!
Posted: Sat Jan 28, 2012 7:02 pm
by jaygee
That is one fine looking canoe! Can`t wait to see the rest.
Goodluck
Jaygee
Re: Chenoa 16 build - outside done!
Posted: Sat Jan 28, 2012 10:43 pm
by TRC886
Re: Chenoa 16 build - outside done!
Posted: Tue Jan 31, 2012 7:38 am
by JCordray
HI Dave,
I'm coming on well with my HC14 and will be ready to start the fairing process by the end of the week I hope. As your boat is a similar size, I thought I would ask you a few questions...

What did you use for fairing compound? How much did it take per coat?
Obviously the amount per coat will vary depending on the thickness of the coating. I am running a little low on epoxy and so will need to re-order more for the fairing process - I think. So I am trying to make a little guess at how much I will need.
For fairing, I am guessing I just need to give the epoxy a sanding and then lay on the fairing compound. Are there more steps than that?
Thanks for the help! The paint job looks fantastic!
Re: Chenoa 16 build - outside done!
Posted: Tue Jan 31, 2012 3:16 pm
by dbcrx
It's hard for me to say how much filler you'll need. I've been using an epoxy filler (2 part 1:1 mix, creamy paste type stuff) because that's what I've got leftover in stock at the moment. It's more of a smooth finishing filler than a fairing filler (we have a lightweight version too that sands a lot easier, but don't have any at the moment), so I was just trying to fill the weave of the cloth. To do the outside I've probably used about 1/2 to 3/4ltr, but I still have slight bits of weave visible. What I'd have liked to have done was used about 1 - 1.5ltrs of the lightweight filler then finished of with a light skim of the finishing filler.
But then you have less glass to hide and probably a thinner layer than mine too!
The process is pretty much as you say. Give it a quick sand to key the epoxy - try not to sand through it into bare wood or through the glass. Blow or vaccuum the dust off, and then I usually give a quick wipe with acetone as well. You will probably only need to spread filler on the tape and about 3-4 inches either side to blend it in rather than filling over the entire panel.
If it helps, these are the fillers I use -
Jotun (click on yachting-products-fillers) - The lightweight and the finishing. International and Awlgrip and probably others do similar versions too. I prefer to use these as they're a lot easier to mix than using epoxy and additives.
Re: Chenoa 16 build - outside done!
Posted: Thu Feb 23, 2012 4:15 pm
by dbcrx
Been rather busy lately and haven't been able to do much, but the inside is now faired and ready for some primer.
Re: Chenoa 16 build - outside done!
Posted: Sat Feb 25, 2012 10:44 am
by dbcrx
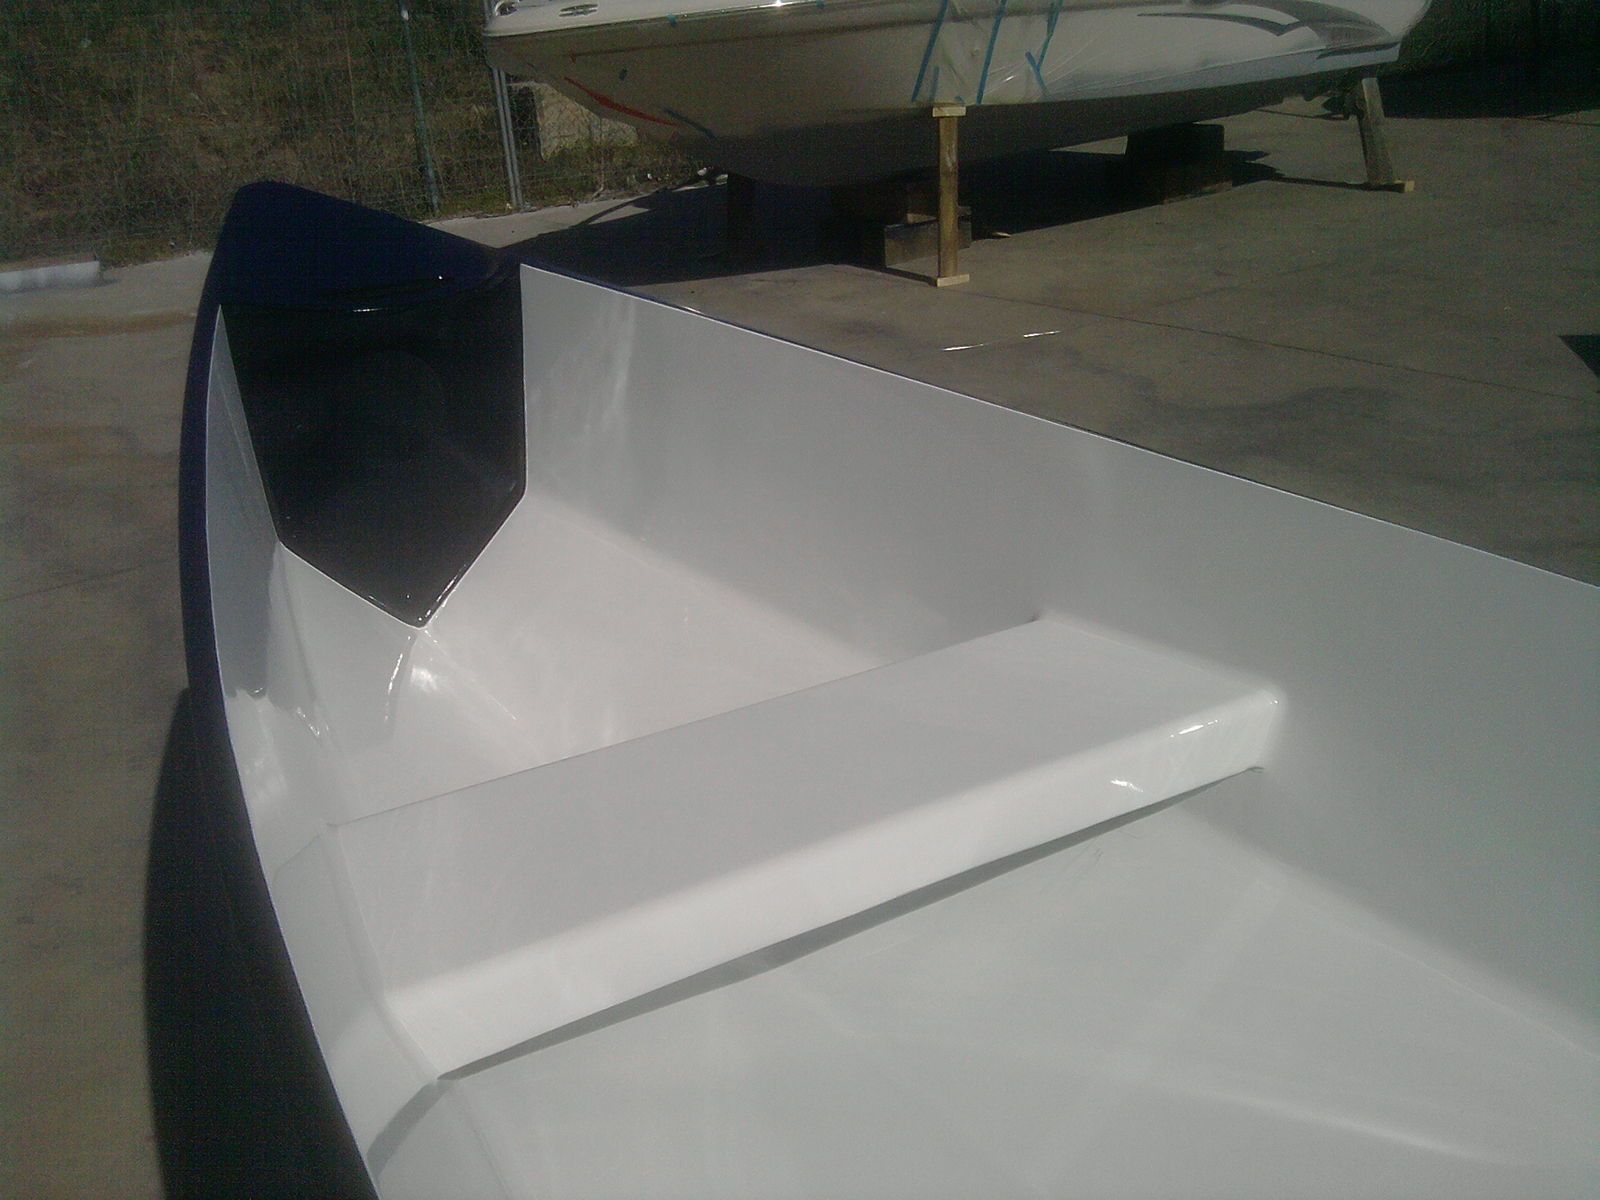
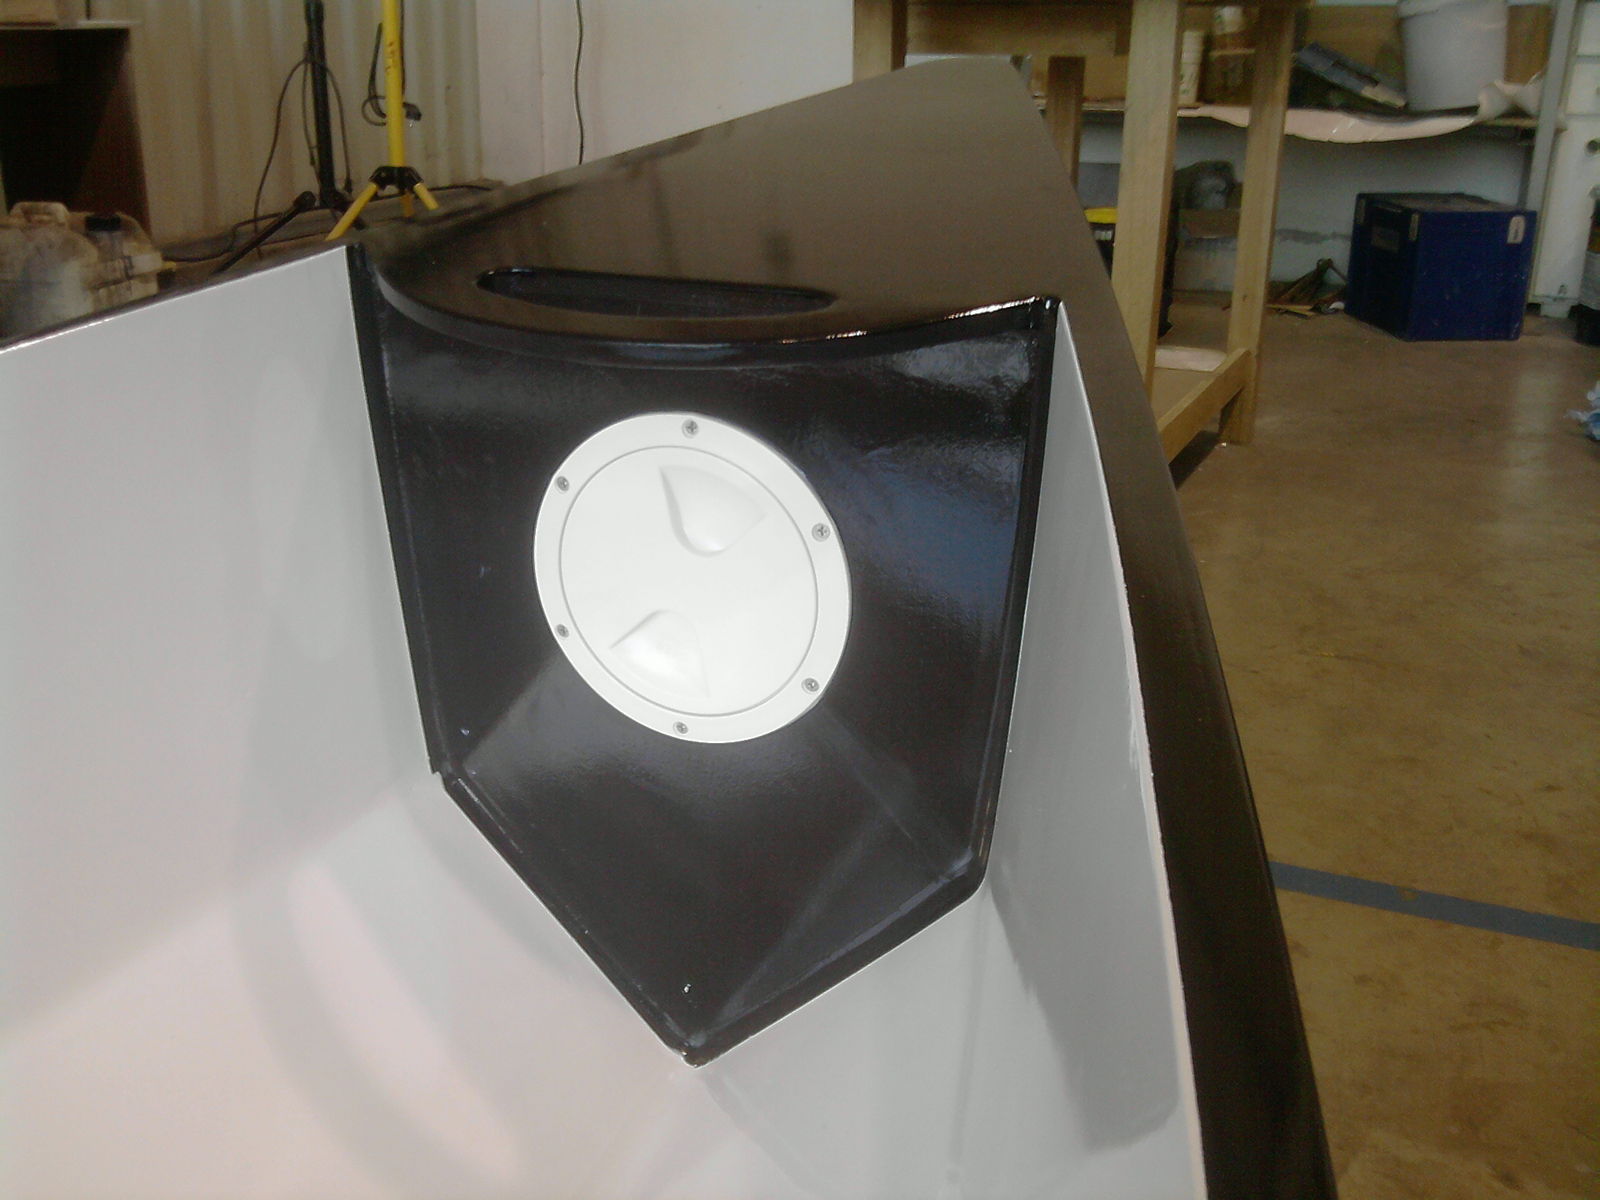
I'm hoping to get this near enough finished this weekend. Today I got the inside primered and the detail areas painted black:
I also came across a pair of old ores so chucked some paint on them to brighten them up a bit:
Should get the rest painted white tomorrow, which will just leave the access hatches to be put in during the week ready for its first splash next weekend.
Re: Chenoa 16 build - outside done!
Posted: Sun Feb 26, 2012 10:16 am
by dbcrx
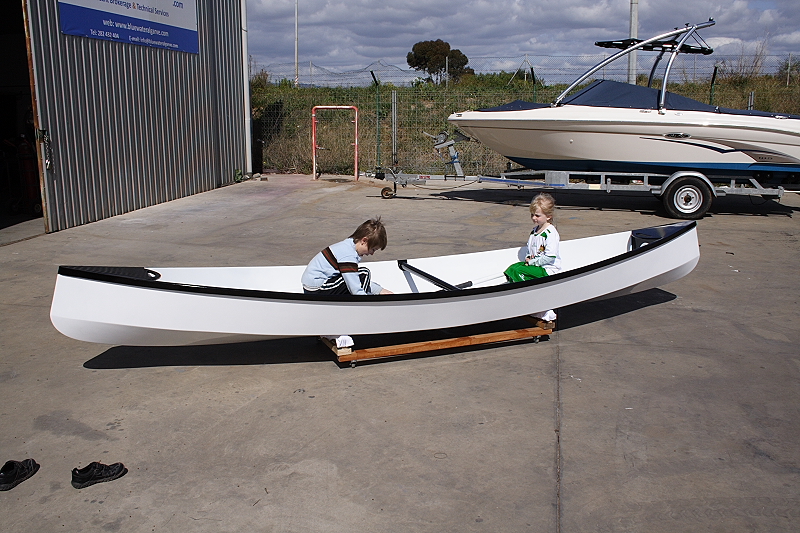
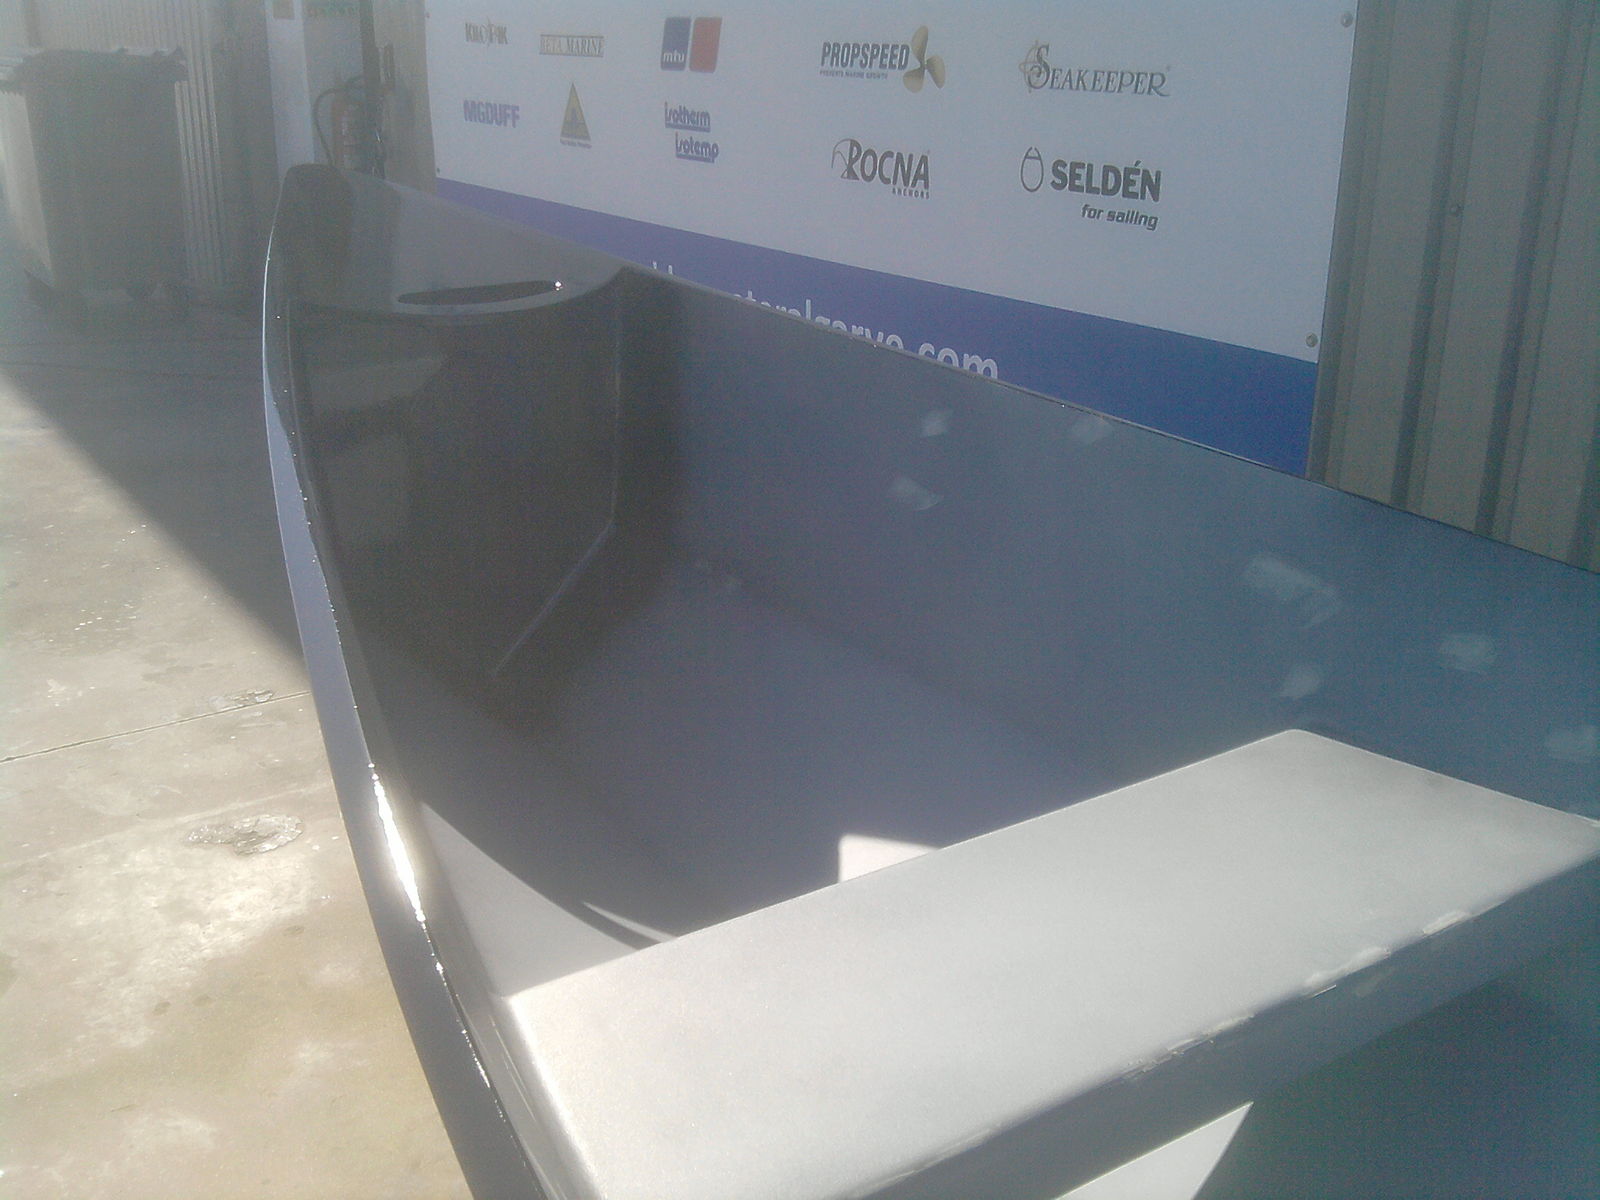
Painting done!
It's not perfect - there's still a few pin holes and scratches but I just want to get it finished for now and use it for a bit. Maybe later in the year I'll finish it a bit better.

First splash penciled in for next weekend - I'll make sure I get some good pictures then.
Re: Chenoa 16 build - paintwork done!
Posted: Sun Feb 26, 2012 10:24 am
by Cracker Larry
That is a good looking canoe
Nice job!
Re: Chenoa 16 build - paintwork done!
Posted: Wed Feb 29, 2012 1:49 pm
by dbcrx
Thanks Larry.
It's now mobile too, so even if it doesn't float I can at least push the kids around the yard in it!
And the last couple of finishing touches:
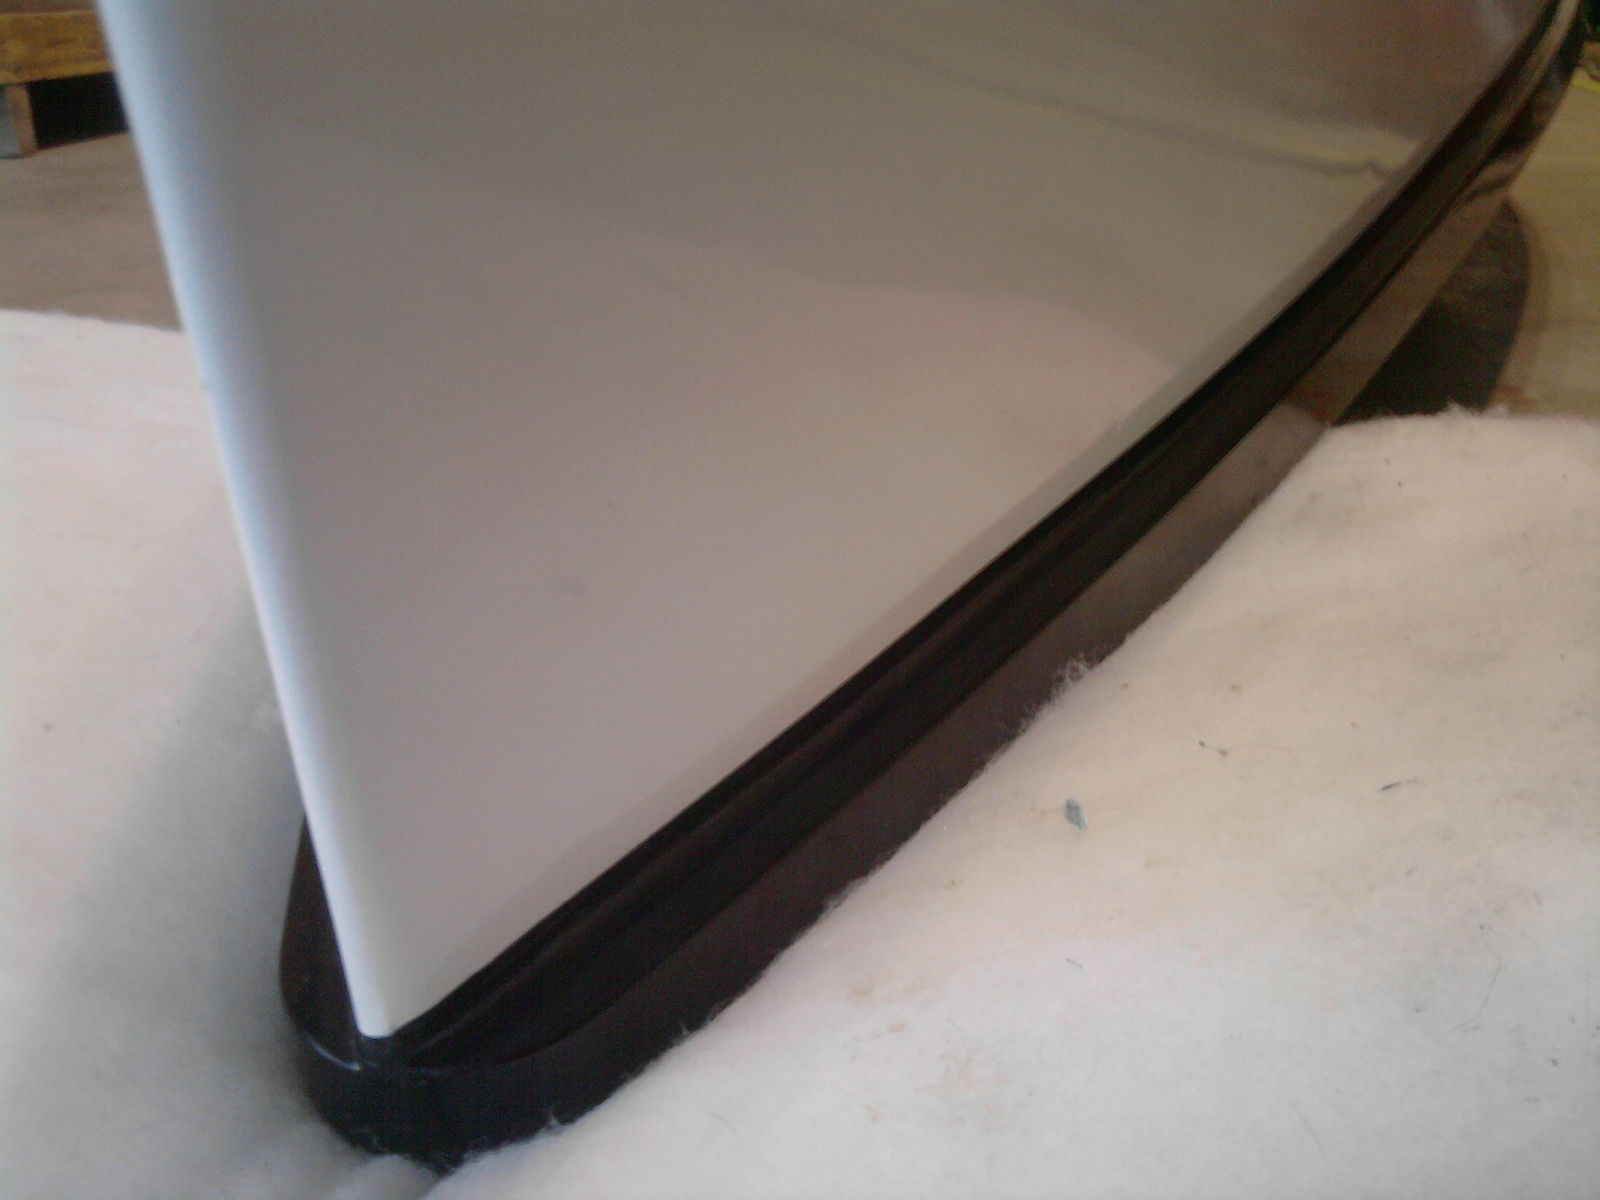
Under the rubrails tidied up with a nice bead of sika
And the storage hatches fitted
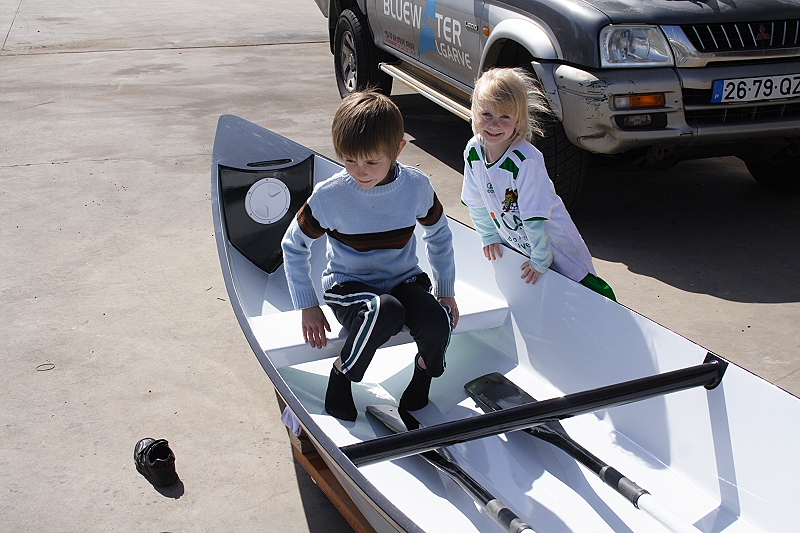
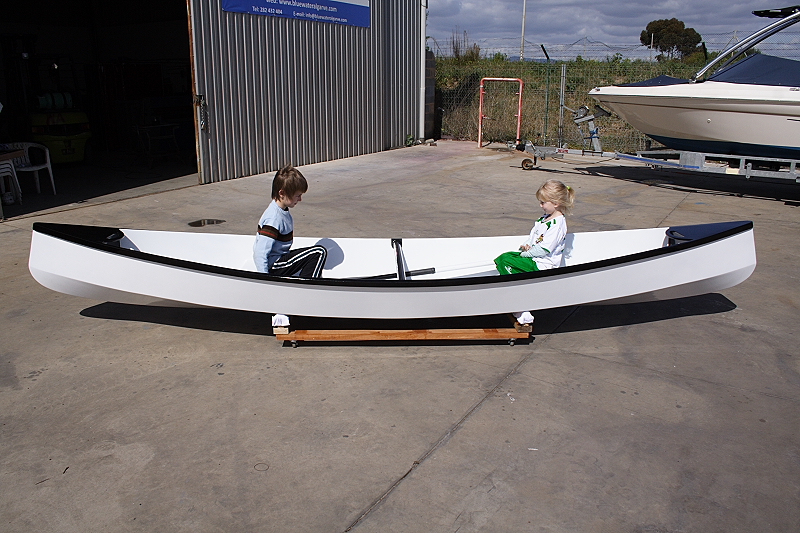
And it's finished!
I"m sure I'll think of something else to do to it once I've tried it out though, like back supports if nothing else. Now have a long wait till the weekend for it's first splash.
Re: Chenoa 16 build - Finished
Posted: Wed Feb 29, 2012 1:57 pm
by jacquesmm
Beautiful finish, congratulations.
It's almost to pretty to put in the water, I would be afraid to make it dirty.
Re: Chenoa 16 build - Finished
Posted: Wed Feb 29, 2012 3:56 pm
by dbcrx
jacquesmm wrote:Beautiful finish, congratulations.
It's almost to pretty to put in the water, I would be afraid to make it dirty.
That's ok - if the kids wreck the paintwork it will give me an excuse to paint it again!
Re: Chenoa 16 build - Finished
Posted: Wed Feb 29, 2012 4:06 pm
by jacquesmm
What's that little inboard in the background?
It looks like an old Yanmar or Petter.
I would build a boat around that engine!
Re: Chenoa 16 build - Finished
Posted: Wed Feb 29, 2012 7:01 pm
by stickystuff
I noticed the motor also. Boat looks great. Don't know when I will build another. To many irons in the fire right now. Retirement is made for people who think they don't have to work. I haven't stopped since I moved back in JUly.
Re: Chenoa 16 build - Finished
Posted: Thu Mar 01, 2012 3:04 am
by dbcrx
jacquesmm wrote:What's that little inboard in the background?
It looks like an old Yanmar or Petter.
I would build a boat around that engine!
Not sure. That belongs to a guy that retired over a year ago, yet still takes up a big corner of our workshop with his tools and toys!

He has 2 boats he's refitting here, but I think that engine was just something he picked up to rebuild and sell on.
I have an old mercury 650 sitting outside waiting for a boat. I'd love to build something for that, but I struggled to fund the canoe let alone anything bigger!

Re: Chenoa 16 build - Finished
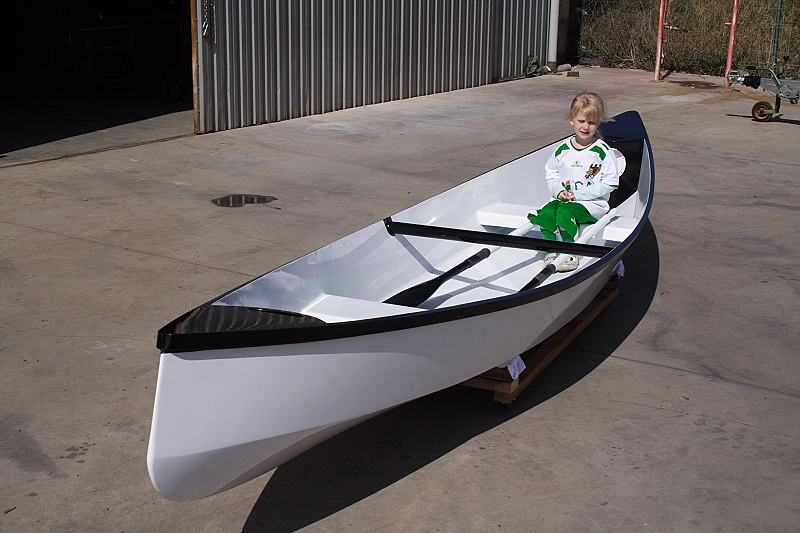
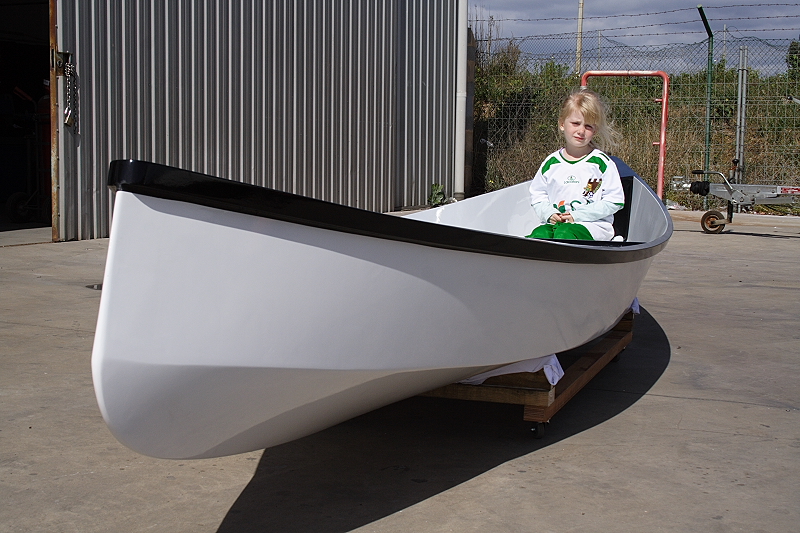
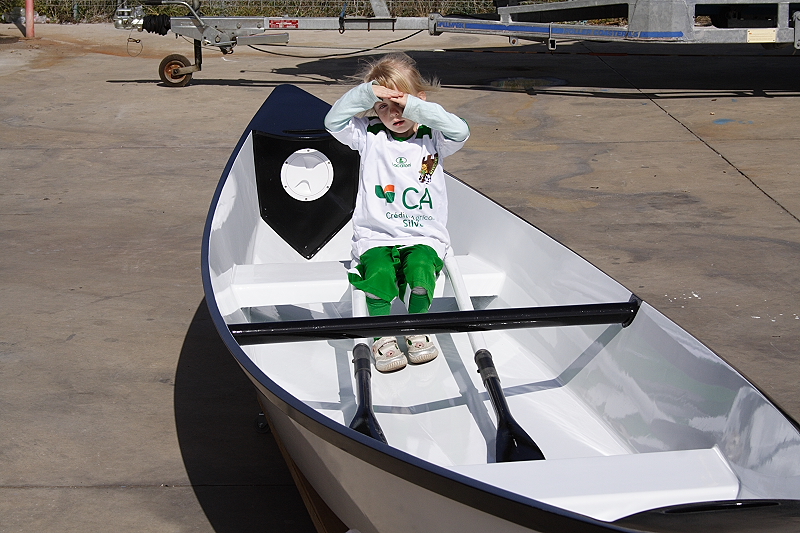
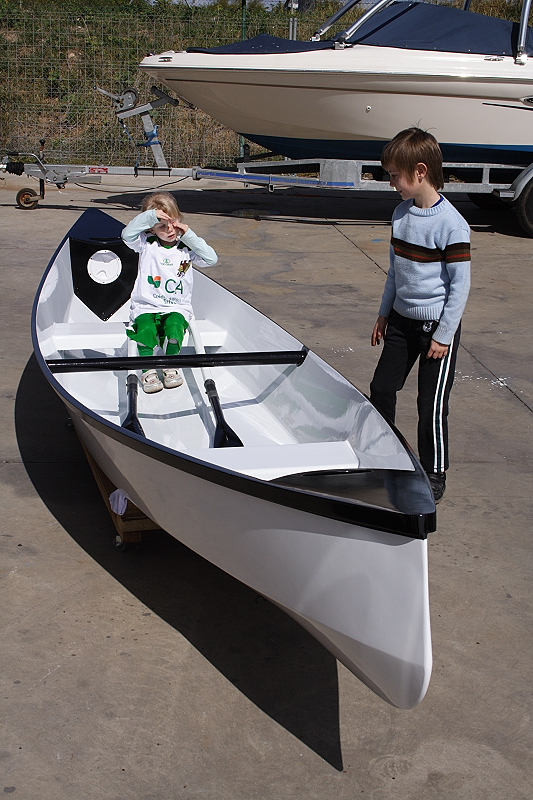
Posted: Sat Mar 03, 2012 4:11 pm
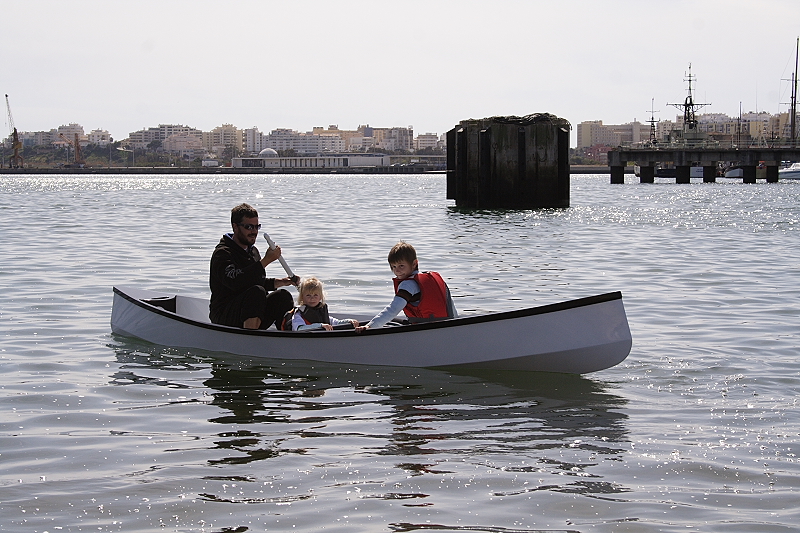
by dbcrx
Re: Chenoa 16 build - Splashed
Posted: Sat Mar 03, 2012 5:08 pm
by gstanfield
Congrats on the splash
If you think it goes along good now you should get (or build) a pair of proper canoe paddles and then you'll really be amazed at the performance
Re: Chenoa 16 build - Splashed
Posted: Sat Mar 03, 2012 5:18 pm
by Aripeka Angler
Nice work
You raised the bar of excellence in canoe building several notches. Awesome job!!!
edit for spelling, I hate I-pad auto correct
Re: Chenoa 16 build - Splashed
Posted: Sat Mar 03, 2012 6:12 pm
by Cracker Larry
That looks great
I might have to build one of those
Re: Chenoa 16 build - Splashed
Posted: Sat Mar 03, 2012 8:55 pm
by Seadation
Hello dbcrx,
VERY nice canoe. You should be very proud of that boat!
/david
Re: Chenoa 16 build - Splashed
Posted: Sun Mar 18, 2012 10:52 am
by dbcrx
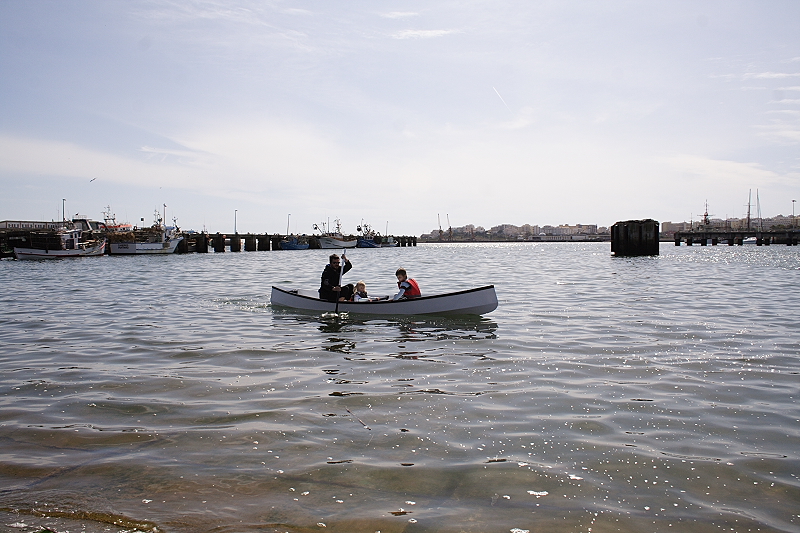
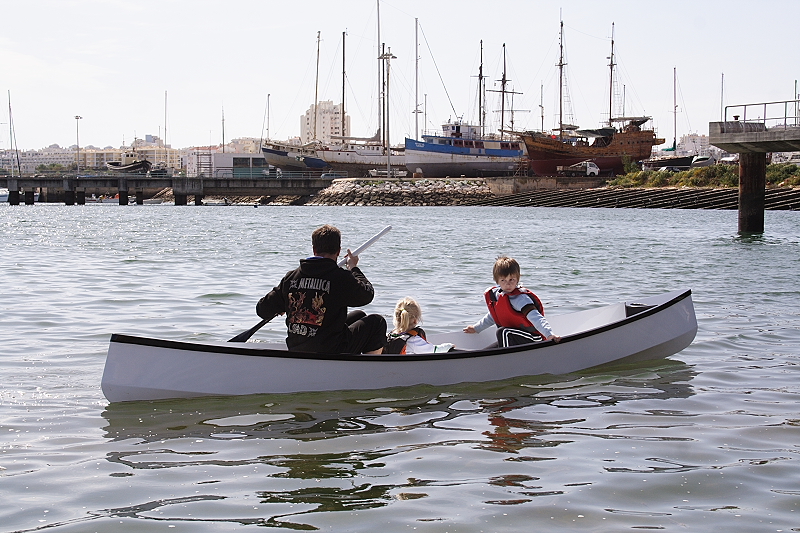
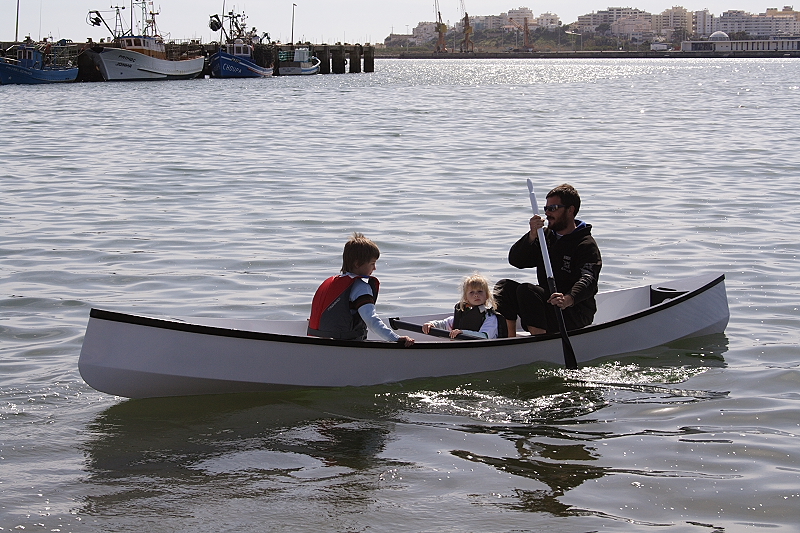
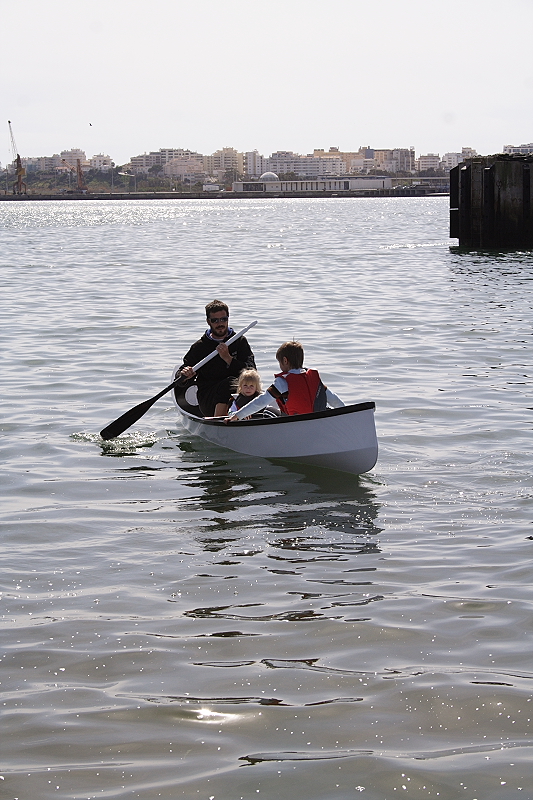
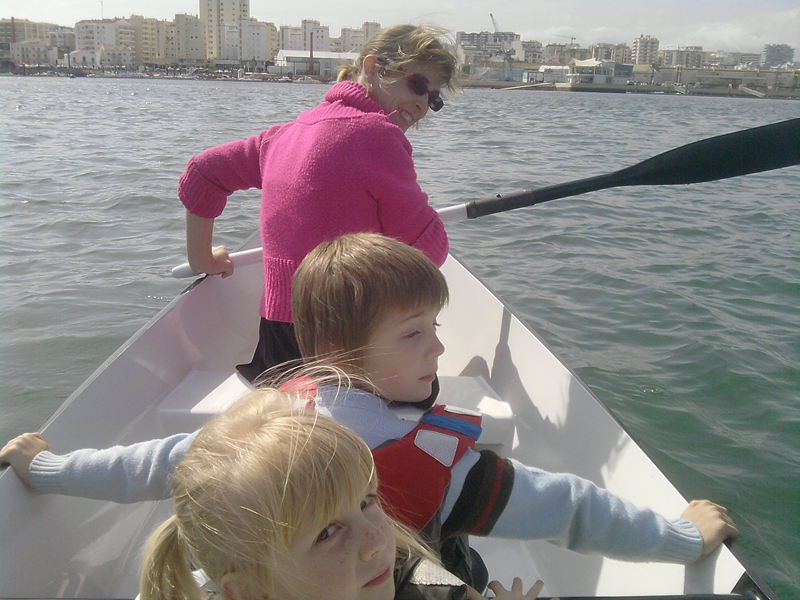
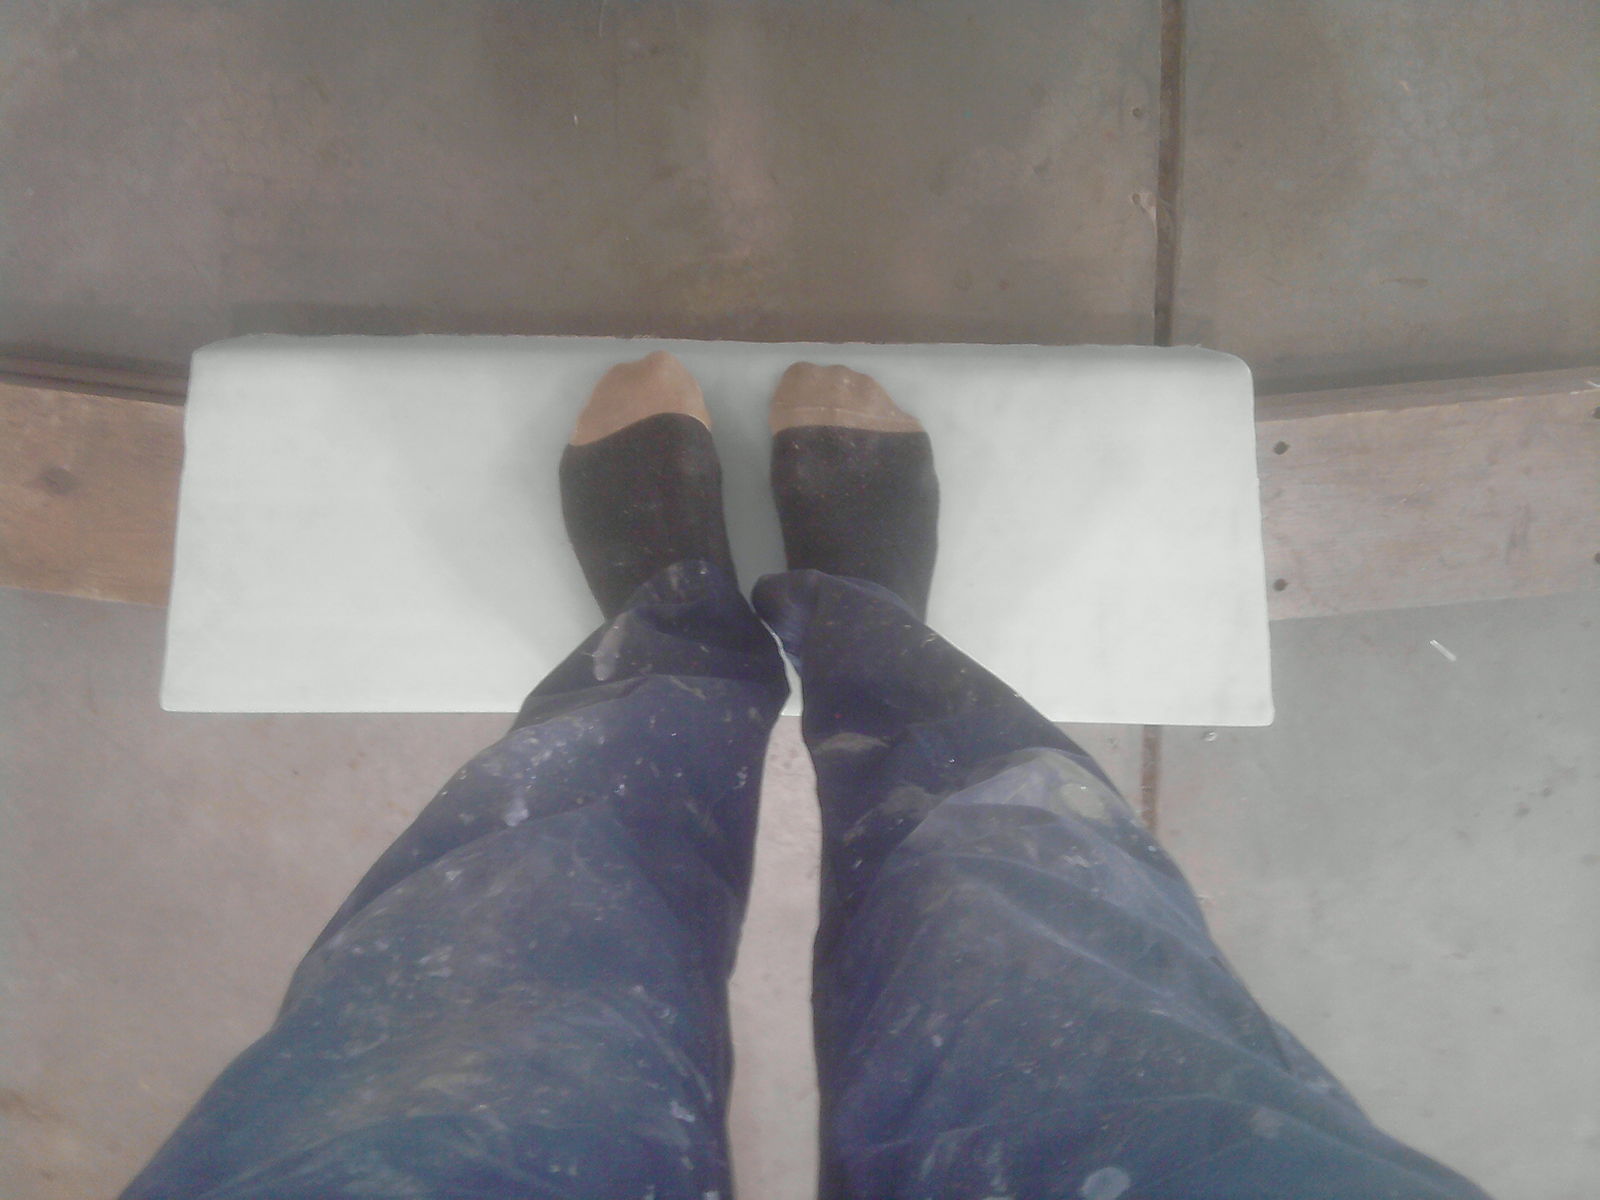
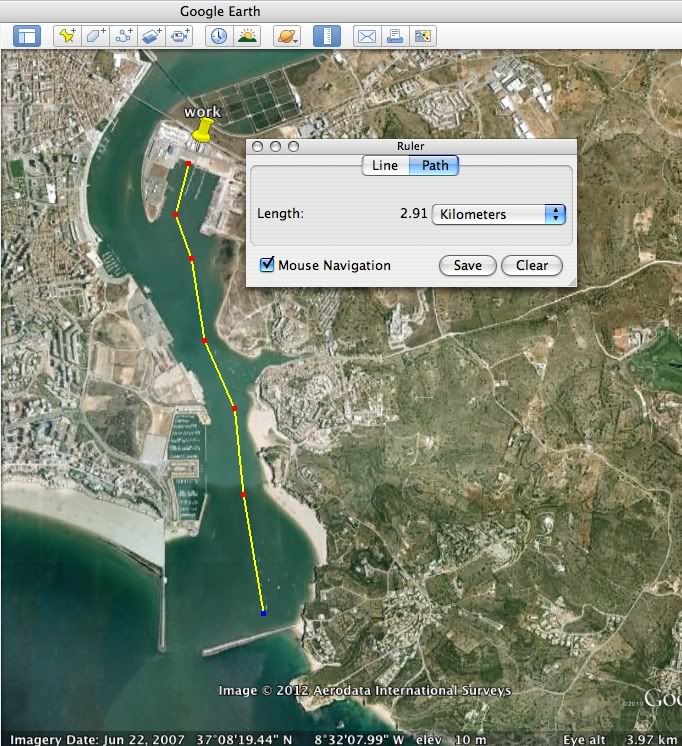
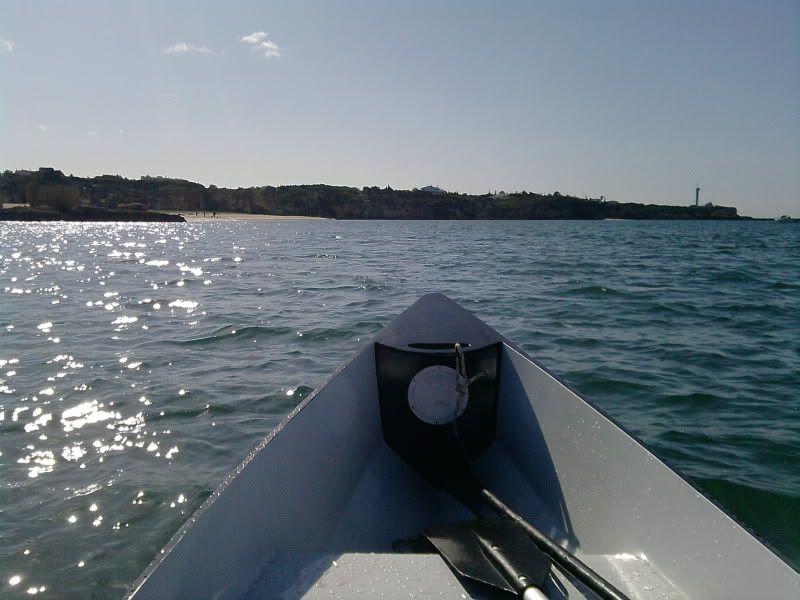
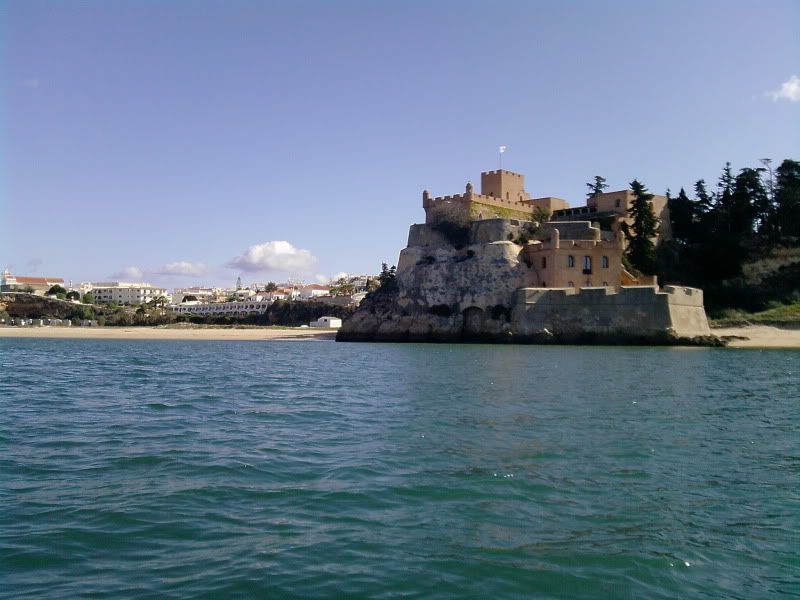
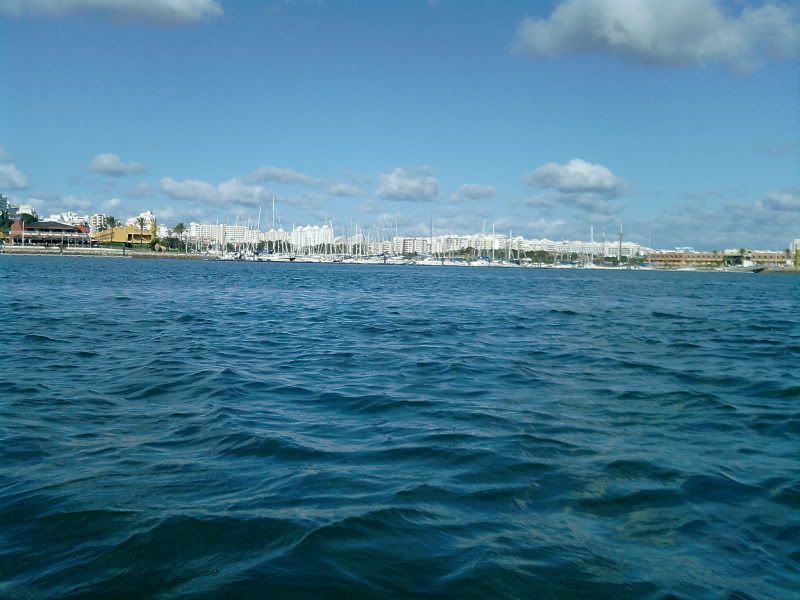
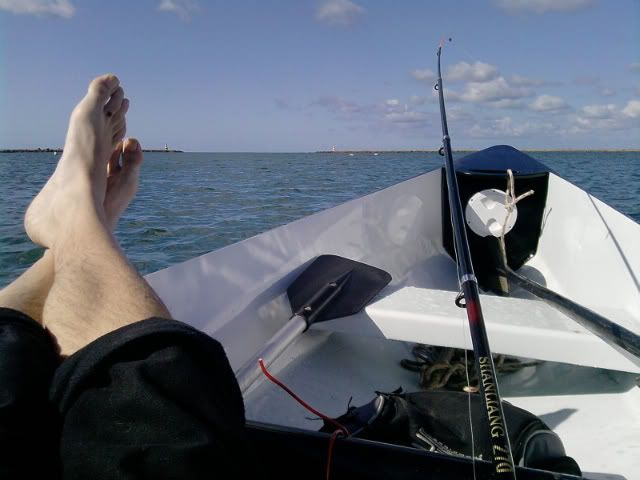
I took the canoe out on my own this morning and had a lovely trip down the river. Using a different paddle that was a bit shorter and had a wider blade made a big difference so will definitely be making some new ones soon. Here's some of the scenery I got to enjoy today:
My trip - about 3km each way, took me just under an hour each way.
Our favourite beach

Portimao marina south basin
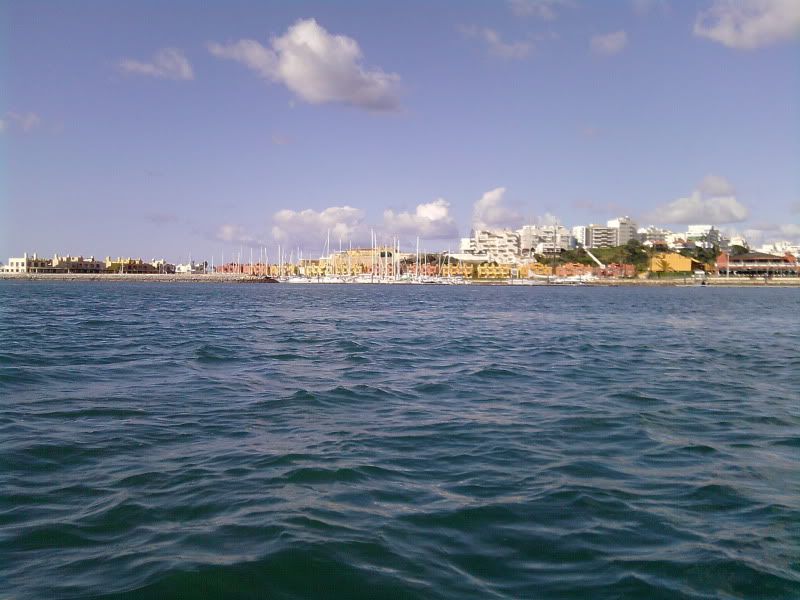
Portimao marina north basin
My ugly mug!

And this one's specially for George
Also remembere to weigh it today. It finshed up at 36kg, so a bit heavier than the plans but it is glassed in and out with 450gsm biax plus has the extra b/heads, so it's pretty solid!
Re: Chenoa 16 build - Splashed
Posted: Sun Mar 18, 2012 11:51 am
by Cracker Larry
Beautiful
I love looking at pics of different places that I've never been. Is that a new castle on top of an old one? Nice digs! Great looking canoe and family. I see more boat builds in your future
Re: Chenoa 16 build - Splashed
Posted: Sun Mar 18, 2012 12:29 pm
by dbcrx
Cracker Larry wrote:Beautiful
I love looking at pics of different places that I've never been. Is that a new castle on top of an old one? Nice digs! Great looking canoe and family. I see more boat builds in your future
Yep, it's days like this that makes me remember why we moved here.
The castle/fortress was rebuilt and turned into apartments. I never saw it before but from what I hear it took quite a lot of work!