Page 1 of 1
willg's PH18 - "Yepper" launched 6/11/17
Posted: Tue May 14, 2013 12:25 am
by willg
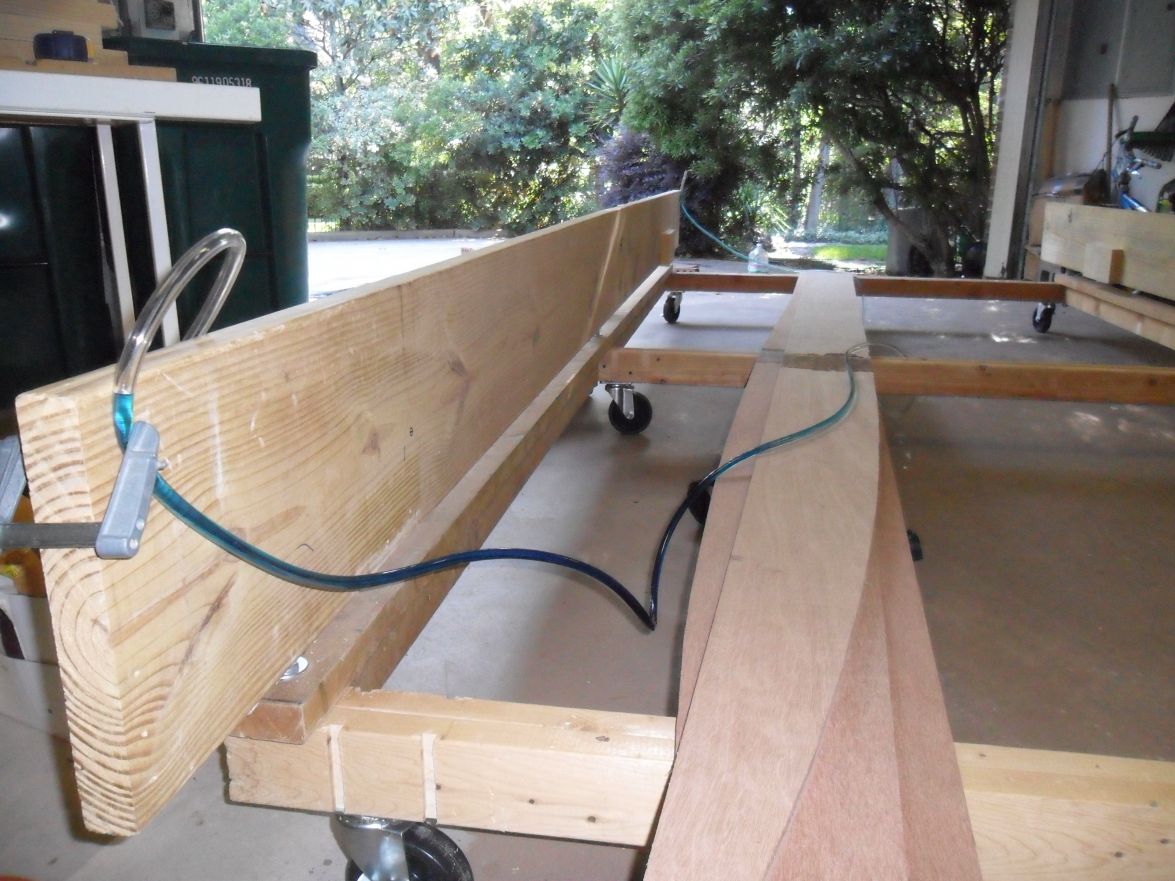
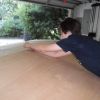
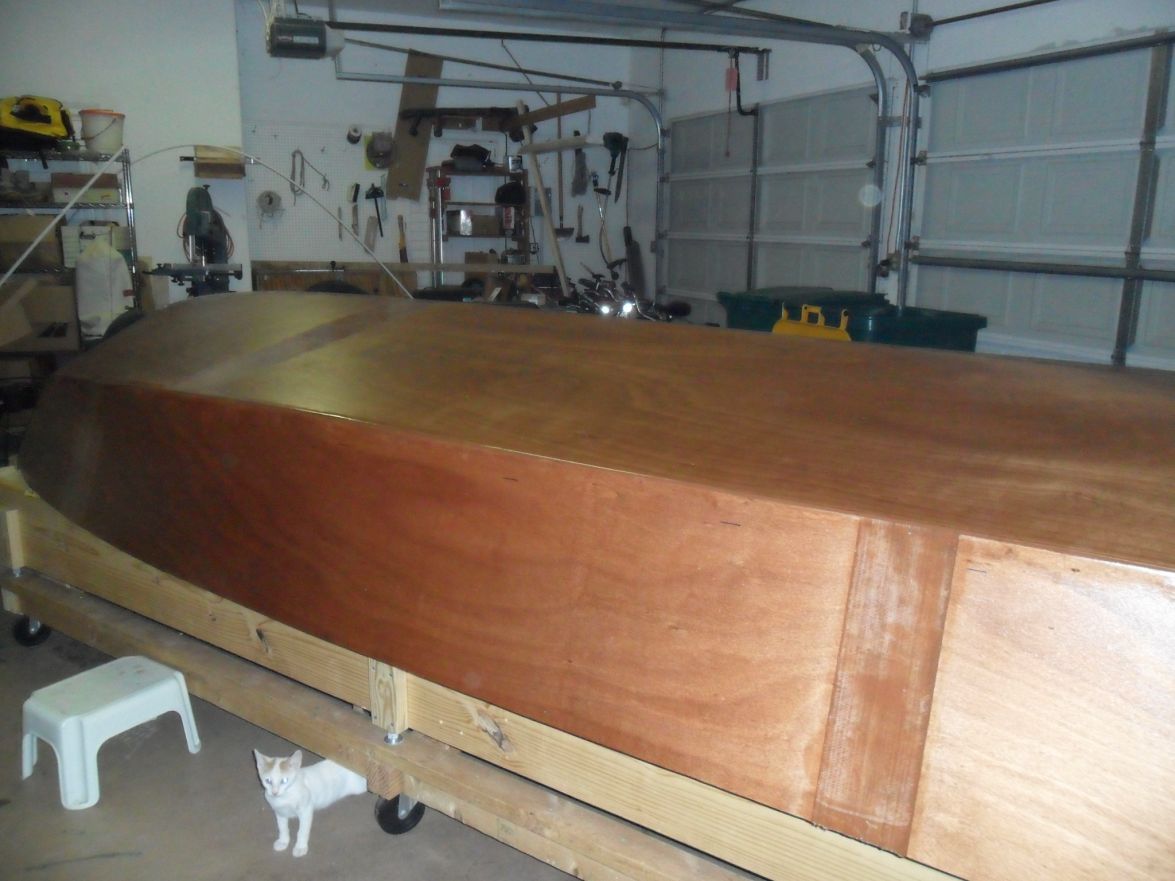
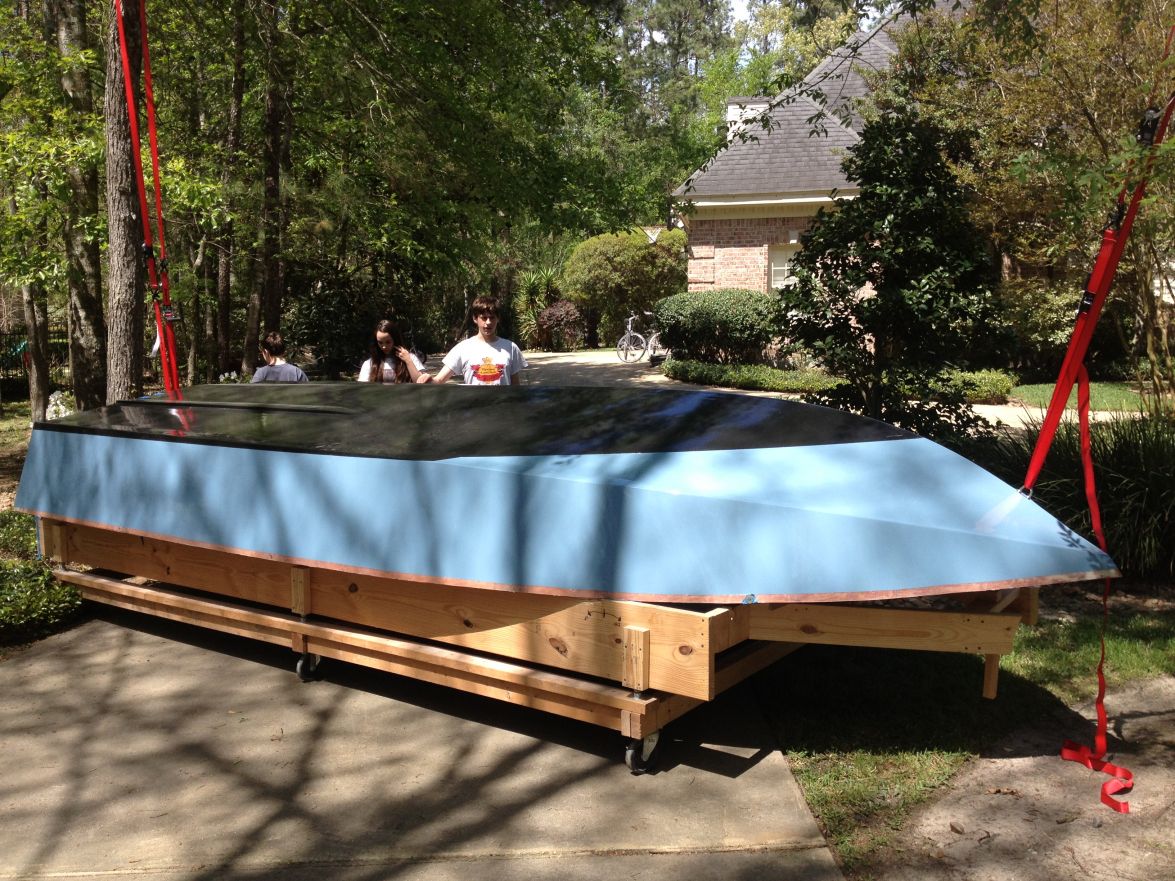
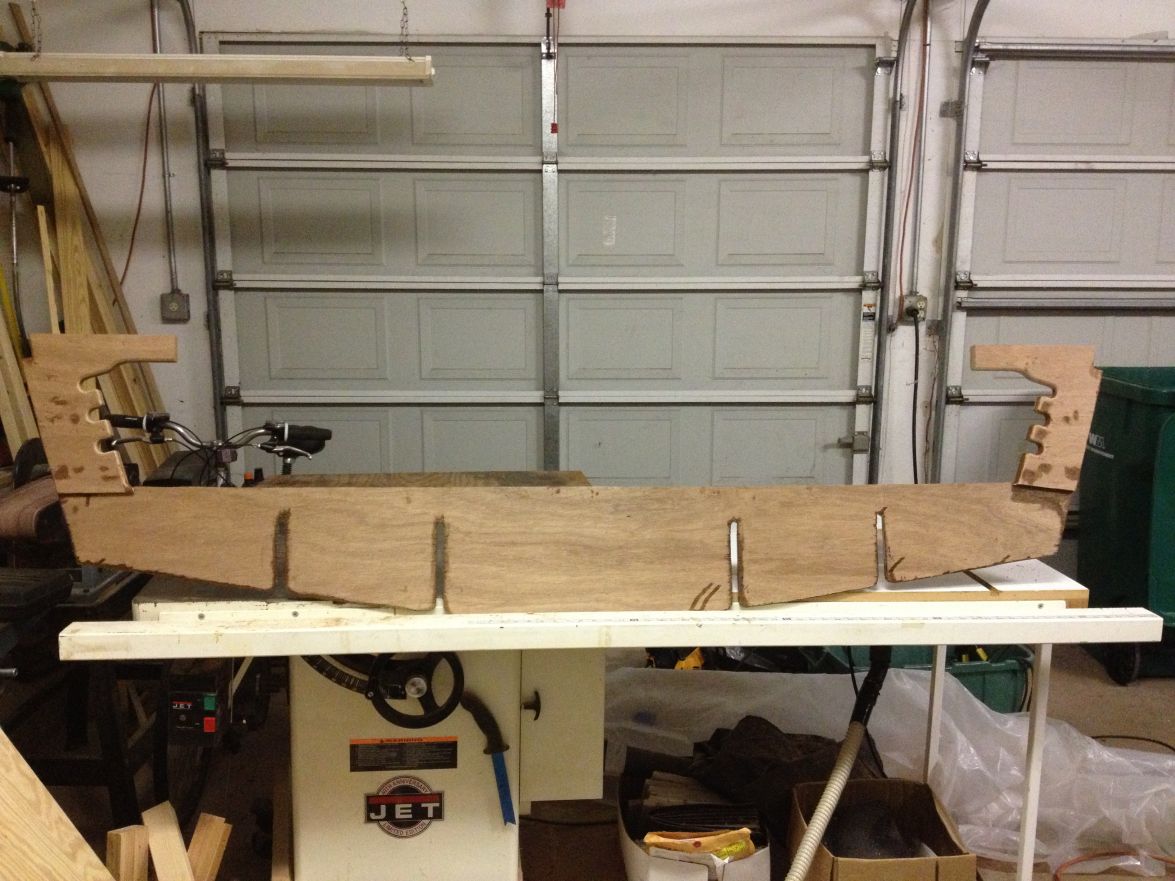
I am on my way into a Phantom 18! I have been cruising the bateau site for a couple of years now. In fact, I've has the PH18 plans for over 2 years. Like a lot of builders have said, I've got it built (maybe a few times over) in my head. Now I just need to build it. I have the luxury of being close to Houston Hardwoods every Saturday with my boys' activities. It's where I got all the ply. I was generously given the adjustable boat stand by flyfishingmonk. Casey, you'll notice a few mods, but I really do appreciate the time you put into selecting very nice lumber. I have been able to easily adjust it to my uneven garage floor. Once I'm done with it it will be up for grabs again. Just letting you know, Casey, I will be lifting many other ideas from you as well during my build. I am using Silvertip from bateau.
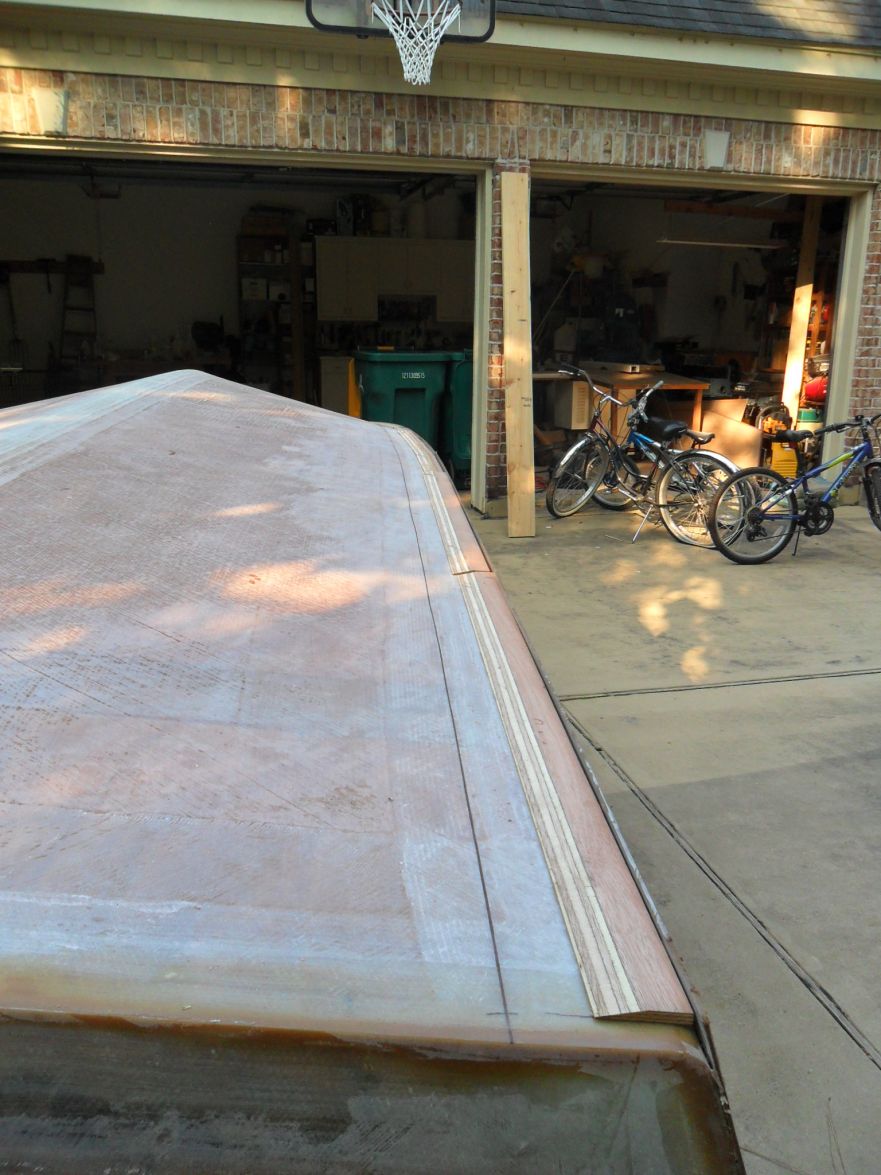
Got a couple of questions: I have been very happy with how the bulkhead/stringers set up on the stand with one exception. The inside stringers stand proud of bulkhead A by 3/8". I think it's due to my inaccuracy in laying out the stringer pattern. I think the choice is either to plane the stringers down in a sweeping manner or to just leave them be and see how the panels come together. I know I'll need to deal with the second option when the boat is flipped, so I'm leaning to option A.
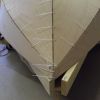
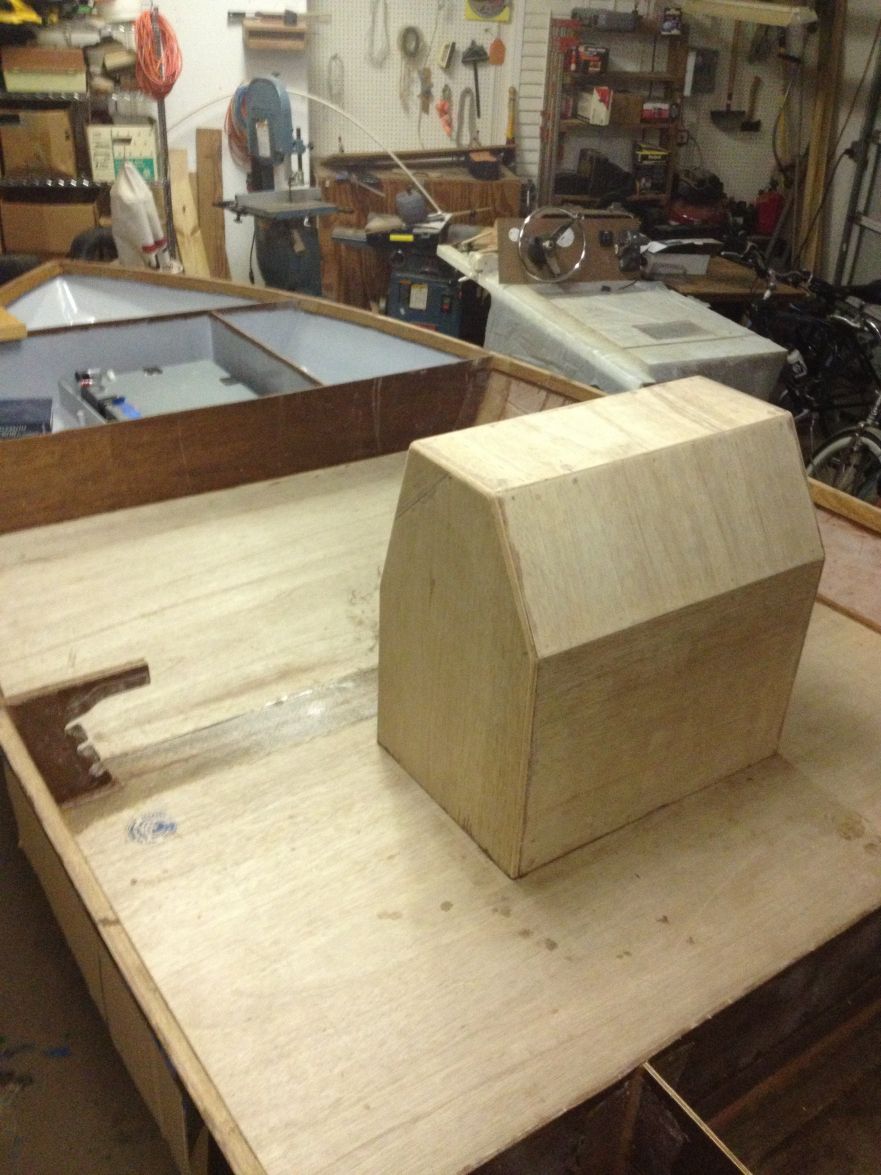
The transom piece fits up against the stringers nicely, but there is a 1/2" offset b/w the transom and stringer bottoms. Are the plans supposed to result in a 3/8" offset to account for the epoxy glue filling that gap? Seems like that would be the case. If so, I think the additional offset was due to my error in cutting the transom. I am going to laminate 3 transom pieces anyway, so I already have the extra ply. I just wanted to know this answer before I cut a new one. I would use the slightly short transom piece for one of the inside laminations.
http://gallery.bateau2.com/albums/userp ... M_0270.JPG
Re: willg's PH18
Posted: Tue May 14, 2013 12:31 am
by willg
Re: willg's PH18
Posted: Tue May 14, 2013 12:35 am
by willg
Ok, despite my searching for the answer I cannot figure out how to post multiple appropriately sized photos into a single post.
Re: willg's PH18
Posted: Tue May 14, 2013 12:38 am
by willg
Re: willg's PH18
Posted: Tue May 14, 2013 12:39 am
by willg
Re: willg's PH18
Posted: Tue May 14, 2013 12:40 am
by willg
I'll figure it out. Sorry for the pain. Last one:
Re: willg's PH18
Posted: Tue May 14, 2013 6:49 am
by peter-curacao
Re: willg's PH18
Posted: Tue May 14, 2013 6:53 am
by peter-curacao
Also here's a short movie on how to place pics on the forum
http://www.youtube.com/watch?v=scBeYCe88V0
Re: willg's PH18
Posted: Tue May 14, 2013 8:28 am
by willg
peter-curacao wrote:Here you go, now try to answer me by quoting me and you can see how I did it, hope this helps

Thanks. I have seen that video, a few times in fact, and I might have it figured out now. I have learned a lot from your posts, so I thank you for that also.
Re: willg's PH18
Posted: Tue May 14, 2013 12:08 pm
by tobolamr
Congratulations on starting your build!
I'm going to ask the first thing that comes to my mind, even though I'm sure you've probably done it: Have you quadruple-checked the measurements to ensure you have everything cut right? We do a lot of measuring/cutting, and sometimes the best of us mis-read a tape measure several times over. I know I've done it a million times...

Re: willg's PH18
Posted: Tue May 14, 2013 12:44 pm
by willg
Tobolamr, thanks.
I believe in measuring multiple times before cutting but, yes, I have made plenty of mistakes before despite that. I remeasured all the bulkheads while they were up on the strongback and they are nuts-on accurate. The stringers required tracing full patterns for the tips and melding them with the straighter aft portions. I think there's a decent chance that's where my error occurred. Also, I was cutting the stringers with a somewhat cheesy jigsaw. Fortunately, that jigsaw broke and I replaced it with a much nicer model and used the new saw to cut the bulkheads and bottom/side panels. I stacked the panels and cut them together for symmetry and like the way they turned out. Another potential reason for offset b/w the stringers and bulkhead A is that my stand is out of level but it holds up to scrutiny. I have more faith that the bulkheads are true to plans than the stringer tips, so that is why I'd consider planing the stringers down some. I'll do some more head scratching and thinking before any action is taken.
Re: willg's PH18
Posted: Mon May 20, 2013 1:32 am
by willg
Re: willg's PH18
Posted: Mon May 20, 2013 2:06 am
by willg
Alright, this picture uploading is making me a little nutty. Just like in the previously mentioned video, when I hit Builders Galleries, then Upload File, I do not get the window seen in the video. Instead I get the window to browse photos to place them in my gallery. If I'm in my gallery, right click on a photo I want to post, copy the URL, highlight and hit [img], what comes out are these thumbnail photos you see above. If I open the picture in my gallery, save and paste that URL in my reply, I get the "It was not possible to determine the dimensions of the image" error and my pictures do not post. It's the same with Internet Explorer and Chrome. Anybody have a suggestion? Also, I cannot upload even the thumbnails except one at a time, saving messages and having to visit my gallery each time. I know there's a better way, I just don't know what is is.
Re: willg's PH18
Posted: Mon May 20, 2013 3:00 am
by willg
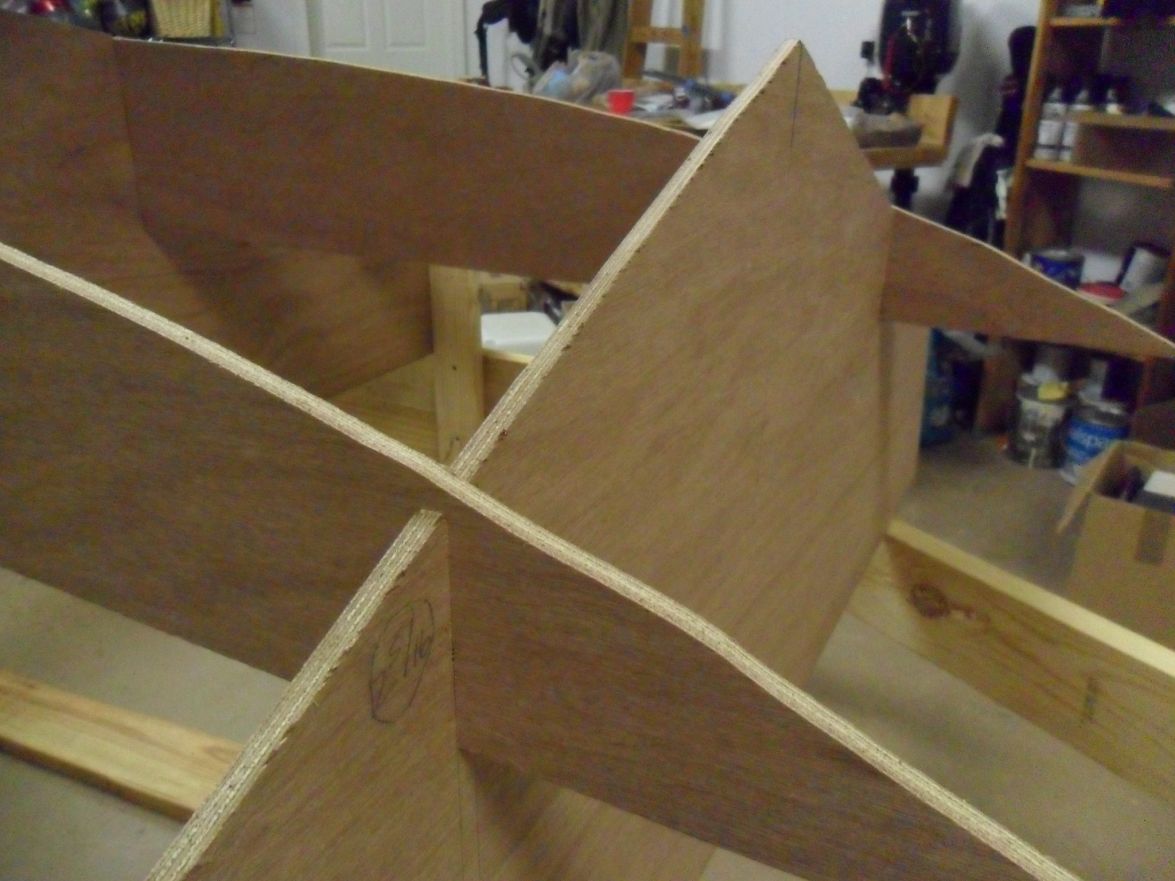
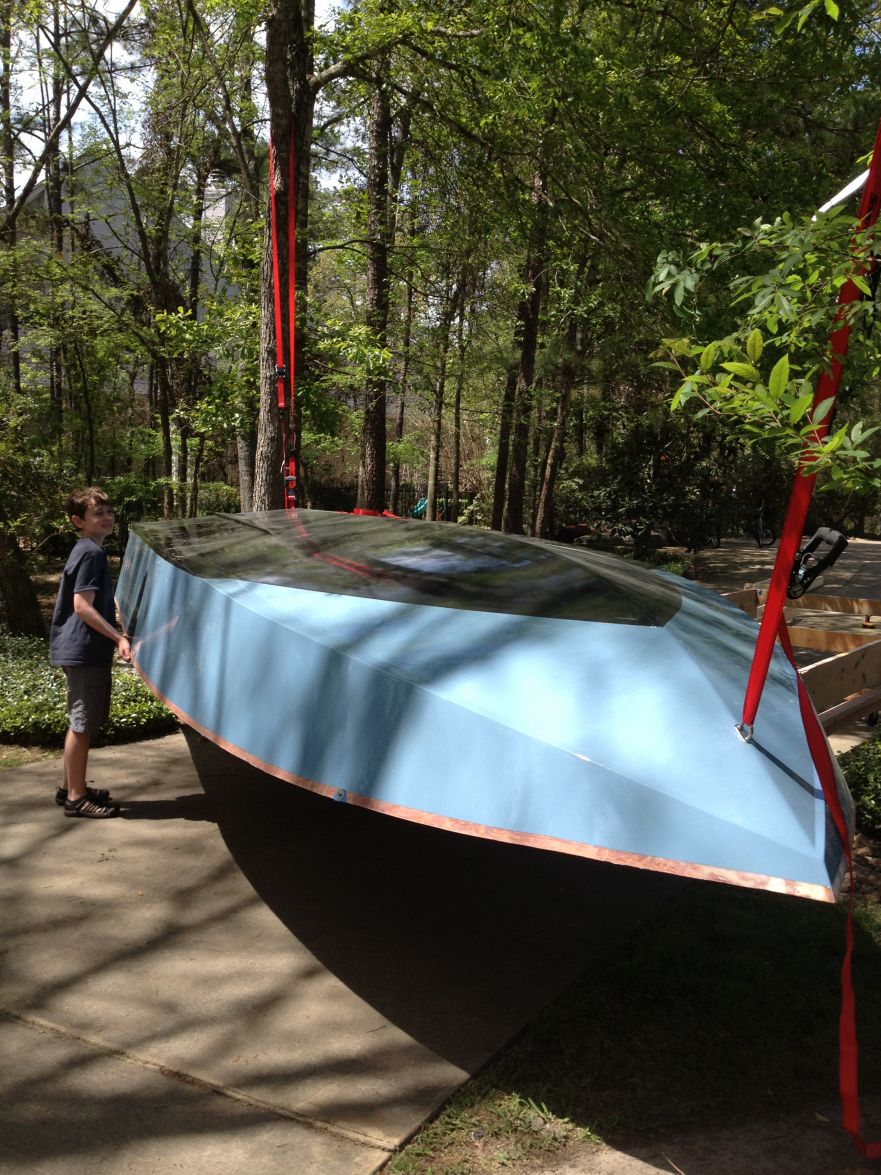
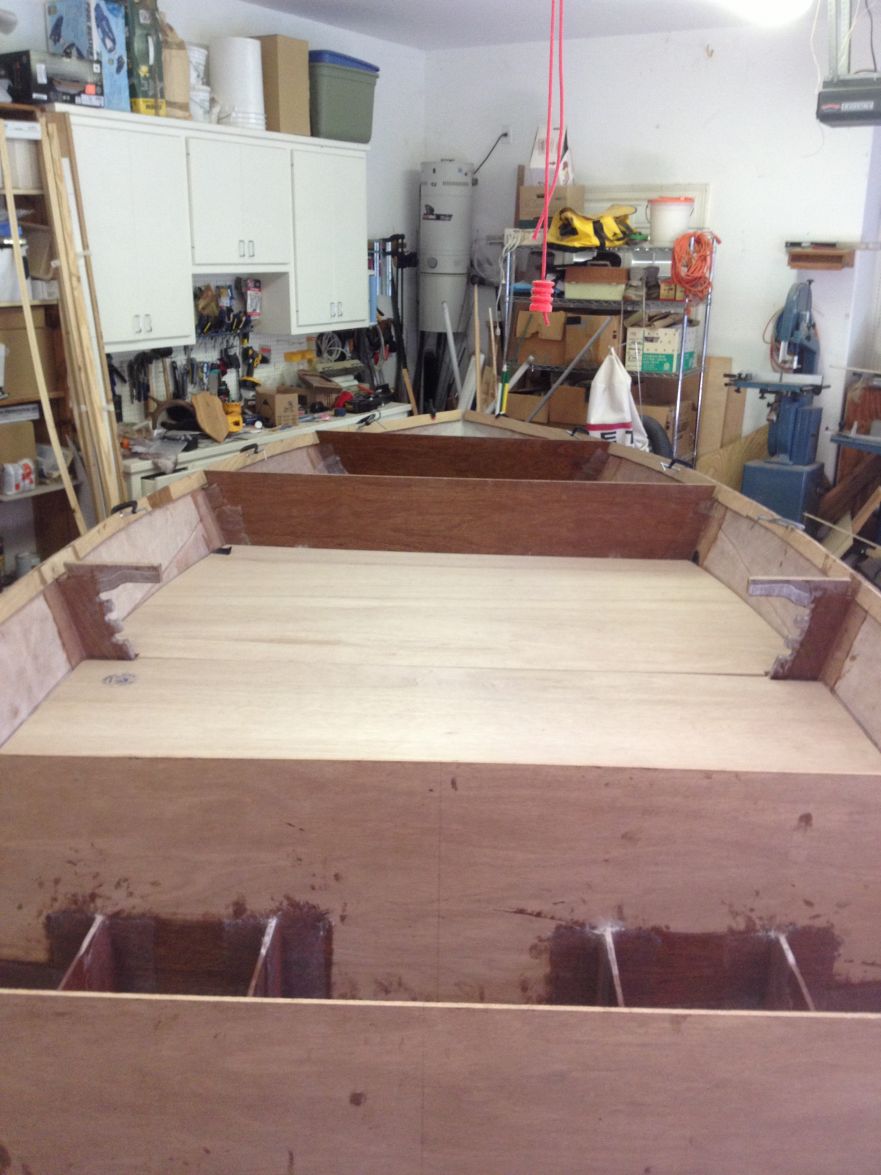
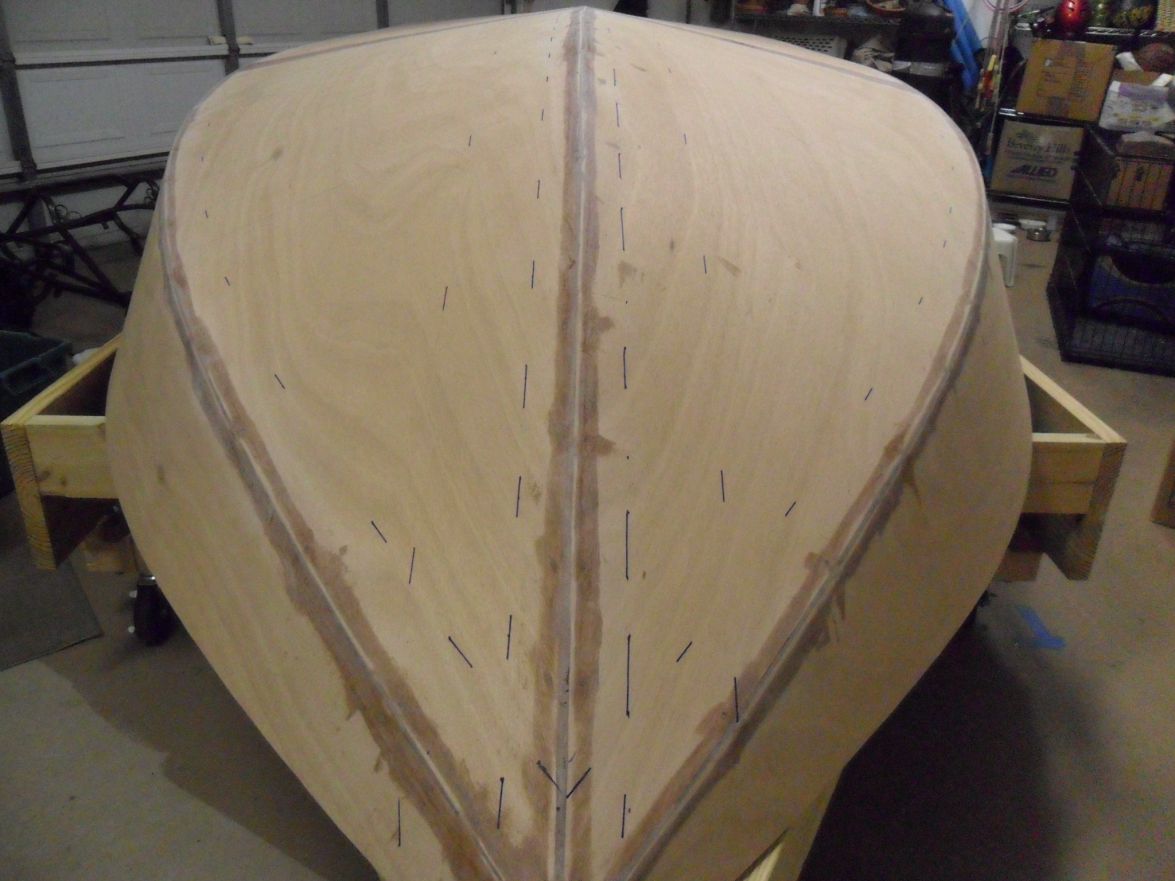
I got it. Even a blind pig ...
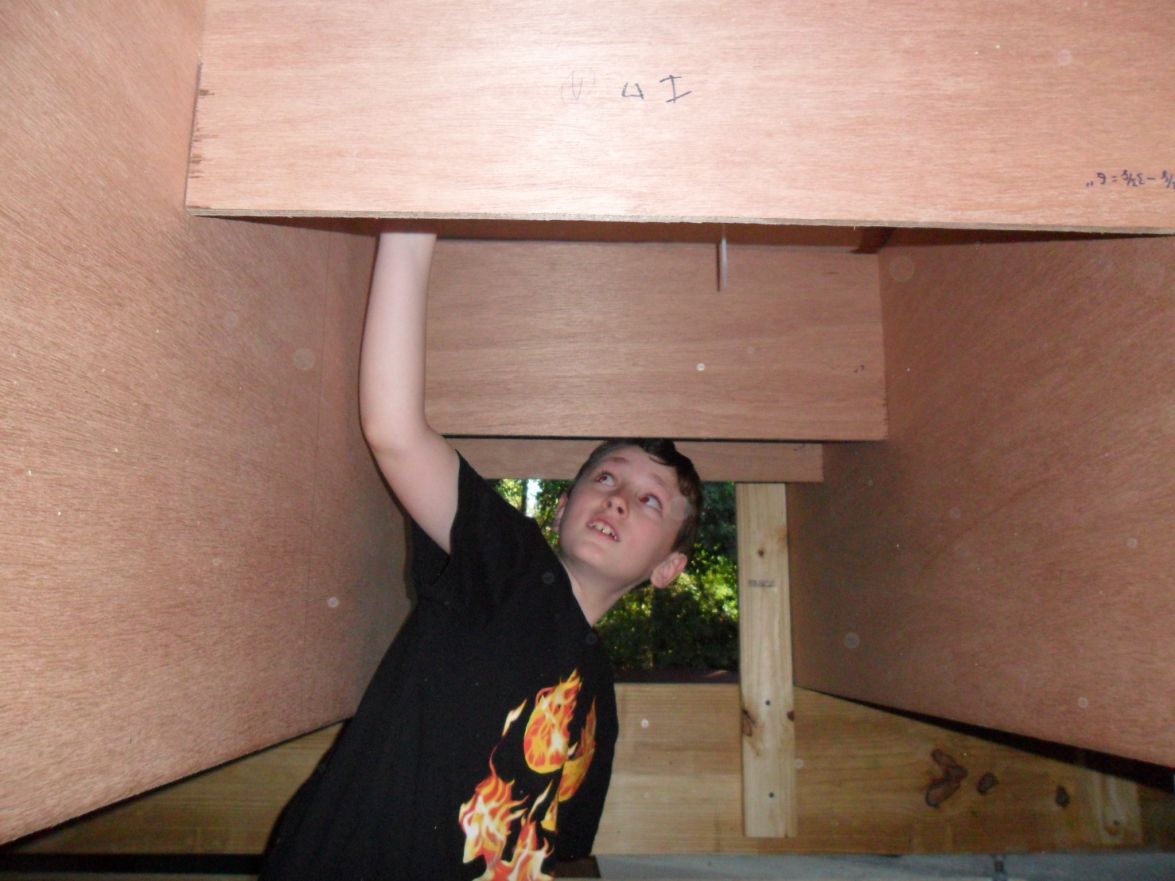
My 9 yo passing zip ties from below.
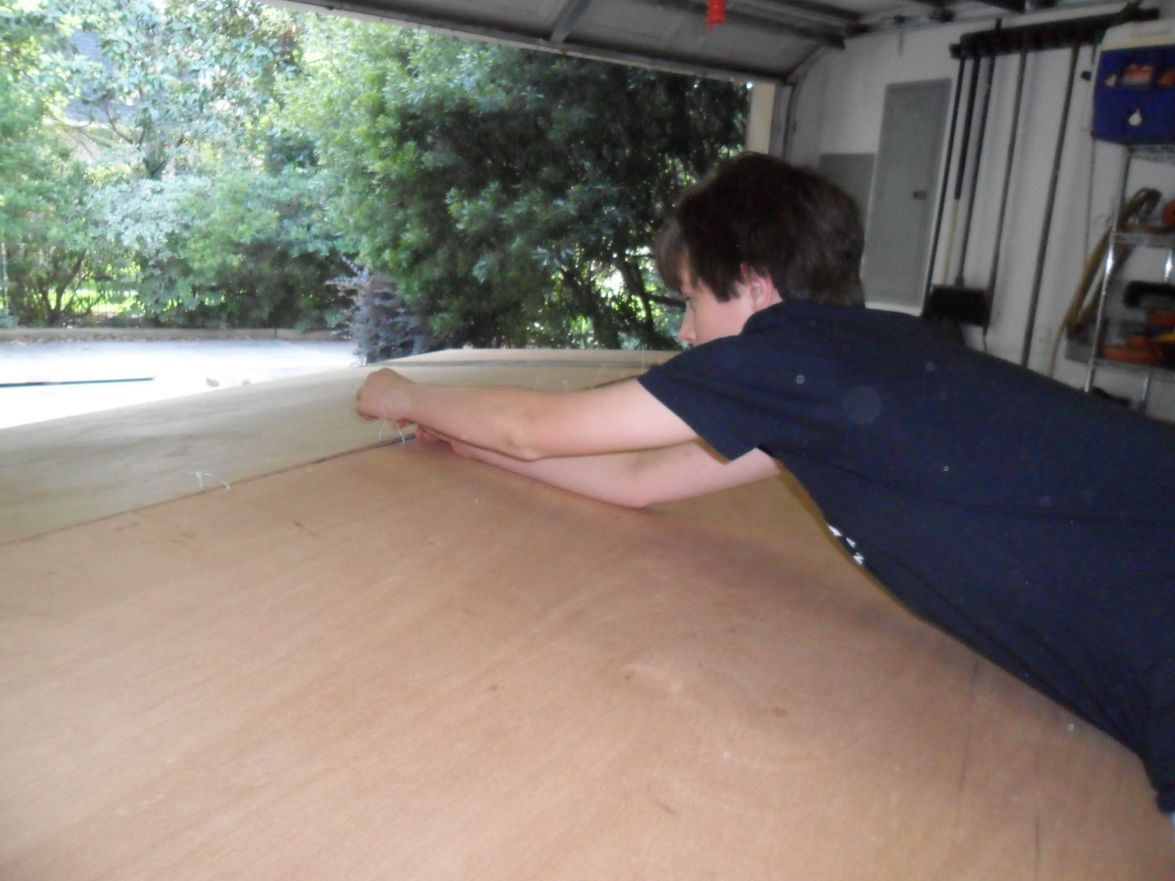
14 yo helping with assembly
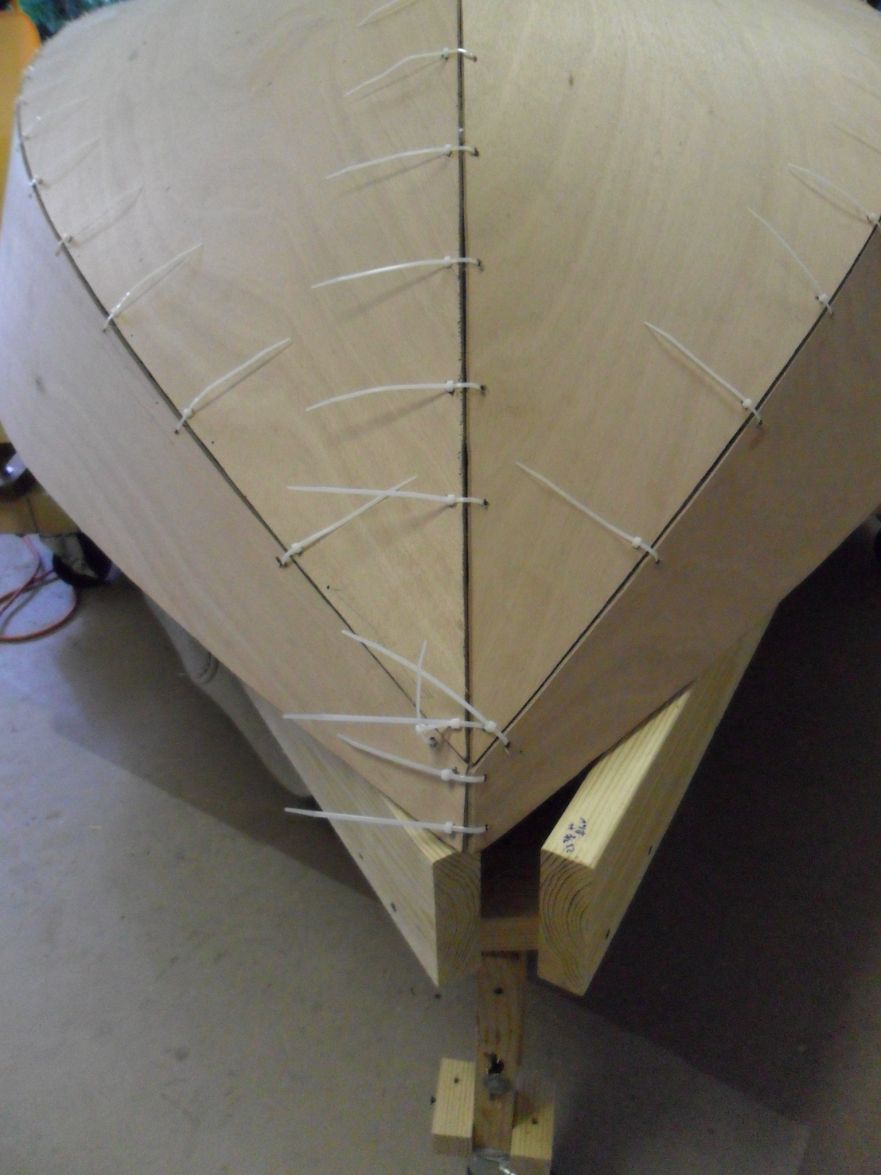
If anybody has a comment on my panel gap/fillet question above I 'd be grateful.
Re: willg's PH18
Posted: Mon May 20, 2013 7:02 am
by Cracker Larry
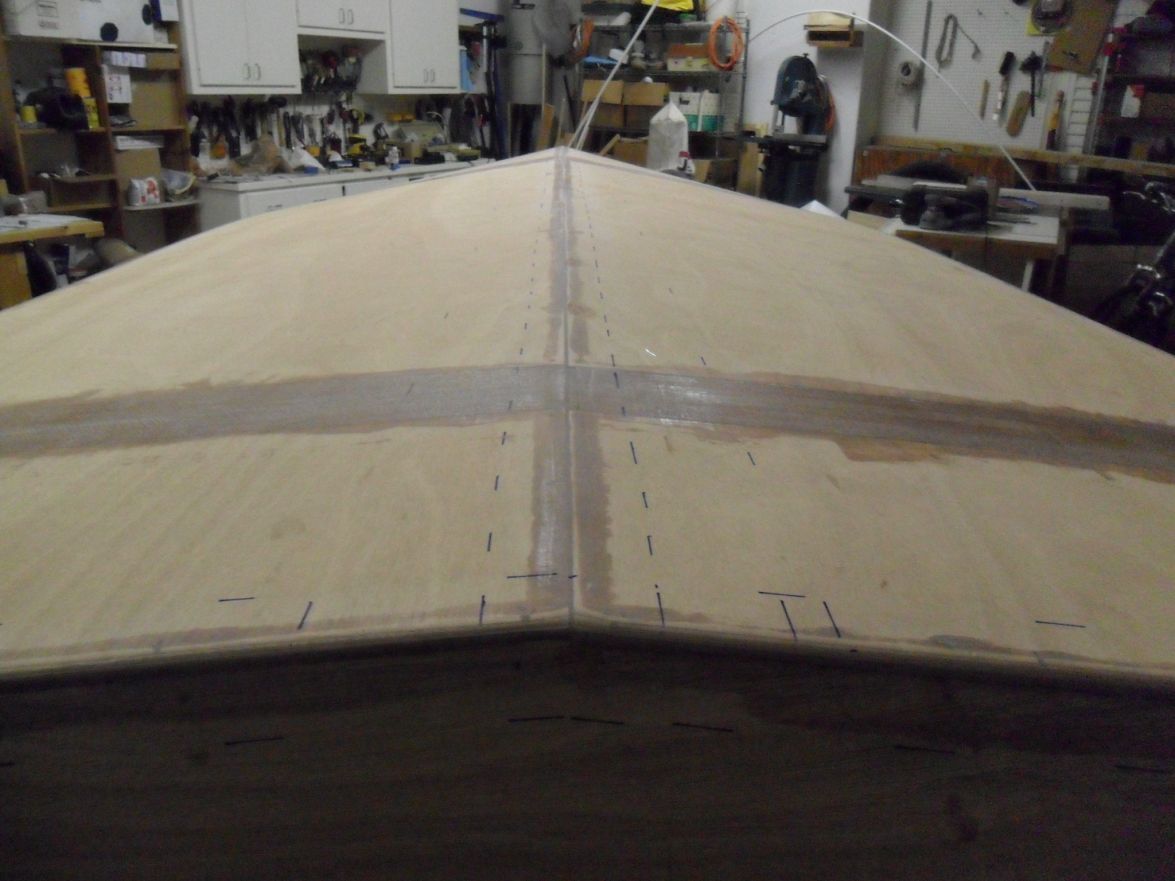
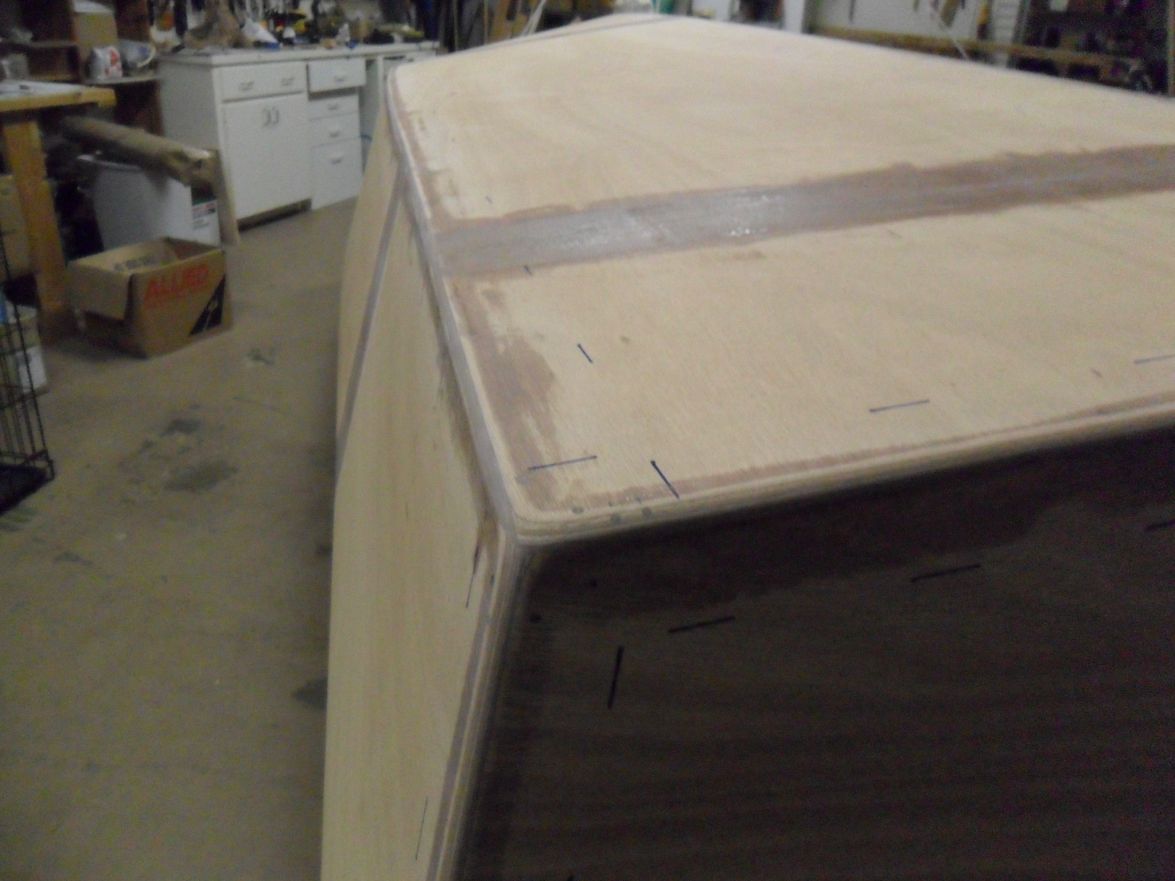
Looks great! The gaps are perfect, finishing nail is just right.
Must be nice to have your own labor pool
Maybe I should adopt a couple of younguns.
Re: willg's PH18
Posted: Mon May 20, 2013 12:38 pm
by tobolamr
Cracker Larry wrote:Maybe I should adopt a couple of younguns.
I could send my oldest 2 down to help you... 10 and 7... or my 15 year old nephew could get shipped down to you...
Re: willg's PH18
Posted: Tue May 21, 2013 12:26 am
by willg
The labor pool is fun to have. They are excited about the boat build.

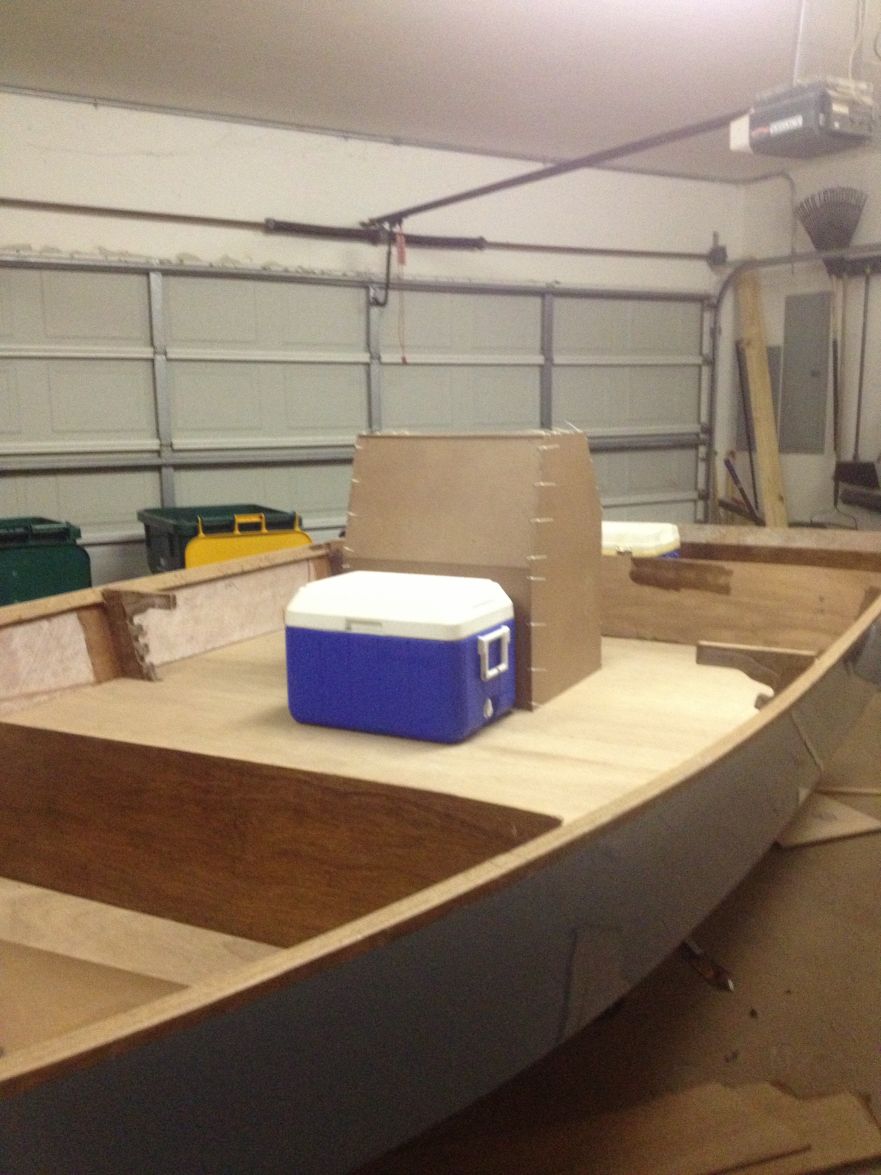
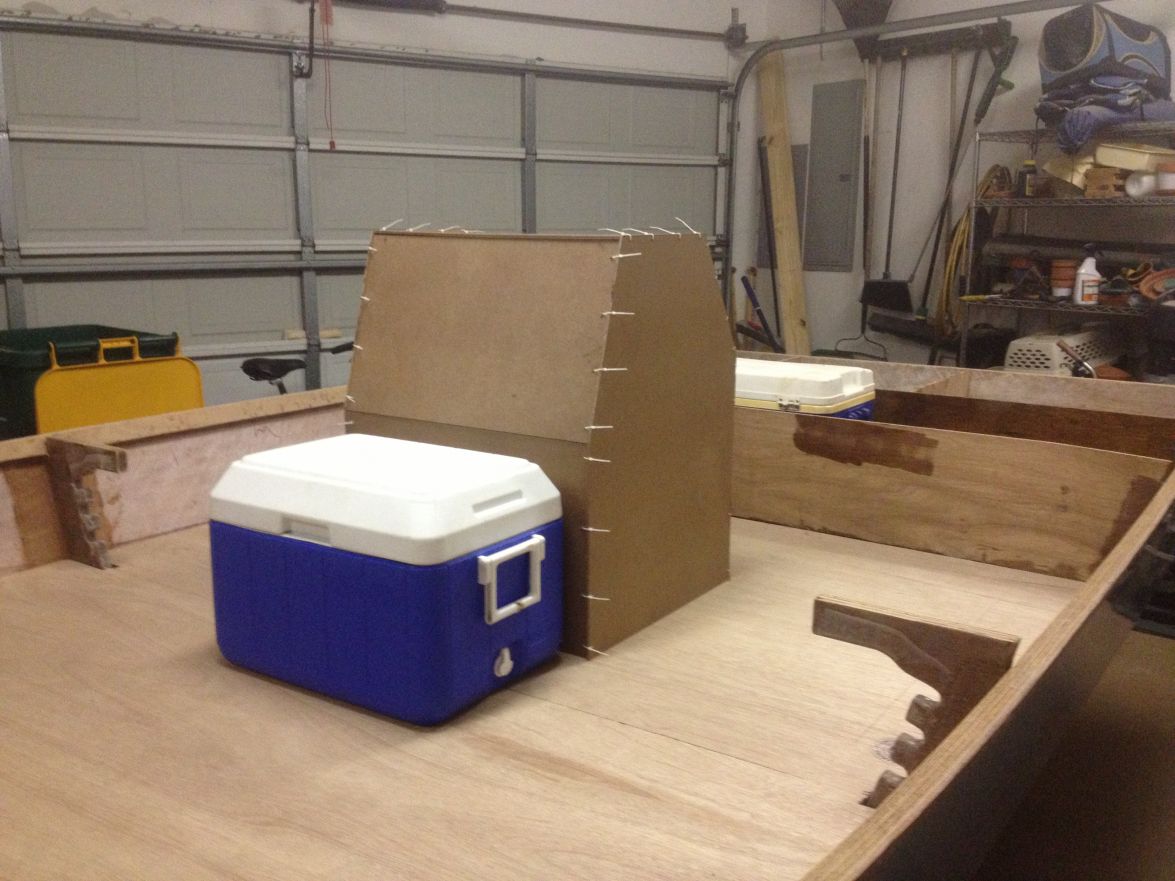
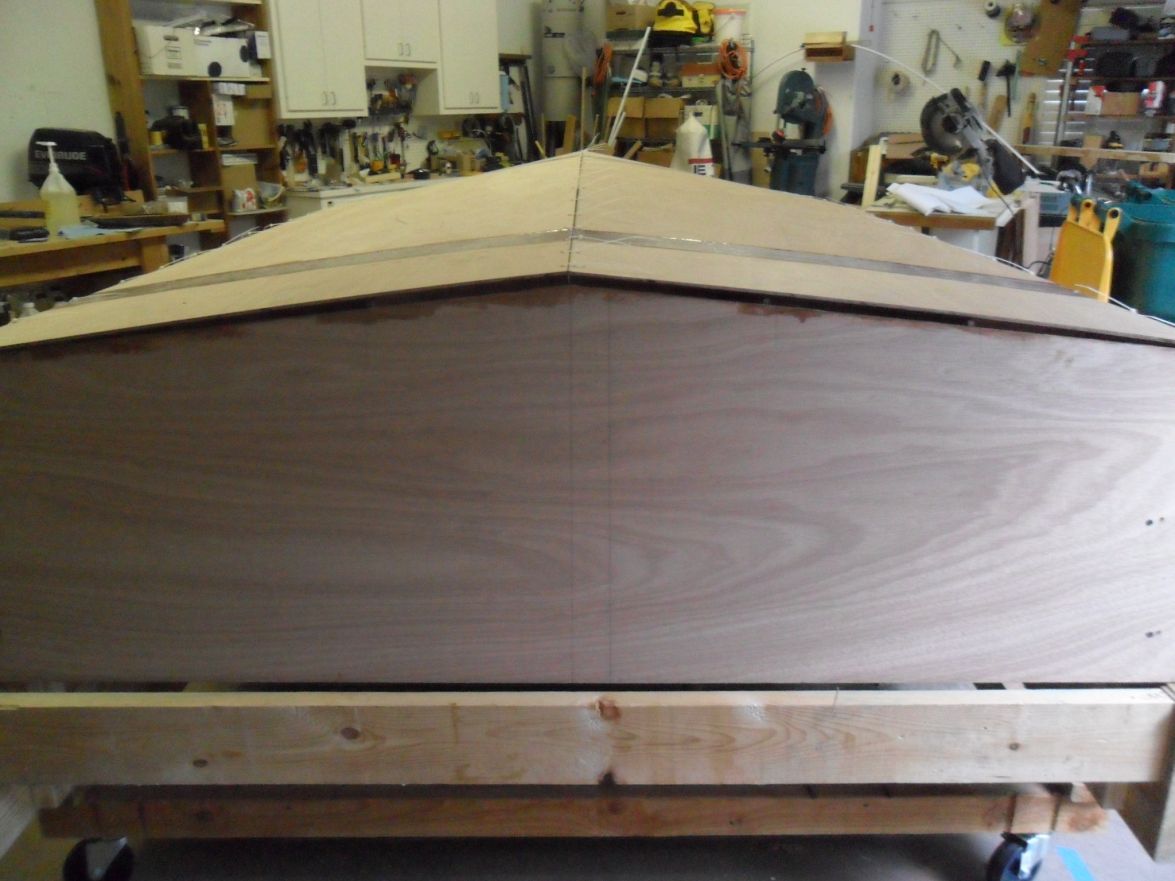
Thanks for the feedback. The panels at the keel aftwards are nearly butt-jointed because of the low deadrise. When it's time to fillet should I just squish some into that gap or would it make sense to rout a shallow V into that joint to increase the surface area? Perhaps I'm worrying about the fillets' role in this step too much.
Re: willg's PH18
Posted: Tue May 21, 2013 7:48 am
by Cracker Larry
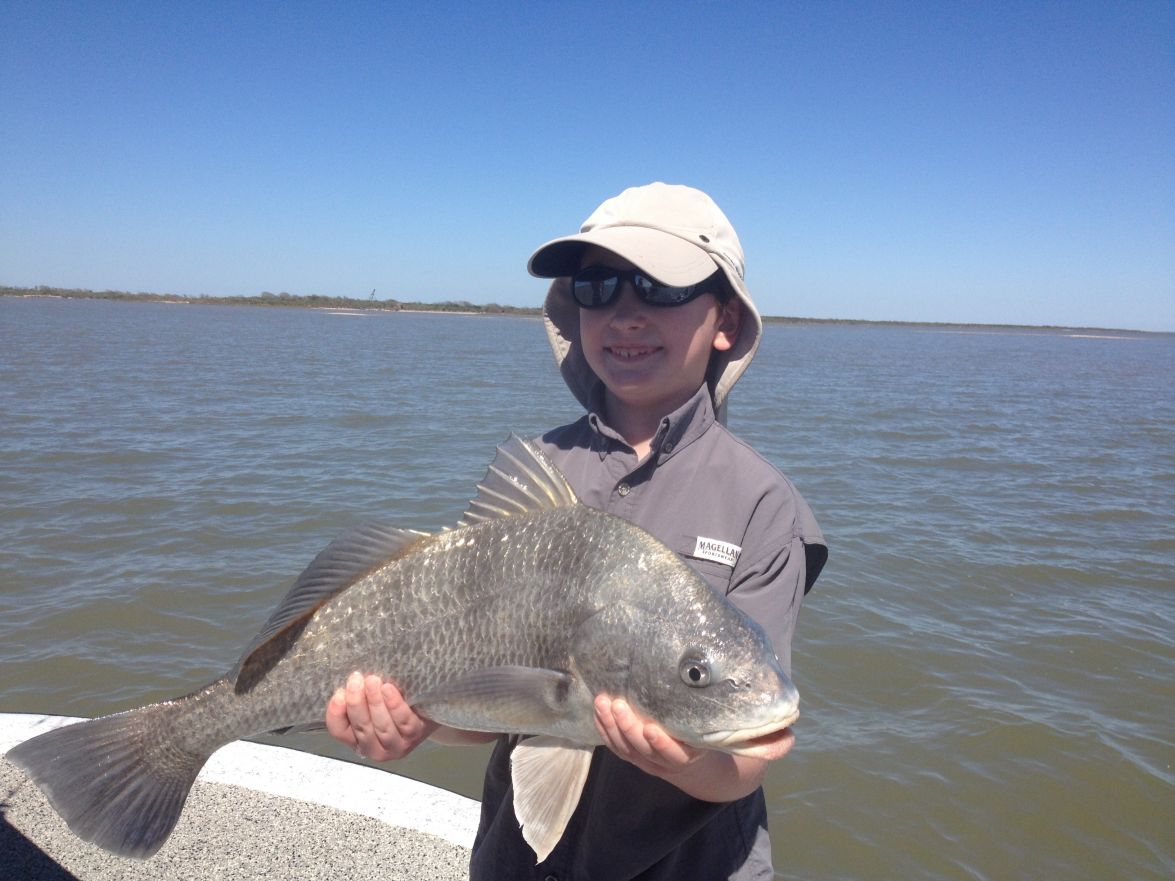
Nice black drum
As long as you have a gap, just squish some glue in it. Before you start that, get your child labor pool under the boat and tape the inside of all the seams with wide masking tape. This will hold the glue in the joints and keep it from running all over the inside of the boat. Saves a lot of sanding later.
Re: willg's PH18
Posted: Wed May 29, 2013 11:41 am
by willg
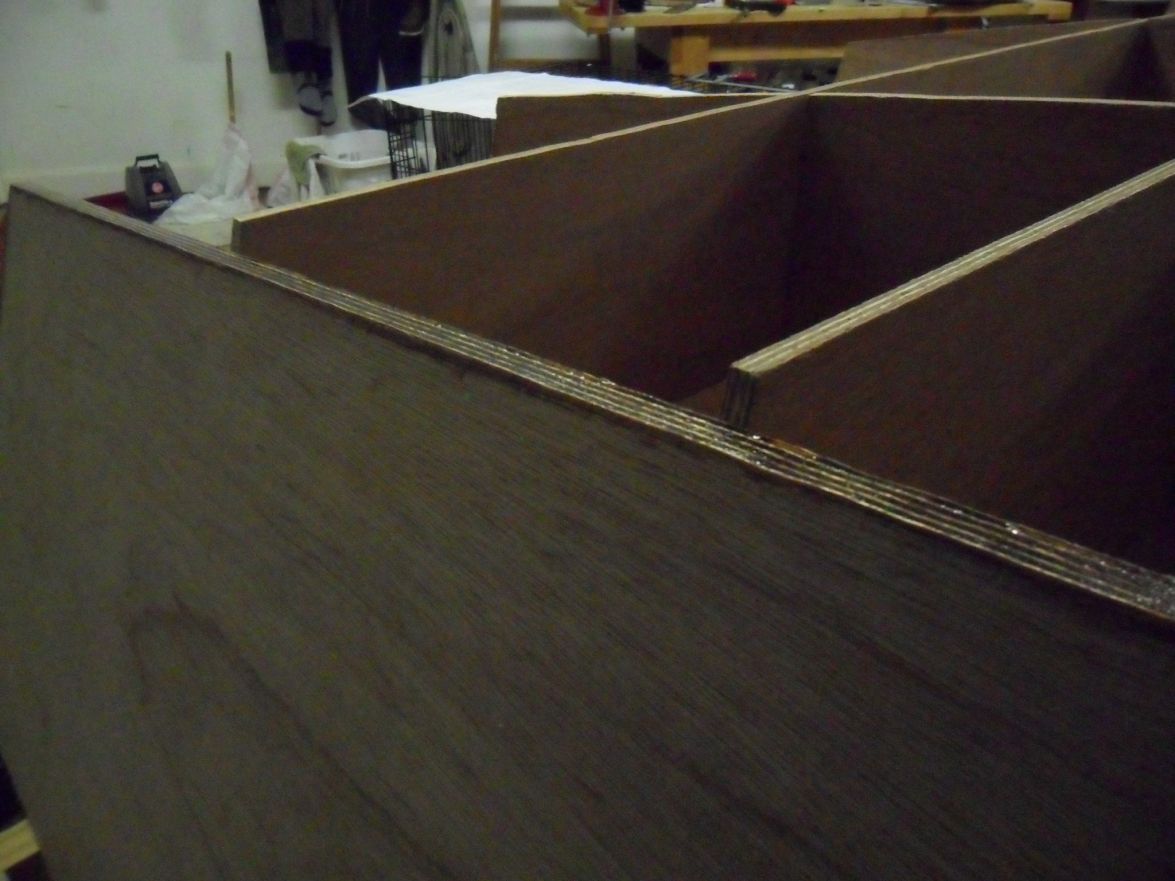
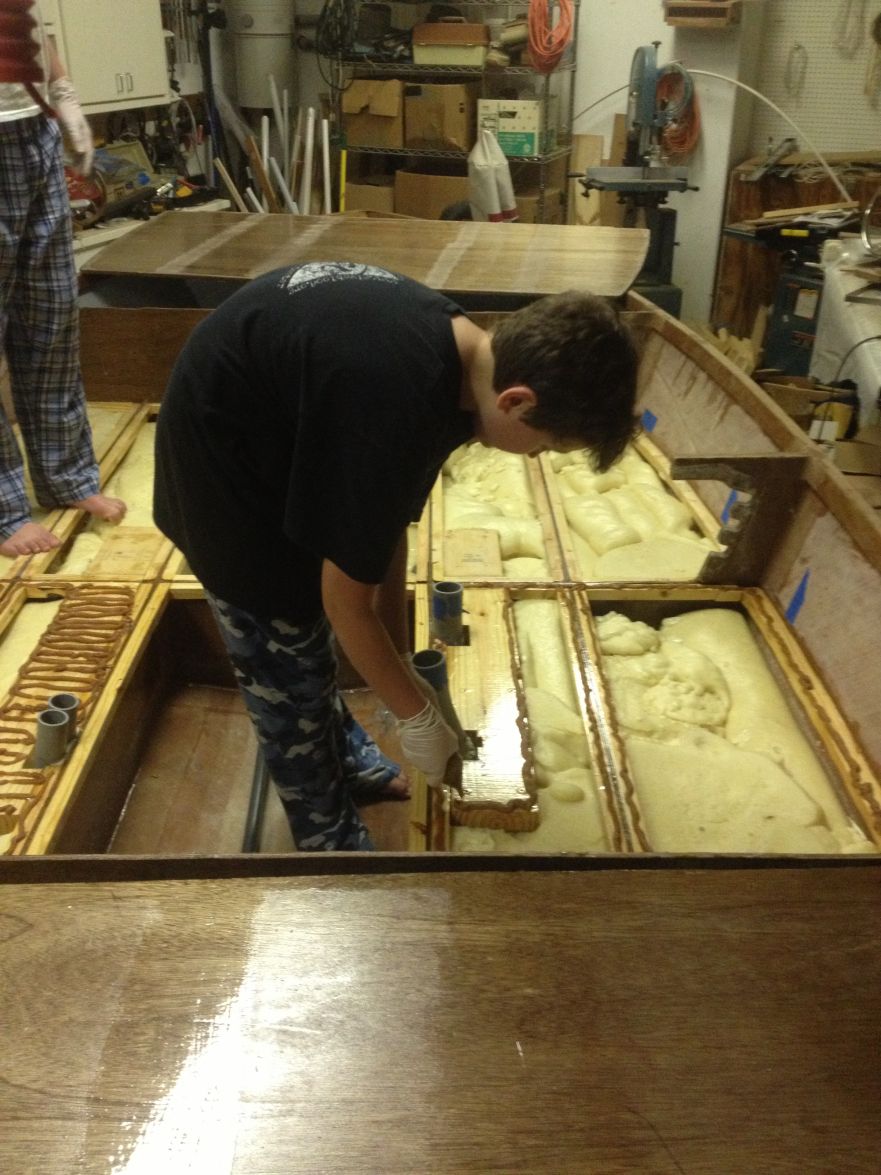
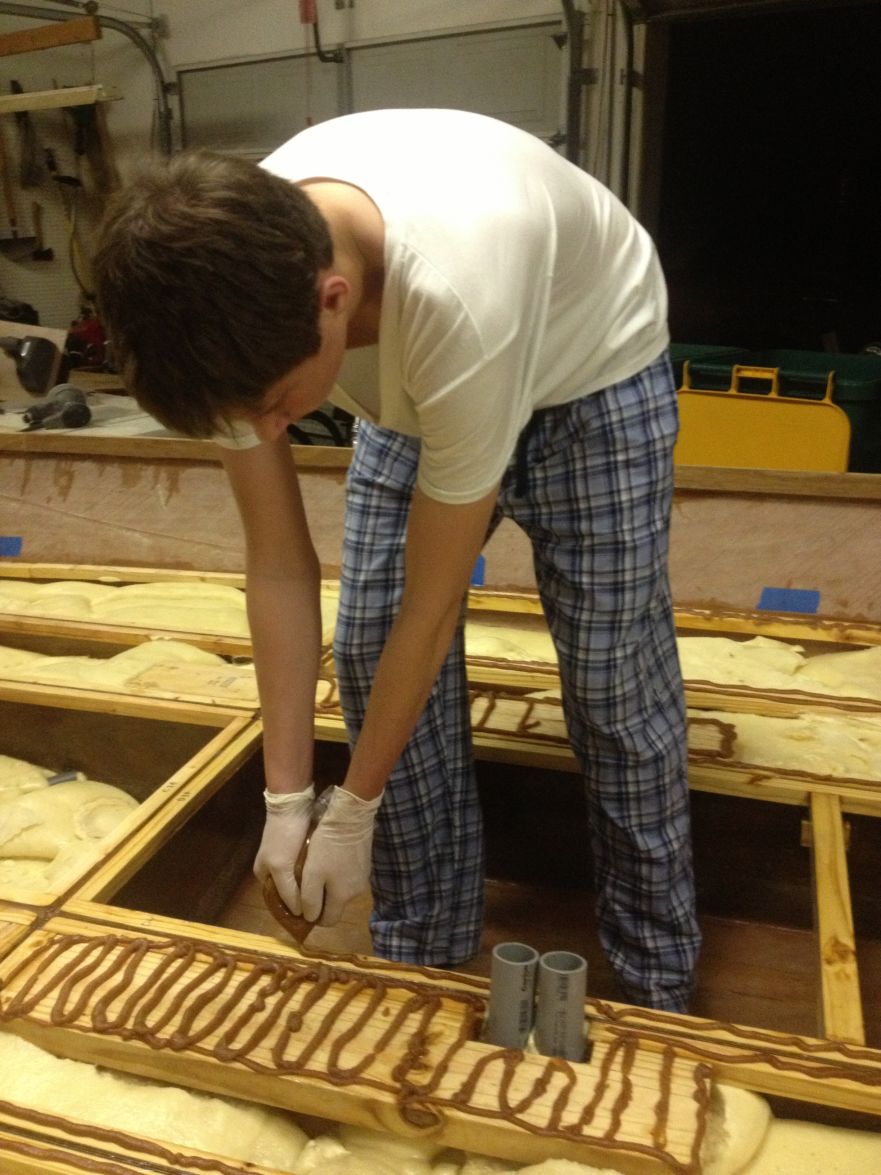
After some final adjustments I filleted the panel joints on Monday. I'll take out the zip ties later this week and complete the filleting. Some lessons I learned in the process:
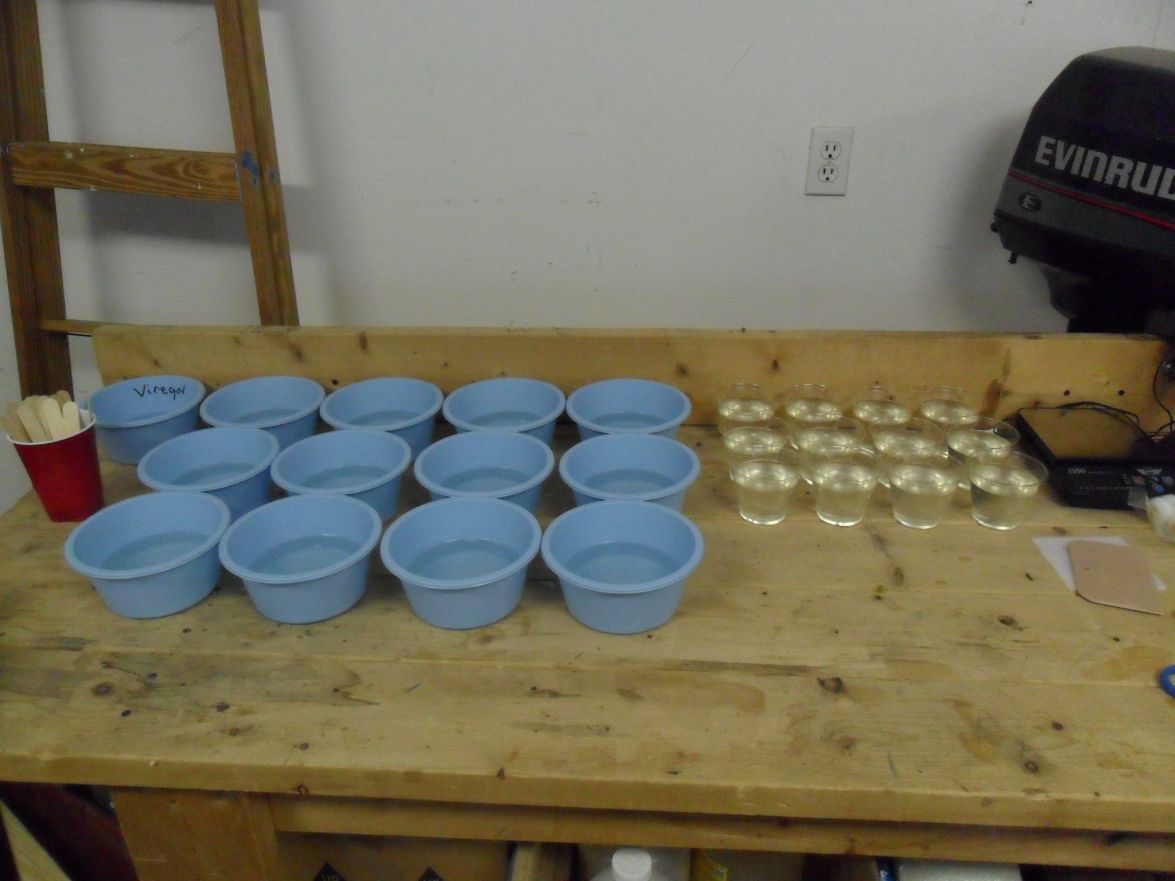
1. I used EZ-Fillet, and it was great to work with.
2. I used a couple of pastry bags at first, but then used quart zip-locs. I preferred the zip-locs for the smaller batches and piping it into these small gaps. When it comes time to making the inside fillets I will probably use the pastry bags again because the opening can be cut at whatever diameter you want.
3. I made up too much volume for my second batch. It got hot as hell and gelled up in my pastry bag. It was a much better experience to make smaller batches and not be rushed.
For measuring my epoxy and EZ-Fillet I bought a 500gm electronic scale. Rather than worrying about measuring specific volumes, I can put any quantity of Part A in at first, multiply that weight by 1.44, then add enough B until I get to the final weight. I keep a small calculator next to the scale. It's made the mixing very easy.
Re: willg's PH18
Posted: Sun Jun 09, 2013 10:51 pm
by willg
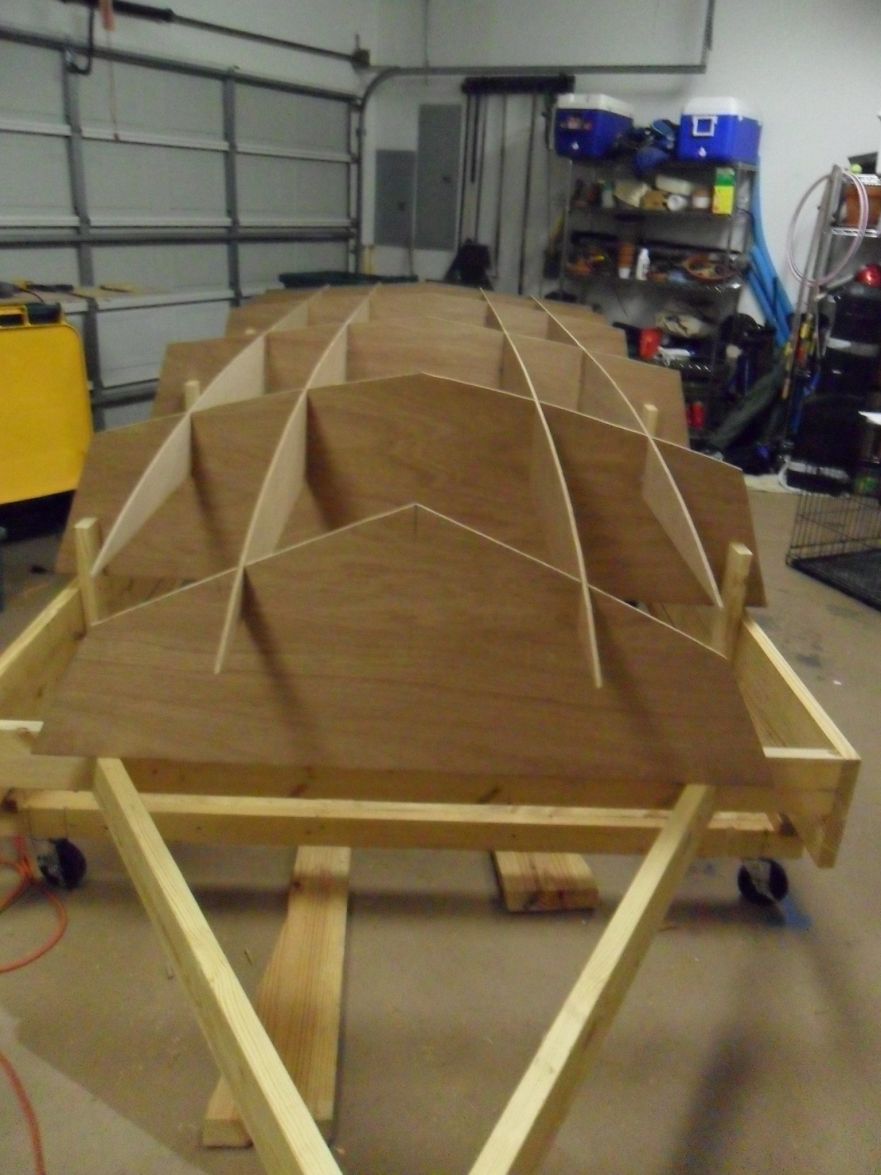
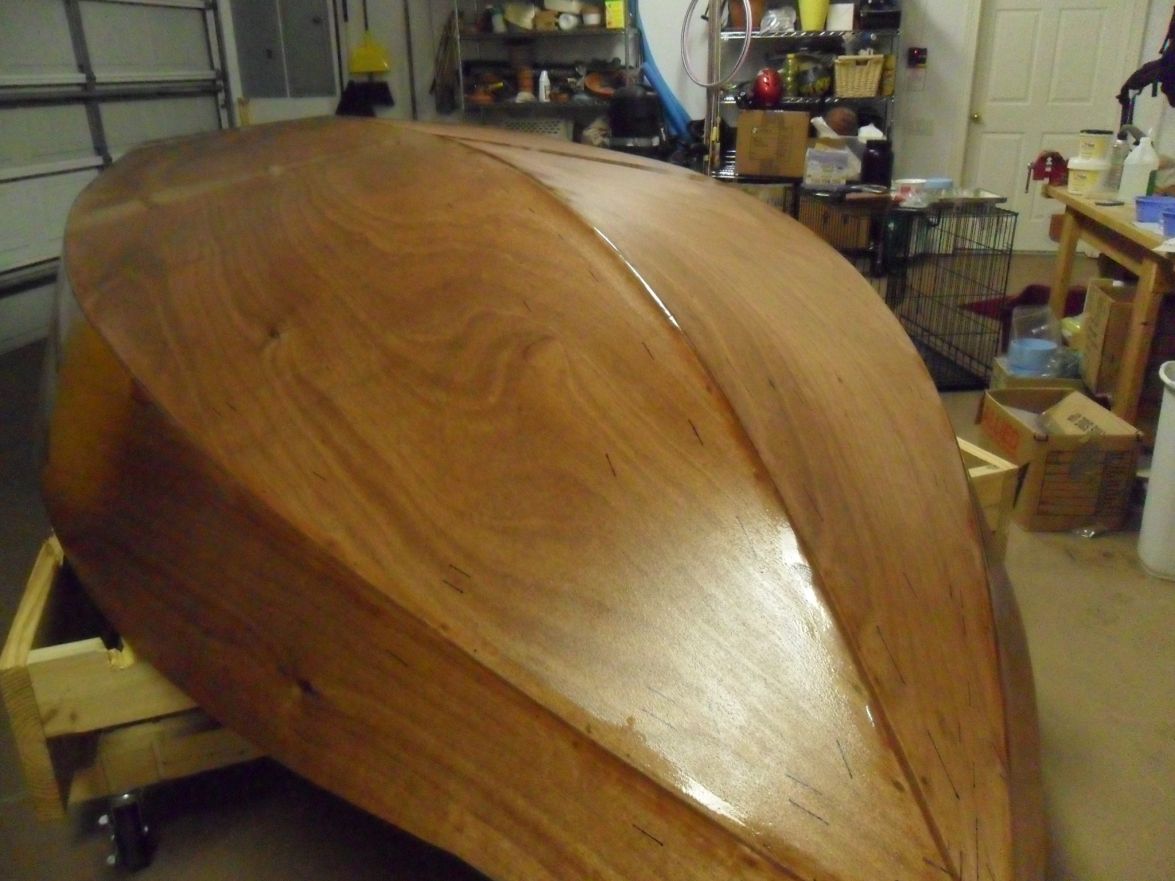
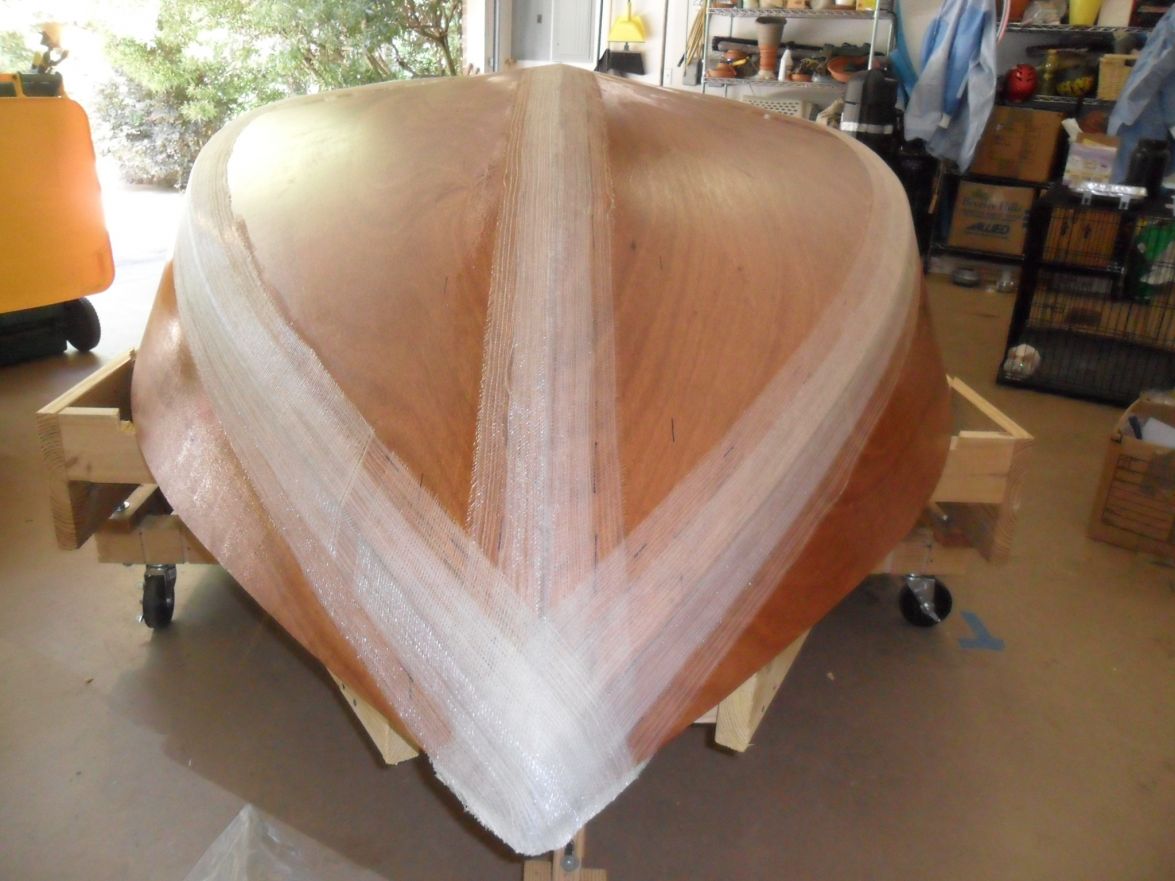
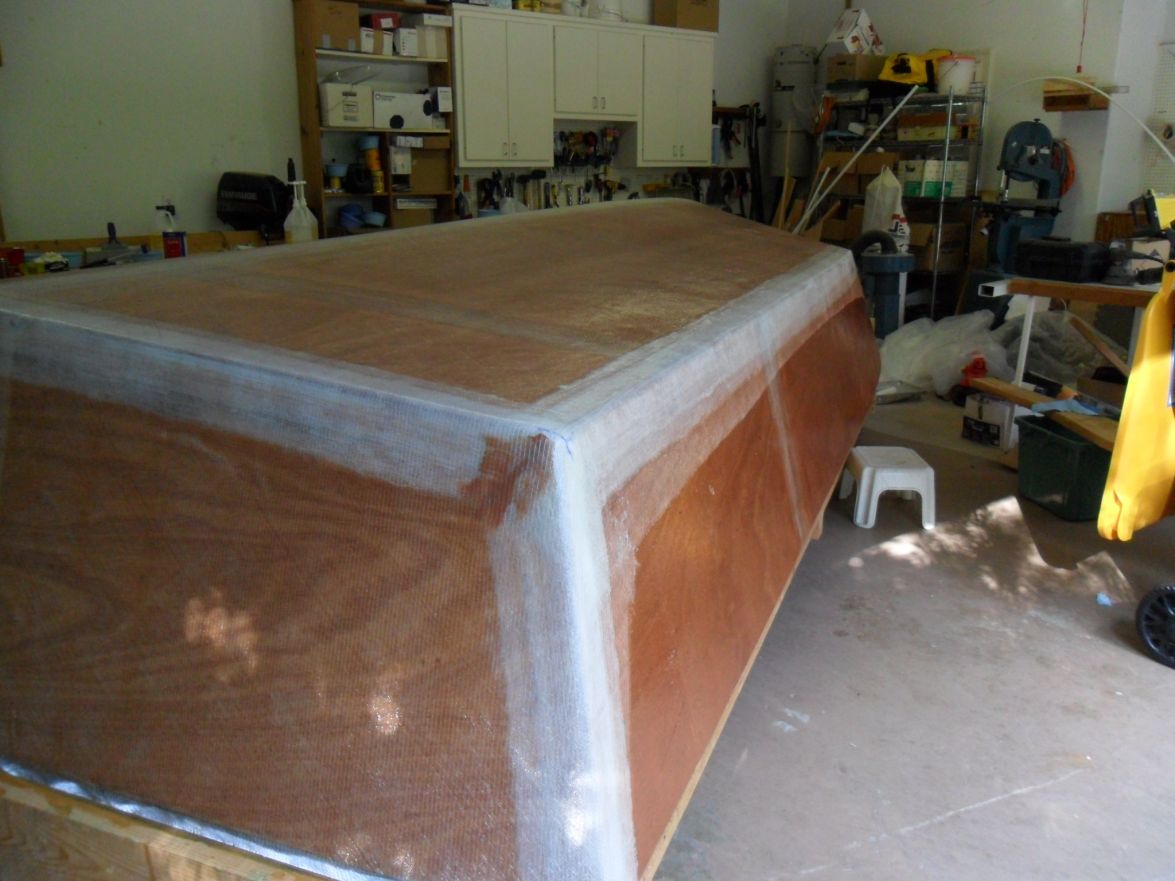
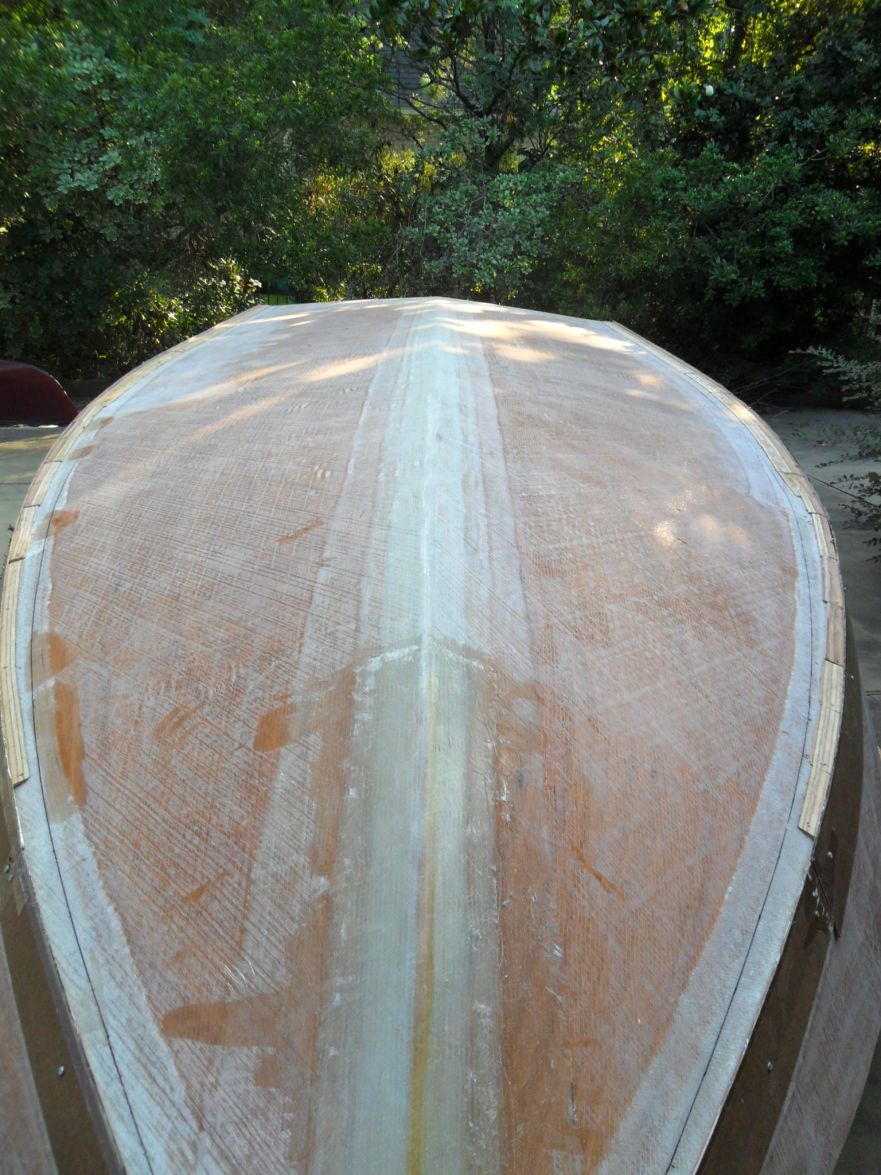
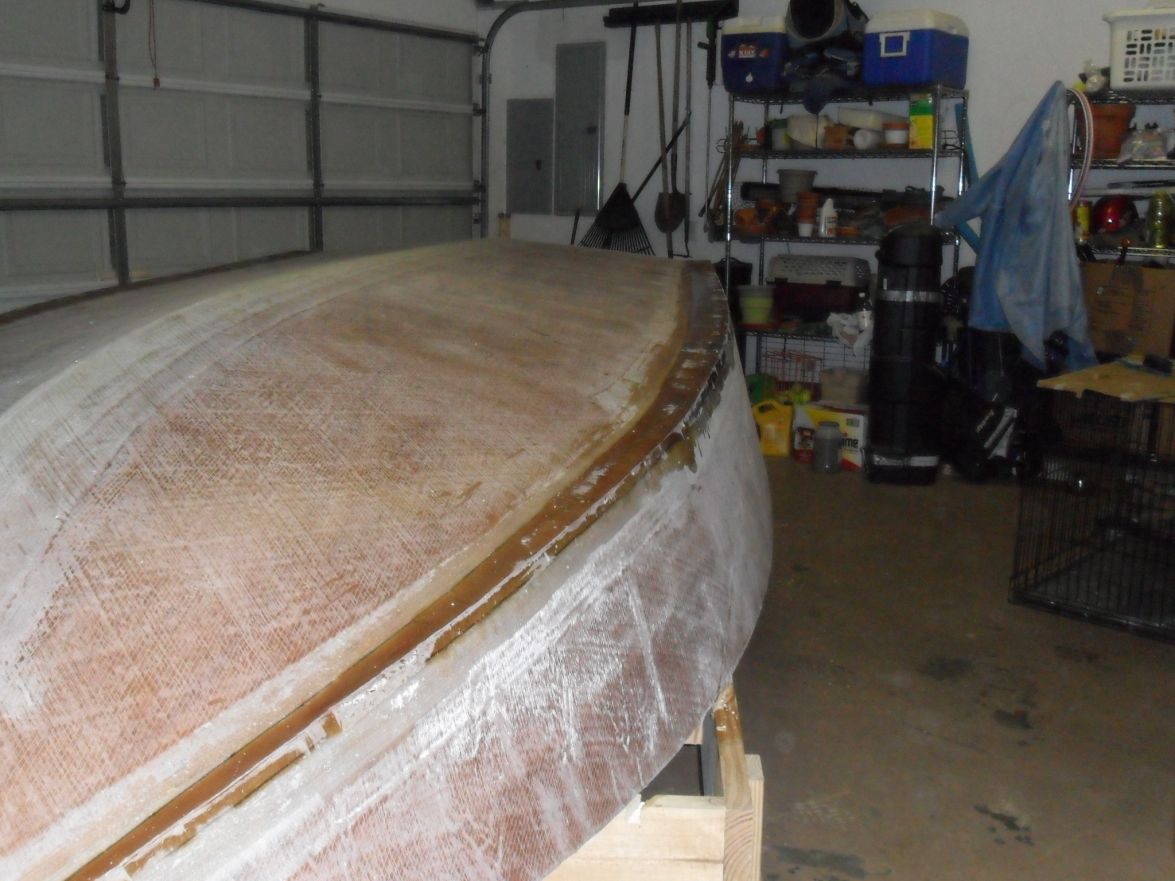
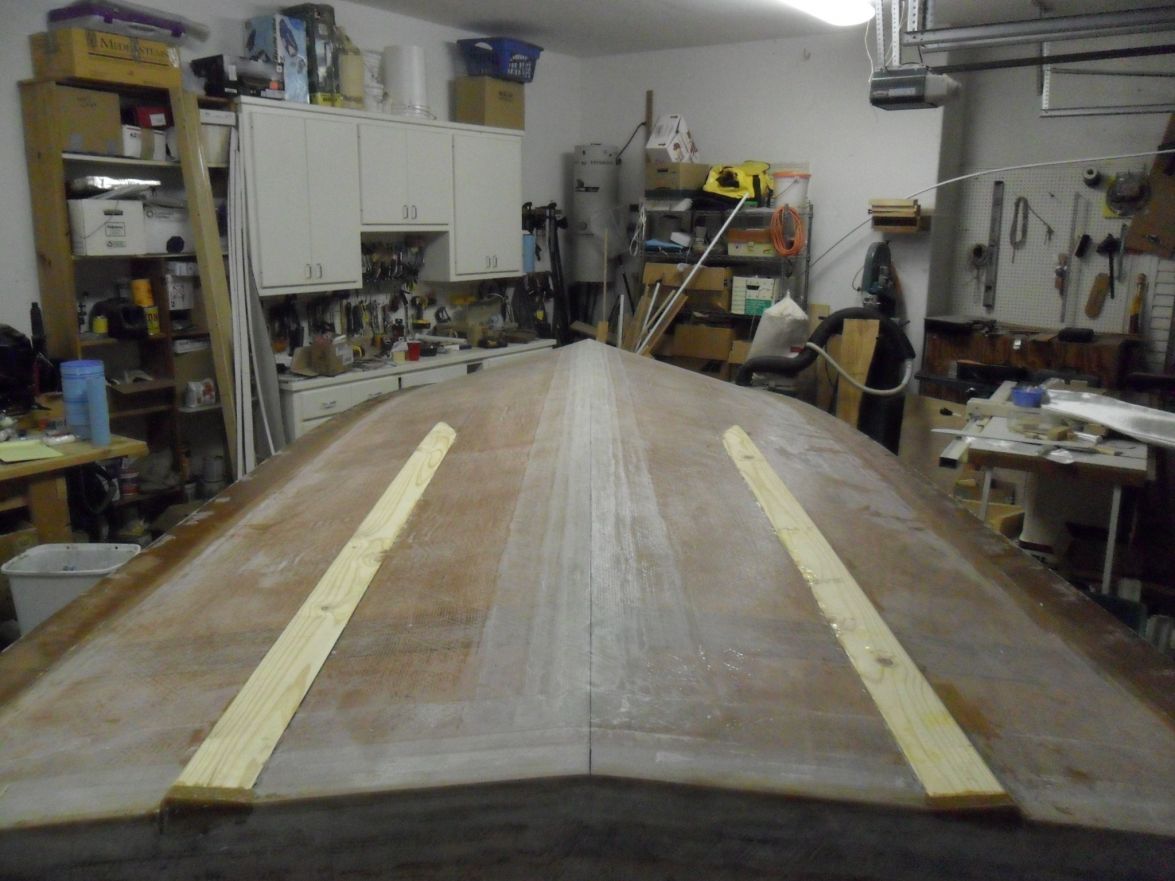
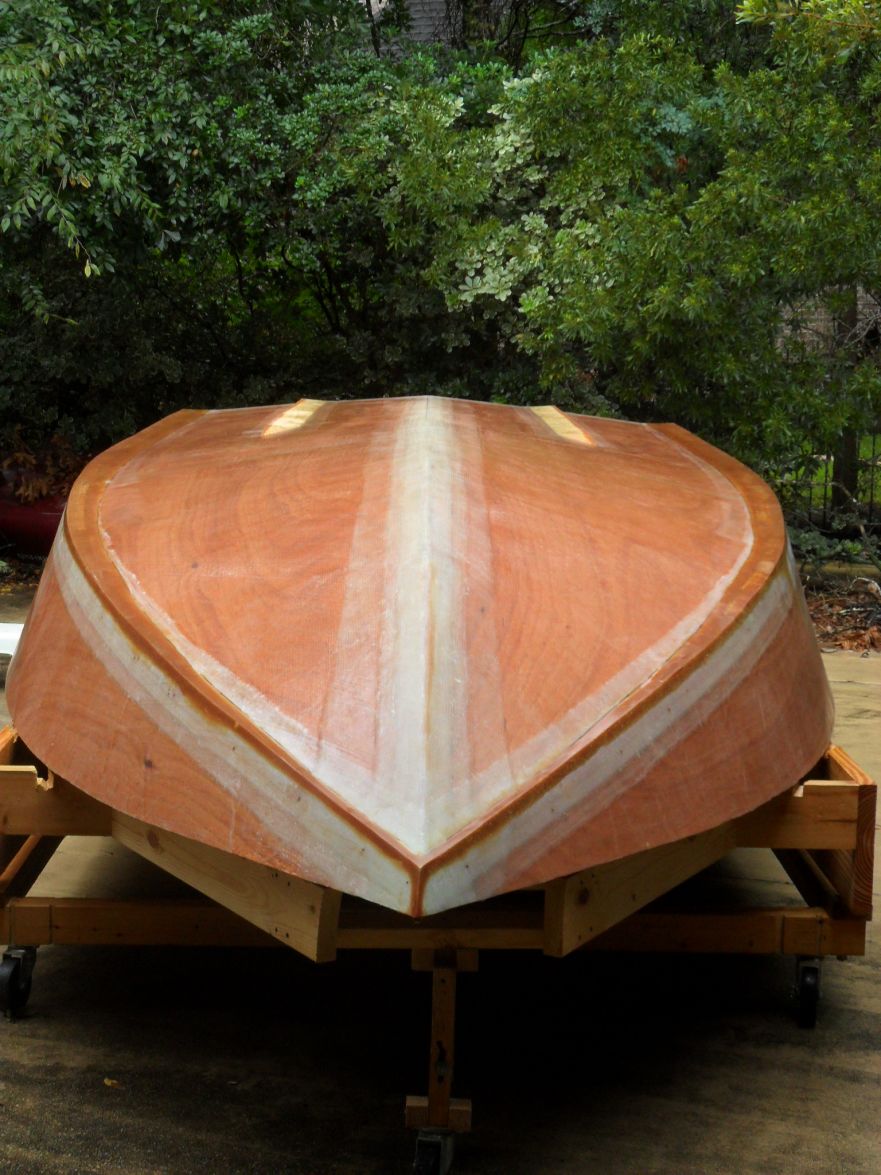
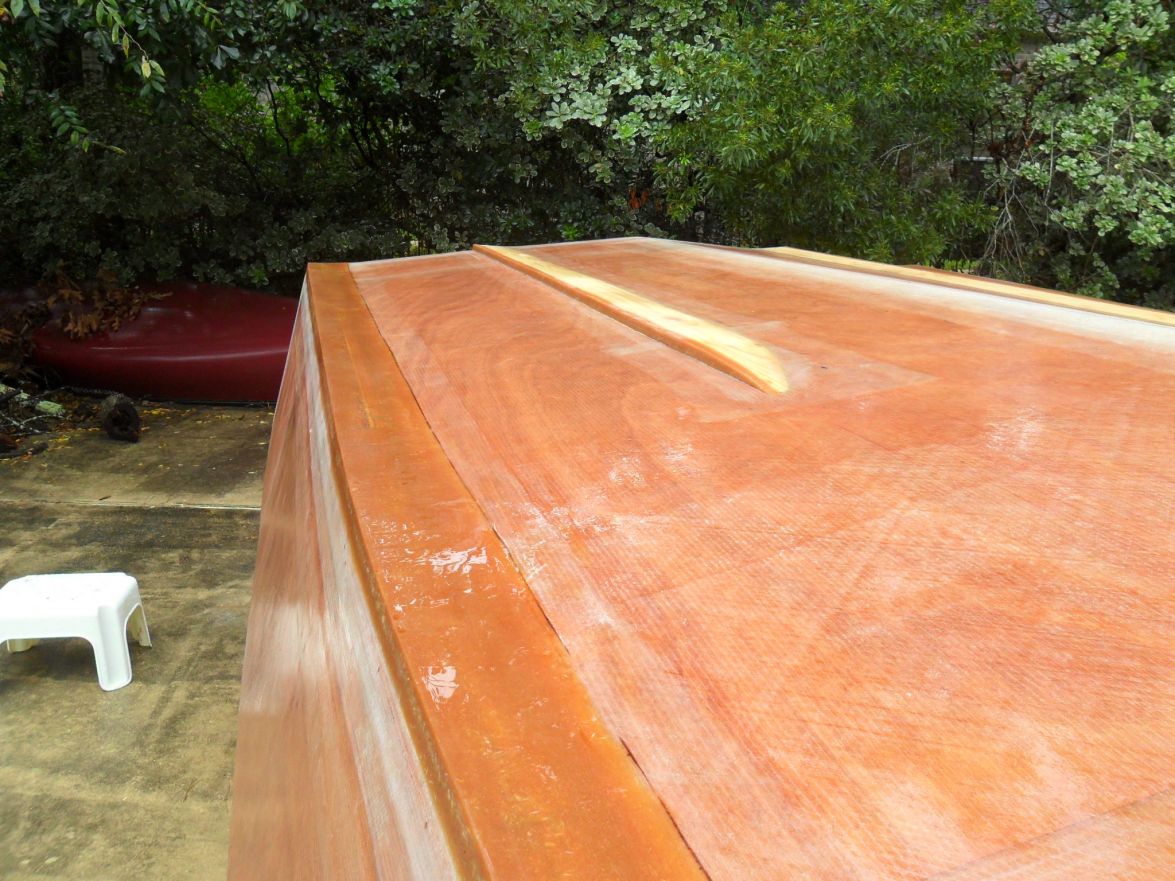
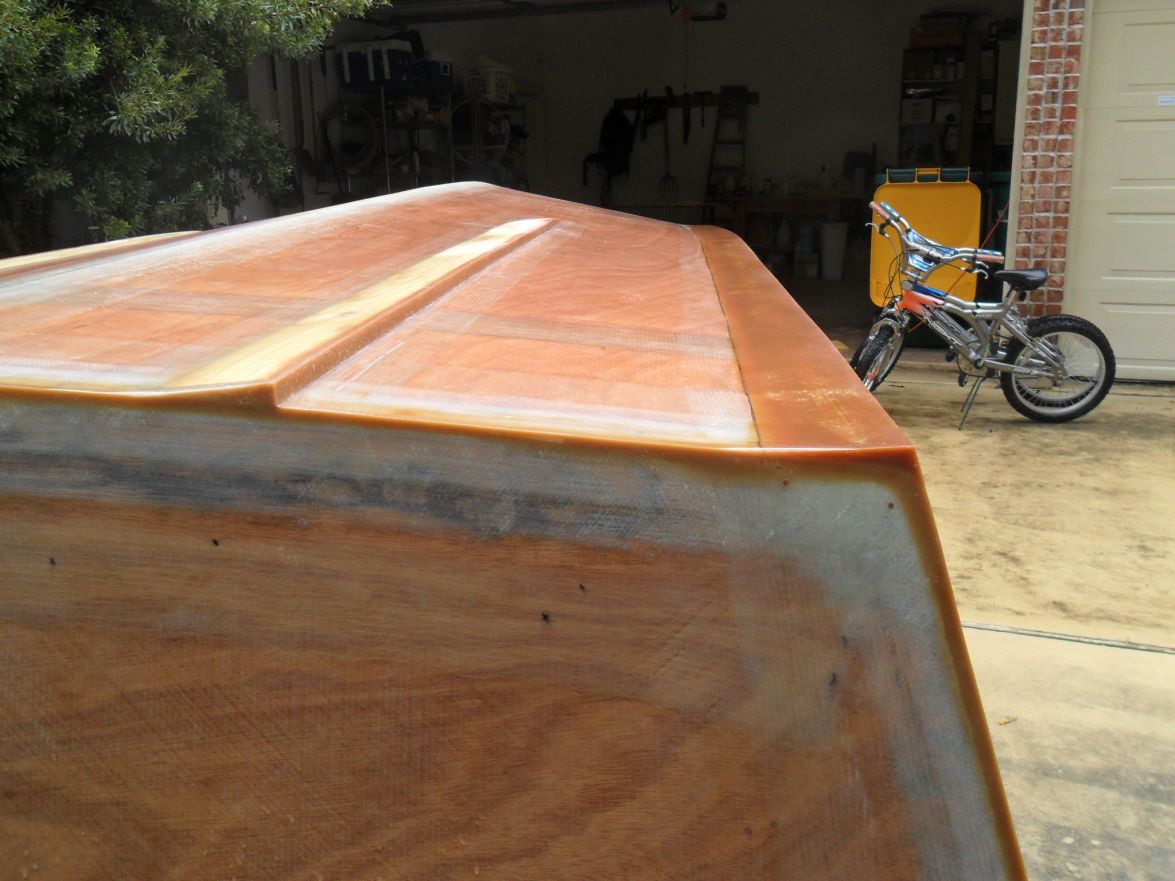
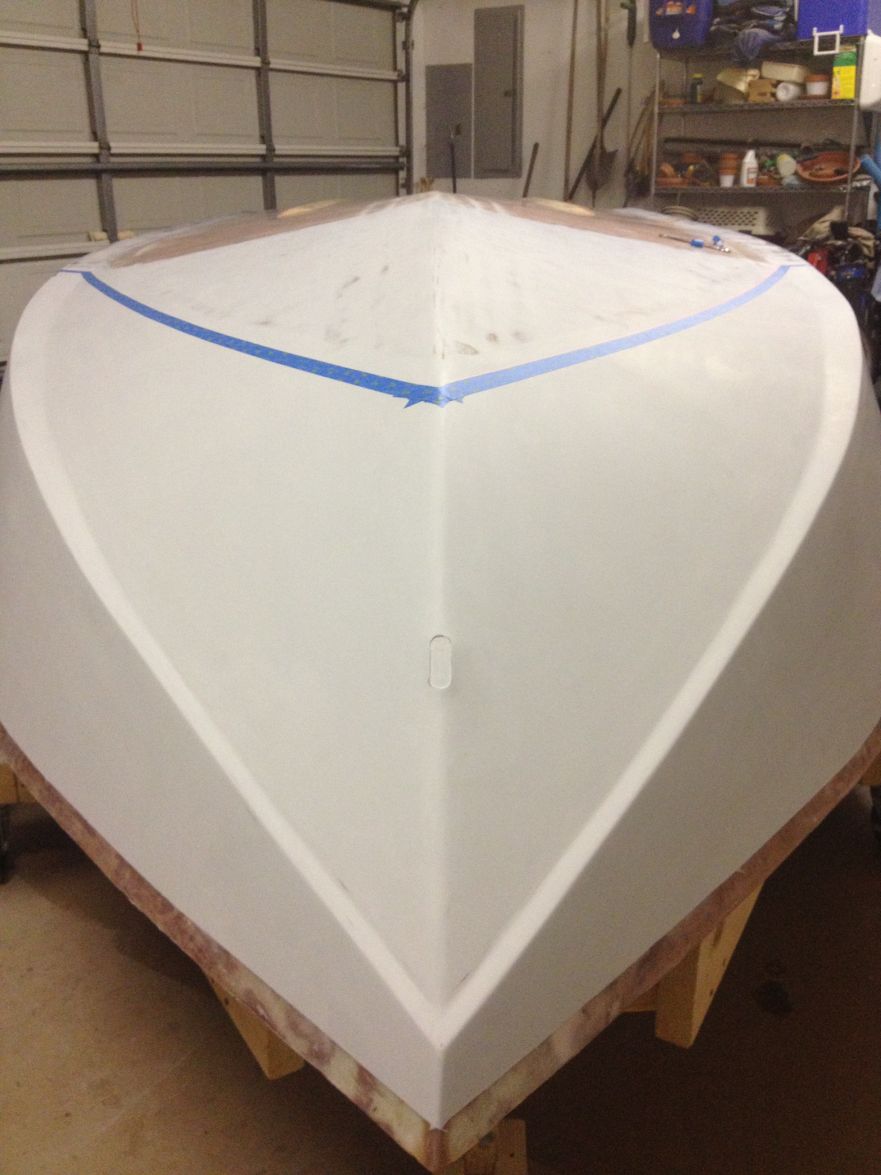
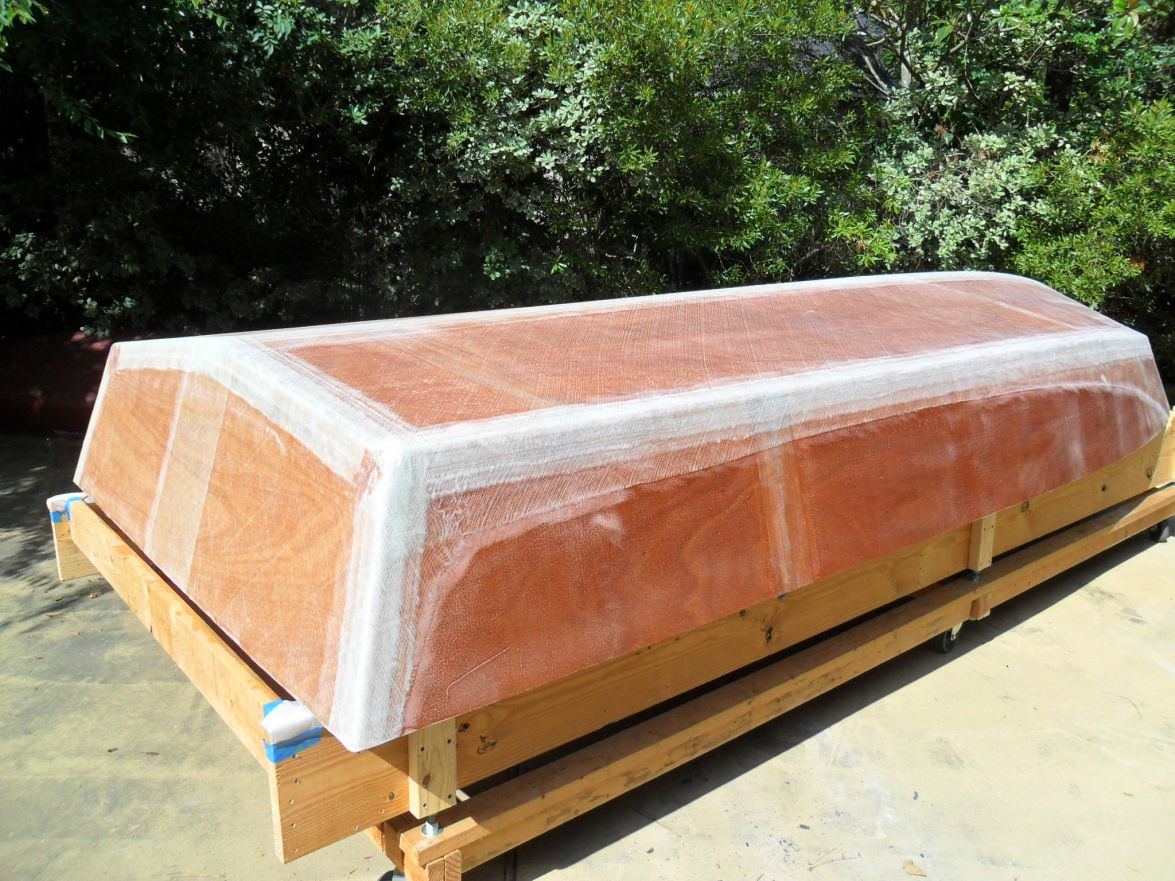
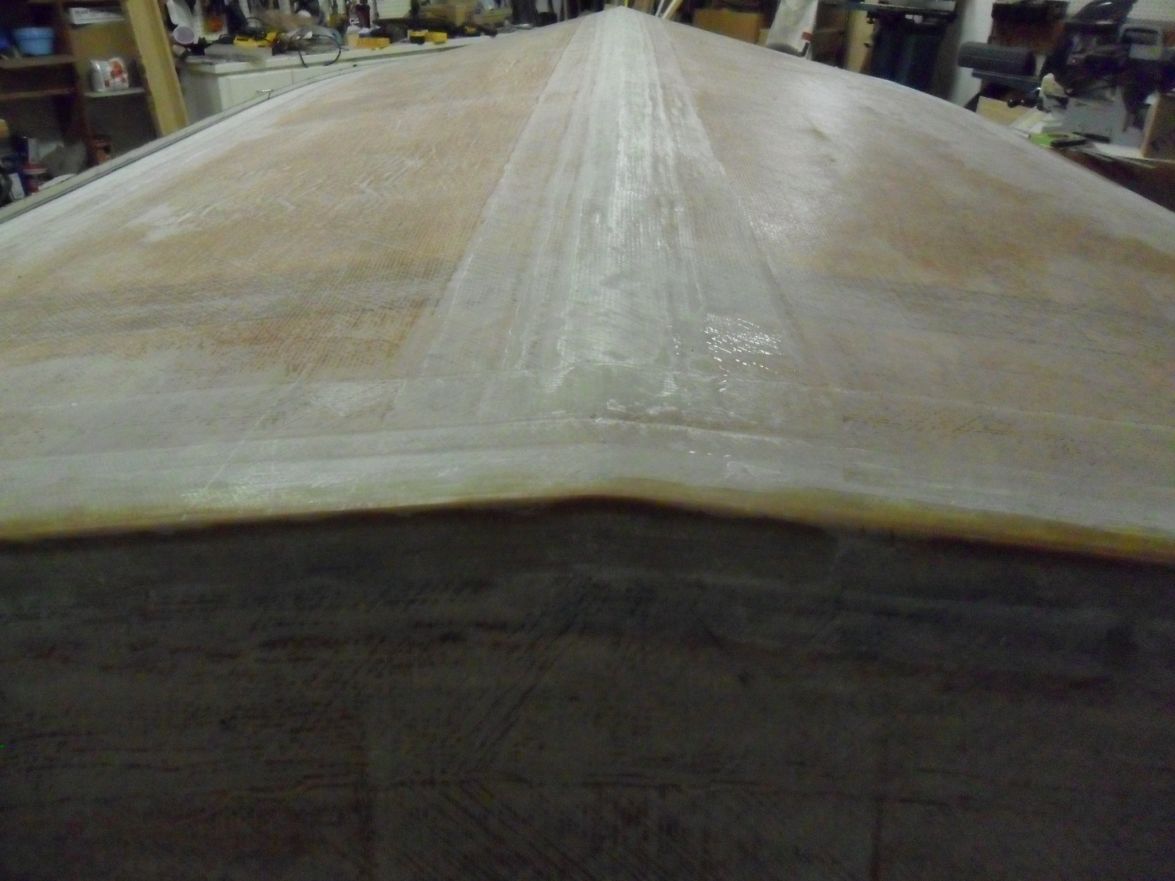
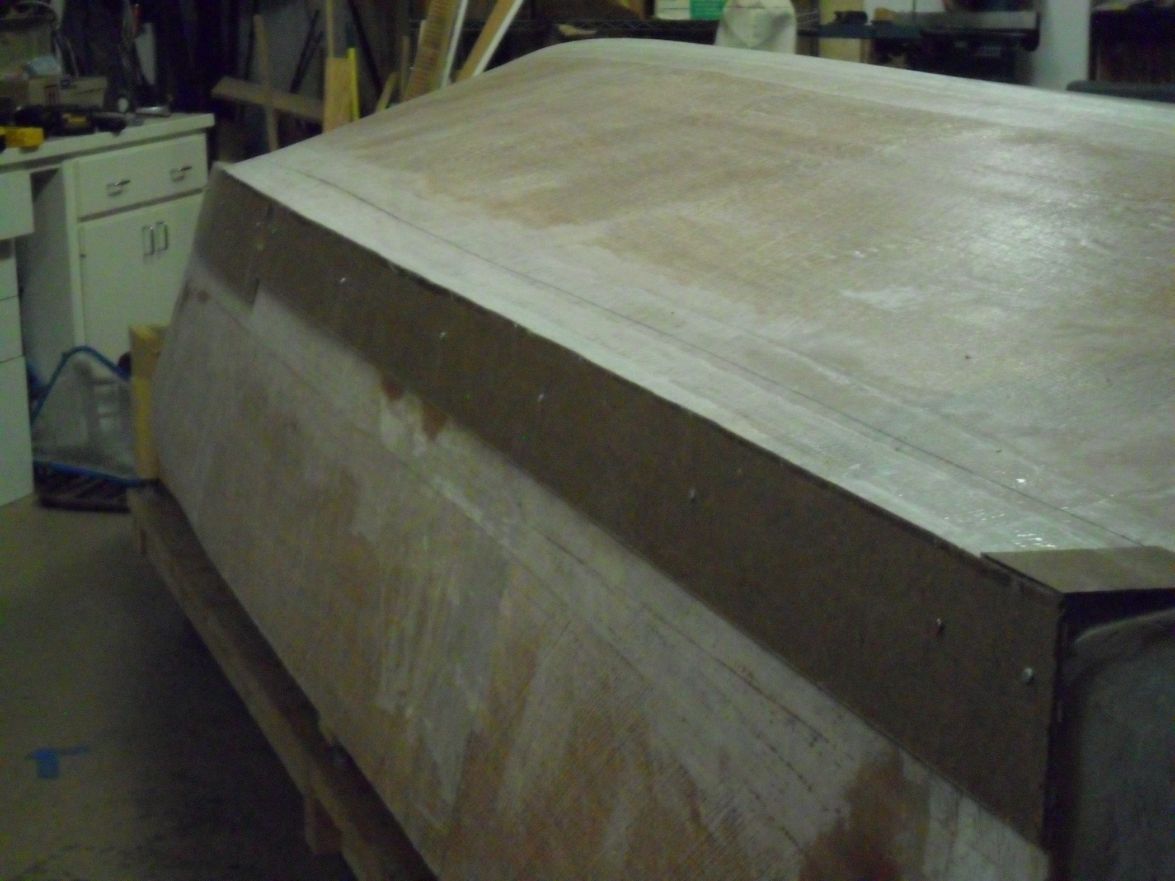
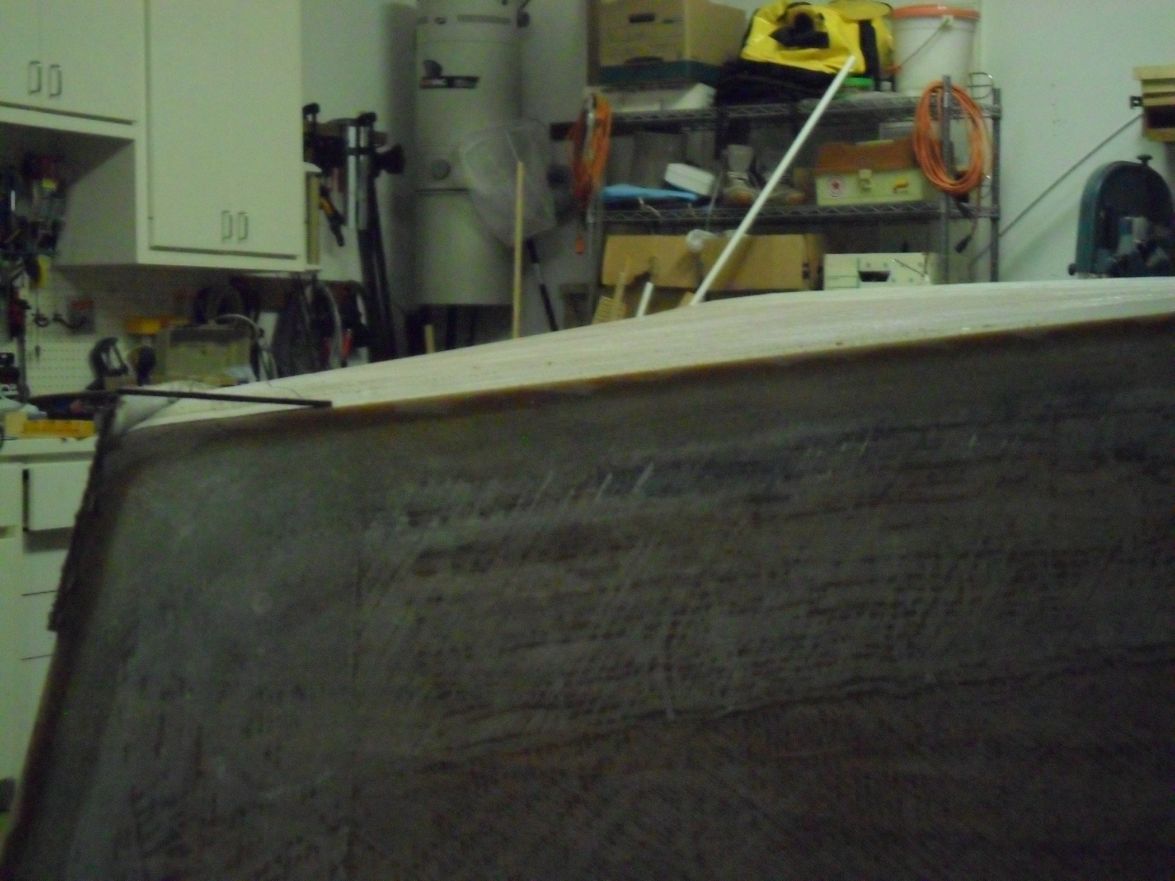
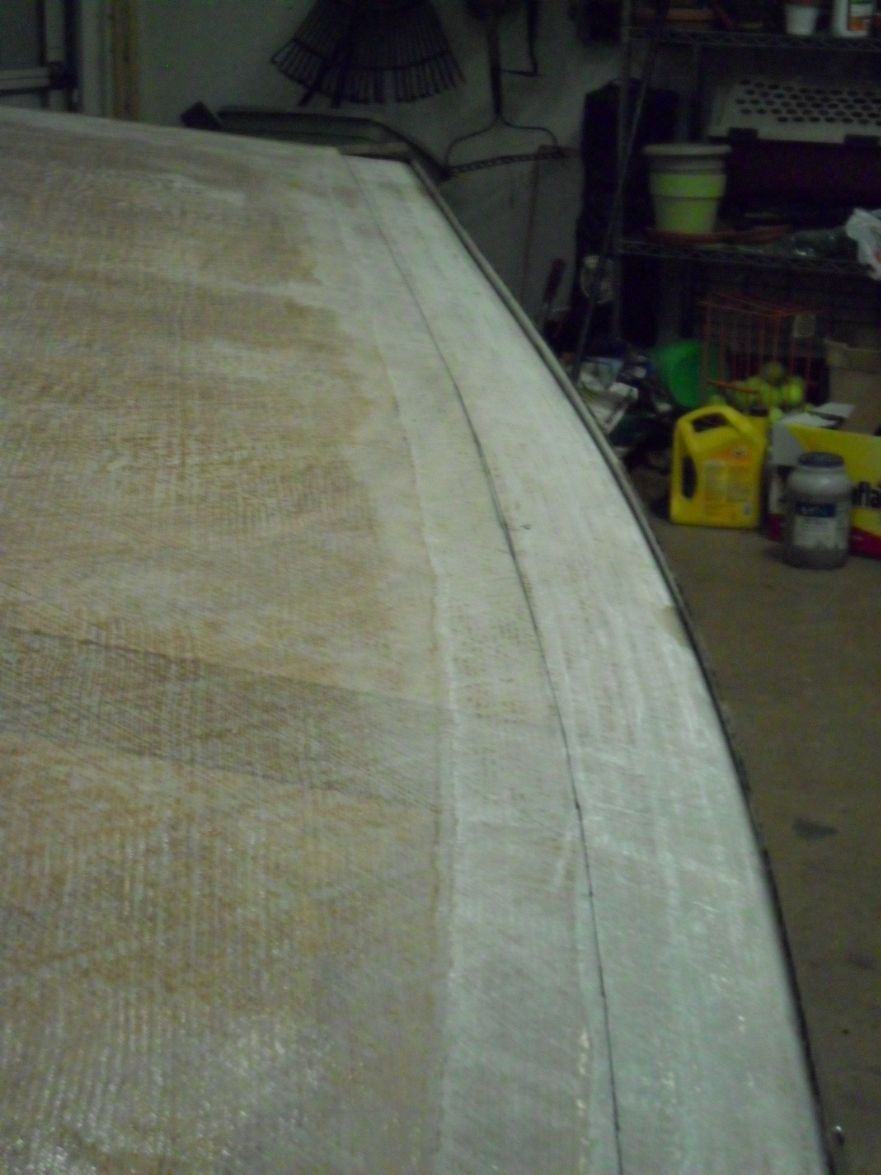
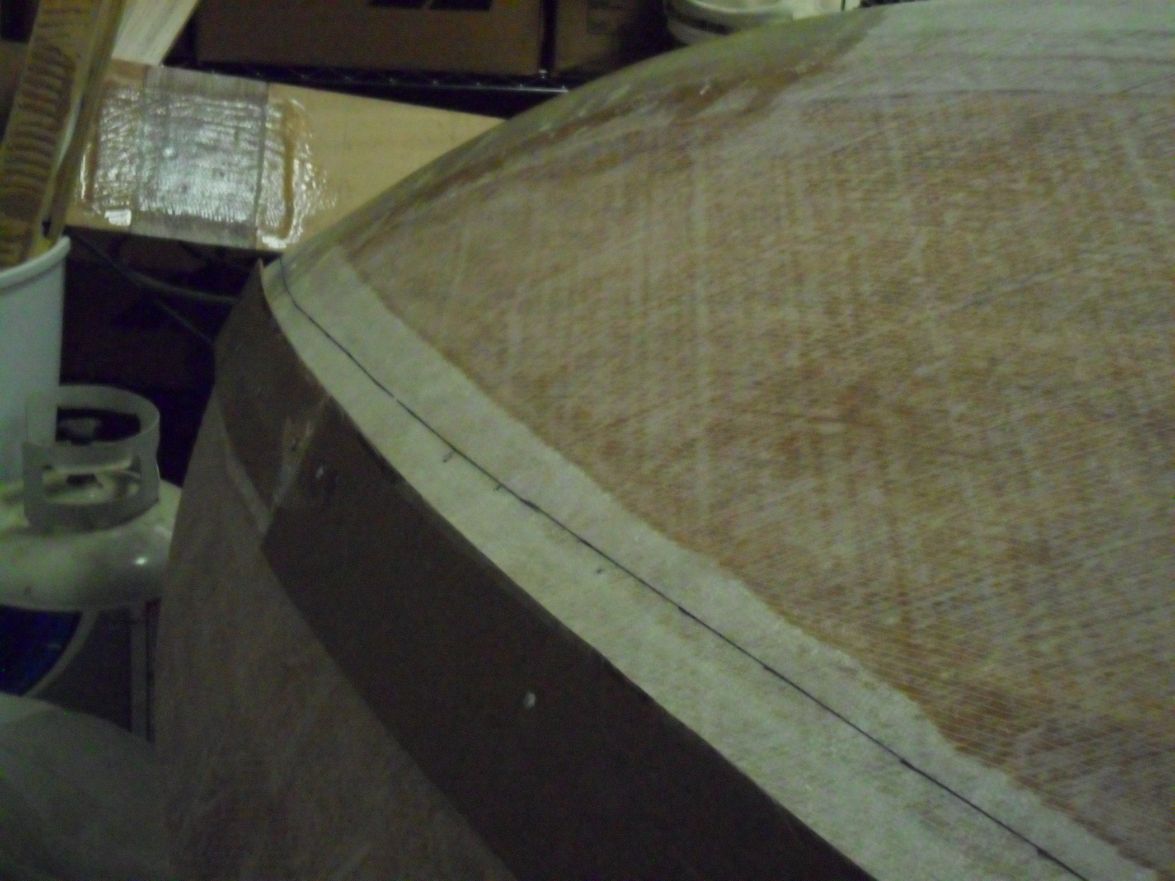
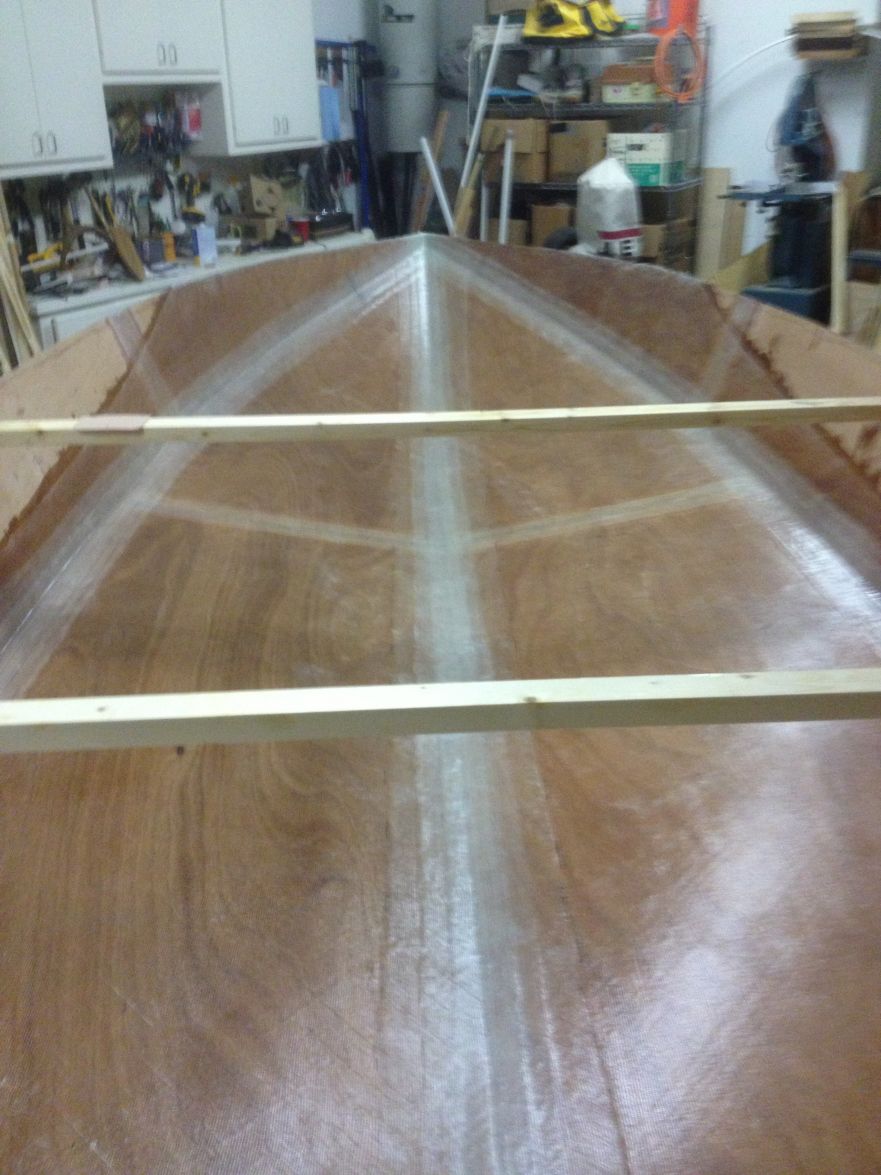
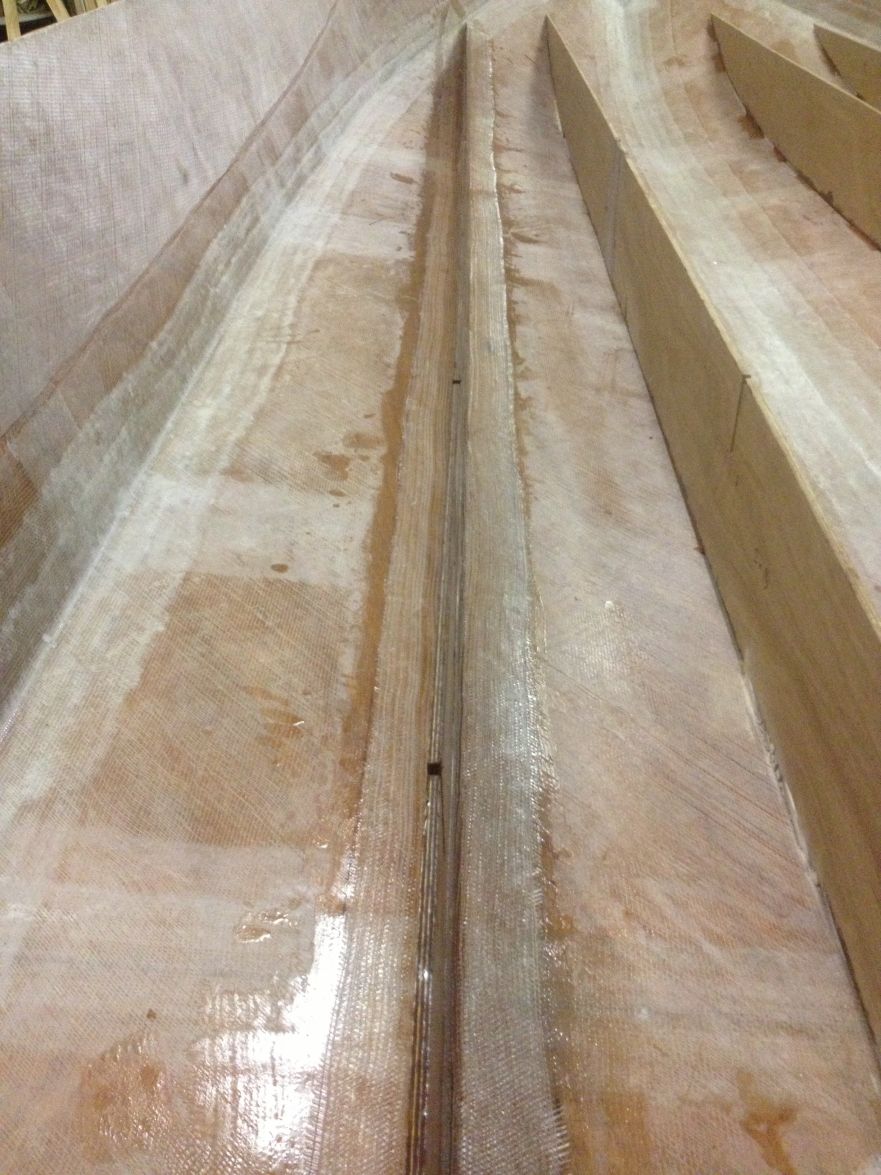
I have sanded down my chine/keel seams to what I think will be a good angle for glassing. Thanks, Cracker Larry, for your help. I now have the hull marked out for glassing. I think the lamination schedule in my plans should be more plainly worded, but what I plan to do is based on what I think others have done. I will run 2 staggered 6" tapes along the keel, run a single 6" tape along each chine, stagger 2 layers of tape at the transom and overlap each side's biaxial cloth 6" to the other side of the keel. If anyone would like to chime in and offer suggestions I would welcome it.
I suppose now's the best time to decide whether to prepare for a shoot-through transducer. As long as it's out of the way of the single strake I plan to install on each side, does it matter in which stringer box I place the transducer? That is, between the keel and inside stringer, between the two stringers or between the outside stringer and the chine? I plan on making a reverse chine, if that impacts anyone's advice.
Will
Re: willg's PH18
Posted: Wed Jun 12, 2013 11:14 am
by Uncle D
Looks good Will. When you do the 50" cloth, it won't go all the way up the sides. You might want to have cloth cut and ready if you plan on covering it completely and wet on wet. Or not.
Casey and I have reverse chines on ours. he built his by laminating ply. I built mine by dam and fill. Used about a gal of epoxy to do it. Don
Re: willg's PH18
Posted: Thu Jun 13, 2013 8:28 am
by willg
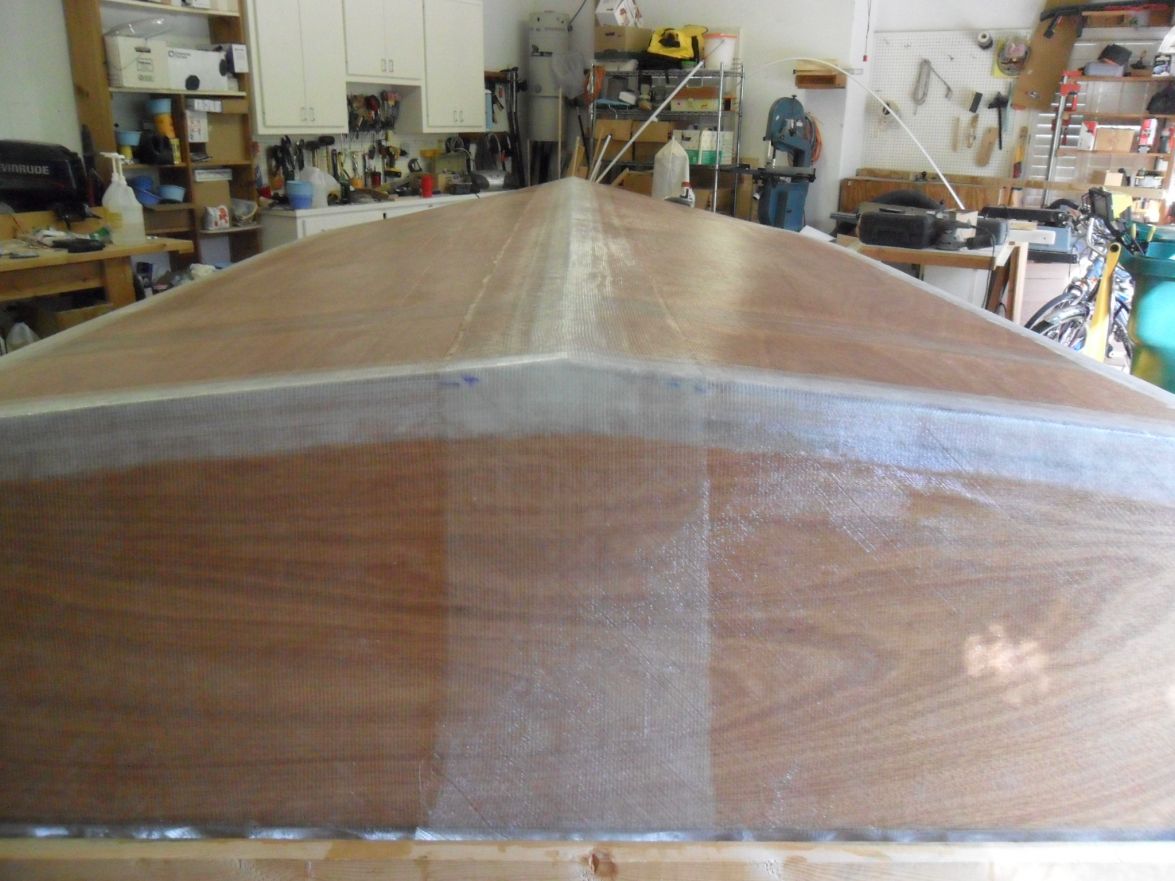
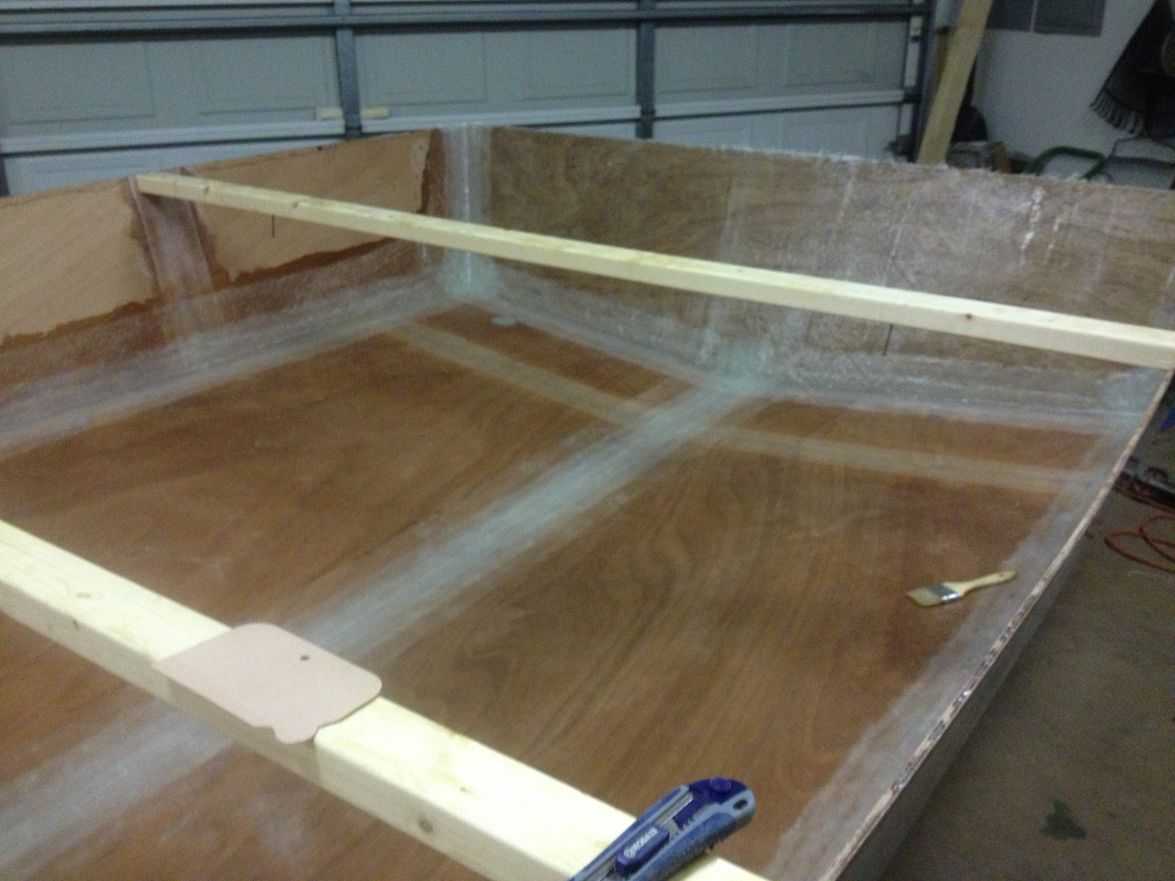
Thanks, Don. I'm having fun with the build. I have things lined up for glassing the hull this weekend. I do plan to glass the sides.
Yep, I'm going to order 1.5 gallons epoxy from bateau for the reverse chines and strakes. I plan to dam and fill, but also imbed some wood cut to fit to take up some of the volume.
I'd love to swing down your way some time this summer and check out your build.
Will
Re: willg's PH18
Posted: Thu Jun 13, 2013 2:25 pm
by Uncle D
No problem Will. Someday I might even finish and we'll go fishing.

Don
Re: willg's PH18
Posted: Sun Jun 16, 2013 10:26 pm
by willg
Re: willg's PH18
Posted: Mon Jun 17, 2013 12:02 am
by AtTheBrink
Looks good Will. That is a nice milestone to pass. You said fairing won't be that bad? Fairing is always a pain.
Re: willg's PH18
Posted: Sun Jun 23, 2013 11:23 pm
by willg
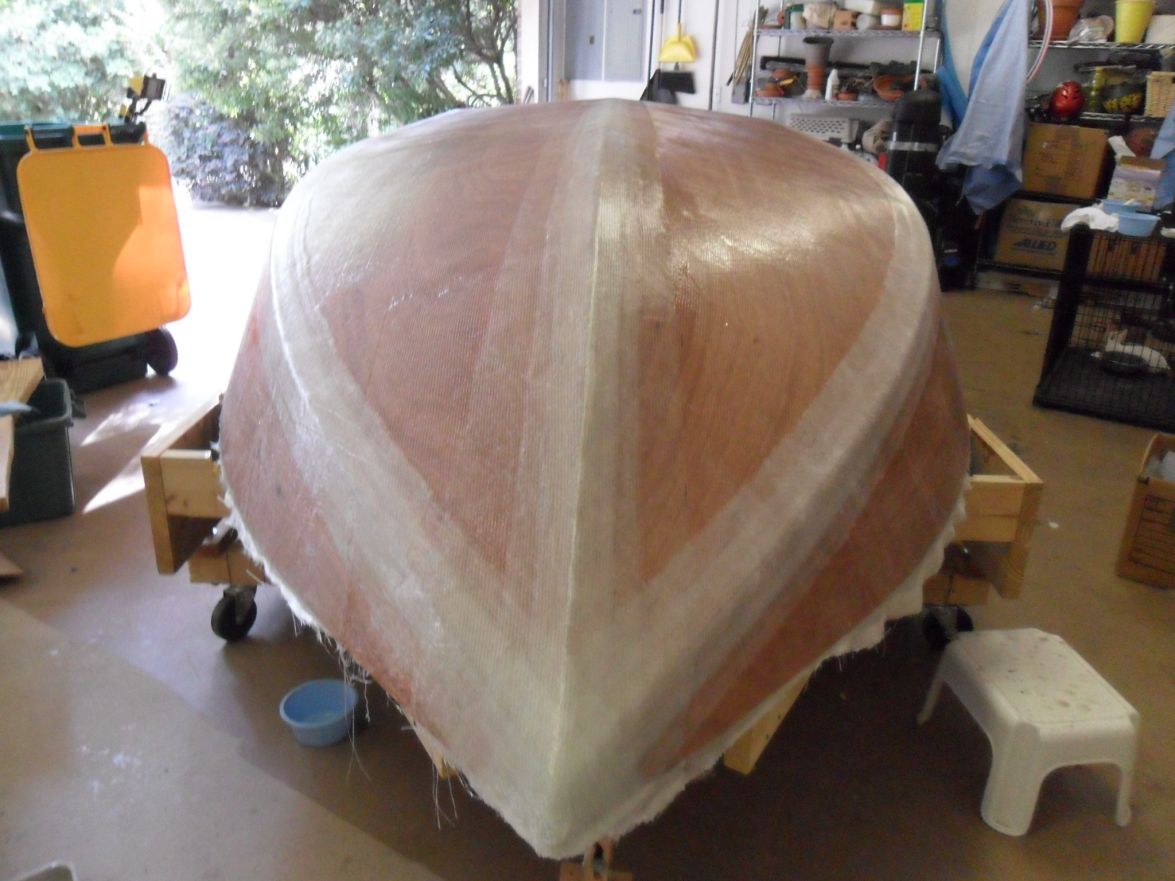
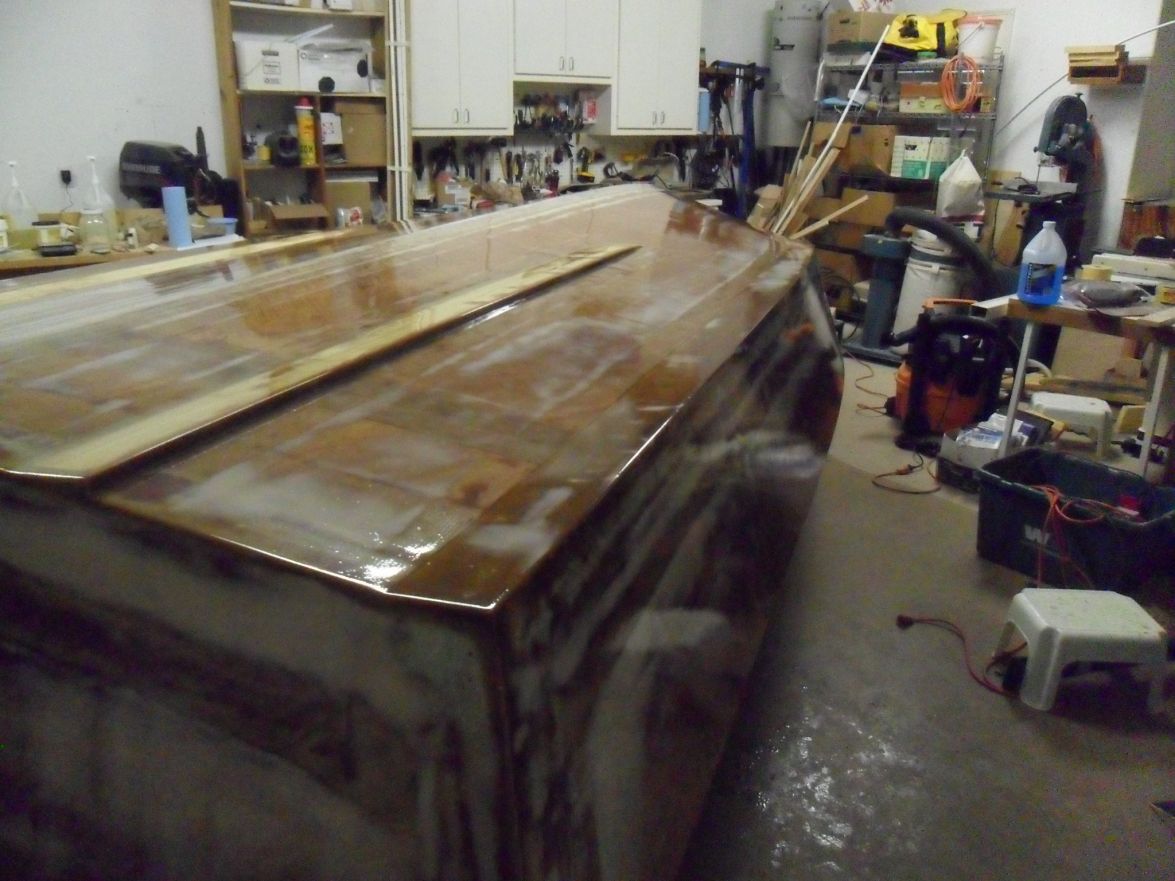
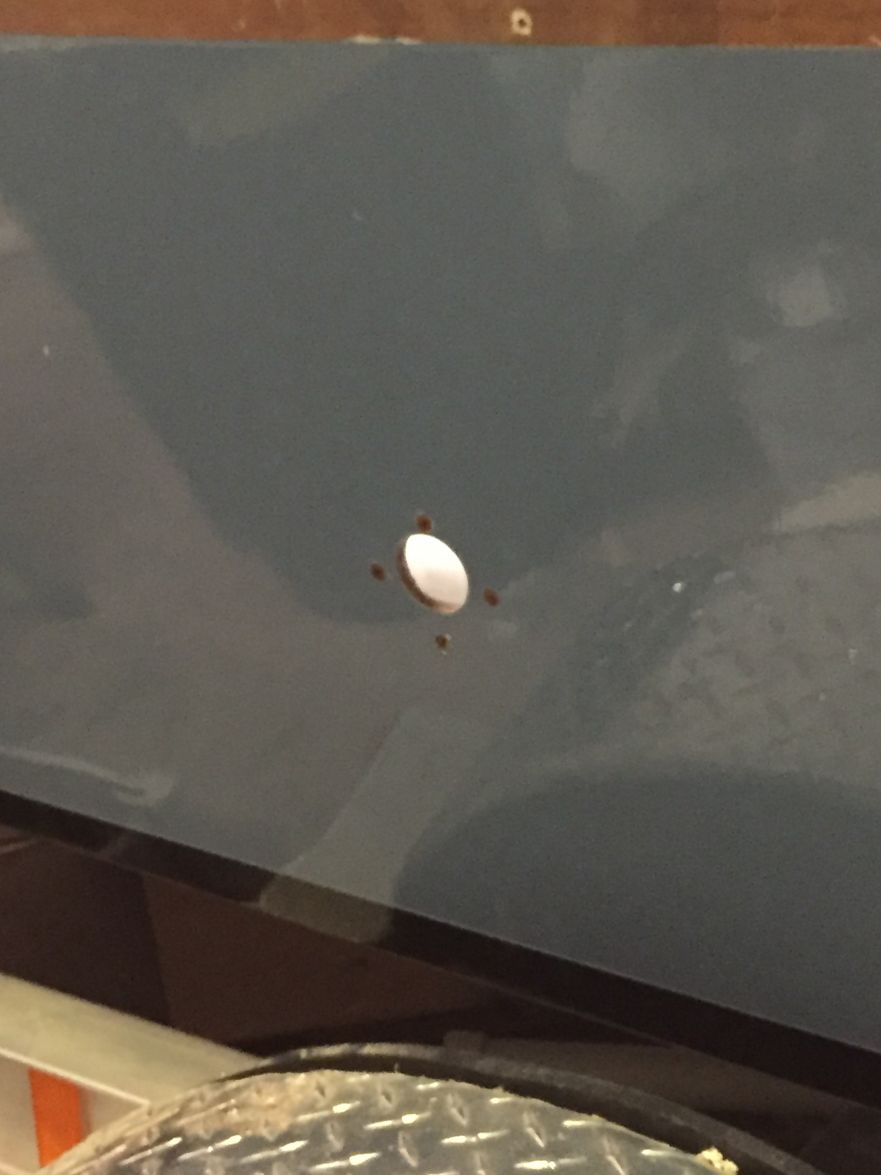
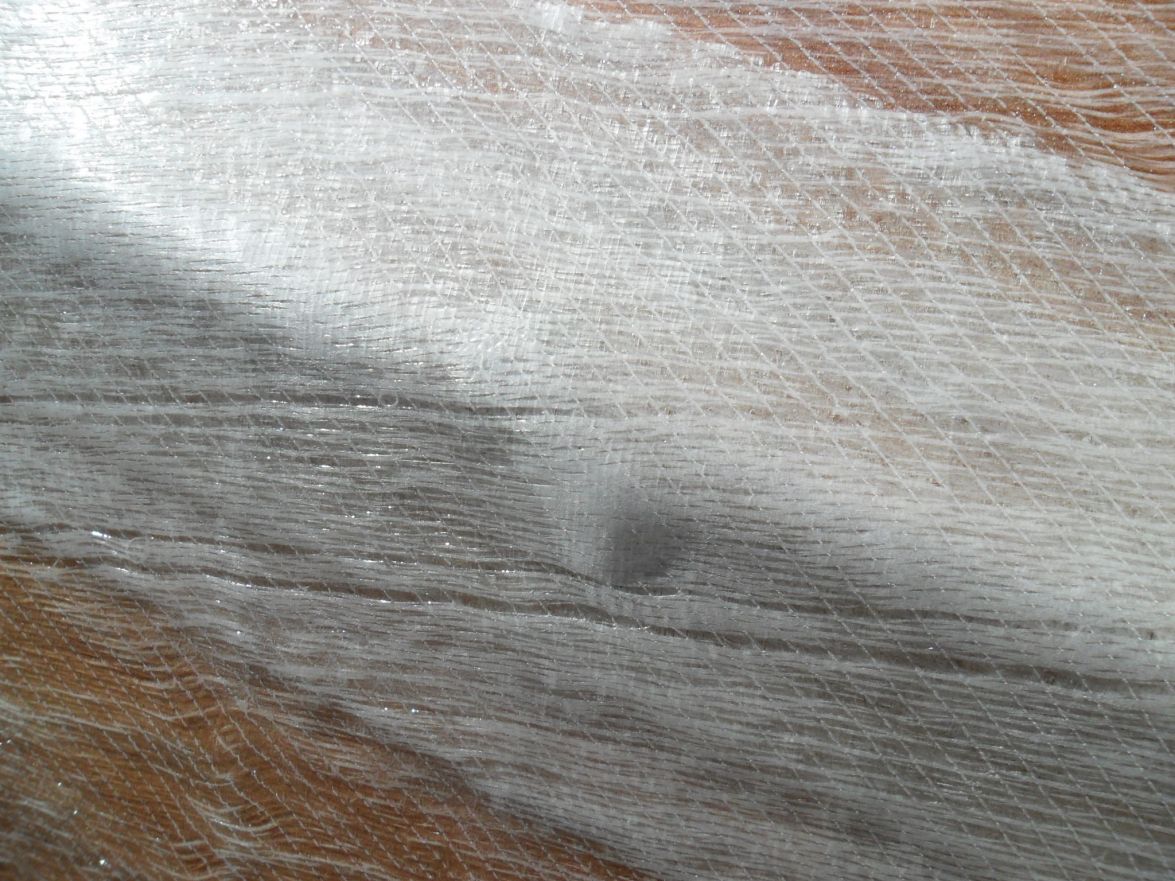
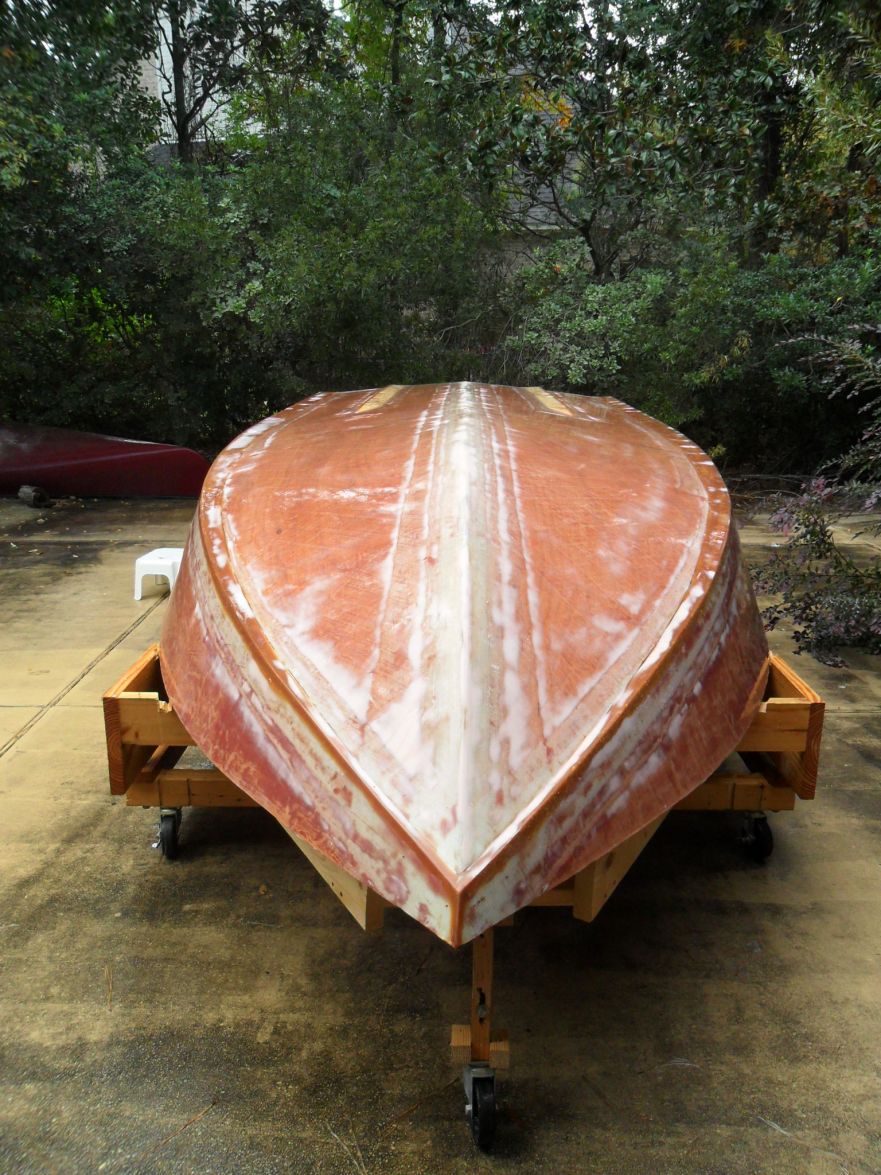
Sanded the whole hull and washed off the dust. It felt good to spray water on the hull! I had known I had a few air pockets to deal with, but the sanding/washing process made those and several others more noticeable. The biggest of them are pictured below. I have filled them with epoxy using a syringe. I went over the hull a few times and tried to fill anything that looked like a pocket. In general the glass is very solid and based on what I read I think I'm good to go after filling the pockets.
I could see how a big, long pocket would be a sign of a weak lamination, but could someone tell me what the concern would be for any pockets I might have missed? Is it lamination strength, future paint failure or something else?
Will
Re: willg's PH18
Posted: Sun Jun 23, 2013 11:26 pm
by willg
Thanks for the compliment, Mike. In a way I'm looking forward to the fairing process. At least that's what I'm saying now ...
Re: willg's PH18
Posted: Mon Jun 24, 2013 12:00 pm
by AtTheBrink
I felt the same way about fairing before I started with the long board!

I am still fairing!
Re: willg's PH18
Posted: Wed Jun 26, 2013 11:53 am
by Uncle D
Very nice work Will. If I remember, I sanded down the small bubbles that stood proud then patched. Looks great!! Don
Re: willg's PH18
Posted: Sat Jun 29, 2013 11:45 pm
by willg
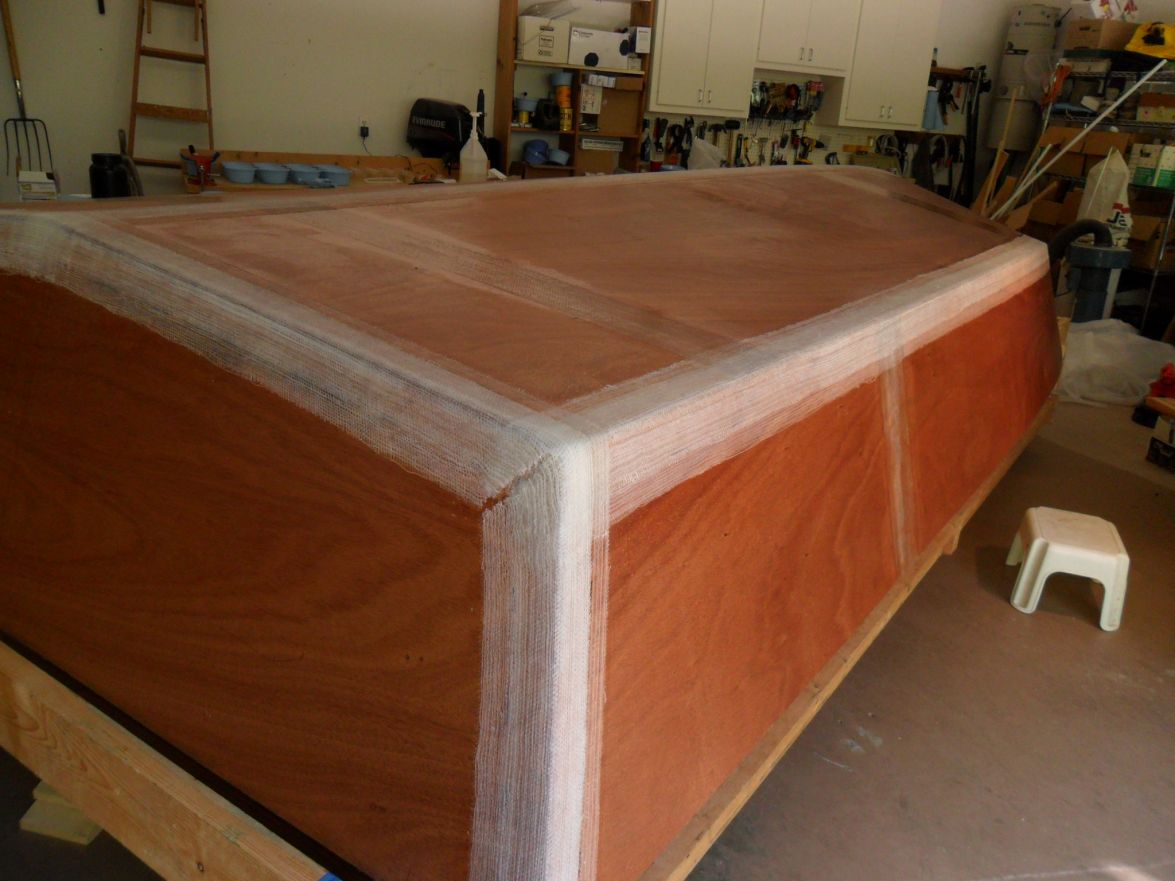
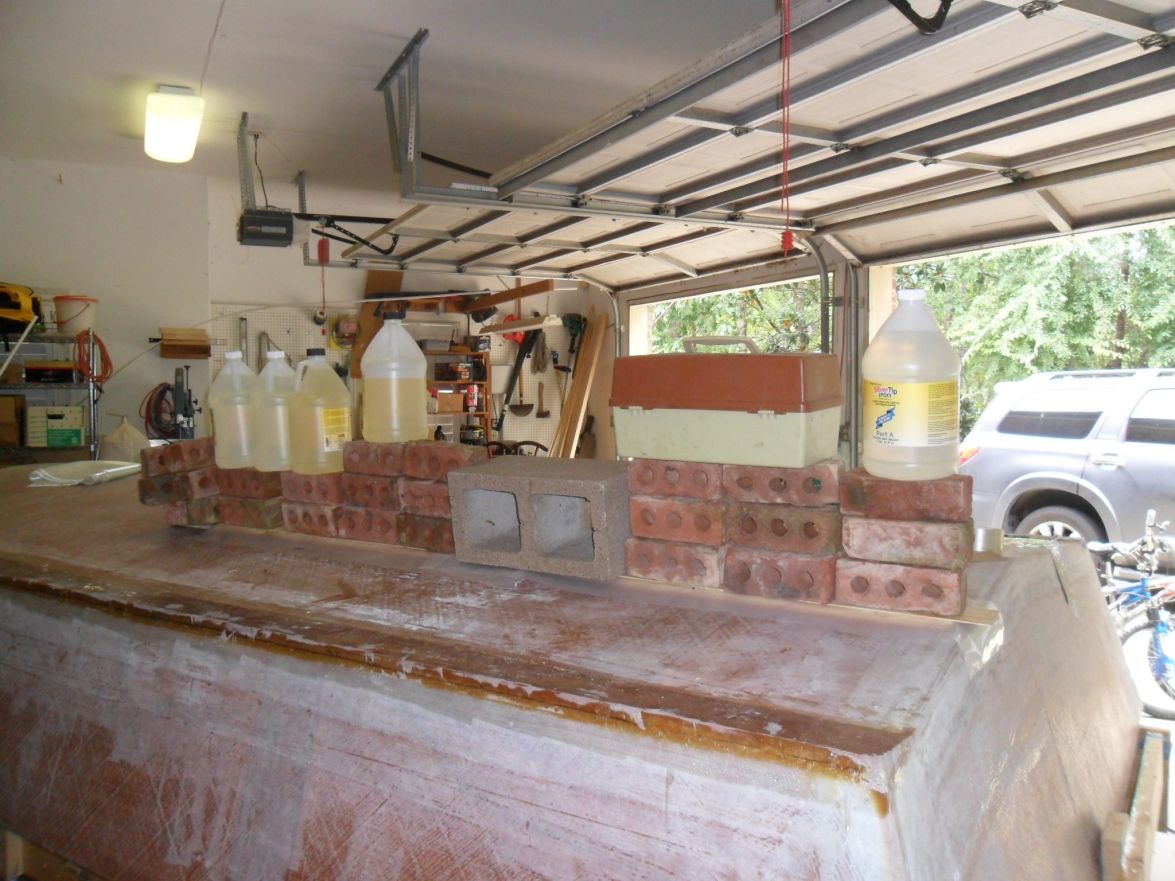
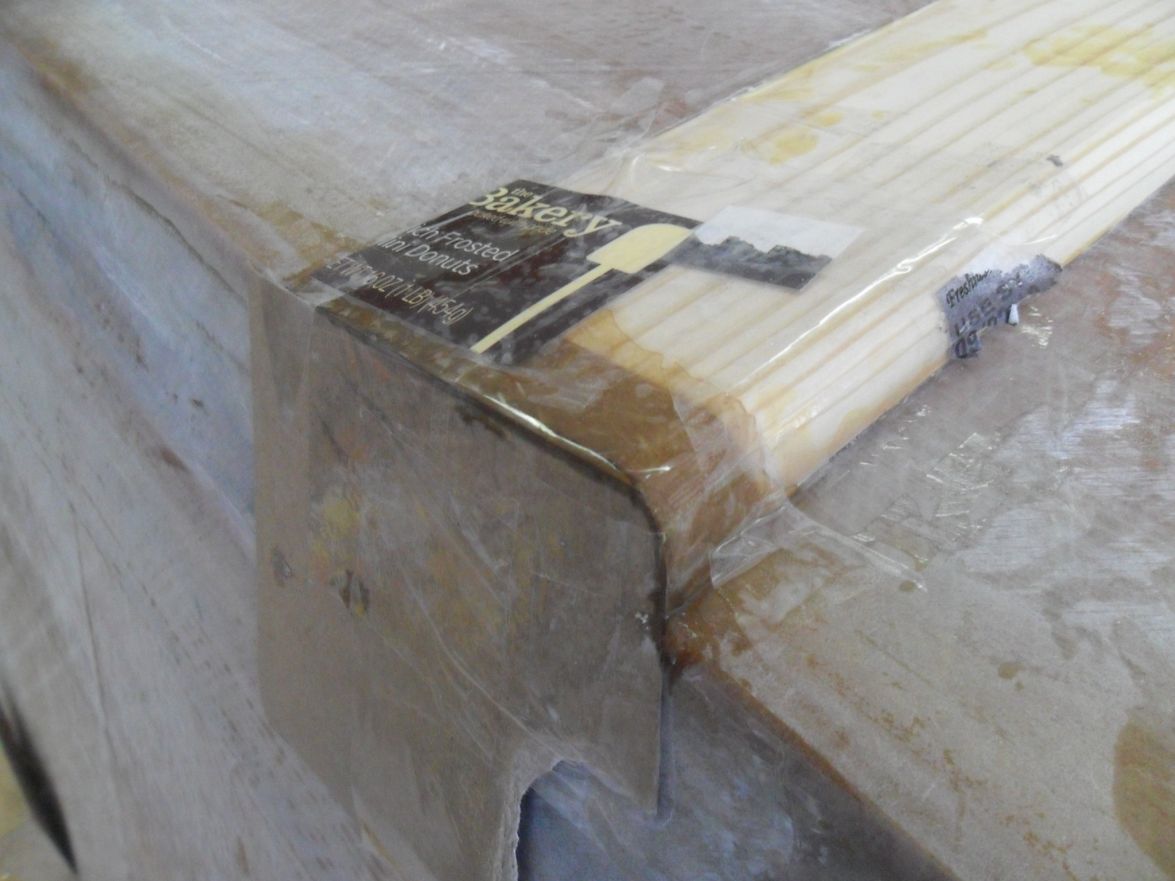
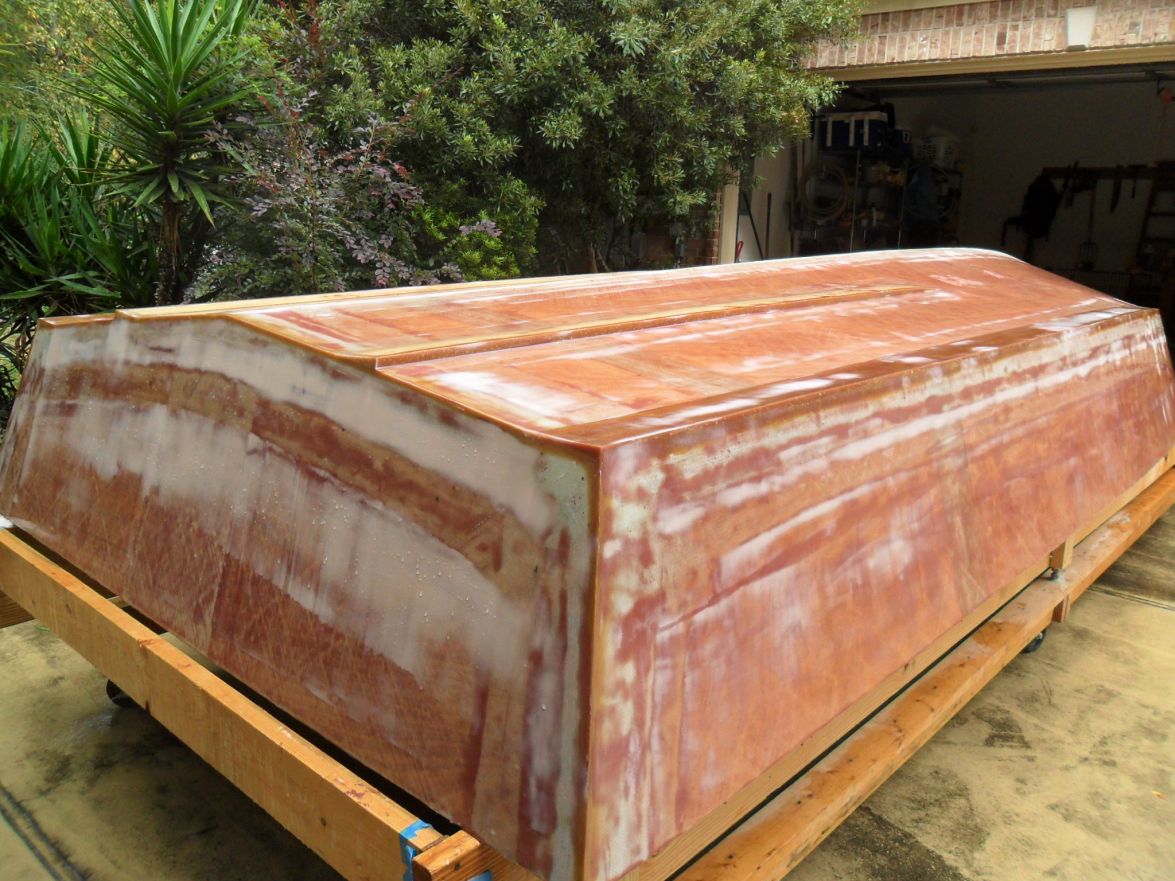
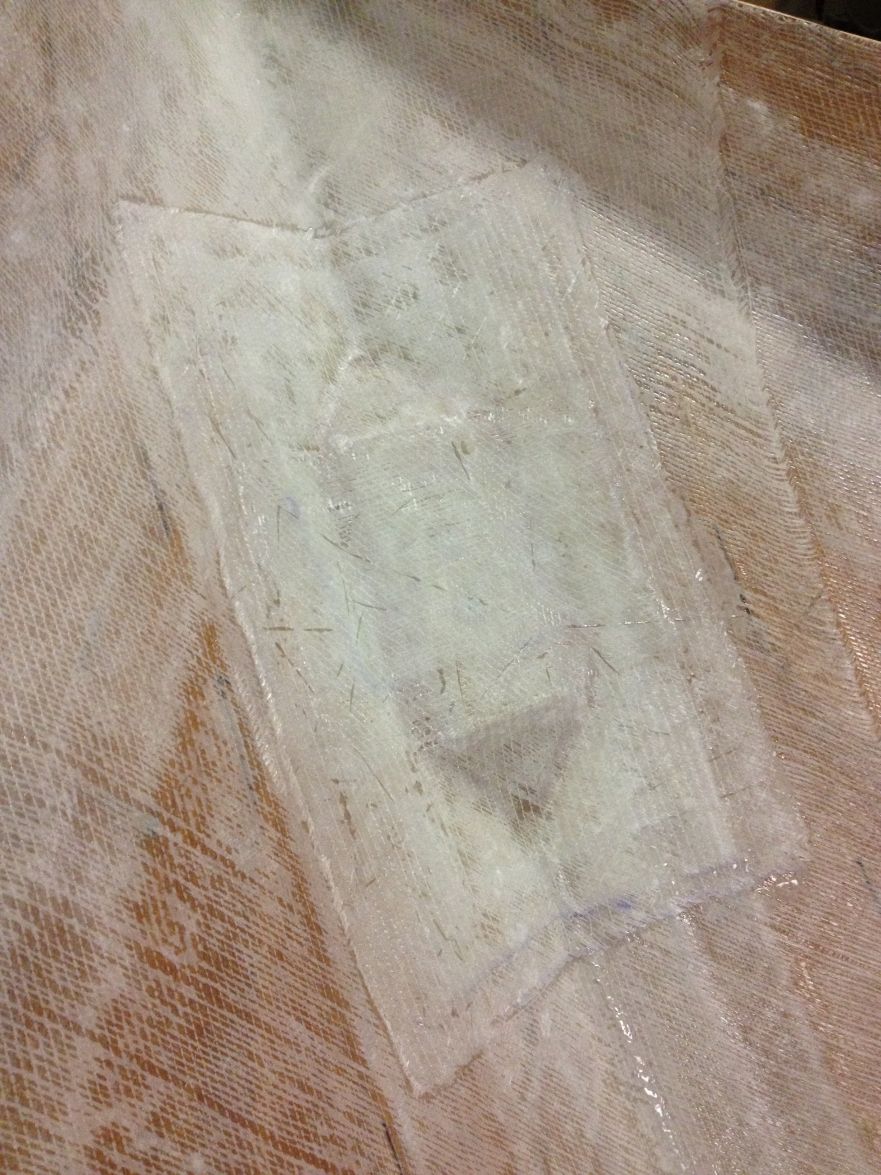
Thanks, Don. I did find a few areas with pockets which I injected but didn't like the outcome. I sanded them down and patched them today. I held each piece down with visqueen as peel ply and like the result. If I were to do the build all over again I would cover each hull seam with lengths of visqueen - it seems to prevent air intrusion nicely.
Here's one completed patch
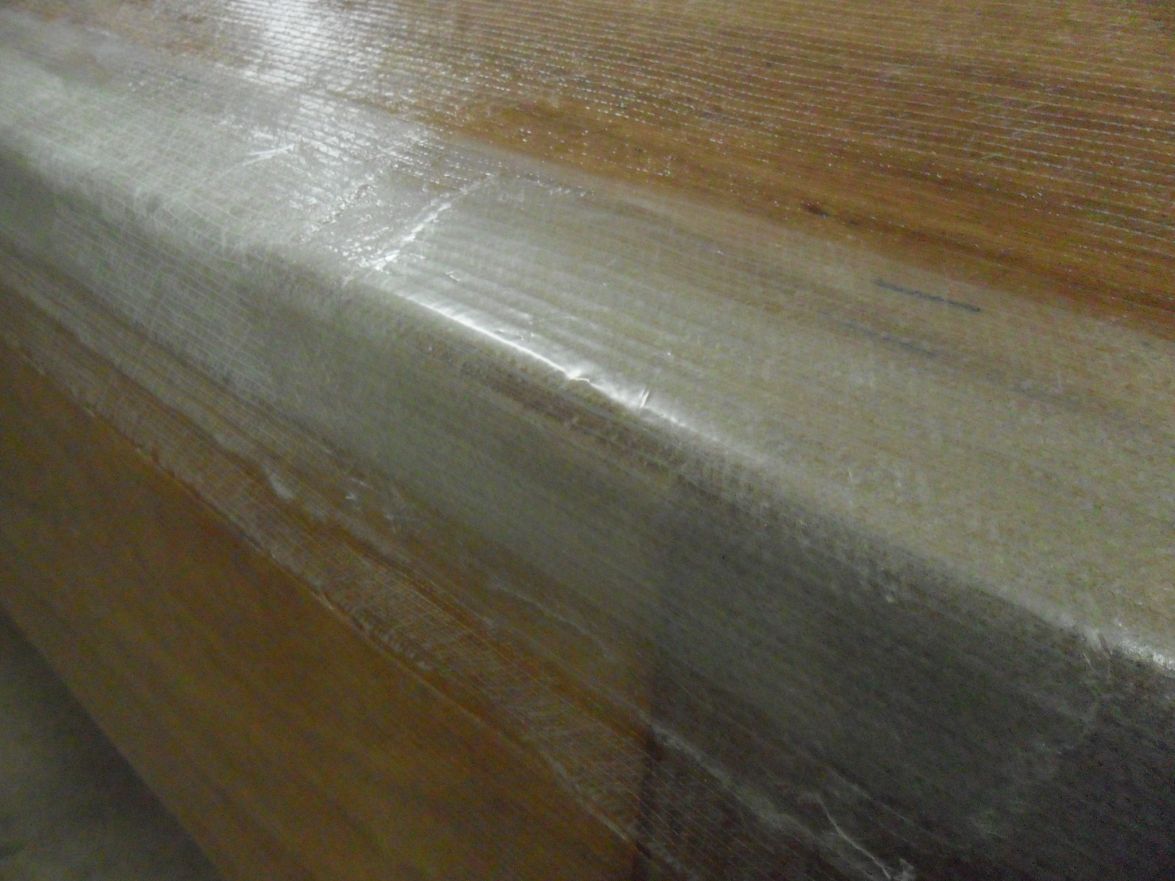
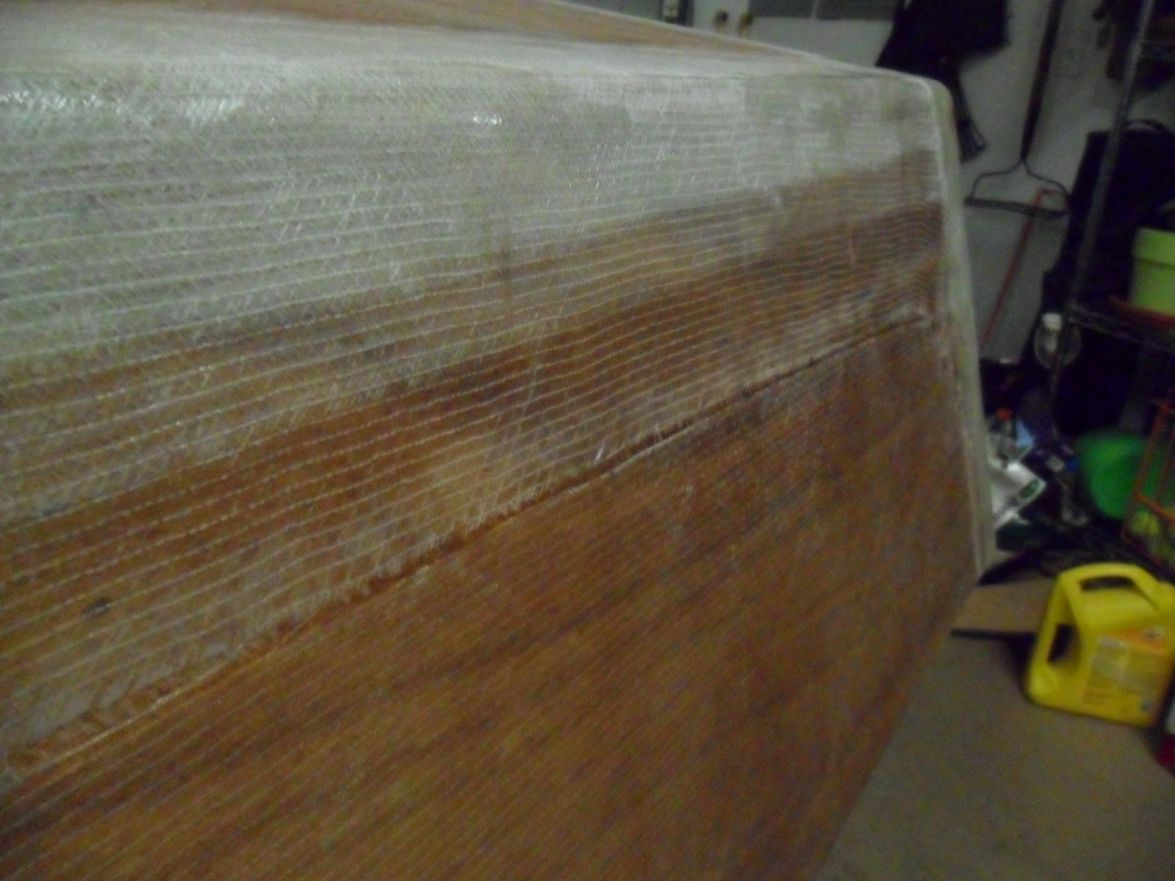
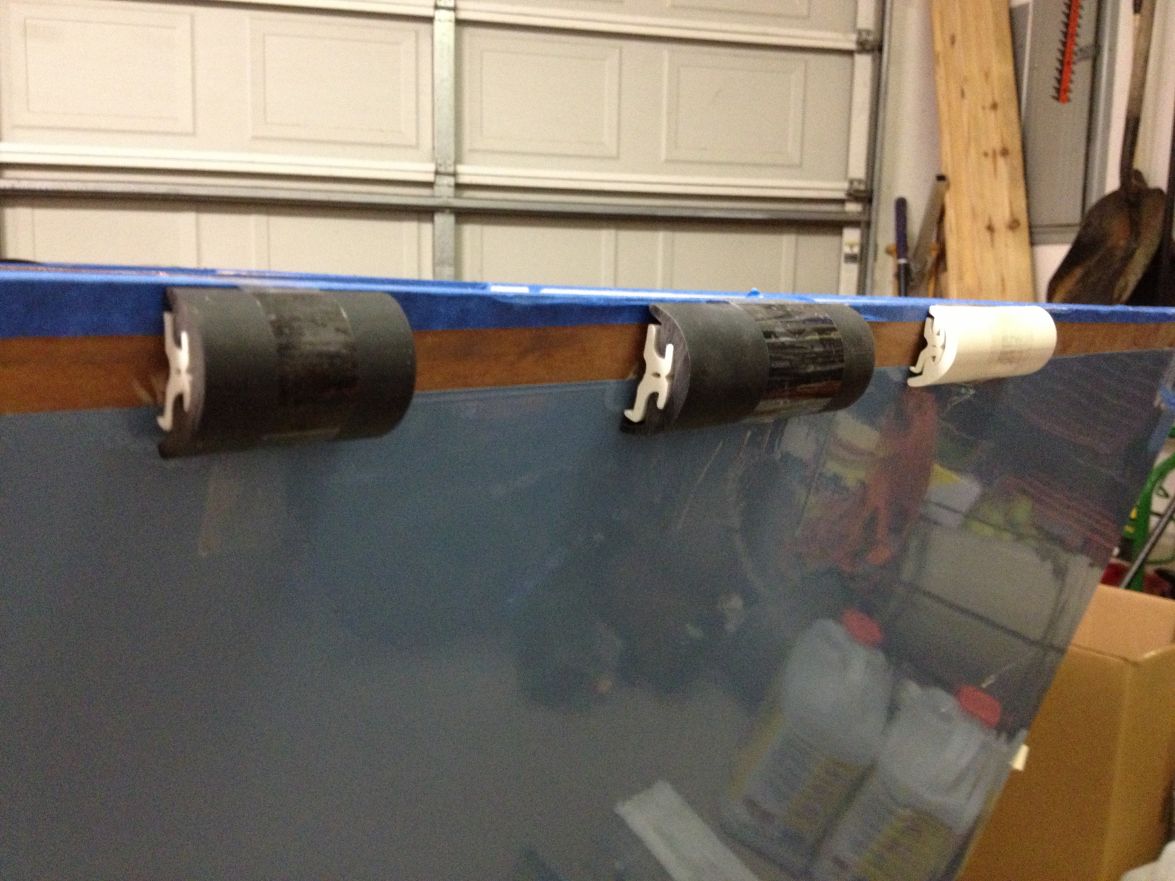
I glassed the sides today as well. I had sanded the edges of the biax cloth planning to overlap with the side glass, but ultimately decided that since the side glass is not structural to just approximate the two edges. I first put wide masking tape along the old cloth, overlapped the new glass and epoxy a bit onto the masking tape, then cut a nice edge when the epoxy was green. It came out well and should be easy to fair without any humps. I know I'm not describing anything new to many of you, but I did like the final product and wanted to pass it on.
Tape in place
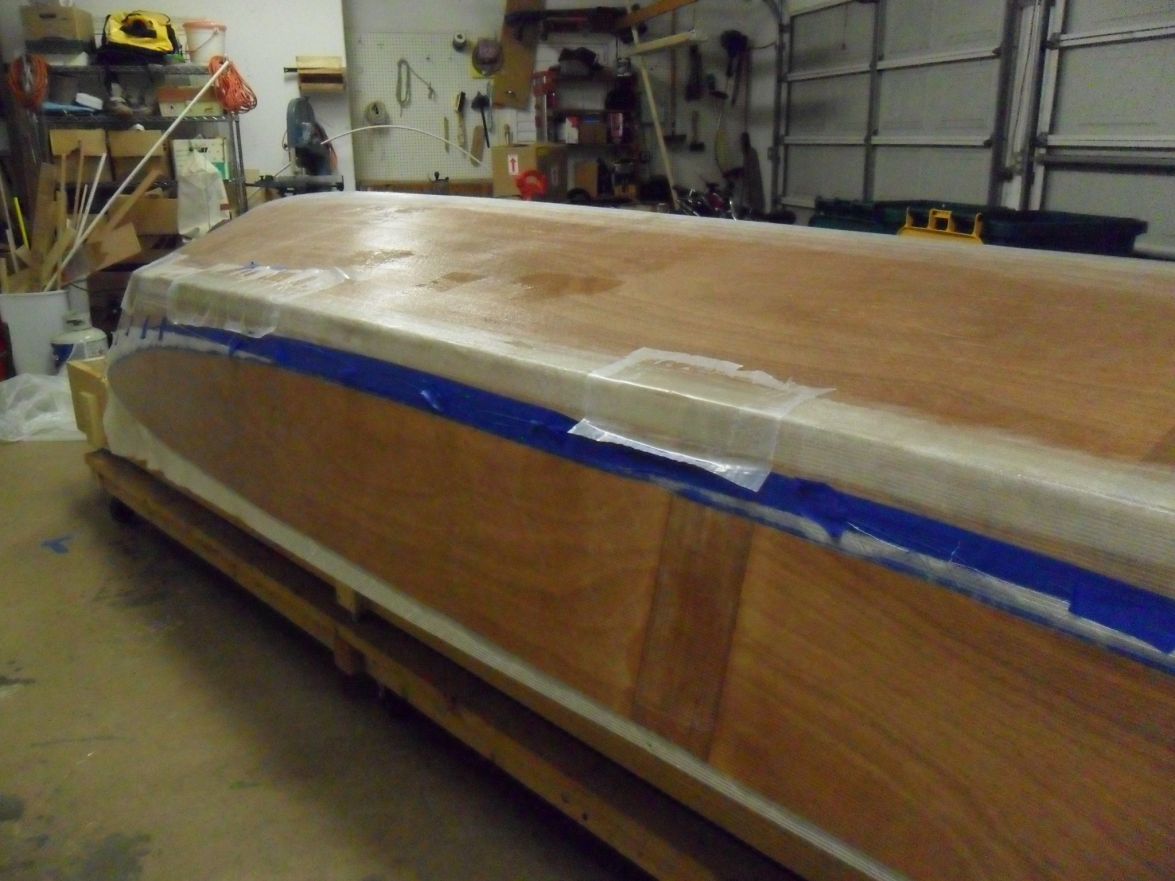
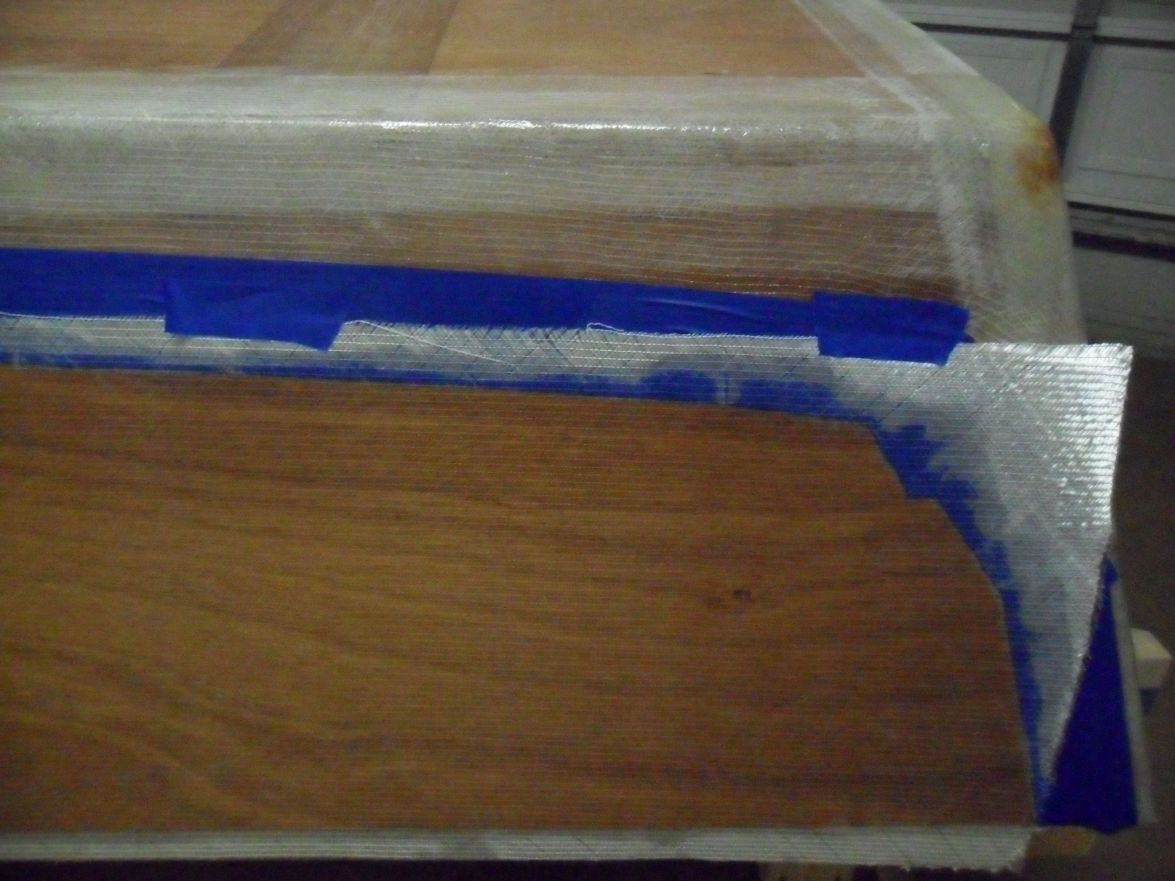
Tape removed
Re: willg's PH18
Posted: Mon Jul 01, 2013 10:15 pm
by swglenn
You are making a lot of progress and your boat looks great. Very good workmanship. My visit with you really inspired me to start on mine. I hope to get my plywood in the next week or so. I am trying to decide how much epoxy and fiberglass to order now. Glenn
Re: willg's PH18
Posted: Wed Jul 03, 2013 12:52 pm
by willg
Thanks, Glenn. Glad to hear you'll be starting soon and I'm looking forward to watching your progress. I would recommend getting the standard epoxy/glass kit from Bateau. You'll get a better idea of what else you'll need after you've been at it for a while. For instance, I've ordered some additional epoxy and fillers for my strakes/reverse chines. Should have gotten fairing mix so will need that before long. I know I'll need more cloth, probably more EZ Fillet and Quick Fair but will wait till after a flip and maybe combine with pigment and some other things. I don't have any comparison, but I have really liked the System Three products and don't think you could go wrong with that, and it should save you some time and head-scratching.
Will
Re: willg's PH18
Posted: Thu Aug 29, 2013 2:13 am
by willg
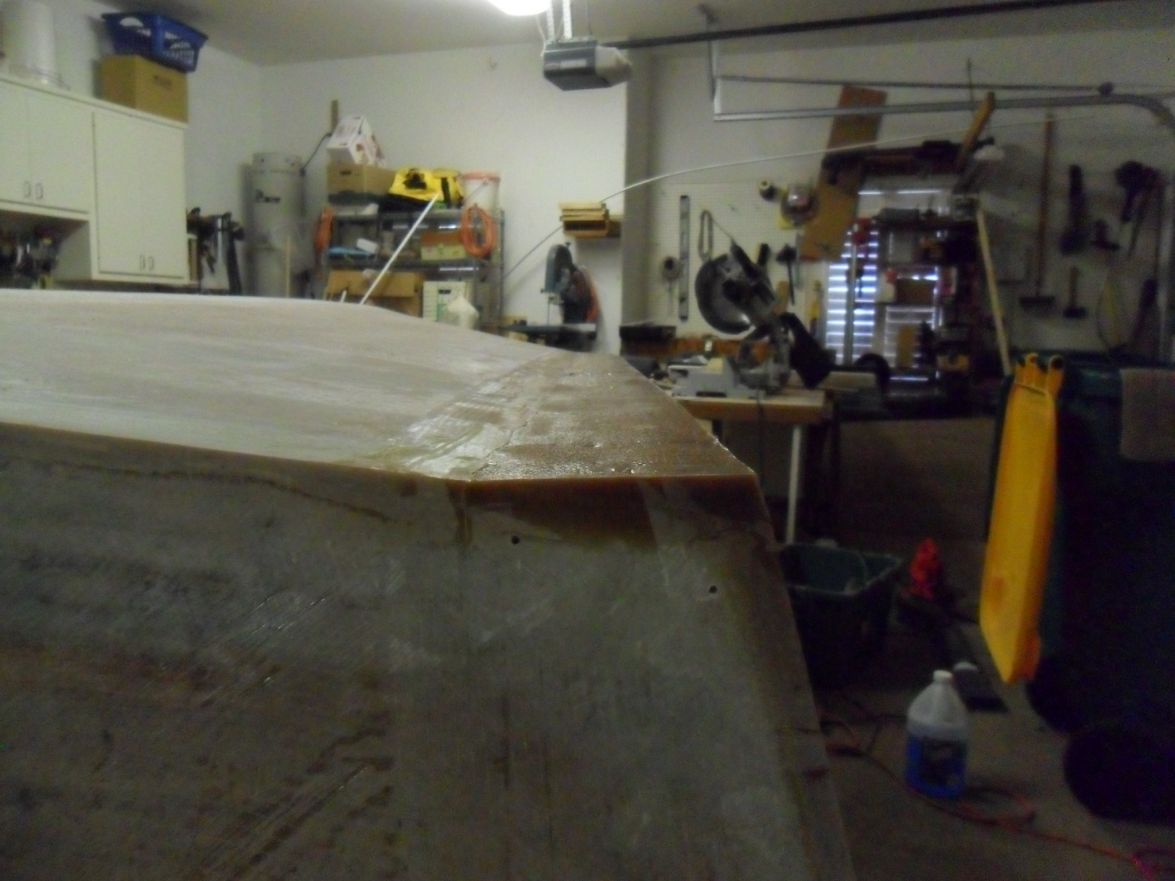
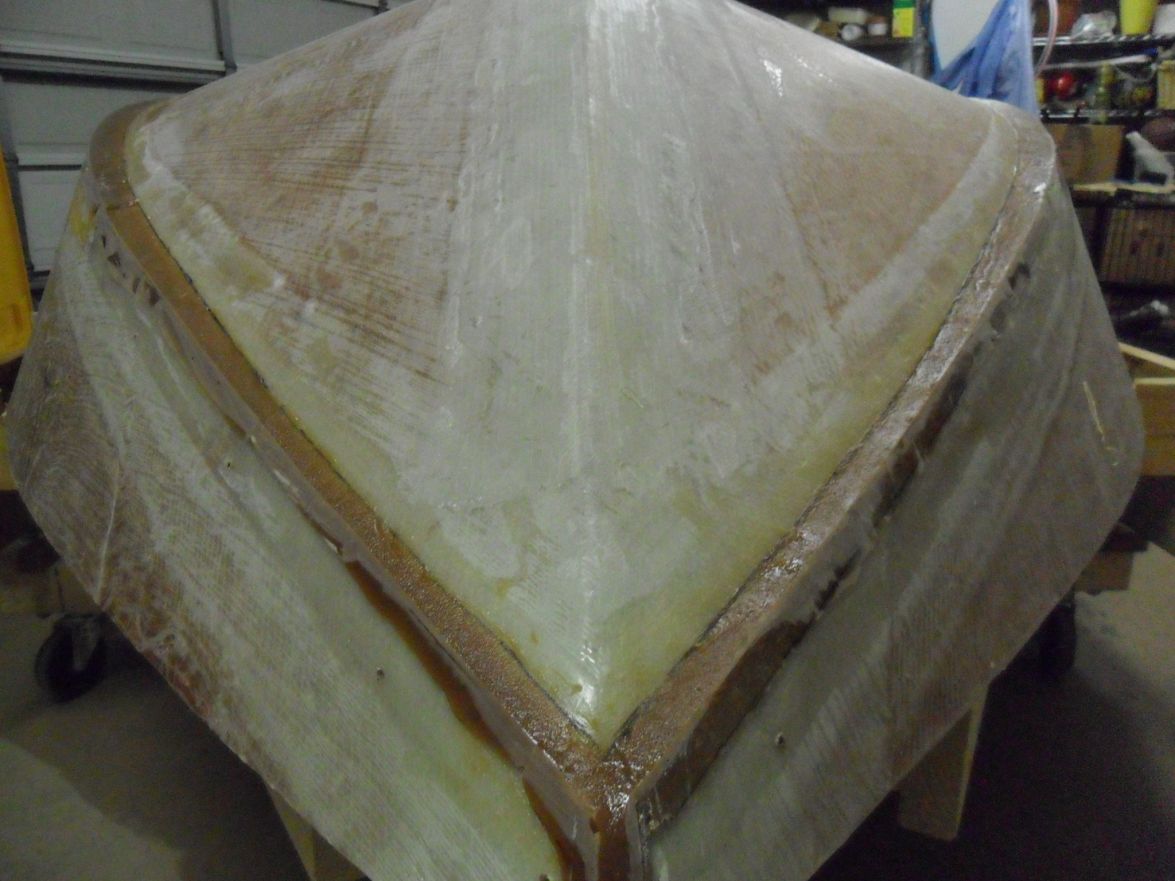
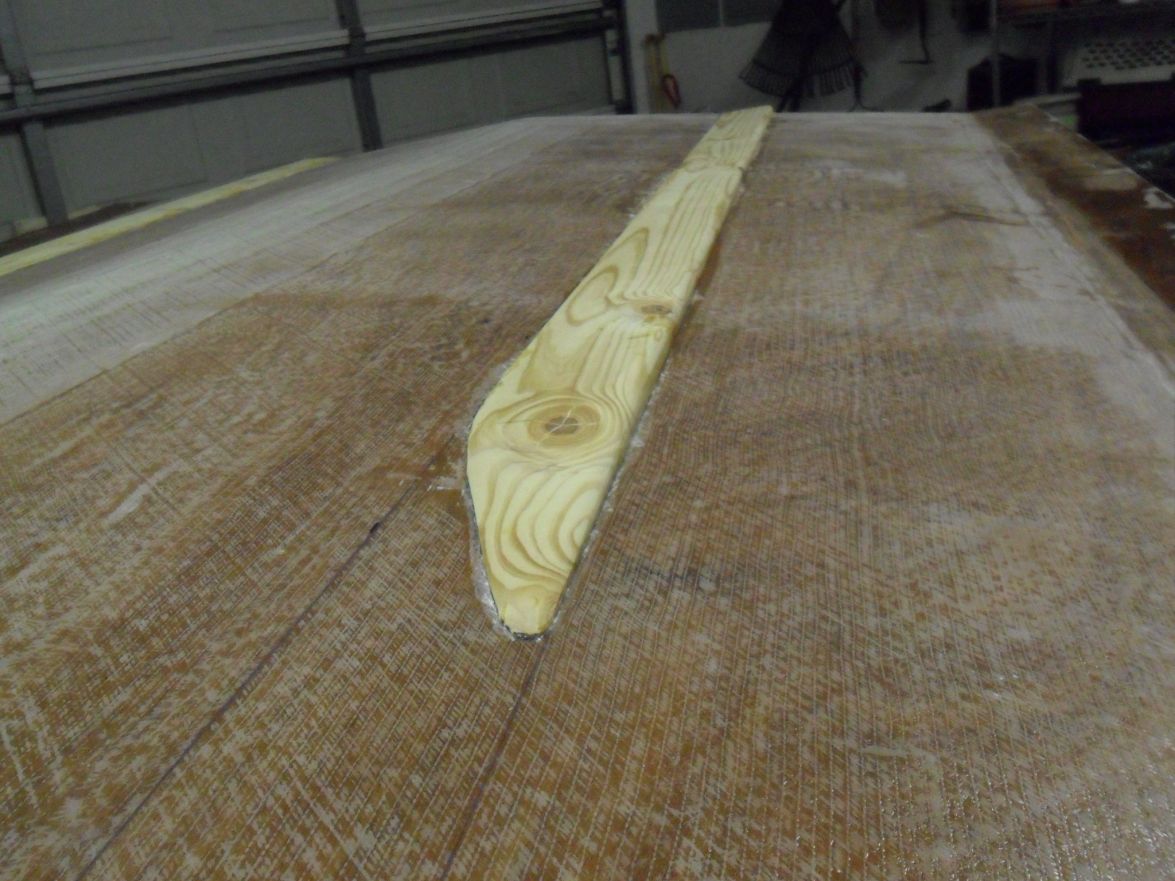
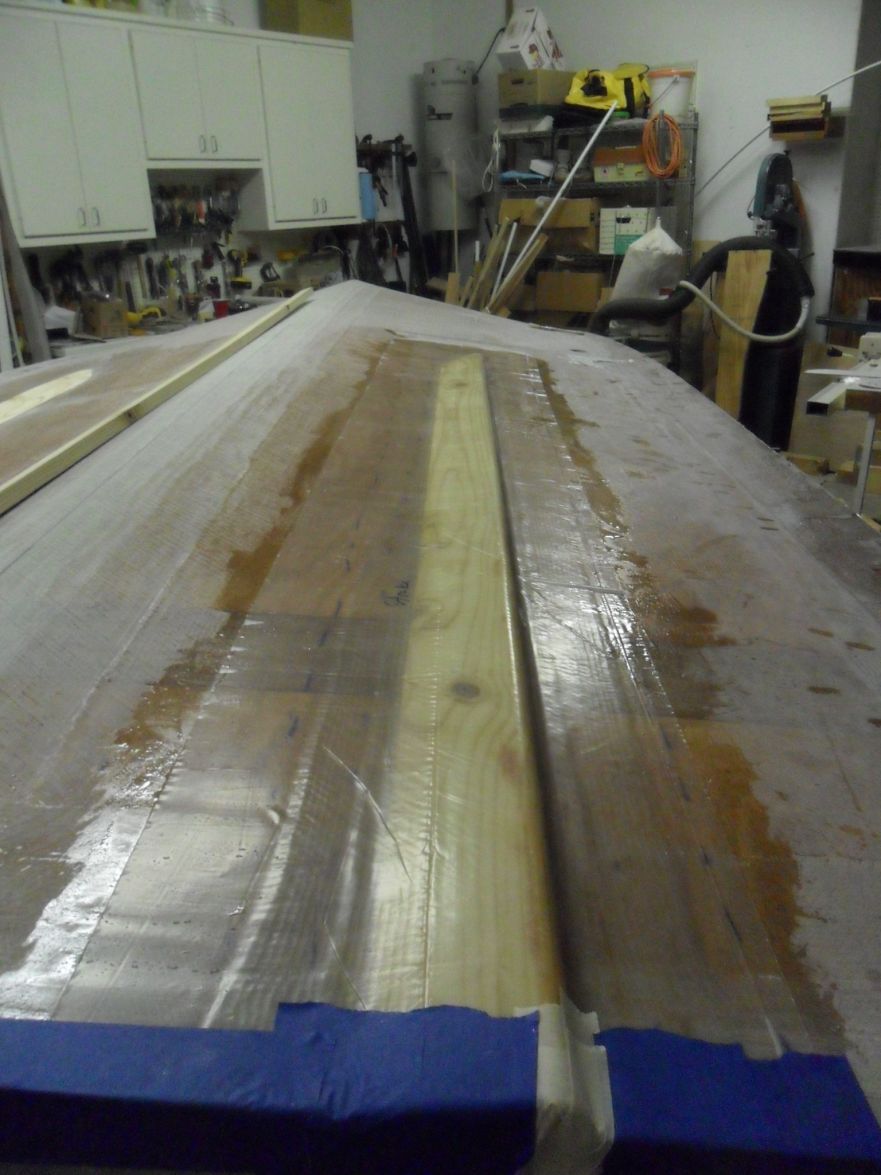
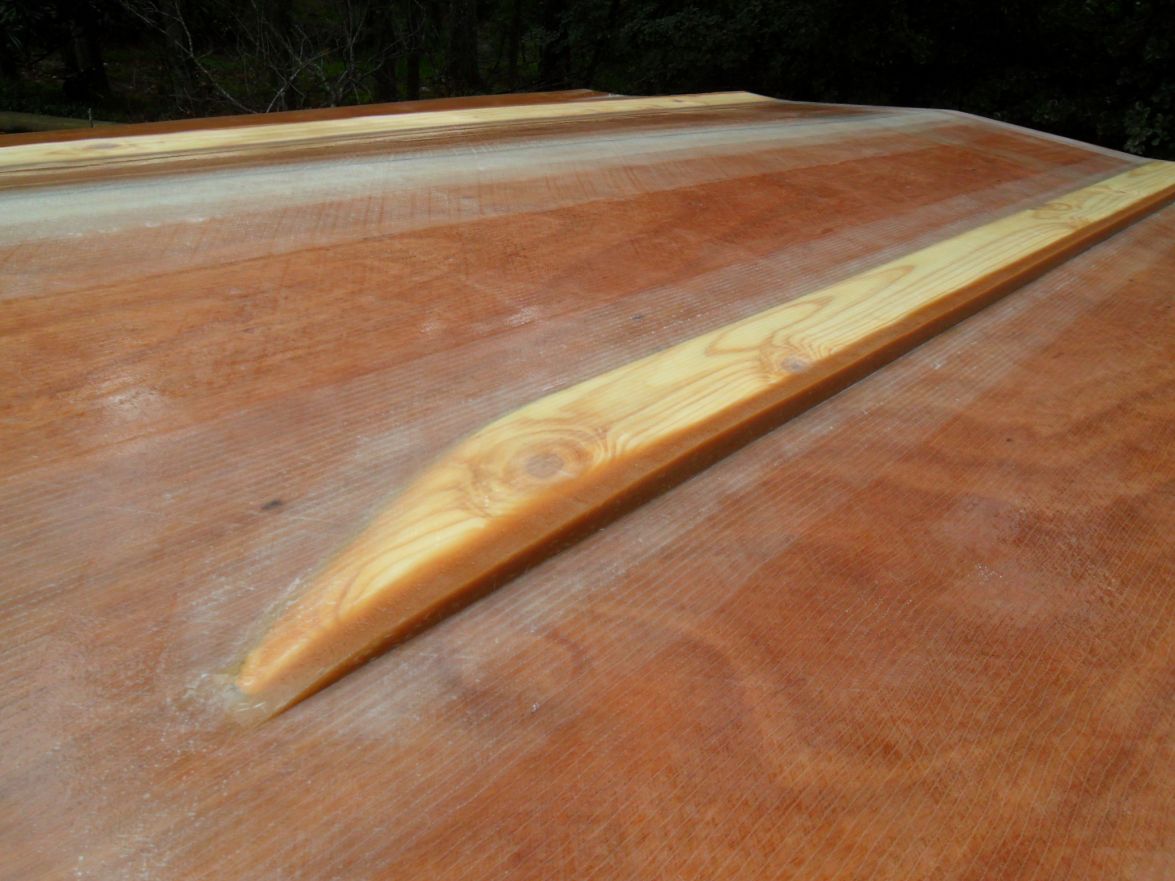
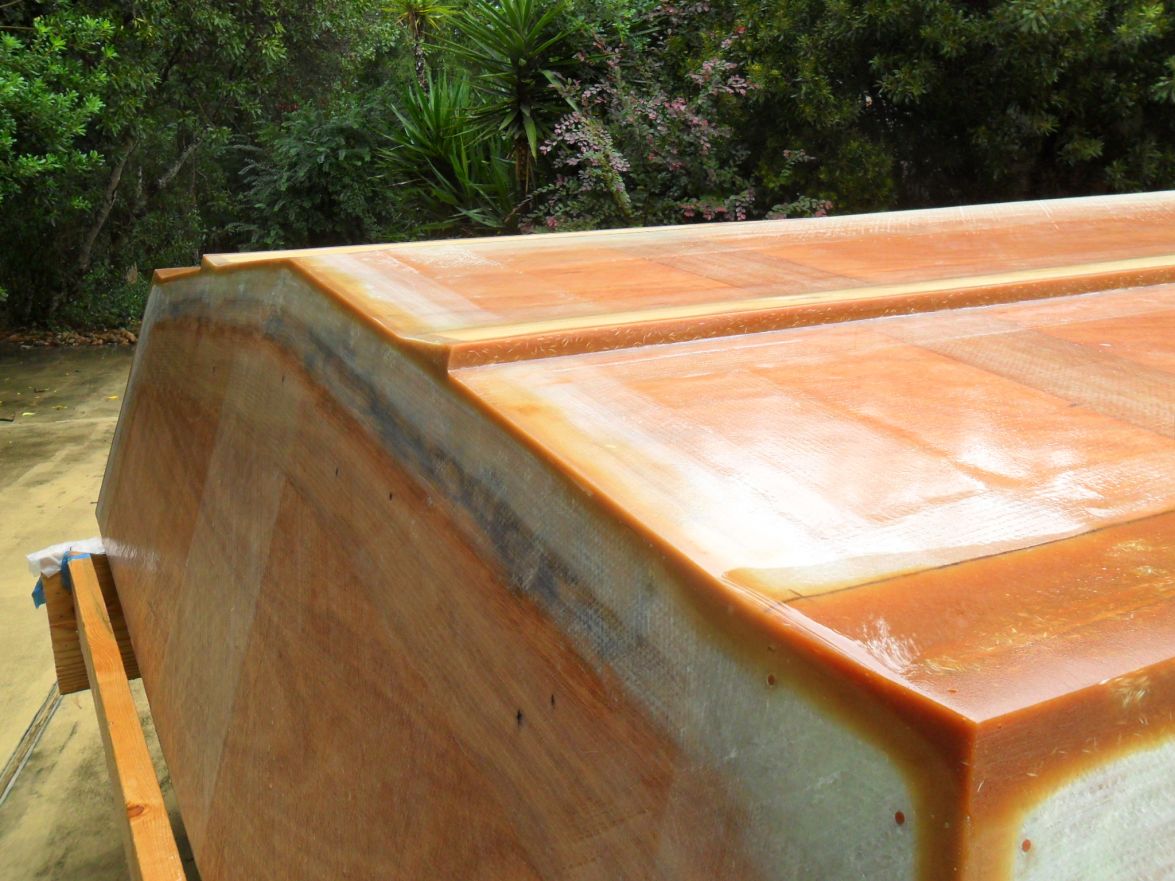
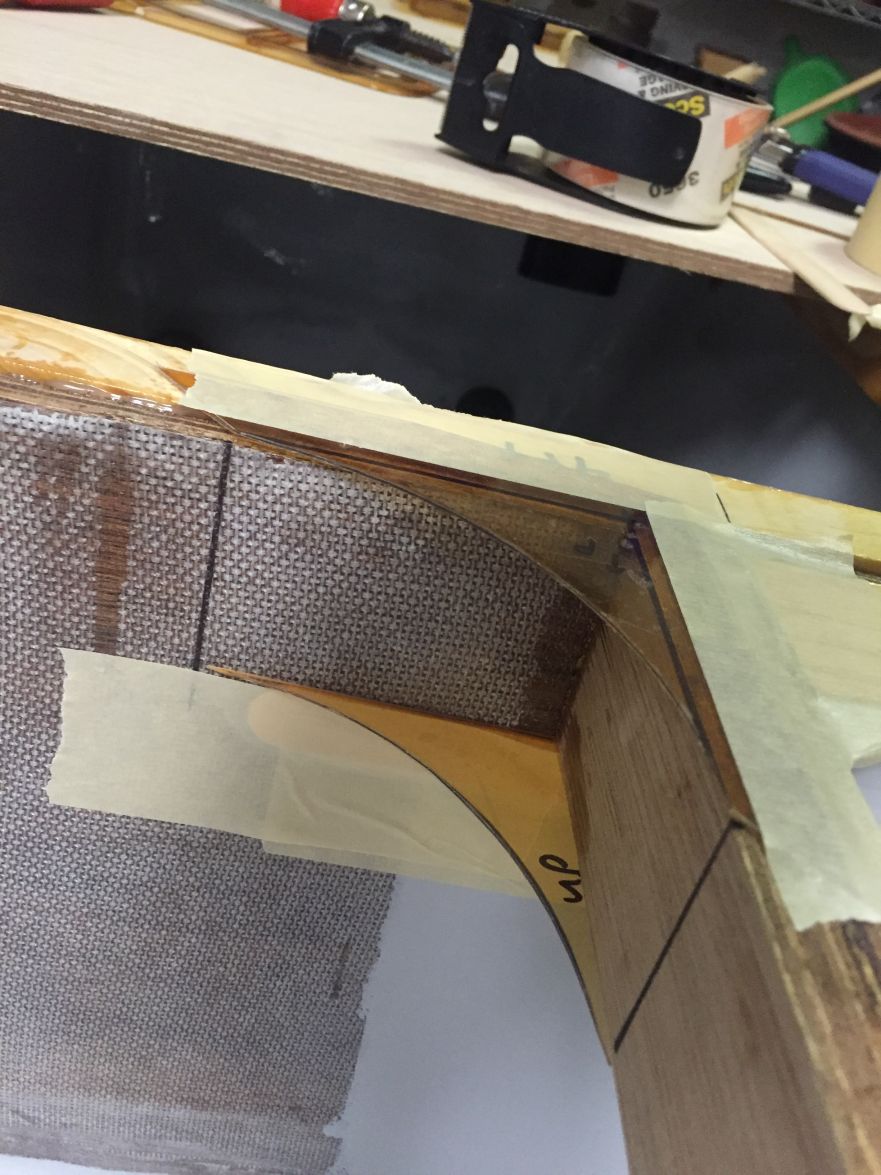
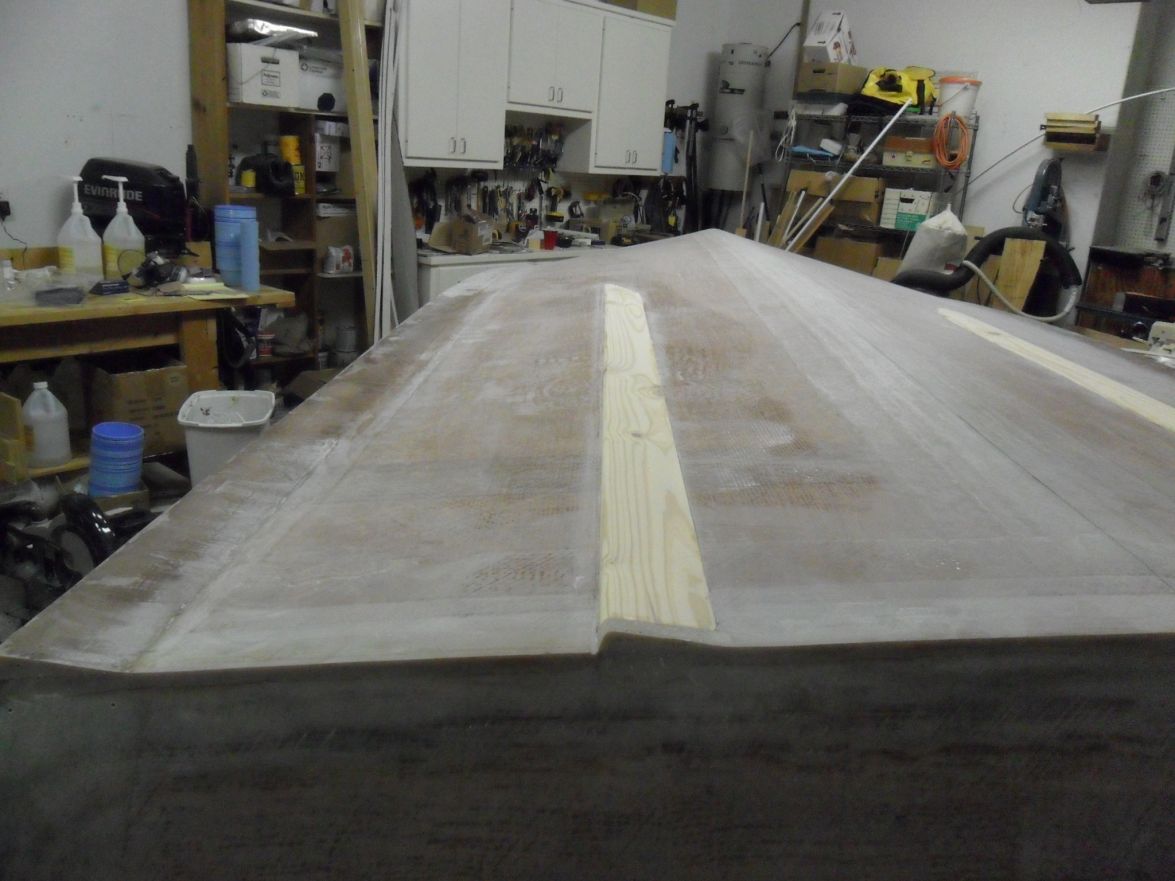
I have a build update, and would like anyone's input into my plans for a reverse chine. Since my last post I found that there were some areas on the aft part of the chines and on the transom seams that appeared dry/airy/devoid of epoxy. I made the painful but I think right decision to grind away all the epoxy and tape down to bare wood on these joints. I went forward from the transom about 12 ft, until the chine angle becomes more obtuse and where there was no air in the glass. I think the problem was that I didn't round over the edges enough before glassing and/or didn't get enough epoxy into the glass. The second time around I corrected both of those issues and also laid long strips of 3 mil plastic over the joints as peel ply to evacuate the air. The result was very satisfying. Anyhow, after family vacation and work keeping me away from the build I am now back on it.
I sharpened up the transom edges with epoxy/flour/milled glass. That turned out nice.
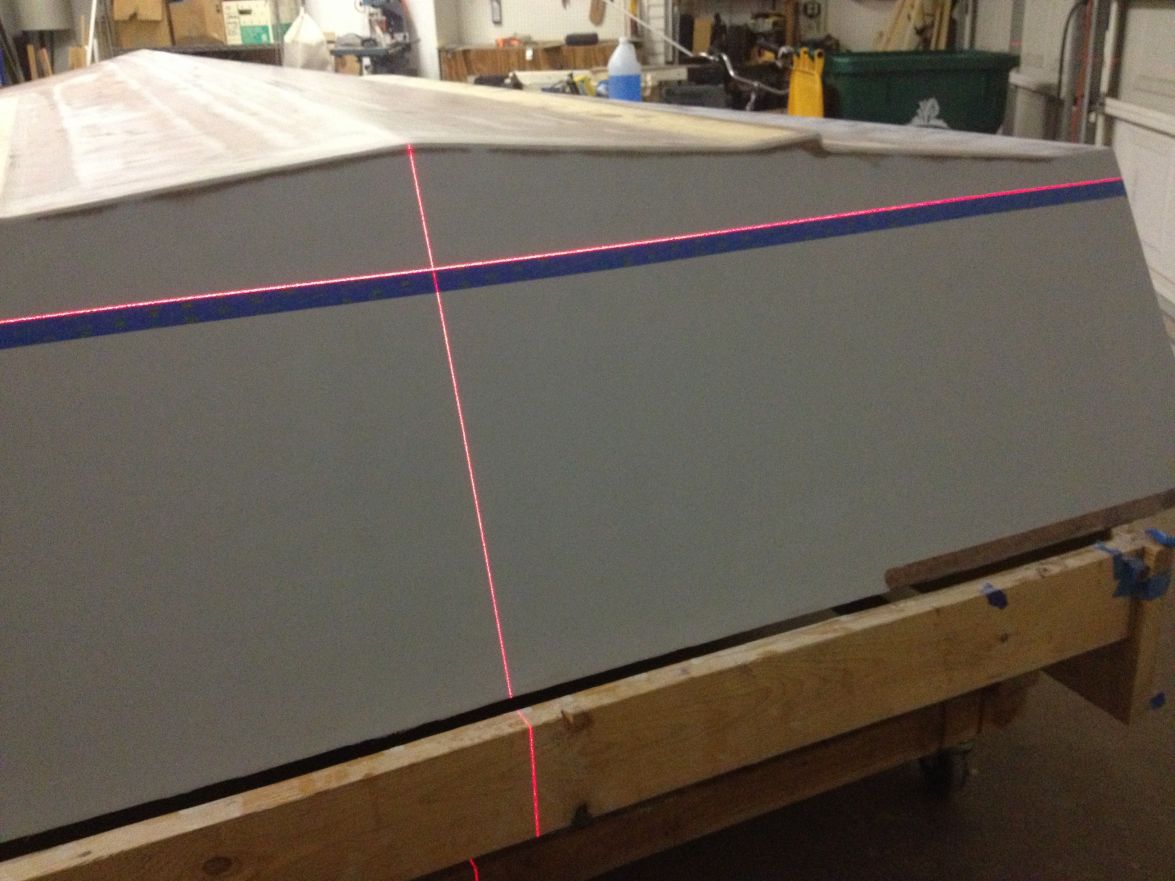
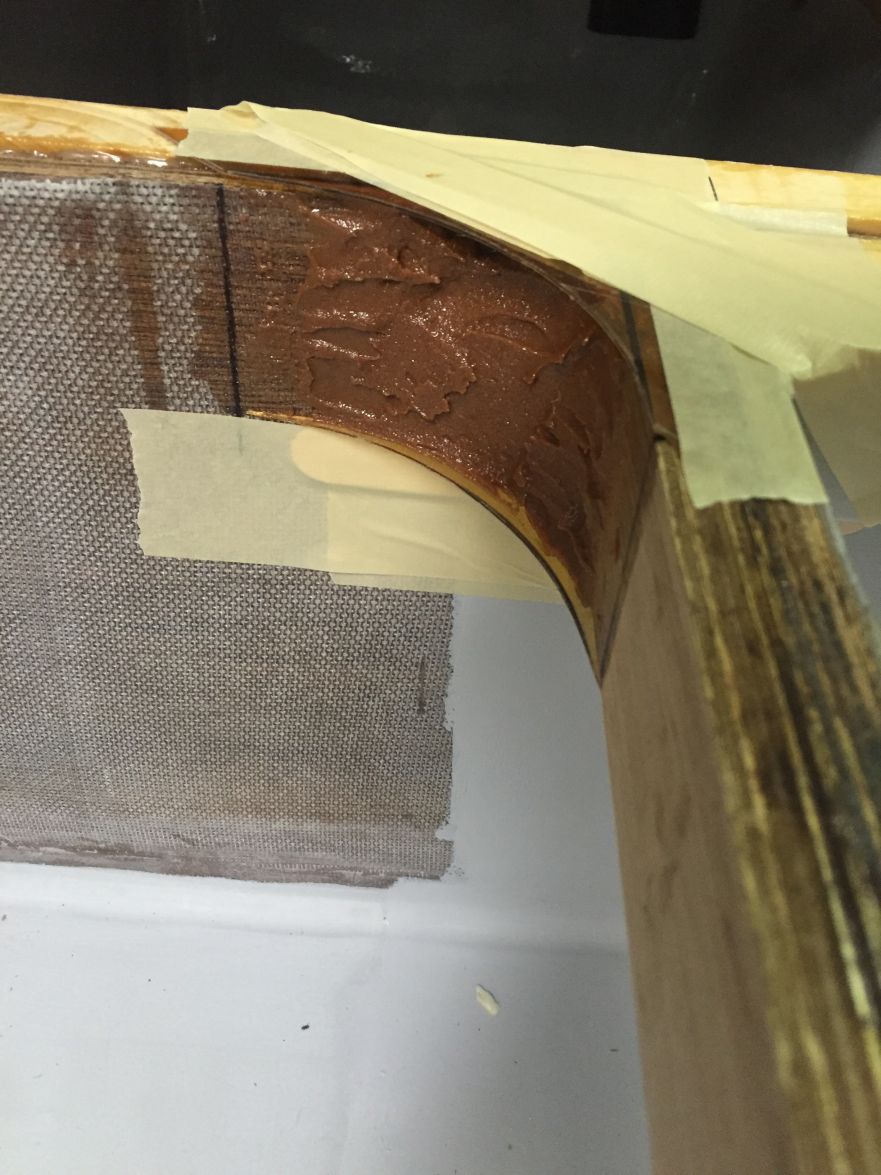
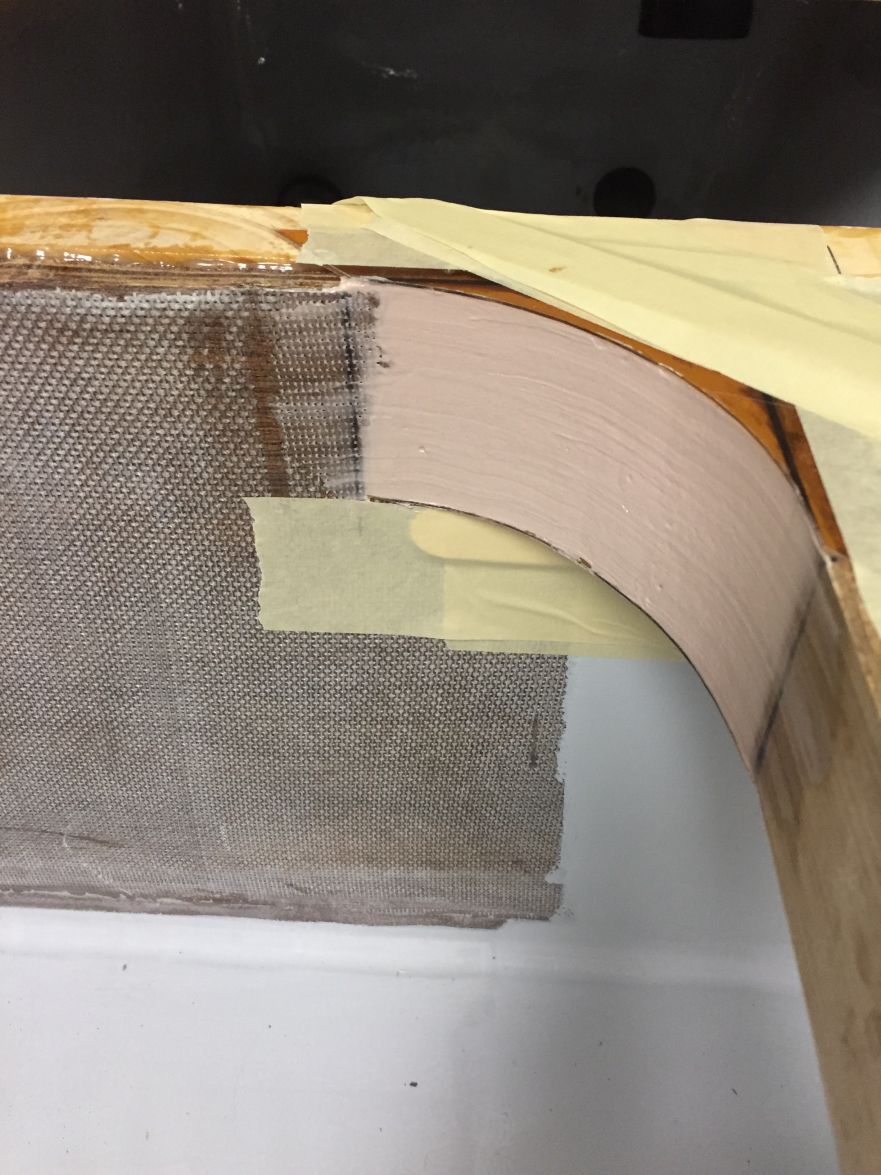
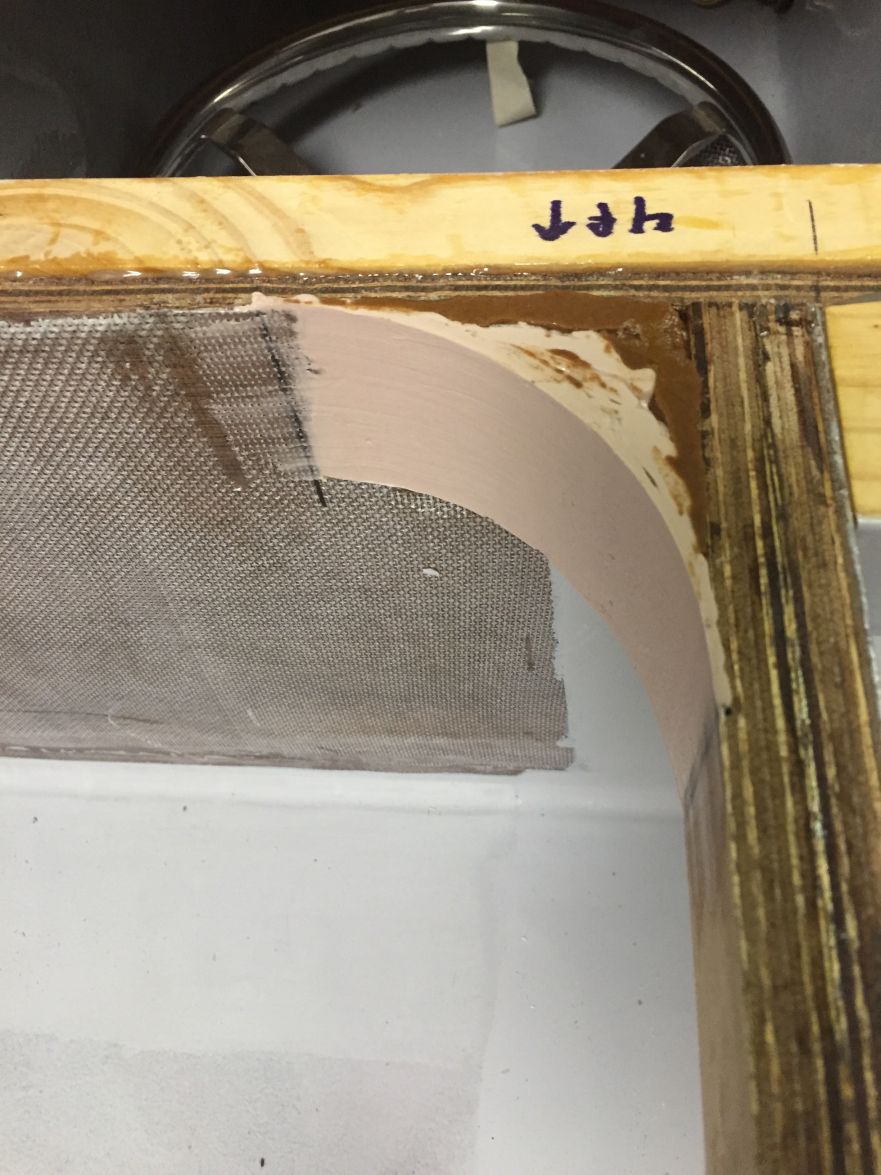
For the reverse chine, using measurements from the plans for the hull side profile I cut a piece of thin fiberboard and fixed it to the side. It stands proud of the bottom surface by 3/4 inch.
If I make the reverse chine width 4.5 inches along the hull the resulting angle is about 9.5 degrees and would look like this:
I'm planning so far to keep that width the same going forward 8 ft, then would gradually taper it narrower going forward, such as along the line shown.
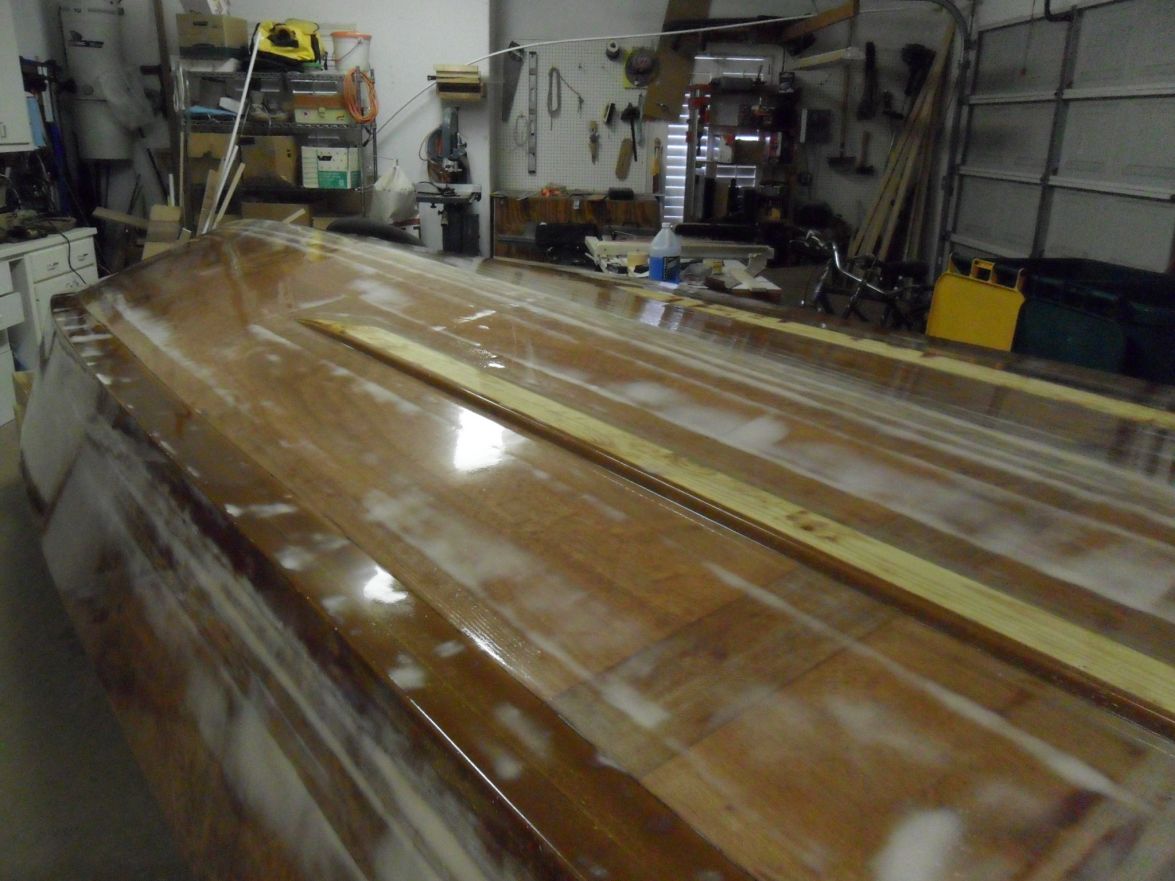
I'll make the curve smoother in its final form. I will lay some ply on a putty bed in the reverse chine, then cover with putty, then will glass over it after I remove the mold. I'm also going to put a lifting strake on either side, with approximately the same angle. From my study of many production hulls, the angles of the hard/reverse chines and lifting strakes go from horizontal (parallel to the water line) to about the angle I've shown on my build. Any input or advice would be appreciated. Feels good to be working on the build again!
Will
Re: willg's PH18
Posted: Mon Sep 02, 2013 9:01 pm
by willg
Re: willg's PH18
Posted: Tue Sep 03, 2013 7:57 am
by cottontop
Good looking work. This is going to be one fine boat. John
Re: willg's PH18
Posted: Tue Sep 03, 2013 11:46 pm
by willg
Thank you, John. I'm standing on the shoulders of you and other boat-building giants.
Re: willg's PH18
Posted: Wed Sep 18, 2013 10:34 pm
by willg
Re: willg's PH18
Posted: Thu Sep 19, 2013 10:23 am
by tech_support
it all cleaned up nicely .......
I think the angle on the chine flats will work well for you. If I remember from my textbook correctly, after 5% you can start seeing more drag introduced at higher speeds.
Re: willg's PH18
Posted: Sun Oct 06, 2013 12:28 pm
by willg
Re: willg's PH18
Posted: Sun Oct 06, 2013 12:57 pm
by Cracker Larry
That looks sharp
Nice work Will!
Re: willg's PH18
Posted: Mon Oct 07, 2013 9:01 am
by willg
Thank you, Larry. I put an initial layer of Bateau fairing mix on the transom and the starboard bottom/side. I know there's a lot of sanding in my future, but applying the fairing compound was fun and satisfying. Thanks to you, Joel and others for the clear guidance in how to fair - it would be intimidating without it.
Re: willg's PH18
Posted: Mon Oct 07, 2013 9:18 am
by tech_support
very, very nice

Re: willg's PH18
Posted: Mon Oct 07, 2013 10:13 am
by swglenn
Looks great Will. I look forward to seeing it next Monday.
Re: willg's PH18
Posted: Sun Nov 10, 2013 9:23 pm
by willg
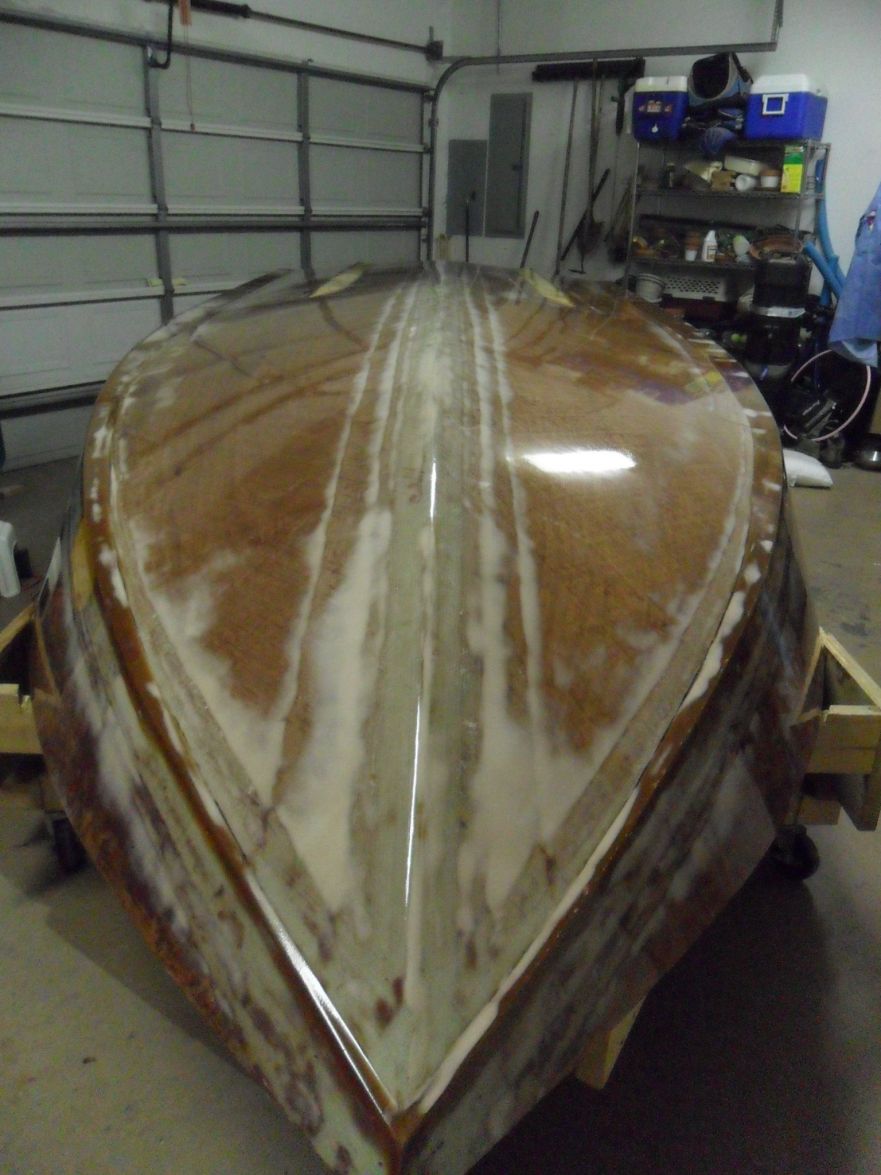
One layer of Bateau blended filler on the whole boat, 3 of QFair on the transom and one on the rest. So far so good. I think, at least, since I've never done this before ...
Re: willg's PH18
Posted: Mon Nov 11, 2013 9:42 am
by tech_support
It certainly looks like you have the right idea, only filling the lows.
The moment of truth comes with the first coat of primer

Re: willg's PH18
Posted: Mon Nov 11, 2013 1:23 pm
by willg
I know I won't be done for a while yet. I have QF #2 on half the hull now, and expect I'll put a third application on before primer. My RO sander has been performing admirably.
Joel, I should be placing an order with you soon for primer, paint and other things. Do you have a recommended bow eye size for the PH18? I will get one for the bow and two for the transom from you.
Will
Re: willg's PH18
Posted: Mon Nov 11, 2013 2:00 pm
by tech_support
just the normal 3/8" is more than enough. I would get a long one though, the PH has a sharp bow and with all the glass overlaps, it helps to have extra length.
Re: willg's PH18
Posted: Sun Dec 01, 2013 7:10 pm
by willg
Re: willg's PH18
Posted: Sun Dec 01, 2013 8:10 pm
by Shamrock Kid
Wow! From looking at it I would think you've done this before. Looks great with just the neat epoxy. The primer is going to make it look awesome.
Re: willg's PH18
Posted: Tue Dec 03, 2013 9:24 am
by willg
John, thanks for the compliment. I'm looking forward to seeing how it turns out. I'm also ready to flip this boat over and look at a different part of her.
Re: willg's PH18
Posted: Tue Dec 03, 2013 9:26 am
by Cracker Larry
That looks smooth as a baby's butt

The primer goes on easy, you'll be real happy with that.
Re: willg's PH18
Posted: Tue Dec 03, 2013 10:18 am
by wegcagle
WOW. That looks awesome
My favorite part was putting the primer on it. It really makes it look like a boat.
Will
Re: willg's PH18
Posted: Tue Dec 03, 2013 10:51 am
by tcason
Looks awesome!
Is there a reason to put primer under the graphite epoxy ?
Re: willg's PH18
Posted: Tue Dec 03, 2013 11:16 am
by Cracker Larry
The graphite doesn't really need primer. The reason I do it is that the primer will show up any shortfalls in the fairing and give you an opportunity to fix it.
Re: willg's PH18
Posted: Tue Dec 03, 2013 1:22 pm
by willg
I didn't think I'd put primer under all of the graphite, but thought I could bring it up so it partly went under the edge of the graphite a few inches. By my way of thinking that would give me an even primer base that I could tape off for the graphite, then tape off for the paint and have things be level. I am wide open to suggestions or a better way ….
Re: willg's PH18
Posted: Mon Dec 30, 2013 10:10 pm
by willg
Re: willg's PH18
Posted: Tue Dec 31, 2013 7:31 am
by SmokyMountain
Looks great!! I remember when I primed the hull... couldn't keep the smile off my face.. it looked like a real boat (and I knew the fairing was about done, at least on the bottom

) Are you going to graphite to the spray rails in bow area or leave some area for paint? I'm considering going back and using graphite on mine.
Andrew
Re: willg's PH18
Posted: Tue Dec 31, 2013 9:21 am
by willg
Andrew, thanks. It's got me smiling for sure. And if my final paint job turns out as nice as yours I will be a happy man!
As of now I'm planning on graphite on the planing area only, including a little bit up the hull from the chine. How I bring that forward to the keel I haven't worked out just yet.
You may want to consider some of the "white graphite" that Casey used (flyfishingmonk) to match your white hull.
http://forums.bateau2.com/viewtopic.php ... al#p278810. I gave that some serious consideration too, but finally decided on the standard black.
When the time comes I'm thinking of using a black rub rail like you have. Can you give me any tips on getting it to go around the bow point and the sharp corner at the transom?
Will
Re: willg's PH18
Posted: Tue Dec 31, 2013 3:25 pm
by SmokyMountain
Thanks Will. I was thinking the same thing as to where to paint the graphite. Thanks for the heads up on the "white graphite". I remembered something about that but forgot where. I'll definitely check that out. As for rub rail, I used the Tessilmare rub rail kits I got off Jamestown Distributers. It's a little more expensive but it was very easy to install. I've heard some horror story's about rub rail installs. Watch the video on Jamestown. Use a heat gun to bend the track around the bow and stern corners.
Re: willg's PH18
Posted: Thu Jan 16, 2014 11:54 pm
by willg
Re: willg's PH18
Posted: Fri Jan 17, 2014 9:09 am
by tcason
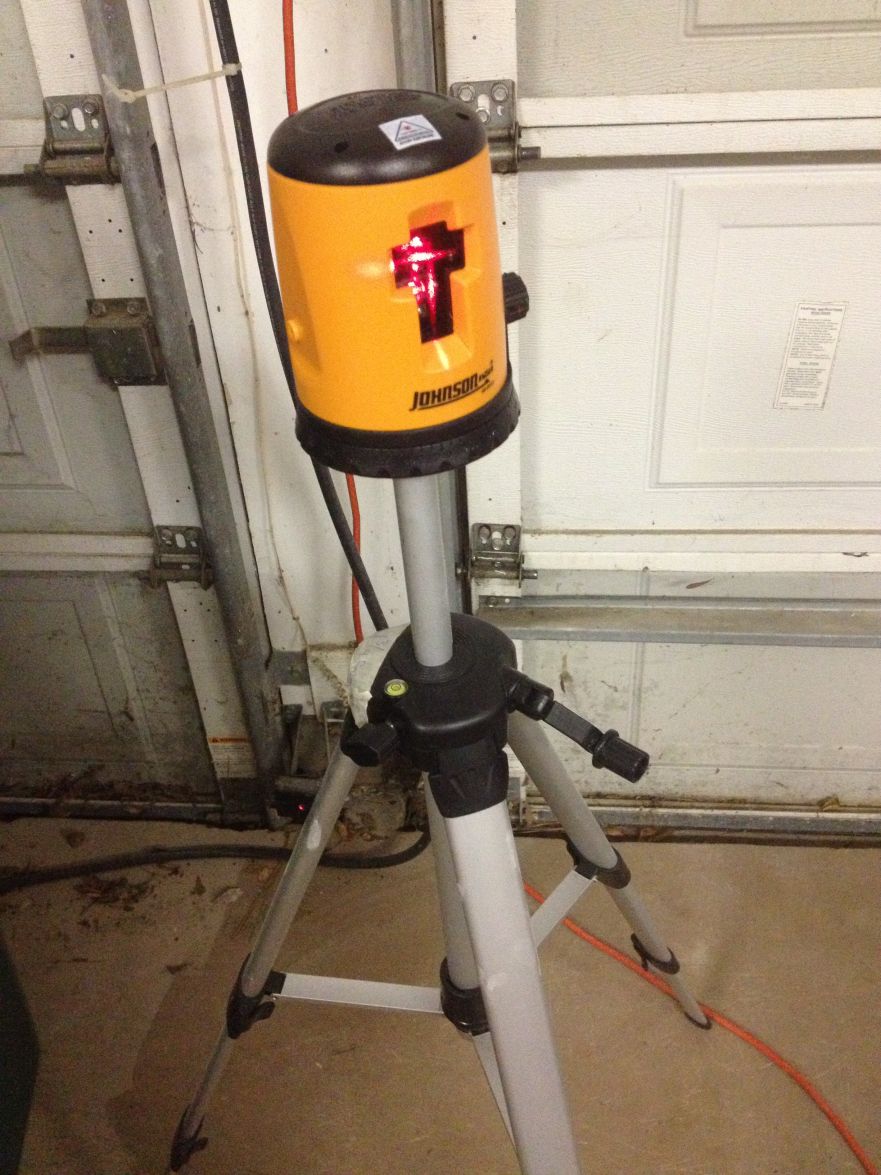
WOW that looks real impressive!!
That laser is cool too.
Re: willg's PH18
Posted: Fri Jan 17, 2014 11:20 am
by glossieblack
Really enjoying your methodical clean build.
Re: willg's PH18
Posted: Sat Jan 18, 2014 8:11 pm
by willg
Thank you, guys.
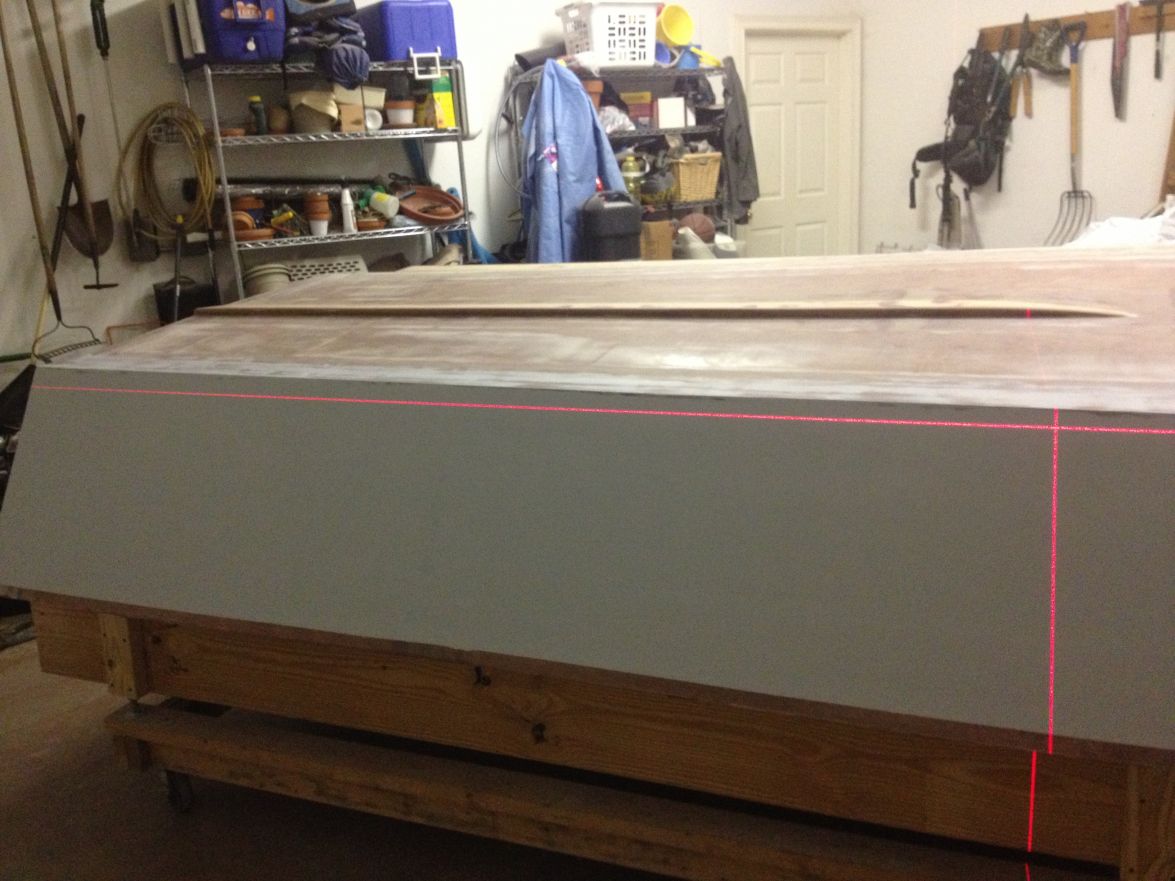
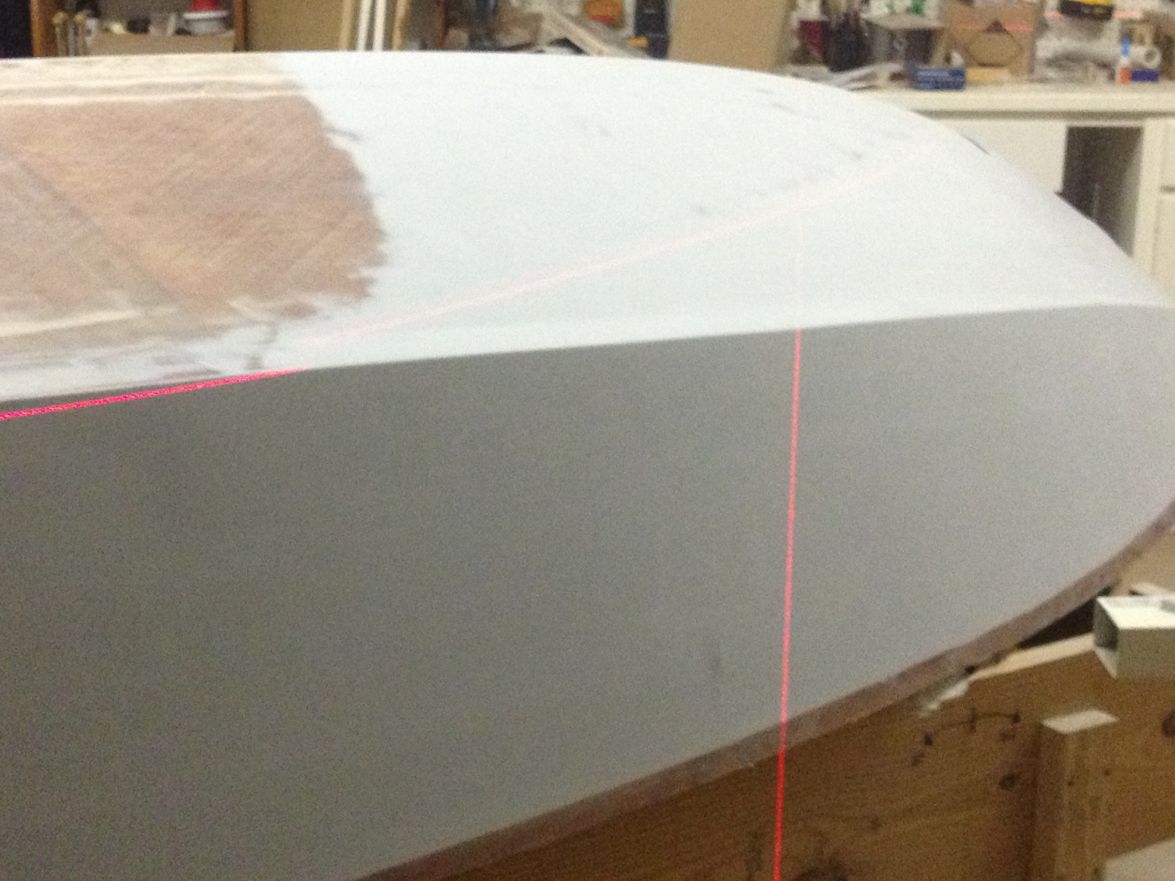
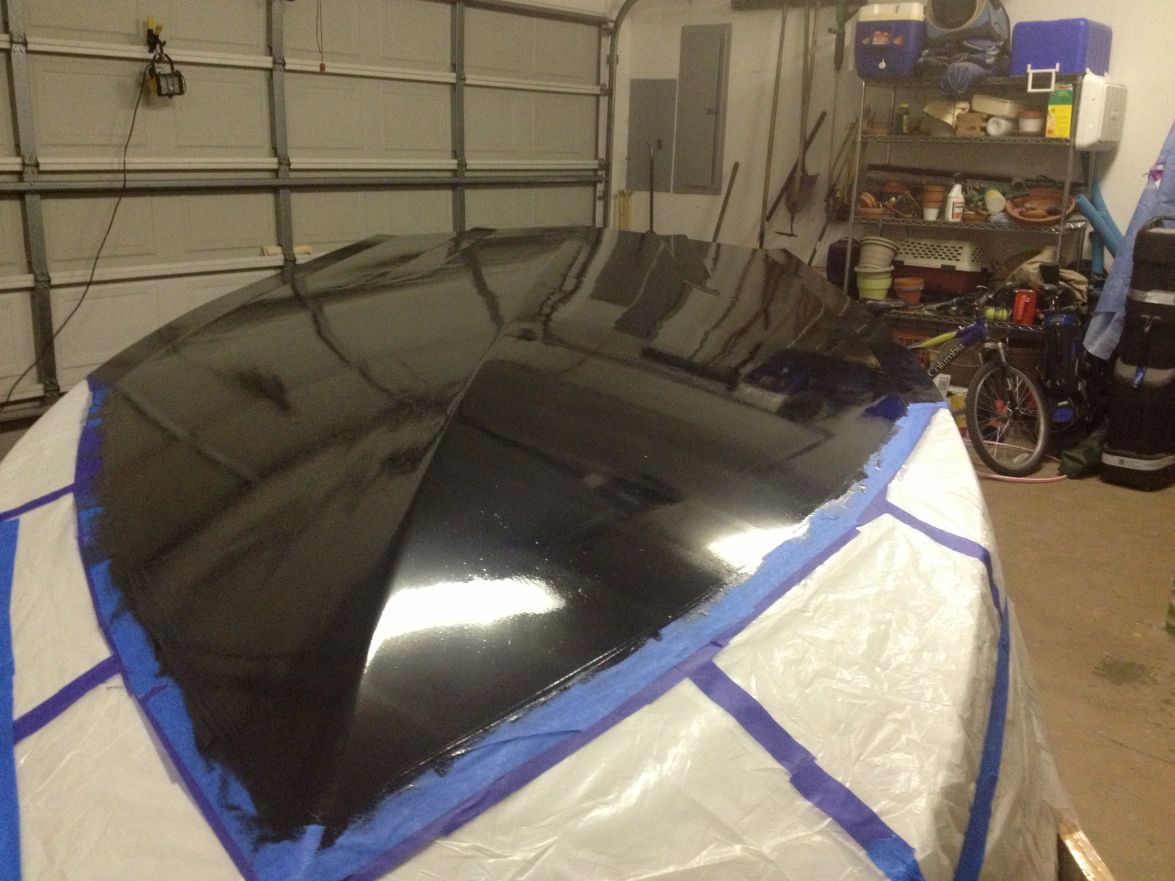
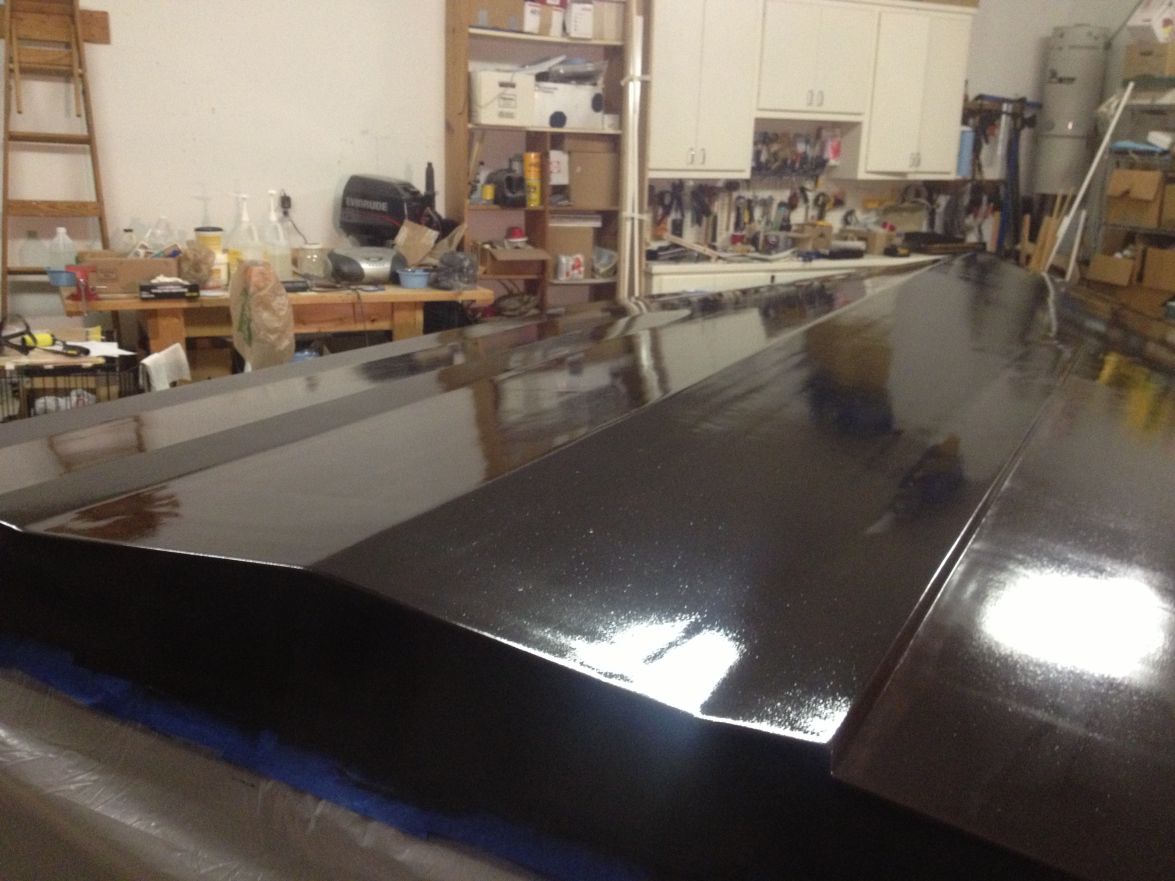
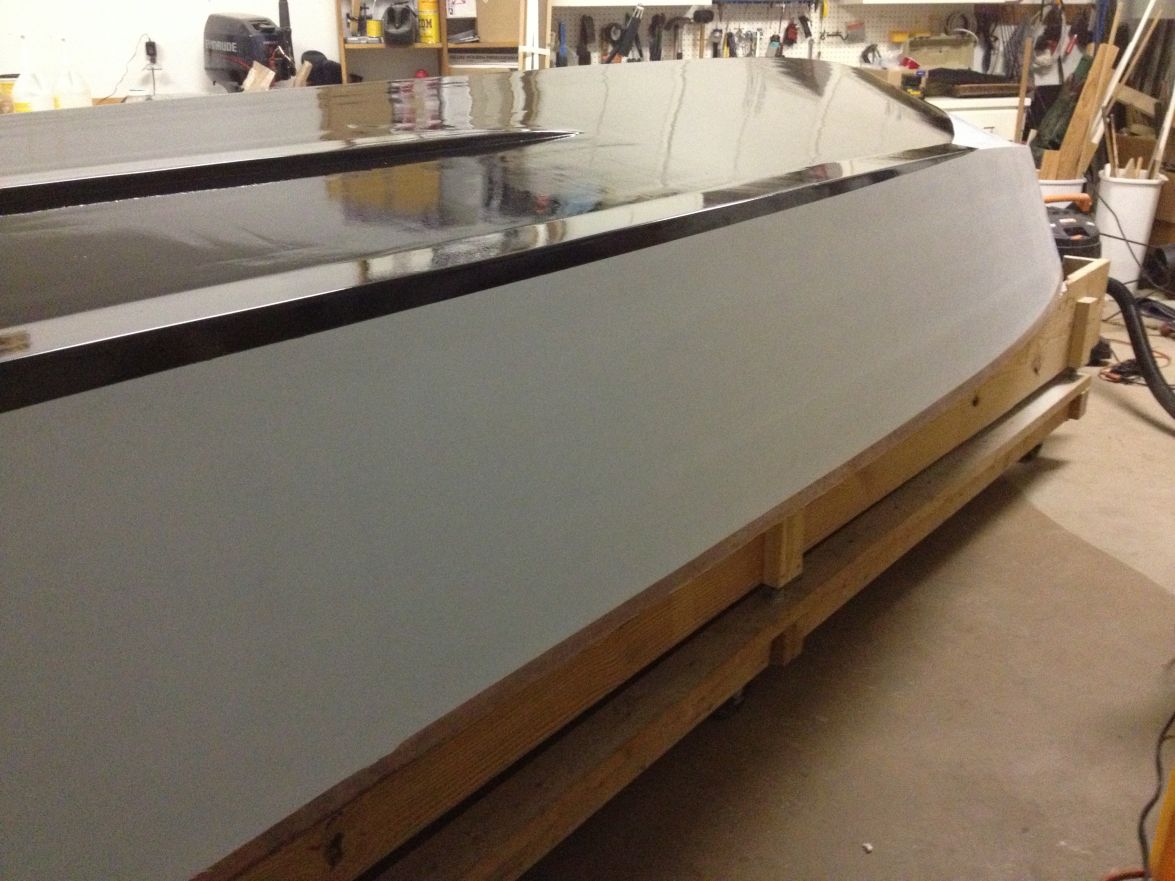
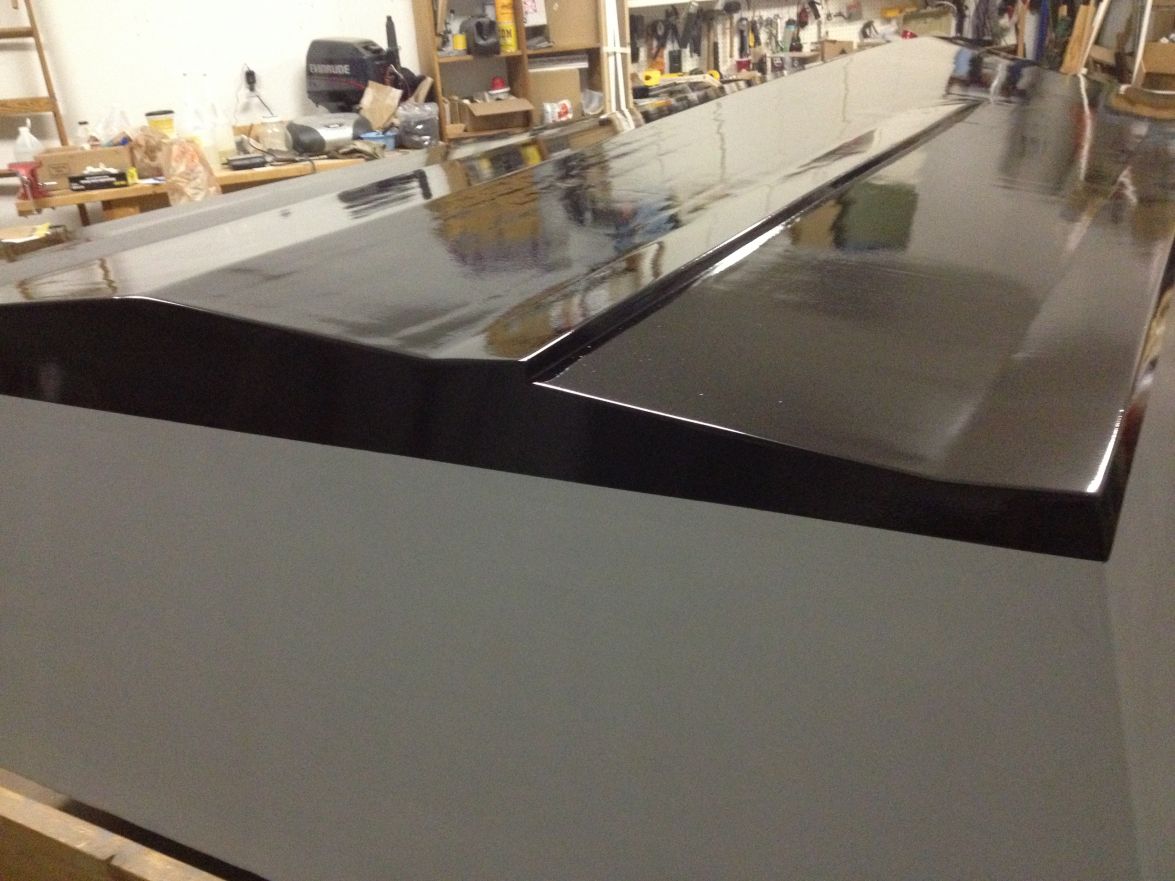
I put on a second coat of 9 oz/2.5 oz, then a third coat of 9 oz/1.5 oz (I got that from a post of Joel's), then pulled the tape.
CL, I used the 3M Edge Lock tape you suggested. Spot on advice once again, Mr. Cracker! The lines came out nice and sharp. Also, thought I'd pass it on that I used my heat gun on high to pass over the last coat and it smoothed out the bubbles and roller stipple almost like magic. I did get a few uglies from the bottom of the cup on the starboard bow but I'm going to leave them be. I'll let the graphite cure fully before taping for paint, so no boat work for a few days.
Re: willg's PH18
Posted: Sat Jan 18, 2014 10:17 pm
by Cracker Larry
That looks mighty fine right there
CL, I used the 3M Edge Lock tape you suggested. Spot on advice once again, Mr. Cracker!
I only give advice when I know what I'm talking about, usually
That is some very good tape!
Re: willg's PH18
Posted: Sun Mar 23, 2014 11:33 am
by willg
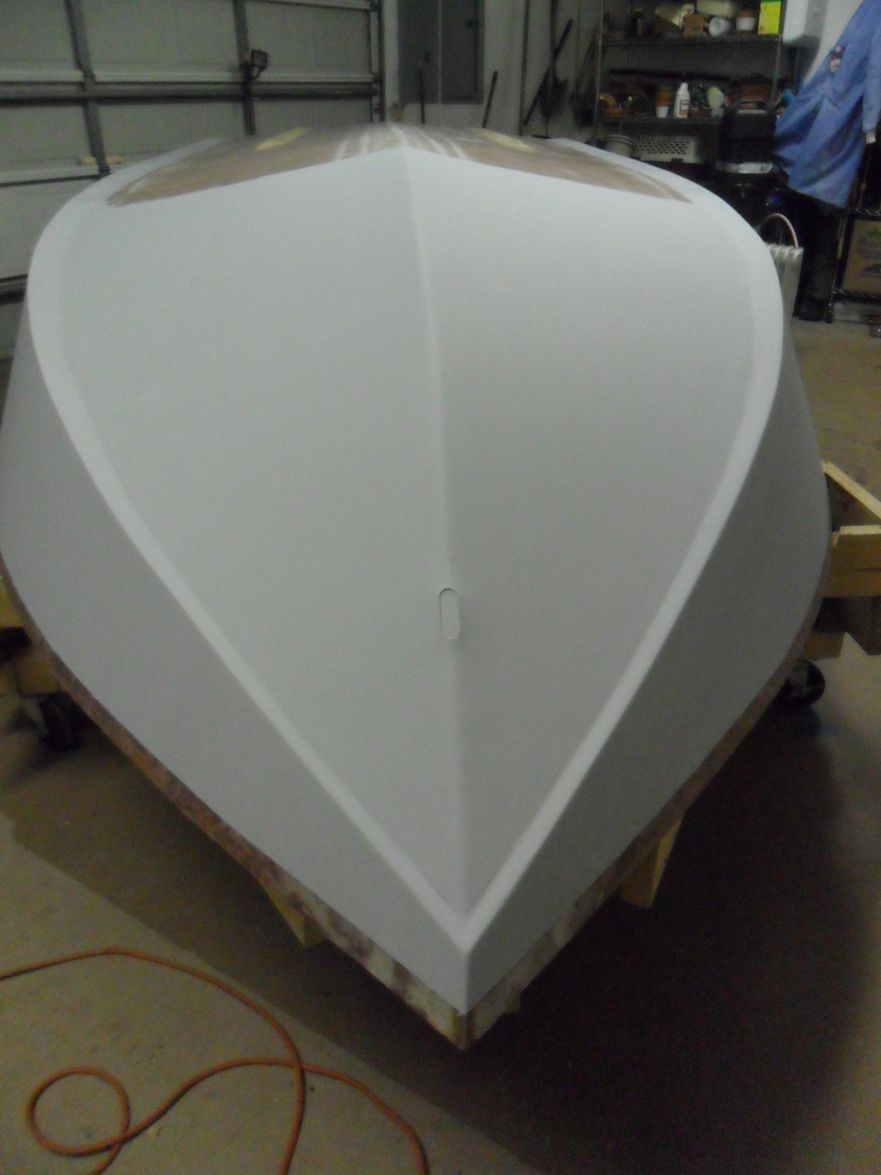
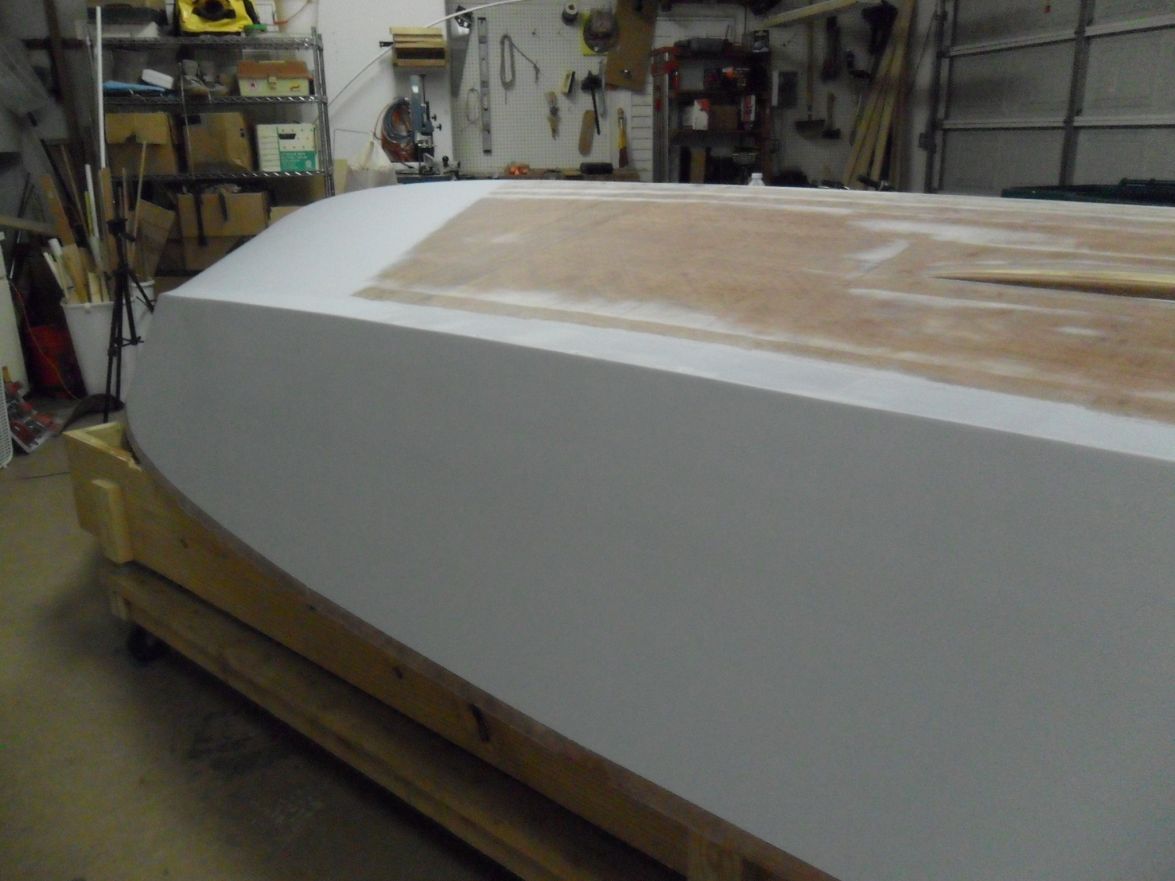
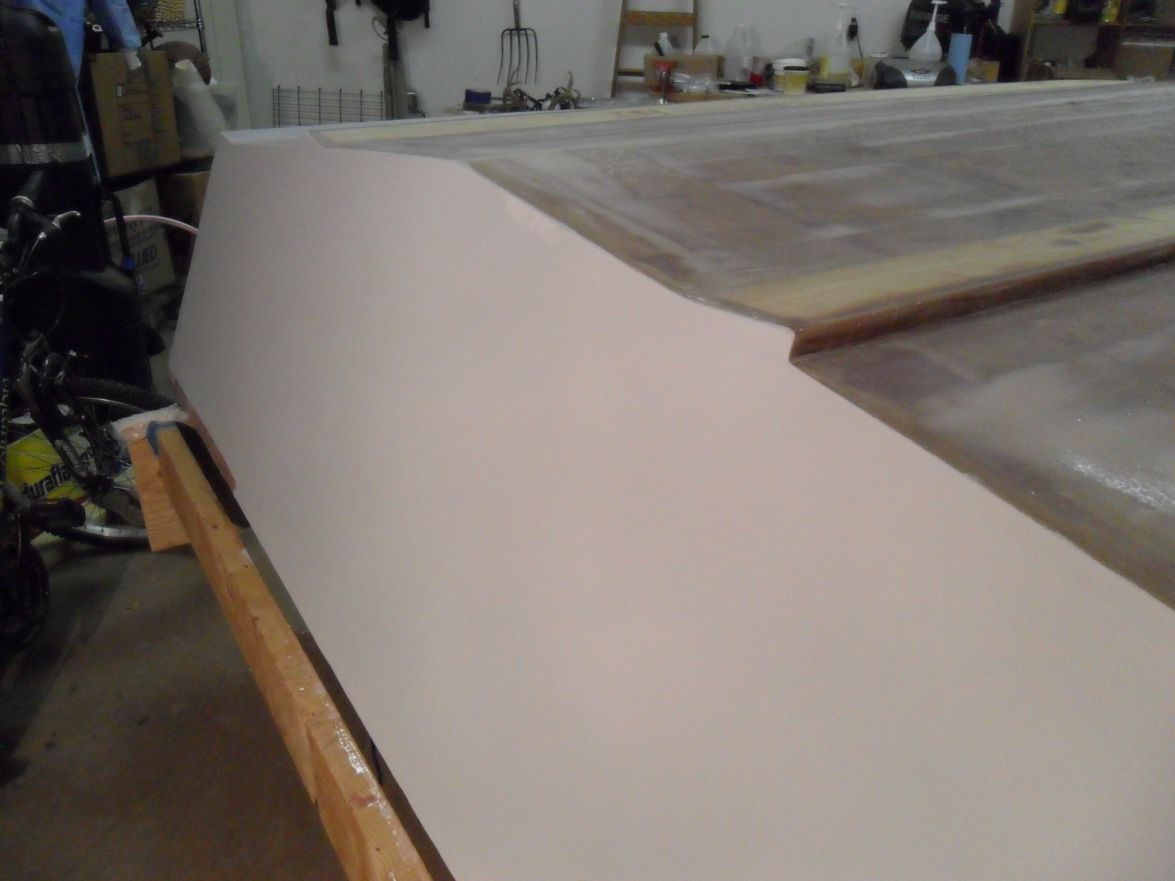
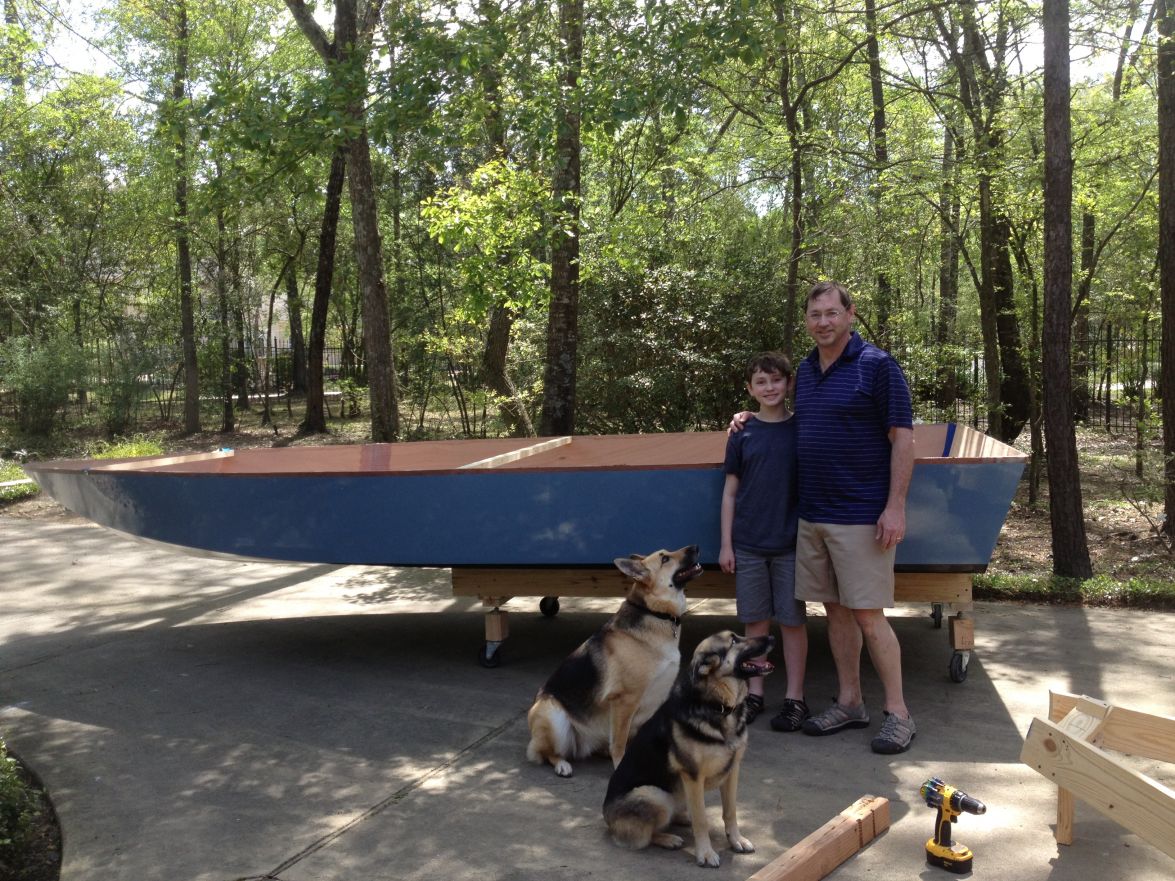
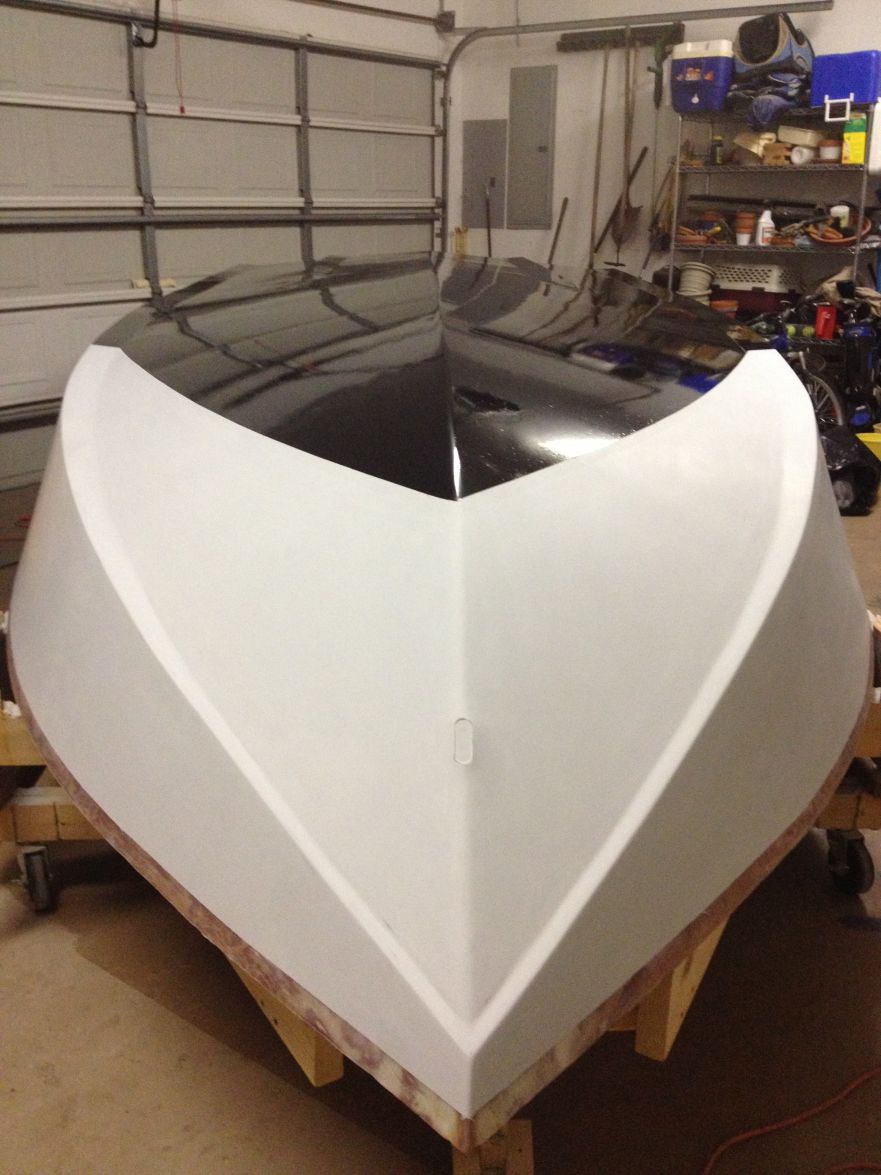
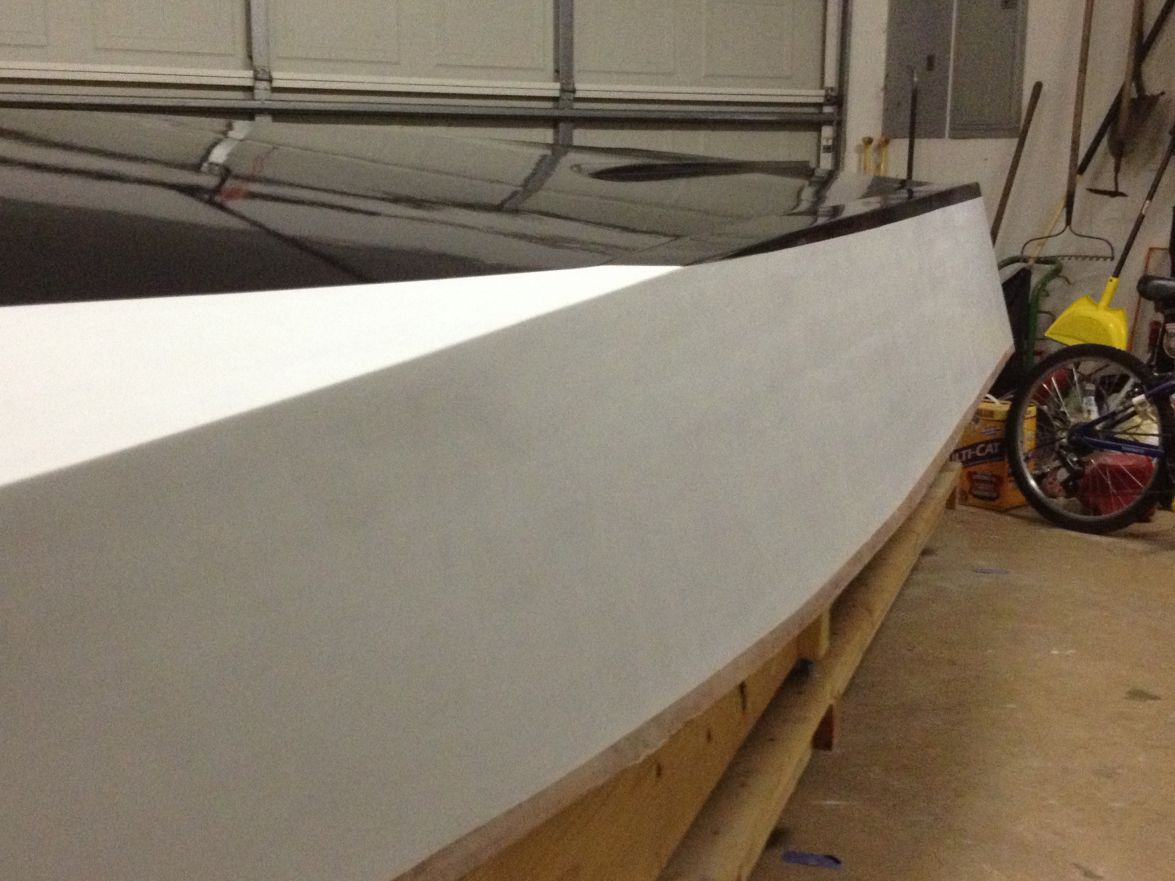
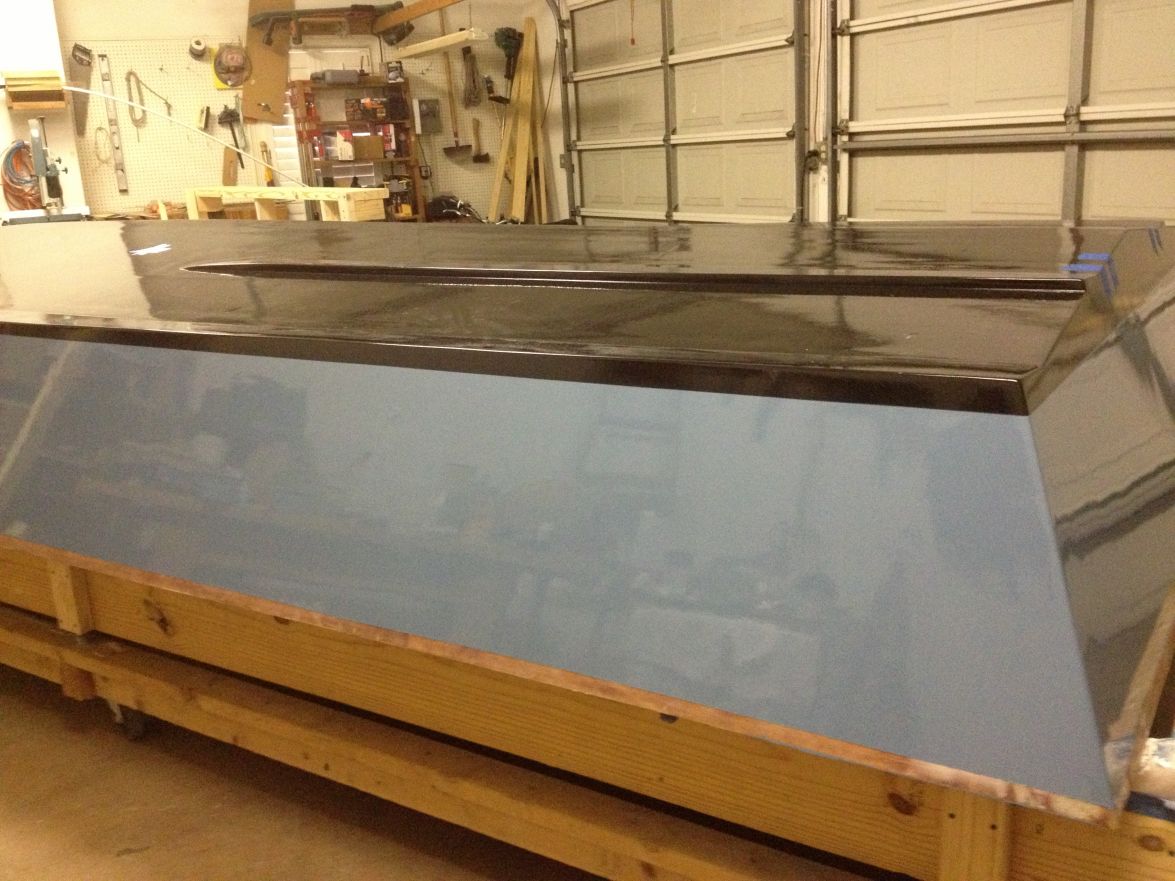
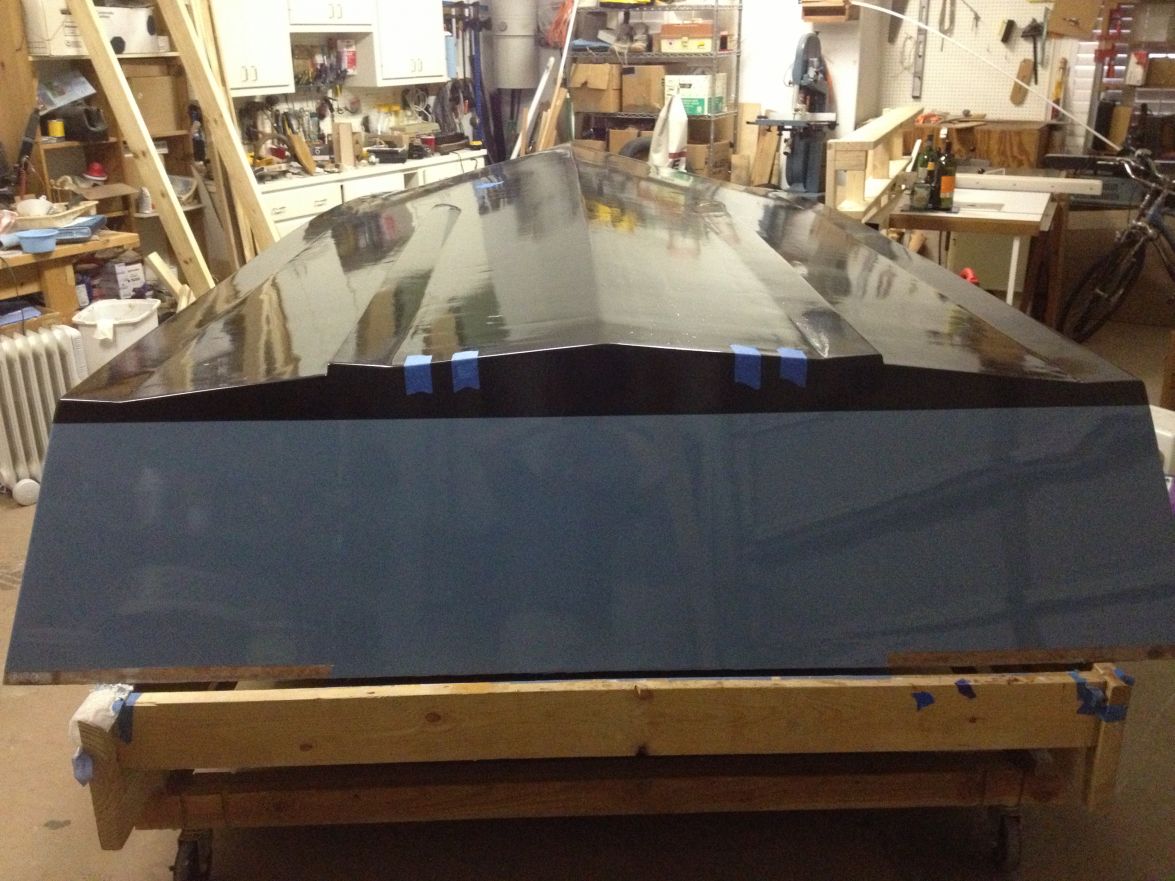
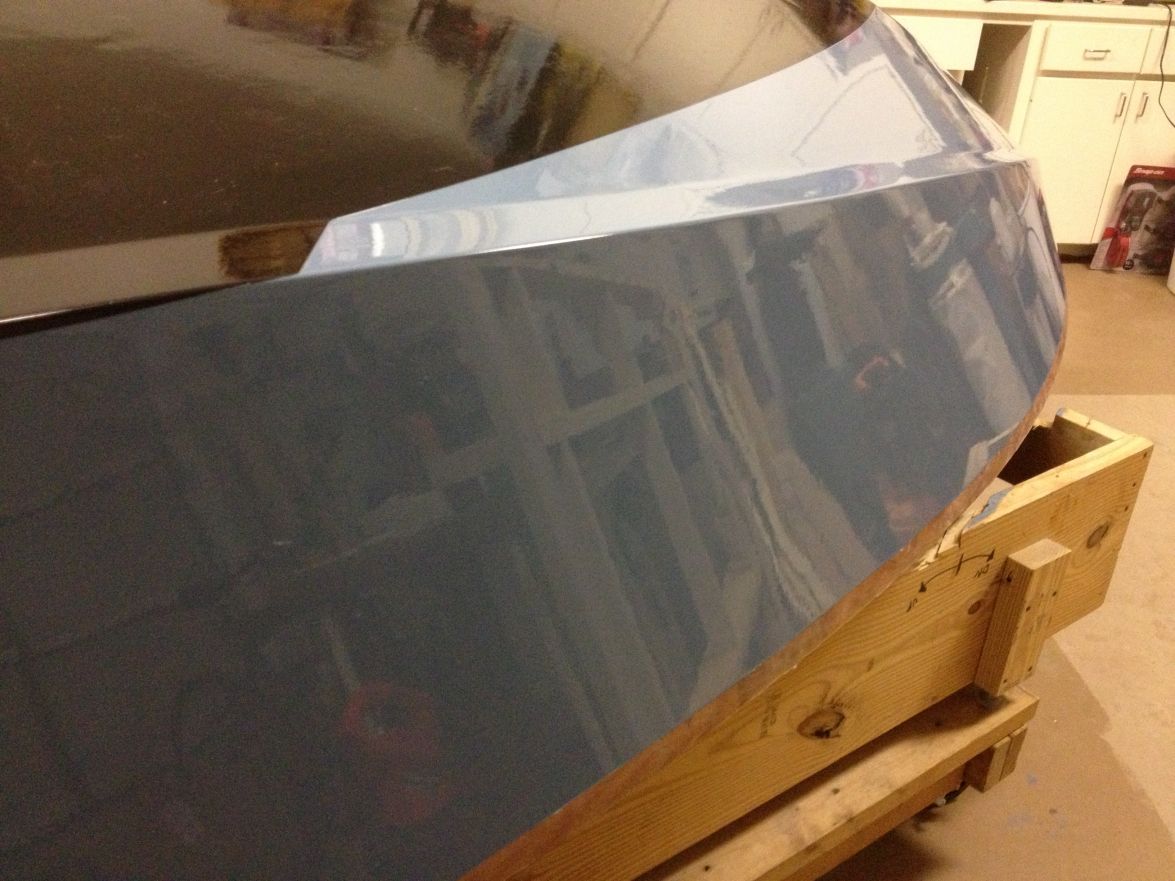
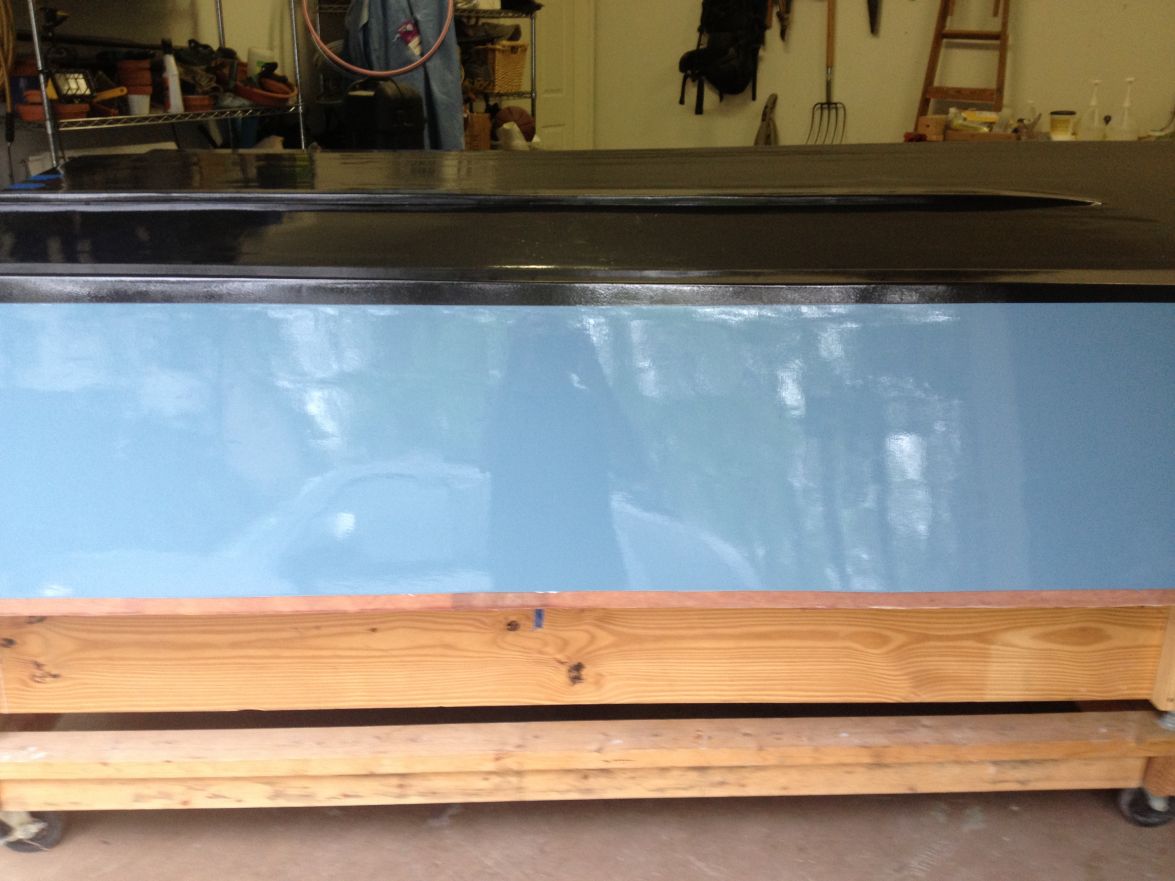
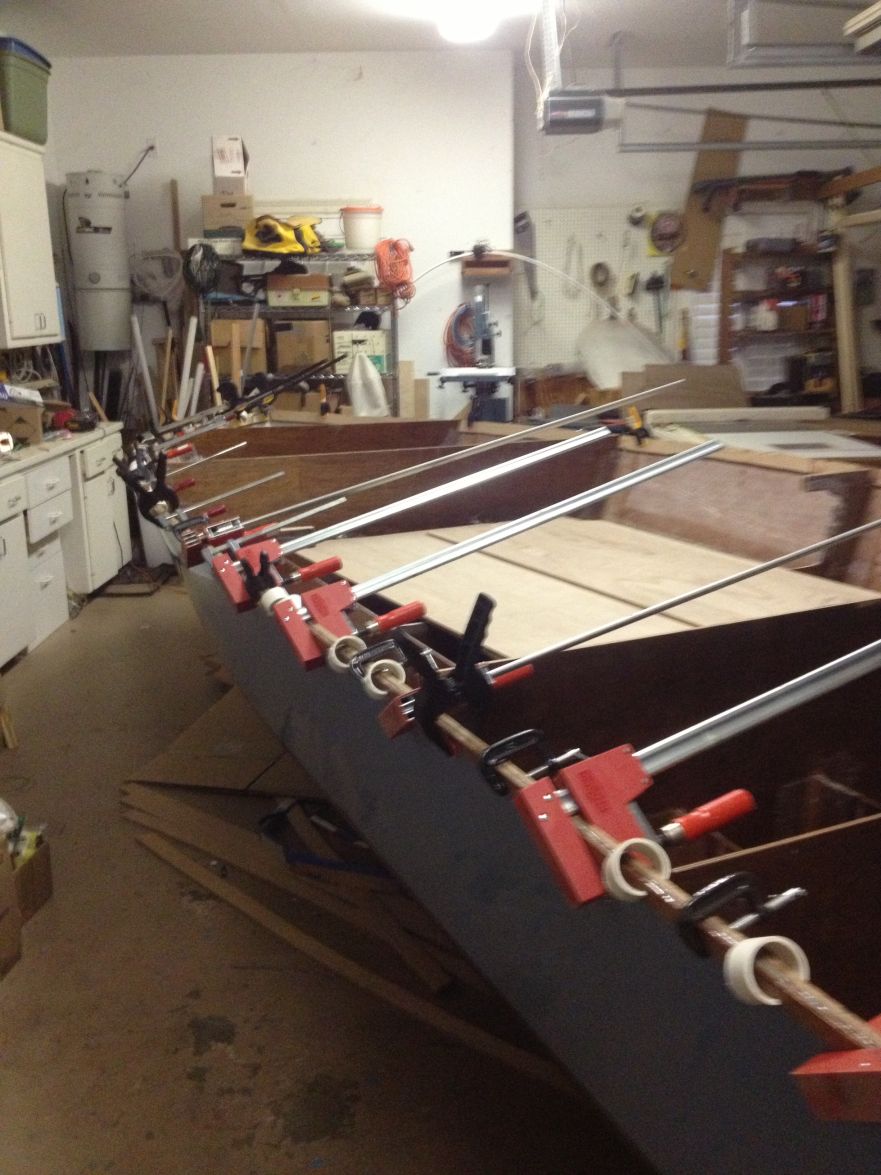
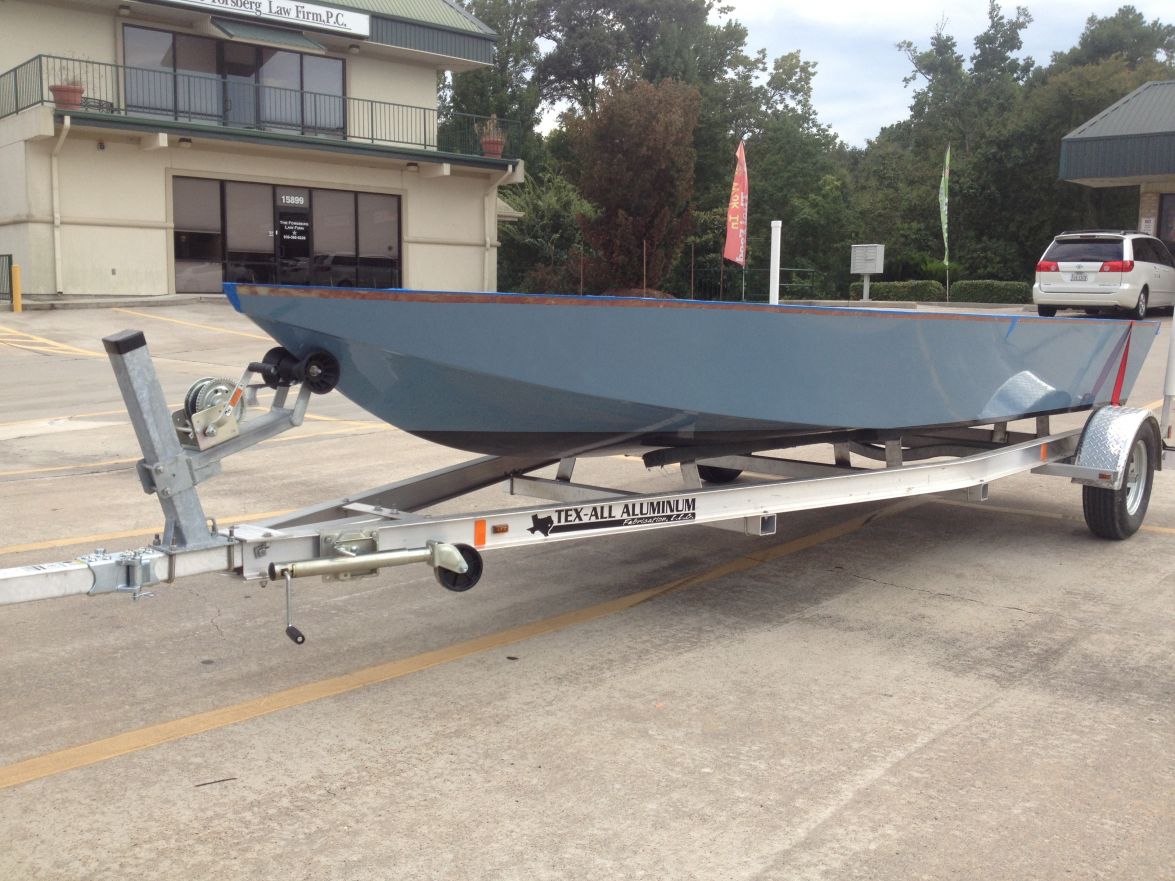
Some progress, finally. Weather and other factors conspired to keep me from painting for a couple of months, but I got it done. This is with 3 coats of Sterling Jay Gray. I'm real happy with the outcome. I followed the Sterling instructions and the info on the forum, including a 2:1:1 ration of base:catalyst:thinner. My son rolled and I tipped. One bit of advice I can pass on is to do no more than 2-3 sq. ft. at a time. We stayed with that for the first coat but for the second coat my son got ahead of me by a couple of sections and we had some coloring inconsistencies. We were careful to stick with 2 sq ft or so for the 3rd coat and got a nice, uniform result. I pulled the tape about 12 hrs after application and it came off easily and clean. I figured I had about 70 sq.ft. to paint. For my first coat I used 8 oz color base, and had about a third left over. For the next two coats I used 2/3 c. base. I had a little left over after the second coat and quite a bit after the third. This paint really goes a long way! I still have over half of my quart of base left.
Next is the flip...
I will post it again in the Power Boats section, but for those in the SE TX area reading this I will have a nice boat stand to give away after the flip. Contact me and it's yours.

Re: willg's PH18
Posted: Sun Mar 23, 2014 5:49 pm
by Cracker Larry
Nice
Re: willg's PH18
Posted: Sun Mar 23, 2014 7:01 pm
by willg
Thanks, CL. I do have a question for you or anyone else with Sterling paint experience. I tipped horizontally first, then vertically. It doesn't show in the pictures, but with daylight and standing back a bit I see vertical brush marks. It's the same throughout the hull, so it wouldn't have been a matter of the paint needing more thinner as I made my way around the hull. I can live with the brush marks, and the fish won't care, but figure now's the time to ask if others have had the same experience or it the paint has spread out to a perfectly flat surface in others' hands. I can't get it to show in a picture - this is the best I can do. Thanks for any input.
Re: willg's PH18
Posted: Sun Mar 23, 2014 7:31 pm
by wildbill
Now that's a mirror finish!
Re: willg's PH18
Posted: Mon Mar 24, 2014 9:33 am
by Cracker Larry
It sounds like you might be over-tipping. That paint doesn't like to be worked too much. I only tip in one direction, vertically, tip it out and move on.
Another thing is the paint will continue to shrink as it cures. Brush marks you saw yesterday may be gone today.
Re: willg's PH18
Posted: Mon Mar 24, 2014 3:33 pm
by Noles309
Very nice job!
Re: willg's PH18
Posted: Sun Mar 30, 2014 11:29 pm
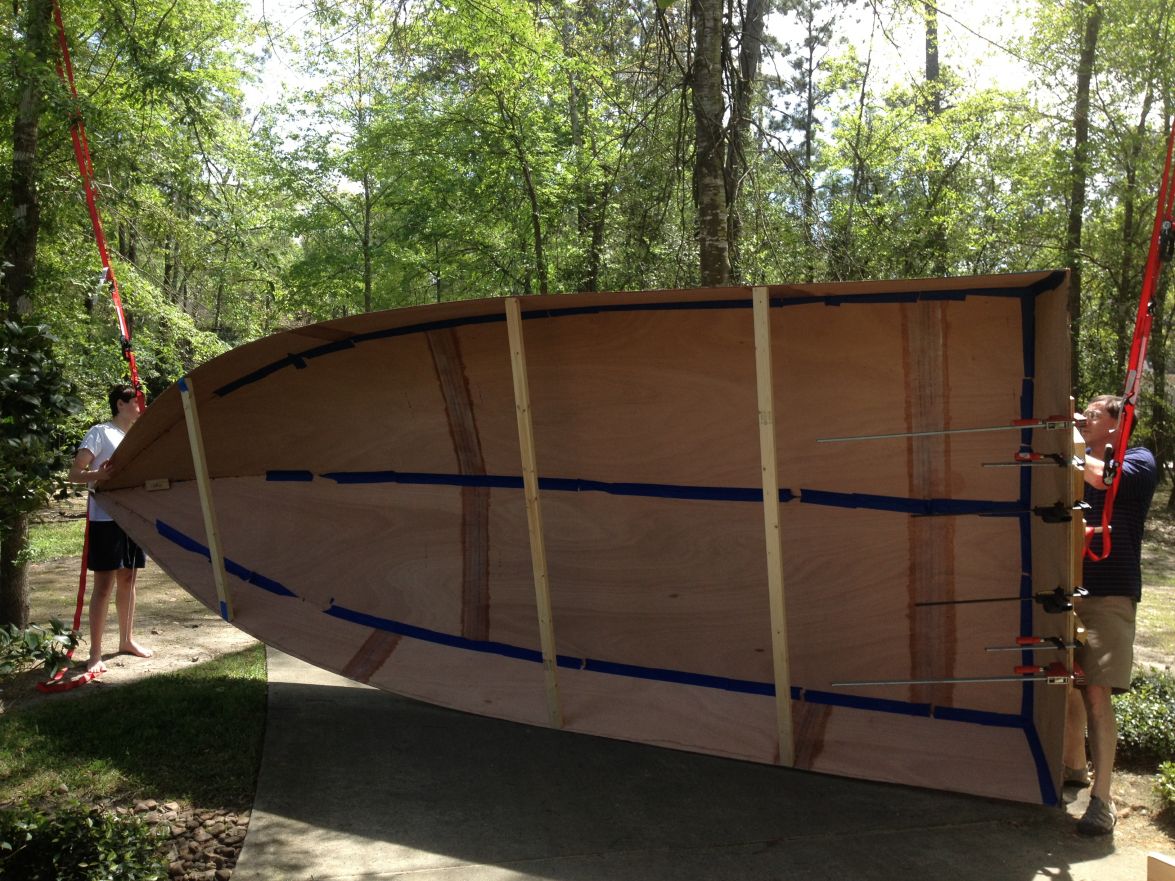
by willg
Re: willg's PH18
Posted: Mon Mar 31, 2014 1:05 pm
by swglenn
Neat way to do it. I have a lot of trees but nothing the right size or placement.
Jay Gray doesn't look gray in the sun, it is more blue. Pretty color.
You do beautiful work. Thanks for all of the help you have given me.
Re: willg's PH18
Posted: Mon Mar 31, 2014 7:25 pm
by justin_dwyer
Hi Will,
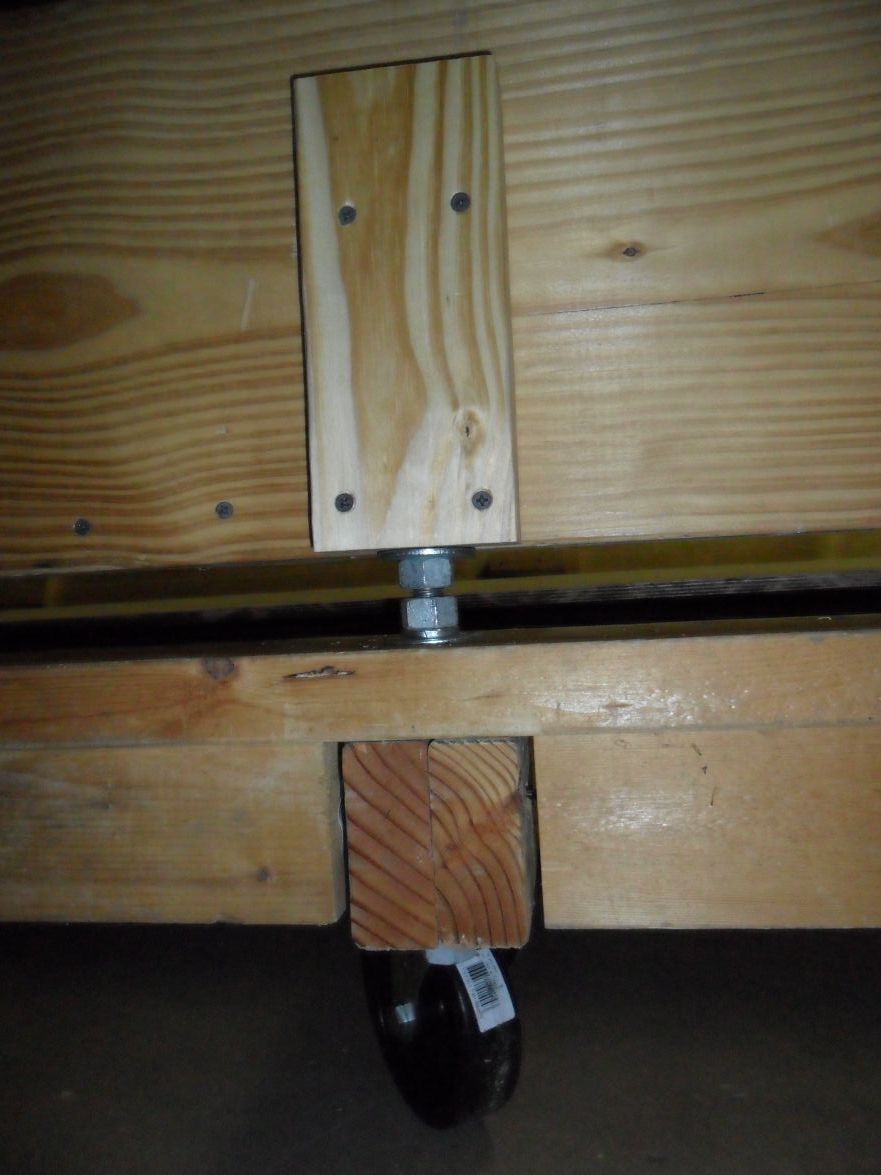
Great flip idea, I like the use of the transom clamp setup you have there, great idea.
The build looks awesome, keep it up.
Cheers
Justin
Re: willg's PH18
Posted: Sun Jun 01, 2014 3:31 pm
by willg
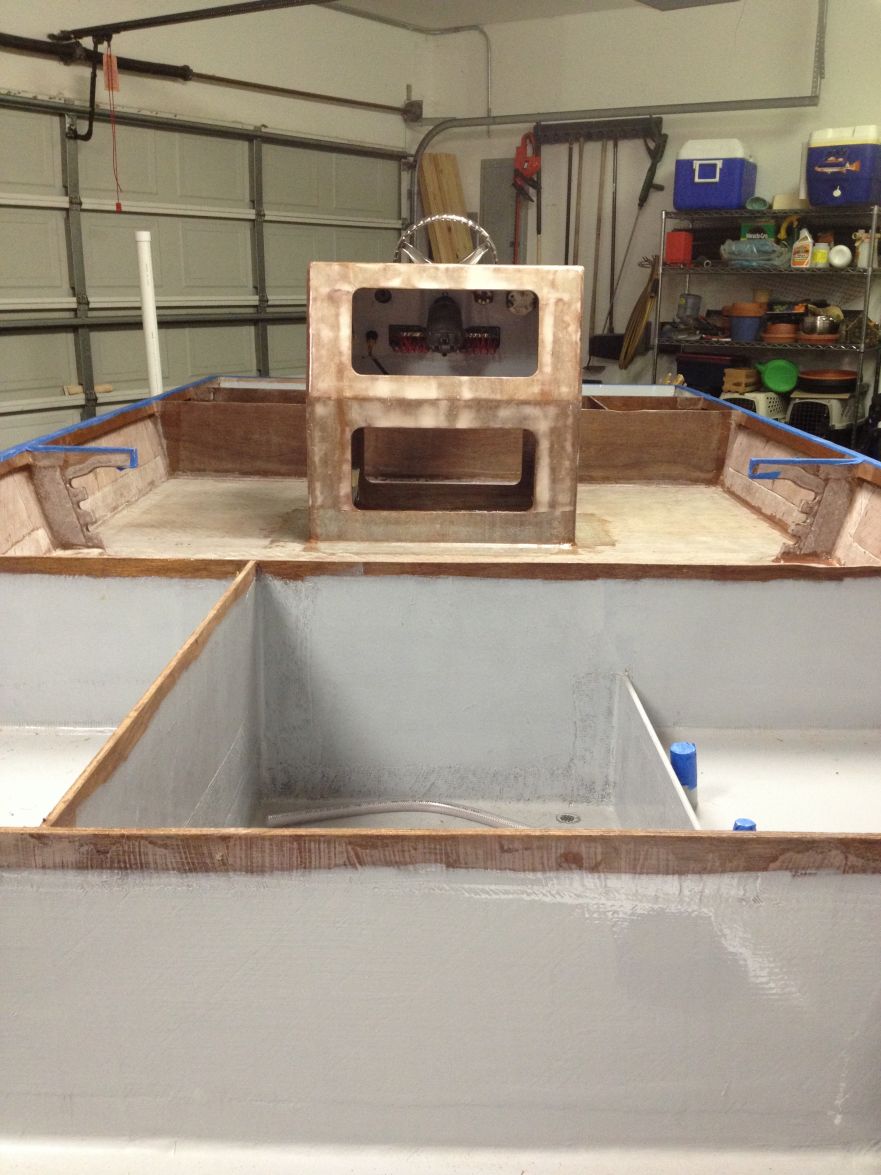
A few things I've done since my last post.
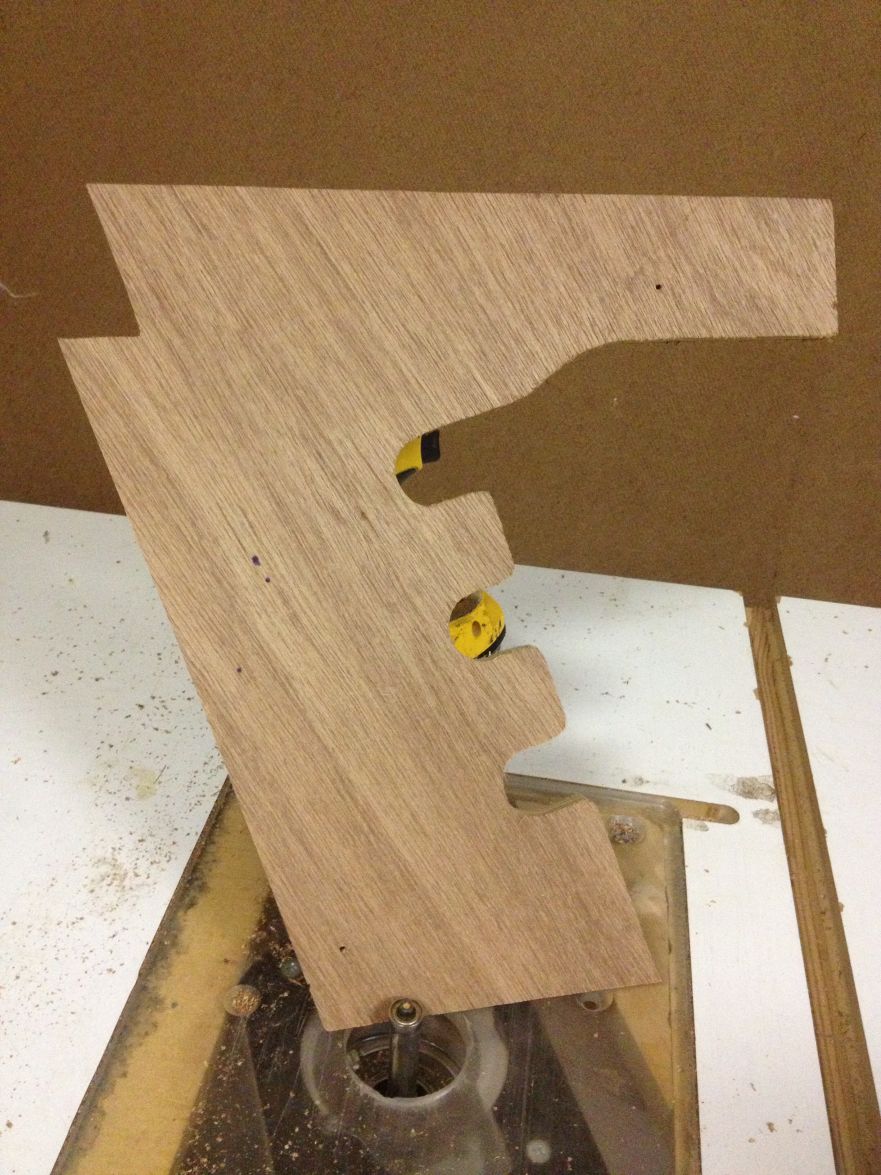
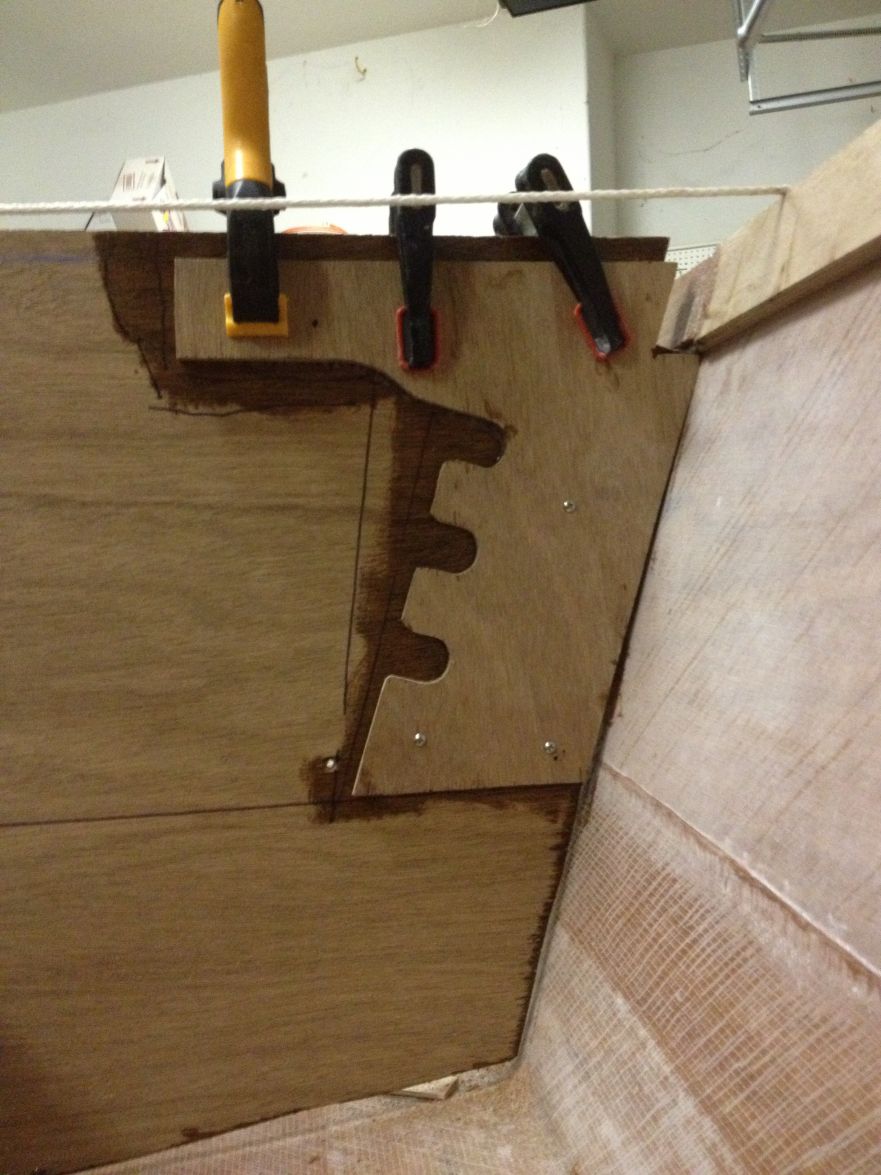
Laminated the transom.
Glassed the interior.
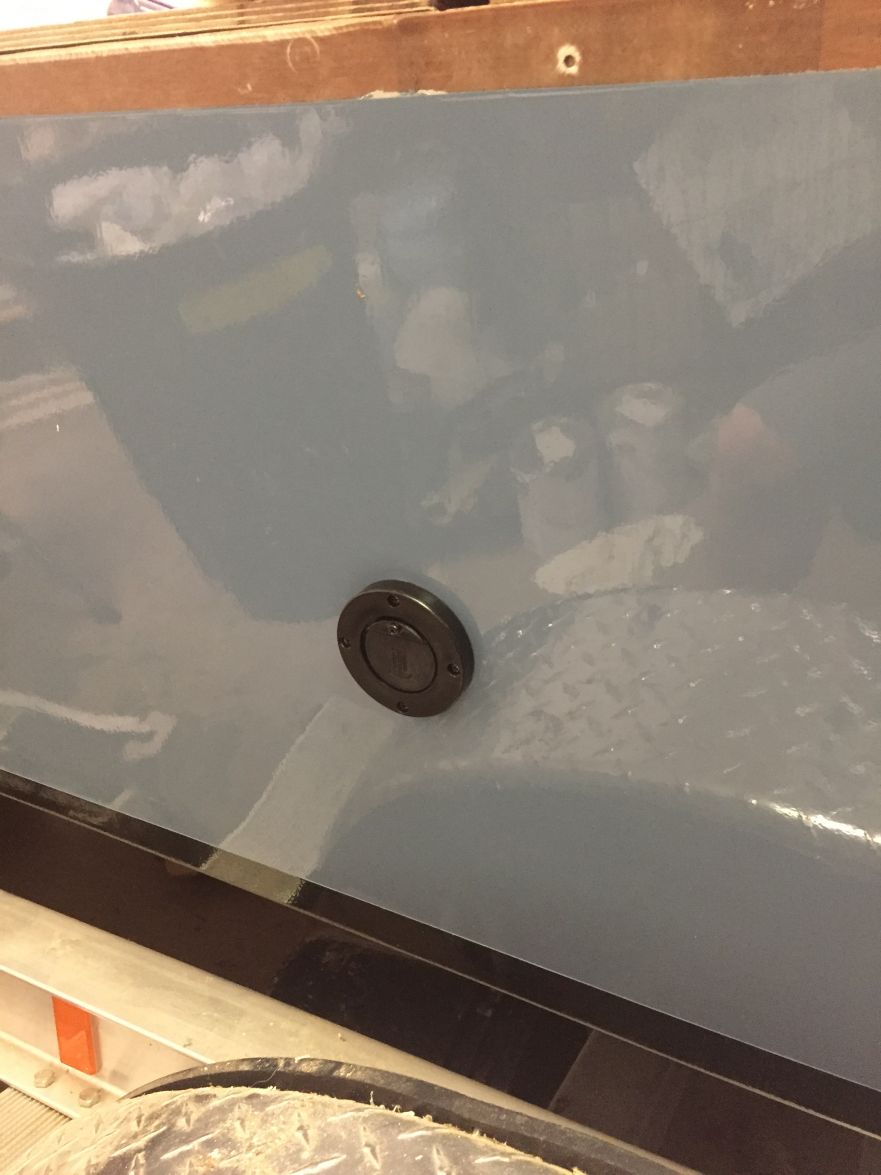
Routed out and glassed in a spot for a tranducer. I dropped my router just before this and broke the friggin' base plate. So I couldn't follow a circular pattern and make a pretty hole. Oh well. I have since replaced the broken plate.
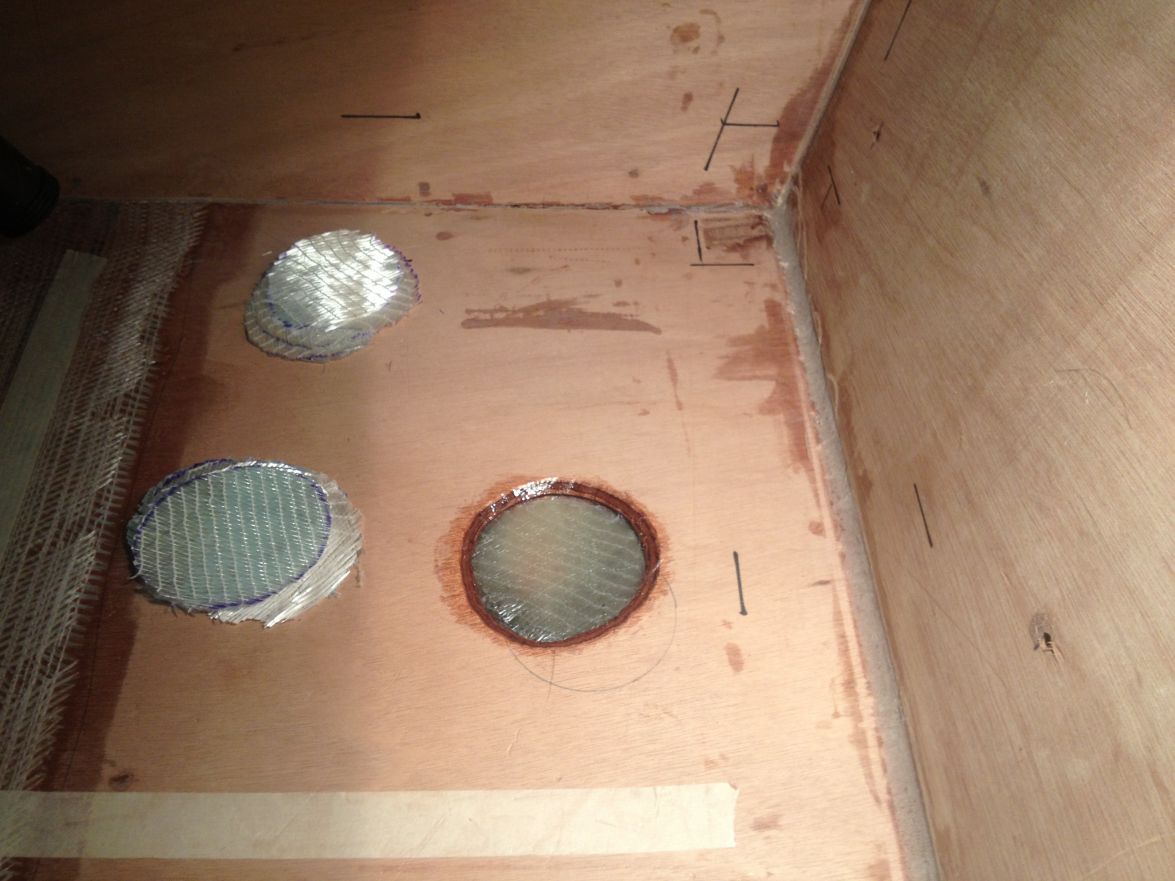
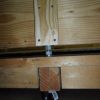
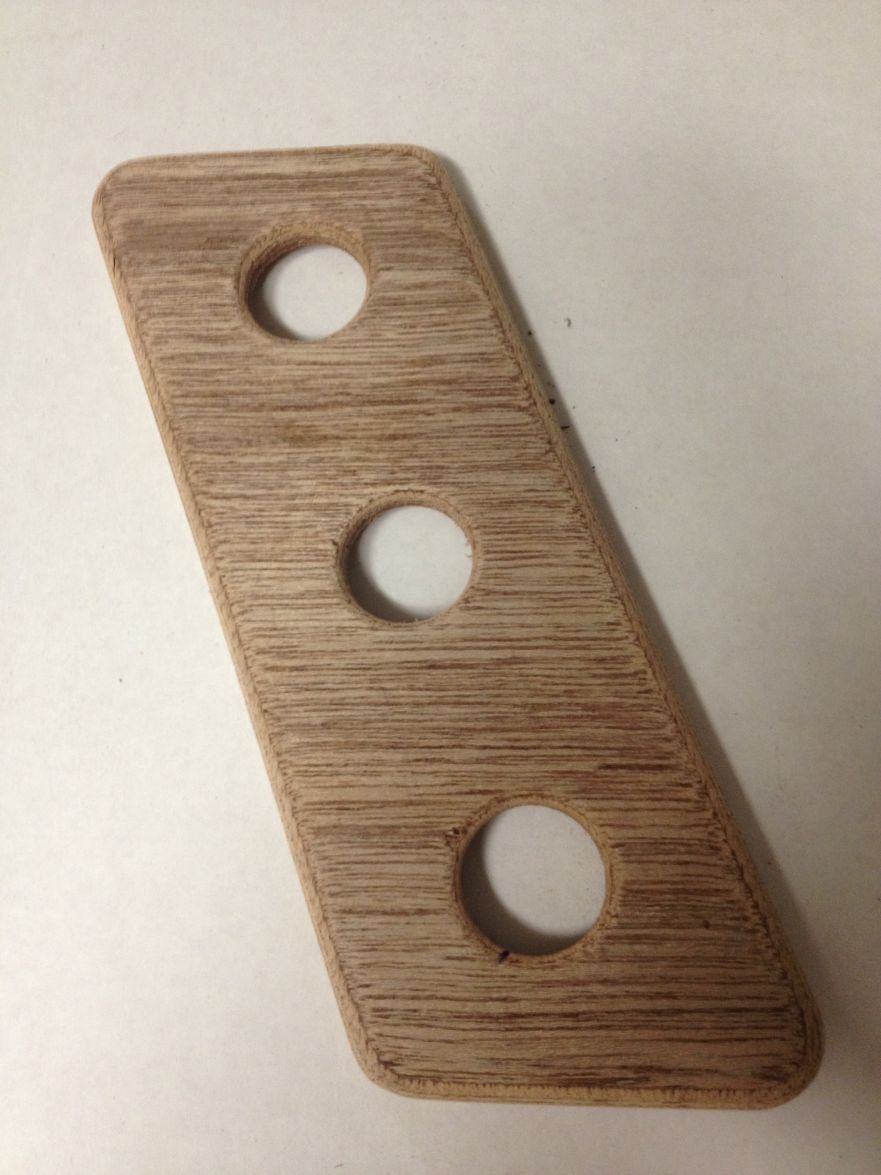
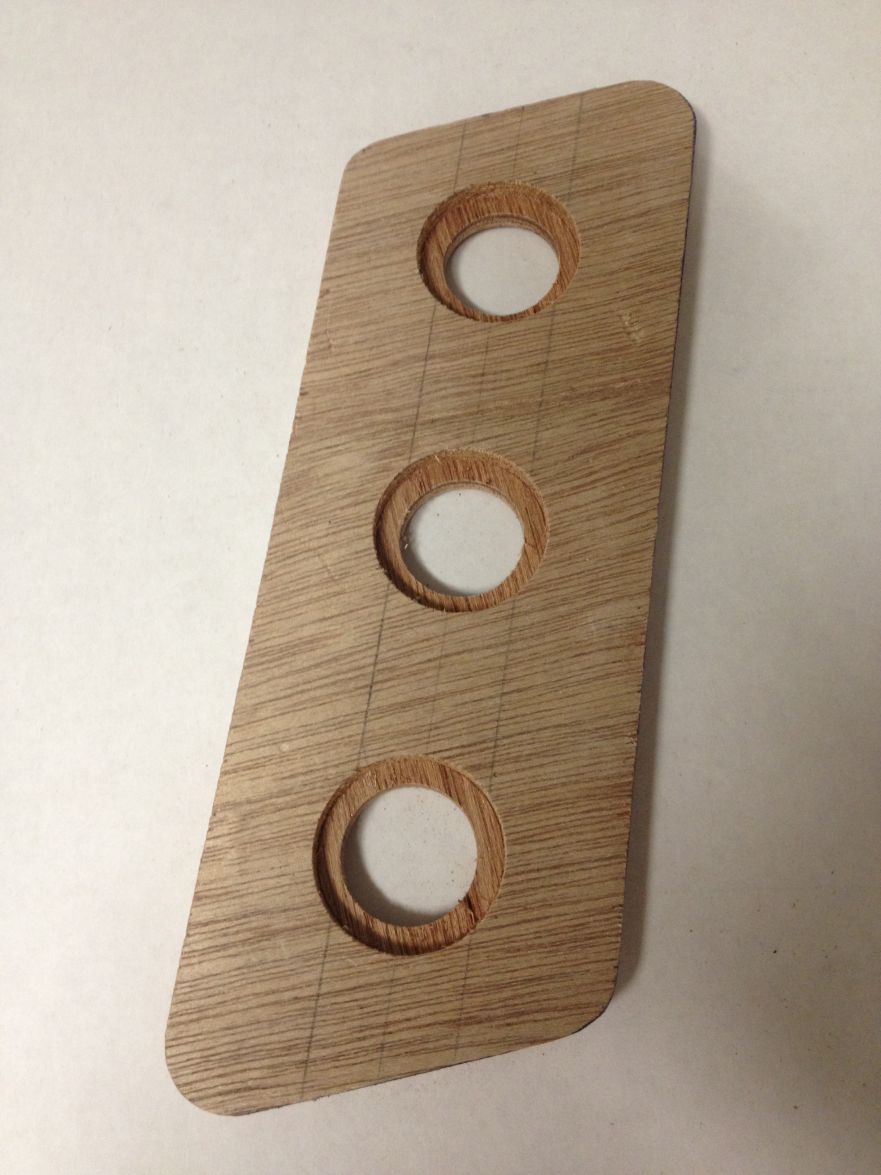
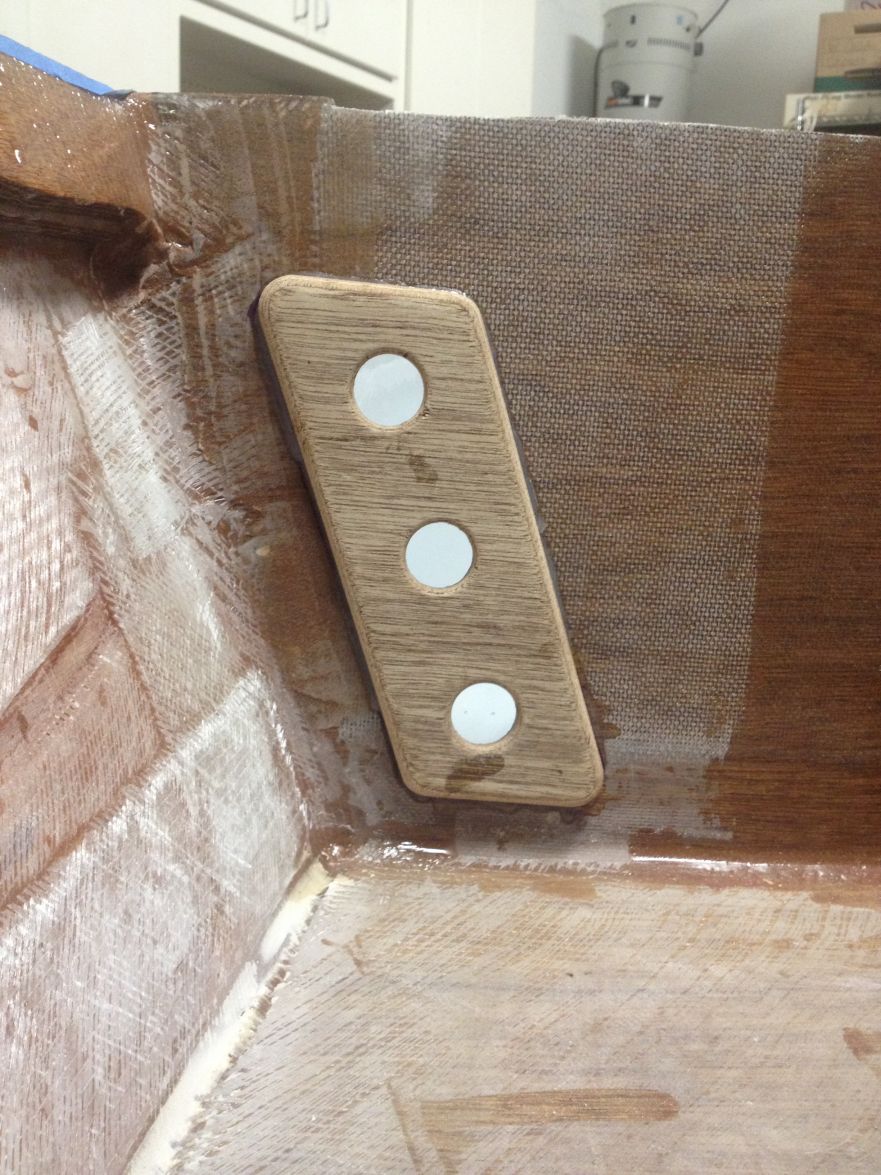
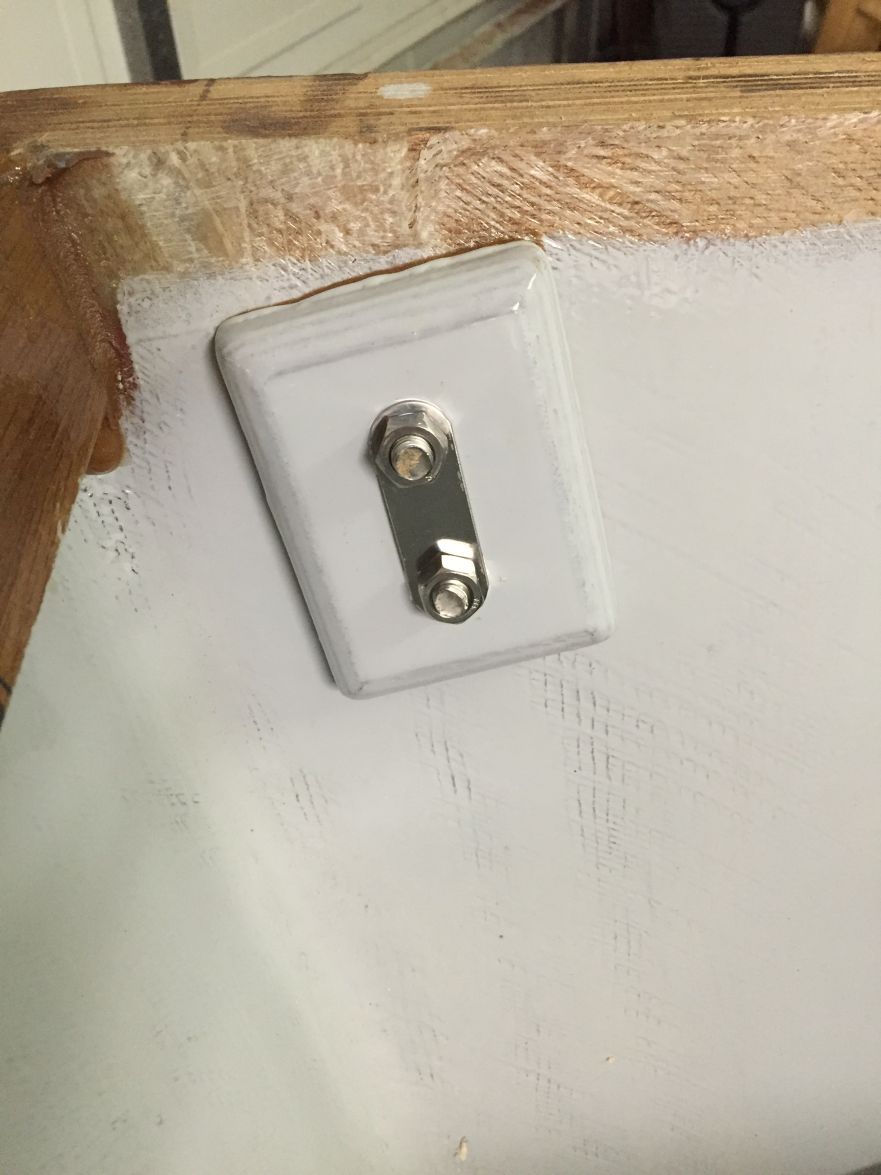
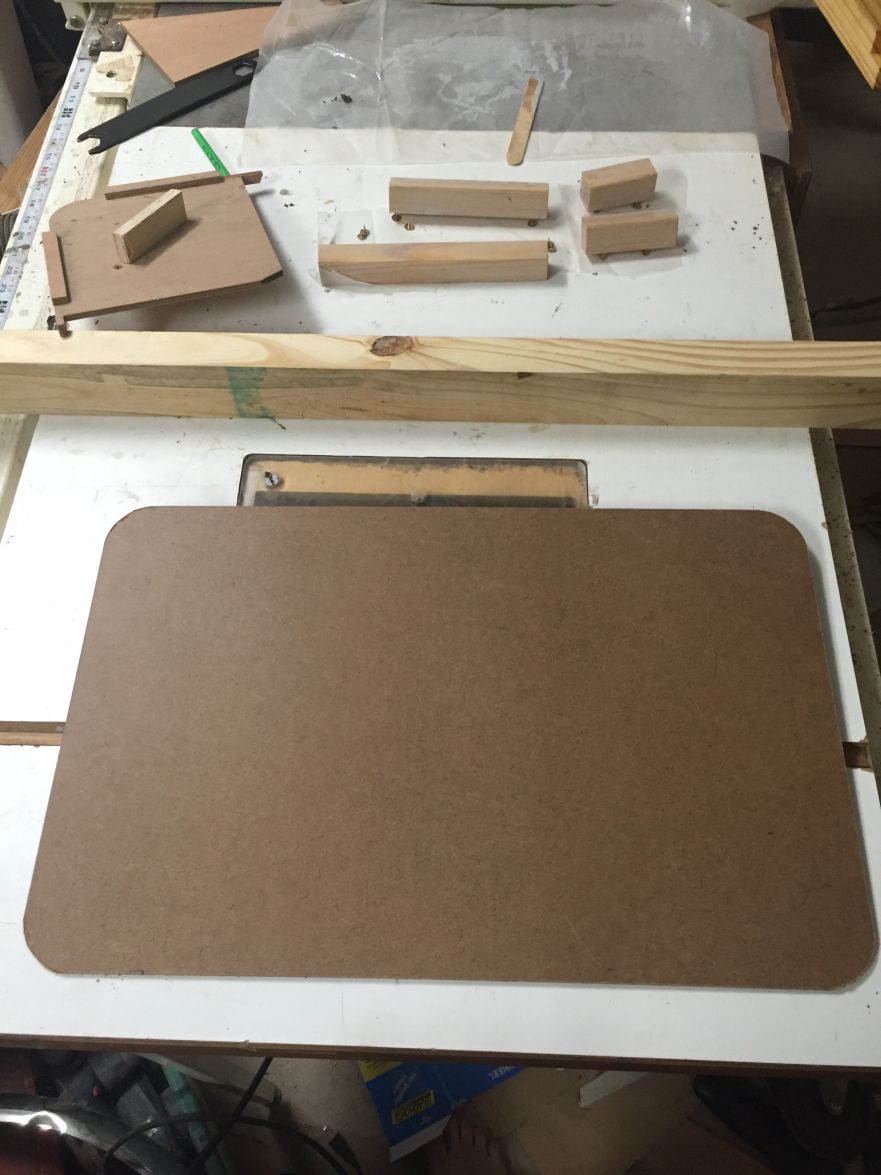
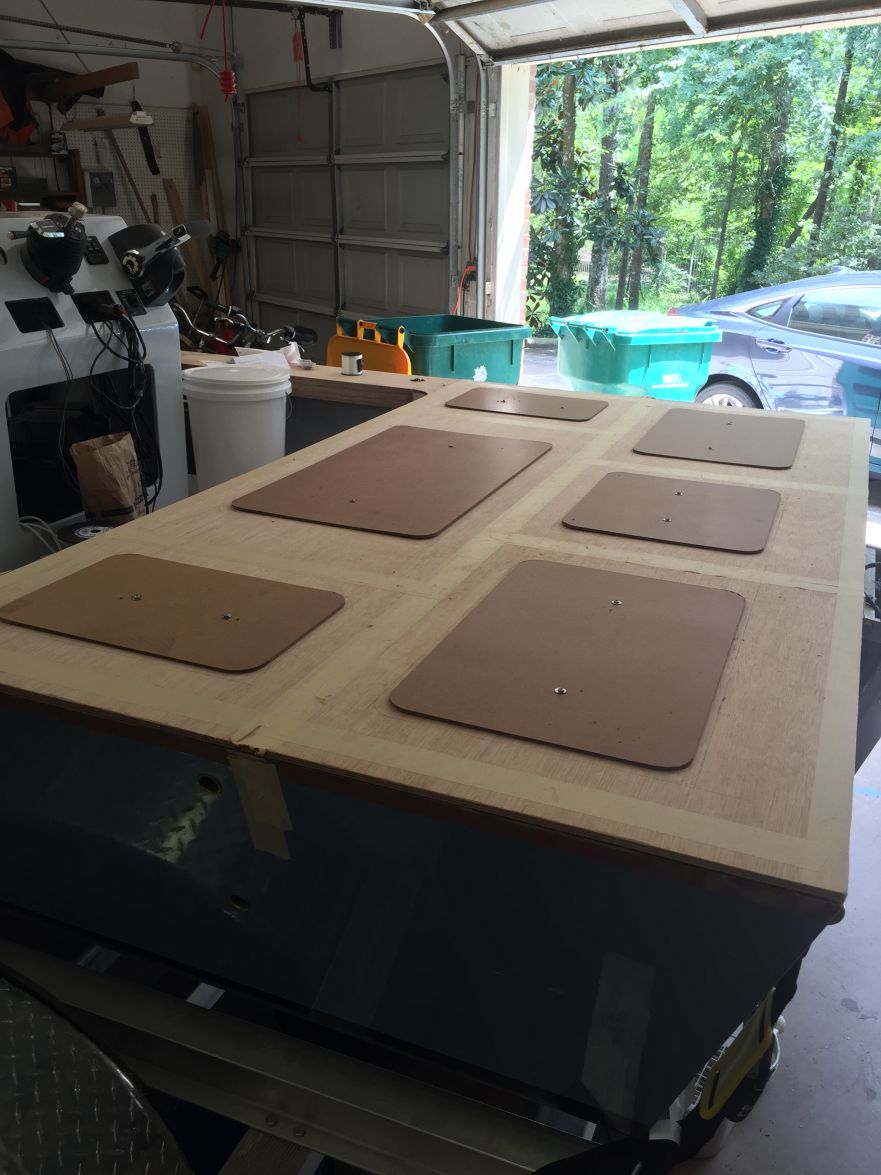
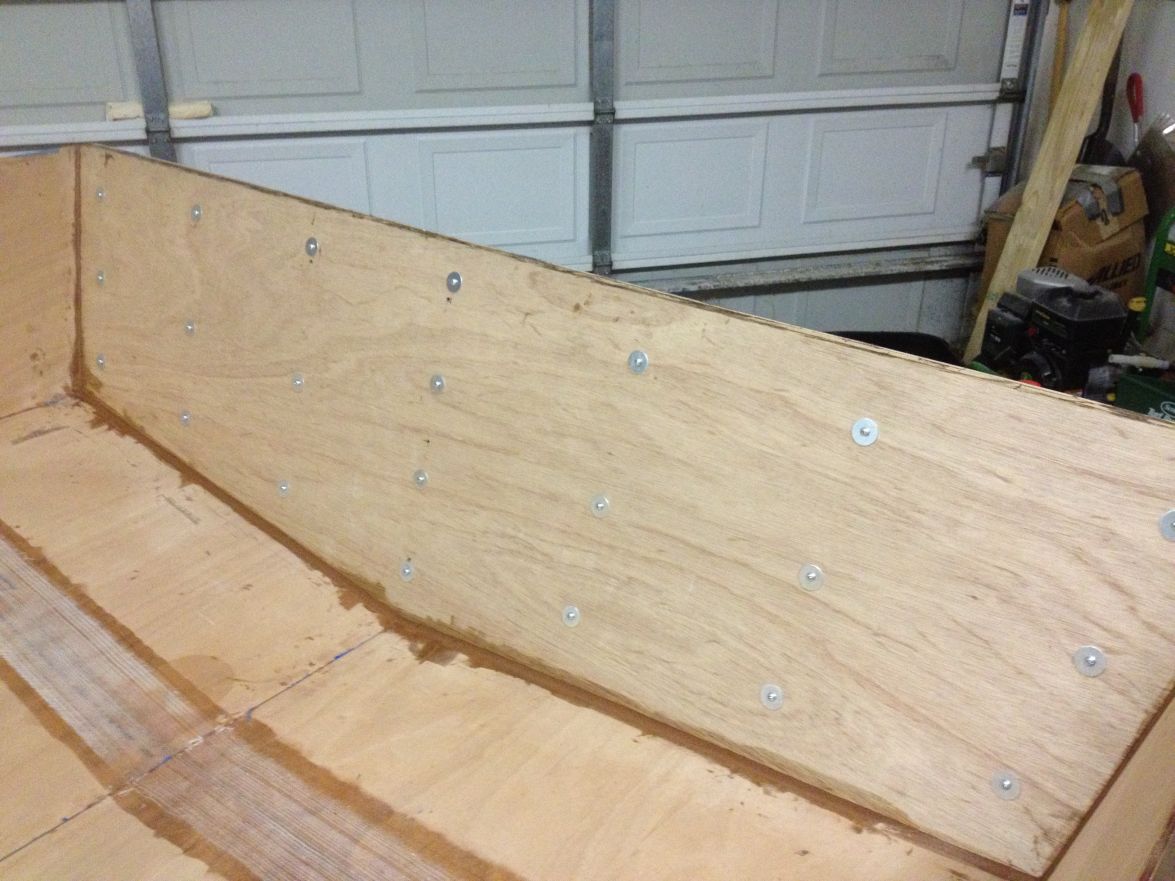
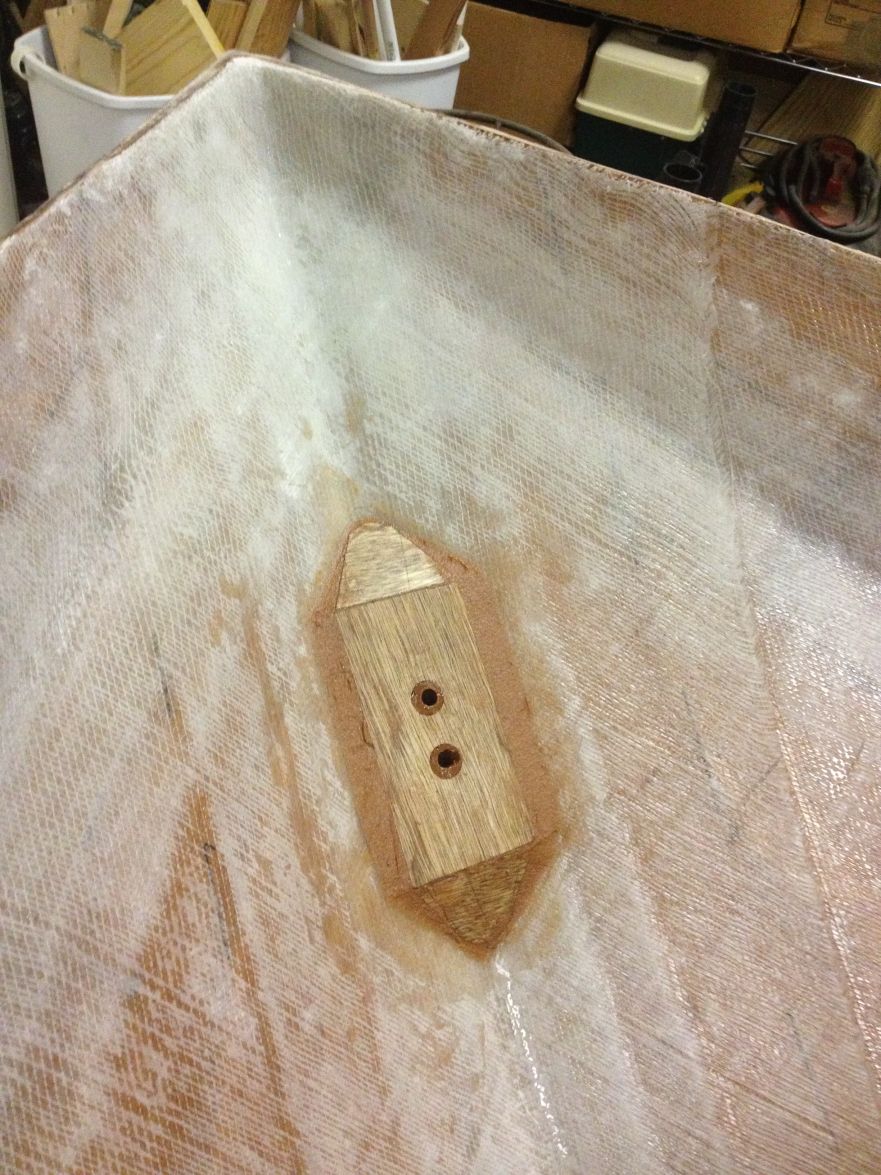
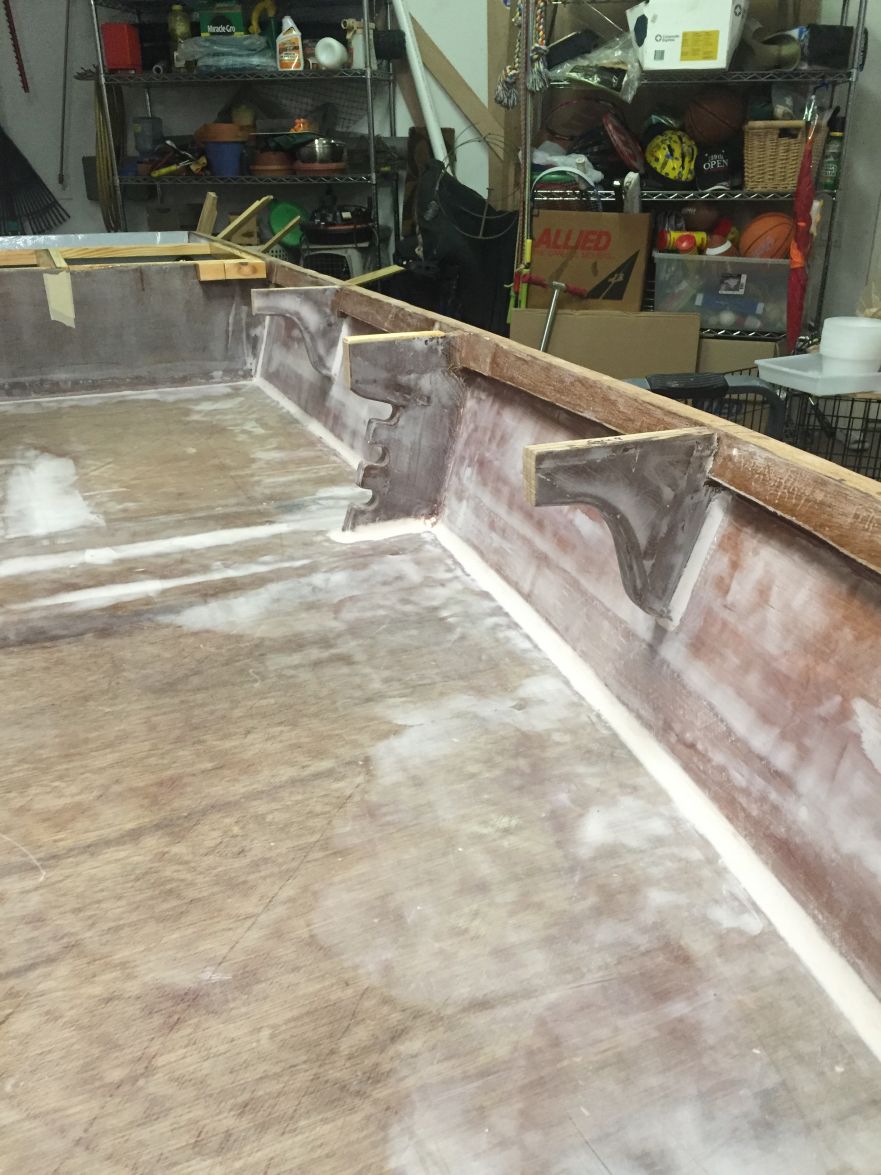
Installed the specified 6"x3" backing plate for the boweye. The corner pieces are there to help the glass lay down. There's also a smaller piece of 1/2" ply beneath the main plate. I beveled the sides to match the hull and bedded it all in EZfillet. I covered it with 5 layers of glass.
Tacked in the stringers.
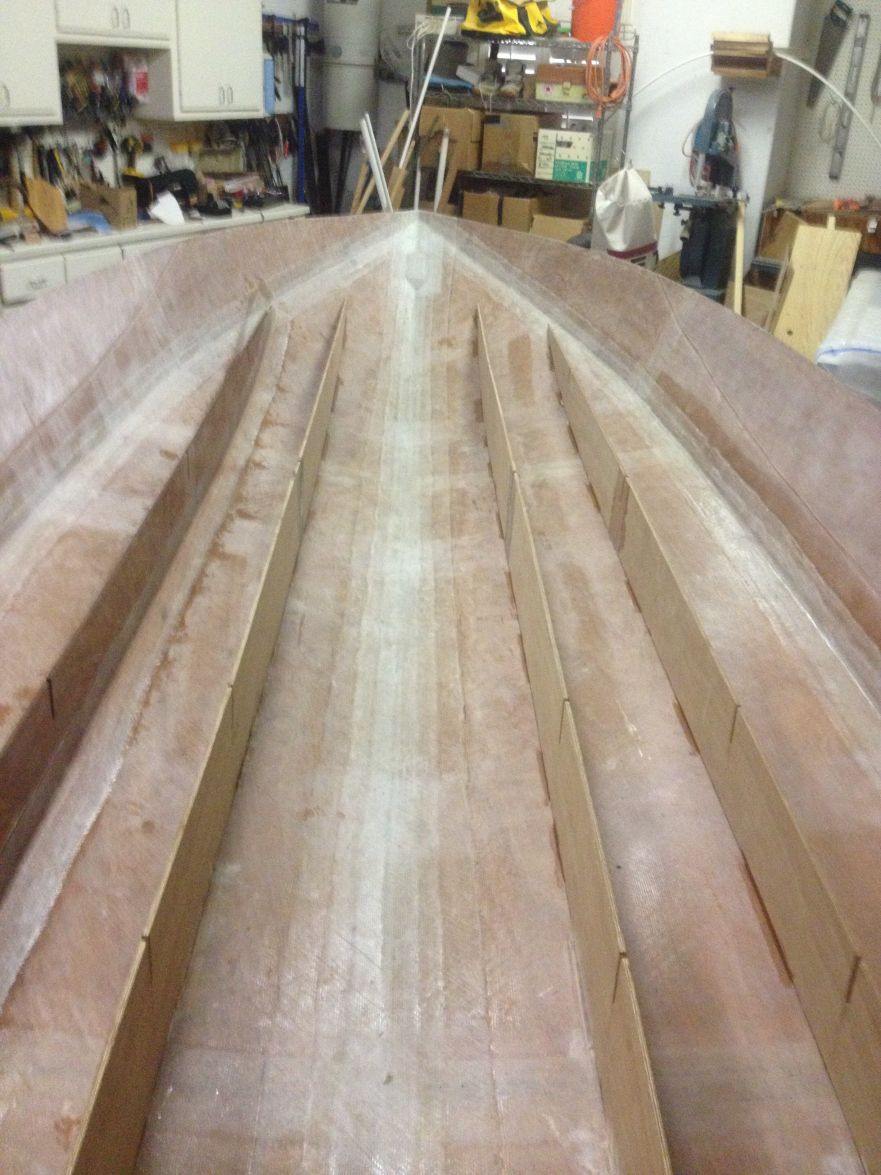
I filleted and glassed in one of them this morning wet on wet.
Following others' advice, I wet out the glass before installing it. Even with the long pieces it worked out great and I bet I got in done in a third the time I would have if I had wet it out in place. I covered my table saw with plastic, wet out the glass about a foot at a time, folded it up as I went along, then unfolded it along the stringer. Easy.
Re: willg's PH18
Posted: Tue Jul 01, 2014 12:13 am
by flyfishingmonk
WOW!!! You have really made a lot of progress. I am VERY impressed. I apologize for being out of the loop the last year or so. It's been a busy season with building a house and having a third baby (now three under the age of 6).
I am glad the stand worked out well and that the flip went smooth.
Your boat looks great! I look forward to watching your progress. It looks like we are at about the same stage.
Casey
Re: willg's PH18
Posted: Tue Jul 01, 2014 9:53 am
by swglenn
Glad to see you were able to work this weekend. Your work is great looking as always. What size bow eye did you get? I see the ones at Bateau but don't know if the length stated is the thread length or the overall length.
Re: willg's PH18
Posted: Tue Jul 01, 2014 12:34 pm
by willg
Casey and Glenn, thanks for the kind words. We are all three at about the same stage of our builds. I'm looking forward to getting those bulkheads in. That feels like the next big milestone for me.
I got 3 of the 3/8" x 4" bow eyes from Bateau. That size was suggested by Joel. Better long than short, particularly at the bow, and any excess can be cut off.
Will
Re: willg's PH18
Posted: Wed Jul 09, 2014 2:43 pm
by flyfishingmonk
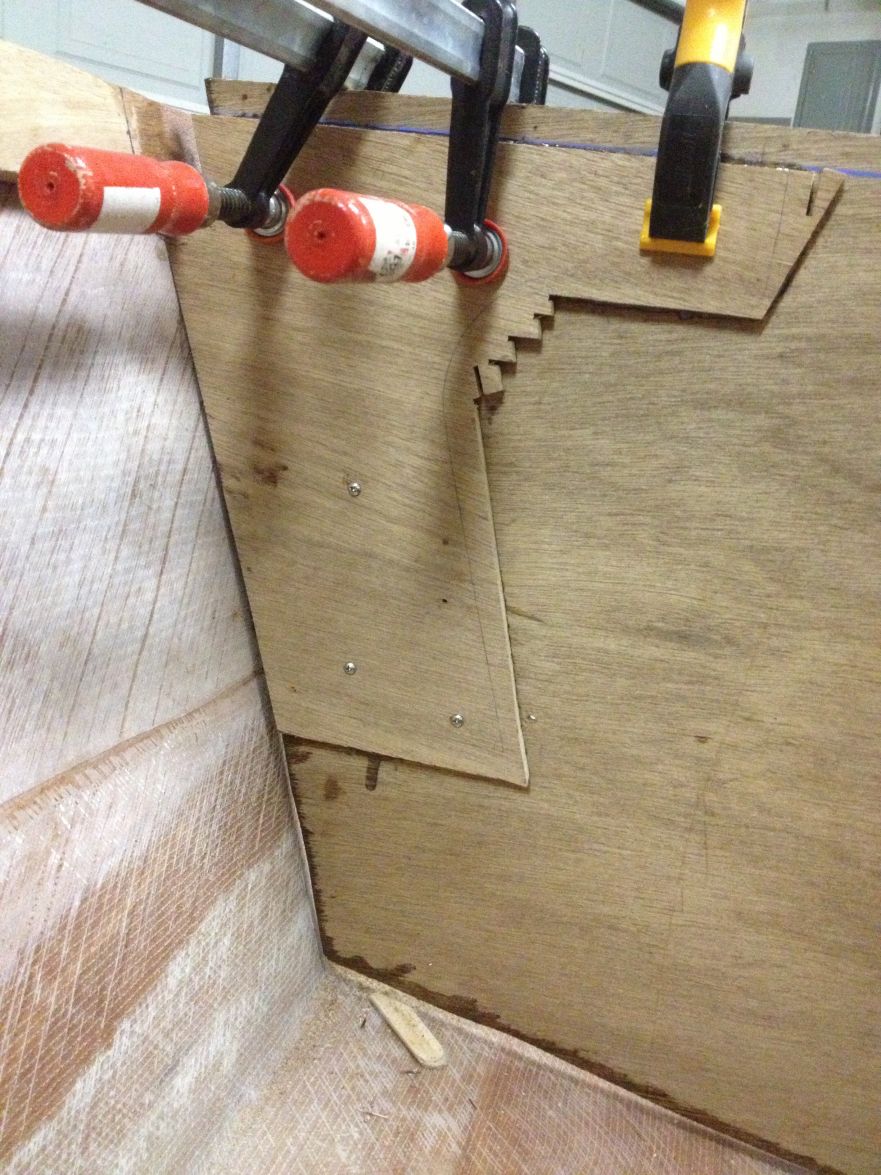
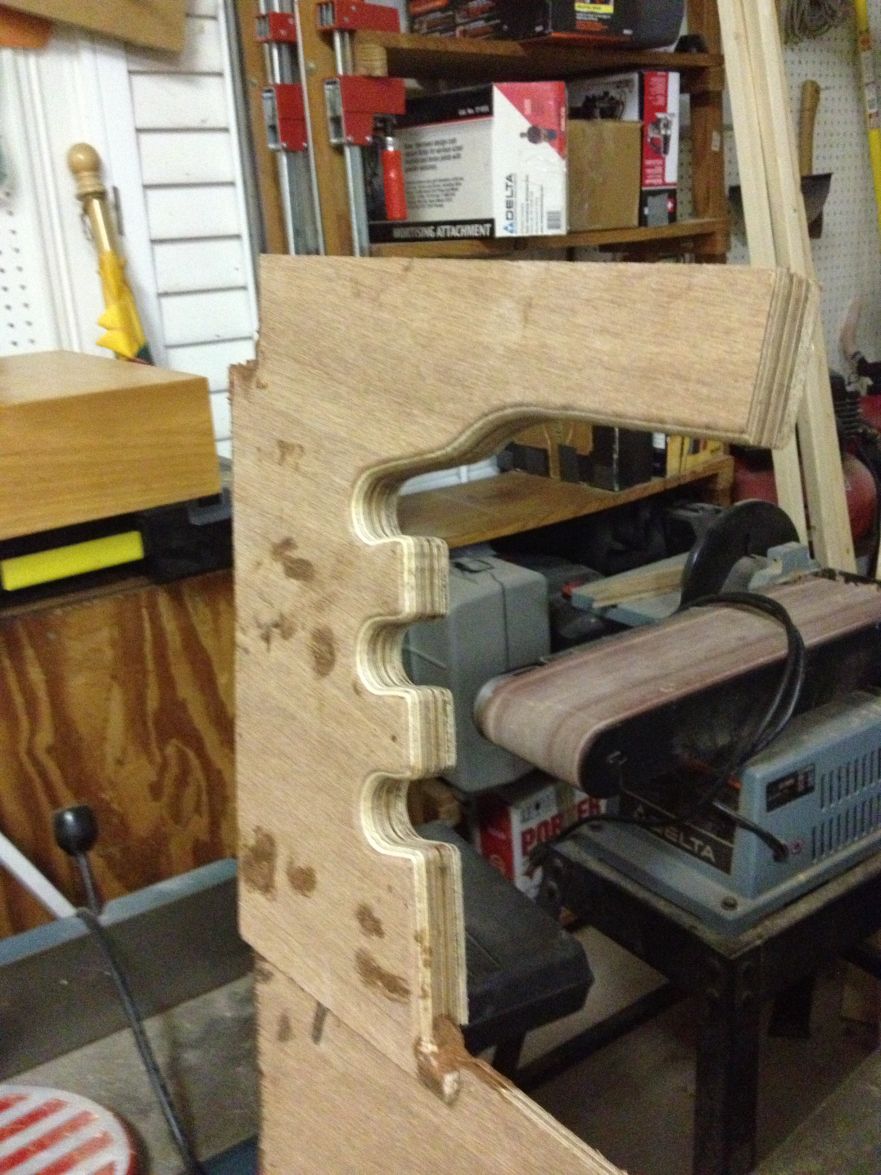
I just cut out two transom pieces exactly like what you did to laminate against the transom that is already there. That looks beefy. Thanks for the good idea.
Casey
Re: willg's PH18
Posted: Wed Jul 09, 2014 7:34 pm
by BarraMan
Very nice work!
Re: willg's PH18
Posted: Thu Jul 10, 2014 8:14 am
by willg
Thanks, guys.
Casey, I installed the transom pieces one at a time. I let the first piece cure, drilled out and filled the holes for the fender washers, then did the second piece. I had dry-fit all the fender washers before applying the glue, so the screws kept the pieces from sliding around during installation. It is beefy, very solid.
Re: willg's PH18
Posted: Thu Jul 10, 2014 10:44 am
by flyfishingmonk
Excellent. Very helpful!
Thank you,
Casey
Re: willg's PH18
Posted: Tue Nov 11, 2014 11:48 pm
by willg
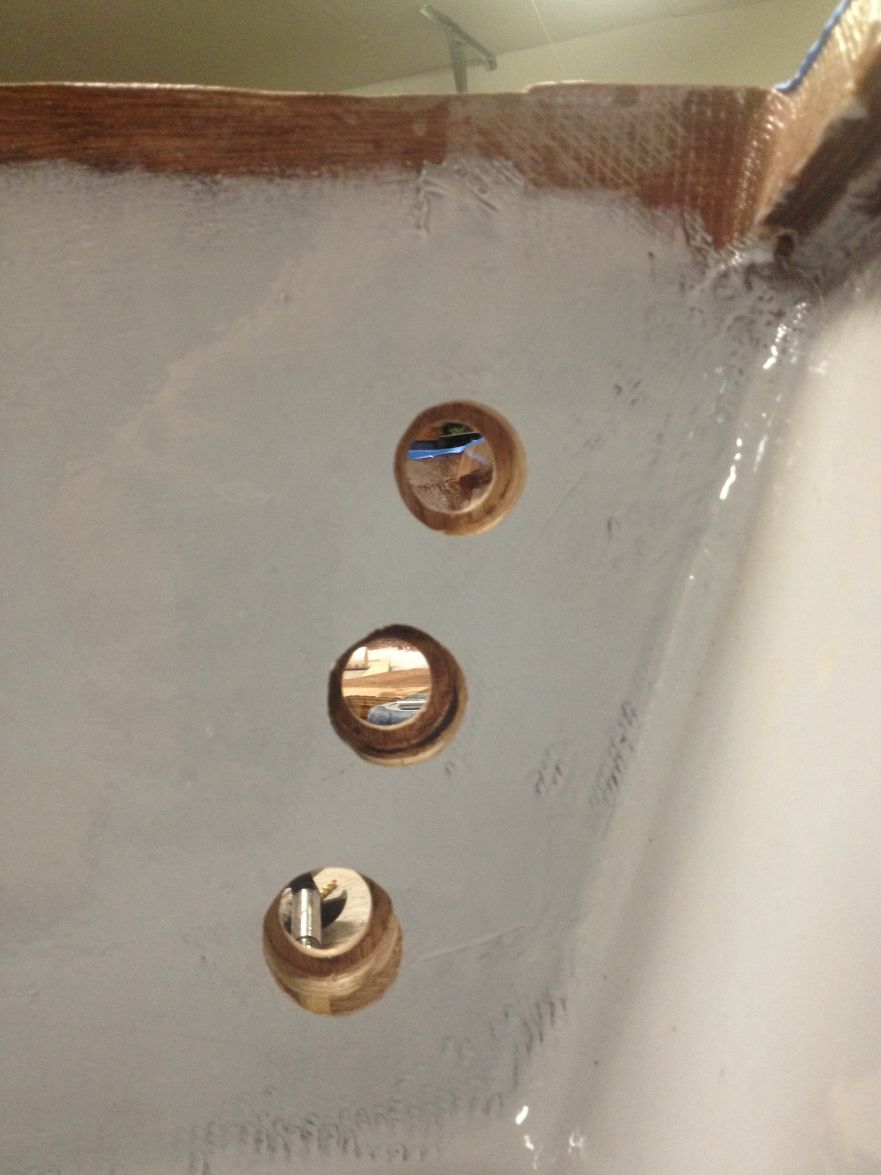
Re: willg's PH18
Posted: Wed Nov 12, 2014 9:56 am
by swglenn
Your glass work looks very nice. The rod holders came out well. Glad to see you making progress and taking another bite out of the elephant.
Re: willg's PH18
Posted: Thu Dec 04, 2014 8:47 pm
by willg
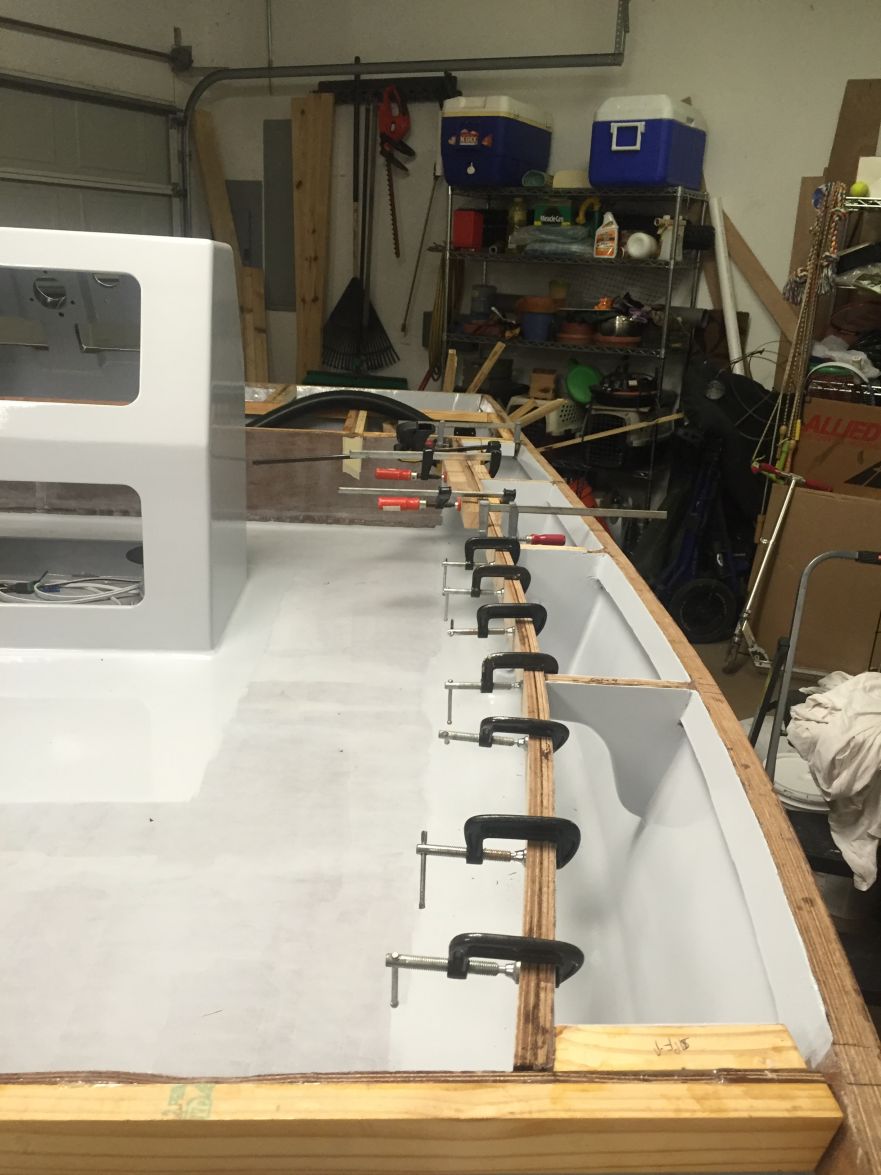
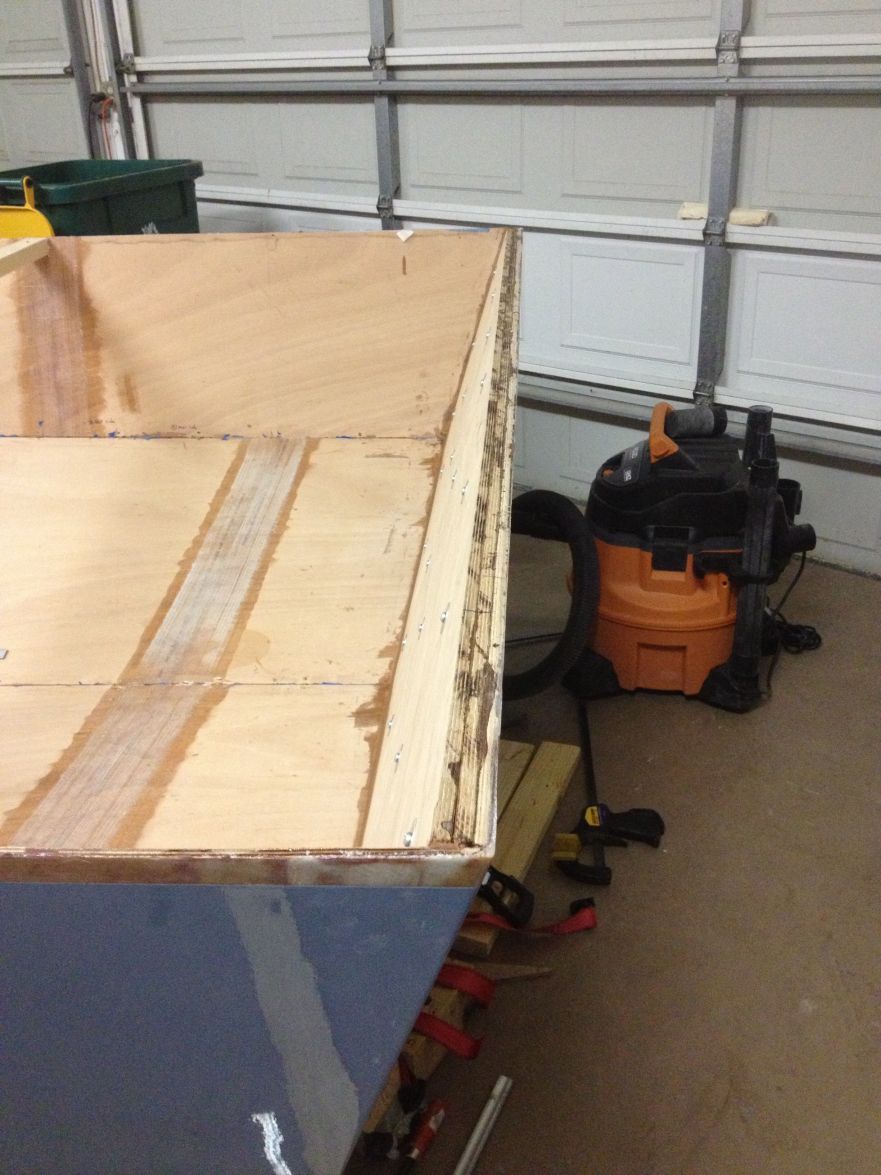
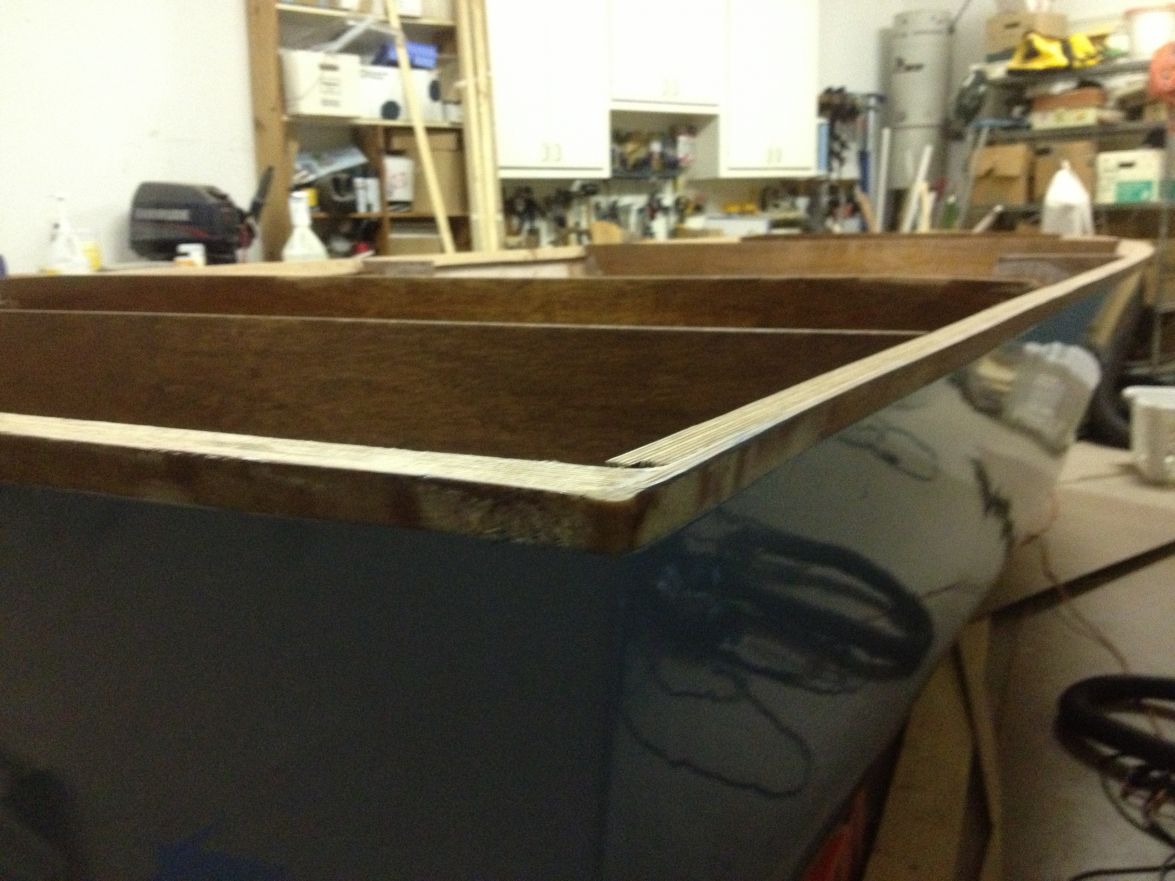
Sheer clamp is now in place with 2 layers each side of 1/2" marine ply. I used GelMagic and it worked very well. It's impressive how rigid the sheer is now. Pictures are a little fuzzy.
I did this 4 times to complete the installation.
I used a power planer to bring the hull and sheer clamp layers to one level. I had never used a power planer before and hot damn that thing works well! I don't think I could have done the job that nearly as well and no way as fast without it.
Re: willg's PH18
Posted: Thu Dec 04, 2014 9:13 pm
by justin_dwyer
Looking great Will, nice clean work!
Re: willg's PH18
Posted: Thu Dec 04, 2014 9:17 pm
by Cracker Larry
Very nice. I use hand planes but have been thinking about getting a power plane. What kind do you have?
Re: willg's PH18
Posted: Thu Dec 04, 2014 9:20 pm
by justin_dwyer
I have a Makita power plane, certainly makes dressing wood a breeze.
Re: willg's PH18
Posted: Thu Dec 04, 2014 10:15 pm
by willg
I got a Bosch PL1682 for about $100. It's powerful and gave impressive results considering it only has one blade. It chomped through the 1 1/2" transom easily. I'm sure a higher end, 2-blade planer would work even better, but I am very satisfied with the one I have. The blade seemed to cut as nicely at the end of the job as the beginning. This model has a reversible blade. As much as I like hand planes, I'd rather go through a blade or two for jobs like this and not have to sharpen a hand plane blade.
Re: willg's PH18
Posted: Wed Dec 10, 2014 12:21 am
by willg
Re: willg's PH18
Posted: Wed Dec 10, 2014 7:58 am
by jorgepease
looking good!
Mine is 30" but only one horizontal surface. I think yours is plenty wide and deep since you have the top shelf. Leaves lots of room to get around the sides.
I also put the Baystar system, if you haven't already bought one, specify that you want the new release with the reposition-able connectors and I would also get the Seastar hoses ... I ended up getting the old kit and spending an extra $180 on adapters because their distributor just wanted to unload it. I was pretty pissed off but their customer service (not the distributor but Seastar) is so good, even with me bitching at them lol, that I would go with them again... They even offered to foot the bill and do whatever to make it right but I had already purchased the new items.
edit ... I can't see how much clearance you have behind the console to stand but that helm sticks out a good 4 inches.
Re: willg's PH18
Posted: Tue Dec 16, 2014 12:46 pm
by antoniekruger
Hi Will,
Just inside your hull on top there is a "inside rub tail". Is this structural and required on the design - what is it called?
Good looking work.
Antonie
Re: willg's PH18
Posted: Wed Dec 17, 2014 12:34 pm
by willg
Yes, this is a 2"x1" sheer clamp and is specified in the plans. I got the 1" thickness with 2 x 1/2" pieces of ply, but you can do it in 1/4" pieces or a single full thickness piece with some kerfing. I am also going to install a Tessilmare rub rail but haven't decided on their narrower or wider model.
Thanks for the compliment.
Re: willg's PH18
Posted: Fri Jan 02, 2015 6:04 pm
by MarkOrge
I just discovered this build, nice work, really nice !
Re: willg's PH18
Posted: Wed Jan 21, 2015 2:46 pm
by willg
Mark, a delayed thanks to you for the compliment. Your build has been great to follow. I'm ready to order toys like jack plate, trim tabs, steering, sonar, gas tank, etc. Fun stuff!
Will
Re: willg's PH18
Posted: Mon Feb 09, 2015 11:30 pm
by willg
The stringers, bulkheads below the sole and all cleats have been triple coated, and I have installed the cleats in the forward 3 sections. I used the Cracker hot glue method to fix the cleats to the bulkheads and hull sides and it worked really well. Thanks again, Larry.
I have a question. There is a 2' span between the inner stringers. With the sole loose in position there is a bit of give when I walk over that span. Maybe that give will go away with the sole glued and glassed in, but would anyone recommend putting a spanner or two in that gap to support the sole?
Re: willg's PH18
Posted: Tue Feb 10, 2015 7:09 pm
by swglenn
I "felt" the same thing between the inner stringers. It isn't as firm as the area between the inner and outer stringers and the outer stringer and the side. However, when you tab in your console the rear of the console should brace this area. The front sole piece is also more flexible. I wish I had put in a 3" deep brace between the inner stingers to provide additional support. It isn't bad, it just isn't as firm as the sides. In your case I might put in 2 braces since my front section of the sole is only a 3' span and yours is 4'. It is almost no weight and gives you peace of mind.
Re: willg's PH18
Posted: Tue Feb 10, 2015 7:38 pm
by Noles309
Are you foaming it? I think you will be fine once you glue it down and glass it, especially with flotation foam under the sole.
Re: willg's PH18
Posted: Wed Feb 11, 2015 8:32 am
by willg
Yes, I'm planning on foam and hadn't considered the support I'd get from that. I think I'll still put in some cross pieces. Should be no flex at that point.
Re: willg's PH18
Posted: Wed Feb 11, 2015 9:02 am
by Wouter
Will you foam the centre box as well..? Or just the two side boxes on each side..?
Re: willg's PH18
Posted: Wed Feb 11, 2015 10:38 am
by swglenn
I did not foam the space between the stringers, just the two side boxes. For flotation purposes that should be sufficient. I used 8 gallons of foam but I didn't get the swell published in the literature. I got better towards the end but still used a lot. If I did the foam again I might get quotes from the home insulation contractors to come fill it up. I don't know if they have a closed cell foam suitable for boat building or not.
Re: willg's PH18
Posted: Wed Feb 11, 2015 12:06 pm
by tech_support
Maybe that give will go away with the sole glued and glassed in, but would anyone recommend putting a spanner or two in that gap to support the sole?
Once you "pin" the sole with epoxy on each side of that span it becomes stiff. While its just floating there, the sole/deck has very little stiffness.
Re: willg's PH18
Posted: Wed Feb 11, 2015 12:22 pm
by pee wee
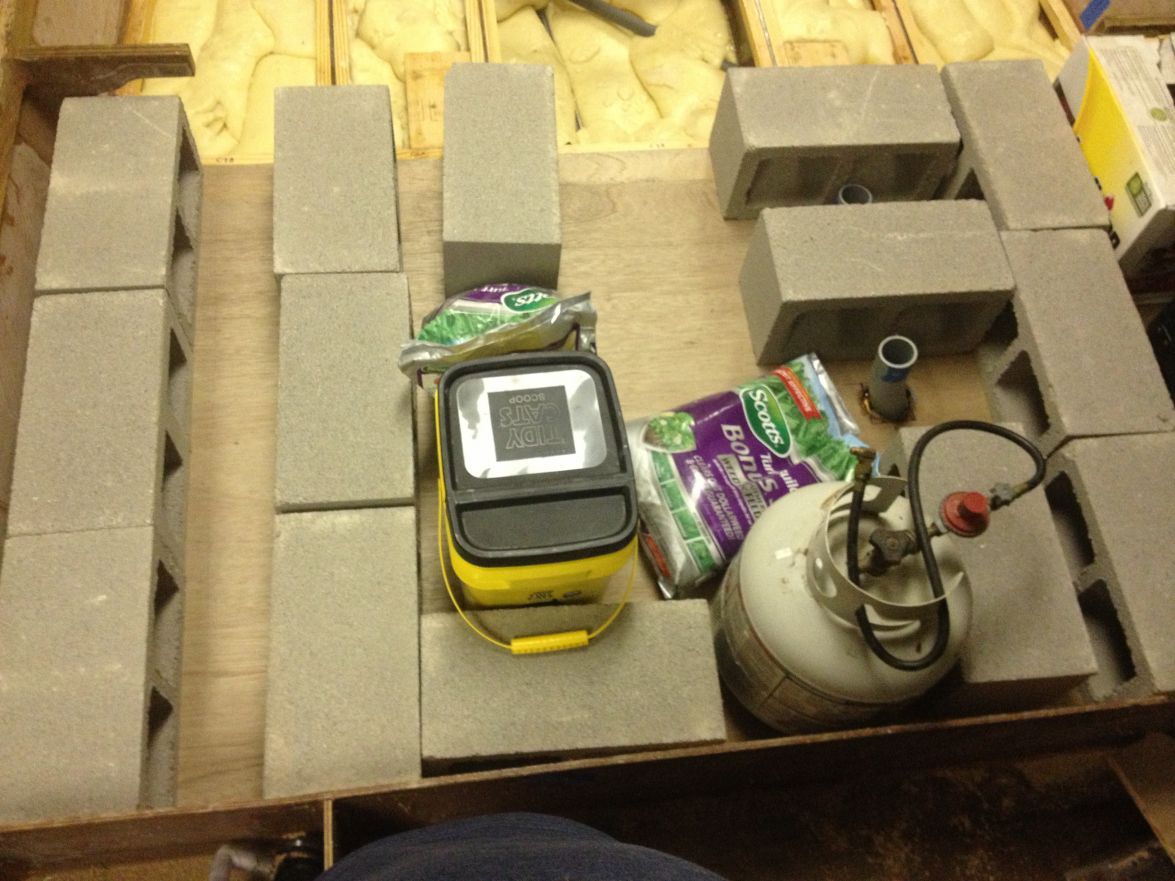
swglenn wrote: I used 8 gallons of foam but I didn't get the swell published in the literature. I got better towards the end but still used a lot.
Foam works best with warm temperatures. Even though it was summer and 90 degrees out when I poured mine, I got a heater and warmed the space that was going to be foamed, so the box and the air was very warm when I poured the foam. This time of year you're just not likely to get as good a result, but you can improve the situation with a little effort.
Re: willg's PH18
Posted: Wed Feb 11, 2015 1:19 pm
by willg
Wouter wrote:Will you foam the centre box as well..? Or just the two side boxes on each side..?
I have waffled on that, but will probably foam the center. It's a big space and will take a lot of foam. Since that's the point of it in the first place I think I'll do it.
Once you "pin" the sole with epoxy on each side of that span it becomes stiff. While its just floating there, the sole/deck has very little stiffness.
Thanks, Joel.
Re: willg's PH18
Posted: Wed Feb 11, 2015 4:02 pm
by Aripeka Angler
Your boat is looking nice
To add stiffness to your deck, you can put a swatch of 6-8 oz. glass on the bottom side of the area you are concerned about.
I did that on my front deck hatch. It doesn't flex despite being about 24" x 30" with only edge supports.
Re: willg's PH18
Posted: Wed Feb 11, 2015 4:40 pm
by Jim_Davisson
Boat looks great, very clean work.
All great points about the foam. Once it's poured in, it adds another level of stiffness to the hull. I know it's not considered a structural element, but if you have ever tried to remove it from a boat and seen the strength it adds once it's bonded to the hull, its amazing.
Re: willg's PH18
Posted: Thu Feb 12, 2015 12:18 pm
by willg
Aripeka Angler wrote:Your boat is looking nice
To add stiffness to your deck, you can put a swatch of 6-8 oz. glass on the bottom side of the area you are concerned about.
I did that on my front deck hatch. It doesn't flex despite being about 24" x 30" with only edge supports.
Thanks. That's a good tip.
Re: willg's PH18
Posted: Tue Mar 10, 2015 9:29 pm
by osotexan
Awesome looking build!
I'm going to keep a close eye on your build. I really like the PH18 plans.
Re: willg's PH18
Posted: Mon Mar 16, 2015 11:51 am
by MarkOrge
I foamed all but the center section. More than enough flotation and will make the hull quieter in rough water. incidentally, I learned that a quieter hull "feels" smoother as the banging noise makes your brain think it is a rougher ride. I have been in quiet hulls and there is some truth to it.
Back to flotation; my center is mostly fuel tank forward of bulkhead D, below/behind D is livewell, then pumps and hoses between D and E and bilge area behind that. Hop this helps.
Re: willg's PH18
Posted: Wed Apr 01, 2015 11:55 pm
by willg
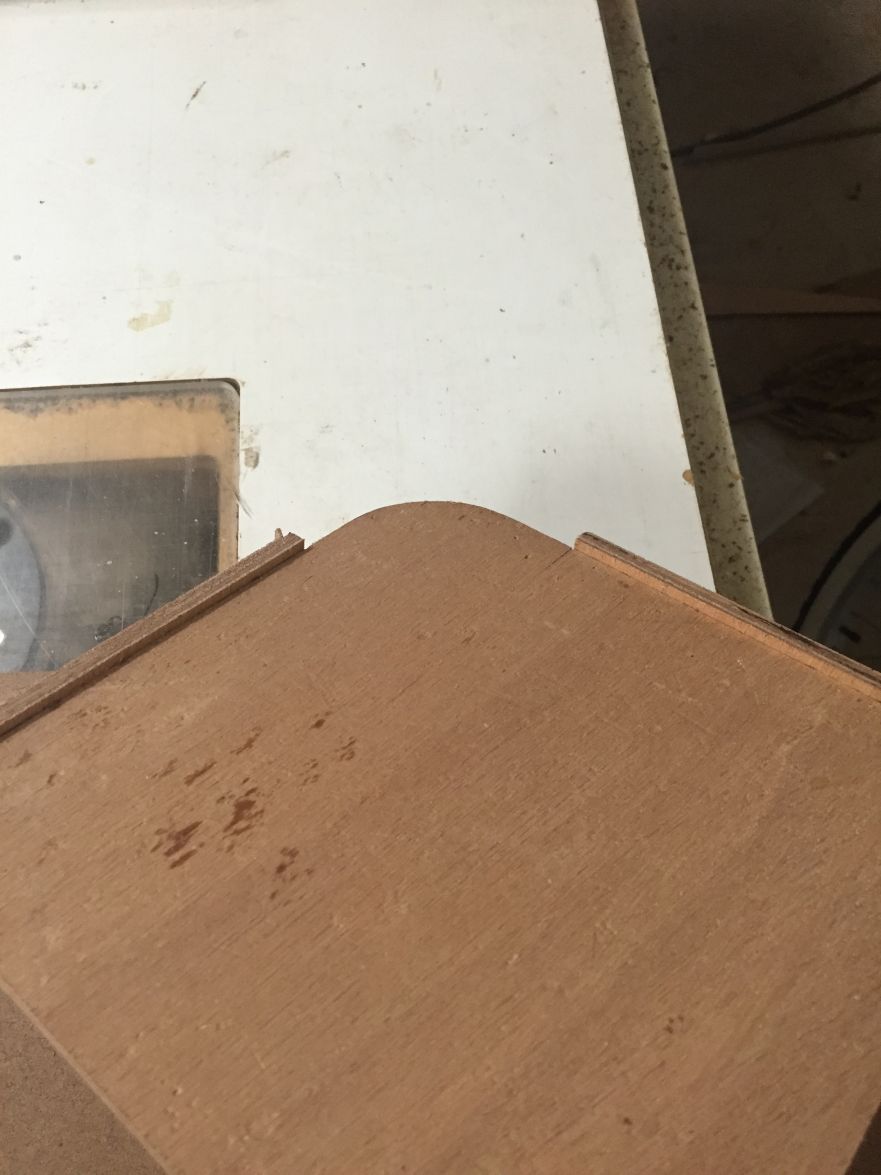
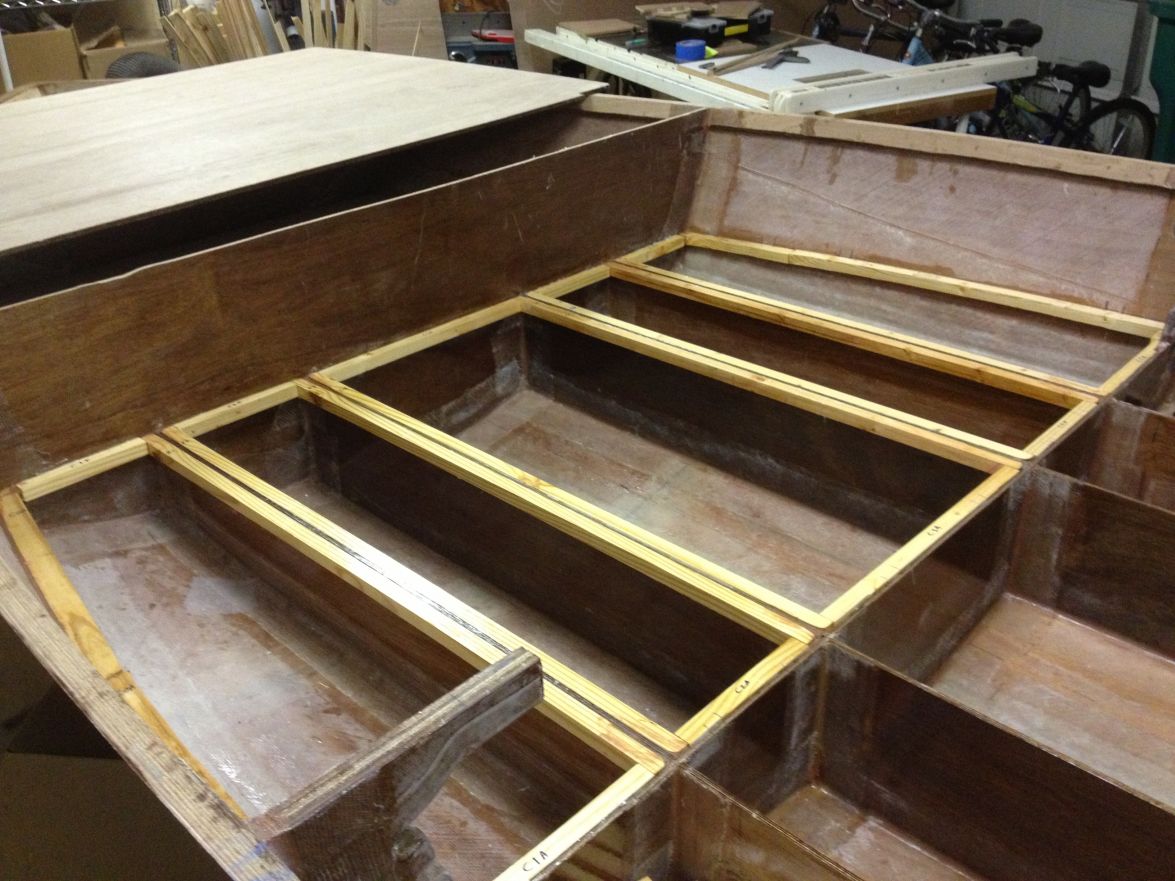
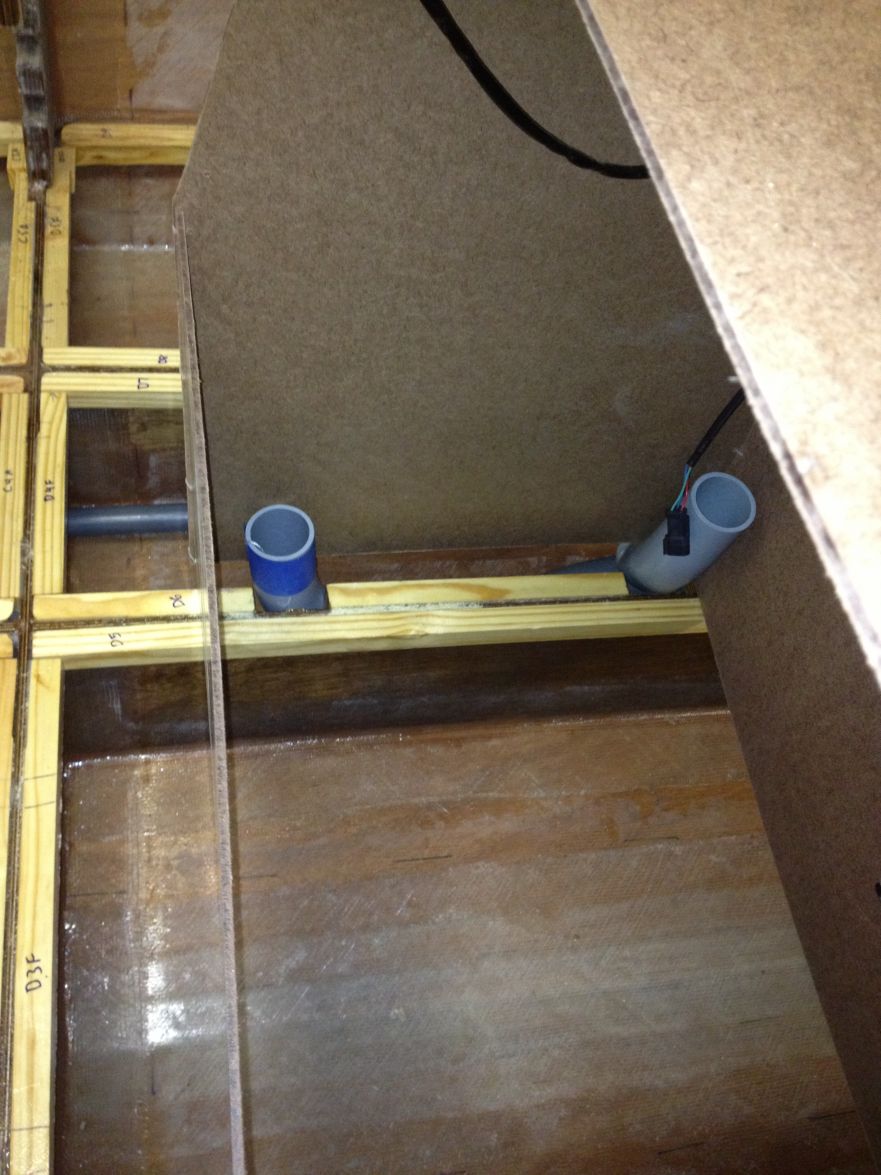
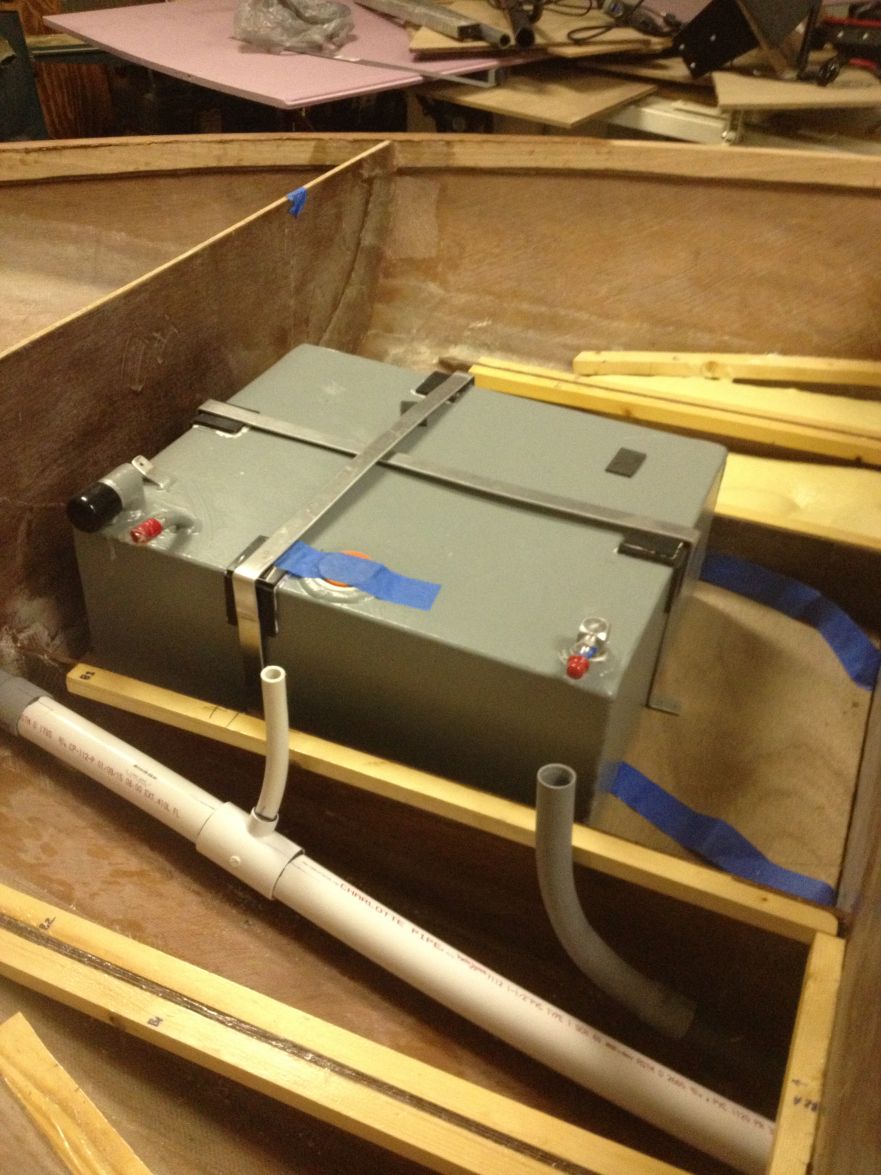
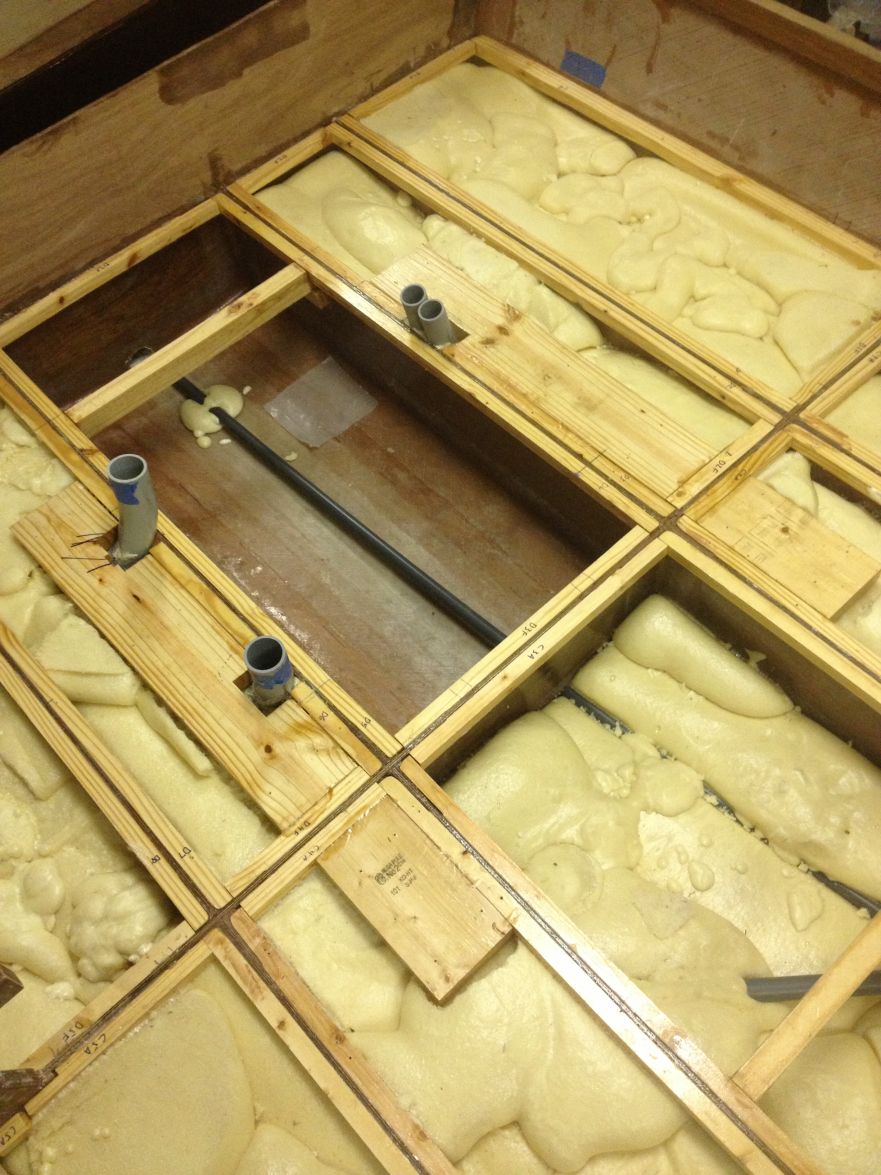
I pondered over chase tubes a long time and found it very helpful to look at what other builders have done. They're not finished yet, but so far here are mine.
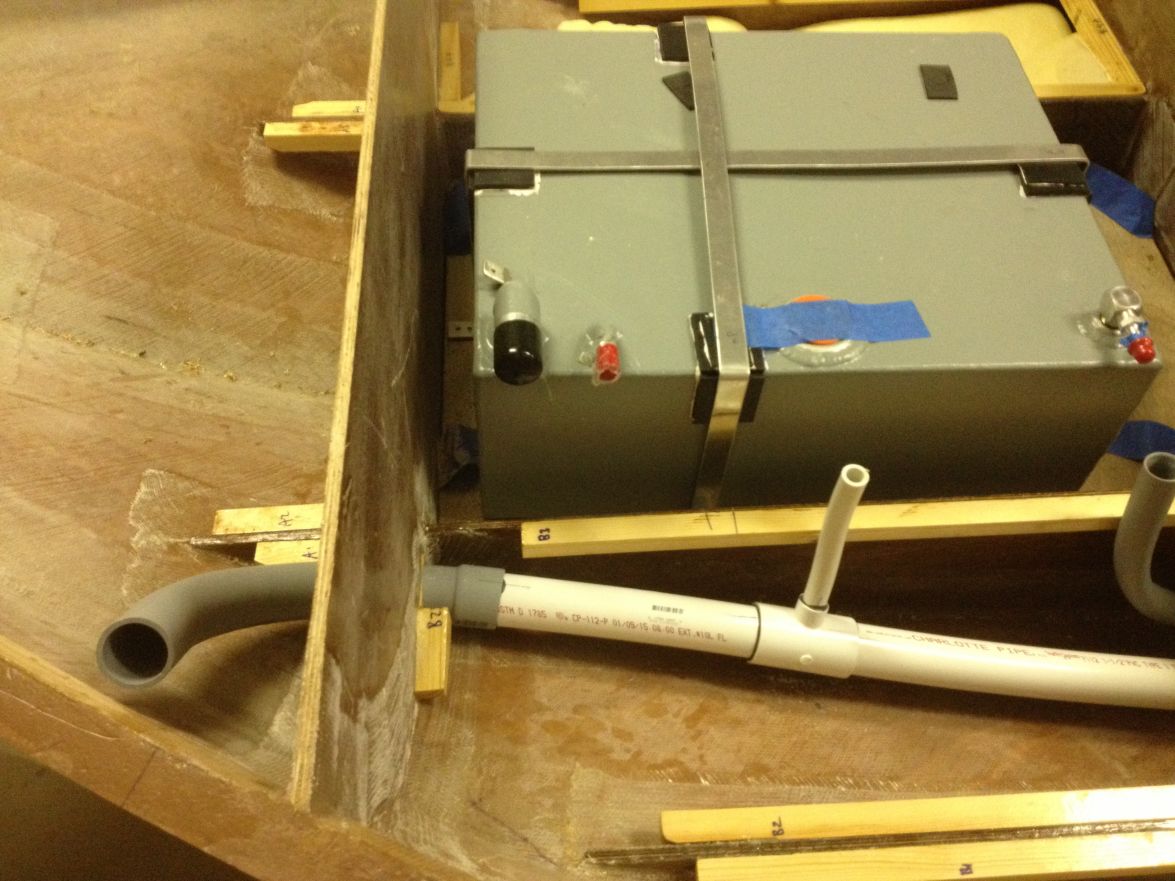
View looking towards the bow. 2" x 2 from the console to starboard stern. The forward one will have shift, throttle and battery. Aft will have harness, jack plate, sonar and maybe other wires. The other is 1" for the gas line. I tapered the pvc fittings for the gas line, and tapered the leading edge of the gas line itself to make sure it goes easily. My speedytank should arrive next week and once it's installed b/w bulkheads A/B I will run the fuel chase forward.
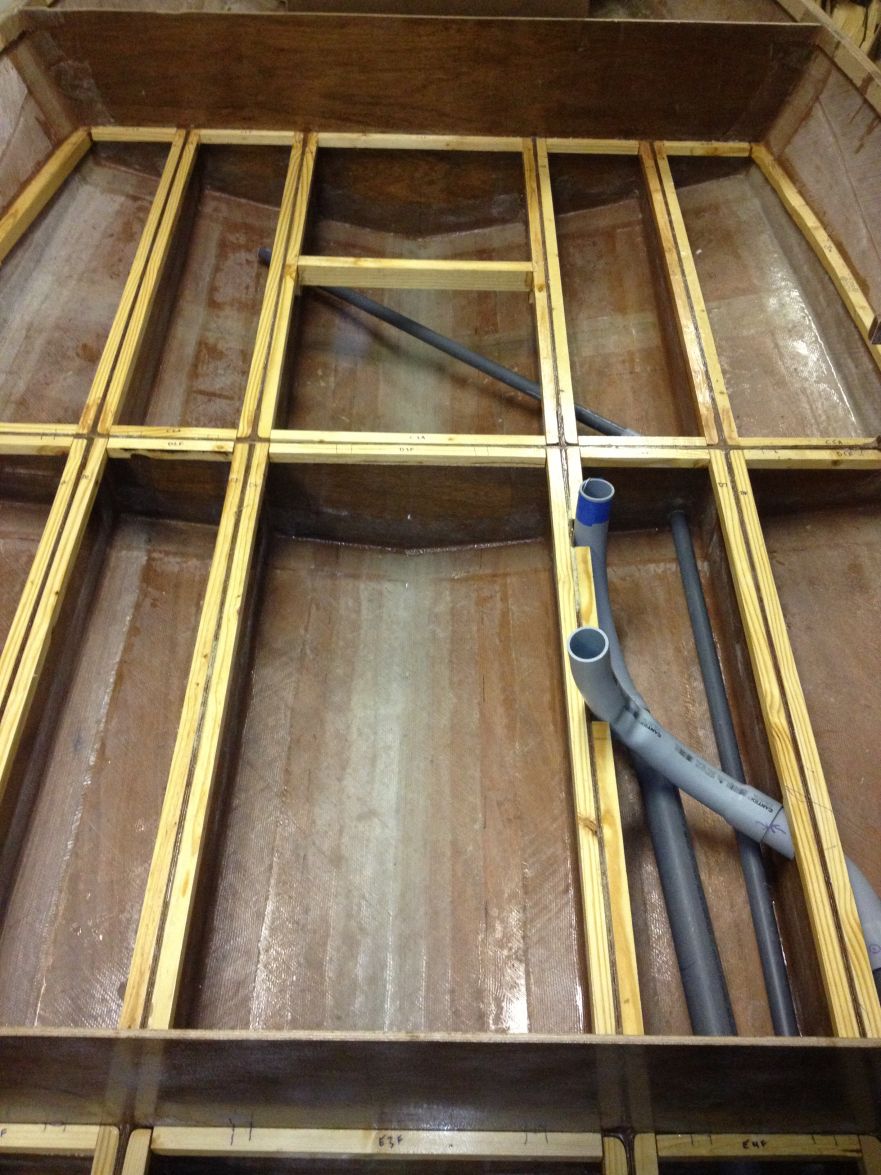
Close-up of the same.
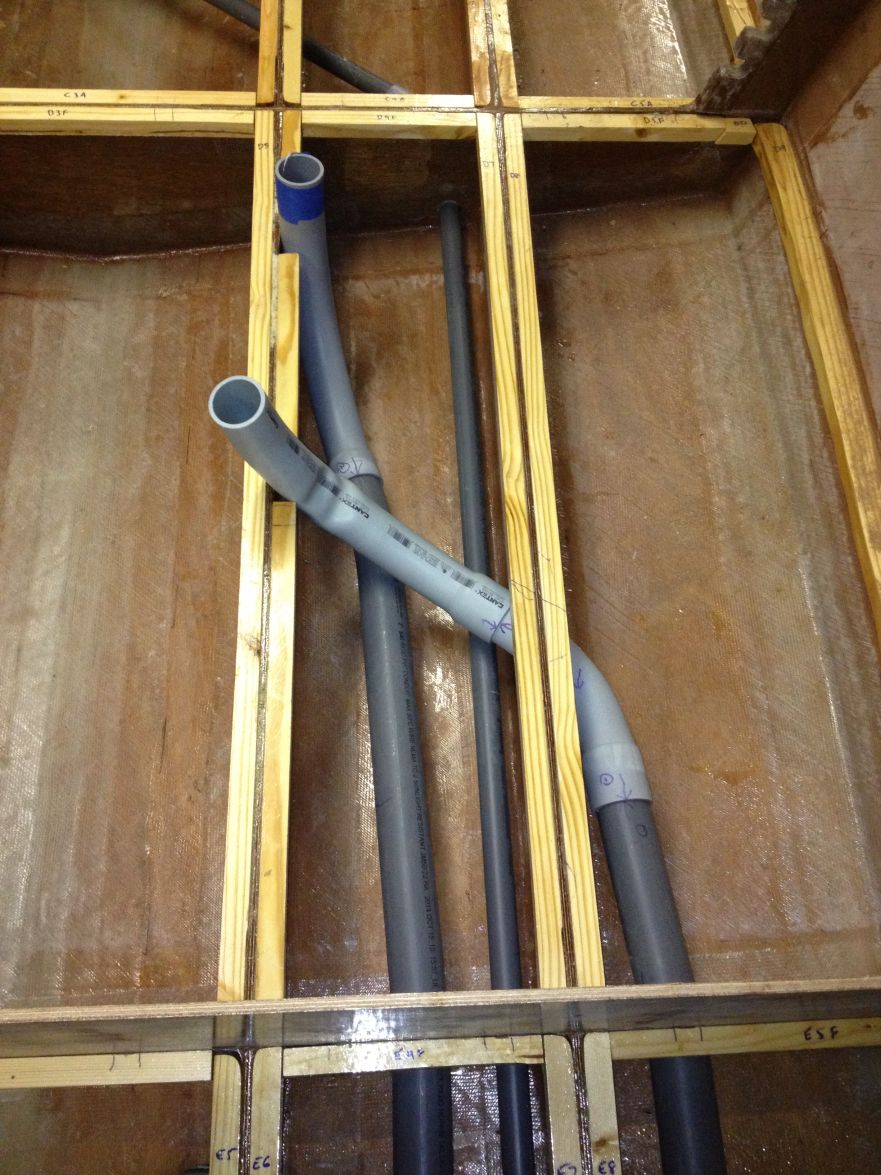
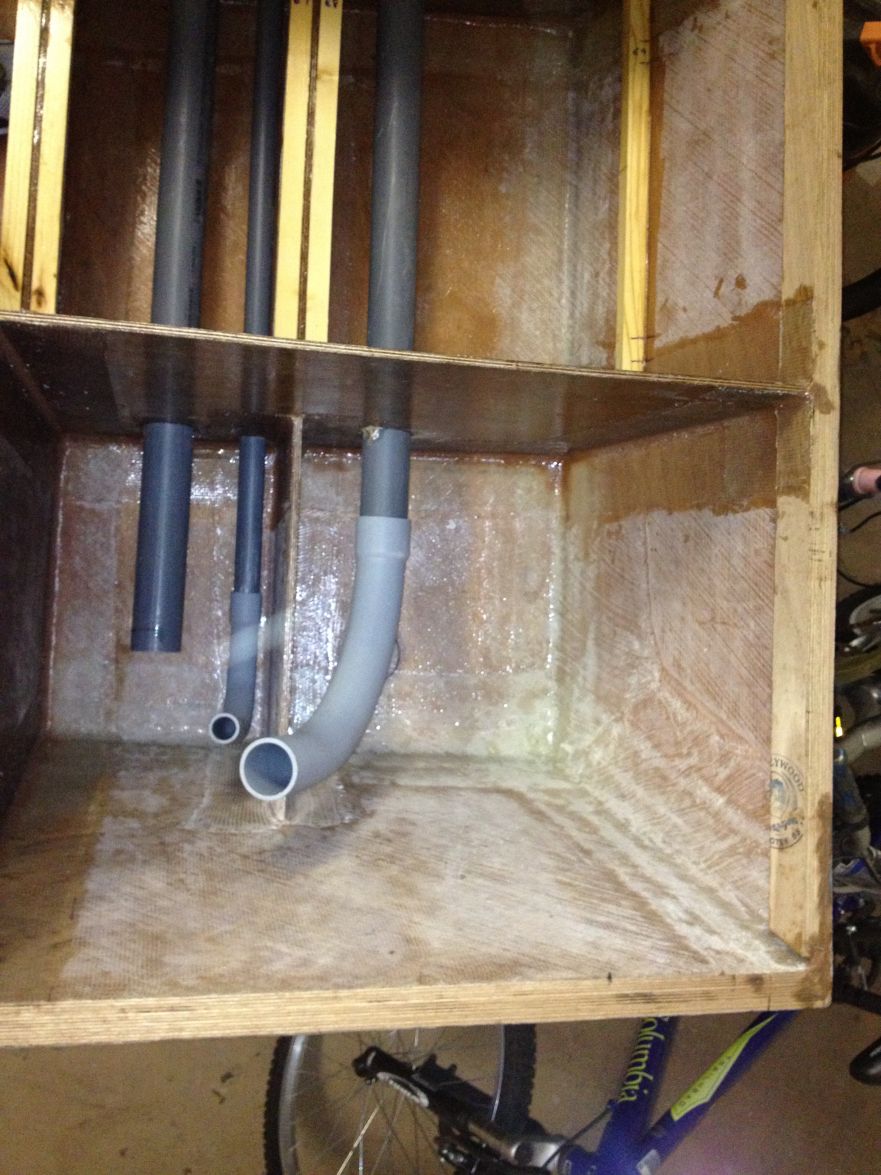
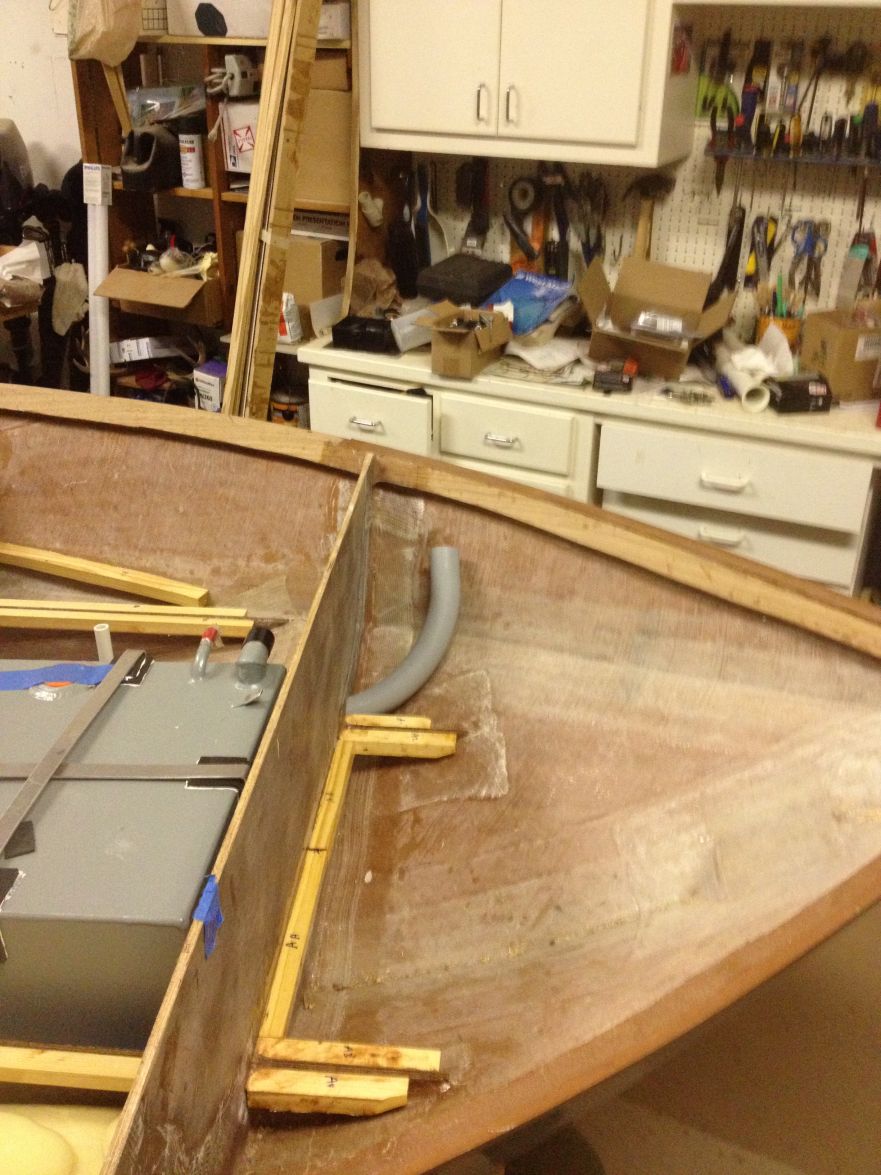
Starboard stern. I will tweak it some more to have sweeps on all 3.
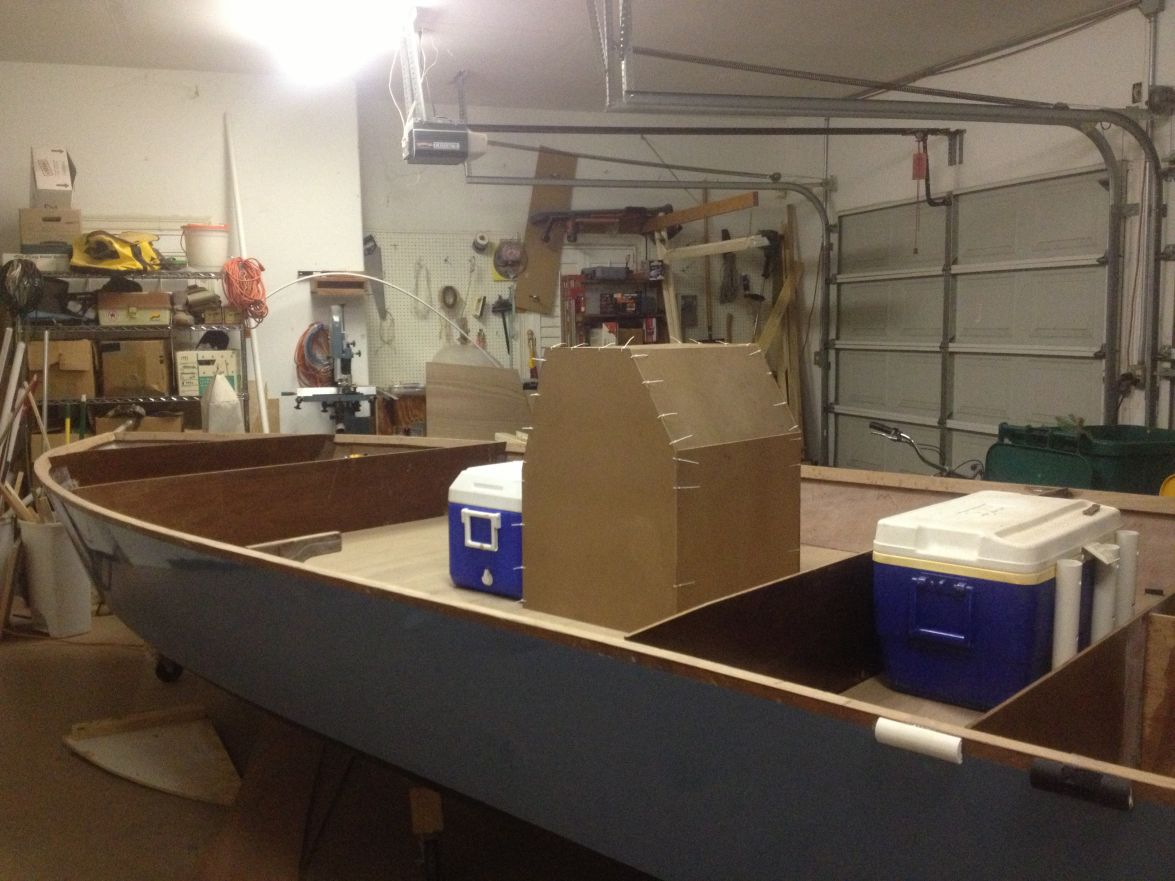
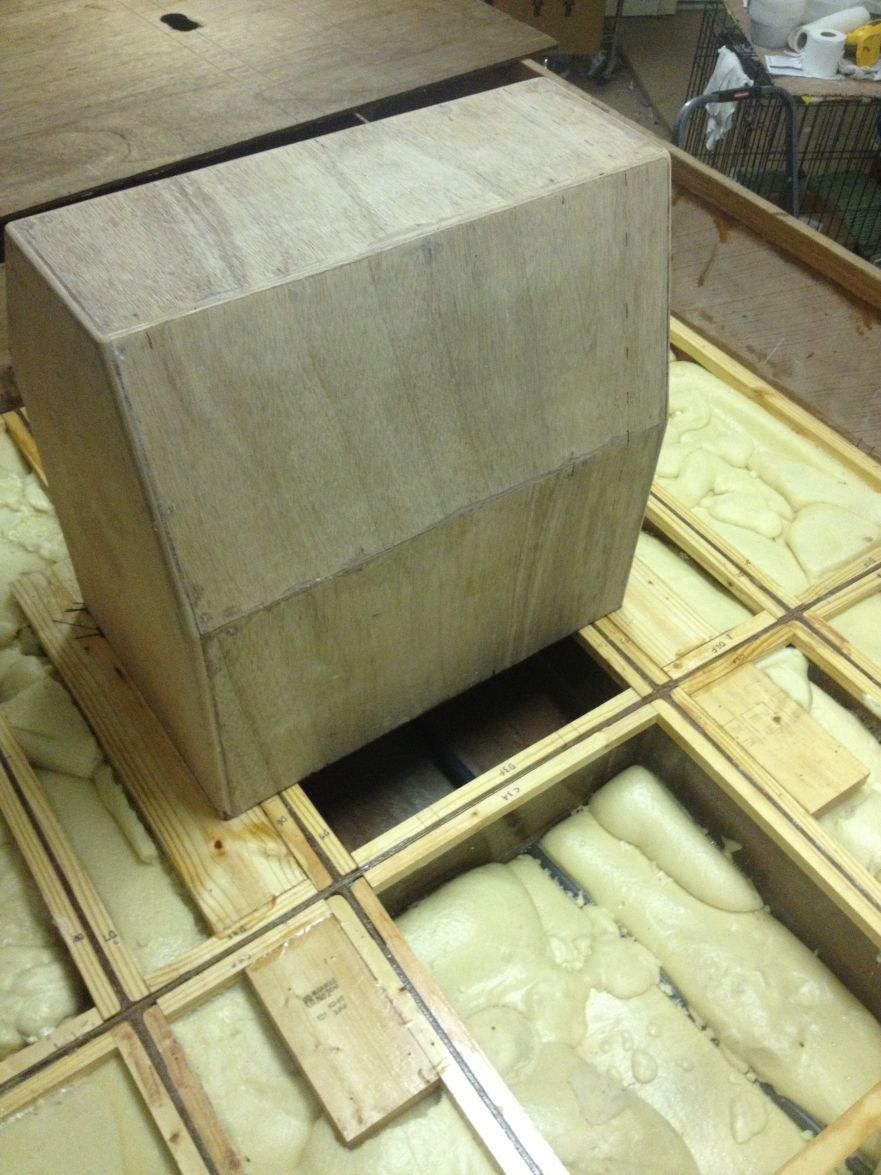
Console mock-up in place.
Chases inside starboard side of console.
I have the following questions and would appreciate anyone's input.
I will put a chase on the port side from the stern to the console and continue it to the bow. This will carry wires for the tank, navigation, trolling motor, bilge/bait pumps, trim tabs. Is a 1.5" chase sufficient or do I need bigger?
I have a 6" Bob's action jack. The transom has not been drilled yet. My transom goes straight across (no motor well). The build plan's motor well cut out is 2 3/8" deep and the standard mounting holes for a motor should be 2" (really 1 7/8") below that, so can I quit worrying about it and proceed with putting the upper jack plate holes 4 3/8" below my transom edge? I'm pretty sure that's right but don't want to overlook something before drilling.
Any reason I should not use this fuel filter/separator? If so are there other suggestions?

Thanks in advance, Will
Re: willg's PH18
Posted: Thu Apr 02, 2015 7:55 am
by Cracker Larry
You do real pretty work
One comment...
The forward one will have shift, throttle and battery
It is not considered good or safe practice to mix electrical cables with control cables in the same chase. It's also against ABYC building regulations, probably USCG too. Best to split those up.
can I quit worrying about it and proceed with putting the upper jack plate holes 4 3/8" below my transom edge? I'm pretty sure that's right but don't want to overlook something before drilling.
I think that would be fine. Chase tube sizes should be good too.
I wouldn't use a filter with a glass or plastic bowl with gasoline. If you use it, don't put in inclosed place. My clumsy self would be likely to break it, I'd go all metal.
Re: willg's PH18
Posted: Fri Apr 03, 2015 9:25 am
by willg
Cracker Larry wrote:It is not considered good or safe practice to mix electrical cables with control cables in the same chase. It's also against ABYC building regulations, probably USCG too. Best to split those up.
Thanks again, Larry. I will split them up as you recommend. Not mentioned above is that I'm planning on putting the steering cables in with the shifter/throttle.
I wouldn't use a filter with a glass or plastic bowl with gasoline. If you use it, don't put in inclosed place. My clumsy self would be likely to break it, I'd go all metal.
I guess a more elemental question is whether a filter with a drainable bowl is important to have vs just the twist on canister. Do you use a drainable metal bowl or just the canister?
Re: willg's PH18
Posted: Fri Apr 03, 2015 9:43 am
by Cracker Larry
Are you using mechanical or hydraulic steering? The mechanical cable is fairly fat, needs a lot of room, hydraulic tubing very skinny.
I don't use a drain-able bowl type, spin on metal canister for me with gas engines. If it were diesel, I'd go with the one you pictured.
Re: willg's PH18
Posted: Fri Apr 03, 2015 10:02 am
by willg
I have a BayStar hydraulic system. The man I've been working with to get my etec has been very helpful by providing the binnacle, engine harness, cables, steering helm/hoses so I can accurately lay out the chases and console. I have done a test run with the steering hoses and shift/throttle cables through the same chase and, like you're saying, it's all good.
Re: willg's PH18
Posted: Fri Apr 03, 2015 10:07 am
by Cracker Larry
Cool, the Baystar system is what we put on the GF18. It's very nice and those small diameter hoses are much easier to deal with than a mechanical cable.
Re: willg's PH18
Posted: Thu May 07, 2015 12:21 am
by willg
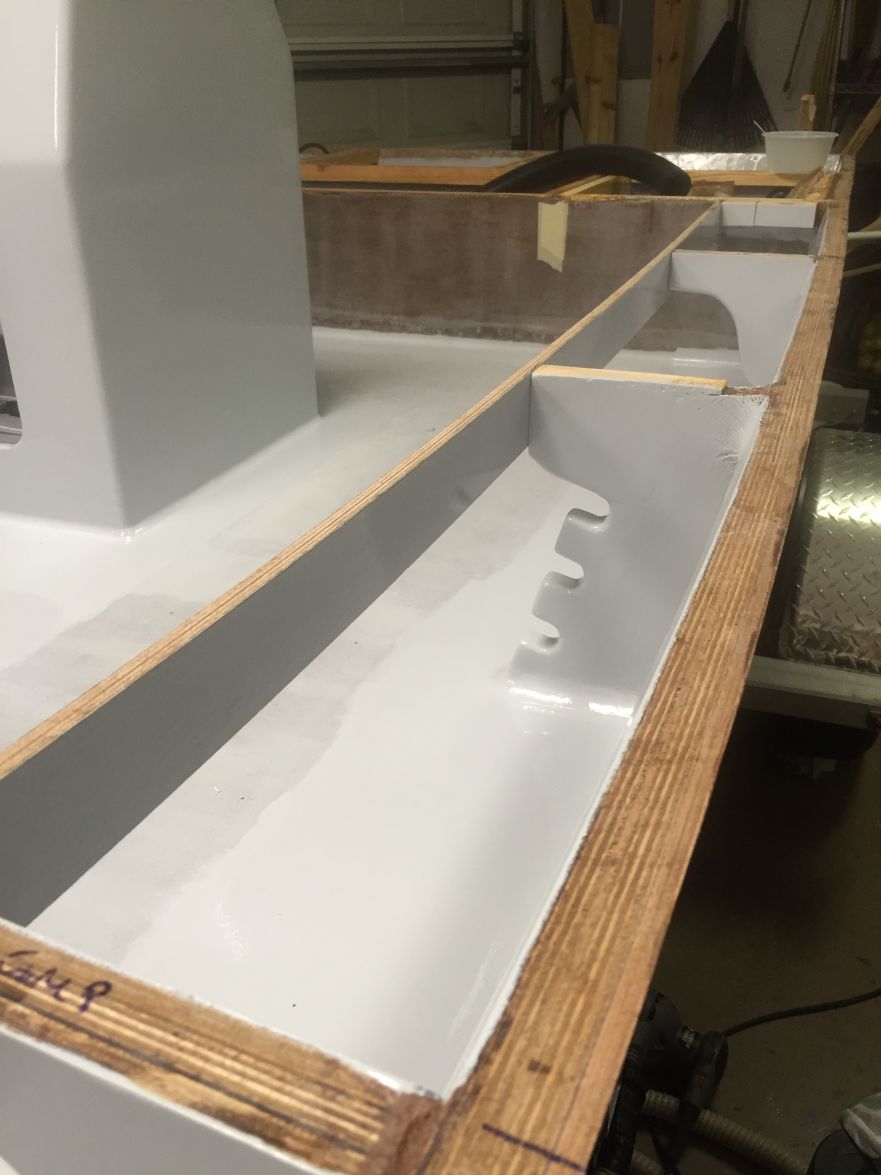
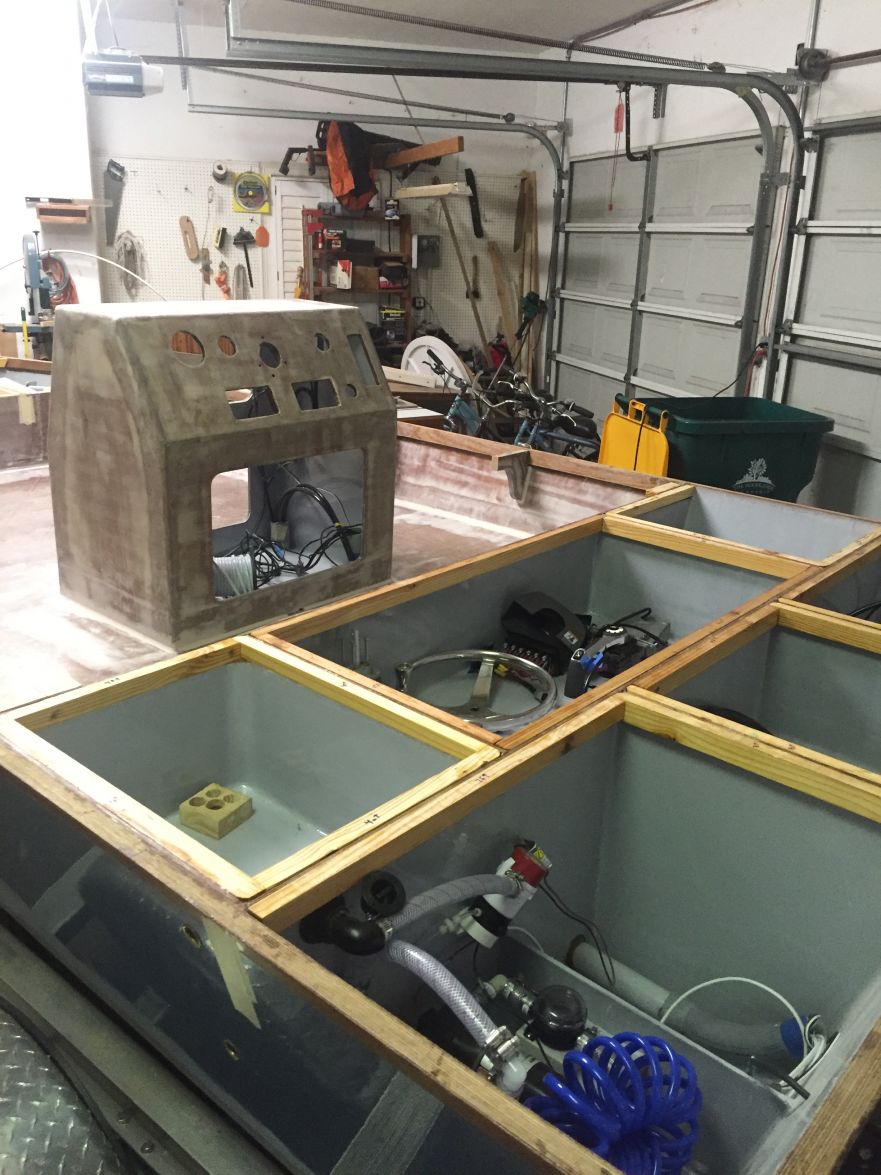
I have finalized all the chase tubes. They are glued together and their compartments are ready for foam. It was handy to use the heat gun to soften and shape the tubes where needed. I found other builders' pictures of their chase tubes to be very helpful, so here goes:
starboard rear hatch
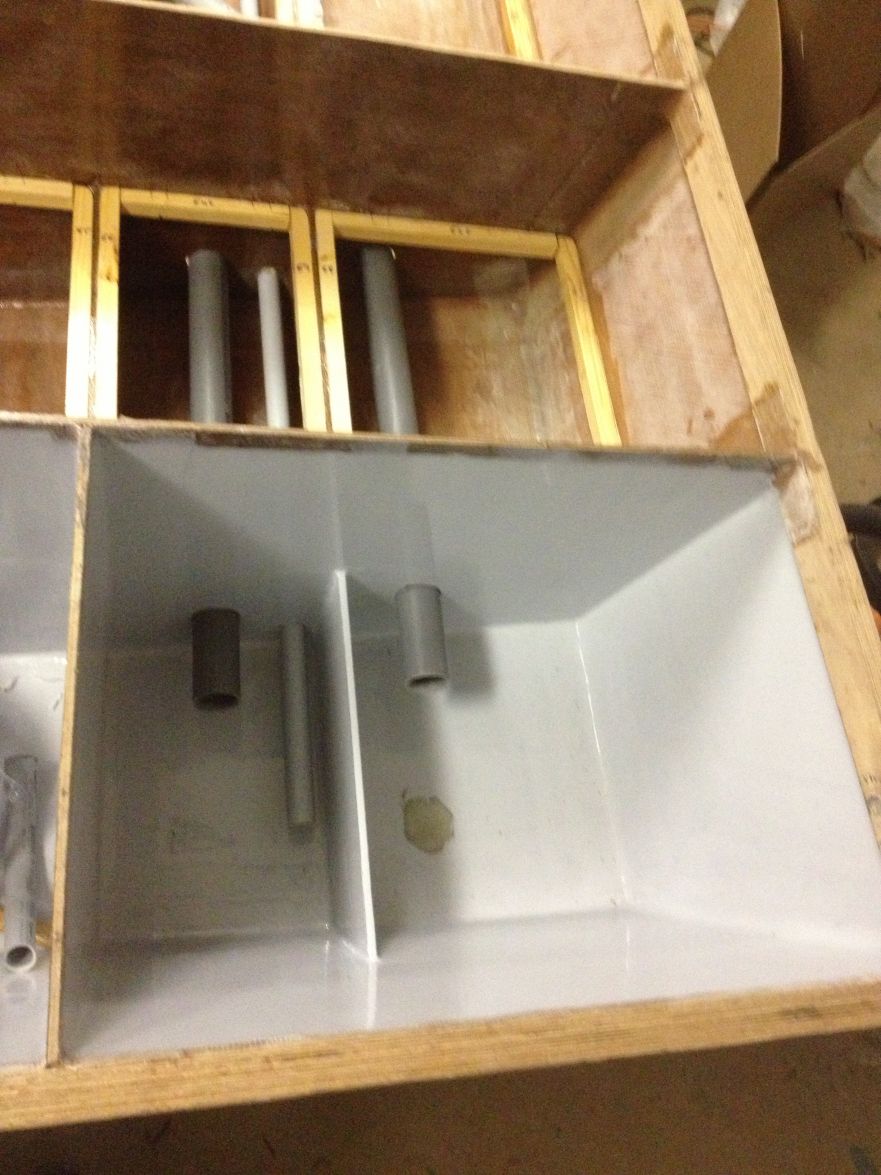
port rear hatch
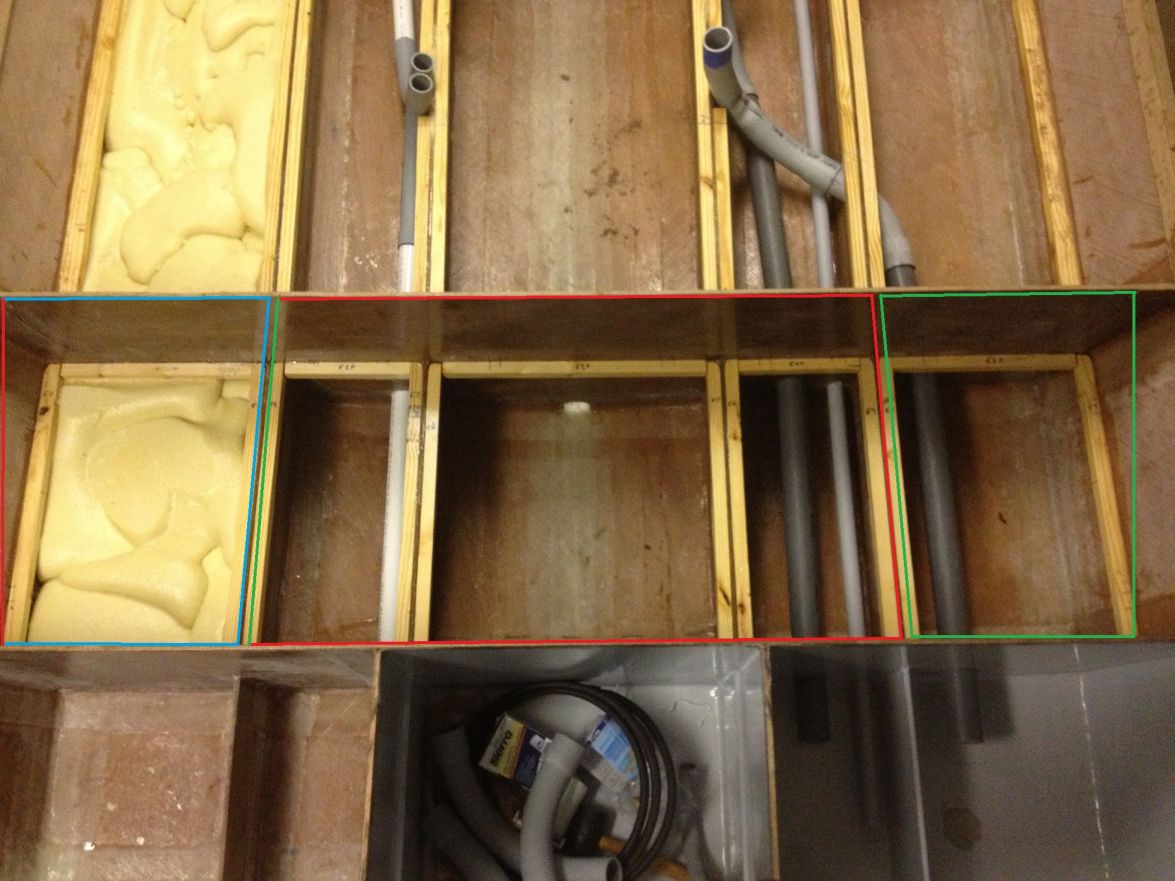
overview

bow and tank hatches
What I'm thinking about the space b/w bulkheads D & E is to insulate the whole thing and partition the space into 3 hatches. At port will be the bait well. The middle and starboard spaces will be for storage, but because they'll be insulated they could each serve as a fish box and/or cooler. I would drain the port bait well out the port hull. The middle space would drain into the starboard space, and the starboard space would drain out it's hull. The colored lines came out screwy when I saved the image, but the partitions still show. Comments welcome.
Re: willg's PH18
Posted: Thu May 07, 2015 12:26 am
by justin_dwyer
Looks impressive to me Will, but I am not there yet so everything at that stage looks impressive!
I can't think too far ahead or it does my head in
I do have one question (and will probably post it in the technical section when I get there), I see everyone has drain holes at the keel for all the frames, but what about the other compartments, will they ever get water in them, do they drain as well.
I know in theory water shouldn't get in there, but why would it get to the keel too?
Re: willg's PH18
Posted: Thu May 07, 2015 2:00 am
by willg
Whether and how to drain all those stringer boxes has been a subject of debate. I feel like if they are sealed, like mine will be, they shouldn't need to be drained. I am draining the keel space below the console b/c I will have a drain from the gas tank space heading that way. It's not in my pictures b/c I haven't installed it yet. If it weren't for that I think I'd be able to seal that space so it wouldn't need to be drained. Forward of the console I will have that drain tube just perforate the bulkhead and I will seal it up good, with no limber hole in that bulkhead. This is all new territory for me and I don't have any real world experience to guide me, just what I get from the forum primarily. I hope I'm right.
Re: willg's PH18
Posted: Fri May 08, 2015 1:34 pm
by Dustinwg
Will,
Every time I think I am gaining ground on you, you blow right past me! The rig is looking awesome!
On the hatch layout, I decided to just go with two large insulated compartments, because once you put the sole in they shrink quite a bit, which would make the side compartments pretty small. I am plumbing both to be used as either a live well, ice box or just storage. That and I could buy one less hatch by doing it that way!
One question for you, on the foam, any indication of a total foam you are going to need? About to place an order, but as expensive as that stuff is I don't want to buy more than I need!!
Also, what size fuel tank did you end up going with?
Re: willg's PH18
Posted: Fri May 08, 2015 3:30 pm
by willg
Dustin, I have 6 gallons (so far). Those pictures show how far 2 gallons went. Since I took these pictures I have used another 2 gallons in the stringer boxes with the chase tubes, though they're not close to being filled. With the last 2 gallons I think all the between-stringer and stringer-chine spaces front to back should be filled, though I am not going to put any in the aft-most area by the transom. I'll also fill beneath the gas tank and anchor locker. That will leave the keel spaces aft of bulkhead B unfilled. I think I'd like to fill them, too, so I'll need another 2 gallons for sure, maybe more. So final usage will be 8-10 gallons.
The speedytank is 24x20x9 and by my calculation is a little over 18 gals, but it was called 17 gals at speedytank. Either way, I'm sure it's more gas than I'll burn in a weekend.
Re: willg's PH18
Posted: Wed Jul 22, 2015 11:39 pm
by willg
I have made a bit of picture-worthy progress. I've got a little over 2 years into this build now. Although it's a slow process I have enjoyed daydreaming and sweating over the countless small details along the way.
I used a total of 10 gallons foam. Some things I have learned about foam that may help others: get it warm, of course, which I did by putting the jugs in hot water in the sink. Pour it just before it kicks and begins to foam. Pouring/dumping into a small area allows for more heating of the foam blob as it expands and I think leads to better expansion than if the mix were poured over a wide area.
Inspired by Larry, I put sections of 2x6 level with the stringer tops which could help with t-top installation some day. I'm not planning on that for now but I do want to put a tie down for a cooler and the 2x6's will help make that secure.
Front lockers
The starboard locker will be separated from the gas tank space. At port I have tubes for grounding/sending wires and the fuel line. I slightly angled the floor the tank rests on so it favors the aft port corner. That way I'll get the last of my fuel if I need it. I put a locker drain in that corner as well.

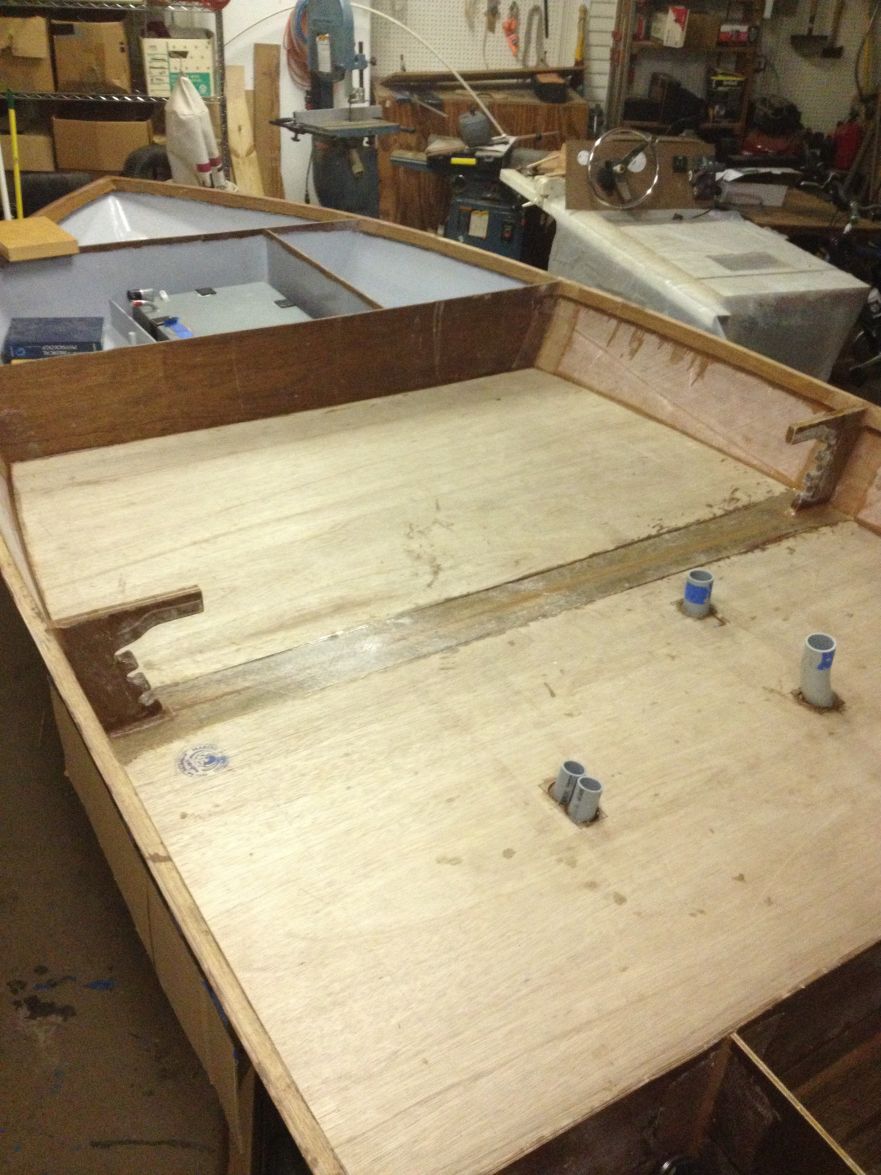
Next step is to install the sole!
Re: willg's PH18
Posted: Thu Jul 23, 2015 2:51 am
by Wouter
Very nice and clean work!
Re: willg's PH18
Posted: Fri Jul 24, 2015 8:46 am
by Dustinwg
Looking good Will!
What are you using to paint the inside of your lockers? Did you have to do a lot of fairing or just paint over the glass?
Also, are you going to fill the stringer boxes to the top with foam? I am currently foaming, and just letting the foam expanding above the stringers and the cutting it down flush, but man it is a pain!
Not sure if you said it earlier but what motor are you going to put on your boat?
Getting closer!
Re: willg's PH18
Posted: Fri Jul 24, 2015 9:50 am
by swglenn
Looking good Will. As always you have thought out how you want to do things. The idea about slanting the gas tank sole is good. Wish I had thought of that.
Re: willg's PH18
Posted: Fri Jul 24, 2015 4:18 pm
by willg
Thanks for the compliments, gentlemen.
Dustinwg wrote:Looking good Will!
What are you using to paint the inside of your lockers? Did you have to do a lot of fairing or just paint over the glass?
Also, are you going to fill the stringer boxes to the top with foam? I am currently foaming, and just letting the foam expanding above the stringers and the cutting it down flush, but man it is a pain!
Not sure if you said it earlier but what motor are you going to put on your boat?
Getting closer!
I used the grey epoxy pigment from Bateau. A 4 oz container is enough for everything I need: the front lockers as shown as well as the transom and hatches b/w bulkheads D/E. I sanded the glass down almost as much as I would have if I wanted it to be faired and finished nicely, then faired it with a single application of the purple Bateau fairing mix, then applied 3 coats of tinted epoxy. Somebody on the forum recently posted that they didn't fair the glass in the hatches and he found that dirt would collect.
The stringer boxes for the most part are filled level with the stringer tops, though I ran out before I could fill the forward center box under the sole. I just couldn't see getting more. As it is the boxes are all filled between the bow all the way to bulkhead E, though I left the space beneath the console without foam.
I have a 90 etec in a box at Red Wing Boat Co. in Houston waiting for me. I'd like to think I'll be ready for it by end of August, but will need to work pretty hard to make that deadline.
Re: willg's PH18
Posted: Tue Jul 28, 2015 2:37 pm
by jeater25
Will,
Great work, it is really coming together. I am in the process of rebuilding a 20' Bay Hawk. I have open runs on my stringers, for better foam application I am guessing that bulk heading those off would be better than 18ish foot runs. My goal on the next 4 days is to figure out a flipping schedule to fix some chips and cracks on the keel. I like the rotiserie method you used; I am thinking of building "flipping stands" out of 4x4's secured to the ground with 36" ground stakes and ratchet straps, then lift the bow and stern and roll it onto a built on site frame. In my mind it will work great

Re: willg's PH18
Posted: Tue Jul 28, 2015 6:26 pm
by willg
Davis, I wouldn't go to the trouble of damming up your stringer spaces . I would just pour the foam in one spot as opposed to pouring down the length of a stringer. My rotisserie flipping method was borrowed from Casey in North Dallas. It worked great for my empty hull but might be a bit dicey for a heavy hull.
Will
Re: willg's PH18
Posted: Tue Jul 28, 2015 6:55 pm
by jeater25
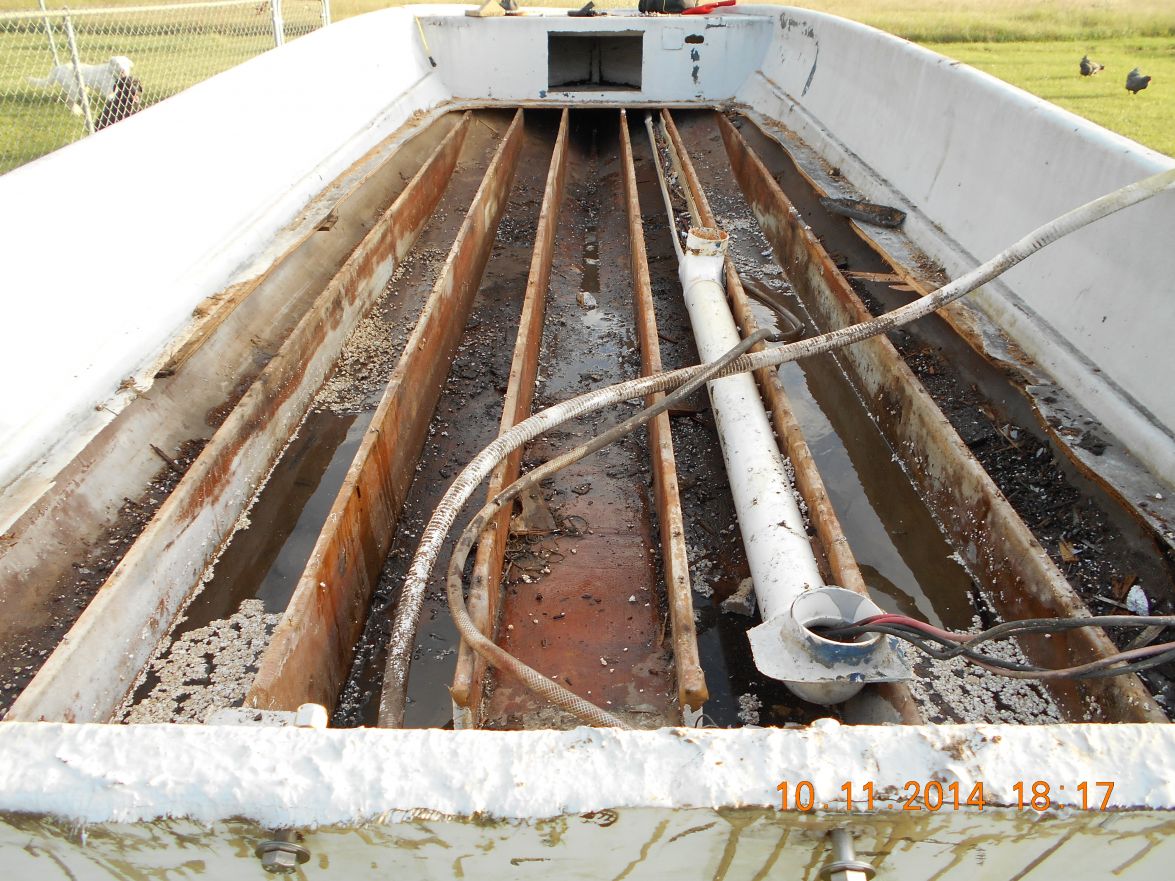
Will,
As you can see I have the sole removed and heavy old styrofoam blocks; I left the front casting deck because it is still in good shape and after I roll it back over (after fixing the bottom) I will remove the transom. I fell in love with these Bay Hawks about 15 years ago and I find myself not wanting another boat.
Re: willg's PH18
Posted: Wed Jul 29, 2015 12:49 am
by willg
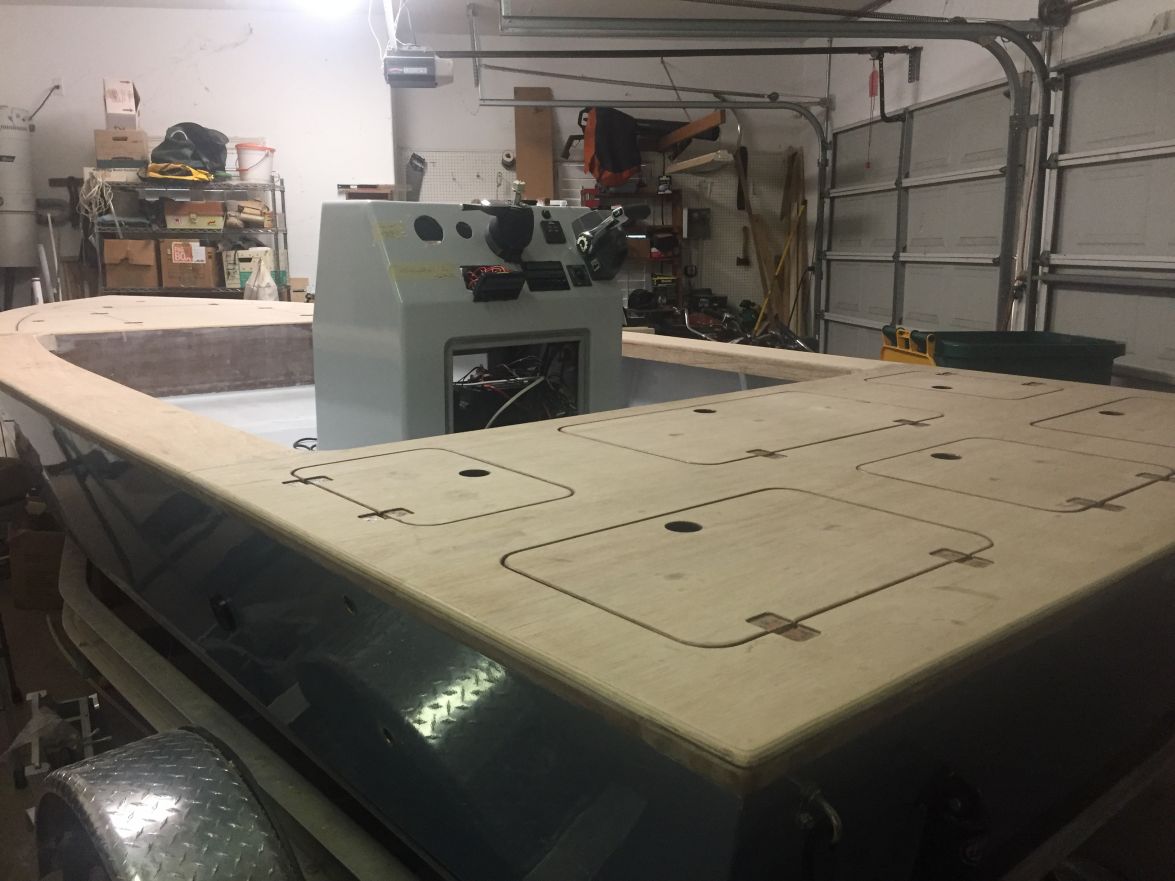
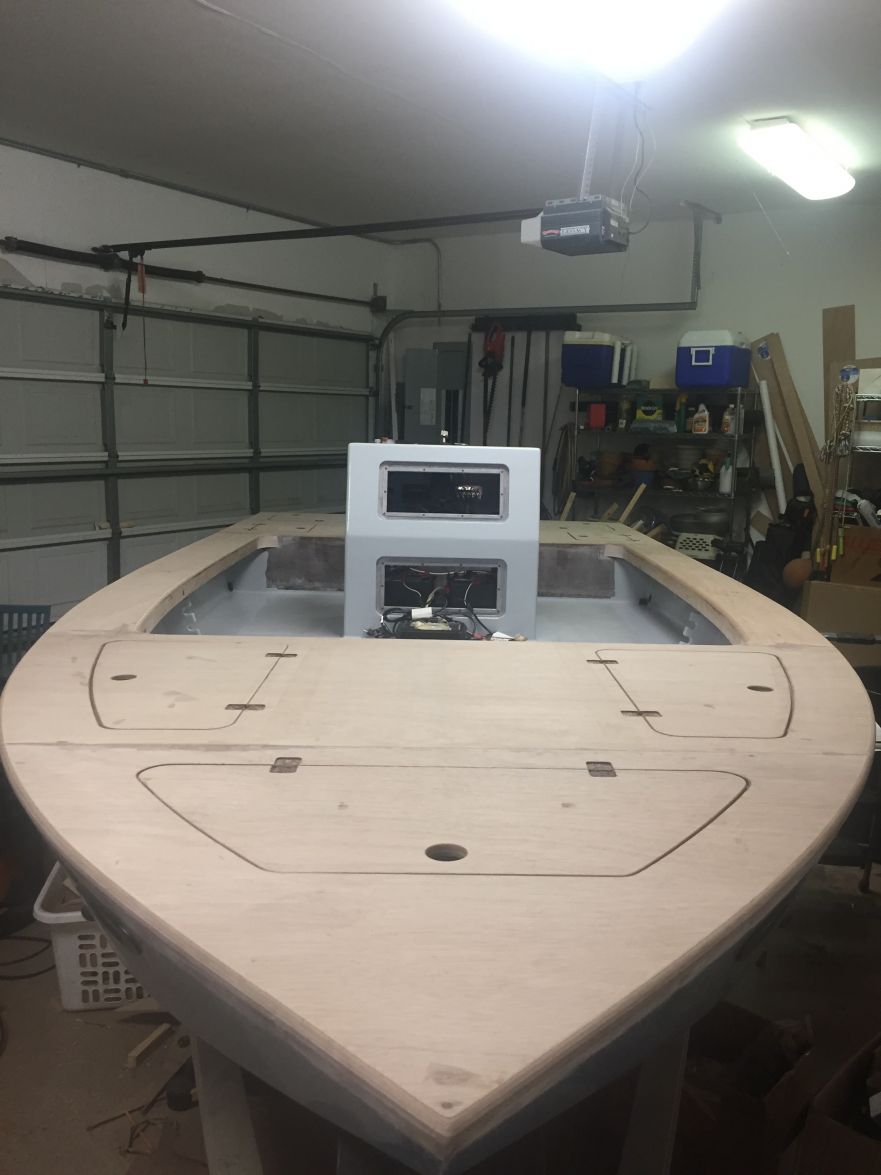
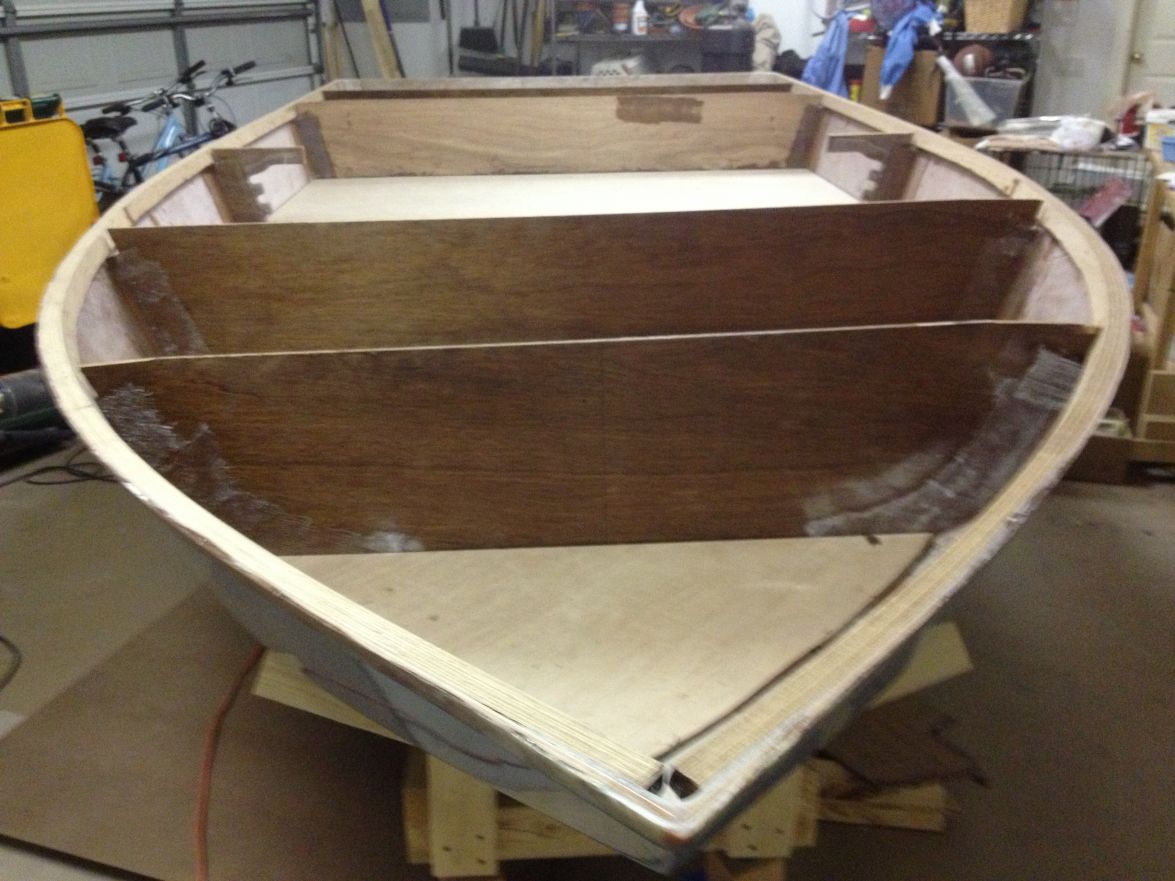
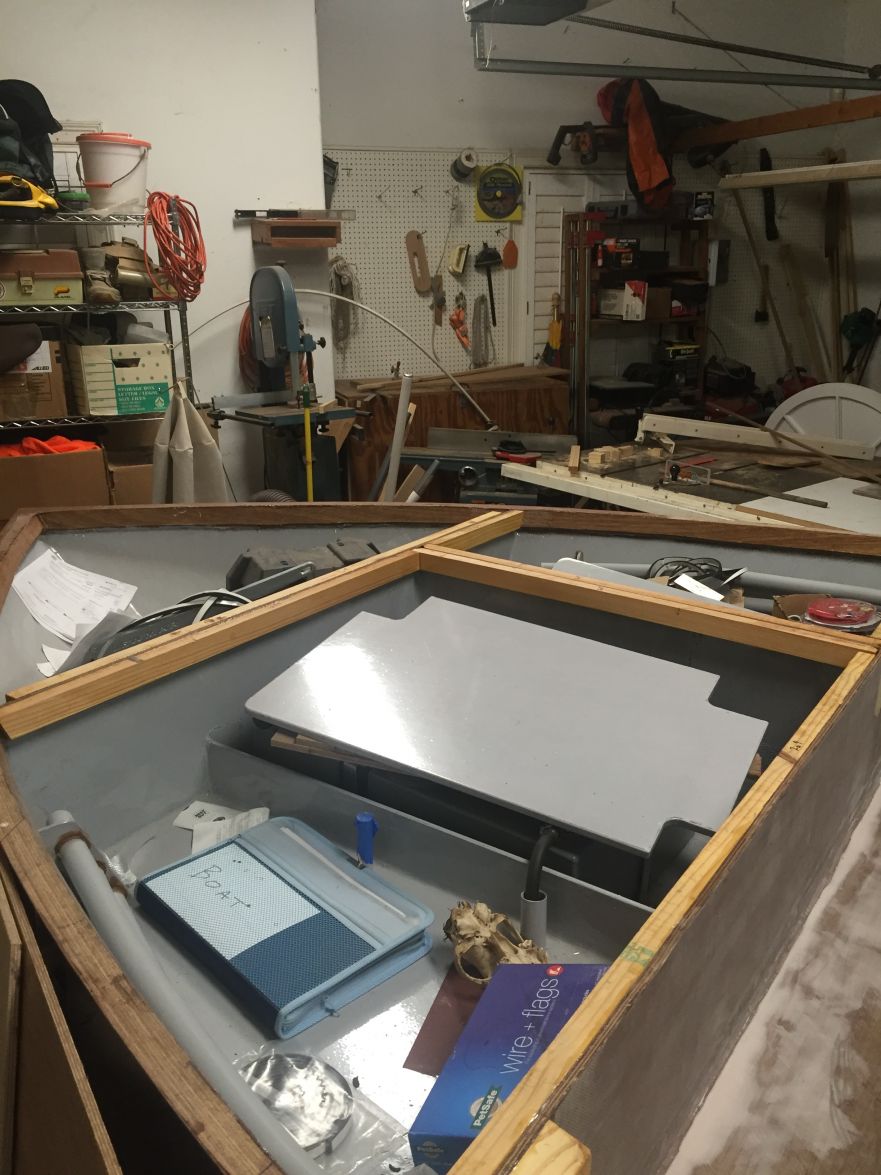
Got the sole glued in and man that feels good.
I positioned a layer of 1/2" ply beneath the console to get more bite if I wind up mounting batteries, charger, etc to the floor of the console.

I kept the boys from their bedtime to lay some glue. They are 2 years older than when we first got the hull panels together. They can hunch over a lot better than I can.
I planed out a recess for the biax tape joining the pieces, 1/64" was the lowest setting on my planer and that seemed right.
Re: willg's PH18
Posted: Wed Jul 29, 2015 8:33 am
by Dustinwg
That's what I'm talking about! Bet it feels good to stand up on the deck!
Looks great!
Re: willg's PH18
Posted: Wed Jul 29, 2015 9:44 am
by Cracker Larry
I'd call that a milestone
Won't hurt those boys to be late for bed a time or 2.
Re: willg's PH18
Posted: Tue Aug 04, 2015 12:21 pm
by Dustinwg
Will,
Quick question, did you cover the inside (ie the sole and bulkheads inside the hatches) of your hatches in the bow with fiberglass cloth or just coat it with epoxy?
Just got the sole glued in on the front compartments and did not know if just the glass tape at the perimeter is good enough or if I need to glass the entire inside. I like how yours turned out and wanted to follow suit.
Re: willg's PH18
Posted: Wed Aug 05, 2015 12:53 am
by willg
I put 12 ox biax on the bottoms of all the hatch spaces, and on the sides of the starboard forward hatch and the anchor locker. I didn't bring the bottom biax up the sides at all, just cut them to fit the bottom only. All the perimeter joints are glassed with 6" biax tape like you mentioned.
I like the way the hatches turned out. But I ain't gonna lie to you, they look better in the picture than they do in the real.
Re: willg's PH18
Posted: Wed Sep 02, 2015 11:51 pm
by willg
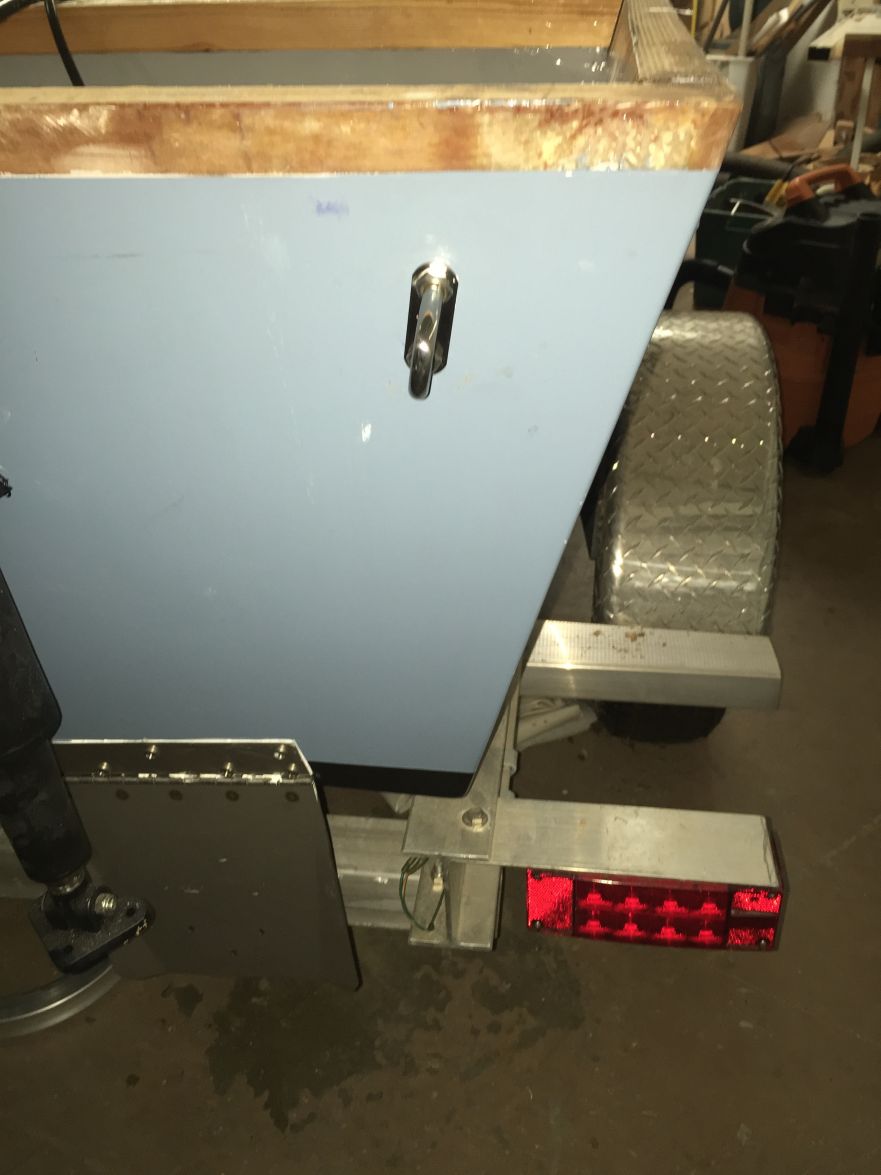
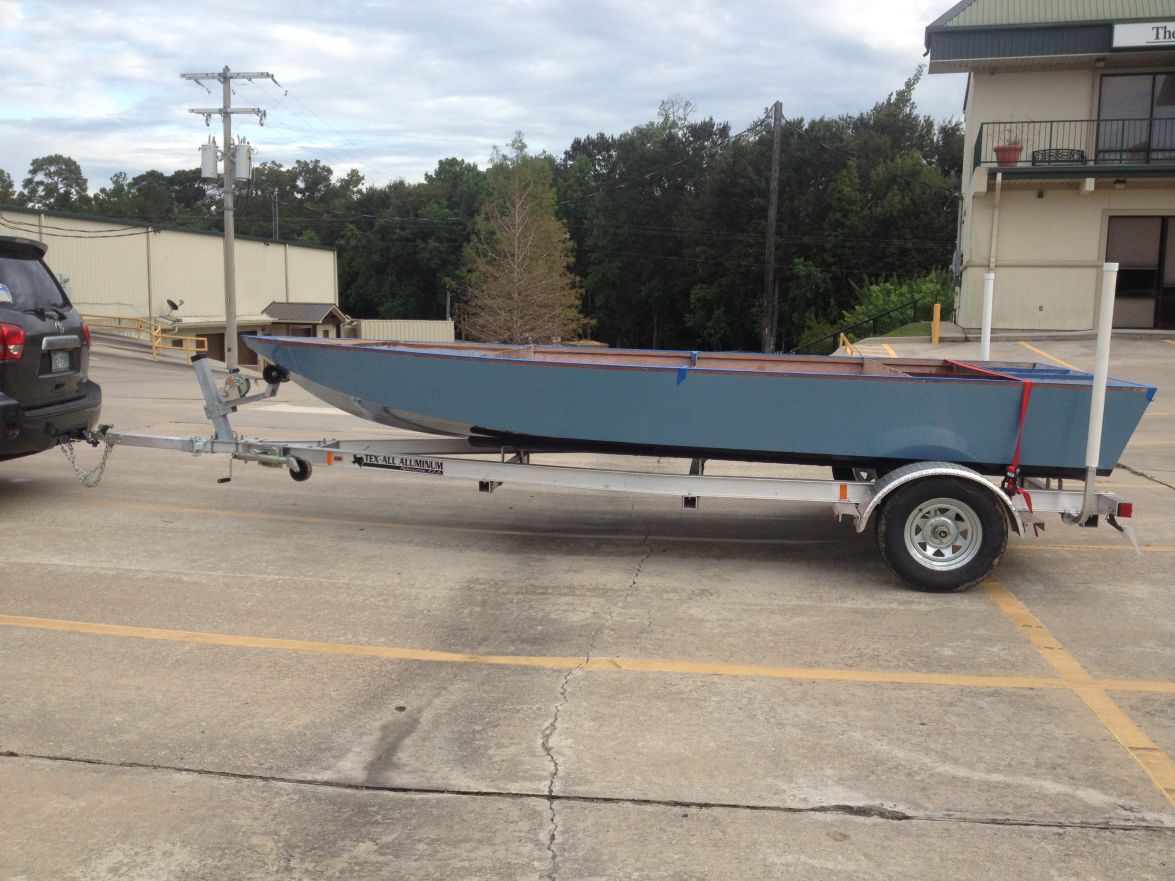
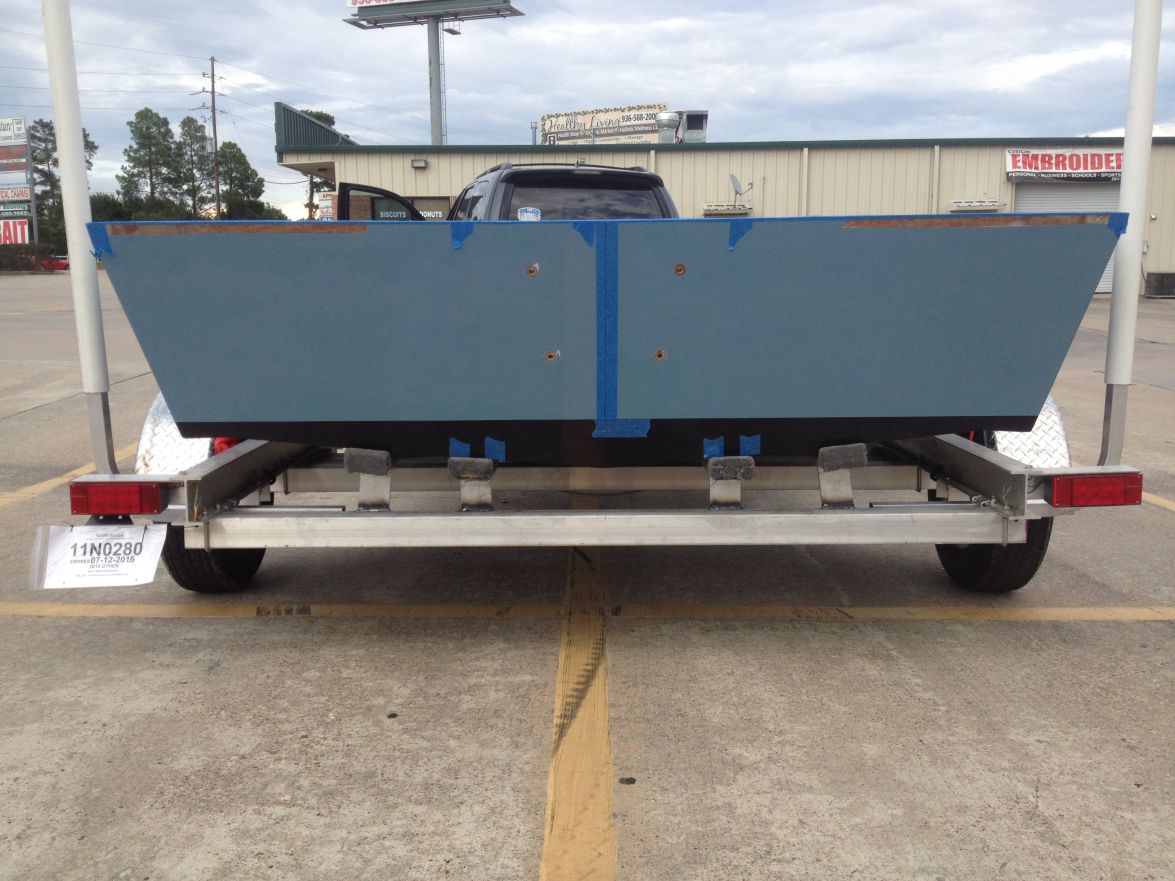
Got my trailer today. It came from Tex-All Aluminum Mfg in Montgomery, TX, about 30 mins from my house. He's made trailers for 2 other phantoms also (Casey and Glenn). The boat stayed at his place a few days to have the bunks placed beneath the stringers. With the folding tongue it fits nicely into the garage.
If anybody in/near east TX needs a trailer I'd recommend giving him a call.
Re: willg's PH18
Posted: Thu Sep 03, 2015 12:06 am
by justin_dwyer
Looking good Will
Re: willg's PH18
Posted: Thu Sep 03, 2015 9:29 am
by Dustinwg
I like that trailer set-up you have. Looks like the placed the bunks right under the stringers. If you don't mind me asking, what did that set you back? And what is the overall length with the tongue folded?
That would make it easy to order from them being they already have the set up now after building trailers for 3 PH18s.
Looking good!
Re: willg's PH18
Posted: Thu Sep 03, 2015 12:27 pm
by swglenn
I ordered mine after Will and paid $2500. He got his a little cheaper. The trailer comes torsion axles and with Vault hubs that don't need any lube or checking for 5 years. They are much better than Buddy Bearings which you have to add grease to routinely and have a bad trait of blowing the rear grease seal and letting water into the bearings. Salt water is not good on bearings.
All of the wiring connections use shrink connectors. Brake lights are LED's. The winch post is galvanized steel. An aluminum winch post is prone to shear off in an accident letting your boat leave the trailer and possibly relocate to your truck bed.
Ty will let you take the trailer with a set of trial bunks. Once your boat is on the trailer he will take it back and custom fit the trailer to the boat. Casey has pictures of his boat suspended above the trailer while permanent bunks are located and then welded to the trailer frame insuring a perfect fit.
I drove from S Louisiana to get mine. It was still less expensive than the stock trailers available here and better built.
Re: willg's PH18
Posted: Thu Sep 03, 2015 9:52 pm
by willg
Dustin, total cost was $2225. Mine was less than Glenn's because I had contacted Ty quite some time ago and he charged me the quote he gave me then. My process was just like Glenn described: brought my empty trailer from his place to the house with universal bunks bolted on, brought it back with my boat, then picked it up completed.
Ty has a great reputation and he was very easy to work with.
With the tongue folded the trailer extends 15" beyond the tip of the bow. The tongue extension is 31". There is 4" b/w the chine and the inside surface of the wheel fender and 13" b/w the chine and the outer surface.
Re: willg's PH18
Posted: Thu Sep 03, 2015 10:12 pm
by Fuzz
Man you guys have it good when it comes to trailers. Around here you do not even ask the price of aluminium trailers. Galvanized trailers go for one dollar per rated pound. That is stock, if you want it fitted to the boat you do that yourself or go rob a bank
Love your PH18. I have thought about one several times.
Fuzz
Re: willg's PH18
Posted: Fri Sep 04, 2015 2:01 pm
by willg
Fuzz wrote:Man you guys have it good when it comes to trailers. Around here you do not even ask the price of aluminium trailers. Galvanized trailers go for one dollar per rated pound. That is stock, if you want it fitted to the boat you do that yourself or go rob a bank
... true, but being able to boat/fish/explore in Alaska: priceless!
Re: willg's PH18
Posted: Sun Sep 27, 2015 5:22 pm
by willg
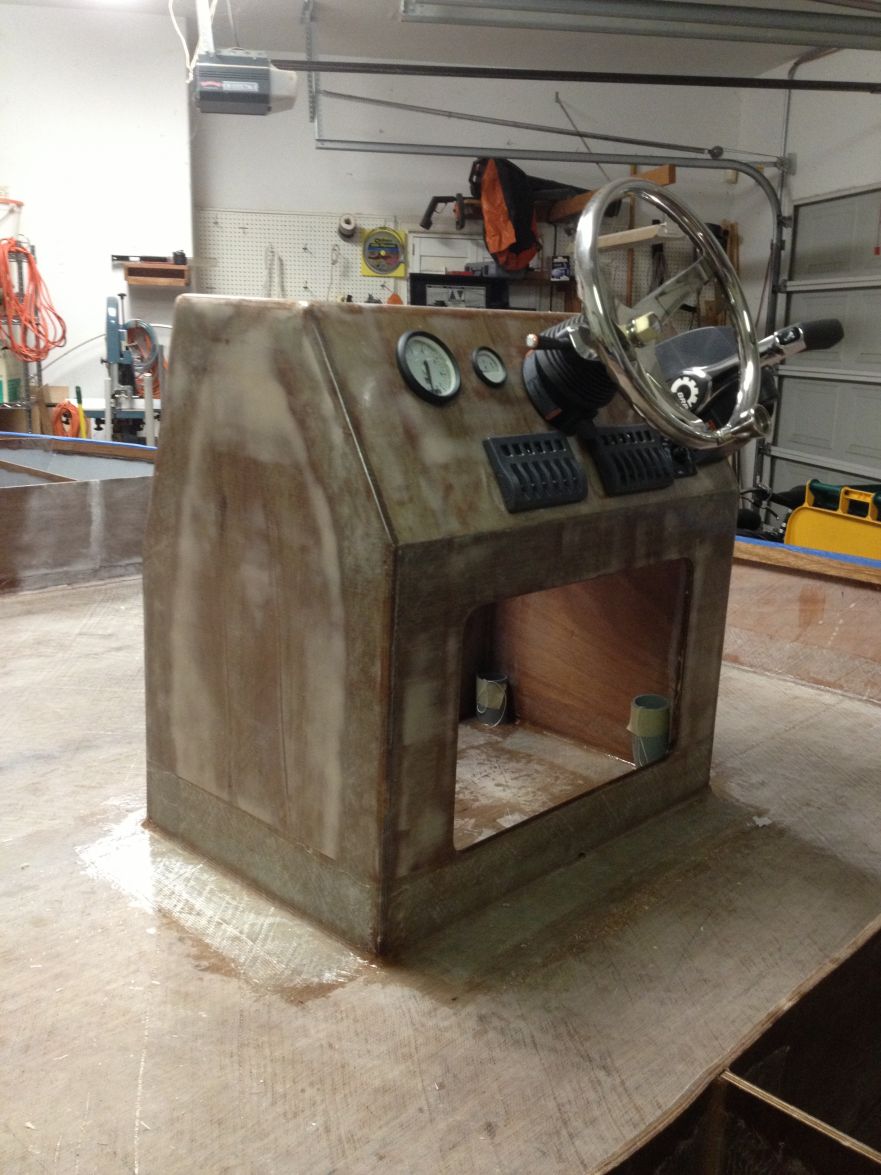
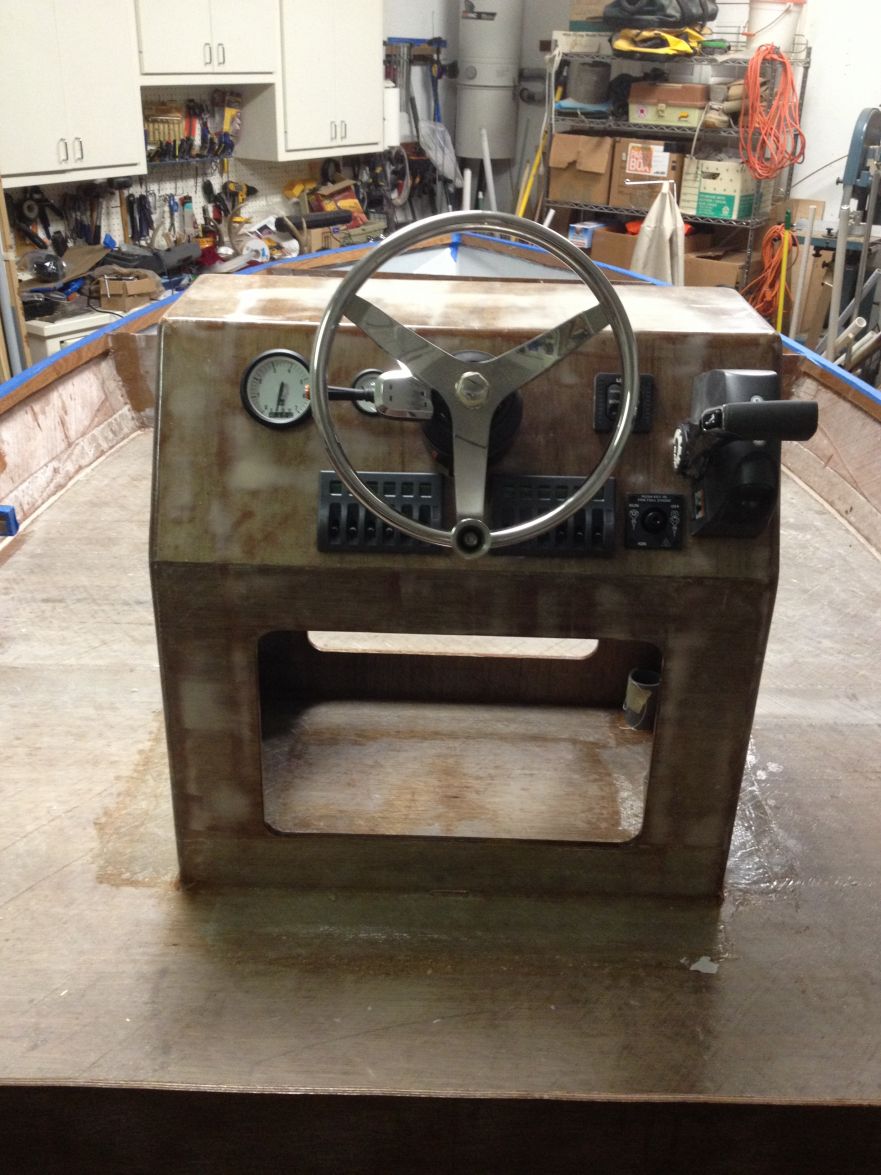
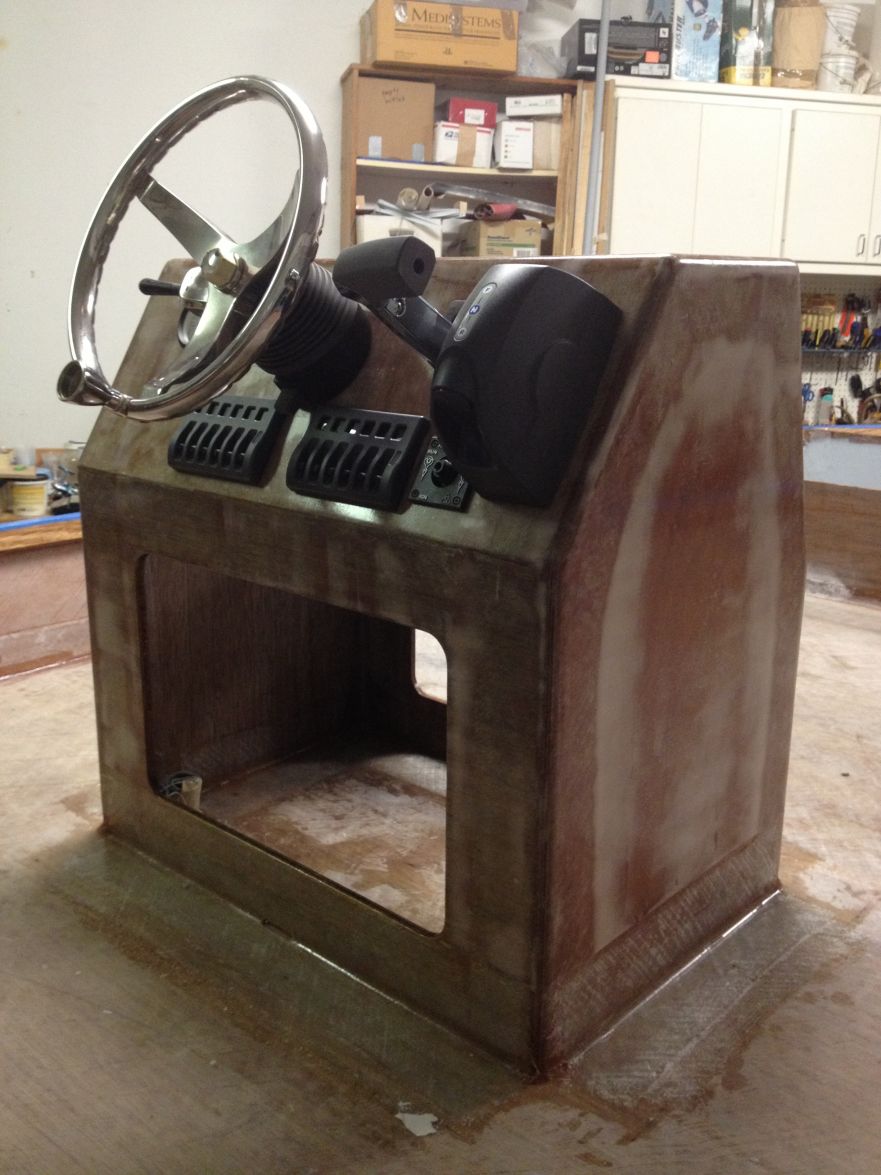
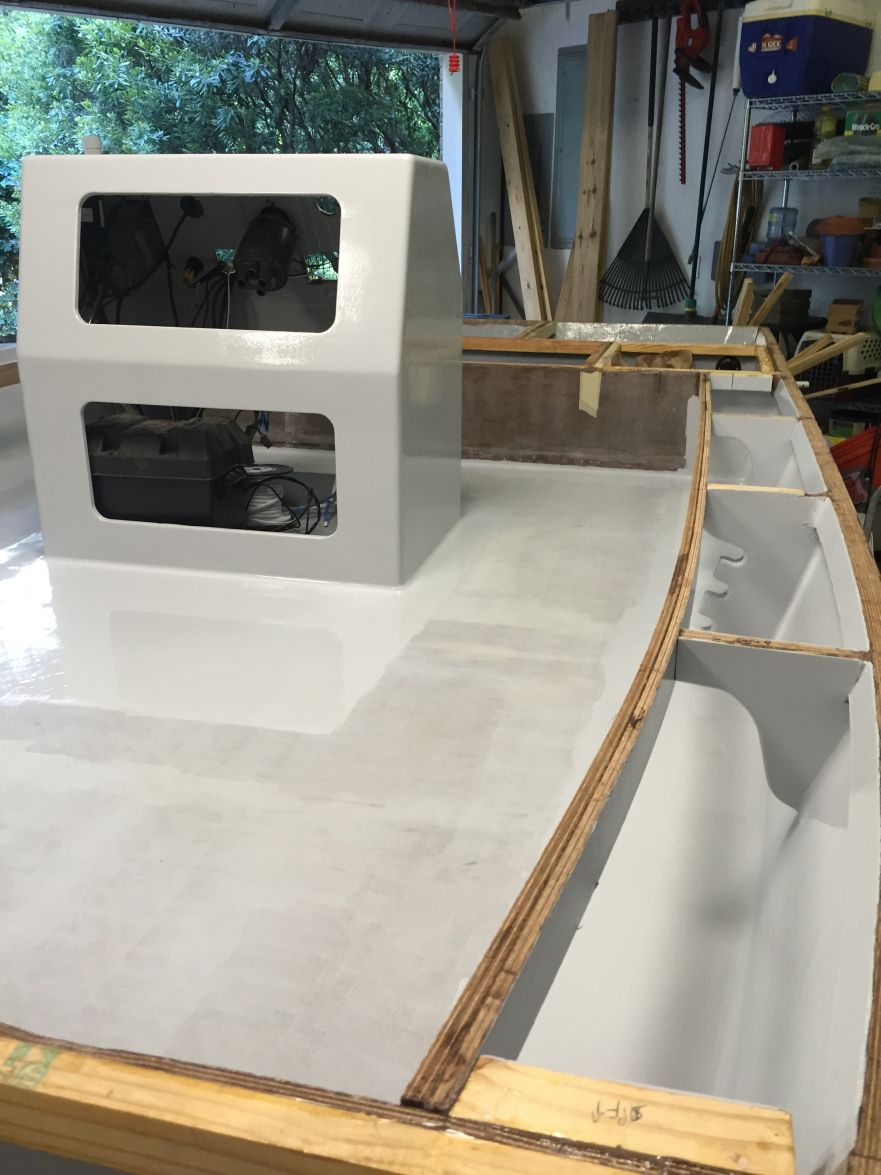
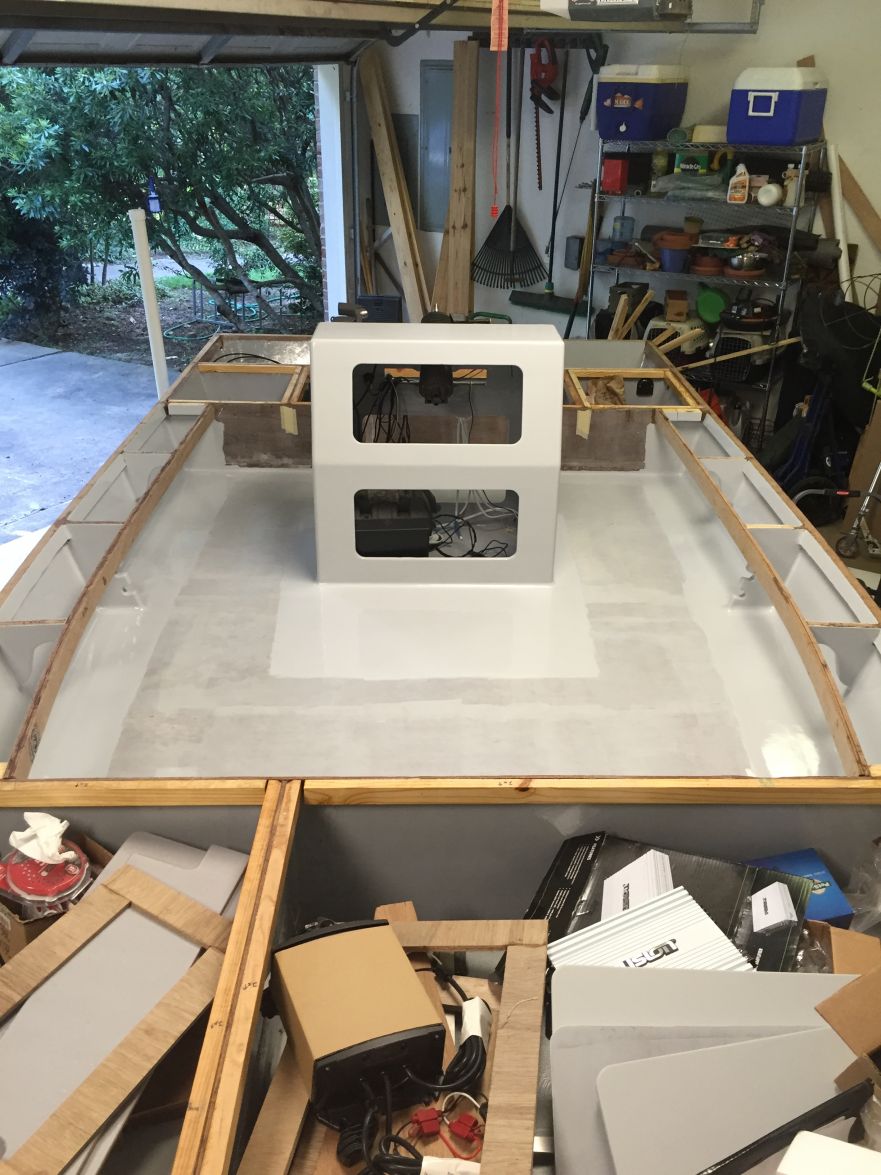
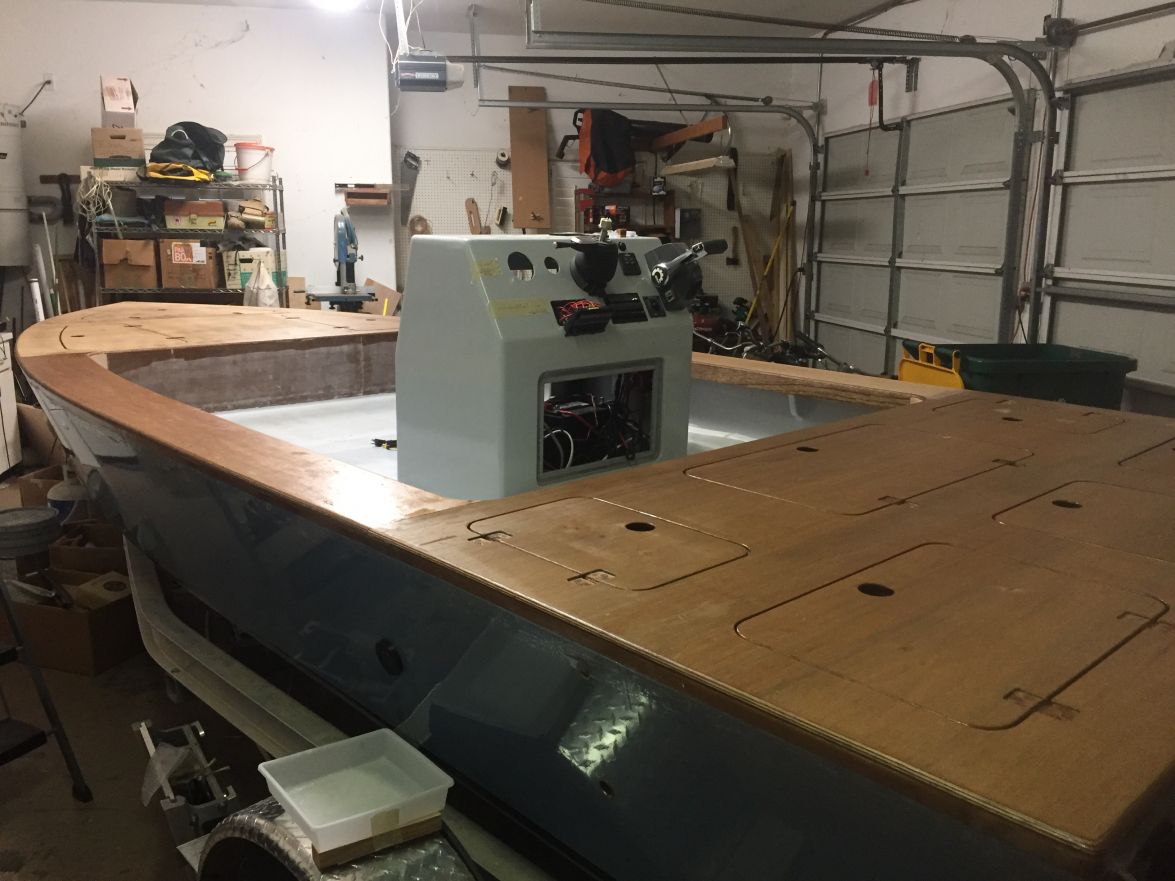
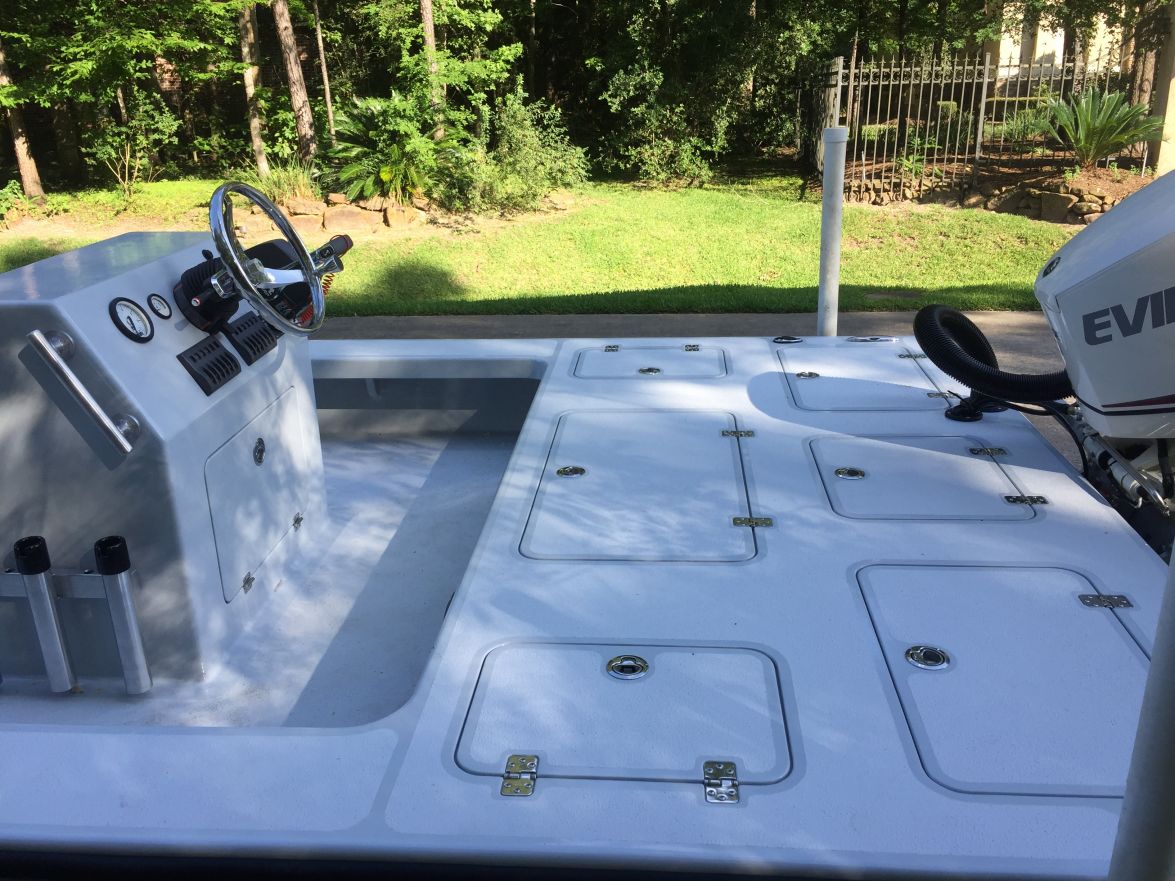
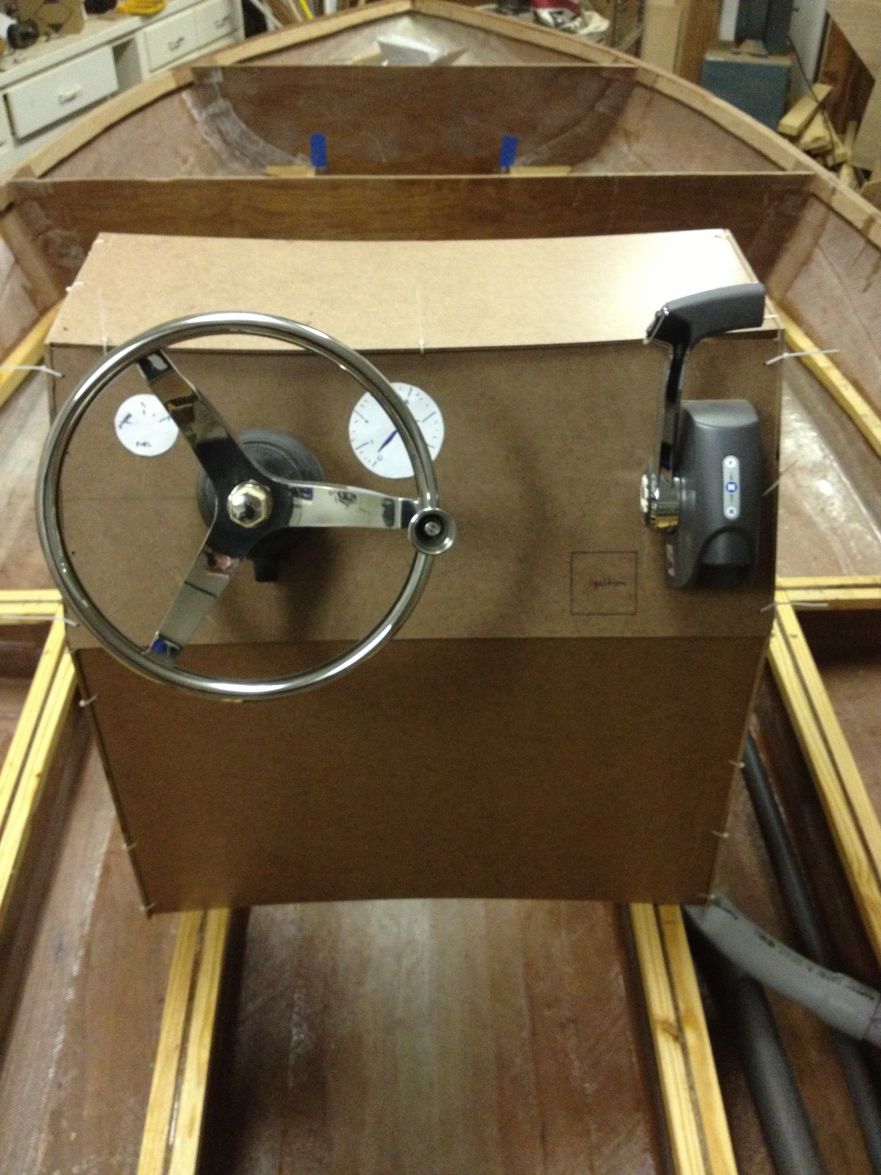
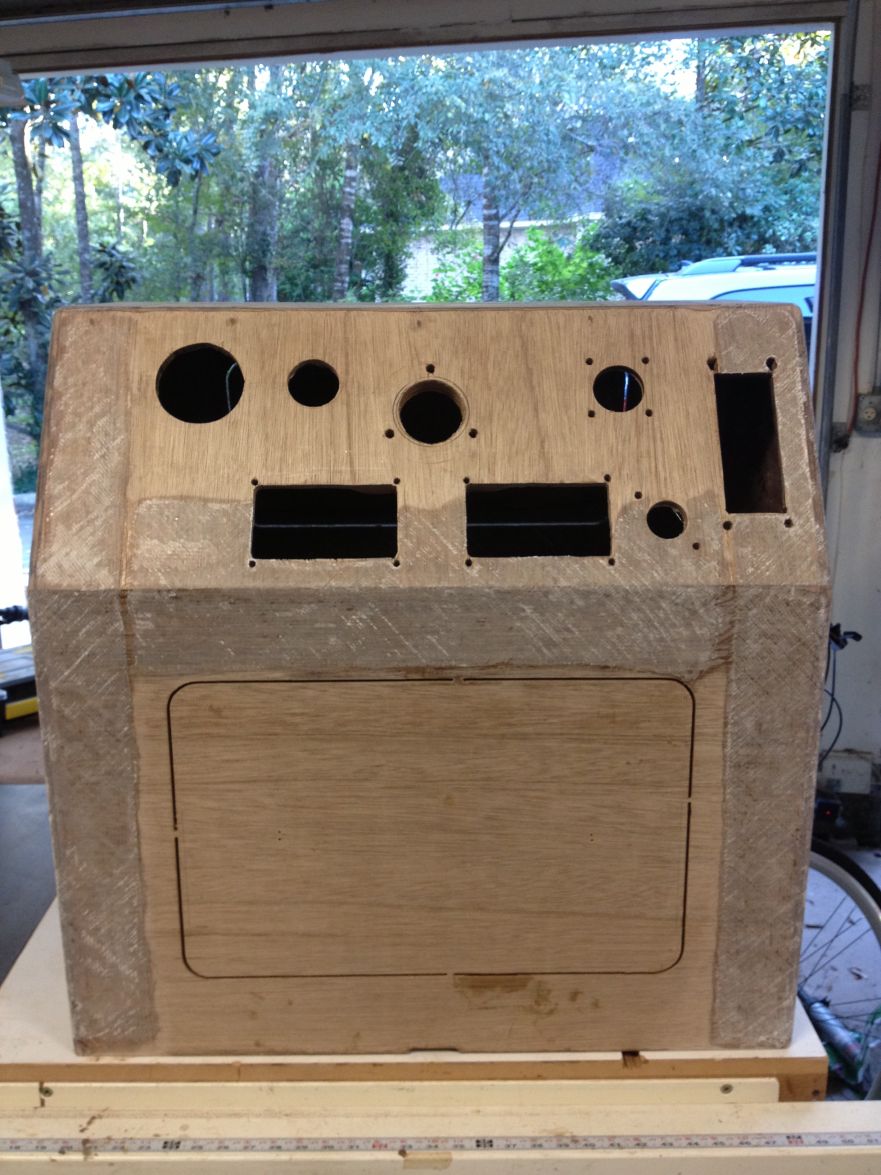
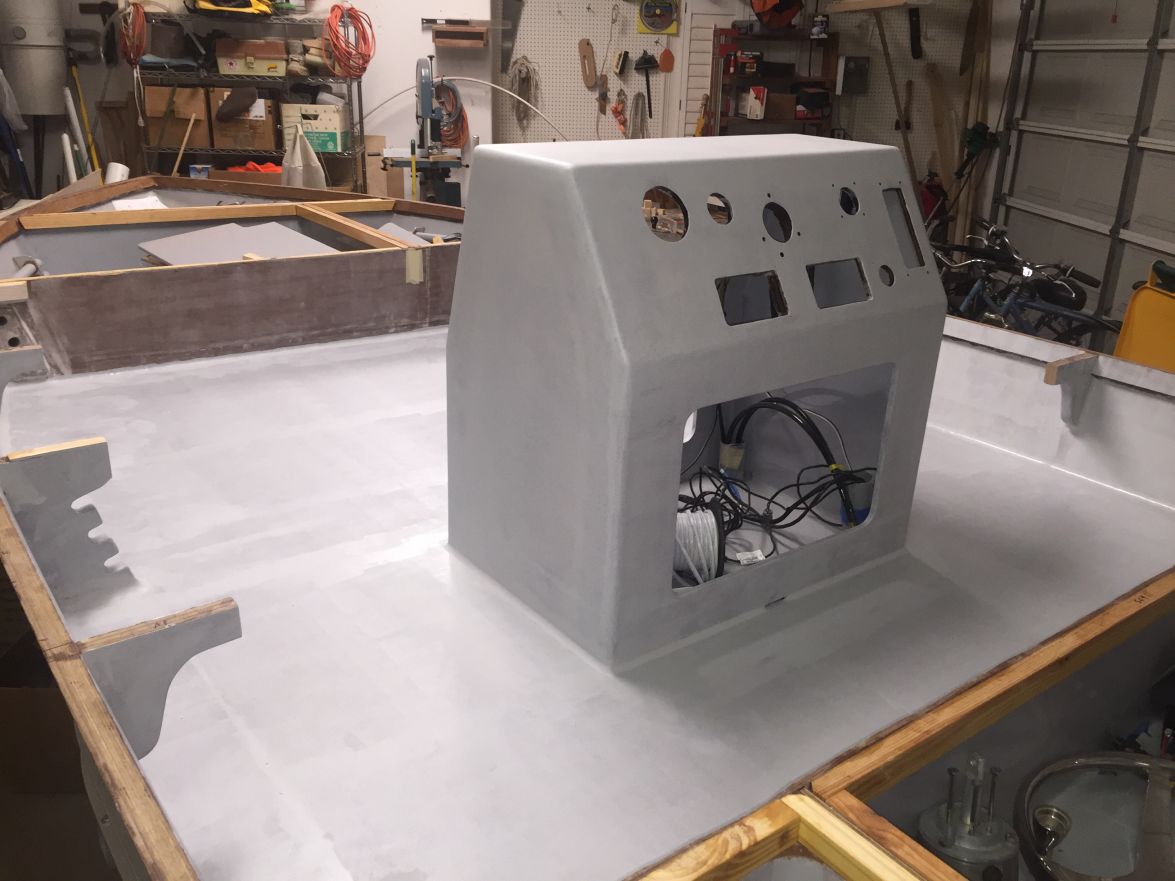
Fellow builders, advice sought. Here is my console.
And after some tweaking here is a mockup of my final layout. The switch at top right is for trim tabs, bottom right is ignition switch. It seems fine to me, but does anybody have any reason I shouldn't begin to cut holes in my console with this layout?
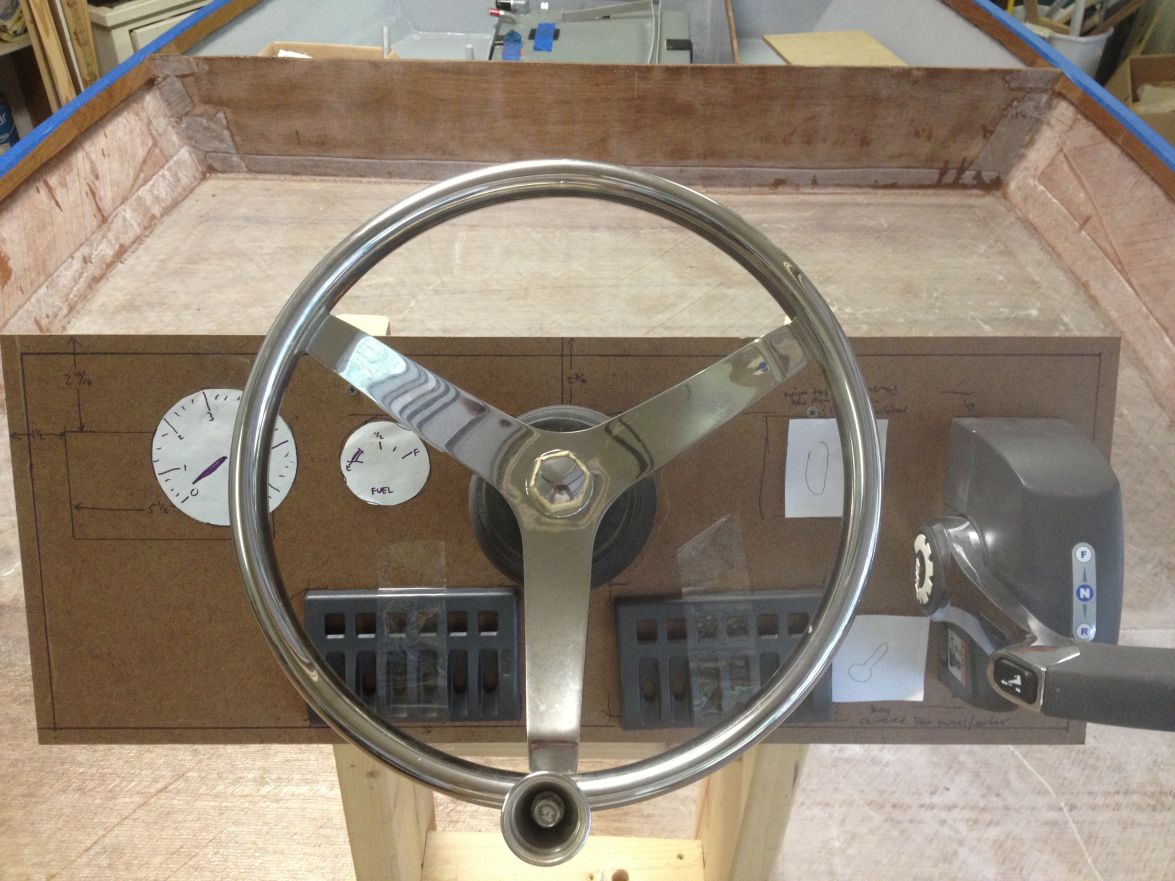
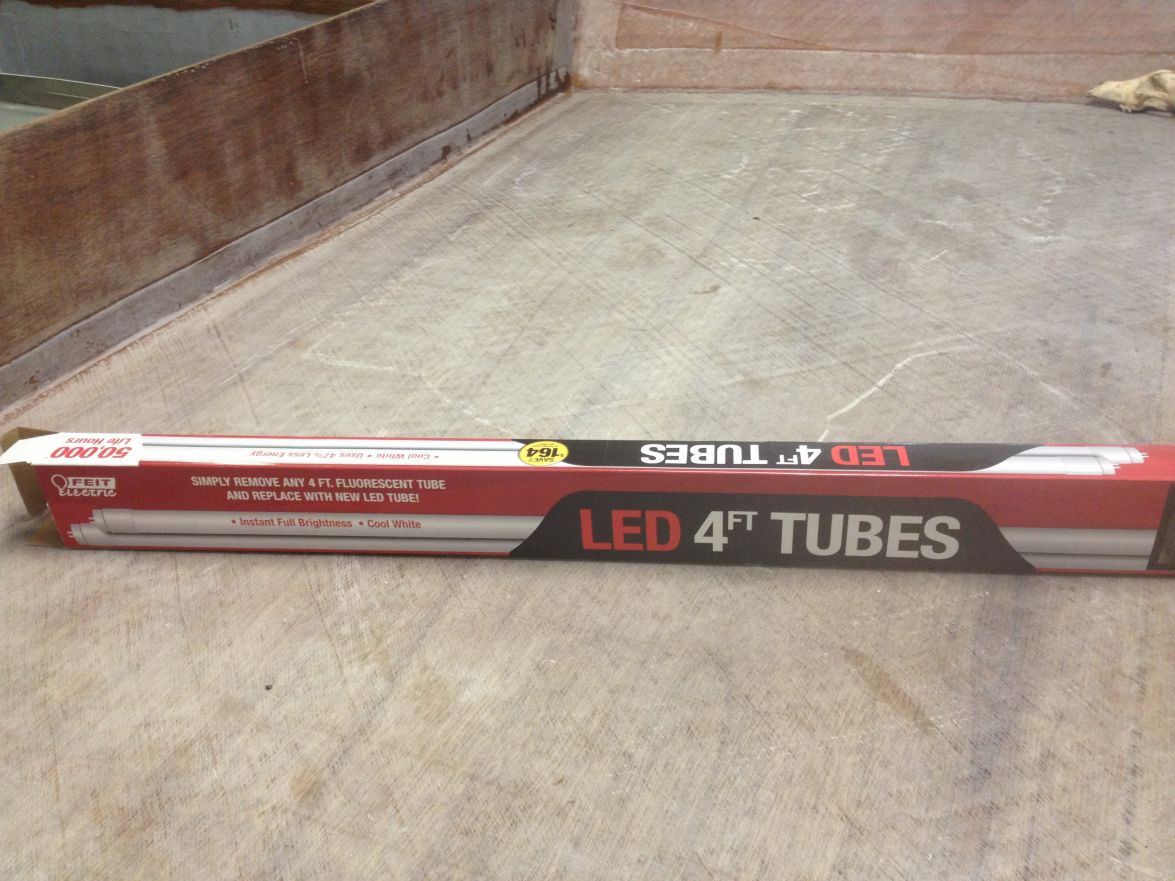
As an aside, I got these yesterday from CostCo to replace bulbs in one of three fluorescent fixtures in my garage. They are very bright and have a nicer color than fluorescent. Two thumbs up.
Re: willg's PH18
Posted: Sun Sep 27, 2015 6:03 pm
by Knottybuoyz
Personally, I don't like reaching behind the wheel to get to a switch. I had the 'Trimdicator' thing on my last boat. Had 'nuff room to mount it just above the shifter/throttle. When they're behind the wheel they're hard to see and unless you memorize each one you'll find yourself looking down a lot to find the switch. It's tough on such a small panel.
Re: willg's PH18
Posted: Sun Sep 27, 2015 10:16 pm
by willg
Kb, thanks. I don't think that's going to be an issue. I have a tilt helm and the wheel is 7" away from the surface. I can get to the switch sitting or standing without having to snake my hand beneath the wheel.
Re: willg's PH18
Posted: Sun Sep 27, 2015 10:36 pm
by Dustinwg
Will, could you put the ignition and trim tab switch on the vertical face of console below where all the rest of the controls are? I'm with KB, the switches behind the wheel could be a pain
Re: willg's PH18
Posted: Mon Sep 28, 2015 9:40 am
by willg
Good idea, I could mount the trim tab switch on the vertical surface and will look into that. If the ignition switch were there I'd worry about banging into the key with my legs. I had originally had a binnacle mount with the integrated switch but changed to the remote switch for that reason also. That key sticks out enough I think to cause trouble.
Re: willg's PH18
Posted: Mon Sep 28, 2015 10:45 am
by Cracker Larry
I'm with you there. Don't put the Ign. switch where you can possibly hit it with you legs or knee. I've broken off a few keys. Trim tab control needs to be in easy reach and probably not behind the wheel.
Re: willg's PH18
Posted: Mon Oct 12, 2015 11:29 pm
by willg
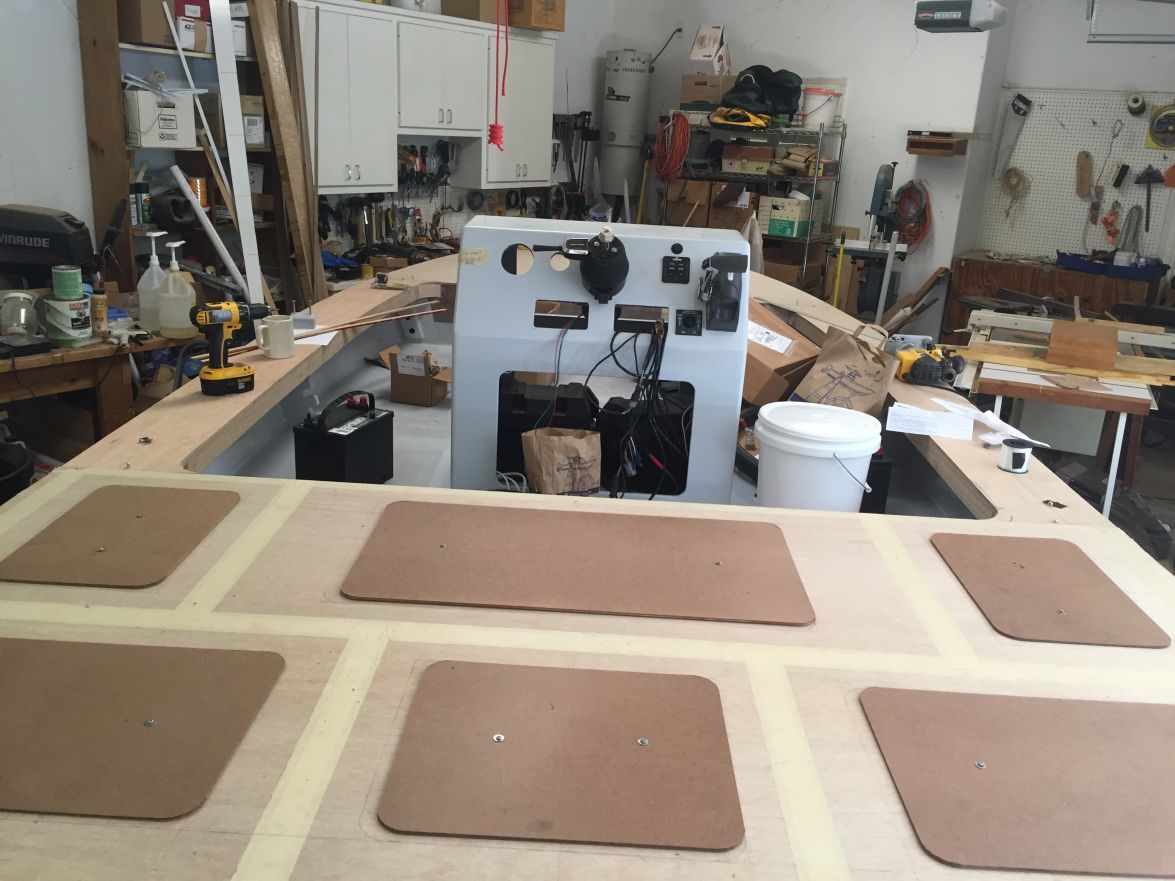
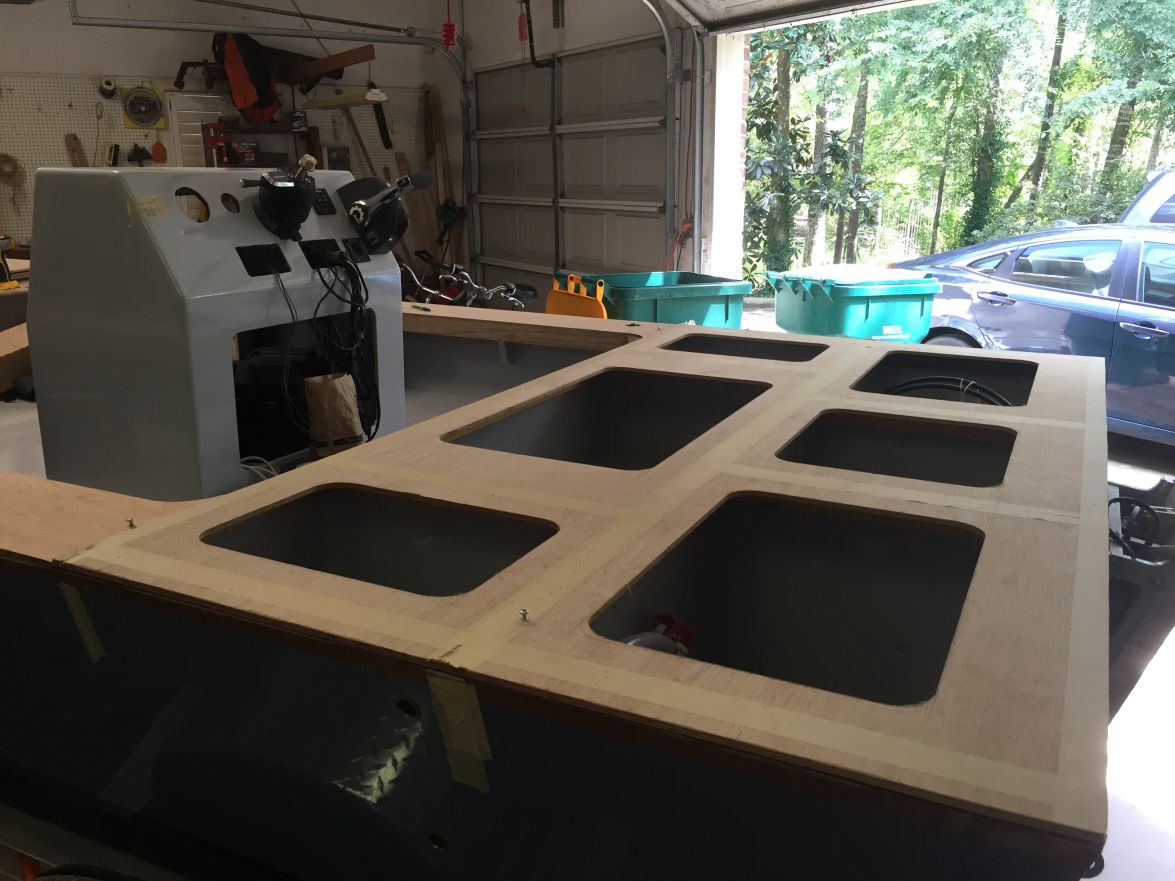
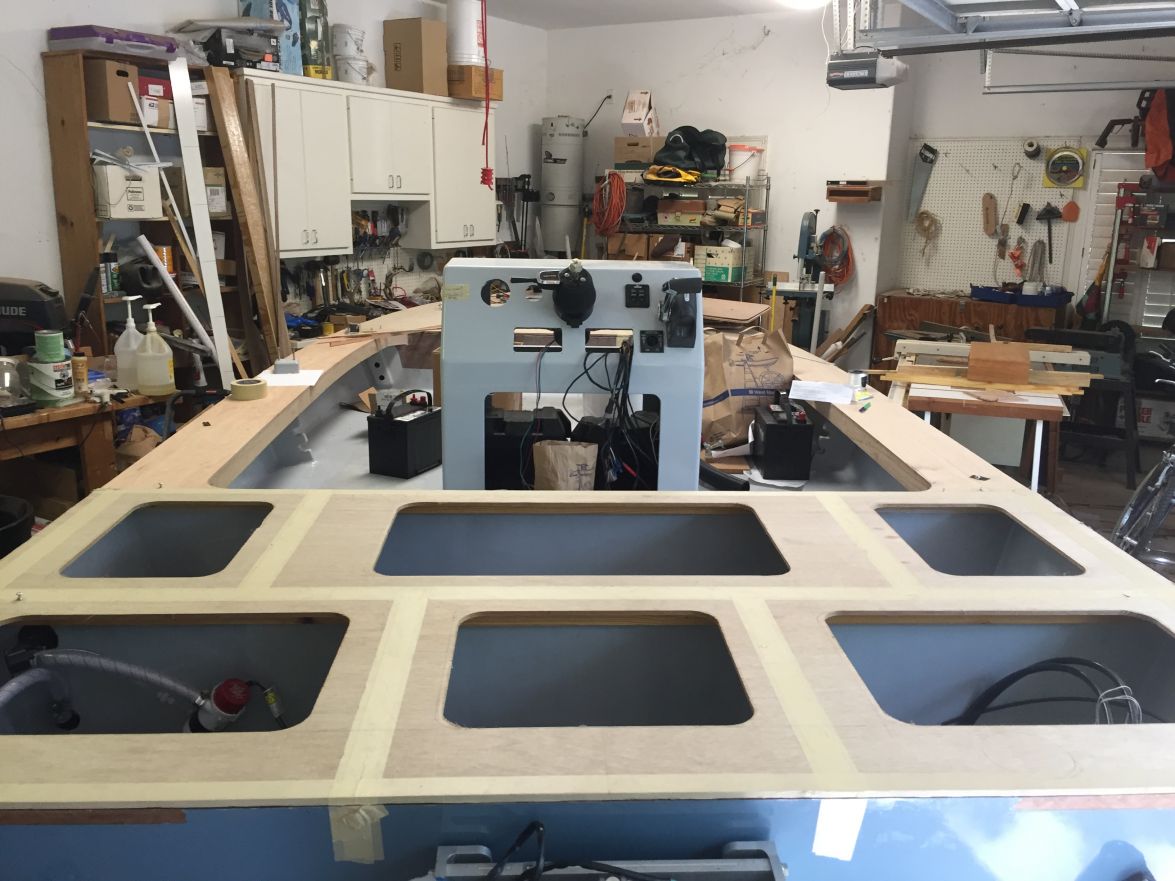
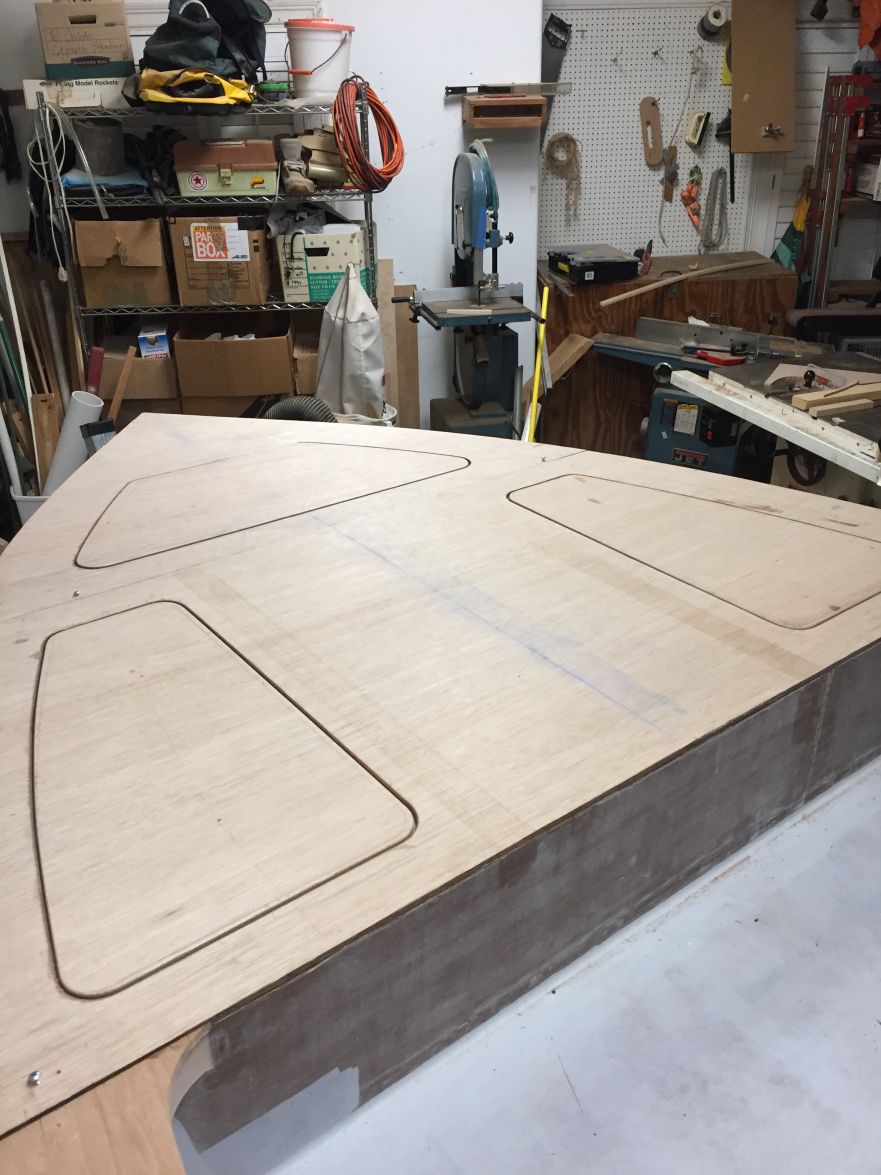
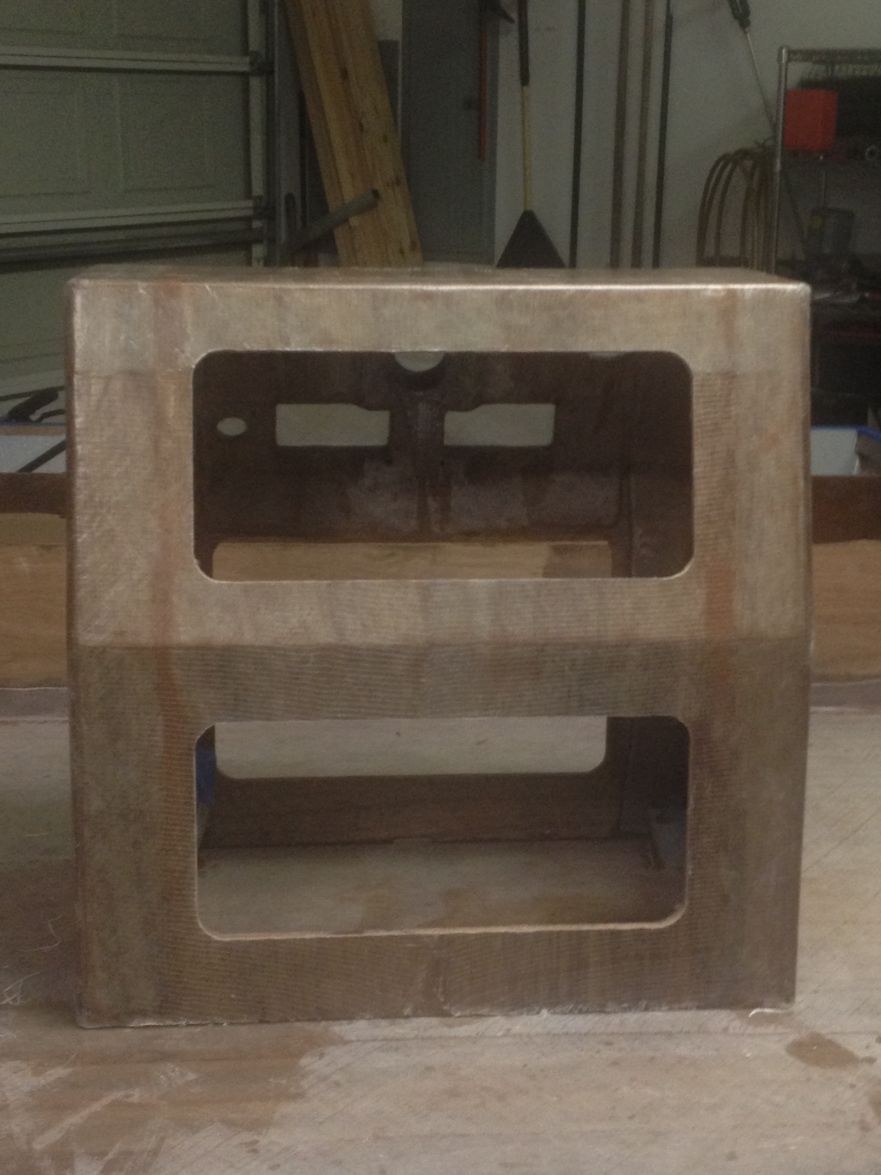
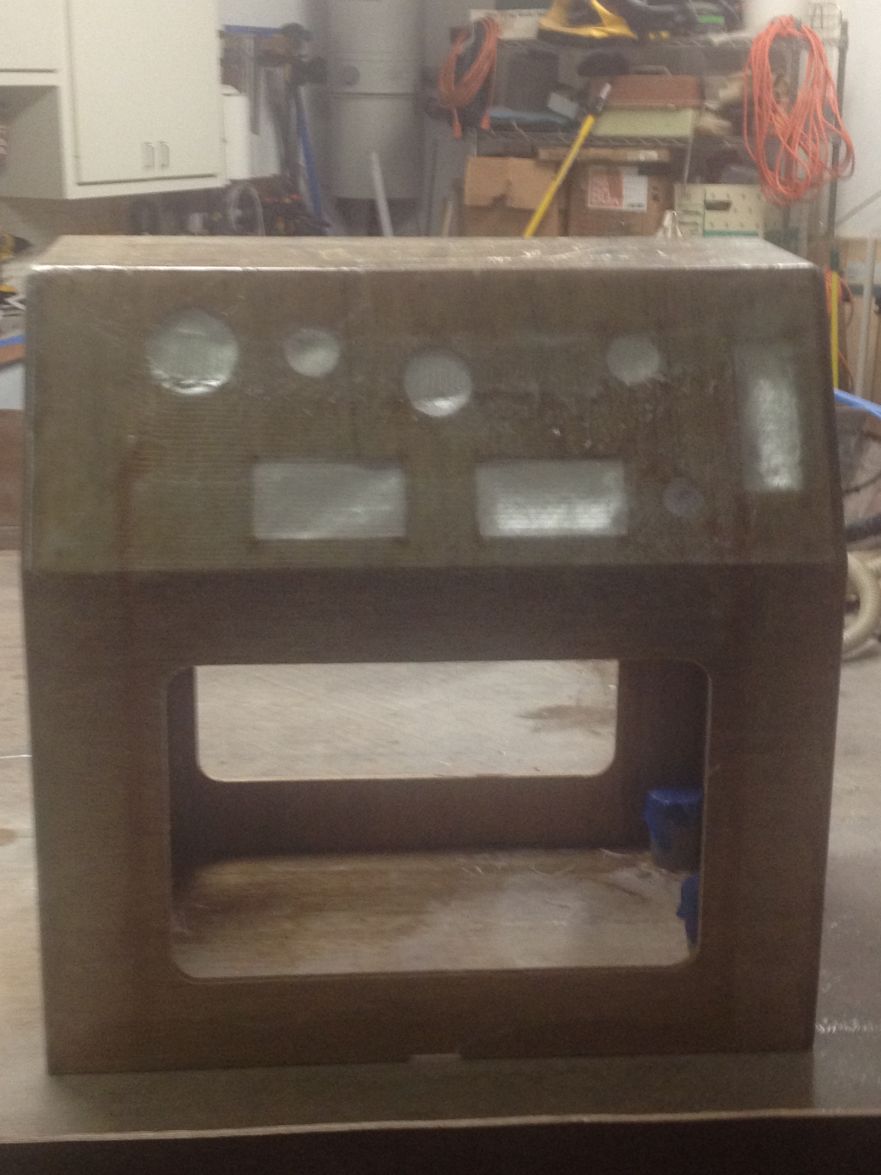
Made some progress on the console. I used fiberboard templates to rout out access hatches. The two facing forward will be covered by the cooler below and a back cushion above. I figure the only time I'll need to remove them is for rigging and moving batteries in/out, so rather than usual hatch covers I will apply some plywood as backing blocks inside the console and will attach the hatch covers with screws and finish washers. I'm going to relieve the backing ply to allow for a gasket. For the aft facing hatch I was thinking of take-apart hinges at the bottom and latches at the top.
Template in place.
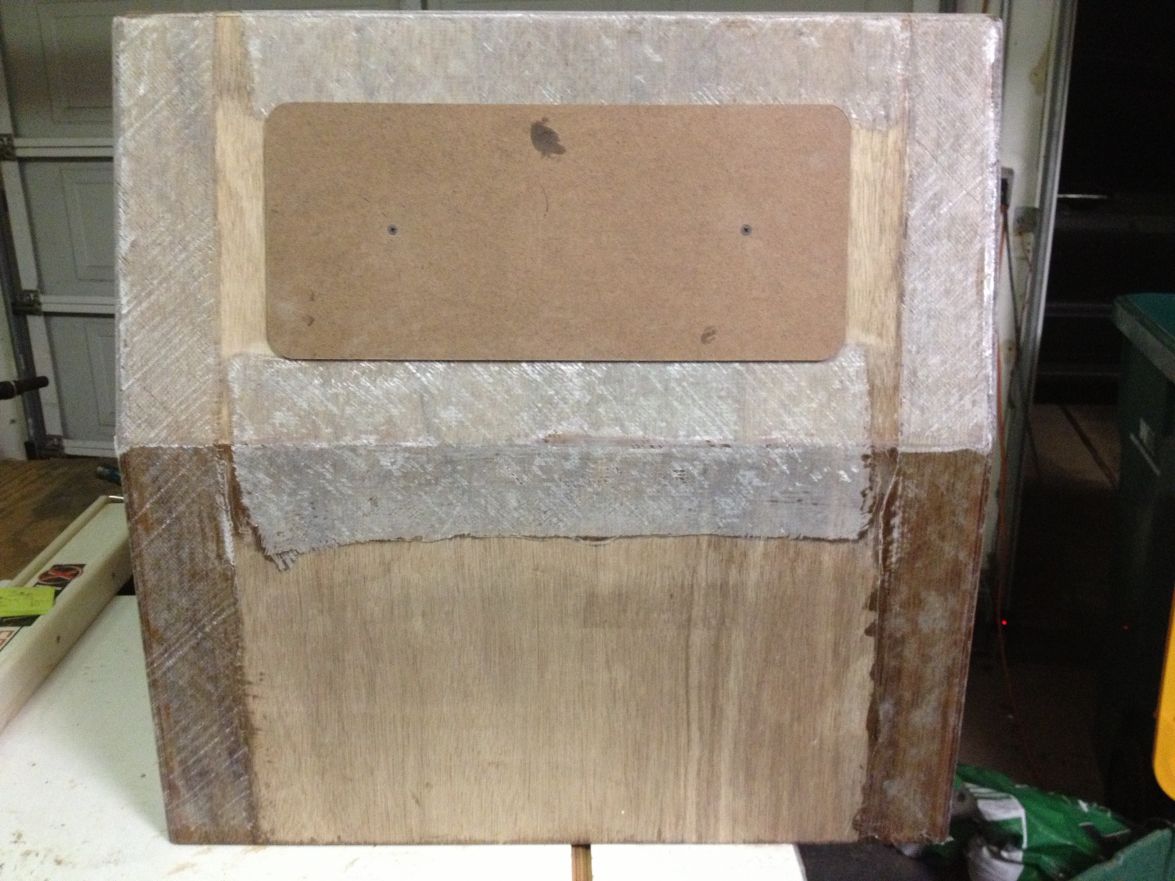
Routed out hatches.
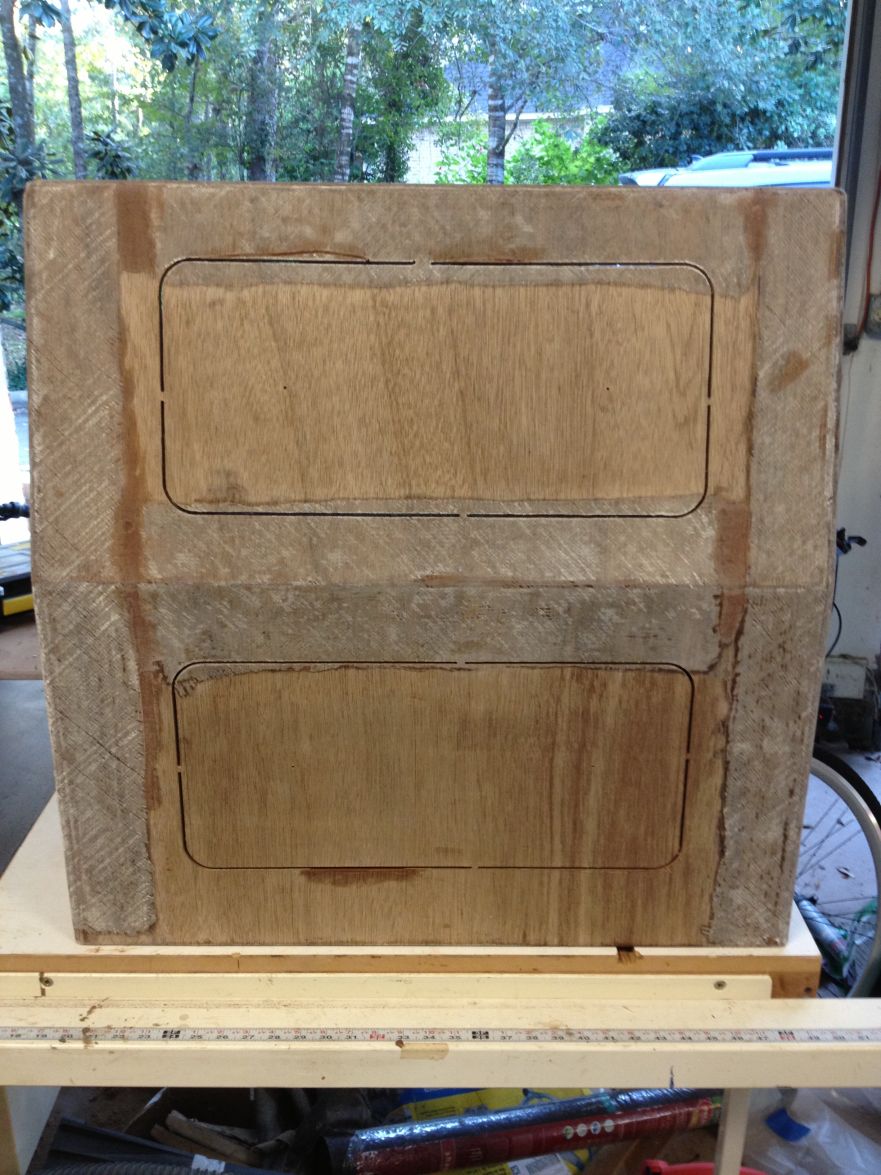
I covered the whole console with 12 oz biax, then cut out the hatches once cured. A shelf will go at a point above battery level. There's enough space at the bottom of the console for offset layers of biax tape.
Re: willg's PH18
Posted: Tue Oct 13, 2015 8:10 am
by Cracker Larry
Looks real good, Will
Re: willg's PH18
Posted: Tue Oct 13, 2015 8:32 am
by wegcagle
Great job Will. If I had it to do again I would maximize the size of the access hatch on the bow side of the console. I dang near dislocated my elbows more than once trying to get both arms in my little hatch to wire/hook up steering/etc.
Your hatch looks wider than mine, so I'm sure you'll be fine. Wiring the console was a complete PITA because of the small access.
Will
Re: willg's PH18
Posted: Tue Oct 13, 2015 4:16 pm
by swglenn
I left the top of my console off so I could reach in from the top for wiring access. I put in cleats and glued the top down after the wiring was completed.
I bought some take apart hinges for my console doors from GemLux. They only sell one side. If you install on the other side they fall out.
http://www.gemlux.com/catalog/hinge-offset-misc/2680
I didn't find any others but I may have missed them.
Console looks great. Good work!
Re: willg's PH18
Posted: Sat Oct 17, 2015 12:32 am
by willg
Thanks, guys, for the kind words. Gotta say I'm happy to make some more tangible steps. I know I have many more to go. I laugh at my previous estimates of when I'd be ready to splash her. 2.5 years into it so far. I keep thinking I've made my last of multiple epoxy/EZ Fillet orders but the stuff just gets eaten up and I know I'll need more. I've got so much gear and wood and stuff laying around the garage. It's chaos, but it's fun chaos and I'm having a great time. I thank the forum for that.
Re: willg's PH18
Posted: Sun Nov 08, 2015 7:54 pm
by willg
Re: willg's PH18
Posted: Sun Nov 08, 2015 8:21 pm
by Steven
Looks great Will. Lots of room to get to the switches. Like the tilt wheel.
Re: willg's PH18
Posted: Mon Nov 09, 2015 8:10 am
by swglenn
Great work. I am taking the boat and trailer to Ty on Thursday to get the bunks changed out. I hope to get it done in a day and head home so I won't be able to stop by. If something changes I will give you a call.
Re: willg's PH18
Posted: Tue Nov 10, 2015 12:48 am
by willg
Thanks, guys.
Glenn, I understand the appeal of getting it done in one day, but if plans change and you could swing by I'd love to see you and your boat.
Re: willg's PH18
Posted: Sat Nov 28, 2015 9:56 am
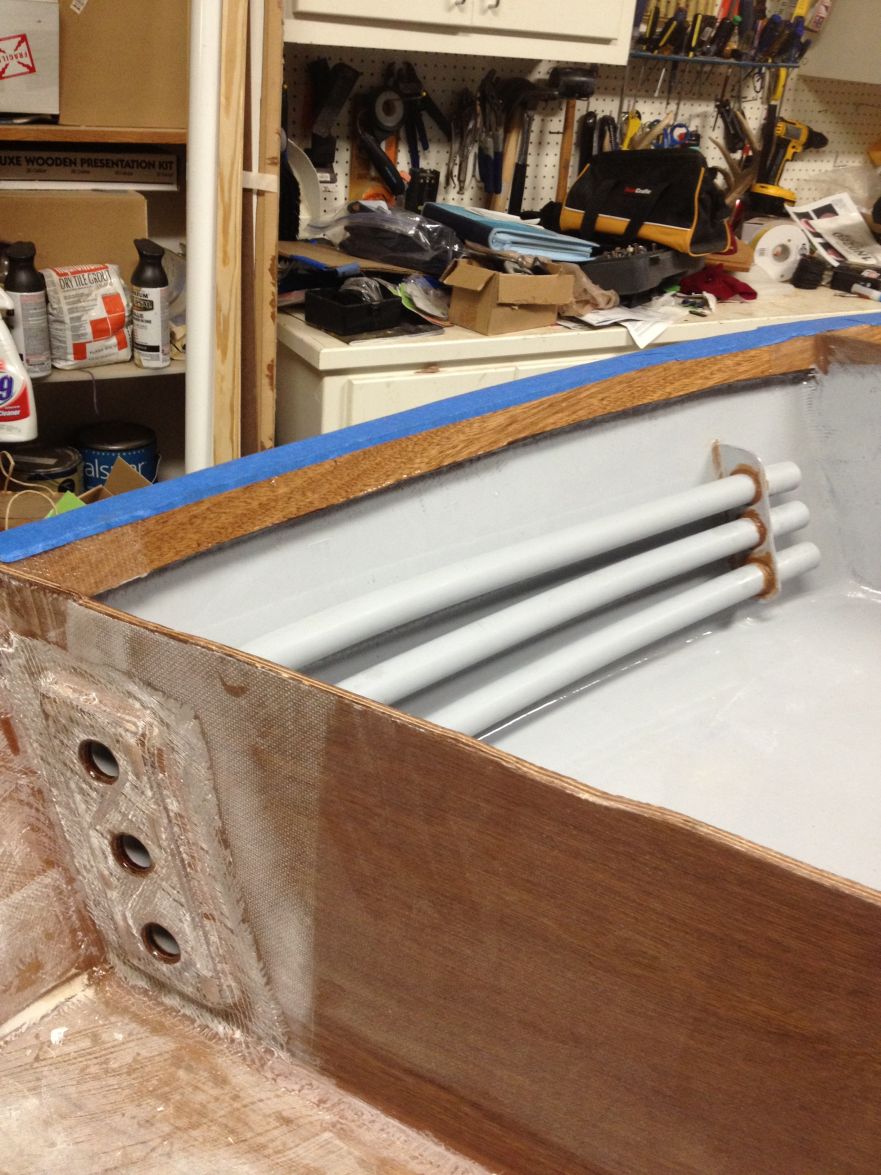
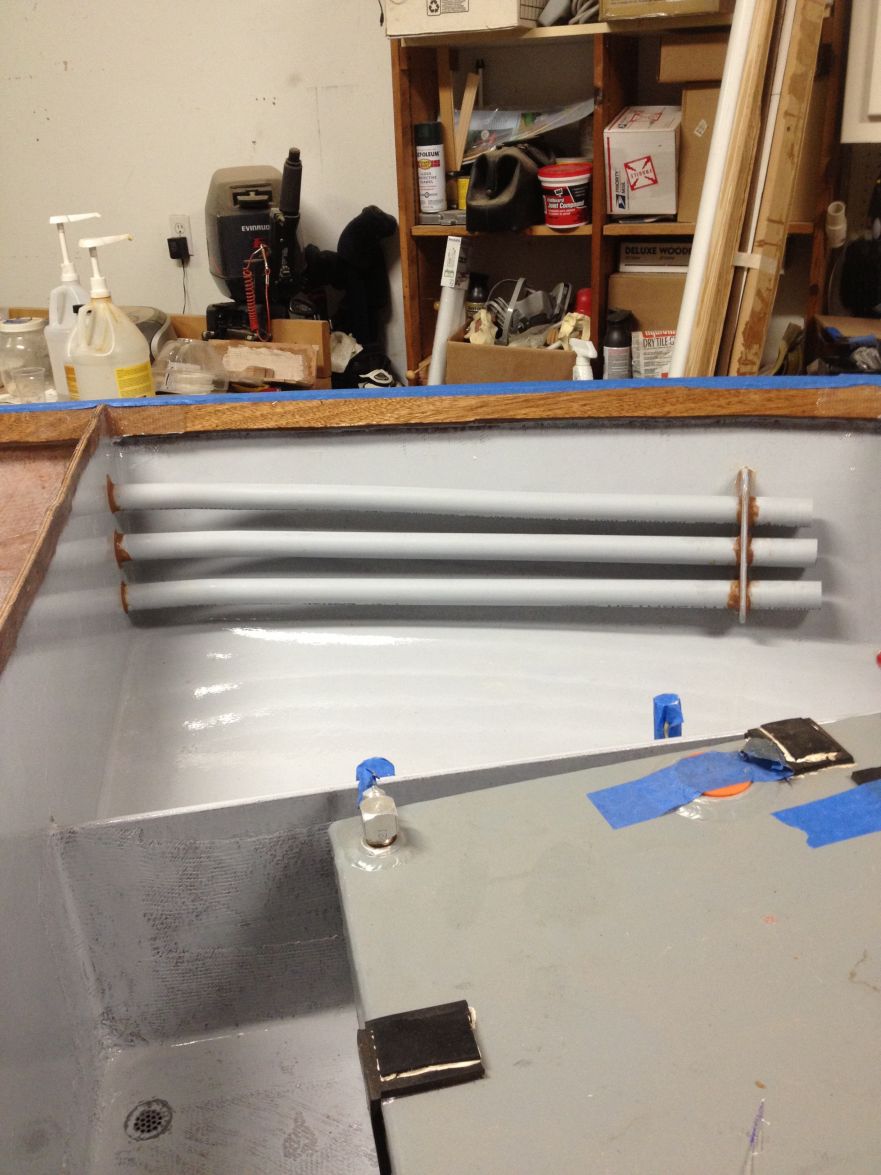
by willg
Re: willg's PH18
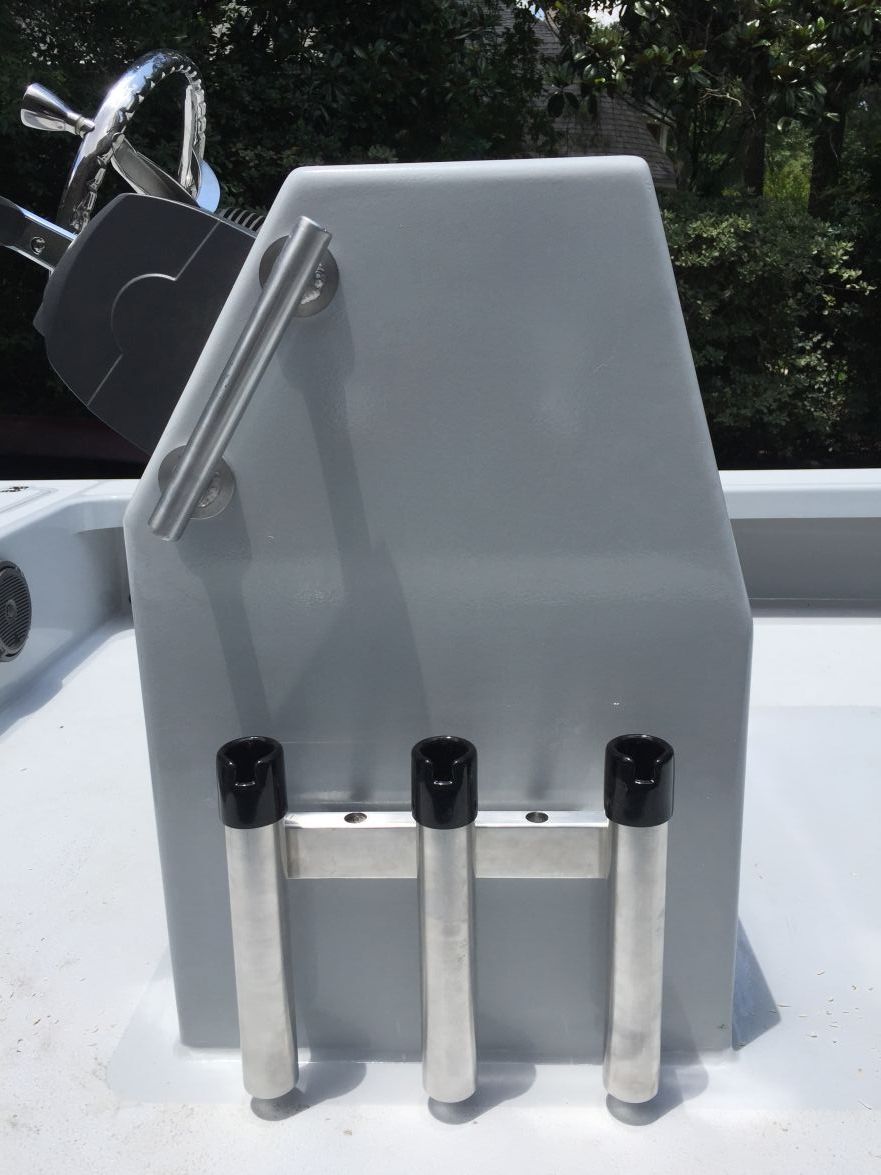
Posted: Fri Dec 04, 2015 3:04 pm
by Dustinwg
Will, your rod tube set up is top notch! How long of a rod can you get in the tubes?
And that console turned out great! Did you glass the entire inside of the console?
Re: willg's PH18
Posted: Fri Dec 04, 2015 11:54 pm
by willg
Thanks, Dustin. The tubes are about 33". With the rod holders at bulkhead C I can get 7' spinning/casting rods and 9' fly rods in place. A spinning rod can rest in the rod holder and the tip fits into the tube easily. That is, the bigger guides don't get in the way.
I put 6" biax tape on all inside joints of the console. That wound up covering a lot of the inside surface with glass but I didn't put any more glass in besides that.
When do we get new pics of your build?
Re: willg's PH18
Posted: Tue Dec 15, 2015 6:01 pm
by Dustinwg
That's good to hear about the rod holders, as I was hoping to be able to use the rod holders for conventional and fly tackle.
On the console, that is what I was planning on doing on the inside as well, so I am glad to hear that the console is solid enough with 6" tape only on the inside!
Hope to get some new photos up soon, just been doing a lot of figuring and head scratching lately with regard to livewell and console layout, so not much to take photos of, but I think I have a plan and hope to make some serious headway in the near future. The no more daylight savings thing really has me unmotivated to do boat work. I mean it's dark at 6:00 pm!!
I am about to place an order for the trailer from the guy you used. Talked to him on the phone and seemed like a good dude. About how long did you say it took to take delivery from the time you ordered?
Re: willg's PH18
Posted: Wed Dec 16, 2015 11:25 am
by willg
Dustinwg wrote:...just been doing a lot of figuring and head scratching lately
I know what you mean. I think the head scratching has been one of the most fun parts of my build.
I don't recall how long it was between placing my trailer order and it being ready for pickup. Because of work it took me a while to find the time to pick it up, so for me I really didn't have a wait. One thing for sure is that Ty will communicate with you quickly and answer any questions you have along the way. I'm sure you'll be happy with the experience.
Re: willg's PH18
Posted: Tue Dec 22, 2015 7:08 pm
by MarkOrge
Nice work Will. Really nice. And I know what you mean about the head scratching - I have had just as much fun designing as I have building. A second set of eyes (wife) has been very valuable too...
Re: willg's PH18
Posted: Wed Dec 23, 2015 1:56 am
by Fuzz
Dustin if it makes you feel any better the sun rises around 1000 here and is set by 1515. Now that is a short day, but better than some others like the guy building up in Nome.
Fuzz
Re: willg's PH18
Posted: Tue Feb 02, 2016 11:49 am
by Dustinwg
Will, have you started messing with the rub rail on your boat yet? Just curious if you were planning on putting a strip of plywood rub rail on the outside of the sheer to install the rub rail on top of, or if you were just going to put the rub rail directly to the sheer?
Re: willg's PH18
Posted: Tue Feb 02, 2016 11:51 pm
by willg
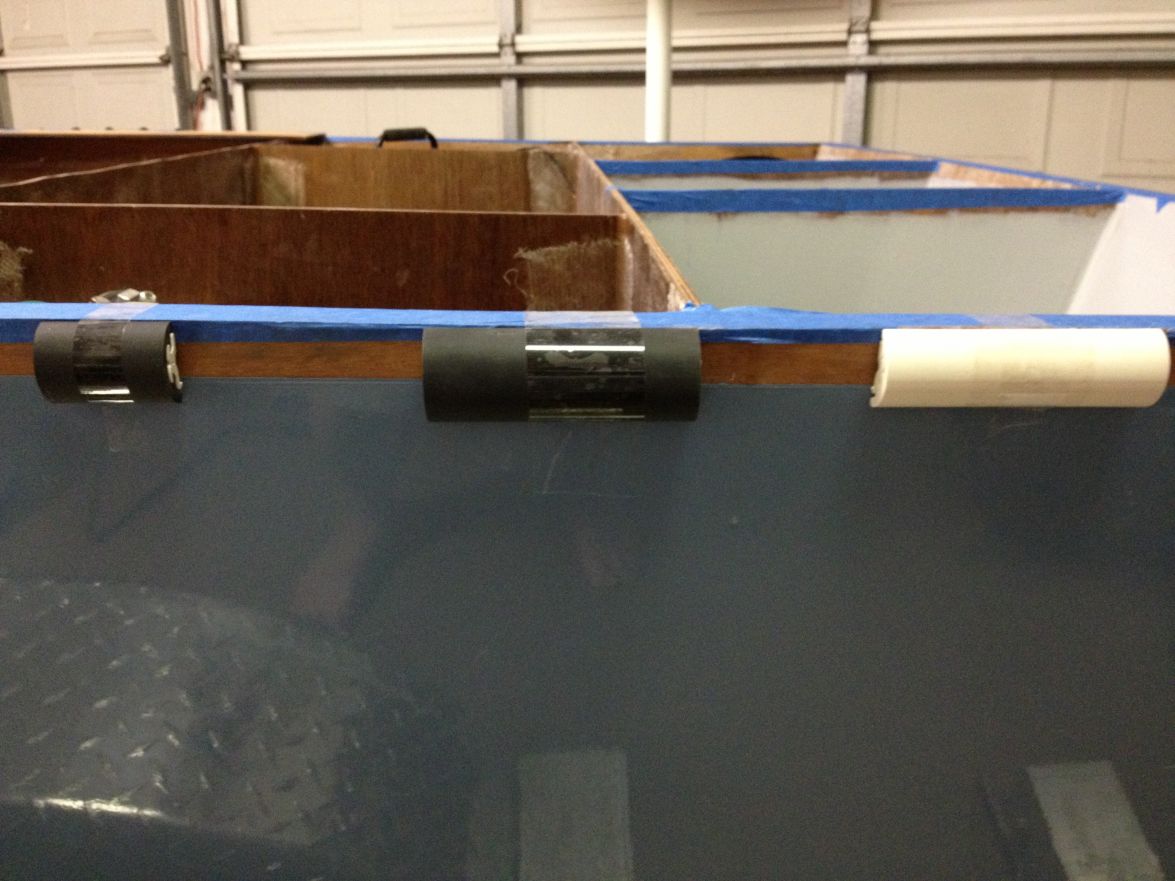
I haven't purchased it yet but have made a decision on it. I am going to use Tessilmare Radial 1 5/8" black rub rail. It can apparently take tight corners nicely. I am going to mount it directly on the sheer, no strip beneath. Smokymountain put it on his PH18 and was happy with it. You can find vendors and installation videos easily. I haven't figured out whether black end caps are available, if not I'll use stainless.
http://www.fisheriessupply.com/mate-usa ... plete-kits
Here are some sample pieces, black 1 1/4" and 1 5/8" and white 1 1/4".
Re: willg's PH18
Posted: Wed Feb 03, 2016 9:05 pm
by Dougster
I used Tessilmare, found it very easy to do and no trouble at all doing corners. Seems like I saw somewhere that Bateau sells it in their store too? Not sure. I don't remember what size I used but I sure would use it again. I went with white and regret that; black wouldn't mark up so easily.
Dougster
Re: willg's PH18
Posted: Sat Feb 06, 2016 7:39 pm
by willg
Dougster, did you mount the rail directly on the hull or did you lay a strip down first?
Re: willg's PH18
Posted: Sun Feb 07, 2016 2:29 am
by glossieblack
Been pondering what type of rub rail to use on our ST 21 Noosa River build. Just discovered your solution - nice. Have decided to follow your example, in black. Thanks willg and dougster!
Re: willg's PH18
Posted: Sun Feb 07, 2016 10:06 am
by Dougster
I layed down a wood rubrail first, from three layers of scrap 1/4" ply, I believe. Then put the Tessilmare rail over that. I screwed the rail in, then took it off, over drilled the screw holes, filled with thickened epoxy, and put the rail back on using the filled holes for the screws. Wasn't as much trouble as it sounds.
Dougster
Re: willg's PH18
Posted: Sun Feb 07, 2016 4:26 pm
by BarraMan
I layed down a wood rubrail first, from three layers of scrap 1/4" ply, I believe. Then put the Tessilmare rail over that. I screwed the rail in, then took it off, over drilled the screw holes, filled with thickened epoxy, and put the rail back on using the filled holes for the screws. Wasn't as much trouble as it sounds.
My plan also!
Re: willg's PH18
Posted: Mon Feb 08, 2016 7:45 am
by Dustinwg
Will, thanks for the info. I was hoping the sheer clamp would be enough to not have to install strips on the outside of the sheer.
I called Tessilmare after seeing that they sent you samples and ordered a sample of the radial like you have, and the also the Sphera, which has a stainless steel insert to check out. Also called Taco and ordered a sample of the rigid vinyl with stainless steel insert.
I like the looks of the stainless but am worried that it will not bend around the bow without flattening out.
Re: willg's PH18
Posted: Mon Feb 08, 2016 3:30 pm
by willg
Dustin, with the sheer clamp and hull together I have 1 1/4" thickness to mount the rub rail, same as yours. I think/hope that will be enough. Looks like it will be a while before I'm installing it, so I'll look to you if you get there first.
Re: willg's PH18
Posted: Tue Mar 29, 2016 9:35 pm
by willg
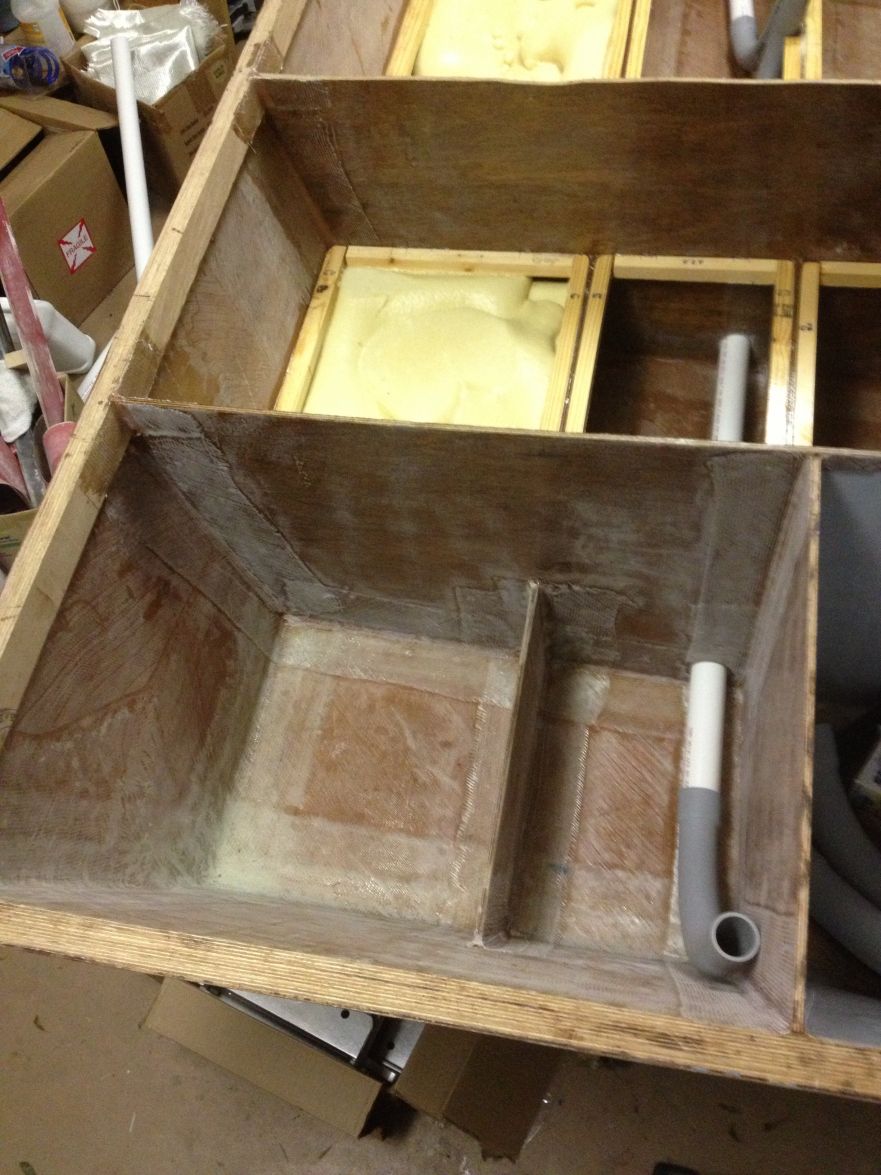
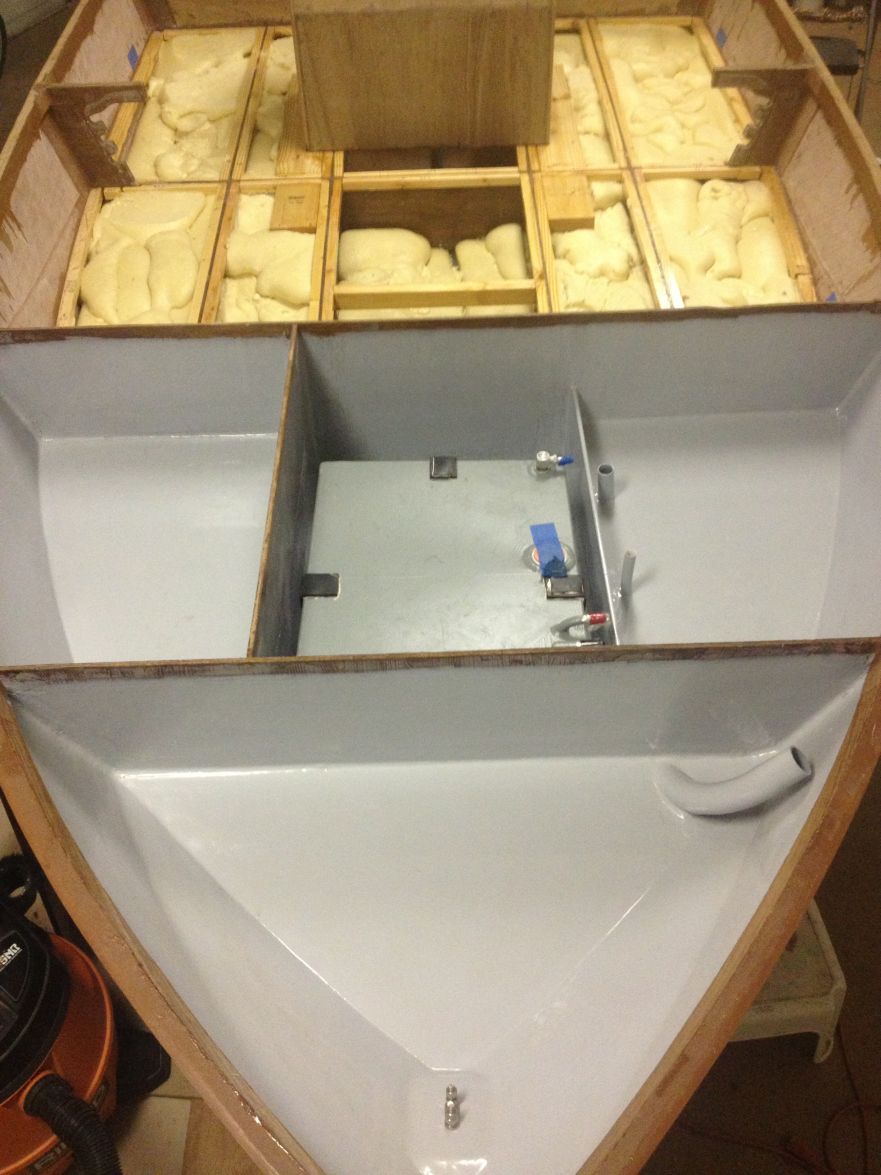
Since my last post I have installed Lenco 9x9 trim tabs, finished the inside of my hatches, made mounting blocks for pumps/switches/bus bars, etc., and have done a little wiring. Using 1" closed cell sheets I insulated the port/starboard hatches b/w bulkheads D and E. This way I can use those hatches as coolers. The one on port is also plumbed as a bait well. The plywood sides have been filleted and taped, and all surfaces are covered with biax. I have also installed 4 brass drain tubes - thanks go out to Larry for loaning his flaring tools, they worked great!
Starboard hatch. Not shown is that it is now plumbed with a 1" drain in the aft corner.


Port hatch/bait well. I eased the corners a bit with fiberglass sections from 2" PVC.


This is a water pump connected to a seacock. From the pump I have a Y-valve which will go to a wash-down hose or fresh water inflow to the bait well. On the back of the bulkhead is a Rule Oxygenator recirculating system for the bait well.

Re: willg's PH18
Posted: Tue Mar 29, 2016 9:47 pm
by Cracker Larry
Those look great!
I have also installed 4 brass drain tubes - thanks go out to Larry for loaning his flaring tools, they worked great!
You are very welcome
Re: willg's PH18
Posted: Wed Mar 30, 2016 1:33 pm
by swglenn
Very well thought out and clean work.
Re: willg's PH18
Posted: Fri May 06, 2016 7:34 pm
by LGF
Picking up on most of the PH builds and yours is very very Good, congrats on your build thus far, will be following your progress.
Re: willg's PH18
Posted: Sat May 07, 2016 11:27 am
by willg
Thanks, LGF, it's been a lot of fun. This forum has been key. I followed it quite a while before pulling the trigger on my build. Looking forward to seeing yours come together.
Re: willg's PH18
Posted: Sat May 07, 2016 11:59 am
by LGF
Same here, my leap over the edge took five years give or take, but it was fishing from an unstable bathtub and the following of builds here in the last couple of weeks that was the final push!
Do you know a good divorce lawyer?
Re: willg's PH18
Posted: Sat May 07, 2016 12:29 pm
by Dustinwg
Will,
You've been pretty quiet lately...lets see some pics!
Re: willg's PH18
Posted: Sat May 07, 2016 3:37 pm
by LGF
Ditto
Re: willg's PH18
Posted: Sun May 08, 2016 12:29 am
by willg
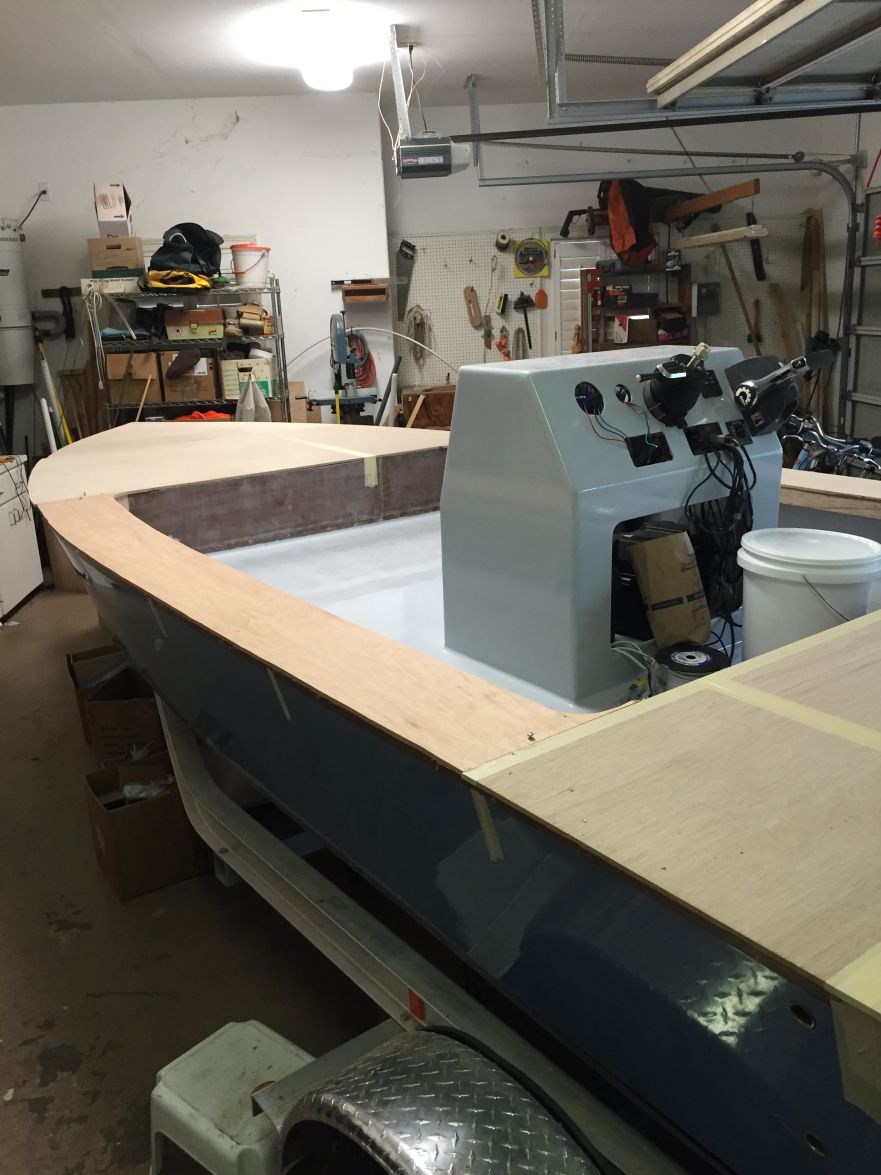
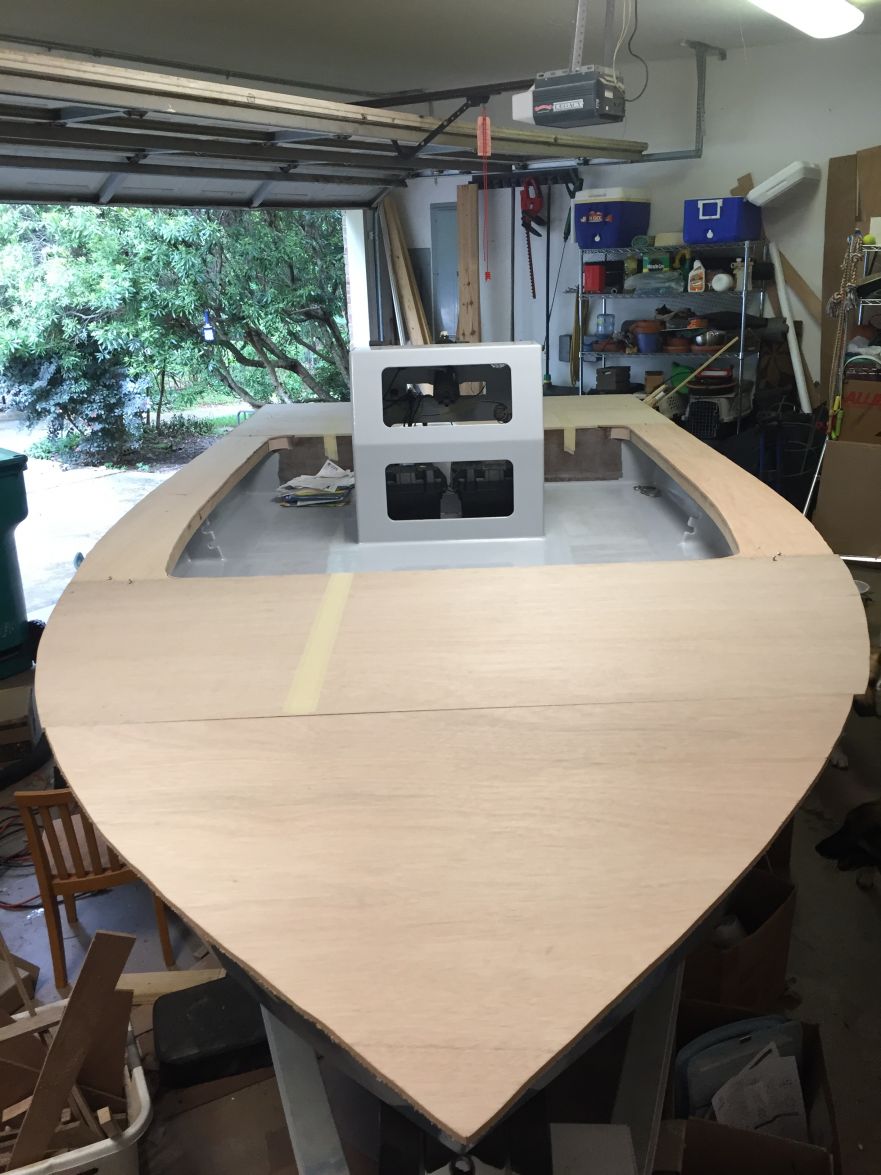
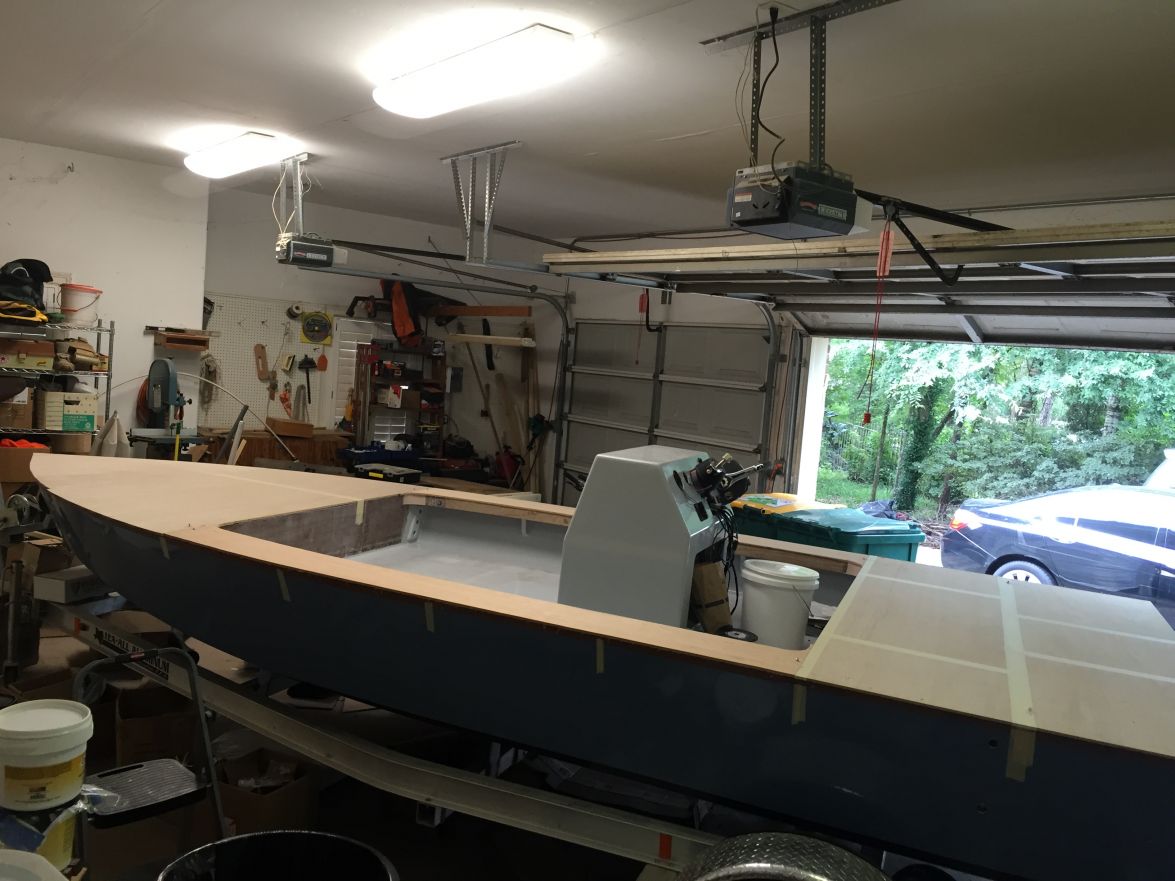
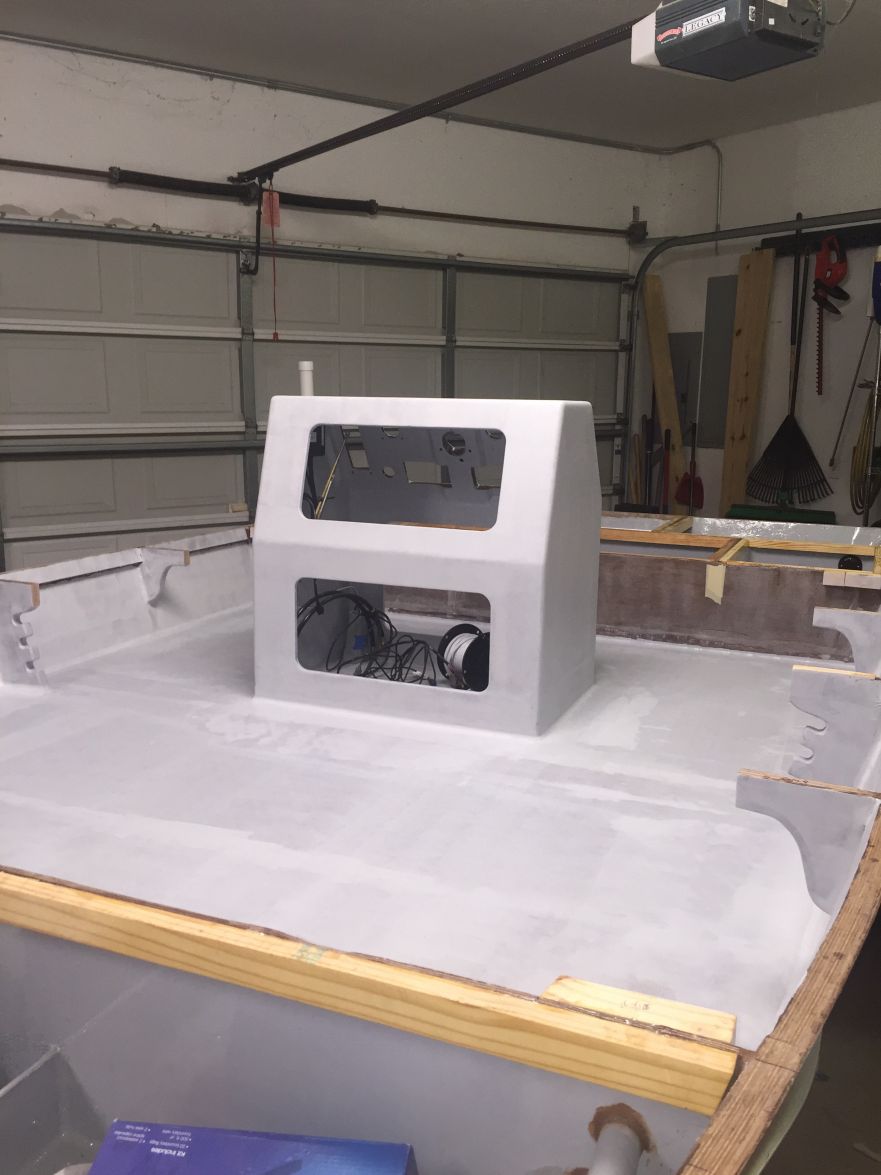
OK, fellers, here you go. It's true, not many pics from me lately but I've actually been fairly busy fitting cleats for the deck, wiring, adding gunnel supports, and today I put some primer on. That felt good! I think I have enough left over from the gallon of S3 primer I used for the hull to get 3 coats on - will be close.
Cleats on. Using the boat for storing various things.
The gunnel supports will allow a 9" wide surface that follows the contour of the sheer.
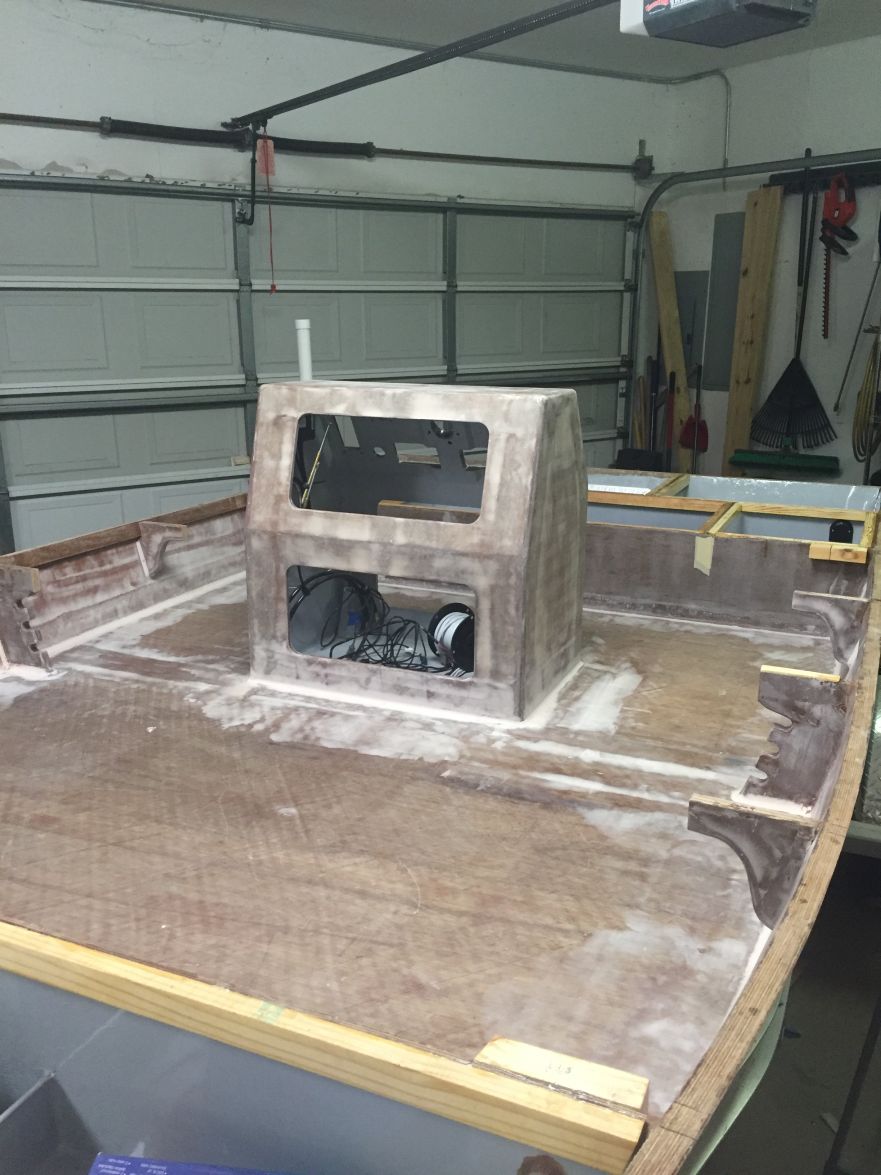
Primer.
Re: willg's PH18
Posted: Sun May 08, 2016 4:00 am
by LGF
Man that looks good, makes me want to kick this flu virus where it hurts and start cutting something, sanding it (like there isn't so much sanding in a build) and gluing it together etc etc, just dunno what I'll be cutting and gluing as I still haven't bought any materials for the build!
Really looks fantastic Will.
Re: willg's PH18
Posted: Mon May 09, 2016 12:07 am
by jorgepease
It's looking great!
Re: willg's PH18
Posted: Tue May 10, 2016 12:10 am
by Dustinwg
Looks great Will! What are you figuring for your splash date? Looks like we are neck and neck...might need to get a little bet together for some extra motivation!!
Re: willg's PH18
Posted: Tue May 10, 2016 11:10 pm
by willg
Dustin, I could use the extra motivation but I can think of two good reasons I'd probably lose that bet. One, I have 'recalculated' my estimated launch date several times. This time last year I was seriously thinking I'd launch by the end of the summer. Of 2015. Two, you are sneaky fast with your boat building. You got that nice console knocked out and the deck installed in pretty short order!
Re: willg's PH18
Posted: Wed May 11, 2016 1:28 am
by LGF
Sneaky? That's how I am also getting it done, mine is just sneaky wrt the Wife-Boss
On the deck topic, is my deduction correct that the deck only gets affixed to the top of the bulkheads and shear cleats by means of epoxy glue? Or does it get glassed somewhere somehow?
Re: willg's PH18
Posted: Wed May 11, 2016 8:05 am
by Dustinwg
Will, I hear ya on the moving the finish date over and over again, but I'm ready to stop sanding fiberglass and start wetting a line. I have given myself a deadline, to be done by the end of the year. Folks come by the house and say "Man looks like your almost done...you will be on the water in no time!" and all I can think about are all of the little things that need to get done before that day comes!
I wouldn't say that I am sneaky fast, I just get to a point where say screw it I am not leaving the shop until I get these decks cut out, or this glassing done, or whatever other big project I have been putting off. Ends up making for long weeknights and beat down days at work.
On a different note, I found out that a friend of mine down the road is a closet boat builder. He has built a CS25, Panga22 and Phantom 18, with the Phantom 18 being the one he just finished about 6 months ago. He asked if I wanted to go run the Phantom when he found out I was building one. We went out and you are not going to be disappointed by the performance of this boat. He had a 115 four stroke Yamaha on it and at WOT we running close to 55 MPH, and it was extremely quick to plane! And man you talk about stable...both he and I stood on one side (both of us being 200 lbs) and it barely even moved! Talk about motivation!!
Re: willg's PH18
Posted: Wed May 11, 2016 8:18 am
by Dustinwg
Re: willg's PH18
Posted: Wed May 11, 2016 8:28 pm
by willg
Dang, that is a beautiful boat!
Re: willg's PH18
Posted: Wed May 11, 2016 8:36 pm
by Cracker Larry
That is sure enough a dang pretty Phantom
He has built a CS25, Panga22 and Phantom 18, with the Phantom 18 being the one he just finished about 6 months ago.
It's amazing how many people build these boats and we never hear from them. He's good
Re: willg's PH18
Posted: Thu May 12, 2016 12:57 am
by ks8
LGF wrote:On the deck topic, is my deduction correct that the deck only gets affixed to the top of the bulkheads and shear cleats by means of epoxy glue? Or does it get glassed somewhere somehow?
I am not the designer, but since you question seems to have been overlooked.... I would venture that like most of these boats -- sole, seat tops, decks, gunnels, are typically bonded with epoxy *putty* to cleats on frames and/or hull panels, the cleats increasing the surface area x2 or more. I don't think there is any problem if one uses a fillet and glass in some areas (if you can). But there is also value in having that extra surface area of a simple cleat because cleats also make some bonds much easier. Point being, the designer has made decisions for particular areas, knowing the benefits of a particular method, and ensuring it is both plenty strong, adequately handling and distributing loads, and easily accomplished by amateur builders. All that said, I added some glass on my boat (a different design), on a few cleat to hull bonds, after hearing some issues of cleats coming detached. I probably did not need to, as I had full cleats, preshaped, and some builders use shorter partial cleats along the hull panel. Too few short cleats, that are too short, with big gaps between them, along a long hull panel bond, will have loads focused on those short bond surfaces. But often there is also fillet and glass on the top of the panel bond too. If the plans call for only cleats, and you use enough of them, without huge gaps between them (along the curve of the hull panel), then you can trust the designer, at this site. Which still leaves the option to add glass also, with the weight, as long as you understand the cost of that weight on the design.
This issue underscores the value of being able to ask in a forum like this. If you want designer response, just ask again, or start a new thread with that single question.
Re: willg's PH18
Posted: Thu May 12, 2016 2:10 am
by willg
Yep, sorry for missing your question, Henk. I am planning to glue the deck down with putty to the full length cleats. These cleats are on all vertical surfaces, not just the sheer. I will then glass the whole deck with 10oz woven and bring the glass onto the hull a bit. I will make that overlap short enough to be covered by the rub rail.
Re: willg's PH18
Posted: Thu May 12, 2016 3:02 am
by LGF
@ ks8,
Thanx for the info, thought as much and actually seen some with cleats right round and all over the inside on the deck side (vertically speaking, as the bottoms are filleted and glassed to the sole). I do understand that I will add weight, but since I am not going to us it as a true flats boat, the draft, give or take an inch or two, won't be an issue.
@willg
Exactly what I had in mind, glue the deck onto the cleats, then install a raised gunnel, if you like, glue that onto the deck and then glass the entire deck, over the gunnels onto the shear with a small overlap on the shear side. Will also cover this overlap with the installation of the rub rail.
@Dustin gw
Thanx for the eye-candy, now I am stoked to get going again even if this Bronchitus wants me to stay in bed
Re: willg's PH18
Posted: Thu May 12, 2016 8:59 am
by ks8
and oh yeah... that's a fine looking Phantom
As a curious question, I wonder how many bateau boats get built and launched and enjoyed, that are never posted to the forum, or the other way around? Maybe five percent post to the forums and galleries? Just curious. Forums are a thing unto themselves, true, but I sure enjoy watching the progress, learning more tricks, and seeing launch pictures.
Re: willg's PH18
Posted: Thu May 12, 2016 4:46 pm
by TomW1
ks8 wrote:and oh yeah... that's a fine looking Phantom
As a curious question, I wonder how many bateau boats get built and launched and enjoyed, that are never posted to the forum, or the other way around? Maybe five percent post to the forums and galleries? Just curious. Forums are a thing unto themselves, true, but I sure enjoy watching the progress, learning more tricks, and seeing launch pictures.
Karl, Jacques posted a couple of days ago that only about 5% of plan sales post on the forum.
Tom
Re: willg's PH18
Posted: Thu May 12, 2016 5:08 pm
by BrianC
Dustinwg wrote:?..On a different note, I found out that a friend of mine down the road is a closet boat builder. He has built a CS25, Panga22 and Phantom 18...
So the Phantom 18 would be the clear choice for any back bay fishing - what about the other two? Both the Panga 22 and CS25 would seem well suited to offshore activities - I was wondering about the difference between the two, particularly with respect to ride comfort and dryness in moderate swell conditions.
Thanks, Brian
Re: willg's PH18
Posted: Fri May 13, 2016 3:07 pm
by ks8
TomW1 wrote:
Karl, Jacques posted a couple of days ago that only about 5% of plan sales post on the forum.
Tom
Well that's one fortunate guess!
After all, nearly 83% of all statistics are made up in the moment they are stated...
Re: willg's PH18
Posted: Fri May 13, 2016 3:56 pm
by Dustinwg
Brian, I am not sure about the handling and dryness of the CS25 and the Panga, as I only went out on the Phantom, but from the looks of the two he built, I would say the CS25 is more of an offshore sportfishing center console, while the Panga is more of a simpler kind of inshore/offshore boat.
Also, he said that the CS25 took about 4-5 times the amount of time to get completed, and the Panga was the first boat he ever built!
Re: willg's PH18
Posted: Sun May 22, 2016 11:43 pm
by willg
Re: willg's PH18
Posted: Mon May 23, 2016 3:17 am
by LGF
Willg, man hat looks good. Giving me a renewed vigor to start when I get my plans, in the meantime I'll just keep on building and sorting out stuff that I can without the plans.
As for your question, I'm not sure if this will help, but there is a supplier here in sunny SA called rutherfordmarine, think their site is
www.rutherfordmarine.co.za that has a downloadable catalog and I have seen some removable "all-round" lights there. Perhaps it can assist in just identifying the make, not sure if will help, but check it out and see, you never know!
Re: willg's PH18
Posted: Mon May 23, 2016 7:47 am
by Cracker Larry
Looks great Will!
I've never seen a removable plug in type light that was reliable or lasted very long in salt water.
Re: willg's PH18
Posted: Mon May 23, 2016 2:48 pm
by jorgepease
Looking good! I used the attwood brand. They sell the plug in base with all the different height lights on Amazon. Seems to work ok.
Re: willg's PH18
Posted: Mon May 23, 2016 4:42 pm
by ks8
Looks good!
About the all-around light... Get a popular name brand mount and pole, one that doesn't keep changing its design, so that when it fails, you can get an easy swap replacement that will align with the old holes. I bought a spare of the mount sockets, and of my deck mounted anchor mounts, for just that reason... I know the holes will match *when* the mounts need replacing. I think the plugs in the end of the pole itself likely won't change, but no guarantee on that. Remember, regs, the all around is technically supposed to be at least 1 meter above the height of your sidelights. Just because not many try all that hard to comply with, well ... it is still technically the regs. And of course, also consider if that will put it right in your eyes...
I got the longest polelight I could practically mount and stow, with a solid mount, and still had to play games, but mine is in front of me. The ideal (for me) is a minimal utility mast with a 225° on the front of it, at least a meter above the side lights, and a 135° stern light. That keeps people, in a good way, in the dark.
or, when it is mounted above a T top, keeping it out of anyone's eyes.
I can't stand losing my night vision, just when I need it most.
My mounts and contacts are still holding up in GOM salt, but the boat isn't in the water every week. If CL says nothing lasts long, he's the one who would know, if anyone is ... so then engineer your choice for backups and the temporary solution if something fails while miles out.
Re: willg's PH18
Posted: Mon May 23, 2016 11:56 pm
by willg
Thanks, guys, good advice. I'm not too surprised to hear I'll need to replace these components as they putz out.
Re: willg's PH18
Posted: Tue May 24, 2016 5:22 am
by LGF
Will, what's cooking in those bow compartments.
Re: willg's PH18
Posted: Tue May 24, 2016 7:31 am
by Cracker Larry
Remember, regs, the all around is technically supposed to be at least 1 meter above the height of your sidelights.
It's also supposed to be above anything that can block it's view. That includes people, console, bimini tops, etc. I prefer to do things right, do it once and forget it for 10 years. Those plug in pole lights are junk.
Re: willg's PH18
Posted: Tue May 24, 2016 8:25 am
by Dustinwg
Will, that paint looks great!
I will echo what CL is saying. Those removable poles never seem work when you need them to. Especially in the saltwater.
Are you planning on putting a poling platform on the boat? If so, you could put a permanent mount on that or just go bandito style with putting a light on top of the motor.
I've had the light mounted on the outboard on several boats and never been harassed about it (shouldn't have said that, now I'm screwed next time I'm on the water!)
Re: willg's PH18
Posted: Tue May 24, 2016 4:01 pm
by ks8
Dustinwg wrote:I've had the light mounted on the outboard on several boats and never been harassed about it (shouldn't have said that, now I'm screwed next time I'm on the water!)
Echelon just bumped you over to the no-fly list ...
Without a T-top or mast, if you mount regulation, an all around in front of the helm station, an all around WILL likely be in the eyes. You can block the rear 135 degrees though on the forward motoring light, and then use a 135 stern light. Some pole lights had the 225 degree fixtures on them for just that reason. Don't know if they are still available. I didn't go that route because it made the light fixture even heavier up on top of a long pole. In a chop, that pole and mount has got to take some strong sway forces, moreso the heavier the fixture. A reason why I think the best option is above a T-Top, or a 225 on some sort of strong mini utility mast for the purpose, that can also be used for rod holders, with a 135 on the stern.
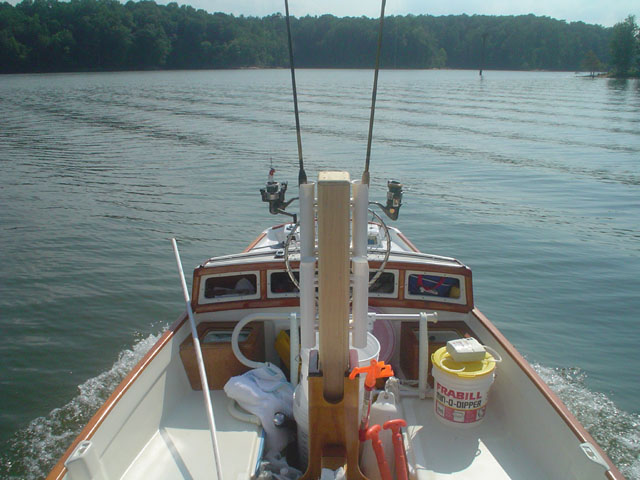
8376
Unfortunately, I think too many do not have the nav light regs as any sort of priority -- more like a *oh yea, did that*, which is evidenced by almost every busy night having at least one boat with a red/green bowlight reversed. I'm hoping all the new lenses are keyed now, so they only go in the correct way.

Though, it isn't all that funny if someone is approaching with a 40 or 50 knot combined energy, and they think they have the right of way because of the color of their *incorrect* bow light. Fortunately, at least I want to believe it, most boaters are not that ignorant.
Re: willg's PH18
Posted: Tue May 24, 2016 10:18 pm
by willg
Thanks for the input, gents. I'm not planning on a poling platform or T-top at this point (I want to launch some day). I have a pop up led nav light which will mount at the bow. In order to avoid white light shing in the eyes at night I may find a way to mount an all around light on the console at a height which accomplishes that. I don't think I'd want a permanent mount so will either accept the obsolence of a plug in or figure something else out.
Re: willg's PH18
Posted: Sun Jun 12, 2016 12:34 pm
by willg
Re: willg's PH18
Posted: Sun Jun 12, 2016 1:23 pm
by LGF
Looking good Will, can't wait to start let alone to get to this stage of the build.
If you don't mind me asking, but why the larger fillets as in your pics?
Re: willg's PH18
Posted: Sun Jun 12, 2016 6:36 pm
by flyfishingmonk
Wow your boat looks awesome!
Casey
Re: willg's PH18
Posted: Sun Jun 12, 2016 9:44 pm
by willg
LGF wrote:Looking good Will, can't wait to start let alone to get to this stage of the build.
If you don't mind me asking, but why the larger fillets as in your pics?
Thanks, LGF.
The large fillet was the look I wanted where the inwale meets the front/back bulkheads inside the cockpit. Rather than an abrupt angle I wanted a smooth sweep. It's just a cosmetic choice.
Re: willg's PH18
Posted: Sun Jun 12, 2016 11:38 pm
by MrPaul
That curve looks great. I might use your idea in my xf but it appears your boat building prowess is about 3 levels above my rookie building skills. Hopefully I can do it without messing things up too badly.
Re: willg's PH18
Posted: Mon Jun 13, 2016 5:45 am
by glossieblack
Been catching up with your build. Nice work!
Re: willg's PH18
Posted: Mon Jun 13, 2016 8:55 am
by BB Sig
I like the curves. Good job.
Re: willg's PH18
Posted: Tue Jun 14, 2016 10:31 pm
by willg
MrPaul wrote:That curve looks great. I might use your idea in my xf but it appears your boat building prowess is about 3 levels above my rookie building skills. Hopefully I can do it without messing things up too badly.
I am 3 years into it, was a noob before that. Have no fear, just post up on the forum with any questions. Most of what I've learned has been from the forum - lots of good stuff here. There's also a guy at work who has built a PH16 and I've been bouncing things off him regularly.
Re: willg's PH18
Posted: Tue Jun 14, 2016 11:20 pm
by Dustinwg
Those curved corners turned out great! Getting those decks roughed in sure is a milestone, especially after working on what seems like an endless list of piddly little details!
Gettin close!
Re: willg's PH18
Posted: Thu Jun 16, 2016 12:09 am
by MrPaul
I am 3 years into it, was a noob before that. Have no fear, just post up on the forum with any questions. Most of what I've learned has been from the forum - lots of good stuff here. There's also a guy at work who has built a PH16 and I've been bouncing things off him regularly.
Thanks for the vote of confidence.
. Hopeing to finish glassing the outside soon and start on the inside...after all of the fairing.
Re: willg's PH18
Posted: Thu Jun 16, 2016 10:02 am
by ks8
that sounds fair...

Re: willg's PH18
Posted: Thu Jun 16, 2016 4:58 pm
by LGF
willg wrote:I am 3 years into it, was a noob before that. Have no fear, just post up on the forum with any questions. Most of what I've learned has been from the forum - lots of good stuff here. There's also a guy at work who has built a PH16 and I've been bouncing things off him regularly.
I've been building this Phantom for the last, well, couple of years now, only bought and got the plans recently, and I still feel and know I'm a total NOOB @ this, every night I have a serious fight with the inner me, concerning this build, and the recurrent question every single time is, will I be able to do it, what if it's a fail? Yes I know there's a lot of info here and the build is "easy even for the inexperienced builder," still I wonder?
Re: willg's PH18
Posted: Thu Jun 16, 2016 8:33 pm
by Cracker Larry
every night I have a serious fight with the inner me, concerning this build, and the recurrent question every single time is, will I be able to do it, what if it's a fail?
It won't be. Just take it one step at a time, learn what you need to know to complete that step, then move to the next step, and repeat. Just like eating an elephant, one bite at a time. Try to get something done every day. As long as you don't quit,you won't fail, you can build a fine boat.
Re: willg's PH18
Posted: Thu Jun 16, 2016 10:02 pm
by TomW1
Will take it one step at a time. Read the How To's above so you know what terms mean. Read the plans several times before starting and the instructions that come with the plans.
Remember you have the Forum to help you and 1000's of other builder who have built boats with out any experience.
Hang in there and you'll do fine.
Re: willg's PH18
Posted: Thu Jun 16, 2016 11:12 pm
by ks8
Yep. And if you are the creative type LGF, it may never be finished, but it will be launched and used plenty, and enjoyed, even as it changes from year to year, maybe with no final date for when it is *finally* complete -- but you'll have your HIN and splash well before *never*.
One task at a time... and the launch and enjoyment will suddenly be on your calendar.
If you are deeply into project management, you'll need to adapt your thinking and expectations to allow some time for the learning curve and becoming quicker with the skills. That holds true for any new project with new skills that need to be learned. You've got plenty help here. If an answer doesn't click right away, a little patience helps, and asking for someone else to present the answer maybe in a different way, different language, and then, yep, piece of cake.... easy as pie... one bite at a time.
So, LGF... if you are intent on wondering... there are better things to wonder about. Like how the design of the human genome came together with all its molecular level machinery at the cellular level, all that information encoded so efficiently, so compactly. Amazing it doesn't have a hiccup more often in such an occasionally hostile environment. Man, that is some intense engineering and execution of code! That is something to wonder about!
Building one of these boats? Piece of cake ... er ... elephant...
Tom, you can change your signature now to *bought* OD18...
Re: willg's PH18
Posted: Fri Jun 17, 2016 2:23 pm
by LGF
Thanx for the replies, gives me confidence to do it. Yes I have to learn new stuff all the time otherwise I waste space and yes I am the creative type, cannot sit and watch television, sleep also is a waste of time to me, always fiddling with stuff, the only problem (well two) I have is huge overload of perfectionism and the extremely severe lack of patience!
Re: willg's PH18
Posted: Fri Jun 17, 2016 11:43 pm
by willg
When you build a boat as a beginner it's like language immersion. At least it has been for me, as much time as I spend thinking about it. After a while techniques and figuring things out become second nature. Also, I don't get as worked up over mistakes.
Re: willg's PH18
Posted: Sun Jun 19, 2016 2:59 am
by LGF
I her you and it makes sense
willg wrote:Also, I don't get as worked up over mistakes.
but this is where my character takes over.
To give you an idea, I had rebuild my home built CNC machine because I wasn't happy with its linear bearing system, spindle setup, lighting and cooling systems and its accuracy which at that point was 0.027mm. It now has a repeatable accuracy of 0.0023mm which rounded off is 0.002mm a whole 0.025mm more accurate, which for a home built machine is crazy, but I just couldn't leave it the way it was.

I know that Jacques mentioned on many an occasion that this is not required I just don't wanna end up building it and then rebuilding it! if you know what I mean
but I suppose I will just have to force myself to get to accept that I am not building a CNC machine.
Re: willg's PH18
Posted: Sun Jun 19, 2016 8:17 am
by pee wee
I can understand wanting to get the CNC machine set up as accurately as possible, there are times that great accuracy would be helpful, and it would bother me to have errors repeated time and again. Sometimes you will want near perfect cuts, so you may as well get it set up as well as possible.
Take a piece of plywood, bend it to a curve, add layers of resin and fiberglass, then fairing compound . . . try to enjoy the build and focus on making a functional thing of beauty. People who work machining metal and those who work with wood speak different languages.
Re: willg's PH18
Posted: Sun Jun 19, 2016 12:43 pm
by LGF
pee wee wrote:I can understand wanting to get the CNC machine set up as accurately as possible, there are times that great accuracy would be helpful, and it would bother me to have errors repeated time and again. Sometimes you will want near perfect cuts, so you may as well get it set up as well as possible.
Take a piece of plywood, bend it to a curve, add layers of resin and fiberglass, then fairing compound . . . try to enjoy the build and focus on making a functional thing of beauty. People who work machining metal and those who work with wood speak different languages.
Ok, so that's what these various voices in my head is all about, all the different crafters talking at the same time
Re: willg's PH18
Posted: Sun Jun 19, 2016 5:44 pm
by ks8
Make it clear to those voices that they are only advisors and not the decision maker....
There may be exceptions, but then we need to shift over to the *bilge* for that.

Re: willg's PH18
Posted: Mon Jun 20, 2016 4:39 am
by LGF
Re: willg's PH18
Posted: Sat Jul 02, 2016 5:52 pm
by willg
Re: willg's PH18
Posted: Sat Jul 02, 2016 6:35 pm
by Jeff
Willg, very nice progress with your PH18!! Please keep the photo's coming!! Jeff
Re: willg's PH18
Posted: Sat Jul 02, 2016 9:36 pm
by Cracker Larry
Nice work Will
For a doctor, you ain't a half bad carpenter either
Re: willg's PH18
Posted: Sat Jul 02, 2016 11:26 pm
by cape man
Nice deck layout.
Re: willg's PH18
Posted: Sun Jul 03, 2016 12:11 pm
by wegcagle
Beautiful Will
Love the layout.
Will
Re: willg's PH18
Posted: Mon Jul 04, 2016 3:42 am
by LGF
Re: willg's PH18
Posted: Tue Jul 05, 2016 12:16 am
by willg
Thanks for the compliments, guys. I know I have a fair amount of work ahead of me but I feel like a launch is within sight.
Re: willg's PH18
Posted: Thu Jul 07, 2016 1:41 am
by LGF
Launch? Man launch it now, I need to see another launch just to satisfy my boat-porn addiction
you can always finish it afterwards and then have another proper launch, that way we can get two fixes from one build!
Re: willg's PH18
Posted: Thu Jul 07, 2016 7:46 am
by jorgepease
SO CLOSE!
Re: willg's PH18
Posted: Tue Jul 12, 2016 6:34 am
by MarkOrge
Really nice work Will. Clean and precise, surgical quality !
Re: willg's PH18
Posted: Wed Jul 13, 2016 10:51 pm
by willg
MarkOrge wrote:Really nice work Will. Clean and precise, surgical quality !
I appreciate the nice comments. It's been a 3+ year long surgery so far ...
Re: willg's PH18
Posted: Sun Jul 17, 2016 11:51 pm
by willg
I worked on hatches this weekend. I more or less did what was in the BarraMan video except used a router rather than a jigsaw. I thought the process in the video was helpful and thought I'd outline it here since the video isn't available now.
I cut out pieces of 3/8 ply (1/2" on the largest piece) so they'd extend 2" around the hatch cut outs on all sides, then coated with epoxy. I taped them in position to make sure they'd fit between the cleats and marked out the hatch cut out line so I'd know where to apply glue.
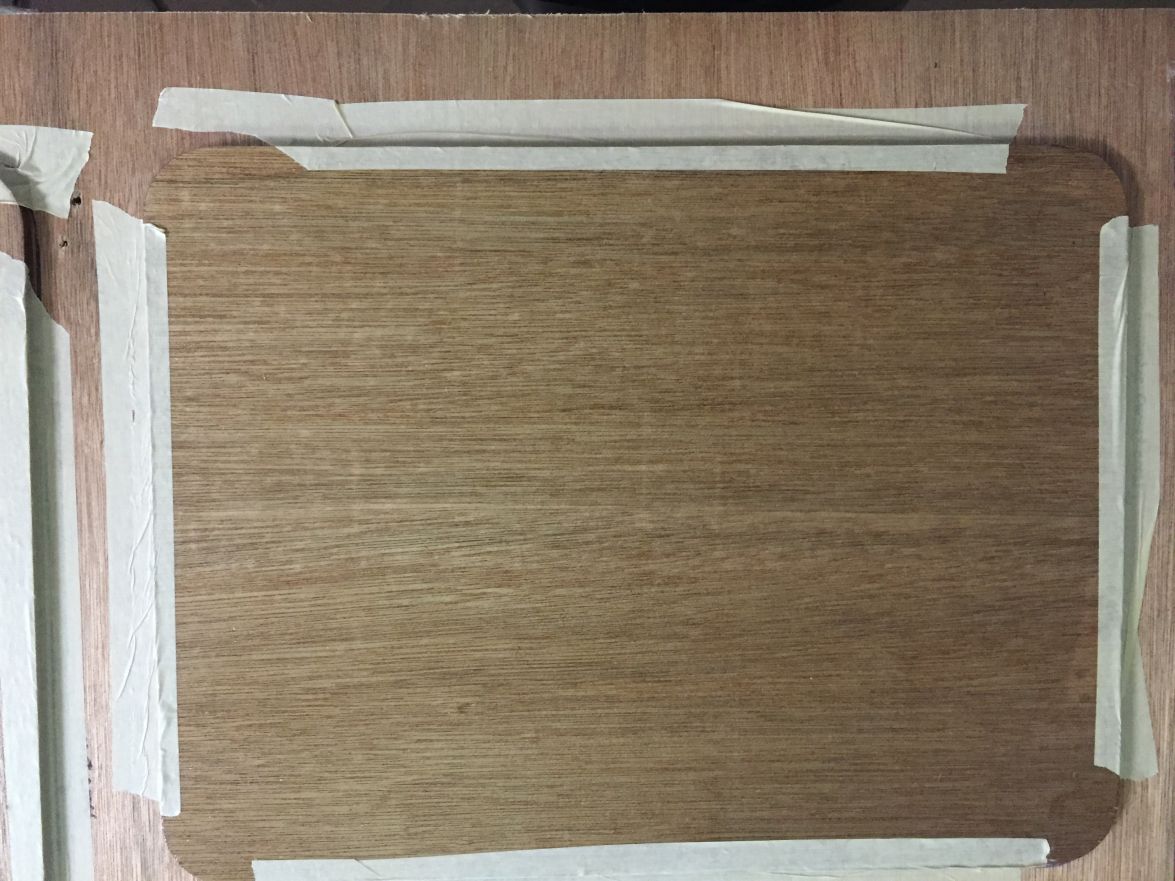
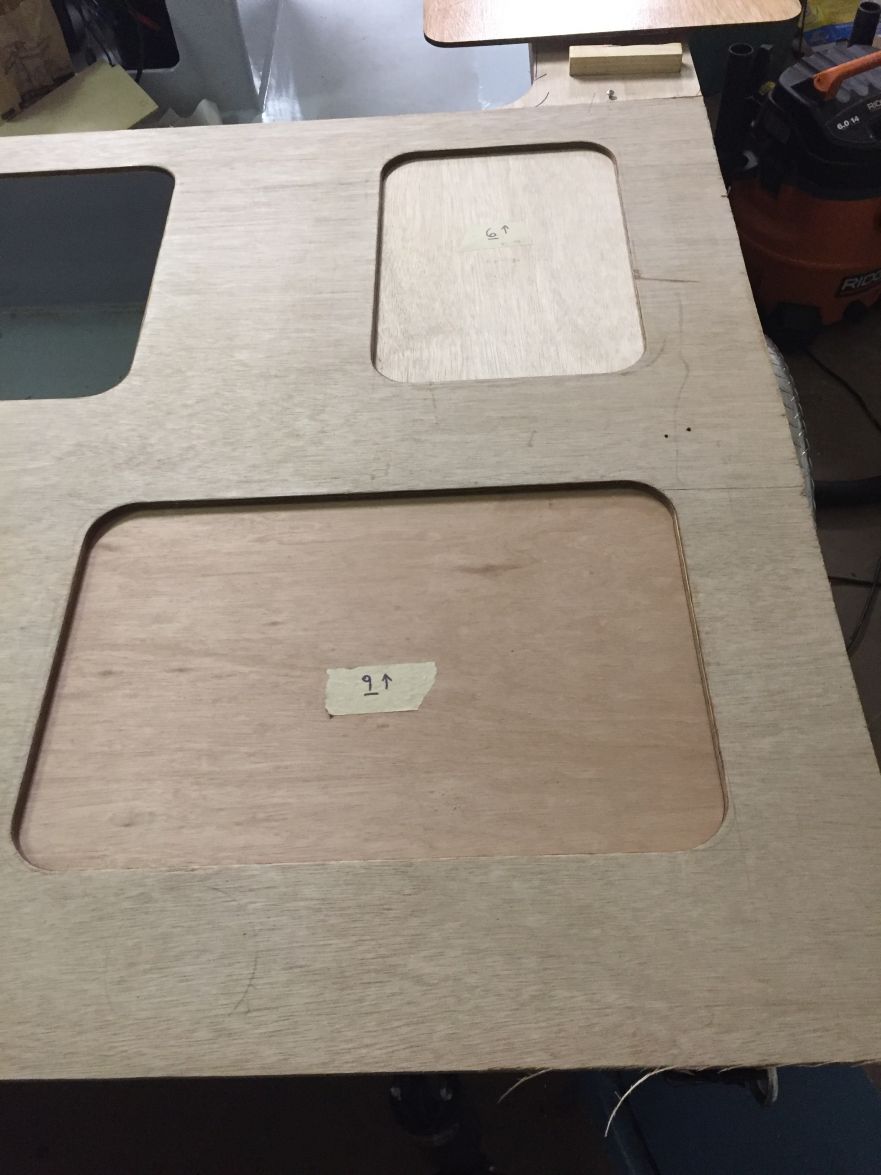
All pieces glued in with GelMagic.
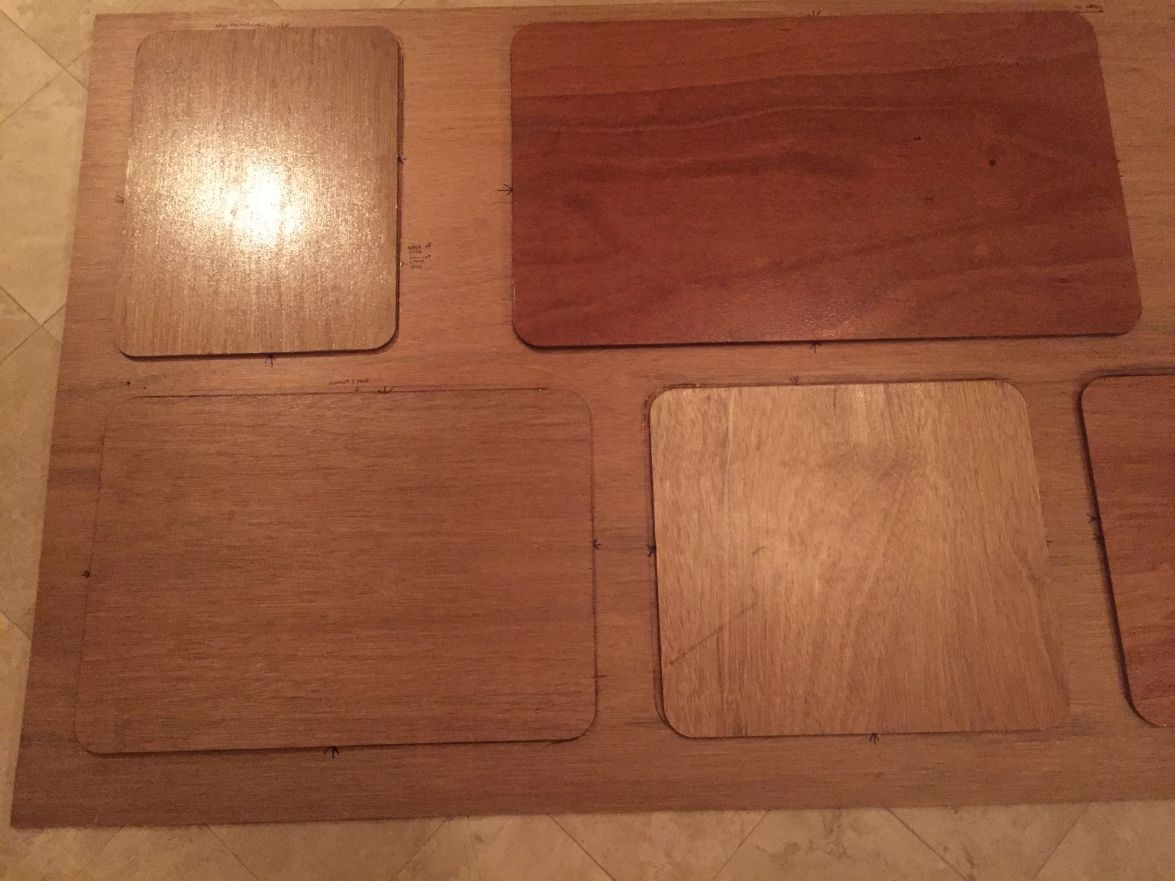
After a cure I cut out the pieces leaving a 1" lip all around. Rather than buy a collar for my router I didn't have, I made a spacer that would give me the 1" relief. It's 3/8 ply, same as the deck, to take the wobble out of the router.
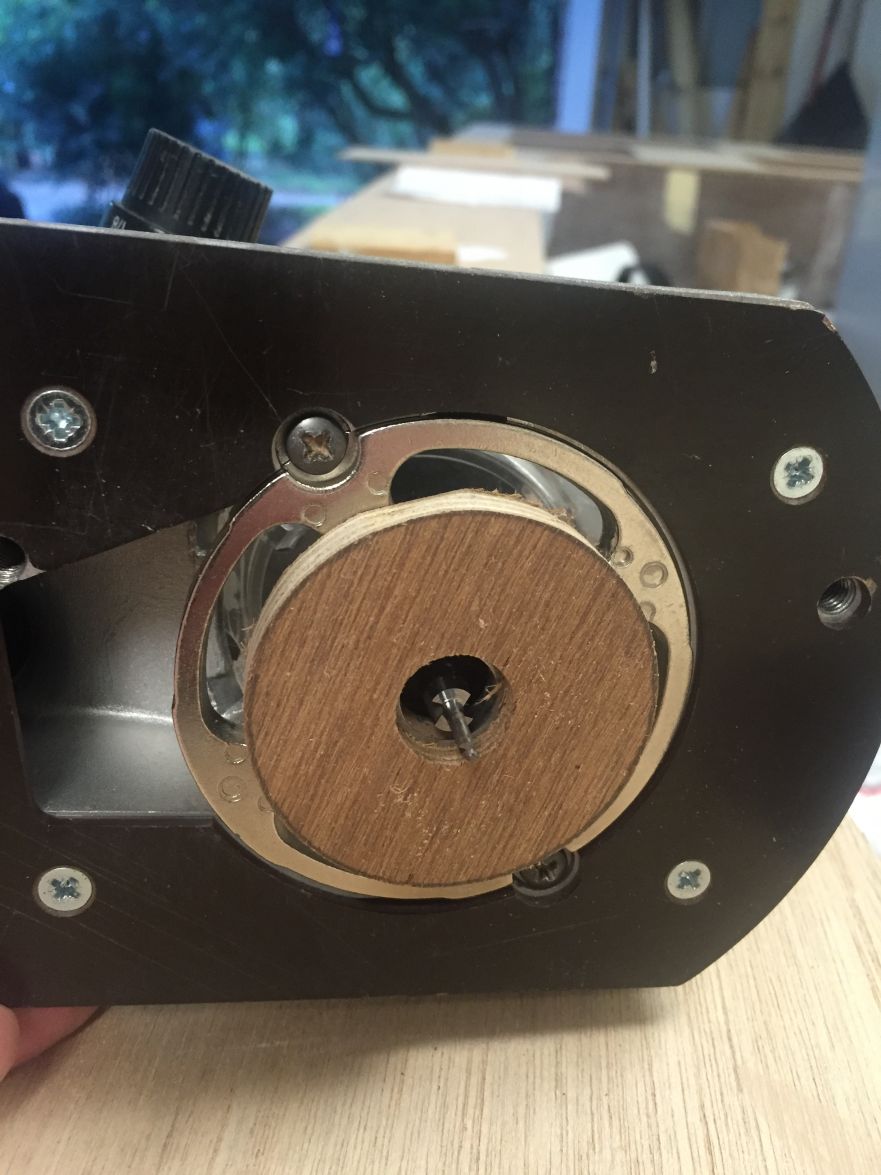
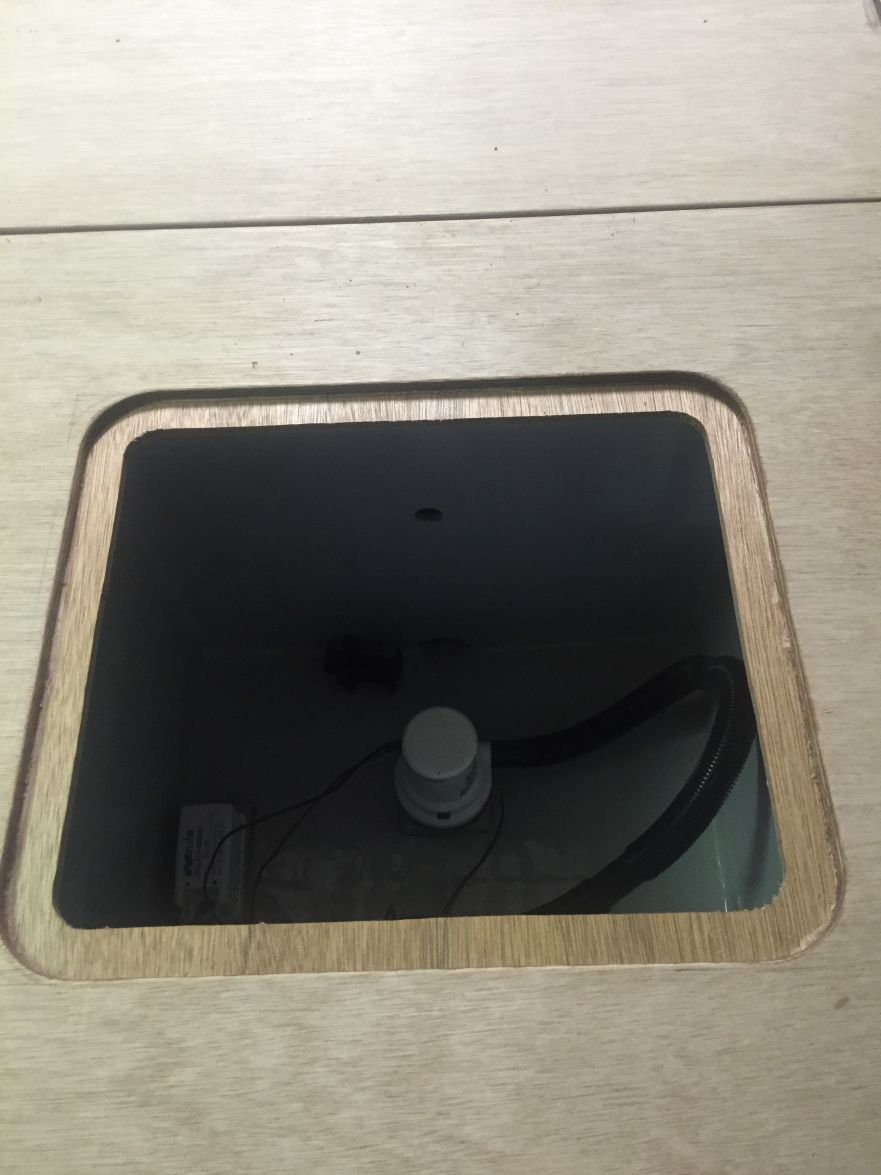
Hatch lids in place. The are dead flat relative to the deck. The pieces from the router cuts will get glued to the bottom of the hatch lids to hopefully eliminate flex.
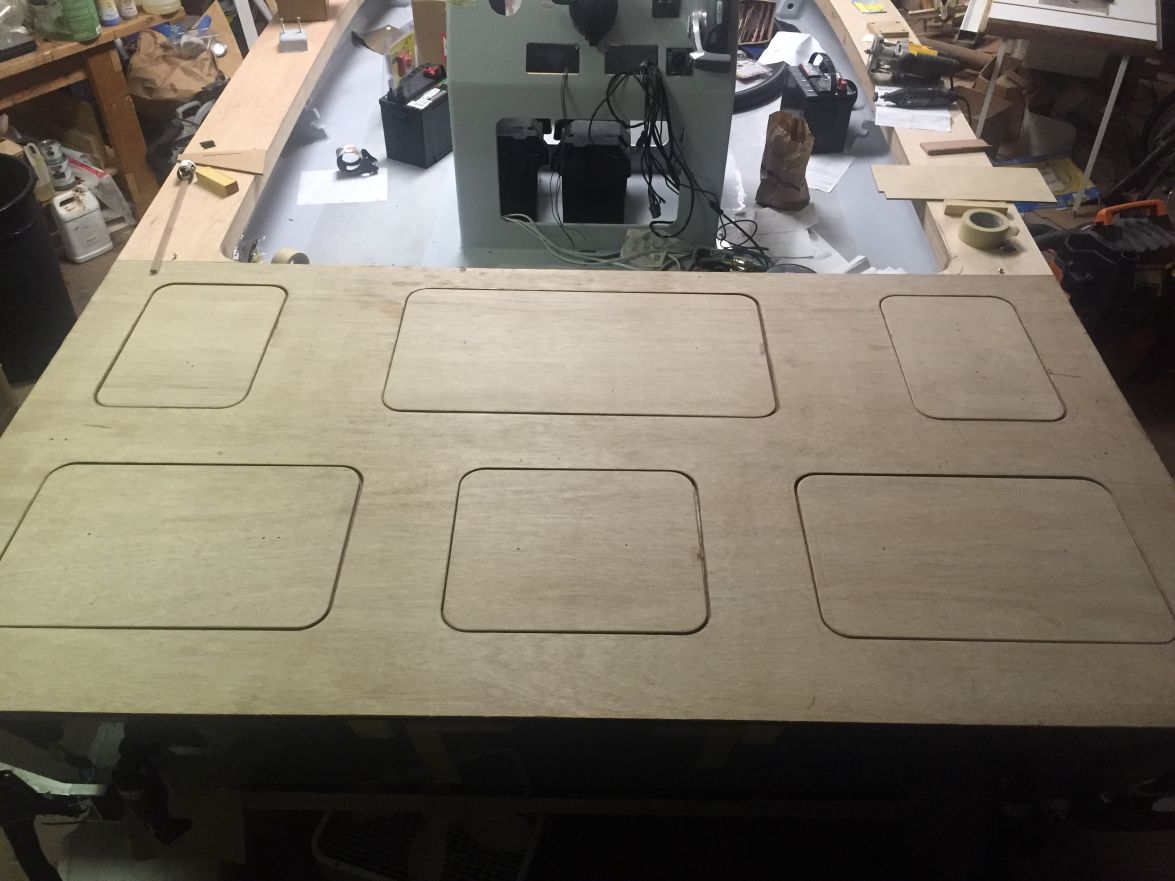
Re: willg's PH18
Posted: Mon Jul 18, 2016 12:59 am
by MrPaul
Looks great! The flush lids will keep you from tripping on them while you're fishing. Much better than the store bought prefab hatches.
Re: willg's PH18
Posted: Mon Jul 18, 2016 11:06 am
by ks8
purdy
Re: willg's PH18
Posted: Mon Jul 18, 2016 11:58 am
by LGF
Super neat work there, those lids look like they were machined! Just one question, what are you planning for water drainage from the deck to keep the hatches dry?
Re: willg's PH18
Posted: Mon Jul 18, 2016 7:00 pm
by TomW1
Super nice router work Will
Re: willg's PH18
Posted: Tue Jul 19, 2016 12:14 am
by willg
Much appreciated, guys.
Henk, I am planning on routing out a recess where I'll install some marine weatherstripping. I haven't worked out final details yet. My hope is that between the recess and the compression of the weatherstripping from closing the latch I will get reasonable dryness. I am not expecting complete dryness at all, so I think I'll be happy with whatever I get. I'll use a dry bag for anything that can't get wet. All the hatch spaces are drained in case water gets in.
Re: willg's PH18
Posted: Tue Jul 19, 2016 2:31 am
by LGF
Sounds good, not too sure which I will do, hence the question.
One idea was to have small channels around each hatch lid in a cleat (so hatch lids will still be flush with the deck) that runs into a small down pipe/tube that will drain to the bilge, not too complicated but sure will keep the hatches bone dry, as long as we don't get thrown with 200liters of water all at once, (pesky jet skis)
Nonetheless, your workmanship is truely inspiring!
Re: willg's PH18
Posted: Tue Jul 19, 2016 9:10 pm
by jorgepease
That came out sweet!! the channel drain is the way I've seen it done too but if your compartments already drain no big deal.
Re: willg's PH18
Posted: Thu Jul 21, 2016 11:23 am
by cape man
Spent a lot of time routing out channels and installing drains in them to keep water out of the hatches. While they certainly help, in a torrential rain or when running through rough seas water makes its way into the hatch. I too use dry bags for anything that needs it. Making your own hatches also lets you choose the dimensions, and they just looks so much nicer!
The boat is looking awesome!
Re: willg's PH18
Posted: Thu Jul 21, 2016 12:29 pm
by Cracker Larry
While they certainly help, in a torrential rain or when running through rough seas water makes its way into the hatch. I too use dry bags for anything that needs it.
Same here. When water is flowing over the boat I've never seen a hatch that was really dry. Some come close. Most not. We keep dry stuff in dry bags, or if we are carrying a lot that needs to stay dry we dedicate a cooler to dry goods.
Those are some beautiful hatches for sure though
Re: willg's PH18
Posted: Sat Jul 23, 2016 10:39 pm
by MarkOrge
Wow nice work. I cannot afford to look back but if I had to do it over again I would have followed this methodology with my coosa board.
Wicked nice hatches Bro
Re: willg's PH18
Posted: Sun Jul 24, 2016 11:45 am
by cvincent
Beautiful job on the hatches. The flush hatches are the way to go.
Re: willg's PH18
Posted: Sun Jul 24, 2016 11:11 pm
by willg
Thanks for the kind words, gentlemen. Working on hinges now, will post up in a few days I hope.
Re: willg's PH18
Posted: Mon Jul 25, 2016 5:27 pm
by LGF
Not words of kindness
, I for one love stating FACTS, your work is GR8!
Re: willg's PH18
Posted: Sun Jul 31, 2016 1:25 am
by willg
Hinges are installed. These are the friction hinges from Gem Products. They will hold the lids partially open without the need for springs or struts.
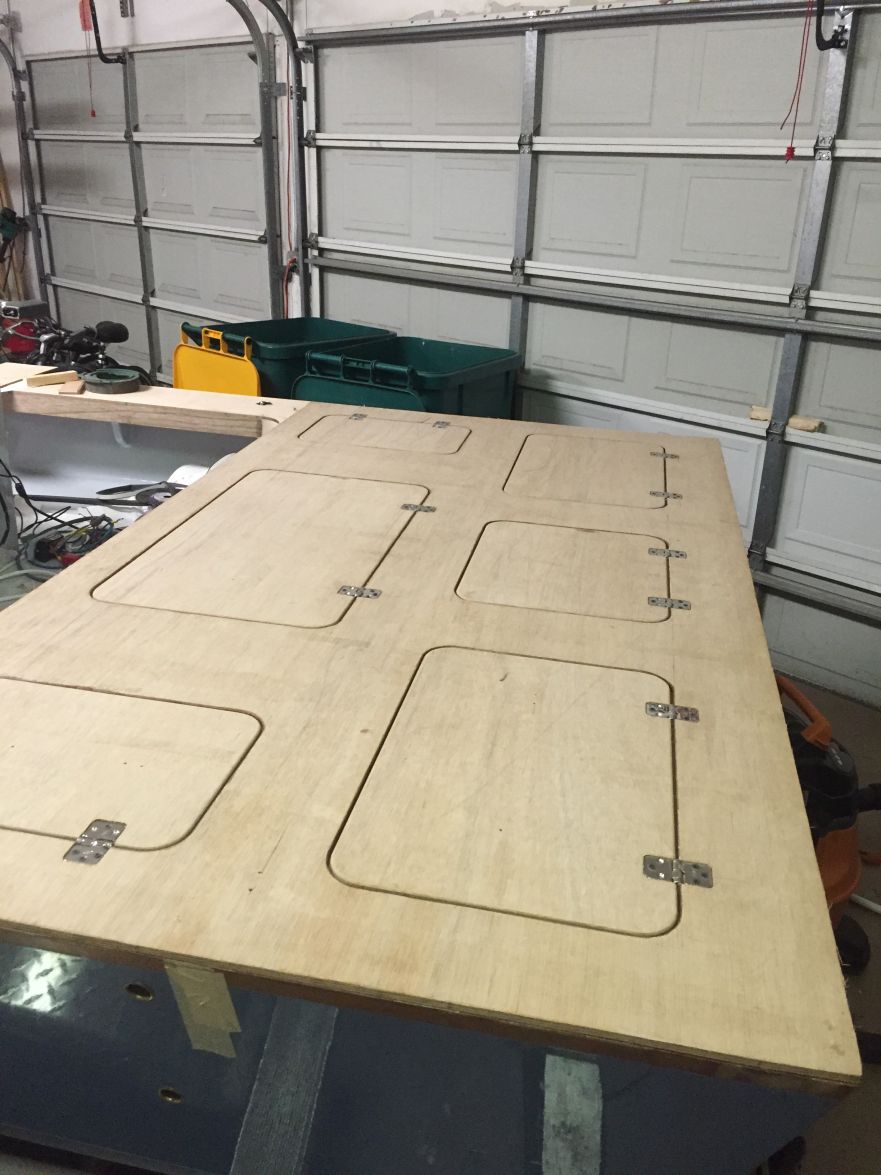
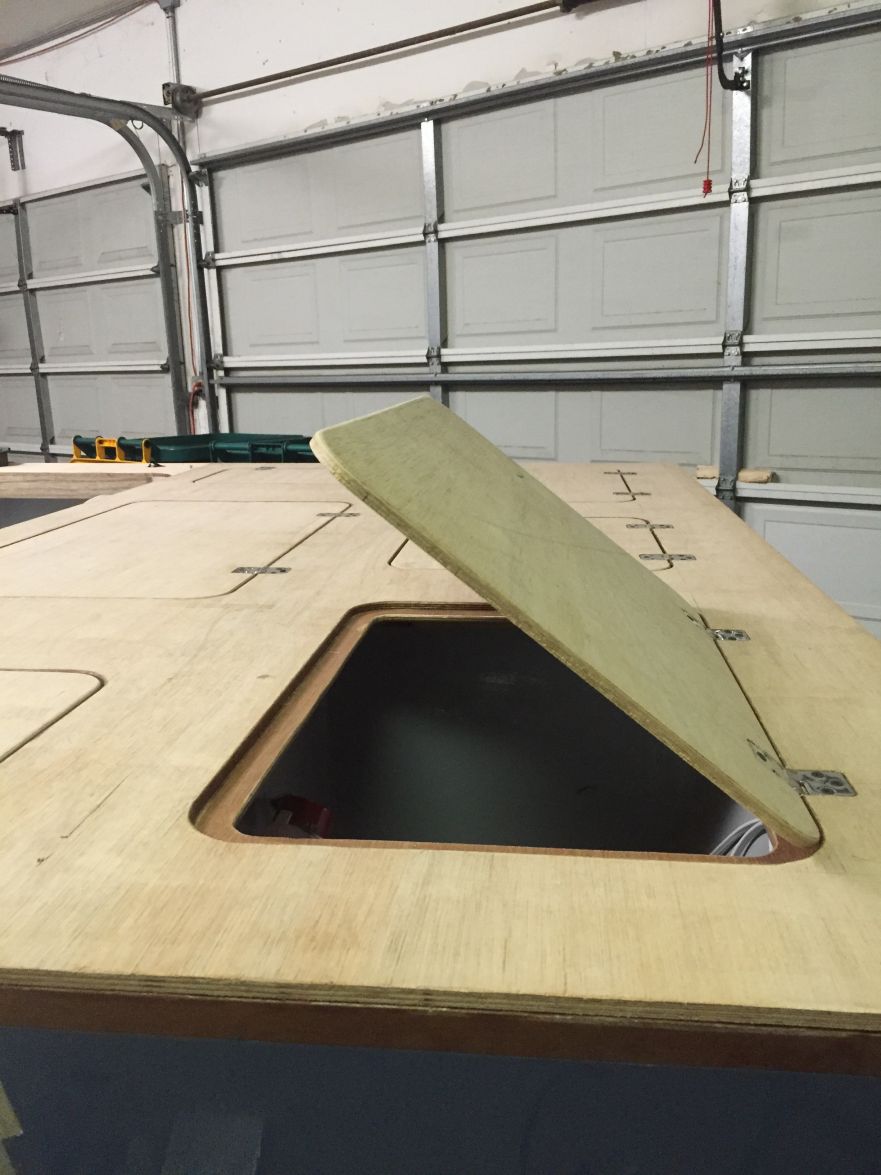
Re: willg's PH18
Posted: Sun Jul 31, 2016 4:14 am
by glossieblack
Beautiful detailing.
Re: willg's PH18
Posted: Sun Jul 31, 2016 4:32 pm
by Jeff
Really nice work!! Jeff
Re: willg's PH18
Posted: Mon Aug 01, 2016 3:22 pm
by LGF
Hi my name is Henk and I am addicted to Boat Porn
Thank you for such a nice fix with your great work, sure looks darn good. Spoke to the wife before I left for work abroad yesterday and it seems she's made peace with a Phantom being built at the latest starting early Dec. she just doesn't realize yet that it won't be finished in the same month, or might be in Dec but most definitely not in the same year!
Can't wait to start and with updates like these, you are just making me more and more restless
Re: willg's PH18
Posted: Tue Aug 02, 2016 1:01 am
by MrPaul
Spoke to the wife before I left for work abroad yesterday and it seems she's made peace with a Phantom being built at the latest starting early Dec. she just doesn't realize yet that it won't be finished in the same month, or might be in Dec but most definitely not in the same year!
I took the same route. Told her I was building a boat in the garage. No time frame. I think that she thinks it's going to be quick because the stitch and glue part came together fast and it looks like a boat now. Little does she know the inside is the time consuming part. Glad I have enough space for the build and her car in the garage.
Re: willg's PH18
Posted: Tue Aug 02, 2016 2:57 am
by BarraMan
Yes, I figured about 12 months to build a boat................3.5 years later I am almost there!
Re: willg's PH18
Posted: Sat Oct 15, 2016 7:28 pm
by willg
It's been a while since I've posted. I've been working on the boat pretty regularly but not much that's picture worthy. Most of the wiring is done, and I have some questions for the forum. I have starting and house batteries, connected with a Blue Sea add-a-battery kit. How should the Bob's jack-plate and trim tabs be wired? Is it recommended that they go directly to a battery so they're always "on" or should they be enabled only when the battery switch is on? For the jack plate at least it seems to me it could/should go directly to the battery, and I don't see why the trim tabs couldn't also. Should they both go to the house battery? The jack plate wiring is fused already and I would fuse the trim tabs from the battery post. Also, is it recommended to put dielectric grease on all connections? Do you use a little or a lot? Thanks in advance for your help.
I wanted to pass this along, cause I think it's pretty cool. To support my wires I started out using cable clamps attched with screws, so I'd overdrill, fill, then install as usual. These Weld Mount devices have made placing wire supports much easier, especially in hard to reach places such as the console. I got them off ebay, $33 for 25 tie mounts. The adhesive sets up quickly and holds very well.
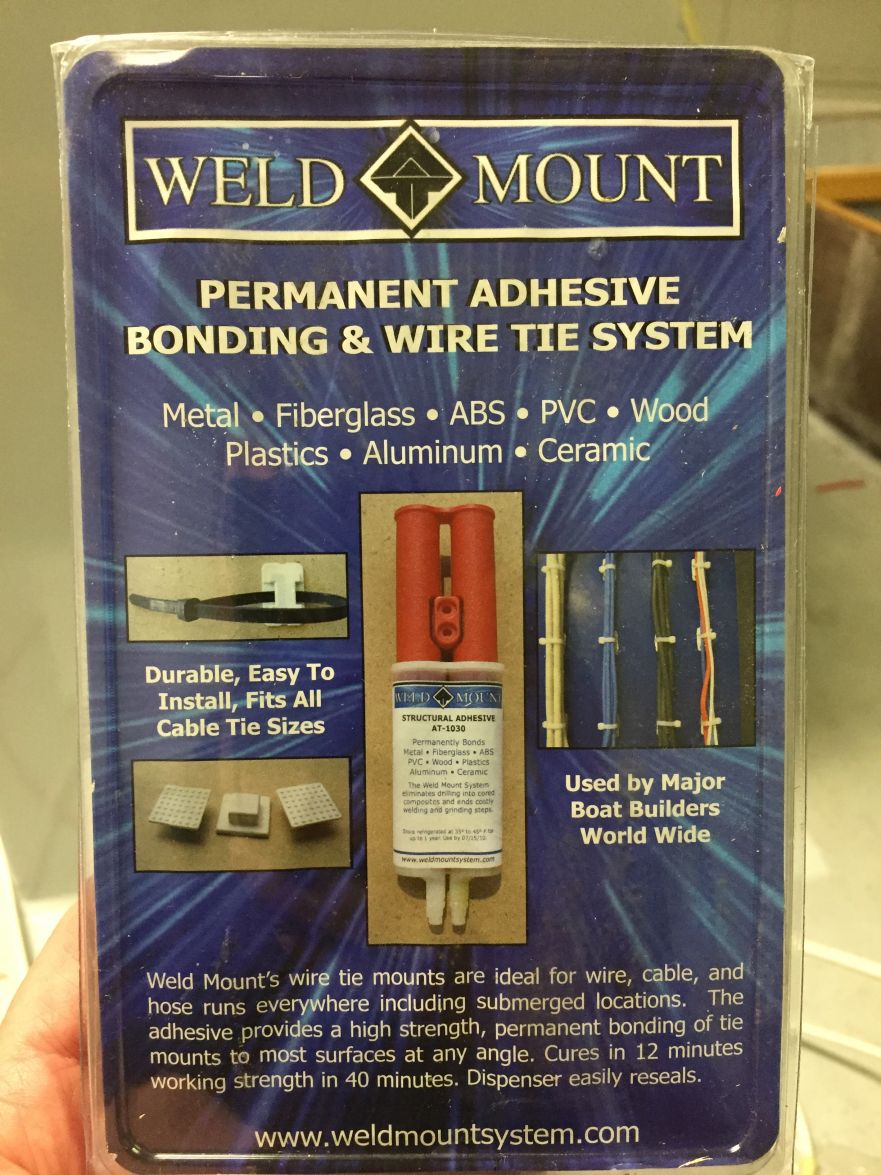
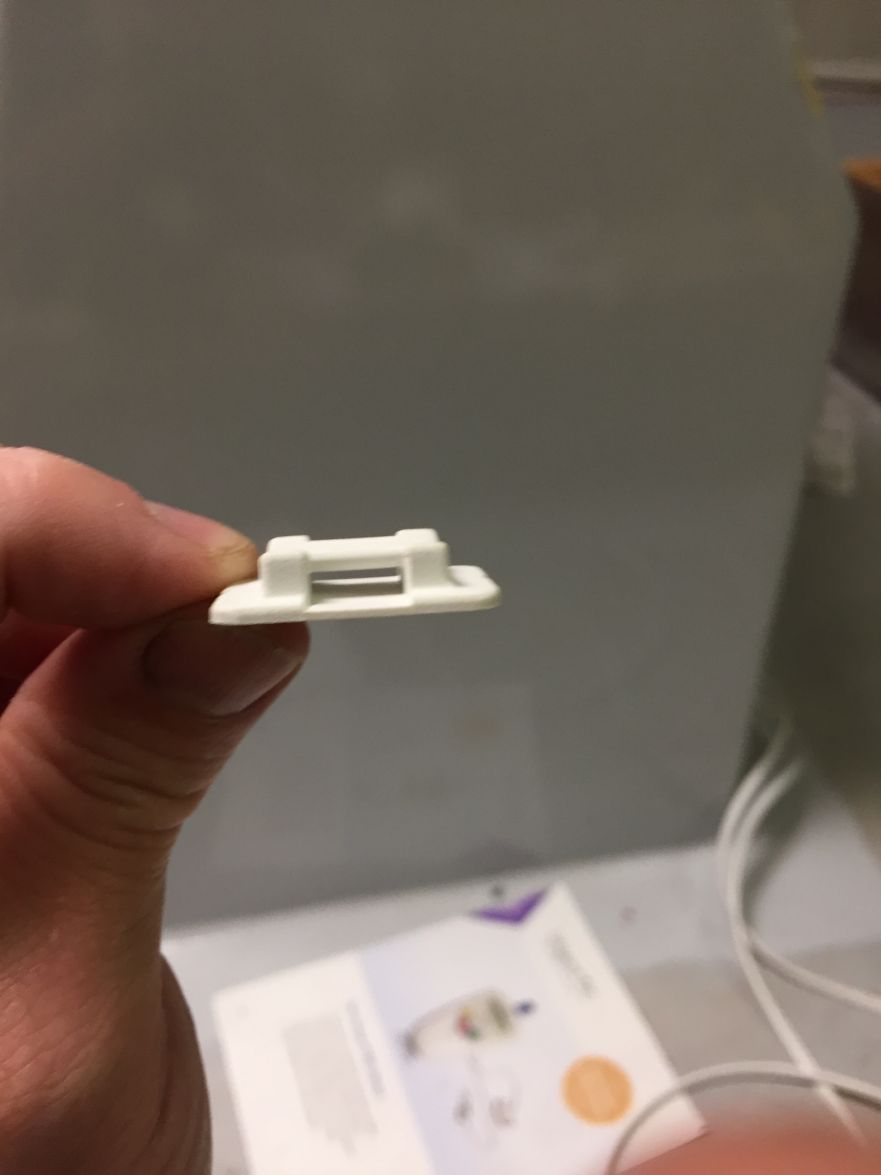
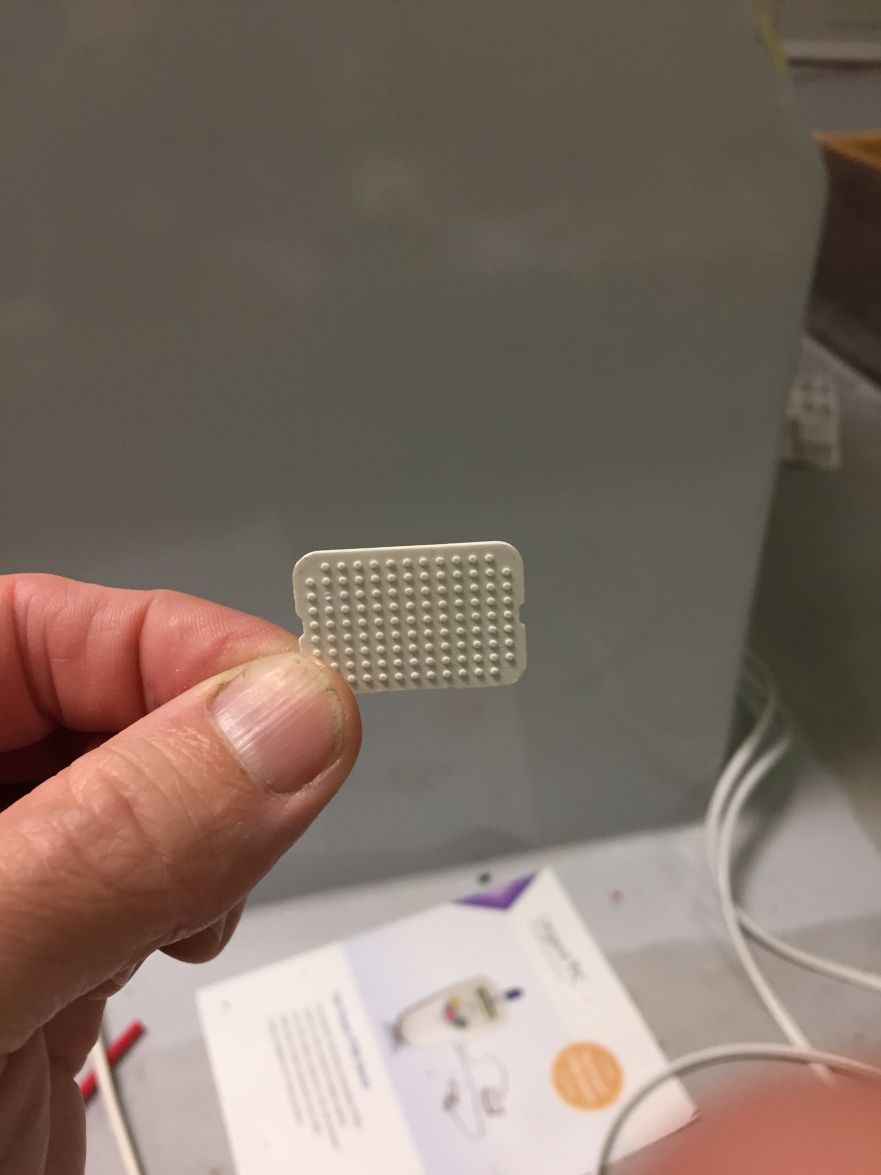
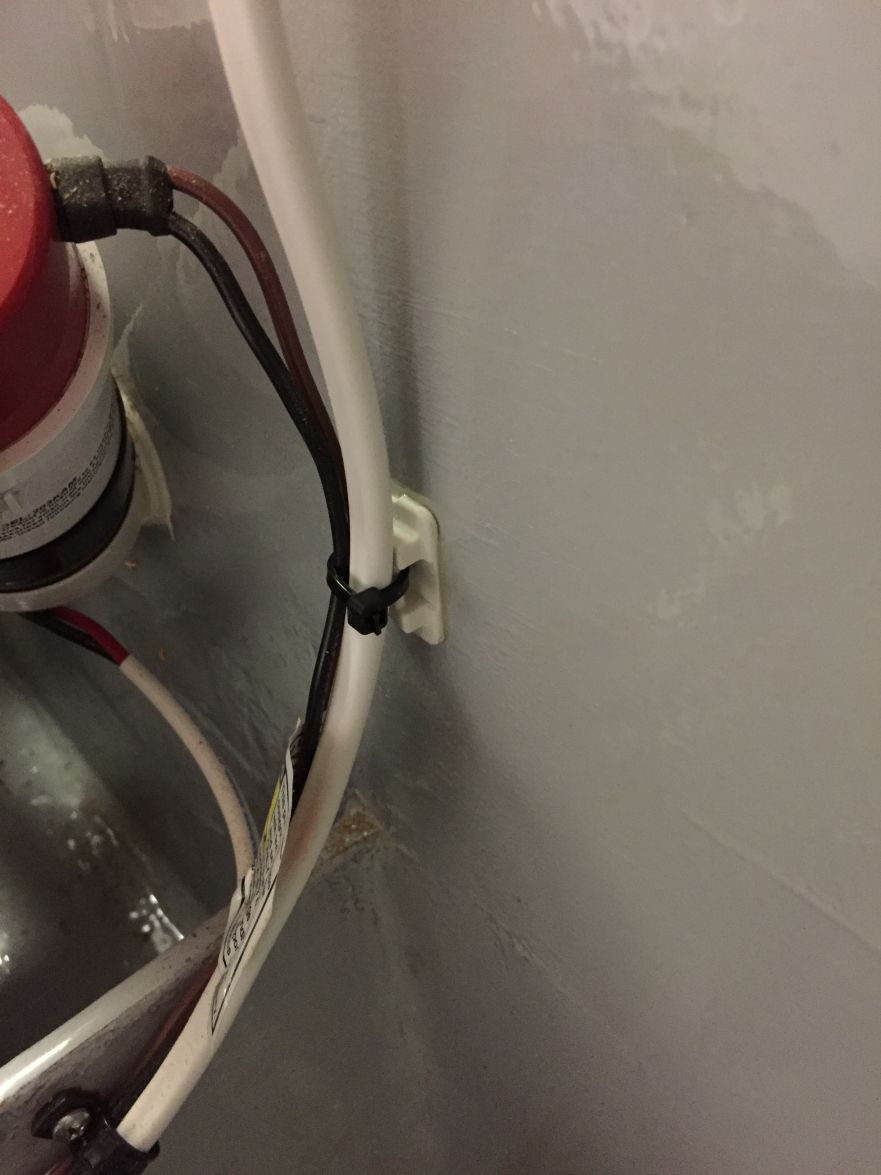
Re: willg's PH18
Posted: Sun Oct 16, 2016 8:57 am
by topwater
Weld mount is nice stuff , i did my whole boat rigging with it.
Re: willg's PH18
Posted: Sun Oct 16, 2016 9:13 am
by BarraMan
The way I figure it I won't be using either the jacking plate or the trim tabs unless the motor is running, so I am going to connect them to my start battery.
Thanks for the Weld mount tip!
Re: willg's PH18
Posted: Sun Oct 16, 2016 10:28 pm
by willg
Thanks, BarraMan. What you say is what I've seen online also. I will wire the jp to the starting battery. I have a Blue Sea battery post attachment with 4 fused circuits, and I think I'll use one of them for the trim tabs.
Will
Re: willg's PH18
Posted: Tue Oct 25, 2016 11:41 am
by flyfishingmonk
Will, what are your thoughts on one continuous hatch hidden under the cushon of the bench seat? I am planning on three in the back like yours. I was ondering if this would reduce the work. I am planning on one in the middle that is dry, and one on each side for used as a bait well and a live well.
Casey
Re: willg's PH18
Posted: Wed Oct 26, 2016 12:12 am
by willg
Casey, my hatch lid behind the console is 31 3/4" x 17". I picked that dimension somewhat arbitrarily, wanting a longish hatch but not so long as to risk having a bow in the hatch lid, and also to jibe with what I had in mind for the other hatches. I plan to make or have made a cushion which will seat 3 people. I have just accepted it that the edges of the cushion will extend beyond the hatch lid. I don't think there'd be an issue making a longer hatch, though, depending on construction technique. With the 1/2" of backing I put on the 3/8" hatch lid there is essentially no flex, probably would have been OK to go longer if I wanted.
I think I've got my front hatches worked out but I'm sitting on that for now to make sure. I'll post up when done.
I'm enjoying watching your progress, btw.
Re: willg's PH18
Posted: Mon Oct 31, 2016 9:30 pm
by willg
Re: willg's PH18
Posted: Mon Oct 31, 2016 10:54 pm
by flyfishingmonk
Can you point me to this process you are referring to? (Page or thread)
Thanks!
Casey
Re: willg's PH18
Posted: Mon Oct 31, 2016 11:00 pm
by flyfishingmonk
Never mind. Found it. =)
Re: willg's PH18
Posted: Mon Oct 31, 2016 11:10 pm
by BarraMan
The hatches look great!
Its a shame that the author of the original video to which I posted a link saw fit to take it down. I think he has a bit of a hang up on people using his construction information to build boats to other than his plans. Very short sighted IMO as builders often build more than one boat and for their next may well buy one of his plans - among which there are some great designs.
When I finish my build I may make another video of this simple method for making hatches - so it is there to help others.
Re: willg's PH18
Posted: Tue Nov 01, 2016 1:32 am
by willg
I like the simplicity of doing the hatches this way. I admire anyone who designs and builds hatches that route water away, I just couldn't see doing that for the 9 hatches I planned. Plus, the slam latches I bought basically allow water to pour through like a sieve and I didn't want to switch them out. The truth is I will have little time to spend on my boat over the next several years, and I just don't care if water gets into the hatches. All the spaces are drained, so I won't sink, and I'll keep important stuff in a dry bag. I also have pondered whether to rout out a channel for foam stripping, to help with water intrusion, but I'm going to skip that too.
I like the slam latches. What I did was to tweak the position of the metal catch just right so when the lid closes it's nice and tight, with no rattle. At least not yet. I'll post a picture of that soon.
Re: willg's PH18
Posted: Wed Nov 02, 2016 6:09 pm
by flyfishingmonk
Helpful comments for sure Will.
I am going to post on my thread about hatches and would like your feedback, when you get a chance to look at it. I wont bother placing it here so as not to get off the topic of your boat.
Casey
Re: willg's PH18
Posted: Sun Nov 06, 2016 1:22 pm
by willg
This is the catch for the slam latch. I made the part for the screws out of ezfillet so I wouldn't have to overdrill, fill and redrill through wood. A little bit wasteful of ezfillet but I think it saved some hassle.
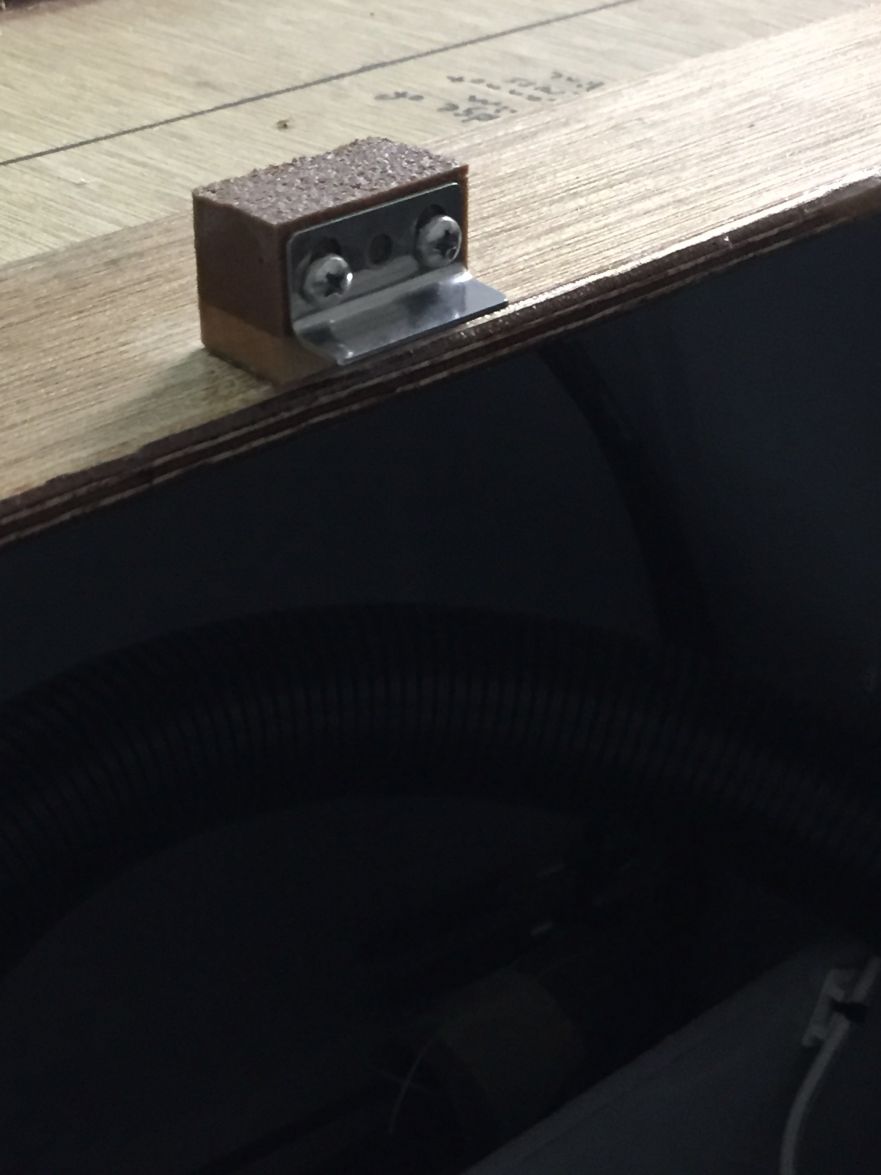
With the latch in place I could adjust the catch position so it grabs just right.
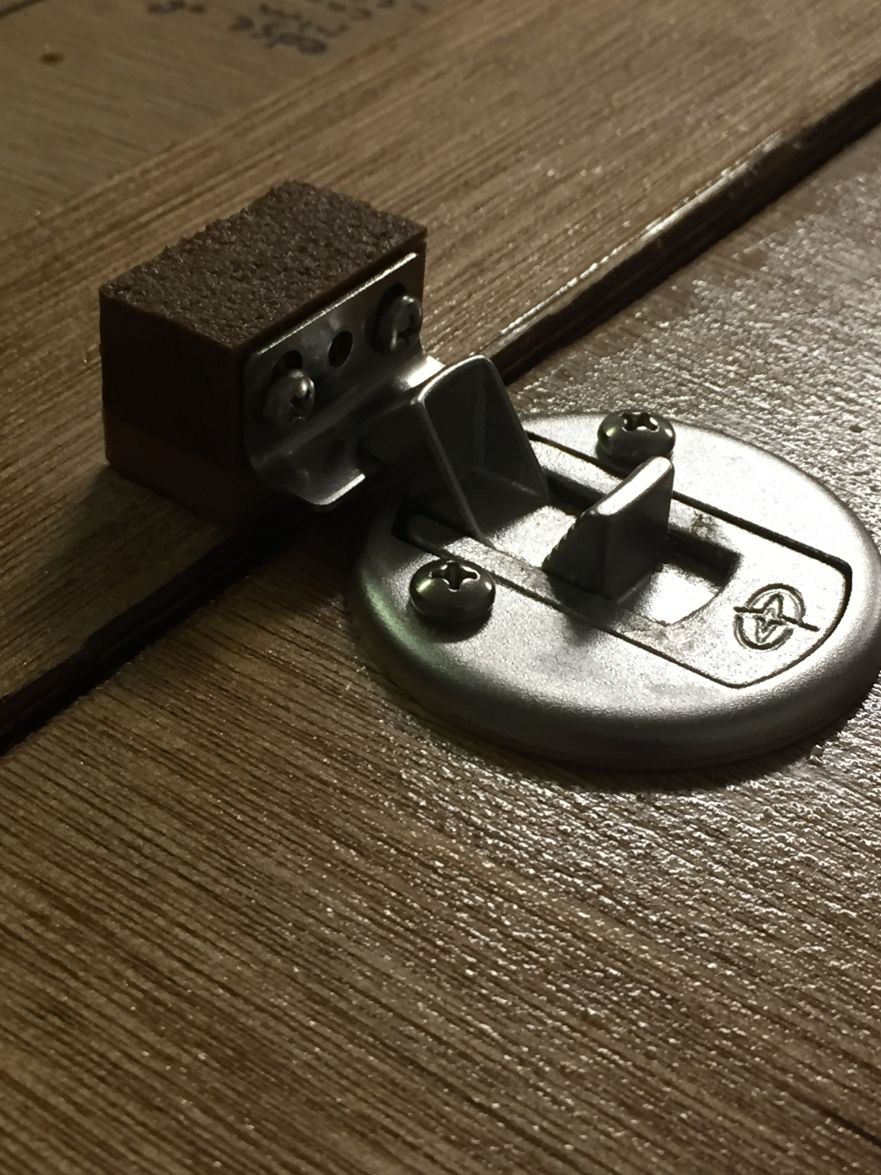
Re: willg's PH18
Posted: Sun Nov 20, 2016 12:50 pm
by willg
I have installed some waterproof RGB LED strip lighting underneath the gunnels and I think it turned out well. The basic unit was only $20, I hope it lasts a while and doesn't disappoint. Via a remote control the lights can shine red, green, blue, white or any combo of these colors, and it's dimmable too. I got it and extension cable/splitters from amazon. It's all surprisingly inexpensive. This is the basic unit:
StripSun LED Strip Lights SMD 5050 Waterproof 16.4ft 5M 300leds RGB Color Changing Flexible LED Rope Lights with 44Key Remote +12V 5A Power Supply +IR Control Box
The strip applied to the underside of the gunnel.
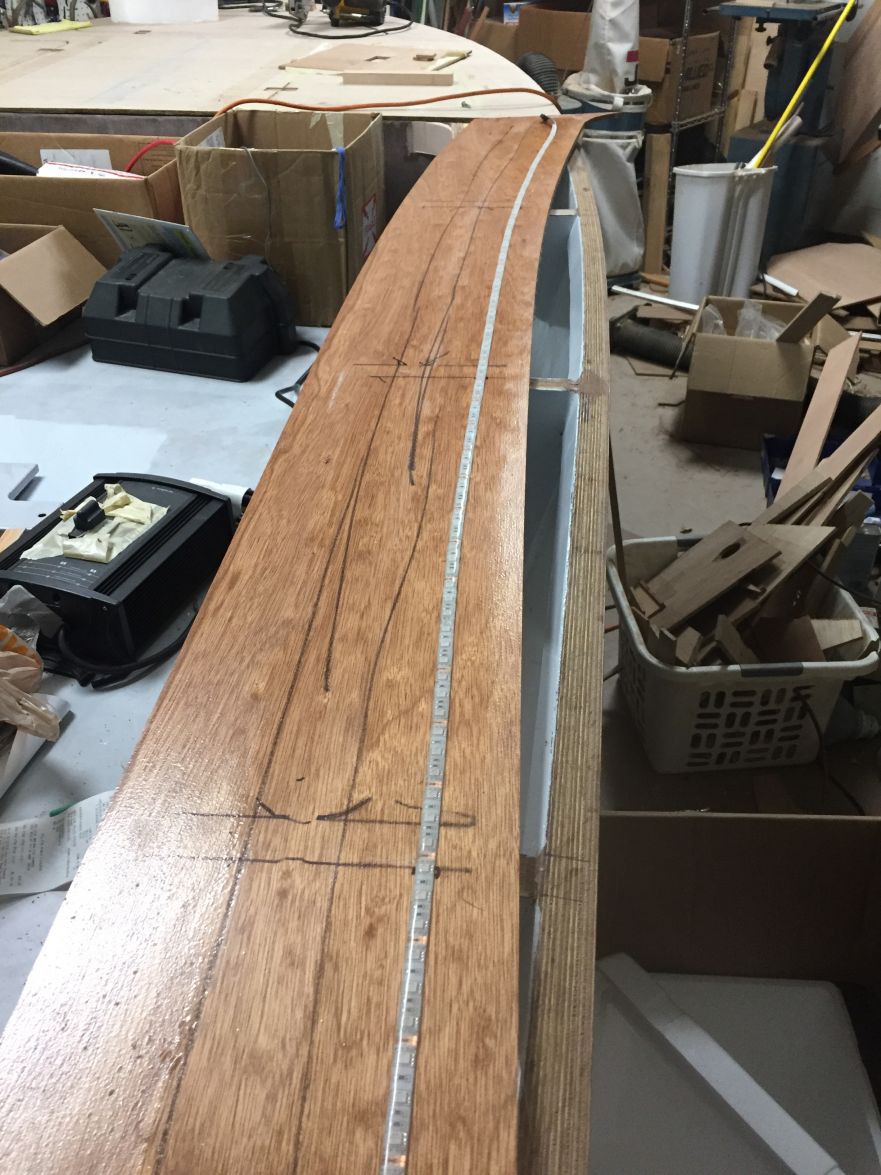
Pictures are lousy, and there's a lot of debris inside the boat, but here are white, red and blue.
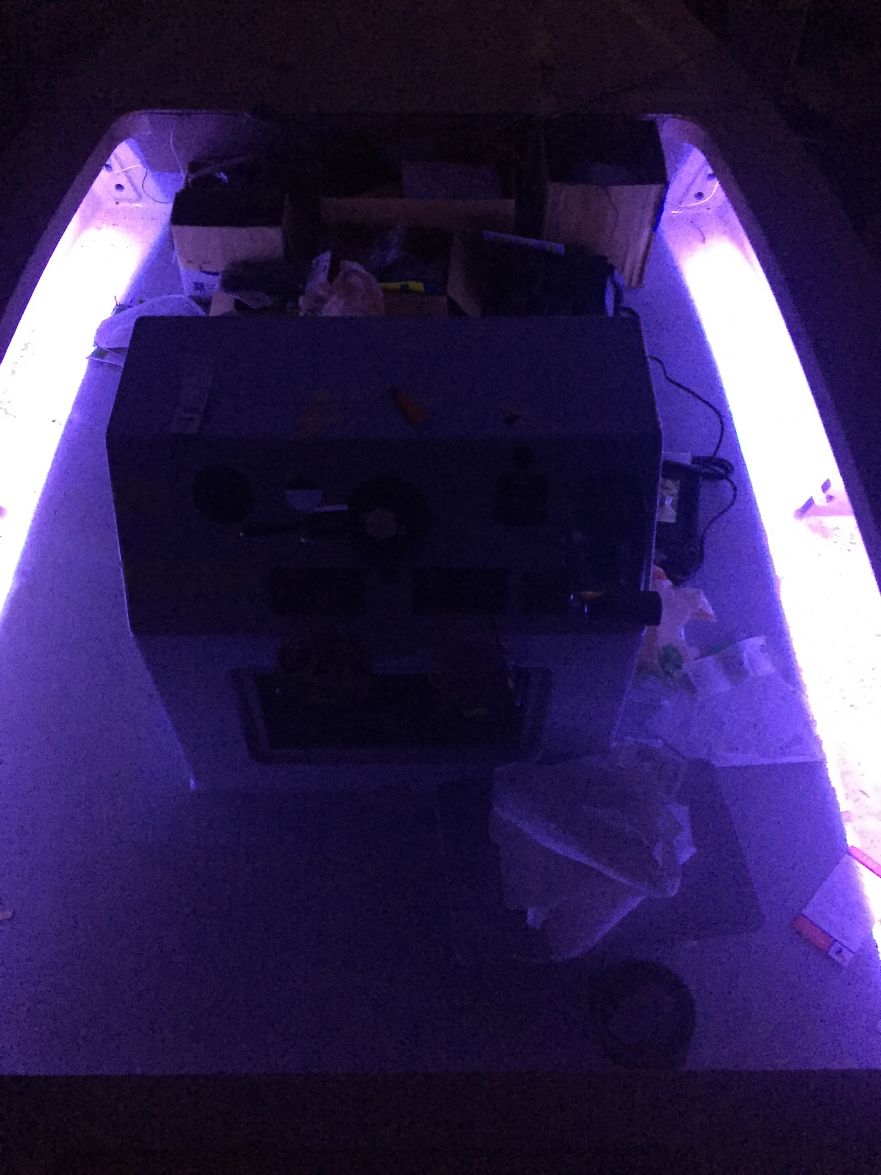
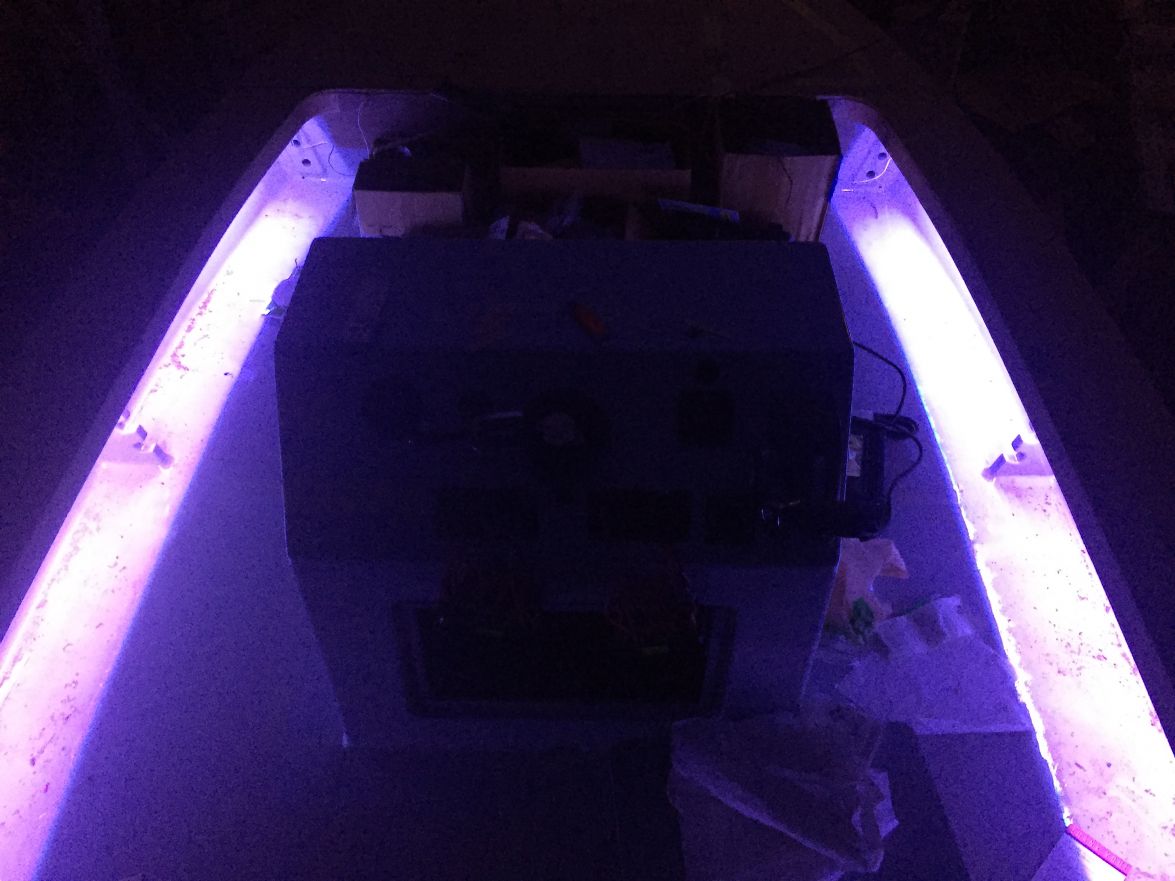
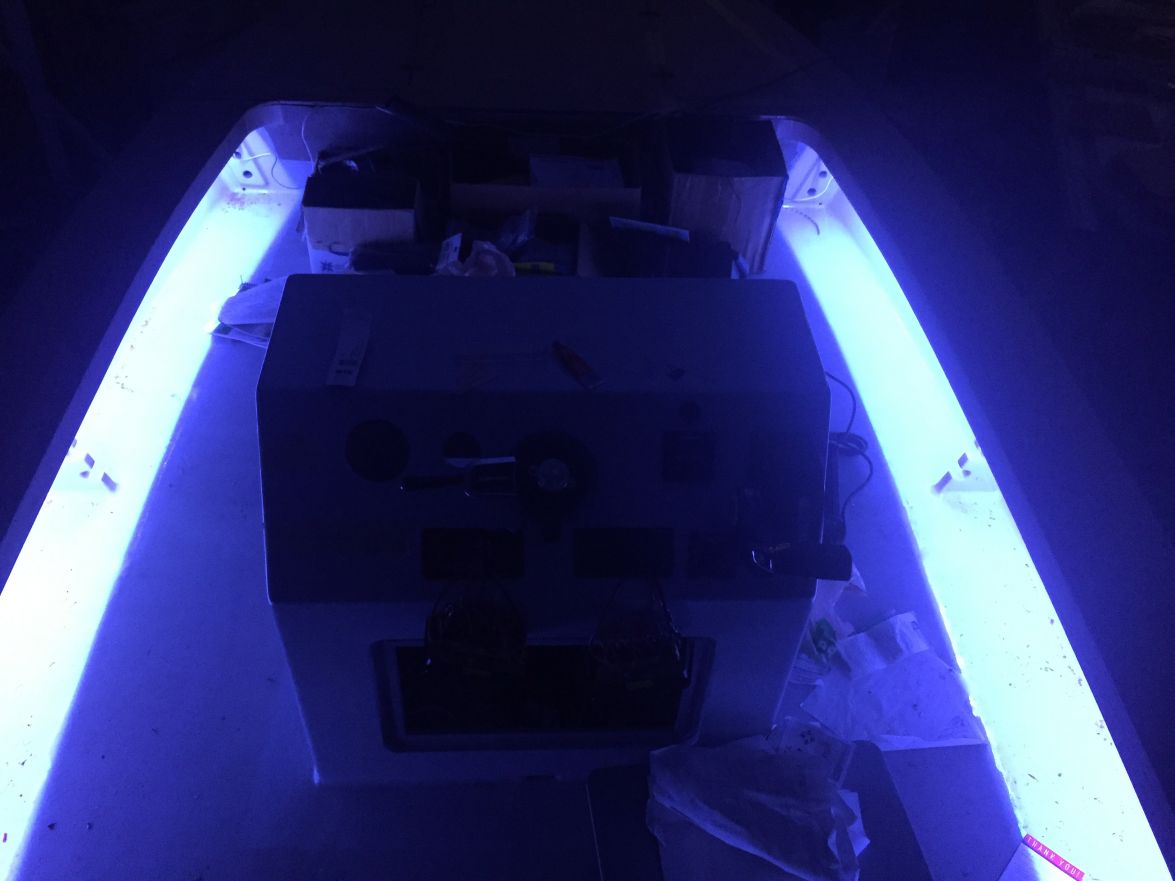
Re: willg's PH18
Posted: Sun Nov 20, 2016 1:24 pm
by flyfishingmonk
Very cool!
Re: willg's PH18
Posted: Sun Nov 20, 2016 2:14 pm
by peter-curacao
Sweet
Re: willg's PH18
Posted: Sun Nov 20, 2016 2:22 pm
by Jeff
Looks great!! Jeff
Re: willg's PH18
Posted: Sun Nov 20, 2016 4:27 pm
by cape man
Your goING to love the red when night fishing.
Re: willg's PH18
Posted: Mon Nov 21, 2016 10:57 pm
by willg
Oops, here's the actual red...
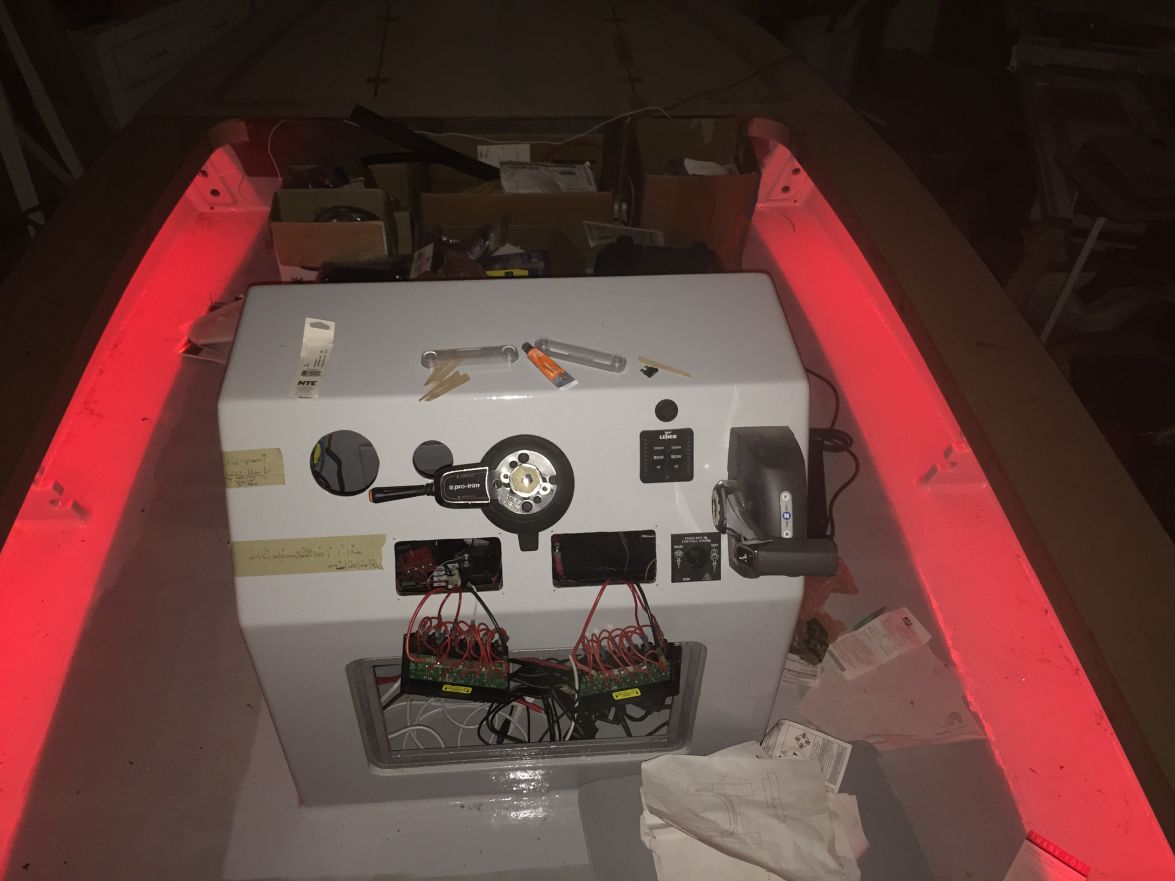
Re: willg's PH18
Posted: Thu Dec 22, 2016 2:30 pm
by Dustinwg
Will,
What type of LED lights did you install under your gunnels? Do they run the entire length? Wanting to do the same, but so many options have my head spinning...
Boat looks great! Looks like you're almost there!
Re: willg's PH18
Posted: Fri Dec 23, 2016 12:21 am
by willg
Dustin, try this link:
http://www.amazon.com/StripSun-Waterpro ... entries*=0
It's a 12V system and comes with an AC adapter for power from the wall. I just cut the power cord and wired it to a console switch. The 16' length has wires and 4-pin connectors on each end so I cut it in half to get 8' lengths which run the length of the cockpit. The cut ends were sealed with liquid tape. I got some 4-wire RGB cable from amazon and made a run from the control module in the console to a forward hatch, then split the wire to go to the front on either side of the cockpit where it gets connected to the led strips. I made all connections with crimp connectors. There are available some easy-to-use 4-pin connectors but I didn't trust them to stay connected on a boat. The system is billed as waterproof. It's so inexpensive I'm a bit leary about it lasting - will see.
Re: willg's PH18
Posted: Sun Dec 25, 2016 5:40 pm
by willg
Re: willg's PH18
Posted: Sun Dec 25, 2016 5:54 pm
by Jeff
Willg, really nice, clean work!! Beautiful boat!! Merry Christmas!!! Jeff
Re: willg's PH18
Posted: Mon Jan 23, 2017 1:10 am
by willg
Next minor milestone done: deck fiberglassed, sanded and washed. The 10 oz fabric laid down well on the flat parts, not as easy on the corners but got it done. Now that it's sanded it's so nearly flat that I tried going straight to Quikfair on one of the gunnels and it turned out real nice. I'll go ahead on do that on the whole deck, which will save me the usual step of fairing mix/sanding before the Quikfair. Getting there.
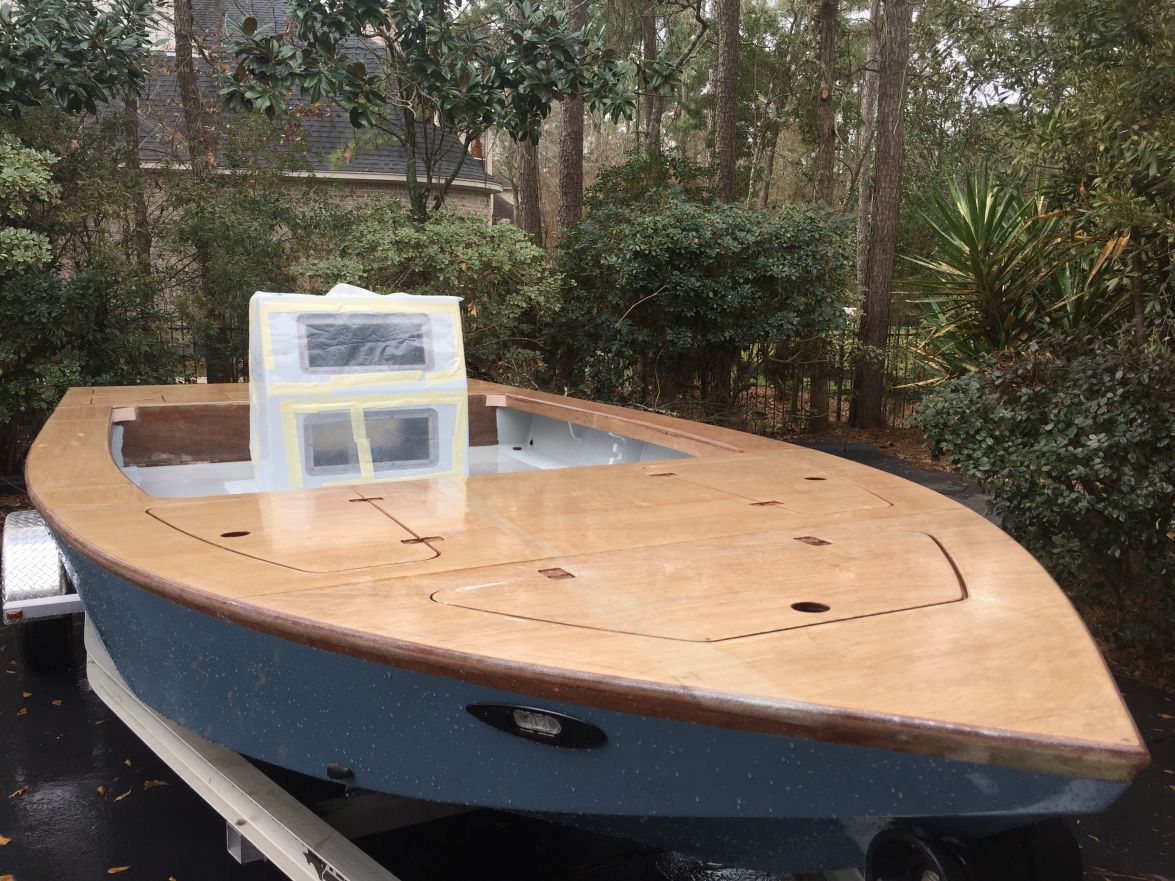
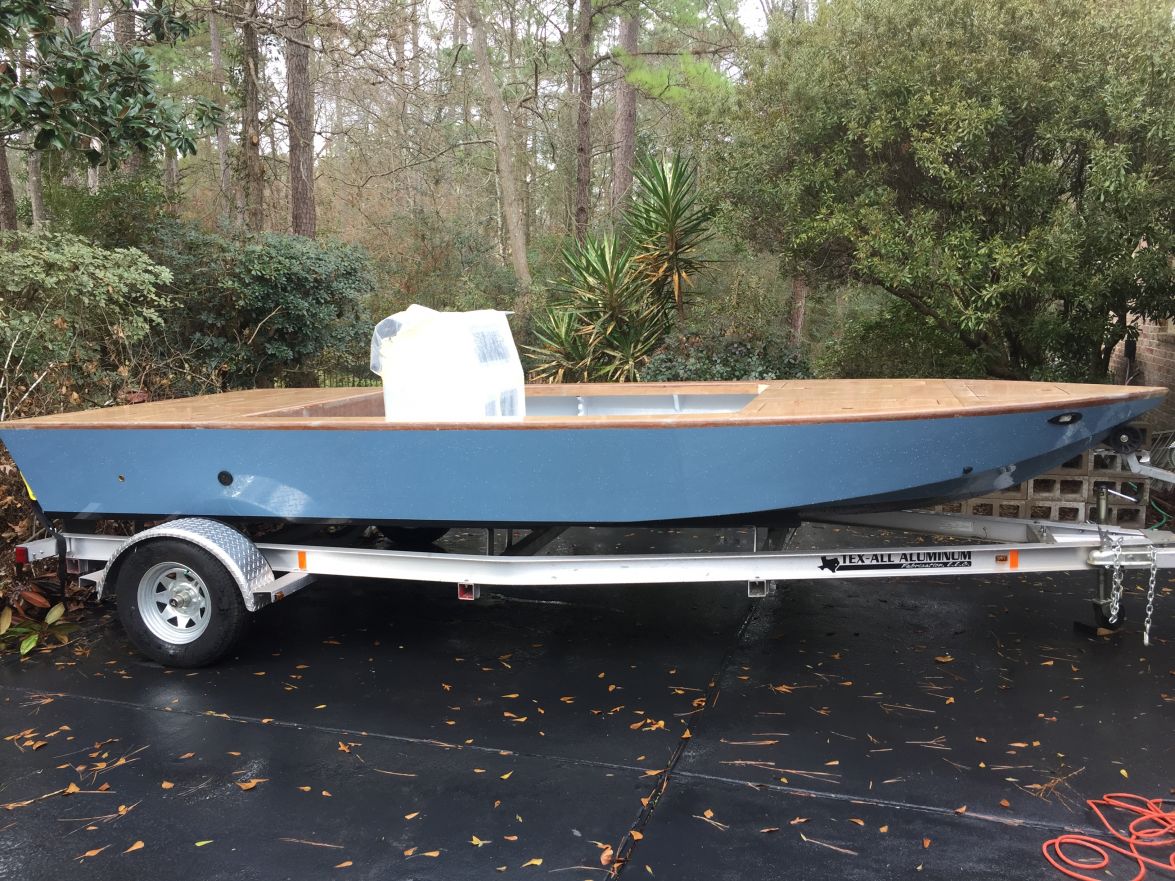
Re: willg's PH18
Posted: Mon Jan 23, 2017 6:23 am
by Jeff
Really nice willg!!! Jeff
Re: willg's PH18
Posted: Mon Jan 23, 2017 9:37 am
by Browndog
Sweet!
Re: willg's PH18
Posted: Mon Jan 23, 2017 10:01 am
by swglenn
Really looks good. You will be fishing this summer.
Re: willg's PH18
Posted: Mon Jan 23, 2017 10:44 am
by MrPaul
Looks like its going fast even when she's on the trailer.
Re: willg's PH18
Posted: Mon Jan 23, 2017 12:27 pm
by Dustinwg
Looks great Will! I like all of the hatches on the casting deck...lots of storage
Re: willg's PH18
Posted: Mon Jan 23, 2017 1:06 pm
by willg
Appreciate the kind words, guys.
Glenn, let me know when you want to come by. Over the next bit I'll be out 2/16-19, but here otherwise.
Re: willg's PH18
Posted: Mon Jan 23, 2017 5:29 pm
by Fair WX Pilot
Great looking boat, love the deck lighting. Can't wait to see how the rest of it comes together.
Re: willg's PH18
Posted: Mon Mar 13, 2017 9:47 pm
by willg
Some more progress. The glass faired out.
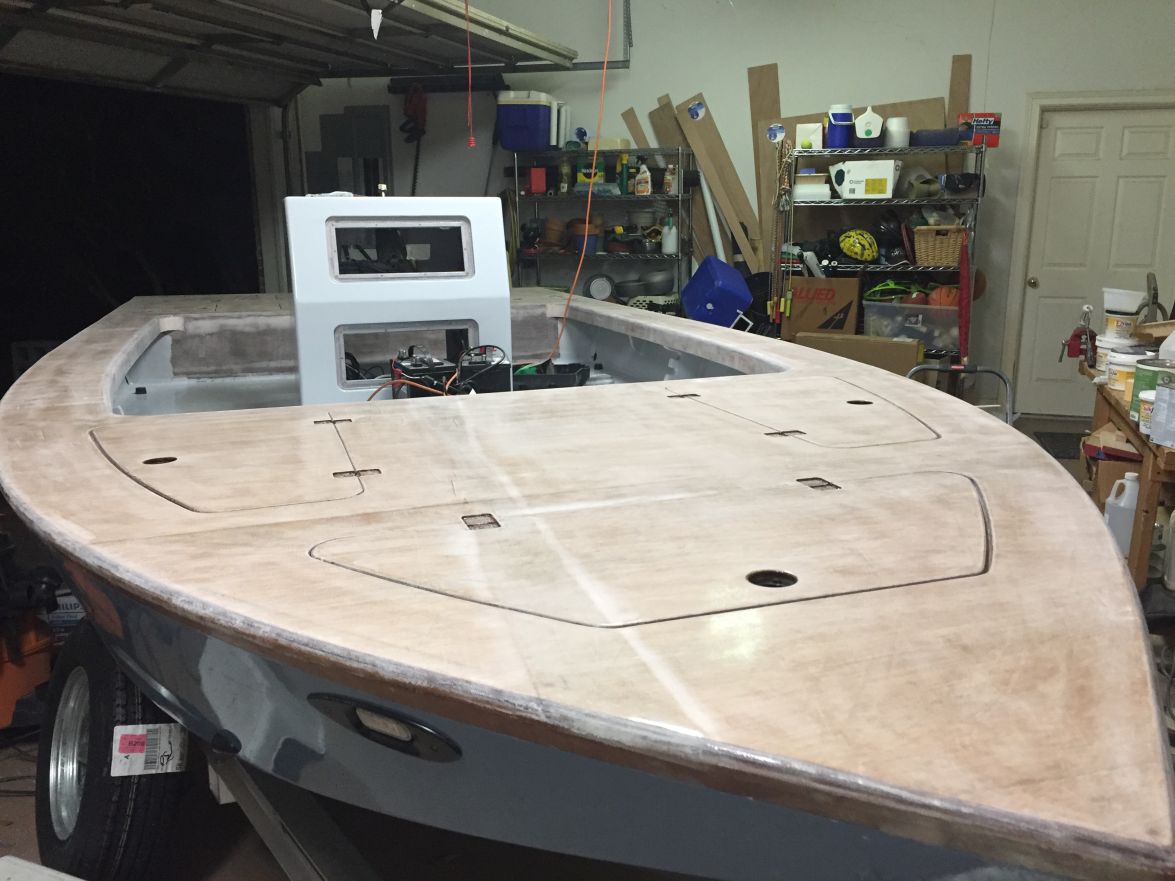
Three coats of System Three yacht primer.
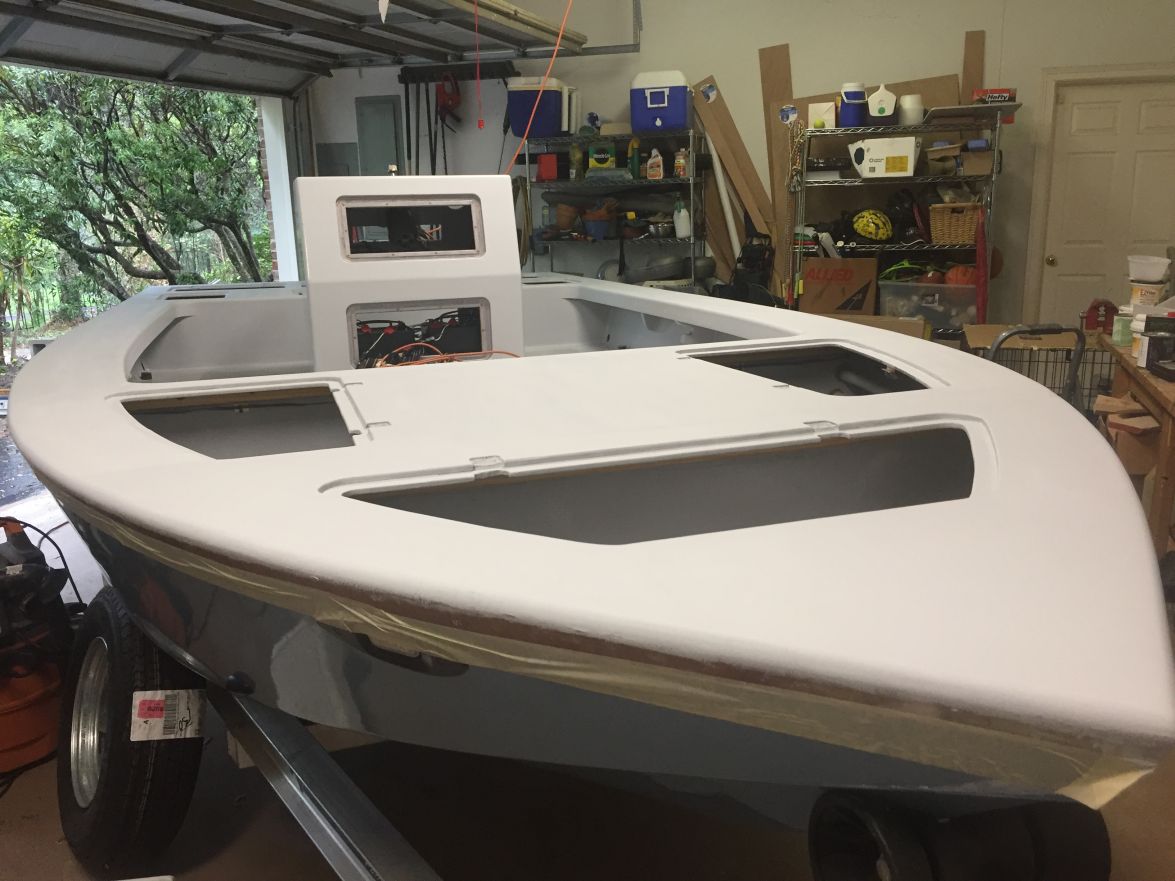
Three coats of EMC Whisper Grey. This paint is very easy to use, goes a long way and looks good. I used foam rollers and applied the coats within a no-sand window.


Next is the Tessilmare rub rail and some wiring wrap up and other minor things, then get the motor installed. If I get this done over the next few month or so I'll be right at the 4 year mark when I launch.
Re: willg's PH18
Posted: Tue Mar 14, 2017 2:46 am
by glossieblack
She's sure looking good Will. It must be exciting seeing the finishing line.
Re: willg's PH18
Posted: Tue Mar 14, 2017 7:58 am
by Browndog
Looks awesome. I hope that my current project has the level of fit and finish that your boat does. Really looks good. I expect you will get a lot of admiring stares and people asking what brand of boat it is.
Re: willg's PH18
Posted: Tue Mar 14, 2017 9:03 am
by cape man
I just used the EMC for the first time. The clear coat for my gunwales. That is some great stuff, and while it isn't free it still is way below some of the other stuff available. She sure looks shiny and smooth! Love the color scheme. The Phantoms are one of my favorite designs from here and you have done it more than justice!
Re: willg's PH18
Posted: Tue Mar 14, 2017 9:44 am
by swglenn
Beautiful boat Will! You have done a masterful job in your build.
Re: willg's PH18
Posted: Tue Mar 14, 2017 11:43 am
by Dustinwg
Will, it is looking awesome! You're almost there!
Are you going to take the boat to the Port A builders meet in Oct?
I am thinking about it and it would be pretty awesome to have a couple new Phantoms out there!
Re: willg's PH18
Posted: Tue Mar 14, 2017 2:27 pm
by Aripeka Angler
First class work! You bet you are going to love the topside paint, it will be easy on your eyes.
I don't know what it is about the phantoms, I have seen three of them in person and they all look fantastic
Your build is going to continue to raise the bar...
Re: willg's PH18
Posted: Tue Mar 14, 2017 8:49 pm
by willg
Thanks, guys. It sure does feel good to get this far. I also have a gallon of grey kiwigrip which will cover most of the deck and sole. It ought to break the sun glare further also.
Dustin, Port A in October could be fun and I will keep that in mind. Is this the wooden boat show that's been covered on the forum before?
Re: willg's PH18
Posted: Tue Mar 14, 2017 10:50 pm
by Dustinwg
Yes it is the Wooden Boat show, Let me know if you decide to head make the trip. My boat will be kept in a boat barn in Port A half of the year, so it is no big deal to head down for that!
http://portaransasplywoodenboatfestival.org
Be pretty cool to show up in force for Bateau!
Re: willg's PH18
Posted: Tue Mar 14, 2017 11:14 pm
by Dougster
It for sure would be fun to meet up and see your boats. I plan on bringing my SK14. I did call 'em and confirm it's on for this year, Oct. 20 as I recall. They don't have the current website up yet.
Dougster
Re: willg's PH18
Posted: Mon Jun 12, 2017 9:15 am
by willg
Re: willg's PH18 - "Yepper" launched 6/11/17
Posted: Mon Jun 12, 2017 9:23 am
by pee wee
Congratulations! She turned out a beauty, let's see some action shots!
Re: willg's PH18 - "Yepper" launched 6/11/17
Posted: Mon Jun 12, 2017 10:00 am
by swglenn
Congratulations! Your boat looks fantastic. Great build. Thank you for all of the help you gave me on mine.
Re: willg's PH18 - "Yepper" launched 6/11/17
Posted: Mon Jun 12, 2017 10:07 am
by Wouter
That's a great boat! Congrats on the splash!!
Re: willg's PH18 - "Yepper" launched 6/11/17
Posted: Mon Jun 12, 2017 10:27 am
by Aripeka Angler
Absolutely gorgeous!!! Congratulations on the splash
Re: willg's PH18 - "Yepper" launched 6/11/17
Posted: Mon Jun 12, 2017 10:49 am
by Jeff
WillG, Beautiful Boat!! Great work and glad the splash went well with the family!! Jeff
Re: willg's PH18 - "Yepper" launched 6/11/17
Posted: Mon Jun 12, 2017 10:50 am
by flyfishingmonk
Wow Will! That boat looks fantastic! I can't wait to see it in person some day.
Thanks for all of your advice and help as we other builders have followed your thread. Great stuff!
Casey
Re: willg's PH18 - "Yepper" launched 6/11/17
Posted: Mon Jun 12, 2017 11:46 am
by cvincent
Congratulations! Your boat is beautiful.
Re: willg's PH18 - "Yepper" launched 6/11/17
Posted: Mon Jun 12, 2017 12:22 pm
by csotelo
Congratulations, really beautiful boat!
Re: willg's PH18 - "Yepper" launched 6/11/17
Posted: Mon Jun 12, 2017 1:19 pm
by BB Sig
Nice build! Now it is time to enjoy her! Let her decks become bloodied.
Re: willg's PH18 - "Yepper" launched 6/11/17
Posted: Mon Jun 12, 2017 7:00 pm
by glossieblack
The PH18 has to be one of JM's prettiest designs, and Will, your rendition is a beautiful one.
Re: willg's PH18 - "Yepper" launched 6/11/17
Posted: Mon Jun 12, 2017 9:26 pm
by Eric1
Beautiful Build Will! Congratulations!!
Re: willg's PH18 - "Yepper" launched 6/11/17
Posted: Mon Jun 12, 2017 9:30 pm
by willg
Thank you everybody for all the kind words! It's no exaggeration to say I couldn't have done it without the help of this forum. Cruising this forum for quite a while before pulling the trigger on a build gave me the confidence to get started, and lots of help along the way got it done. I imagine most of us feel the same about the forum. Of course, my (our) biggest debt and thanks go to Larry. Considering the reach of the web, he has probably has taught more people more things about boat building than anybody else. Cheers, Larry!
Don't know when I'll get the decks slimy, but I'll sure post up when it happens.
Will
Re: willg's PH18 - "Yepper" launched 6/11/17
Posted: Mon Jun 12, 2017 9:32 pm
by TomW1
Gorgeous build Will Enjoy her.
Re: willg's PH18 - "Yepper" launched 6/11/17
Posted: Tue Jun 13, 2017 12:27 am
by Dustinwg
Will!!! Congratulations! Boat looks great! Time to get that thing on the water and enjoy it. You will love it!
Re: willg's PH18 - "Yepper" launched 6/11/17
Posted: Tue Jun 13, 2017 8:11 am
by topwater
Beautiful boat congratulation
She should be a beast on the flats
Re: willg's PH18 - "Yepper" launched 6/11/17
Posted: Wed May 02, 2018 12:15 am
by willg
It's been a while since I've posted on my boat so thought I'd share some info. I don't know what she weighs but suspect she's built comparatively heavy. My 90 etec came with a 17" 3-blade evinrude stainless viper prop. I have a 6" Bob's action jack and with the trim and jp tweaked just right she'll do 38.4 mph with about 5200 rpm WOT (specs are 5000-5500). She is super stable - walk on the gunnel and she doesn't move. We've fished 4 people once and had the room we needed just had to be careful. Head on, she can take waves and stay dry. Quartering into decent waves and it can get pretty wet. She feels extremely solid in a chop. I have Lenco trim tabs and use them all the time - I'd consider them to be a requirement. I have a lifting strake and reverse chine on each side and though I can't say she rides on a rail I like the way she turns.
All in all I am very happy with my Phantom. She has turned some heads and prompted a lot of questions when she's out. I wish I had some action shots or even shots on the water but I don't.
Thank you again to Bateau and all the great people on the forum!
Re: willg's PH18 - "Yepper" launched 6/11/17
Posted: Wed May 02, 2018 1:11 am
by glossieblack
Interesting update thanks.
Re: willg's PH18 - "Yepper" launched 6/11/17
Posted: Wed May 02, 2018 6:37 am
by cape man
38 with a 90 on a boat that big is amazing. Love the Phantoms.
Re: willg's PH18 - "Yepper" launched 6/11/17
Posted: Wed May 02, 2018 7:27 am
by cape man
38 with a 90 on a boat that big is amazing. Love the Phantoms.
Re: willg's PH18 - "Yepper" launched 6/11/17
Posted: Wed May 16, 2018 1:22 am
by flyfishingmonk
Will - have any video you can post?
I hope all is well.
Casey
Re: willg's PH18 - "Yepper" launched 6/11/17
Posted: Wed May 16, 2018 3:40 pm
by TomW1
Will it sounds like you have your prop pretty well dialed in, see if they will trade it for an 18 pitch and get a couple 200 rpms more. It will give you 2 or 3 mph. The Viper is an excellent prop. I am not sure Evinrude makes an 18 some of there prop lines only go in 2 inch groupings. More importantly it will keep you in the main rpm range when loaded with those 4 guys.
Congratulations on a very successful launch. Another thought is if your not ventilating in turns try raising your motor on the jack plate just until you are and then lower the motor 1/2 inch. This may increase your performance. You said you had it tuned just right so ignore this if you have already have done it.
Tom
Re: willg's PH18 - "Yepper" launched 6/11/17
Posted: Fri May 18, 2018 10:31 pm
by willg
flyfishingmonk wrote: ↑Wed May 16, 2018 1:22 am
Will - have any video you can post?
I hope all is well.
Casey
Casey, no videos yet. I will someday and will post up. All is well, thanks. I moved the boat to a secure storage facility in Matagorda. It has made getting on the water much easier than hauling the boat there and back. A few weekends ago my son and I fished Sat/Sun and stayed Sat night at the Fisherman's Hotel. Low cost, clean and nice people. My storage place, the hotel and Matagorda are all within a few hundred yards of each other.
TomW1 wrote: ↑Wed May 16, 2018 3:40 pm
Will it sounds like you have your prop pretty well dialed in, see if they will trade it for an 18 pitch and get a couple 200 rpms more. It will give you 2 or 3 mph. The Viper is an excellent prop. I am not sure Evinrude makes an 18 some of there prop lines only go in 2 inch groupings. More importantly it will keep you in the main rpm range when loaded with those 4 guys.
Congratulations on a very successful launch. Another thought is if your not ventilating in turns try raising your motor on the jack plate just until you are and then lower the motor 1/2 inch. This may increase your performance. You said you had it tuned just right so ignore this if you have already have done it.
Tom
Tom , I should get a spare prop for safety's sake, and was debating something less expensive vs another stainless model with different specs. Was wondering about a 4-blade also. I'm still in the learning phase and am trying out different jp and trim adjustments for various conditions, turning, etc. It's becoming second nature to some degree but I have more learning to do.
Re: willg's PH18 - "Yepper" launched 6/11/17
Posted: Sat May 19, 2018 7:56 pm
by flyfishingmonk
Sounds great Will! Glad you found a workable arrangement to get on the water without too much burden.
Casey
Re: willg's PH18 - "Yepper" launched 6/11/17
Posted: Sun May 20, 2018 7:06 pm
by TomW1
willg wrote: ↑Fri May 18, 2018 10:31 pm
flyfishingmonk wrote: ↑Wed May 16, 2018 1:22 am
Will - have any video you can post?
I hope all is well.
Casey
Casey, no videos yet. I will someday and will post up. All is well, thanks. I moved the boat to a secure storage facility in Matagorda. It has made getting on the water much easier than hauling the boat there and back. A few weekends ago my son and I fished Sat/Sun and stayed Sat night at the Fisherman's Hotel. Low cost, clean and nice people. My storage place, the hotel and Matagorda are all within a few hundred yards of each other.
TomW1 wrote: ↑Wed May 16, 2018 3:40 pm
Will it sounds like you have your prop pretty well dialed in, see if they will trade it for an 18 pitch and get a couple 200 rpms more. It will give you 2 or 3 mph. The Viper is an excellent prop. I am not sure Evinrude makes an 18 some of there prop lines only go in 2 inch groupings. More importantly it will keep you in the main rpm range when loaded with those 4 guys.
Congratulations on a very successful launch. Another thought is if your not ventilating in turns try raising your motor on the jack plate just until you are and then lower the motor 1/2 inch. This may increase your performance. You said you had it tuned just right so ignore this if you have already have done it.
Tom
Tom , I should get a spare prop for safety's sake, and was debating something less expensive vs another stainless model with different specs. Was wondering about a 4-blade also. I'm still in the learning phase and am trying out different jp and trim adjustments for various conditions, turning, etc. It's becoming second nature to some degree but I have more learning to do.
A four blade on a Phantom would be pretty standard. It would allow you to go shallower, turn faster, increase your straight line holding. But since you have the 3 blade lets see if it is the right one. Get the motor broken in and see what the top rpm's are compared to the motors listed top rpms. I really prefer 4 blades on most boats due to the performance enhancements they provide. When you have the motor broken in let me know and we will go from there. Either stay with your 3 blade or calculate a new 3 blade or 4 blade.
For a backup prop there is no reason to get anythin other than an aluminum prop. It may be my German in me but why spend $400 when you can spend less than $200 fir something you may never use.
Tom