
MF14 - New Build in UK
-
Shamrock Kid

- Frequent Poster

- Posts: 127
- Joined: Mon Jun 24, 2013 11:40 am
- Location: Corpus Christi, TX
Re: MF14 - New Build in UK
Very nice clean work you can tell you've done this a time or two. Can't wait to see it come together so I can pick up some pointers.
John
_______________________________________
Between the Devil and the Deep Blue Sea.......
_______________________________________
Between the Devil and the Deep Blue Sea.......
-
Whameller
- Frequent Poster
- Posts: 30
- Joined: Tue Aug 23, 2011 11:08 am
- Location: United Kingdom
- Location: West Pembrokeshire, United Kingdom
- Contact:
Re: MF14 - New Build in UK
Holidays over, back at work - I've had some time to make some progress over the last couple of weekends.
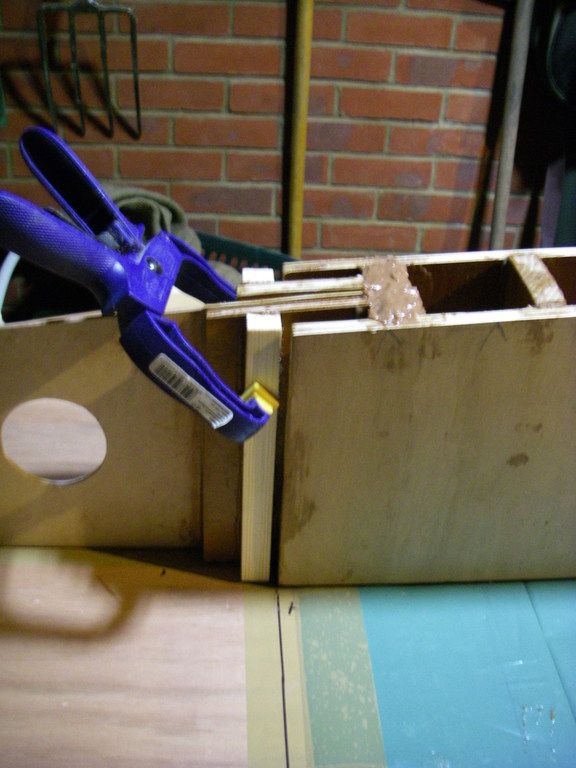
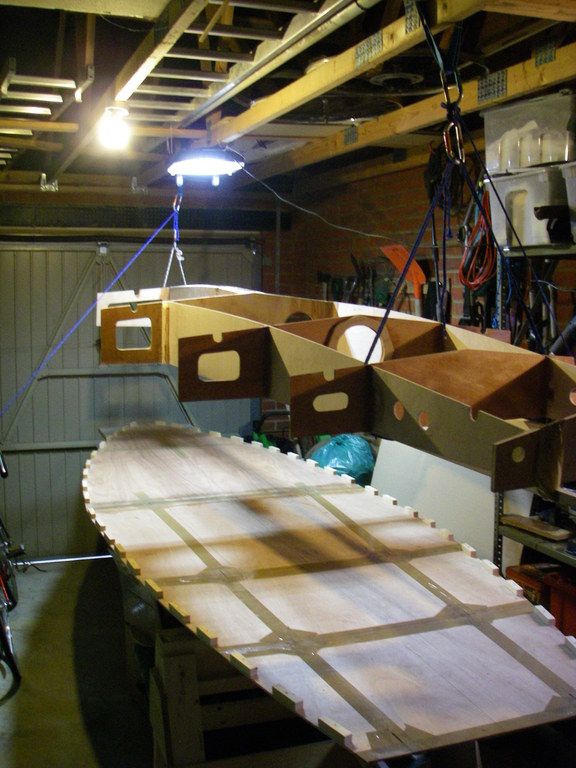
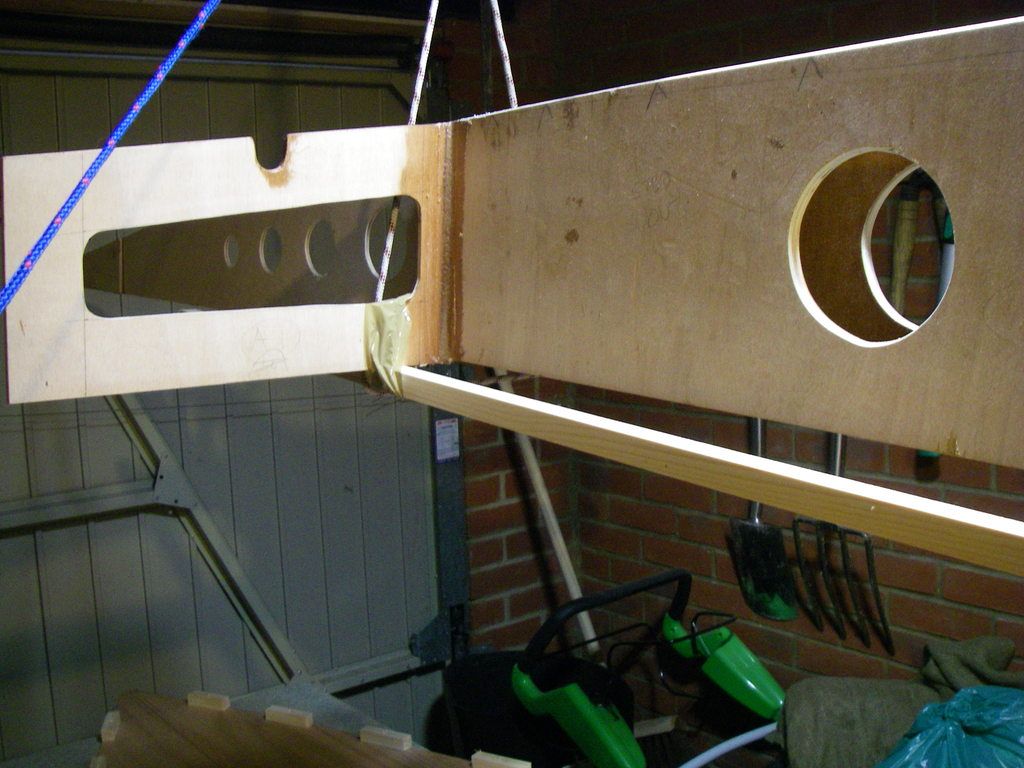
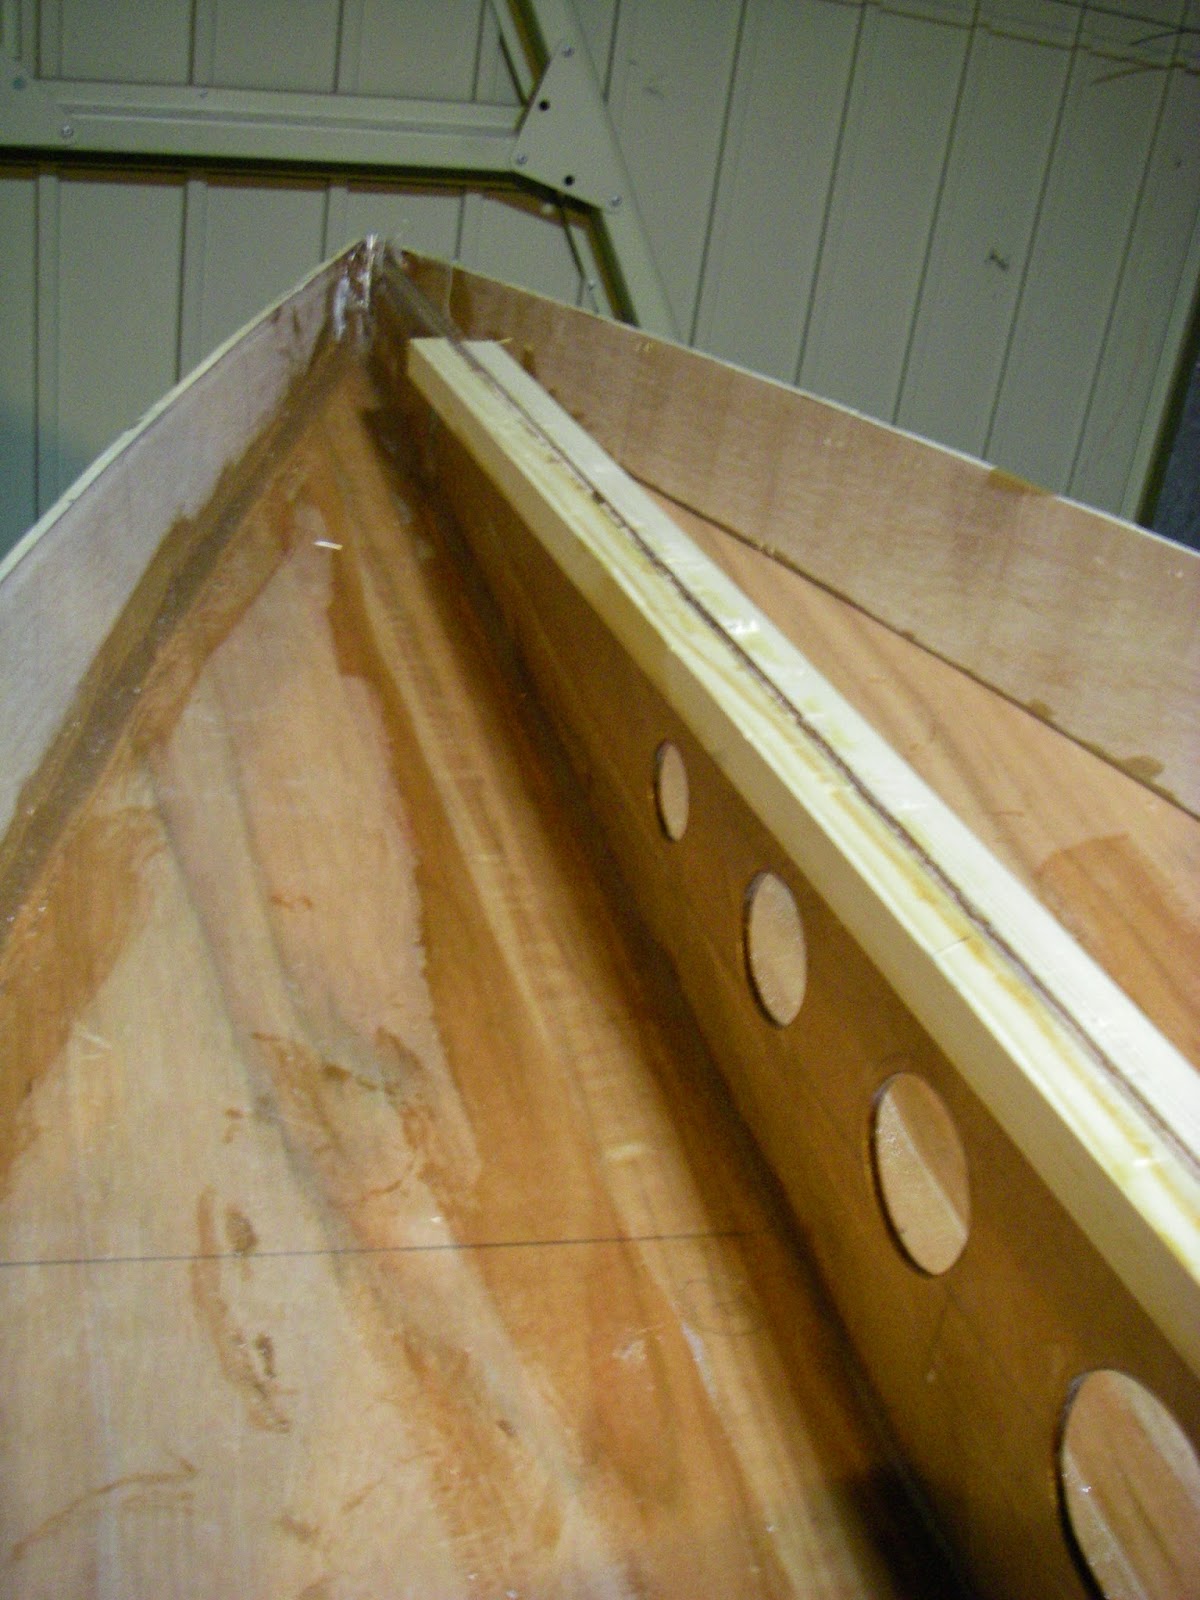
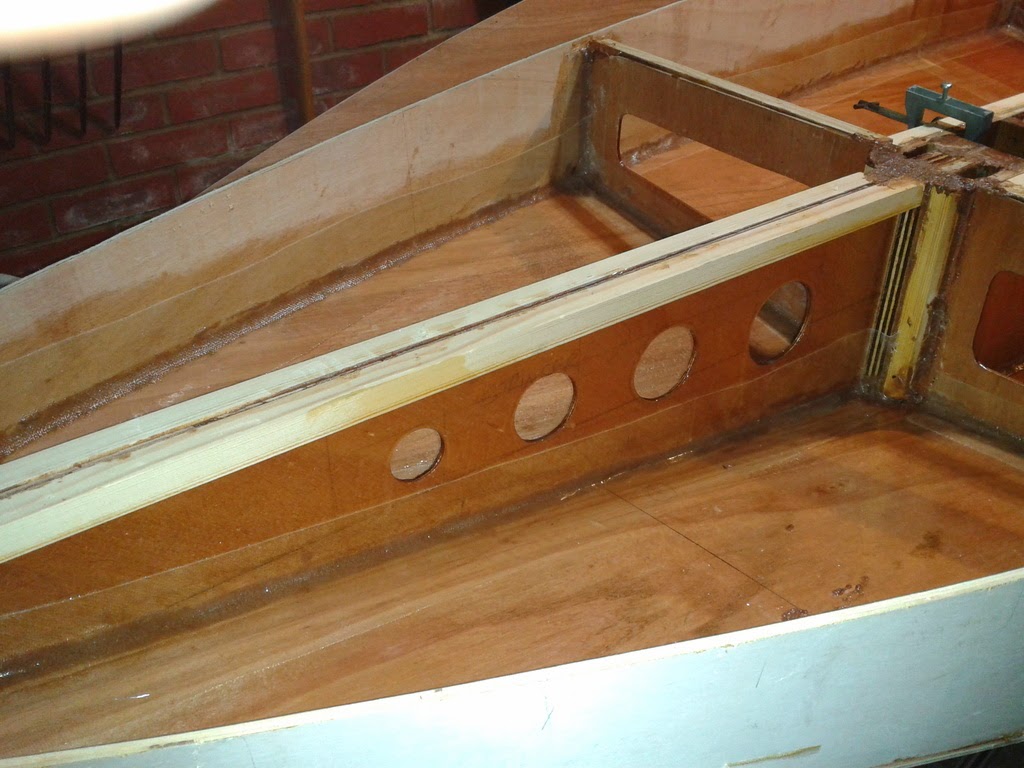
Last weekend, I got the trunking that houses both the daggerboard and mast wells assembled:
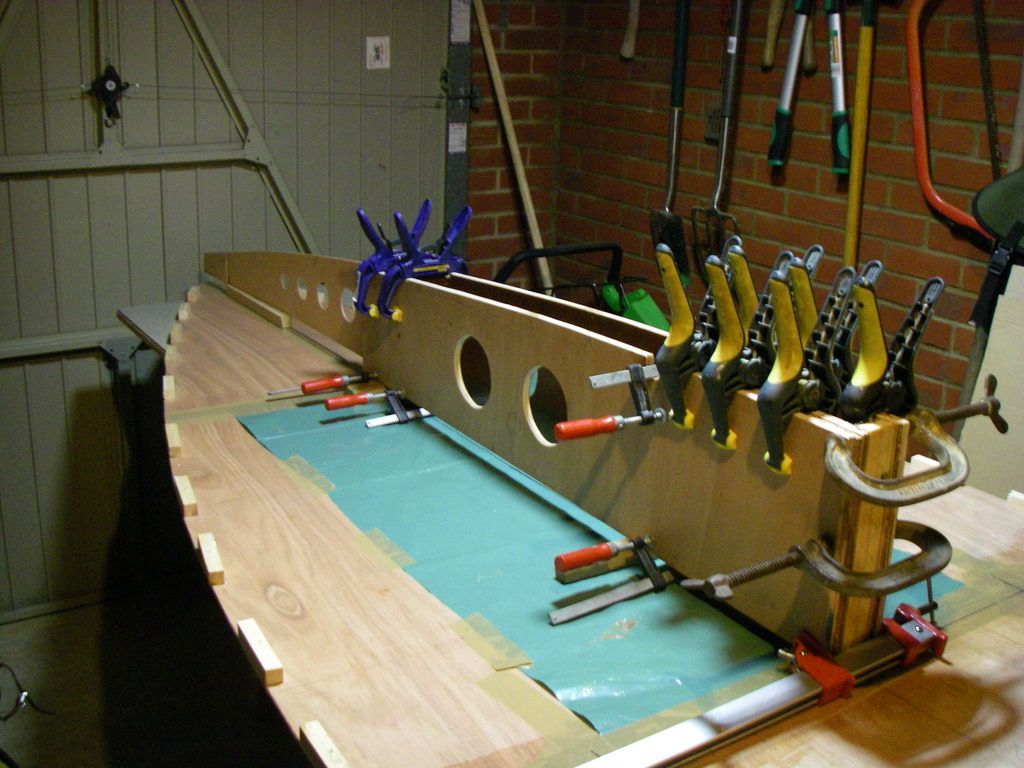
(there are 19 separate components in this assembly - I used nearly that many clamps)
This is the key assembly of the whole frame and includes the bow stringer. Assembly was a three stage process needing patience as I waited for the epoxy to go off before being able to move on to the next stage.
Here's the result:
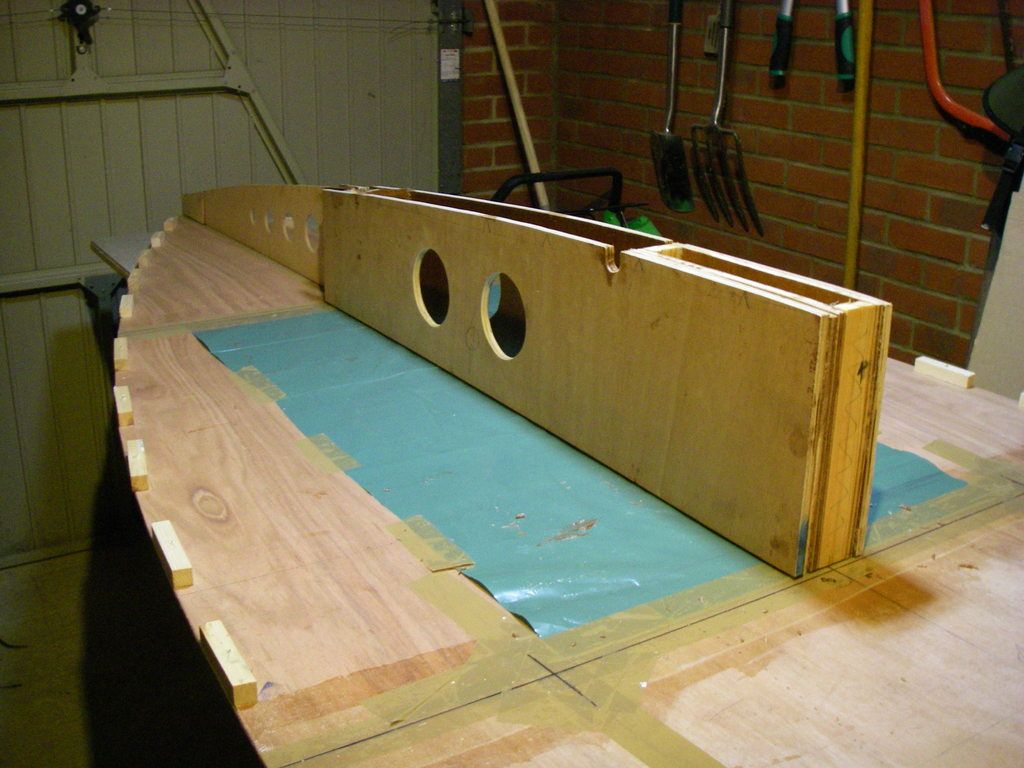
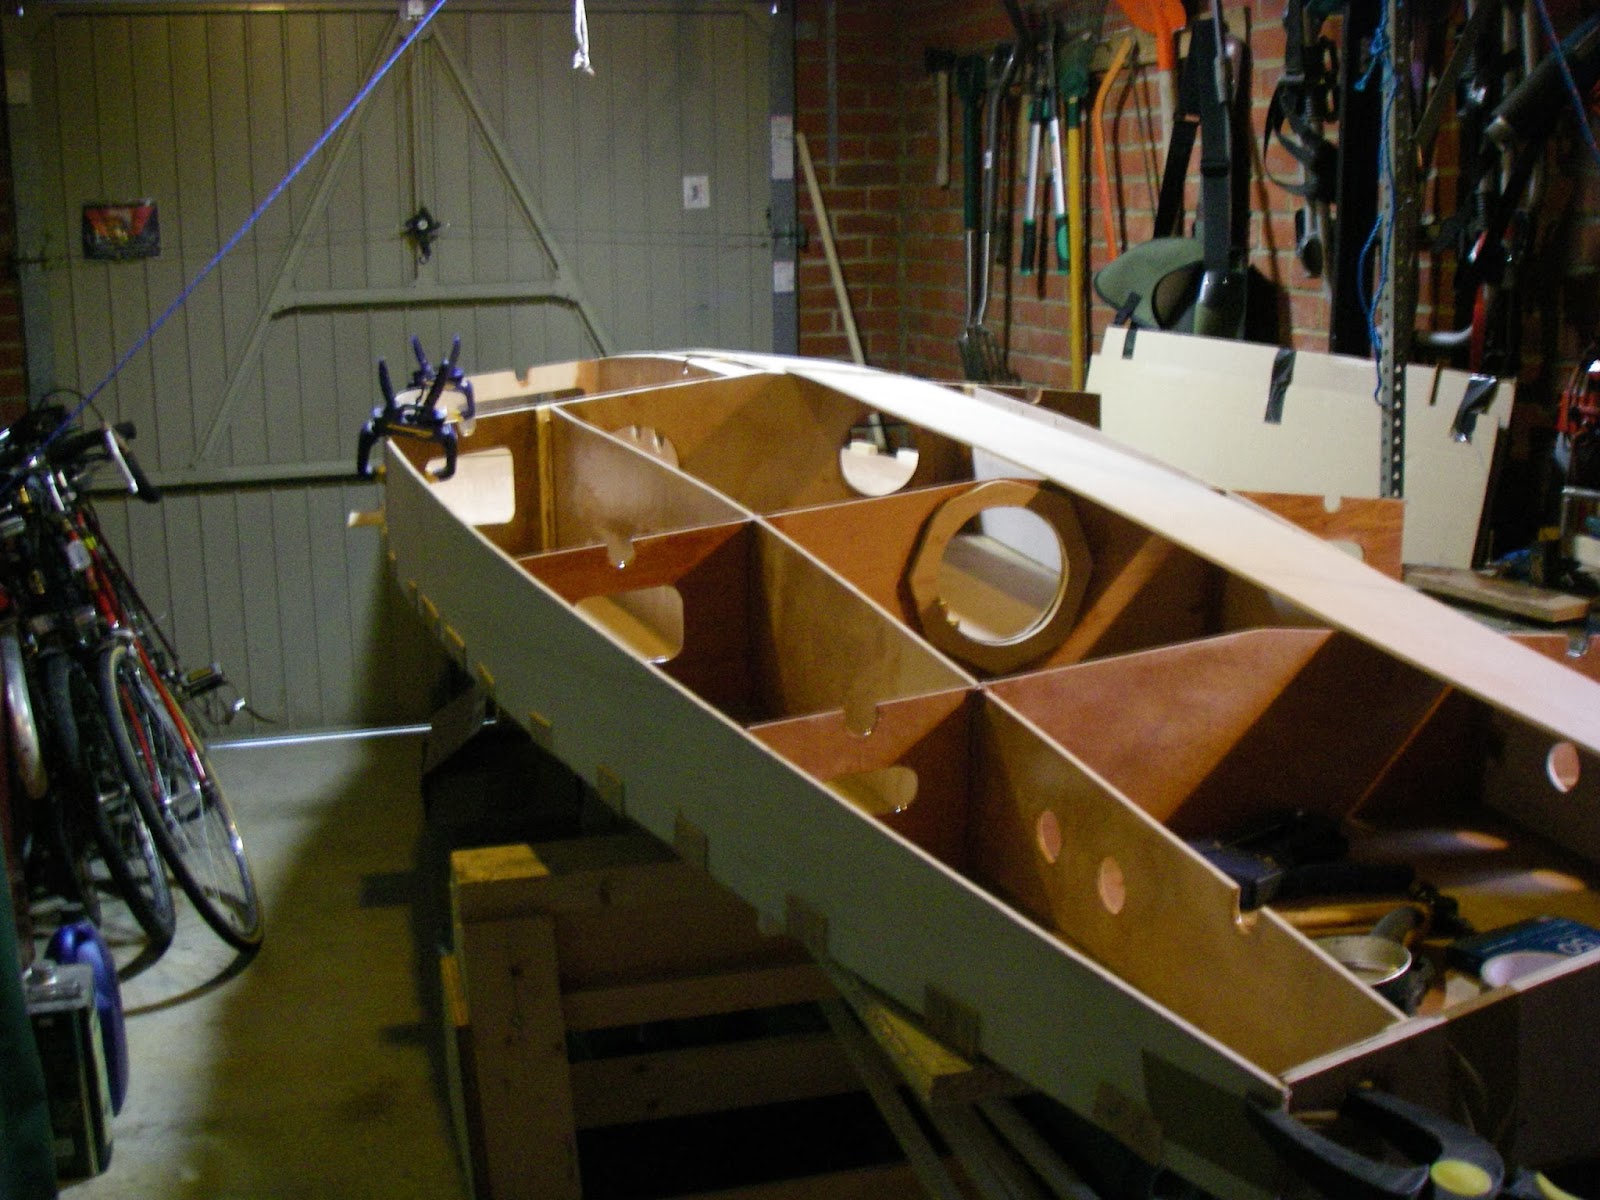
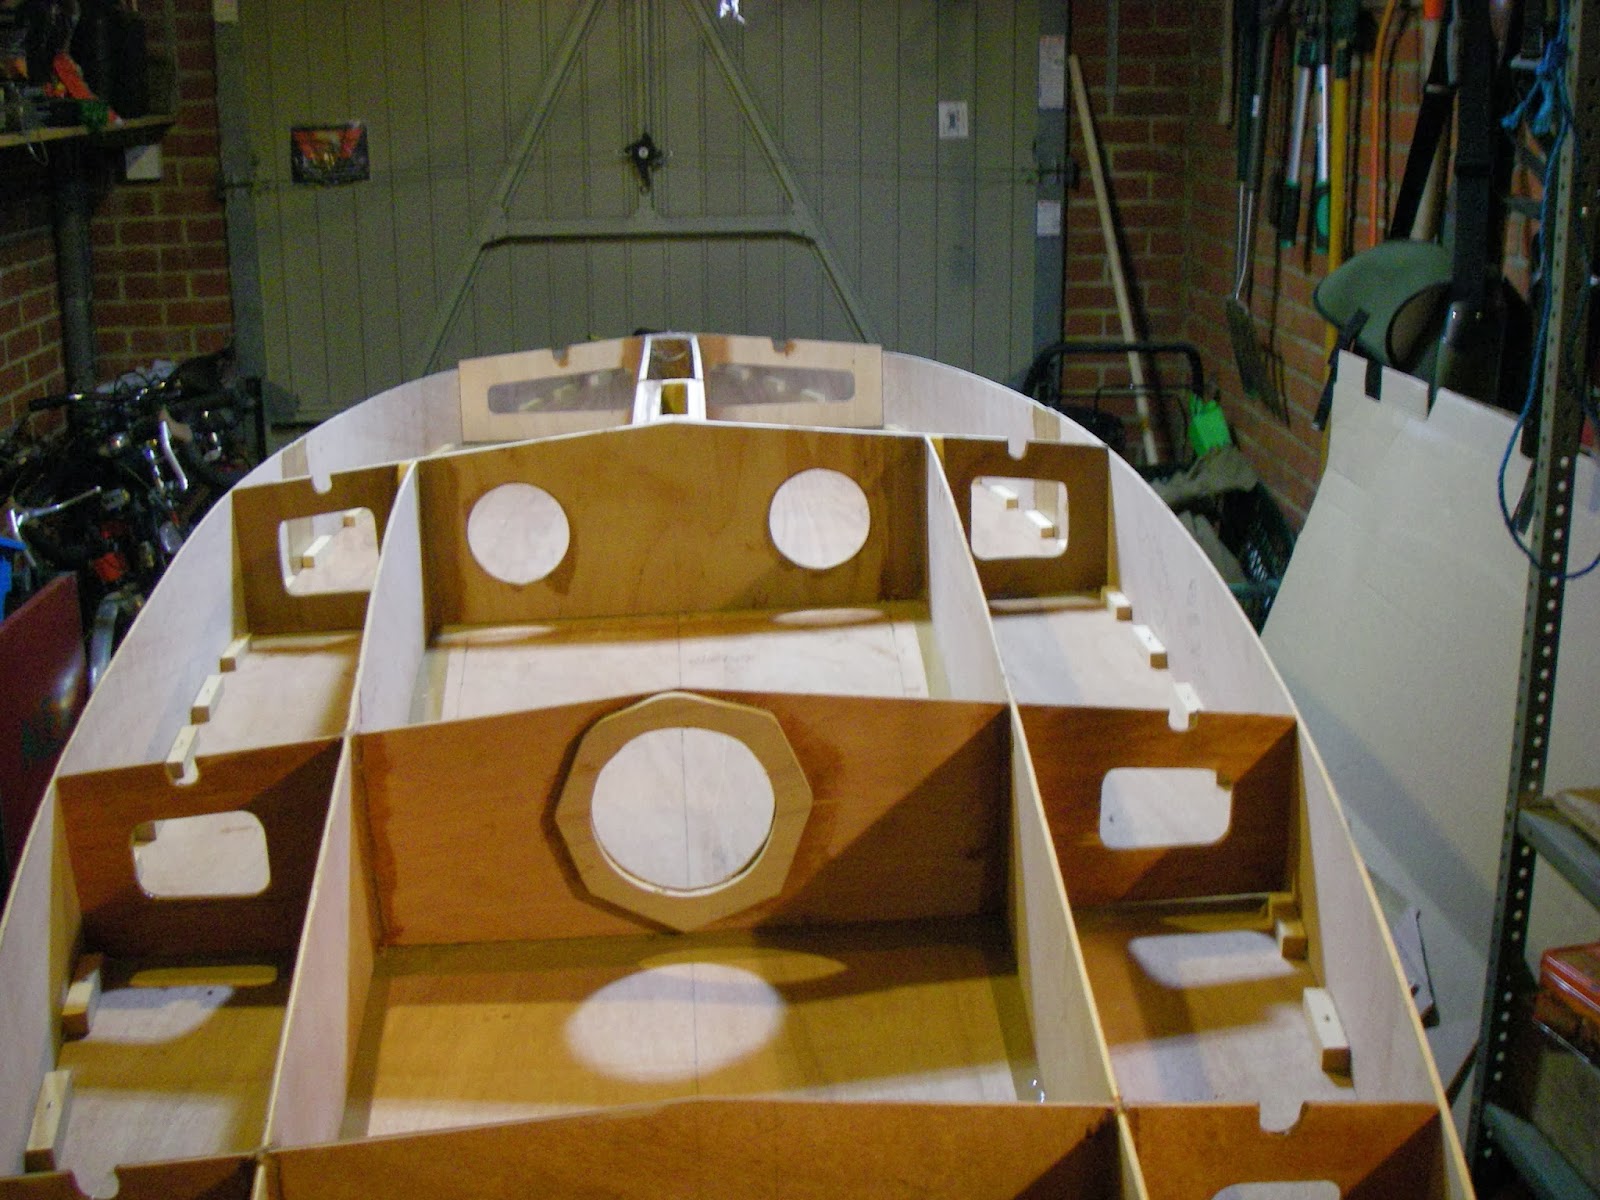
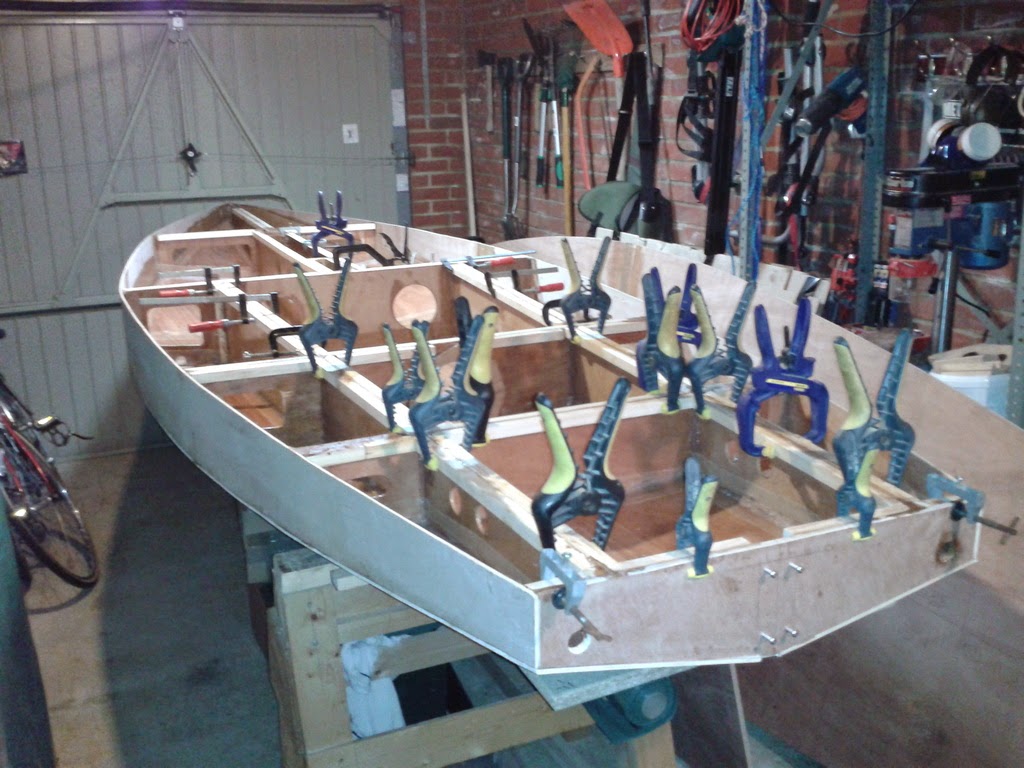
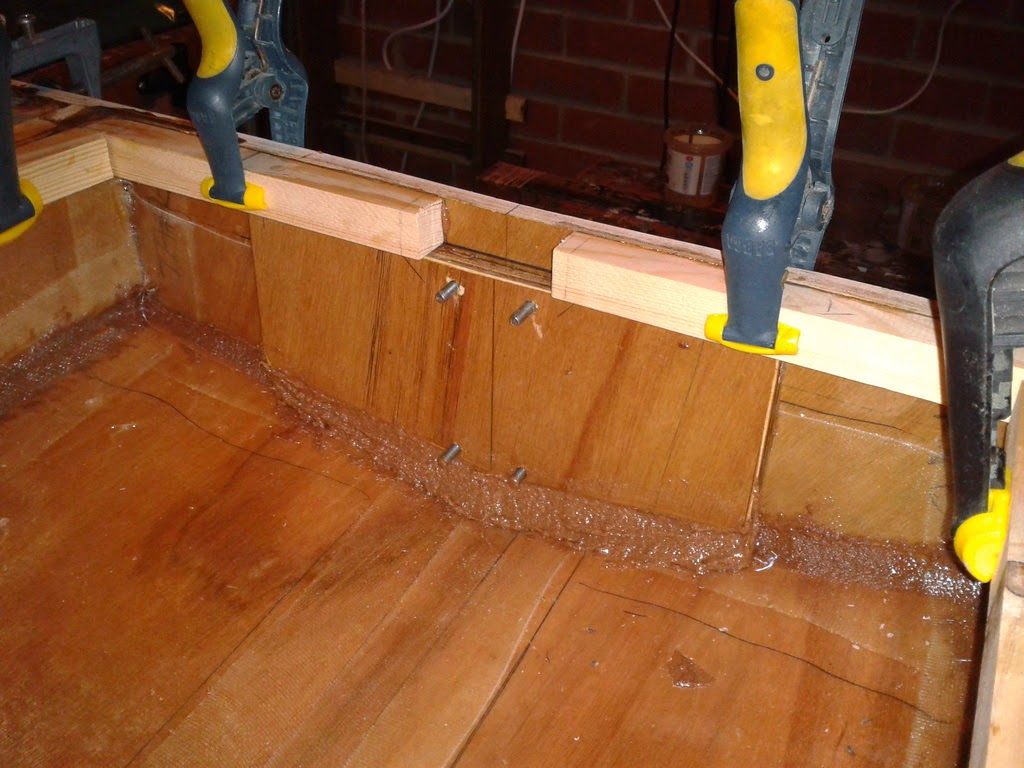
This weekend, I moved on to bulkheads A and B.
Bulkhead A is in 2 parts:
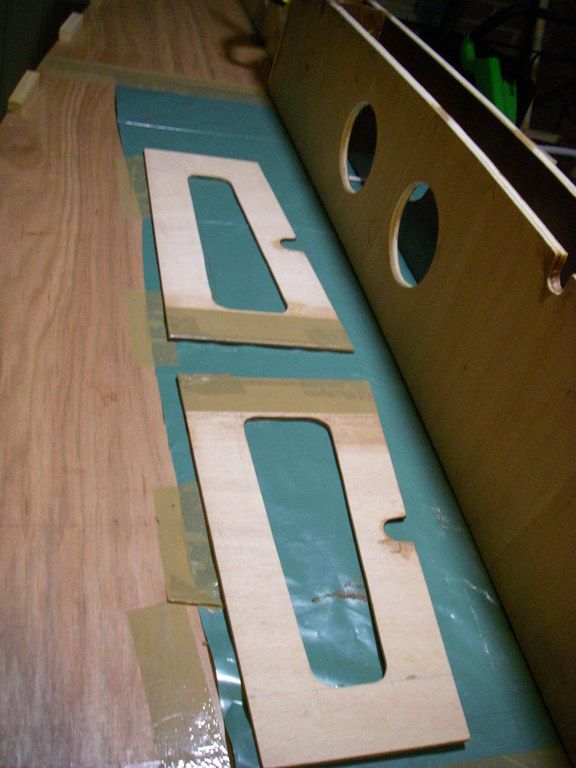
and needed some careful dry assembly and pre-setting of supporting cleats to ensure that the alignment was correct:
I then moved on to bulkhead B, which is the main load bearing cross-boat structure in the boat and forms the forward wall of the cockpit/well:
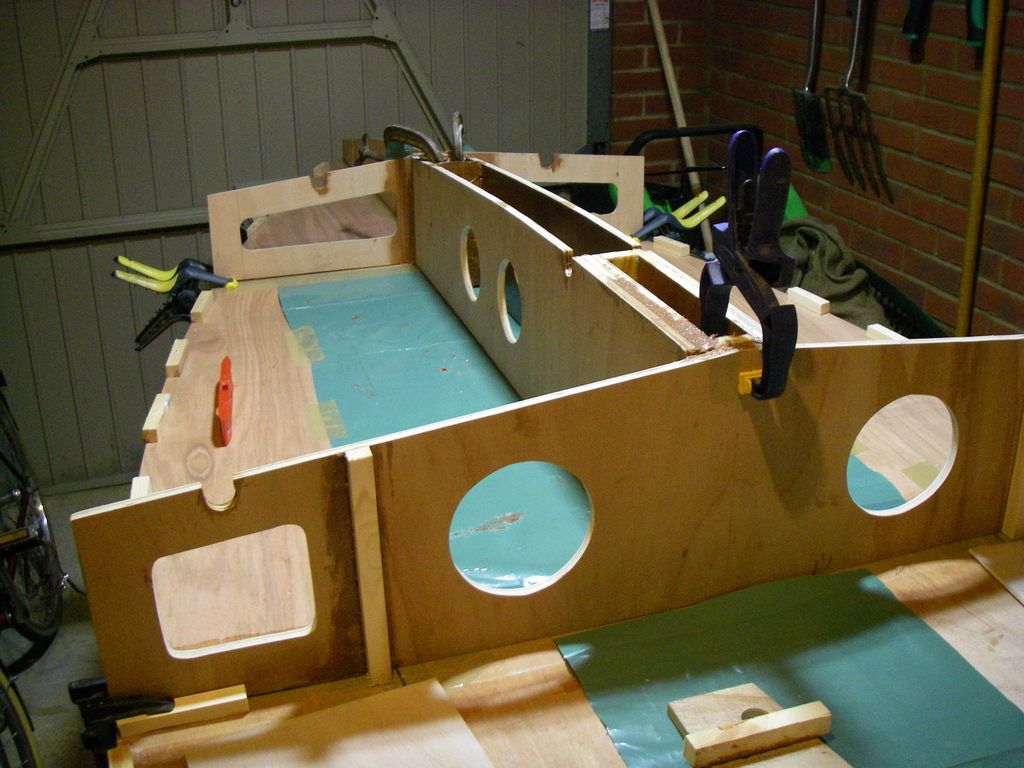
So that's the forward half of the frame complete.
Last weekend, I got the trunking that houses both the daggerboard and mast wells assembled:
(there are 19 separate components in this assembly - I used nearly that many clamps)
This is the key assembly of the whole frame and includes the bow stringer. Assembly was a three stage process needing patience as I waited for the epoxy to go off before being able to move on to the next stage.
Here's the result:
This weekend, I moved on to bulkheads A and B.
Bulkhead A is in 2 parts:
and needed some careful dry assembly and pre-setting of supporting cleats to ensure that the alignment was correct:
I then moved on to bulkhead B, which is the main load bearing cross-boat structure in the boat and forms the forward wall of the cockpit/well:
So that's the forward half of the frame complete.
-
Whameller
- Frequent Poster
- Posts: 30
- Joined: Tue Aug 23, 2011 11:08 am
- Location: United Kingdom
- Location: West Pembrokeshire, United Kingdom
- Contact:
Re: MF14 - New Build in UK
You are very kind to say so, but I've only built one small stitch & tape tender and a couple of skin on frame kayaks before this. They did teach me the value of economical use of epoxy AND of cleaning off any surplus, drips, etc while still uncured. Rasping & sanding back cured epoxy if very hard labour indeed and best avoided wherever possible !Shamrock Kid wrote:Very nice clean work you can tell you've done this a time or two. Can't wait to see it come together so I can pick up some pointers.

-
Whameller
- Frequent Poster
- Posts: 30
- Joined: Tue Aug 23, 2011 11:08 am
- Location: United Kingdom
- Location: West Pembrokeshire, United Kingdom
- Contact:
Re: MF14 - New Build in UK
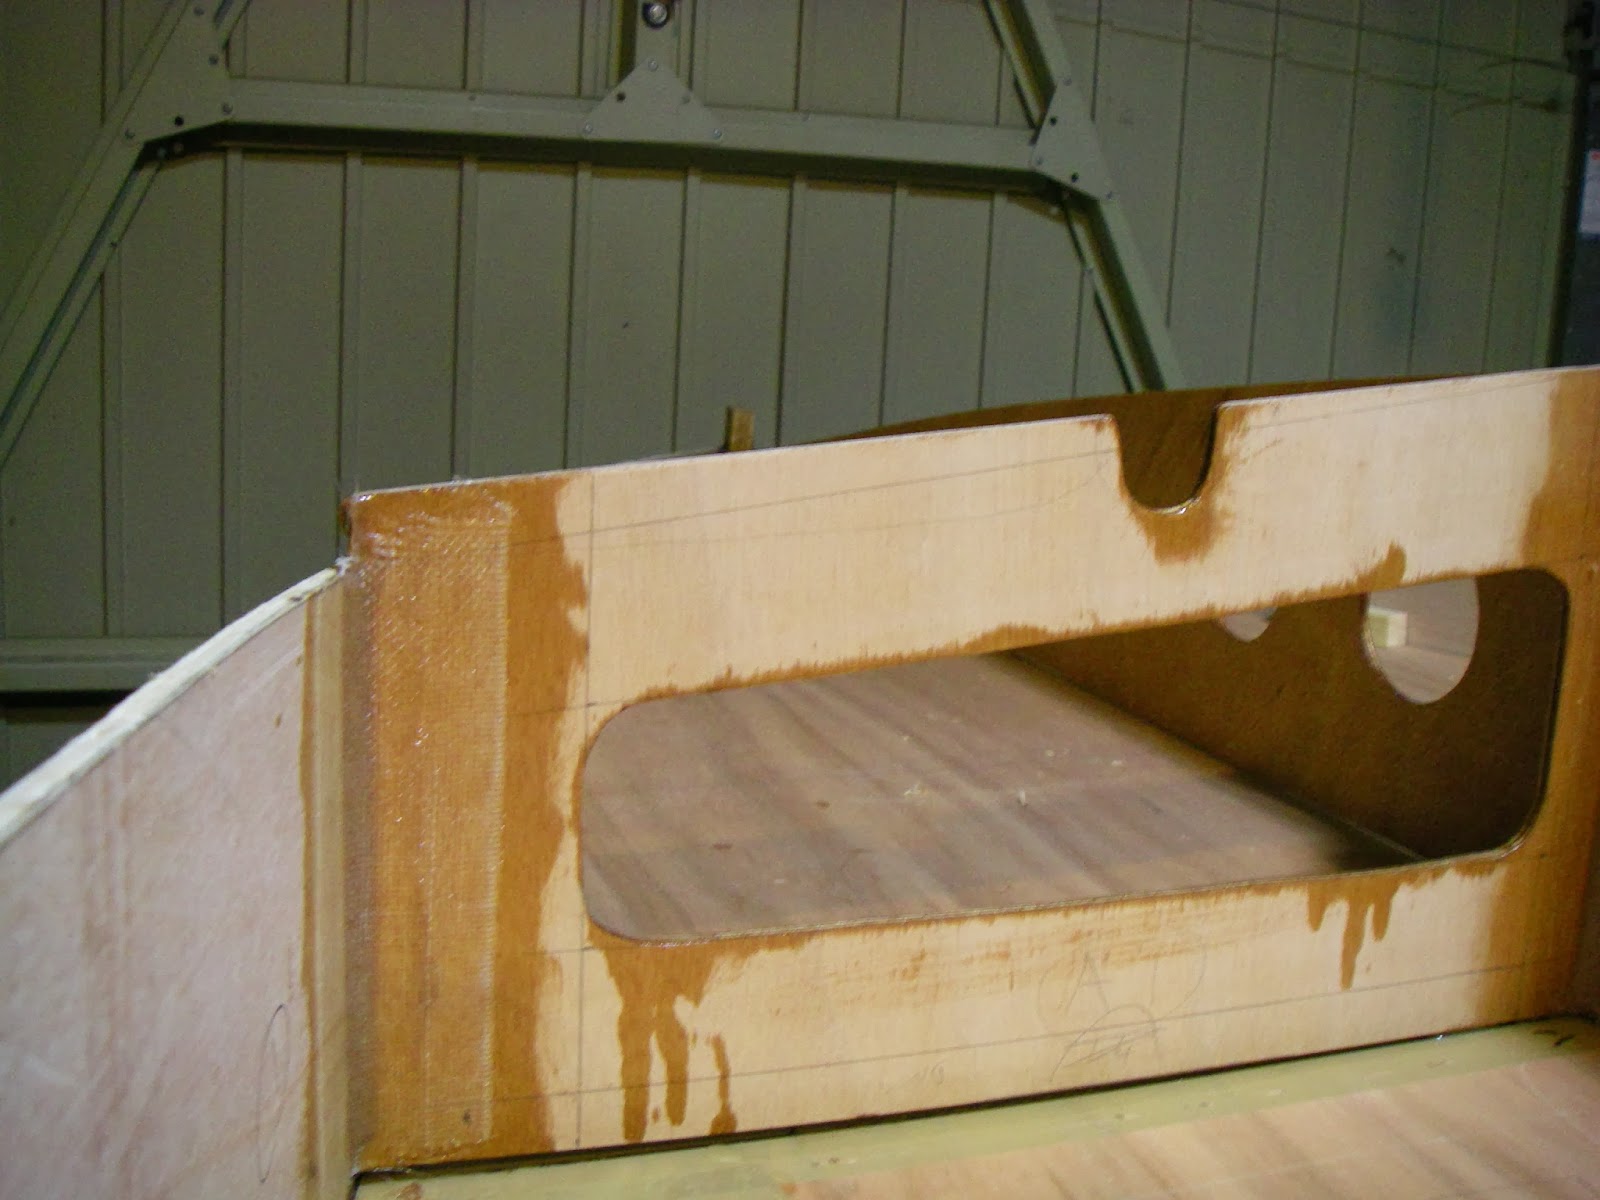
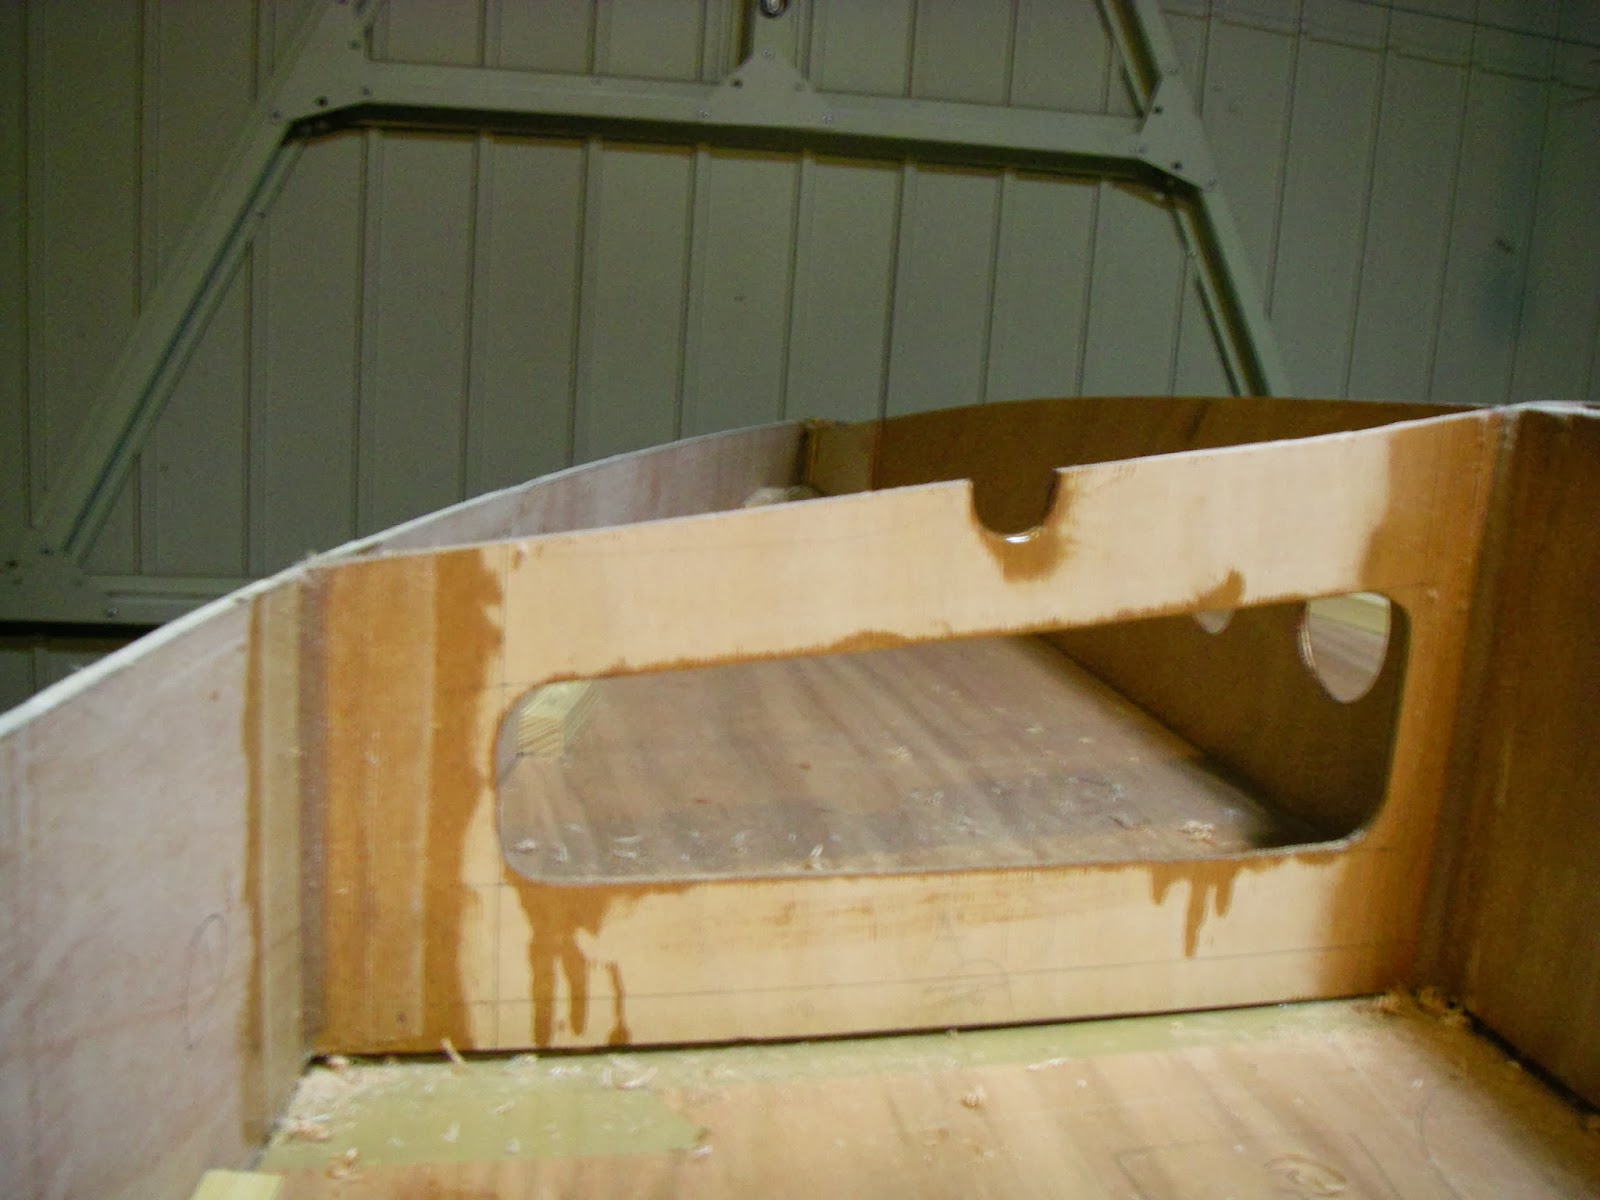
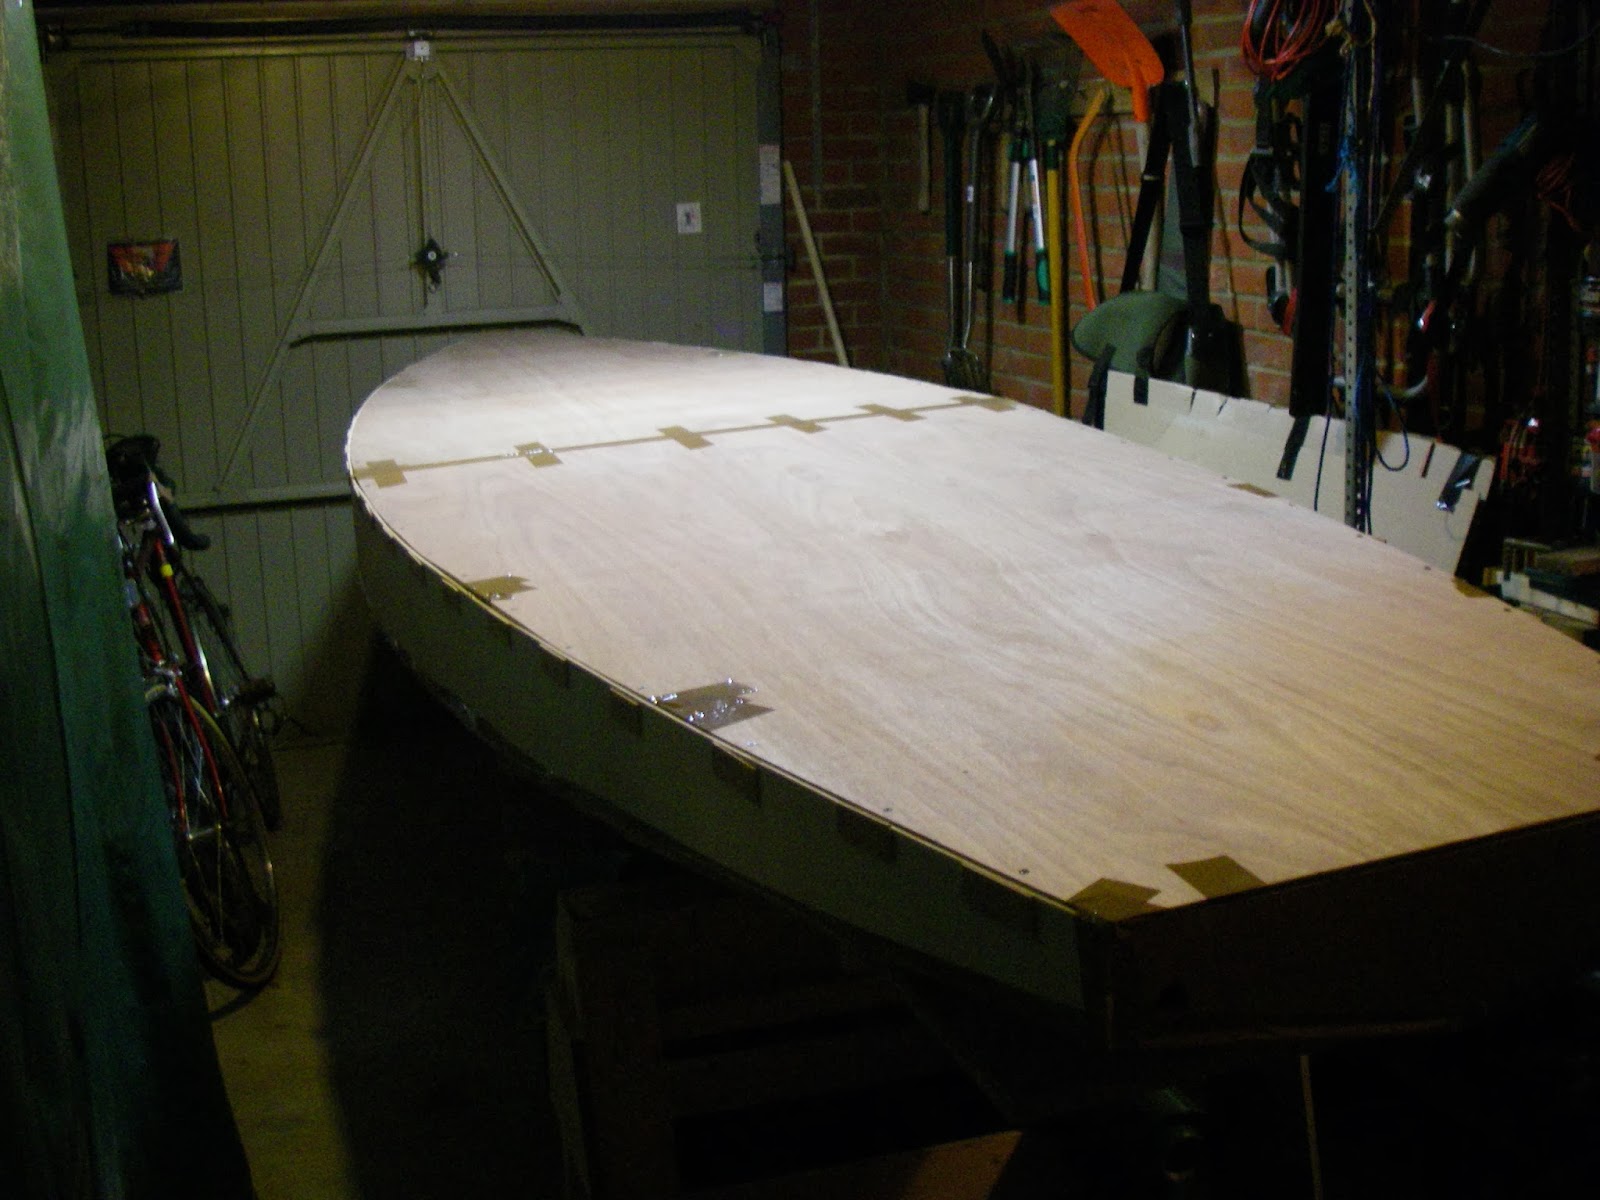
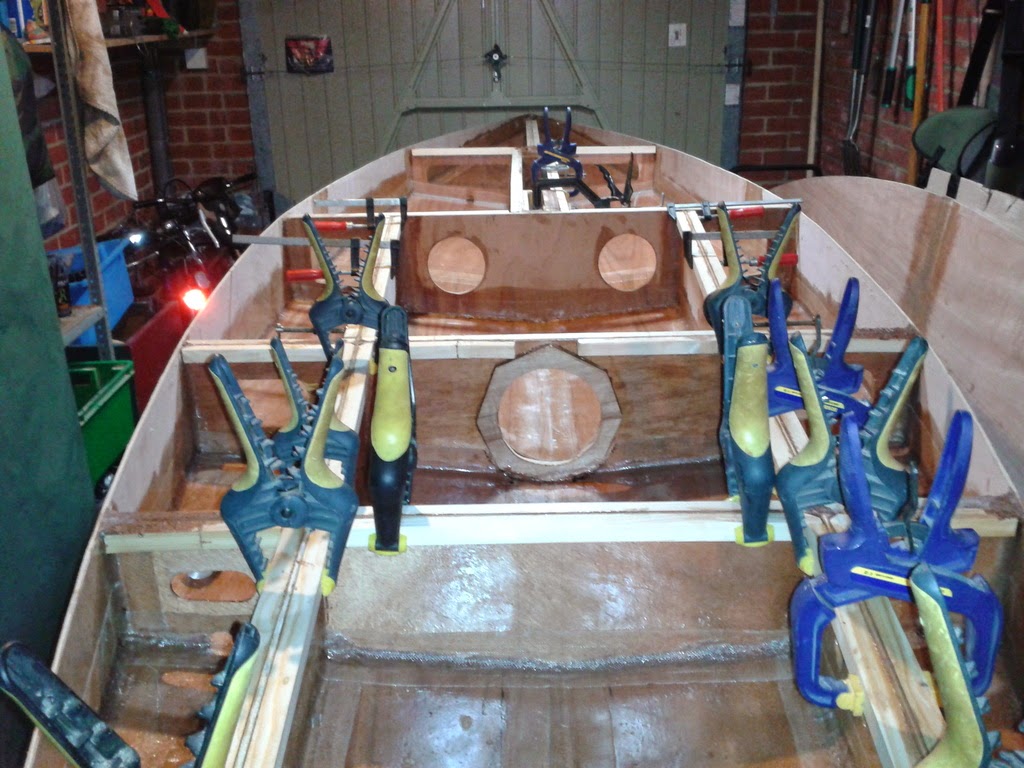
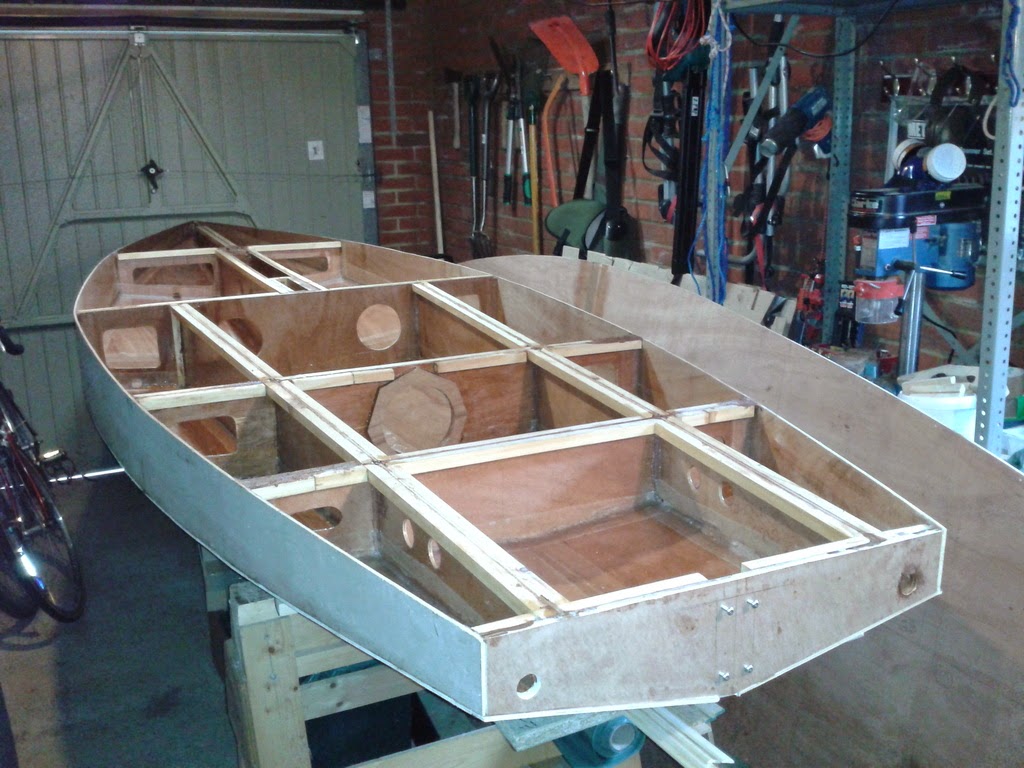
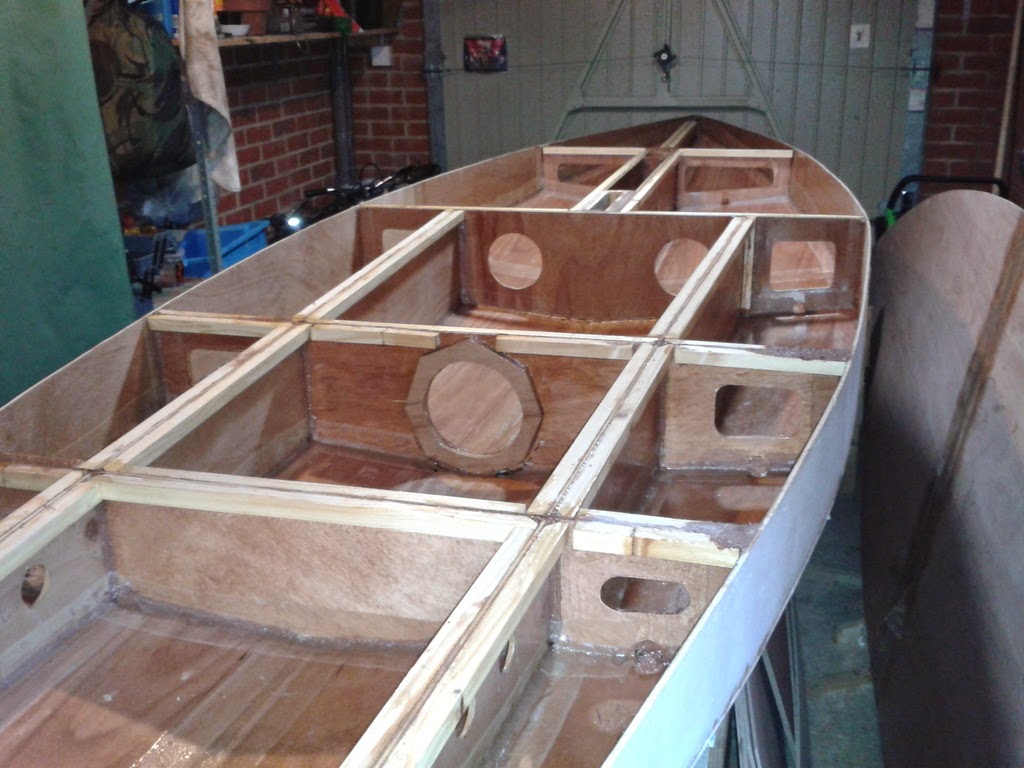
The frame is now complete:
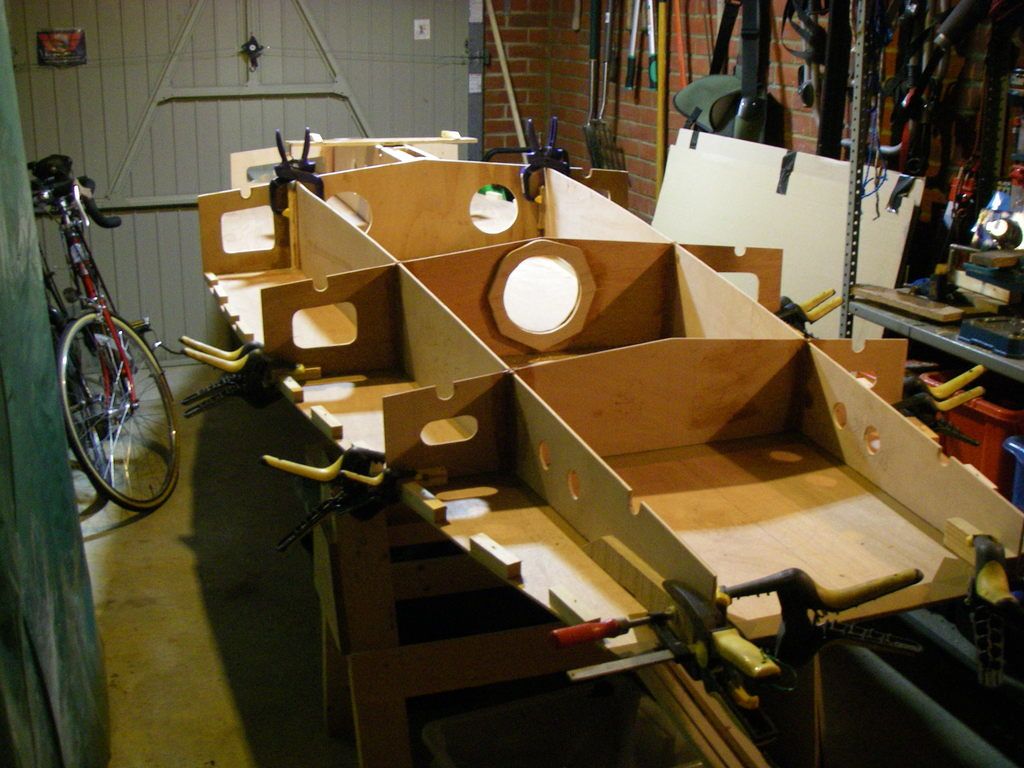
Bulkhead C has a doubler to give some meat for the screws when I come to fit the watertight hatch:
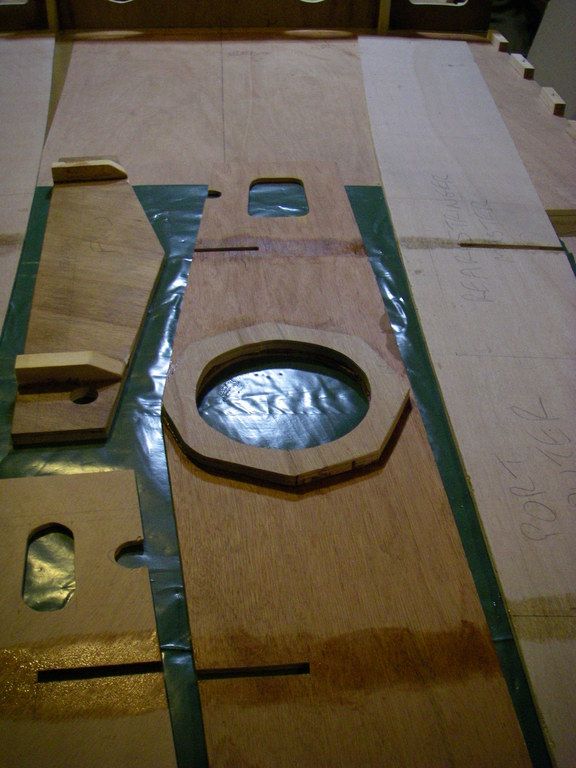
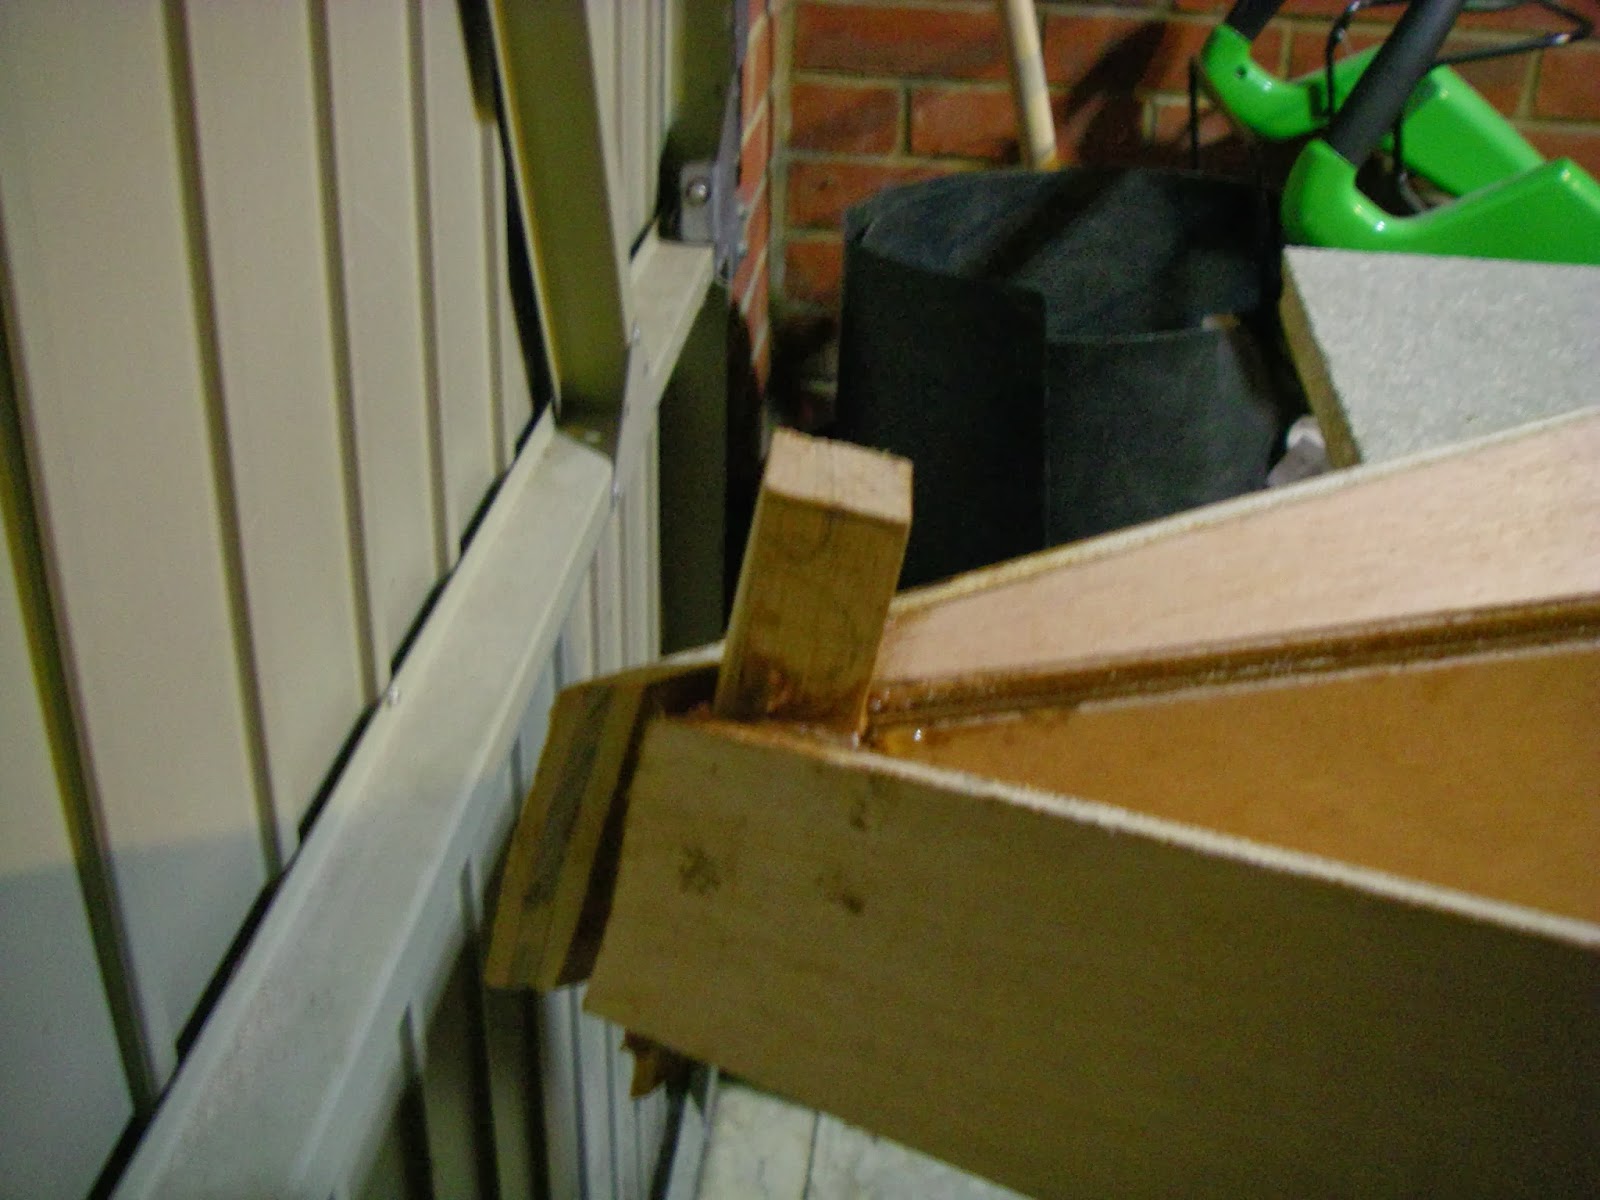
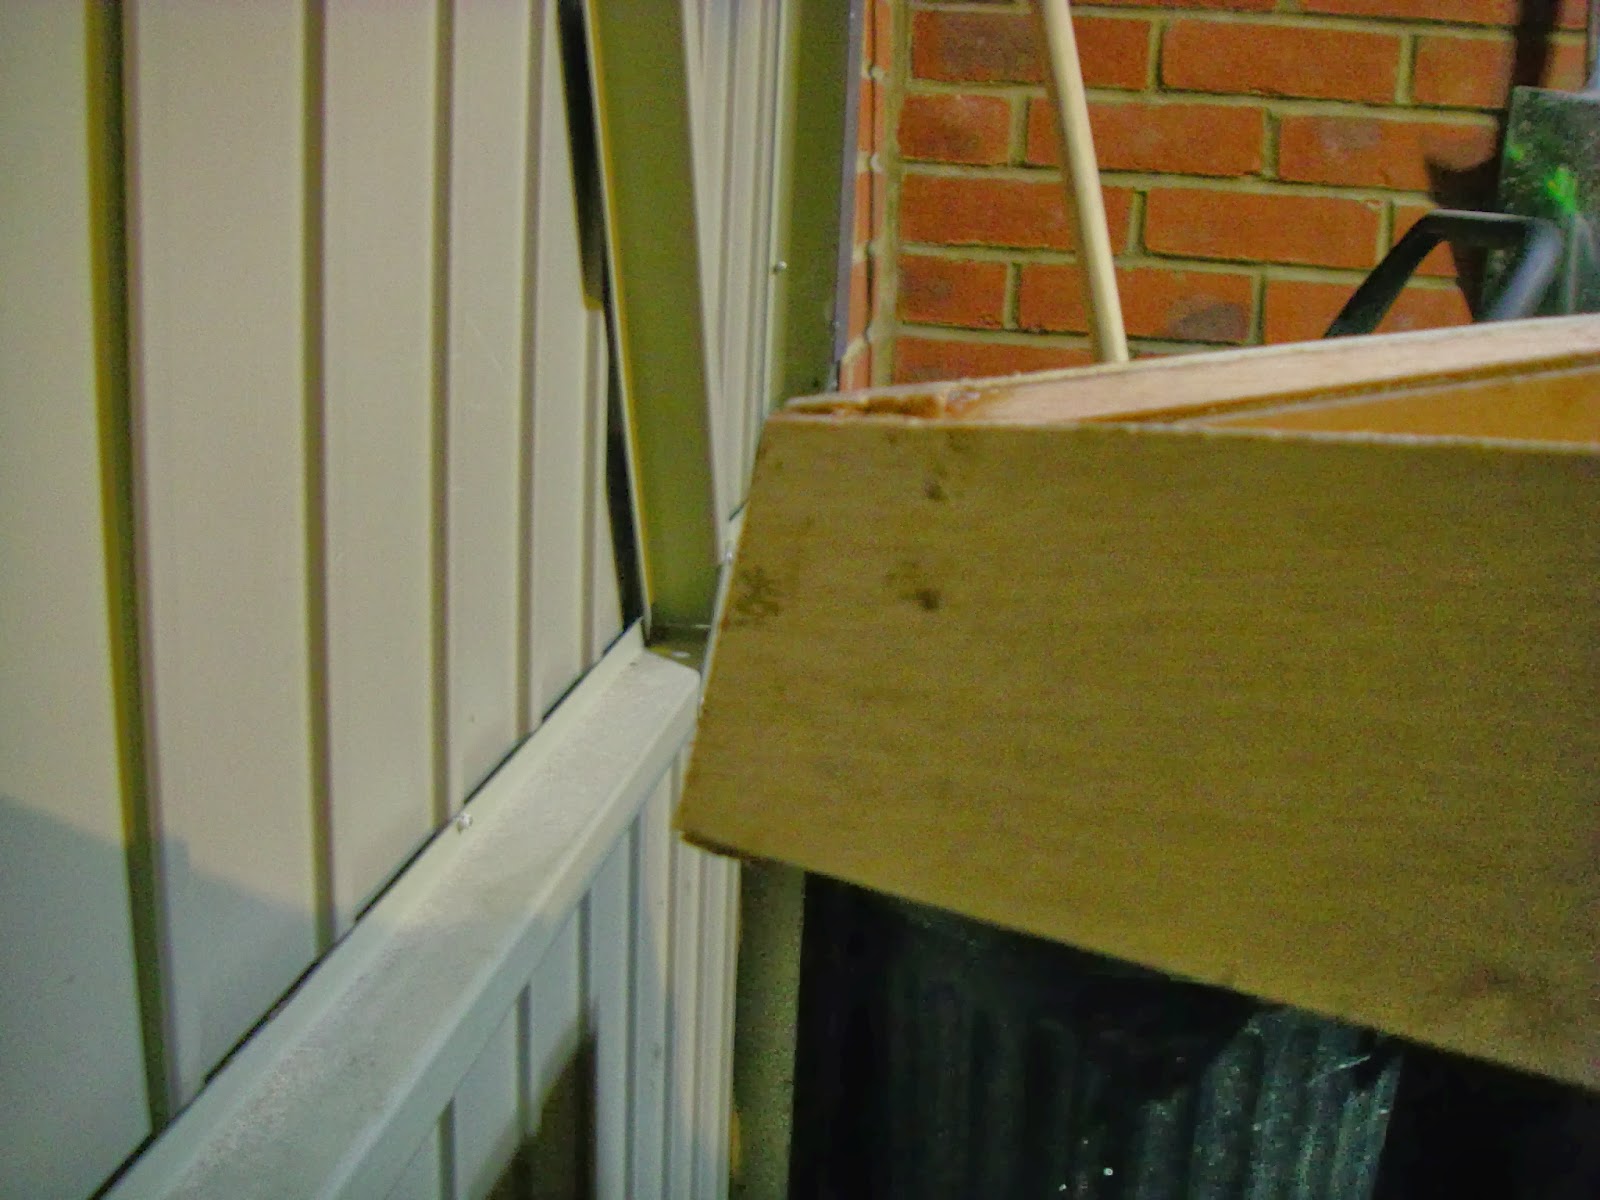
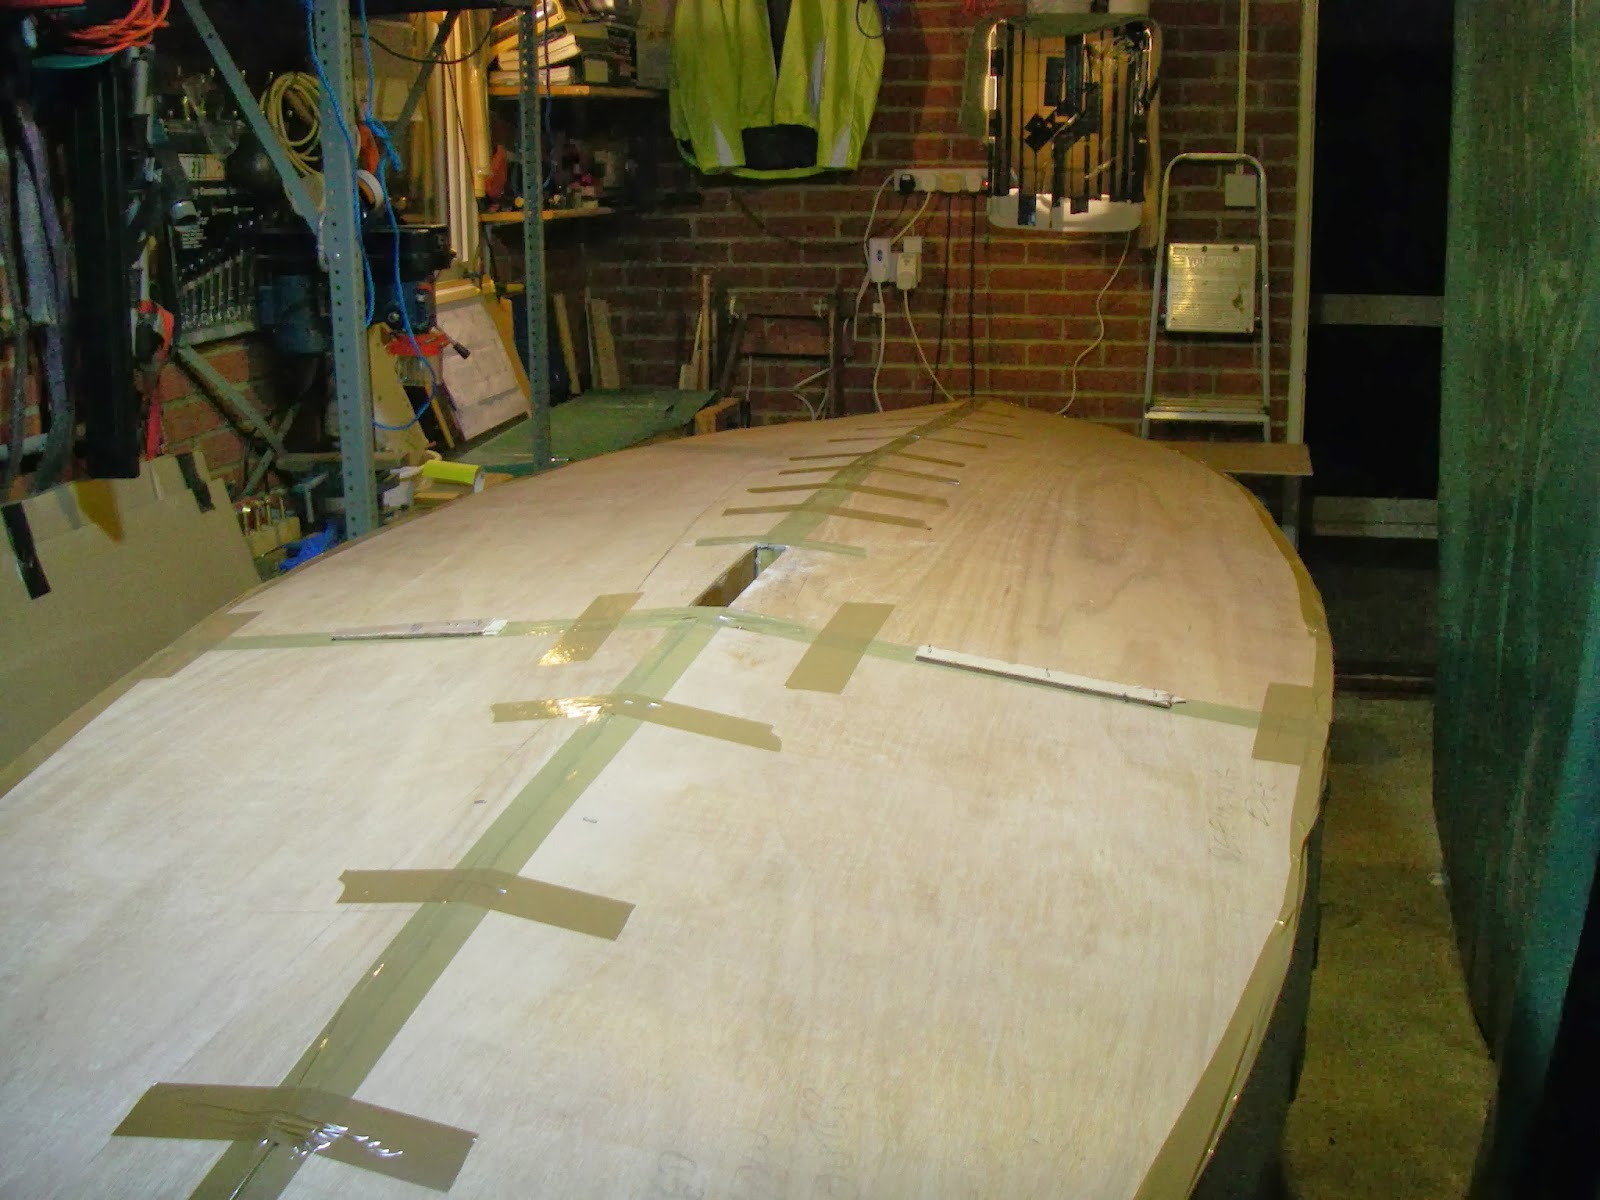
And I need to move on to marking out the side and bottom panels. The only place I have space is up:
A couple of long battens, 2 slings and 4 carabiners from my climbing days, some parcel tape and up she goes. This gives me space to mark out on ply sheets that have been pre-cut in half lengthways - careful study of the nesting diagram allowed me to solve a storage problem earlier.

I've now got half the 4 bottom panels marked and cut out (thanks to a brief break in the appalling weather we're having in the UK this winter allowing to get outside to cut panels) and will do the other 2 tomorrow; the weather forecast is dry.
Bulkhead C has a doubler to give some meat for the screws when I come to fit the watertight hatch:
And I need to move on to marking out the side and bottom panels. The only place I have space is up:
A couple of long battens, 2 slings and 4 carabiners from my climbing days, some parcel tape and up she goes. This gives me space to mark out on ply sheets that have been pre-cut in half lengthways - careful study of the nesting diagram allowed me to solve a storage problem earlier.
I've now got half the 4 bottom panels marked and cut out (thanks to a brief break in the appalling weather we're having in the UK this winter allowing to get outside to cut panels) and will do the other 2 tomorrow; the weather forecast is dry.
-
Cracker Larry

- * Bateau Builder - Expert *

- Posts: 22491
- Joined: Fri Mar 11, 2005 3:39 pm
- Location: Savannah, GA
Re: MF14 - New Build in UK
Nice work in such a tight space. Very cool  This ain't your first rodeo is it?
Completed GF12 X 2, GF16, OD18, FS18, GF5, GF18, CL6
"Ships are the nearest things to dreams that hands have ever made." -Robert N. Rose
-
Whameller
- Frequent Poster
- Posts: 30
- Joined: Tue Aug 23, 2011 11:08 am
- Location: United Kingdom
- Location: West Pembrokeshire, United Kingdom
- Contact:
Re: MF14 - New Build in UK
Thanks Larry. This is the first boat or kayak of this size or complexity that I've attempted. I did build a kit car nearly 30 years ago; I find that the same methodical approach (and RT*I !) works. You've also got to know when to stop work, walk away and come back another day; it's far easier to make mistakes when tired & frustrated !Cracker Larry wrote:Nice work in such a tight space. Very cool
I'm building my skills up to build a larger retirement boat in a couple of years time.
-
Cracker Larry
- * Bateau Builder - Expert *
- Posts: 22491
- Joined: Fri Mar 11, 2005 3:39 pm
- Location: Savannah, GA
Re: MF14 - New Build in UK
Very trueYou've also got to know when to stop work, walk away and come back another day; it's far easier to make mistakes when tired & frustrated !
Completed GF12 X 2, GF16, OD18, FS18, GF5, GF18, CL6
"Ships are the nearest things to dreams that hands have ever made." -Robert N. Rose
-
Whameller
- Frequent Poster
- Posts: 30
- Joined: Tue Aug 23, 2011 11:08 am
- Location: United Kingdom
- Location: West Pembrokeshire, United Kingdom
- Contact:
Re: MF14 - New Build in UK
It's been a while .....
since I last posted but I've managed to make a fair bit of progress on the Moonfish build.
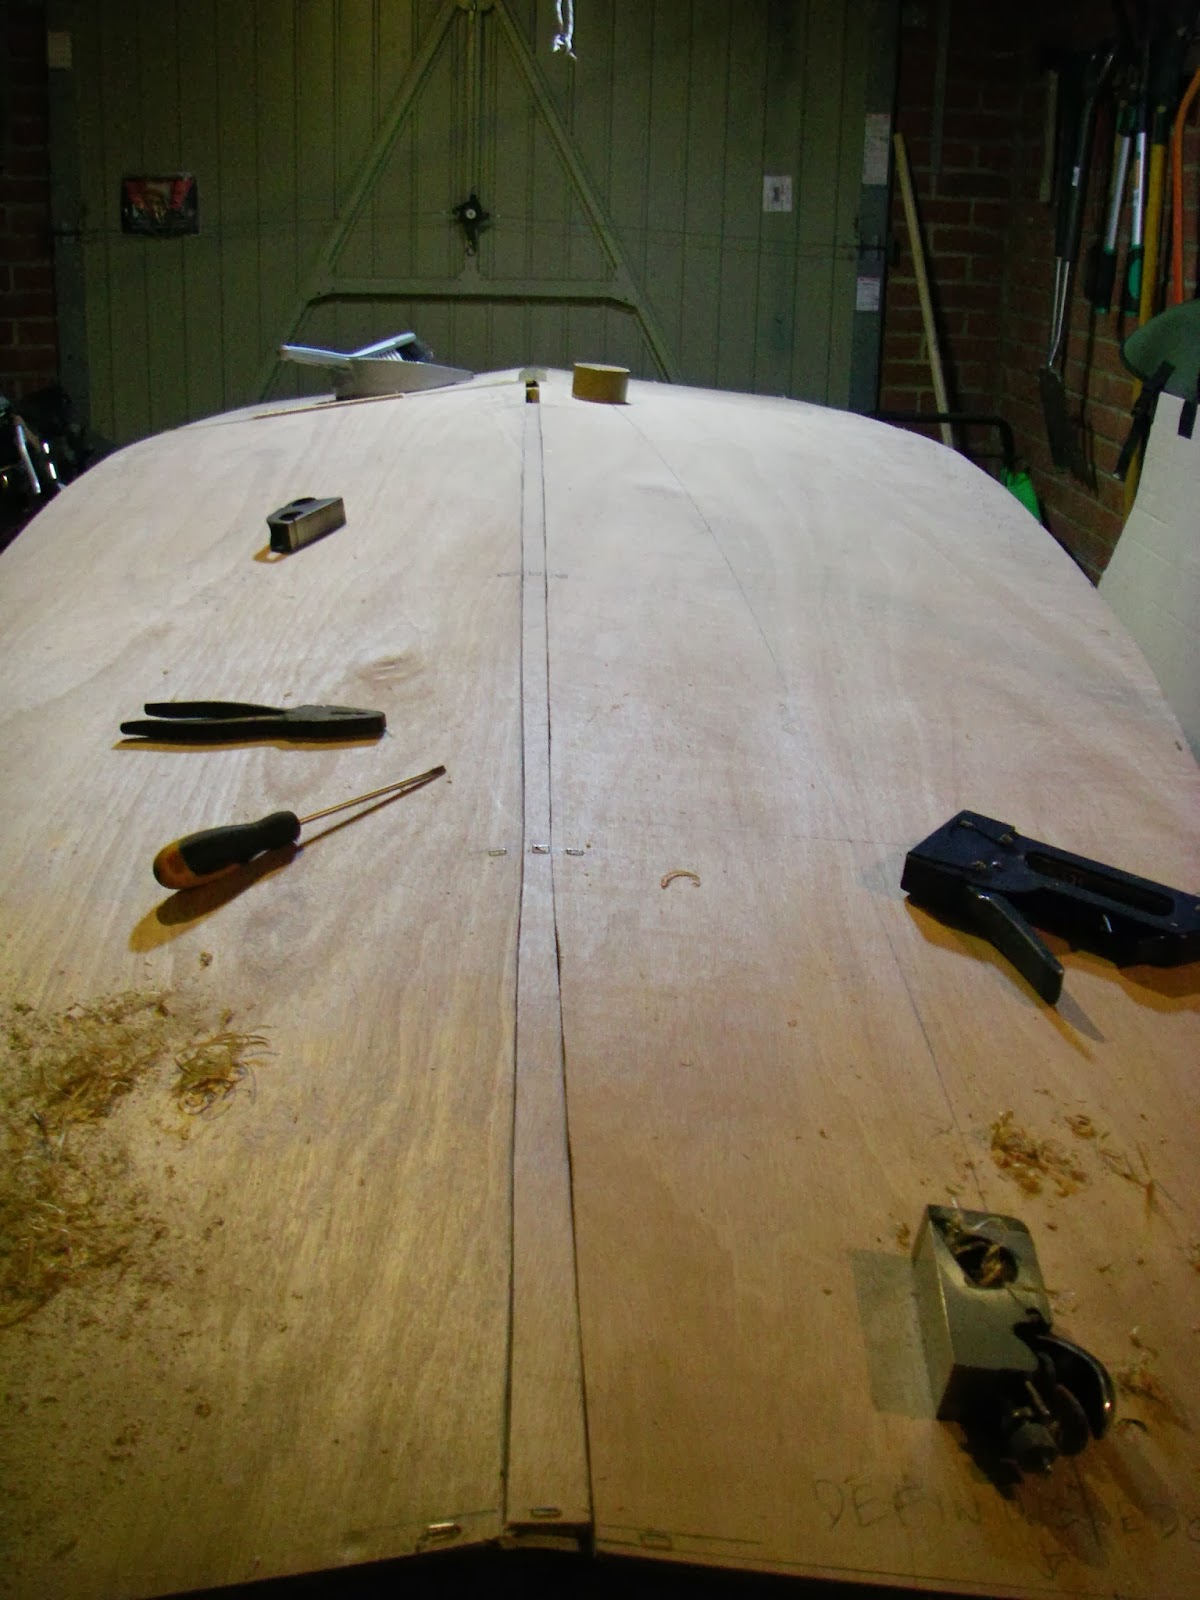
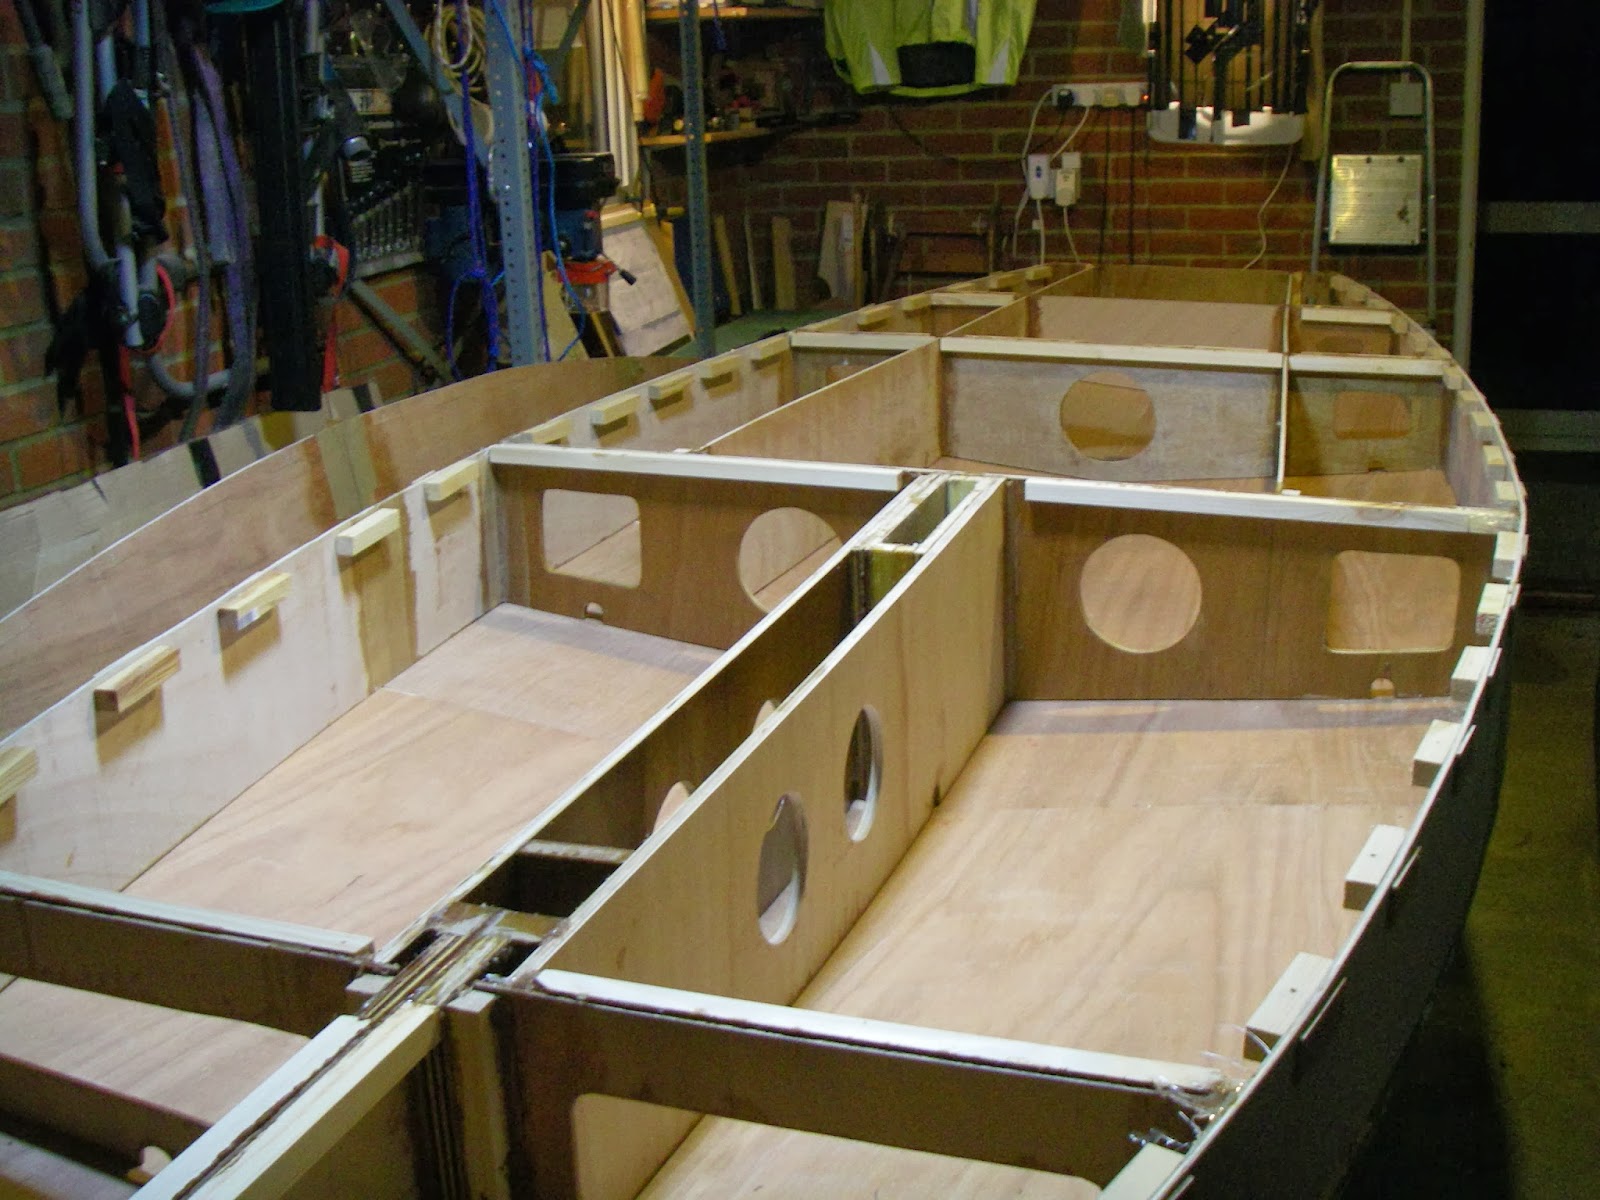
First I got the side panels tacked on with staples (through thin ply pads to make extraction easier):
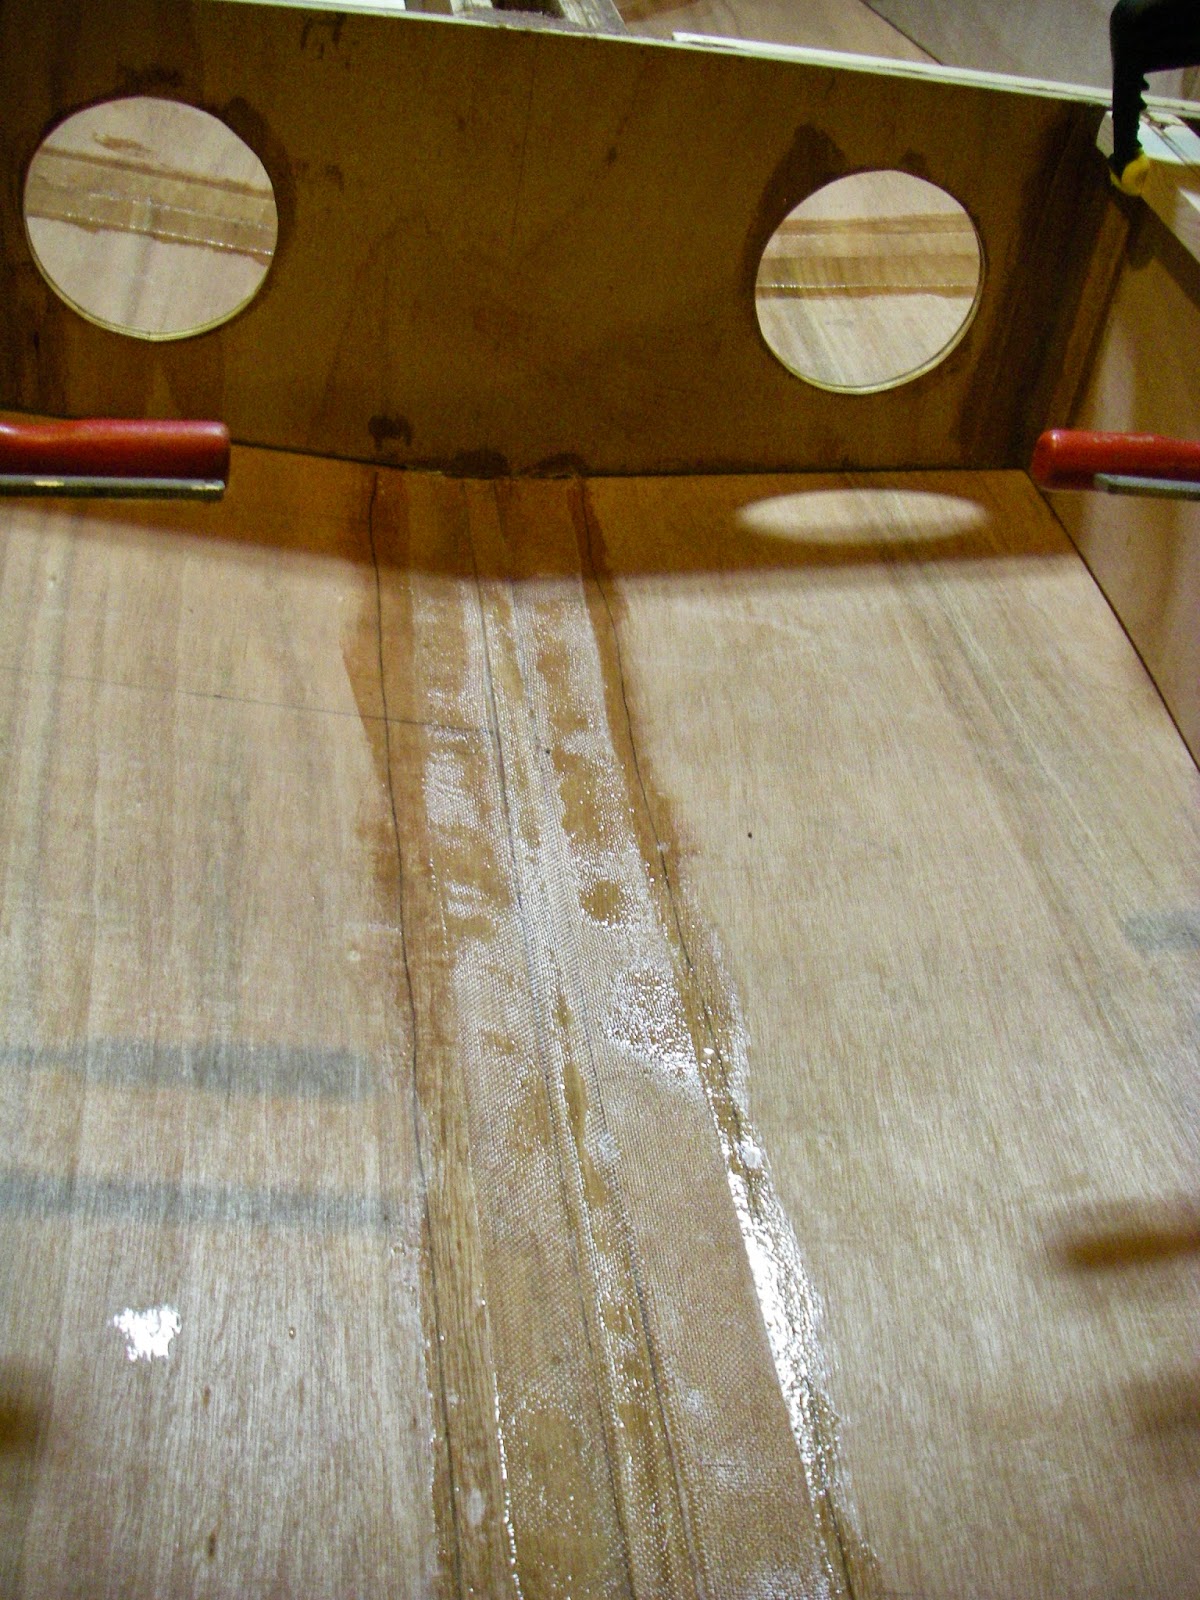
And then filleted and epoxy taped both sides of each bulkhead/side panel joint. I then realised that I had an issue with the height of both sides of bulkhead A:
which was solved by cutting and planing them down to fit:
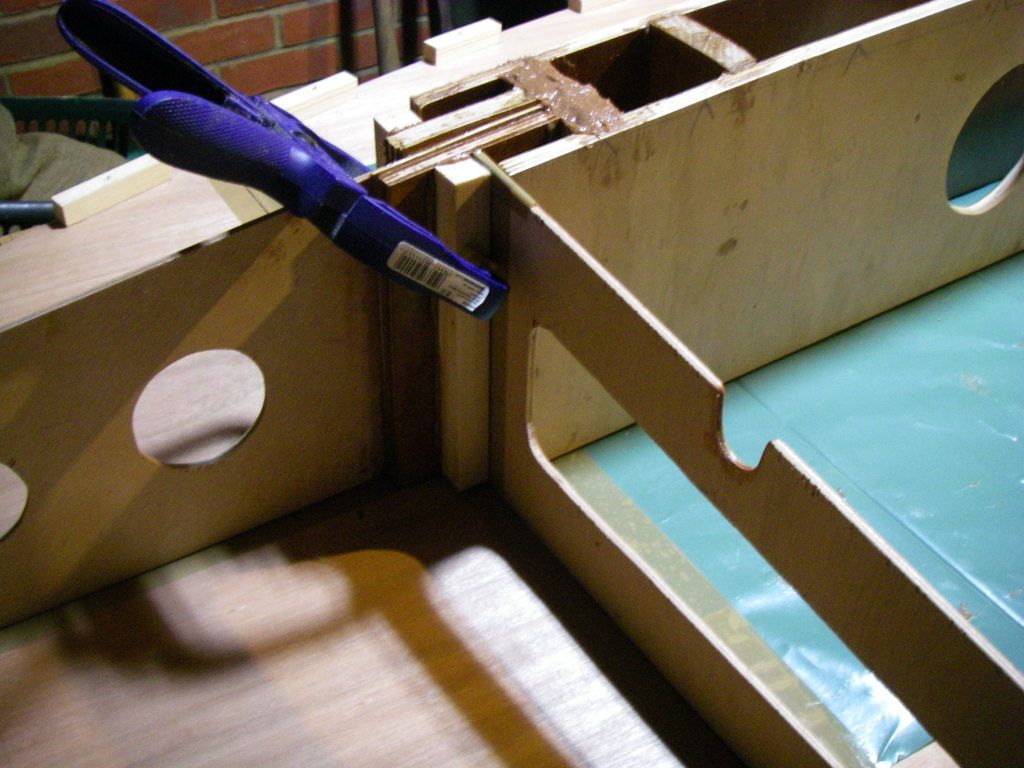
Where the side panels meet at the bow, I put in a piece of oak forward of the frame doubler to add a bit of resilience:
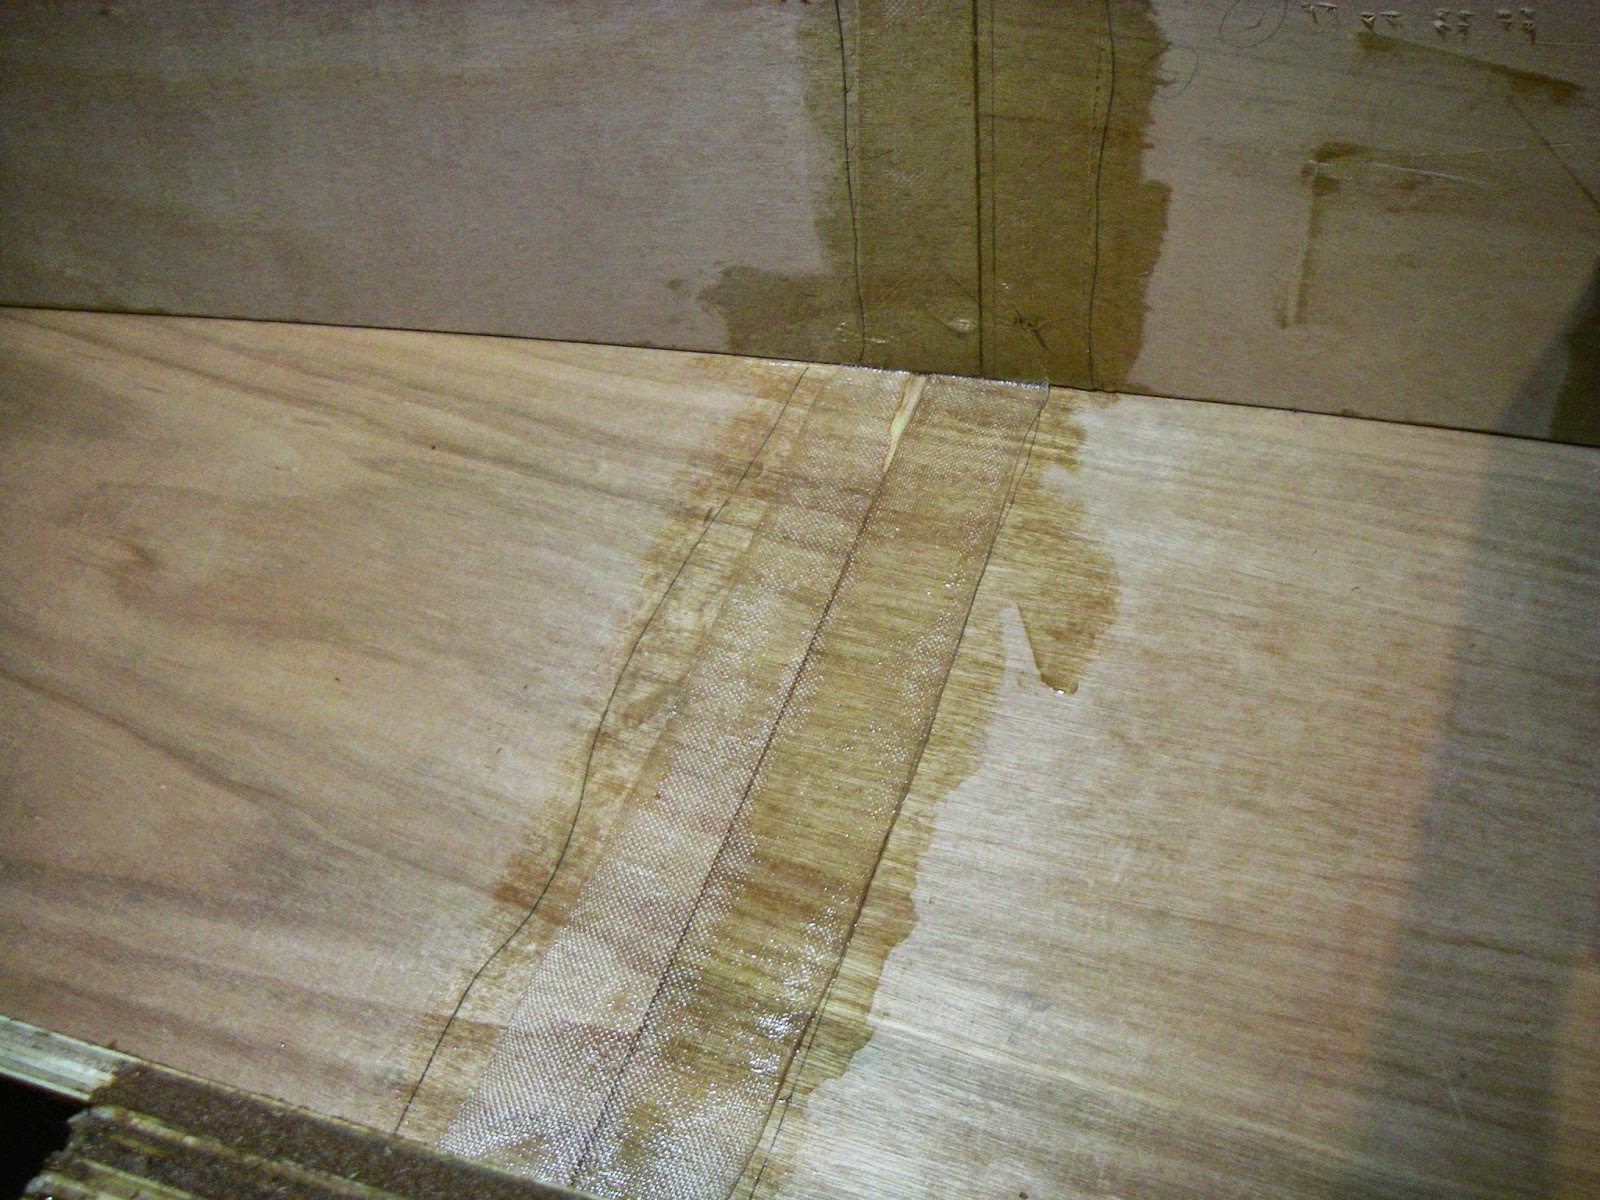
I had already pre-cut the four bottom panels, which now had a trial fit. No problems with the bow pair, but there was an issue with the after pair:
I decided to make a fillet for this gap. The first step was to mark out a rough template onto a length of paper (fax roll):
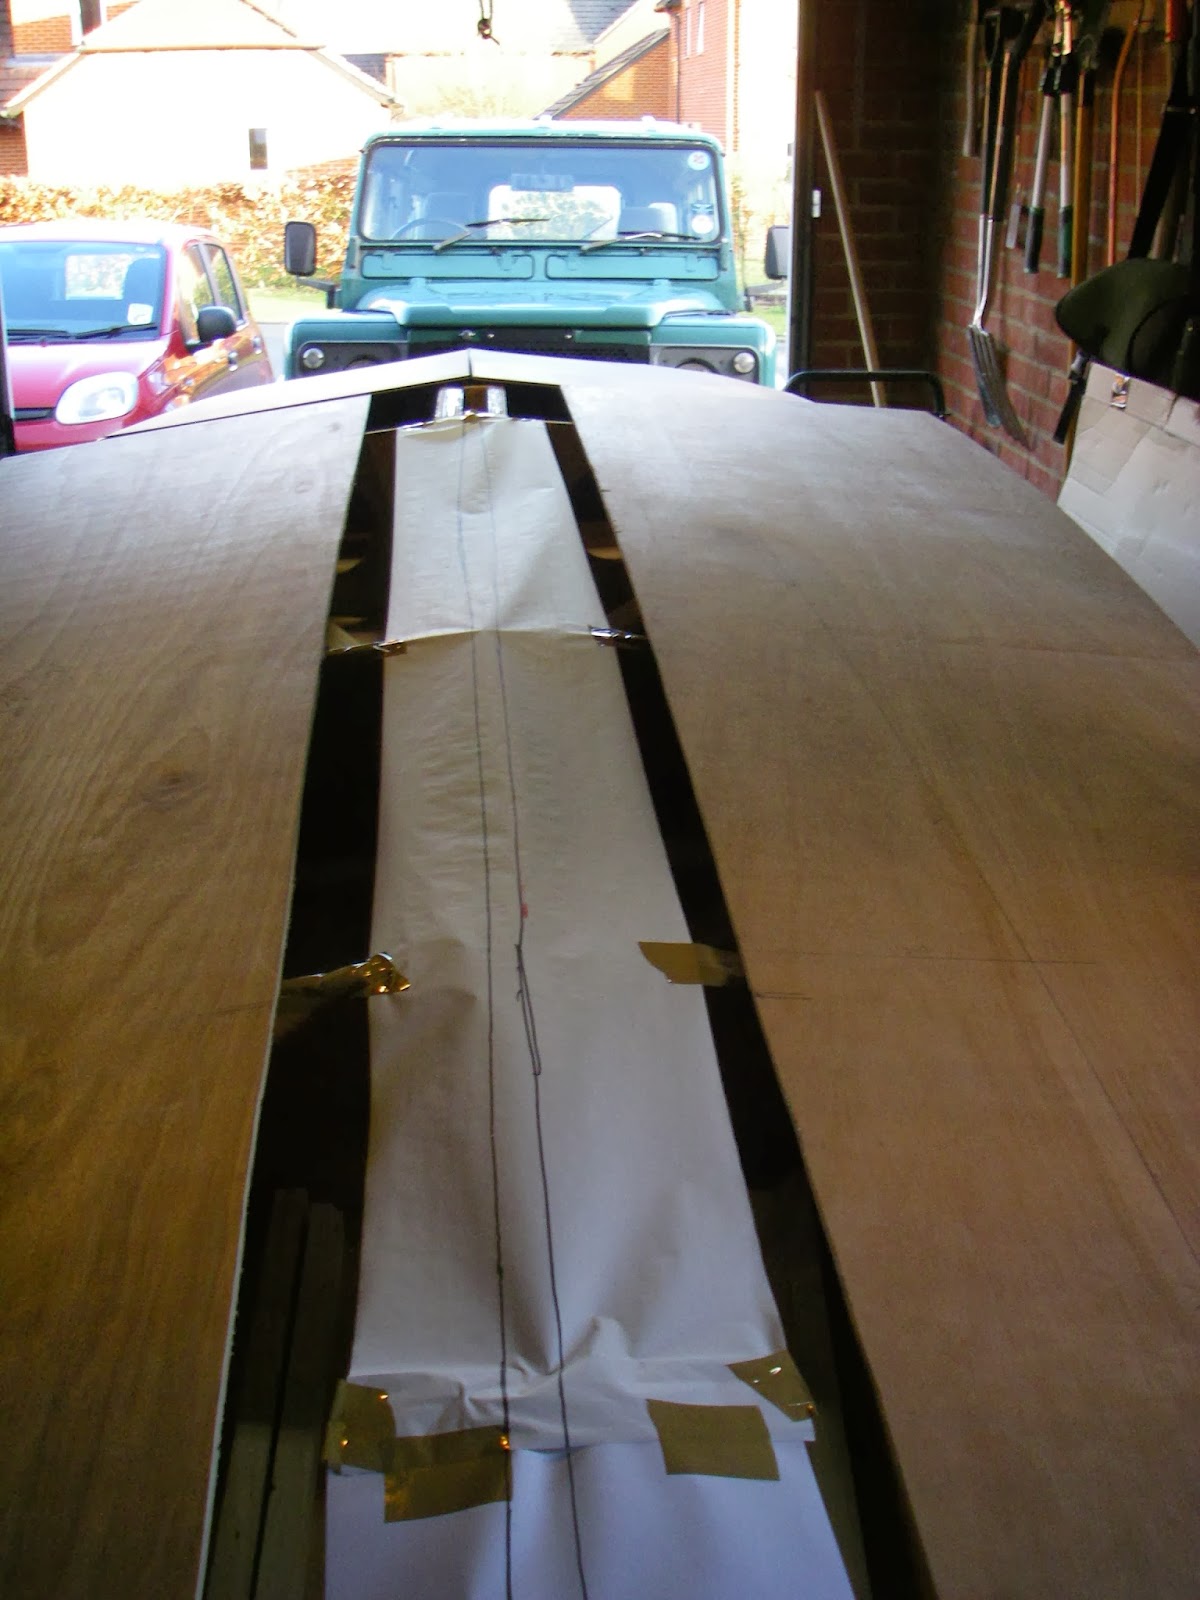
Once I had an oversized fillet cut from ply with the jigsaw, I then refitted the panels and took measurements of the width at 10cm (4") intervals, marked them onto the fillet and cut again with a Japanese hand saw. It was then a question of gradually planing it to fit until I had this:
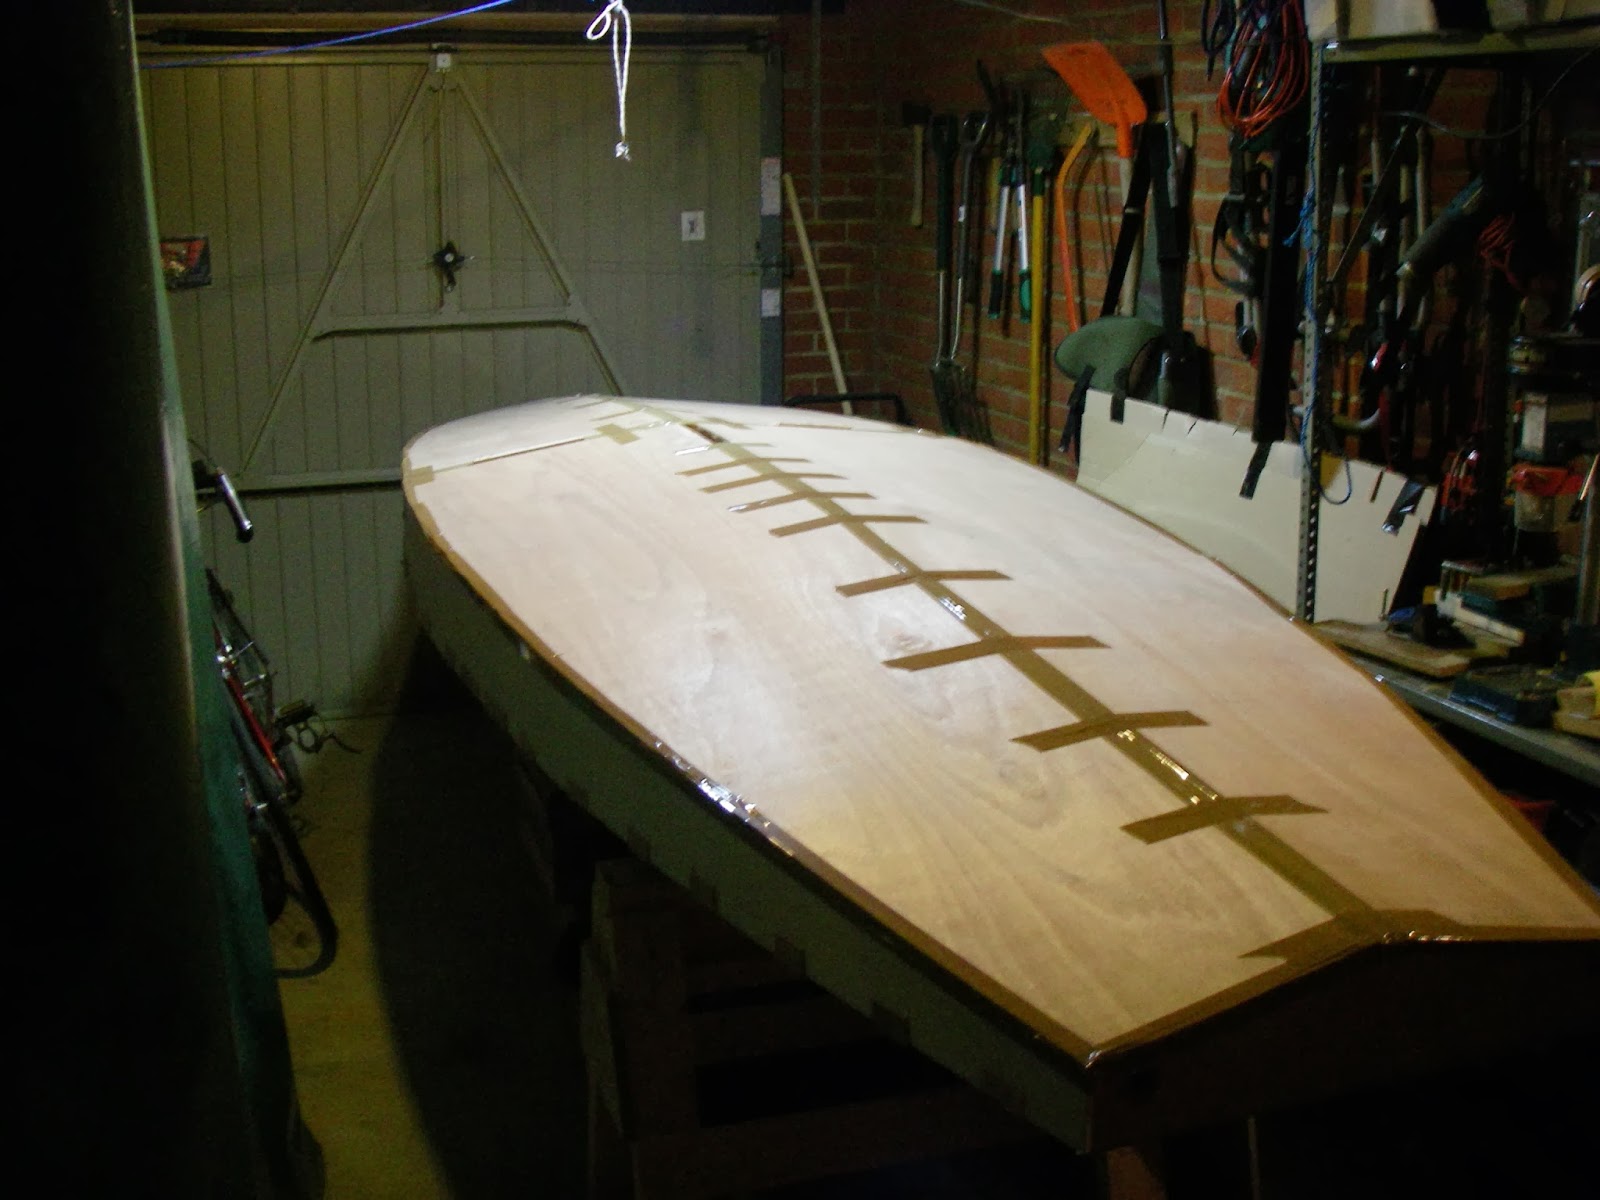
The panels were then tacked into place with staples, trimmed to fit and the daggerboard slot opening cut. All the seams were then taped with parcel tape:
The hull was then turned over and the deck removed:
Next up - a lot of filleting and epoxy taping .........
since I last posted but I've managed to make a fair bit of progress on the Moonfish build.
First I got the side panels tacked on with staples (through thin ply pads to make extraction easier):
And then filleted and epoxy taped both sides of each bulkhead/side panel joint. I then realised that I had an issue with the height of both sides of bulkhead A:
which was solved by cutting and planing them down to fit:
Where the side panels meet at the bow, I put in a piece of oak forward of the frame doubler to add a bit of resilience:
I had already pre-cut the four bottom panels, which now had a trial fit. No problems with the bow pair, but there was an issue with the after pair:
I decided to make a fillet for this gap. The first step was to mark out a rough template onto a length of paper (fax roll):
Once I had an oversized fillet cut from ply with the jigsaw, I then refitted the panels and took measurements of the width at 10cm (4") intervals, marked them onto the fillet and cut again with a Japanese hand saw. It was then a question of gradually planing it to fit until I had this:
The panels were then tacked into place with staples, trimmed to fit and the daggerboard slot opening cut. All the seams were then taped with parcel tape:
The hull was then turned over and the deck removed:
Next up - a lot of filleting and epoxy taping .........
-
Whameller
- Frequent Poster
- Posts: 30
- Joined: Tue Aug 23, 2011 11:08 am
- Location: United Kingdom
- Location: West Pembrokeshire, United Kingdom
- Contact:
Re: MF14 - New Build in UK
This is not really exciting stuff (I much prefer the woodwork), but here are some photos:
Thrilling, eh ?
That done, I began fitting the cleats on all the bulkheads that both give them additional strength and provide bonding/bearing surfaces for the deck:
In the last shot, you can also see the additional 12mm support pad (so 24mm in all - say 1") for the rudder gudgeons.
The end result looked like this:
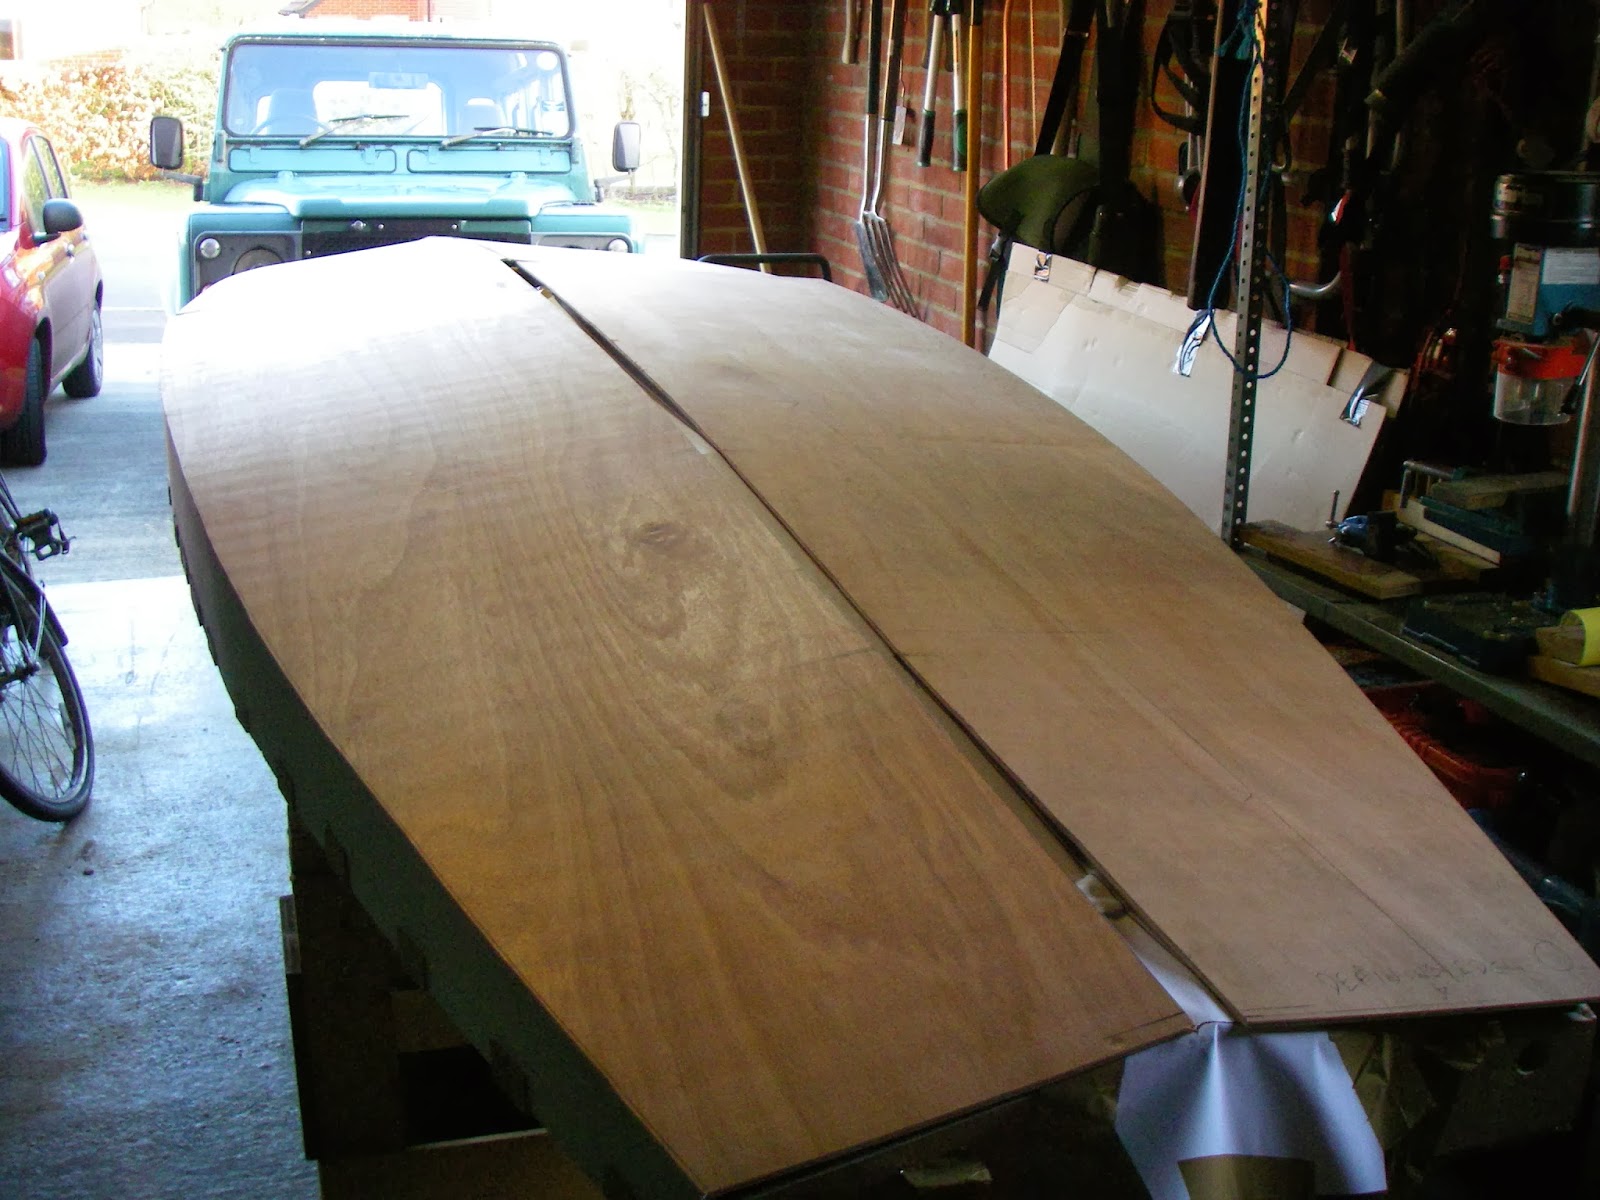
All this while, the deck panel (really flexible & flimsy-seeming) had been stored off to one side - you can just see it on the right in the pic above.
Thrilling, eh ?
That done, I began fitting the cleats on all the bulkheads that both give them additional strength and provide bonding/bearing surfaces for the deck:
In the last shot, you can also see the additional 12mm support pad (so 24mm in all - say 1") for the rudder gudgeons.
The end result looked like this:
All this while, the deck panel (really flexible & flimsy-seeming) had been stored off to one side - you can just see it on the right in the pic above.
Who is online
Users browsing this forum: No registered users and 6 guests