Page 1 of 1
MF14 - New Build in UK
Posted: Sun Nov 24, 2013 2:18 pm
by Whameller
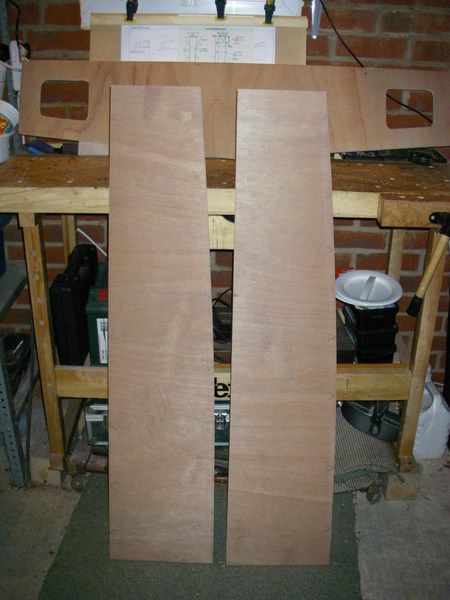
Well, I've finally made a start !
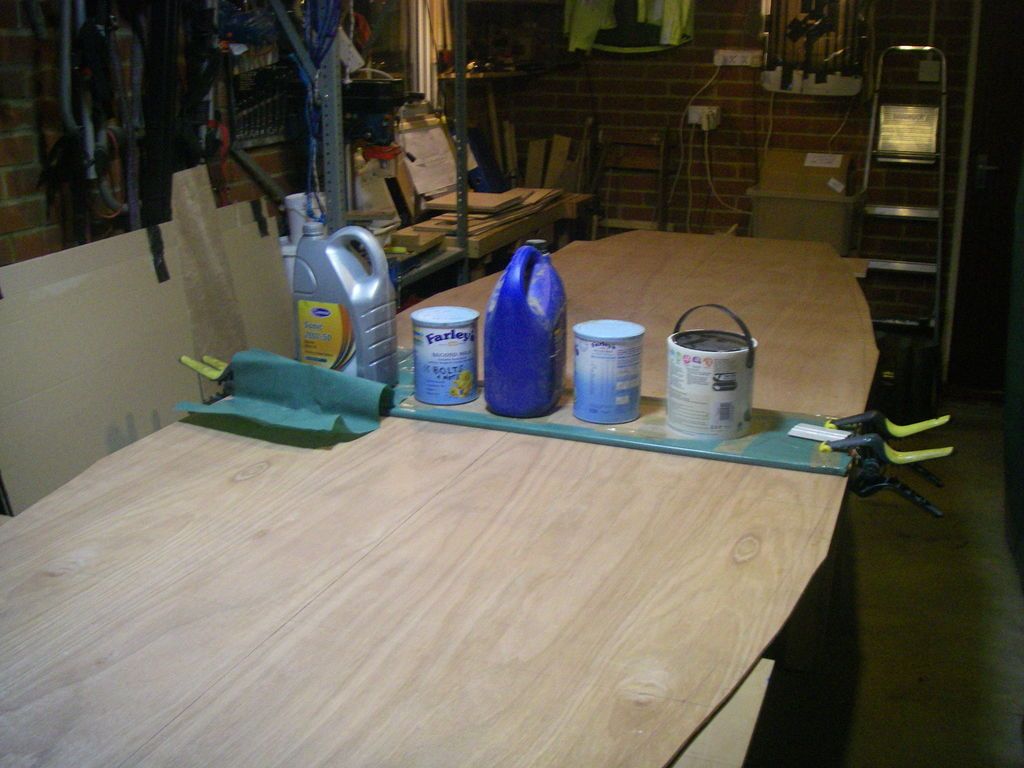
Only a small step - the transom:
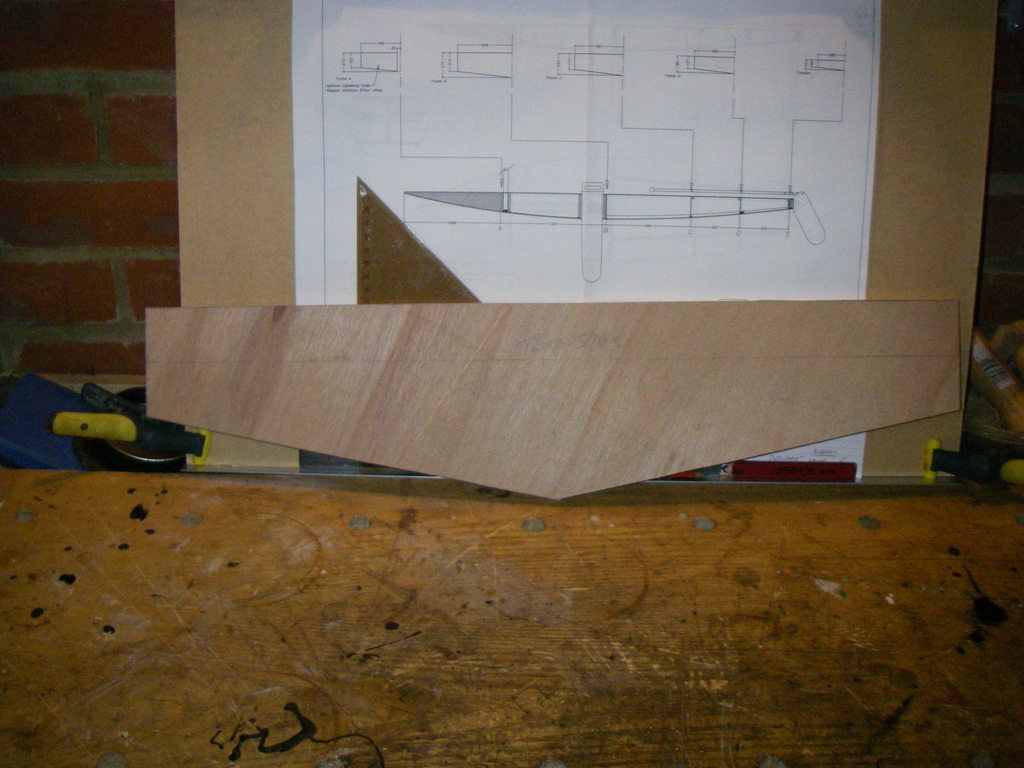
This will be a pretty slow build as I have to balance it with life & work demands. With luck, we'll be on the water next summer.
Re: MF14 - New Build in UK
Posted: Mon Nov 25, 2013 10:58 am
by ks8
Congrats on the first cuts!


Re: MF14 - New Build in UK
Posted: Mon Dec 09, 2013 5:27 pm
by Whameller
Some progress:
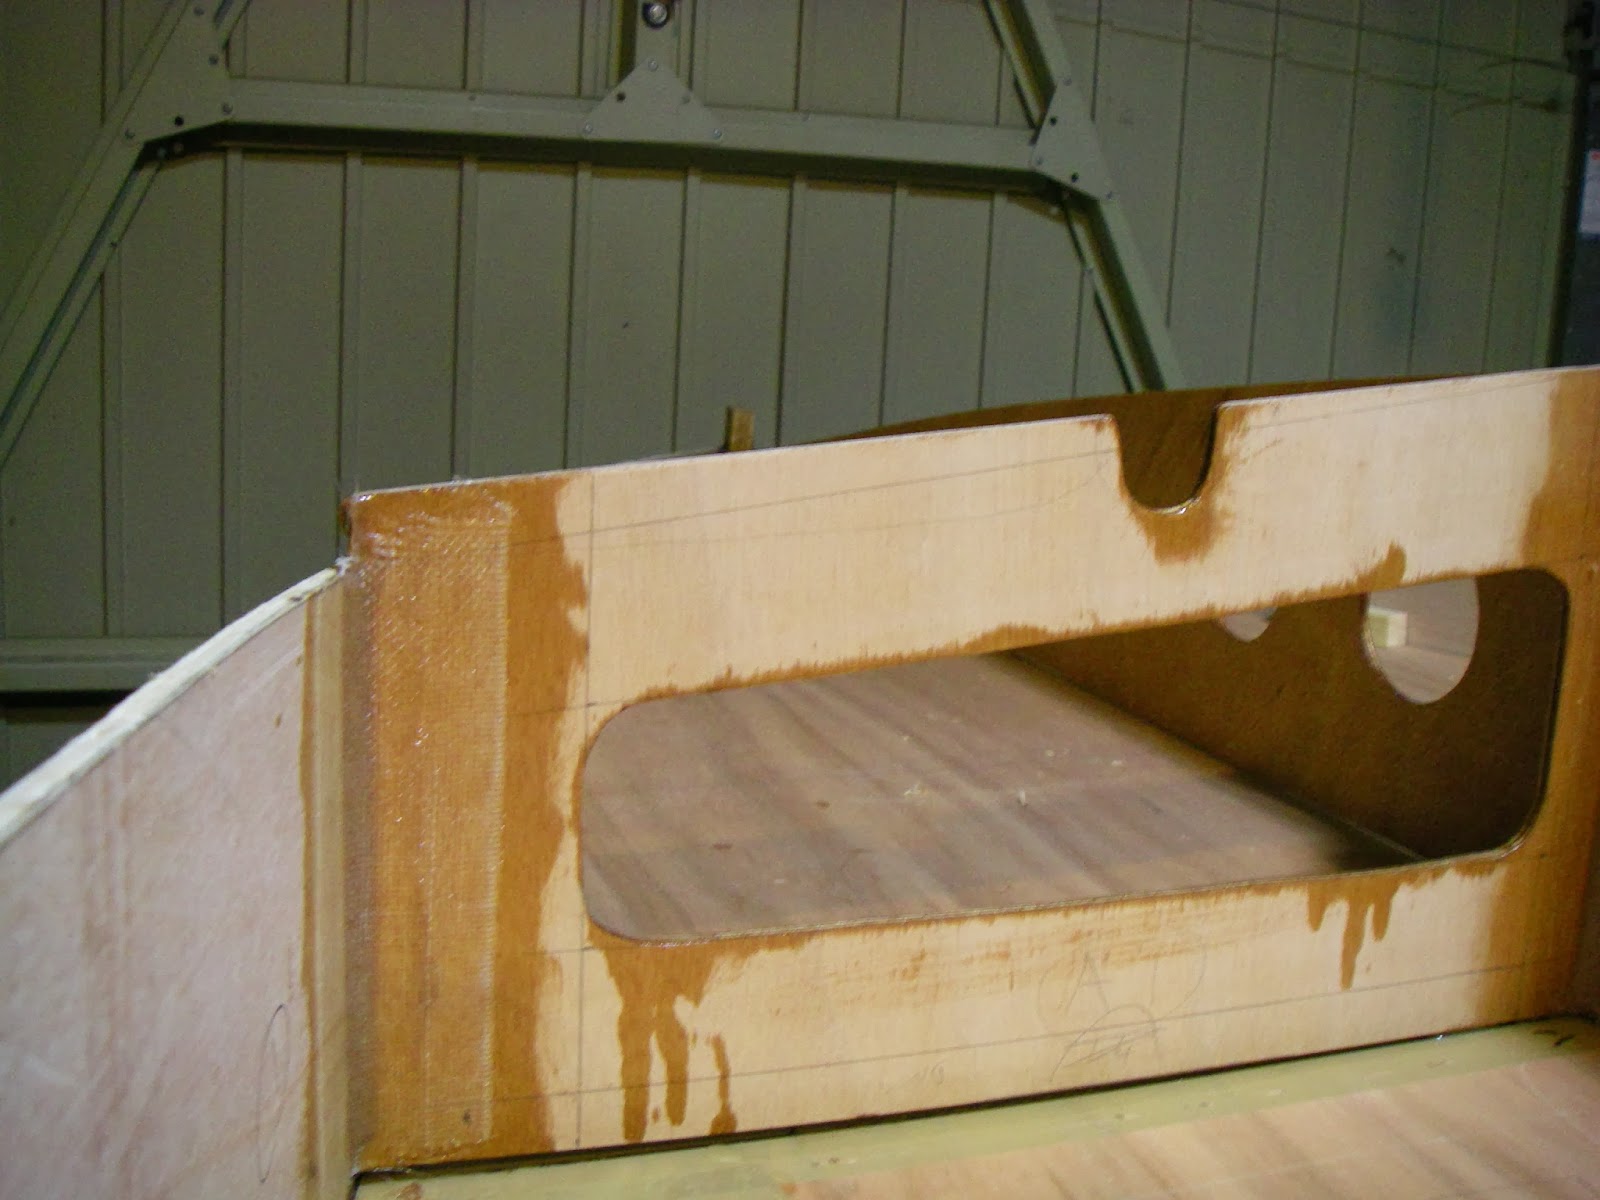
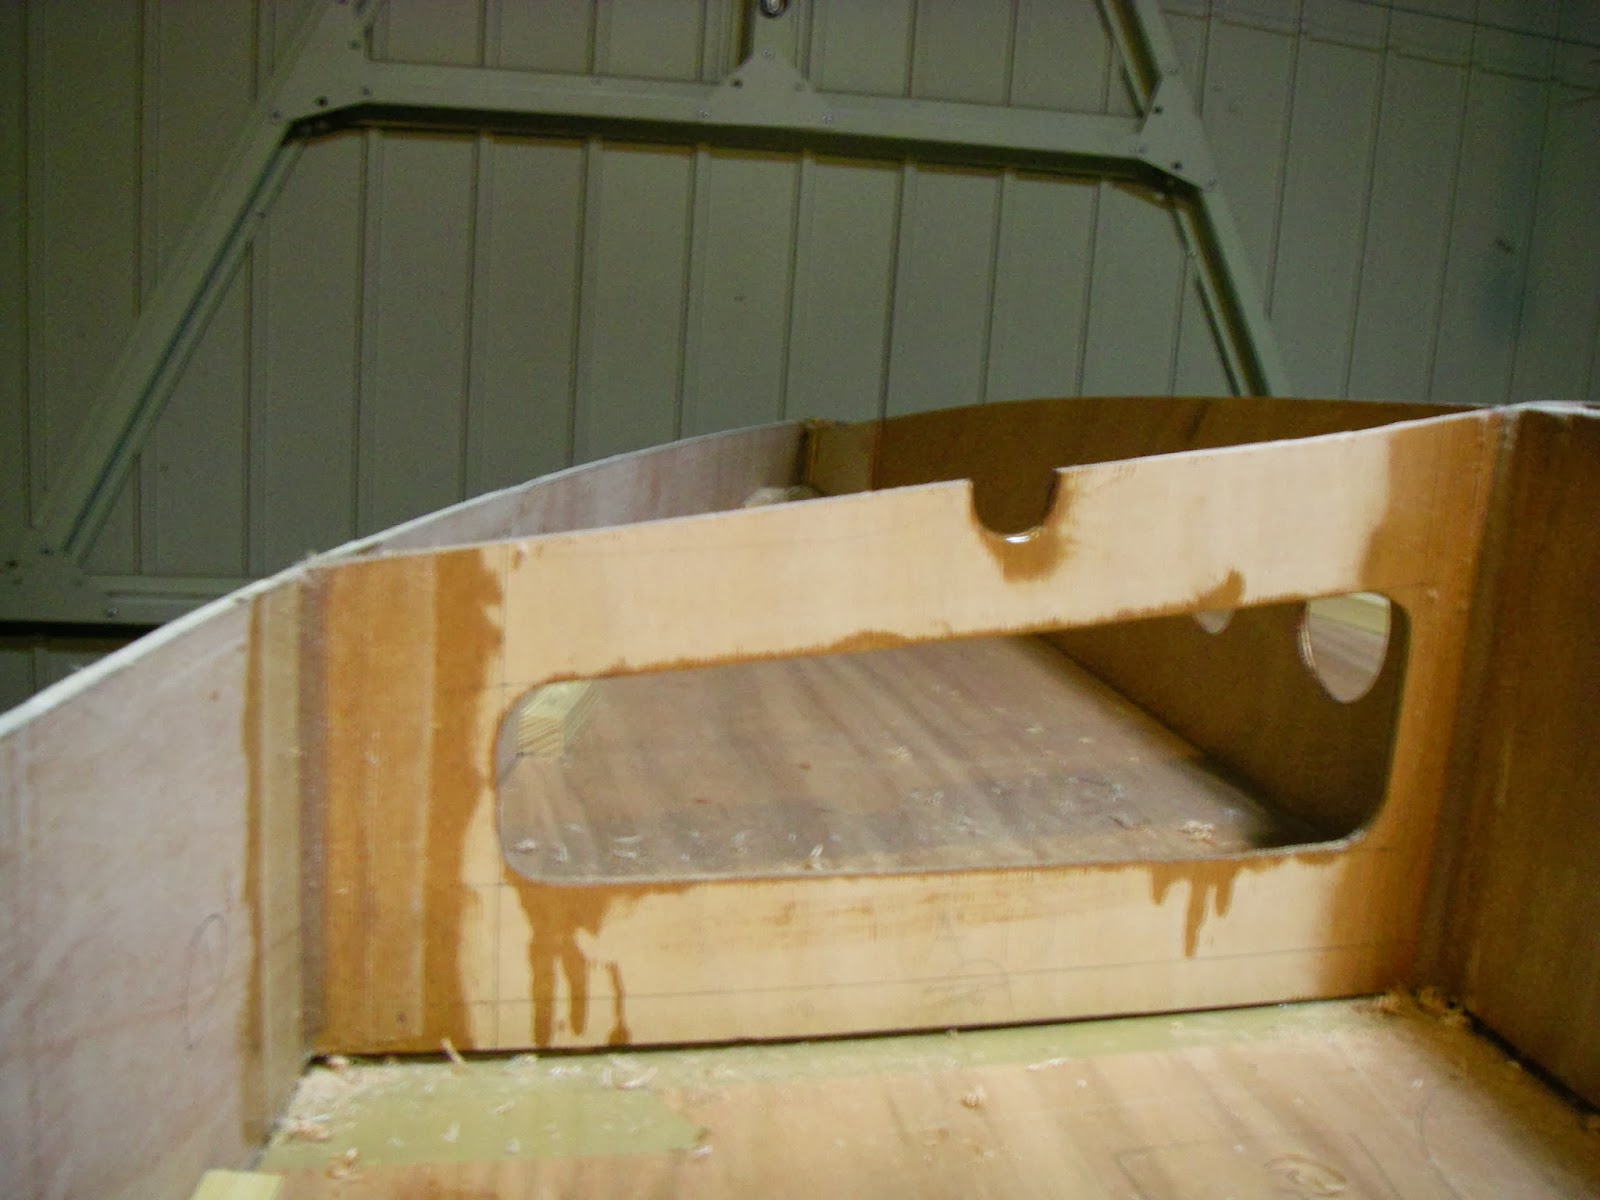
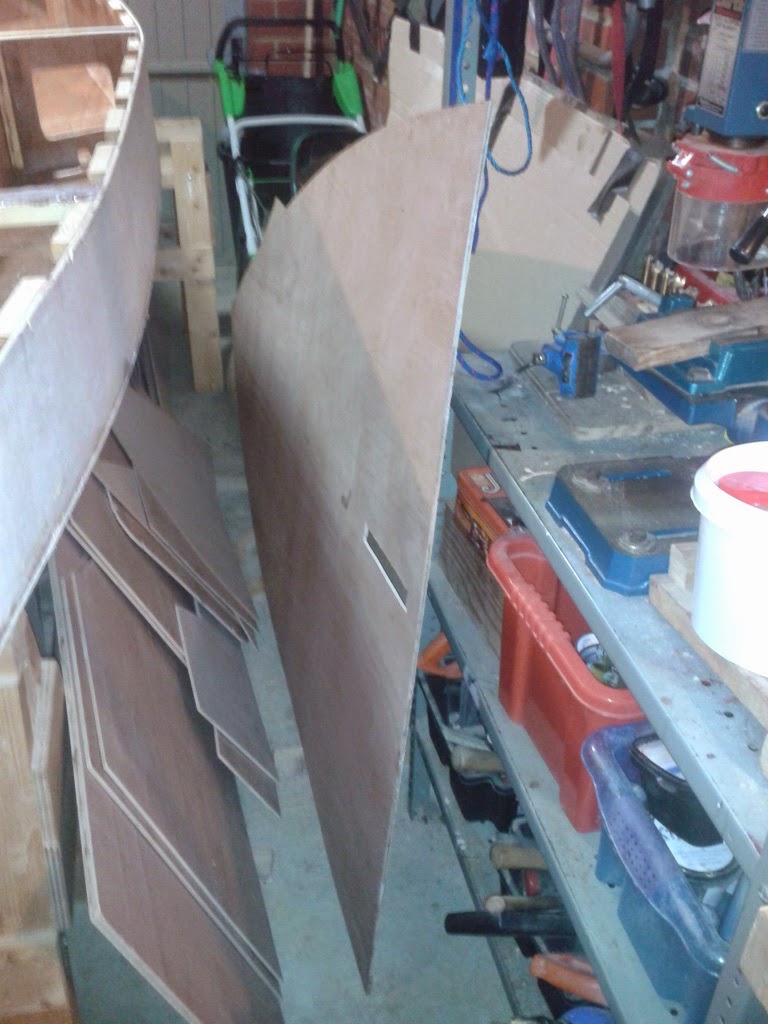
This is the main bulkhead which forms the aft part of the dagger board/mast trunk and the forward part of the cockpit:
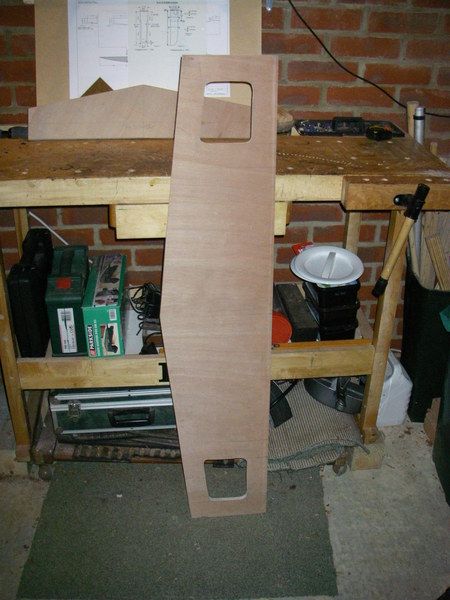
And theses are the sides of the trunk:
All in 12mm WBP ply. I'm using up some of my workshop offcuts from previous builds and repair work - its surprising how many components fir a small craft like this you can get out of offcuts, which all reduces the cost of the project (not to mention clutter in the workshop !). The frame is going to end up a mix of WBP and Robbins Elite marine ply; the former is more than adequate as the design is explicitly an epoxy/ply sandwich - the latter is overkill in quality terms, but it was lying about in small parts, so .....
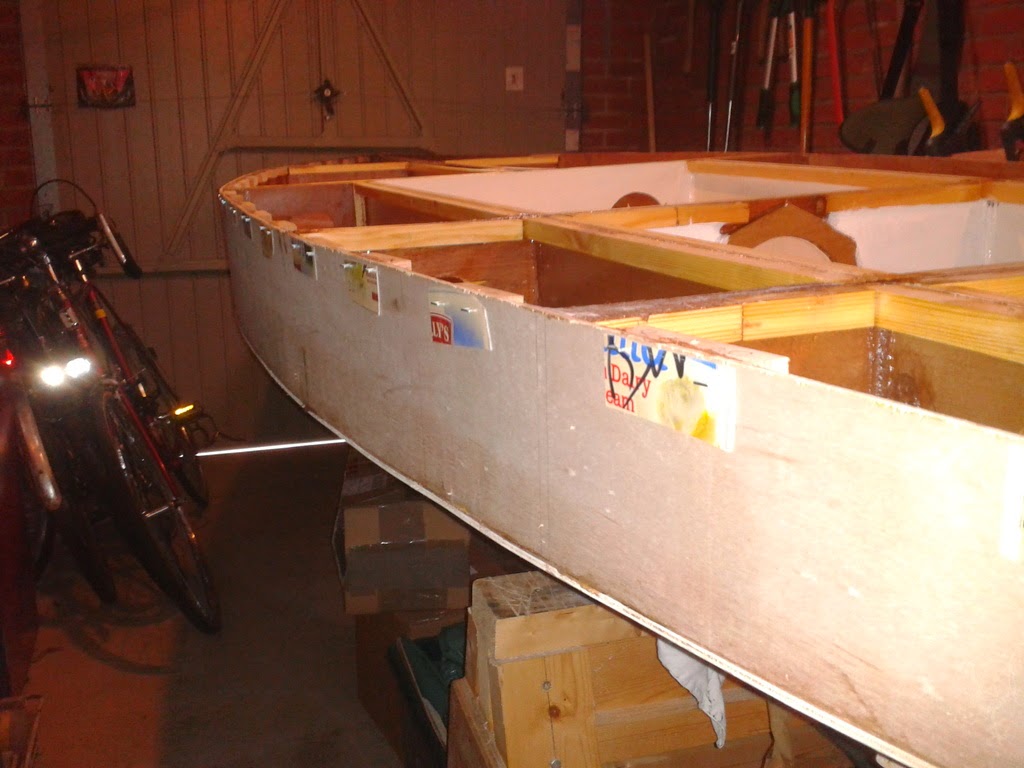
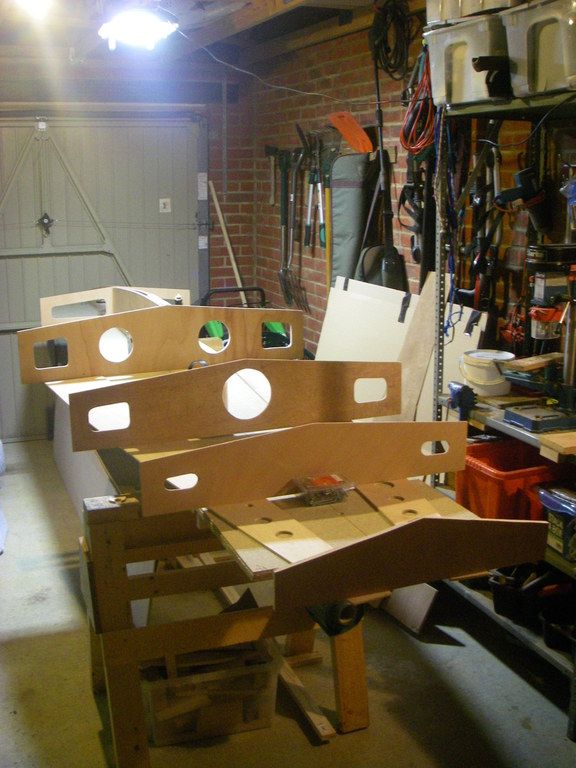
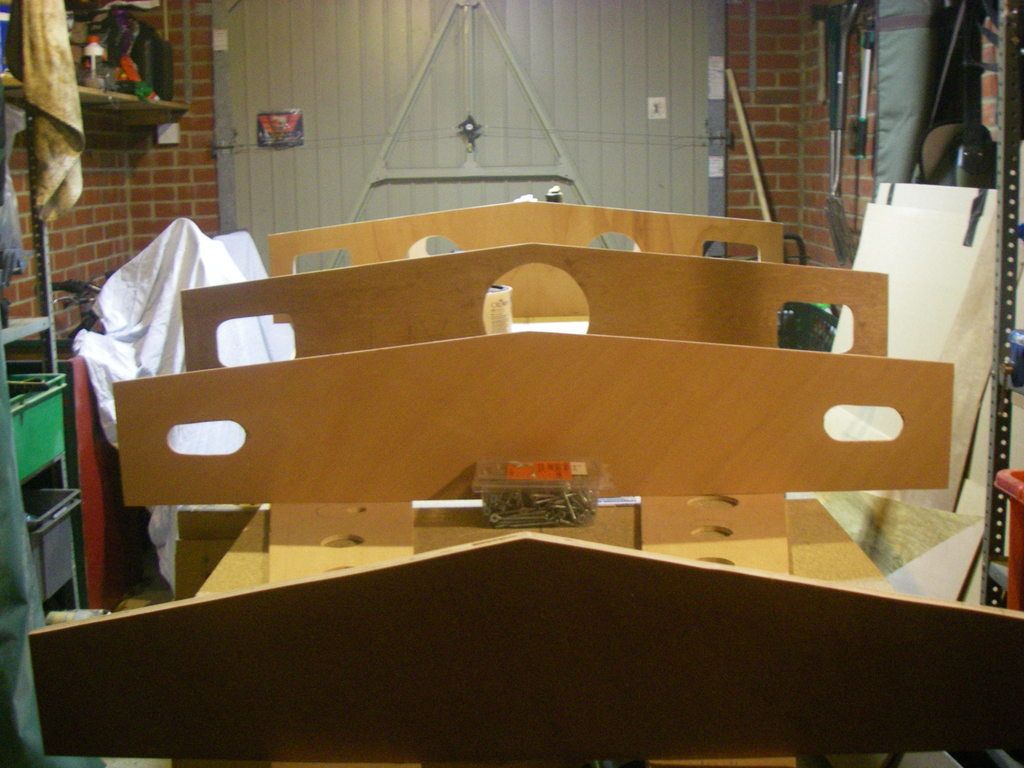
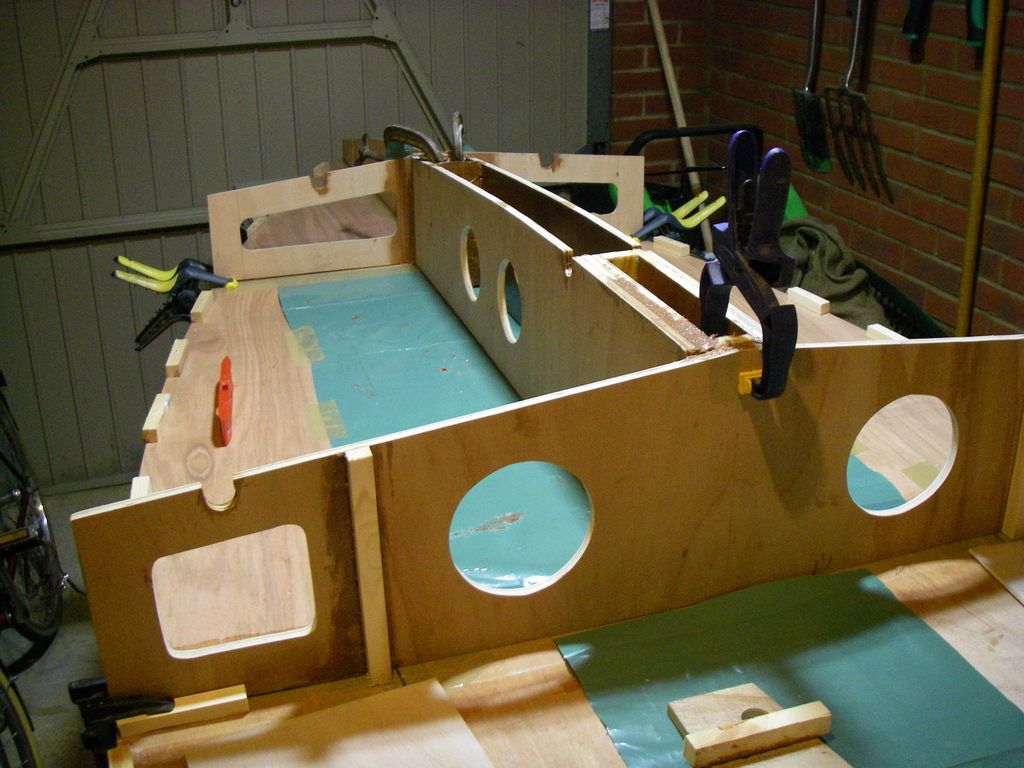
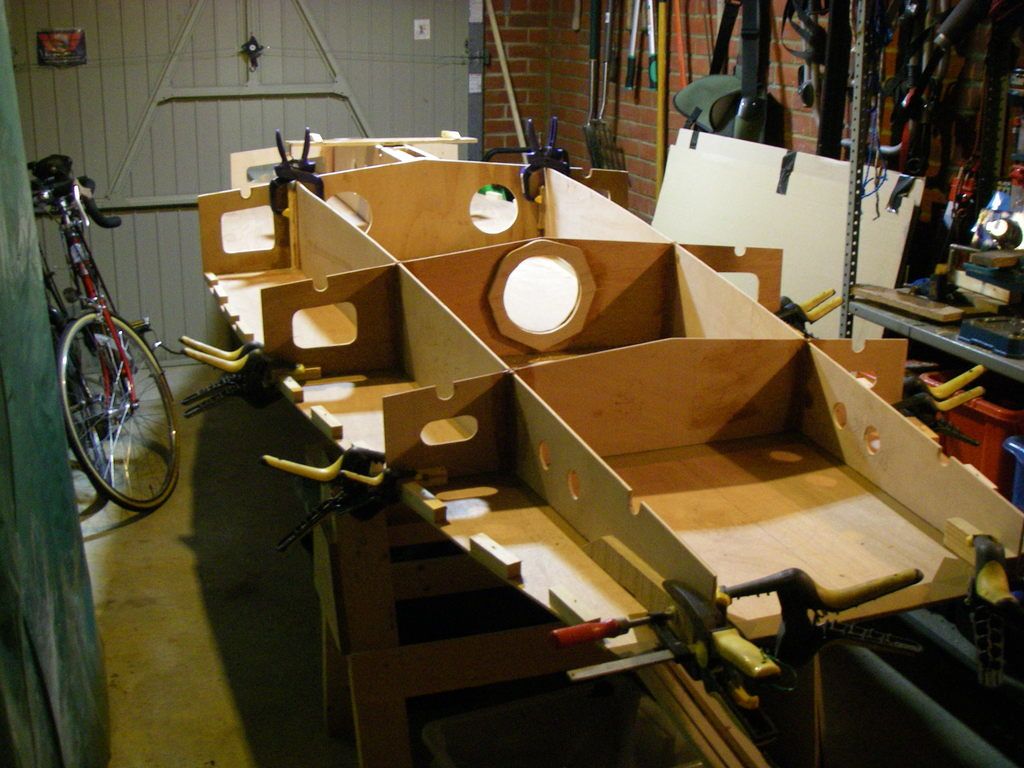
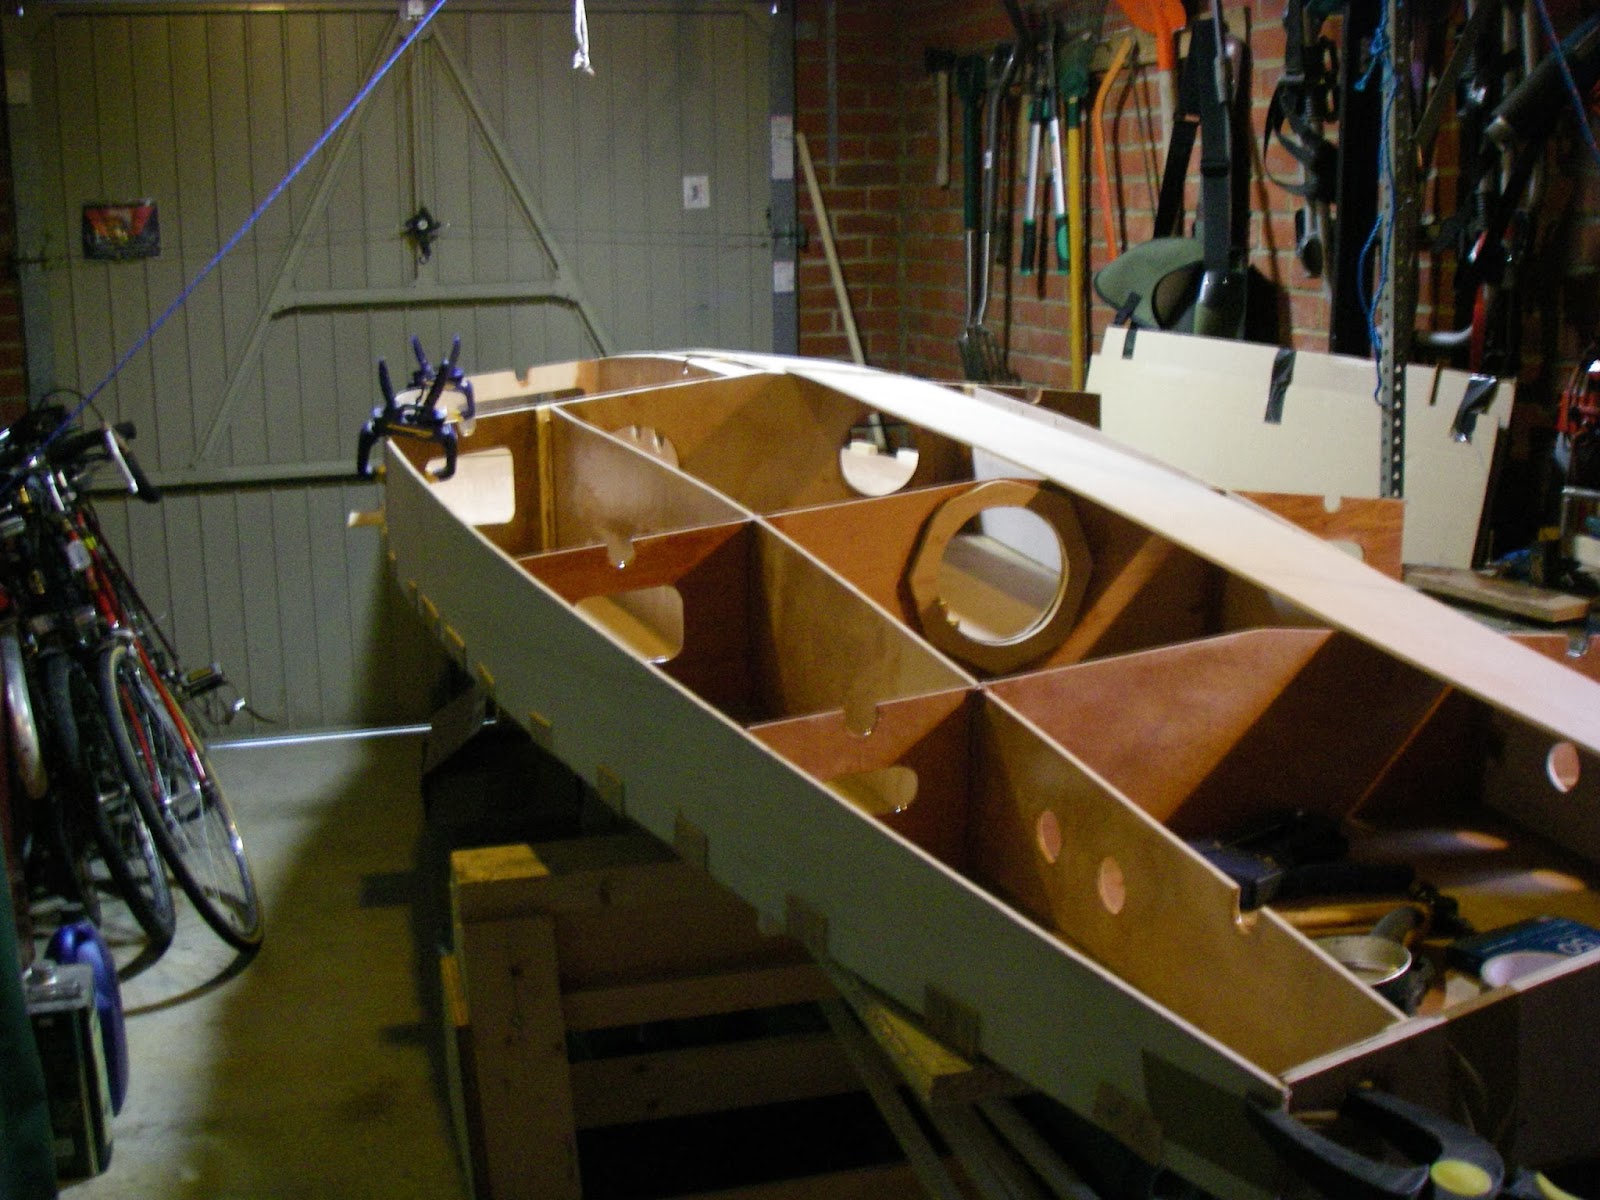
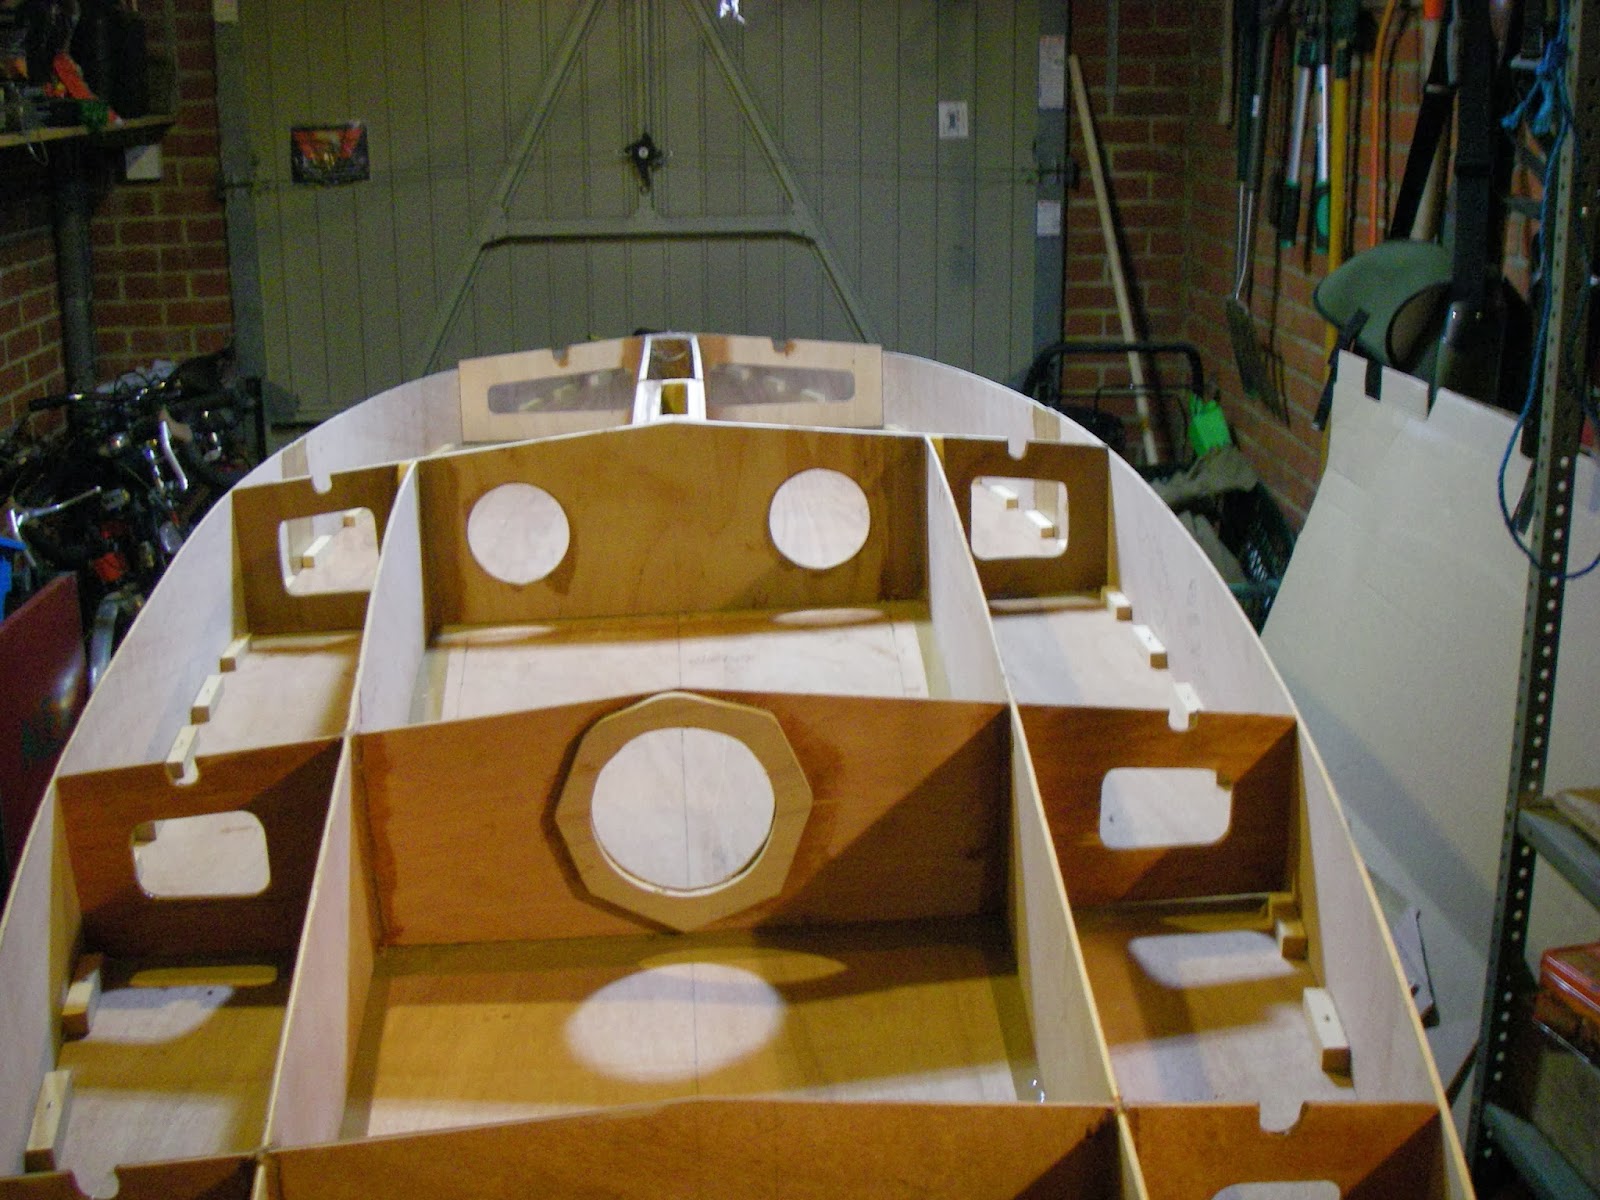
I have now completed all the frame components. I couldn't resist setting them out roughly, so that I could begin to get a clearer picture of what I am building.
A view from the stern:
another from up towards the bow looking at the daggerboard trunk:
And a final closer view from the stern:
For bulkhead C (the one with the central circular and two rectangular side cutouts) which is the rear bulkhead of the cockpit well, the design called for 6mm ply. I had run out of large enough stock scraps for this, so laminated it from two 4mm layers; I reckon that a little extra strength at the rear of the cockpit (the forward bulkhead is 12mm) will be no bad thing.
Somehow this seems bigger than a Laser hull - though they are nominally about the same length.
Re: MF14 - New Build in UK
Posted: Fri Dec 13, 2013 7:08 am
by Whameller
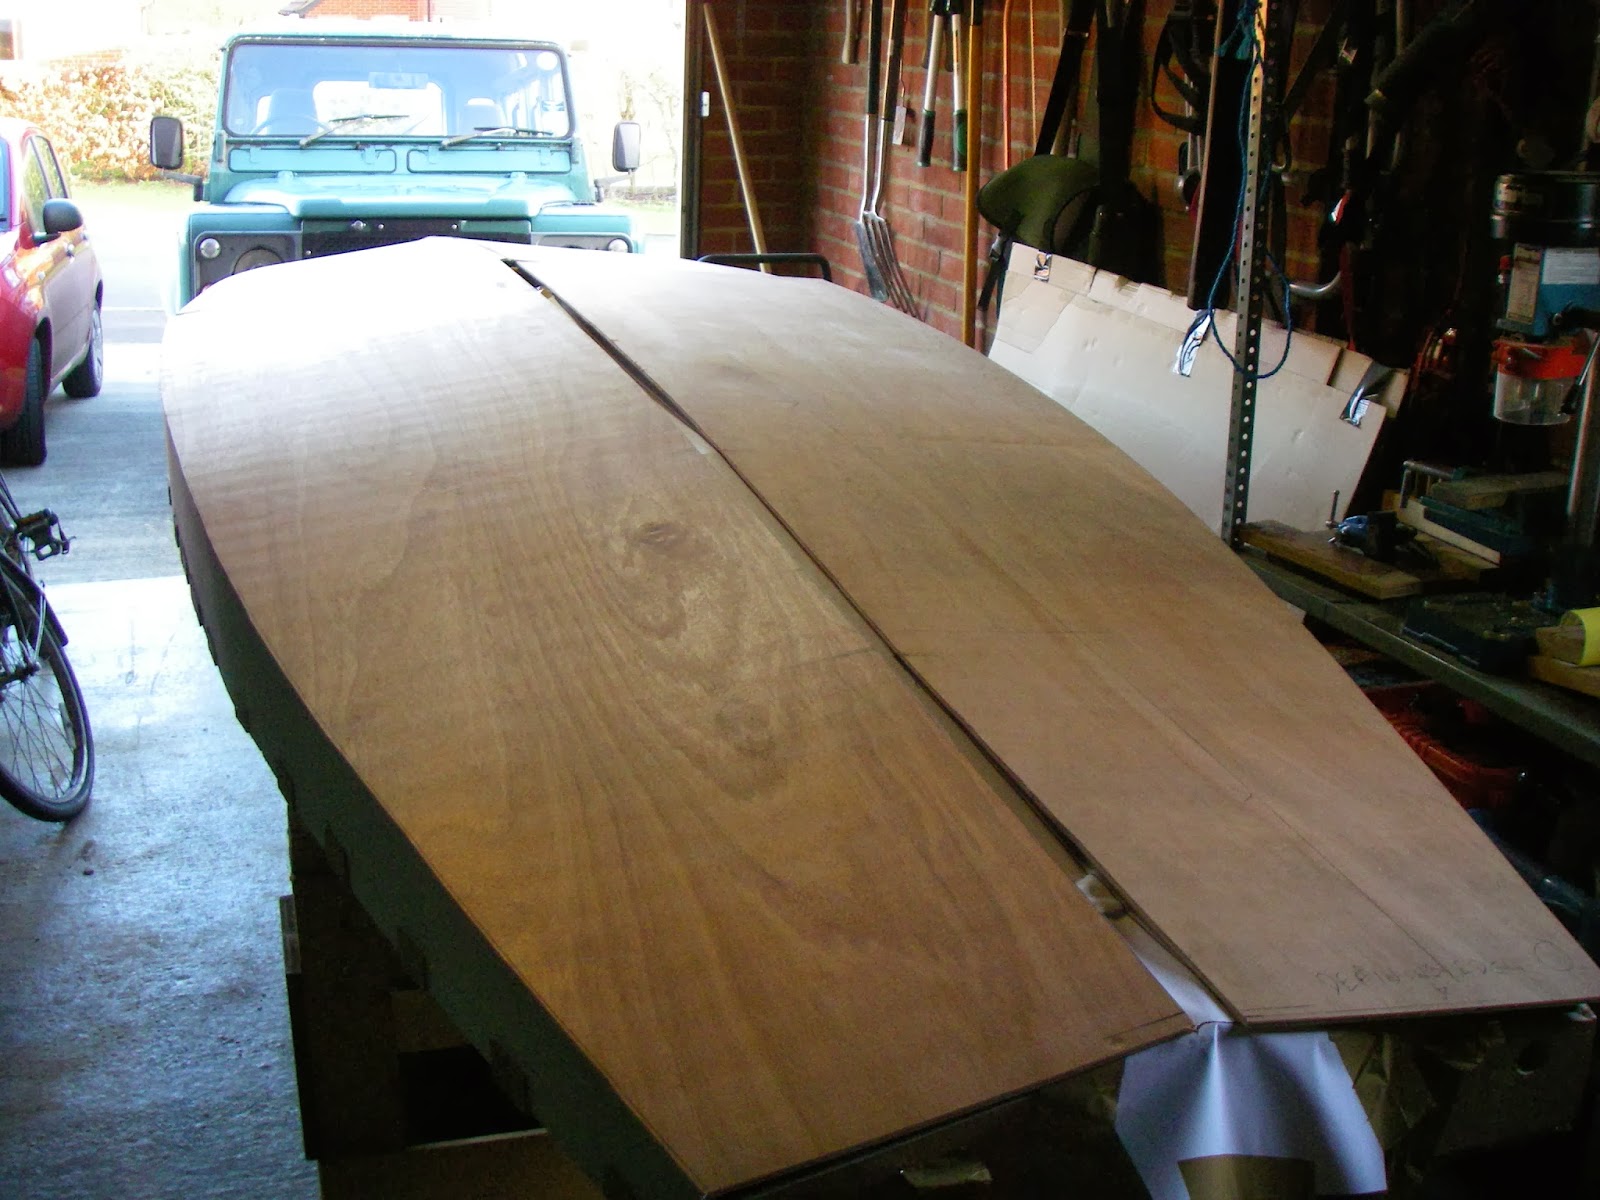
Just about to start on the deck.
A question:
- The builders notes say that I should cut out the 2 sections of the deck and then splice them together. It seems to me that it would be better to join the sheets of ply and then mark out before cutting anything - that way I can spring a fair curve with a batten along the complete sheer. If I cut first, then the curve is likley to be too flat near the join.
- Am I right, or is there something I'm missing here ?
Many thanks.
Re: MF14 - New Build in UK
Posted: Fri Dec 13, 2013 1:07 pm
by sds
There are many ways to skin a cat. Don't do that though -- I like cats.
You could also just butt the deck pieces together to draw the curve.
Re: MF14 - New Build in UK
Posted: Fri Dec 13, 2013 4:11 pm
by Whameller
Thanks, that advice is very reassuring because that is what I have just done ! I clamped the sheets together, dry-fitted, then marked out the sheer lines. Once I had them marked, I rough-cut to within an inch of the marks; this made the sheets much easier to handle in what is a very small, multi-use workshop.
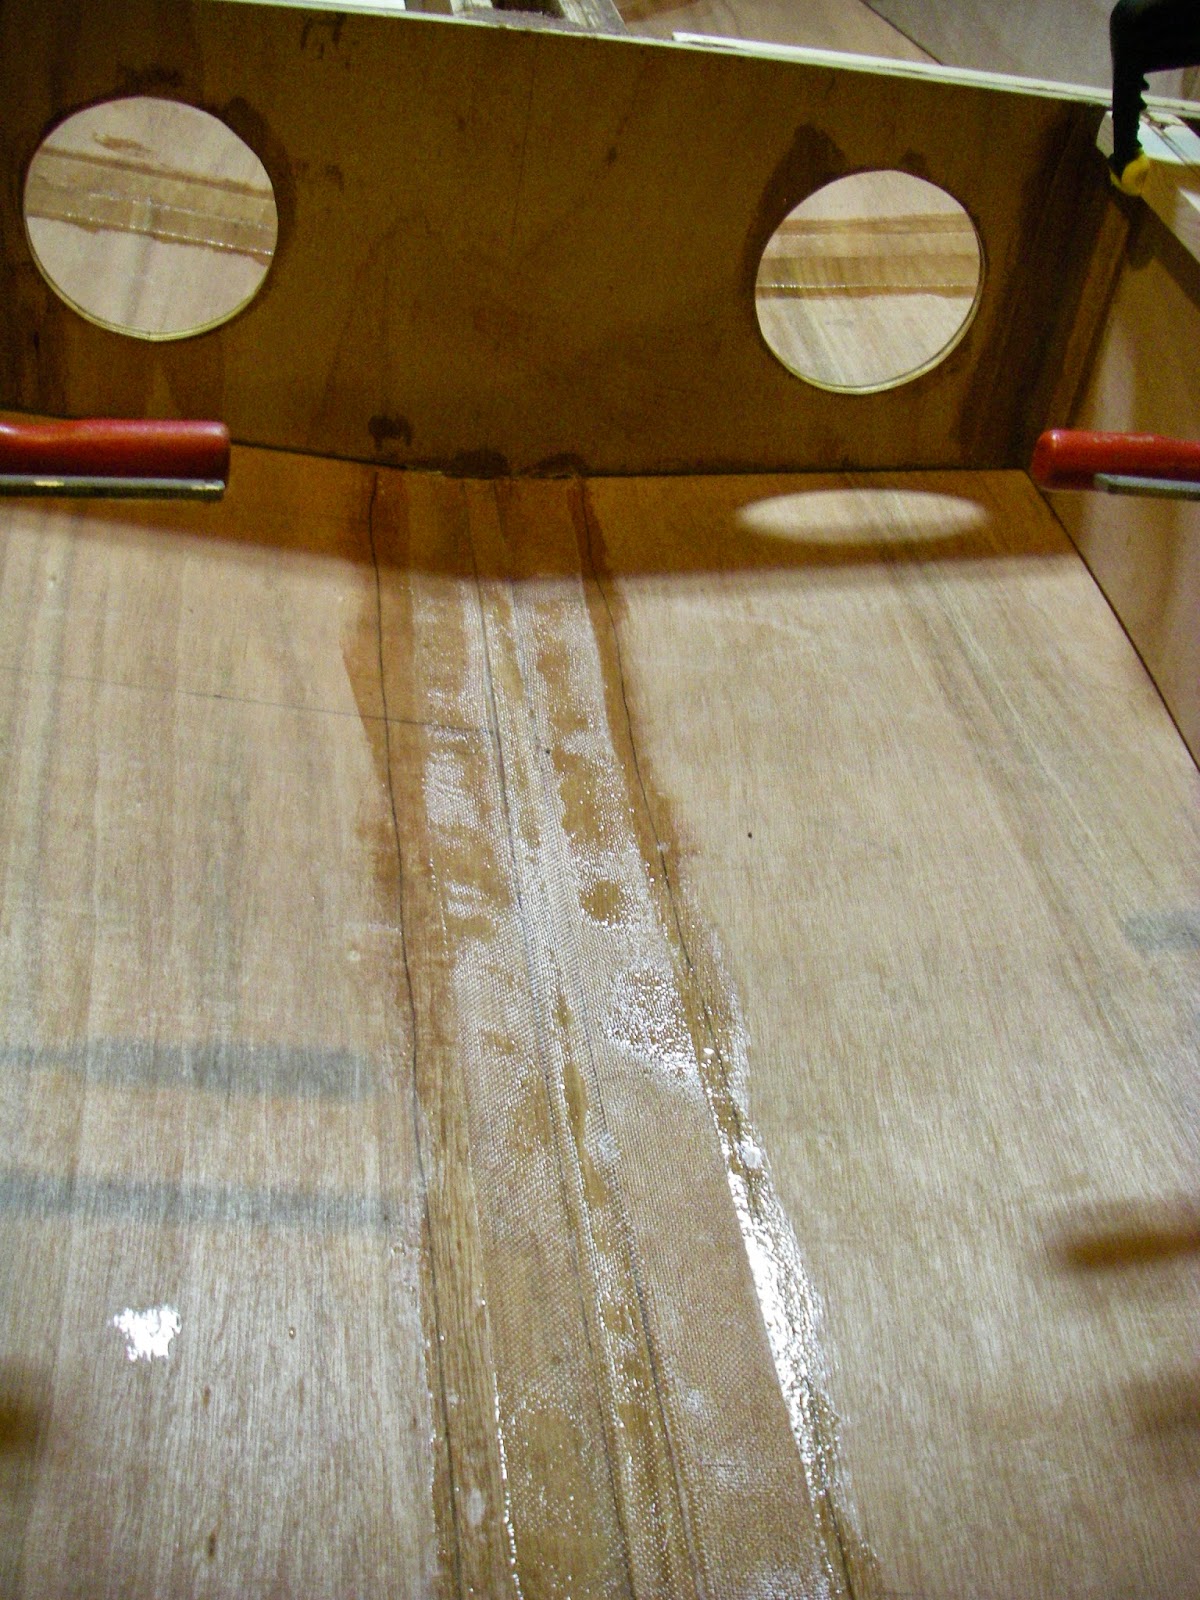
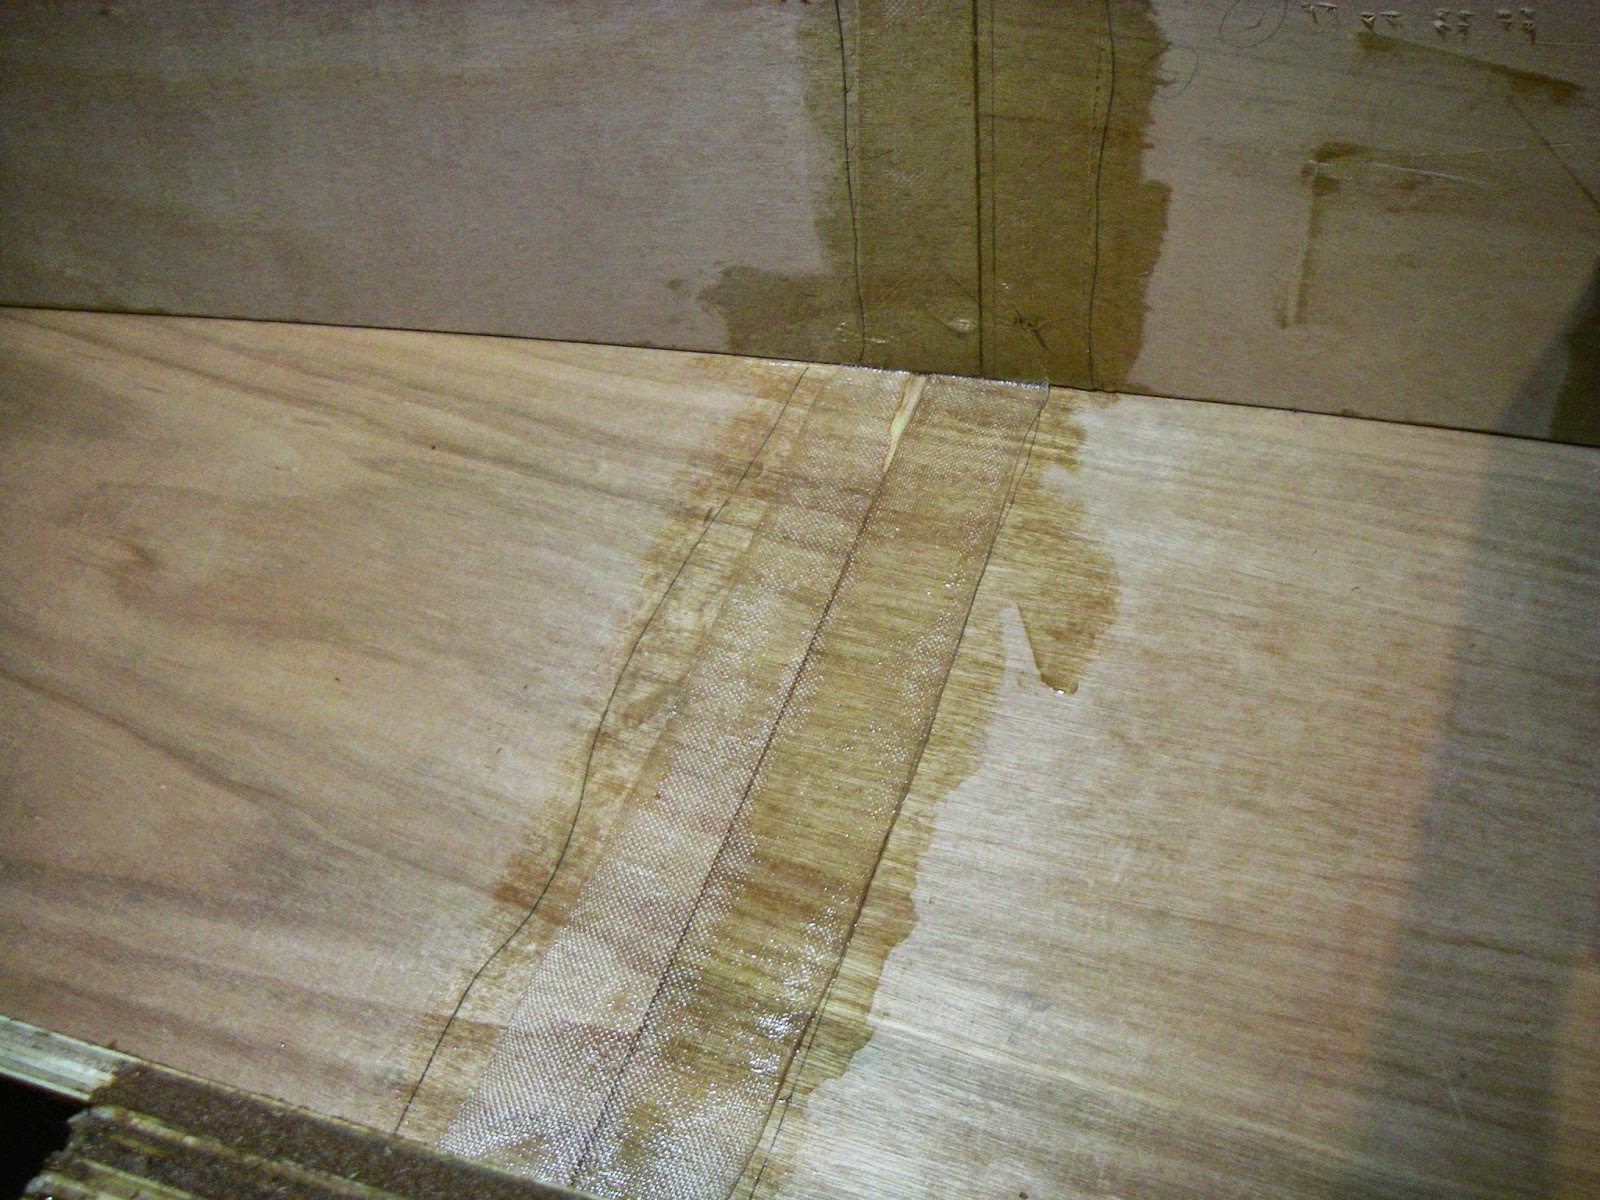
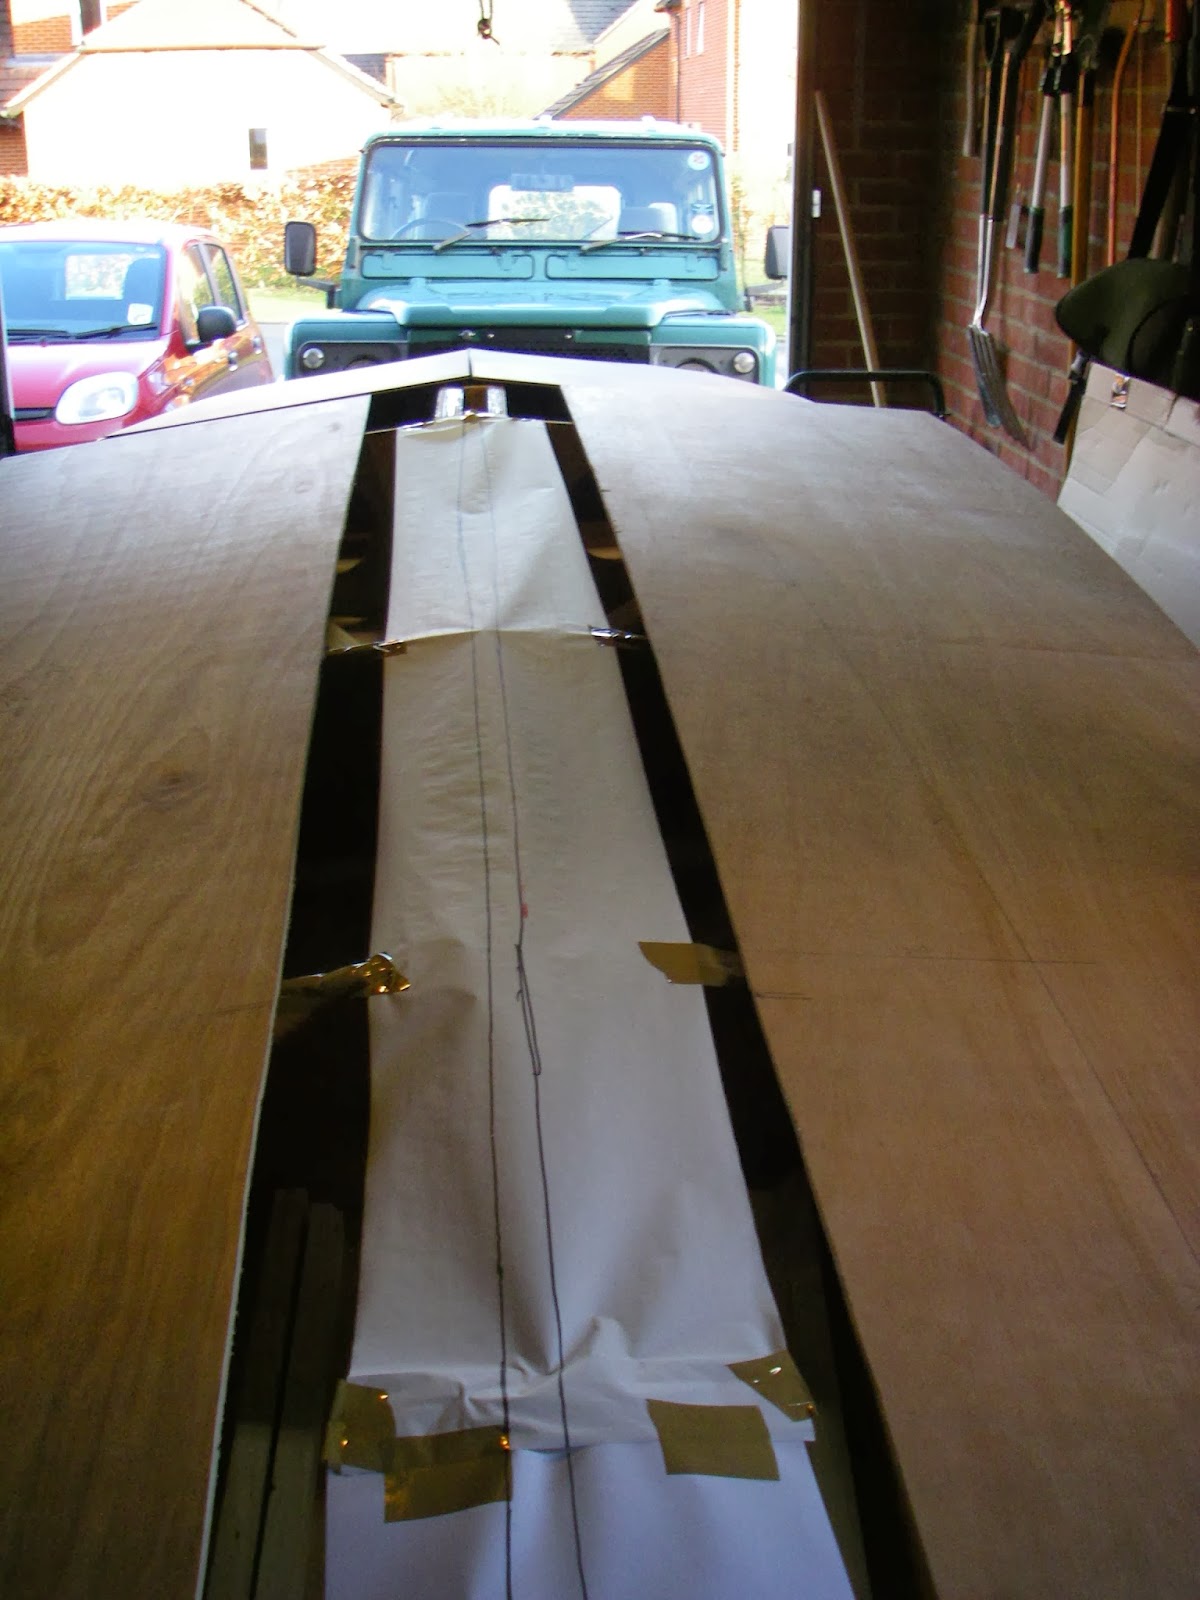
I've now made the splce:
and tommorow should be able to start marking out for placement of the bulkheads.
Re: MF14 - New Build in UK
Posted: Sun Dec 15, 2013 3:56 pm
by Whameller
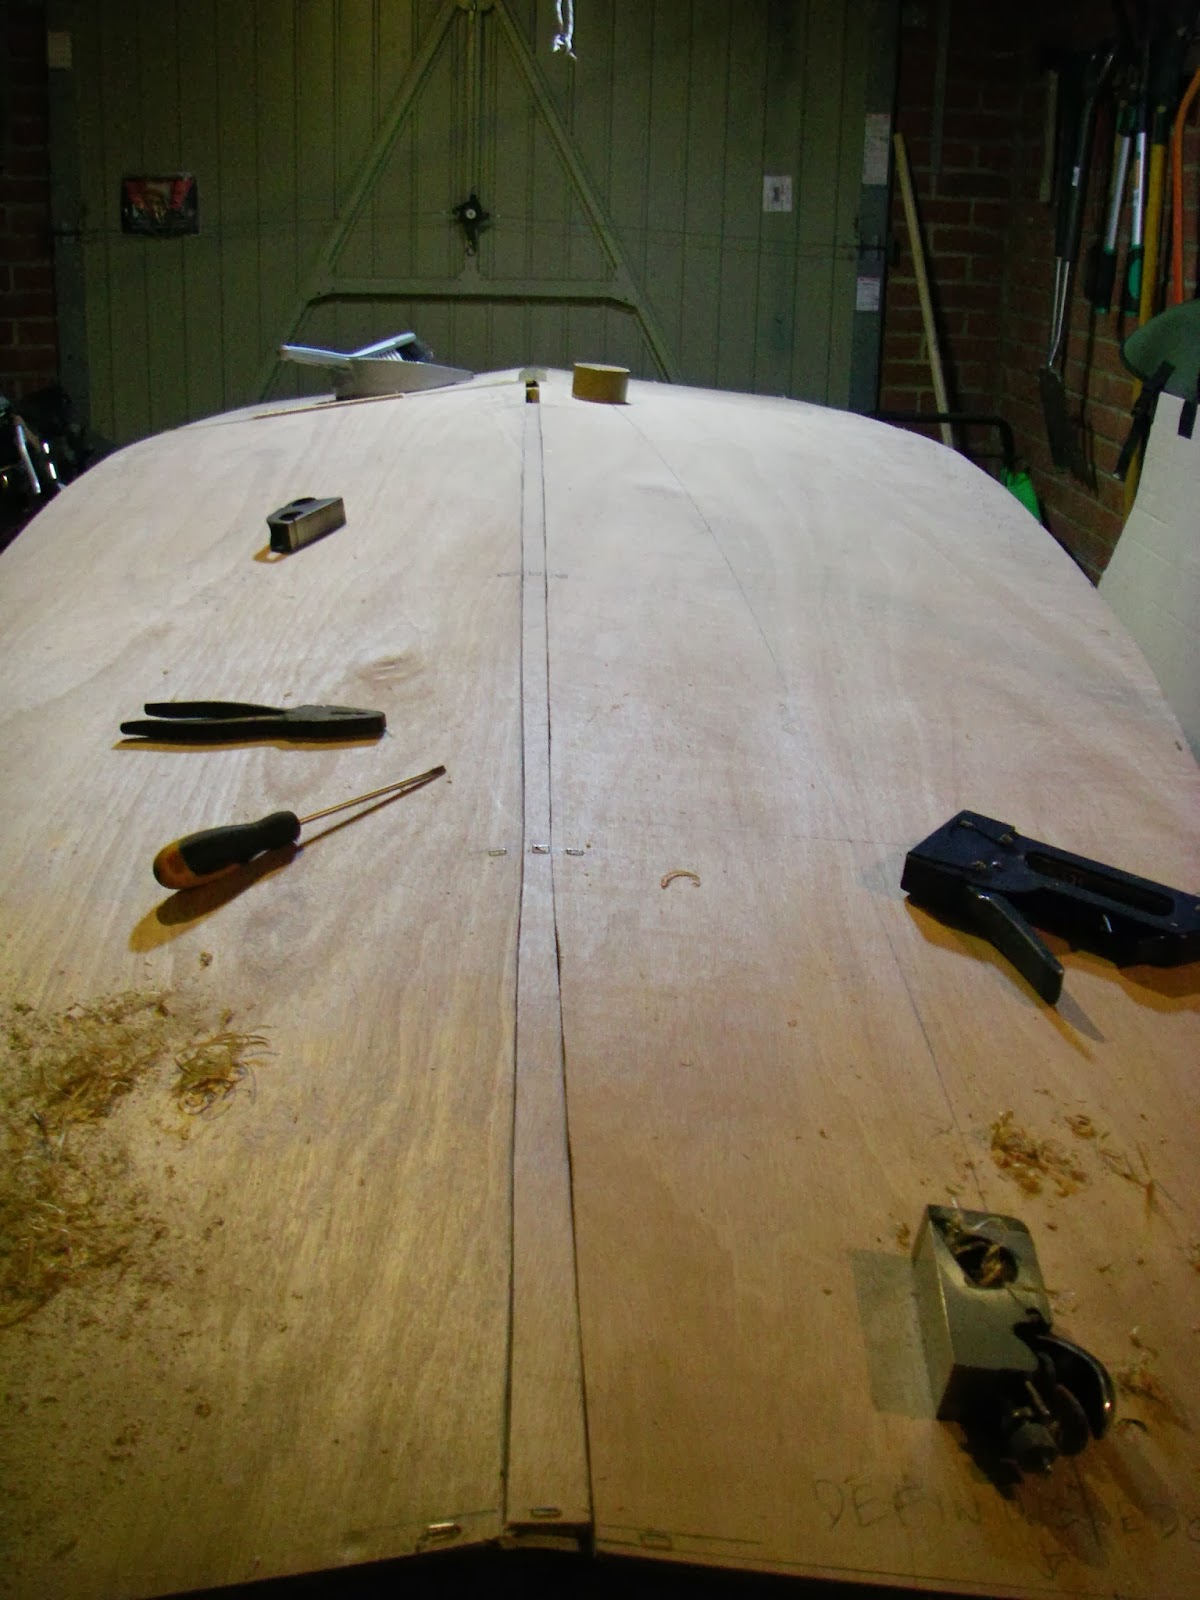
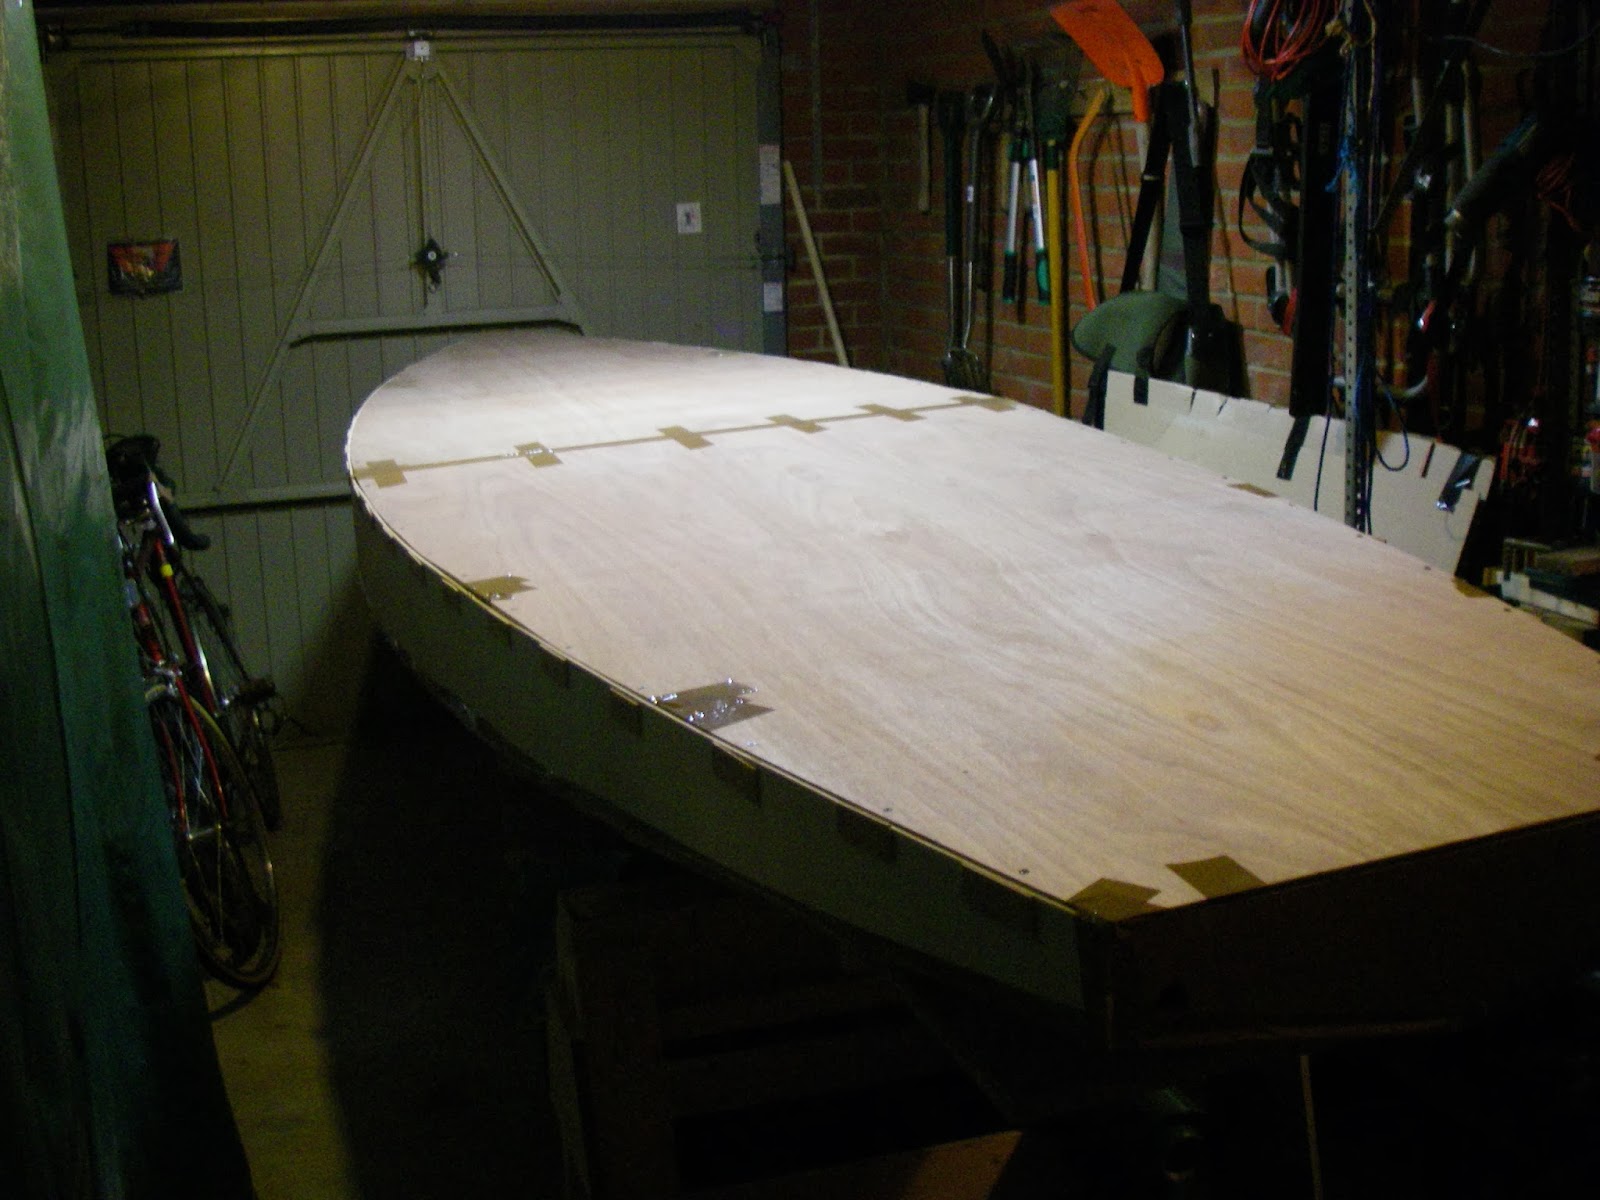
The splice of the deck sheet has worked out well, although - given the low (for UK) temperature - it took over 48 hours for the epoxy to cure:

After which I planed down to the marks all round and then marked out the positions of the bulkheads. Either there is a discrepancy in the plans between the sheet cutting plan and the bulkhead position plan, or I have cut the bow of the deck out 20mm short ! I'm pretty certain its not me as I have checked & re-checked my marking out against the plans before cutting. Whatever, the sheer line is fair and I reckon that I will be able to adjust the side and bottom sheets if necessary.
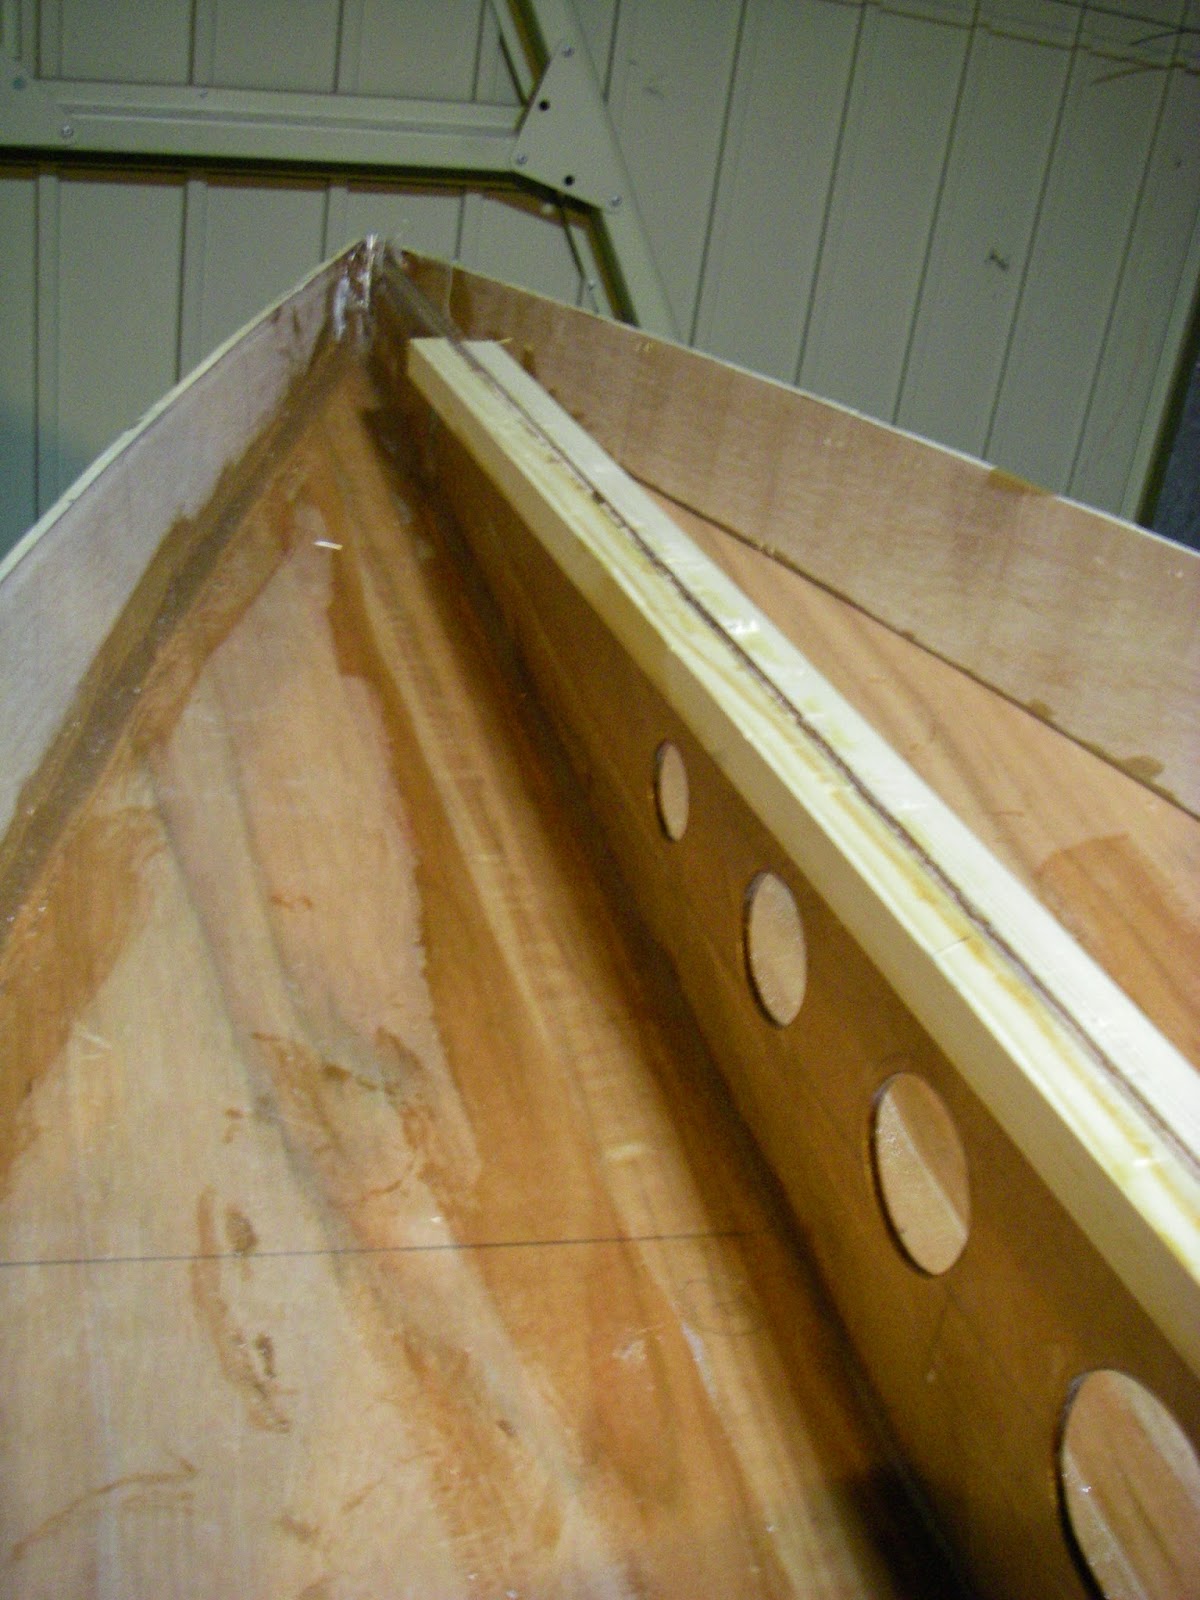
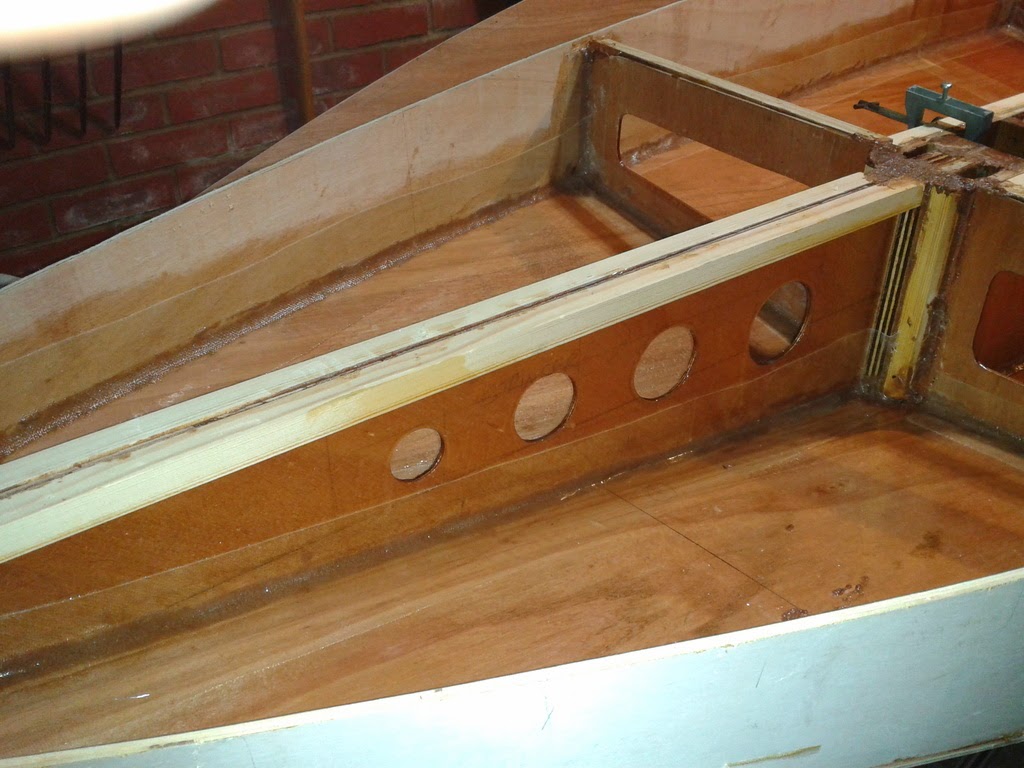
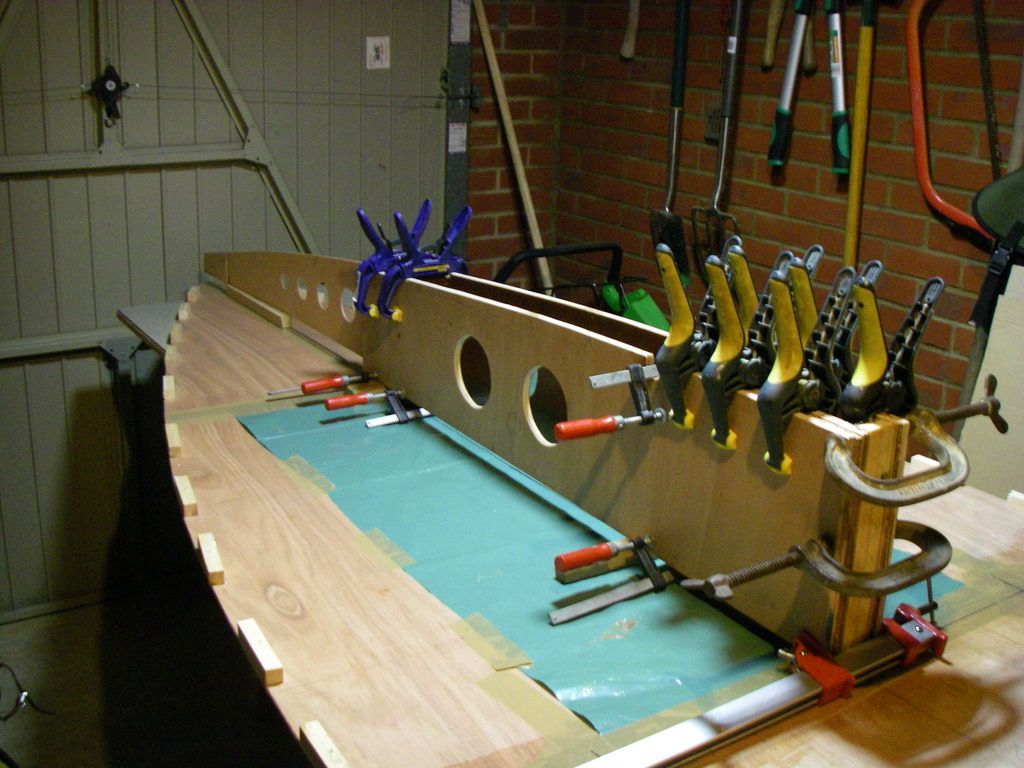
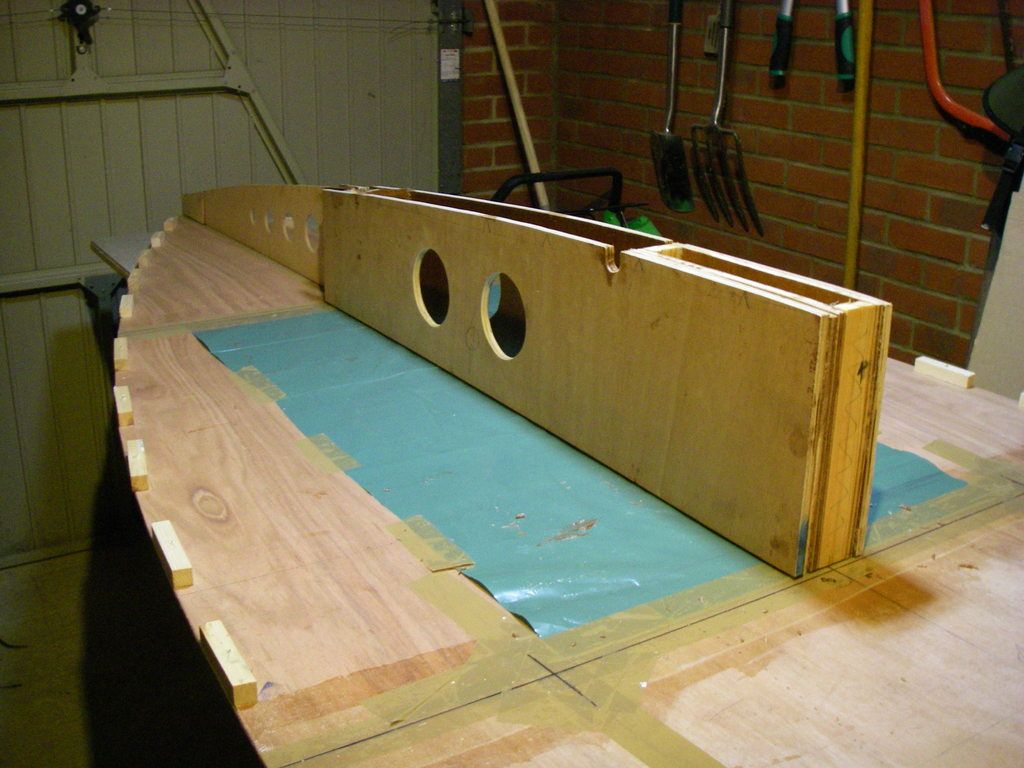
The next step is to assemble the daggerboard/mast trunk (you can just see it under the bench in the photo above). Here's a better view of it in the process of being dry assembled:
The bulkheads are there to provide reference points and the bow stringer (with 6mm doublers either side of the forward 76mm) forms part of the trunking assembly.
Here's a view of the daggerboard slot:
Getting this the right width (not fully specified in the plans) took quite a bit of calculation - factoring in the thickness of the 2 layers of 12mm ply, glue joint and glassing the sides of the well, plus 3mm play on each side.
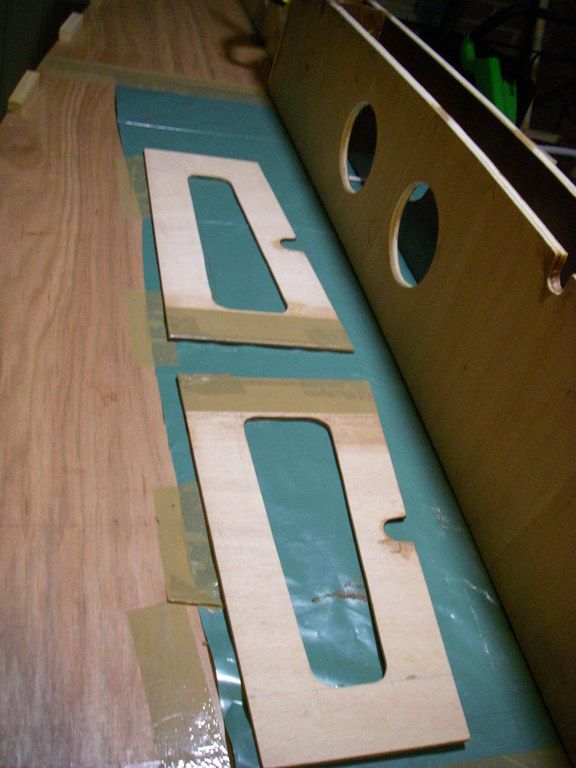
Here's as shot of the mast well:
which is easier to calculate as I know the OD of the mast tube. The packing pieces immediately fore and aft of the well are oak from my offcuts box as I reckon that this area is going to take a fair amount of stress - so I want something tougher than the pine recommended in the plans
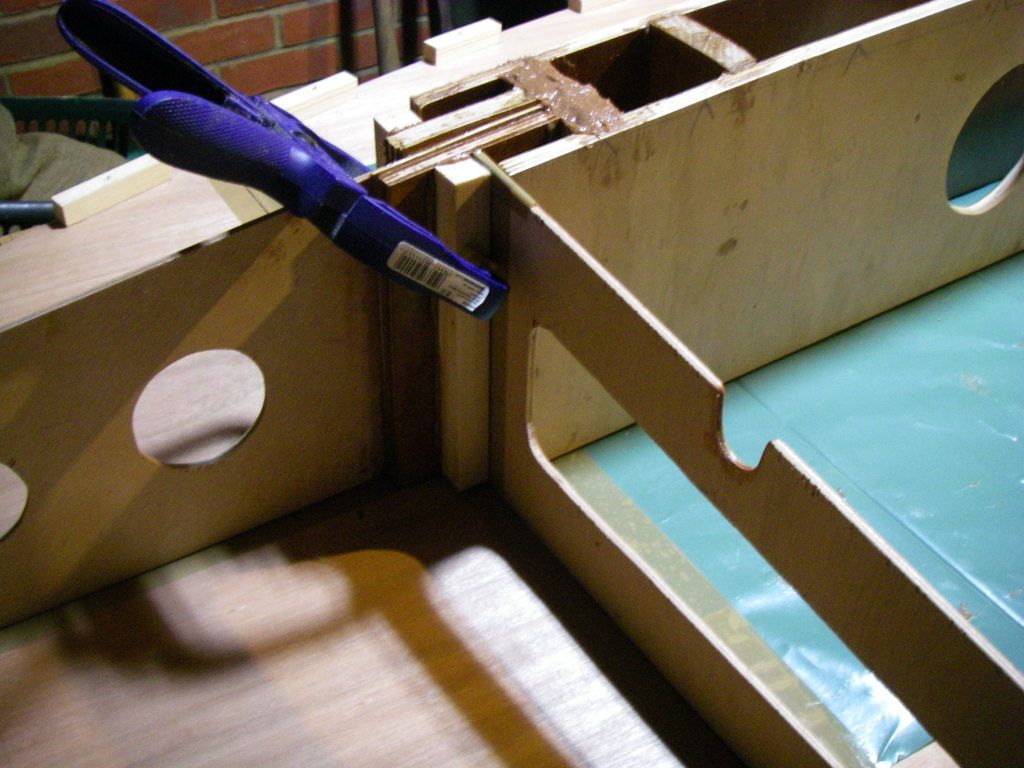
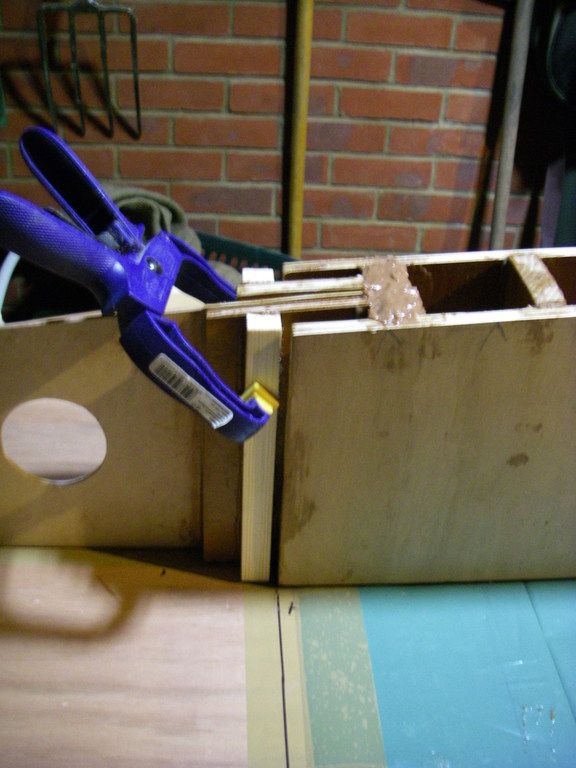
To the left of the clamp, there is a complex joint where the bow stringer enters the trunking. This requires some experimentation with packing pieces to get a good fit:

Once I've got the fit right, I'll tidy up the packers to match the bow stringer, bulkhead and trunking.
Next up will be the glueing up, which I think will be at least a 2 stage process.
Re: MF14 - New Build in UK
Posted: Mon Dec 16, 2013 9:30 am
by jacquesmm
Nice clean build but I have to move this to the proper forum.
Re: MF14 - New Build in UK
Posted: Tue Dec 17, 2013 4:57 am
by Whameller
Apologies - my mistake.
Re: MF14 - New Build in UK
Posted: Wed Dec 25, 2013 4:56 pm
by Whameller
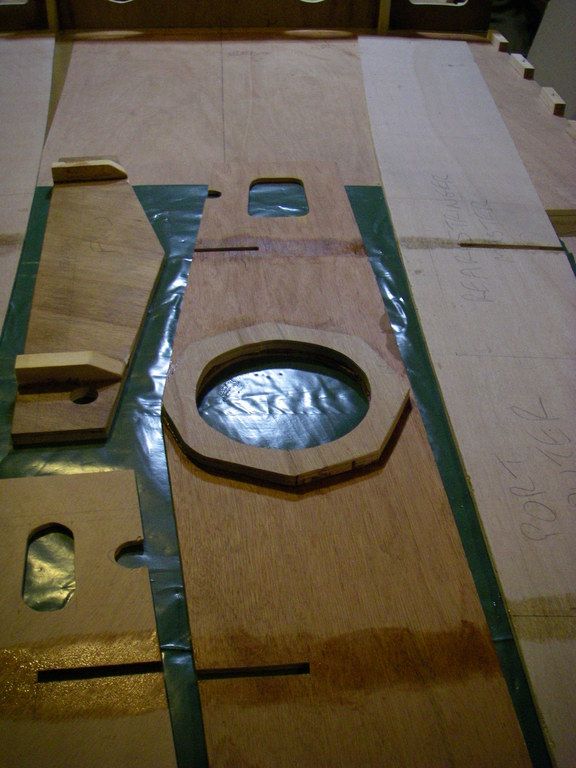
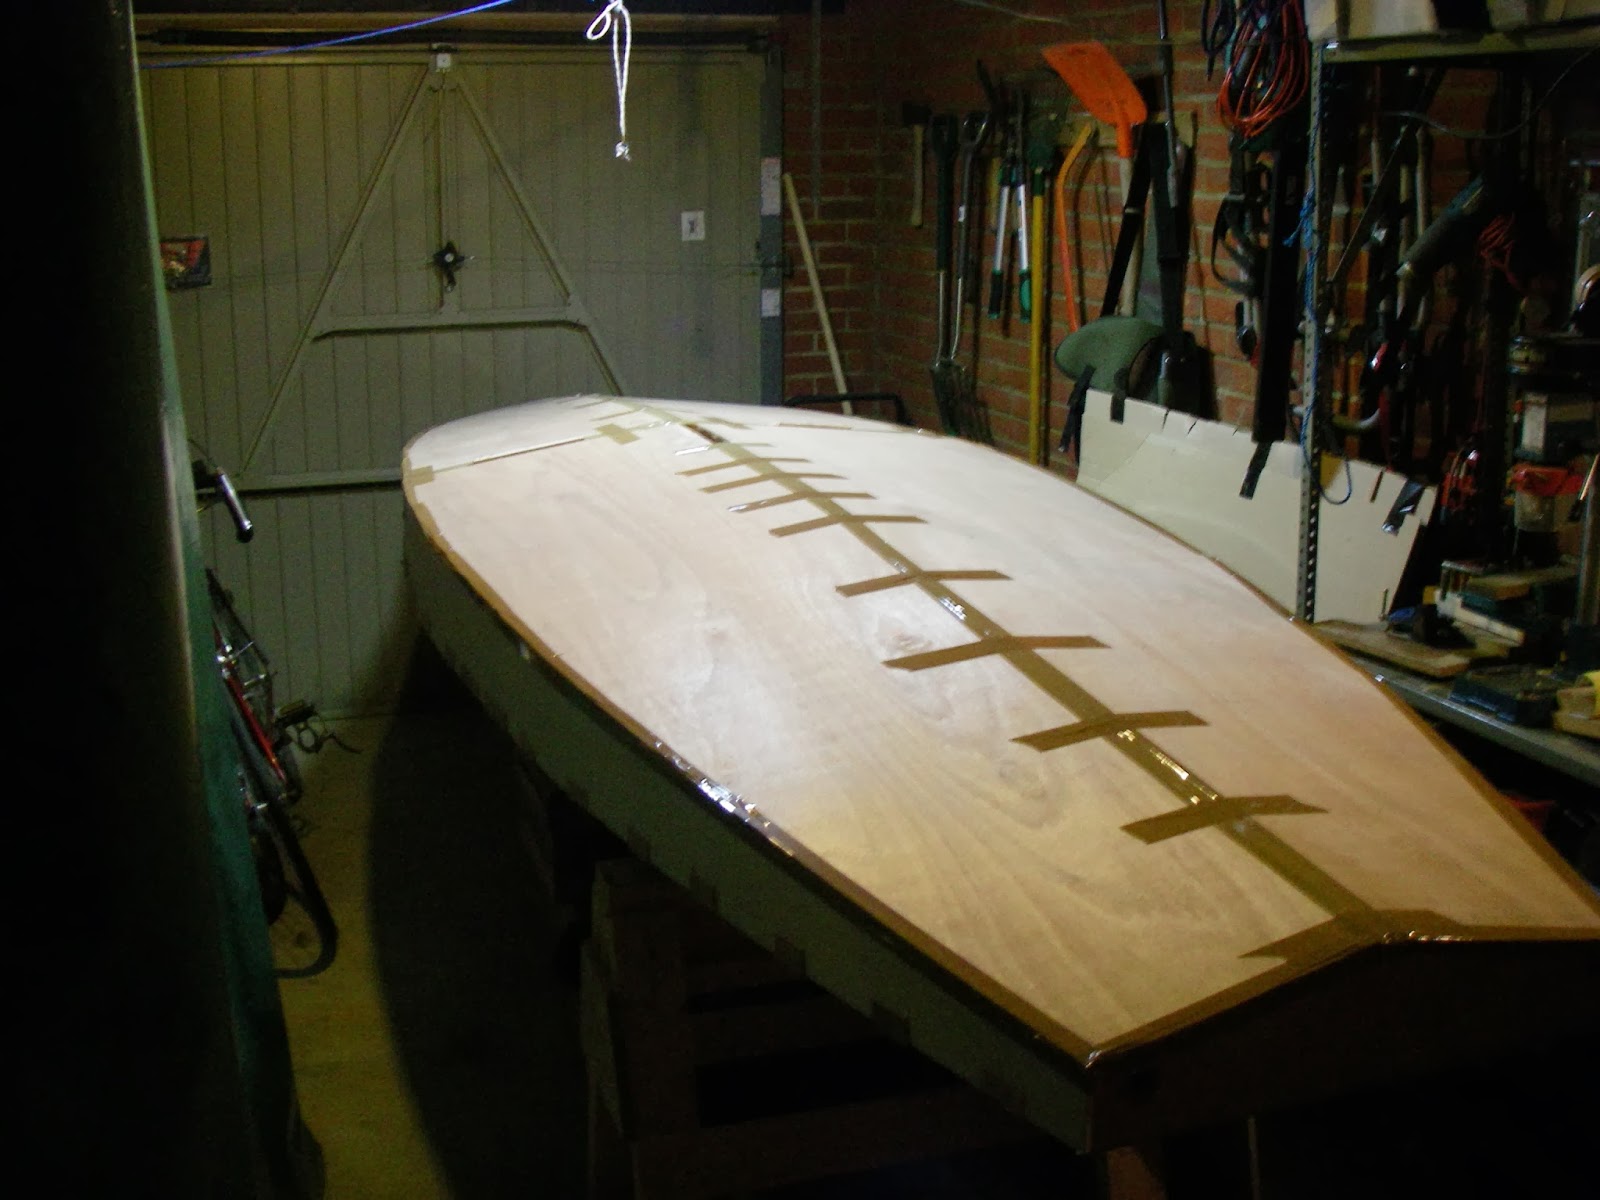
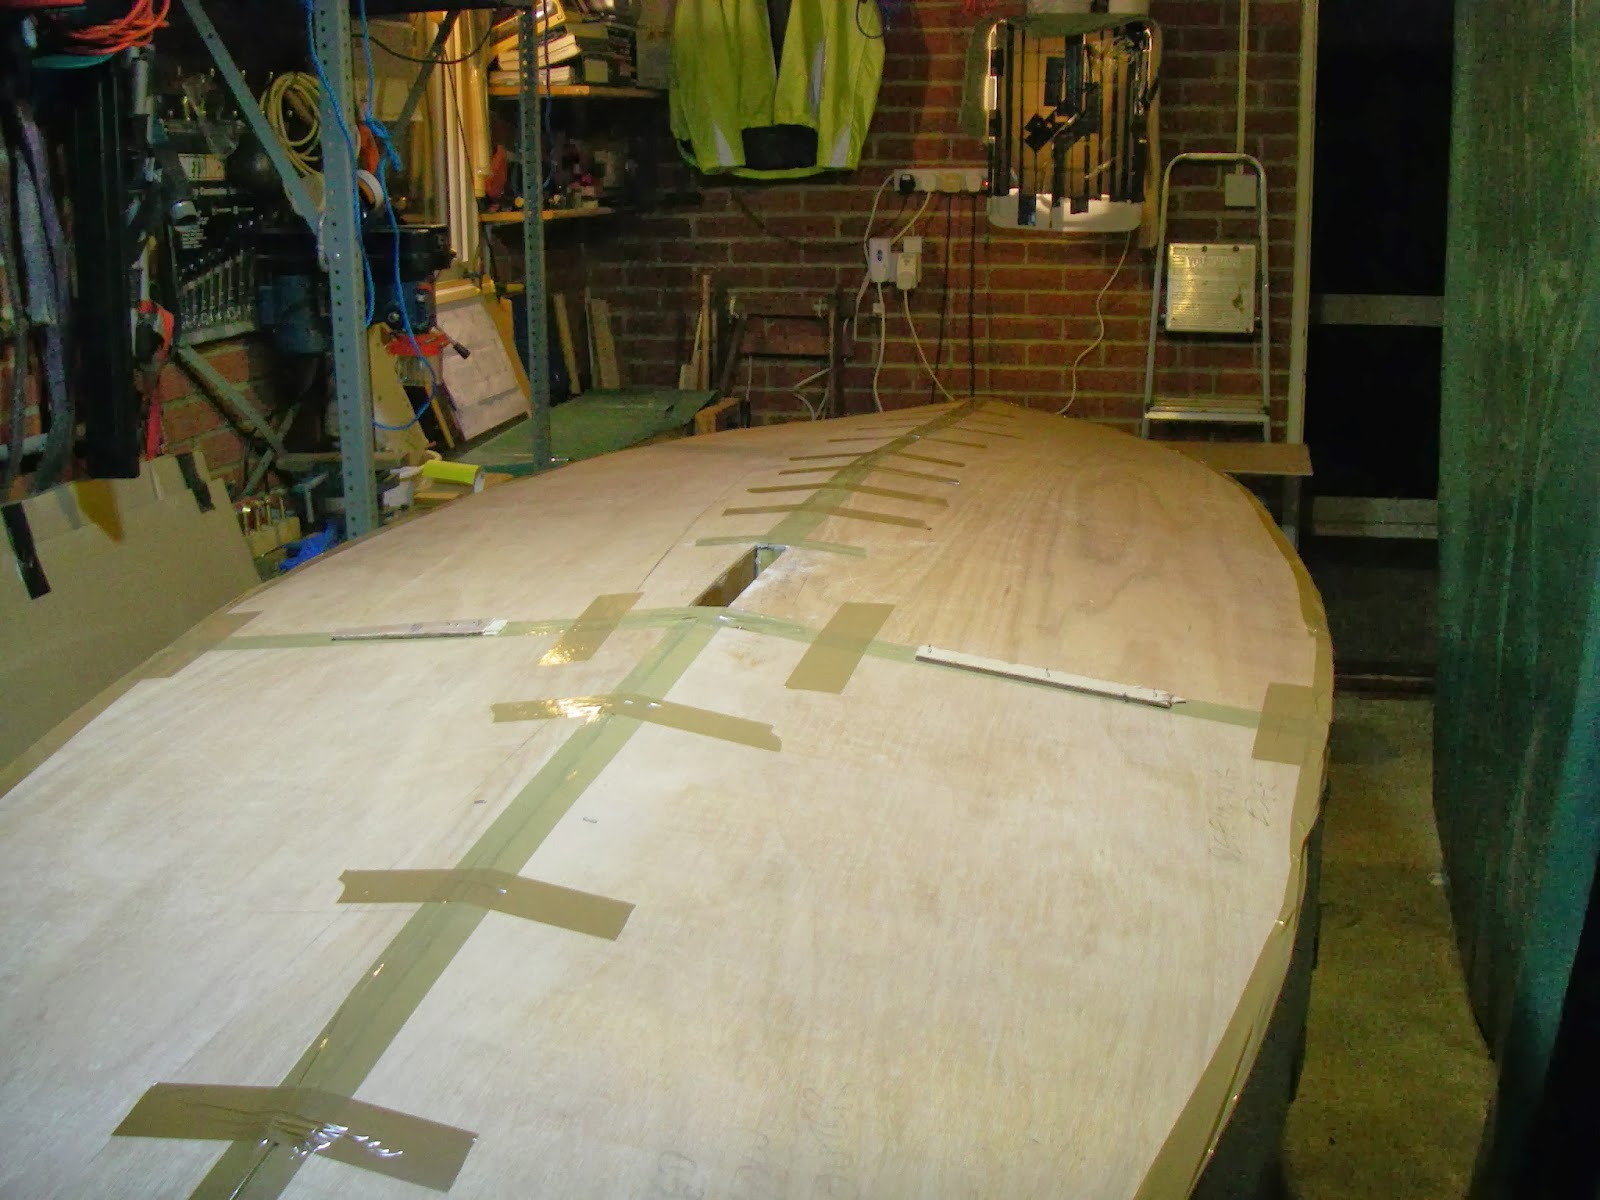
The Moonfish design uses the inverted deck accurately marked out as the building jig for the frame. Here you can see that, after I marked out the positions of the bulkheads and stringers on the deck in pencil, I covered them with parcel tape and then remarked with permanent marker:
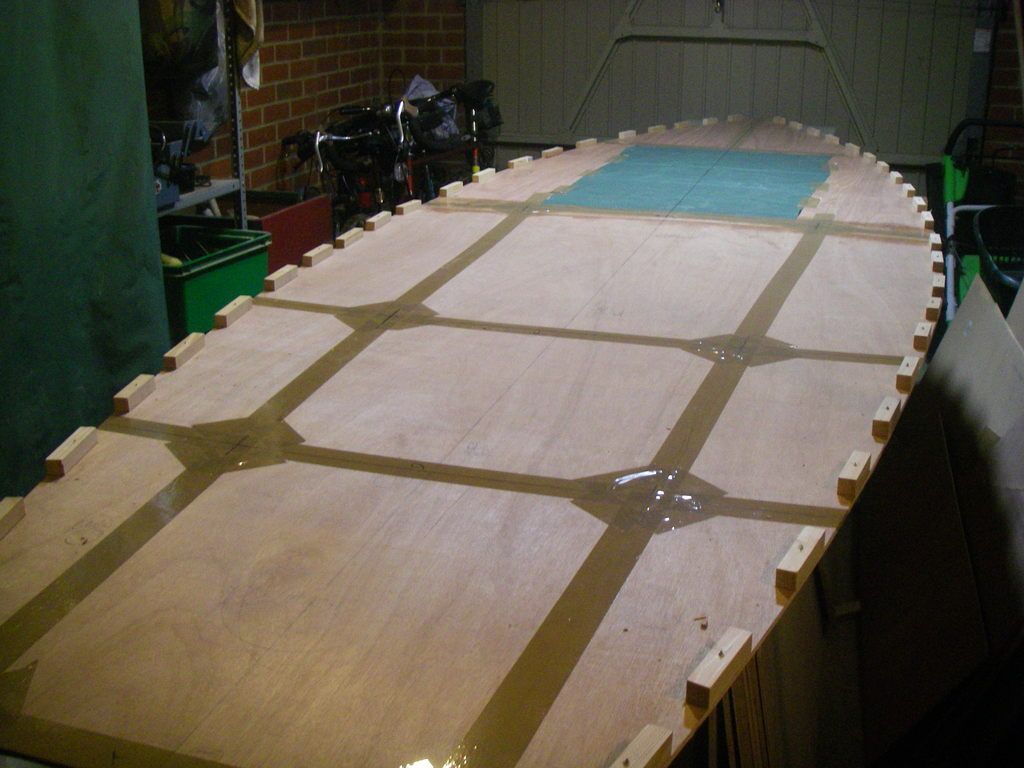
The tape is to prevent the frame sticking to the deck at this stage of assembly; the green polythene sheet serves the same function for the daggerboard/mast trunking assembly. The cleats around the sheerlines are screwed on temporarily and will be used when fixing the hull side panels to the frame.
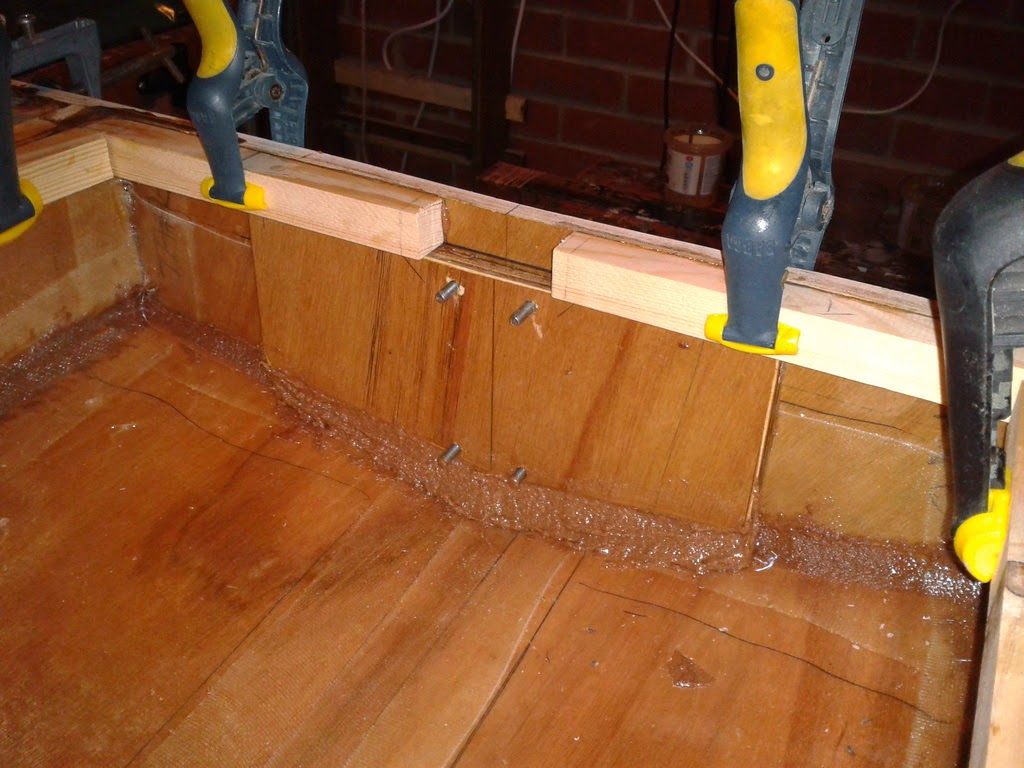
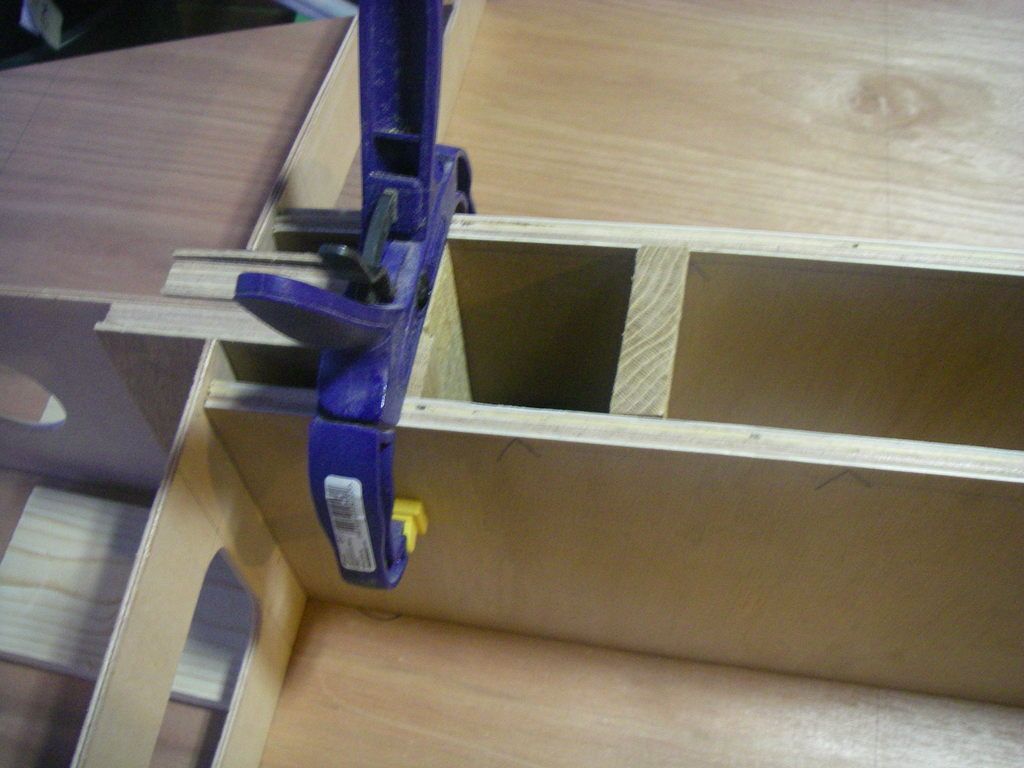
I start the daggerboard trunk in two halves. When it was accurately dry assembled, I drilled it for dowels which will provide accurate and positive location during assembly:
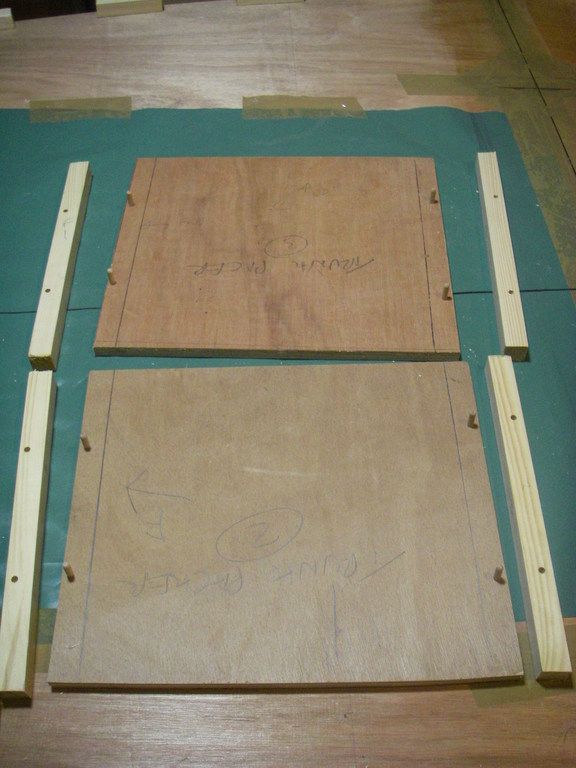
I've learned the hard way that epoxy coated components are slippery and tricky to clamp together accurately !
Once those packing pieces were glued on, I then coated the trunk sides with glass cloth and epoxy:
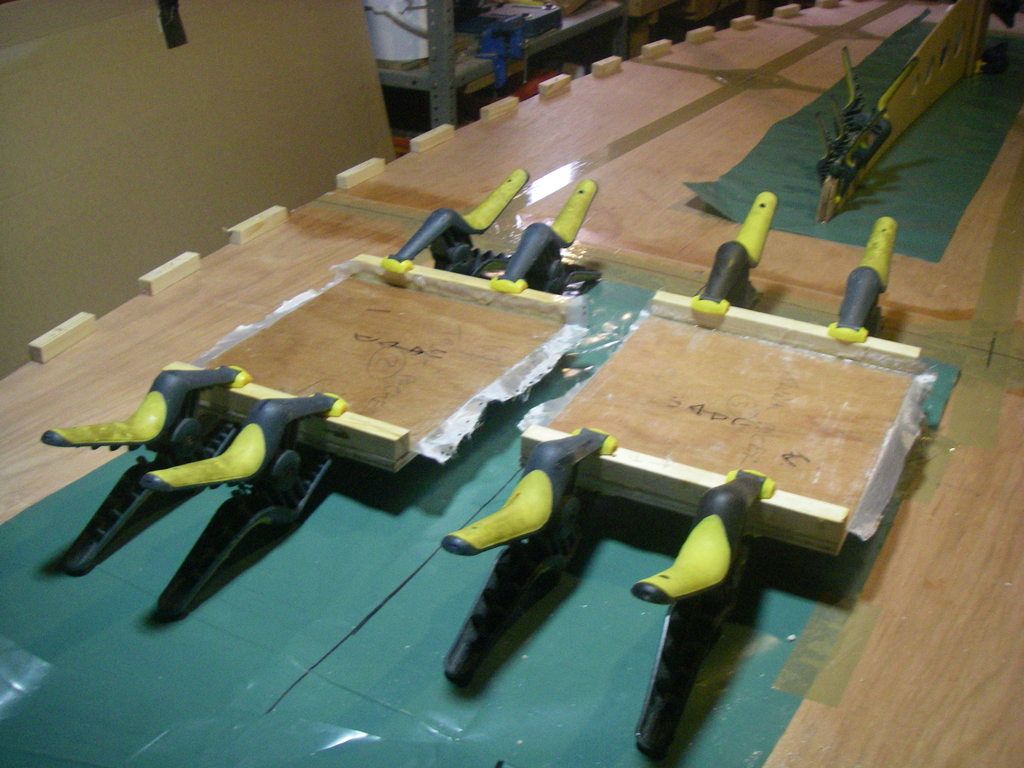
These will need a second coat of epoxy before assembly of the trunk. Once assembled, the ends formed by the packing pieces will be covered by glass tape and epoxy.
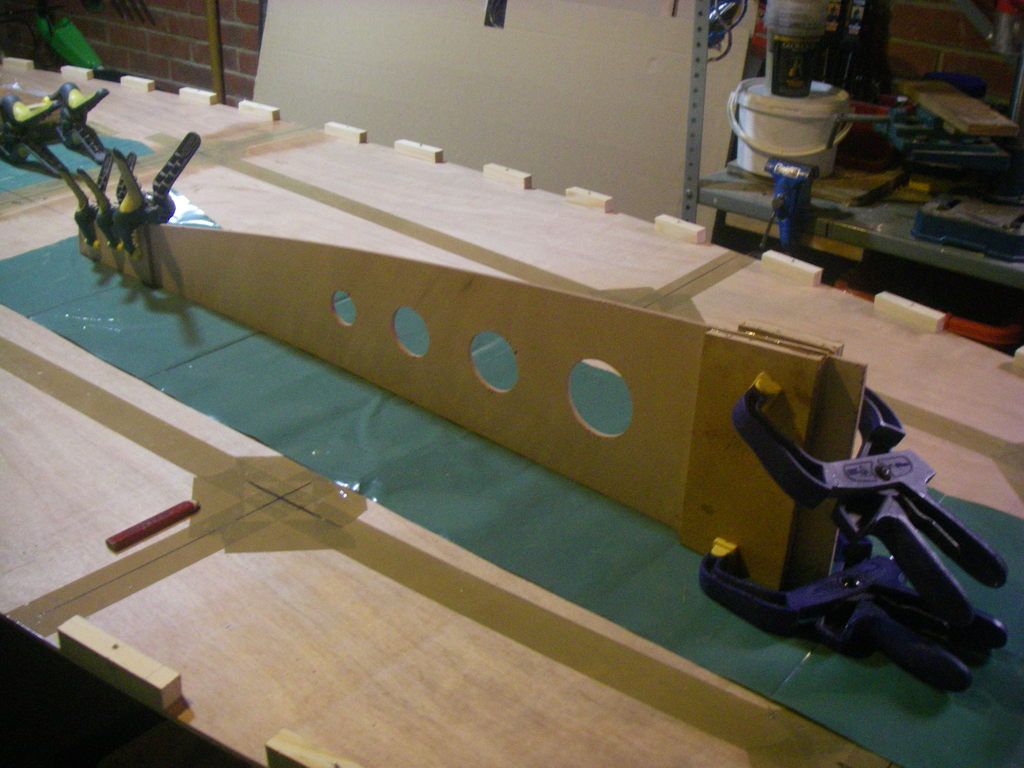
Next up is the bow stringer, which gets doublers at the bow and packing pieces where it goes into the daggerboard/mast trunking:
Re: MF14 - New Build in UK
Posted: Thu Jan 02, 2014 7:11 am
by Shamrock Kid
Very nice clean work you can tell you've done this a time or two. Can't wait to see it come together so I can pick up some pointers.
Re: MF14 - New Build in UK
Posted: Sun Jan 12, 2014 5:12 pm
by Whameller
Holidays over, back at work - I've had some time to make some progress over the last couple of weekends.
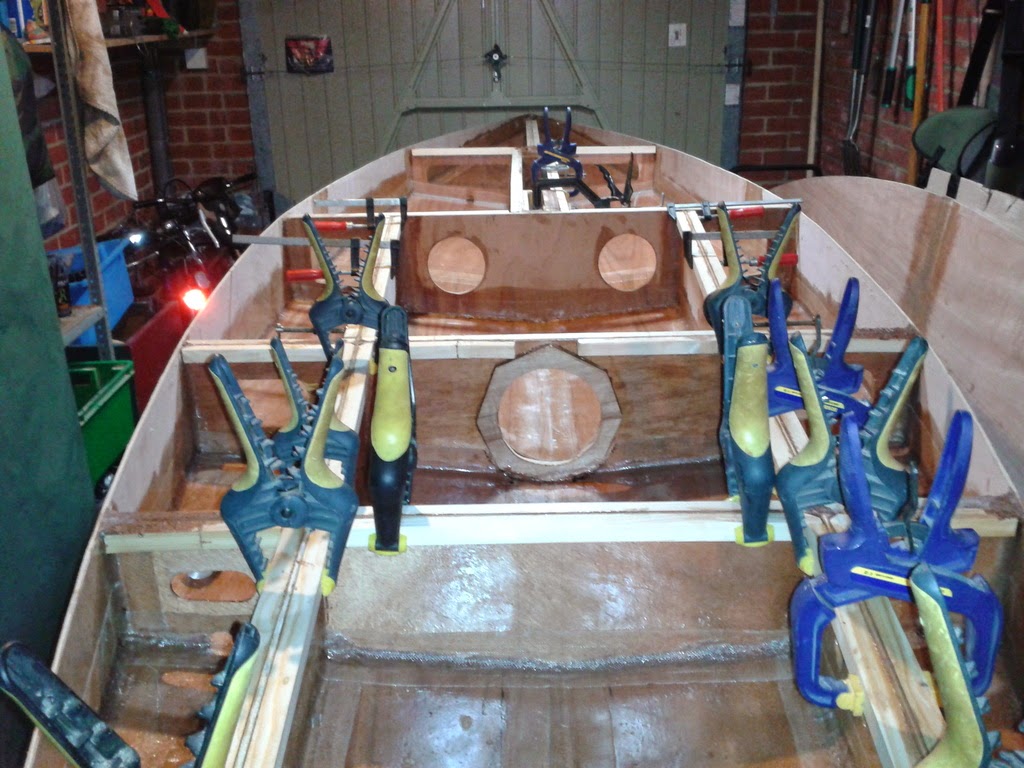
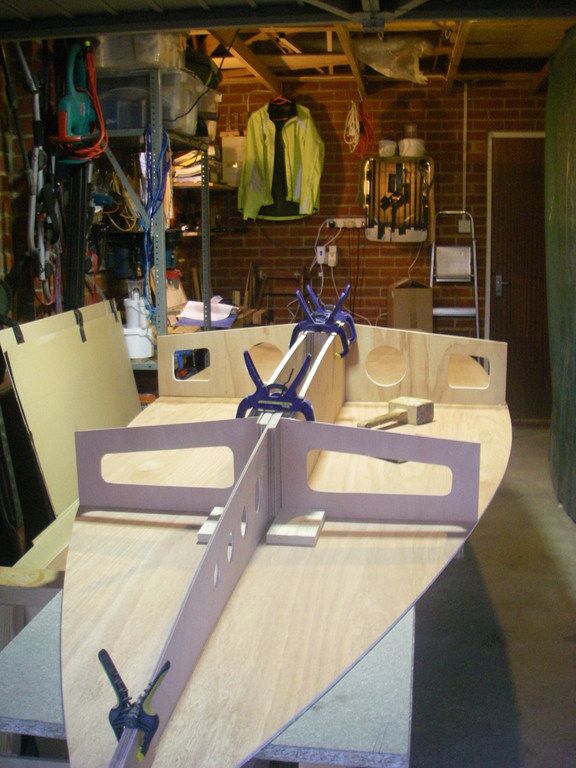
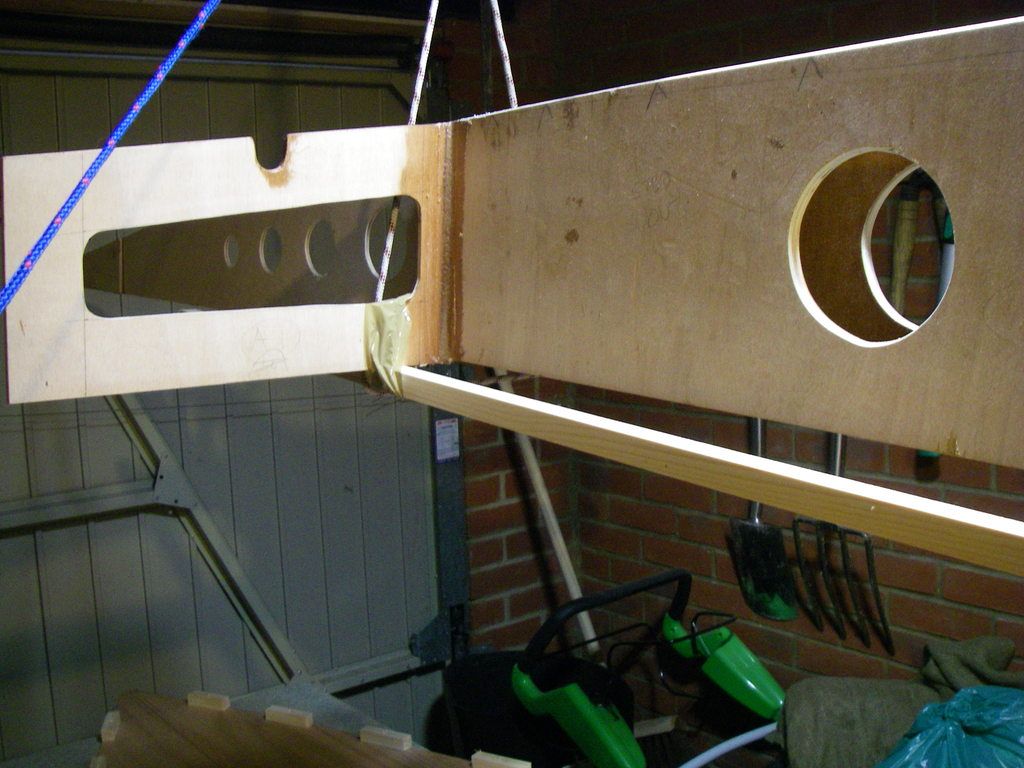
Last weekend, I got the trunking that houses both the daggerboard and mast wells assembled:
(there are 19 separate components in this assembly - I used nearly that many clamps)
This is the key assembly of the whole frame and includes the bow stringer. Assembly was a three stage process needing patience as I waited for the epoxy to go off before being able to move on to the next stage.
Here's the result:
This weekend, I moved on to bulkheads A and B.
Bulkhead A is in 2 parts:
and needed some careful dry assembly and pre-setting of supporting cleats to ensure that the alignment was correct:
I then moved on to bulkhead B, which is the main load bearing cross-boat structure in the boat and forms the forward wall of the cockpit/well:
So that's the forward half of the frame complete.
Re: MF14 - New Build in UK
Posted: Sun Jan 12, 2014 5:18 pm
by Whameller
Shamrock Kid wrote:Very nice clean work you can tell you've done this a time or two. Can't wait to see it come together so I can pick up some pointers.
You are very kind to say so, but I've only built one small stitch & tape tender and a couple of skin on frame kayaks before this. They did teach me the value of economical use of epoxy AND of cleaning off any surplus, drips, etc while still uncured. Rasping & sanding back cured epoxy if very hard labour indeed and best avoided wherever possible !
Re: MF14 - New Build in UK
Posted: Mon Jan 13, 2014 12:37 pm
by ks8
Re: MF14 - New Build in UK
Posted: Sat Jan 25, 2014 4:08 pm
by Whameller
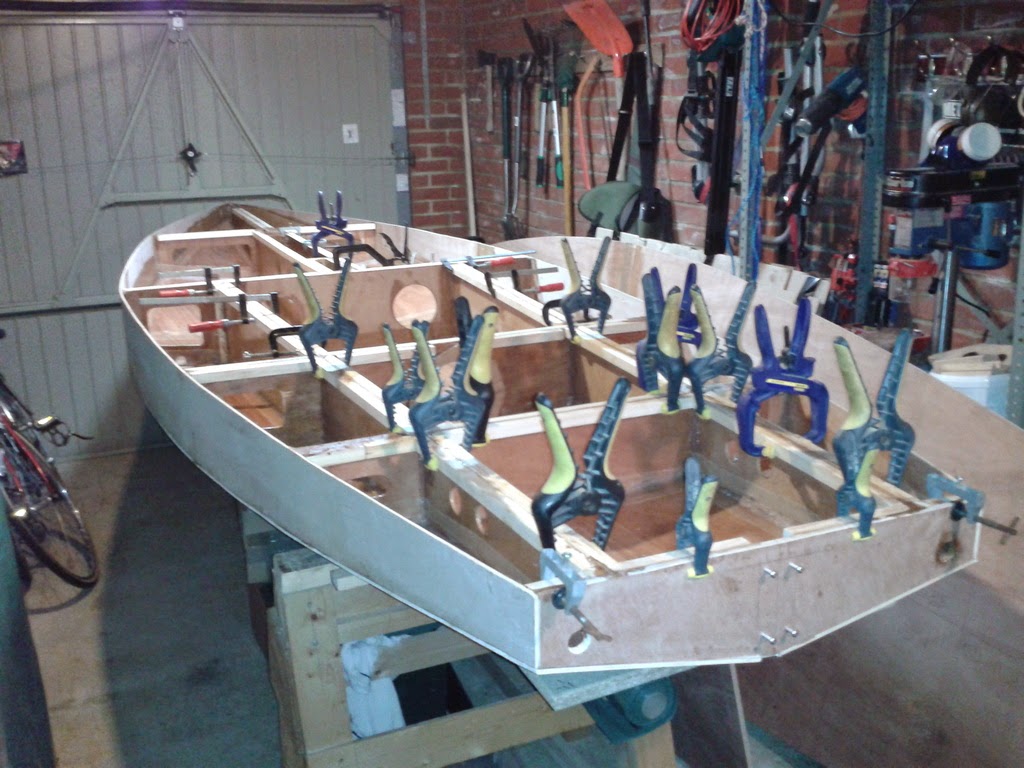
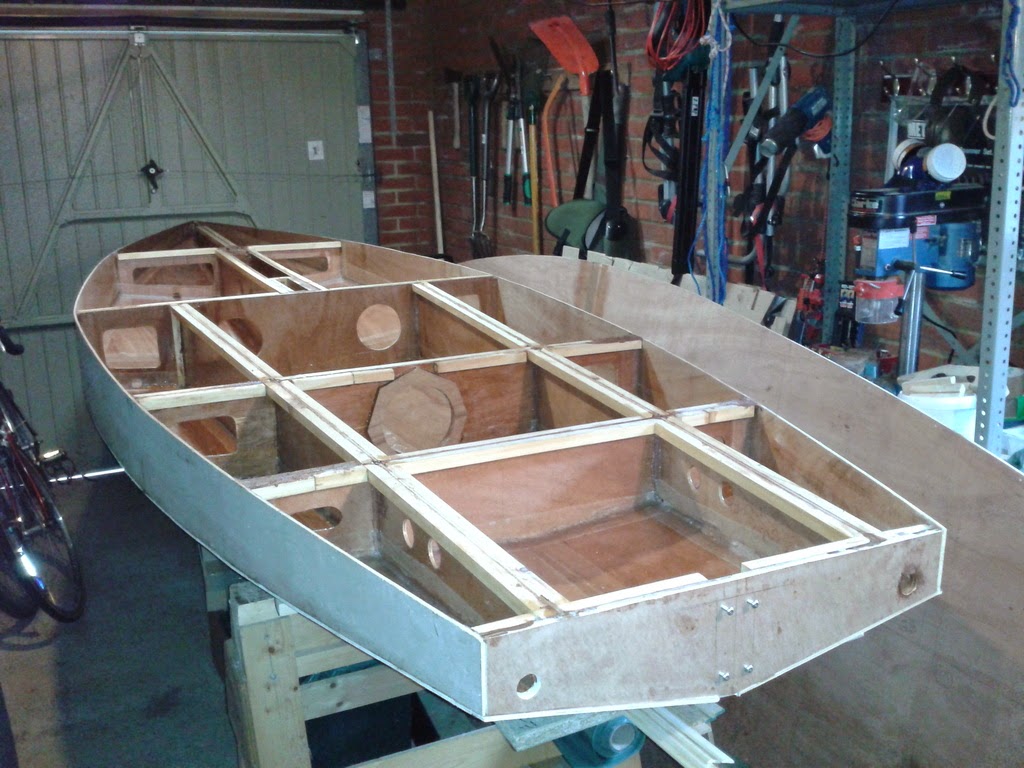
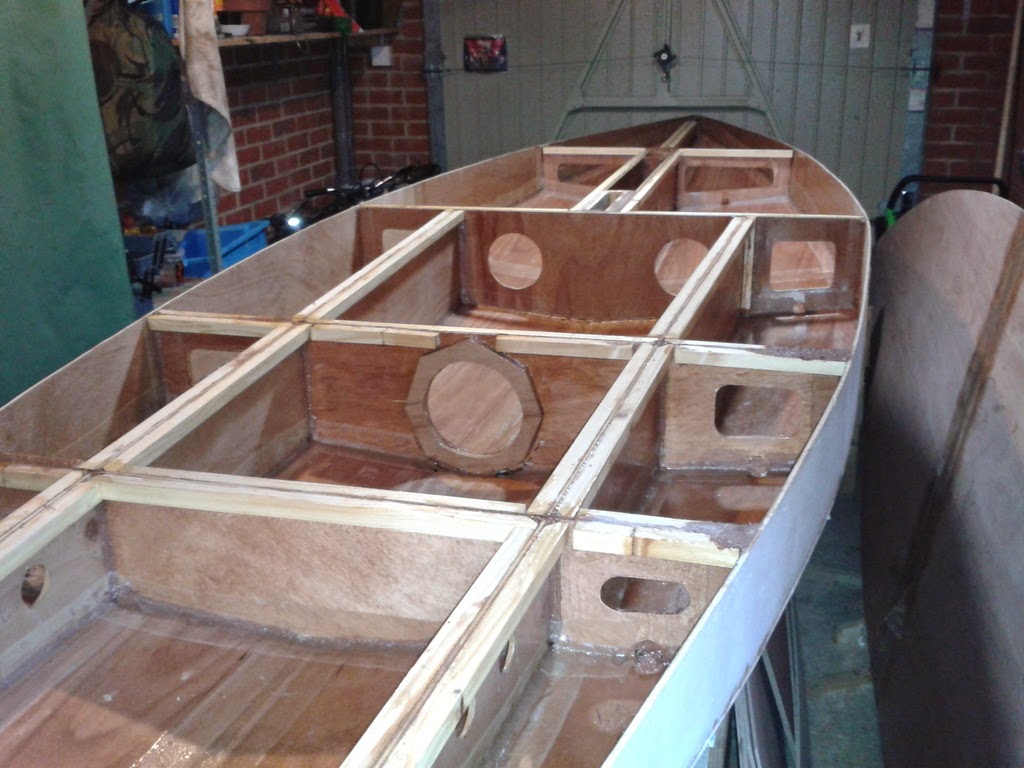
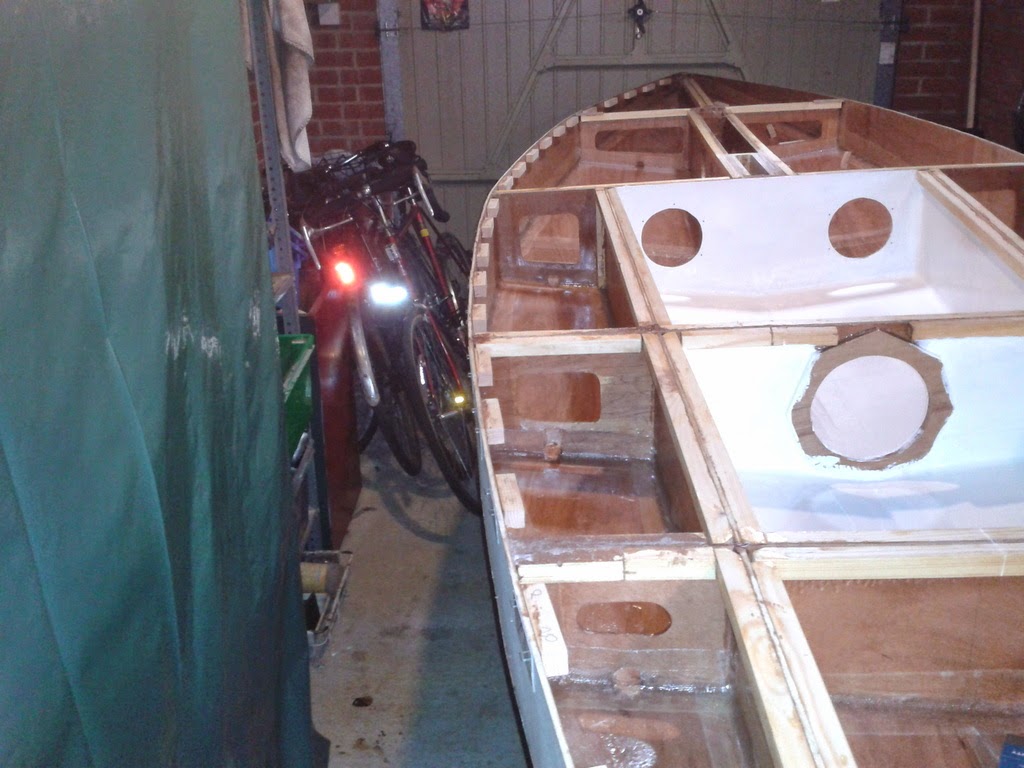
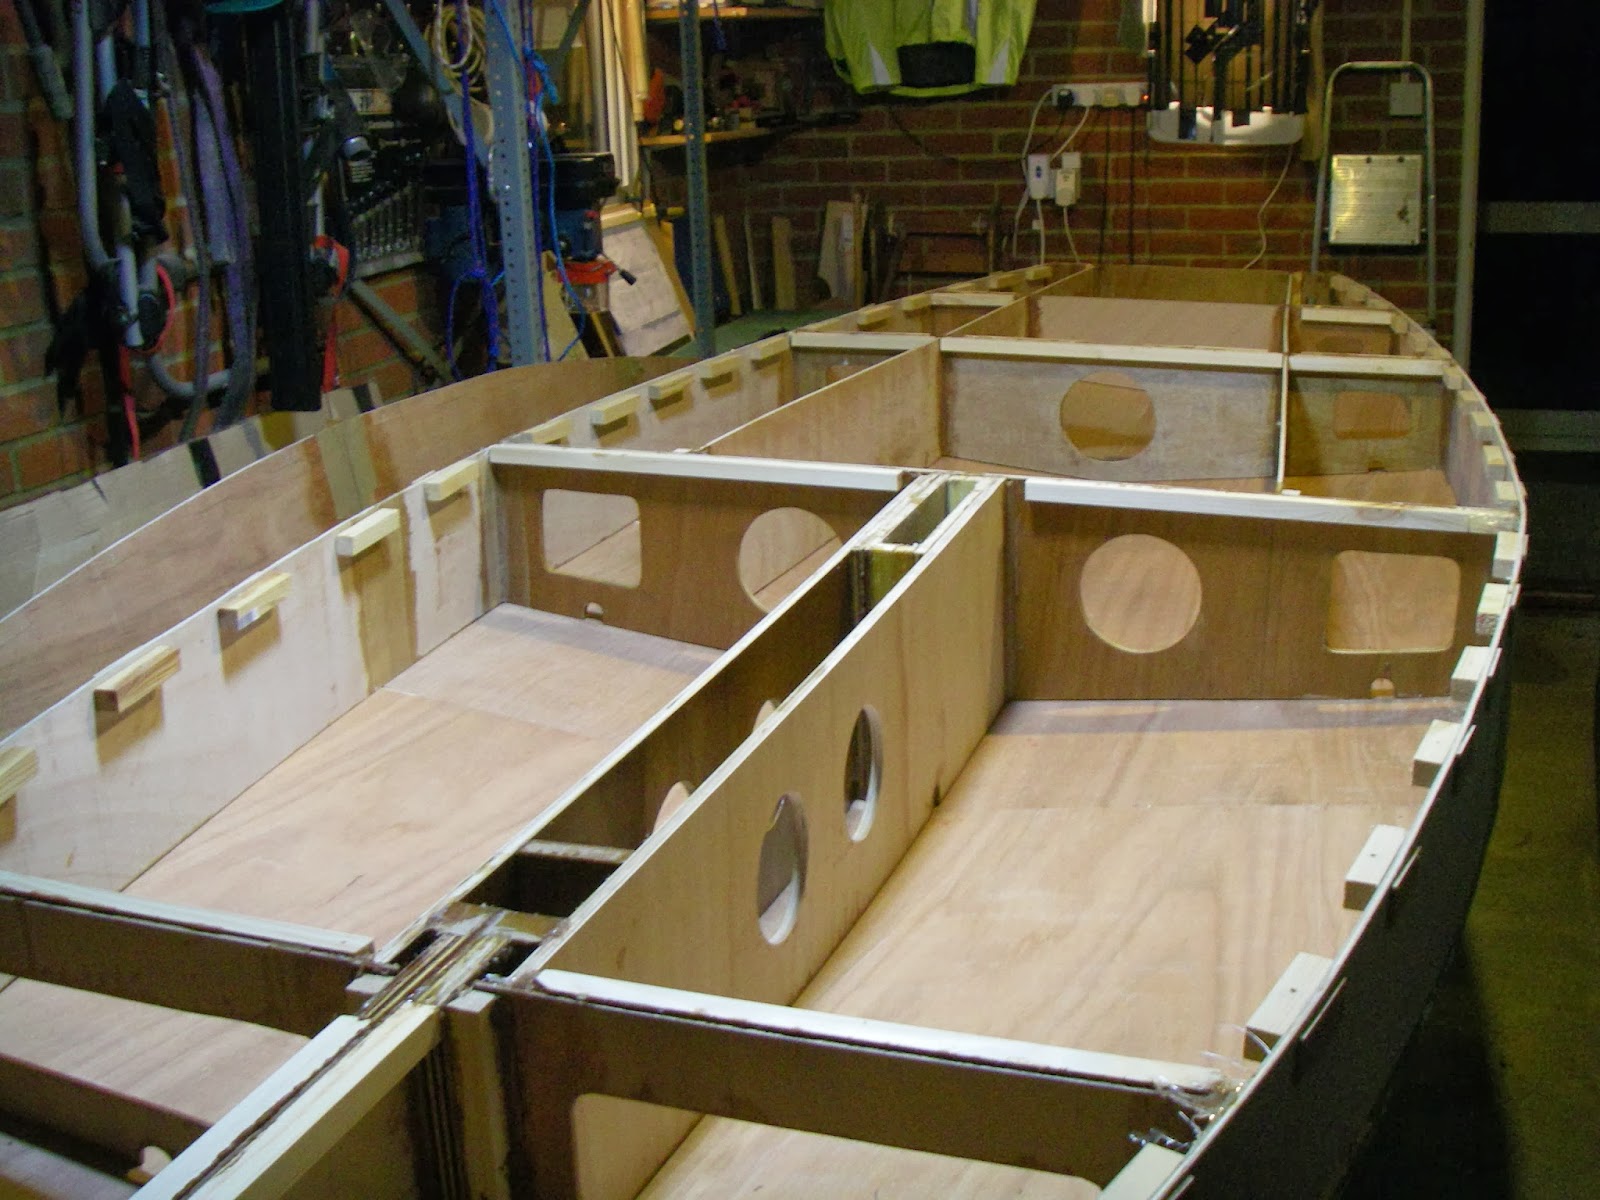
The frame is now complete:
Bulkhead C has a doubler to give some meat for the screws when I come to fit the watertight hatch:
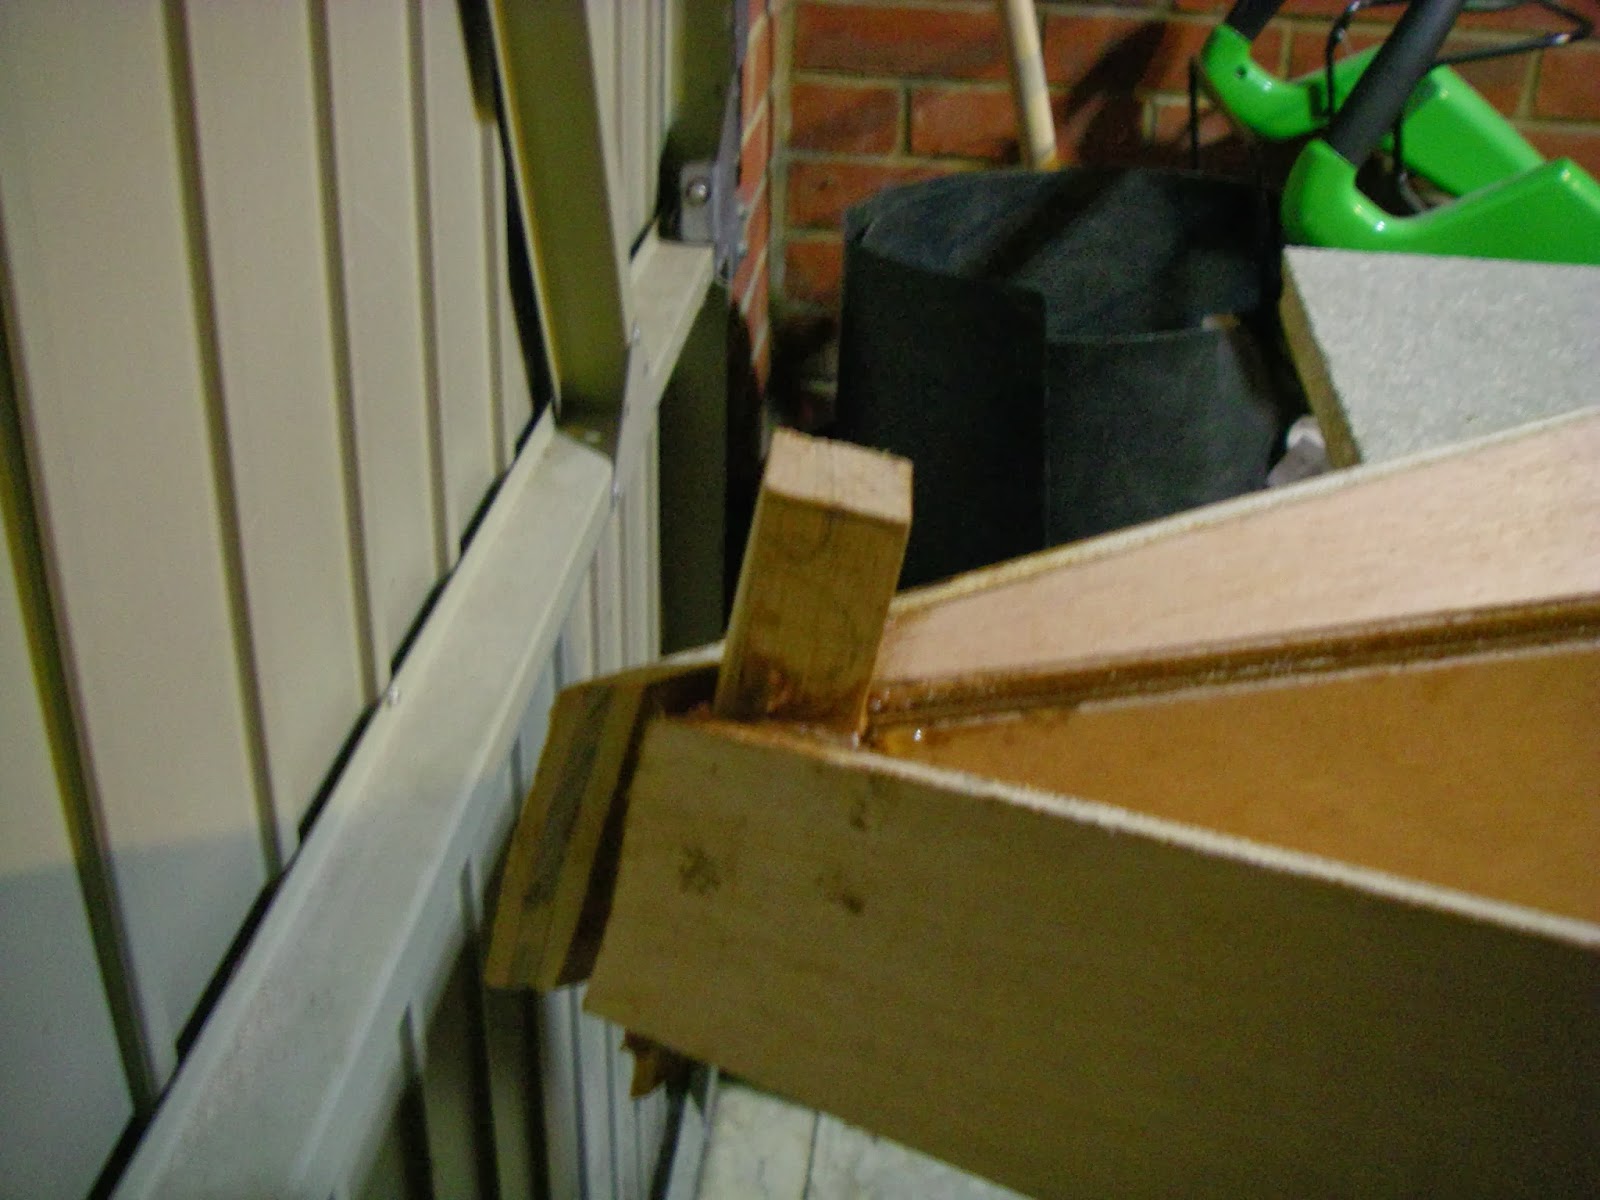
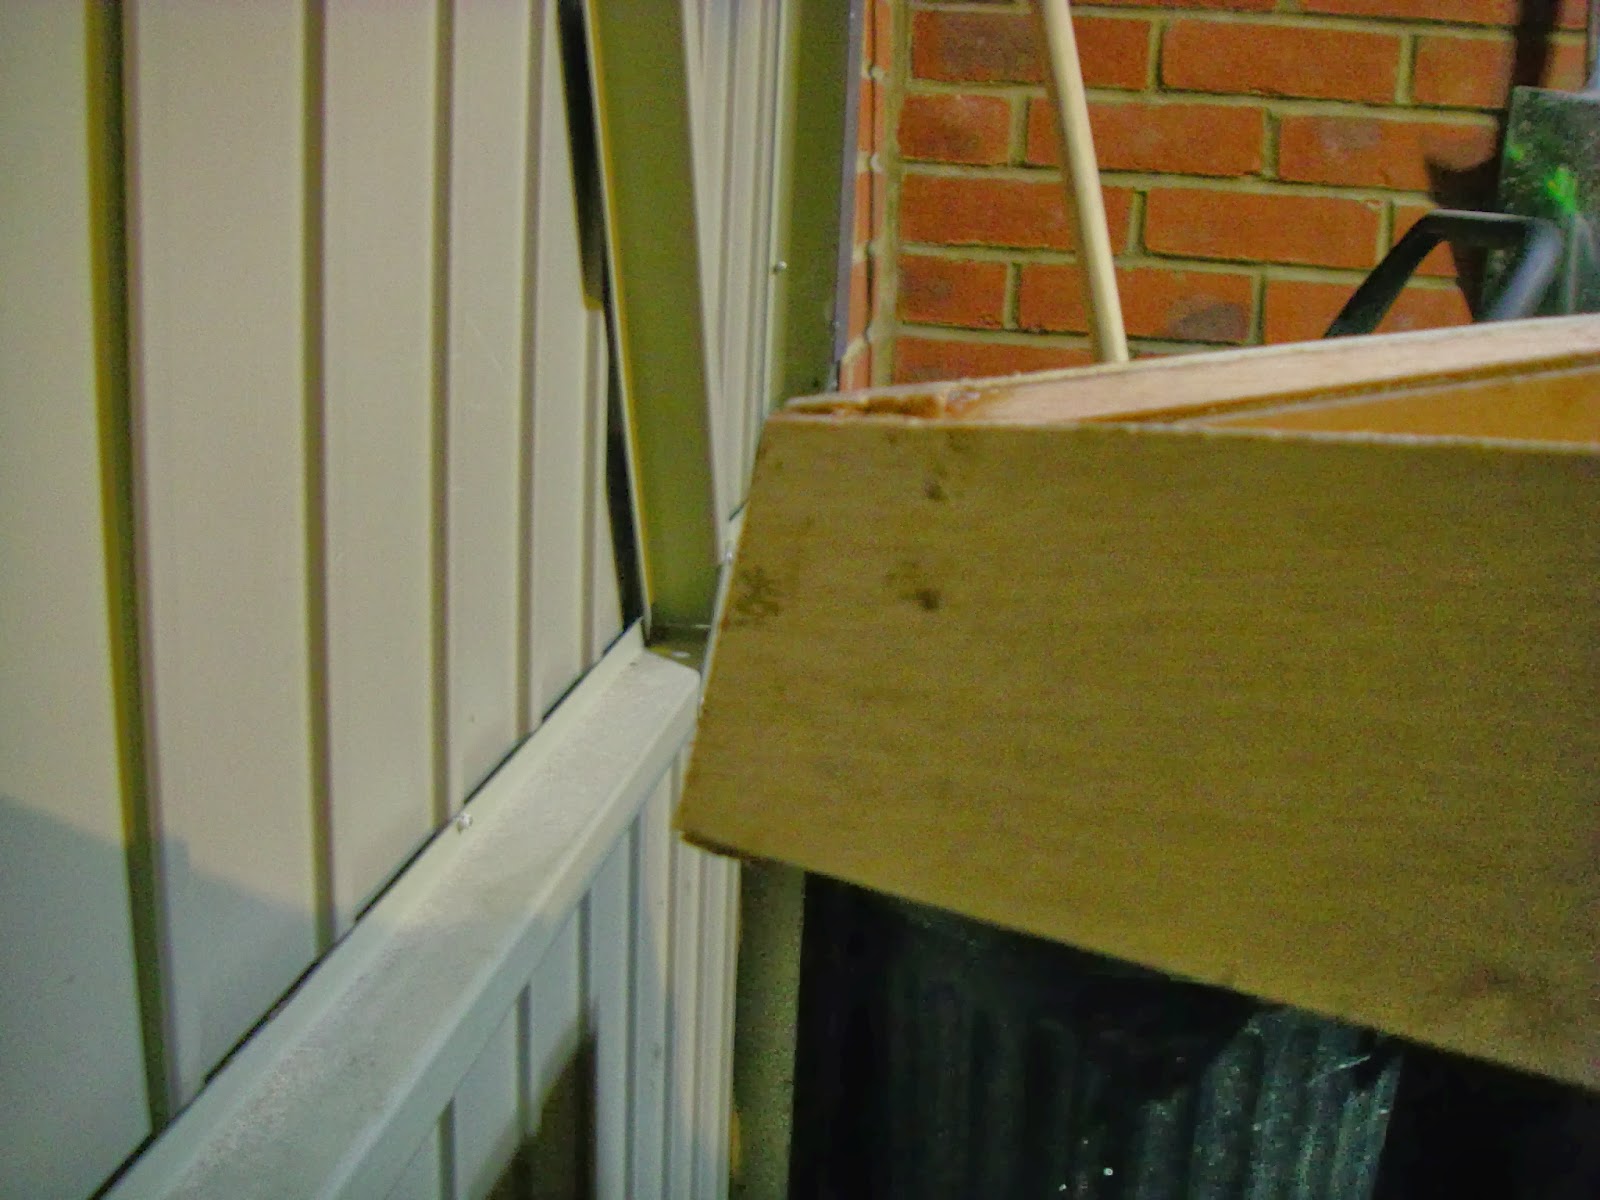
And I need to move on to marking out the side and bottom panels. The only place I have space is up:
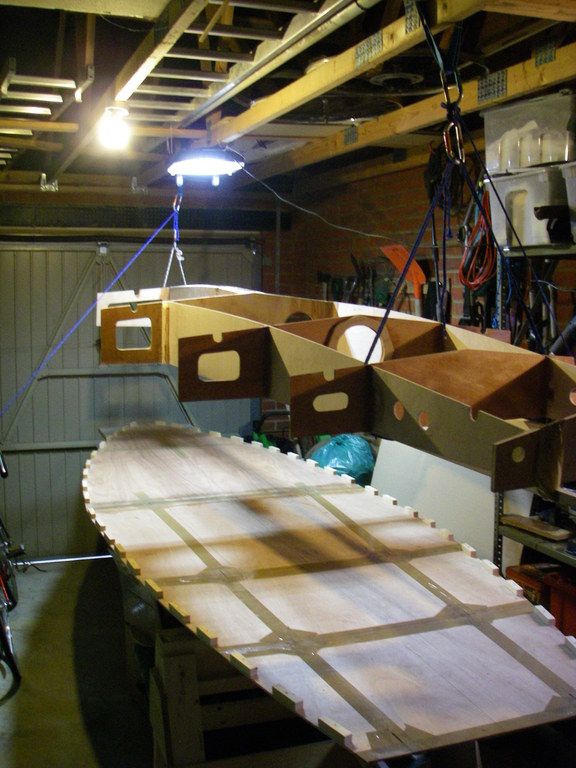
A couple of long battens, 2 slings and 4 carabiners from my climbing days, some parcel tape and up she goes. This gives me space to mark out on ply sheets that have been pre-cut in half lengthways - careful study of the nesting diagram allowed me to solve a storage problem earlier.

I've now got half the 4 bottom panels marked and cut out (thanks to a brief break in the appalling weather we're having in the UK this winter allowing to get outside to cut panels) and will do the other 2 tomorrow; the weather forecast is dry.
Re: MF14 - New Build in UK
Posted: Sat Jan 25, 2014 4:42 pm
by Cracker Larry
Nice work in such a tight space. Very cool
This ain't your first rodeo is it?
Re: MF14 - New Build in UK
Posted: Sun Jan 26, 2014 6:45 am
by Whameller
Cracker Larry wrote:Nice work in such a tight space. Very cool
This ain't your first rodeo is it?
Thanks Larry. This is the first boat or kayak of this size or complexity that I've attempted. I did build a kit car nearly 30 years ago; I find that the same methodical approach (and RT*I !) works. You've also got to know when to stop work, walk away and come back another day; it's far easier to make mistakes when tired & frustrated !
I'm building my skills up to build a larger retirement boat in a couple of years time.
Re: MF14 - New Build in UK
Posted: Sun Jan 26, 2014 7:16 am
by Cracker Larry
You've also got to know when to stop work, walk away and come back another day; it's far easier to make mistakes when tired & frustrated !
Very true
Re: MF14 - New Build in UK
Posted: Fri Feb 14, 2014 4:03 pm
by Whameller
It's been a while .....
since I last posted but I've managed to make a fair bit of progress on the Moonfish build.
First I got the side panels tacked on with staples (through thin ply pads to make extraction easier):
And then filleted and epoxy taped both sides of each bulkhead/side panel joint. I then realised that I had an issue with the height of both sides of bulkhead A:
which was solved by cutting and planing them down to fit:
Where the side panels meet at the bow, I put in a piece of oak forward of the frame doubler to add a bit of resilience:
I had already pre-cut the four bottom panels, which now had a trial fit. No problems with the bow pair, but there was an issue with the after pair:
I decided to make a fillet for this gap. The first step was to mark out a rough template onto a length of paper (fax roll):
Once I had an oversized fillet cut from ply with the jigsaw, I then refitted the panels and took measurements of the width at 10cm (4") intervals, marked them onto the fillet and cut again with a Japanese hand saw. It was then a question of gradually planing it to fit until I had this:
The panels were then tacked into place with staples, trimmed to fit and the daggerboard slot opening cut. All the seams were then taped with parcel tape:
The hull was then turned over and the deck removed:
Next up - a lot of filleting and epoxy taping .........
Re: MF14 - New Build in UK
Posted: Fri Apr 25, 2014 11:40 pm
by Whameller
Re: MF14 - New Build in UK
Posted: Fri Apr 25, 2014 11:44 pm
by Whameller
Re: MF14 - New Build in UK
Posted: Fri Apr 25, 2014 11:53 pm
by Whameller
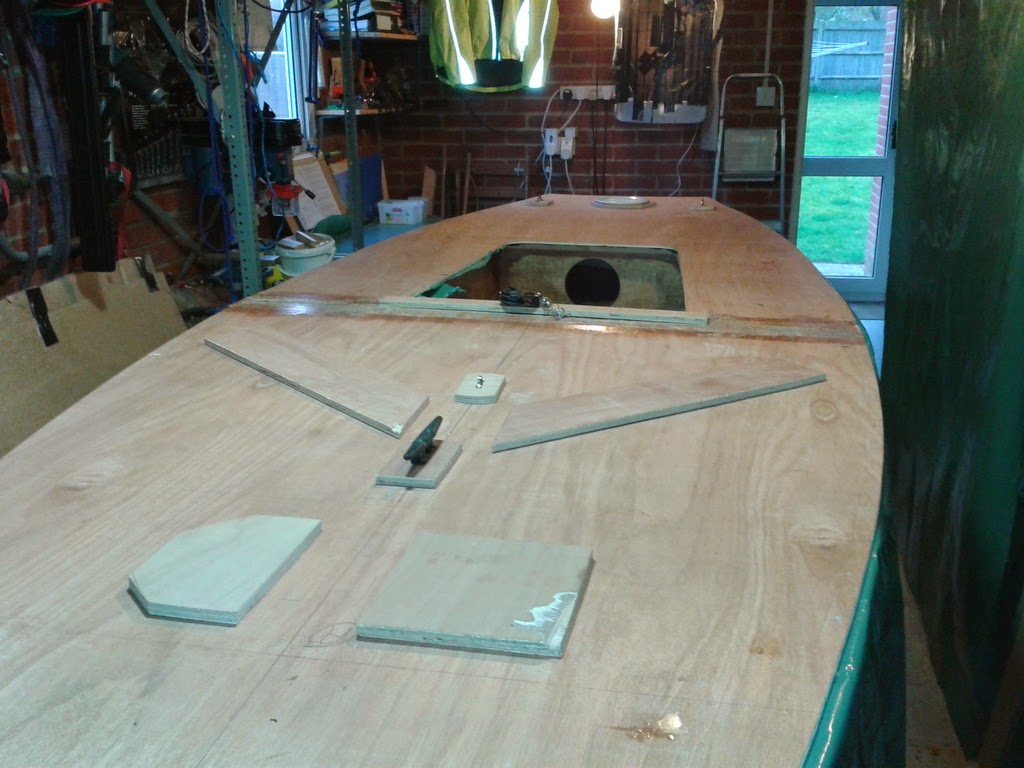
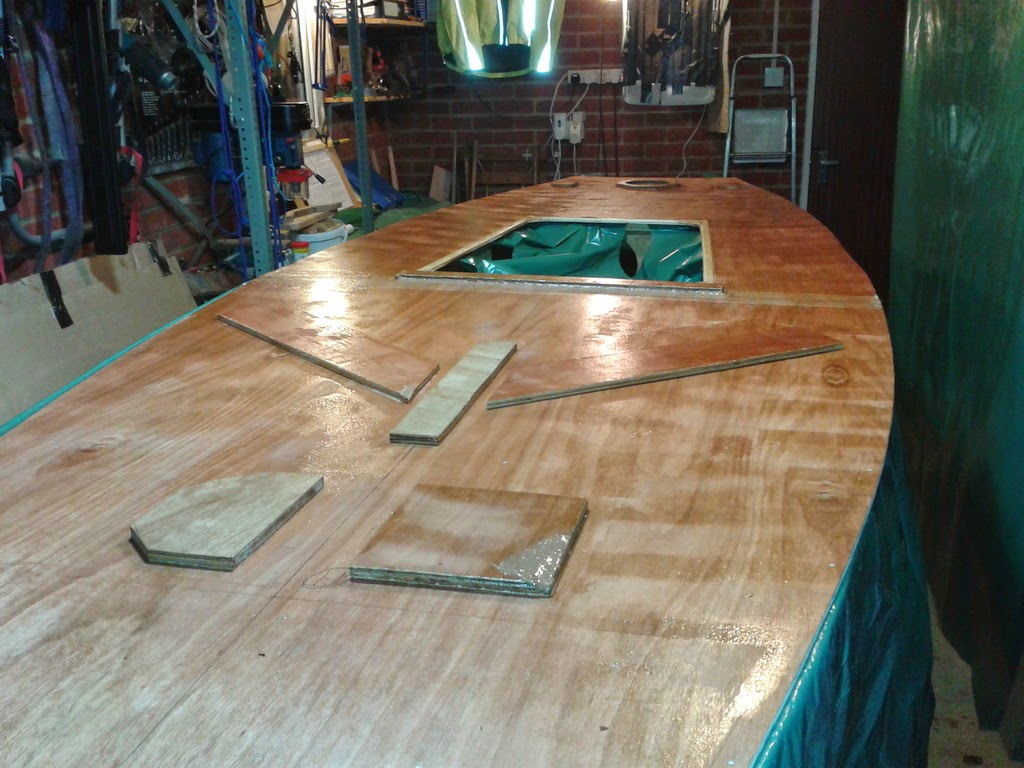
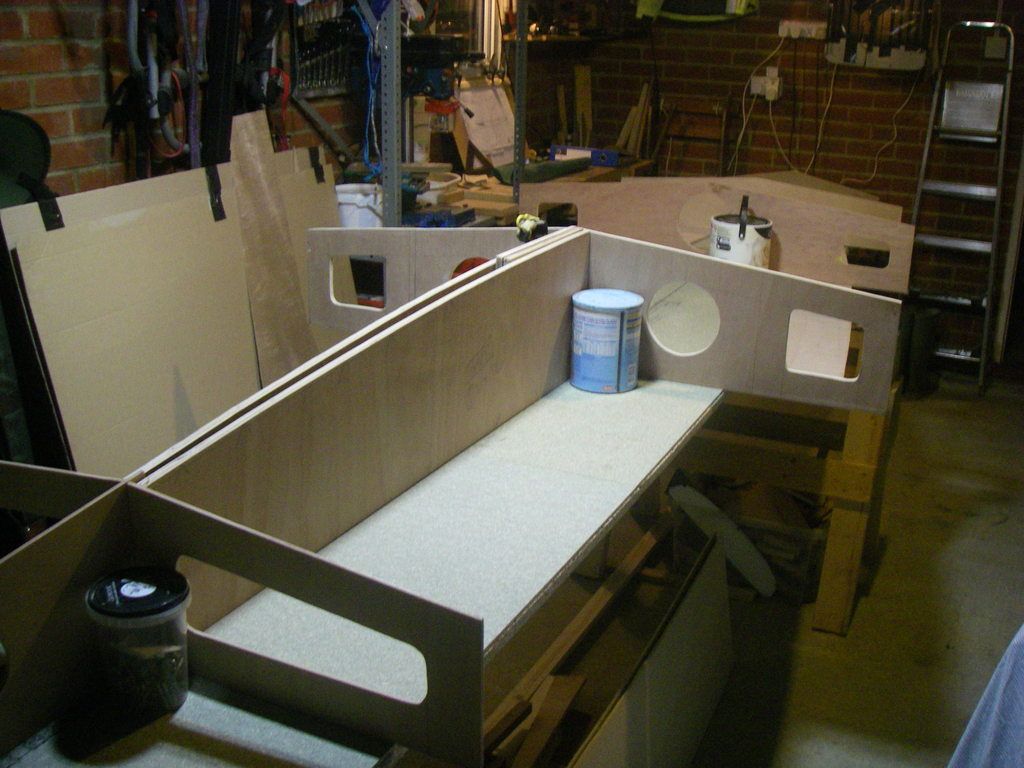
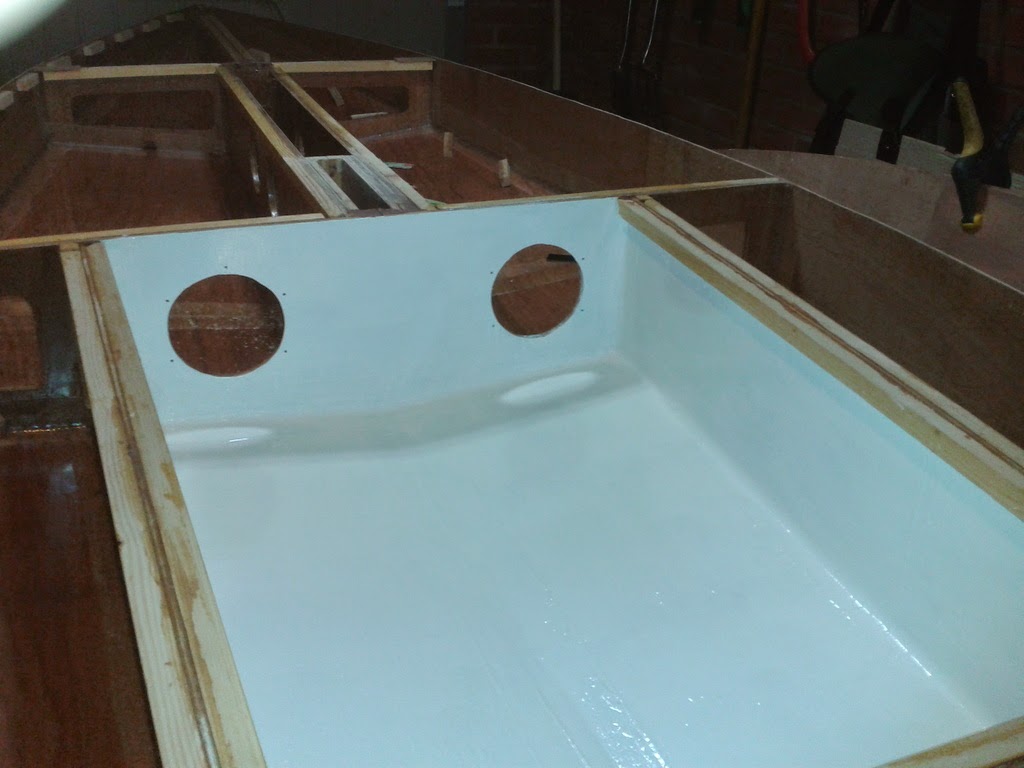
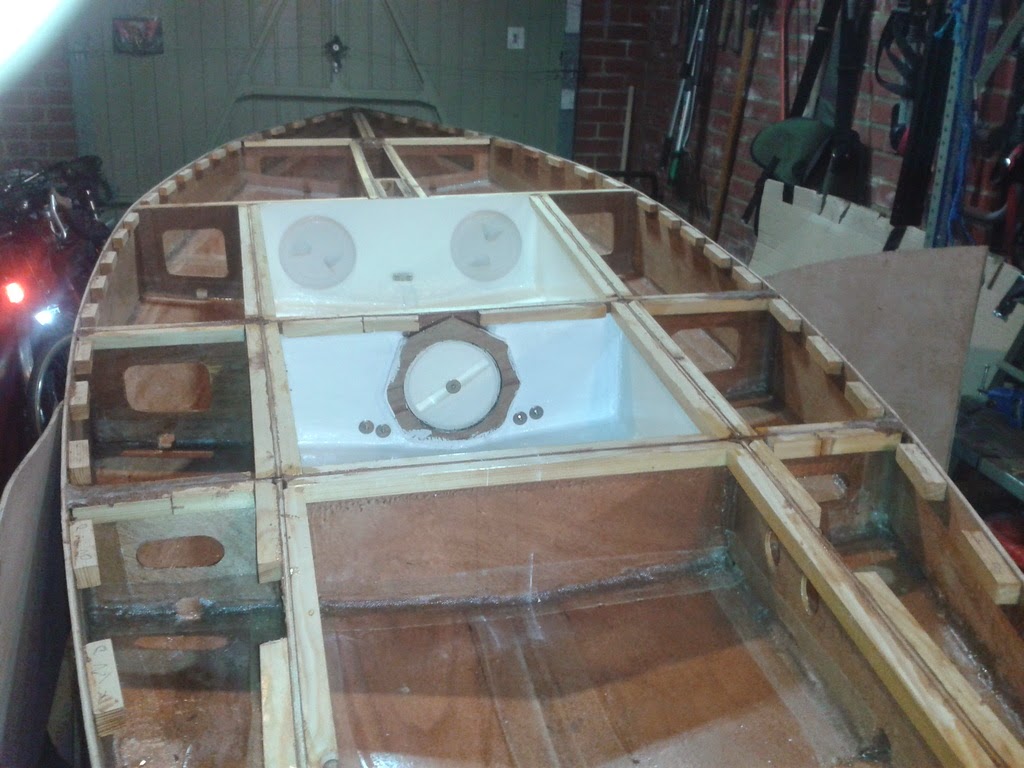
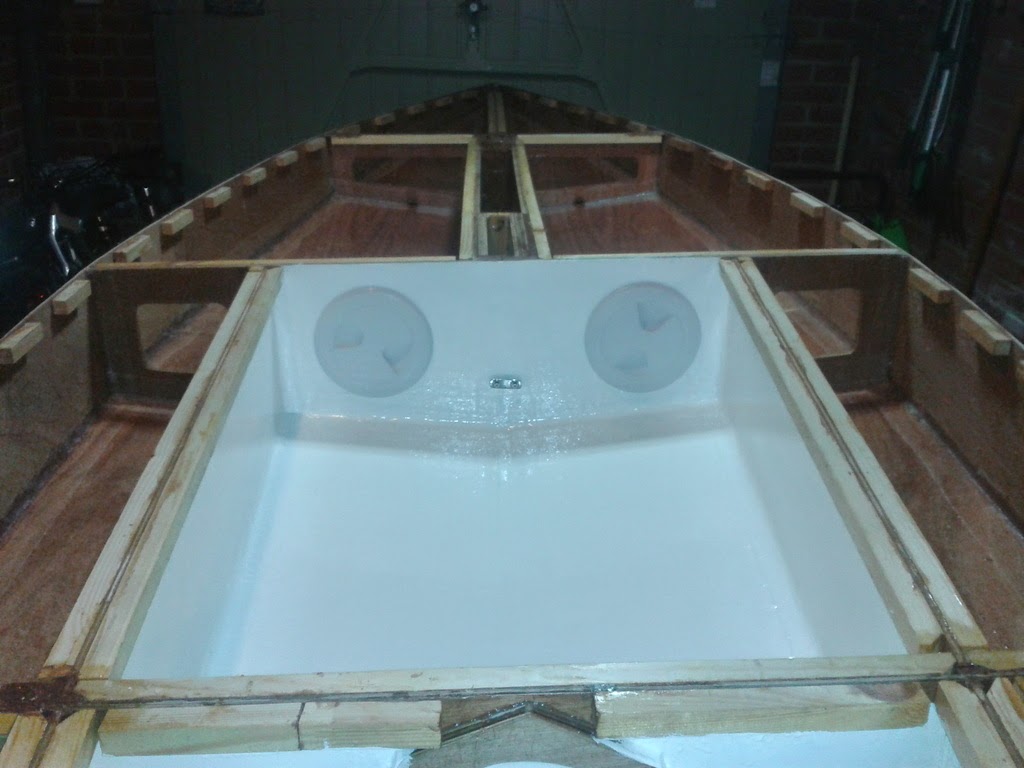
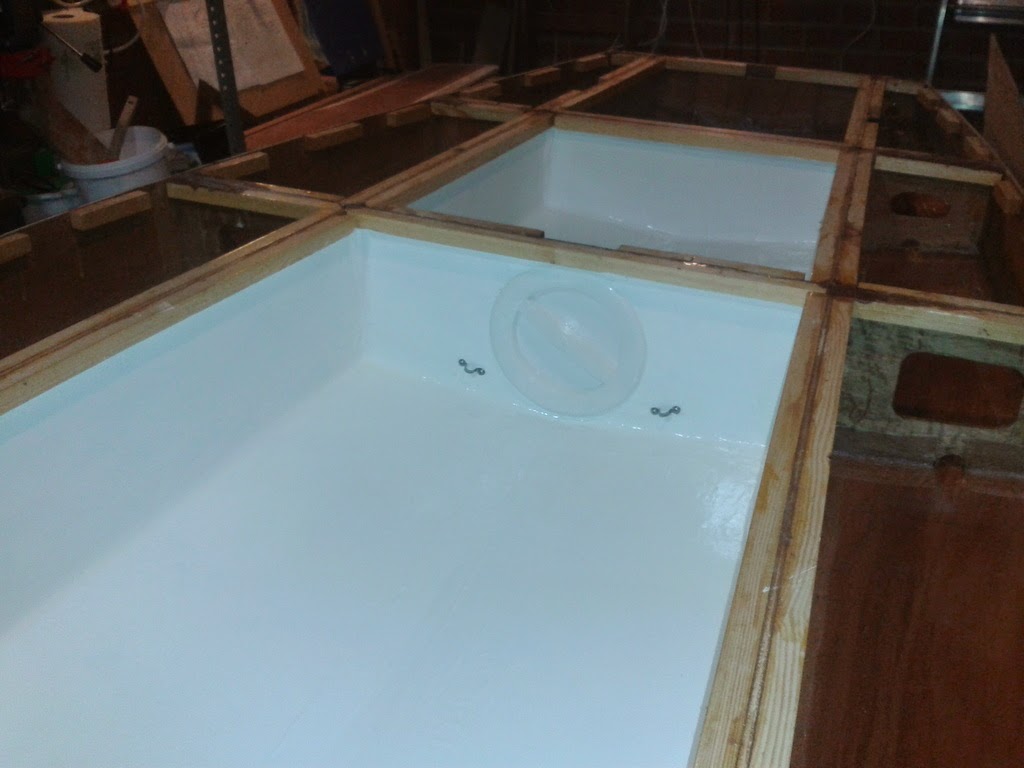
Next came the paint job on the cockpit and watertight compartment, together with the fittings for which I needed access to both sides of bulkheads B and C at each end of the cockpit (the hatches and the hiking strap fittings):
The deck was to come next. I really struggled to get it aligned properly with it in one piece. So,after much thought and with considerable trepidation,
....... I cut it in half again !
I realised that the join fell exactly astride bulkhead B at the forward edge of the cockpit. This would give it more than adequate support, even if it did give me some minor fairing issues later on.
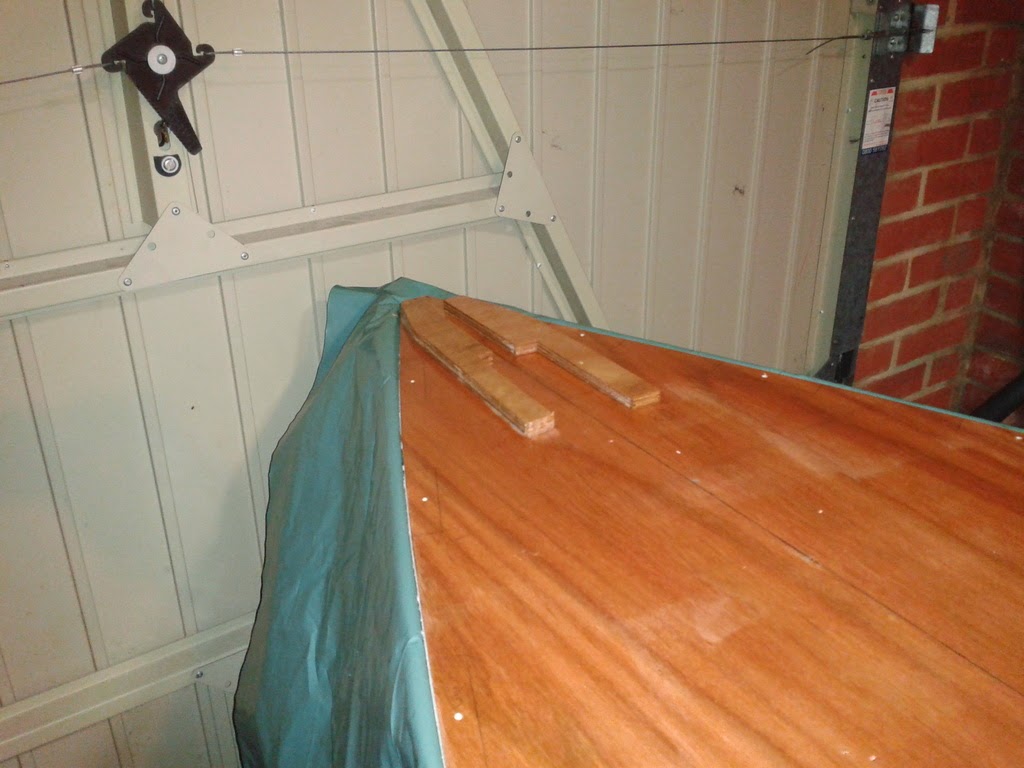
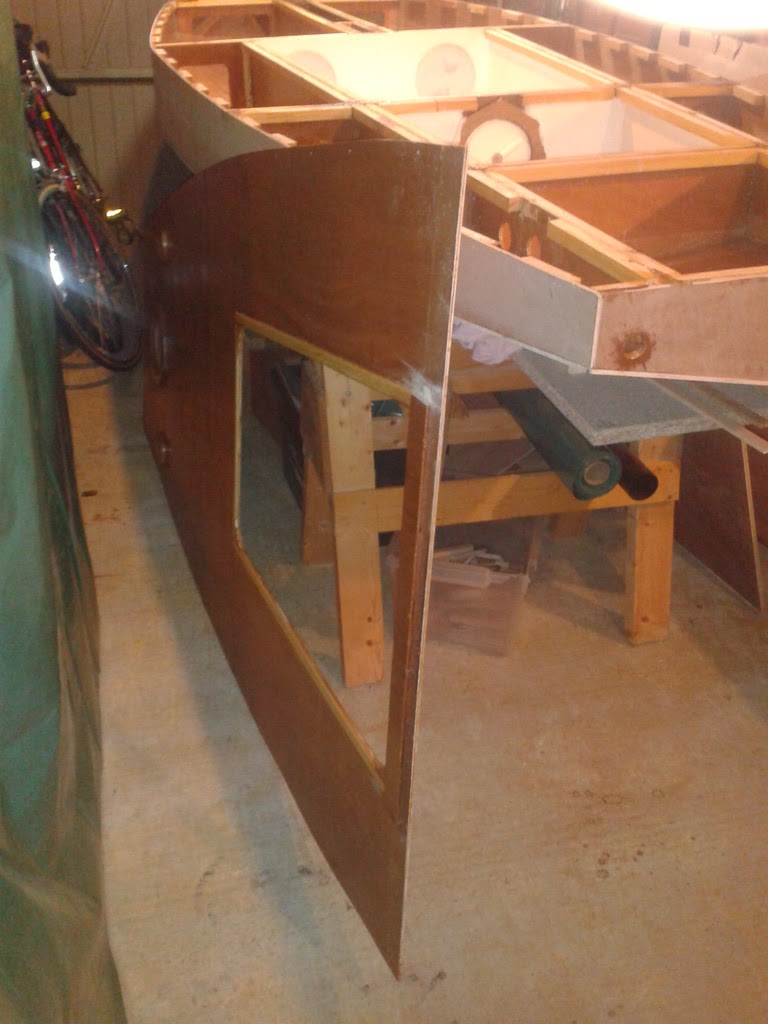
The deck was then glued down in two halves, held temporarily with screws into the cleats and staples into all the bulkhead and stringer cleats:

The stern half went on first; the bow half is shown above.
Once the screws and staples were removed, I planed and sanded all the seams to get a 1/2" radius before the taping work began again.
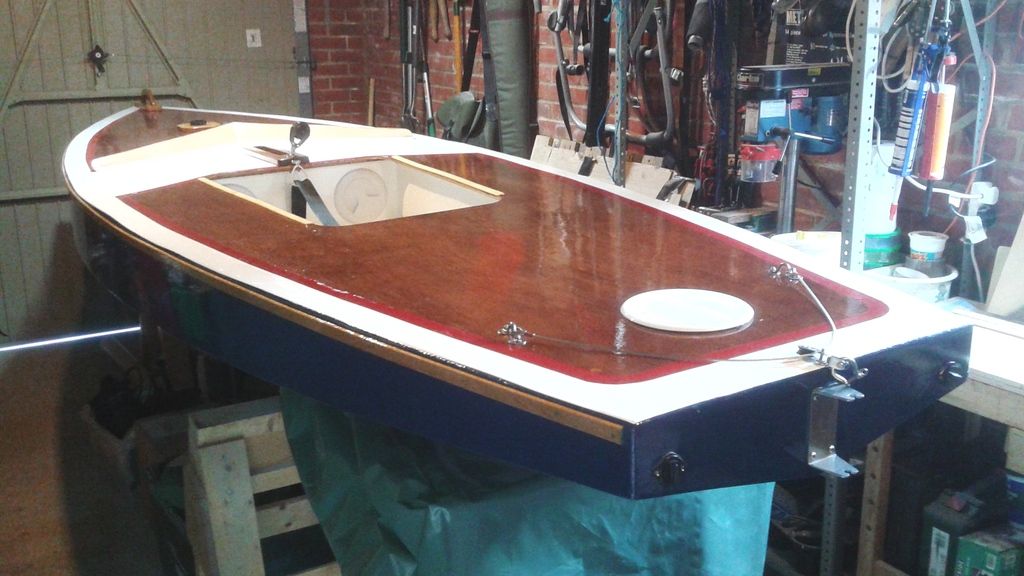
This is where I've got to so far:
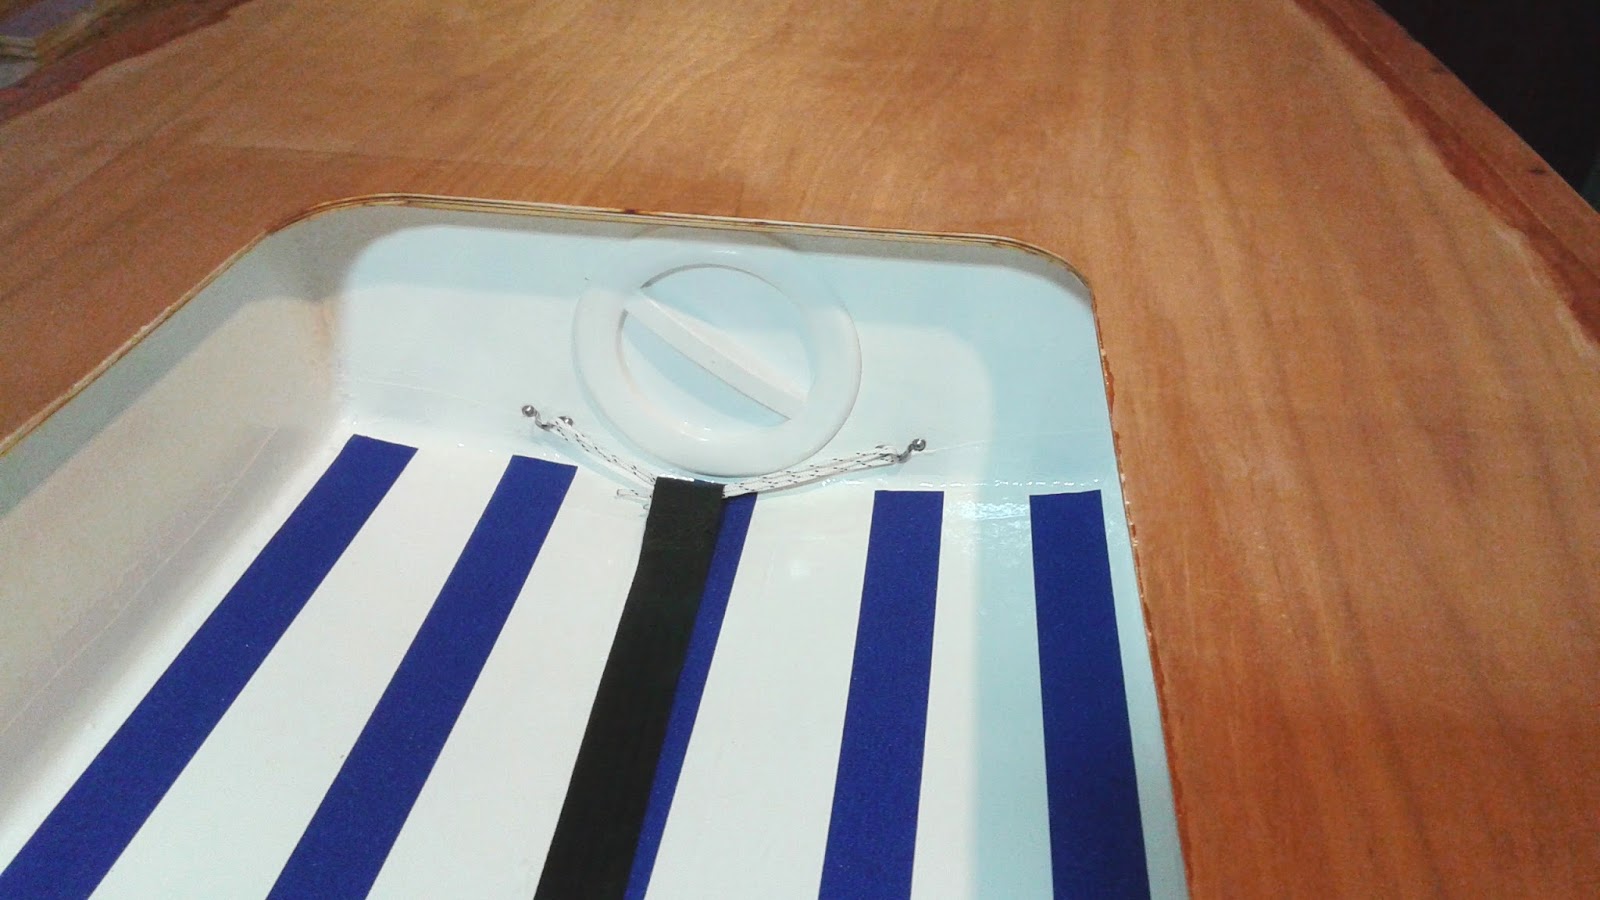
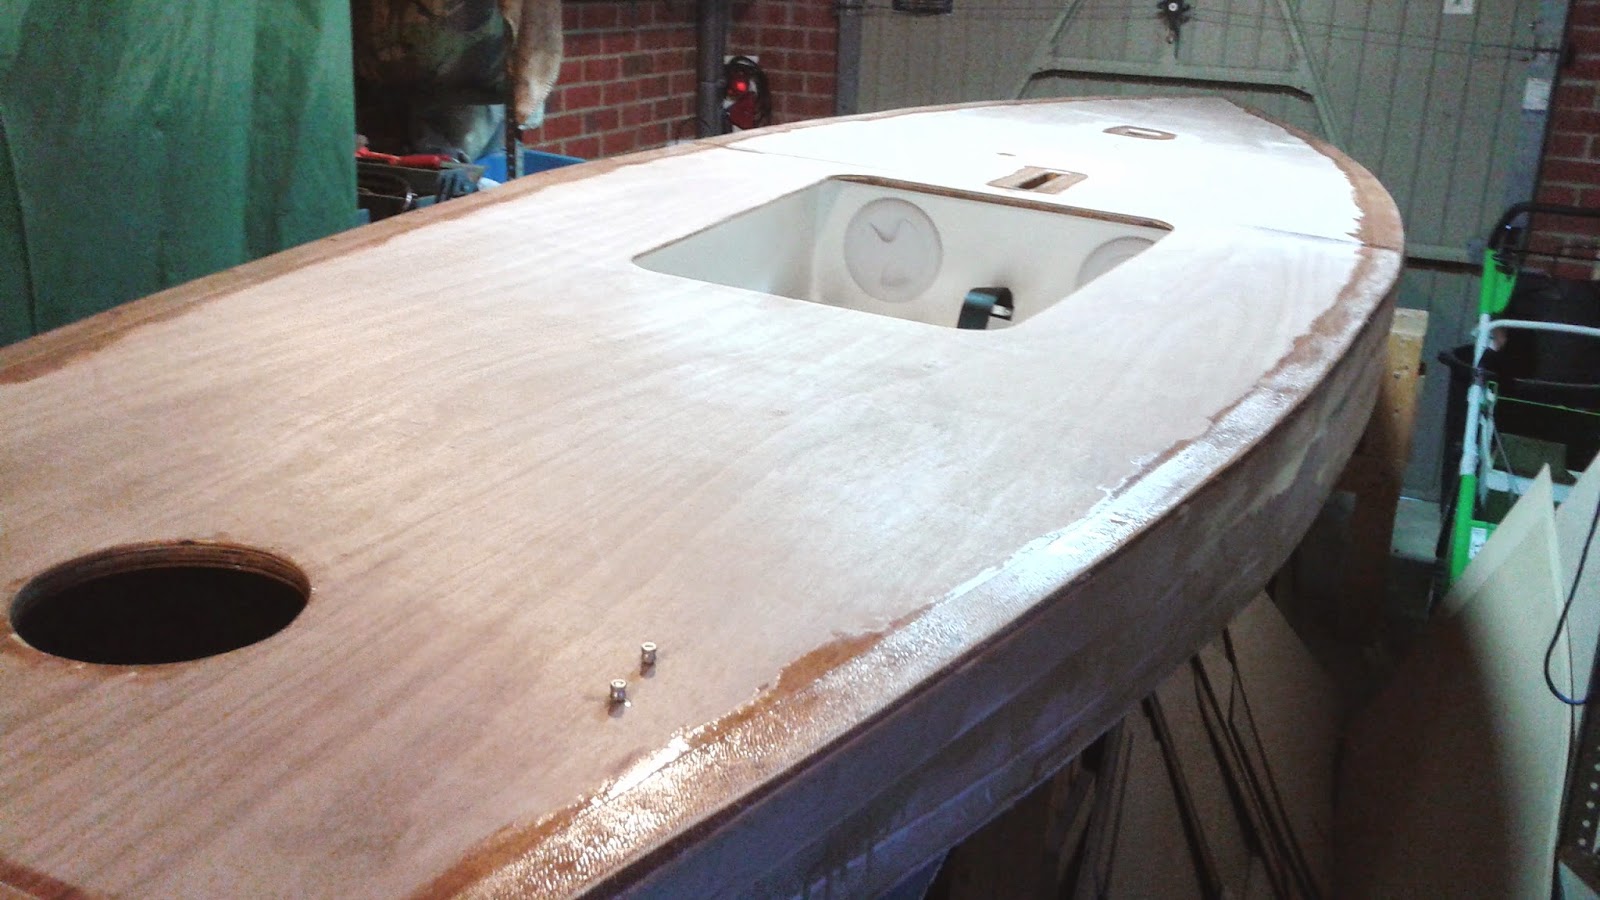
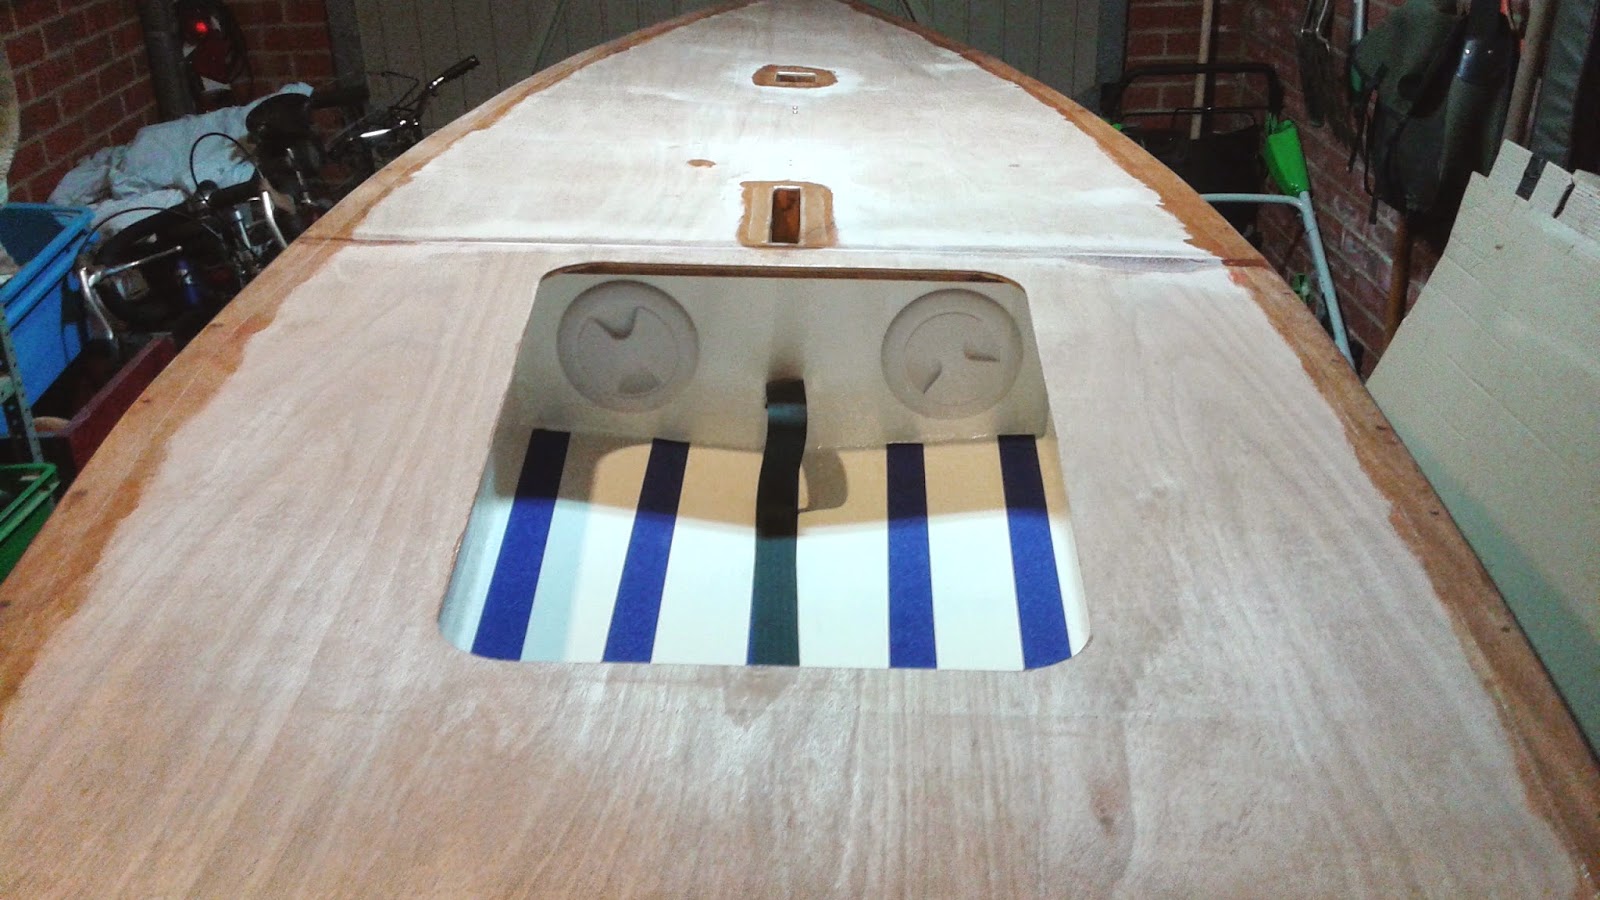
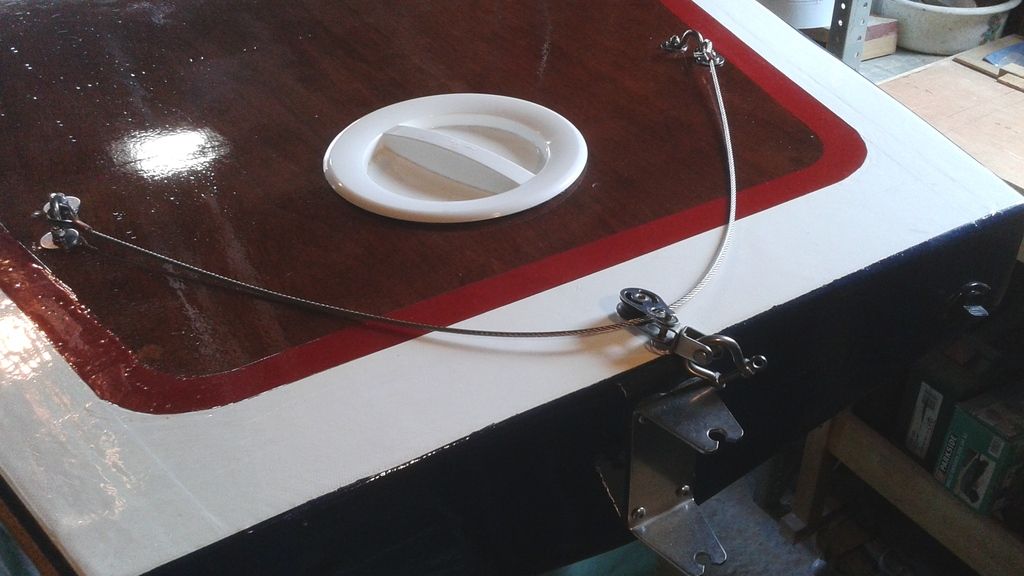
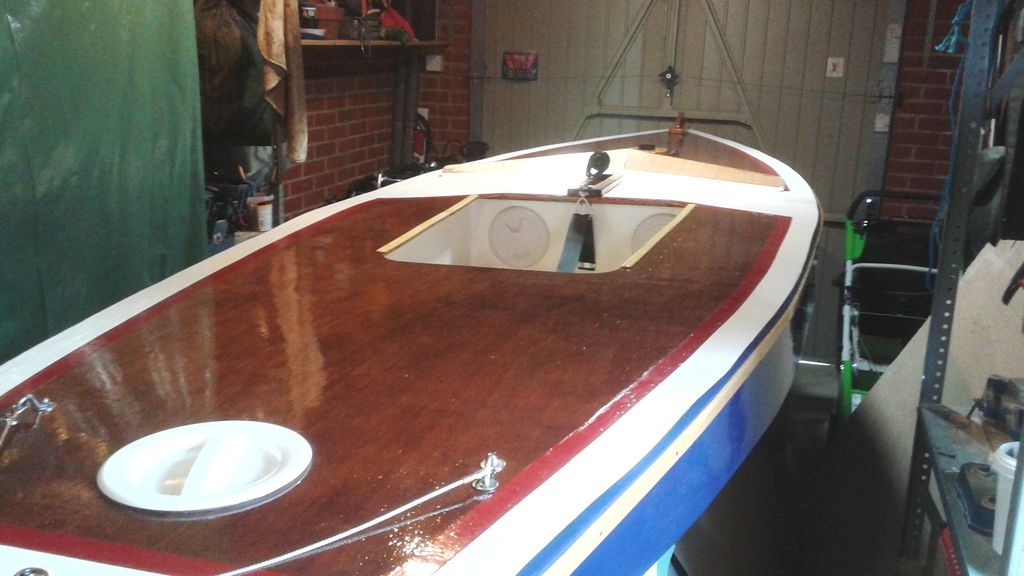
The hull is structurally complete, with all seams epoxy taped. The cockpit was finished and painted before fitting the deck. It has a watertight stowage compartment aft (the two forward hatches are for ventilation of the hull when stored), a hiking toe strap (made from an old car seat belt) and non-slip tape on the sole. The paint is white domestic exterior gloss over two layers of epoxy. There is a layer of fibreglass on the sole to add strength and abrasion resistance.
Next up - hull sheathing, fairing and painting. I've also done some work on the daggerboard and deck fittings.
Re: MF14 - New Build in UK
Posted: Sat Apr 26, 2014 9:47 am
by Noles309
Impressive work. Looks great.
Re: MF14 - New Build in UK
Posted: Sat Sep 27, 2014 4:41 pm
by Whameller
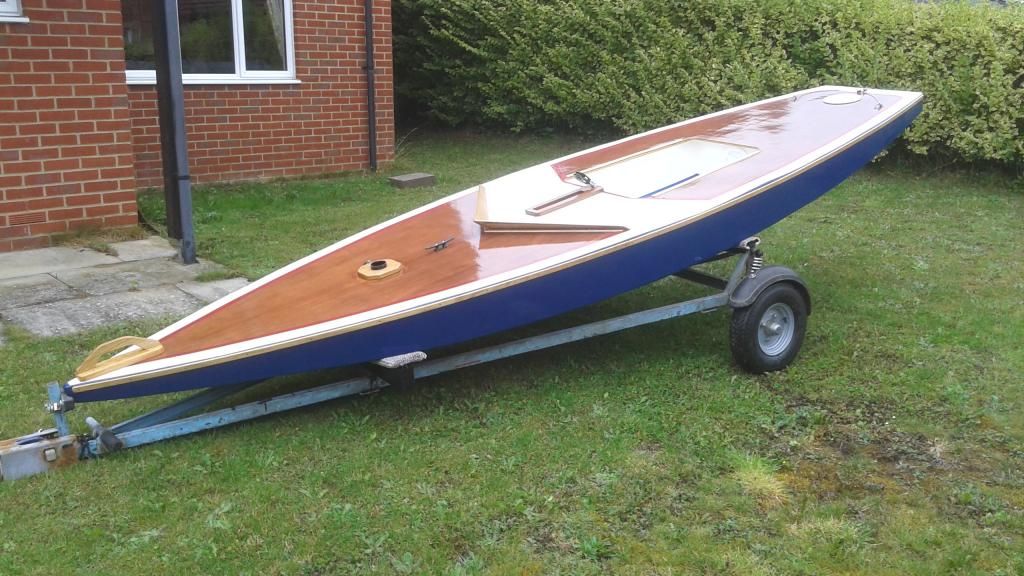
Well - hull complete, painted, varnished and fitted out !
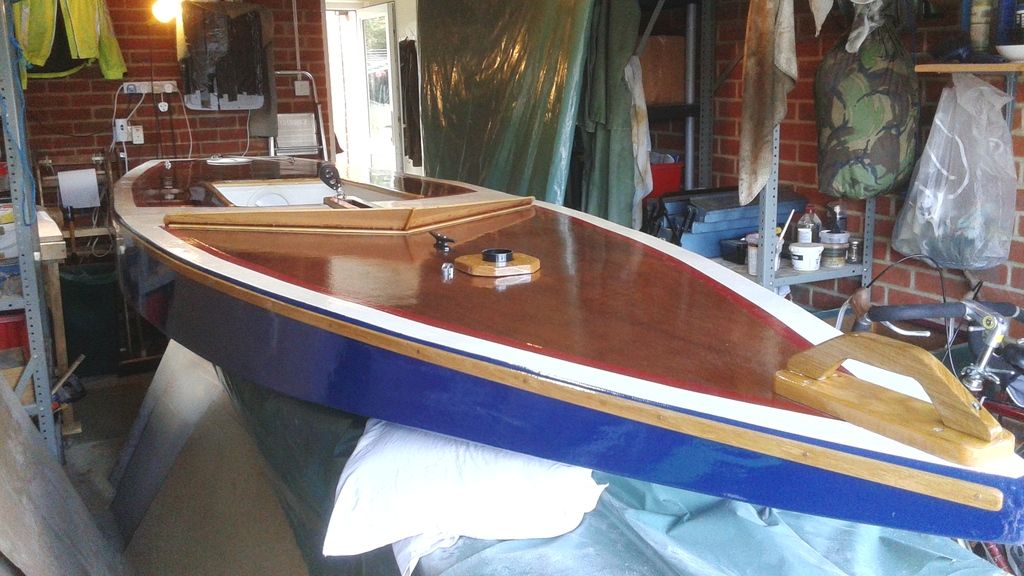
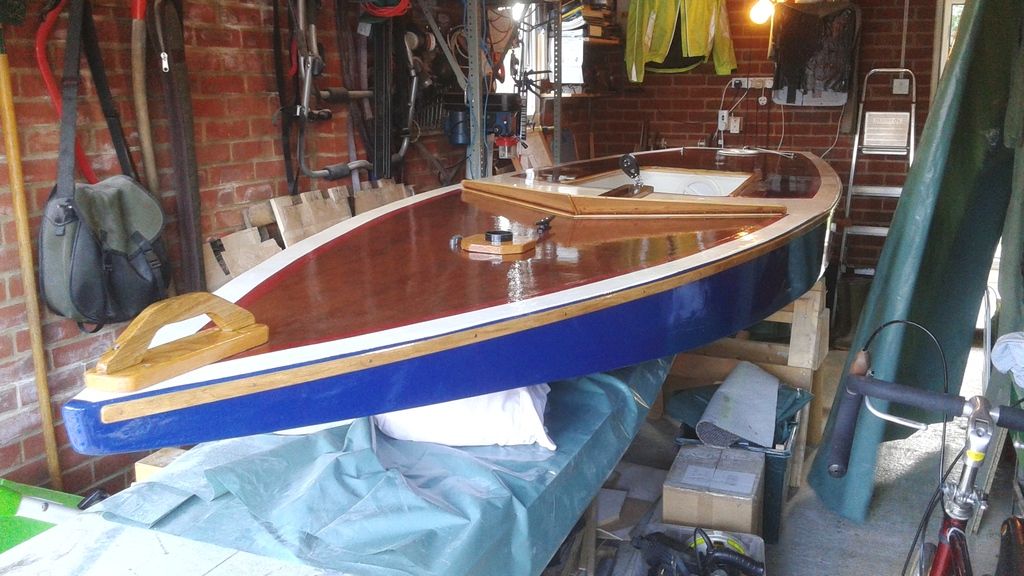
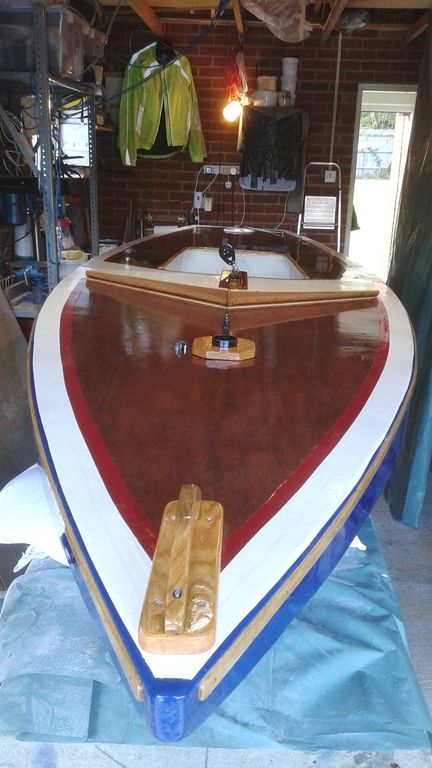
No photos of how I got there, I'm afraid. Hours and hours of filling, painting, sanding and fairing. Not my favourite jobs (tho' critical to the final aesthetics) and not exciting to photograph.
The hull is painted in marine paint over marine primer (both ebay bargains). The varnish is Coo-Var yacht & seaplane varnish, the white paint ordinary exterior house gloss and the red detail line is all-purpose exterior enamel. Rubbing strips are varnished oak D strips from the local DIY store, fastened with bronze ringnails into the chocks (holes sealed with marine mastic). The last photo shows the mainsheet horse and the sunfish-styled rudder fitting.
I need to get the hull onto the trailer (I still haven't posted about renovating that yet), so that I can clear space to work on the foils and spars.
Re: MF14 - New Build in UK
Posted: Sat Sep 27, 2014 5:09 pm
by jacquesmm
Impressive work!
Re: MF14 - New Build in UK
Posted: Sat Sep 27, 2014 8:23 pm
by Cracker Larry
Beautiful

Re: MF14 - New Build in UK
Posted: Sun Sep 28, 2014 11:33 am
by Whameller
Thank you, gentlemen.
Re: MF14 - New Build in UK
Posted: Sun Sep 28, 2014 11:44 am
by Whameller
Rudder
Making the rudder has caused me more head scratching than any other part of this build. As allowed for in the Moonfish plans, I am using Sunfish rig and foils. The challenge is finding out the exact dimensions of the foils - particularly the rudder.
The Sunfish class regulations give this information:
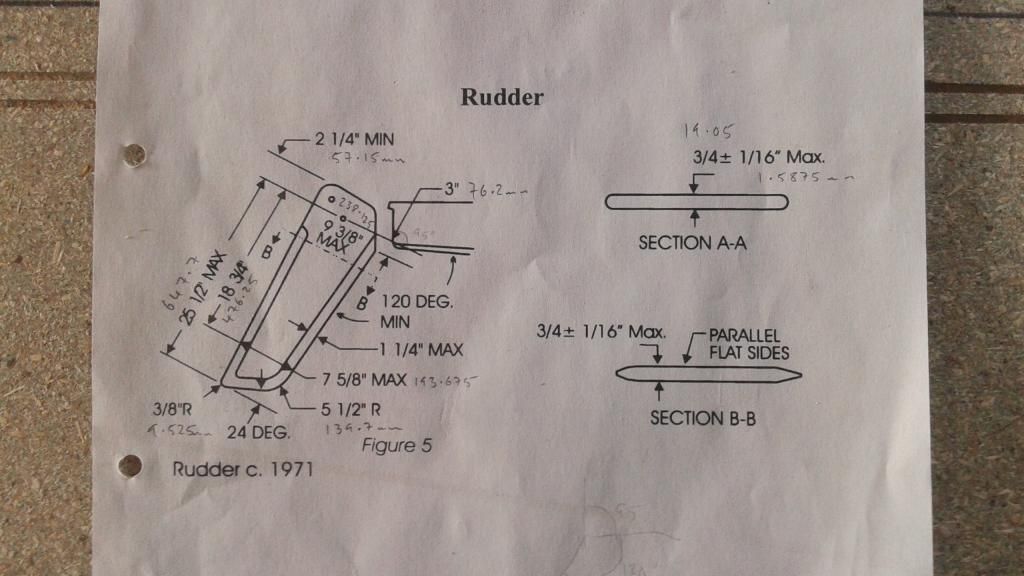
While there are enough dimensions to work out the size and shape of the bottom part of the foil, there is nothing about the size, angles, curve radii or mounting holes (for tiller, rudder head and tension spring). In an ideal world, I would find an existing foil and just take the dimensions from it - but Sunfish aren't all that common here in the UK.
So what I did was find the clearest photos that I could of the foil and the rudder head/tiller on the web and print them out blown up to the largest size I could without loosing resolution:
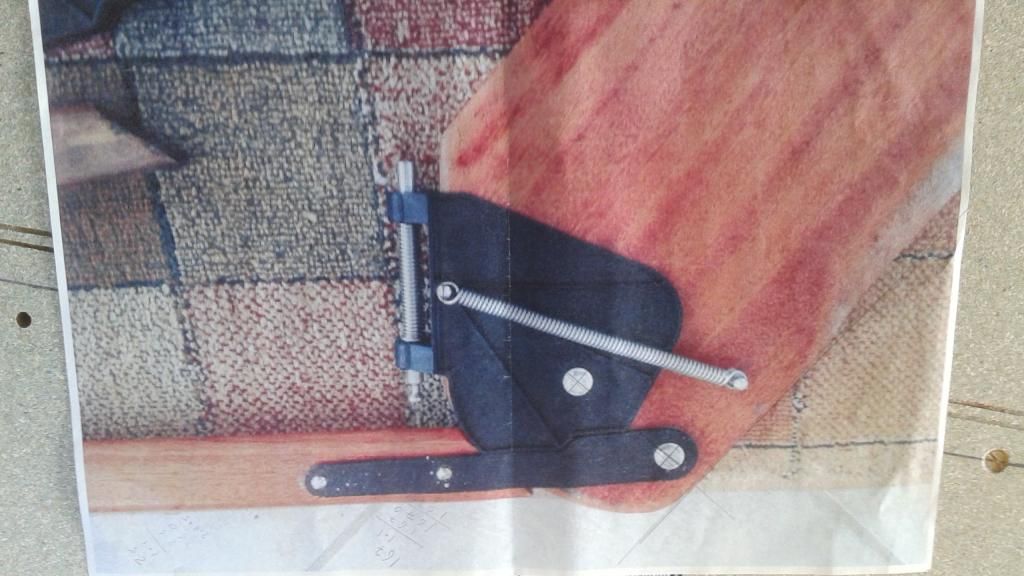
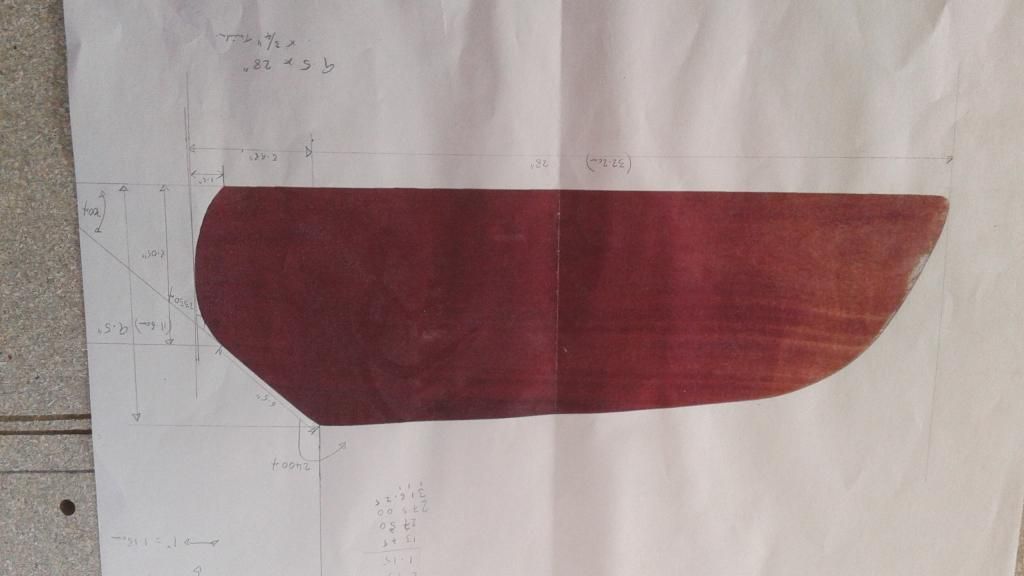
By careful measurement of the photos (in both x and y axes, to take into account probable distortion of the photo views and printing/enlarging processes and all the necessary angles and radii) and comparison with the plan and the Sunfish rudder head and tiller plates that I had bought, I was able to rough out a hardboard template:
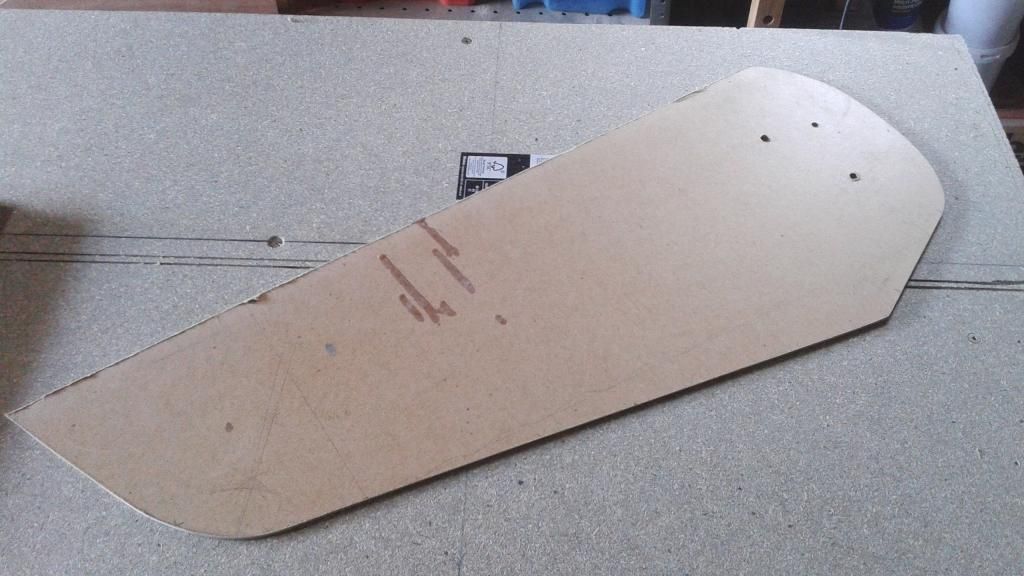
I then fitted the rudder head and tiller plates to the template which allowed me to refine the rough shape and position the three holes:

This whole arrangement allows the foil to kick up, yet be held securely in either the 'down' or 'up' positions without the need for lines.
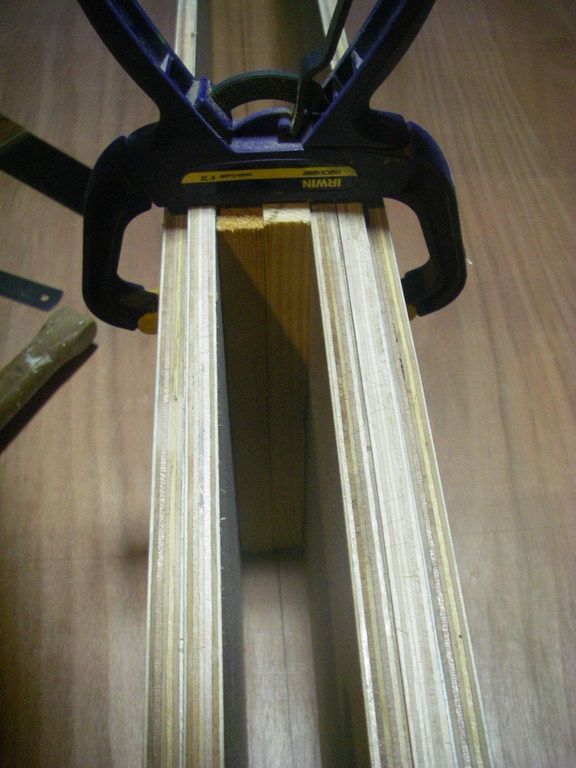
The Sunfish class regulations give the thickness of the foils as 3/4" (+/-), which matches the gap in the rudder head. To achieve a blank of this size, I had to laminate three sheets of ply: one of 12mm, one of 6mm with one of 4mm sandwiched between them:
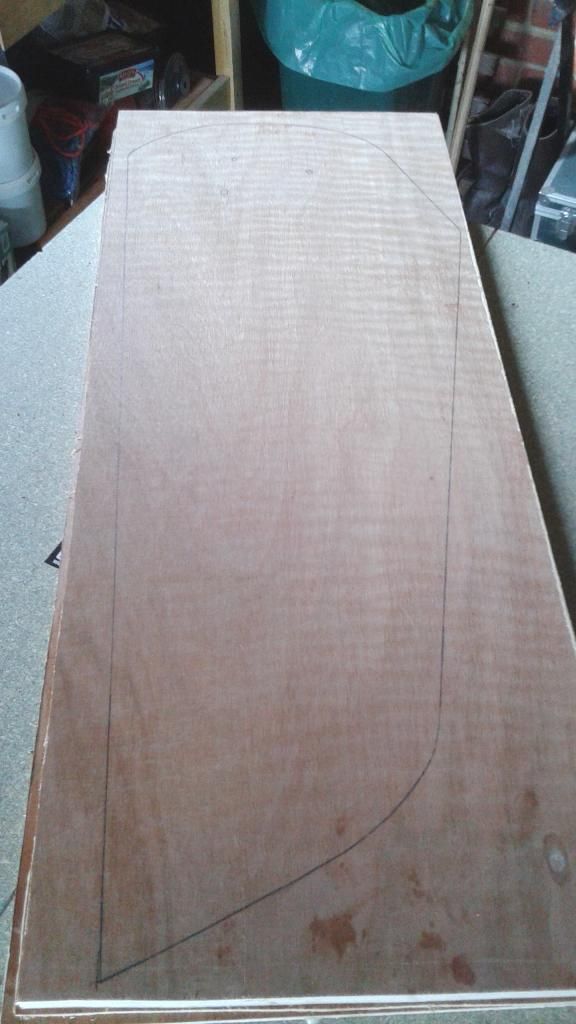
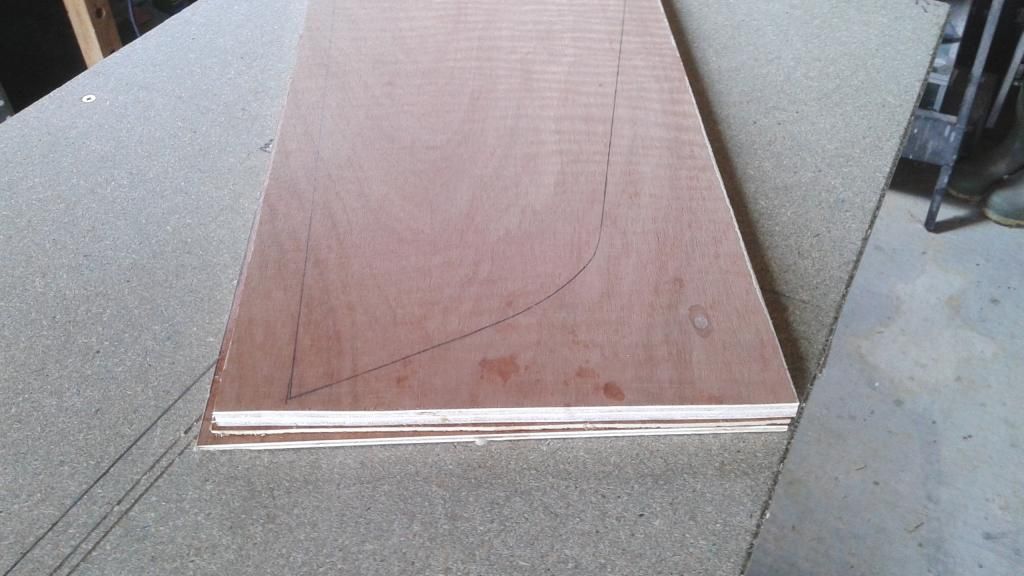
which worked well after a night curing under quite high, but uniform pressure.
I then marked out the edges and shaped them down, mostly using a low angle block plane (with a small sureform in places), finishing off with sandpaper. There were some rough spots left where some of the rougher filler laminations of the ply were exposed; I filled these with wood filler and then sanded back again to achieve smooth curves and corner radii. The whole thing was then stained with mahogany wood dyes - as I had done on the deck of the hull.
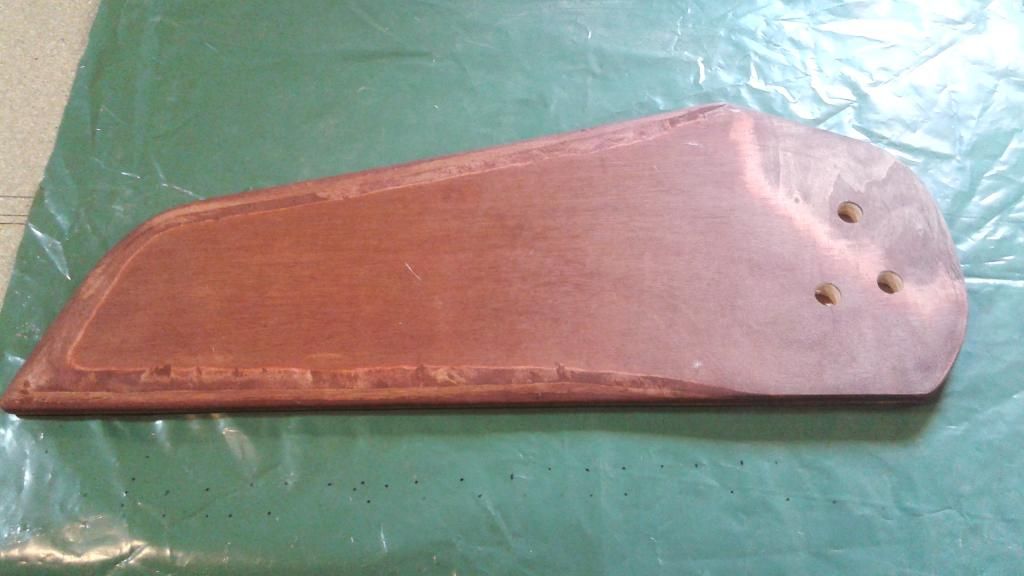
You will see that the three mounting holes have been enlarged (to 20mm with a forstner bit). These will be filled with epoxy before being drilled out again to the exact sizes. This will give me mounting holes that are (a) more robust than bare wood and (b) impervious to water penetration.
Re: MF14 - New Build in UK
Posted: Sun Sep 28, 2014 11:47 am
by Whameller
And a Few More ......
..... gratuitous shots of her outside on the refurbished 1960s trailer:
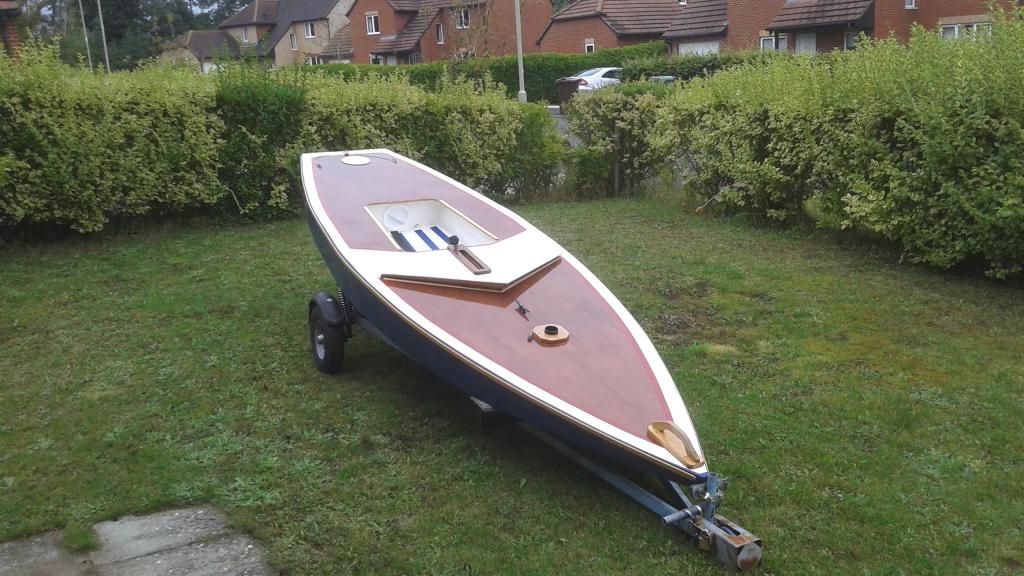
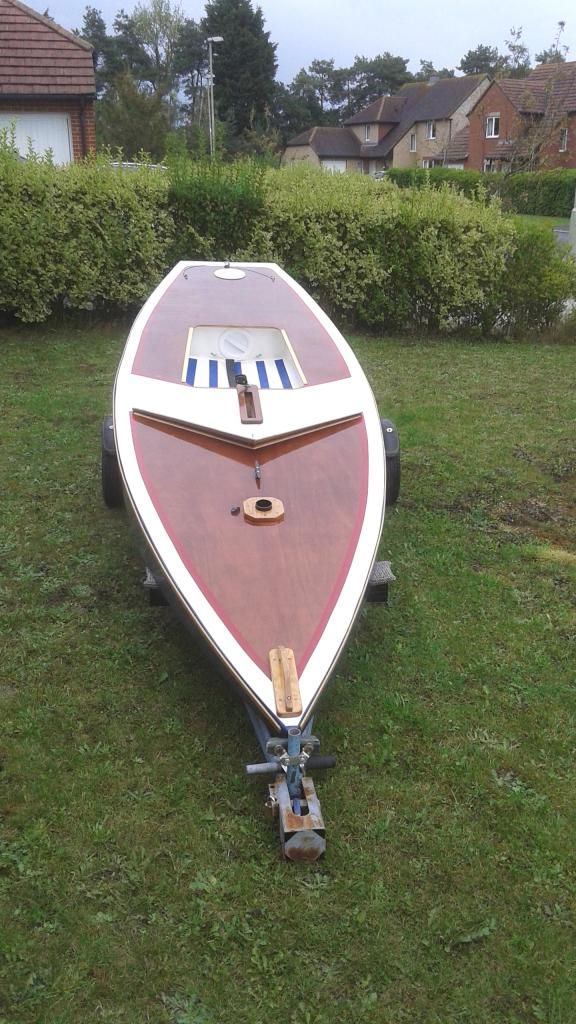
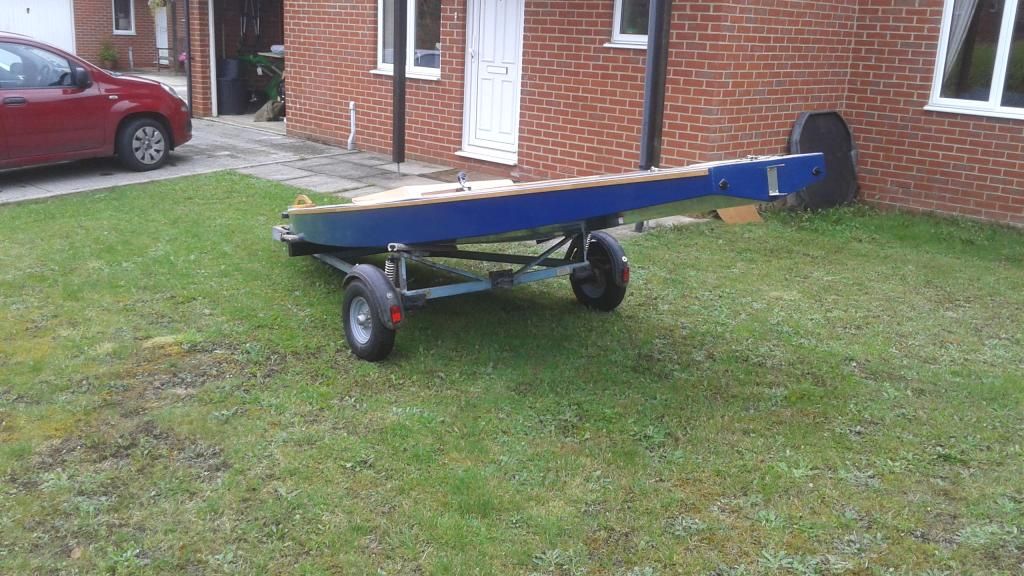
A bit easier to appreciate the lines, I think.
Re: MF14 - New Build in UK
Posted: Tue Sep 30, 2014 5:28 pm
by Whameller
Well - I have finally finished her !
I'm way behind with keeping up with this thread, so I have posted an album 'Whameller's MF14' full of photos of the completed boat, polytarp sailmaking and some others.
I'll keep posting in the thread to fill in the detail.
Re: MF14 - New Build in UK
Posted: Tue Sep 30, 2014 5:42 pm
by Cracker Larry
No Sunfish ever looked so good
Re: MF14 - New Build in UK
Posted: Sun Apr 12, 2015 3:35 pm
by Whameller
After a winter of waiting, we conducted sea trials of Blue Streak (as the Moonfish has been named) on Easter Day.
After suitable christening with beer:
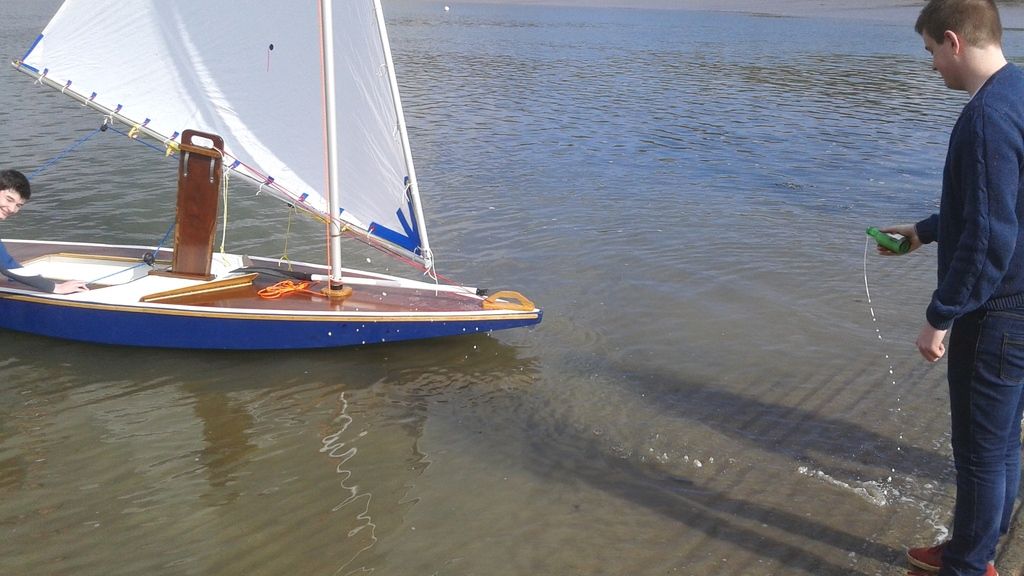
she was launched onto the River Cleddau.
She floated (level !) and the test pilot reported that, when there was wind, she sailed well:

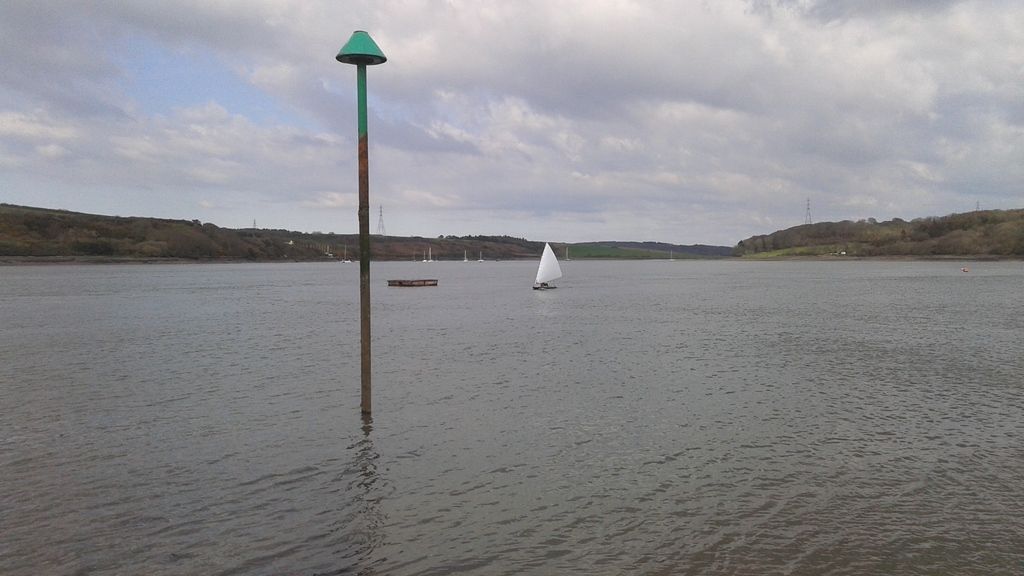
Unfortunately, there wasn't much wind and he was really unimpressed at having to paddle back the last quarter of a mile to the slip against the incoming tide !
All the rig seemed to work as it should and I'm pretty pleased with the shape of the polytarp sail. We'll have to wait for some better wind when the test pilot is next available (heavily engaged in revising for upcoming public exams - GCSEs) to see how she performs when pushed a bit harder.
Re: MF14 - New Build in UK
Posted: Sun Apr 12, 2015 5:51 pm
by jacquesmm
Nice job, congratulations on the launch.
I agree, that polytarp sail looks nice.