Page 1 of 1
Biscuit's Panga 22 build
Posted: Sun Feb 16, 2014 11:35 pm
by Biscuit
I started posting in the wrong section. Oops
My build and general posts will be made here from now on. Nothing new to report as of this evening. I have plenty to do on the strongback but I messed up and ordered 5 pallets of sod for the backyard that will be here in 2 days. So I spent most of today blistering up my paws a bit. Not exactly relaxing work but it did get me working on something away from the TV and that isn't bad.
Re: Biscuit's Panga 22 build
Posted: Tue Feb 18, 2014 10:51 am
by Matt Gent
http://forums.bateau2.com/viewtopic.php?f=2&t=58447 link to original thread
To continue the console location discussion, I agree with the math listed but don't forget about the driver. When you move the console back, you are moving its weight (60lb?) plus the pilot (200lb?). And if that is offset by the fuel tank moving forward, the fuel weight is variable, so I might only count half of its weight (and be off by +50% when full, and -50% when empty).
Personally I prefer to have the console a bit forward and have good walking & working space behind a leaning post or seat.
Re: Biscuit's Panga 22 build
Posted: Tue Feb 18, 2014 2:13 pm
by Biscuit
Thanks for your input Matt,
There's a lot more to my question than I initially thought. I never considered how my big behind would affect the boat.
Re: Biscuit's Panga 22 build
Posted: Tue Feb 18, 2014 6:47 pm
by Hope2float
Good luck with the build. The panga is a very seaworthy boat and an easy design. Keep picture posting on the high side, we all like them I think. I posted tons of them. I hope you all liked them. I think you did, but who knows. On the console issue I would think that if you keep the battery in a forward compartment or two batteries forward it would help offset the rear load. One optima battery weighs 59 lbs for the 31 class and can be mounted in any position. If you use two forward it would much more weight than the offset of the console and possibly you. I may be wrong so bring on the suggestions. I feel the boat should be what you want it to be. Your building it and will have to live with what you built, so make it your own.
BUILD-ON!
Dave
Re: Biscuit's Panga 22 build
Posted: Tue Feb 18, 2014 9:55 pm
by Biscuit
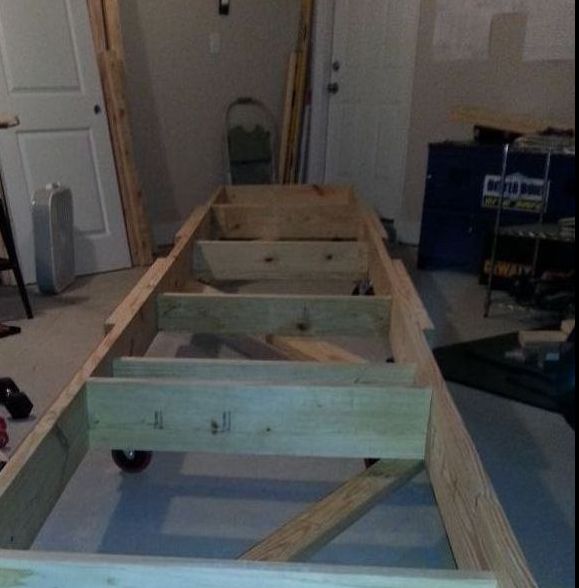
Last night after work I stayed up entirely too late to get the strongback finished but was successful at my goal. It's stiff as a board and rolls like dream. Good thing those eight casters are lockable. I stepped on it and the darn thing started rolling out the garage to the drive.
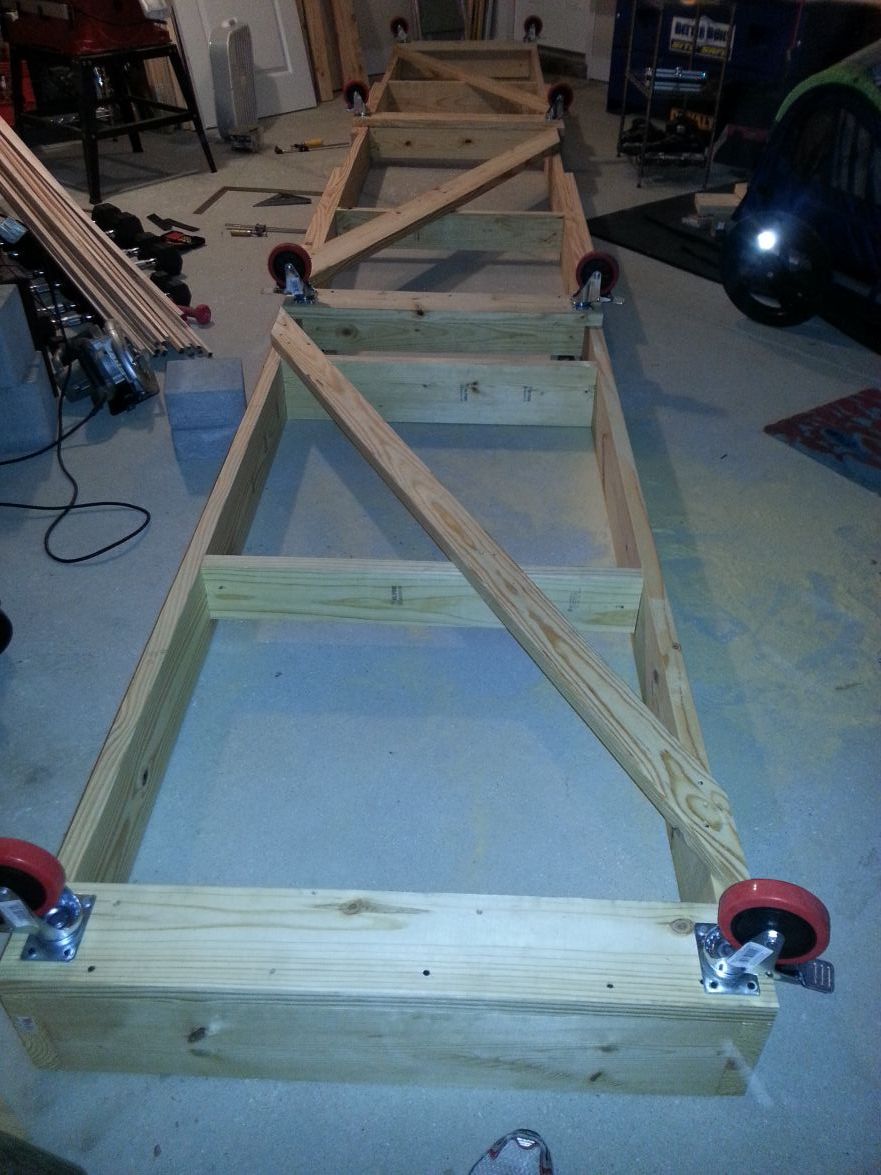
As mentioned in an earlier post, look close for the subtle hint of overkill. Lol
Received an e-mail from BBC about my 20 sheets of BS1088 Meranti today. Apparently my ply is in packaging. Not sure what state that's in but hopefully it's close to Mobile.

Jeff
Re: Biscuit's Panga 22 build
Posted: Fri Feb 21, 2014 1:30 am
by Biscuit
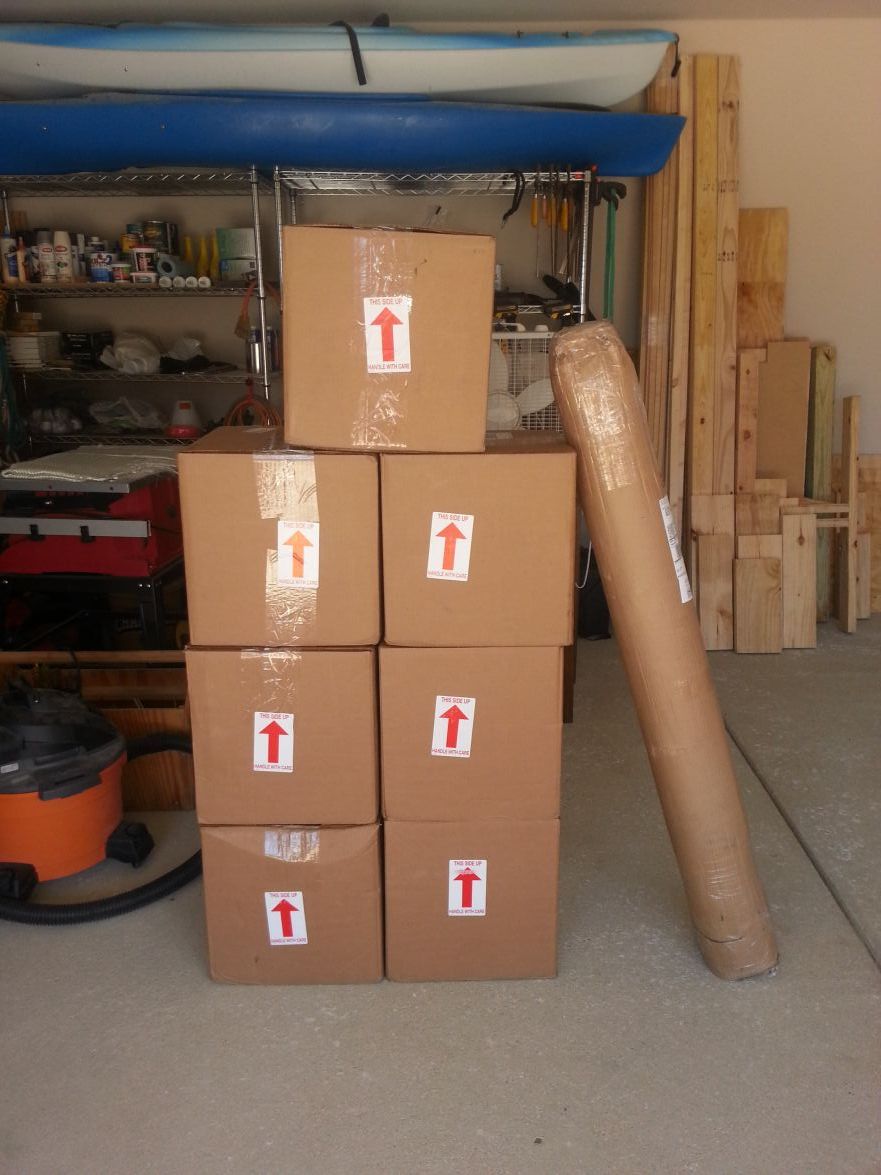
Received an e-mail today, shipment of plywood due to be delivered tomorrow. 20 sheets of BS1088 Meranti @ 297lbs it said. Folks in the big brown truck are gonna love that package. It would be great to have the plywood here for Monday morning when my (stay)cation starts. Even my wife is excited to see some progress. So much so that tonight after dinner she said "Hey we should try to find an outboard while you're on vacation." I think my heart skipped a beat or two. I knew there was another reason I married that beautiful lady beside her great sinse of humor and amazing personality. Well all that and she's a "sexual tyrannosaurus".
So that sweet wife of mine wanted grass and a motion detector light mounted. Well yesterday morning we, the wife and I, laid 5 pallets of sod and we're sore everywhere. The light may have to wait till Monday due to my crazy work schedule. Today though I finished prepping the garage for the build. Two projects to finish up and a motion detector light to hang and you'll be reading and watching our Panga 22 come alive.
I'll post a picture when the ply gets here all packaged up.

Jeff
Re: Biscuit's Panga 22 build
Posted: Fri Feb 21, 2014 9:05 am
by tcason
Plenty of pictures please - I hope this is my next build or the Panga 25 - I am about 75% done with Garvey 11 build
I like your "inspirational shots" on the other thread.
If your boat build is as nice as your strong back it will be beautiful!
Re: Biscuit's Panga 22 build
Posted: Fri Feb 21, 2014 9:27 am
by tech_support
297 lbs would be maybe 10 sheets

maybe thats epoxy/glass.
UPS does not bring the plywood, it comes by freight truck
Nice
strong back

Re: Biscuit's Panga 22 build
Posted: Fri Feb 21, 2014 4:51 pm
by Biscuit
shine wrote:297 lbs would be maybe 10 sheets
maybe thats epoxy/glass.
UPS does not bring the plywood, it comes by freight truck
Nice
strong back
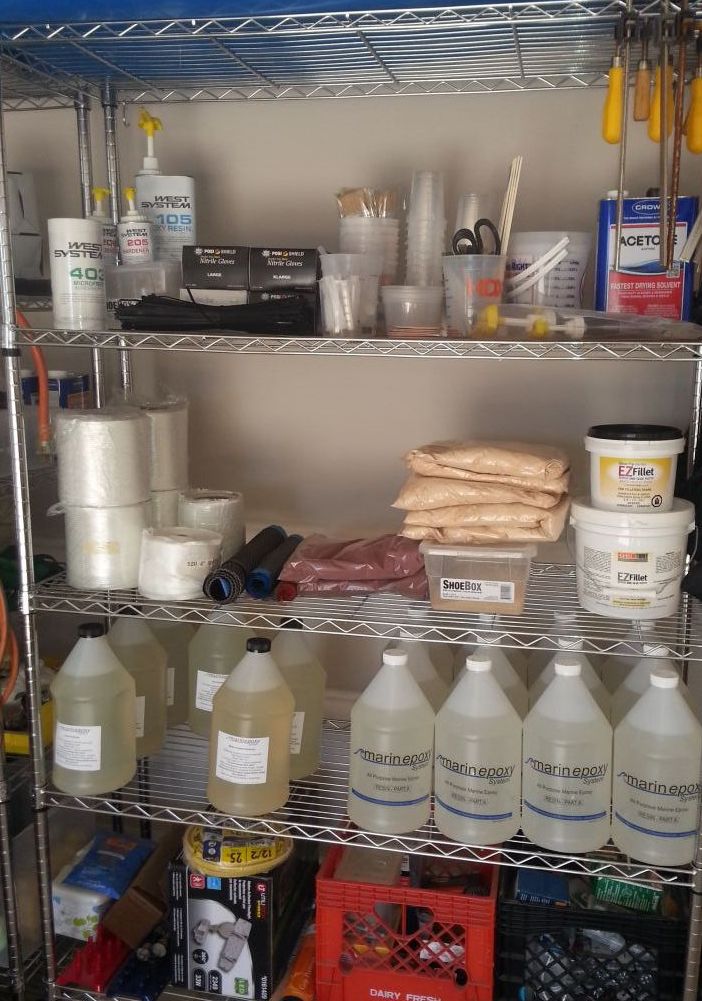
That's what it was Shine, epoxy/ glass kit. Just finished unpacking.
Re: Biscuit's Panga 22 build
Posted: Fri Feb 21, 2014 5:00 pm
by Biscuit
Re: Biscuit's Panga 22 build
Posted: Fri Feb 21, 2014 5:08 pm
by Biscuit
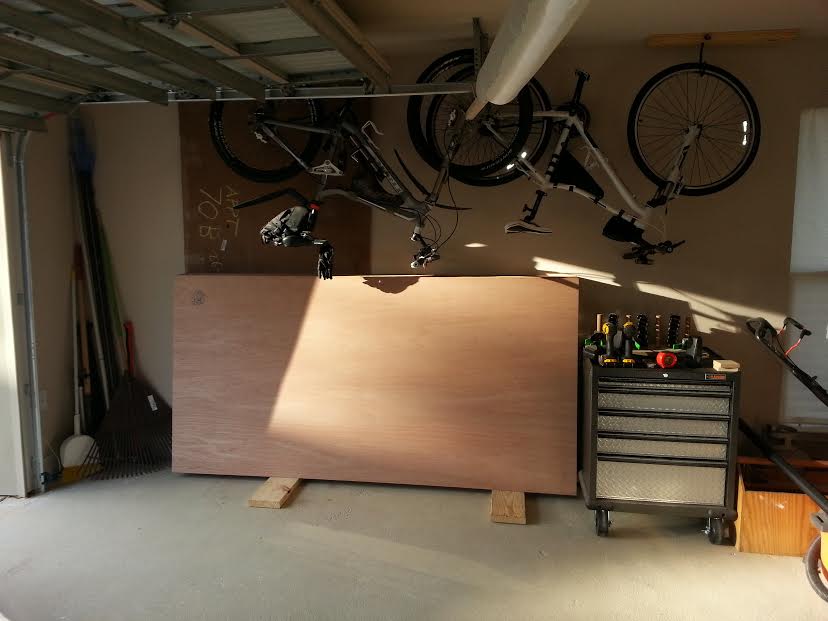
This shot was for you Larry, little bites.
Re: Biscuit's Panga 22 build
Posted: Fri Feb 21, 2014 5:17 pm
by Biscuit
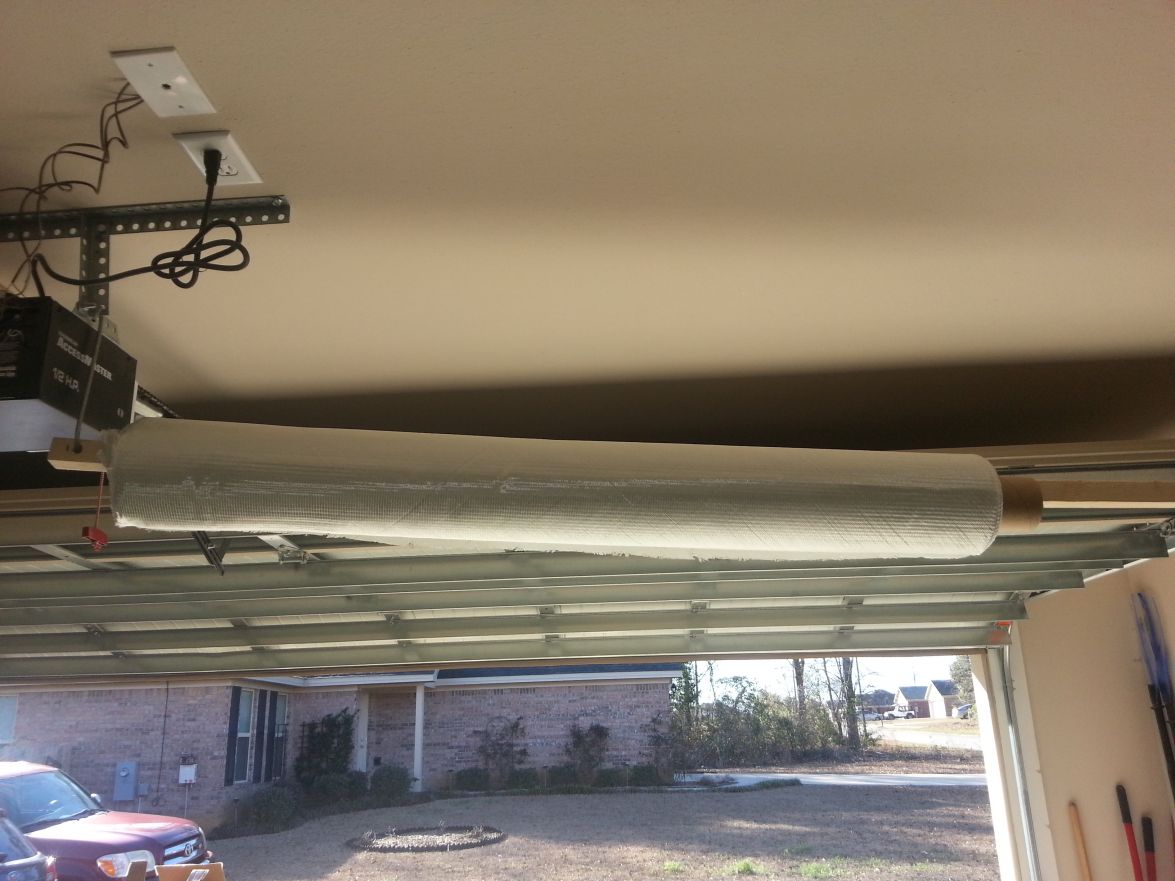
Out of the way but where it can still be used.
Re: Biscuit's Panga 22 build
Posted: Fri Feb 21, 2014 5:34 pm
by Biscuit
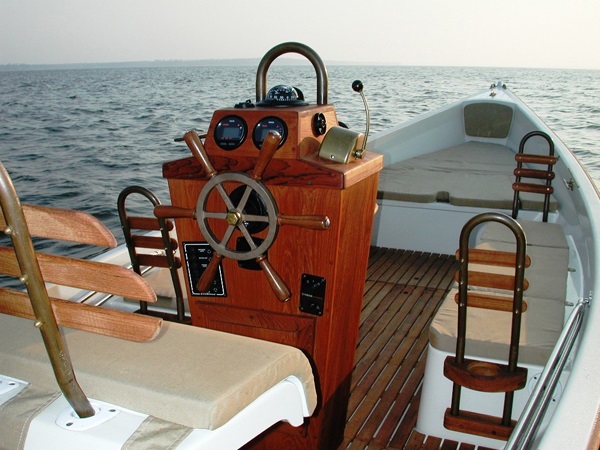
"inspirational shots" on the other thread.
If your boat build is as nice as your strong back it will be beautiful!
Thanks Tcason and Shine for the comments on the strongback.
And how about another inspirational shot just to help everyone stay motivated for the build....
Re: Biscuit's Panga 22 build
Posted: Sat Feb 22, 2014 8:11 am
by Biscuit
Good luck with the build. The panga is a very seaworthy boat and an easy design. Keep picture posting on the high side, we all like them I think. I posted tons of them. I hope you all liked them. I think you did, but who knows. On the console issue I would think that if you keep the battery in a forward compartment or two batteries forward it would help offset the rear load. One optima battery weighs 59 lbs for the 31 class and can be mounted in any position. If you use two forward it would much more weight than the offset of the console and possibly you. I may be wrong so bring on the suggestions. I feel the boat should be what you want it to be. Your building it and will have to live with what you built, so make it your own. BUILD-ON! Dave
Dave Thanks for the input on my console question. I'm still no closer to a solution but do have several points to research before the hull flip. The plan however, is to have two batteries but not sure of the exact locations yet. They very well may be pushed forward a bit depending on the console math.
Re: Biscuit's Panga 22 build
Posted: Sat Feb 22, 2014 8:21 am
by Biscuit
I have a question for all of you following along. What do you want to see pictures of? Several have requested me to post a slew of them. My goal is to build a beautiful boat and to keep those interested abreast of my progress. So if there's something you want to see specifically, just let me know and I'll do my best..
Re: Biscuit's Panga 22 build
Posted: Sat Feb 22, 2014 8:46 am
by topwater
Post whatever you want for pic's , we all love boat porn
Re: Biscuit's Panga 22 build
Posted: Sat Feb 22, 2014 9:42 pm
by Biscuit
Study plans and plan detail sheet show two different max HP's. Which is right?
Re: Biscuit's Panga 22 build
Posted: Sun Feb 23, 2014 6:46 am
by Cracker Larry
What do you want to see pictures of?
I want to see that sexasauras rex
Study plans and plan detail sheet show two different max HP's. Which is right?
I think the 90 hp would be reasonable for that boat.
Re: Biscuit's Panga 22 build
Posted: Sun Feb 23, 2014 8:18 am
by Biscuit
I want to see that sexasauras rex
I'll trade you some fairing time for a peak brother.

Re: Biscuit's Panga 22 build
Posted: Sun Feb 23, 2014 9:31 am
by Biscuit
Study plans and plan detail sheet show two different max HP's. Which is right?
I see now. "Can accept outboards up to 115 Hp but we don't recommend anything larger than a 90 Hp."
I think the 90 hp would be reasonable for that boat.
So how about fuel economy, is the Panga 22 better off with the 65, 75 or 90 Hp? Does the expenditure of funds up front pay off in the end and is going above 35 mph in my Panga really necessary or even safe? Study plwn states 75hp will push it to 36mph. Although outtrunning a black cloud every now and again is commonplace in the gulf. And then the additional weight of a 90 on shallow draft...
Re: Biscuit's Panga 22 build
Posted: Sun Feb 23, 2014 7:18 pm
by Cracker Larry
There will be no appreciable difference in fuel economy at the same speed. If a 75 can push it 35 at WOT (I doubt it), a 90 will push it 35 at 80% of WOT. Fuel consumption is based on HP actually used, not HP available. At the same speed, all engines will use about the same amount fuel. But a 90 will not be working nearly so hard doing it and will last a lot longer running at 75-80% than a smaller engine running wide open all the time, plus you have HP in reserve when you need it with a heavy load, or out-running the storm. I don't know of anybody who ever wished they had less HP

I'd put everything Jacques would allow, plus 10
Re: Biscuit's Panga 22 build
Posted: Mon Feb 24, 2014 8:00 am
by topwater
Most mid range engines use the same engine block , so a 70 and a 90 would weigh the same.
No weight penalty for more HP.
Re: Biscuit's Panga 22 build
Posted: Mon Feb 24, 2014 8:27 am
by Biscuit
Thanks fellas. Just did some net surfing and found the new Suzuki's are only 7 lbs different in weight from the 75 to 90 hp. Wouldn't have believed it if I didn't see it on the Suzuki website.
So today is my first day of vacation and no ply yet. Maybe I should have ordered it sooner.
Maybe it'll be delivered today. If not I'm going to hang a light then measure up and cut the bow form.
Re: Biscuit's Panga 22 build
Posted: Sat Mar 01, 2014 12:06 am
by Biscuit
Re: Biscuit's Panga 22 build
Posted: Sat Mar 01, 2014 1:49 pm
by wegcagle
Sweet
Pretty exciting making those first traces on the plywood.
Will
Re: Biscuit's Panga 22 build
Posted: Sat Mar 01, 2014 5:50 pm
by Biscuit
wegcagle wrote:Sweet
Pretty exciting making those first traces on the plywood.
In deed it is Will.
Then life happens and you have to stay up all night with your crying baby, sleep half the day away, have family over for dinner tonight and go pick out two new recliners. So much for momentum. There might still be enough day left to fit in transom cut out and glue up. We'll see.
Jeff
Re: Biscuit's Panga 22 build
Posted: Mon Mar 03, 2014 3:15 am
by Biscuit
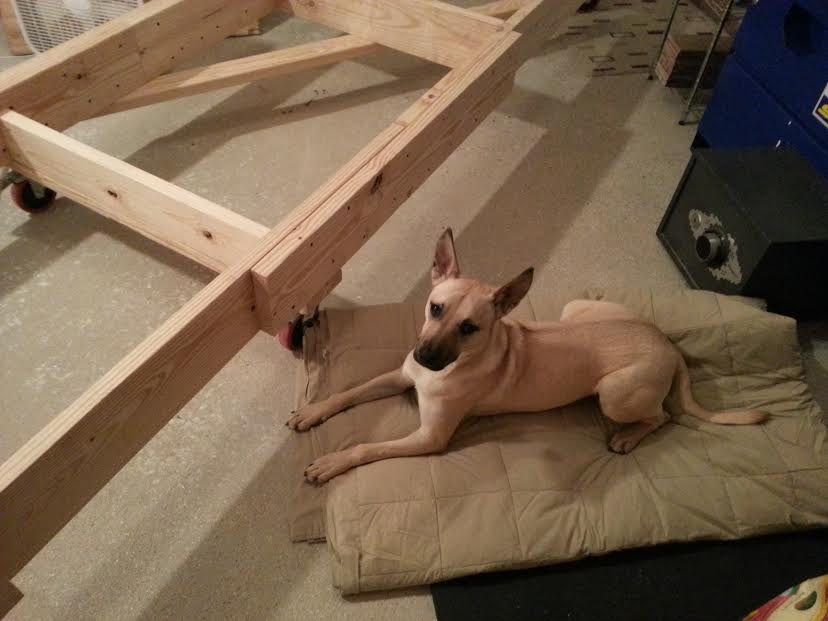
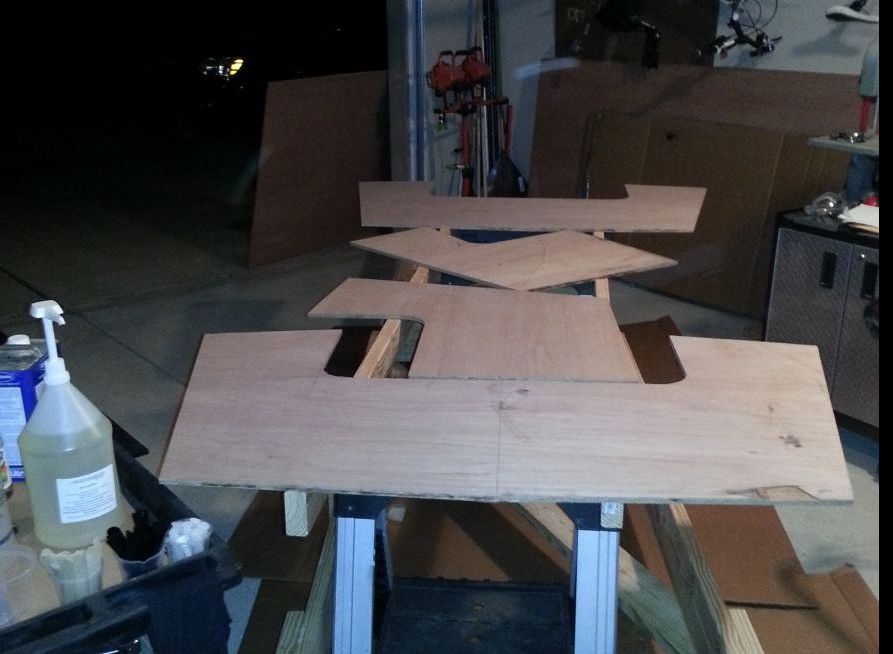
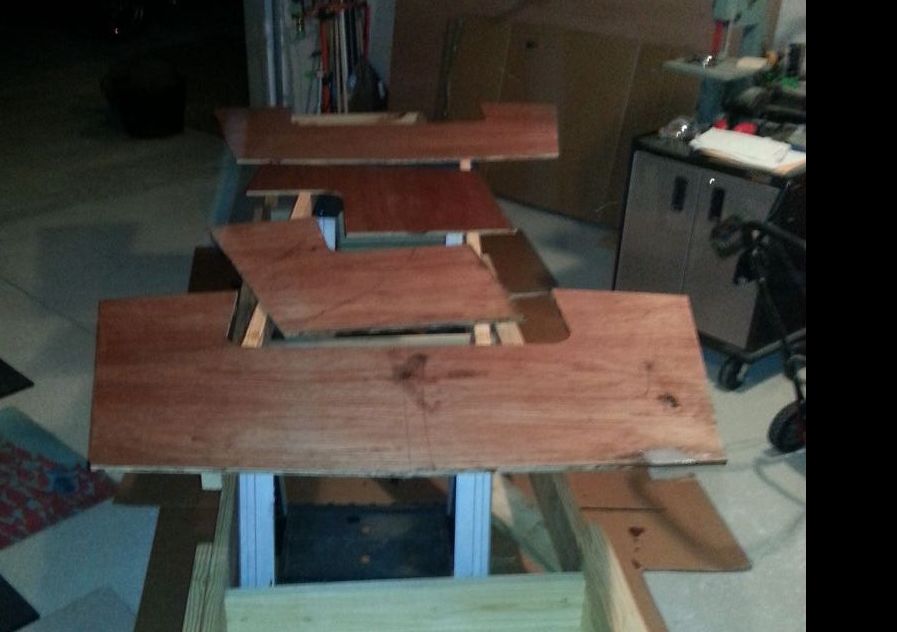
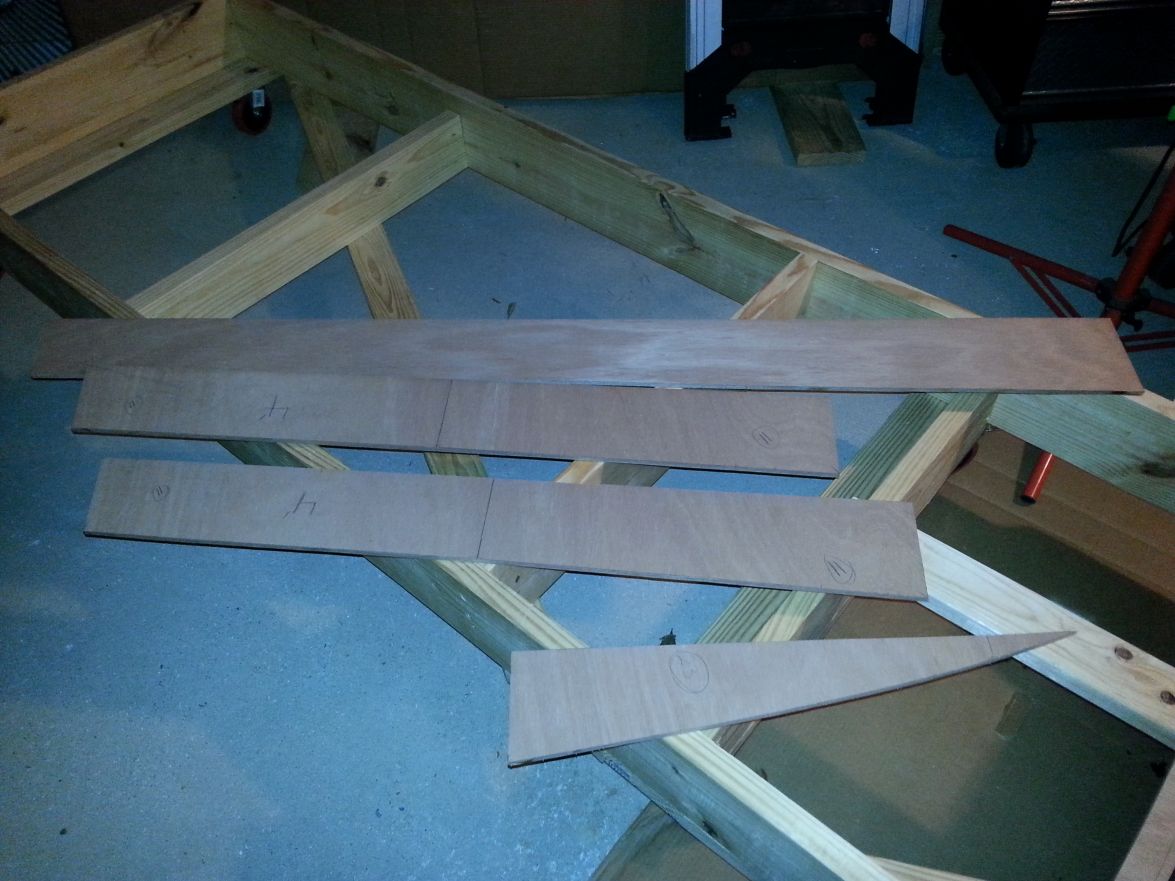
Made a little progress tonight. Managed to steal away for about two hours and cut these out and put a "clean coat" on one of the sides. If you look close, you'll see a couple small shipping bruises. Nothing major but I went ahead and filled them with thickened epoxy just to make me feel better.
In this small space junk is starting to stack up. I have to work on making some more room in here.

Don't say it too loud but I used one of those numbered fillers I had left over from another project.
Re: Biscuit's Panga 22 build
Posted: Mon Mar 03, 2014 6:20 am
by antoniekruger
HI Bud, congrats on your start. I like your QA officer as well.
Just a heads up - if those transom pieces are going to be glued together, be careful of the blush(waxy layer after epoxy cures) on your priming layers. You'll have to sand it off to give a key and get rid of the blush, and don't be shy with the glue. I had a whole lecture from the guys when I glued my transom...something between mayo and peanut butter if memory serves. There are great tutorials on the homepage as well.
Few things as great as the smell of wood being worked on and a whole stockpile to work with.
Have fun.
Antonie
Re: Biscuit's Panga 22 build
Posted: Mon Mar 03, 2014 11:45 am
by Biscuit
antoniekruger wrote:HI Bud, congrats on your start. I like your QA officer as well.
Just a heads up - if those transom pieces are going to be glued together, be careful of the blush(waxy layer after epoxy cures) on your priming layers. You'll have to sand it off to give a key and get rid of the blush, and don't be shy with the glue. I had a whole lecture from the guys when I glued my transom...something between mayo and peanut butter if memory serves. There are great tutorials on the homepage as well.
Few things as great as the smell of wood being worked on and a whole stockpile to work with.
Have fun.
Antonie
Thanks brother,
I plan on sanding and washing them a bit as well.
Heading out there in a few minutes to get started. The QA officer is a stickler for punctuality so I better get to it.
Re: Biscuit's Panga 22 build
Posted: Tue Mar 04, 2014 12:10 am
by Biscuit
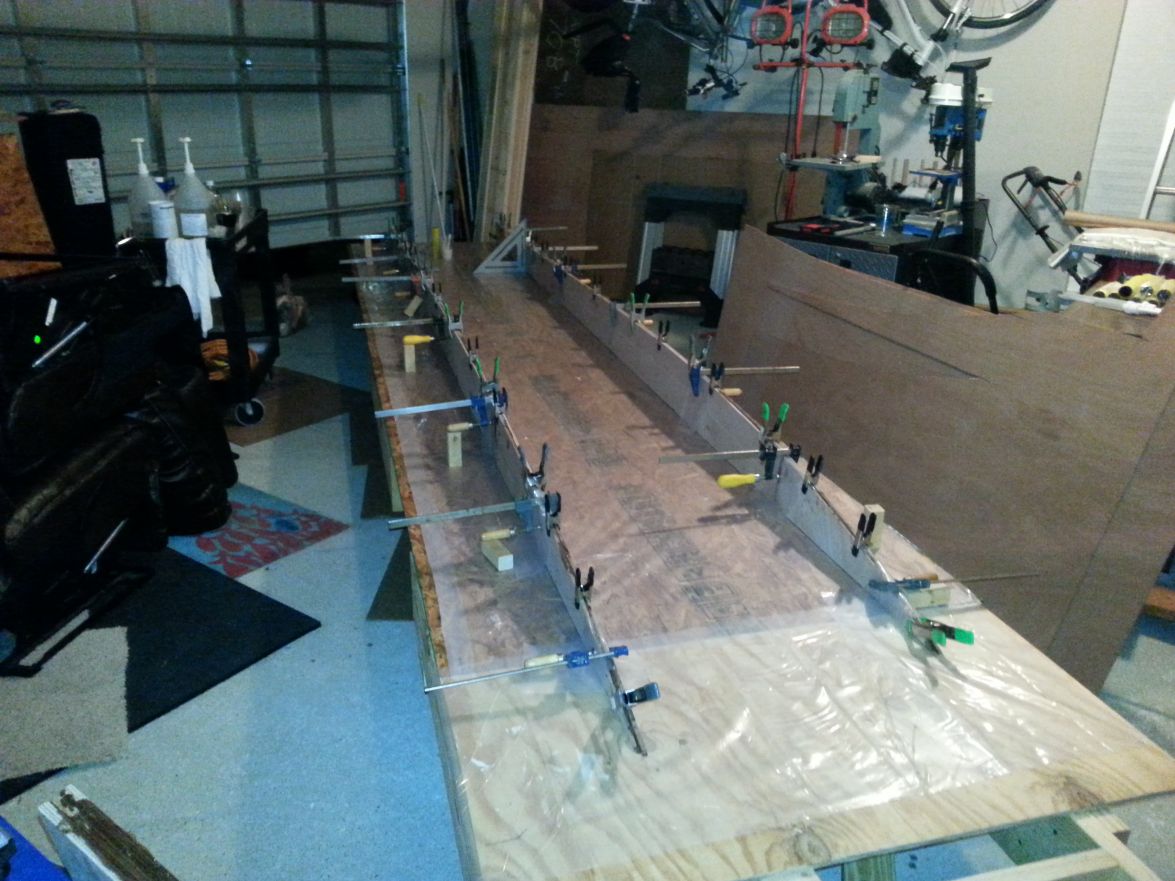
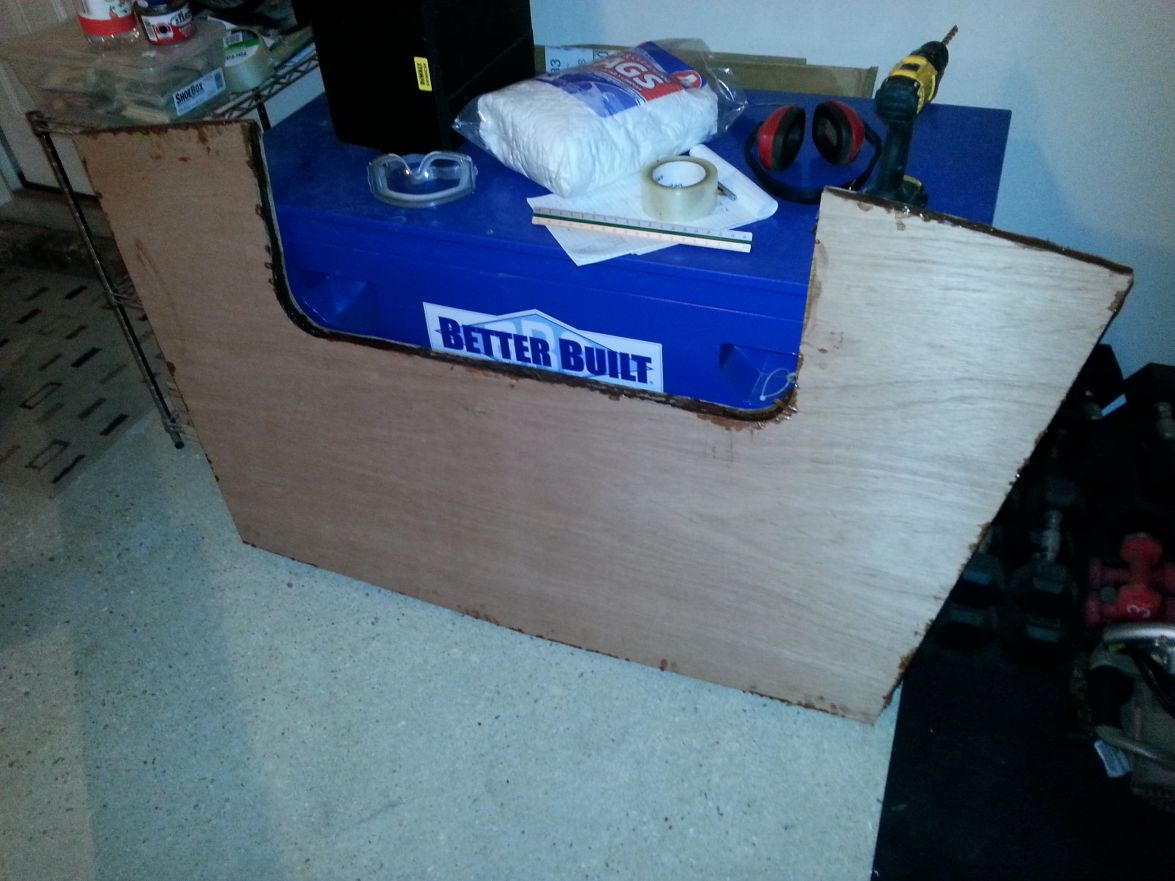
Well today I was able to devote about 4 hours to the Panga. The transom is glued and clamped, not too tight of course and I used way too much thickened epoxy. It got everywhere and sure was a job by myself. Frames A, F, G and the bow form are cut out. Picture to come shortly. New phone and I haven't set it up yet.
Jeff
Re: Biscuit's Panga 22 build
Posted: Tue Mar 04, 2014 2:57 am
by Biscuit
Re: Biscuit's Panga 22 build
Posted: Tue Mar 04, 2014 8:25 am
by pee wee
That's a big transom. Nice, looks like you prepared well for the glue job.
Re: Biscuit's Panga 22 build
Posted: Tue Mar 04, 2014 10:02 am
by gk108
one of those numbered fillers I had left over from another project.
I hung on to the empty cans and used them for the various fillers from bateau. The cans are eassier for me to handle with gloved hands.
Way too much glue on the transom? Doesn't look like it to me. There's not enough dripped on the floor.
The first parts are not as easy, but as you progress, you'll be able to cut a few parts ahead of the work you are doing at the time and have them available to use the extra epoxy on.
Re: Biscuit's Panga 22 build
Posted: Tue Mar 04, 2014 10:50 am
by tcason
I use a notched spreader to evenly spread epoxy glue on entire wood surface when I glue two pieces together.
see link
http://www.amazon.com/West-System-809-N ... B002IZDIYK
Re: Biscuit's Panga 22 build
Posted: Tue Mar 04, 2014 12:18 pm
by Biscuit
That's a big transom. Nice, looks like you prepared well for the glue job.
Hank
gk108 wrote:one of those numbered fillers I had left over from another project.
I hung on to the empty cans and used them for the various fillers from bateau. The cans are eassier for me to handle with gloved hands.
Way too much glue on the transom? Doesn't look like it to me. There's not enough dripped on the floor.
The first parts are not as easy, but as you progress, you'll be able to cut a few parts ahead of the work you are doing at the time and have them available to use the extra epoxy on.
Fellas,
Thanks for the encouraging comments but I wouldn't exactly say I prepared for or executed vary well. I ended up running around like a fool once the job started. I forgot everything. I had to pull that plastic out the bottom of the garbage can once the squeeze out started coming. I had to go find the notched spreaders I ordered. Then I had to go raid my wife's kitchen for vinegar because I, un-knowingly stepped in a huge squeeze out spot. Then like an idiot I walked on her wood floor with my shoes on. Didn't see that until I had to go find an old shirt or two to use as rags for the full cup of resin that slipped right out my epoxy soaked, gloved hand. Sure glad my wife was out having lunch with her mother through all that. And to top it off I was frantic the entire time. I was sure the epoxy was going to set and I'd end up needing to place another order for two more pieces of 1/2" ply. To my neighbors I'm sure I looked like "Mr Bean".
I agree, the wood flour was a bit of a bear to scoop in the bag so I'll probably be re-using those "numbered" containers as well.
Today I plan on cutting and gluing the stringers but first I have to go buy plenty of rags and plastic.
Jeff
Re: Biscuit's Panga 22 build
Posted: Wed Mar 05, 2014 10:13 pm
by Biscuit
The plan of having the stringers cut and glued yesterday didn't happen. It was a cold, dreary and rainy day so pretty much nothing got done on the boat. Tonight my circular saw crapped out and I'm pretty sure the missing teeth on the blade means I need a new one of those too.
All I was able to get done before the saw came apart was cut out a couple of the stringer pieces. But it's progress none the less.
The transom came out the plastic wrap and clamps today. As soon as the stringers are complete we'll be ready to mount it on the strongback.
Today was garden prep day anyhow. My wife and I started our garden tasks by putting seeds in the germination trays and planning our raised bed configuration for the growing season. Tonight I'm going to do some drawing in preparation for a new saw blade tomorrow and my wife says tomorrow is a boat building day, ALL DAY! We'll see about that.
Jeff
Re: Biscuit's Panga 22 build
Posted: Fri Mar 07, 2014 4:00 pm
by Biscuit
Re: Biscuit's Panga 22 build
Posted: Fri Mar 07, 2014 4:18 pm
by Biscuit
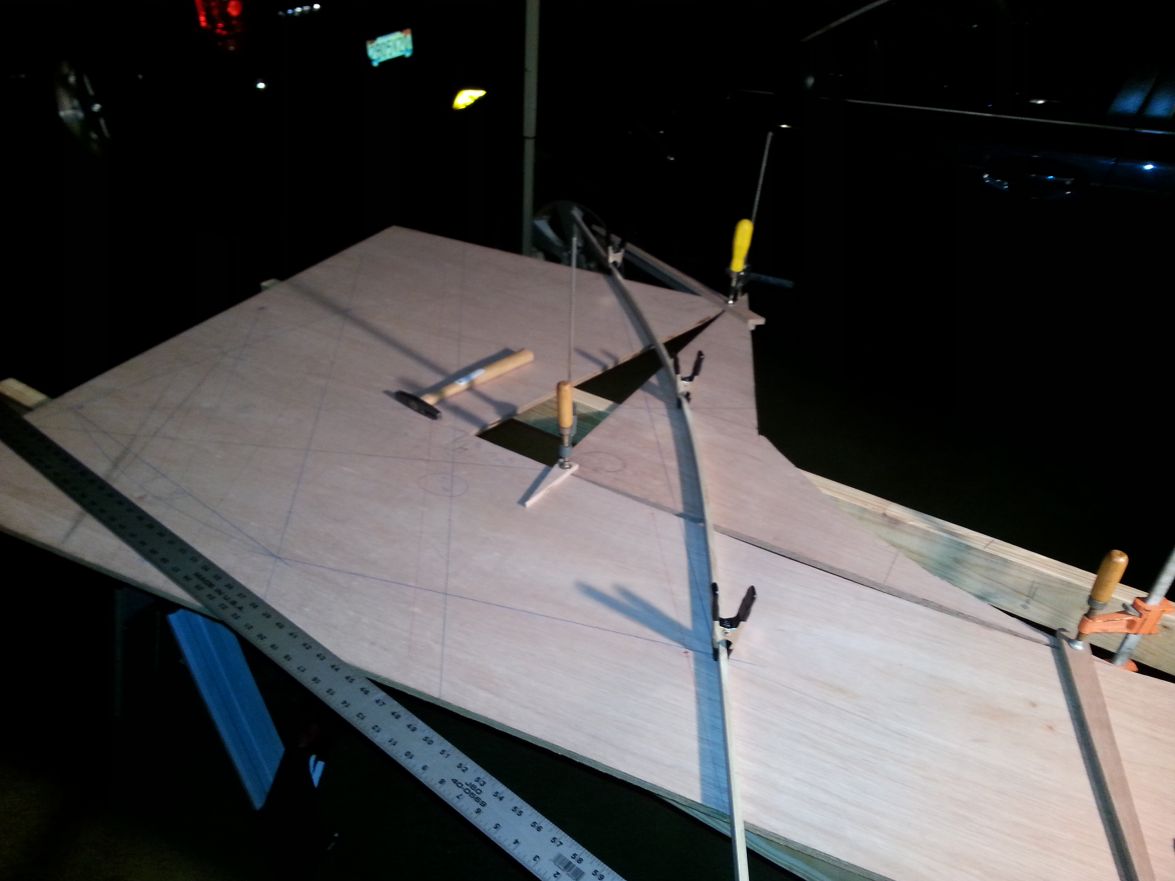
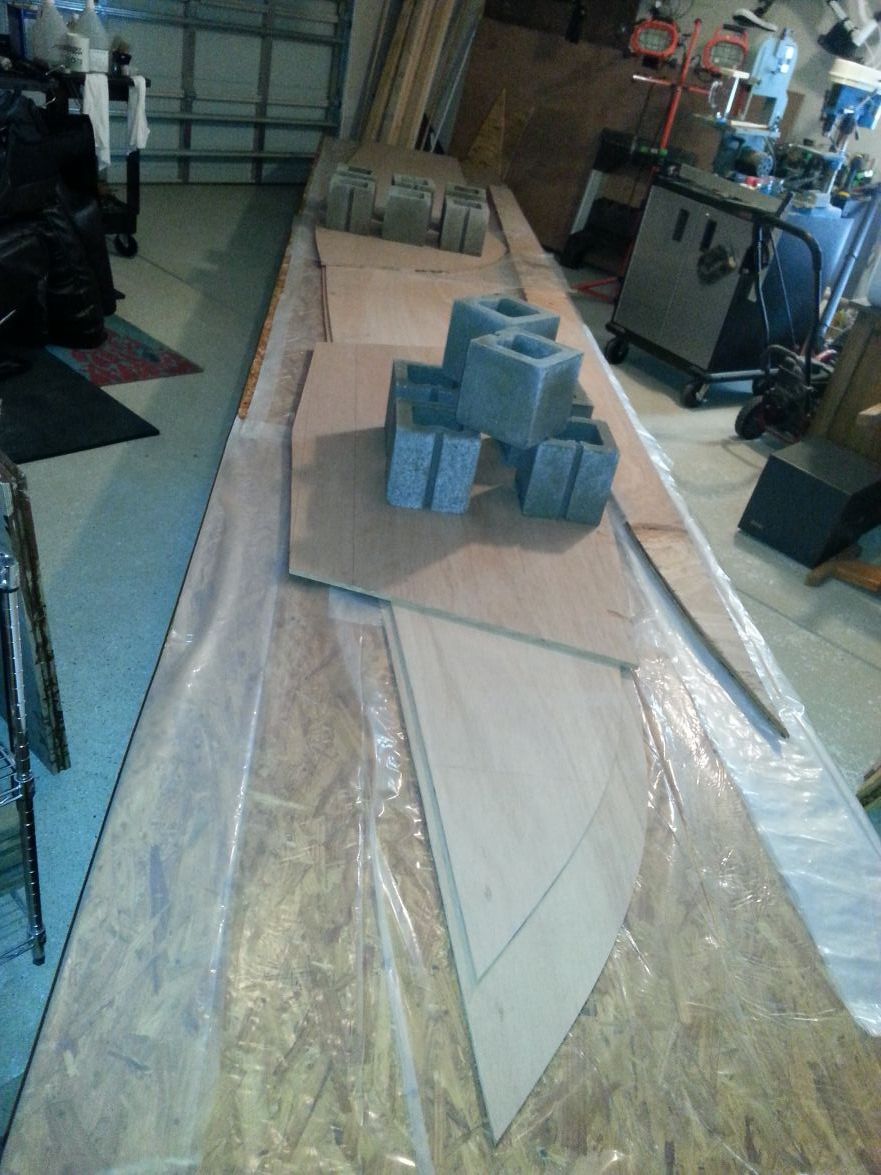
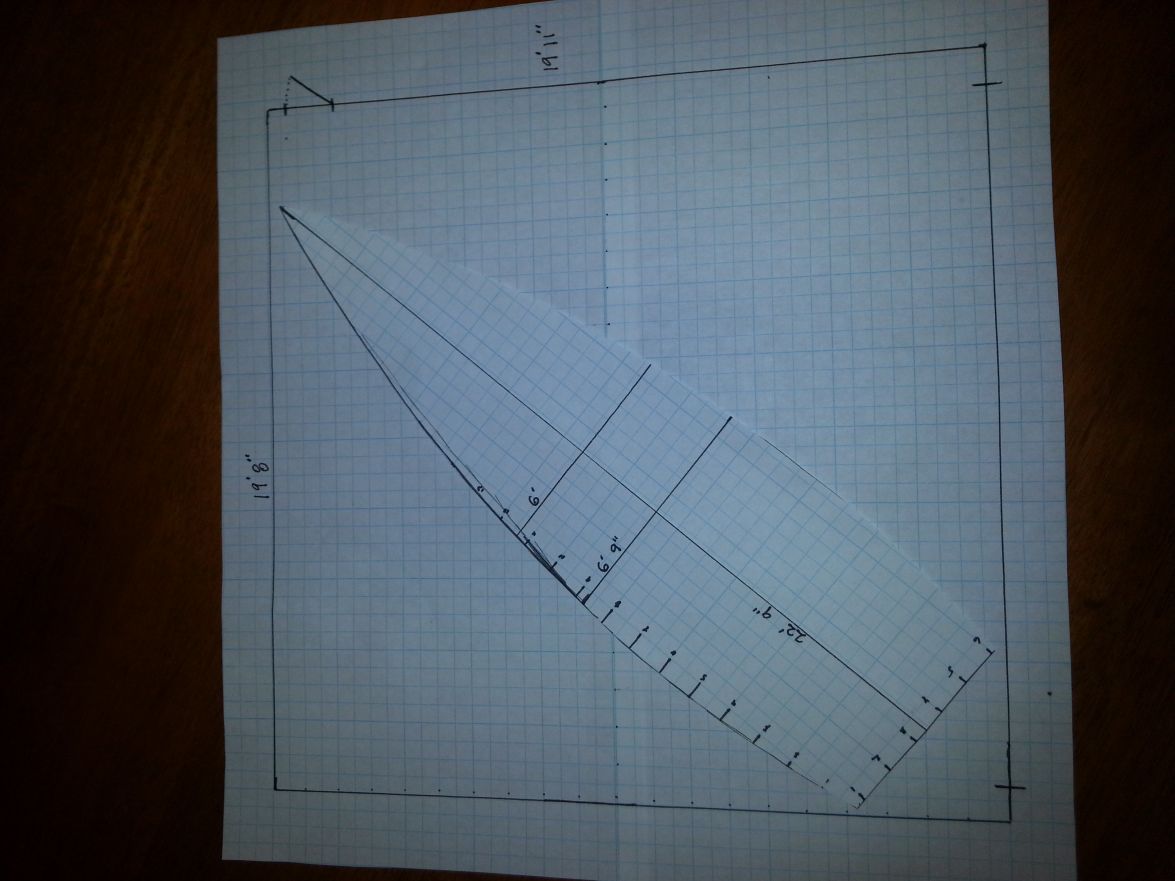
Long story short this form was cut out of a sacrificial piece of 1/2 inch ply and then I decided to go ahead and use the Merranti ply. So this shot is proof that thinking ahead a little pays off. On this sheet of ply the nesting diagram has this form sort of wrapping around one of the transom forms right in a corner. Well I cut out the transom and didn't draw nor cut this one out so I had to draw it three times to get all of it on the ply. Then I had to fill in the gap where the transom was so I could get the required camber right. Also when I cut out the transom I continued through the corner on both sides so I wouldn't have to use the handsaw. Well that created two cuts over the casting deck line onto this form.
Nothing too difficult but it was a pain.
All that to say it's never too early to start thinking ahead.
Re: Biscuit's Panga 22 build
Posted: Sat Mar 08, 2014 2:17 am
by Biscuit
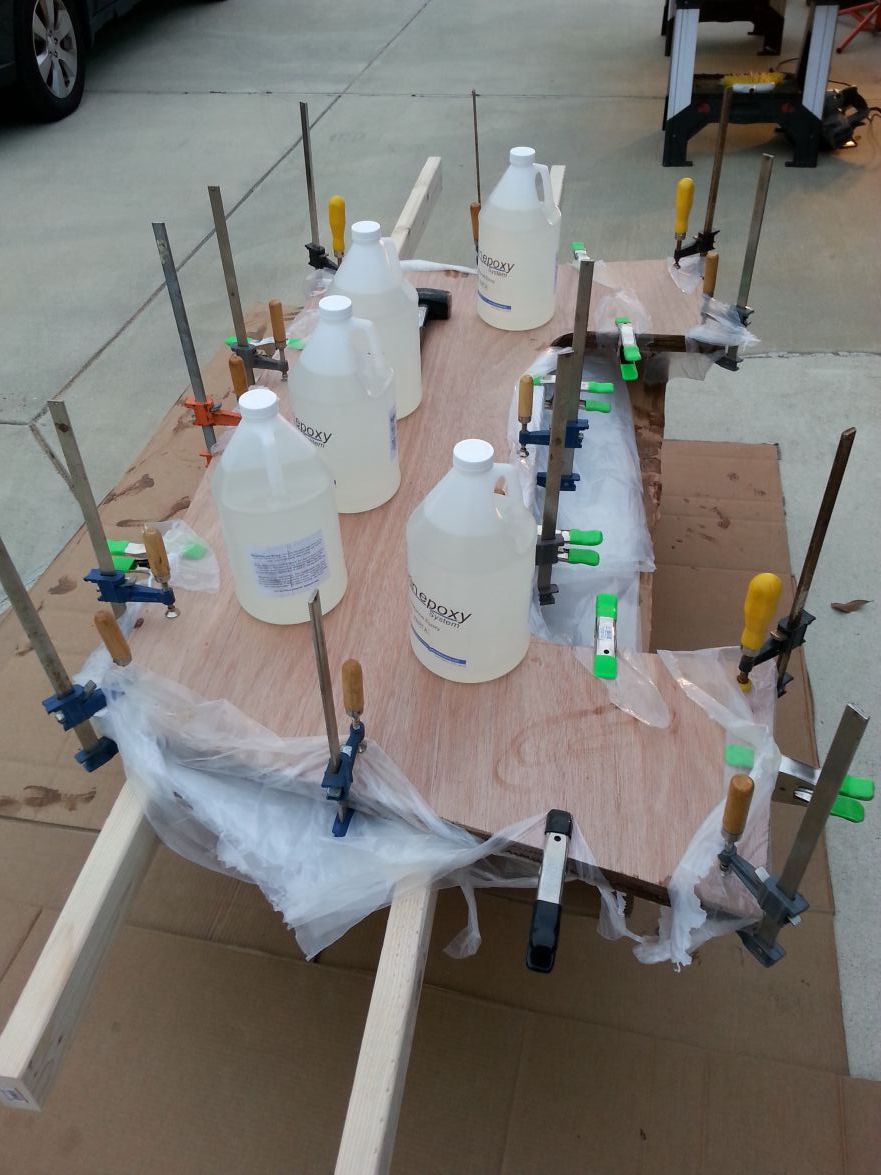
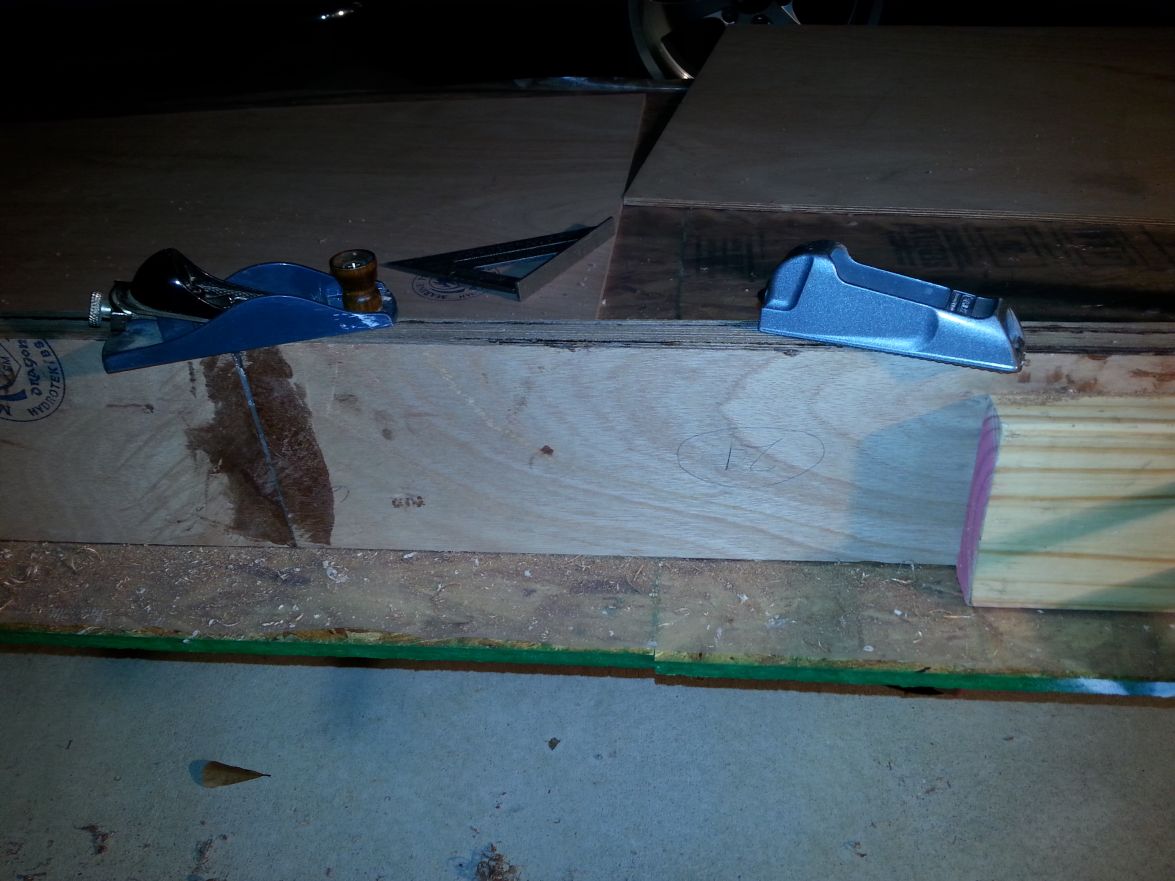
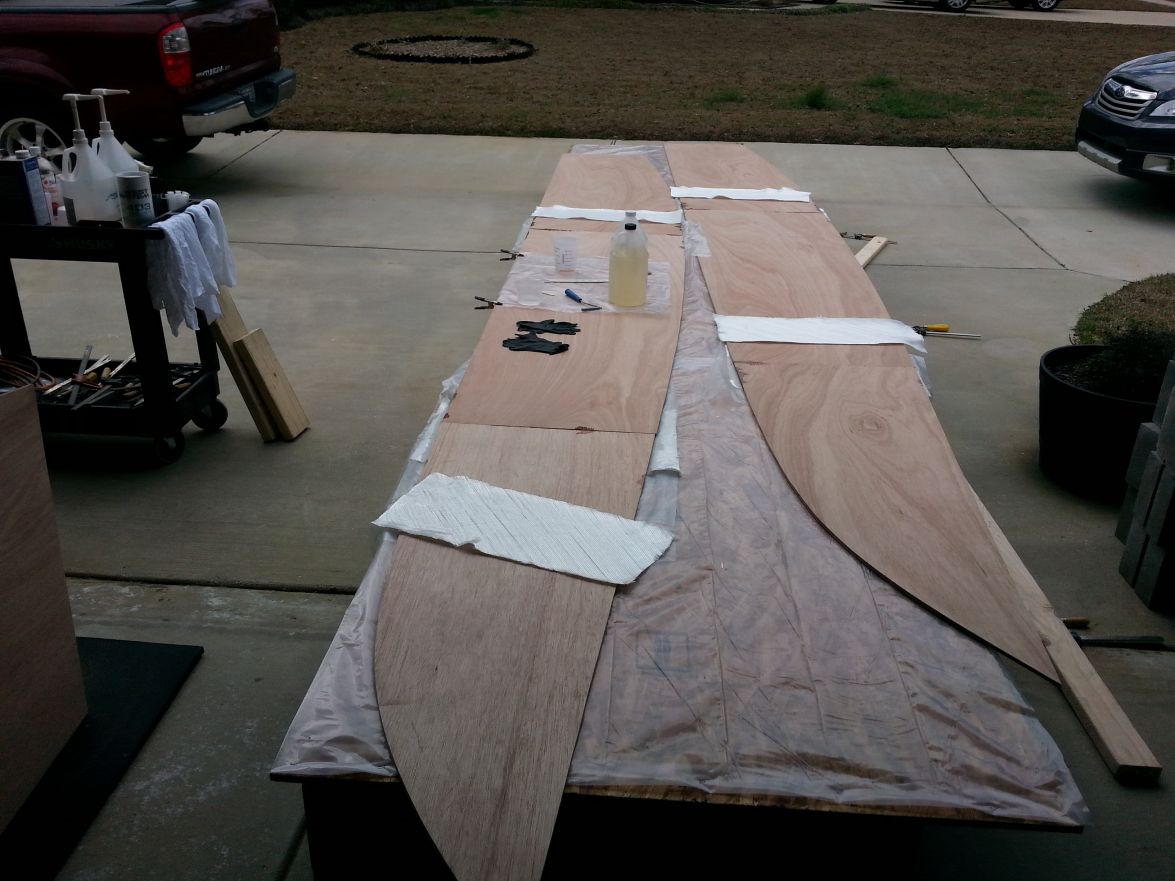
Another productive day today. After a little light cleaning up with a Sure Form tool for the larger epoxy runs and then a block plane to make them more uniform, the stringers are ready to be mounted.
Bottom panels were cut out and dry fit.
This is a long boat. Seeing the bottom panels next to my 4 door Toyo is an eye opener to the actual size of this beast and the overall length is still another two feet and a few inches longer than that. Sure not looking forward to sanding all of it.
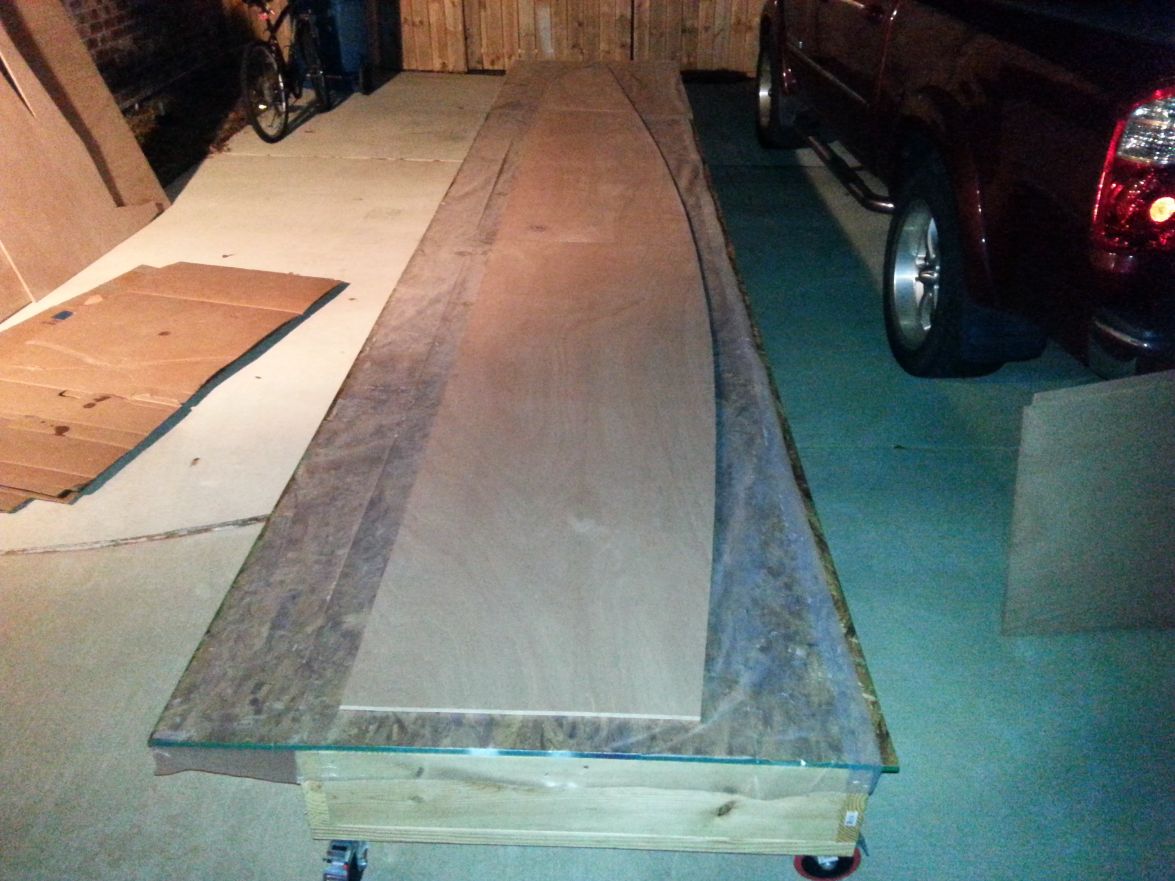
pre-coated
and the first side is glassed on both panels.
Re: Biscuit's Panga 22 build
Posted: Sat Mar 08, 2014 10:27 am
by antoniekruger
Hi Biscuit - that's looking good. Good momentum.
And its good to see you have hand planes. They do come in handy.
She's a big boat - according to Larry, sanding is therapeutic.....not so sure about that. Are you intending to use quickfair?
Just one note - if you do replace a tool(power or not) replace it with the best you can afford.
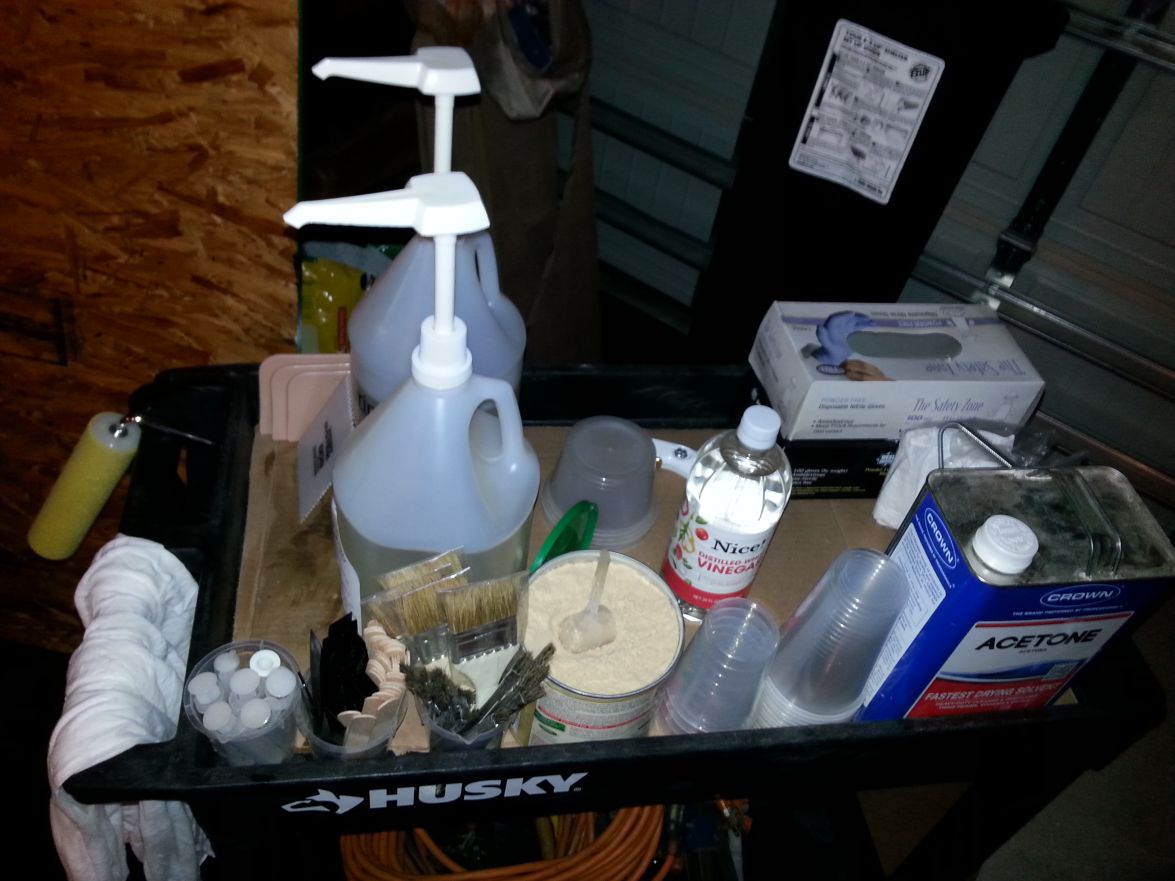
Are you using Acetone to clean your brushes? My composite supplier sold me a water soluble brush cleaner. Very cool stuff. I'll post a pic of the container. I was even able to revive those brushes that has gone a bit hard at the top....
Cheers,
Antonie
Re: Biscuit's Panga 22 build
Posted: Sat Mar 08, 2014 11:58 am
by Biscuit
antoniekruger wrote:Hi Biscuit - that's looking good. Good momentum.
And its good to see you have hand planes. They do come in handy.
She's a big boat - according to Larry, sanding is therapeutic.....not so sure about that. Are you intending to use quickfair?
Just one note - if you do replace a tool(power or not) replace it with the best you can afford.
Are you using Acetone to clean your brushes? My composite supplier sold me a water soluble brush cleaner. Very cool stuff. I'll post a pic of the container. I was even able to revive those brushes that has gone a bit hard at the top....
Cheers,
Antonie
Thanks Antonie,
I'm in a bit of a hurry to get the hull on the forms and spot welded together. I have a really crazy work schedule and once I go back the momentum will definitely drop off some. Mostly though the excitement is keeping me going.
I think Cracker Larry is most knowledgeable about building these boats but I don't know how therapeutic sanding this monster will be. There's always the possibility that the Biscuit and the Cracker have two different understandings of the word therapeutic.
I'll probably use the micro-balloon/ glass mixture provided with my epoxy kit first. Then move to the quickfair. Honestly though the micro-balloons in epoxy do a great job by theirself so I'll keep you updated on that.
I've been using vinegar and sometimes acetone. I've never tried anything else. The acetone works best if you have something that's started to harden over but if you're cleaning up epoxy that's not kicked yet, then vinegar is the best value, does an amazing job and well, here we can pick up a gallon at almost any grocery for next to nothing. The vinegar is essential to remove any epoxy mixed or in parts that may contact your skin. The vinegar doesn't absorb into your skin the way acetone does, thus the harmful epoxy chemistry stays out of you.
Bottoms not ready to be rolled over yet.

Jeff
Re: Biscuit's Panga 22 build
Posted: Sat Mar 08, 2014 2:40 pm
by jorgepease
for what it's worth on the fairing … I used micro balloons with cabosil and two different techniques to get to the point where I am now which is just about done and this is what I learned.
1) Micro balloons with cabosil and using mechanicle mixing with a paddle to get you a nice light weight and non-slumping mix works great, it's much cheaper than the ready made stuff and it's strong.
2) Using a V notched trowel 3/16 (like what you would use to lay down thin set) for your first coat makes it tremendously easy to sand the ridges down to a perfectly flat plane. The second coat fills in any low spots. I expect I sanded my /16 high notches down to a 1/16 height in most areas. Filling in is a breeze.
3) Because I have that big flat bottom, I used a floor (12 x 18 rectangular orbital sander) to get a super flat and smooth surface. On the first pass I epoxied one side of the red mat which attaches to the sanders teeth to a 12 x18 piece of plywood and then stuck the sand paper to the other side of the plywood. That turns the sander into a big long board. On the second pass you can just use the mat and 220 paper to get a perfect ready for primer plane.
Good luck with your build, the Panga is one of my favorite boats, I may be building one someday!! )
Re: Biscuit's Panga 22 build
Posted: Sat Mar 08, 2014 3:43 pm
by Cracker Larry
according to Larry, sanding is therapeutic.....not so sure about that.
In small doses
By the time you finish sanding that big girl you will probably need therapy yourself

My best advice is to work clean, work wet on wet whenever possible and wipe off all runs and drips while they are still wet. Much easier to brush or roll it all smooth than to sand it smooth later.
Re: Biscuit's Panga 22 build
Posted: Sat Mar 08, 2014 4:13 pm
by antoniekruger
Hey Larry, agreed - it's best not to have clean up.
Biscuit, those long panels, are you putting biax on both sides of the join? I suppose your drawings and notes would tell you the same as mine - biax both sides of the long panels joints. I had an issue with uniform bent towards the bow - tight bend right on the join. This also created some issues during fairing. My 'quickfair' went on almost 2mm on the join since it did not bend as the rest of the panel. I saw a similar build of a chap in Aus....Tim and Jess(if memory serves). I noticed on his pics that he only joined the one side of the long panels and it was the inside. The risk is in handling the panel - it could crack if you do not have a helping hand to lift and place it.
Re: Biscuit's Panga 22 build
Posted: Sat Mar 08, 2014 4:46 pm
by Biscuit
jorgepease wrote:for what it's worth on the fairing … I used micro balloons with cabosil and two different techniques to get to the point where I am now which is just about done and this is what I learned.
1) Micro balloons with cabosil and using mechanicle mixing with a paddle to get you a nice light weight and non-slumping mix works great, it's much cheaper than the ready made stuff and it's strong.
2) Using a V notched trowel 3/16 (like what you would use to lay down thin set) for your first coat makes it tremendously easy to sand the ridges down to a perfectly flat plane. The second coat fills in any low spots. I expect I sanded my /16 high notches down to a 1/16 height in most areas. Filling in is a breeze.
3) Because I have that big flat bottom, I used a floor (12 x 18 rectangular orbital sander) to get a super flat and smooth surface. On the first pass I epoxied one side of the red mat which attaches to the sanders teeth to a 12 x18 piece of plywood and then stuck the sand paper to the other side of the plywood. That turns the sander into a big long board. On the second pass you can just use the mat and 220 paper to get a perfect ready for primer plane.
Good luck with your build, the Panga is one of my favorite boats, I may be building one someday!! )
Thanks for the tips. I like the idea of using the notched trowel. Sounds like it'll do the trick on mine.
Re: Biscuit's Panga 22 build
Posted: Sat Mar 08, 2014 4:50 pm
by Biscuit
bottom panels second side
Re: Biscuit's Panga 22 build
Posted: Tue Mar 11, 2014 4:18 am
by Biscuit
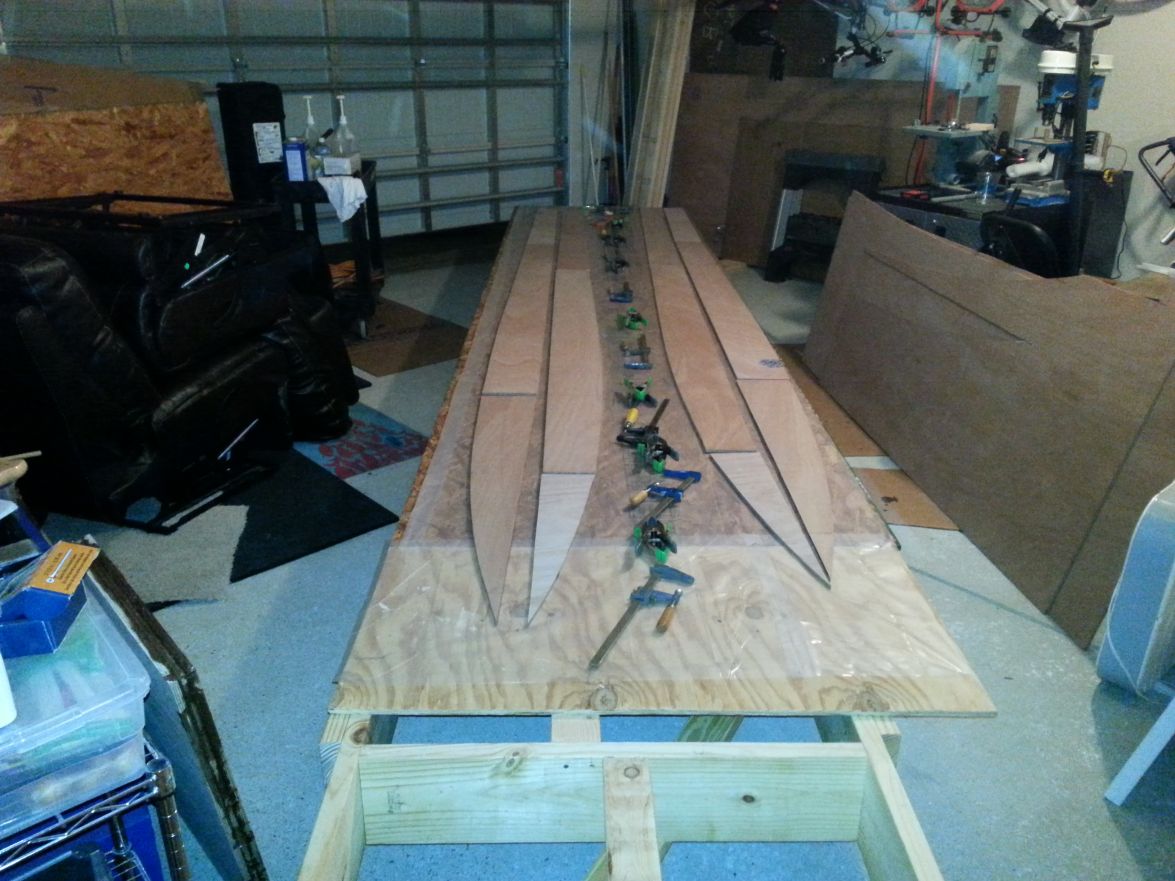
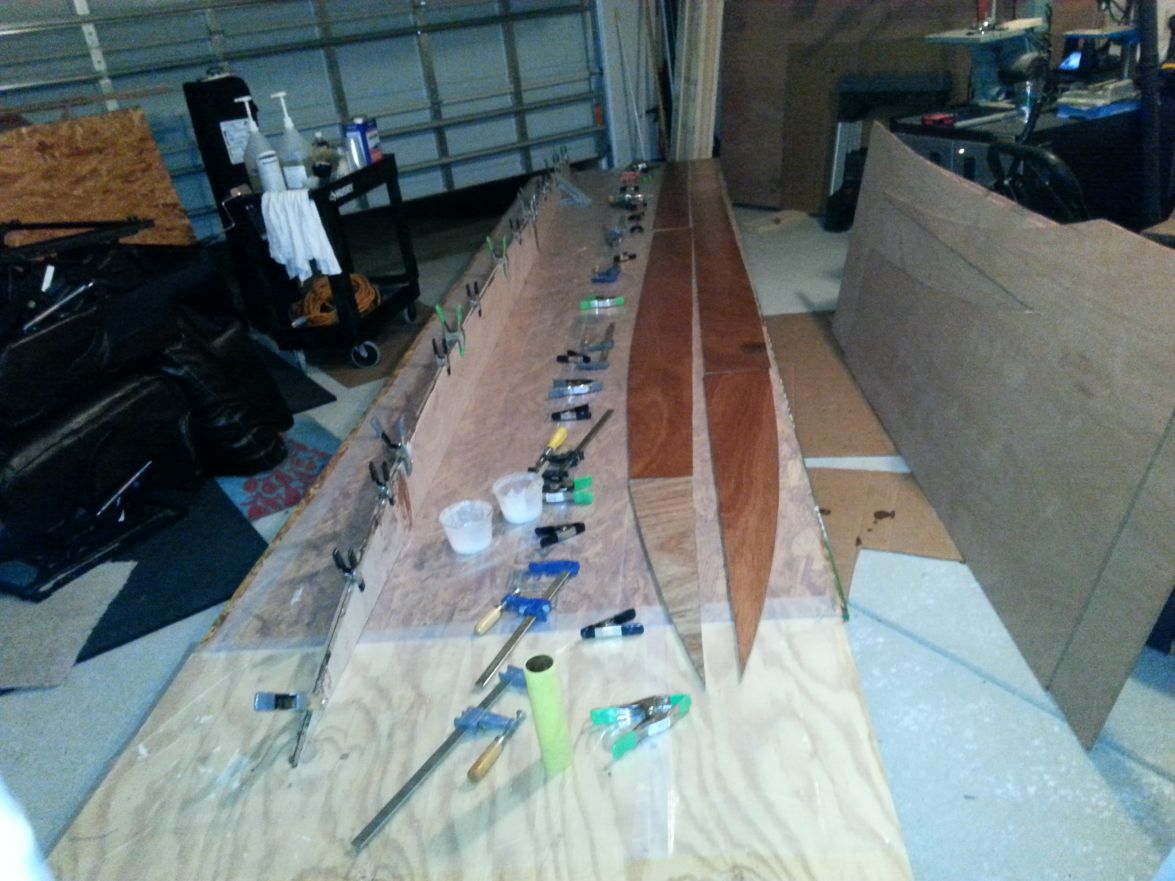
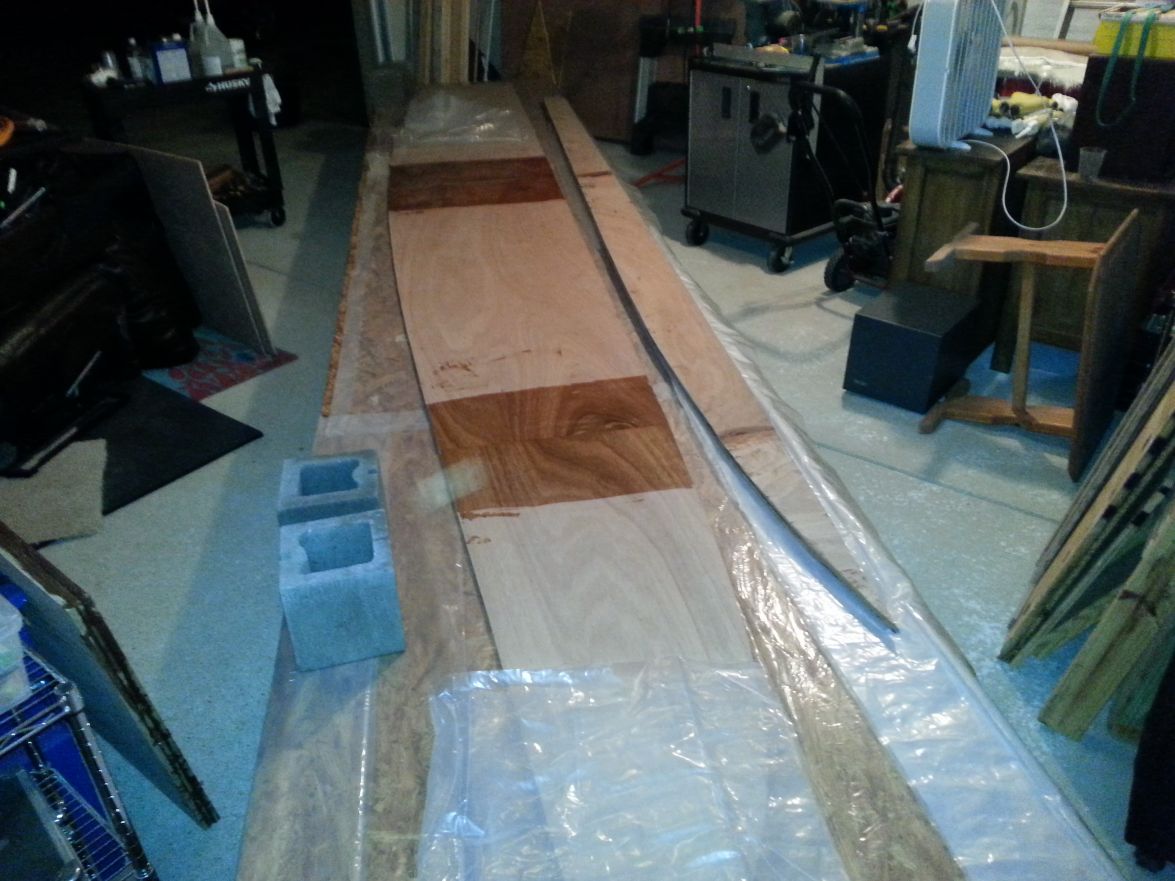
Worked on the Panga for about six hours today and made some headway. I drew the side panels, cut them out, and glass taped both sides. Tomorrow I'll be pulling the flight deck off the carrier to turn it back into a strongback. Maybe the rain will hold off until later in the day so I can roll everything outside and enjoy the sun.
The forms leaning in the corner and the stringers are itching to get mounted tomorrow as well. If that happens we might get to see the bottom and sides loosely mounted too. Maybe that's a bit too ambitious but we'll see.
Here's the sides being drawn.
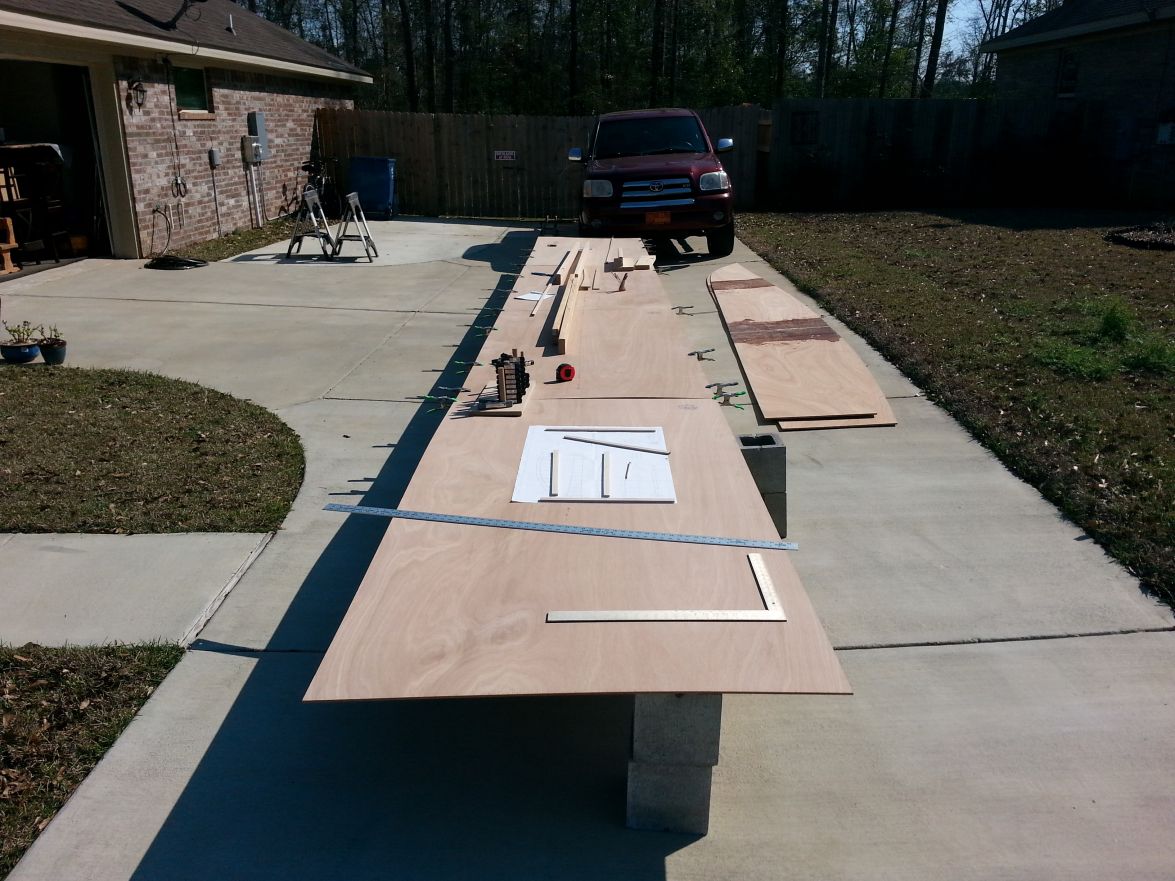
Side panels glass taped on both sides and bottom panels ready to be mounted.
Re: Biscuit's Panga 22 build
Posted: Wed Mar 12, 2014 12:50 am
by Biscuit
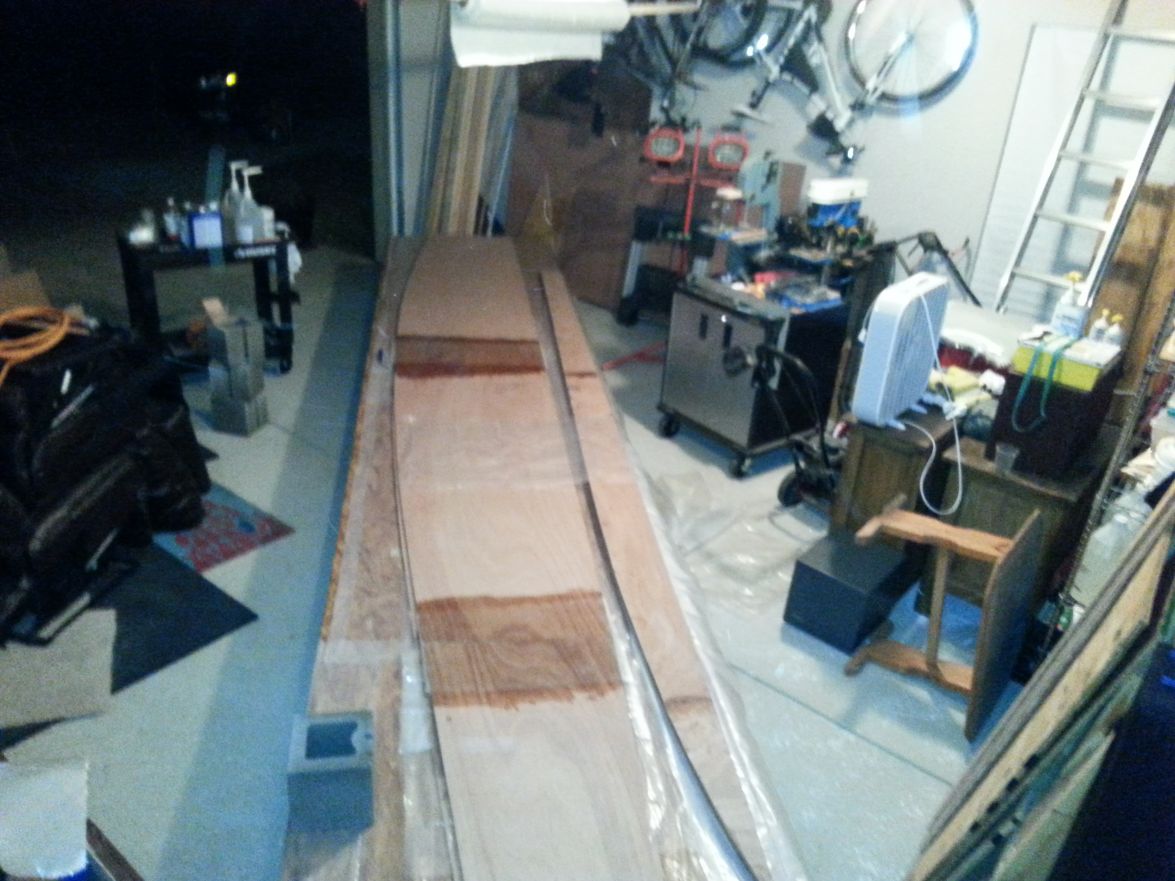
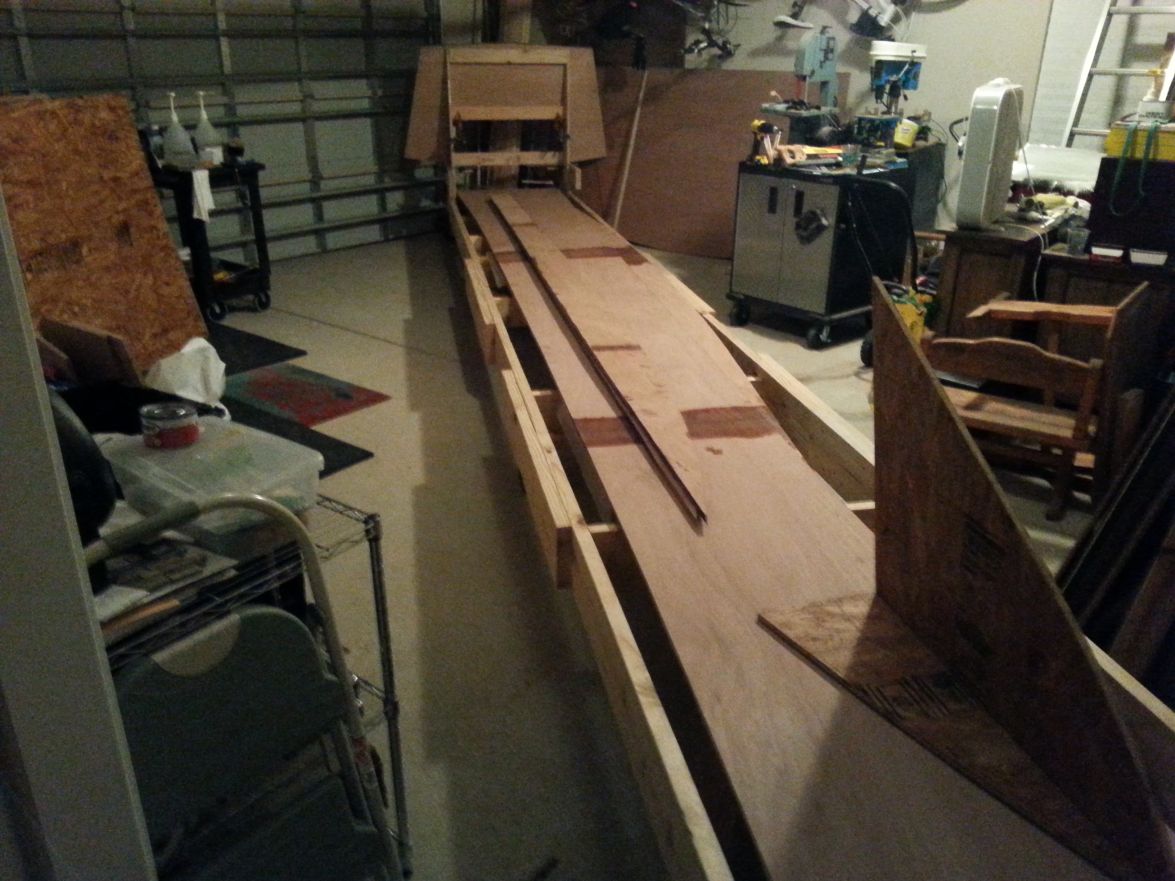
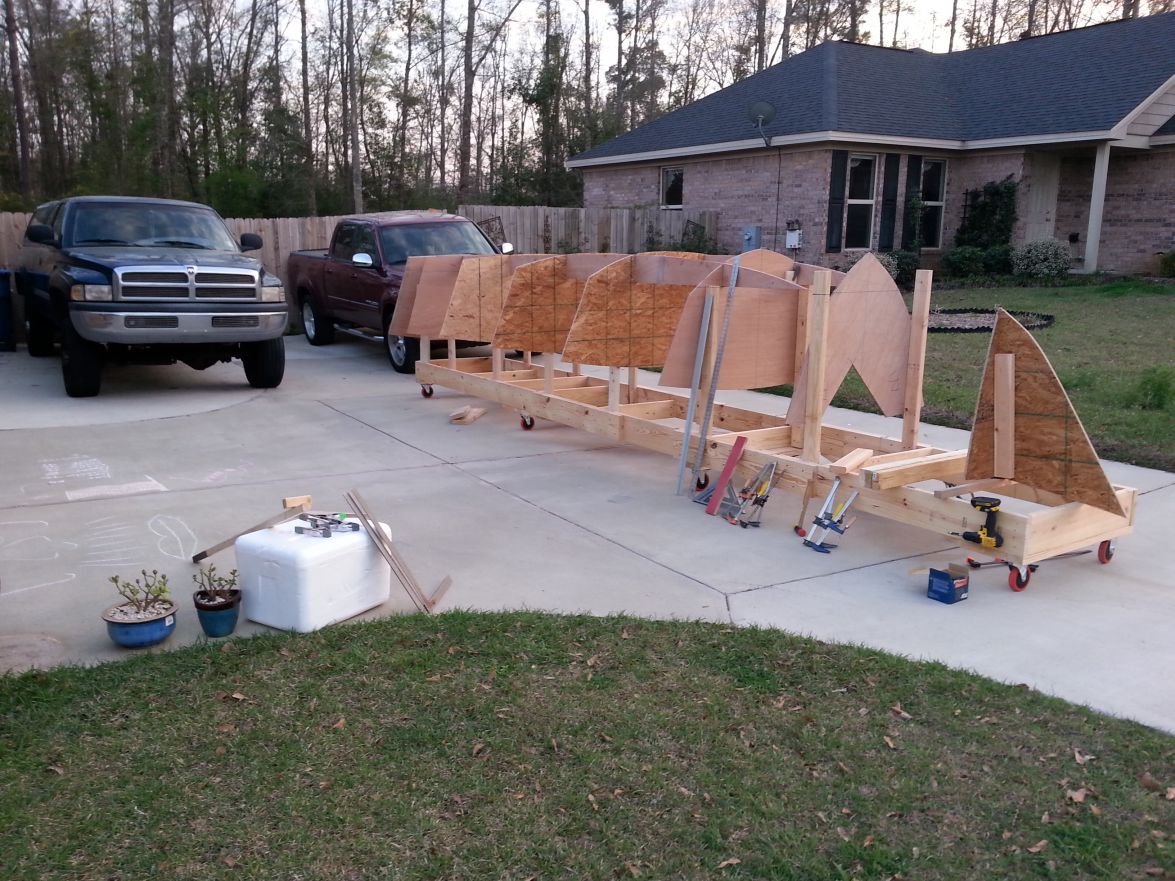
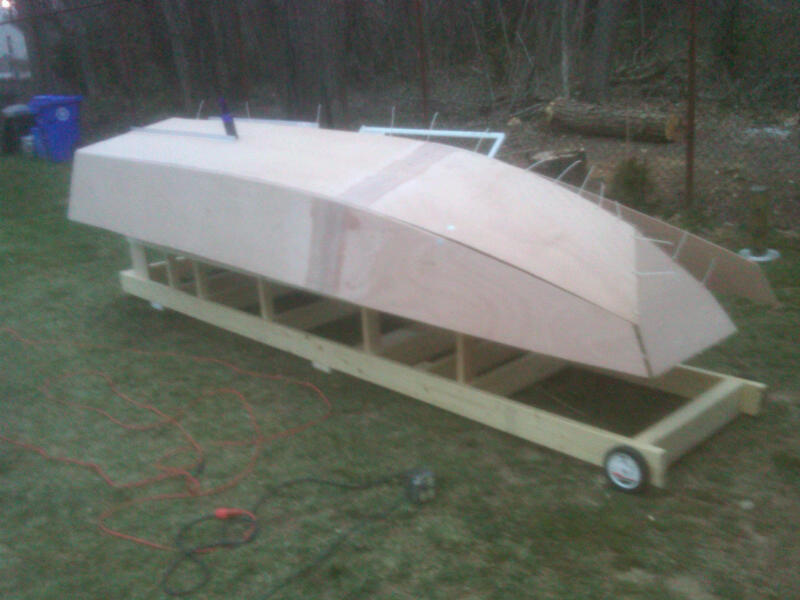
Well back to work tomorrow after several weeks off and this is how the Panga will be waiting for me this weekend. Not as much finished as I'd hoped but it's definitely closer to the water than two weeks ago.
The sides, bottoms, transom, stringers, stations and bow form are complete.
Next is mount everything, align it and get busy sanding.
Re: Biscuit's Panga 22 build
Posted: Mon Mar 17, 2014 12:33 am
by Biscuit
This weekend was plenty busy but only Sunday afternoon was devoted to the Panga.
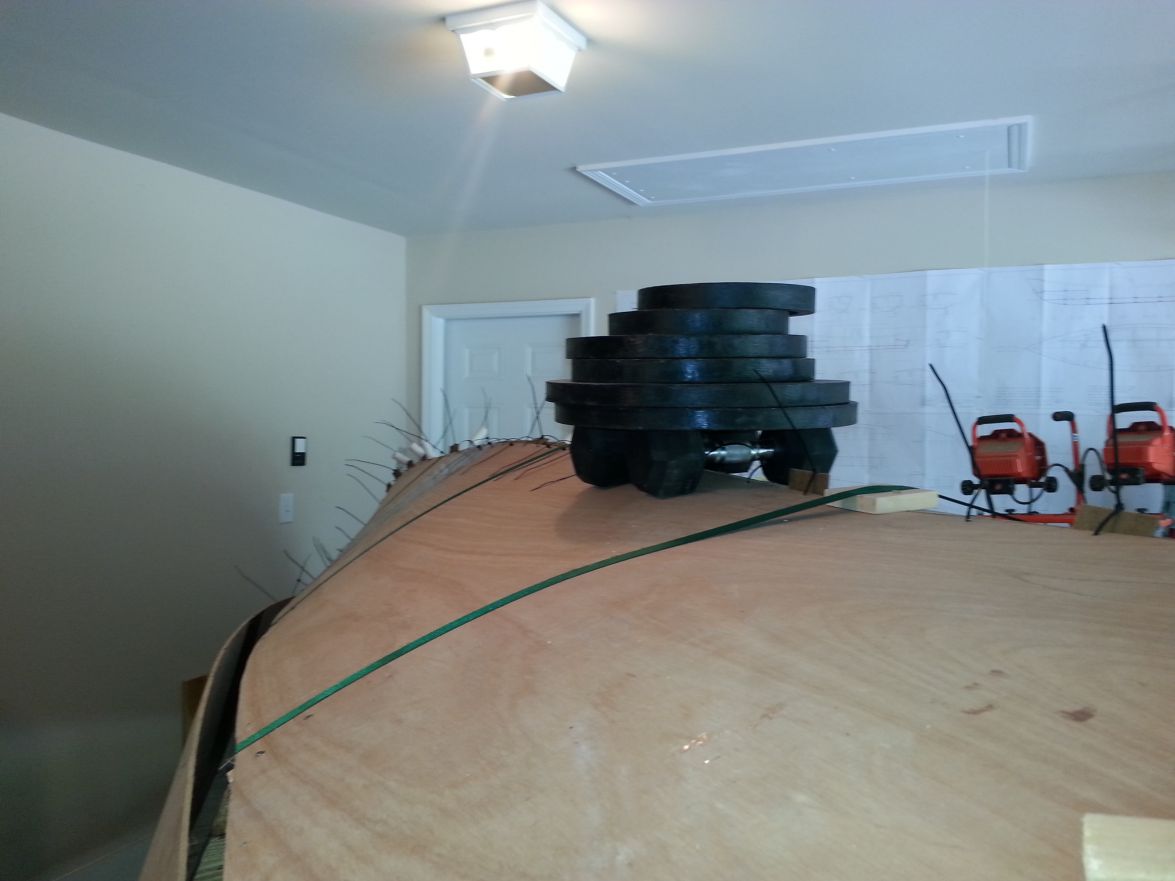
I mounted station D first then the transom. After those two were perfectly aligned I started mounting some of the others. They're all temporarily mounted because the stringers are in need of a little shimming and station F will have to be raised a touch.

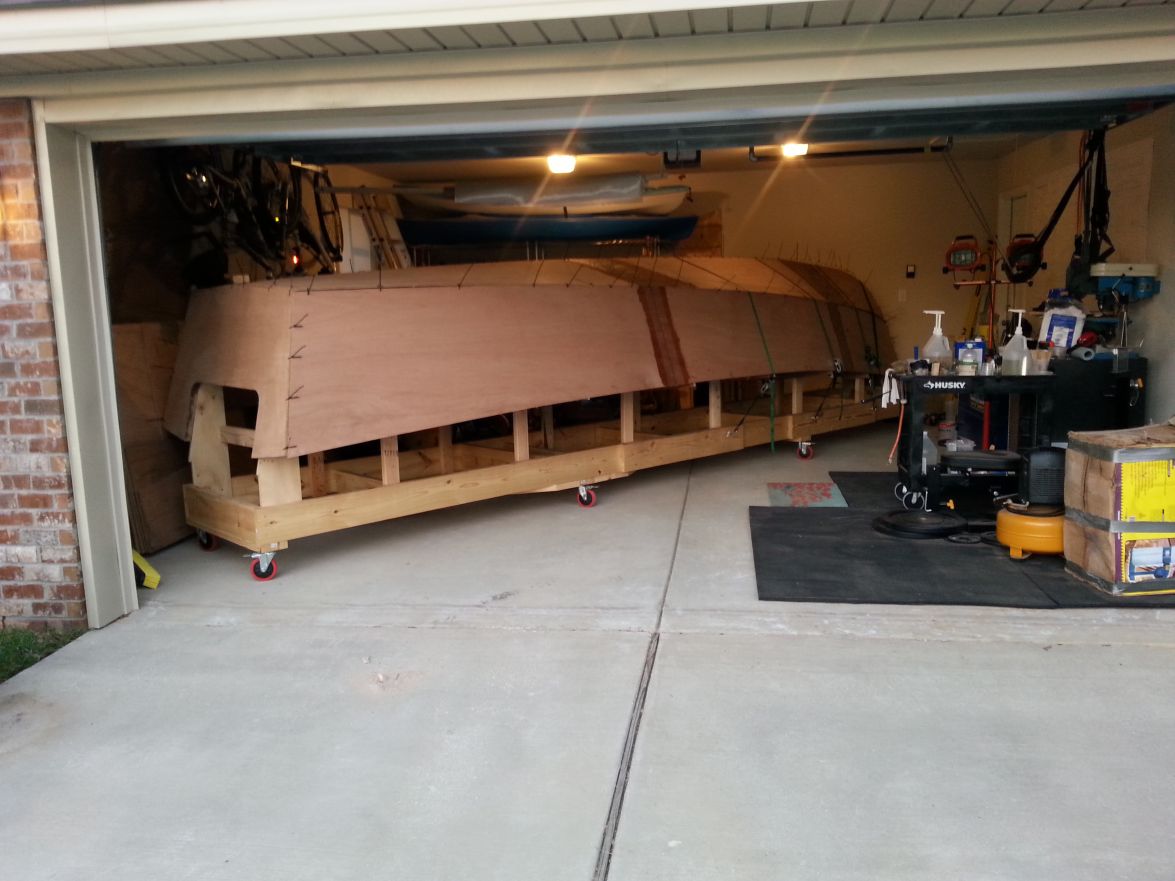
You can see two things from this picture.
1- The Panga 22 is starting to look like a boat and
2- I need more space in the garage.
Starting to look like my art project.
Re: Biscuit's Panga 22 build
Posted: Mon Mar 17, 2014 12:46 am
by Biscuit
Just in case I'm asked in the future, I've been keeping track of hours worked as well as dollars spent.
As of 3/16/14
45 hours worked
$4,397.52
I'll post the EXCEL spread sheet later on in the build for anyone contemplating the Panga 22.
Re: Biscuit's Panga 22 build
Posted: Mon Mar 17, 2014 10:12 pm
by 94Virago
Biscuit wrote:Just in case I'm asked in the future, I've been keeping track of hours worked as well as dollars spent.
You're more organized than I. I've only kept up with costs. I think it's because I'm subconciously aware of how disappointed I am in my rate of progress.
Re: Biscuit's Panga 22 build
Posted: Tue Mar 18, 2014 7:37 am
by Biscuit
94Virago wrote:Biscuit wrote:Just in case I'm asked in the future, I've been keeping track of hours worked as well as dollars spent.
You're more organized than I. I've only kept up with costs. I think it's because I'm subconciously aware of how disappointed I am in my rate of progress.
It's quite easy for me to keep track of one hour here and two hours there. My biggest drive to count them is the statement made about being able to have a workable boat in around 100 hours. Looks like I'm going to be a little over that.
Re: Biscuit's Panga 22 build
Posted: Tue Mar 18, 2014 8:00 am
by Biscuit
antoniekruger wrote:Hey Larry, agreed - it's best not to have clean up.
Biscuit, those long panels, are you putting biax on both sides of the join? If wet lopose your drawings and notes would tell you the same as mine - biax both sides of the long panels joints. I had an issue with uniform bent towards the bow - tight bend right on the join. This also created some issues during fairing. My 'quickfair' went on almost 2mm on the join since it did not bend as the rest of the panel. I saw a similar build of a chap in Aus....Tim and Jess(if memory serves). I noticed on his pics that he only joined the one side of the long panels and it was the inside. The risk is in handling the panel - it could crack if you do not have a helping hand to lift and place it.
Antonie,
Sorry I missed your post buddy. I found it when I went back to look for the fairing recommendations that jorgepease post.
I didn't try taping only one side. I'd be willing to bet I would have had issues with flimsy panels. As it was the 1/4 inch sides at around 20 something feet long had to have a 2 by 4 clamped to them so they wouldn't flex too much as I moved them around my sprawling metropolis of a shop.
But you do bring up a very valid point with the fairing. Guess I'm gonna deal with that the best way I can.
Re: Biscuit's Panga 22 build
Posted: Sat Mar 22, 2014 8:15 am
by Biscuit
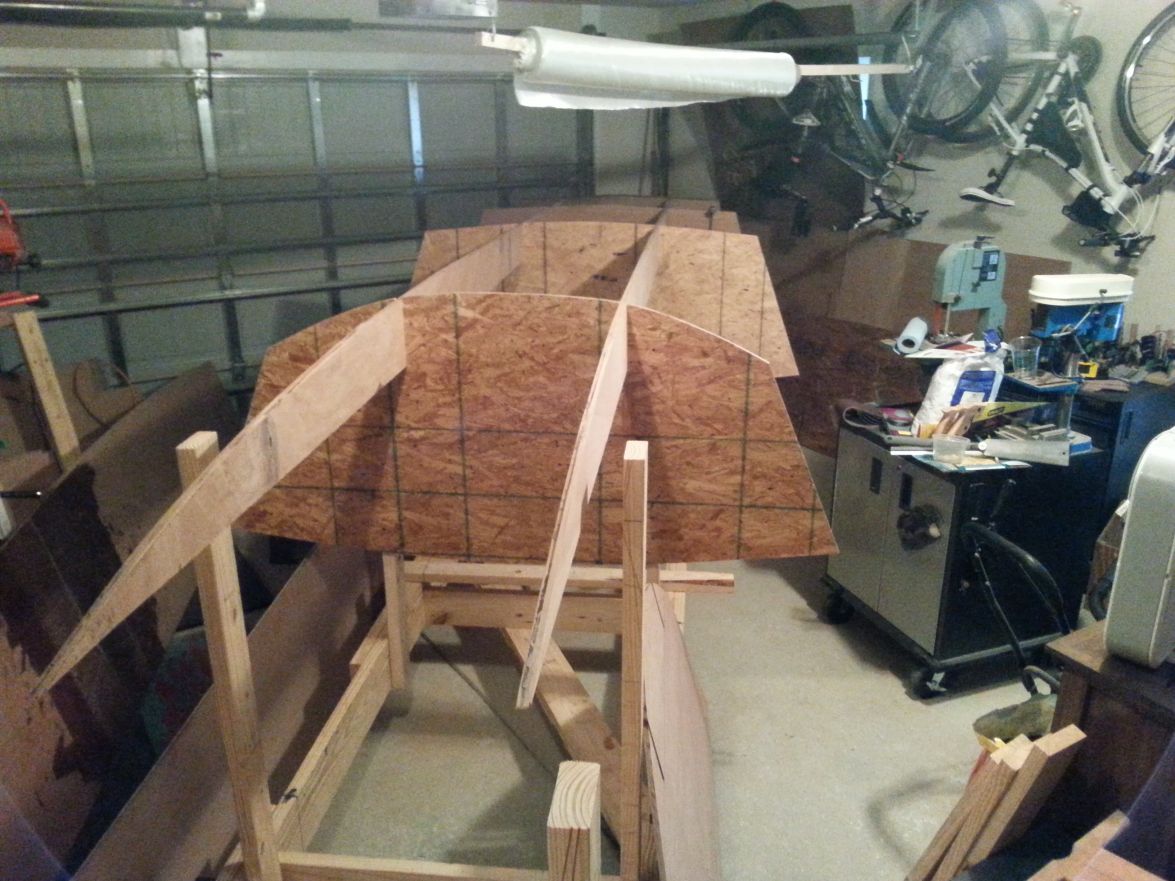
Well the only progress to report is all the forms are on the strongback. Stations A, B and the bow form are temporarily mounted. All they're lacking is final alignment and being screwed in place.
It was a long night at work folks so please excuse the photo rotation. I'll see about fixing it when I get up for work tonight.
My prediction about the build progress on my Panga basically stopping after returning to work was dead on. I haven't really been able to work on the boat in a few days. I managed to slip in 2 hours the other night before bed. I might be able to squeeze in an hour today before work but I can't promise anything.
Re: Biscuit's Panga 22 build
Posted: Sun Mar 23, 2014 2:13 am
by Biscuit
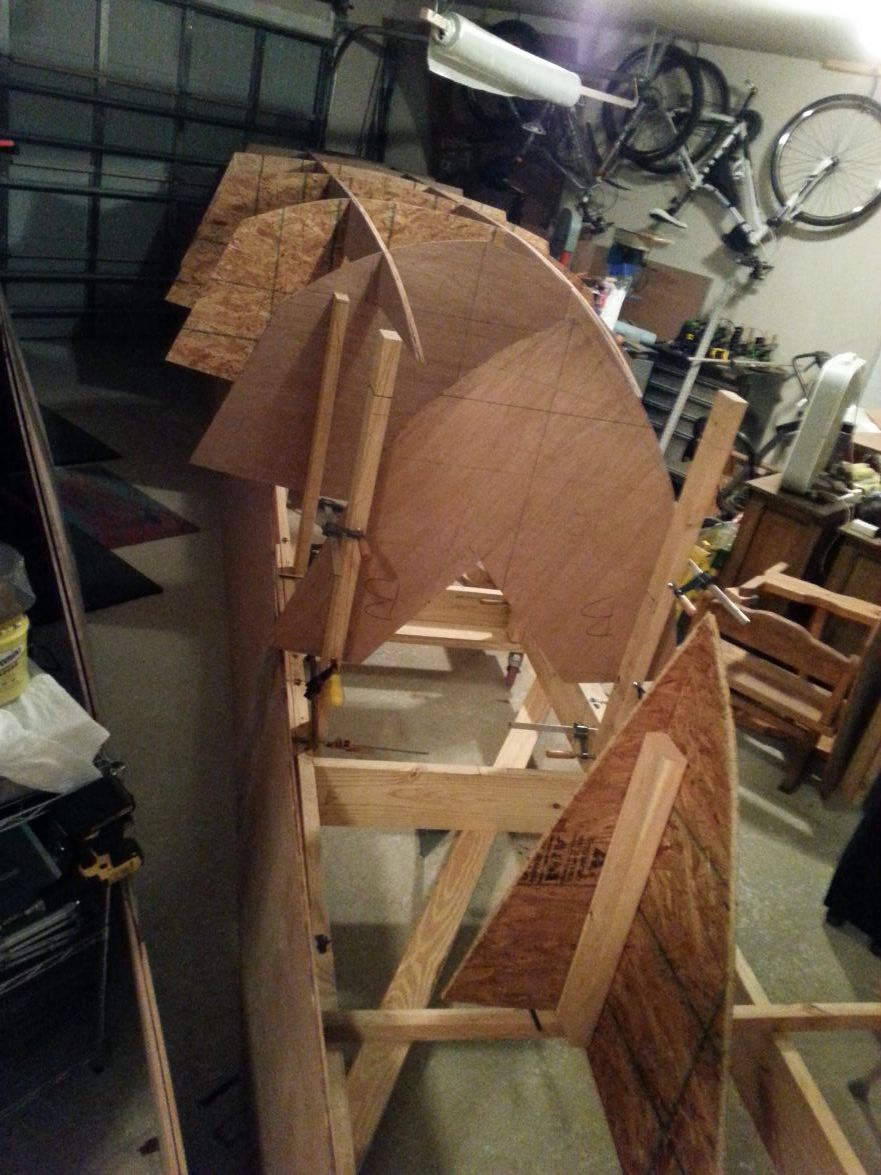
I ended up working a few hours today and what a transformation from yesterday.
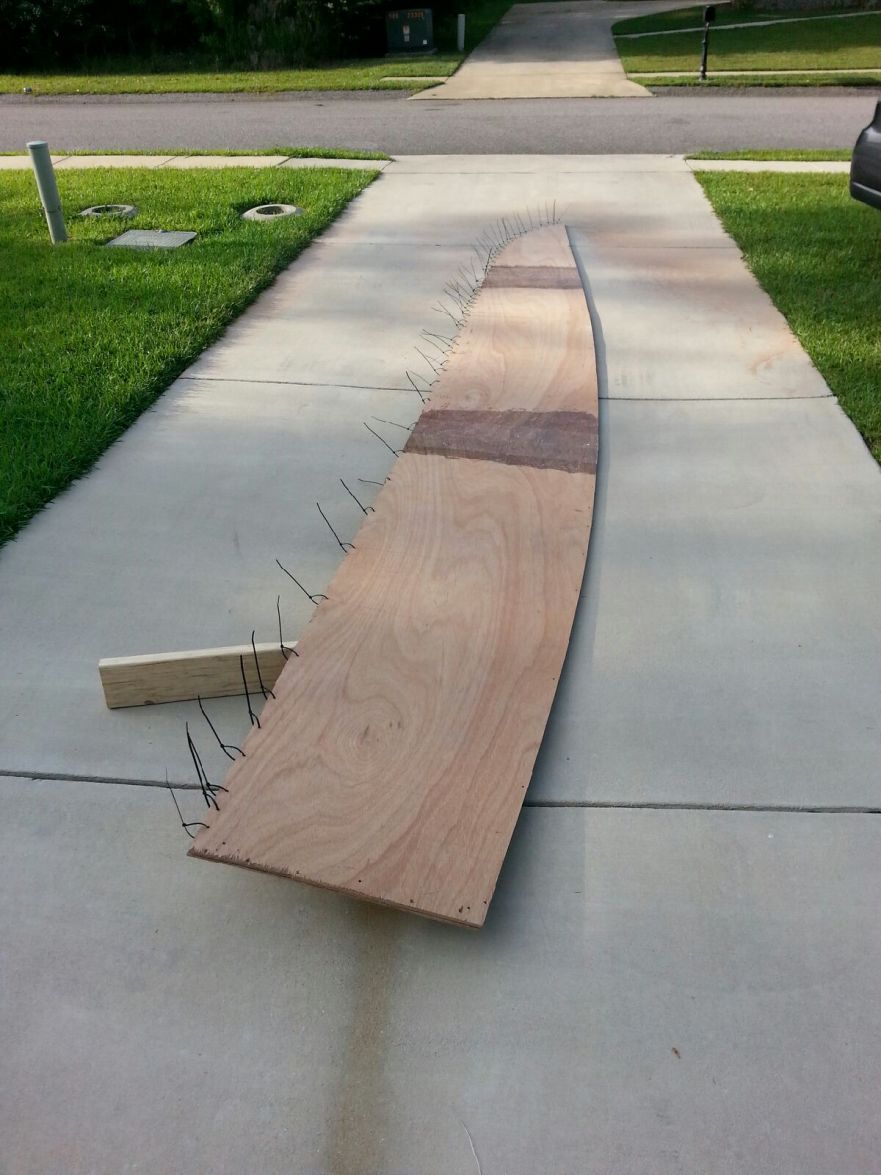
All the forms are permanently mounted to the strongback and the bottom panels are on the forms. I drilled most of the keel holes for wire ties and loosely stitched the panels together. I wanted to attempt the bow curve before taking the circular saw to her panels but they're most likely going to require a few kerfs to talk them into that bend, the 3/8 inch meranti ply is rather stiff. Maybe they'll come together better with the side panels stitched to them.

My next step is to align the bottom panels with the transom and then try to draw the bow together with straps. If they resist much I'm going to try stitching the sides to the bottoms. Last resort will be remove all 4 panels and get to kerfing at the bow.
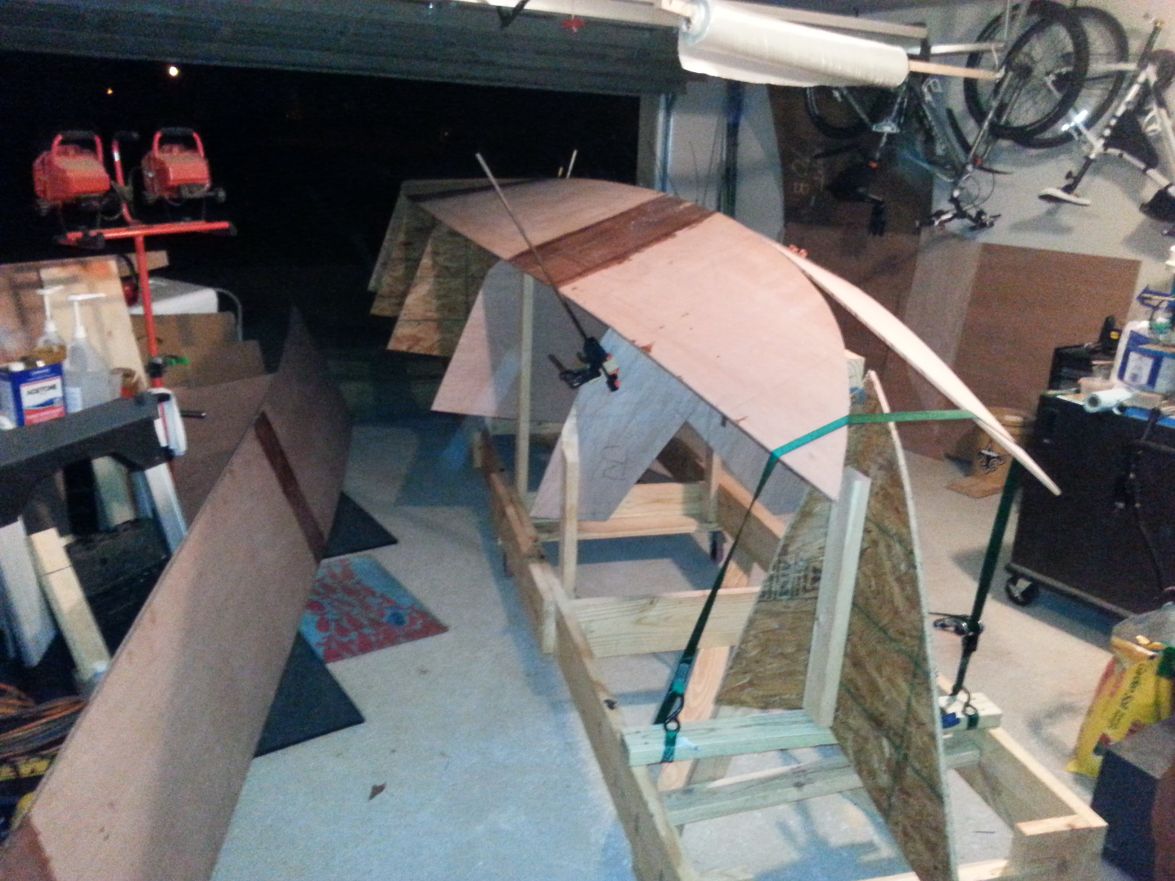
Initially I simply snugged the wire ties down but didn't try to bring the panels together much. I'll try to really align everything once the sides are on.
Re: Biscuit's Panga 22 build
Posted: Sun Mar 23, 2014 2:41 am
by antoniekruger
Hi,
Looking good - good progress.
I saw your comment regarding cutting the panels to fit the frames - if your panels are cut to design, the there should be no reason to modify them to fit the frames. Loosely tie the panels together until all are on the frames. From here you can tighten and shape them systematically until the hull is tied to the shape you like. If all were cut to design you should not have to many issues pulling things together. The bow bend can be stubborn. I pulled my bow panels from the bow mould - then I realised my bow mould was cut incorrectly. Fixed it and all was fine. It was the only place I used the mould to pull a panel. I just looked at 'Frame A' - That's a sharp bow - can drive up a snakes backside with this boat
.
Is there a chine step on the Panga?
Antonie
Re: Biscuit's Panga 22 build
Posted: Sun Mar 23, 2014 12:29 pm
by pee wee
I don't know why you are having difficulty pulling the hull panels together on your build, but on some designs builders have had to give the plywood time to accept the new shape- pull tension on it and wait a few days, maybe repeat.
Re: Biscuit's Panga 22 build
Posted: Sun Mar 23, 2014 5:58 pm
by Cracker Larry
I would take the 2 bottom panels off of the frames, align them and stitch them loosely together from bow to stern. Then put them back on the frame and open the sides like a book over it. From there you can coerce it into submission. You can kerf it in place if necessary, no need to remove it just to cut it.
Re: Biscuit's Panga 22 build
Posted: Sun Mar 23, 2014 10:57 pm
by Biscuit
Thanks for the comments and the advice fellas.
I believe however, I didn't make myself clear. So let me try again.
I simply stitched the panels together to see how difficult the bottom panels were going to be to bend around frames A, B and the bow form.
I'm not ready to permanently install the panels just yet. I want to do a couple things too the panels first.
I'm not cutting anything to "fit the forms".
I'm not having trouble with bending the panels.
I will be kerfing the bow section so I don't have to fight for days with the bend.
I truly don't mean to rant but come on guys.
Re: Biscuit's Panga 22 build
Posted: Sun Mar 23, 2014 11:05 pm
by Biscuit
LARRY,
Cracker Larry wrote:I would take the 2 bottom panels off of the frames, align them and stitch them loosely together from bow to stern. Then put them back on the frame and open the sides like a book over it. From there you can coerce it into submission. You can kerf it in place if necessary, no need to remove it just to cut it.
Your comment is now my new plan. While I have them off though I'm gonna kerf them on the ground and not worry with it again.
Thank You for the help
Re: Biscuit's Panga 22 build
Posted: Mon Mar 24, 2014 6:22 am
by antoniekruger
Gotcha - build on, buddy - looks good.
Re: Biscuit's Panga 22 build
Posted: Tue Mar 25, 2014 12:00 pm
by fukes
Hey Biscuit, glad I found your thread. I've been thinking about the Panga 22. I bought the Panga 20 plans about 5 or 6 years ago but ended going with the GV13 instead.
I didnt start with a garage though. Had a tarp attached to roof and tied to fence. Not the best set up. Only took me two years to finish, not sure how many hours that was.
Now I need something bigger to fit my wife and 2 kids (2 and 8 years) and still be able to move around. Right now everyone sits on a bench and doesnt move until we get where we're going. At least not without mom yelling at someone to sit down so they dont fall over (she's such a drama queen
).
I grew up overseas, in Panama, where pangas are a common boat for the locals. My dad had one built for himself (fiberglass mold) that was 23 feet long I believe. Said he got about 35 mph with a 65hp. He would take it offshore to fish.
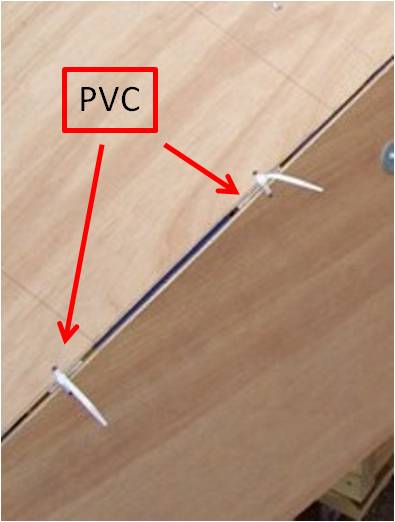
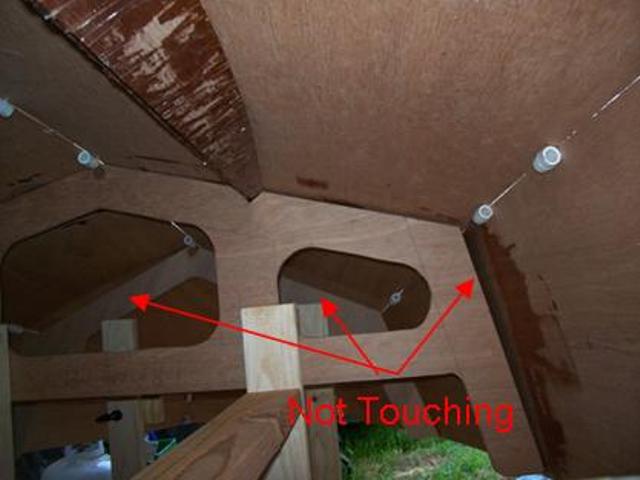
Something that helped me with stitching on my GV13 was using pieces of 3/4" PVC on the inside of the hull. It really helped me with avoiding panels not aligning or overlapping with just using zip ties. And hard spots (where the panels are touching). I believe that was something to avoid but it's been awhile. See pic.
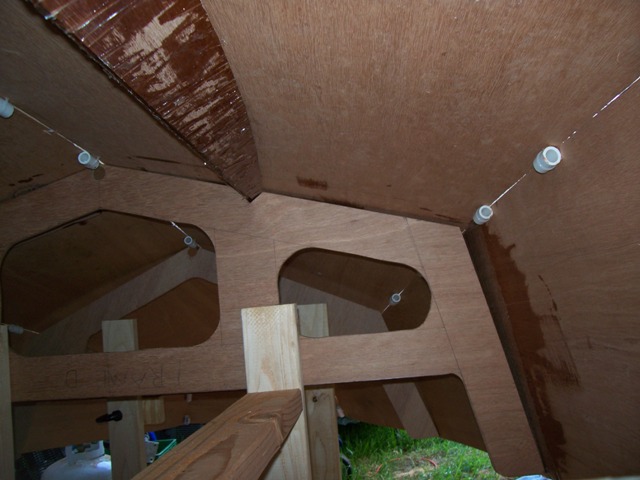
I look forward to following this build. Keep up with the pics.
Re: Biscuit's Panga 22 build
Posted: Wed Mar 26, 2014 12:12 am
by Biscuit
Good to meet ya Fukes,
I appreciate the tip with the PVC and the speed reference. On the PVC note, I love it and want to use it but what's on the outside oposite the pipe?
I'm up in the air still with the motor. No big rush though. Today my "drama queen" wife helped me stitch the side panels on the Panga
. Lol I love her to death but she sure can lay it on pretty thick.
She was a trooper right up to the "assault" though. She helped till we finished with the sides then we cleaned up some and she helped me squeeze the boat back in the garage. Well I was pushing up hill and she was in front stearing. Long story short she's now on the couch with ice on her big toe and I had to cook dinner and take care of our 18 month old daughter. Yea I pushed the strongback over her toe and I think we're gonna have to amputate.
I feel horrible as you can imagine and she knows it. But the darn thing isn't even red.
Anyhow buddy, good to meet you and thanks for the encouragement.
Re: Biscuit's Panga 22 build
Posted: Wed Mar 26, 2014 10:06 pm
by Biscuit
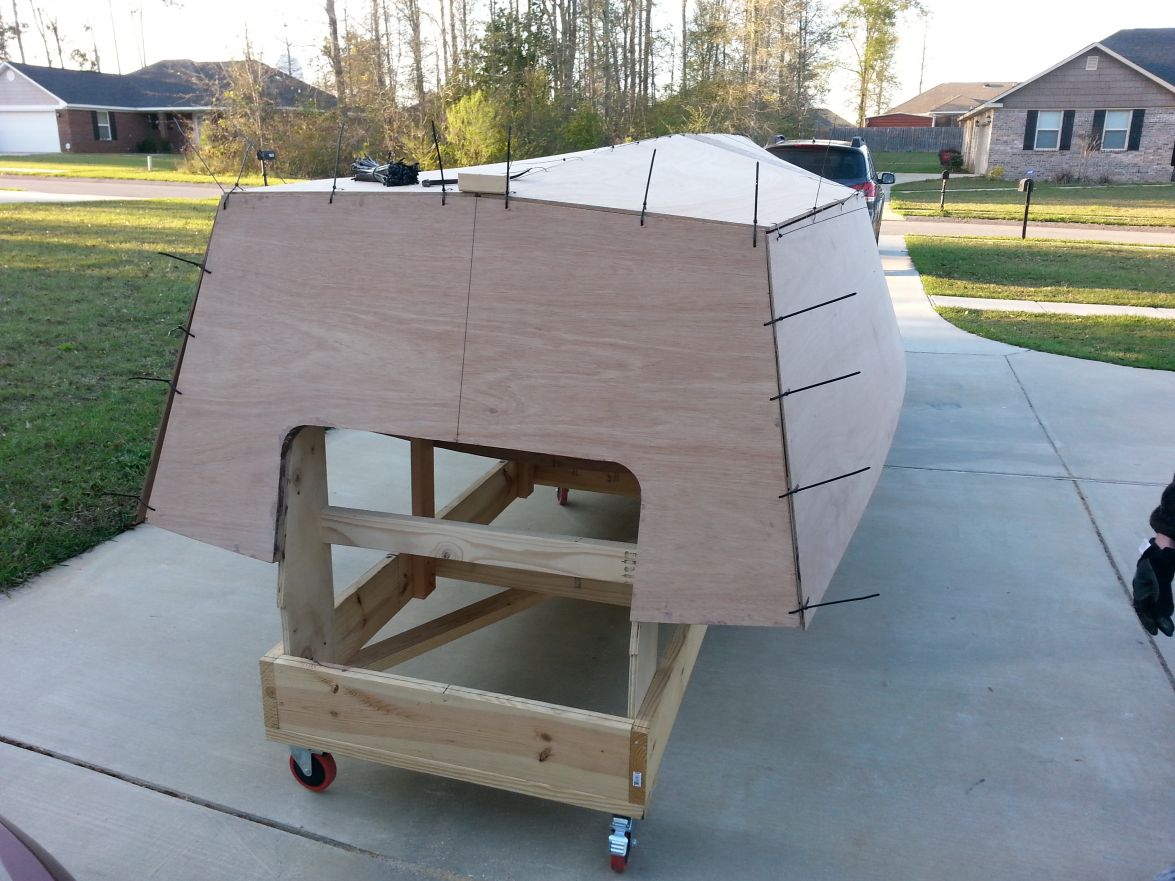
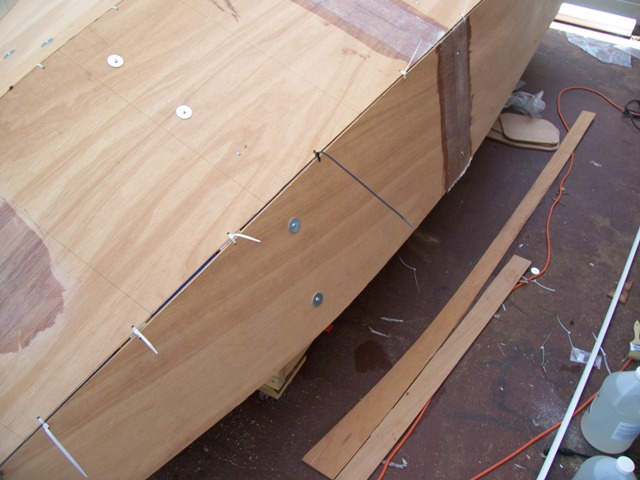
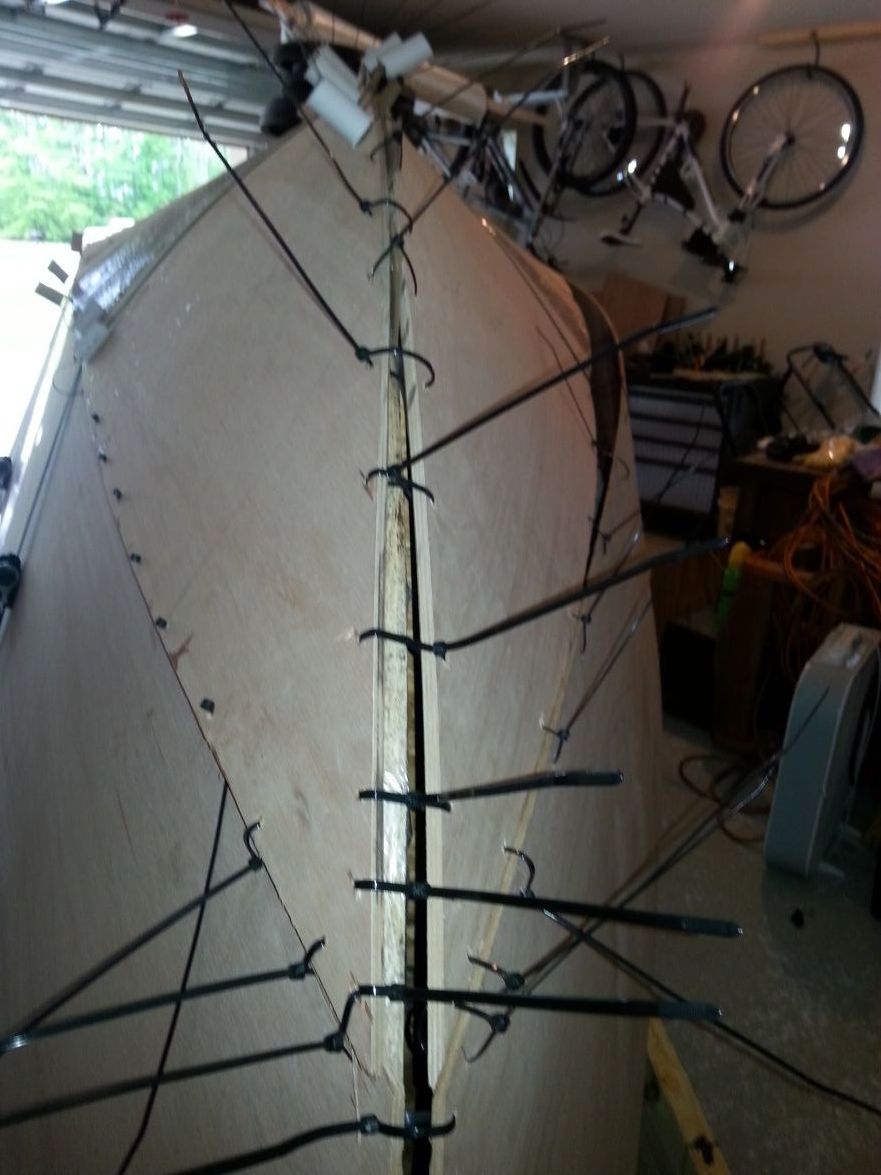
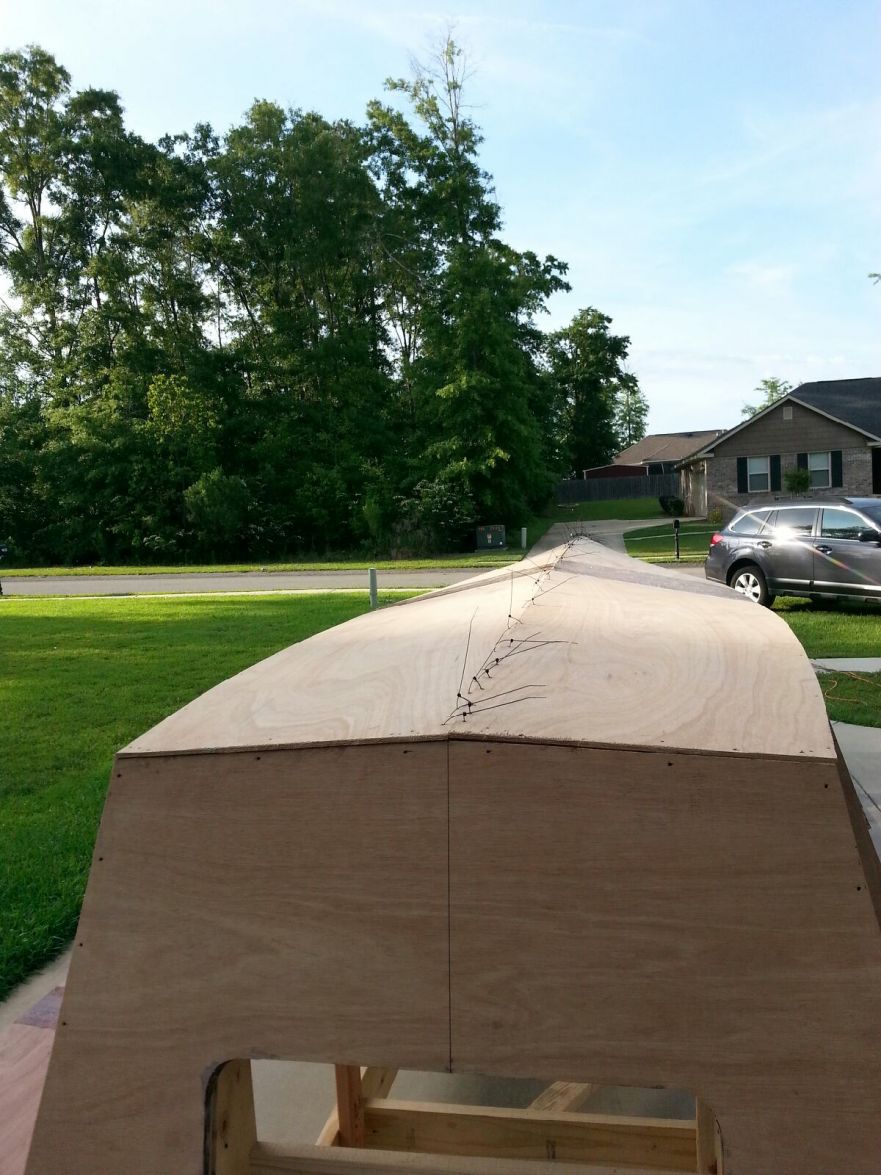
Here's a couple shots of the stitch job. There's more in my gallery if anyone wants to critique the work.
Obviously all we've done at this point is loosely stitch her together though. So don't be too rough on me.
Any advice is welcome however.
Over the next few days I'll be drawing everything together, but not hard spot close and aligning her perfectly getting ready to spot tape the panels and transom together.
I'm digging the design more and more as she's taking shape.
Re: Biscuit's Panga 22 build
Posted: Thu Mar 27, 2014 5:57 am
by Biscuit
Oh yea and no kerfing needed. I pulled the panels off lined the bottom two up, stitched them together and slipped them right over the forms.
Thanks CrackerLarry
Re: Biscuit's Panga 22 build
Posted: Thu Mar 27, 2014 8:05 am
by Cracker Larry
Looks good!
Re: Biscuit's Panga 22 build
Posted: Thu Mar 27, 2014 8:59 am
by fukes
Biscuit wrote:
I appreciate the tip with the PVC and the speed reference. On the PVC note, I love it and want to use it but what's on the outside oposite the pipe?
I first want to say, I did not come up with this idea. Someone else told me about it when I was doing my build. Not sure who, it was awhile ago. Just passing the info along. The pictures are all me though.
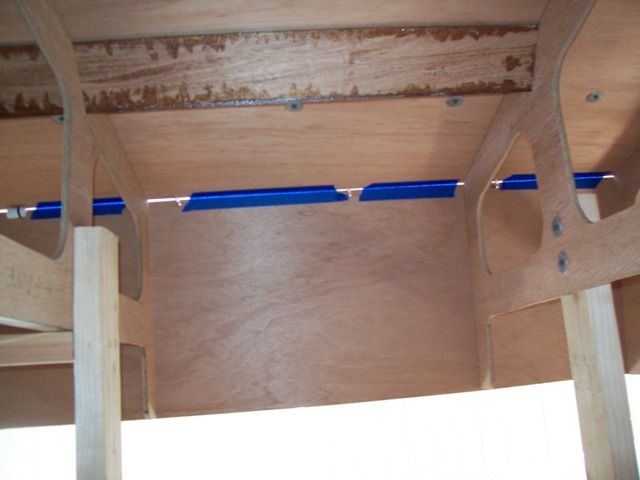
Hey Biscuit, there is nothing on the outside of the hull opposite the PVC. Your zip strip goes around the PVC on the inside, keeping the hull panels flush and lined up. The outside looks just like what you have. Here's a couple crude illustrations to help explain what I mean. The first shows the PVC keeping the panels in line. The second is an example of what was happening to me without the PVC when I would try to sinch tight enough to get the panels together for gluing. (The black circle with the line coming off it is the zip strip
)


Re: Biscuit's Panga 22 build
Posted: Thu Mar 27, 2014 9:16 am
by fukes
I also used tape on the inside of the seam to prevent the thickened epoxy from dripping through when I tabbed the outside. Once the tabs dried and I cut off the zip ties I put tape ine the remaining gaps to finish filling. One thing about the taping though. I used the blue scotch tape and for the most part it came off easily. There was some I had to work at but I think it was because I left it on too long. Might be able to use packing tape since it is official that the epoxy wont stick to the plastic. Just fold over the end of each piece of tape a little so you have something to grab to pull it off.
Re: Biscuit's Panga 22 build
Posted: Thu Mar 27, 2014 9:54 am
by tcason
you might want to put a straight edge on bottom to hold portion of bottom panels flat while doing final bend
attached is Garvey 13 picture - I used aluminum angle L channel scewed to frames and transom on my back 48 inches - hard to see
there are better pictures of others using a 2 x 4 to hold bottom flat
I love this boat and hopefully next build - I grew up with canoes and this boat looks like a large freight canoe
with a 100hp - WOULD BE FUN!
Re: Biscuit's Panga 22 build
Posted: Fri Mar 28, 2014 4:47 am
by 2ndratecaller
Man, you are making great progress. I remember that stage of my build like it was yesterday. You seem to be moving a little faster than we did though. Good to see another Mobile guy building a Panga 22. We just glued the frames into ours, believe me when I say, if you can get past fairing and get it flipped it's all down hill from there. Maybe we can get up sometime and drink a beer and share some boat building knowledge.
Re: Biscuit's Panga 22 build
Posted: Fri Mar 28, 2014 11:50 am
by peter-curacao
Biscuit wrote:
I'm digging the design more and more as she's taking shape.
Me to!
great work so far!
Re: Biscuit's Panga 22 build
Posted: Fri Mar 28, 2014 12:07 pm
by Biscuit
Cracker Larry wrote: Looks good!
Thanks Larry
Yours is coming along nicely too. Shame it has to be hauled off when you finish.
Re: Biscuit's Panga 22 build
Posted: Fri Mar 28, 2014 12:09 pm
by Biscuit
peter-curacao wrote:Biscuit wrote:
I'm digging the design more and more as she's taking shape.
Me to!
great work so far!
Thanks buddy
Re: Biscuit's Panga 22 build
Posted: Fri Mar 28, 2014 12:17 pm
by Biscuit
I see fukes. Makes perfect since now that I see it.
On my way to Lowe's in a few minutes to get a stick of 3/4 to give it a go.
Re: Biscuit's Panga 22 build
Posted: Fri Mar 28, 2014 1:52 pm
by fukes
Hope it helps. Did you say you had a helper? Will make putting them in easier since someone can sit inside the boat to route the zip ties around the PVC and back out.
I had to do it alone, but my boat wasnt as big.
Re: Biscuit's Panga 22 build
Posted: Fri Mar 28, 2014 4:27 pm
by Biscuit
I can talk some help up every once and a while.
My wife may be ready to go back in the garage now. She's not walking with a limp anymore and she hasn't mentioned me running her over with the strongback yet today.
I'll ask later for her help.
Re: Biscuit's Panga 22 build
Posted: Fri Mar 28, 2014 8:33 pm
by jorgepease
lol )
Re: Biscuit's Panga 22 build
Posted: Fri Mar 28, 2014 9:07 pm
by fukes
haha...you should probably take the inside of the boat then and let her have the easy part.
It can get hot under the boat. All she has to do is snug it enough that the PVC wont fall out and then you can go down the line tightening and lining things up.
Re: Biscuit's Panga 22 build
Posted: Sun Mar 30, 2014 12:47 am
by Biscuit
No boatbuilding this Friday or Saturday but Sunday is all mine and I plan on making some progress. I spent Friday hanging with the family in Mississippi and Saturday grocery shopping in New Orleans, LA with the wife and daughter (no whole foods in Mobile just yet. Coming in 2014, I think) tomorrow is Alabama at the house with a Panga in my sights. Woohoo!!!
Tonight I did crawl under the shell of the old girl and snap a couple pictures before I tightened the rachet straps down. Not as bad as I thought it was gonna be. I'll post a picture or two of the biggest offenders in a few.
Keep in mind though that nothing has been aligned yet and there is going to be some port and starboard gap differences around the stations. Tomorrow though, hopefully will be the end of all that.
Any suggestions on shaping and bringing everything together? I did cut two 3/4" X 8' sticks of PVC into 2 inch pieces to aid in the alignment of the panels.
Re: Biscuit's Panga 22 build
Posted: Mon Mar 31, 2014 9:01 am
by fukes
I remember I had some problems with gaps between my frames and the hull that were bigger than I think they should have been. It was closer to the bow where the hull started to bend, so the hull panel out an outwoard bend and wasnt sitting flat on the frame.
Turns out that it was actually written in my plans, if I remember correctly, and maybe overlooked it at the time until after I stitched everything, but I was supposed to screw the panels to the frames in those areas so pull them in. I did have to reposition my front most frame a little, but that was most likely because my jig was off some. Small wood/deck screws with fender washers pulled the panels into the frames to get the proper hull shape. I had to fillet and tape inside first before removing the outside screws, so technically had an extra hull flip. I dont know if the same will be needed for your build. Your boat is obviously bigger so flipping more than once would be a real pain.
Re: Biscuit's Panga 22 build
Posted: Tue Apr 01, 2014 8:35 am
by Biscuit
Flipping more than once would be a serious pain. No room in the garage for a flip
I did drive a couple screws down the keel and into the forms starting at the transom. This is helping bring everything closer to the forms.
Re: Biscuit's Panga 22 build
Posted: Wed Apr 02, 2014 2:13 am
by 2ndratecaller
I can't remember exactly, but I want to say we tried screwing down our side panels to the stations and it led to some wavy sides so we ended up taking them out. But take my advice lightly bc when we ended up gluing our panels together they were not all sitting perfectly on the jig. After exhausting many methods and hair brained ideas, we decide to make sure that everything was straight and kind of let the panels take a little of their own shape. You are building a stitch and glue hull and not a cold molded one, the S&G design is just a little harder to make perfect. But that's just my opinion, and the imperfections in our hull were not performance effecting and did not change the general lines of the hull.
My last reply may have gotten lost in the thread, but I'm also in Mobile. We should get together and have a beer sometime
And talk boats. You're welcome to come over and check ours out, I promise it may help you get through the fairing process!! For some reason this forum has no PMs so shoot me an email if interested.
PeteHotard@me.com
Re: Biscuit's Panga 22 build
Posted: Wed Apr 02, 2014 3:47 pm
by Biscuit
I'm about at the point of pulling my hair out. Being touched with OCD is not good at the panel alignment stage. I see what you're saying about letting the panels fall as the may. The shape looks good and is uniform but doesn't have the same bottom as some of the pictures of others i've seen on the forum and gallery.
I didn't kerf my panels so I'm flirting with pulling everything apart and starting from there. I think seeing your hull might be my deciding factor on kerfing.
Re: Biscuit's Panga 22 build
Posted: Thu Apr 03, 2014 7:48 am
by justin_dwyer
Hi Biscuit,
I found this stage very frustrating as well, I ended ip pulling all my panels off three times and once I even pulled all the frames off and started again. Took me about 2 months to finally feel confident to glue them together.
I don't think you'll have to do that, but persevere, you'll get there and then you'll feel confident to move on.
Not too far away and you'll be glassing. It is looking great so far.
Cheers
Justin
Re: Biscuit's Panga 22 build
Posted: Thu Apr 03, 2014 9:41 pm
by Biscuit
justin_dwyer wrote:Hi Biscuit,
I found this stage very frustrating as well, I ended ip pulling all my panels off three times and once I even pulled all the frames off and started again. Took me about 2 months to finally feel confident to glue them together.
I don't think you'll have to do that, but persevere, you'll get there and then you'll feel confident to move on.
Not too far away and you'll be glassing. It is looking great so far.
Cheers
Justin
Thanks Justin.
I'm sure once I can spend more than 30 minutes at a time in the garage things will line up properly.
I'm hooking up with fellow Panga 22 builder 2ndratecaller, Mr. Pete, within the next week or so if we can get our schedules to match up. I think seeing his build at the point of installing cleats on the internal structure and seeing the bottom shape up close will help me to drive through this speed bump.
Jeff
Re: Biscuit's Panga 22 build
Posted: Thu Apr 03, 2014 10:07 pm
by Biscuit
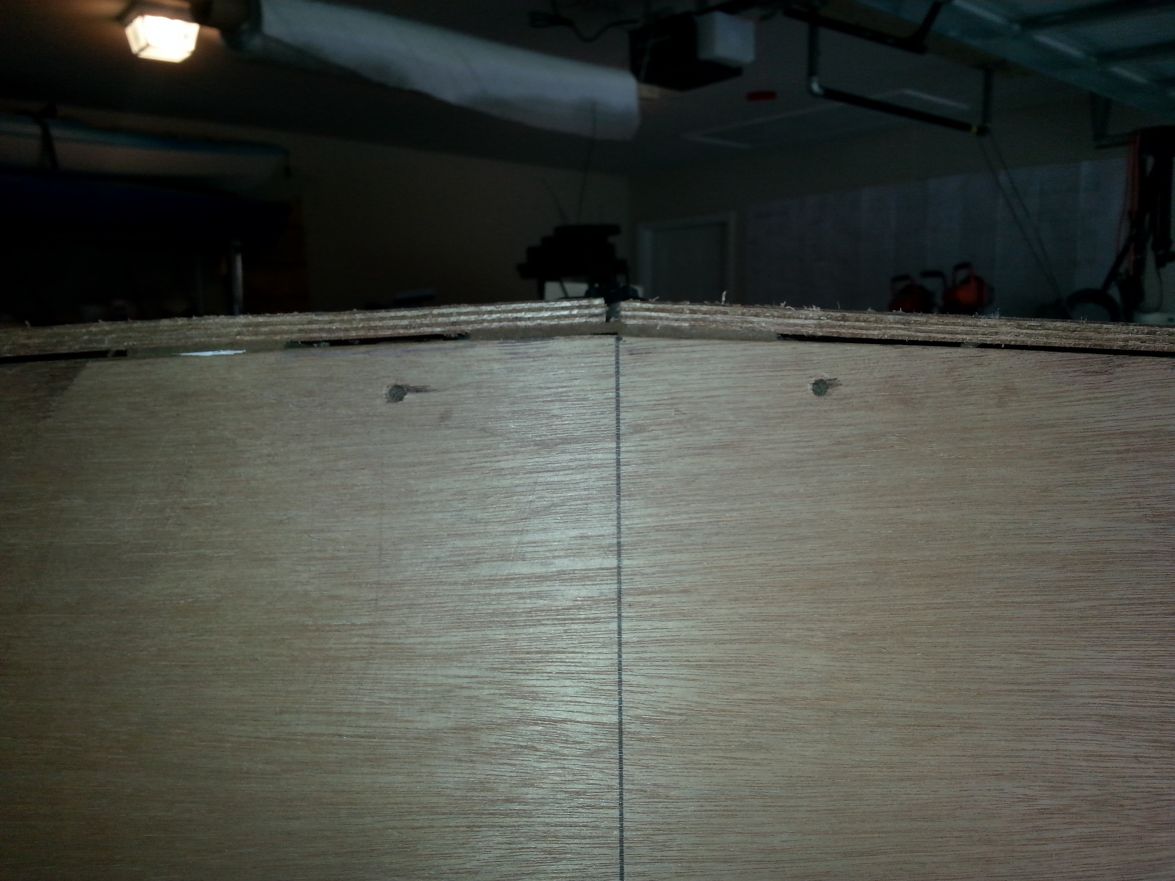
Here we have frame "B" I believe. This is before I tightened the straps down but there wasn't much change after tightening.
And the start of screwing down the bottom panels. I didn't completely snug them down to the station but the transom panel is touching and the last station, station "G" is about 1/2 inch off.
Re: Biscuit's Panga 22 build
Posted: Thu Apr 03, 2014 10:26 pm
by justin_dwyer
My P19 has a fair gap like that near the bow, bit I got the last 6 feet flat forward of the transom, so I moved on. By the time you get a fillet in there and 3 or 4 layers of glass you will have made up some of that gap.
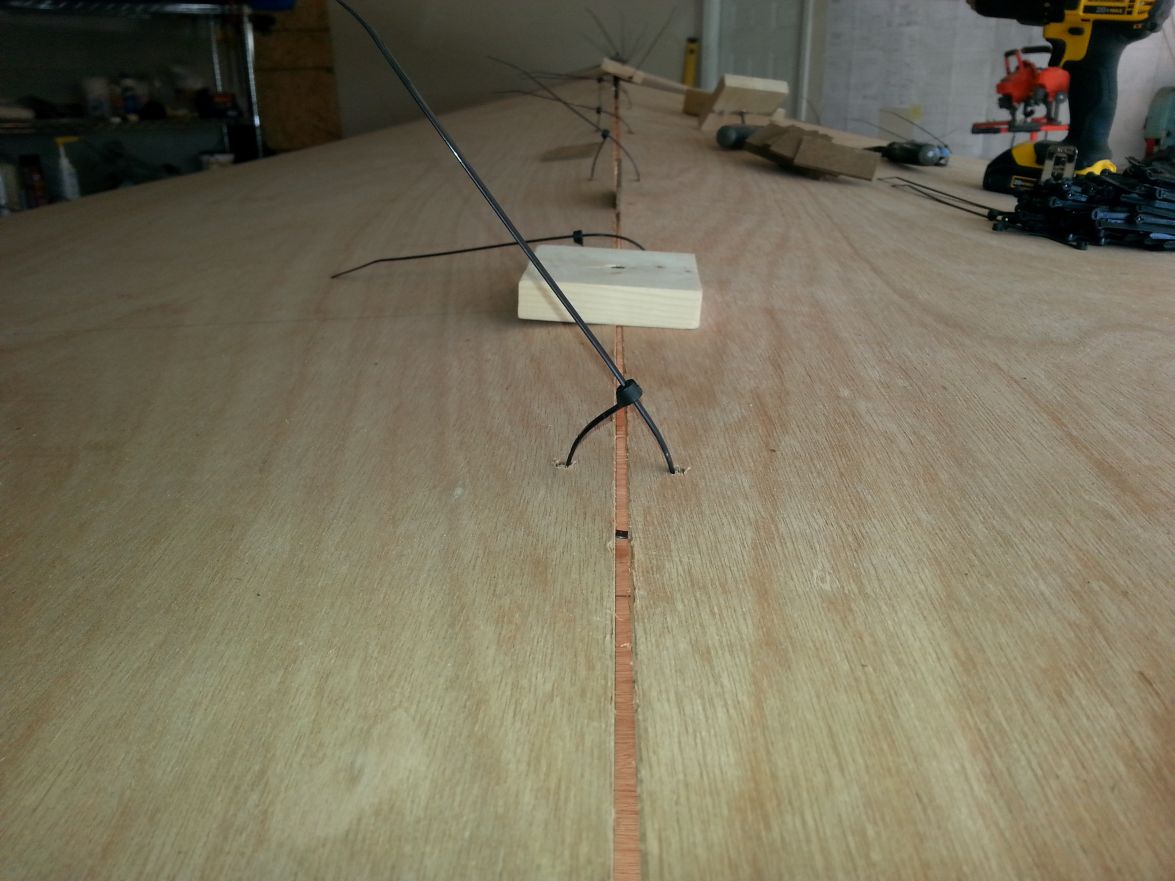
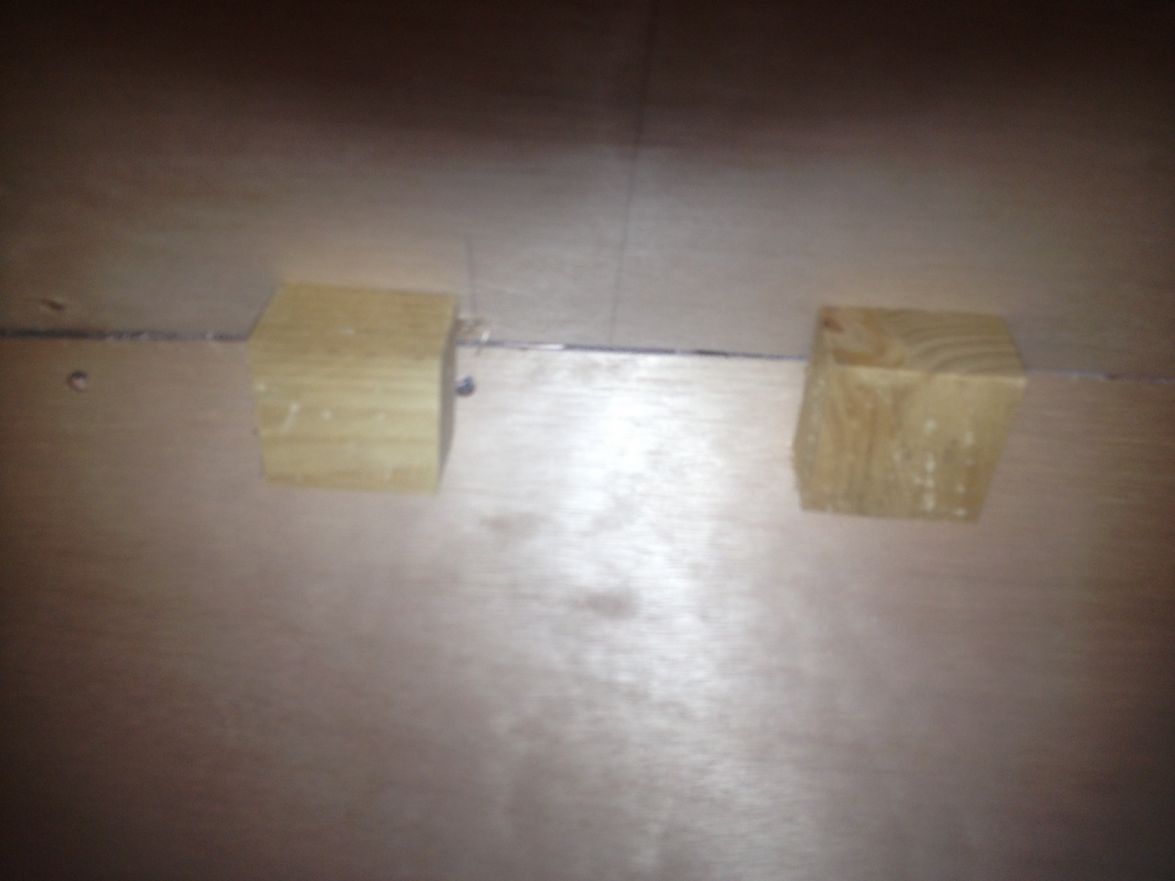
I would put something between those two panels at the bow so they don't mash together.
I put some nails into some wooden blocks to hold them apart, you want to be able to get some glue in there.
You are doing a great job, concentrate your efforts on getting that planning area flat.
Re: Biscuit's Panga 22 build
Posted: Thu Apr 03, 2014 11:49 pm
by Biscuit
You are doing a great job, concentrate your efforts on getting that planning area flat.
Thanks buddy,
Great suggestion with the nails in blocks from the inside out. I spent a half hour on the tablesaw cutting 3/8" hardboard spacers 2" X 3".
Re: Biscuit's Panga 22 build
Posted: Thu Apr 17, 2014 8:28 am
by tcason
any update on build for your fans out here?
Re: Biscuit's Panga 22 build
Posted: Fri Apr 18, 2014 4:03 am
by Biscuit
tcason wrote:any update on build for your fans out here?
Unfortunately nothing to report at this time Sir. Between my horrible work schedule and helping my wife with our baby more while she gets ready for this semesters finals, wife's finals not the baby's, I haven'done much of anything. Only a little panel alignment/ tweaking. I'll post a couple pictures tomorrow. The bottom shape is coming along nicely
Re: Biscuit's Panga 22 build
Posted: Fri Apr 18, 2014 4:04 am
by Biscuit
tcason wrote:any update on build for your fans out here?
Unfortunately nothing to report at this time Sir. Between my horrible work schedule and helping my wife with our baby more while she gets ready for this semesters finals, wife's finals not the baby's, I haven'done much of anything. Only a little panel alignment/ tweaking here and there. I'll post a couple pictures tomorrow. The bottom shape is starting to come along nicely though.
Re: Biscuit's Panga 22 build
Posted: Sat Apr 19, 2014 5:08 pm
by Biscuit
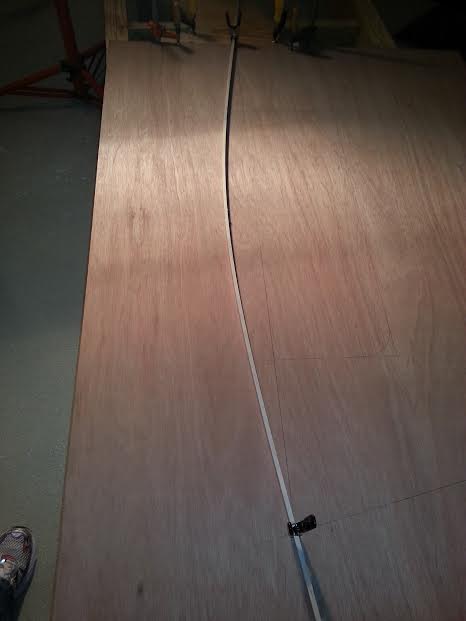
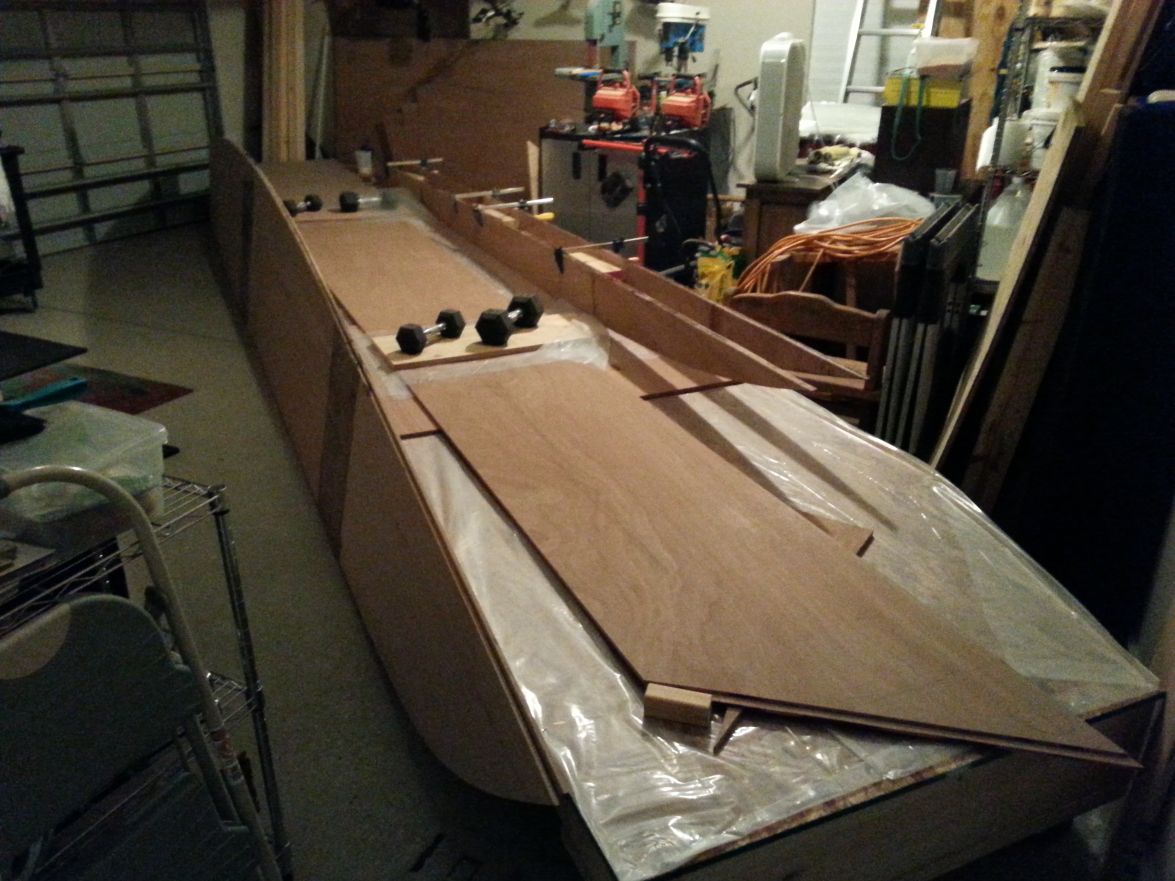
This is the aft 6' and without trying too much it's quite flat. That's where it stops though. The rest of it looks like a state road in Kentucky.
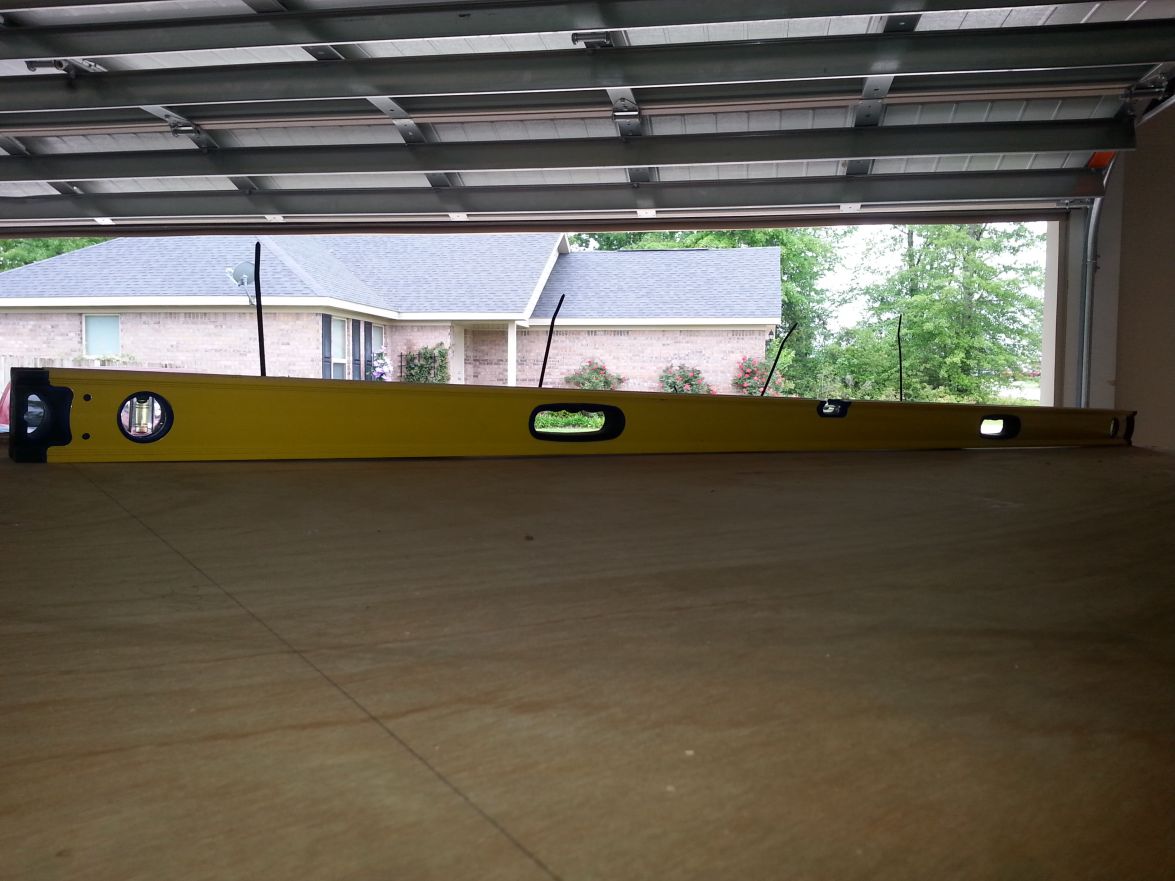
Hey look it's 31W on the way to Louisville right down the keel.
Yea maybe having 280lbs up there isn't the safest idea but it is helping snug the bottom down.
The bottom panels were so hard to get to stay put back here so I screwed them in place with some spacers between them and the transom.
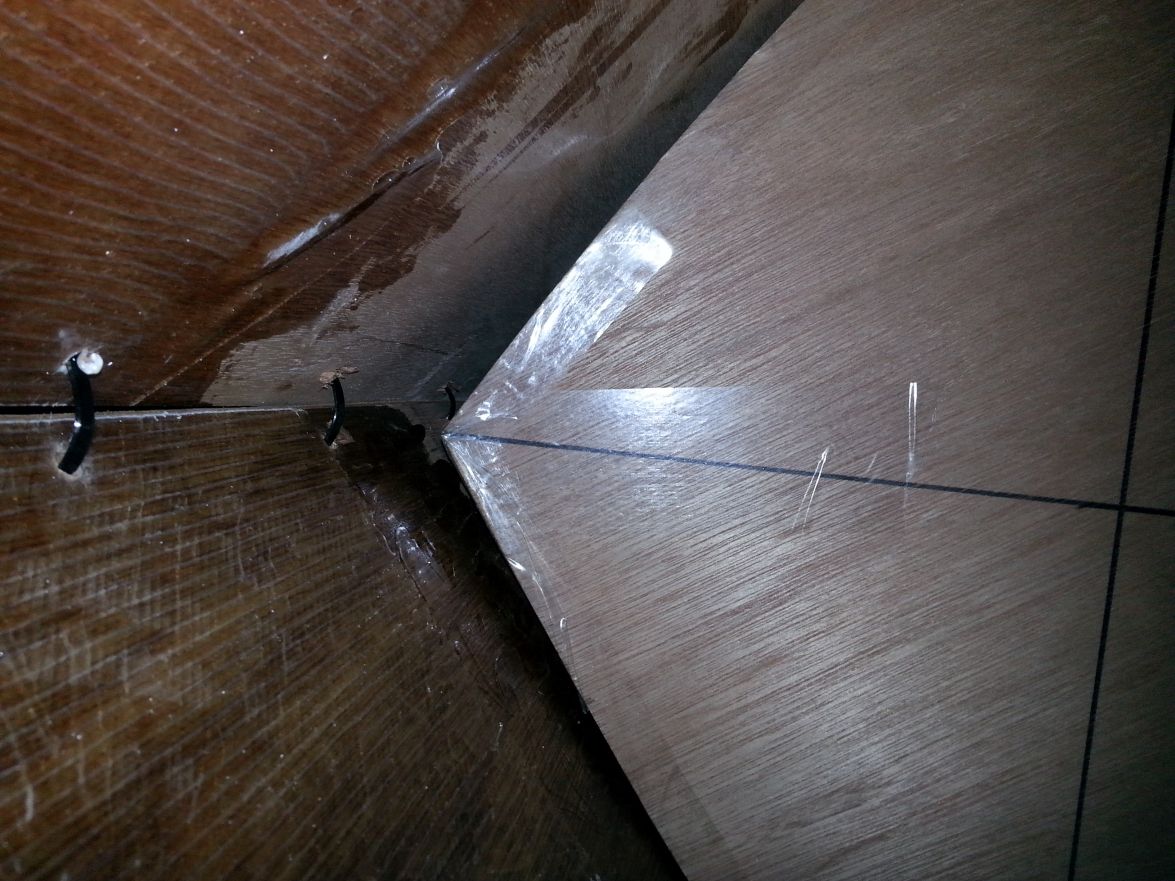
The bow close to being sown up. Not overlapped anymore. And yes the side panels are pulled loose a good bit. It seemed like I was having more trouble aligning the bottom with the additional weight hanging on it. I'm trying to get the keel line straight and flat to begin with.
Re: Biscuit's Panga 22 build
Posted: Sat Apr 19, 2014 8:52 pm
by Biscuit
On another note. Our entire Panga 22 project has taken a 180° turn in the design department. The new plan is to use less brightly finished wood. After much deliberation over our requirements of the old girl. I believe we've settled on less yearly maintenance and to add a couple more fishing options. We really like the compact tackle station and maybe even a bait well. I'm up in the air about the bright work now. Maybe I'll put some on the console or decks. We definitely like the look of it and are going to incorporate some somewhere. I'm open to suggestions.
Which leads me into a homework assignment, if anyone's interested.
How about a few shots of your suggestions or your compact rigs and brightwork.
Re: Biscuit's Panga 22 build
Posted: Sat Apr 19, 2014 10:11 pm
by peter-curacao
I have my tackle station in my seat box, I like it you can store a lot there, do a Google pic search on tackle station, it gives you a lot of idea's
Re: Biscuit's Panga 22 build
Posted: Sun Apr 20, 2014 2:44 pm
by jorgepease
I have seen some fancy pangas but when I think panga I think LOW MAINT!! ))
Re: Biscuit's Panga 22 build
Posted: Sun Apr 20, 2014 4:31 pm
by ericsil
As for the bright work....my P19 had a lot 6 yrs ago when it was launched. I was encouraged by the success I had with a number a kayaks. However, kayaks don't sit out on the mooring all summer or on a trailer all winter. By the end of this June I hope to see the last of the bright work disappear beneath a nice coat of Sterling. I'd save the bright work for the guys that can have hinkley touch it up every year.
Re: Biscuit's Panga 22 build
Posted: Sun Apr 20, 2014 5:11 pm
by Biscuit
ericsil wrote:As for the bright work....my P19 had a lot 6 yrs ago when it was launched. I was encouraged by the success I had with a number a kayaks. However, kayaks don't sit out on the mooring all summer or on a trailer all winter. By the end of this June I hope to see the last of the bright work disappear beneath a nice coat of Sterling. I'd save the bright work for the guys that can have hinkley touch it up every year.
I know you're right but I want a little shine here and there. No pun intended "Shine". After all, that's one of the reasons I took on this project. I was actively searching for a used Caribiana Sea Skiff but couldn't bring myself to pull the trigger on a new one. They're proud of that hand built reputation. So I'm gonna be stubborn on this one.
Re: Biscuit's Panga 22 build
Posted: Sun Apr 20, 2014 5:50 pm
by Biscuit
and probably have to eat those words in the near future.
Re: Biscuit's Panga 22 build
Posted: Tue Apr 22, 2014 11:00 am
by Biscuit
peter-curacao wrote:I have my tackle station in my seat box, I like it you can store a lot there, do a Google pic search on tackle station, it gives you a lot of idea's
Oh yea Peter, yours is great along with your entire boat. You've done a damn fine job. That set up would work on mine scaled down a bit.
Re: Biscuit's Panga 22 build
Posted: Sat May 03, 2014 9:18 pm
by Biscuit
Had too much trouble getting the bottom panels to fall in line. So I pulled them off and kerfed the hell out of them.
***Larry I wanted to leave them on and kerf from the bottom but couldn't figure out how to get this result.***
And before someone beats me up too bad... The right panel taped joint needs some love. Not sure how to fix it but I'm thinking maybe I'll grind it out once I turn the hull over and re-tape it.
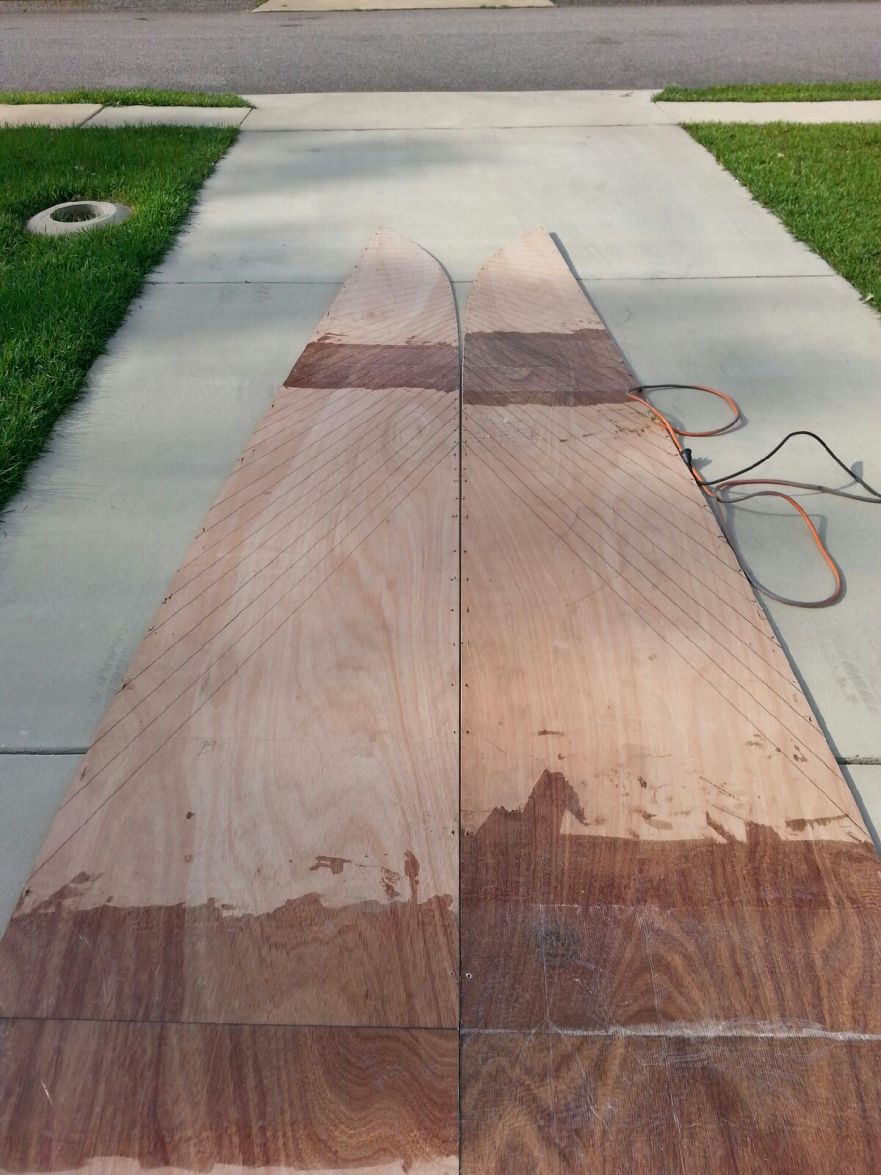
Then re-stitched them down the keel.
Then threw them back on the forms and they were close to perfect.
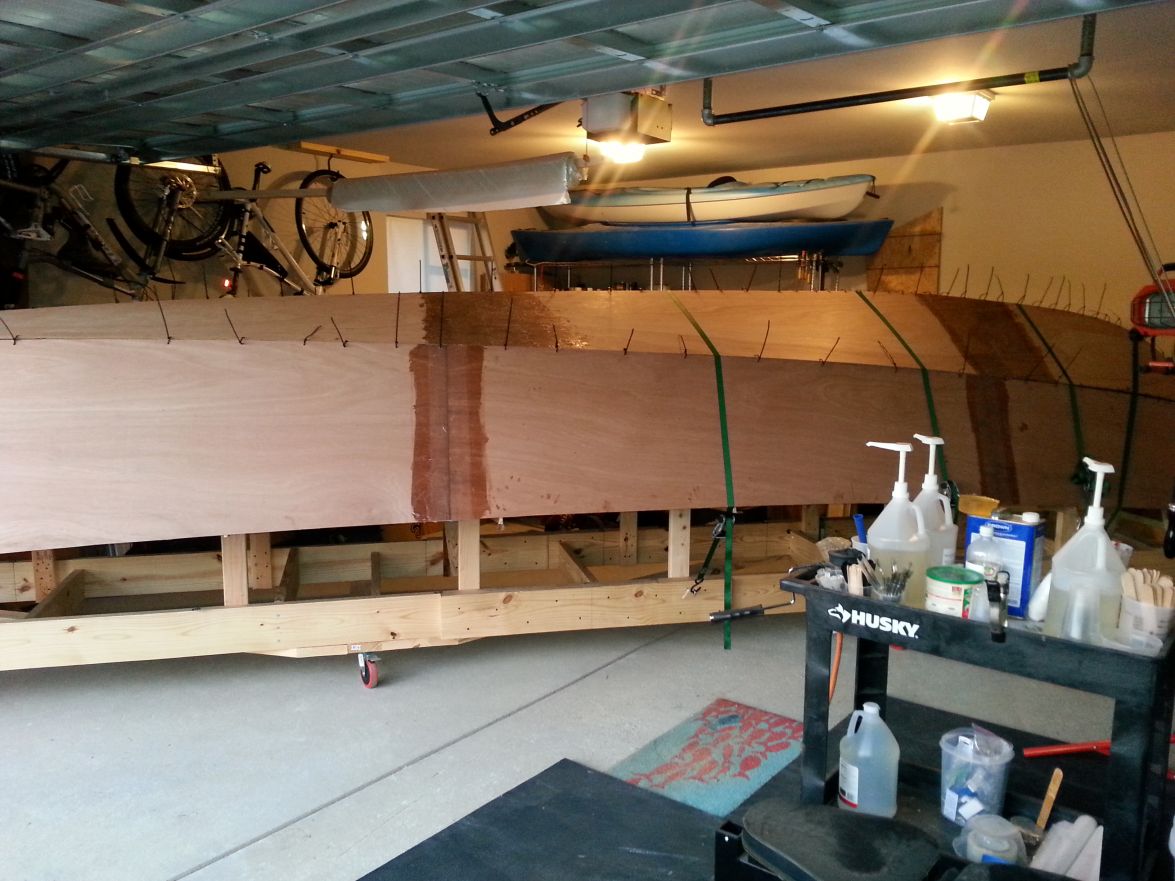
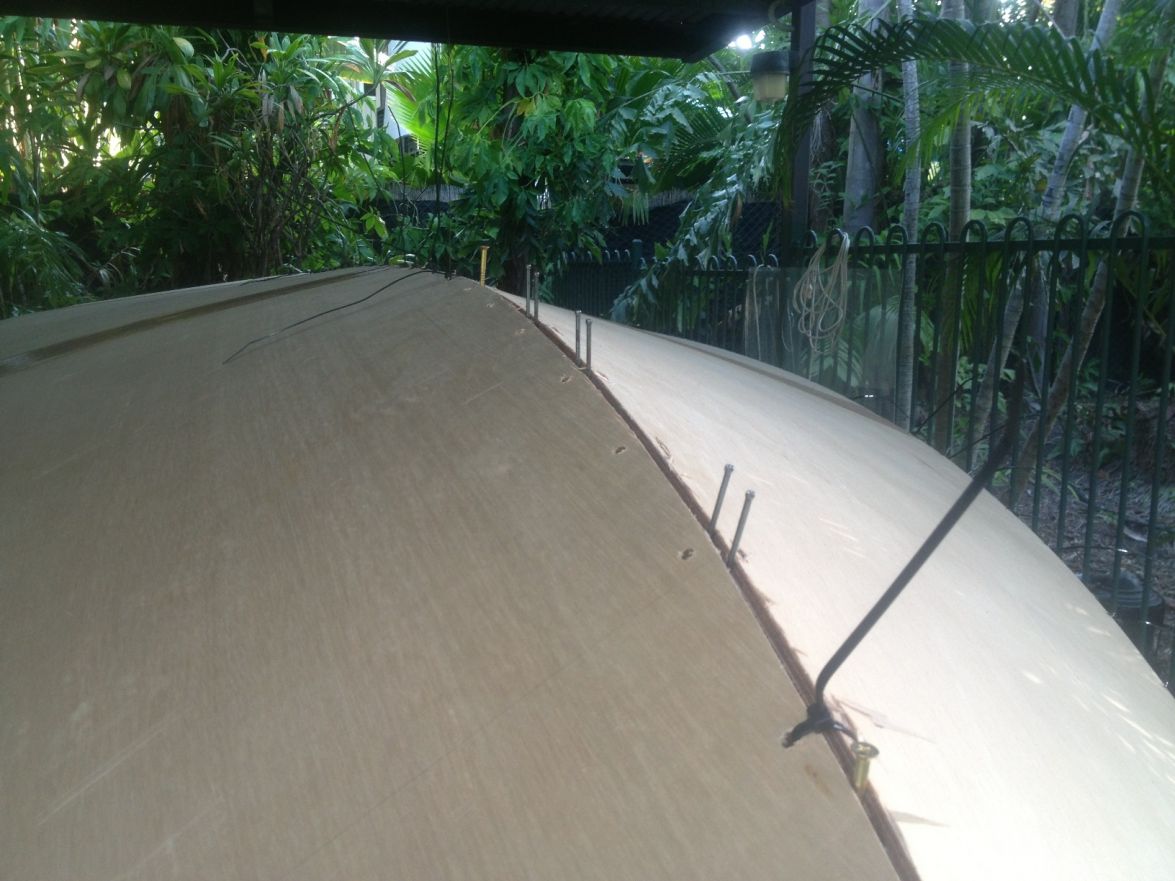
Then put the sides on, aligned and spaced them.
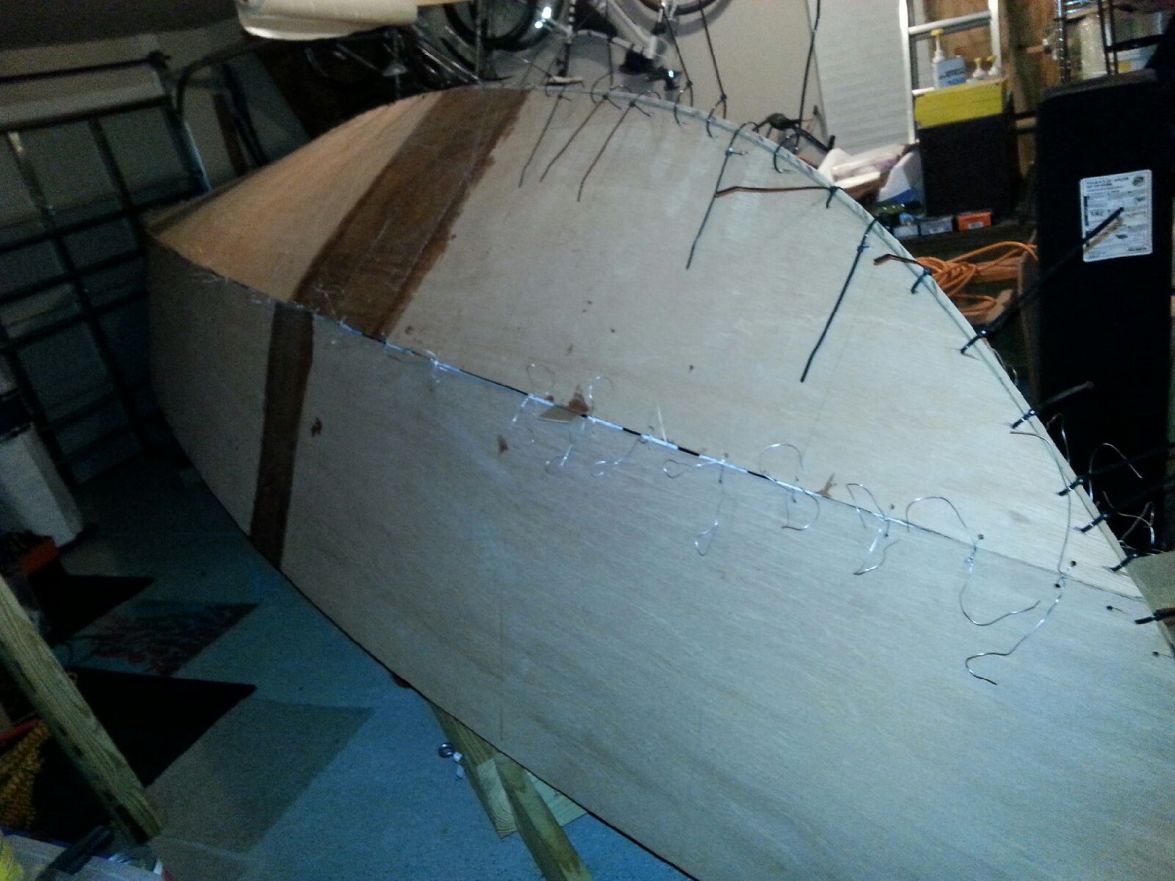
In this one you can see the sides ready for glass and the keel needing a little attention.
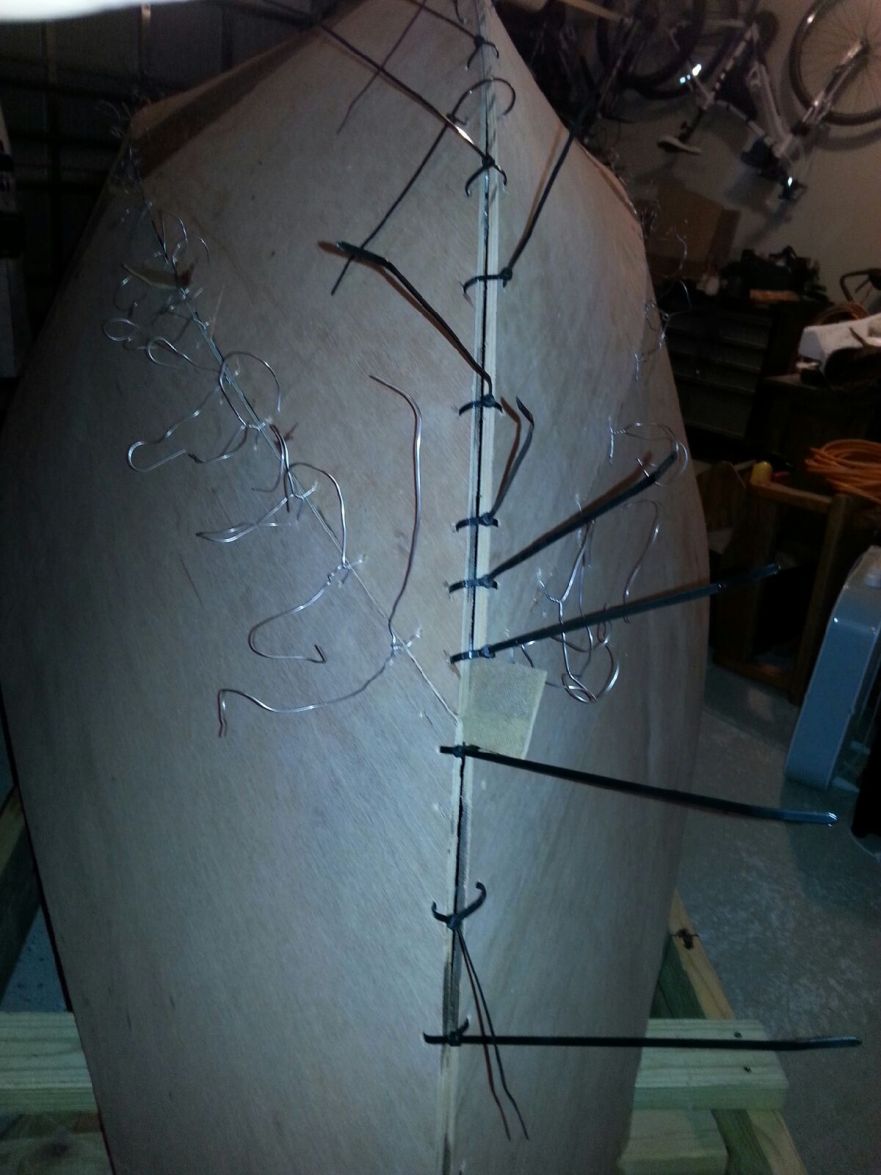
Over the next few days I'll get the keel in line and start spot gluing everything together.
Re: Biscuit's Panga 22 build
Posted: Sat May 03, 2014 10:18 pm
by Cracker Larry
Whatever it takes. Looks fine
And happy birthday !
Re: Biscuit's Panga 22 build
Posted: Sun May 04, 2014 8:30 pm
by Biscuit
Thanks Larry
Re: Biscuit's Panga 22 build
Posted: Tue Aug 12, 2014 9:38 am
by tcason
any update on progress
I love this boat and want to follow a build
Re: Biscuit's Panga 22 build
Posted: Fri Sep 19, 2014 10:08 am
by Biscuit
Nothing new unfortunately. It seems I may have bit off more than I can chew with home life, sailing, fishing, work and the Panga. I want to work on her but having the time is a huge stumbling block.
So there may be a PG22 on the market in the near future around 40% complete for one heck of a deal.
Plywood and fiberglass kit to go with her
Anyone in the neighborhood of South Alabama have any interest?
Re: Biscuit's Panga 22 build
Posted: Wed Sep 24, 2014 7:24 pm
by DIXON7007
I might be, I have been following this forum for about 5 yrs and have been envious on all of you boat builders. I live in Covington ,La.and we have a Maritime Museum that has a wooden boat building program,but mostly Lake skiffs and piroques. This might be a great oppurtunity to get started and or finish this project. Please pm me what you had in mind as far as price. Thanks James
Re: Biscuit's Panga 22 build
Posted: Tue Feb 10, 2015 11:49 pm
by Biscuit
Panga 22 has to go. I need my garage back asap. Too much project for me to finish while building a business. My loss your gain. Send a PM if you're interested. The price is extremely low...
Re: Biscuit's Panga 22 build
Posted: Thu Feb 12, 2015 9:50 am
by wseibert
The Panga may be more than I can chew. I've got the plans for the OB17, the OC17, and the OB15 and was looking at building one of them. However, I may be interested. That Panga is a lot of boat to build. I live in Mobile, AL.
Re: Biscuit's Panga 22 build
Posted: Mon Aug 05, 2019 11:01 am
by tcason
Did this boat get sold??
I may start on Panga 22 this winter this would give me a huge jump start.
please send me an e-mail
Re: Biscuit's Panga 22 build
Posted: Mon Aug 05, 2019 9:17 pm
by narfi
Last active:Wed Jun 28, 2017 11:20 am
I am guessing you wont get a very quick response.........