
Fred In Wisc CC14 Cheap Canoe at 80% Scale
-
Fred in Wisc
- * Bateau Builder *

- Posts: 972
- Joined: Tue May 02, 2006 8:54 pm
- Location: SE WI
- Location: Milwaukee WI
Re: Fred In Wisc CC14 at 80%
Side note, my test plywood pieces have now been soaking for well over a week, they are very flexible, but still intact and are not delaminating even when twisted into shapes plywood shouldn't form into. Score on that. Especially for free wood. So far, I had to buy the 2x6 for trim, so I am into this project for a cash outlay of $6, plus materials I had left over from other projects.
-
Fred in Wisc
- * Bateau Builder *
- Posts: 972
- Joined: Tue May 02, 2006 8:54 pm
- Location: SE WI
- Location: Milwaukee WI
Re: Fred In Wisc CC14 at 80%
And rubrail #2 is glued up. Did this last night, will pull the clamps tonight. It's about 62F in the basement and using slow hardener it takes a while for it to cure.
One interesting thing I found is that the rubrails stayed a bit curved after being clamped in place without glue for a few days. I hope that doesn't end up making the boat asymmetrical once it's all glued up. I guess I could have run a center line and checked that but it's too late now.
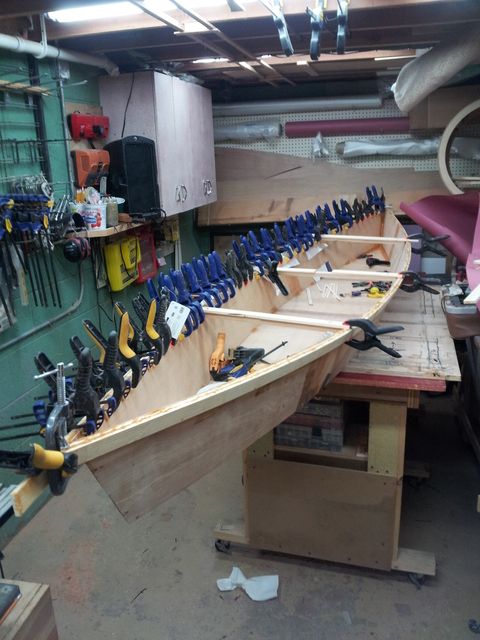
The ends wanted to slide vertically, putting a big C clamp on them to hold things from sliding worked really well. Although the front one may be a challenge to remove, I forgot to put the tyvek in between the clamp and rub rail so it will release. Hope epoxy doesn't hang on to C clamps too well.......
One interesting thing I found is that the rubrails stayed a bit curved after being clamped in place without glue for a few days. I hope that doesn't end up making the boat asymmetrical once it's all glued up. I guess I could have run a center line and checked that but it's too late now.
The ends wanted to slide vertically, putting a big C clamp on them to hold things from sliding worked really well. Although the front one may be a challenge to remove, I forgot to put the tyvek in between the clamp and rub rail so it will release. Hope epoxy doesn't hang on to C clamps too well.......
-
Cracker Larry

- * Bateau Builder - Expert *

- Posts: 22491
- Joined: Fri Mar 11, 2005 3:39 pm
- Location: Savannah, GA
Re: Fred In Wisc CC14 at 80%
Naw, all my clamps have epoxy on them  If you dry fit it then drill in a few spots for a wood dowel, that will keep it from sliding when you glue. That stuff is as slick as grease.
Completed GF12 X 2, GF16, OD18, FS18, GF5, GF18, CL6
"Ships are the nearest things to dreams that hands have ever made." -Robert N. Rose

Re: Fred In Wisc CC14 at 80%
You more $ in clamps than in plywood on that boat. 
If it's asymmetrical, no big deal. You can call it a gondola canoe (they are asymmetrical) and paddle only on one side.
If it's asymmetrical, no big deal. You can call it a gondola canoe (they are asymmetrical) and paddle only on one side.
Jacques Mertens - Designer
http://boatbuildercentral.com
http://boatbuildercentral.com
-
Fred in Wisc
- * Bateau Builder *
- Posts: 972
- Joined: Tue May 02, 2006 8:54 pm
- Location: SE WI
- Location: Milwaukee WI
Re: Fred In Wisc CC14 at 80%
I do like to buy clamps whenever they are on a real good sale.
I sanded the excess glue off the top of the rubrails (and some on the sides where I got a little messy) with the orbital sander, then a little cleanup hand sanding under the rubrails. Put a 1/4" round over on the outer edges of the rubrails with a bearing bit in the trim router.
Hull weight with rubrails installed about 11 pounds.
Installed the interior fillets and glassed the inside last night. That super thin ply doesn't seem like it will have a lot of impact resistance, and I have some cloth left over along with plenty of resin. I ran the cloth beam to beam to minimize waste. 2 widths of (I think) 6 oz fabric, overlapped about 4" at the center seam of the boat. Only used a little over 2 yards of fabric that way. Then the remaining ends about 16" long (which will be covered and foam filled for positive flotation- this boat is for an 8 year old) had tape applied to the center seam and then 9 or 10 oz fabric. I figured the ends would take the most impact/wear/crashing into stuff so went with heavier glass. No tape on the interior seams, I think the fillet and cloth will be enough. If not, I'll have to add it later on over the fabric. I will tape the outside and them apply wide cloth as well. As much for abrasion resistance as for strength, but better to have a little extra glass in there for safety.
I was careful with the resin, scraped it well, and ended up with just some real small areas where it pooled up near the corners. It would have been cool to peel ply those and see if I could soak it up, but I didn't get it finished glassing until after 130 am and I was just too tired. It's good enough.
-
Fred in Wisc
- * Bateau Builder *
- Posts: 972
- Joined: Tue May 02, 2006 8:54 pm
- Location: SE WI
- Location: Milwaukee WI
Re: Fred In Wisc CC14 Cheap Canoe at 80% Scale
Haven't posted in a while on this little boat. I got stuck in pondering mode. Sometimes that develops good ideas, but it sure slows things down.
I wanted a little flotation built in to this boat. Just an extra margin of safety since it's for my daughter.
So it will have short decks at the front and back, sort of a Rob Roy canoe kind of thing. Somebody dumped a few (spruce?) short 3x8 beams from a shipping crate in my parking lot and I'm going to resaw one thin and use it for the decking. Bright finish the decks and gunwhales, maybe the interior as well. I really like the wood look and it certainly separates it from the crowd of plastic boats around here. The volume of each end is about 700 cubic inches, so I can get just under a foot of flotation foam inside, should provide about 50 pounds of positive buoyancy.
It'll also cover up the rough glass and seams in the ends on the canoe. Bonus.
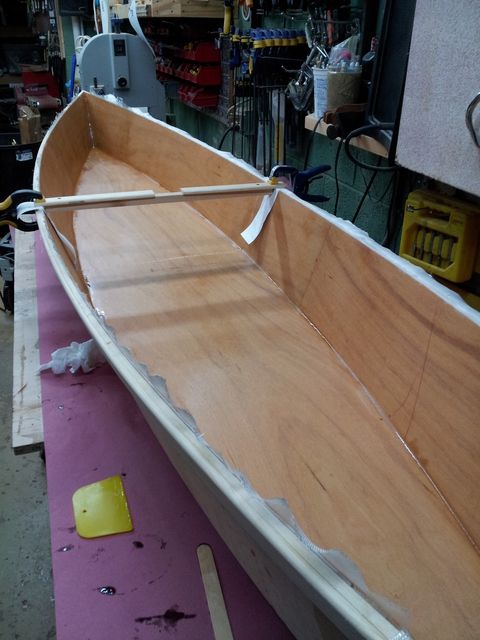
Glued in cross beams. Also had a little spot where the cloth was raised at both sides of the center thwart from when I glassed the inside of the boat. Worked some epoxy down into those gaps and clamped them down to fix the bubbles. Turned out it worked pretty well.
View from inside. Really trying to work neat and not have to sand out all kinds of glue and drips.
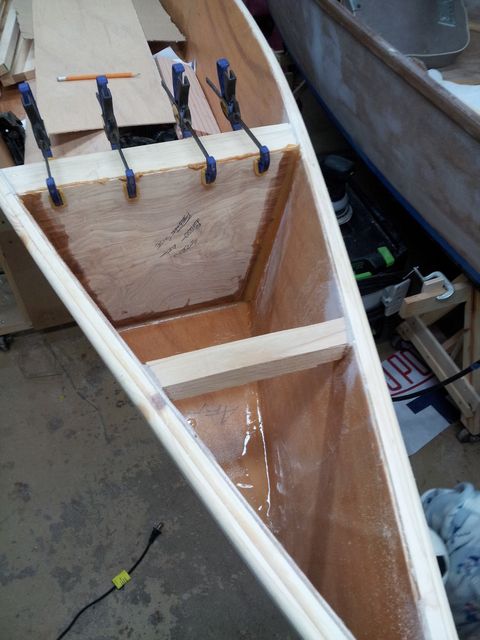
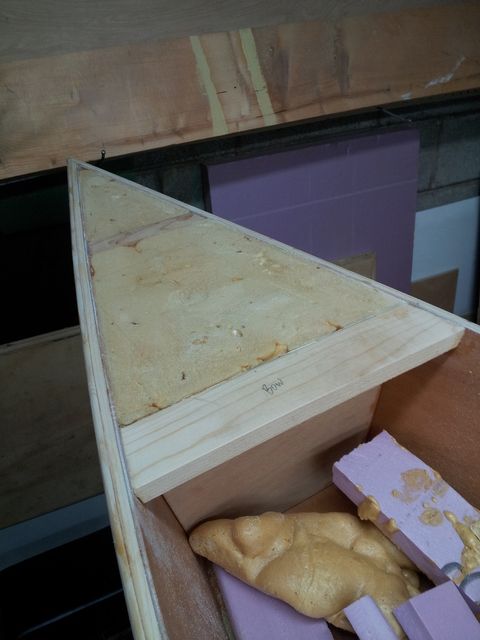
Squared up the bulkhead so it's at a right angle to the boat bottom. Precoated and filleted in. Lightly sanded the existing cloth for a good bond.
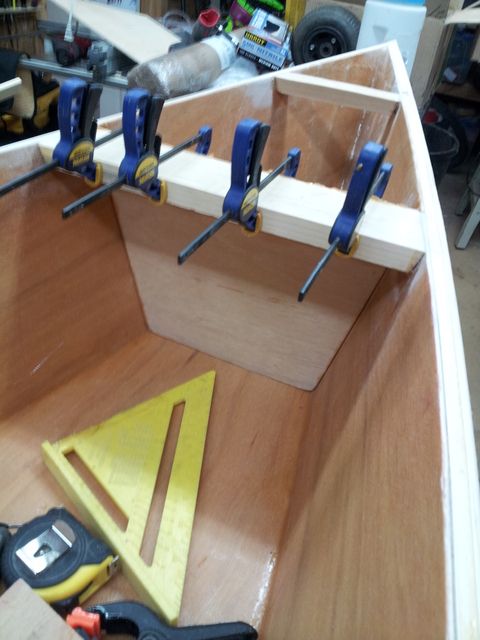
Little bulkhead glued in. Made cardboard patterns first, then traced and cut from plywood. This 2.5mm ply cuts with about 3-4 strokes of a sharp utility knife and a straight edge. Then just a little sanding and things fit up quite nicely.
Next- light cloth on the inboard sides of the bulkheads, and fill them with foam.
I wanted a little flotation built in to this boat. Just an extra margin of safety since it's for my daughter.
So it will have short decks at the front and back, sort of a Rob Roy canoe kind of thing. Somebody dumped a few (spruce?) short 3x8 beams from a shipping crate in my parking lot and I'm going to resaw one thin and use it for the decking. Bright finish the decks and gunwhales, maybe the interior as well. I really like the wood look and it certainly separates it from the crowd of plastic boats around here. The volume of each end is about 700 cubic inches, so I can get just under a foot of flotation foam inside, should provide about 50 pounds of positive buoyancy.
It'll also cover up the rough glass and seams in the ends on the canoe. Bonus.
Glued in cross beams. Also had a little spot where the cloth was raised at both sides of the center thwart from when I glassed the inside of the boat. Worked some epoxy down into those gaps and clamped them down to fix the bubbles. Turned out it worked pretty well.
View from inside. Really trying to work neat and not have to sand out all kinds of glue and drips.
Squared up the bulkhead so it's at a right angle to the boat bottom. Precoated and filleted in. Lightly sanded the existing cloth for a good bond.
Little bulkhead glued in. Made cardboard patterns first, then traced and cut from plywood. This 2.5mm ply cuts with about 3-4 strokes of a sharp utility knife and a straight edge. Then just a little sanding and things fit up quite nicely.
Next- light cloth on the inboard sides of the bulkheads, and fill them with foam.
-
Fred in Wisc
- * Bateau Builder *
- Posts: 972
- Joined: Tue May 02, 2006 8:54 pm
- Location: SE WI
- Location: Milwaukee WI
Re: Fred In Wisc CC14 Cheap Canoe at 80% Scale
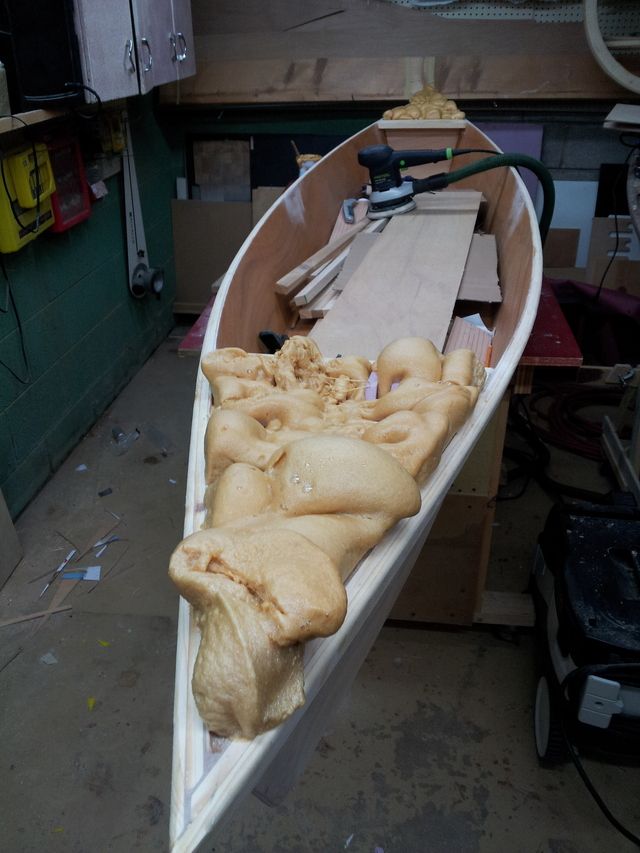
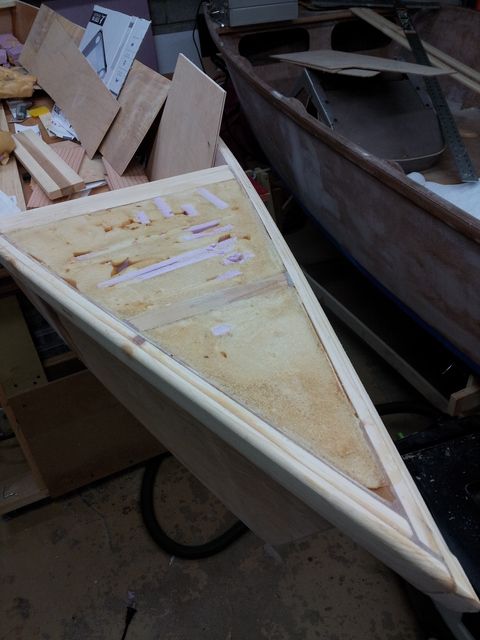
Foam is in. Wasn't sure if I'd have enough so I put a bunch of strips of pink Styrofoam in there and poured the foam around them. Turned out to have just enough.
The foam I had was pretty old and darker colored than when new, the part A had some "crust" on the top of it. But a test batch expanded nicely so I figured it was still good. Worked fine, but I ended up overfilling, it takes a long time to finish expanding at low temperatures (it was 61 in the basement shop yesterday).
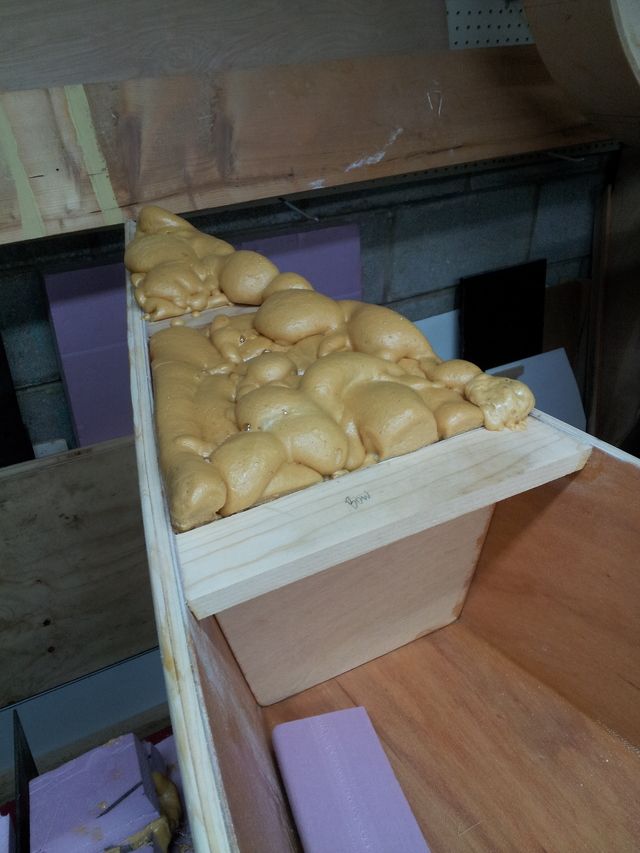
It'll be ready to trim tonight if I can get time.
The foam I had was pretty old and darker colored than when new, the part A had some "crust" on the top of it. But a test batch expanded nicely so I figured it was still good. Worked fine, but I ended up overfilling, it takes a long time to finish expanding at low temperatures (it was 61 in the basement shop yesterday).
It'll be ready to trim tonight if I can get time.
-
Fred in Wisc
- * Bateau Builder *
- Posts: 972
- Joined: Tue May 02, 2006 8:54 pm
- Location: SE WI
- Location: Milwaukee WI
Re: Fred In Wisc CC14 Cheap Canoe at 80% Scale
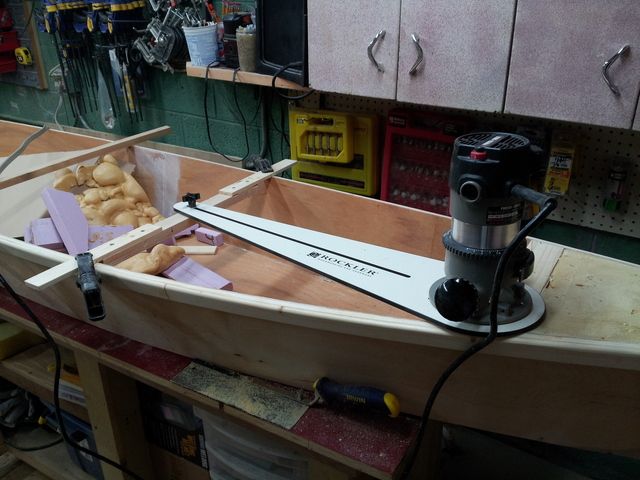
Trimmed and ready for the decks.
Narrow areas like this are super easy to trim, just ran a flush cut trim saw around all the edges, then finished off with a Japanese type pull saw and sanded with an autobody long board. 20 minutes tops for the whole process.
Took a look at the spruce block I was going to saw up for the decks last night and it's too pink in comparison to the other wood, I think I'll go with an alternating pine/ cedar layout for the decks. The decks are each about 15x26" so it won't be a lot of material and there is enough lying around the house to do them (staying with the "use up existing supplies, trying not to buy stuff" theme).
-
Cracker Larry
- * Bateau Builder - Expert *
- Posts: 22491
- Joined: Fri Mar 11, 2005 3:39 pm
- Location: Savannah, GA
Re: Fred In Wisc CC14 Cheap Canoe at 80% Scale
Looking good!
Completed GF12 X 2, GF16, OD18, FS18, GF5, GF18, CL6
"Ships are the nearest things to dreams that hands have ever made." -Robert N. Rose
-
Fred in Wisc
- * Bateau Builder *
- Posts: 972
- Joined: Tue May 02, 2006 8:54 pm
- Location: SE WI
- Location: Milwaukee WI
Re: Fred In Wisc CC14 Cheap Canoe at 80% Scale
Made some progress on the end decks this weekend. Not a lot, it was WAY too nice out to work in the basement.
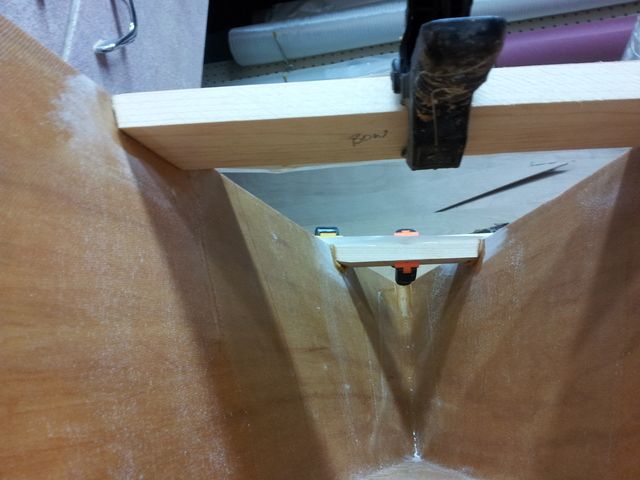
Didn't like the look of the deck ends, the straight edge looked wrong with the rest of the boat all nice curves. So, after some pondering, trimmed it up with the router circle jig. I couldn't get all the way to the end without cutting the hull, so there is a little 1/8-1/4" straight section at the ends, but it will get covered up in the next steps.
And the result, a lot more pleasing visually.
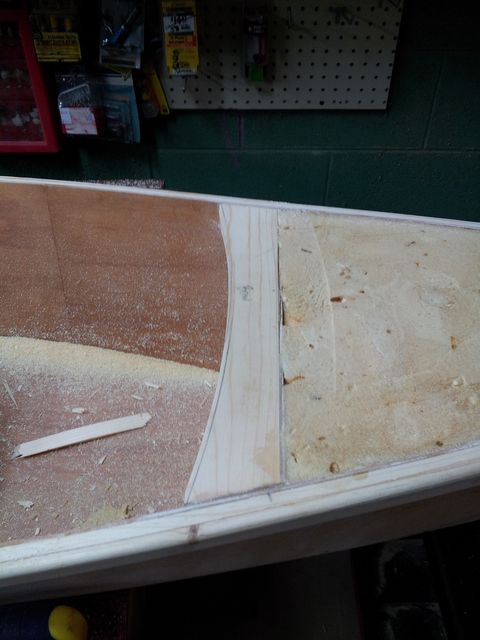
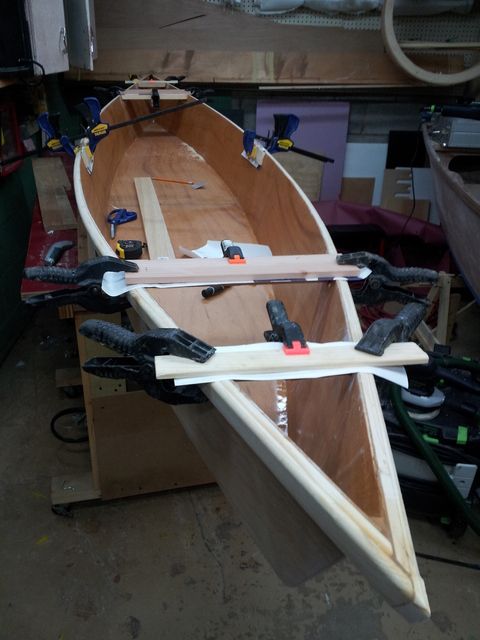
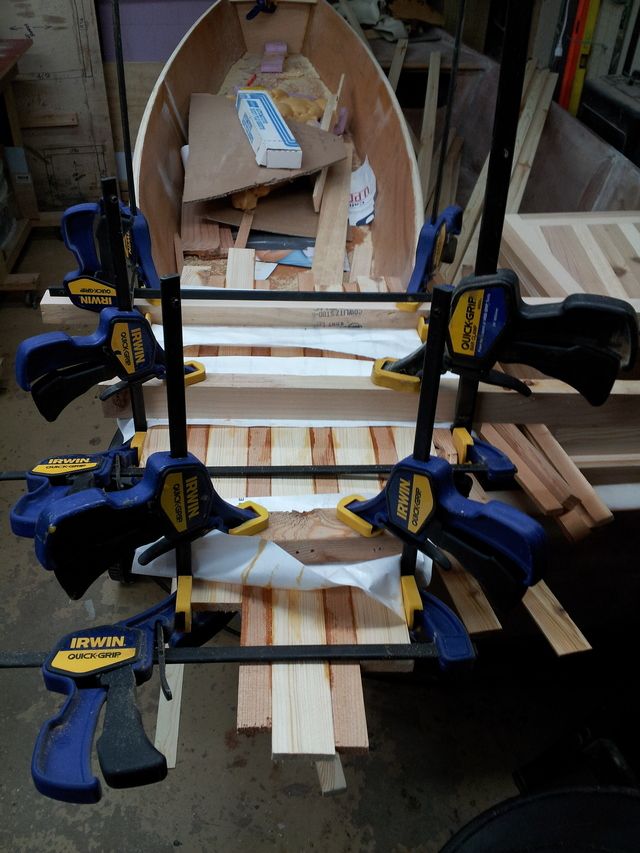
Glued down the center strips for the little end decks, just to keep everything centered and so nothing shifts in the next step.
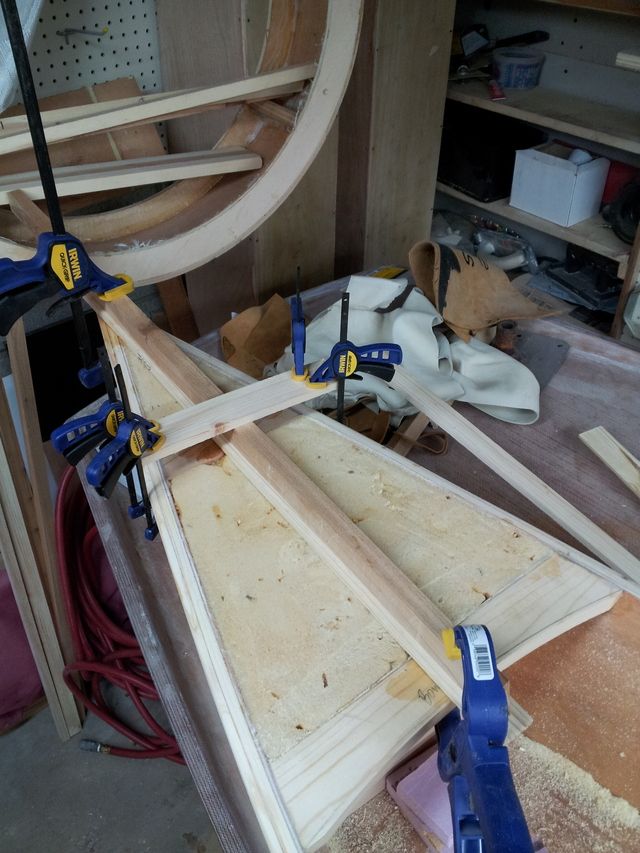
Then after that cured, planked the rest of the deck. Used strips approx. 5/16 thick, glued them to the cross members, rub rail, and adjacent strip with some pretty thin wood flour and epoxy. And a lot of clamps. Once that cures, it'll get trimmed to size, roundovers on the edges, and probably a little putt around the rub rail (I shouldn't have rounded the edge of the rubrail over before gluing this one)

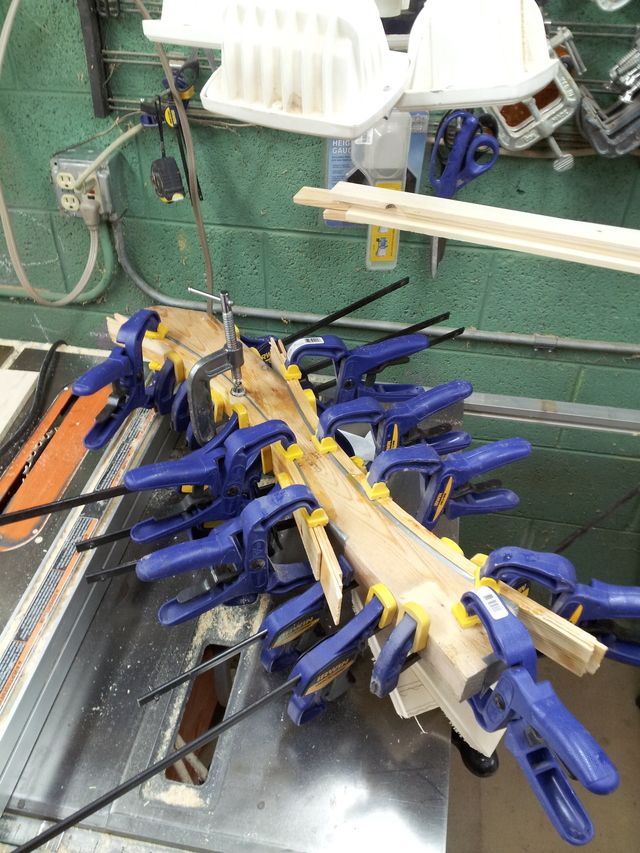
Also used the router to cut a pattern out of a scrap 2x4 to make 2 laminated end trims for the end of the decks. I want a little lip there to finish them off and keep any water that gets on the deck from dripping back into the boat. Cut some thin (around 1/8") slices of 2x2, trimmed out nice clear sections, and then laminated 4 layers together to create the end trims. And of course, a lot of clamps again.
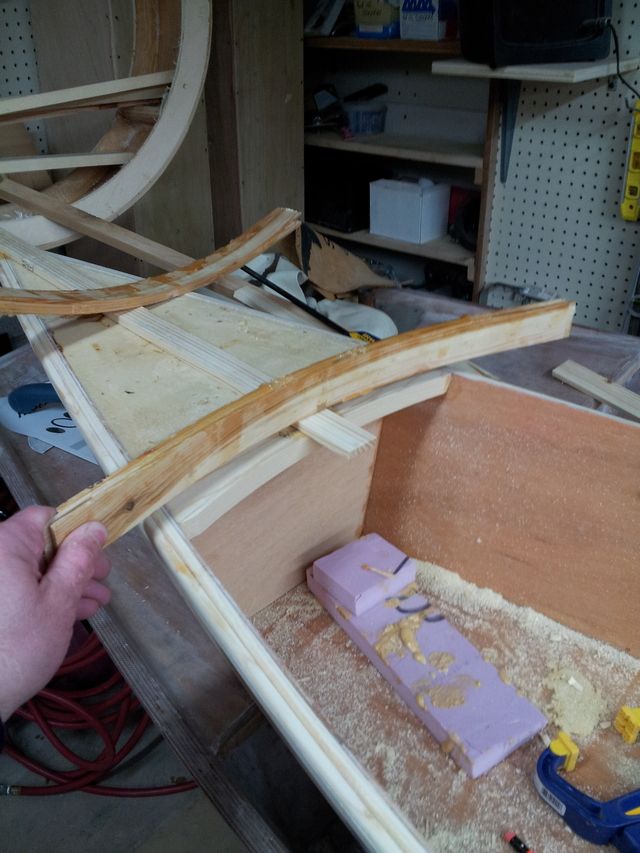
And the molded trim, which matches the end of the deck quite well. Now they need a bunch of sanding and cutting to length.
Didn't like the look of the deck ends, the straight edge looked wrong with the rest of the boat all nice curves. So, after some pondering, trimmed it up with the router circle jig. I couldn't get all the way to the end without cutting the hull, so there is a little 1/8-1/4" straight section at the ends, but it will get covered up in the next steps.
And the result, a lot more pleasing visually.
Glued down the center strips for the little end decks, just to keep everything centered and so nothing shifts in the next step.
Then after that cured, planked the rest of the deck. Used strips approx. 5/16 thick, glued them to the cross members, rub rail, and adjacent strip with some pretty thin wood flour and epoxy. And a lot of clamps. Once that cures, it'll get trimmed to size, roundovers on the edges, and probably a little putt around the rub rail (I shouldn't have rounded the edge of the rubrail over before gluing this one)
Also used the router to cut a pattern out of a scrap 2x4 to make 2 laminated end trims for the end of the decks. I want a little lip there to finish them off and keep any water that gets on the deck from dripping back into the boat. Cut some thin (around 1/8") slices of 2x2, trimmed out nice clear sections, and then laminated 4 layers together to create the end trims. And of course, a lot of clamps again.
And the molded trim, which matches the end of the deck quite well. Now they need a bunch of sanding and cutting to length.
Who is online
Users browsing this forum: No registered users and 14 guests