Page 1 of 1
Fred In Wisc CC14 Cheap Canoe at 80% Scale
Posted: Thu Apr 02, 2015 5:57 pm
by Fred in Wisc
This project came about from several factors- planning to go kayak camping with some friends and a bunch of kids this summer, it's still too cold to paint my other boat but I have the rest of it pretty much done, and I got some really nice lauan 2.5mm plywood from work for free. The ply was part of a packing crate for some equipment, but it was really nice looking, so I salvaged it before it went to the dumpster. Soaked a sample in water for about 3 days with no signs of delamination, so I figured a Cheap Canoe was in order. Unfortunately I didn't have big enough pieces to build it, but if I scaled down to 80%, there was just enough. Considering that my daughter weighs under 80 pounds, I think that should work just fine for her. So my little girl is going to get her first boat at age 8.
Construction may vary a bit from the ideal, trying to make it all out of leftover stuff I already have. Fortunately I have a good supply of resin and various cloth and tape.
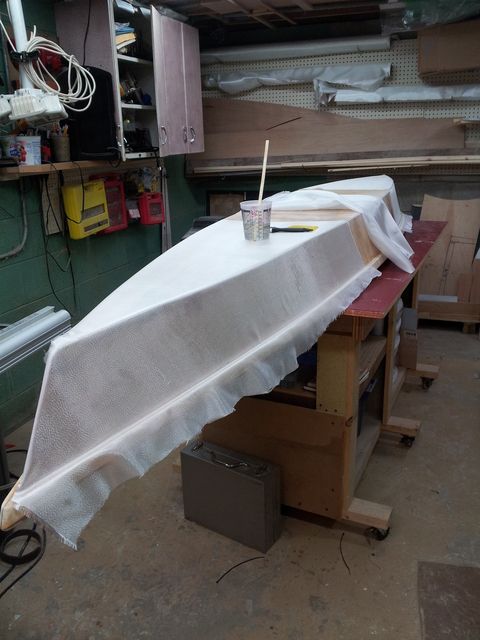
I cut the pieces, fiberglass seamed them together with some 4oz cloth. I found a real slick way to do it- Lay up in this order- Tyvek building paper (epoxy won't stick to it), plywood, glass/epoxy, peel ply (the real stuff- you only need a little), 4 layers of paper towel, tyvek again, 3/4 plywood over it all and them some heavy stuff on top to clamp it. Almost perfect joints with no excess resin.
Really thin plywood is no fun to work with. Too floppy, wiggly, and wavy. I got it assembled, had to use a fair number of zip ties to keep it fair, the duct tape method just wasn't working. Put in some epoxy/woodflour stitches to hold it together so I can pull the ties and do the fillet/taping wet on wet. I really like this part of the process, in a few hours you have a pretty much boat shaped object!
I'll post the pics tomorrow.
Re: Fred In Wisc CC14 at 80%
Posted: Thu Apr 02, 2015 6:43 pm
by terrulian
Sounds interesting. Photos would be great if you have them.
Re: Fred In Wisc CC14 at 80%
Posted: Fri Apr 03, 2015 1:24 am
by Fred in Wisc
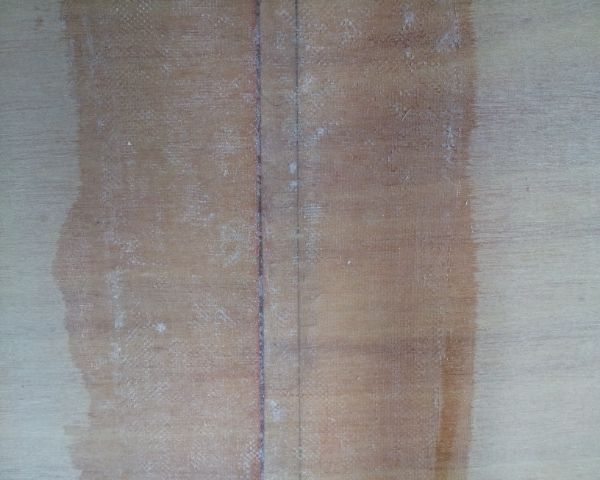
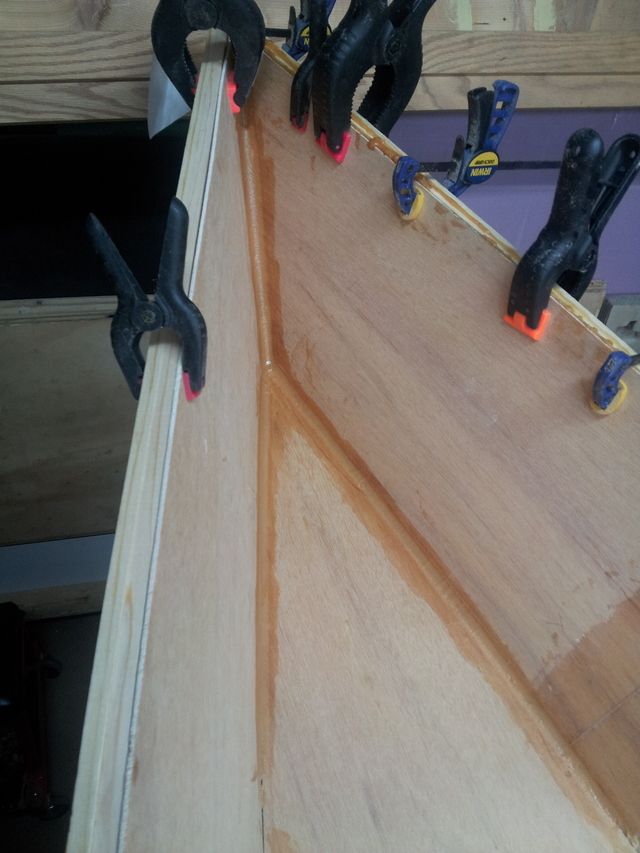
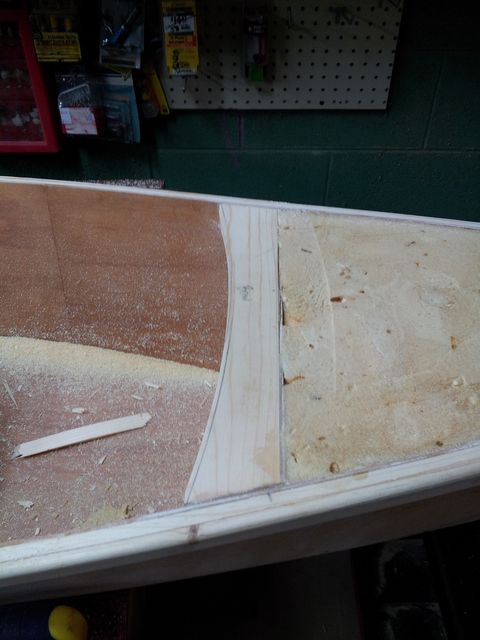
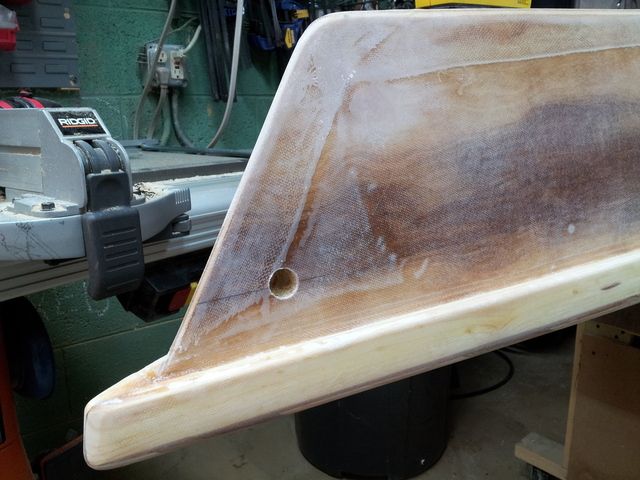
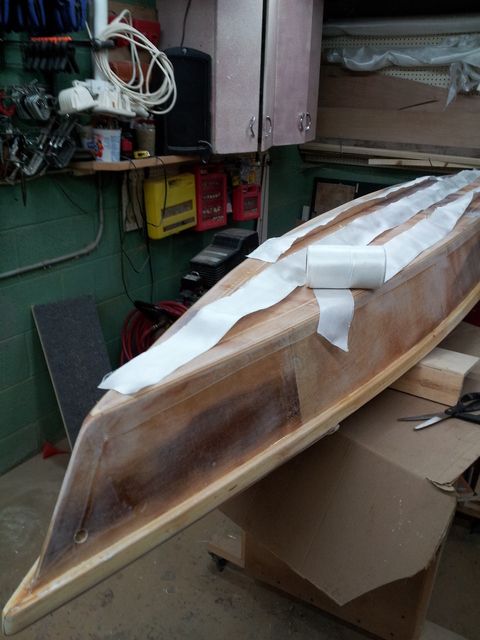
Tape seam. The amount of peel ply used here was minimal- about 4-5" wide. A yard of it would do the panel seams for several small boats like this and the seams come out near perfect. Super flat with no excess resin.
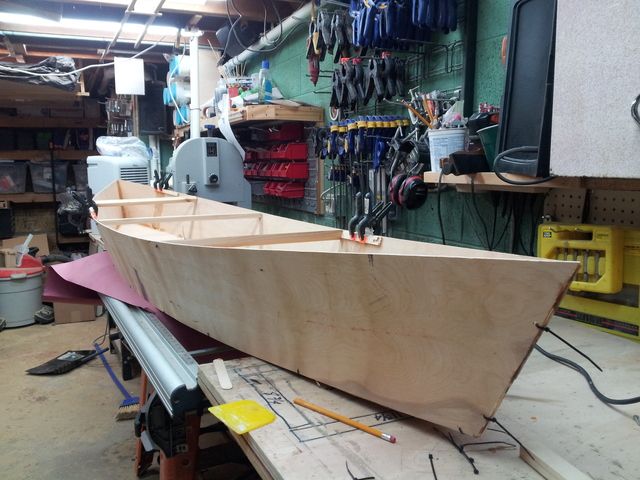
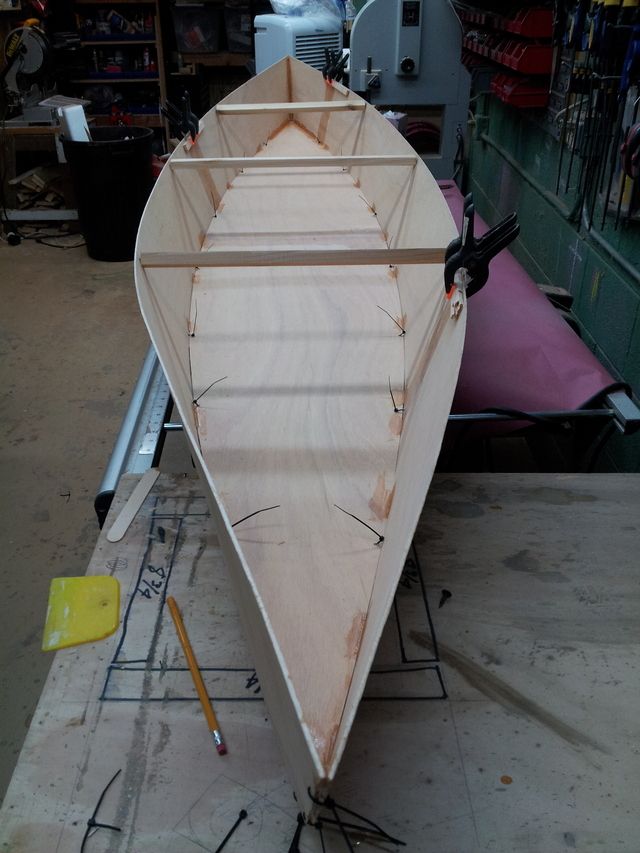
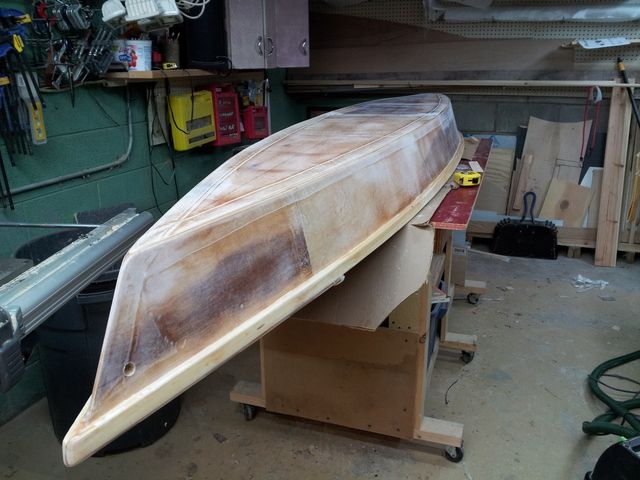
Stitched together. This really thin plywood is too flexible to form nice fair sheer lines on its own. It will need some support and guidance from the rub rails. You can see that better on the other pic.
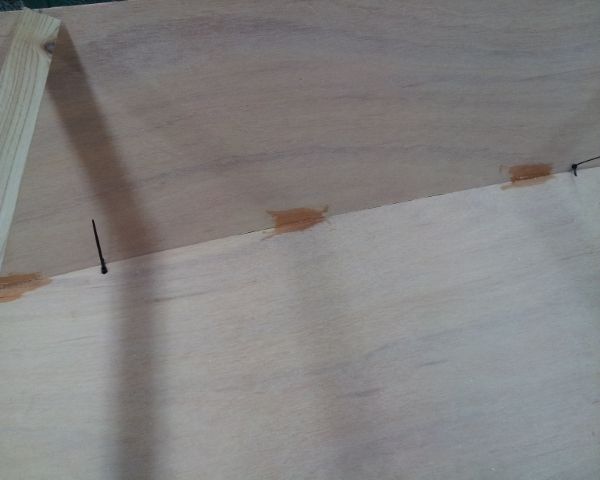
Tacked together with little bits of epoxy and wood flour. The fillets are extra small to keep weight down and so I can make the continuous fillets right over the top of them. I tried to be careful not to leave any bumps or blobs of epoxy- don't want to sand before the next step. My other 2 boats took a long time to build because of fooling with stuff like that. Trying to be more efficient on this one.
The assembled hull, subtracting the clamps and spacers, weighs about 7 pounds at this point. It is approx 10 1/2 feet long. In order to make it from the material on hand I had to make one side from 3 pieces rather than just 2. That's ok, I am trying to use up materials I have on hand rather than purchasing new stuff for this little build.
Re: Fred In Wisc CC14 at 80%
Posted: Fri Apr 03, 2015 2:29 am
by Fred in Wisc
Looks like I need to resize the pics from my computer. Cant find it in the phone app. Tomorrow.
Re: Fred In Wisc CC14 at 80%
Posted: Fri Apr 03, 2015 8:13 am
by Cracker Larry
Very cool Fred

Re: Fred In Wisc CC14 at 80%
Posted: Fri Apr 03, 2015 8:49 am
by jacquesmm
It looks nice from here but put the rubrail on before doing anymore glass work.
The rubrail will fair the sides.
A boat scaled down by 20% has only half the volume of the original . . . I hope you don't plan for heavy loads.
Re: Fred In Wisc CC14 at 80%
Posted: Fri Apr 03, 2015 9:40 am
by terrulian
Thanks for the photos. Very clean work indeed!
My other 2 boats took a long time to build because of fooling with stuff like that. Trying to be more efficient on this one.
I'm on my first boat but all the stuff I'm learning will never be used again as I've no plans to build another. So I'll move on to doing something else I don't know how to do.
Re: Fred In Wisc CC14 at 80%
Posted: Fri Apr 03, 2015 11:22 am
by Fred in Wisc
Jacques, I will indeed install the rubrail before glassing anything. Thanks for the advice. I was going to tape first, but that would partially lock in the unfair shape, I hadn't thought of that.
This will be very lightly loaded, just making it for my daughter who is currently under 80 pounds. Even with her camping gear, total load should be under 100. In a couple years, she'll probably need a bigger one, but then this can pass along to her little brother.
Thanks for the feedback and encouragement everyone. Hoping to get this done quickly, my wife and kids are going on Easter vacation for a few days so I'll have some time to work on it next week. Not going for a real high level of finish, I know it's going to get beat up floating down the river, and my little girl wants to do the paint herself. I'm interested to see what color she picks out, her current favorites are pink and that bright safety green/yellow. Either way, I should be able to recognize her out on the river pretty easily.
Re: Fred In Wisc CC14 at 80%
Posted: Fri Apr 03, 2015 2:11 pm
by jacquesmm
80 lbs is fine.
Interesting project.
Re: Fred In Wisc CC14 at 80%
Posted: Mon Apr 06, 2015 11:10 am
by Fred in Wisc
Made a little more progress this weekend.
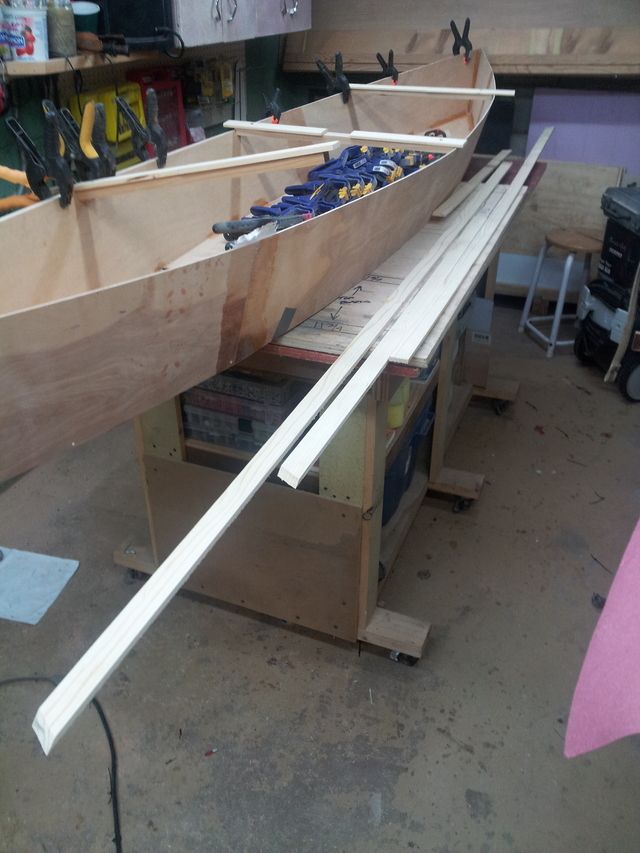
Cut the rubrail pieces from a pretty good looking pine 2x6 8' long. Ripped it into 5/16" thick strips. Those looked a little wide on the boat, so I ripped them down to 1 1/4" high. Selected the best looking ones, with the fewest knots and imperfections. Then laminated 2 layers with the joints offset several feet on to one side of the boat.
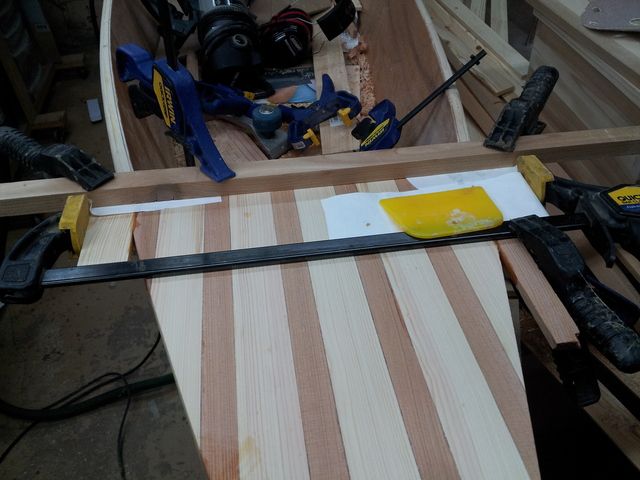
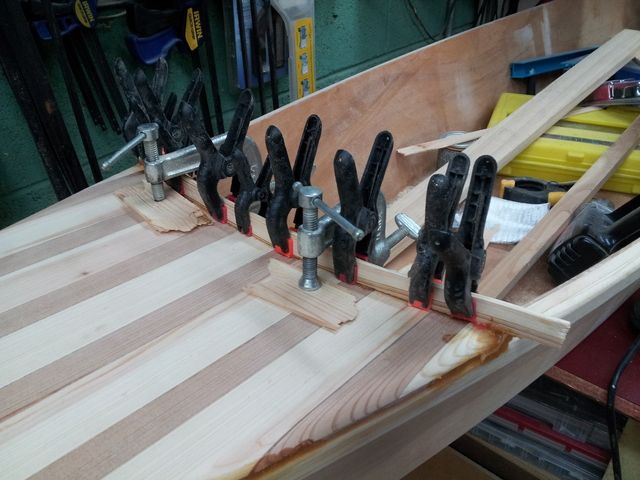
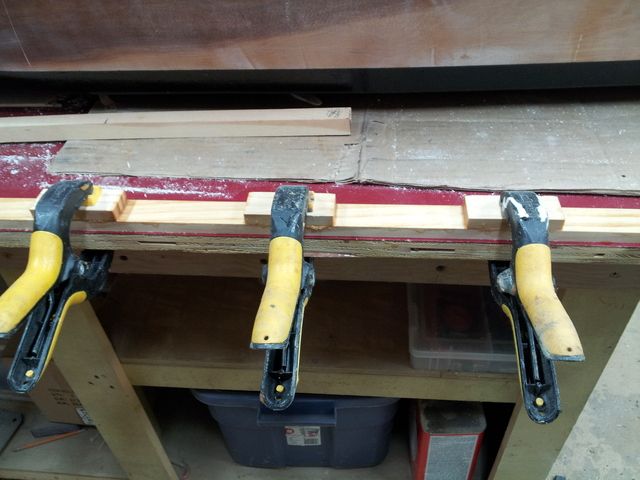
Precut the trim before even getting the glue out. Staged a lot of clamps where they were easy to get at.
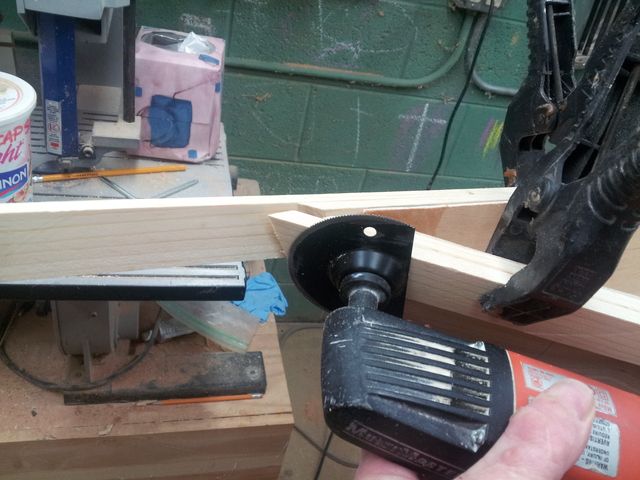
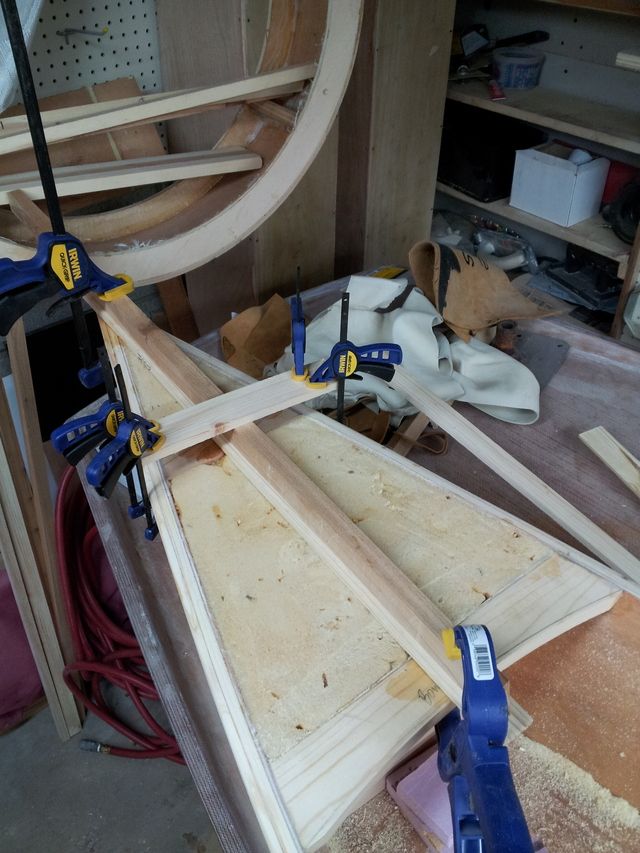
Oscillating tool works great for trimming the ends so the angles match. I found that it works well to cut the end with the oscillating tool which leaves it about 1/32 too long, and then trim the opposite end of the board (where it's cut square and butts up to the other trim) a little on the miter saw to get an exact match at the end. This isn't a great pic, the stuff shifted. I don't have enough hands to hold it and take a pic at the same time, but it gets the idea across.
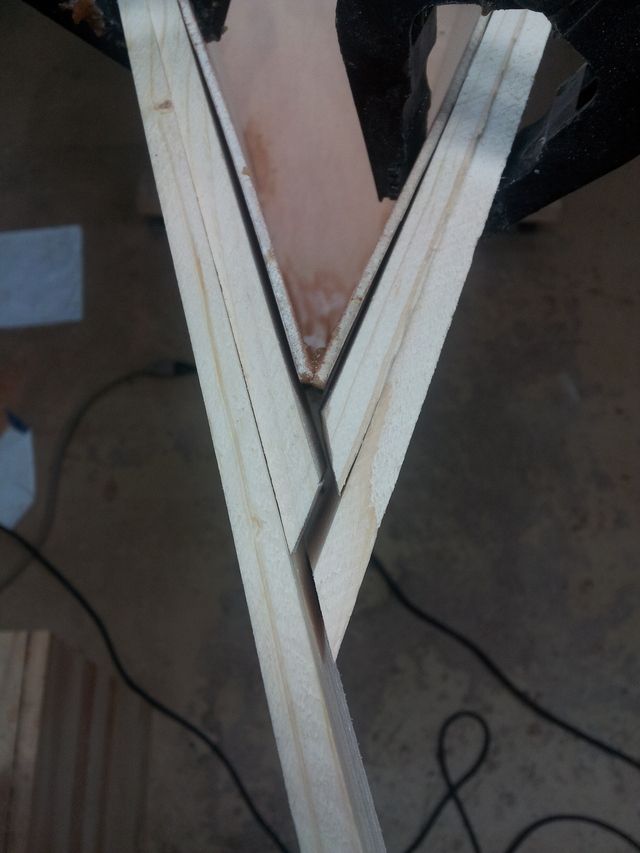
Detail of the end joints on the rubrail.
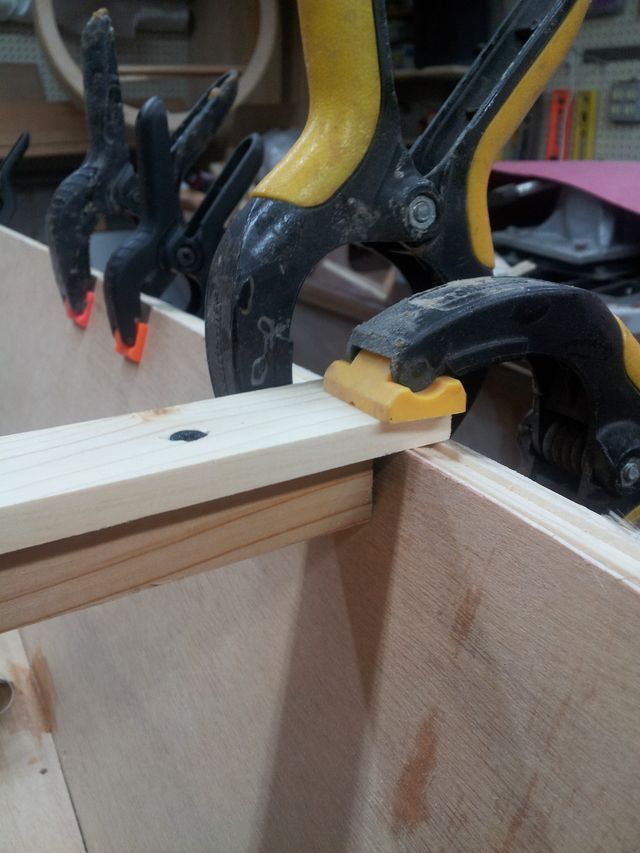
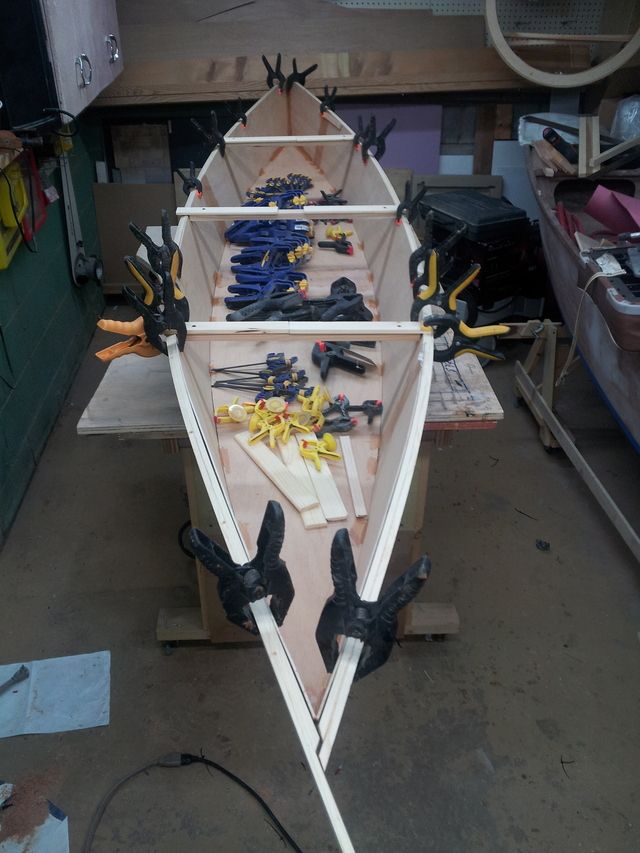
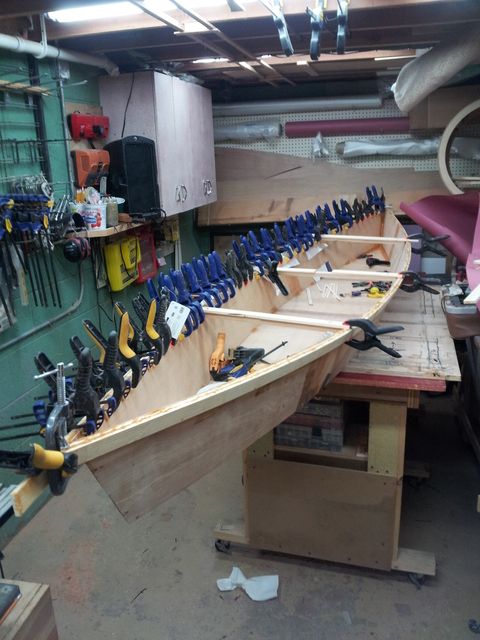
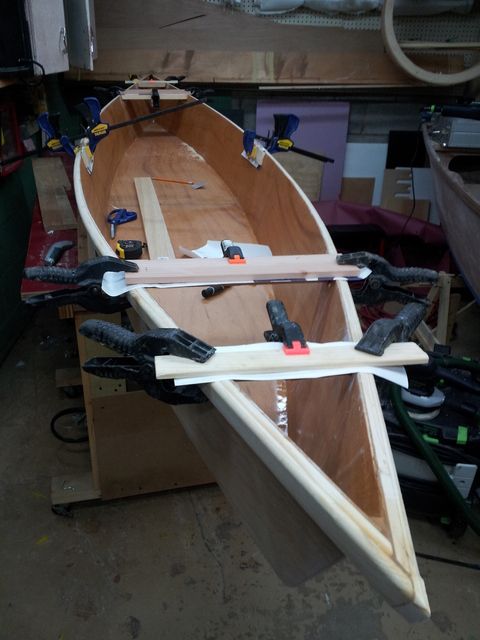
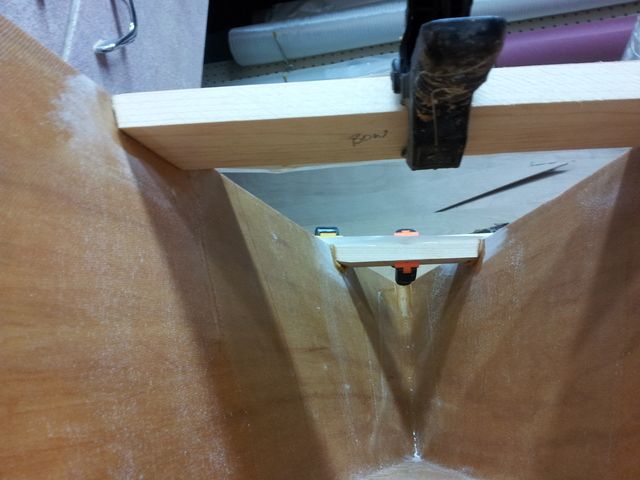
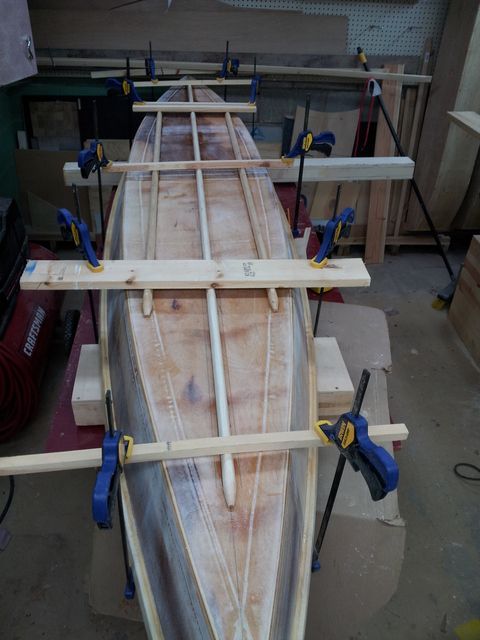
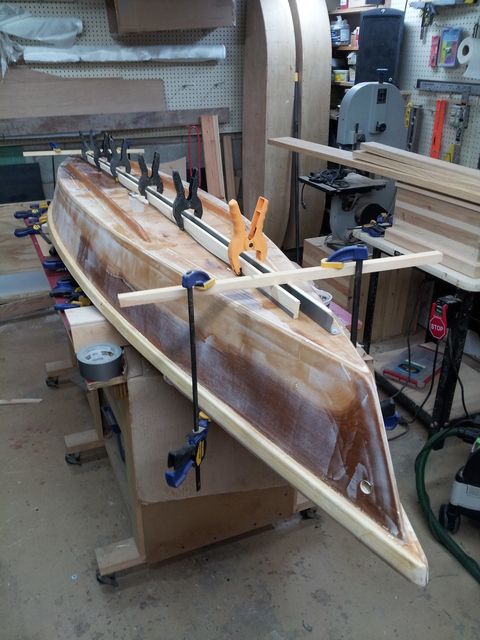
Holding the spreaders in place to get the right hull shape. Once the glue was applied, pieces of tyvek paper were put under these to prevent gluing them down. One clamp just behind the bar, towards the wider side of the hull to keep it from sliding, then another clamp to hold it down to the rubrail. Note the extra pieces screwed down to the top of the spreader bars to keep them level with the top of the hull.
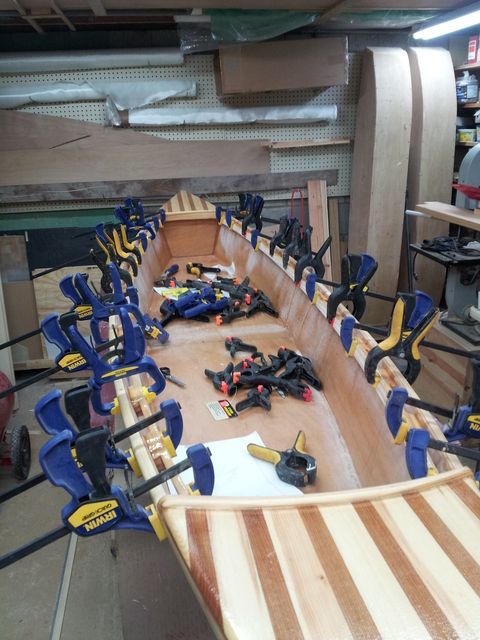
Precut pieces laid out and ready for epoxy. I glued this up one side at a time. With the thin plywood it's going to take a lot of clamps, the plywood is real wiggly. Also didn't know how much fiddling around it would take to get them all lined up and I didn't want the epoxy kicking when I was in the middle of the job. The other side is clamped on to the hull and will stay there to keep things symmetrical.
Next the upper edge of the boat panel and the backs of all the rubrail were coated with epoxy, a thin layer applied with a 1" chip brush. Then a little of the remaining mixed epoxy was reserved and the rest mixed with wood flour to form glue. I knew the coating on the boards would thin it a little, so I mixed slightly stiffer than normal for glue. I applied this to the coated sides of both layers of rubrail.
The first layer of rubrail was applied on one side, then the remaining straight epoxy brushed on to its exposed surface, and the second layer of rubrail applied. Then I evened up the tops , matched the ends, and put on a lot of clamps. No pictures of this, I didn't want to slow the process down or get epoxy on my phone.
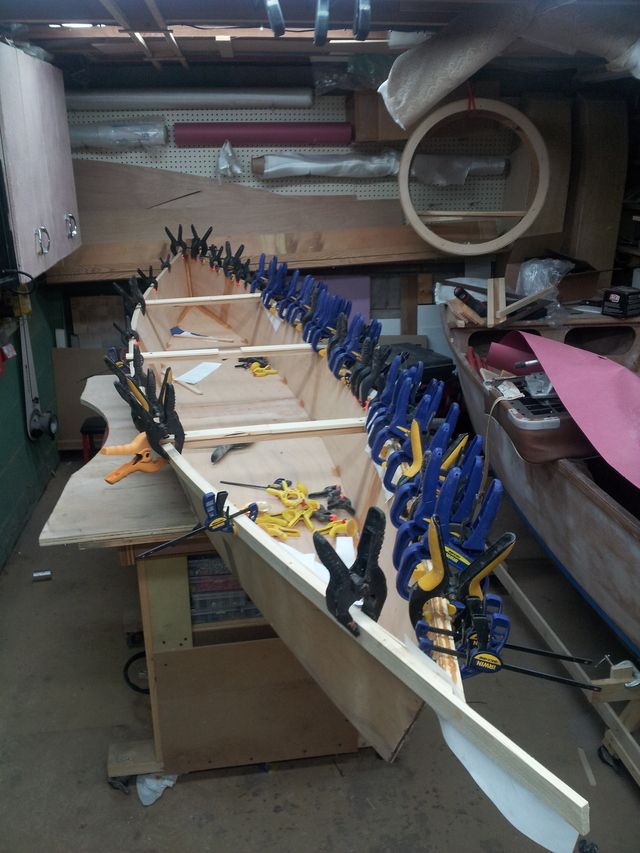
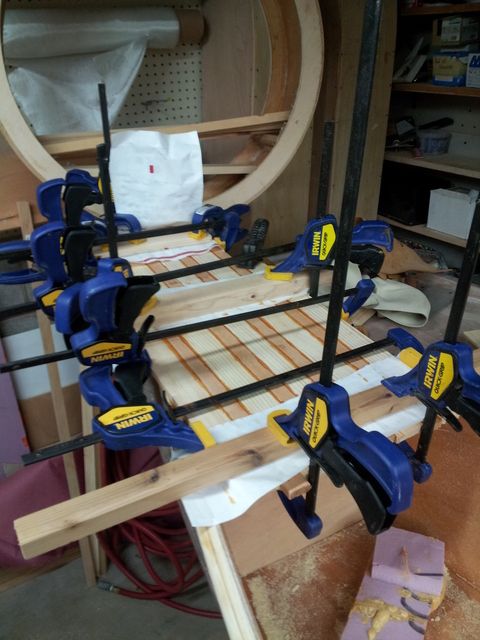
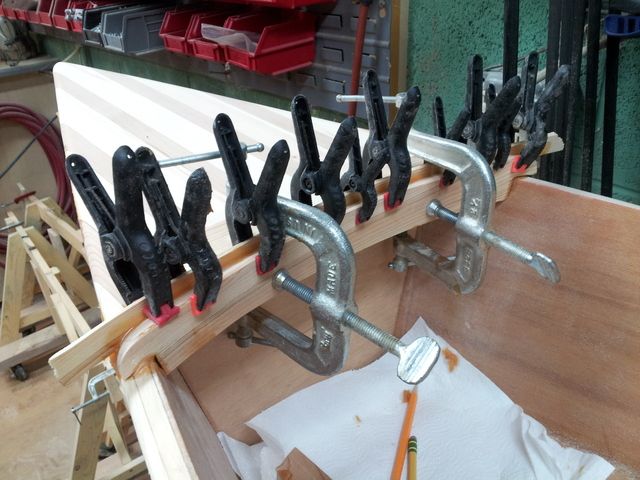
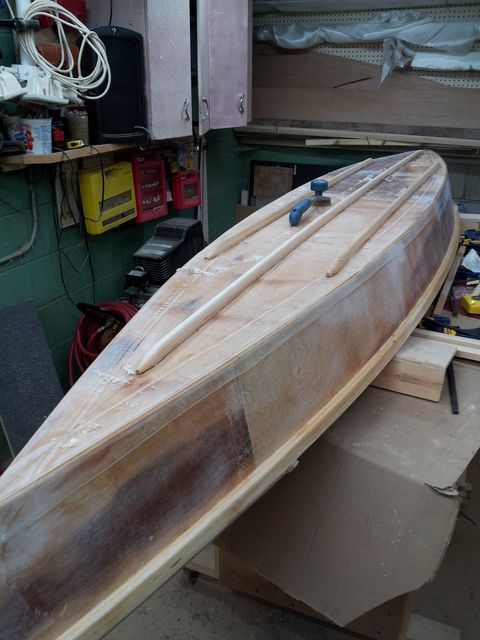
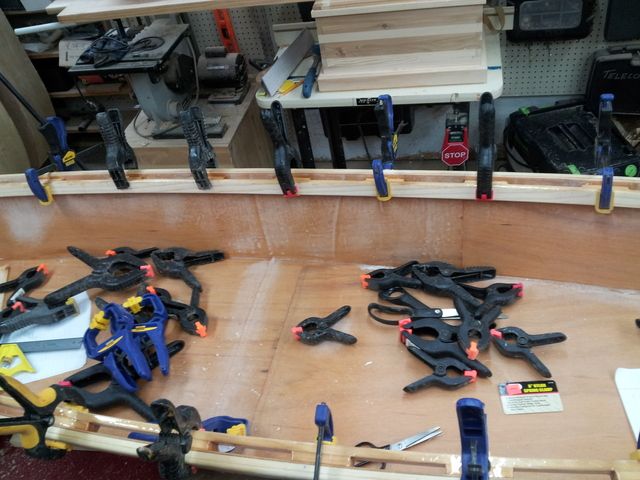
First side clamped in place. This wasn't too hard to do. Note the extra short pieces of scrap covering the butt joints to keep them fair. Used over 60 clamps, the think plywood didn't have enough stiffness to squeeze the thickened epoxy wout if the clamps were more than a 3 inches or so apart, and I didn't want the plywood all wavy and the glue joint getting thicker and thinner.
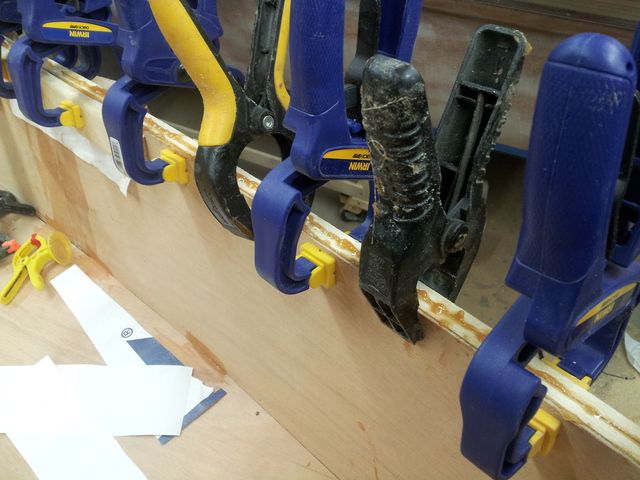
Excess glue squeezed out on the top. With all the clamps it was really difficult to access this and scrape off the excess. The good part is it's an easy place to sand it off when the clamps are removed.
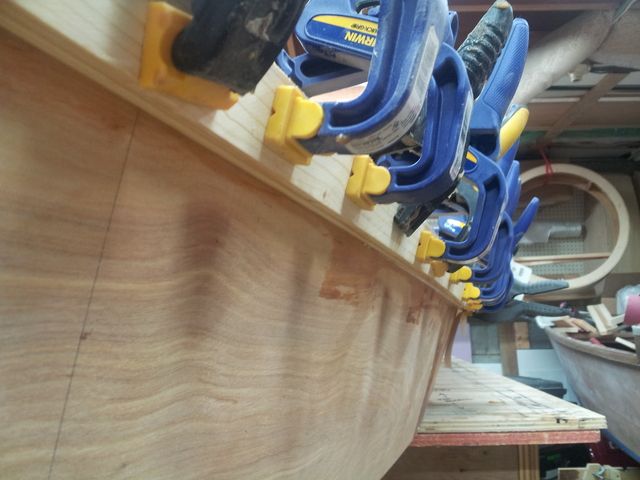
Carefully scraped the excess glue off below the rubrail. It was accessible and it's a real bugger to sand that. I spent a lot of time sanding these on my last boat- it's a hard area to work in without damaging the plywood hull when trying to get into the corner. Way easier to do this before it hardens.
Had a little excess glue and it was about the right consistency for fillet putty, so I filled in the bow and stern joints and the sole joints a foot or so on each end. The hull should be approximately the right shape now, so locking them in should be ok.
Left it sit about 36 hours before removing the clamps. But I forgot to take a pic of that. I'll do that tonight, my wife and kids went on a road trip for a few days so I'll have some "operating power tools late at night without waking the kids up" time the next couple of nights.
Re: Fred In Wisc CC14 at 80%
Posted: Mon Apr 06, 2015 12:46 pm
by Fred in Wisc
Side note, my test plywood pieces have now been soaking for well over a week, they are very flexible, but still intact and are not delaminating even when twisted into shapes plywood shouldn't form into. Score on that. Especially for free wood. So far, I had to buy the 2x6 for trim, so I am into this project for a cash outlay of $6, plus materials I had left over from other projects.
Re: Fred In Wisc CC14 at 80%
Posted: Tue Apr 07, 2015 2:24 pm
by Fred in Wisc
And rubrail #2 is glued up. Did this last night, will pull the clamps tonight. It's about 62F in the basement and using slow hardener it takes a while for it to cure.
One interesting thing I found is that the rubrails stayed a bit curved after being clamped in place without glue for a few days. I hope that doesn't end up making the boat asymmetrical once it's all glued up. I guess I could have run a center line and checked that but it's too late now.
The ends wanted to slide vertically, putting a big C clamp on them to hold things from sliding worked really well. Although the front one may be a challenge to remove, I forgot to put the tyvek in between the clamp and rub rail so it will release. Hope epoxy doesn't hang on to C clamps too well.......
Re: Fred In Wisc CC14 at 80%
Posted: Tue Apr 07, 2015 2:32 pm
by Cracker Larry
Naw, all my clamps have epoxy on them

If you dry fit it then drill in a few spots for a wood dowel, that will keep it from sliding when you glue. That stuff is as slick as grease.
Re: Fred In Wisc CC14 at 80%
Posted: Tue Apr 07, 2015 3:22 pm
by jacquesmm
You more $ in clamps than in plywood on that boat.

If it's asymmetrical, no big deal. You can call it a gondola canoe (they are asymmetrical) and paddle only on one side.
Re: Fred In Wisc CC14 at 80%
Posted: Wed Apr 08, 2015 11:08 am
by Fred in Wisc
I do like to buy clamps whenever they are on a real good sale.
I sanded the excess glue off the top of the rubrails (and some on the sides where I got a little messy) with the orbital sander, then a little cleanup hand sanding under the rubrails. Put a 1/4" round over on the outer edges of the rubrails with a bearing bit in the trim router.
Hull weight with rubrails installed about 11 pounds.
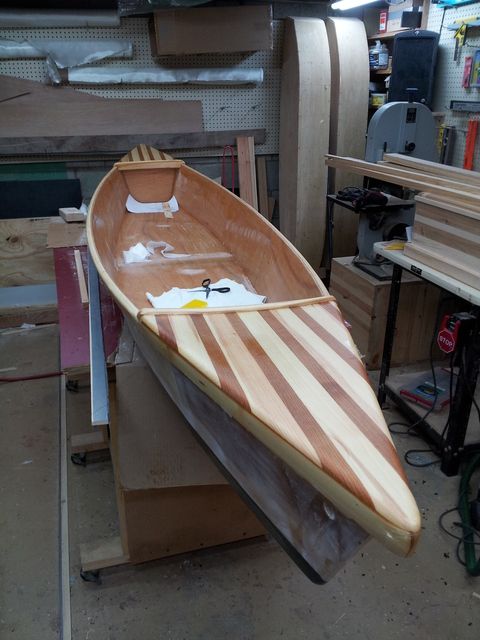
Installed the interior fillets and glassed the inside last night. That super thin ply doesn't seem like it will have a lot of impact resistance, and I have some cloth left over along with plenty of resin. I ran the cloth beam to beam to minimize waste. 2 widths of (I think) 6 oz fabric, overlapped about 4" at the center seam of the boat. Only used a little over 2 yards of fabric that way. Then the remaining ends about 16" long (which will be covered and foam filled for positive flotation- this boat is for an 8 year old) had tape applied to the center seam and then 9 or 10 oz fabric. I figured the ends would take the most impact/wear/crashing into stuff so went with heavier glass. No tape on the interior seams, I think the fillet and cloth will be enough. If not, I'll have to add it later on over the fabric. I will tape the outside and them apply wide cloth as well. As much for abrasion resistance as for strength, but better to have a little extra glass in there for safety.
I was careful with the resin, scraped it well, and ended up with just some real small areas where it pooled up near the corners. It would have been cool to peel ply those and see if I could soak it up, but I didn't get it finished glassing until after 130 am and I was just too tired. It's good enough.
Re: Fred In Wisc CC14 Cheap Canoe at 80% Scale
Posted: Mon Apr 27, 2015 2:59 pm
by Fred in Wisc
Haven't posted in a while on this little boat. I got stuck in pondering mode. Sometimes that develops good ideas, but it sure slows things down.
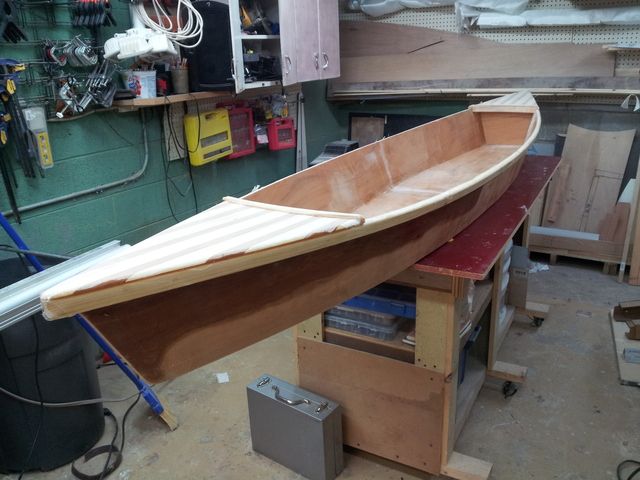
I wanted a little flotation built in to this boat. Just an extra margin of safety since it's for my daughter.
So it will have short decks at the front and back, sort of a Rob Roy canoe kind of thing. Somebody dumped a few (spruce?) short 3x8 beams from a shipping crate in my parking lot and I'm going to resaw one thin and use it for the decking. Bright finish the decks and gunwhales, maybe the interior as well. I really like the wood look and it certainly separates it from the crowd of plastic boats around here. The volume of each end is about 700 cubic inches, so I can get just under a foot of flotation foam inside, should provide about 50 pounds of positive buoyancy.
It'll also cover up the rough glass and seams in the ends on the canoe. Bonus.
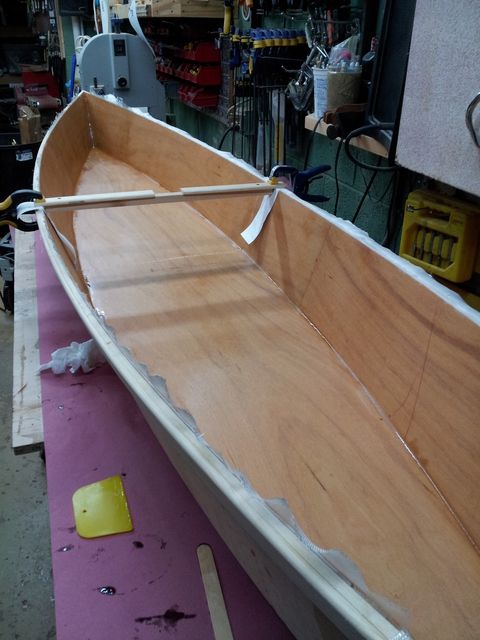
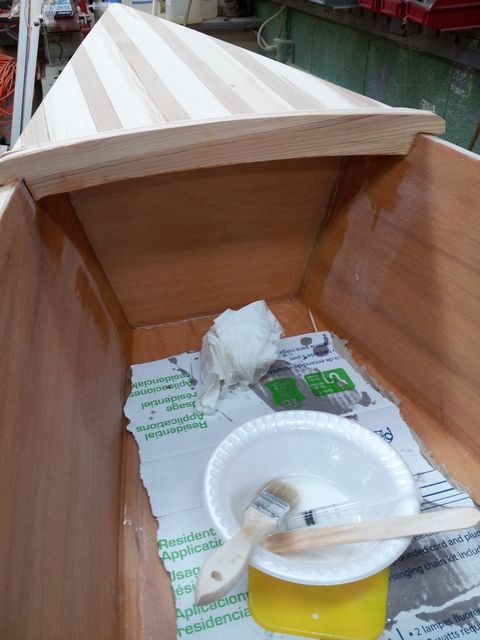
Glued in cross beams. Also had a little spot where the cloth was raised at both sides of the center thwart from when I glassed the inside of the boat. Worked some epoxy down into those gaps and clamped them down to fix the bubbles. Turned out it worked pretty well.
View from inside. Really trying to work neat and not have to sand out all kinds of glue and drips.
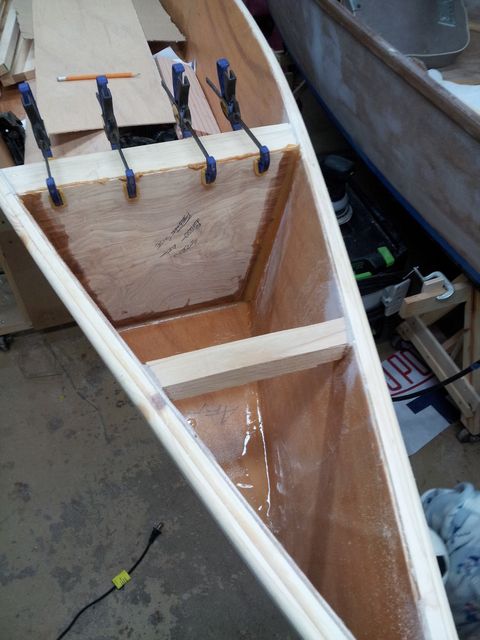
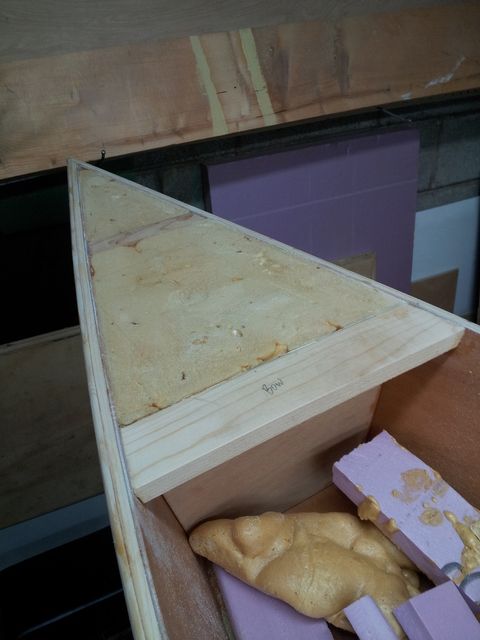
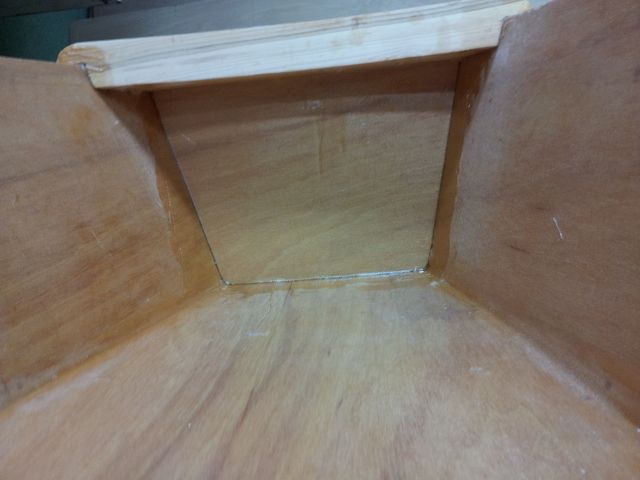
Squared up the bulkhead so it's at a right angle to the boat bottom. Precoated and filleted in. Lightly sanded the existing cloth for a good bond.
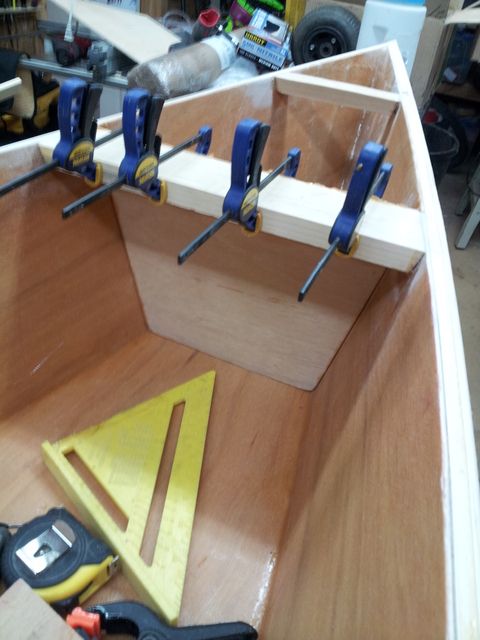
Little bulkhead glued in. Made cardboard patterns first, then traced and cut from plywood. This 2.5mm ply cuts with about 3-4 strokes of a sharp utility knife and a straight edge. Then just a little sanding and things fit up quite nicely.
Next- light cloth on the inboard sides of the bulkheads, and fill them with foam.
Re: Fred In Wisc CC14 Cheap Canoe at 80% Scale
Posted: Wed Apr 29, 2015 4:55 pm
by Fred in Wisc
Foam is in. Wasn't sure if I'd have enough so I put a bunch of strips of pink Styrofoam in there and poured the foam around them. Turned out to have just enough.
The foam I had was pretty old and darker colored than when new, the part A had some "crust" on the top of it. But a test batch expanded nicely so I figured it was still good. Worked fine, but I ended up overfilling, it takes a long time to finish expanding at low temperatures (it was 61 in the basement shop yesterday).
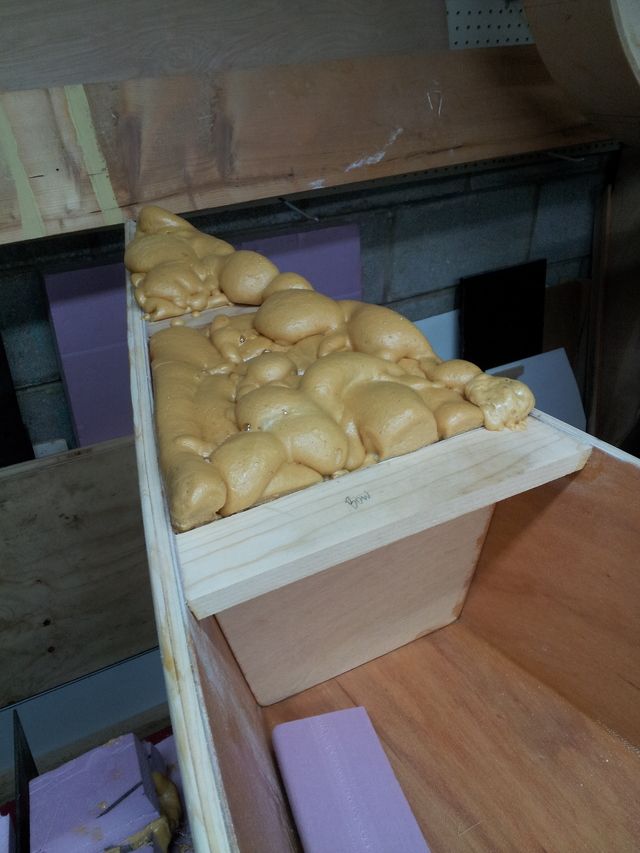
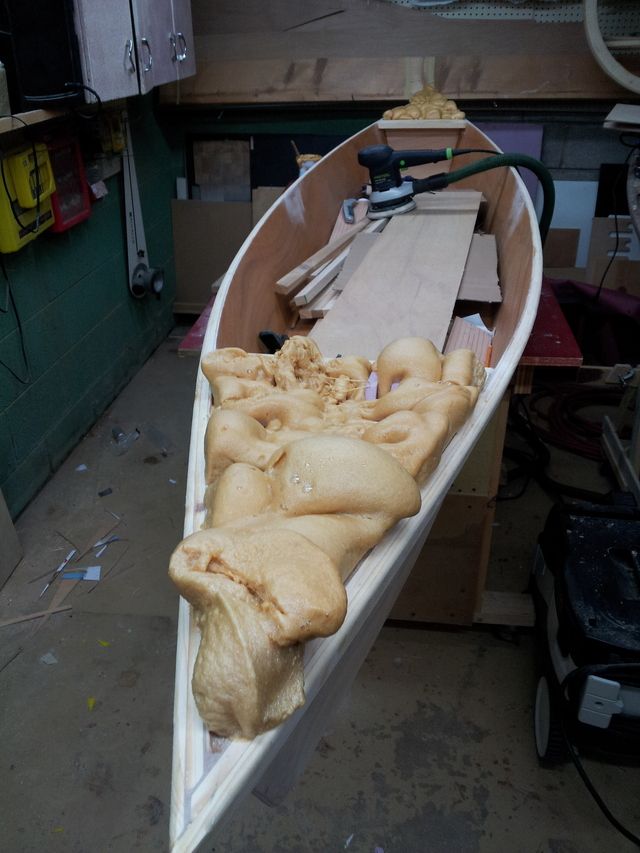
It'll be ready to trim tonight if I can get time.
Re: Fred In Wisc CC14 Cheap Canoe at 80% Scale
Posted: Thu Apr 30, 2015 12:14 pm
by Fred in Wisc
Trimmed and ready for the decks.
Narrow areas like this are super easy to trim, just ran a flush cut trim saw around all the edges, then finished off with a Japanese type pull saw and sanded with an autobody long board. 20 minutes tops for the whole process.
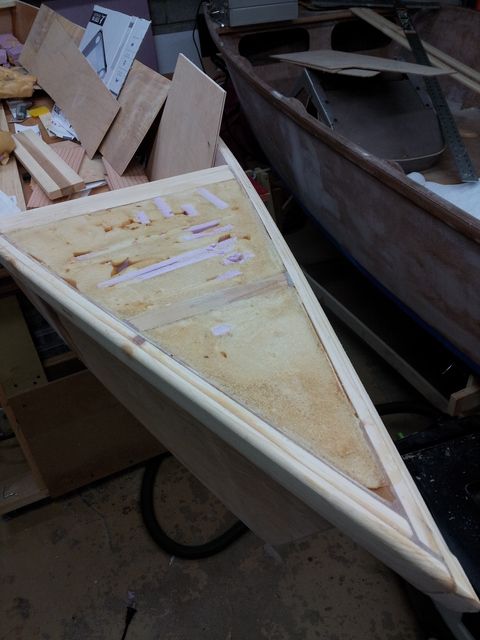
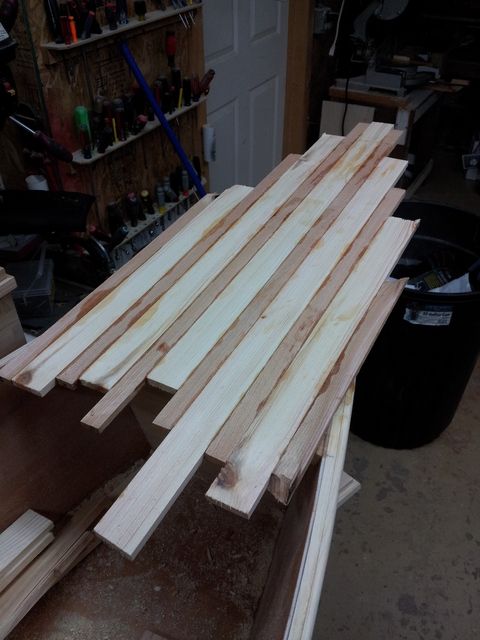
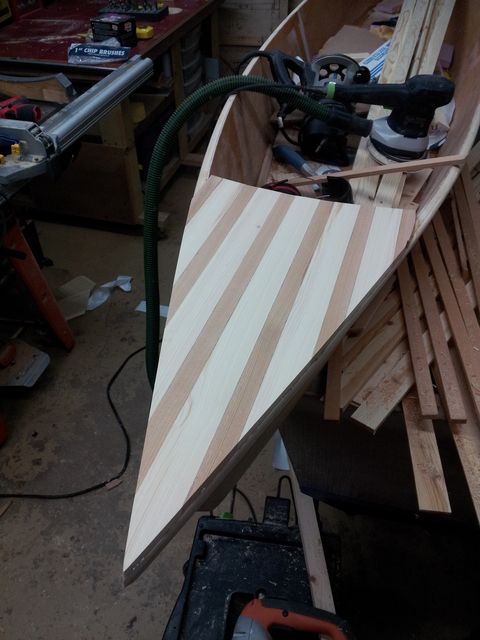
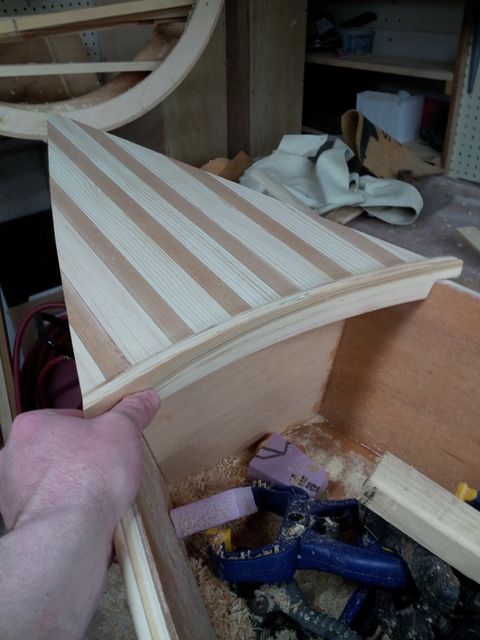
Took a look at the spruce block I was going to saw up for the decks last night and it's too pink in comparison to the other wood, I think I'll go with an alternating pine/ cedar layout for the decks. The decks are each about 15x26" so it won't be a lot of material and there is enough lying around the house to do them (staying with the "use up existing supplies, trying not to buy stuff" theme).
Re: Fred In Wisc CC14 Cheap Canoe at 80% Scale
Posted: Thu Apr 30, 2015 12:19 pm
by Cracker Larry
Looking good!
Re: Fred In Wisc CC14 Cheap Canoe at 80% Scale
Posted: Mon May 04, 2015 11:49 am
by Fred in Wisc
Made some progress on the end decks this weekend. Not a lot, it was WAY too nice out to work in the basement.
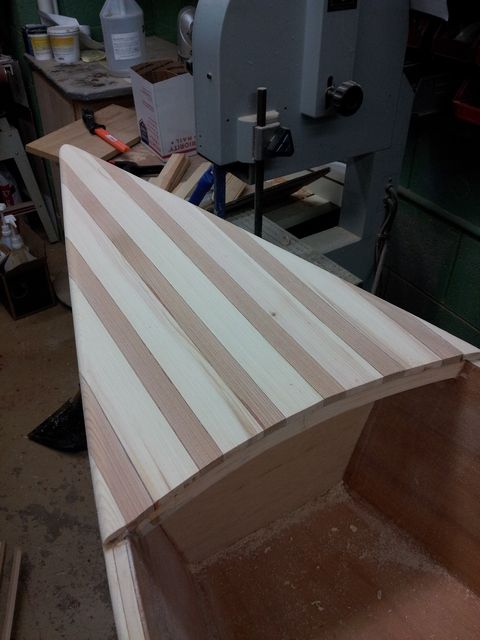
Didn't like the look of the deck ends, the straight edge looked wrong with the rest of the boat all nice curves. So, after some pondering, trimmed it up with the router circle jig. I couldn't get all the way to the end without cutting the hull, so there is a little 1/8-1/4" straight section at the ends, but it will get covered up in the next steps.
And the result, a lot more pleasing visually.
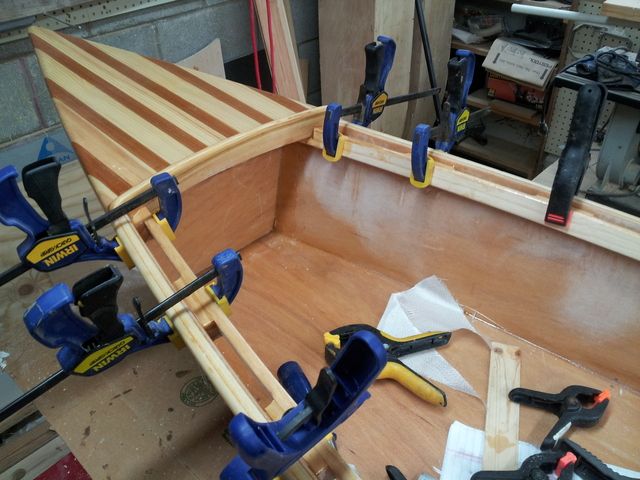
Glued down the center strips for the little end decks, just to keep everything centered and so nothing shifts in the next step.
Then after that cured, planked the rest of the deck. Used strips approx. 5/16 thick, glued them to the cross members, rub rail, and adjacent strip with some pretty thin wood flour and epoxy. And a lot of clamps. Once that cures, it'll get trimmed to size, roundovers on the edges, and probably a little putt around the rub rail (I shouldn't have rounded the edge of the rubrail over before gluing this one)
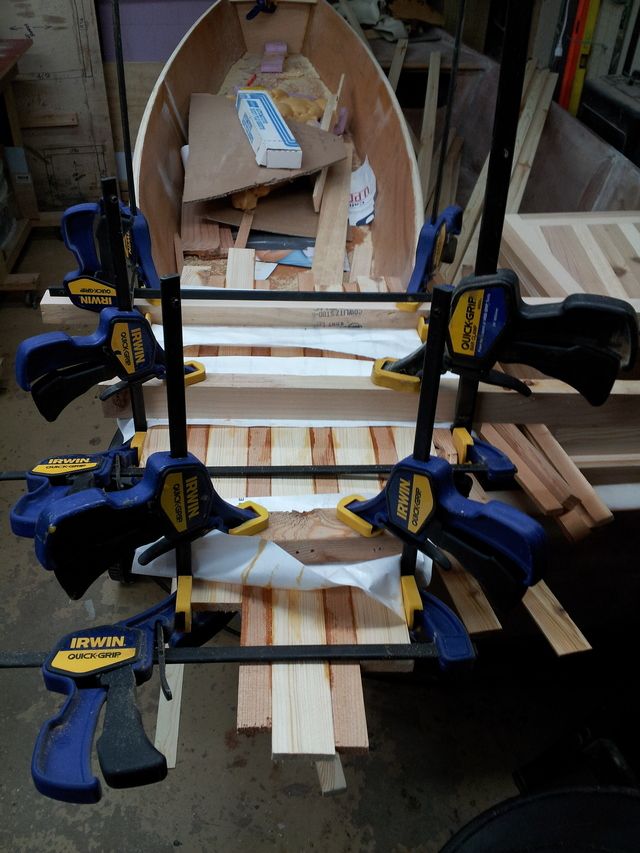

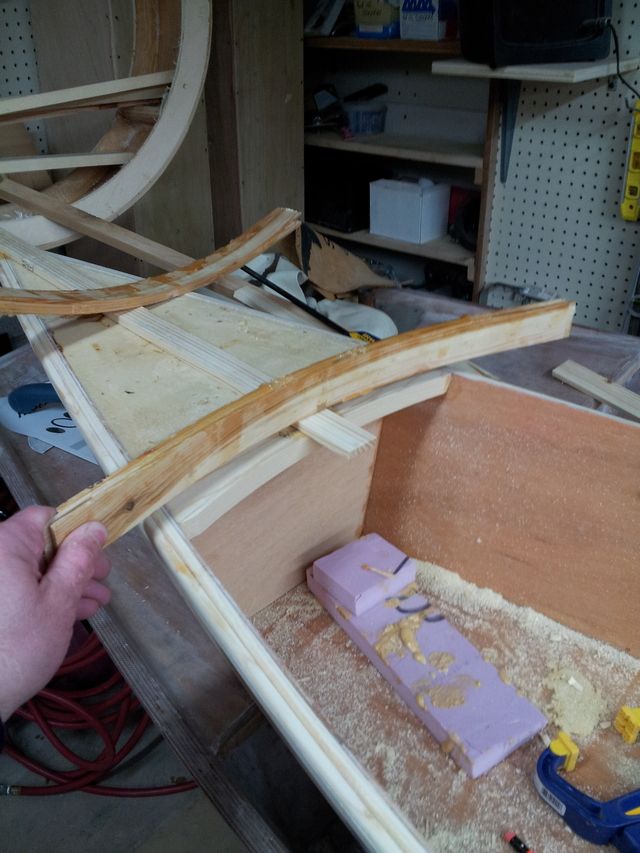
Also used the router to cut a pattern out of a scrap 2x4 to make 2 laminated end trims for the end of the decks. I want a little lip there to finish them off and keep any water that gets on the deck from dripping back into the boat. Cut some thin (around 1/8") slices of 2x2, trimmed out nice clear sections, and then laminated 4 layers together to create the end trims. And of course, a lot of clamps again.
And the molded trim, which matches the end of the deck quite well. Now they need a bunch of sanding and cutting to length.
Re: Fred In Wisc CC14 Cheap Canoe at 80% Scale
Posted: Mon May 04, 2015 3:42 pm
by terrulian
This is skillful and beautiful work.
My seats would have come out better with a router jig for the curves. I totally should have thought of that instead of a sabre saw jig, although that worked OK. You sure have a lot of clamps.
Re: Fred In Wisc CC14 Cheap Canoe at 80% Scale
Posted: Tue May 05, 2015 11:15 am
by Fred in Wisc
Thanks for the kind words gentlemen.
Trying to spend a little time on this each day so it keeps moving along.
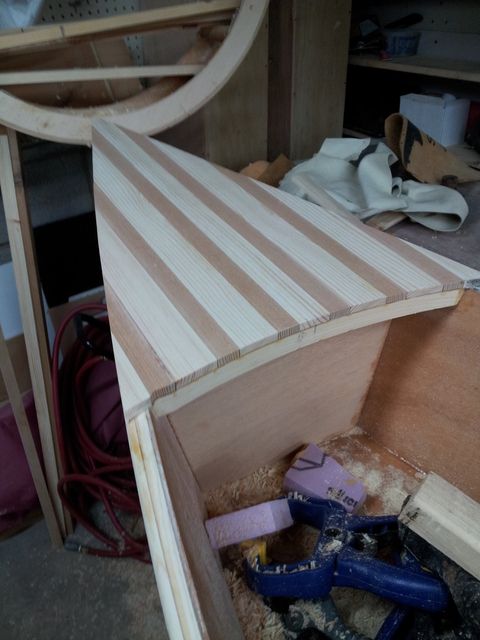
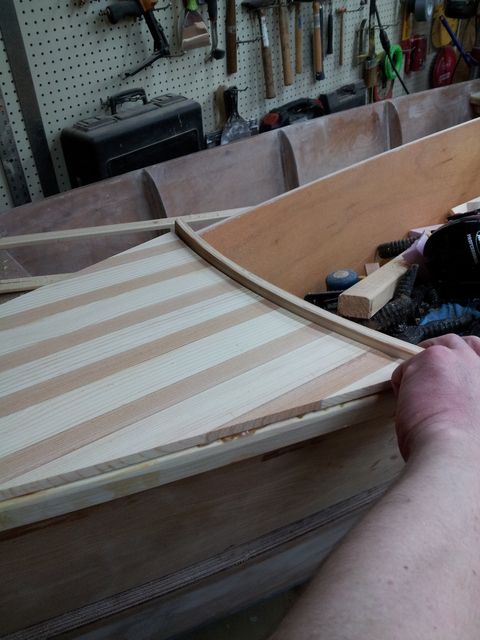
Last night I pulled the clamps from the strip planked deck. Scraped off the big globs of epoxy with a scraper.
Trimmed it off with a router and flush trim pattern bit. Unfortunately my bit was a little dull and I forgot how fragile cedar can be, I split off one of the end strips when cutting against the grain. Frustrating, but not irreversible. One of those times I had to say to myself- "So, that thing you just did.....not gonna do it that way again are ya?"
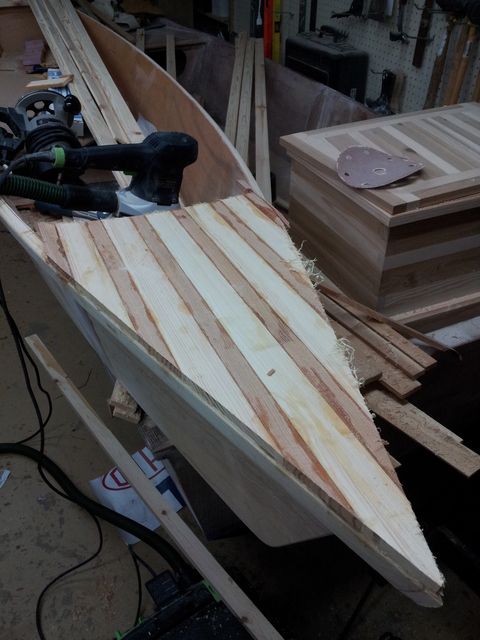
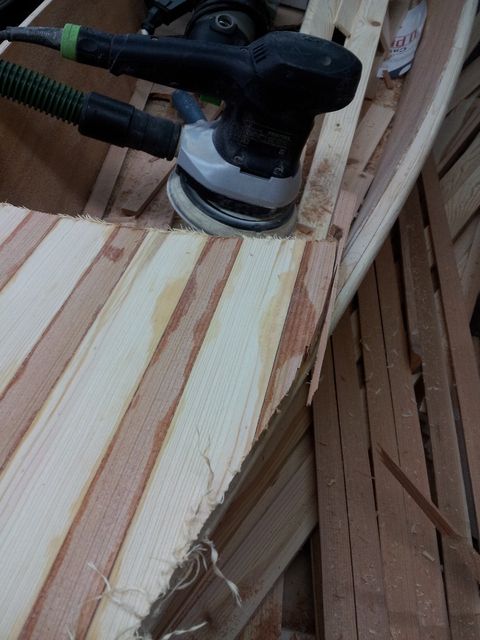
Ran the sander over the deck a little to clean it up and remove the "fuzz" from the dull router. It looks pretty nice.
Trimmed that broken strip back out with a sharp wood chisel. Was able to get it close enough that it shouldn't be noticeable with a new strip glued in. Then glued in the outboard strips next to the rub rails. I hadn't figured out a way to clamp that all at once so I did it in 2 steps.
Then glued up the bow deck. Used a little more glue this time, there were some small gaps between a few of the strips in the first deck that I'll have to fill in. Trying to get better at this each time. Going to use a new sharp router bit to trim that one when it's cured.
Re: Fred In Wisc CC14 Cheap Canoe at 80% Scale
Posted: Tue May 05, 2015 1:11 pm
by Cracker Larry
That's going to look beautiful! Very nice.
Re: Fred In Wisc CC14 Cheap Canoe at 80% Scale
Posted: Fri May 08, 2015 9:43 am
by Fred in Wisc
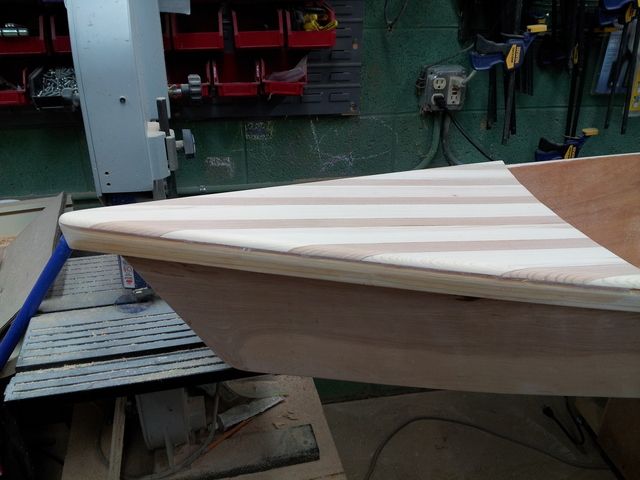
Trimmed the rest of the decks off. Way smoother cutting with a brand new triple flute flush cut bit. No chipping at all. But it was cutting so smooth and nice that I forgot to stop before the end of the curve on the inboard end of the deck. So I ended up following the little straight bit at the end where I hadn't cut the thwart in a curve. You can see it on the left end here. Ah, well, nothing a little wood flour putty won't fix.
Then I rough trimmed the curved trim pieces that I had laminated for the ends of the decks. These won't be glued in place until the gaps around the decks are filled in and a nice roundover is put on the top edges of the decks. I'd like to be able to run the router all the way to the end of the deck and then cover the transition with the trim piece, so they need to glue up later. I might laminate a small strip on the outside above the decks to make the deck to trim joint look perfect. Only adds a little work and it covers my router slip above, and the spot where I made the other deck a little short on one corner.
I was kind of nervous about doing these, but it was easier than I thought. Just marked and rough cut them a little big with a back saw, then sanded down until the matched the curve of the sides pretty close. I didn't worry much about getting the fit exact, that's going to fill in with wood flour putty and be pretty inconspicuous. Probably nobody but me will even notice it once it's bright finished. Trying to be realistic about that stuff so I don't take forever to build this as I have in the past.
The ends of the trim will be rounded off and a little radius applied to the top and bottom edges before it's glued on, but it's pretty much the right shape now. I'm pretty pleased with it.
Re: Fred In Wisc CC14 Cheap Canoe at 80% Scale
Posted: Fri May 15, 2015 3:49 pm
by Fred in Wisc
Filled the seams between the rubrails and decks, but it's curing awful slow. About 4 days now and I can still just barely dent it with a fingernail, pushing hard. But it's better each day. I think I had the mix a little off, I only made about 30ml of resin to do that and I must have been off a cc or 2 using the syringes to measure.
Hopefully it's hard enough to router the edges of the decks and sand tomorrow so I can get that finished and install the curved deck trim. After that it's probably just glassing the decks and bottom and it should be good to go.
Re: Fred In Wisc CC14 Cheap Canoe at 80% Scale
Posted: Mon May 18, 2015 11:17 am
by Fred in Wisc
That epoxy in the seams finally finished curing, so I put a nice 1/2" routered roundover on the edge of the decks and did a little sanding to clean them up. Here they are with an 80 grit finish, I think I will take that to about 150 before glassing and coating, so they look nice and scratch free. Also have a couple small areas to add a little filler to the seam where it's not quite flush to the surface.
Had I planned this better, I would not have put the roundover on top of the rubrail where the decks go. It makes the epoxy joint between the deck and rubrail too wide. LIve and learn, plus probably nobody else is going to notice once it's done.

You can see the epoxy joint is a little wide where I broke the deck strip with the dull router bit, and had to replace it. I doubt anyone will notice that but me. And it sure doesn't bother me enough to tear it out and try to redo it better.
Re: Fred In Wisc CC14 Cheap Canoe at 80% Scale
Posted: Mon May 18, 2015 12:26 pm
by Cracker Larry
Re: Fred In Wisc CC14 Cheap Canoe at 80% Scale
Posted: Mon May 18, 2015 2:20 pm
by terrulian
I've got a bunch of those little glitches, and the list is getting longer.
My wife is kind enough to say they are "birthmarks" and it really is true you'd have to have a masochistic streak to point them out to everyone who would otherwise not notice.
That's what this forum is for!

Re: Fred In Wisc CC14 Cheap Canoe at 80% Scale
Posted: Fri Jul 10, 2015 2:51 pm
by Fred in Wisc
As usual, all the other stuff of life is keeping me from working on this. Part of that being a pretty major interior rebuild on my old 16' aluminum boat. I can't wait to retire, have time to mess around with the stuff I really like doing. Alas, I just turned 45 so it's gonna be a little while yet.
I got the front and rear deck trim on. It was interesting to figure out how to clamp it, and then to minimize the uneven appearance where it joins the deck, I added another lamination to the trim to give it a really nice finished appearance. Also filled some of the seams between the deck and rubrail where I hadn't added quite enough epoxy to bring them out flush.
Re: Fred In Wisc CC14 Cheap Canoe at 80% Scale
Posted: Fri Jul 10, 2015 3:15 pm
by Cracker Larry
That ain't no cheap canoe! Beautiful work Fred
Re: Fred In Wisc CC14 Cheap Canoe at 80% Scale
Posted: Fri Jul 10, 2015 4:11 pm
by Fred in Wisc
Thank you. That means a lot coming from a guy who just built a custom yacht in an 18' package. It's been cheap in materials but certainly not in time. But it's for my daughter, and she's worth it!
Daddy brag pic from the gun club last night. We're finally getting that right handed/left eye dominant thing worked out....

Re: Fred In Wisc CC14 Cheap Canoe at 80% Scale
Posted: Fri Jul 10, 2015 6:03 pm
by terrulian
That is some straight shooting!
Re: Fred In Wisc CC14 Cheap Canoe at 80% Scale
Posted: Fri Jul 10, 2015 10:38 pm
by Cracker Larry
Teach her to shoot left handed now while she's still young. There is no other good way to correct for a cross dominance. Although she seems to be on target just fine, she has to make mental corrections to get there. She can learn to pull the trigger with her left hand easier than to compensate the offset in her mind, and leave her mind free to think about more important stuff. She is certainly on the target as she is though
Re: Fred In Wisc CC14 Cheap Canoe at 80% Scale
Posted: Fri Jul 10, 2015 11:14 pm
by Noles309
My son had the same issue with left eye dominance. It was a piece of cake for him to pick up shooting left handed. He was about the same age. Your canoe is looking awesome

Re: Fred In Wisc CC14 Cheap Canoe at 80% Scale
Posted: Fri Jul 10, 2015 11:28 pm
by Fred in Wisc
That is exactly what we are doing. She was shooting left handed. Felt weird to her at first but once she practiced a bit and saw how accurate she was she was enthusiastic about shooting that way.
Re: Fred In Wisc CC14 Cheap Canoe at 80% Scale
Posted: Wed Jul 15, 2015 9:53 am
by Fred in Wisc
A little more progress last night. Got the bulkheads that separate the flotation foam chambers glassed. Used light stuff, 4 oz, except for one area where the side plywood seam fell almost, but not quite, on the bulkhead. It had a little gap inside where the glue partly ran out of the joint. I injected some epoxy into that with a syringe and put a little piece of 1" wide woven tape on that. Seemed like it could be a weak spot so I reinforced a little. Easy fix now, hard one later. You can see this on the right side of the top pic.
I've been using syringes to mix small batches of epoxy for small areas like this (both of these ends together used approx. 50cc of mixed epoxy). It works really well, and by using smaller syringes you can mix real tiny batches accurately. I have been using 60cc units for small batches and 3cc for tiny batches.
http://www.sciplus.com/p/60CC-THUMB-GRIP-SYRINGE_49257
and
http://www.sciplus.com/p/3ML-LUER-LOCK- ... INGE_49427
On the little ones, I use a utility knife to trim off the lock mechanism and leave just the center tip, that way I can wipe the exterior off to avoid extra drips that could throw off the mix on such a small batch. These also work great for injecting mixed resin into voids (like if a corner fillet pulls away from the putty a little, instead of sanding it all off and doing over, just drill a little hole and fill it in.
Re: Fred In Wisc CC14 Cheap Canoe at 80% Scale
Posted: Wed Jul 15, 2015 11:46 am
by terrulian
I've used syringes before to get in small spots but

I never thought of mixing small batches that way. Brilliant!
Re: Fred In Wisc CC14 Cheap Canoe at 80% Scale
Posted: Mon Jul 27, 2015 12:12 pm
by Fred in Wisc
My wife and kids went up north to visit my Mom for a few days, so I got some boat building done.
Radiused the bottom to side joints with the sander so they would fiberglass better.
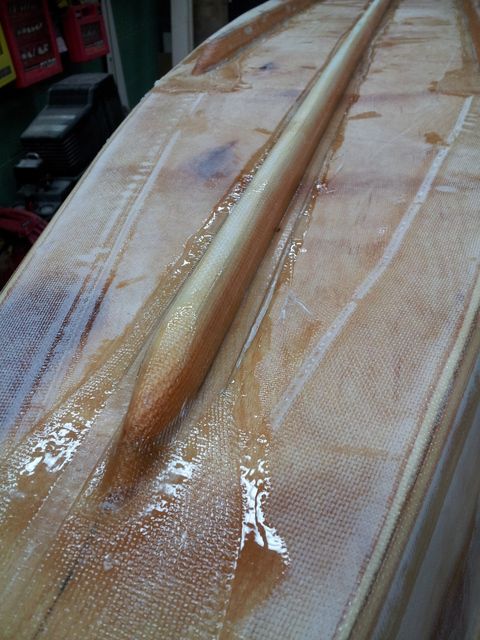
Laid out the glass. Used 4 or 6 oz cloth, in 3 sections across the beam. This was both to save material and to allow me some space to work out wrinkles, I seem to have problems doing that when I have one giant piece of cloth. The seams overlap about3" so it shouldn't reduce the strength.
Wet out the cloth. It sure uses a lot less epoxy than 12oz biax.
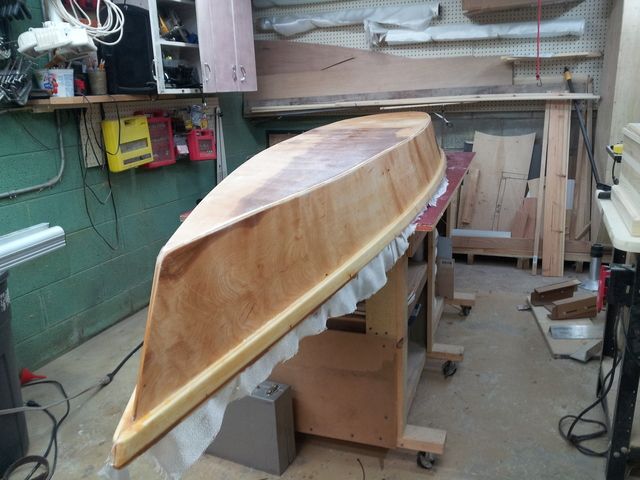
Added 3" tape at the chines / bow/ stern. This is outside the cloth rather than inside because I think it's going to end up being kind of sacrificial and I'd prefer to have that wear out and get repaired while leaving the wide cloth covering intact. It will take a bit more fairing than putting it under the wide cloth. It was all done wet on wet.

After setting up overnight, the epoxy was still a little green. I carried it outdoors and put it in the sun for quicker curing. That extra 20 degrees of ambient temperature and sitting in the sun really speeds things along.
And then back downstairs at the end of the day. Trimmed off most of the excess cloth. I'll have to sand some of it to clean up the edges along the gunwhale trim.
Next up, wrap the gunwhale trim and top decks. Add bottom runners for tracking and to stiffen up the sole a little more. Graphite the bottom. Roughly fair and paint. Add a center thwart. Go paddling.
Re: Fred In Wisc CC14 Cheap Canoe at 80% Scale
Posted: Tue Jul 28, 2015 9:51 am
by Cracker Larry
My wife and kids went up north to visit my Mom for a few days,
What in heck is north of Wisconsin ?
The canoe is looking great! I've been wanting to start building a fishing yak and had about decided on a PY12, but the more I see of this canoe, the better I like it. Decisions, decisions, so many cool boats to build, so little time...
Re: Fred In Wisc CC14 Cheap Canoe at 80% Scale
Posted: Tue Jul 28, 2015 10:15 am
by Fred in Wisc
North of Wisconsin is pretty much just glaciers, polar bears and Canada. If you drive all the way through Wisconsin to the tip of Upper Michigan (seven hours north from me), you get lake effect snow from lake Michigan and Lake Superior- which usually results in over 200" of snow each winter. No freakin' way.......
Actually I live in the far southeastern corner of the state (about an hour north of Chicago) and Mom lives up in the "middle" of the state, about 3 hours away. I like it better up there, but the job market's not very strong.
Thanks for the feedback. A friend of mine just launched a similar kayak made from a CC14 last week. Made it for his son as a birthday present. Mark checks the forum at times but doesn't have a build thread.
He said it's a capable little boat, and easy to paddle, actually tracks better with 2 adults on board (although not real heavy ones)
I like how the slotted inner gunwale looks. And it's a handy place to tie off gear. Might do that myself.
Re: Fred In Wisc CC14 Cheap Canoe at 80% Scale
Posted: Wed Aug 12, 2015 3:37 pm
by Fred in Wisc
Got the exterior sanded down, and the extra cloth removed. It needs a little fairing. I think it's gonna get one go-over on that and then call it good. Our camping trip is on the 28th so I need to get this wrapped up.
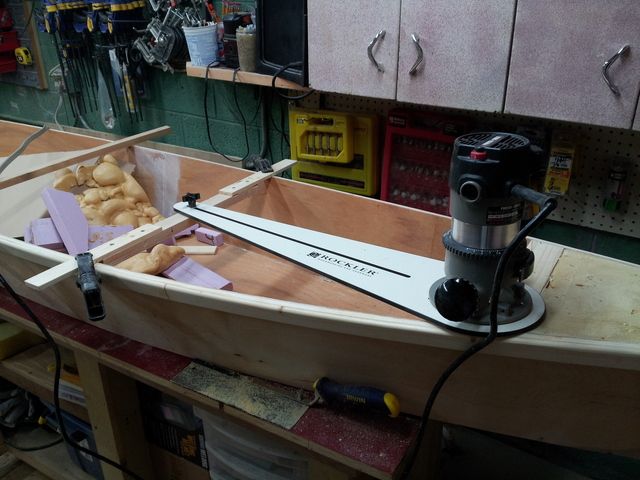
Used a laser to mark a center line for a keel. Then marked reference points on the laser line and connected them to get a center line. I'm planning a full length or near full length one in the center and then a pair of 4' long ones about 6" outboard of that. That should not only aid in tracking, but also protect the bottom outer edges in beaching and parking lots, and should add some stiffness to the bottom. It seems real strong, but it's got some flex since the core is only 2.5mm thick.
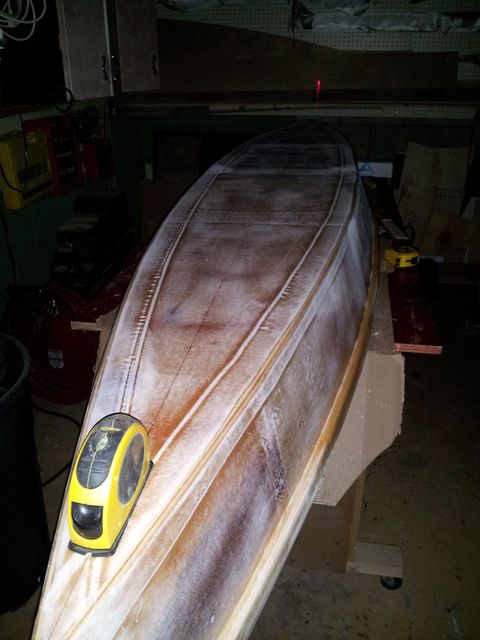
Bottom will be graphite coated, exterior painted, interior, gunwales and decks bright finished.
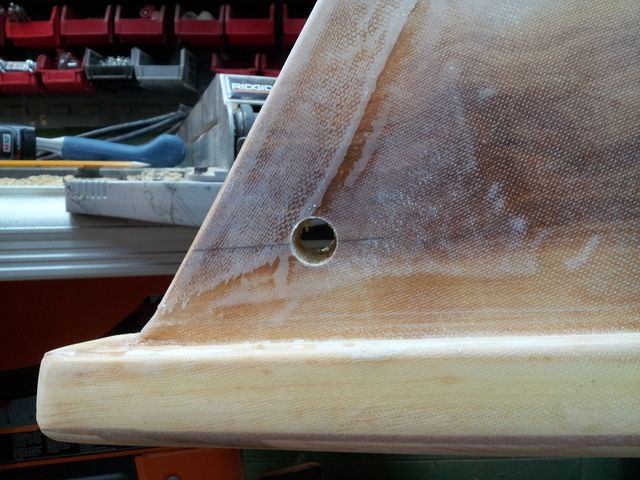
Drilled the bow and stern for some painter lines. Didn't want exposed hardware, and there wasn't an easy way to attach it anyway with the front and rear areas sealed and foamed. Measured twice, predrilled with a small bit, eyeballed up for symmetry, then drilled with a big step drill.
Re: Fred In Wisc CC14 Cheap Canoe at 80% Scale
Posted: Wed Aug 12, 2015 7:54 pm
by Cracker Larry
Re: Fred In Wisc CC14 Cheap Canoe at 80% Scale
Posted: Thu Aug 13, 2015 12:58 pm
by Fred in Wisc
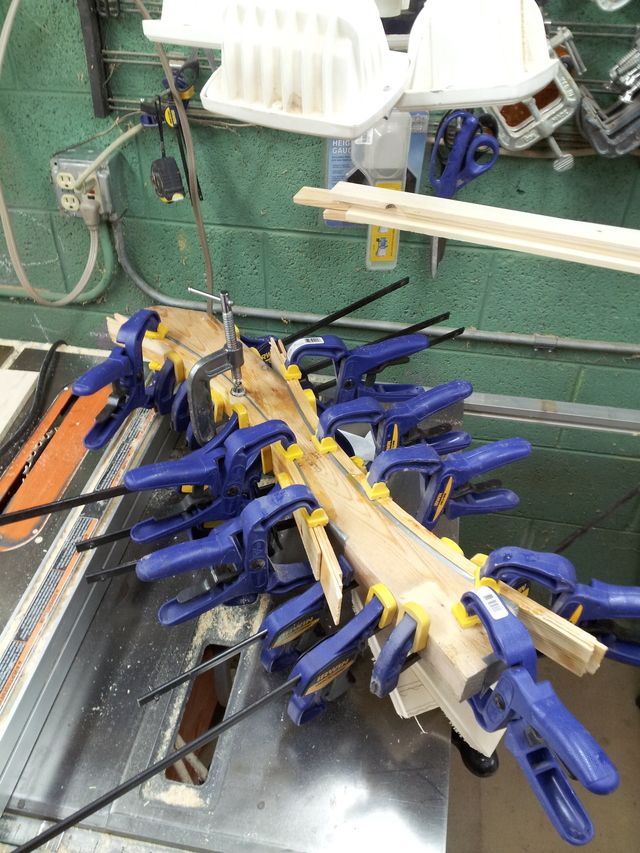
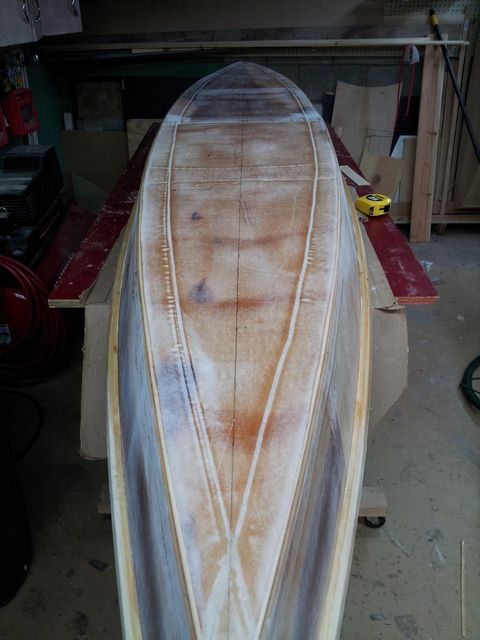
Some triple keel runner action with a creative clamping arrangement. The bottom is supported from beneath at 4 points along the centerline to keep it from deforming from the downward pressure of the clamps.
Drew a line 3/4" to each side of the center line for centering the keel, then a pair of them 5" off to each side for the side runners. Double checked them for parallellness (yeah, that ain't really a word). Marked each runner for front to rear alignment, they are all centered.
The runners are clear cedar 7/8 tall and 3/4 wide, cut with a 20 degree taper on each side to approx. a 5/16 wide tip, then sanded lightly to round them off. Ends were trimmed with a jig on the table saw and then sanded round. The little flats on the ends will be faired into the bottom with a dab of wood flour putty. A denser pine would have probably been a better choice for these, but I had some nice cedar in stock and only a small amount of nice long clear pine, which is going to form the inner rub rails.
Precoated the glue side with neat epoxy, then mixed wood flour into the rest until it was like stiff frosting, spread a layer on the runners and set them in place. Clamped it down lightly. Had some spots where there were little gaps between the hull and runners, filled in what I could without pushing them out of place. Will put a little fillet on the edges when taping, so that should fill in anything I missed. I want those operations to be wet on wet so I don't have to sand in between.
I was careful to scrape off the excess glue that squeezed out so I won't have to sand it off tonight when I glass tape over them. Hopefully I can tape them and lay down the first coat or 2 of bottom graphite wet on wet. No fairing on that, I'll just work as neat as I can and then the rocks in the river will wear off all the high spots eventually.............

Re: Fred In Wisc CC14 Cheap Canoe at 80% Scale
Posted: Fri Aug 14, 2015 10:32 am
by Fred in Wisc
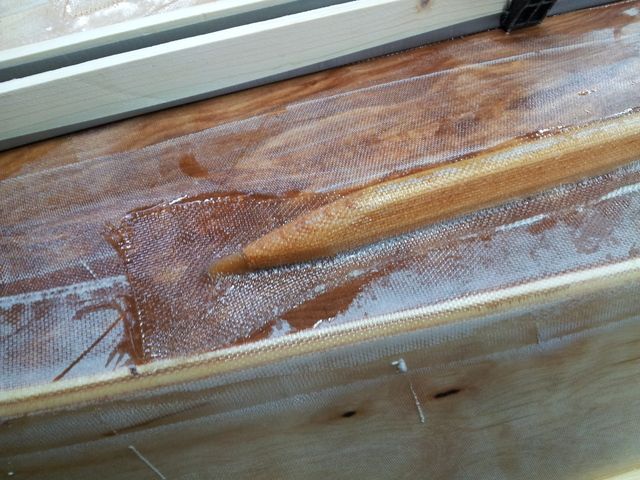
Taped the runners last night. It took a lot longer than I had anticipated. Pretty tired this morning, was up til 2 finishing it up.
Used the scraper to clean up some small bits of glue sticking out from under the runners. The bottom of the boat is tremendously stiffer with the runners glued on. Precoated the runners since cedar seems to suck up a fair amount of epoxy. Added little blobs of wood flour putty to the runner ends since they have a little flat on then that will need to blend in to the bottom.
I had some 6" woven tape left over from another project, so I cut that down the center into 3" tape.
Foolishly, I thought that tape would wet out and drop pretty nicely into that square corner with a little prodding, so I didn't fillet the runners. That was not the case. The tape only overlapped about 3/8" onto the bottom of the boat and with the slipperiness of the epoxy and the springiness of the tape, it kept pulling away and forming an air gap. So I had to keep going back and stick it back down. That worked pretty well as the epoxy started to set up, but it required a fair amount of time.
I clamped the long center one down. Took a couple narrow boards, covered in duct tape, slid them down the sides of the runner to pull it tight, then clamped them every 16" or so, and downward at the ends. I used a similar method on the rub rails and it worked real well. We'll see how this works once I pull the clamps off.
In retrospect, I should have used some little fillets, and I should have used 2 layers of 4oz cloth cut on a bias. With that I could have brushed epoxy on the runners, let it soak in a little, and just stuck the cloth down. Press down, add a little epoxy where needed, and press on the second layer. that would have conformed a lot better and been a bunch faster to do. Either that or I should have vacuum bagged it, but I didn't want to run the pump so late at night (I don't have a vacuum reservoir so I have to run the pump constantly and bleed air in after the bag connection to control the amount of vacuum.) Live and learn.
Also mixed a little microballoon mix for fairing and filled in the worst of the stuff on the sides. I tried to really use a minimum of material, usually I end up putting on too much and then spending way too much time sanding it back off.
Checked on it this morning, the 2 side runners look pretty good, just a few small bubbles here and there. Especially right at the tip of the runner, it seems to have lifted just a touch there. Looks like I left a flat at the top, should have rounded it off completely. That tape was stiffer than I remember. Left the center runner clamped, I don't want to pull off the tape since it's not completely cured yet.
In other news, I had to let a boat go yesterday. I had build a Swift Canoe about 9-10 years ago. It's scaled down, 12' long. Been a great little boat for rowing and fishing, but with 2 new boats this summer my wife is reaching the BSAT (Boat Saturation Anger Threshold). It's made from exterior plywood, all cloth and epoxy encapsulated, and has been stored outside. Still in pretty remarkable shape structurally - needs paint badly and a bunch of nicks and scratches fixed but solid as a rock. Anyway, I have a LOT of hours tied up in it, so it didn't feel right selling it. I gave it to a good friend. He's the one that just build the CC14 for his son (See pics a page or 2 ago on this thread- the boy sure gets a lot of compliments and inquiries on where he got it out on the river). He also spends a chunk of time reloading all my ammo (thanks Mark!). He's going to use it as is for the now, but is planning to cut it lengthwise and widen it a foot or so and refinish it next year. That should make a dandy duck hunting/ fishing rig, and I think it's a real cool project.
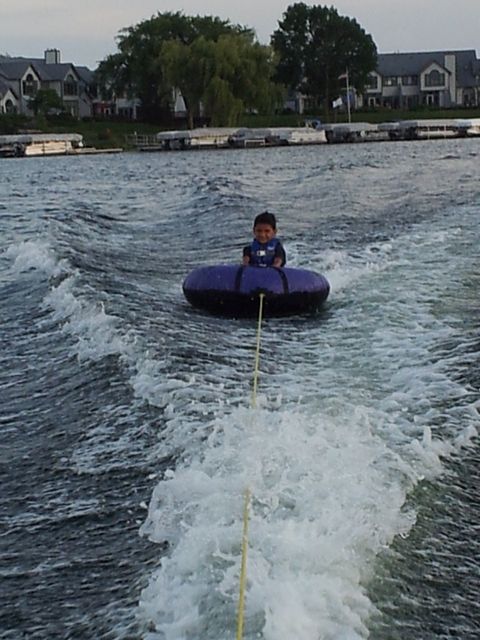
Took the family and a couple of neighbor kids tubing in my old 16' aluminum V that I built a new interior in earlier this summer. Worked out great and they had a blast. Great fun, but kept me from starting the boat work until late. totally worth it.
Re: Fred In Wisc CC14 Cheap Canoe at 80% Scale
Posted: Fri Aug 14, 2015 2:37 pm
by Fred in Wisc
Stopped home at lunch and pulled the battens off the center runner. Turned out pretty well, just a few small areas that will need epoxy injected with a syringe (long thin bubbles along the flat spot on the tip of the runner). Duct tape is an excellent release agent.
Re: Fred In Wisc CC14 Cheap Canoe at 80% Scale
Posted: Fri Aug 14, 2015 3:05 pm
by terrulian
Great pictures. Admirably precise work.
Just to be clear, you are using duct tape and not packing tape? I would not have thought duct tape would work so well.
Re: Fred In Wisc CC14 Cheap Canoe at 80% Scale
Posted: Fri Aug 14, 2015 4:25 pm
by Fred in Wisc
Yep, duct tape. This was "duck" brand. It's got a smooth shiny finish on the back. Better quality duct tape with the fabric back probably would stick like crazy. Go for the cheap stuff in this case.
Re: Fred In Wisc CC14 Cheap Canoe at 80% Scale
Posted: Fri Aug 14, 2015 4:49 pm
by jacquesmm
Duct tape with brand name Duck tape: that solves all the spelling mistakes, duck or duct, it's always correct.
Re: Fred In Wisc CC14 Cheap Canoe at 80% Scale
Posted: Sun Aug 16, 2015 12:52 am
by Fred in Wisc
Drilled little holes in the air bubbles and injected epoxy slightly thickened with silica. Put another coat of epoxy on the runners to fill in the weave a bit. Let that set up for a couple hours.
Then rolled on a coat of graphite. Mixed it stiff- 3oz epoxy and about 1.5 oz graphite plus a little silica. The silica seems to keep stuff from running and dripping. Looks nice. No roller bits in it like my Hickman Sled had.
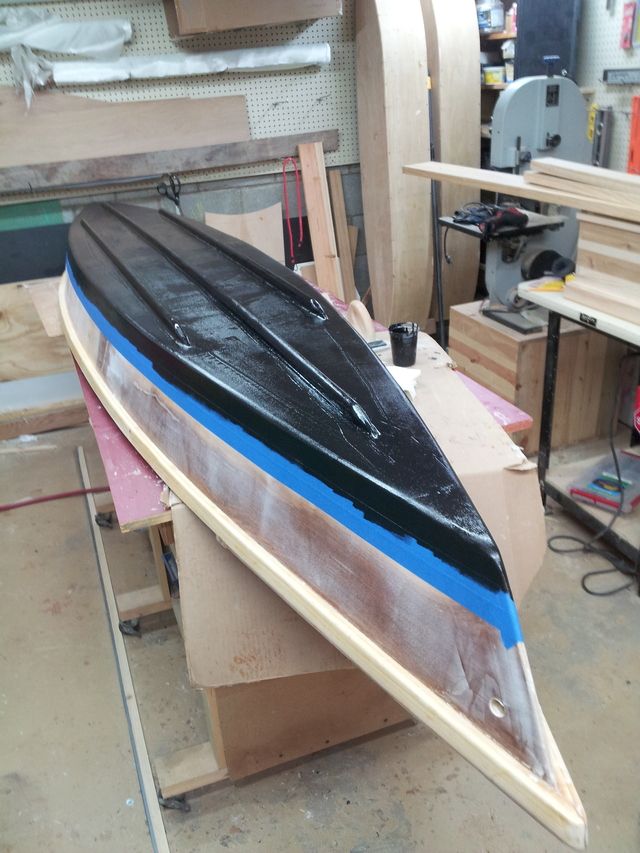
These rollers work great, no shedding and gives good coverage. Leaves the finish a little orange peel like, but the epoxy flows out to pretty smooth after a few minutes if you don't roll it too thin. Much better than the ones I used last time that left little bits in the finish.

Re: Fred In Wisc CC14 Cheap Canoe at 80% Scale
Posted: Tue Aug 18, 2015 10:02 am
by Fred in Wisc
Feels like I'm coming into the home stretch with this build now. Hoping to launch it at a family gathering on Saturday (without paint- that will happen next week before our camping trip).
Rolled on a second coat of graphite a few days ago. Pulled the tape and had a pretty nice sharp line. Forgot to take pics of that.
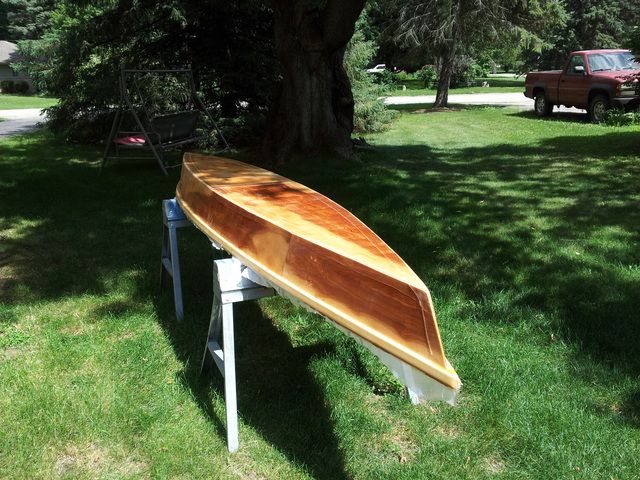
Rounded over the inner edges of the rubrails with a 1/4" bit. Did the curved trims at the ends of the cockpit with a 1/4" router on the inner sides and a plane and sandpaper on the outer sides. Sanded the strip plank decks smooth and rounded the edges with sandpaper (I had introduced some waves into them sanding off the previous glassing edges). All hand sanding, at this stage I didn't want to overdo it with the electric sander.
Then precut 4oz (I think, maybe it's 6) fabric for the rubrails and decks. Wet it out, the whole thing only took 7oz of epoxy. With cloth that light I found it worked best to brush the resin on to the area I was going to apply cloth, then lay the cloth into that thin layer. In most places it was enough to saturate the cloth, I went through with a small brush to saturate the spots that were still a little dry and to move the excess around so it wasn't too much in any one area. On the decks I used a scraper rather than a brush, it gives a more consistent finish and removes a bit more resin. Couldn't effectively scrape the rubrails, with the narrow strip of cloth, stuff wanted to move all over.
That epoxy coating really makes the grain in the strip planked decks wood pop. I'm very pleased with it.
Then this morning I trimmed off the excess cloth. The epoxy was still a little soft so it trimmed nicely with a utility knife blade. Tonight I'll have to sand the edges and corners, and fill a few small bubbles at the corners of the decks. Then probably a second coat of epoxy to fill the weave and get it ready for varnishing.
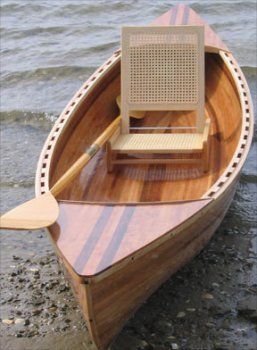
Then a slotted inwale to give a place to tie down gear, seatback, and footrests. I'm planning to space it down a little from the top, just to keep the sheer pretty. I'm thinking something like this, but a little less blocky. I think this one looks a little bit too thick for my boat. (Photo from Sandy Point Boatworks)
Re: Fred In Wisc CC14 Cheap Canoe at 80% Scale
Posted: Tue Aug 18, 2015 10:28 am
by Cracker Larry
Beautiful
Re: Fred In Wisc CC14 Cheap Canoe at 80% Scale
Posted: Tue Aug 18, 2015 11:27 am
by terrulian
I was thinking about blocking the inwales as you are going to do but decided that since I was cutting holes at the top of the middle frame for lines, the thickness of it would intrude on the holes. I can't believe I'm so dumb
that when I was picturing this I was completely
not considering something I knew full well, that I could attach lines in between the blocks. Funny how you get going in one direction and then fail to consider the alternatives. My situation is just slightly different because I needed to create some firmness in the gunnel for the oarlocks, and also because I had to limit the beam so that I could (theoretically and yet to be proven) get the boat into my van; so I couldn't have external wales. In regard to the inwales, you say,
I'm planning to space it down a little from the top, just to keep the sheer pretty.
Very clever and something that would not have occurred to me.
This continues to be beautiful work.
Re: Fred In Wisc CC14 Cheap Canoe at 80% Scale
Posted: Tue Aug 18, 2015 1:29 pm
by Fred in Wisc
Thanks for the kind words gentlemen. It ain't quite as pretty close up, but not many folks are going to look at it that close.
Re: Fred In Wisc CC14 Cheap Canoe at 80% Scale
Posted: Wed Aug 19, 2015 11:13 am
by Fred in Wisc
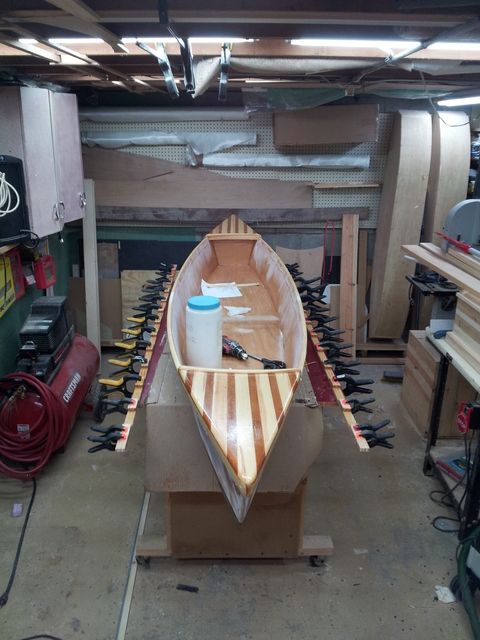
Didn't have a lot of time to work last night, but got the tubing for the painter line tie points installed.
I had the holes for installation already drilled in the bow and stern, but had to find a way to seal them since they are drilled through thin plywood and flotation foam, and with the lines installed they'll be subject to stress and abrasion.
Started with 3/4" holes drilled though both sides.
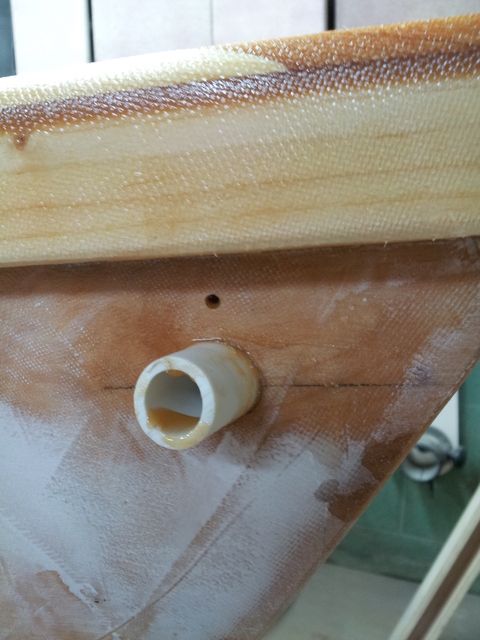
Decided to use 1/2" schedule 40 PVC pipe as the tube. Opened up the holes a bit with a grinding bit in a drill, and a round file. Made it so the pipe slides thorough both sides of the hole, but with some resistance, it fit up pretty snugly. Then took a hook tool and dug out some foam- about 3/8 deep and 1/4 to 3/8 thick around the sides next to the plywood plus a couple of channels side to side. Drilled a small hole above the big hole (a 3cc syringe tip fits tightly in the small hole) and dug out the foam between that and the big hole. Sanded the outside of the PVC pipe so the epoxy will stick to it better.
Then I mixed up some thick wood flour putty and some thin wood flour putty. Spread the thick putty into the grooves I had created, and a thin layer on all surfaces inside the hole. Inserted the pipe, trying to scrape out the least amount of putty. Twisted the pipe around a bit to get good glue coverage. Then I took a small 3cc syringe and injected thin wood flour putty into the small hole until it started to leak out both sides of the pipe/boat junction. Wiped the excess off, installed the other end, then went back and injected a little more in both to make sure the pipe was fully bedded in. I had been a little nervous about that operation but it worked out really slick.
Then filled a few bubbles with the thin putty. These formed at the ends of the decks by the raised trim. The corners lifted just a touch when the cloth wrapped around.
Sorry no pics of each step, it was going so well I didn't want to interrupt the process by stopping for pictures.
Next up- trim those pipes off with the Fein, sand smooth, and radius the edges.
Re: Fred In Wisc CC14 Cheap Canoe at 80% Scale
Posted: Wed Aug 19, 2015 3:02 pm
by terrulian
There might have been a sloppier way to do this, and I'm pretty sure I would have thought of it.
Re: Fred In Wisc CC14 Cheap Canoe at 80% Scale
Posted: Thu Aug 20, 2015 10:58 am
by Fred in Wisc
Short work time but good progress last night.
Trimmed up the painter line tubes. First cut them off
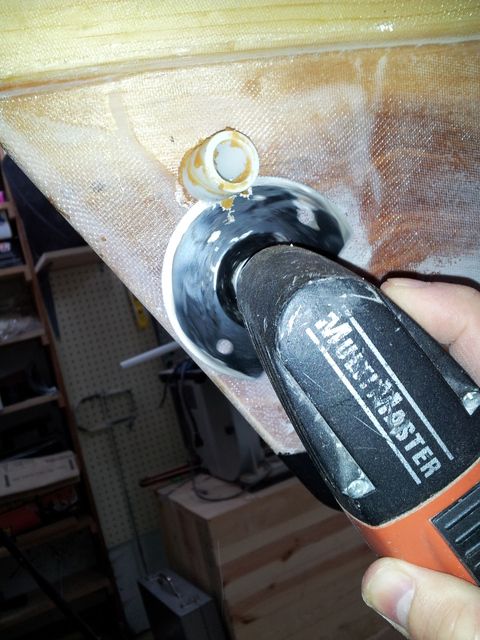

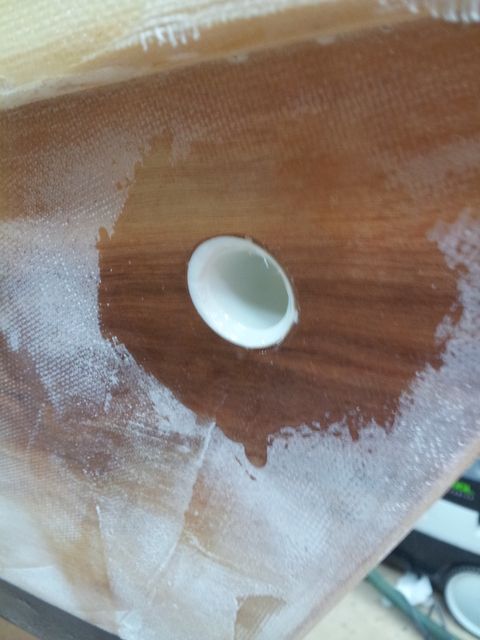
Then sanded flat
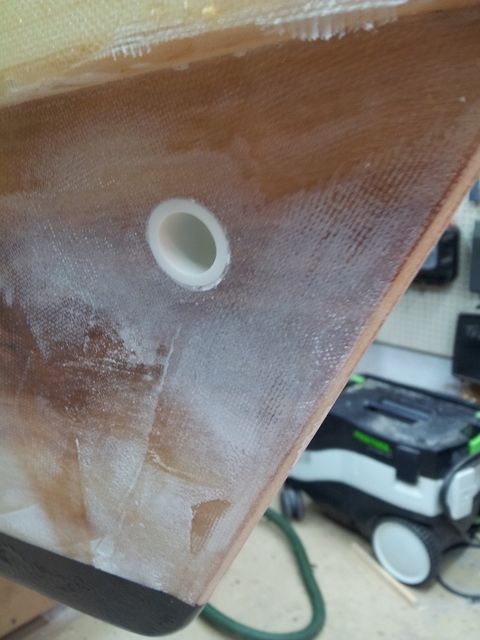
Rounded the corners with a router bit chucked in the drill (too close to the gunwale to fit the router or even the trim router), then with a hand powered countersink. Coated with epoxy to seal. This will get some fine sanding later when the primer goes on the boat sides.
Then made the slotted inwales. I had some really nice clear pine about 1 1/8 thick and 8' long left from when they replaced the windows on my house so it got repurposed into the boat here.
Precoated the long piece and the sides of the blocks that glue to it, plus the ends of the blocks. Then glued it up with some wood flour putty (mixed stiff, the extra epoxy from precoating dilutes it when assembled), clamped all the blocks together, and then went back over and put a thicker coat of epoxy on the back side of the whole thing, since that will be really difficult to get at once it's glued into the boat. The blocks are just under 3" long and the spaces between are just over 4". Longer blocks or shorter spaces made the inwale look too bulky and solid. I hope this looks good when it's installed (it looks good in my imagination right now, but that doesn't always translate into how it will look in reality).
Close up of spacing
Also had a little mixed epoxy left so I put a layer on the decks to fill the weave in

Re: Fred In Wisc CC14 Cheap Canoe at 80% Scale
Posted: Thu Aug 20, 2015 5:25 pm
by wegcagle
Beautiful canoe
Will
Re: Fred In Wisc CC14 Cheap Canoe at 80% Scale
Posted: Fri Aug 21, 2015 10:11 am
by Fred in Wisc
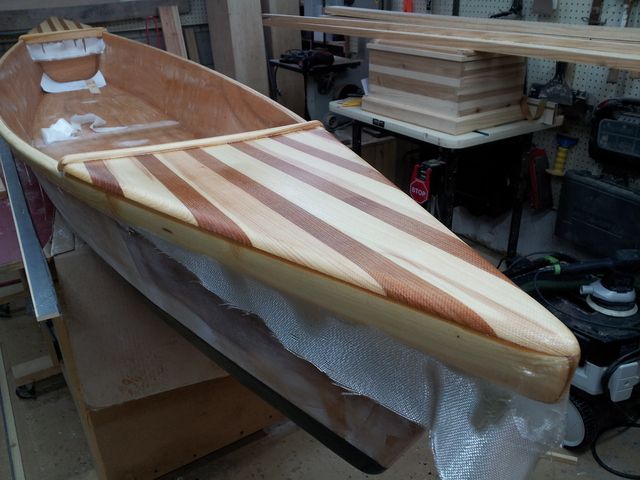
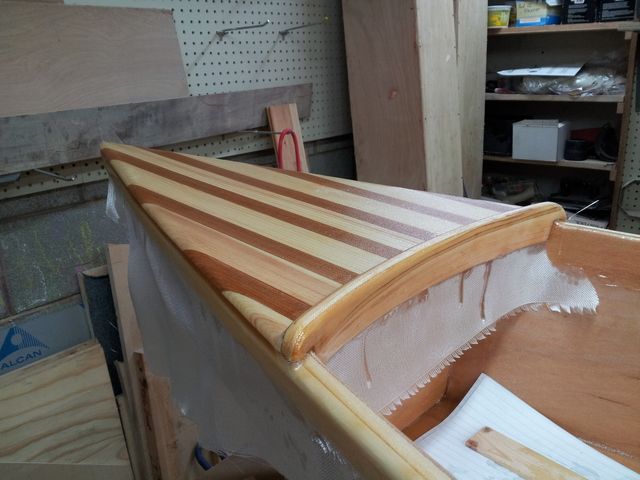
Got the inwales installed last night. Ended up having almost 4 hours into it, more than I expected. Probably a third of that was fooling with notching the ends to find a height where I liked the look of them. Trimmed them in a couple steps to test fit, that takes time.
Started by prying them off the build table. Dripped a little epoxy down the sides when I glued them up, so they were glued to the table a little. Fortunately the laminate on the table is pretty slick and epoxy doesn't bond to it real well.
Sanded the excess glue off both the top and bottom, plus any drips that got on the back so I had a flat bonding surface. Used a 1/8" roundover bit in my laminate trimmer to round all the corners that are exposed, both on the inboard side and in the slots. Then hand sanded that to blend a few places where my bit was set a tiny bit low and left a line.
Also ran the sander inside the boat a bit, to make sure there were no high spots where the inwale gets glued, and because sanding that area with the inwale in place will be a whole lot more work than doing it right now while it's easily accessible.
Notched the ends so they fit under the decks and bring the level of the inwale to about 3/8" below the sheer. Doing that so when there are lines tied into the slots, they shouldn't show above the sheer. Notching those was interesting, there are several angles involved. I temporarily clamped them in place to get the end of deck angle traced onto the inwale, then angled the top to fit flat against the bottom of the deck. At first I did those real precisely with a Multimaster and wood chisel, but after doing a few and then redoing to bring the inwale up a bit higher, I ended up using a hand saw. Not quite so precise, but way faster. And the part that isn't quite perfect is mostly under the deck and is filled with putty.
Had to pull them in and out of the boat a ton of times for test fitting, which was kind of a pain. The decks on each end are about 3" wide and the inwales go under them, so I had to work the piece to opposite corners of the boat and then put a pretty radical bend into it to get it in and out past the deck on one end.
Key learning here is that it would have been better to install these before the decks, and then I could have extended them all the way to the bow and stern. I'll do that if I build another of these. Pretty likely that I will, it's already partly cut out and waiting in the shop (you can see the sole cutouts on the back wall of my shop up on the pegboard in the pics below), but a full size one for me this time (well, almost. The wood I had left was a couple inches short so I moved the stations a touch closer together to make it fit- total reduction in length about 4" or so if I remember correctly). Eventually I'll build something right off the plans, I expect it will assemble quicker and work better that way too.
Once they fit up well, I epoxy coated the back of the inwale where it would be glued, let that soak in a bit, and then spread some stiff wood flour putty on. Wrestled it into position, trying to get as little glue as possible in spots it doesn't belong, and then clamped them in, making small height adjustments along the way. It took a fair amount of force to clamp this in place with all the mating surfaces flat, had to use a bunch of bar clamps in addition to the regular spring clamps to get it into place.
After that it was just a matter of filling any small gaps with extra putty, scraping the squeezed out glue off before it sets (so much easier that way), and then putting a coat of epoxy on top of the inwales to seal them. I put on a pretty thick coat. I'll do the same on the inboard faces and bottoms once I can take the clamps off. Once that started to set up a little I went back and scraped off any drips and runs that I could see.
Sorry no pics of the middle of the process, Didn't want to keep pulling gloves off to take pics.
I'm excited to see how much these stiffen up the structure. It was pretty good before but there was a bit of flex in the sides (real thin 2.5mm plywood and small gunwales), I bet this really makes the structure more rigid. The bottom is very rigid now with the runners added.
Re: Fred In Wisc CC14 Cheap Canoe at 80% Scale
Posted: Fri Aug 21, 2015 10:22 am
by Cracker Larry
Need more clamps
I've always been a fan of slotted rub rails. Very handy for line and tool storage, plus they look good. This is one I built 30 or 35 years ago, before epoxy was invented. My boy is now almost 28 and I built it long before he was born.

He and I are working together building some seafood catering boats now, and putting a slotted rail on those also to hold oyster knives, tongs or other tools.
Re: Fred In Wisc CC14 Cheap Canoe at 80% Scale
Posted: Fri Aug 21, 2015 10:45 am
by Fred in Wisc
Ya can't ever have too many clamps. Same goes for fishing lures, food, and ammo. When they're on sale I buy extra of all those.
I like the big slotted rubrails on that boat. Lots of places to store stuff without it getting underfoot. Is that Dori with the big 90's hair?
Re: Fred In Wisc CC14 Cheap Canoe at 80% Scale
Posted: Fri Aug 21, 2015 10:55 am
by Cracker Larry
I'm with ya on the food and ammo, been having a hard time keeping stocked up on ammo since Mrs. Cracker and little Mrs. Cracker have started going through 500 rounds a weekend though. They kill a sheet of plywood almost every Sunday


Is that Dori with the big 90's hair?
That's her. They quit fishing to fly a kite. The picture was about 1992.
Re: Fred In Wisc CC14 Cheap Canoe at 80% Scale
Posted: Fri Aug 21, 2015 11:01 am
by terrulian
Beautiful work, Fred. You and Larry are making me regret I didn't do this.
I wasn't certain it would produce the stiffness in the gunwale that would be achieved with a solid piece since there was no exterior wood on my gunwale except the 1/4" side of the hull, and that assumed weakness is what sealed the deal. I'll be interested in seeing your judgment about the rigidity, but you have the exterior wale to strengthen it, which I wouldn't have had. 1/4" just seemed too flimsy for this area even with separated backing blocks.
One of the advantages of your design is that when the boat is inverted, water can drain from the sides of the hull instead of being captured by the underside of the inwale, which is what will happen with me. I guess I'm just a little worried about storing the boat like that but on the other hand, maybe I'll wipe down the boat before turning it over. For the first week or two.

Re: Fred In Wisc CC14 Cheap Canoe at 80% Scale
Posted: Fri Aug 21, 2015 11:19 am
by Fred in Wisc
Larry, I'm jealous that you can shoot like that right at home. I sure miss living in the country.
Terrulian- I'm guessing it will be nearly as stiff as a solid piece- the middle section of a beam doesn't matter too much, most of the load is carried in the outer surface, and stiffness is a function of thickness (I think to the 3rd power even), so a thick rail even with a partially hollow center, should be pretty strong and really stiff. That's the theory at least. I'll see how it plays out tonight.
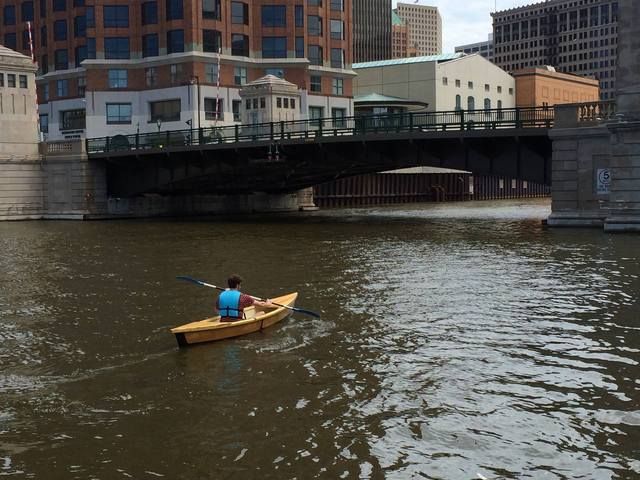
Splashed!
Posted: Mon Aug 24, 2015 11:55 am
by Fred in Wisc
Was invited to a relative's lake house on Saturday for a party, thought it would be a good time to get the little boat wet. It's not quite done, needs paint, seat, and finish sealing the slotted rail. But done enough to take for a little paddle around.
Loaded boat on the minivan roof rack, no problem.
50 miles on the highway, no problem.
Carry down 4-5 flights of steps (the shoreline is really steep), no problem.

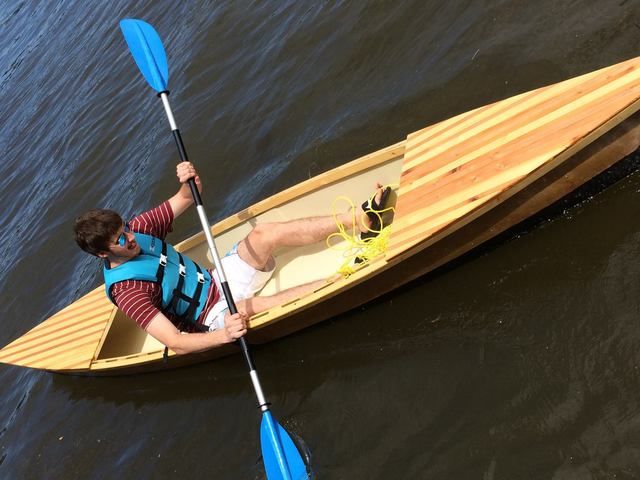
Drop it off the dock into the lake, no problem. Figured I should take a quick test paddle before putting my little girl in there. It floats real high and pretty, it's super light weight.
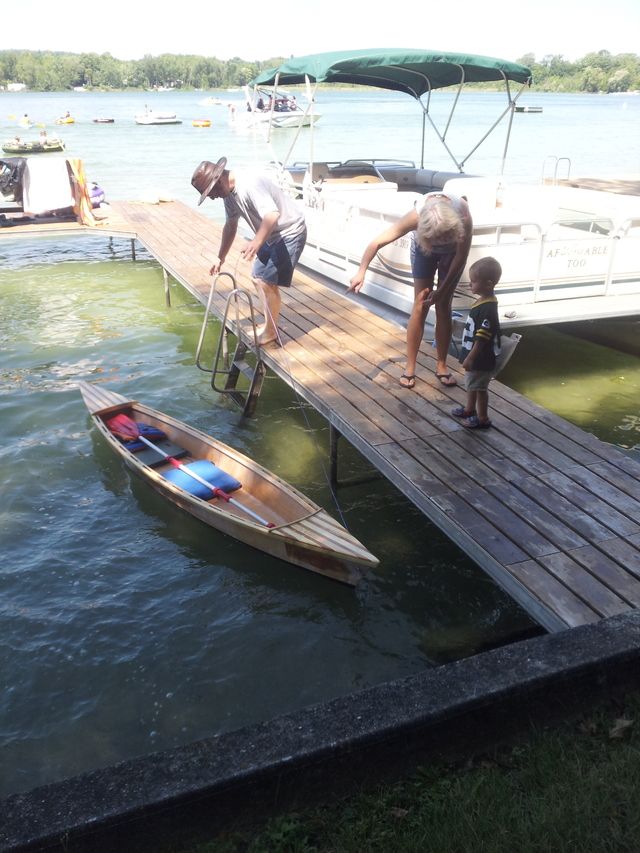
Climbing on board, figured I had better be cautious, it's designed for a max weight of about 120 pounds and me with a little gear is 195. Ain't gonna have much freeboard. That's a concern, but probably not a problem.
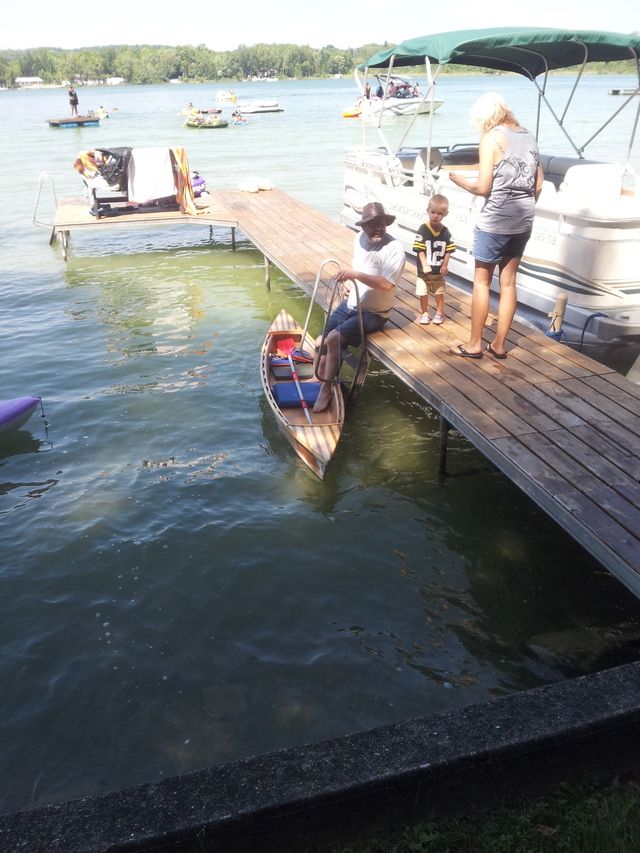
Put my weight in the boat, that left little freeboard and it feels real tender, it's narrow and my center of gravity is a little high. Sitting on the boat cushion raises it another 2". Kind of a problem. If this were a flight rather than a paddle, I'd stop and evaluate, maybe scrub the mission for the moment. Or at least take my wallet and stuff out of my pockets. But it's not flying, it's just boating in waist deep water so we forge ahead.
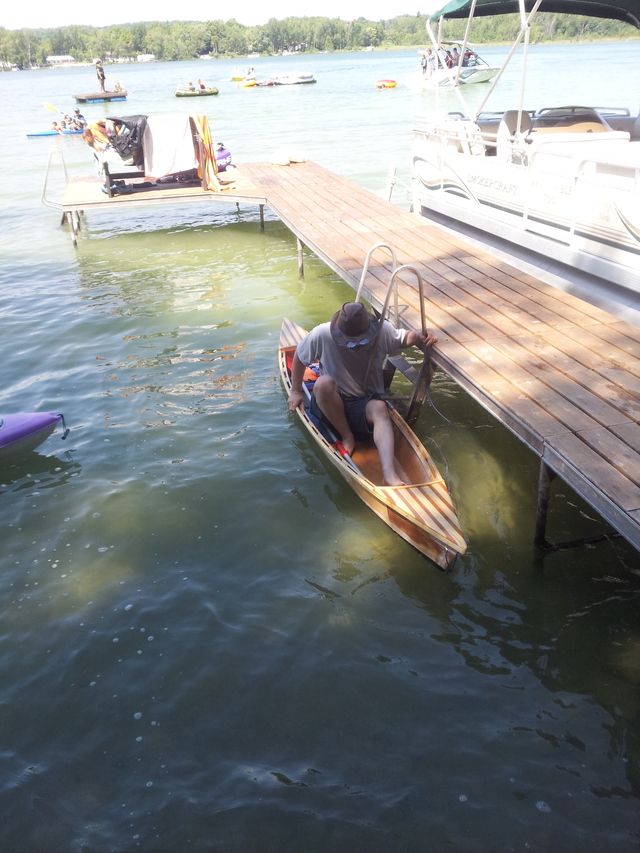
Got settle in and started to push away from the dock. Leaned a little and then things went downhill fast. Houston, we have a problem......
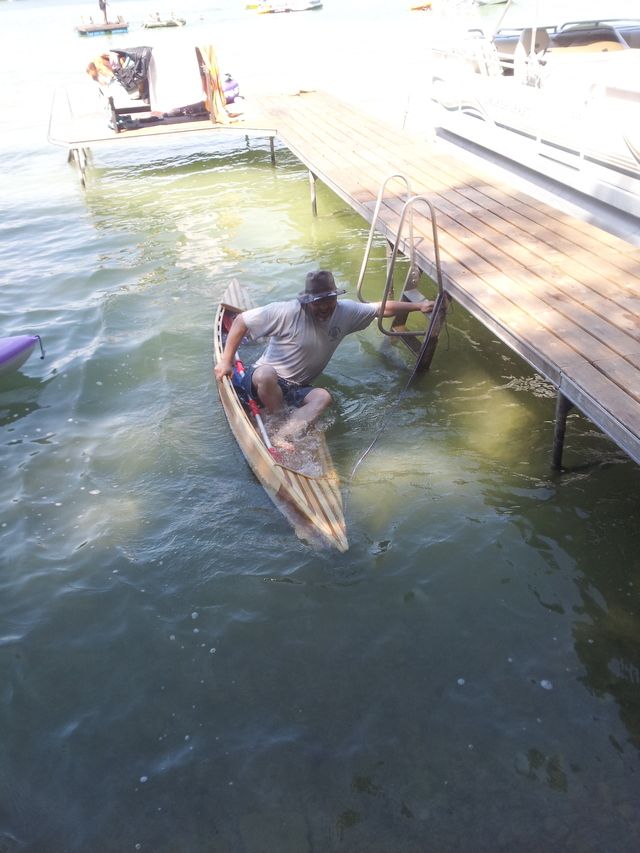
Well, nothing really hurt but my ego. Performed an important safety test. The foam in both ends will indeed float the boat when completely swamped. And the slotted rubrail really makes draining all the water out easy.
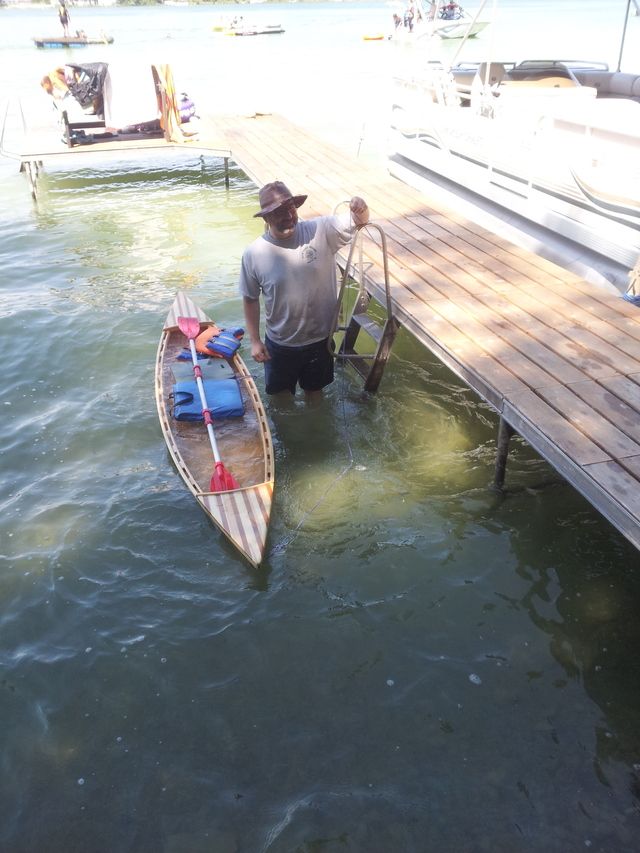
Thought y'all might enjoy seeing that not every splash is problem free and triumphant.
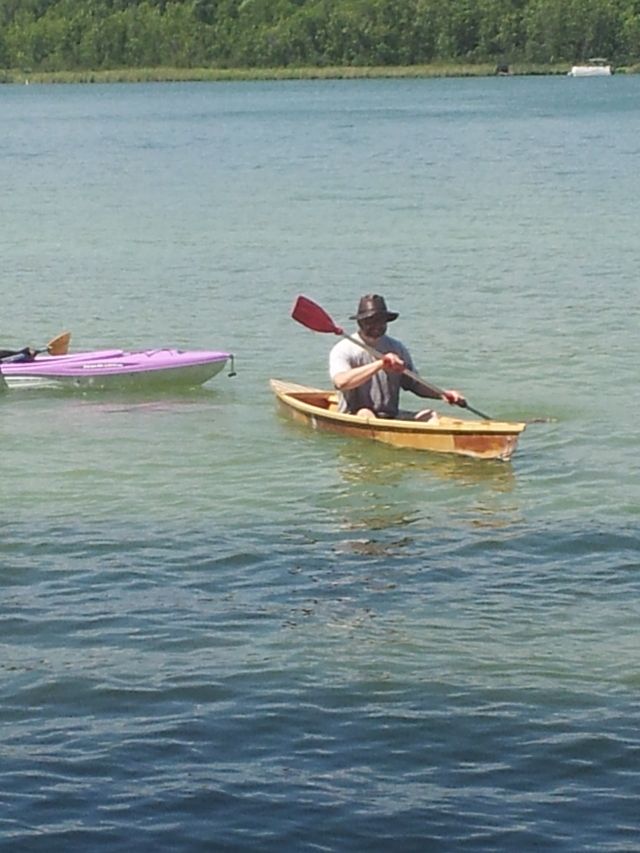
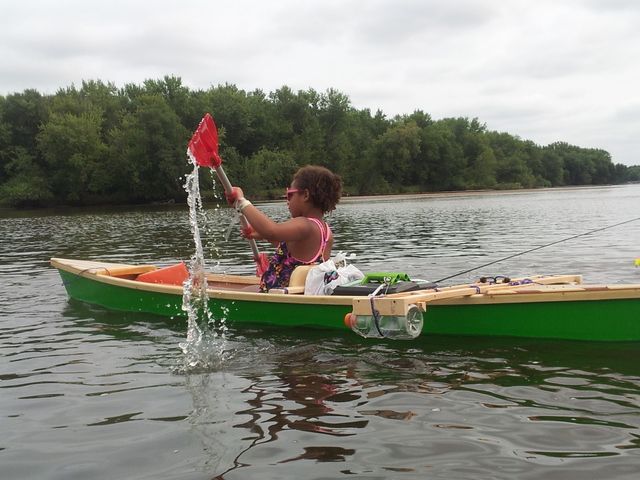
After that, I got in a whole lot more carefully and cruised it around a bit. I'm definitely too heavy and have to really be careful, a little lean or a small wave and water comes right over the side. On the other hand, it's super fast. Way faster than the other plastic kayaks we had out in the water. tracks very straight but takes a little distance to turn with the triple keels (and my inability to lean it over any without going swimming).
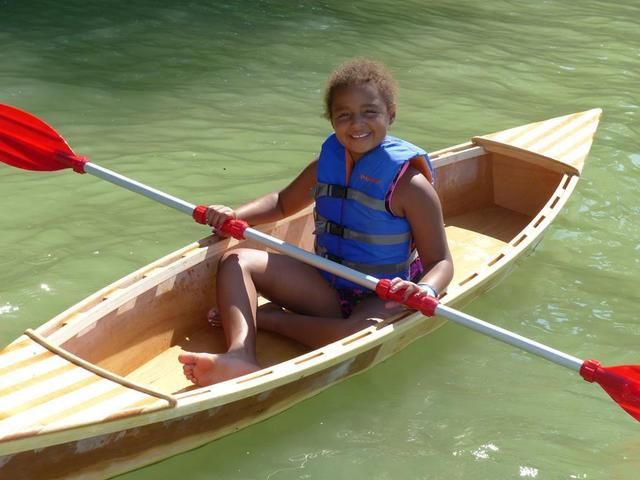
Abby was a little shy about trying it out after watching Daddy get plopped in the drink, but it works great for her. She paddled around just fine one she got used to it being a bit less stable than the wide plastic boats.
Re: Fred In Wisc CC14 Cheap Canoe at 80% Scale
Posted: Mon Aug 24, 2015 12:02 pm
by jacquesmm
It's less stable than a wide plastic boat but it is also 20% smaller than designed. It will be fine for a child or a light teenager and if I remember well, that was the idea.
The smile of that child proves that it is the ideal boat for them!
Re: Fred In Wisc CC14 Cheap Canoe at 80% Scale
Posted: Mon Aug 24, 2015 12:07 pm
by Fred in Wisc
Yep, works great for her, and that was indeed the goal. But I'm a big fat Midwestern American. Not a good fit for me. Not at all a fault of the design, I'm just plain too big. If I had better balance and was a little smaller, it would be great fun, it's a LOT faster than the plastic boats. And it sure looks nicer.
I'll build a regular sized one for me later on.
Re: Fred In Wisc CC14 Cheap Canoe at 80% Scale
Posted: Mon Aug 24, 2015 12:15 pm
by Fred in Wisc
I put the boat downstairs when we got home, with the dehumidifier and a fan....... It was nice and dry by Sunday afternoon.
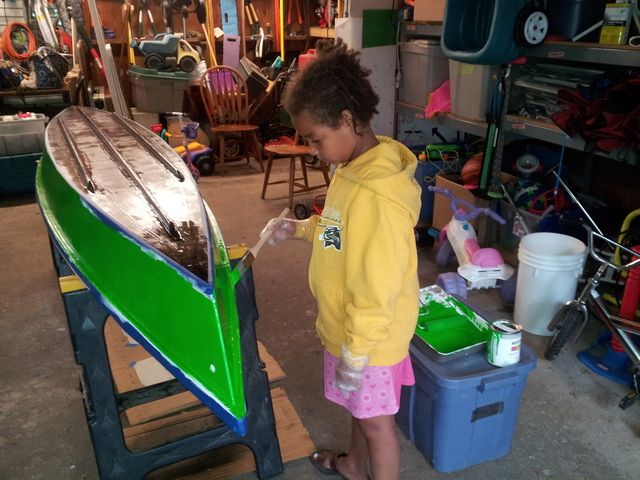
Sunday Abby asked if she could start painting. Flipped it over, masked the rubrail and the graphite bottom. Showed my girl how to do a "roll and tip" paint job, and then mostly got out of the way. I was in charge of dispensing paint, handing tools, and holding the boat down so it didn't move if she was pressing hard with the roller.
Once it's dry, we'll sand lightly, then go to the real paint (with a better tipping brush, not just a chip brush).
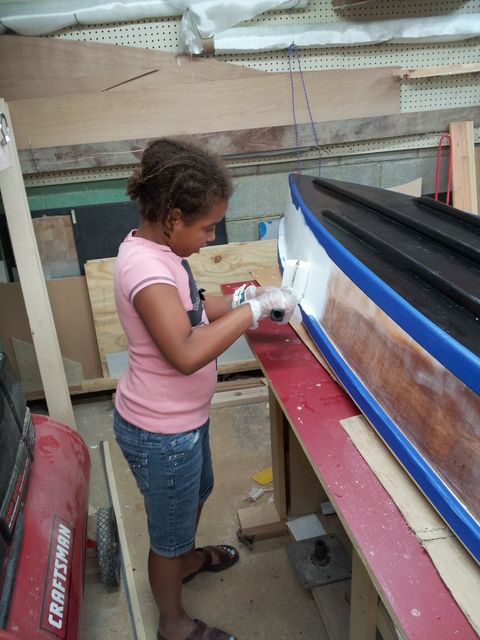
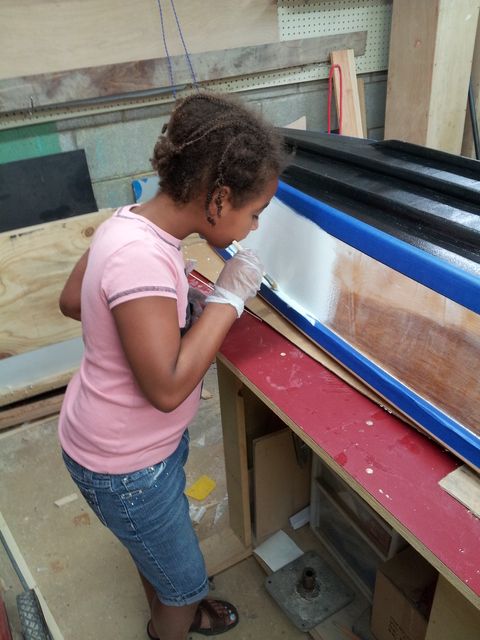
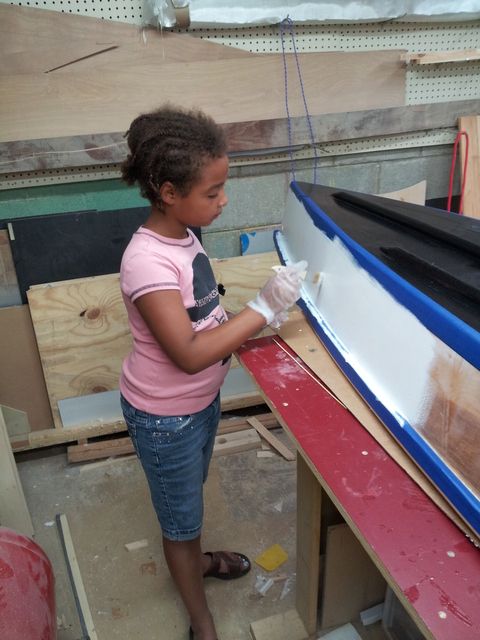
The primer meets with Abby's approval.

Re: Fred In Wisc CC14 Cheap Canoe at 80% Scale
Posted: Mon Aug 24, 2015 2:49 pm
by terrulian
Great shots, great report all around. Congrats on getting her (the boat) wet and keeping the new skipper dry.
Re: Fred In Wisc CC14 Cheap Canoe at 80% Scale
Posted: Tue Aug 25, 2015 10:08 am
by Fred in Wisc
Oh , I forgot, you had asked about how strong the slotted rubrail is. It feels extremely strong and rigid. I can support my weight on it no problem. And the sides are only 2.5mm plywood.
I REALLY like how water drains right through it. That and the light weight make it super easy to drain the boat by passing it over another boat out on the water. We practiced that a few times just to make sure we could do it if we had to.
Re: Fred In Wisc CC14 Cheap Canoe at 80% Scale
Posted: Tue Aug 25, 2015 9:22 pm
by Cracker Larry
Re: Fred In Wisc CC14 Cheap Canoe at 80% Scale
Posted: Wed Aug 26, 2015 10:08 am
by Fred in Wisc
I really like that pic too, wish I could take credit for it. I borrowed it off my 15 year old niece's facebook page. Abby is sure excited to have her own boat, though.
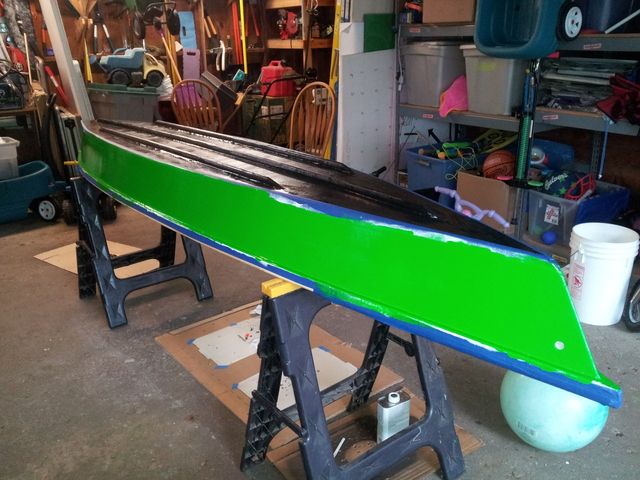
First coat of paint after the primer, yesterday evening:
Rolled
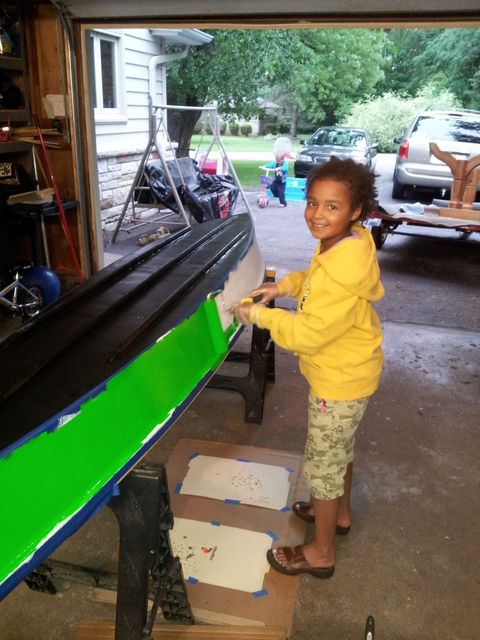
and tipped. She did a nice job on this considering that she never did it before, and she just turned 9 years old.
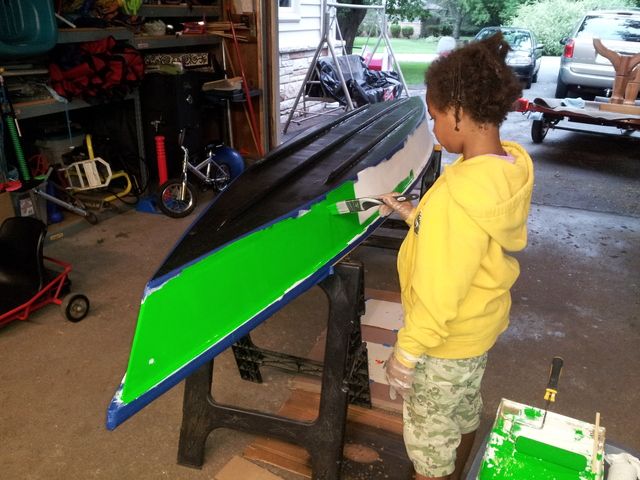
The color wasn't real consistent, there were lighter spots where the white primer showed through a bit. But it was fairly smooth and shiny.
So she is putting on a second coat this morning. I got her the equipment and got her started this morning before heading to work, but this coat she's on her own. We'll see how it turned out when I get home this evening.
Re: Fred In Wisc CC14 Cheap Canoe at 80% Scale
Posted: Wed Aug 26, 2015 1:24 pm
by ks8
Great project! Good fun!
Re: Fred In Wisc CC14 Cheap Canoe at 80% Scale
Posted: Thu Aug 27, 2015 10:57 am
by Fred in Wisc
The paint turned out pretty good. Good enough that the little captain is happy, so we'll call it done. The bright finished parts get a fine grit sanding and a couple coats of spar varnish, but later on. Our camping trip is this weekend, no time for varnish to dry.
Pulled the tape and it looks nice. A little bleed under the tape under the rails but that doesn't show when it's being used so we aren't worried about it.
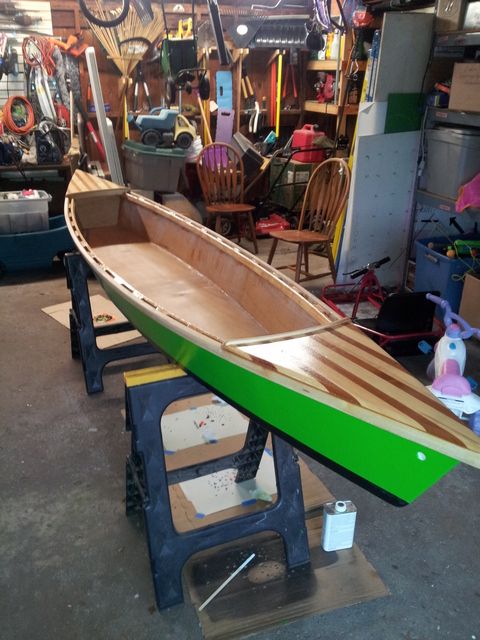
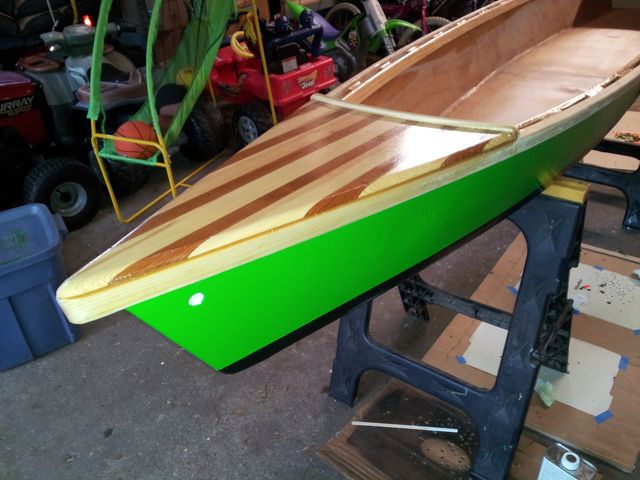
I'll definitely be able to identify her at a distance with that color. I think the combo of wood/bright green/graphite actually looks pretty cool. A fun color like that on a little boat seems to work, but I wouldn't paint a big boat that color.
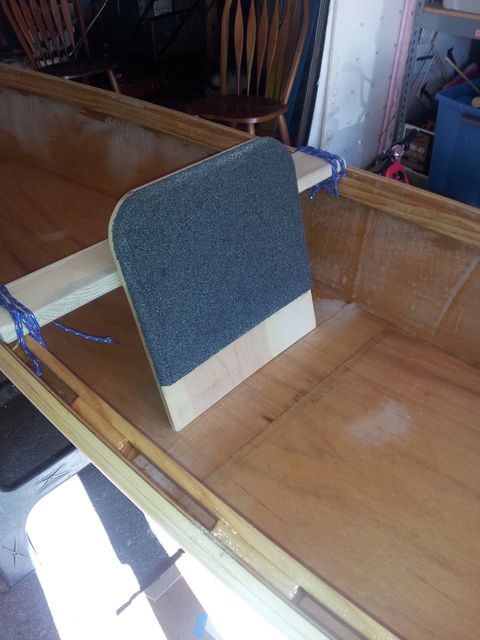
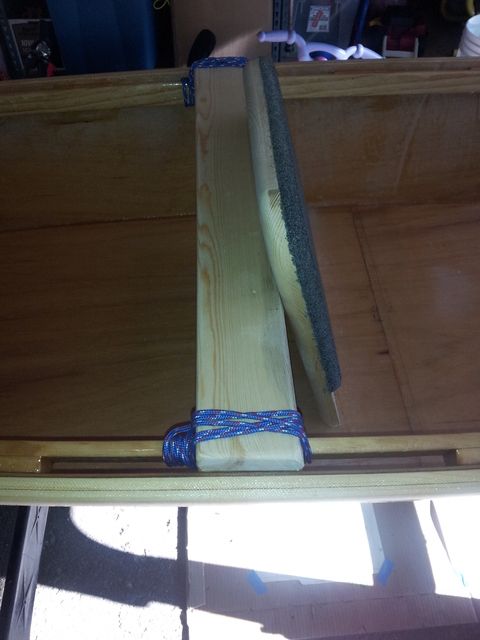
It needs a backrest for comfortable paddling. I made up a temporary one so we can test it this weekend and fine tune the positioning, angle, etc before putting one in with epoxy. I cut a section of pine 1x12, angled the bottom 15 degrees, rounded off the top corners, and then glued some 1/2" thick dense foam to it for padding. Routered the edges of that round, then rounded the back of the seat as well.
It's screwed to a lashed in thwart with a 15 degree angle cut on the front face to match the seat angle. I put some little roundovers on that too so it doesn't have sharp edges. I might have the seat a little too far forward, but she'll have a little cargo behind her for camping. With lashing it in, I had to match up to the slots in the rail. Permanent install won't require that. On the bottom, it just butts up to the floor, which actually seems rather solid with the 3 runners under the bottom. Permanent version will be glued in.
Planning on adding a footrest bar tonight, but need Abby to fit that up.
Re: Fred In Wisc CC14 Cheap Canoe at 80% Scale
Posted: Thu Aug 27, 2015 11:26 am
by terrulian
Excellent.
I've wondered before about using a router on foam but chickened out. Are you going to cover the padding? Are you planning a pad for the seat bottom as well?
Re: Fred In Wisc CC14 Cheap Canoe at 80% Scale
Posted: Thu Aug 27, 2015 11:32 am
by terrulian
A little bleed under the tape under the rails
I reported elsewhere on this forum a trick I recently learned online somewhere that I'm going to try when I get to that stage: After taping, you apply a coat of the old paint, right along the edge of the tape. Whatever voids may exist (and they always seem to for me) will be filled by the same color paint that the tape is covering. When the new color is then applied, it cannot seep into these tiny places because they have already been filled by the old paint. Theoretically, when you pull the tape you should get a clean line with no bleed. I'll report back how it goes.
Re: Fred In Wisc CC14 Cheap Canoe at 80% Scale
Posted: Thu Aug 27, 2015 12:32 pm
by Fred in Wisc
That's smart, never thought of that but it sounds like it'd work well.
A sharp router bit works well on hard foam, but the contact adhesive really gums it up fast. I'd glue the foam down with epoxy/microballoons if you are planning to router it. It probably won't work well on the white/yellow foam. This black stuff has a coarser texture and it's real stiff.
For the floor I'm thinking a little removable foam pad. I don't think that stuff will do well getting wet on the floor, not sure how well it'll dry out.
The permanent version will have nice vinyl wrapped foam and all the wood will be well sealed. This was hacked together in under an hour as a test and to get by for our upcoming boat trip.
Re: Fred In Wisc CC14 Cheap Canoe at 80% Scale
Posted: Thu Aug 27, 2015 12:38 pm
by Cracker Larry
That looks great Fred. Fantastic project with the daughter.
I've wondered before about using a router on foam but chickened out.
My buddy Raymond uses a router on his upholstery foam to shape it and cut grooves for piping and seams. I've never done it myself, never done any upholstery at all for that matter, I call Raymond
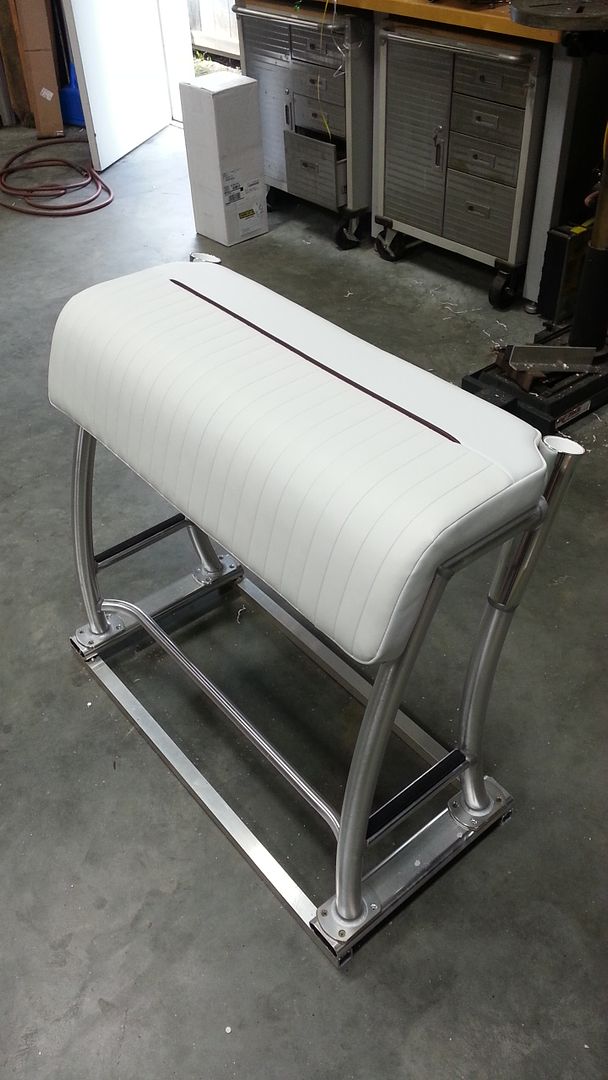
This is the leaning post foam for the GF18. It was cut and grooved with a router.
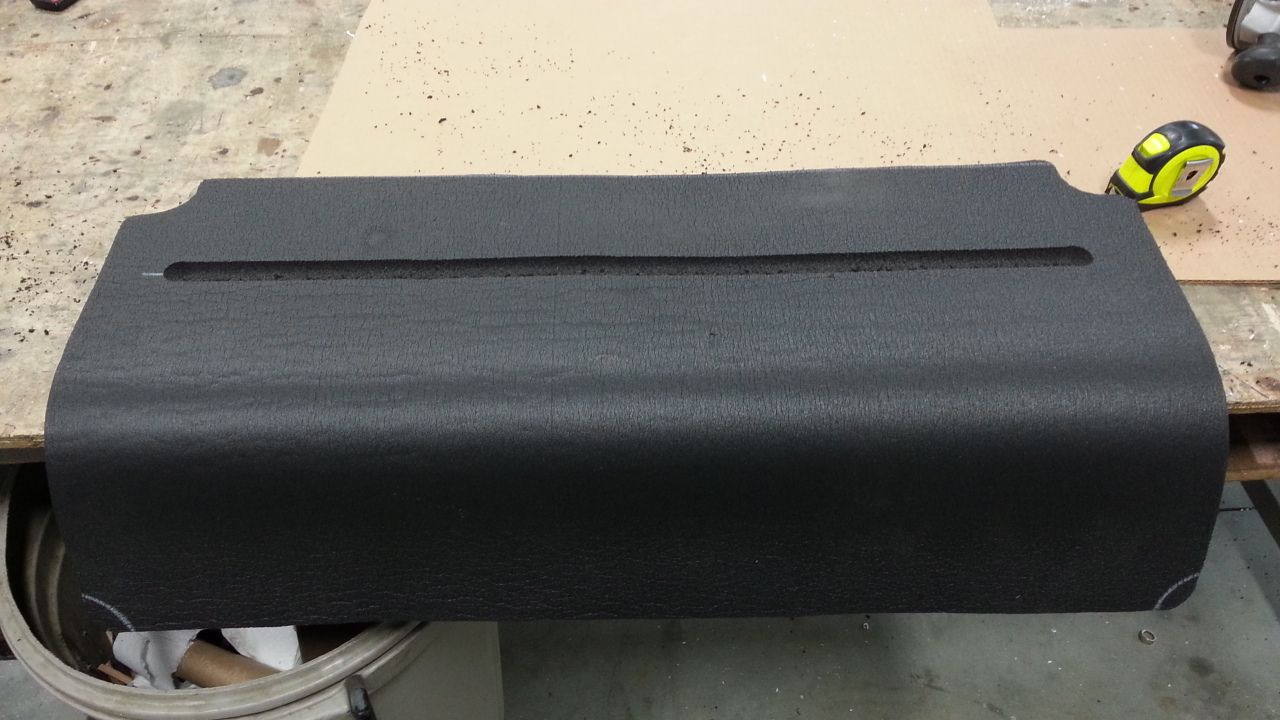
Now that piping trim strip won't give you a crease in your butt when you sit on it.
Re: Fred In Wisc CC14 Cheap Canoe at 80% Scale
Posted: Thu Aug 27, 2015 3:00 pm
by Fred in Wisc
My upholstery won't be that pretty, Raymond is like you- automatically takes it to the next level. But I have an idea about how to do it up nice looking to match the rest of the boat.
Looks like our trip is going to get delayed a day, forecast for Friday is rain most of the day and a high of 67 degrees. That won't be any fun for the girls. This is our "daddy- daughter trip" 4 dads and 5 girls from 9-15 years old. Saturday has a 30% chance of rain-isolated t- storms and a high of 77. Sunday no chance of rain (they say) and a high of 83. Much better weather for boating and camping with kids. I hope to have some good pics and great memories from that one.
Re: Fred In Wisc CC14 Cheap Canoe at 80% Scale
Posted: Fri Aug 28, 2015 9:35 am
by Fred in Wisc
My daughter is a bit concerned about tipping over on our trip since she hasn't kayaked by herself much. So last night's project was a set of kayak "training wheels". Hopefully these will be a one time use kind of thing, so I didn't spend a lot of time or money on them.
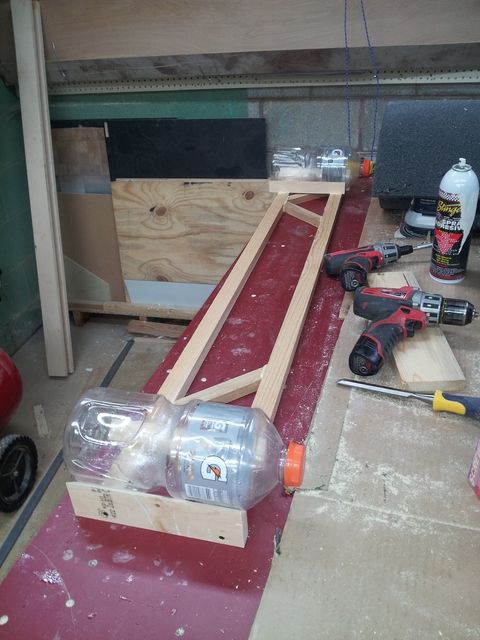
The principle is simple- a pair of outriggers that ride out of the water so they don't add any resistance, but if the boat is starting to lean over, the low side outrigger will provide additional buoyancy to help stop the boat from rolling too far. We went to Walmart and Menards in search of a suitable float- something inexpensive and easy to fabricate around. (Didn't want to take the time to make a fiberglassed Styrofoam structure.) Initially I was thinking one of those heavy duty pool noodles- they are nearly 4" dia with about a 1" center core, but with summer ending, they are nowhere to be found. I ended up with a couple 2l bottles of Gatorade. The bottle for these is about 10-11" tall, 4" dia, and it has a groove molded in around the middle which will make lashing it to a simple frame super easy. Also Abby likes Gatorade and she got to pick the flavors.
A little bar napkin math to see if this is likely to be effective: A 2l bottle provides a little over 4 lbs of buoyancy (1l= 1kg= 2.2 lb less the mass of the bottle and framing. That will be real light), and the outrigger will be 4 feet across, so a 2 foot long lever arm on each side. That will provide about 8 pound-feet of righting moment. Since the boat is a little under 2 feet wide (1' lever arm), that's the same as setting an 8 pound anchor on the rail to counterbalance when you need it. From my previous launch experience, I think 8 pounds of force at the rail is going to be a pretty significant stabilizing force.
I cut the frame from a 4' cedar 1x6 and some scrap. Put it together with gorilla glue and a few trim screws. Epoxy is overkill here and gorilla glue dries quick. The arms are 7/8 x 1 1/4 and with an 8# or so force on one end they bend very minimally. The bottles will be held by some little 45 degree blocks and lashing, I'll add a few little triangle braces to keep it from being pushed out of shape and the glue joints broken if she runs into something with that long arm sticking out the side of the boat. The assembly will be lashed to the slotted rubrail when finished.
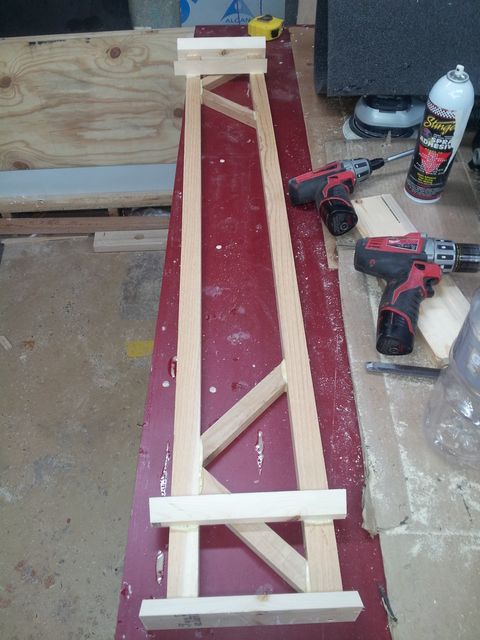

I pried the assembly off the table this morning (accidentally glued it down a little) and it seems straight and strong. ready for a little glue cleanup, routering, float installation and then lash it on the boat.
Re: Fred In Wisc CC14 Cheap Canoe at 80% Scale
Posted: Fri Aug 28, 2015 9:49 am
by ks8
long term, try making it a configurable trimaran. real skinny amas. or even a single well designed ama. its not as if its never been done before
if it is already fast compared to wide plastic kayaks, the ama(s) might not slow it down too much.
but it will be even more difficult to turn, most likely.... but super stable, depending on design.
A single ama design would make entry and exit easier at a dock or steep shore.
we've still got plenty pool noodles down in florida but next day shipping would make for some wildly expensive training floats!
looking forward to pictures.
Re: Fred In Wisc CC14 Cheap Canoe at 80% Scale
Posted: Fri Aug 28, 2015 10:39 am
by Fred in Wisc
It would be an option to go Hawaiian style with the amas, but I' think that with some practice my girl's going to paddle it like a pro. She does pretty well, just needs more seat time to gain confidence.
Although a unit like that could be removable, as you say. And there are times it could be pretty handy to have a super stable fast human powered boat. But that's an option for another day.
Re: Fred In Wisc CC14 Cheap Canoe at 80% Scale
Posted: Fri Aug 28, 2015 11:00 am
by terrulian
You've built flotation into the boat, she's wearing a properly fitted vest, and my experience with kids, though I have none myself, is that a swim is all part of the fun. Perhaps really what's next after the training amas is a few practice drills on recovery from a capsize, kayak-style, if that's possible with this boat, as a confidence builder. You can buy the elements of a capsize recovery kit from a kayak outfitter. Mainly, it's an inflatable bag.
Re: Fred In Wisc CC14 Cheap Canoe at 80% Scale
Posted: Fri Aug 28, 2015 11:05 am
by Cracker Larry
Tony has a very good point there. Before you turn her loose in the lake, have a few capsize and recovery drills in shallow water and controlled conditions. Learn what the boat will do capsized, how to get the water out and climb back in. A little practice and preparation will prevent future panic and problems.
Re: Fred In Wisc CC14 Cheap Canoe at 80% Scale
Posted: Fri Aug 28, 2015 11:35 am
by Fred in Wisc
Indeed that is a good point. We've talked about what to do in case of a capsize, and she's done a number of them goofing around with the other kids. We've got her gear in a couple plastic dry boxes. She's a weak to moderate swimmer so I insist on a PFD.
We'll probably launch at a resort with a nice sandy beach, and it takes a while to shuttle one truck down river to our take out point so we'll have some time there. I'll probably run a couple practice capsize drills with her and the other kids (and one dad) that aren't experienced boaters.
Most of the Lower Wisconsin river is sandy, slow, and shallow. It's pretty likely that if you have a capsize, you can just stand up and straighten it out. And we'll have 9 people/ 7 little boats traveling as a group, so there will be plenty of help around.
Re: Fred In Wisc CC14 Cheap Canoe at 80% Scale
Posted: Fri Aug 28, 2015 8:34 pm
by ks8
An outrigger canoe can be paddle like a pro too
but I hear ya.
Whatever you decide on, enjoy a safe outing. Take pictures of course.
Re: Fred In Wisc CC14 Cheap Canoe at 80% Scale
Posted: Mon Aug 31, 2015 1:07 pm
by Fred in Wisc
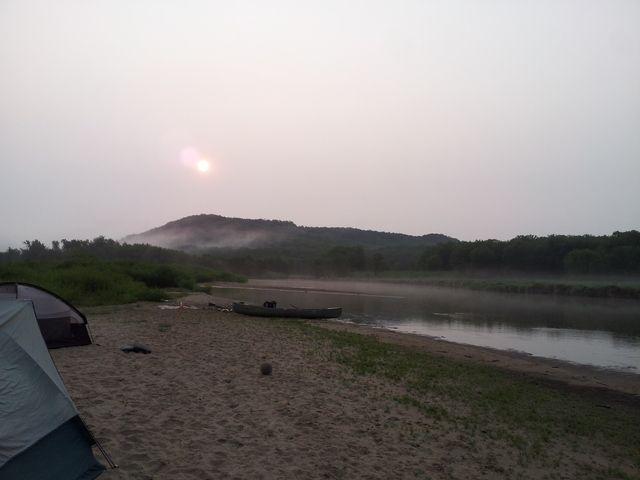
We had a great trip. Excellent weather (warm, no rain, overcast, light winds). Had 4 dads and 5 daughters along, this is an (almost- skipped last year) annual event where we can spend some quality time with our girls. Had 7 kayaks and a canoe along.
No unintentional capsizes in the whole trip.
Anyone in the Wisconsin/ Minnesota/ Iowa area, I highly recommend a trip down the lower Wisconsin river. Over 80 miles with no dams, and the Wisconsin State Riverway area allows camping on the islands and sandbars. No fees, no permits, just clean up after yourself. We put in at Spring Green at the Wisconsin Riverside Resort. Floated down to Gotham, about 13 miles. Most of it felt very remote, except the section where the highway parallels the river for a while. If you want to make it real easy, there are outfitters that will provide boats, gear and transport.
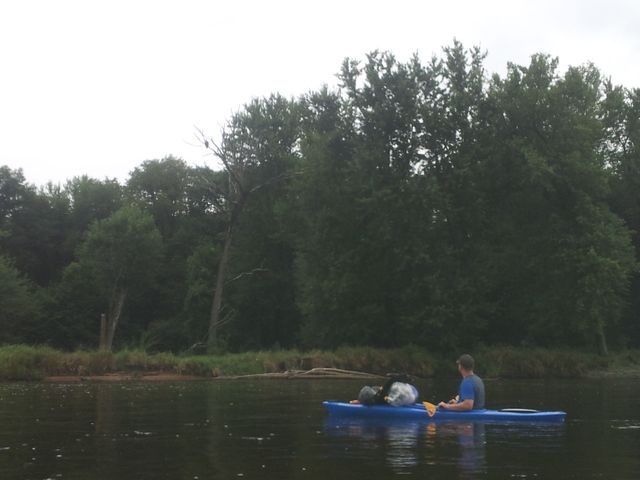
Lots of wildlife, check out the bald eagle in the tree above Rick. Saw a couple of those, along with deer, herons, turkeys, geese, and more. Turtles were plentiful , too- the girls had fun trying to sneak up on them in the kayaks before they plopped off the logs and back into the river.
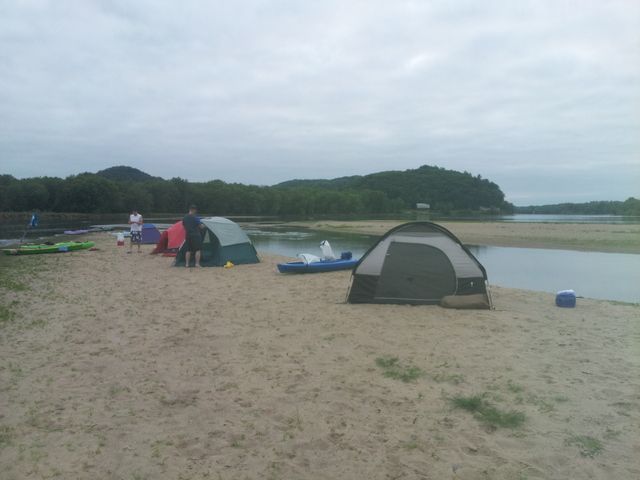
Camped on a little island. Each family made a meal for everyone so we ate great.
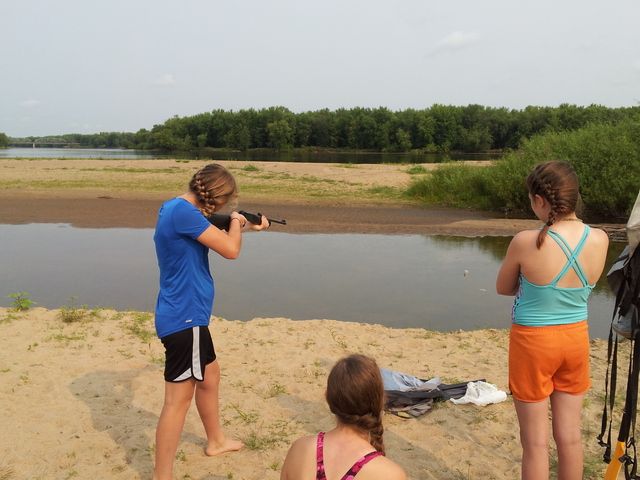
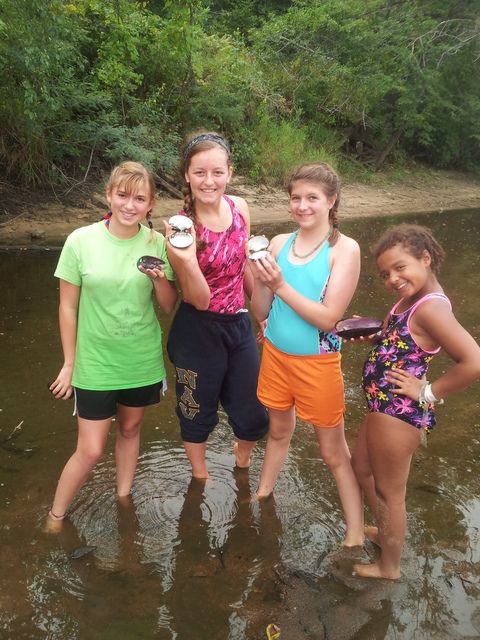
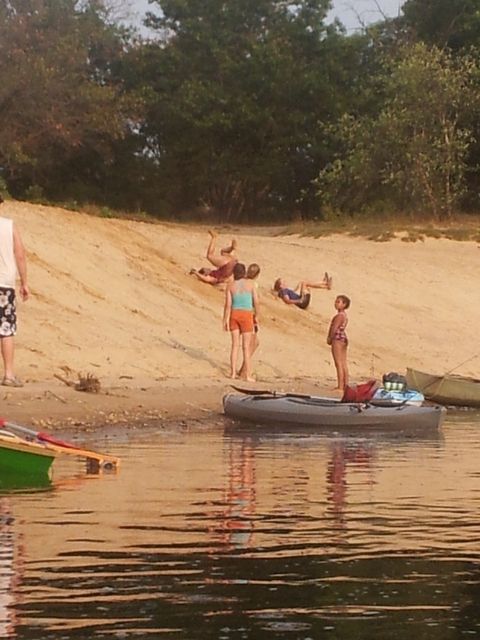
The kids played soccer and roughhoused on the sand bars, swam, fished, shot (Aguila Super Colibri 22s are quieter than an air rifle),picked up clam shells (and whole clams, but we made 'em put those back), sang around the campfire, helped make meals, jumped and rolled down sand cliffs, generally goofed off, and had a great time. With their Dads. Which is the whole point.
And Abby enjoyed her boat a lot. She got tired after a while and traded off with her friend Taryn, who was sharing a canoe with her Dad. Those 2 were the smallest, so it was nice for them to get a ride once in a while and not have to paddle. I also towed her behind my fat plastic 'yak for an hour or so, her little boat pulls real easily.
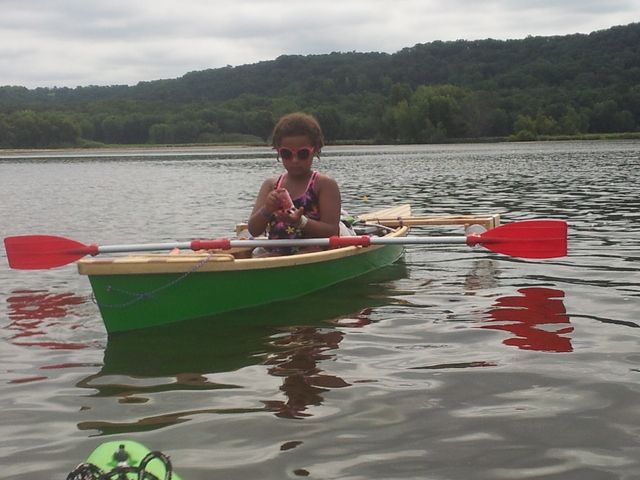
The little outrigger worked pretty well. It wasn't in the water very often. I'll see how she's doing with balance the rest of the boating season, and either go without it next year, or build a little ama setup with tiny versions of the same boat as outriggers.
This boat just needs a couple scuffs from the trip touched up, and a few coats of spar varnish on the bright finished parts and it'll be done.
Re: Fred In Wisc CC14 Cheap Canoe at 80% Scale
Posted: Mon Aug 31, 2015 2:57 pm
by terrulian
What a great time, and a fine inaugural cruise with the new boat!
Re: Fred In Wisc CC14 Cheap Canoe at 80% Scale
Posted: Mon Aug 31, 2015 4:52 pm
by Dougster
Wonderful tradition, you can't measure the value of such a thing. I have a theory that most adult hobbies and passions originate in positive childhood experiences. My dad took me down to the creek and river fishing with a cane pole many times, and though he died when I was nine, I continued to love fishing all my life. And I notice that most guys that like fishing did it as a child, often with their dad. Same with boats, bowling, crafts, sports, reading, etc., so long as it is a good experience instead of a critical one. Great pics, thanks for sharing.
Was a kid once Dougster
Re: Fred In Wisc CC14 Cheap Canoe at 80% Scale
Posted: Mon Aug 31, 2015 6:18 pm
by ks8
Excellent!!!
Re: Fred In Wisc CC14 Cheap Canoe at 80% Scale
Posted: Mon Aug 31, 2015 9:00 pm
by Cracker Larry
Fantastic
You are living right Fred, and raising those kids right. Love those 2 liter outrigger floats too
Re: Fred In Wisc CC14 Cheap Canoe at 80% Scale
Posted: Wed Jun 27, 2018 3:37 pm
by Fred in Wisc
After a couple years of use, we gave this a light sanding and a coat of spar varnish on the bright finish parts. Once it stops raining, I'd like to do a few more coats.
It's still nice looking, but there are a few dark areas on the wood where we wore through the old finish and it got stained a bit.
A good inspection shows no water damage, the graphite bottom has some worn areas at the tips and the ends of the keep. those will get touched up when I do the graphite bottom on my current project.


Re: Fred In Wisc CC14 Cheap Canoe at 80% Scale
Posted: Wed Jun 27, 2018 4:03 pm
by Jeff
Really well done Fred!!! Jeff
Re: Fred In Wisc CC14 Cheap Canoe at 80% Scale
Posted: Thu Jun 28, 2018 9:20 am
by ks8
I second that. Nice!