Page 1 of 1
New NC16
Posted: Thu Jun 09, 2016 5:58 pm
by Grainhopper
Today I am drawing it out. The beginning.
I have decided to go the metric route. Just to make sure, 100 centimeters is a 1000mm?
Doug.
Re: New NC16
Posted: Thu Jun 09, 2016 6:10 pm
by WouldWork
G'day Doug,
Yes, that's right.
100cm = 1m = 1000mm
And 10mm = 1cm
Enjoy your build.
Cam.
Re: New NC16
Posted: Sat Jun 11, 2016 6:00 pm
by Grainhopper
I can't seem to find how to find the information on installing butt blocks, what kind of glue coverage etc...
Re: New NC16
Posted: Sat Jun 11, 2016 6:58 pm
by WouldWork
Wet out the area with a clear resin mix both sides - so your panels and your butt block. Then make a thickened batch of resin for the glue. My understanding of making glue is it's a thinner mix than say for fillets. I make it a mayonnaise consistency. Apply that to the wet area, again to both your panels and butt blocks. Put it together and put a weight on the butt block. You don't want too much weight otherwise it will squeeze out too much epoxy. You'll see heaps of pics of peoples builds on here doing butt blocks and lots of people use their resin bottle or two or similar to weigh it down. Just a few pounds and make sure it's sitting nice flat level and even. It's good to have some news paper or something underneath so it doesn't stick to the floor.
As with any epoxy filleting or gluing, I always clean the edges where the excess epoxy has oozed or squeezed out. It saves you a lot of sanding later.
it should be easy to find a thread on here where someone's photographed their butt block installation.
Re: New NC16
Posted: Sat Jun 11, 2016 11:24 pm
by Grainhopper
Thanks, I'm getting excited but I have never worked with epoxy or fiberglass. This is what has me worried the most. It will be put on hold for almost a week, my daughters have a basketball camp, out of state in Florida.
Well when I get back I will be jumping in with the epoxy and fiberglass. One of the reasons I'm doing the canoe is practice for the bigger build. When it's all done I'll probably say cutting the piecesame out was the hardest part. Lol
Doug
Re: New NC16
Posted: Sat Jun 11, 2016 11:45 pm
by WouldWork
The hardest part of building a boat is getting past procrastinating over things you've never done before. I built the CC14 (smaller version of yours) first for the same reason as you. Dive in with both hands and give it a go. This method of building, on a canoe like yours is very forgiving. When you stuff up, you work it out or post a question here and you'll be back on track in no time flat.
It ends up being fun instead of daunting and the pride upon conpletion is wonderful.
Looking forward to your updates, and post pics!
Take care
Cam.
Re: New NC16
Posted: Thu Jun 23, 2016 4:17 pm
by Grainhopper
Back from vacation had a great time in Florida. I kayaked. out in the gulf. I saw lots of marine life. Was surrounded by dolphins the cc entire time I fished.
I have got the canoe cut out and butt blocked. I have to work fast, I didnt realize I had gotten the fast epoxy and I'm a first time user of epoxy, but it went fine.
will post pictures later in the build.
Doug
Re: New NC16
Posted: Fri Jun 24, 2016 10:24 am
by WouldWork
Doug,
There may be ways to slow your epoxy curing. You may already be doing this, but in case you aren't here's a couple of ideas that work for me.
The smaller the container, the more heat, the quicker the reaction. If you mix it in a small container, pour it into a larger one to work with it.
I find it cures a lot slower working at night, as long as it isn't too cold.
I try not to work in direct sunlight also.
It's easier to work with if it cures slower and it can sink in deeper to the ply as well making a better seal.
You get used to using it, and will come up with ways to use curing times to your advantage.
Good to hear you had a good time, get some pics up. Fellow builders love pics!
Take care
Cam.
Re: New NC16
Posted: Fri Jun 24, 2016 12:35 pm
by Cracker Larry
Also if you refrigerate the hardener it will give you a longer working time. But the biggest trick was said above, get it out of that mixing cup and into something with a lot of surface area, like a pie pan.
Re: New NC16
Posted: Sat Jun 25, 2016 10:36 pm
by Grainhopper
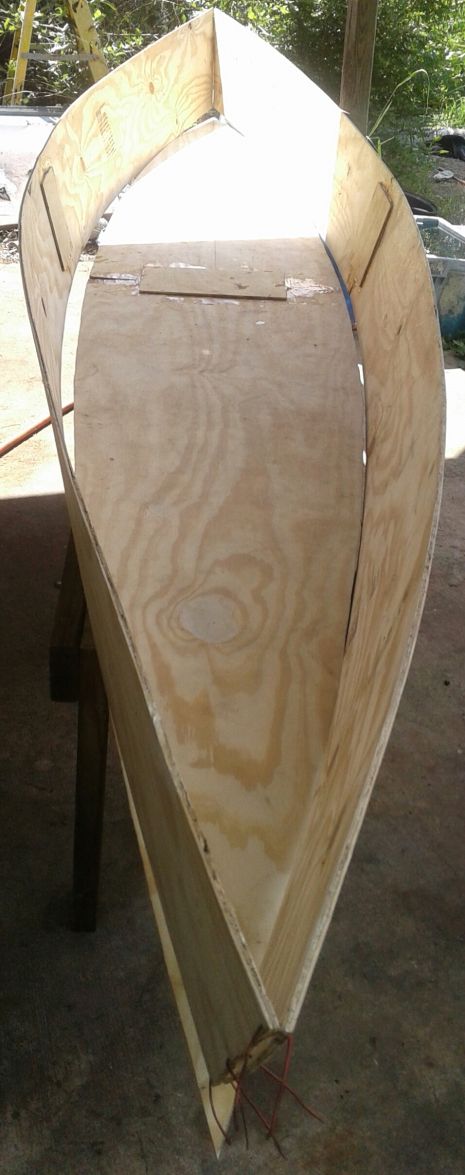
Thanks for the tips. I have finished the butt blocks. It went fine with that. The tips will help with the next epoxy step. I plan on using wire when stiching, once I get it where I want it. I'm going to undo one wire at time, every other one and replace it with fishing line, then go back and do the other ones.
Re: New NC16
Posted: Sat Jun 25, 2016 11:19 pm
by Grainhopper
This is a side panel butt block.
Http://gallery.bateau2.com/displayimage.php?pid=60602
This is the bottom butt block.
http://gallery.bateau2.com/displayimage.php?pid=60603
Picture of bottom.
http://gallery.bateau2.com/displayimage.php?pid=60604
It's a little sloppy I hope to get better at it. Wasn't sure how much to put on. It oozed out after I had did my initial clean up. The weight was not too heavy. They are glued though.
Re: New NC16
Posted: Sat Jun 25, 2016 11:26 pm
by Grainhopper
Can't figure out how to get the pictures in here
Re: New NC16
Posted: Sat Jun 25, 2016 11:29 pm
by Grainhopper
Re: New NC16
Posted: Sat Jun 25, 2016 11:37 pm
by WouldWork
Just a thought to consider come stitching time Doug.... I used extra long cable/zip ties. My current build is famous for being a bit of a bitch to get the bow knuckle into shape. With cable ties it made it a reasonably easy job. Have a look at page 2 of my build.
http://forums.bateau2.com/viewtopic.php ... 5&start=10
With a canoe like yours, you only need a few on each side. I remember with my CC14 (like yours but 14 footer) I think I only used 5 ties per side. Apply them loose, and work your way down the hull tightening them to close the gaps and ensure she's square.
Then, with the boat sitting the right way up, put tape over the outside of the join all the way along and 'spot weld' with a thickened resin mix. The aforementioned tape stops it leaking right through. Put a nice dob between each of your cable ties and allow to cure. Then you can cut every cable tie out and she'll hold together. You then have the hull shap formed and square, and no stitches in the way. Then you re-tape the outer joints and apply your putty fillet and FG tape to the insides. When dry you flip it, sand and shape your outer chine, fill any gaps with putty, and then apply your outer FG tape.
Make sure your fillets for the glassing of the seams are of a peanut butter consistency. I got a great tip reading one of Cracker Larry's builds. I think is was him anyway... Sorry if I got it wrong... Anyway, the tip - wet out the area all along the join with resin. Using whatever works for you, put a 'fillet' of thicken epoxy putty along the seam. To get it even use the back of a spoon. Press it onto the seam and run it along the join. It makes the fillet the same thickness all the way along and results in a better looking joint. You can also use the spoon to clean up spills, dribbles or runs. Then boil the billy and have a cup of tea.. Give the fillet a few minutes to settle. Then apply your FG tape the length of the seam on top of the fillet and wet out. Make sure there's no bubbles or air left. It's good to measure and pre-cut your FG to length before trying to apply it.
Once you've done a couple, you get neater and faster at it. I'm still quite a novice but if you read any of Cracker Larry's threads you'll get a wealth of knowledge out of it. There's MANY more builder's threads worth reading mind you, so many really clever people around here, but Cracker's advice on his threads have got me on the right track over and over. Sometimes I'll read his posts just to learn general things unrelated to my own build. He's that good.
Anyway, good luck with it.
Cam.
Re: New NC16
Posted: Sat Jun 25, 2016 11:41 pm
by WouldWork
Get a paint scraper, or plastic card like a credit card or something and a spoon. You can clean up any resin or putty that's where it shouldn't be. And a spoon or your finger can run along the edge giving an even bead of putty at the join. 5 minutes cleaning when curing saves 30 minutes of sanding when dry.
Re: New NC16
Posted: Sun Jun 26, 2016 2:49 pm
by Grainhopper
Well one thing I'm going to do is get it off the floor. I'm too old and wore out to be on the floor..lol. it will free up a hand.
Doug
Re: New NC16
Posted: Sun Jun 26, 2016 10:48 pm
by WouldWork
Lol good idea. I did my CC14 on 2 wooden saw horses. It sat on the horses throughout the entire build. Made it easy to work on, easy to flip and kept it off the ground for hosing out the shed when I got too much saw dust on the floor. Only downside was I couldn't use the horses for other jobs but oh well.
Re: New NC16
Posted: Mon Jun 27, 2016 12:46 am
by Grainhopper
I had some wood laying around. So I made a 2x4 table, height just above the knees and about 12 foot long. I'll be able to reach over the sides and work fine. The ends will be free from the table about 2 ft. I was lucky with the dimensions of the table. Glad it work out.
Doug
Re: New NC16
Posted: Wed Jun 29, 2016 4:17 pm
by Grainhopper
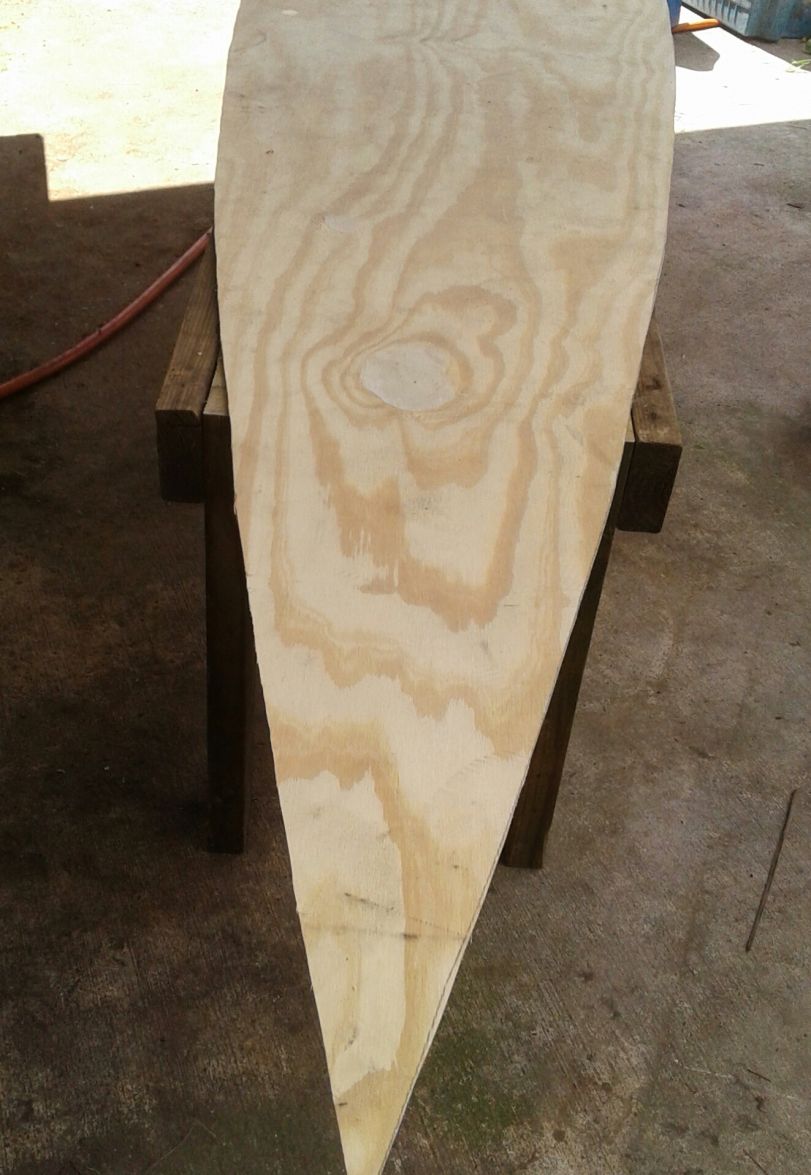
Bottom on table
Re: New NC16
Posted: Wed Jun 29, 2016 4:34 pm
by Grainhopper
Re: New NC16
Posted: Fri Jul 01, 2016 7:33 pm
by Grainhopper
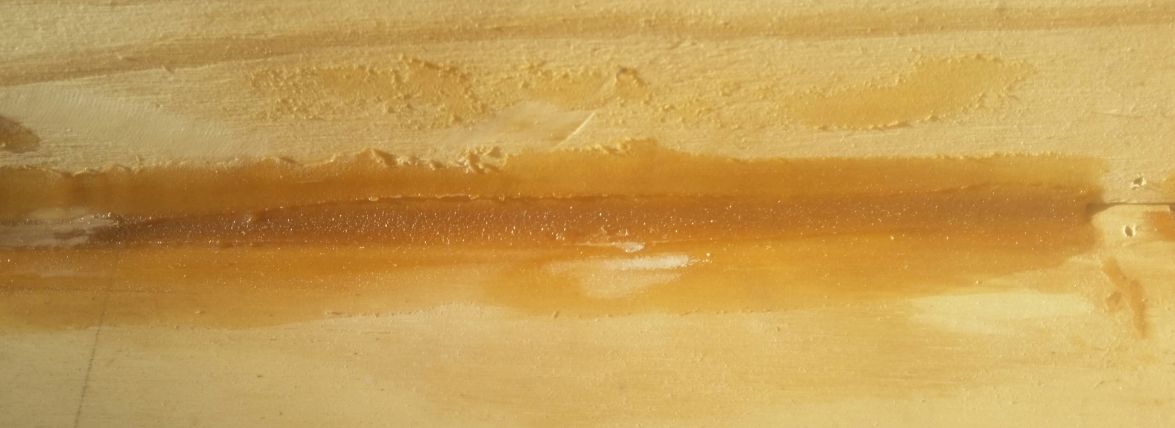
My first fillet. They got uglier as I went. 2nd day they were better, made a smaller batch, so I wasn't pressed to get it done.
Doug
Re: New NC16
Posted: Fri Jul 01, 2016 10:33 pm
by Fred in Wisc
Bondo spreaders are my favorite for smoothing putty. The yellow ones at Harbor Freight. The problem is after the first use the edge gets so rough it pulls the fabric. After use let them set up overnight. Crack off the epoxy film and then plane the spreading edge down lightly with a block plane. You will get about 3 uses out of each that way, they just get a little stiffer as you remove the thin edge.
Re: New NC16
Posted: Sat Jul 02, 2016 9:50 am
by topwater
I use a 1" wooden dowel for 1/2" fillets . You can cut them any length for getting into corners or tight
places. I used just two sizes for 90 percent of of all the fillets on my boat a 6" long and a 2" .
Cut to what ever length you need and sand the rough edge off and build on.
Re: New NC16
Posted: Sat Jul 09, 2016 2:31 pm
by Grainhopper
Nice tip topwater. I am about finished with inside seams will post pictures after I finish. And recover from the heat.
Re: New NC16
Posted: Sat Jul 09, 2016 3:32 pm
by Grainhopper
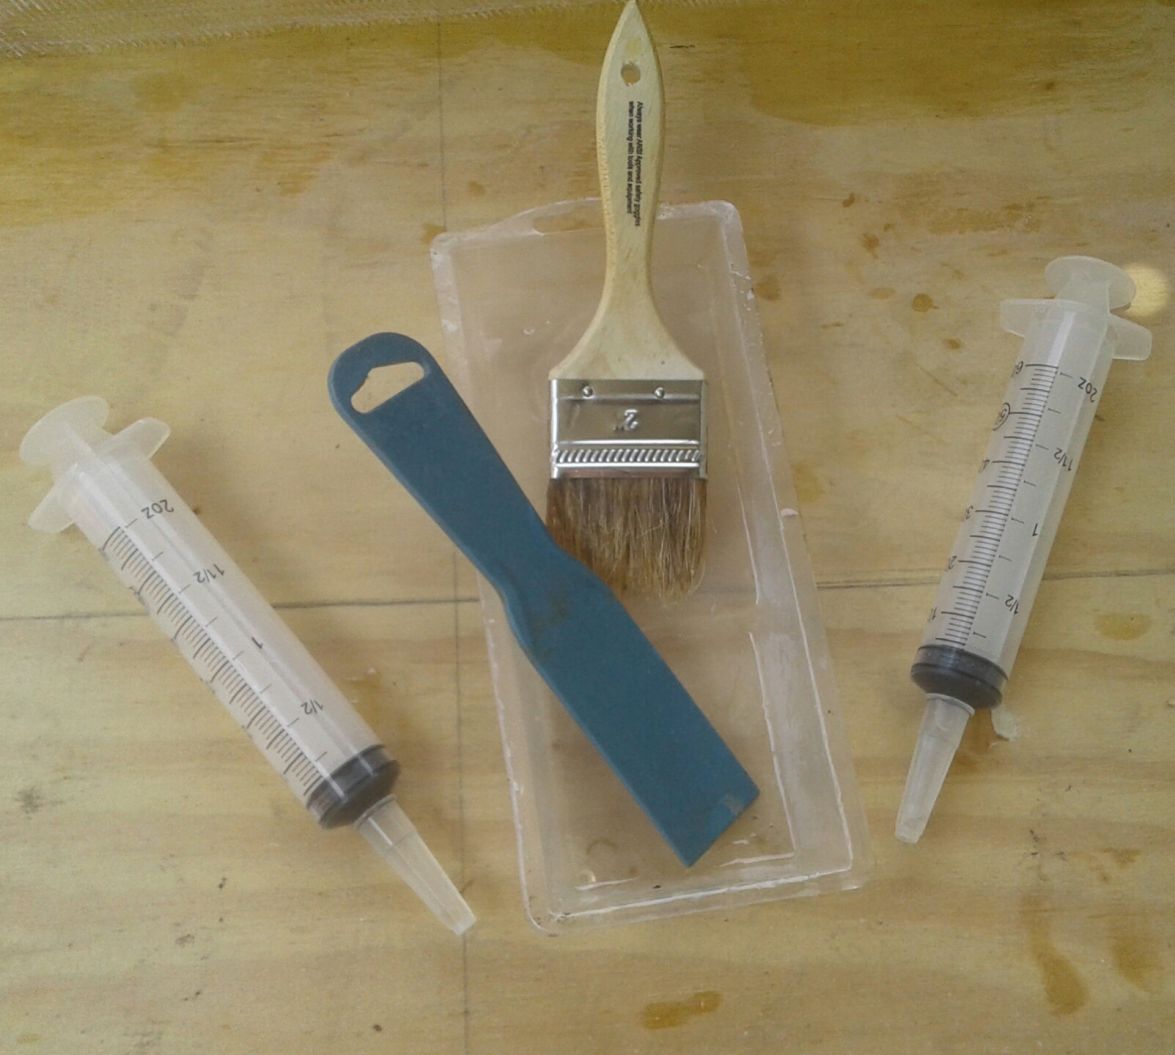
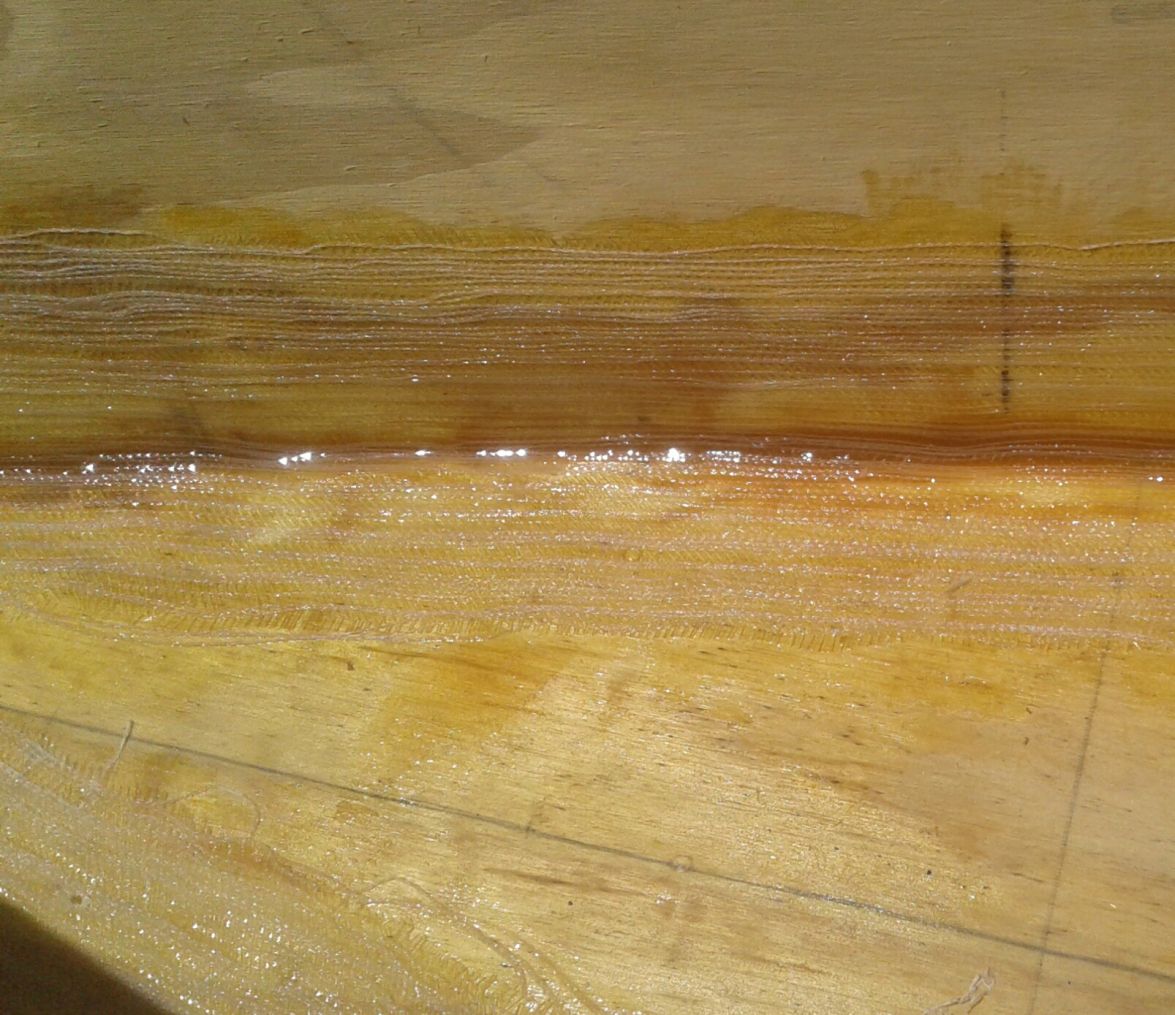
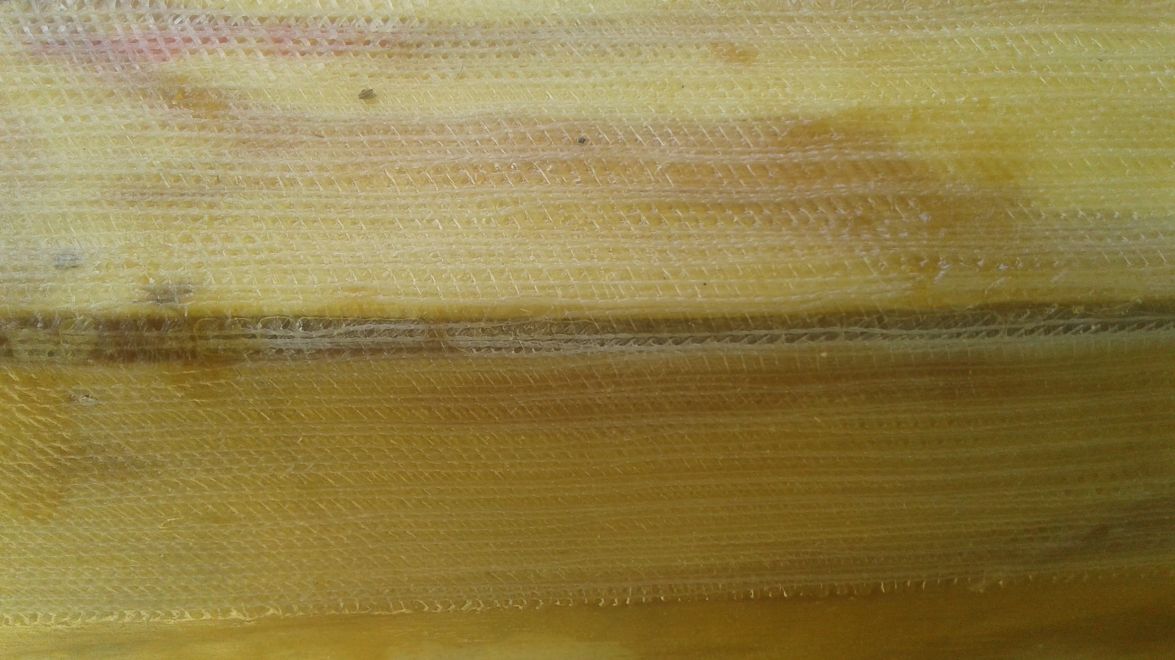
I'm showing this picture on how I measure it. For wetting out I use 3oz. At a time. For fillets I use 1.5 oz.
Pictures of my seams.

Re: New NC16
Posted: Mon Jul 11, 2016 9:35 am
by wegcagle
Nice work. Nothing wrong with those filets at all


Will
Re: New NC16
Posted: Mon Jul 11, 2016 9:40 am
by Jeff
Nice work!! Very clean!! Jeff
Re: New NC16
Posted: Mon Jul 11, 2016 10:09 am
by Fred in Wisc
I found another radius tool that works really well for when you need small fillets. Laminate samples (like Wilsonart or Formica). We were throwing out a bunch of outdated ones at work so I grabbed a couple handfuls, they have radiused corners and work really well.
Re: New NC16
Posted: Mon Jul 11, 2016 10:42 am
by jacquesmm
Very clean seams and yes, pieces of laminate the size of a business card make good fillet tools.
Re: New NC16
Posted: Tue Jul 12, 2016 7:35 am
by WouldWork
I was a window tinter previously, still do a bit here and there. There's one tinting tool that I've found brilliant for fillets, spreading, cleaning up and much much more.
http://lilchizler.com
It's a small pink hard plastic card. Four corners, each with a different radius for different seams/fillets. You can angle it against your fillet for even more radius' and control. It has a sharp edge and scrapes up every last bit of putty or resin from the spots you want clean. It's saved me literally hours and hours in sanding.
I get mine off ebay, they're very cheap and last for years. Every now and then I take to it with a piece of 1000grit paper to maintain its hard and sharp edge.
Have a look, give it a go, forget I said anything... I love it!
Your seams look good anyway, but can't hurt to offer tips and tricks.
Cam.
Re: New NC16
Posted: Tue Jul 12, 2016 9:27 am
by tcason
looks perfect just ordered one for what? - I don't know but looks like a great tool to have. My fillets are done.
Amazon link
https://www.amazon.com/gp/product/B00AZKR2CY
Re: New NC16
Posted: Tue Jul 12, 2016 4:21 pm
by Grainhopper
Thanks for the compliments, maybe too early, I have some air pockets in my outside seam work.
I think I have a remedy, just use one of my syringes and fill it.
Doug
Re: New NC16
Posted: Tue Jul 12, 2016 4:35 pm
by Fred in Wisc
That remedy works very well, I've used it many times. Drill a little hole at each end and inject the epoxy. Sometimes it works better if it's just slightly thickened so it doesn't run out.
Re: New NC16
Posted: Tue Jul 12, 2016 4:41 pm
by cape man
No need for the extra step. Use the wire, then glue between all the wires, remove the wires and finish glueing.