Hybird MF14

To help other builders, please list the boat you are building in the Thread Subject -- and to conserve space, please limit your posting to one thread per boat.

Please feel free to use the gallery to display multiple images of your progress.
Chenier
Active Poster
Active Poster
Posts: 219
Joined: Wed Feb 14, 2018 5:46 am
Location: Annapolis, Maryland

Re: Hybrid MF14

Post by Chenier »

After seeing how much space the 15' x 2' table took up in my workspace, I realized I wasn't going to have room to get out the tablesaw once the larger table was in place. So in between holiday distractions I've spent the last month ripping and cutting stock for the cleats that will be used during construction. Not much to see there. Also rearranged some of the shop to give me a bit more room.

Finally ready to start the "big build". Got the 15" x 4' worktable set up. Nothing fancy - just plywood on 2x4's:

Image

Not shown: the table is presently occupied with deck panels being joined together with a fiberglass butt joint. The epoxy is curing slowly at these temperatures.

User avatar
OrangeQuest
Very Active Poster
Very Active Poster
Posts: 3948
Joined: Tue Aug 28, 2018 1:14 pm
Location: Houston, Texas

Re: Hybird MF14

Post by OrangeQuest »

Nice big worktable!
"that it isn't just an ordinary sort of boat. Sometimes it's a Boat, and sometimes it's more of an Accident. It all depends." "Depends on what?" "On whether I'm on the top of it or underneath it."
A. A. Milne

Chenier
Active Poster
Active Poster
Posts: 219
Joined: Wed Feb 14, 2018 5:46 am
Location: Annapolis, Maryland

Re: Hybird MF14

Post by Chenier »

Thanks. I'm going to save it after the build to use as a dance floor. :D

Bogieman
* Bateau Builder *
* Bateau Builder *
Posts: 1992
Joined: Wed Jun 15, 2016 12:20 pm
Location: Myrtle Beach

Re: Hybird MF14

Post by Bogieman »

Nice! Can't wait to see what is next.

Chenier
Active Poster
Active Poster
Posts: 219
Joined: Wed Feb 14, 2018 5:46 am
Location: Annapolis, Maryland

Re: Hybird MF14

Post by Chenier »

I want to be a boat when I grow up!

Image

Just finished the rough cut of the deck template, still need to trim it to the lines that you see in the picture. I'm using a BC plywood deck template so I won't feel bad about drilling holes for construction cleats etc. in the fancy strip-planked deck I'll build later.

Chenier
Active Poster
Active Poster
Posts: 219
Joined: Wed Feb 14, 2018 5:46 am
Location: Annapolis, Maryland

Re: Hybird MF14

Post by Chenier »

Laminating a sheer clamp:

Image

Wait. The MF14 doesn't have sheer clamps. :doh:

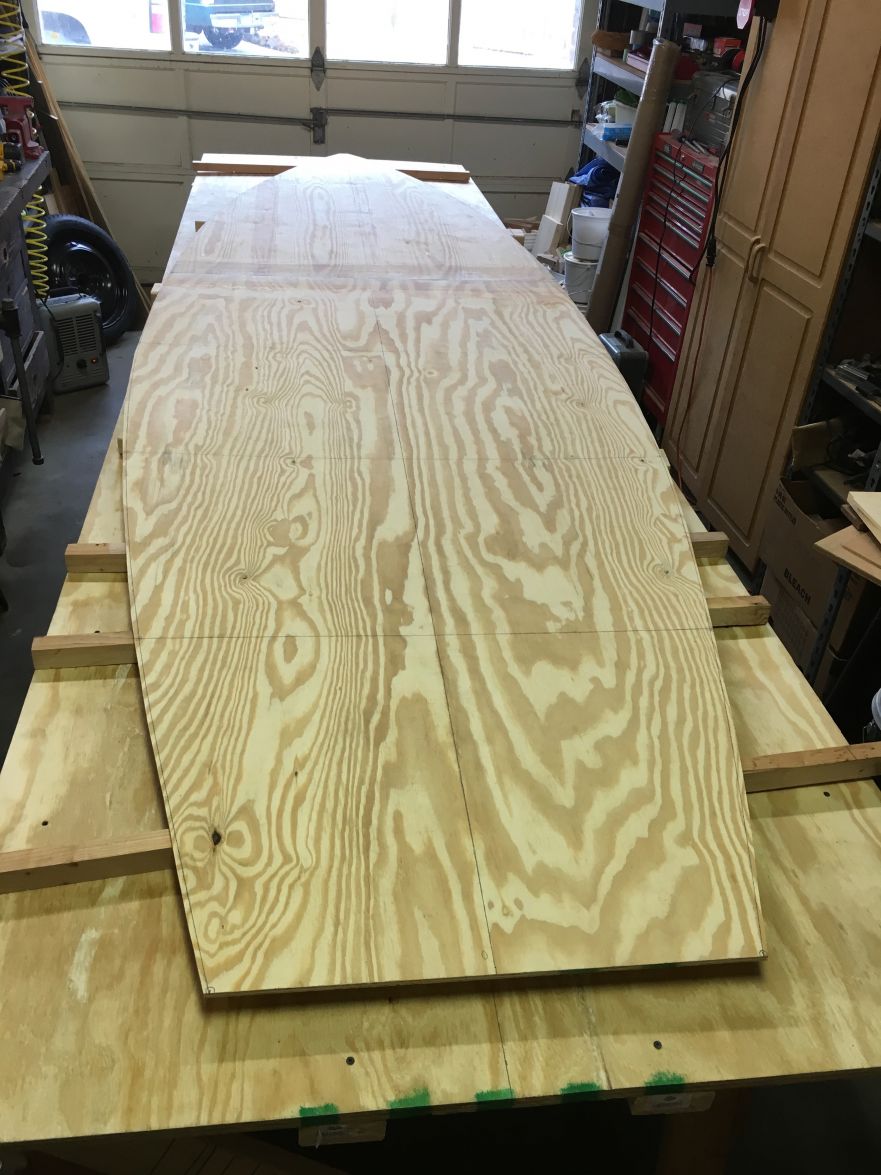
From the examples online, Moonfish builds end up with a noticeable gap between the deck and the side panels. The gap dissapears after it's covered with fiberglass tape, epoxy and paint. But since the deck and sides of this Moonfish will be finished bright, a gap won't do. Shear clamps on each side will replace the cleats outlined in the Build Notes and allow the deck to be firmly affixed to the side panels. They will also fill any gaps that might appear when I radius the deck/side joint.

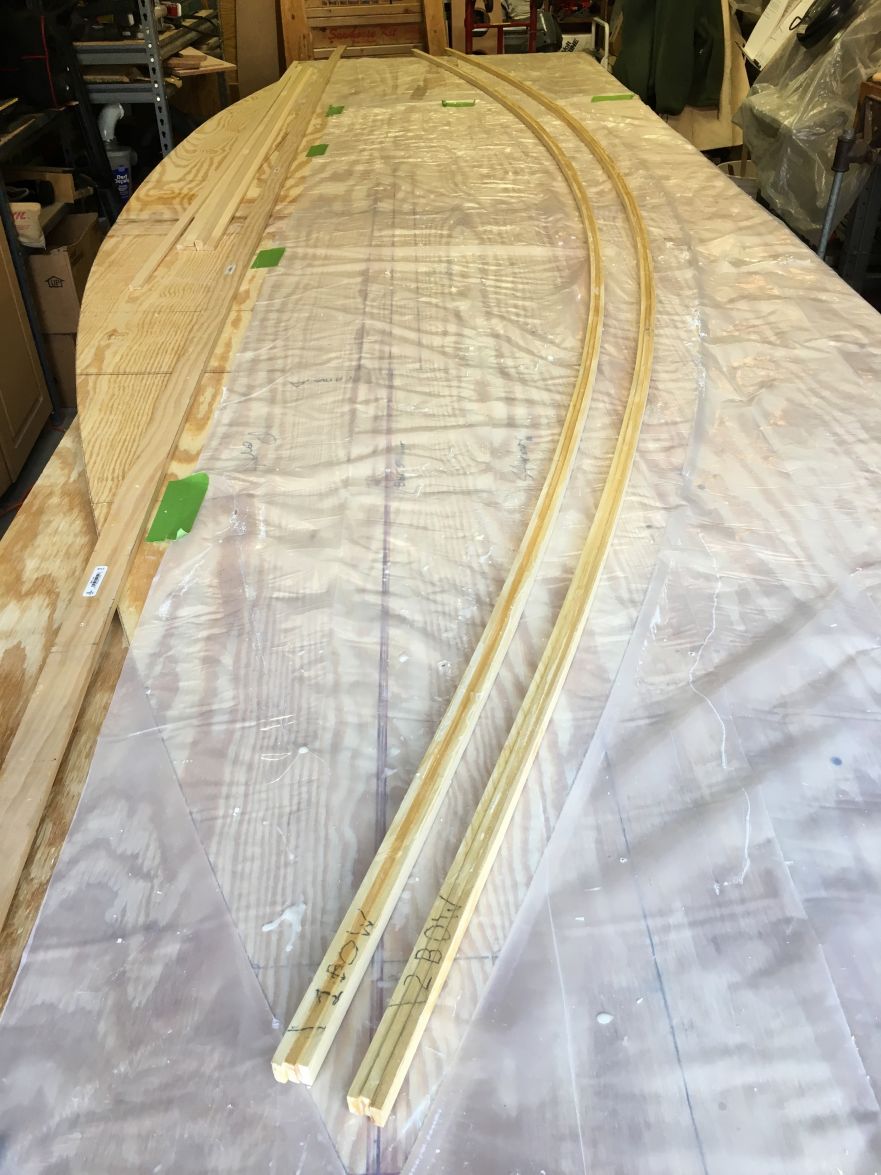
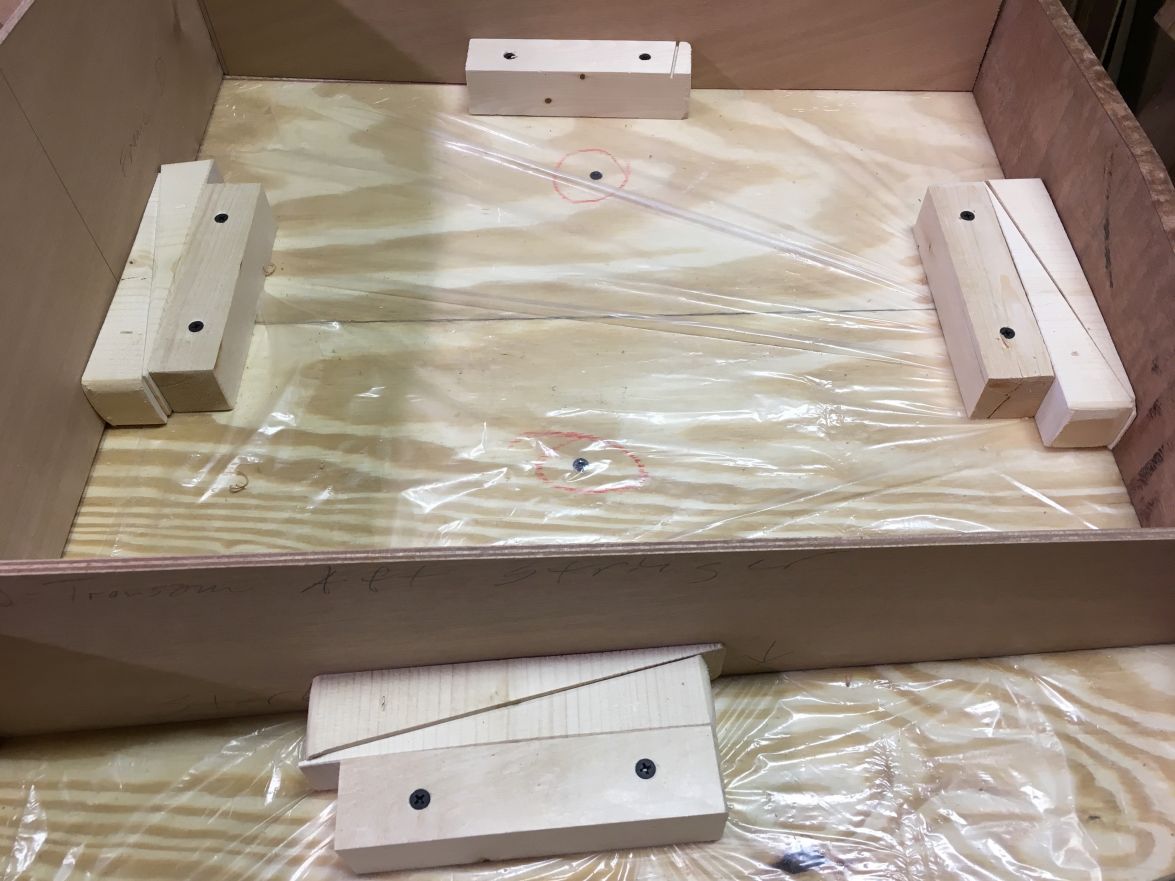
The sheer clamp is 3/4" x 3/4", laminated from three cedar strips, on the left side of the assembly. I'm laminating because a solid piece of cedar or cypress won't take the bend by itself. And I'm not about to build and fire up a 15-foot steam box when I have easy access to cedar strips and epoxy.

To the right of the lamination, the large strip you see with the shiny top is my fairing batten covered with packing tape to keep epoxy from sticking. It's held firmly against the edge of the deck template by pine cleats screwed into the worktable. This forms the basic shape. The deck is also screwed into the worktable, under the poly sheet, to make a rigid jig. Spring clamps and a sprinkling of quick clamps hold the cedar strips against the jig while the epoxy sets up.

I'll make two of them, one for each side. The sheer clamps will be trimmed to fit and glued in place just before the deck goes on. In theory I could wait to laminate until then. But, being in uncharted waters, I didn't want to risk distorting the boat with wierd stresses. Not to mention this is a sloppy process and cleanup is way easier at this stage before I have to work around a whole lot of structure.

Hope this works. Where's the "Cross your fingers" smiley?

Chenier
Active Poster
Active Poster
Posts: 219
Joined: Wed Feb 14, 2018 5:46 am
Location: Annapolis, Maryland

Re: Hybird MF14

Post by Chenier »

Image

Sheer clamps are done.

Chenier
Active Poster
Active Poster
Posts: 219
Joined: Wed Feb 14, 2018 5:46 am
Location: Annapolis, Maryland

Re: Hybird MF14

Post by Chenier »

All the pieces for the internal structure are cut and dry-fit in place.

Image

Image

I'll be cutting lightening holes before gluing it all together.

Chenier
Active Poster
Active Poster
Posts: 219
Joined: Wed Feb 14, 2018 5:46 am
Location: Annapolis, Maryland

Re: Hybird MF14

Post by Chenier »

Cleats and wedges hold all the parts of the internal structure in place. The wedges make it easy to remove a piece without throwing the cleats out of alignment with the design lines drawn on the deck template. They also avoid screw holes in the boat components.

Image

Each pair of wedges is backed by two opposing cleats - the one the wedges press against and another one on the far side of the frame or stringer. In my layout the solo cleat is aligned with the design reference lines. You can see an example at the top of the photo. The positioning of the cleats on the wedge side is not critical.

Bogieman
* Bateau Builder *
* Bateau Builder *
Posts: 1992
Joined: Wed Jun 15, 2016 12:20 pm
Location: Myrtle Beach

Re: Hybird MF14

Post by Bogieman »

Looking good.

Post Reply

Who is online

Users browsing this forum: No registered users and 5 guests