Page 1 of 1
GV10 Stop and Start Project
Posted: Wed Dec 26, 2018 2:04 am
by MikeyGnz
I need a new dinghy to get out to our big boat on the mooring as well as a bit of fishing when it is not worth putting the big boat in the water. Since i have an unused 10hp outboard and i want something that will plane with this and 2 people i have decided to build a GV10.
Given the cost of plywood and resin here in NZ and the fact that the dinghy will be left out for renters of our holiday home to use i am adapting the plans to build from aluminium.
I've been going for a few days already fitting in an hour here and there as i can over my christmas break. Photos to come.
Re: GV10 Christmas project
Posted: Wed Dec 26, 2018 8:13 am
by Jeff
MikeyGnz, Welcome to the Builders Forum!! It will be nice to follow a aluminium build!! Get those photos coming!! Happy holidays, Jeff
Re: GV10 Christmas project
Posted: Wed Dec 26, 2018 10:01 am
by Fair WX Pilot
Hi MikeyGnz, I love my standard plywood GV10 but an aluminum version would be very interesting. Looking forward to following your build.
Re: GV10 Christmas project
Posted: Thu Dec 27, 2018 2:47 am
by peterrivers
Hi, I have a completed Gv10 in Christchurch. Would love to see yours when done if you don't mind?
Cheers
Pete
Re: GV10 Christmas project
Posted: Thu Dec 27, 2018 3:34 am
by MikeyGnz
Got a bit done today. Over the last few days I've measured, marked out and done all the cutting. Tomorrow night I start the fun bits - actually building.
Measuring and marking


Cutting

All ready to start on reinforcing the frames tomorrow

Re: GV10 Christmas project
Posted: Thu Dec 27, 2018 3:37 am
by MikeyGnz
peterrivers wrote: ↑Thu Dec 27, 2018 2:47 am
Hi, I have a completed Gv10 in Christchurch. Would love to see yours when done if you don't mind?
Cheers
Pete
Sure thing. I'm hoping for a relatively quick build and only aiming for a workboat finish. The limit will be how much welding I get out of my Argon bottle.
Re: GV10 Christmas project
Posted: Thu Dec 27, 2018 7:13 am
by Jeff
MikeyGnz, how did you choose the thickness of the aluminum? Jeff
Re: GV10 Christmas project
Posted: Thu Dec 27, 2018 11:03 am
by piperdown
Definitely following this build!
Re: GV10 Christmas project
Posted: Thu Dec 27, 2018 2:49 pm
by MikeyGnz
Jeff wrote: ↑Thu Dec 27, 2018 7:13 am
MikeyGnz, how did you choose the thickness of the aluminum? Jeff
Hi Jeff.
I googled the weight of a sheet of 1/4" marine ply then calculated the thickness of Aluminium required to give the same weight. The result was just over 2mm thick. I rounded up to 2.5mm as I will not have the weight of all the resin in the boat. This should give me the same weight hull to get the same performance as the plywood version. So pretty much I am guessing/hoping it will be strong enough.
Many aluminium jet boats use 2.5mm for the sides so I am not too worried about strength. The plans show a pair of 20x40mm bottom stiffeners, I will use 40x40x3mm aluminium angle for the same purpose. I will lightly tack them on initially and if it seems too flexible I can grind the tacks and instead of 1 stiffener halfway between chine and keel I can add a second so there are 2 each one third of the way.
2.5-3mm is also a good thickness to weld. Any thinner and it is easy to blow holes while any thicker needs much more weld prep to grind Vs to get full penetration.
Re: GV10 Christmas project
Posted: Thu Dec 27, 2018 2:53 pm
by MikeyGnz
A question for all the GV10 owners.
The plans show the middle seat on top of frame 2. I plan to add an additional frame the width of the seat forward or back from the middle frame with the seat bridging the two frames to form a flotation chamber. If you had to move your middle seat by 140mm/5.5" would you go forward or back?
Thanks
Mike
Re: GV10 Christmas project
Posted: Thu Dec 27, 2018 3:27 pm
by Jeff
Thank you for the response MikeyGnz!! Sounds like a solid plan!! Jeff
Re: GV10 Christmas project
Posted: Sun Dec 30, 2018 6:26 pm
by Fair WX Pilot
MikeyGnz wrote: ↑Thu Dec 27, 2018 2:53 pm
A question for all the GV10 owners.
The plans show the middle seat on top of frame 2. I plan to add an additional frame the width of the seat forward or back from the middle frame with the seat bridging the two frames to form a flotation chamber. If you had to move your middle seat by 140mm/5.5" would you go forward or back?
Thanks
Mike
Hi Mike, I run with my fuel tank in front of the middle seat and also my trolling motor battery mounted in the front to get as much weight forward as I can. I think the seat is about right as it is but as I normally use the boat alone and understand what you’re trying to do with the floatation chamber I would probably go forward if I had to choose. Having said that, my floatation is provided by two fiberglassed foam panels that bolt under the seats so that I can take them out for cleaning and prevent rot from setting in due to trapped moisture. What’s the specification on your material? I presume as you’re welding it you’re using aluminum and not alclad which will make it more susceptible to corrosion.
Re: GV10 Christmas project
Posted: Tue Jan 01, 2019 4:33 am
by peterrivers
Yes I would go forward as well. My seat is bridging that frame that would be no problem to be a little bit forward I think. When rowing the passengers tend to sit in the back so you need a bit more weight forward anyway. You are welcome to come and have a look if you wish. I'm in Somerfield. Cheers Pete
Re: GV10 Christmas project
Posted: Wed Jan 02, 2019 12:20 am
by MikeyGnz
Fair WX Pilot wrote: ↑Sun Dec 30, 2018 6:26 pm
MikeyGnz wrote: ↑Thu Dec 27, 2018 2:53 pm
A question for all the GV10 owners.
The plans show the middle seat on top of frame 2. I plan to add an additional frame the width of the seat forward or back from the middle frame with the seat bridging the two frames to form a flotation chamber. If you had to move your middle seat by 140mm/5.5" would you go forward or back?
Thanks
Mike
Hi Mike, I run with my fuel tank in front of the middle seat and also my trolling motor battery mounted in the front to get as much weight forward as I can. I think the seat is about right as it is but as I normally use the boat alone and understand what you’re trying to do with the floatation chamber I would probably go forward if I had to choose. Having said that, my floatation is provided by two fiberglassed foam panels that bolt under the seats so that I can take them out for cleaning and prevent rot from setting in due to trapped moisture. What’s the specification on your material? I presume as you’re welding it you’re using aluminum and not alclad which will make it more susceptible to corrosion.
Hi Alan
I'm using a mix of 5052 aluminium sheet and 6061 aluminium angle so corrosion shouldn't be an issue. I could have gone for 5083 sheet but that costs 40% more and is a bit overkill for a boat so small.
Re: GV10 Christmas project
Posted: Wed Jan 02, 2019 12:33 am
by MikeyGnz
Re: GV10 Christmas project
Posted: Wed Jan 02, 2019 8:18 am
by Jeff
Very interesting build & nice work!!! Jeff
Re: GV10 Christmas project
Posted: Wed Jan 02, 2019 6:47 pm
by MikeyGnz
Re: GV10 Christmas project
Posted: Wed Jan 02, 2019 7:02 pm
by Fuzz
Thank you for posting this.
I know nothing about melting metal but I am enjoying seeing a build like this come together.
Re: GV10 Christmas project
Posted: Wed Jan 02, 2019 7:15 pm
by TRC886
This is an interesting project, and it's looking good

It may be too late, but for what it's worth, both of my factory tinnies have 1.5" (38 mm) clamping boards. They are not full transoms because they only go 2/3 of the way to the bottom of the hull, but they're both braced to the bottom.
Re: GV10 Christmas project
Posted: Wed Jan 02, 2019 8:30 pm
by MikeyGnz
TRC886 wrote: ↑Wed Jan 02, 2019 7:15 pm
This is an interesting project, and it's looking good
It may be too late, but for what it's worth, both of my factory tinnies have 1.5" (38 mm) clamping boards. They are not full transoms because they only go 2/3 of the way to the bottom of the hull, but they're both braced to the bottom.
The transom is something I am still working out. It is a 9 hour round trip to get to my outboard and until I can measure the shaft length I do not know exactly what transom design I will be using. I will have a clamping board of some sort, probably dressed 6 by 2 or 8 by 2 which is about 40mm thick once they dress it. I am yet to decide if the clamping board will be the full distance across the transom or If it will be in the motor area only with a couple of angle aluminium braces the whole width. If I go with the braces I can screw the clamping board to the braces and will not need to drill the transom for bolt holes.
Re: GV10 Christmas project
Posted: Thu Jan 03, 2019 1:08 am
by MikeyGnz
Got most of the way through welding up the next frame then my welder died. The repairman is on holiday until 19 Jan so no progress expected until then.
Re: GV10 Christmas project
Posted: Thu Jan 03, 2019 2:27 am
by Fuzz
MikeyGnz wrote: ↑Thu Jan 03, 2019 1:08 am
Got most of the way through welding up the next frame then my welder died. The repairman is on holiday until 19 Jan so no progress expected until then.
Dang the luck

Oh well we will be waiting for updates when they can happen

Re: GV10 Christmas project
Posted: Wed Jan 16, 2019 3:38 pm
by MikeyGnz
Still waiting on welder repair but just asked a question about the reinforcing/strakes I am planning to the bottom of the hull. See
https://forums.bateau2.com/viewtopic.php?f=1&t=63878 for my question.
I will copy the question and answer here once I have a reply so all of my build is in the one place.
Re: GV10 Christmas project
Posted: Wed Jan 16, 2019 3:40 pm
by MikeyGnz
peterrivers wrote: ↑Thu Dec 27, 2018 2:47 am
Hi, I have a completed Gv10 in Christchurch. Would love to see yours when done if you don't mind?
Cheers
Pete
Hi Pete
Had my bosses boss come see me the other week, turns out he is a friend of yours and knows your boat/build.
Re: GV10 Christmas project
Posted: Thu Jan 17, 2019 5:22 am
by peterrivers
Yep he said, small world!

Re: GV10 Christmas project
Posted: Fri Jan 18, 2019 7:25 pm
by MikeyGnz
Ok so here is a copy of the question I posted in the 'plans and building' section:
Hi
The Hull Assembly A plan for the GV10 shows a pair of 2 by 4s screwed to the bottom of the hull to keep the panels flat during assembly. I was thinking to permanently mount 40x40x3mm alloy angle to give added stiffening to the bottom panels and form strakes on the final hull.
How far forward from the transom should I go with these, that is how long is the flat section of the hull bottom?
Would these strakes on the outside be worth it or should I install them on the inside of the hull so I have reinforcement without the strakes?
Thanks
Mike
And responses I got from Evan and other builders.
From Fair WX Pilot
Hi, this is all based on my standard construction. As your building from aluminum you probably want to wait for a response from Jacques or Evan Gatehouse as he designed the original.
The hull is completely flat from Frame 2 aft to the transom. I found that the 2x4's really helped keep everything flat and prevent rocker as you bend the panels up to the front. Once the bottom stiffeners and transom gussets were installed it was all very solid. When doing similar on 6061 aircraft skins I sometimes place temporary stringers on the outside picking up on the rivet holes I plan to use once I am ready for the internal stringers to go in.
Though I haven't been to full "hold my beer" speed in my GV10, I have had it well on the way and mine shows no sign of slipping in turns or doing anything nasty. In fact it seems to turn on a sixpence. If the strakes have to be there for structural reasons due your build changes then that's the answer but functionally it all seems to work very well without them.
As I said above, please check with the designer as your build may not be comparable to mine due the material. Enjoying watching it all come together and looking forward to more pictures.
Thanks Alan. I read your OD18 thread in one sitting last night. Impeccable work there. Seeing the amount of fairing and sanding you had really makes me appreciate alloy but worries me as well as I cannot fair out any hook or rocker that others have run into.
From peterrivers
Hi Mike, I formed the stiffners by glassing over half a waterpipe foam insulation tube... To make it easier on the feet.
I would also keep the outside of the hull clean, is no strakes. Its handling is great as designed, and I have had it flat out with one pob and 15hp.
Cheers
Maybe cut a length of 2" aluminum tube in half and weld that in? Will need to be bent to the hull shape.
Alternative maybe a length of 1" square? Either would be fine on the feet...
Thanks Peter. Your GV10 looks very nice in the photos. Nice Surtees as well. I've got access to my dads 6m McLay at the moment if you want a second boat along to go further out.
The pipe approach sounds real good. It will depend on how stiff the final hull is, I'm half making this up as I go but if extra stiffening is needed I will put reinforcement in after the frames so could do half pipe sections in the flat areas and the curved stringers from the plans forward. I will check what extrusions I can get off the shelf as well, maybe I can avoid the lengthwise cutting.
I'm also considering 1 inch pipe all around the top of the side panels, bow panel and transom (except motor clamping area) but will wait until hull is fully welded to see how stiff it is.
And from Evan Gatehouse
Yes, it's really hard to get external strakes right and not mess with handling. The internal stiffeners formed with glass over foam half pipes is pretty gentle on the feet.
Our GV10, with an aged 15 HP motor and 1 person, topped out around 26 knots. It's pretty quick at full throttle. With 1 person, and high speeds take it easy in turns. Such a short hull can wash out and "spin out", putting a lot of side load on passengers.
Thanks Evan. I'm enjoying the build so far and looks like I should end up with a good durable boat.
I have read about others having issues with hook or rocker on their build so was thinking that welding strakes/reinforcing on the bottom panels prior to fitting them to the hull might help avoid it. Going on the advice from everyone I'm not going to add strakes and will add internal hull reinforcement as required.
I've got to say it is great to have a forum like this to be able to throw ideas and questions.
Re: GV10 Christmas project
Posted: Sat Jan 19, 2019 9:22 am
by pee wee
One of the things that contribute to a hook at the transom is multiple fiberglass tape layers, requiring lots of fairing compound to make it flat again-you won't have to deal with that.
Re: GV10 Christmas project
Posted: Sun Jan 20, 2019 5:01 am
by fallguy1000
Been a day since the repairman got back and no updates!
More seriously, what is this gonna weigh in ally?
Also, I don't weld, but it sure is fun to watch this project.
Re: GV10 Christmas project
Posted: Sun Jan 20, 2019 3:01 pm
by MikeyGnz
fallguy1000 wrote: ↑Sun Jan 20, 2019 5:01 am
Been a day since the repairman got back and no updates!
More seriously, what is this gonna weigh in ally?
Also, I don't weld, but it sure is fun to watch this project.
His first day back was a Saturday and they only work a half day on Saturdays. I decided to give him that to catch up and will be calling when they open today.
Density of aluminium is 3 times that of plywood but since I am using 2.5mm alloy instead of 6mm and 10mm and no epoxy, fairing compound or paint I'm expecting roughly the same weight hull as on the plans.
I'm building this partly as an experiment to test my welding before I buy a jet-boat kitset and am pretty much taking a guess at thicknesses, reinforcement, etc. so hopefully I end up with something that works.
Re: GV10 Christmas project
Posted: Sun Jan 20, 2019 3:10 pm
by fallguy1000
MikeyGnz wrote: ↑Sun Jan 20, 2019 3:01 pm
fallguy1000 wrote: ↑Sun Jan 20, 2019 5:01 am
Been a day since the repairman got back and no updates!
More seriously, what is this gonna weigh in ally?
Also, I don't weld, but it sure is fun to watch this project.
His first day back was a Saturday and they only work a half day on Saturdays. I decided to give him that to catch up and will be calling when they open today.
Density of aluminium is 3 times that of plywood but since I am using 2.5mm alloy instead of 6mm and 10mm and no epoxy, fairing compound or paint I'm expecting roughly the same weight hull as on the plans.
I'm building this partly as an experiment to test my welding before I buy a jet-boat kitset and am pretty much taking a guess at thicknesses, reinforcement, etc. so hopefully I end up with something that works.
Very cool! I was totally joking about the repairman.
Good luck. Love the work and watching the welds improve. Do you know what a mousehole is?
When you weld a boat, no weld is allowed at intersections of three planes. Instead a relief hole is cut on the transverse framing. Aka mousehole.
Re: GV10 Christmas project
Posted: Sun Jan 20, 2019 3:12 pm
by fallguy1000
Of course mouseholes are not possible at the transom and a few other locations.
Mouseholes prevent stress cracks, btw. Those occur from having a massive weld in the corner and that weld can damage surrounding structures.
My expertise is limited to other reading, but your frames woth the angles look like they did not have the needed relief.
Wish I knew more and sorry if I missed or you knew.
Re: GV10 Christmas project
Posted: Sun Jan 20, 2019 4:48 pm
by MikeyGnz
fallguy1000 wrote: ↑Sun Jan 20, 2019 3:10 pmVery cool! I was totally joking about the repairman.
I guessed so but if patience is a virtue I'm not very virtuous.
fallguy1000 wrote: ↑Sun Jan 20, 2019 3:10 pmGood luck. Love the work and watching the welds improve. Do you know what a mousehole is?
When you weld a boat, no weld is allowed at intersections of three planes. Instead a relief hole is cut on the transverse framing. Aka mousehole.
Thanks for the info Fallguy
I didn't know about mouseholes but from a quick look on google there seems to be a bit of controversy about them. A set of boat construction course lecture notes I found refers to this
https://www.steelconstruction.info/Stif ... Cope_holes. Based on those notes the coping hole or mouse hole is an easy way of getting clearance for one weld bead to pass completely through the intersection without having to precisely measure the weld bead and shape the third plate precisely. That site is for steel and not alloy where the stress crack issue is larger though.
I'll look through my book
https://www.bookdepository.com/Boatbuil ... 0071443180 tonight when I get home.
I am going to be trying to turn the frames into watertight compartments so want to avoid mouseholes. If cracking becomes an issue I can add them later when doing repairs.
Re: GV10 Christmas project
Posted: Sun Jan 20, 2019 5:34 pm
by MikeyGnz
MikeyGnz wrote: ↑Sun Jan 20, 2019 3:01 pm
His (welder repair man) first day back was a Saturday and they only work a half day on Saturdays. I decided to give him that to catch up and will be calling when they open today.
Gave a call to the repair place and turns out today is his first day back so no update on the repair yet. Good that I called though because it had been left in the wrong bay and the repairer didn't know anything about it.
Re: GV10 Christmas project
Posted: Sun Jan 20, 2019 7:05 pm
by fallguy1000
To build watertght with the mousehole; you'd use foam I'd say.
Here is good reading on trouble welding in these corners..
https://www.boatdesign.net/threads/crac ... ost-843890
Kind regards. I am eyeing the design for a tender.
Re: GV10 Christmas project
Posted: Mon Jan 21, 2019 5:27 pm
by MikeyGnz
Thanks for the information FallGuy.
I have done a count and there are 31 or 39 (depends on the number of stringers) places where I have welds with 3 or more panels/frames joining. Of these 6 are unavoidable as they join hull panels to the transom or bow along the chine or keel. Of the remaining joins there will be cope holes at all but 13 where I want to maintain water tightness. 3 of these are within 150mm/6” of the bow so I do not expect high stress as they will only be in the water at low speeds.
Given that this particular boat is smallish at 3m/10ft with 2.5mm thick panels and 3mm thick frames I think it fits into the category of over-engineered. I will be the only person using the outboard with the boat under oar power most of the time so I am tempted to risk it with the remaining 10 joints. They are in visible locations and I can check for cracks after each use and repair as required.
In other news my welder is being repaired and should be ready for this weekend.
Re: GV10 Christmas project
Posted: Mon Jan 21, 2019 8:46 pm
by fallguy1000
The only added benefit of the cope is a smidge less weight and ease of welding.
Re: GV10 Christmas project
Posted: Fri Jan 25, 2019 1:46 am
by MikeyGnz
Just been told welder is repaired and I can pick it up in the morning. Tomorrow the build recomences.
Re: GV10 Christmas project
Posted: Fri Jan 25, 2019 5:25 am
by OrangeQuest
MikeyGnz wrote: ↑Fri Jan 25, 2019 1:46 am
Just been told welder is repaired and I can pick it up in the morning. Tomorrow the build recomences.
Good luck!

Re: GV10 Start and Stop Project
Posted: Sun Feb 03, 2019 6:10 am
by MikeyGnz
Got some more welding done today then welder died again, back to repairman tomorrow.
Since I didn't finish over Christmas and the project is stop/start I've changed the title of my thread.
Re: GV10 Stop and Start Project
Posted: Sun Feb 03, 2019 1:49 pm
by fallguy1000
Don't give up!
Have you calculated a final weight?0
Re: GV10 Stop and Start Project
Posted: Sun Feb 03, 2019 6:18 pm
by Fuzz
You will get there. Just need the metal melter to do it's thing

Re: GV10 Stop and Start Project
Posted: Sun Feb 03, 2019 8:41 pm
by MikeyGnz
fallguy1000 wrote: ↑Sun Feb 03, 2019 1:49 pm
Have you calculated a final weight?0
A VERY ROUGH weight estimate.
According to the study plans GV10 final weight = 43kg but it does not say if this is using okoume or meranti ply.
Bill of materials:
3 sheets 6mm ply
1 sheet 9mm ply
11L resin
From google: 6mm sheet ply = 9.7kg okoume/12.6kg meranti. 9mm sheet ply = 13.2kg gaboon/17.4kg meranti.
Assuming resin is 1kg/L the proportion of plywood used is:
(43kg – 11kg) / (3*9.7kg + 1*13.2kg) = 75.7% for okoume or 58% for meranti.
I am using 4 sheets of 2.5mm 5.52 aluminium at 19.29kg/sheet for a total weight of 77.16kg sheet. If the 43kg in the study plans was with okoume ply this would mean I can expect to use 58.4kg of my alloy sheet. If the 43kg in the study plans was with meranti ply this would mean I can expect to use 44.8kg of my alloy sheet.
As well as the alloy sheet I am using about 10m of 30*30*3mm angle extrusion at 0.463kg/m = 4.63kg, about 0.5kg of welding rods, call it 5kg for the transom board and another 5kg of 6mm ply for seats. So all up final weight estimate:
73.5kg assuming the 43kg weight in the study plans was with okoume ply.
60kg assuming the 43kg weight in the study plans was with meranti ply.
The difference between these weights and the 43kg on the study plans is roughly the same as the spare tyre round my middle. I can offset the material weight gain by dropping the tyre.
Re: GV10 Stop and Start Project
Posted: Sun Feb 03, 2019 8:42 pm
by MikeyGnz
Fuzz wrote: ↑Sun Feb 03, 2019 6:18 pm
You will get there. Just need the metal melter to do it's thing
I'm starting to think it is operator error.
Re: GV10 Stop and Start Project
Posted: Wed Feb 06, 2019 12:10 am
by Evan_Gatehouse
43kg is using okoume
Re: GV10 Stop and Start Project
Posted: Wed Feb 06, 2019 2:53 am
by MikeyGnz
It wasn't me, it was the beer.
So the cause of the welder failures has been identified. When the beer fridge kicks in while welding the welder gets a voltage spike and burns out the input power board. I'll have to move the beer fridge onto another circuit.
Although the welder is still in for repairs I got the 2 frames welded up before it broke the second time. Some of the welds on the inside corners are ugly but when finished they will be hidden.

Holiday today so I spent some time sanding/grinding down the weld beads on the surfaces the frames meet the hull or seats.

There are a couple of places I didn't get enough penetration so I'll have to touch them up but I'm pleased with most of it. Along the top of the alloy section in the centre of the photo below you can see a bit where the weld didn't penetrate and after grinding it hasn't fused.

Re: GV10 Stop and Start Project
Posted: Wed Feb 06, 2019 5:49 am
by OrangeQuest
Interesting on the beer fridge.
Frames look good.
Re: GV10 Stop and Start Project
Posted: Wed Feb 06, 2019 7:30 am
by Jeff
Yes, frames look good!! Crazy about your fridge!! Jeff
Re: GV10 Stop and Start Project
Posted: Wed Feb 06, 2019 11:39 pm
by MikeyGnz
OrangeQuest wrote: ↑Wed Feb 06, 2019 5:49 am
Interesting on the beer fridge.
Jeff wrote: ↑Wed Feb 06, 2019 7:30 am
Crazy about your fridge!! Jeff
Speaking to the repair guy, the max voltage before the power circuits in the welder fail is 275V. Our power system runs at 240V so it only needs a small amount of arcing when a thermostat is opening or closing to give a spike over 275V. Technically the welder socket should be on its own circuit as it has a 15A plug and standard sockets are 10A but my garage only has a single circuit so unless I rip the roof off the house to lay new wiring from the switchboard I'm stuck with what I have. I blame developers building everything as cheap as possible.
In future I will run an extension cord into the house and plug the fridge and freezer off it so the welder is the only thing running on the garage circuit.
Re: GV10 Stop and Start Project
Posted: Thu Feb 07, 2019 6:00 am
by OrangeQuest
Could you install something like this to protect the welder from surges?
https://www.smarthome.com/leviton-51120 ... essor.html
Re: GV10 Stop and Start Project
Posted: Thu Feb 07, 2019 6:20 am
by Bogieman
Just another example of how beer and the use of power tools don't mix

Re: GV10 Stop and Start Project
Posted: Thu Feb 07, 2019 7:56 am
by Jaysen
Bogieman wrote: ↑Thu Feb 07, 2019 6:20 am
Just another example of how beer and the use of power tools don't mix
If you're putting them in a bowl yeah... but if you think about it, beer is the BEST way to get all the "help" to keep their hands off your build...
story time wrote:"Hey there! Nice to see you... you building a boat?"
"Hey Bob! Yeah, just working on some fairing."
"Cool! Hand me a thingy there and I'll help."
"That'd be great. But right now, why don't you grab a beer and and look something up on youtube for me."
And that's how MikeyGNZ saved his boat from Bob.
Boogie may get some practice with this technique shortly,
Re: GV10 Stop and Start Project
Posted: Thu Feb 07, 2019 1:20 pm
by BB Sig
That sucks about the garage power. The previous homeowners had run a 30 amp breaker to the pole barn using 12/2 over 70'.

I swapped out to 8/3 and ran a 40 amp breaker. I also put a subpanel in the barn with 15 amps for the lights and 20 amps for tools. All wires in gray pvc. I hate cheap construction!
Re: GV10 Stop and Start Project
Posted: Thu Feb 07, 2019 7:36 pm
by MikeyGnz
I hadn't thought of using a surge protector but have had a look after seeing this. The issue is with most appliances/plugs/sockets here being 10A it is hard to find one rated for 15A. Also the specs for most units say they protect against surges of 336V or more and I need to keep it below 275V at the absolute maximum.
The unit in your link is to protect a whole house from surges in the power supply external to the house. My surges are occuring within my house so I would probably be better off with a plug in one like this
https://ampfibian.com.au/product/weathe ... r-s1000dx/
Re: GV10 Stop and Start Project
Posted: Thu Feb 07, 2019 7:37 pm
by MikeyGnz
Bogieman wrote: ↑Thu Feb 07, 2019 6:20 am
Just another example of how beer and the use of power tools don't mix
Funny how beer improves dancing and pool skills but is a hindrance to DIY.
Re: GV10 Stop and Start Project
Posted: Thu Feb 07, 2019 7:39 pm
by MikeyGnz
BB Sig wrote: ↑Thu Feb 07, 2019 1:20 pm
That sucks about the garage power. The previous homeowners had run a 30 amp breaker to the pole barn using 12/2 over 70'.
I swapped out to 8/3 and ran a 40 amp breaker. I also put a subpanel in the barn with 15 amps for the lights and 20 amps for tools. All wires in gray pvc. I hate cheap construction!
Some people just don't understand that garages and barns are for building cool toys not just for parking in.
Re: GV10 Stop and Start Project
Posted: Thu Feb 07, 2019 7:41 pm
by MikeyGnz
Jaysen wrote: ↑Thu Feb 07, 2019 7:56 am
Bogieman wrote: ↑Thu Feb 07, 2019 6:20 am
Just another example of how beer and the use of power tools don't mix
If you're putting them in a bowl yeah... but if you think about it, beer is the BEST way to get all the "help" to keep their hands off your build...
story time wrote:"Hey there! Nice to see you... you building a boat?"
"Hey Bob! Yeah, just working on some fairing."
"Cool! Hand me a thingy there and I'll help."
"That'd be great. But right now, why don't you grab a beer and and look something up on youtube for me."
And that's how MikeyGNZ saved his boat from Bob.
Boogie may get some practice with this technique shortly,
Seeing the work people put into fairing I am so happy I am building in alloy and can fair with an angle grinder. No problems with helpers, once I start throwing UV with the welder or sparks with the grinder people tend to disappear.
Re: GV10 Stop and Start Project
Posted: Thu Feb 07, 2019 8:07 pm
by Bogieman
MikeyGnz wrote: ↑Thu Feb 07, 2019 7:41 pm
Jaysen wrote: ↑Thu Feb 07, 2019 7:56 am
Bogieman wrote: ↑Thu Feb 07, 2019 6:20 am
Just another example of how beer and the use of power tools don't mix
If you're putting them in a bowl yeah... but if you think about it, beer is the BEST way to get all the "help" to keep their hands off your build...
story time wrote:"Hey there! Nice to see you... you building a boat?"
"Hey Bob! Yeah, just working on some fairing."
"Cool! Hand me a thingy there and I'll help."
"That'd be great. But right now, why don't you grab a beer and and look something up on youtube for me."
And that's how MikeyGNZ saved his boat from Bob.
Boogie may get some practice with this technique shortly,
Seeing the work people put into fairing I am so happy I am building in alloy and can fair with an angle grinder. No problems with helpers, once I start throwing UV with the welder or sparks with the grinder people tend to disappear.
Re: GV10 Stop and Start Project
Posted: Thu Feb 07, 2019 8:19 pm
by Jaysen
Bogieman wrote: ↑Thu Feb 07, 2019 8:07 pm
MikeyGnz wrote: ↑Thu Feb 07, 2019 7:41 pm
Jaysen wrote: ↑Thu Feb 07, 2019 7:56 am
If you're putting them in a bowl yeah... but if you think about it, beer is the BEST way to get all the "help" to keep their hands off your build...
Boogie may get some practice with this technique shortly,
Seeing the work people put into fairing I am so happy I am building in alloy and can fair with an angle grinder. No problems with helpers, once I start throwing UV with the welder or sparks with the grinder people tend to disappear.
That means no one knows you have beer...
Re: GV10 Stop and Start Project
Posted: Tue Feb 26, 2019 4:10 pm
by Netpackrat
Welders combined with residential wiring can cause weird things to happen. In my old shop, there was a gfci outlet in close proximity to where I used my tig welder. It wouldn’t always do it, but if I were welding light material or doing a lot of starts and stops and using the high frequency arc starting heavily, often as not the HF would trip the gfci and shut off the outlets on that side of the garage.
Re: GV10 Stop and Start Project
Posted: Tue Feb 26, 2019 5:04 pm
by MikeyGnz
Welder repaired and will be restarting my restart this weekend. I hope to soon have something more 3D and less flatpack.
Looking at the welder repair the initial repair only replaced one diode on a circuit board and this second time the partner diode went so it may be nothing to do with the power after all and just that both diodes should have been repaired initially. We'll see how I go.
Re: GV10 Stop and Start Project
Posted: Sat Mar 16, 2019 4:39 am
by MikeyGnz
Been a bit busy but have now started again. Side and bottom panels all welded up.
Welding some reinforcement onto the transom I've managed to get a fair bit of distortion so need some more alloy. Just waiting for that now then I can finally start on the assembly.


Re: GV10 Stop and Start Project
Posted: Sat Mar 16, 2019 6:16 pm
by Fuzz
From what I have seen it is really tough to not get distortion when welding thinner material.
Glad you are able to be moving forward.
Re: GV10 Stop and Start Project
Posted: Sat Mar 16, 2019 10:54 pm
by Netpackrat
Are your chine seams going to just be plain butted corner welds, or are you going to have some additional bracing there? Plain butt welds are difficult to make in thin aluminum especially without a lot of distortion. When I was making fuel tanks out of .050" 5052 for an aircraft project a few years ago, I found that corner welds with a flange on one of the pieces (making it a lapped weld) were not so bad, but without the flange it was much more difficult. But those were 90 degree joints with no curve. Also I was using tig.... With mig it should be easier to control distortion if you keep the welds short and skip around a lot.
Re: GV10 Stop and Start Project
Posted: Sun Mar 17, 2019 5:00 pm
by MikeyGnz
Netpackrat wrote: ↑Sat Mar 16, 2019 10:54 pm
Are your chine seams going to just be plain butted corner welds, or are you going to have some additional bracing there? Plain butt welds are difficult to make in thin aluminum especially without a lot of distortion. When I was making fuel tanks out of .050" 5052 for an aircraft project a few years ago, I found that corner welds with a flange on one of the pieces (making it a lapped weld) were not so bad, but without the flange it was much more difficult. But those were 90 degree joints with no curve. Also I was using tig.... With mig it should be easier to control distortion if you keep the welds short and skip around a lot.
I'm using TIG. On the transom I was fillet welding on some reinforcing members, did not have the transom clamped to anything, welding in one direction and had the current a bit low so was having to do a multi-pass weld. The 2nd and 3rd beads caused the worst distortion. Next time I will backstep with a higher current and temporary reinforcing clamped to multiple places and should not have the same issues.
With the sides and bottom the distortion is perpendicular to the welds causing the end of the panel to lift slightly as seen in the photo. This is where the design calls for a curve in the panels and I should be able to bend it back out when I assemble the hull, especially once the bead is polished off the outside. On the transom the distortion was parallel to the weld causing a twist in the panel. I will grind off the welds, beat the panel back flat and use it for some non-structural work but I'm not happy reusine it as a transom.
For the chine/keel I will be screwing 4 by 2 parallel to the panels from the middle seat to the transom to brace the panel during welding. With enough screws and careful welding I'm hoping to get away with standard corner welds. As the panels are already cut adding a flange at this stage isn't possible. I'm making this as a small project in alloy welding practice/learning before I decide on building a big aluminium kitset boat so I am expecting to run into problems.
I'm using 2.5mm/100 thou thick alloy so not quite as difficult as your fuel tanks.
Re: GV10 Stop and Start Project
Posted: Sun Mar 17, 2019 11:13 pm
by Netpackrat
Thanks for the informative reply. Are you using air or water cooled torch?
Re: GV10 Stop and Start Project
Posted: Mon Mar 18, 2019 3:42 pm
by MikeyGnz
Gas/air cooled size 26 torch. I would love a water cooled but don't really do enough welding at high enough amps to make it worth the cost.
Re: GV10 Stop and Start Project
Posted: Mon Mar 25, 2019 2:00 pm
by OneWayTraffic
I'm not sure if anyone else has posted this yet, but I am sure that you will need to add a lot of stiffeners/frames in there. Aluminium isn't nearly as stiff as glass/ply/glass at equal weight. According to my Maths 4mm aluminium should be not quite as stiff as 6mm ply glassed both sides with 400g. Stiffness is a cubic relationship to thickness, but also a inverse cubic relationship to span. I'd put reinforcements in the middle of all panels, or two to be safe.
Gerr has scantlings for light aluminium construction in "The elements of boat strength".
I'll look some up as I have his book if you like.
Re: GV10 Stop and Start Project
Posted: Sun Mar 31, 2019 3:54 pm
by MikeyGnz
OneWayTraffic wrote: ↑Mon Mar 25, 2019 2:00 pm
I'm not sure if anyone else has posted this yet, but I am sure that you will need to add a lot of stiffeners/frames in there. Aluminium isn't nearly as stiff as glass/ply/glass at equal weight. According to my Maths 4mm aluminium should be not quite as stiff as 6mm ply glassed both sides with 400g. Stiffness is a cubic relationship to thickness, but also a inverse cubic relationship to span. I'd put reinforcements in the middle of all panels, or two to be safe.
Gerr has scantlings for light aluminium construction in "The elements of boat strength".
I'll look some up as I have his book if you like.
I'm definitely planning for reinforcement, just waiting to get the hull in shape to measure and decide exactly how to do it. I'd like to cut some 2" or 3" pipe in half lengthwise and use it in the flat sections. There should be enough off-cuts from the original sheets to cut some curved longitudinal stringers for the not so straight sections at front.
The other option is to use angle or box on the exterior so I have strakes as well as reinforcement.
Re: GV10 Stop and Start Project
Posted: Sun Mar 31, 2019 3:59 pm
by MikeyGnz
Got some more done in the weekend. No new photos just tidying up welds on frames. Now that they are completely welded I will drill out all the rivets holding the frames together and fill the holes, then on to assembly.
I'm off on holiday so will be pushing pause here so I am not taking up the whole garage while I am away. As is I can stack everything against the wall and fit cars inside but once I start assembling there is room for one less car. Starting again in about 9 weeks.
Re: GV10 Stop and Start Project
Posted: Fri May 24, 2019 2:12 pm
by Netpackrat
MikeyGnz wrote: ↑Mon Mar 18, 2019 3:42 pm
Gas/air cooled size 26 torch. I would love a water cooled but don't really do enough welding at high enough amps to make it worth the cost.
Was going through this thread again for ideas, and thought I would mention I have been told if you have a faucet and drain in your shop, you can get a fitting to hook a water cooled torch up to your faucet, and then run the outflow right back into your drain, and thus avoid the cost of a radiator and coolant setup.
Re: GV10 Stop and Start Project
Posted: Sun Jun 09, 2019 3:17 am
by MikeyGnz
Back from my holiday and recovered ready to start building again. Hopefully I will start assembly next weekend.
Re: GV10 Stop and Start Project
Posted: Sun Jun 09, 2019 3:21 am
by MikeyGnz
Netpackrat wrote: ↑Fri May 24, 2019 2:12 pm
MikeyGnz wrote: ↑Mon Mar 18, 2019 3:42 pm
Gas/air cooled size 26 torch. I would love a water cooled but don't really do enough welding at high enough amps to make it worth the cost.
Was going through this thread again for ideas, and thought I would mention I have been told if you have a faucet and drain in your shop, you can get a fitting to hook a water cooled torch up to your faucet, and then run the outflow right back into your drain, and thus avoid the cost of a radiator and coolant setup.
I have thought about that but from what I have read it reduces torch life. 2 main issues:
- Heat from the torch boils off some of the water leaving deposits in the cooling passages.
Torch internals are brass and brass is attacked by chlorinated water.
As well as that I would have to run a lot of hoses as there is no water in my workshop.
In truth the air-cooled torch is all I need, I just want more toys.
Re: GV10 Stop and Start Project
Posted: Sun Jun 09, 2019 1:07 pm
by BB Sig
MikeyGnz wrote: ↑Sun Jun 09, 2019 3:21 am
In truth the air-cooled torch is all I need, I just want more toys.
Isn't that the truth in most of what's on forums?!
Re: GV10 Stop and Start Project
Posted: Tue Jun 11, 2019 9:49 pm
by MikeyGnz
BB Sig wrote: ↑Sun Jun 09, 2019 1:07 pm
MikeyGnz wrote: ↑Sun Jun 09, 2019 3:21 am
In truth the air-cooled torch is all I need, I just want more toys.
Isn't that the truth in most of what's on forums?!
Philosophy time
Is a home built boat 'just a toy' or is an expression of self, creativity and skill?
The things I have to tell myself to rationalise building one.
Re: GV10 Stop and Start Project
Posted: Tue Jun 11, 2019 10:11 pm
by Jaysen
It is whatever you need it to be to justify the build.
Re: GV10 Stop and Start Project
Posted: Mon Jun 24, 2019 5:42 pm
by MikeyGnz
No pictures but have been arranging things all ready to start stitching together. Should see some progress this week.
Re: GV10 Stop and Start Project
Posted: Tue Jun 25, 2019 8:41 am
by Jeff
Get us some photos when you can MikeyGnz!!
Re: GV10 Stop and Start Project
Posted: Sat Jun 29, 2019 7:04 pm
by MikeyGnz
Nothing interesting to show Jeff. It was all just small odds and ends like buying tie wire to stitch with. Buying pipe and cutting to short lenghts since i have seen others use that in their stitches.
Started some actual boat work yesterday. Welds on panels ground flat. Rivets holding frames together for welding drilled out. Rivet holes welded up. Found one dodgy weld on a bottom panel and rewelded that. Was too lazy to go and get camera, especially as it is still just a pile of panels like in the last photos so nothing to show.
Today it will be stitched, and there will be photos.
Re: GV10 Stop and Start Project
Posted: Sun Jun 30, 2019 6:00 pm
by MikeyGnz
MikeyGnz wrote: ↑Sat Jun 29, 2019 7:04 pm
Today it will be stitched, and there will be photos.
I was wrong. Much more prep required than I anticipated, then I ran out of screws. To continue tonight.
Re: GV10 Stop and Start Project
Posted: Mon Jul 01, 2019 7:38 am
by MikeyGnz
Finally some progress. Frames assembled and mounted on sawhorses, sides screwed in place.


Bottom panels fitted with temporary stiffners and drilled for tie wires.

Transom drilled for stiffeners and ready to fit. I will attach stiffeners once fitted.

And since everyone else puts up a selfie but I hate having my photo taken

Note: Don't weld with the torch pointing back at yourself. I was wondering what the burning smell was. Luckily just the helmet and not me.
Re: GV10 Stop and Start Project
Posted: Mon Jul 01, 2019 9:25 am
by Dougster

Dougster
Re: GV10 Stop and Start Project
Posted: Mon Jul 01, 2019 10:18 am
by Jeff
Love the build MikeyGnz, but be careful!!!! Jeff
Re: GV10 Stop and Start Project
Posted: Mon Jul 01, 2019 11:45 am
by Netpackrat
You’re not welding if you don’t set yourself on fire once in a while.
Re: GV10 Stop and Start Project
Posted: Mon Jul 01, 2019 12:41 pm
by Jaysen
Once in a while? So needing an assigned fire putter-outter means I’m an over achiever!
Re: GV10 Stop and Start Project
Posted: Mon Jul 01, 2019 3:25 pm
by Netpackrat
Burning flesh is nature’s way of telling you to stop unless you have a really good bead going.
Re: GV10 Stop and Start Project
Posted: Mon Jul 01, 2019 3:57 pm
by MikeyGnz
Netpackrat wrote: ↑Mon Jul 01, 2019 3:25 pm
Burning flesh is nature’s way of telling you to stop unless you have a really good bead going.
and when you have a good bead going you just need to convince yourself it is BBQ you smell
Re: GV10 Stop and Start Project
Posted: Mon Jul 01, 2019 3:59 pm
by MikeyGnz
Realised overnight that if I add a couple of fixings to the aft frame now it will make welding a lot easier in the future. So it all comes apart again after work.
Re: GV10 Stop and Start Project
Posted: Mon Jul 01, 2019 4:57 pm
by MikeyGnz
This is my first big welding project and first time welding sheet. My finishing expectations have rapidly gone from tidy to tidy workboat to work boat to I hope it floats.
To the designer, my sincerest apologies for the sacrilege i am creating.
Re: GV10 Stop and Start Project
Posted: Mon Jul 01, 2019 7:09 pm
by Fuzz
I am NOT a welder but one of the biggest problems I have seen is trying to weld thin plate and not have it distort. That is one reason guys around here tend to use heaver plate...........well and maybe they are not so good as they think they are

Re: GV10 Stop and Start Project
Posted: Tue Jul 02, 2019 6:21 pm
by Fair WX Pilot
Loving the build, great to see such a different take on the GV10.
Re: GV10 Stop and Start Project
Posted: Tue Jul 02, 2019 6:23 pm
by MikeyGnz
Fuzz wrote: ↑Mon Jul 01, 2019 7:09 pm
I am NOT a welder but one of the biggest problems I have seen is trying to weld thin plate and not have it distort.
That is exactly my problem. The distortion where I've welded the two halves of the bottom and side panels is real ugly. There are so many places where I would do it differently that I'm want to start over, my wallet is the only thing stopping me. I'll see how it goes but a few more stuff-ups and everything done so far may end up in the welding practice box.
Re: GV10 Stop and Start Project
Posted: Wed Jul 03, 2019 9:35 pm
by Fuzz
Most of the home built aluminium skiffs around here are work boats. They use too heavy of plate so they can weld it and also take a ton of abuse. Aluminium can be great but it not the easiest stuff to work with.
Re: GV10 Stop and Start Project
Posted: Thu Jul 04, 2019 7:44 am
by Fair WX Pilot
Welding light gauge aluminum is very difficult and the weld is almost never any where near as strong as the parent metal. That’s exactly why airplanes are riveted even though welding is quicker and cheaper and most light weight aluminum boats are a mixture of rivets and weld. Having said all that, if no one broke with tradition we wouldn’t have progress or inventions. I think you’re doing a great job and should keep going. All any of us can say is that our next boat will be better than this one
.
Re: GV10 Stop and Start Project
Posted: Thu Jul 04, 2019 9:33 am
by Netpackrat
Fair WX Pilot wrote: ↑Thu Jul 04, 2019 7:44 am
Welding light gauge aluminum is very difficult and the weld is almost never any where near as strong as the parent metal. That’s exactly why airplanes are riveted even though welding is quicker and cheaper and most light weight aluminum boats are a mixture of rivets and weld. Having said all that, if no one broke with tradition we wouldn’t have progress or inventions. I think you’re doing a great job and should keep going. All any of us can say is that our next boat will be better than this one
.
That and most of the aluminum alloys used for primary structure in airplanes are not generally considered weldable. There are plenty of welded aluminum parts on airplanes in applications where the highest strength isn't required.
Re: GV10 Stop and Start Project
Posted: Tue Jul 09, 2019 4:29 pm
by MikeyGnz
So after a bit more time looking at what I have completed so far and thinking I have decided to accept the horribly distorted welds in the front section and keep going with my current side and bottom panels.
BUT I have also decided that my frame construction is just going to cause issues in the long run and have decided to make new frames that are closer in design to what is shown on the plans. Got some more alloy last night and will make a start on the new frames this weekend.
Old frames will be cut up and used for some welding practice before I put torch to hull.
Re: GV10 Stop and Start Project
Posted: Sat Jul 13, 2019 2:42 am
by MikeyGnz
Back to the build today.
Have marked out new frame panels and will cut tomorrow. I'll also be making a circular saw guide as discussed in another thread, I can't remember whose. No photos today because you've all seen marking out before. There will be some new photos tomorrow.
I had all the build photos in a facebook album and was linking them through to here but I notice all photos/links are broken except for the most recent post with photos. So I've just uploaded them all to a builders gallery here and redone all the links so the photos should all be visible again.
Re: GV10 Stop and Start Project
Posted: Sun Jul 14, 2019 6:02 am
by MikeyGnz
Had a few chores this morning so didn’t get to spend as much time on the boat as I wanted.
I’ve got the mid frame marked out and ready to cut from MDF. I will be using this temporary mid frame for hull construction, then once the hull is all welded, I will measure up and install alloy frames 150mm fore and aft of the MDF frame to give me a fully boxed in buoyancy chamber.
Also shown is my circular saw guide copied from another builders’ posts. I have made mine double sided as I have 2 blades one for alloy and one for wood. The alloy blade is thinner so has a different offset from the centre guide rail.

Aft frame and transom knees cut. I have made the aft frame in multiple pieces so I have access to weld the joins of the transom knees and aft frame when assembled as shown in the second picture below. Once all in the boat this will give me two buoyancy chambers between the aft frame and the transom, one each side. Between the two will be an open area to allow for motor clamping and bilge drainage.


Next step is to do some more welding practice before starting final assembly. I need to have a play with pulse settings on my welder to hopefully minimise heat input and thus distortion.
Re: GV10 Stop and Start Project
Posted: Tue Jul 16, 2019 8:52 am
by pee wee
I'm fascinated with the work you're doing, thanks for posting your progress. Thanks also for going to the trouble to get the photos uploaded, good photos are valuable.
Re: GV10 Stop and Start Project
Posted: Tue Jul 16, 2019 10:13 am
by Netpackrat
Yes, thanks for posting all of this. It will be an extremely valuable thread in the future for anyone who wants to convert one of the plywood designs into aluminum.
Re: GV10 Stop and Start Project
Posted: Thu Jul 18, 2019 4:37 pm
by MikeyGnz
Netpackrat wrote: ↑Tue Jul 16, 2019 10:13 am
Yes, thanks for posting all of this. It will be an extremely valuable thread in the future for anyone who wants to convert one of the plywood designs into aluminum.
Since there has been no calculation behind the conversion to alloy and it is all gut feel and making it up as I go, I just hope it doesn't turn into a cautionary tale of how not to covert to aluminium.
Re: GV10 Stop and Start Project
Posted: Thu Jul 18, 2019 5:29 pm
by Netpackrat
MikeyGnz wrote: ↑Thu Jul 18, 2019 4:37 pm
Since there has been no calculation behind the conversion to alloy and it is all gut feel and making it up as I go, I just hope it doesn't turn into a cautionary tale of how not to covert to aluminium.
I think if you are persistent enough and willing to re-do stuff until you are satisfied, it will be okay. But even at worst, you will still probably make somebody else's boat better. If what you are attempting were easy, more people would be doing it.
Re: GV10 Stop and Start Project
Posted: Sun Jul 28, 2019 5:12 am
by MikeyGnz
Decided that I will be better off assembling everything the right way up, checking square, tack welding all parts to hold them in position then flipping to weld exterior. A second flip will be needed to finish the inside. To make assembly easier I calculated the angles under the frames and cut cradles to be mounted on top of my saw horses.

To get a good weld it is best to give alloy a good clean with a wire brush first. But it needs to be a stainless-steel wire brush because any small bits of mild steel wire left on the surface will rust and the rust makes holes in the aluminium’s protective oxide layer so the alloy will corrode as well. Had to order in a special stainless-steel wire cup brush to go on the grinder so no work last weekend. This weekend I got all panels brushed around the edges where they will be welded and now the bottom panels are in the cradles with a stitch or two holding them. Photo is pre stich.

After this spent time cutting angle aluminium into short (30mm) lengths that I will be using to brace right angle corners while assembling. Got a new (ex-demo) bandsaw that was going cheap because there were a few bits missing so spent most of the time this weekend making new handles so I could cut the angle.
Re: GV10 Stop and Start Project
Posted: Sun Jul 28, 2019 4:54 pm
by MikeyGnz
MikeyGnz wrote: ↑Sun Jul 28, 2019 5:12 am
Decided that I will be better off assembling everything the right way up, checking square, tack welding all parts to hold them in position then flipping to weld exterior. A second flip will be needed to finish the inside. To make assembly easier I calculated the angles under the frames and cut cradles to be mounted on top of my saw horses.

To get a good weld it is best to give alloy a good clean with a wire brush first. But it needs to be a stainless-steel wire brush because any small bits of mild steel wire left on the surface will rust and the rust makes holes in the aluminium’s protective oxide layer so the alloy will corrode as well. Had to order in a special stainless-steel wire cup brush to go on the grinder so no work last weekend. This weekend I got all panels brushed around the edges where they will be welded and now the bottom panels are in the cradles with a stitch or two holding them. Photo is pre stich.

After this spent time cutting angle aluminium into short (30mm) lengths that I will be using to brace right angle corners while assembling. Got a new (ex-demo) bandsaw that was going cheap because there were a few bits missing so spent most of the time this weekend making new handles so I could cut the angle.
Thinking about it overnight I'm not so sure about assembling the right way up. It makes measuring diagonals easier but bottom panels may sit better assembling upside down. Any comments from anyone else?
Re: GV10 Stop and Start Project
Posted: Sun Jul 28, 2019 5:29 pm
by Fair WX Pilot
Difficult one, the original design was easier to assemble upside down as it made bending the ply around the frames easier. You shouldn't have that problem. Maybe best to go with what you feel most comfortable with. Do you prefer tacking inside corners or outside corners.
Re: GV10 Stop and Start Project
Posted: Sun Jul 28, 2019 9:38 pm
by MikeyGnz
Fair WX Pilot wrote: ↑Sun Jul 28, 2019 5:29 pm
Difficult one, the original design was easier to assemble upside down as it made bending the ply around the frames easier. You shouldn't have that problem. Maybe best to go with what you feel most comfortable with. Do you prefer tacking inside corners or outside corners.
Outside corners are easier to weld but it is 6 of one, half dozen of the other for tacking. I am worried more about the combined weights of the bottom panels and 4 3 by 2 stiffeners making the bottom panels bend towards the side panels when stitching instead of pulling fair. I think i need to go back to assembling upside down so the panel plus stiffener weight ensures fairness.
Re: GV10 Stop and Start Project
Posted: Sat Aug 03, 2019 5:11 am
by MikeyGnz
Well I decided I would be better assembling upside down after all. So today started the third try at assembling all the pieces.
I started by assembling the aft frame, transom and transom gussets. No welding yet, all corners are at right angles and I have screwed all the peices together using angle aluminium brackets. I am extending the transom gussets up to the bottom of the seat and will use a U shaped seat. The open area of the U will allow access to the outboard clamps while the two side pieces will cover the chambers at each side to form watertight compartments. I will install a drain plug at the back corner of each compartment so I can periodically check for water ingress. If any water gets in all I will have to do is remove the seat top, find the leak and re-weld. Screw holes are easily filled with the welder then sanded flush.


Then on to adding the side panels and temporary middle frame. Side panels are screwed through to a length of angle aluminium at each side of the transom. Screws through the side panels hold them to the center frame. Aft frame is attached to the side panels with tie wire stitches. I'm surprised how big the boat will be, this is a replacement for a 8 foot ply on frame dinghy but feels much larger already.


3 by 2s on the transom are braces to help prevent distortion during welding.
Tomorrow I will attach the front transom, stitch on bottom panels, check square and tack weld all panels in place. If I have time and argon left after all that I might get some actual welding done as well.
Re: GV10 Stop and Start Project
Posted: Sat Aug 03, 2019 1:41 pm
by Fuzz
Starting to look like a boat. I am sure after tomorrow it will really look like one
Not something I would do but this building one from aluminium is interesting to watch. Thanks for sharing.
Re: GV10 Stop and Start Project
Posted: Sun Aug 04, 2019 5:57 am
by MikeyGnz
As usual for me I didn't get as much done as i hoped. I did learn an important lesson about finger placement while drilling through a panel though. It is official, I now have blood as well as sweat in the build. I'll do a bit more stitching each night after work and hopefully the welding can start next weekend.

Re: GV10 Stop and Start Project
Posted: Sun Aug 04, 2019 6:15 am
by MikeyGnz
Fuzz wrote: ↑Sat Aug 03, 2019 1:41 pm
Starting to look like a boat. I am sure after tomorrow it will really look like one
Not something I would do but this building one from aluminium is interesting to watch. Thanks for sharing.
My next build will probably be in ply.
The choice of alloy was for three main reasons:
- The boat will live at a rental property for tenants to use so needs to be durable.
- Price. Each alloy sheet was cheaper than a sheet of marine ply. Resin and hardener to make 4.8L is $220 or $500 for 20L. Study plans say 11L needed so I would need the $500 option. Paint, fairing compound, etc all adding up as well I think alloy will come in at 60% of the cost.
- Ultimately I want to build a jet boat for shallow rivers. Alloy hulls are much better for this. I can get a complete hull for $10k or a kitset for $4k but I want to build something to test my welding before I sink a lot of money into a kitset.
Not sure what the next build will be. I'd like something narrow and light that I can car top into the back country then use to get across mountain lakes to access hunting grounds. I have a 2hp outboard so either a chenoa or hiawatha with an outboard bracket, a hokner 15 or a swift canoe would be good.
Re: GV10 Stop and Start Project
Posted: Sun Aug 04, 2019 6:20 am
by MikeyGnz
MikeyGnz wrote: ↑Sun Aug 04, 2019 6:15 am
Fuzz wrote: ↑Sat Aug 03, 2019 1:41 pm
Starting to look like a boat. I am sure after tomorrow it will really look like one
Not something I would do but this building one from aluminium is interesting to watch. Thanks for sharing.
My next build will probably be in ply. The choice of alloy was for four main reasons:
- The boat will live at a rental property for tenants to use so needs to be durable.
- Price. Each alloy sheet was cheaper than a sheet of marine ply. Resin and hardener to make 4.8L is $220 or $500 for 20L. Study plans say 11L needed so I would need the $500 option. Paint, fairing compound, etc all adding up as well I think alloy will come in at 60% of the cost.
- Ultimately I want to build a jet boat for shallow rivers. Alloy hulls are much better for this. I can get a complete hull for $10k or a kitset for $4k but I want to build something to test my welding before I sink a lot of money into a kitset.
- I have to be different/difficult.
Great thing about building our own boats is we can customize them for our own needs and wants.
Not sure what the next build will be. I'd like something narrow and light that I can car top into the back country then use to get across mountain lakes to access hunting grounds. I have a 2hp outboard so either a chenoa or hiawatha with an outboard bracket or a honker 15 would be good. Swift canoe is getting a bit wide and heavy for a roof rack, especially if off roading.
Re: GV10 Stop and Start Project
Posted: Sun Aug 04, 2019 12:15 pm
by Fuzz
You are the first person I have ever heard say it is cheaper to build in alloy. Shipping costs must be really tough for you. I do think you will find it much easier to build a larger boat with thicker plates. But if you are able to finish this one it will only get better
Re: GV10 Stop and Start Project
Posted: Sun Aug 04, 2019 4:01 pm
by MikeyGnz
Fuzz wrote: ↑Sun Aug 04, 2019 12:15 pm
You are the first person I have ever heard say it is cheaper to build in alloy. Shipping costs must be really tough for you. I do think you will find it much easier to build a larger boat with thicker plates. But if you are able to finish this one it will only get better
Not sure how much is shipping and how much is huge markups from local retailers. Bought a fault code reader for my car the other day, $175-250 in shops but i got it online $2.37 including shipping. Looking at the details it was the exact same chip inside.
Expensive part of building in alloy is the welder and press brake for folding. I already had a welder ad no folding needed for this design.
Sheet thickness is same as the topsides of the kitset i want so i need to know if i can weld this thin.
Re: GV10 Stop and Start Project
Posted: Sun Aug 04, 2019 11:52 pm
by Netpackrat
Fuzz wrote: ↑Sun Aug 04, 2019 12:15 pm
You are the first person I have ever heard say it is cheaper to build in alloy. Shipping costs must be really tough for you. I do think you will find it much easier to build a larger boat with thicker plates. But if you are able to finish this one it will only get better
I wouldn't be too surprised if building in aluminum is cheaper in AK too as far as cost of materials and shipping goes. I haven't priced aluminum in a while, but I bet I could go to either of a couple metal suppliers here in Anchorage and leave the same day with the exact material Mikey is using. Quality marine plywood, not so much. Getting the 4 sheets up here for my D5 last year was a big pain in the ass and took me more than 2 months; the company basically acted like they didn't care about my business at all. No resin needed, the only hazmat material is the compressed argon shielding gas for the welder, which is also no problem to get locally. No need to prime and paint at all unless you plan to keep your boat in the water.
The real difference for an amateur builder, of course is the S&G building method is far more accessible to a far greater number of people than metal. Welding machines are expensive and you should ideally have a good skill base using the equipment before you begin. S&G doesn't require much of a tooling investment up front and it's very forgiving of mistakes as far as building methods go. But for somebody like me who already has welding equipment and decent skills using it, metal is attractive. There's just a near total dearth of aluminum designs for amateur building the types of boats I am most interested in, because that market is small. Skiffs are not really a problem, but few designers offer anything in the way of small sailboats out of aluminum because the interesection of people who have the ability to build them, and people who want them is pretty small. What really needs to happen is for the sailing community to start an outreach program to get American rednecks involved in sailing. Then we would see more designs for sailboats out of 'lumnum that can go on a trailer.
Re: GV10 Stop and Start Project
Posted: Sun Aug 25, 2019 4:34 am
by MikeyGnz
I haven’t posted in a while because I have been going around in circles with my build. Using thin alloy instead of plywood means that I can’t just screw the side and bottom panels to the bow transom as per the plans. I tried stitching it on and couldn’t get it to sit straight. I tried screwing some wooden blocks to the back of the transom and screwing the sides to them but having to hold the panel in place with one hand and screw with the other also resulted in misalignment. After thinking about it for the last week I came up with a system that will work.
I cut a replica bow transom from ply and cut lengths of 3 by 2 with the correct angles to go around the perimeter. I routed out a notch from 2 of the 3 by 2s to fit the stiffener I have on the back of the transom and used a 45 degree router cutter to put a chamfer on the front edge. Then with the bow transom clamped on one side of the 3 by 2s and the replica ply bow transom on the other side I drilled through the whole lot in 12 places. This gave me 6 separate pieces I could bolt together into 1. The unbolted assembly shown below.


After this I clamped the individual 3 by 2s onto the front ends of the side and bottom panels and screwed through the very front edge of the panels into the chamfered edges on the front of the 3 by 2s.

Then it was just a matter to putting the bolts through the ply replica transom, through the 3 by 2s and through the alloy transom and tightening it all down to pull it together.

Then it was just a bit of a play with a screwdriver to let off the tension on some screws and increase on others until all the joins lined up.
With that finally done I have started the stitching to get the chine and keel joins lining up and am about 40% done. Really starting to look like a boat now.

I’ll get the stitching finished this week and then I can finally start welding.
One of the things that made bending difficult was the distortion where I welded the long panels (same place where the butt blocks or f-glass splices on a ply build). Maybe it is just my skill level but I find getting distortion free butt welds difficult in alloy and I’m much happier with corner welds. I can get 6100 by 1500 by 3mm (20’ by 5’ by 1/8”) sheets of marine alloy and local firms have laser cutters that can handle this sheet size. If I was starting over I would get 2 side and 2 bottom panels laser cut from a single 6100 by 1500 sheet. This would eliminate the need for butt welds, plus I wouldn’t have the wavy edges from cutting it all with a jigsaw. Oh well, live and learn, what I have is good enough this time.
Re: GV10 Stop and Start Project
Posted: Sun Aug 25, 2019 8:29 pm
by Netpackrat
I wonder if maybe building in a basket mold would have helped in forcing all the panels into submission?
Re: GV10 Stop and Start Project
Posted: Mon Aug 26, 2019 12:13 am
by MikeyGnz
Netpackrat wrote: ↑Sun Aug 25, 2019 8:29 pm
I wonder if maybe building in a basket mold would have helped in forcing all the panels into submission?
Probably, The kitset that this boat is a practice for doesn't use one though so this way is better practice for me.
With the kitsets they leave tabs on the end of the panels. First the rear half of the hull gets assembled, squared and tacked in place. Then you can drill a hole in each tab and use a couple of nuts and large washers on some threaded rod to pull the bow together. Measure square again then weld it all up.
Re: GV10 Stop and Start Project
Posted: Mon Aug 26, 2019 7:53 am
by MikeyGnz
All stitched now.
I'm busy the next 2 nights but welding starts Thursday.
Re: GV10 Stop and Start Project
Posted: Mon Aug 26, 2019 12:23 pm
by tcason
Looks great!!
Re: GV10 Stop and Start Project
Posted: Mon Aug 26, 2019 1:53 pm
by Jeff
Nice work!! Jeff
Re: GV10 Stop and Start Project
Posted: Mon Aug 26, 2019 3:19 pm
by Fuzz
I read where you cut things out with a jig saw. Any reason you did not use a curricular saw with a carbide blade? I have found the curricular saw does a far better job for me. And tons faster
Re: GV10 Stop and Start Project
Posted: Mon Aug 26, 2019 5:34 pm
by MikeyGnz
Fuzz wrote: ↑Mon Aug 26, 2019 3:19 pm
I read where you cut things out with a jig saw. Any reason you did not use a curricular saw with a carbide blade? I have found the curricular saw does a far better job for me. And tons faster
At the time it was a matter of having metal cutting blades for the jigsaw but not the circular saw and wanting to do it on the cheap when the only aluminium cutting circular saw blades I could find were $120-150. Also my circular saw is 9 1/4" / 235mm diameter and I wasn't sure how well a blade this size would go round curves. I have since found a retailer that has more realistic prices ($45 for the same blade the other stores want $120-150 for) and have bought a multi-material TCT blade, works much better.
I'm not good at taking advice and tend to need to find out what not to do by doing it.
Re: GV10 Stop and Start Project
Posted: Mon Aug 26, 2019 5:40 pm
by MikeyGnz
Jeff wrote: ↑Mon Aug 26, 2019 1:53 pm
Nice work!! Jeff
tcason wrote: ↑Mon Aug 26, 2019 12:23 pmLooks great!!
Thanks Guys
Re: GV10 Stop and Start Project
Posted: Mon Aug 26, 2019 11:01 pm
by Fuzz
If your saw can take a 7 1/4 blade, or smaller, with a 16 tooth carbide blade it will walk right through aluminium.
It will go through solid glass just as well if you ever need it to.
Re: GV10 Stop and Start Project
Posted: Sun Sep 01, 2019 4:55 pm
by MikeyGnz
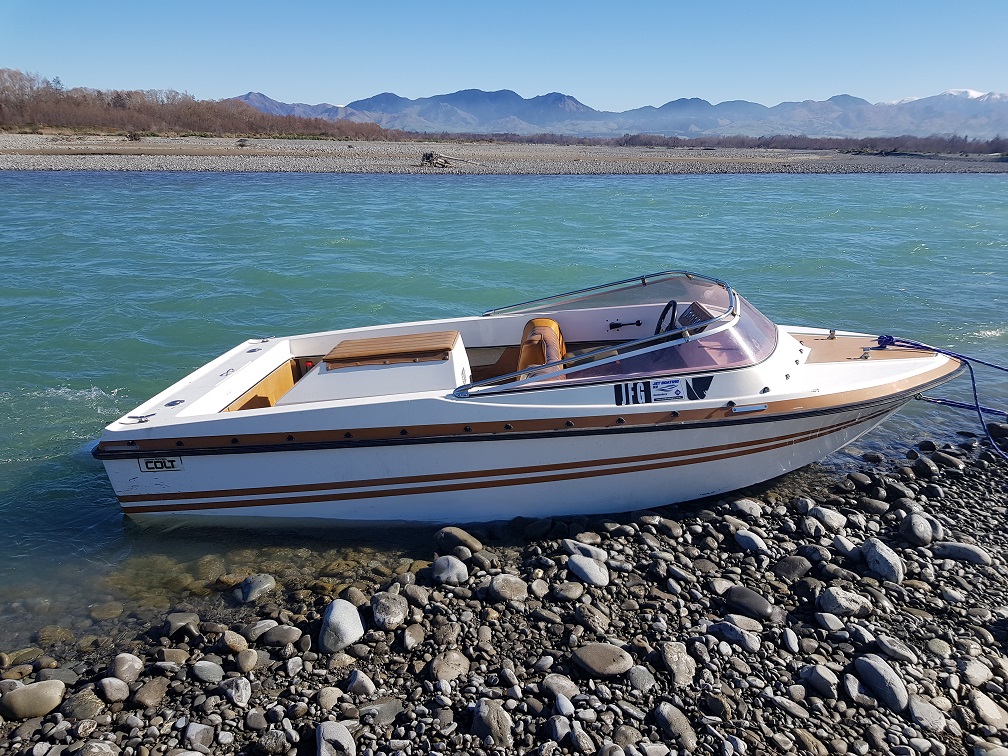
No work on the boat this weekend. It was fathers day here in NZ and we had a jet boat club trip up a local river that I took Dad on.
My old boat that I would like to replace with an aluminium hull and lighter engine. This is a 4ish metre fibreglass hull with a Hamilton 753 3 stage jet unit driven by an old 250ci ford 6, all up weighs about a tonne.. I will be building an aluminium hull kitset if the GV10 shows my welding is up to scratch. With a modern engine and aluminium hull a boat the same length should be about 450kg, much easier to push when water is found to be too shallow.
Someone elses pic on the way up the river. Facebook link so I'm not sure if this will work.

Quick video of me in some easy water on the way upstream, another facebook link so again not sure if this will work.
https://www.facebook.com/michael.galamb ... 11394/?t=0
Re: GV10 Stop and Start Project
Posted: Sun Sep 08, 2019 4:15 am
by MikeyGnz
Back to the build. Got the hull all tacked together and started welding.
Reading up on how to prevent or minimise distortion everything I found says to do short welds to minimise heat input and hold parts well with a lot of tacks. I decided to put a tack in every 30mm, that way I can weld tack to tack on the keel, then do the same on each chine leaving each weld lots of cooling time while I am doing the other welds.


I started off welding tack to tack and there was no sign of distortion and did not seem to have a lot of heat input so I moved to doing two tacks then three tacks at a time. With three tacks there was no sign of distortion but the heat input was getting to the point where I didn't want to go to four tacks at a time. Got about 2 hours welding done then life called and had to hang up the helmet.


Just realised the photos don't really show it well but I got the keel and both chines welded from the transom forward about 1200mm.
Re: GV10 Stop and Start Project
Posted: Sun Sep 08, 2019 8:55 am
by pee wee
Nice, looks like the technique is working, so far. Looking good!
Re: GV10 Stop and Start Project
Posted: Sun Sep 08, 2019 12:31 pm
by Jeff
Love this build!!!!! Jeff
Re: GV10 Stop and Start Project
Posted: Sun Sep 08, 2019 1:53 pm
by Fuzz
Very nice looking welding! And no distortion
Re: GV10 Stop and Start Project
Posted: Sun Sep 08, 2019 10:11 pm
by Netpackrat
Re: GV10 Stop and Start Project
Posted: Sat Sep 14, 2019 4:50 pm
by MikeyGnz
Took Friday afternoon off work for some "me time" namely boat work. Chines, keel and front transom seams now all fully welded. I need to rebare the wooden stiffeners to give me room to weld aft transom then flip and weld inside. No photos, too busy working so far.
Re: GV10 Stop and Start Project
Posted: Sun Sep 15, 2019 4:59 am
by MikeyGnz
Where I left off with the last post. Chines, keel and bow transom all welded except for a 2 inch bit on each seam above the mdf temporary frame. When I tacked this bit the mdf started to smoke so I decided not to weld it yet so as to not burn down the house.


I needed to cut a few of the 4 by 2s I've got as stiffeners on the bottom so they were a bit further from the transom weld. Oops, Turns out I forgot to adjust the blade depth on the skill saw.

Not too big a deal. I cut a short offcut and inserted it in the hole. I've tacked the bottom, will weld the inside solid after the flip then sand flush and re-weld the outside. Then I finally got round to welding on the transom.


Filler piece is purposely high so the plasma from tacking it in doesn't set fire to the temporary stiffeners.
After that the first flip.


I'm planning 3 to 5 flips on the build.
1 - This flip. Flip to weld the inside after welding the outside. I need to cut and weld bow and mid frames and weld in the aft frame. Also want to weld the inside of the chine, keel and transom (bow and stern) seams. Weld in bottom stiffeners and remove the 4 by 2 temporary stiffeners. Weld in cleats for seats. Fill holes and touch up any welds that need it with a die grinder.
2 - Flip upside down again, weld the gaps at the mid frame and add fill to any holes that need it. Fair/smooth all holes and welds with a sanding disc in the grinder.
3 - Flip and take down to the beach to check for water tightness. If water tight install seats, rub rail, etc.
In the first photo you can see the distorted bits near the bow from welding the panel sections together. I'm thinking that I might add in another couple of flips between flip 2 and 3 and fill the hollows with weld then grind/sand fair. Will probably depend on how I feel at that stage and how much argon I have left.
Re: GV10 Stop and Start Project
Posted: Thu Sep 19, 2019 4:43 pm
by MikeyGnz
My Dad was looking at what I've done so far and he thinks that instead of trying to weld all my seat compartments watertight I should just do short welds every so often and fill the space with empty plastic drink bottles since they weigh next to nothing and will not take in water. I suppose I could also do the short welds and do a decent bead of 5200 on all inside seams. I'm not too sure if I like the idea or not, would mean water could get in and potentially be slow draining and would be a place for crap to collect, but then maybe I just want the challenge of welding it all.
Any thoughts about whats best?
Re: GV10 Stop and Start Project
Posted: Thu Sep 19, 2019 4:46 pm
by Jaysen
You can use something water tight for floatation (water bottles... not so sure). If you are worried about water, just leave a limber hole large enough to drain but not enough to let your flotation out. You can add a hatch to allow you to remove/change flotation devices as well.
Not a bad idea...
Re: GV10 Stop and Start Project
Posted: Thu Sep 19, 2019 5:41 pm
by piperdown
someone on here, I think they might have been overseas, used plastic balls like you'd use in a ball pit. He filled the lower compartments with them instead of poured foam.
Re: GV10 Stop and Start Project
Posted: Sat Sep 21, 2019 8:41 pm
by MikeyGnz
Thanks guys. For now I'm going to try welding it all but its good to have a backup.
For access to add or replace flotation I was planning on having to remove the seats. They will be ply glued and screwed to the top of the compartment. To remove I would have to unscrew then pull off/cut through sealant. Most people talk about using 5200 on their boats but some have said this never comes off. Would I be better to use silicon sealant under the seats so they can be removed?
Re: GV10 Stop and Start Project
Posted: Sat Sep 21, 2019 10:48 pm
by Fuzz
Pretty sure I would use something other than 5200. I only use 5200 on stuff I will not remove very often or never.
Re: GV10 Stop and Start Project
Posted: Sun Sep 22, 2019 5:25 am
by topwater
You would have a better time using 4200 i think its half the strength of 5200
Re: GV10 Stop and Start Project
Posted: Sun Sep 22, 2019 6:51 pm
by MikeyGnz
Just to check since we tend to have different product names and stuff than in other countries are the following two links the same as what you mean when you say 5200 and 4200?
https://www.burnsco.co.nz/shop/boating/ ... uv-sealant
https://www.burnsco.co.nz/shop/boating/ ... ve-sealant
Did some more welding over the weekend but not looking any different so I didn't bother with photos. Inside keel fully welded. Front half of inside chines welded along with the bow transom. Just got the back inside half of the chines, the stern transom and the frames to weld in and the stitch holes to weld up before it can have a watertightness test.
Tip of the weekend - after dropping a welding rod with a red-hot tip, check the welding rod hasn't got caught in your glove before scratching your face.
Mmmmm, smells like sausages.
Re: GV10 Stop and Start Project
Posted: Mon Sep 23, 2019 2:01 am
by Fuzz
Your link to the 5200 is the same. 4000 and 4200 are a little different but I am not sure how different.
When welding you are either sitting on something that draws all the heat out of you or you are burning yourself. Nothing about that ever made me want to be a welder

Re: GV10 Stop and Start Project
Posted: Mon Sep 23, 2019 6:35 am
by MikeyGnz
Fuzz wrote: ↑Mon Sep 23, 2019 2:01 am
Your link to the 5200 is the same. 4000 and 4200 are a little different but I am not sure how different.
When welding you are either sitting on something that draws all the heat out of you or you are burning yourself. Nothing about that ever made me want to be a welder
Thanks Fuzz. Some brands have totally different names for our market.
Was worse when i got up this morning and noticed the hot rod end had fallen down my overalls burning as it went. At least with the welding helmet on noone can see the tears.
Re: GV10 Stop and Start Project
Posted: Mon Sep 23, 2019 9:39 am
by Jeff
Nice progress, Jeff
Re: GV10 Stop and Start Project
Posted: Tue Sep 24, 2019 6:46 pm
by MikeyGnz
Fuzz wrote: ↑Mon Sep 23, 2019 2:01 am
Your link to the 5200 is the same. 4000 and 4200 are a little different but I am not sure how different.
I found these that explain the differences. Some reading between the lines required.
http://multimedia.3m.com/mws/media/8118 ... ochure.pdf
https://multimedia.3m.com/mws/media/109 ... owners.pdf
5200 and 4200 are polyurethane based while 4000 is a Silane Modified Polymer. 5200 has a 650psi tensile strength a hardness of 70 shore A and can withstand >230% stretch while 4200 is 220psi, 40 shore A and >275% and 4000 is 450psi, 40 shore A and >300% with higher UV resistance. 5200 is sold as permanent, 4200 as removable and 4000 as semi-permanent.
In short 4000 is halfway between 5200 and 4200 in strength but handles stretch and UV better.
Cost in NZ for a 295mL/10oz caulking gun cartridge are $44.99 for 5200, 39.99$ for 4000. I can't find 4200 and it would have to be a special order. Sika brand products are far more available and $5-15 cheaper so I'll have a look at their range. Has anyone had experience with Sika?
Re: GV10 Stop and Start Project
Posted: Tue Sep 24, 2019 8:41 pm
by Fuzz
I have used the Sika line of products. For what you are doing I would have no problem using it.
Re: GV10 Stop and Start Project
Posted: Wed Sep 25, 2019 5:01 am
by peterrivers
Mike, Surtees use Bostik ISR 70-03 to secure their windscreens ( ask me how I know...) - attaching toughened glass to Ali. It is wonderful stuff and with your discount you'll get it from Blacks for about $20 a cartridge.
It's black, sticks very well, is tough, but can be removed.
Re: GV10 Stop and Start Project
Posted: Fri Sep 27, 2019 9:11 pm
by MikeyGnz
peterrivers wrote: ↑Wed Sep 25, 2019 5:01 am
Mike, Surtees use Bostik ISR 70-03 to secure their windscreens ( ask me how I know...) - attaching toughened glass to Ali. It is wonderful stuff and with your discount you'll get it from Blacks for about $20 a cartridge.
It's black, sticks very well, is tough, but can be removed.
Thanks Peter. Just been down to blacks. Ended up going with Bostic MSR-CA (marine sealant range-construction adhesive). Seems very similar to 3M 4000 but at half the price and available locally.
Decided not to use Sika as all product documentation say I need primers and they are all twice the price of the adhesive itself.
If the rain holds up I might be finished enough for a test launch tomorrow. This will be the alloy hull and bulkheads without seats, rubrails or clamping board. A does it float/leak test before i fit wooden parts just in case more welding is needed.
Re: GV10 Stop and Start Project
Posted: Sun Sep 29, 2019 4:02 am
by peterrivers
Excellent, how did you get on? Would have been a nice day for it.
Re: GV10 Stop and Start Project
Posted: Sun Sep 29, 2019 3:39 pm
by MikeyGnz
Had some friends drop round as well as my usual gross underestimation of the work required so no test launch and still lots to do.
I got the middle frames cut. Since I am replacing one frame with 2 frames 250 apart the dimensions in the plan wouldn't work and I had to measure up.
Was not easy but I have been following Leo's rebuilding Tally-Ho on youtube and I saw how he made patterns using thin ply so gave that a go. I'll try and put the photos up this evening.
Didn't get the welder fired up at all so no new progress on the hull to report.
Re: GV10 Stop and Start Project
Posted: Sun Sep 29, 2019 5:58 pm
by Fuzz
Re: GV10 Stop and Start Project
Posted: Mon Sep 30, 2019 4:29 am
by MikeyGnz
Photos from weekend.
Making template from scraps of wood and cheap ply. Don't forget to add the seat level.

Trace round template onto sheet.

All marked out ready to cut.

.Yay, it fits. All cut ready to weld.

Missing segment at bottom is a limber hole for drainage.
Re: GV10 Stop and Start Project
Posted: Mon Sep 30, 2019 4:31 am
by MikeyGnz
Re: GV10 Stop and Start Project
Posted: Mon Sep 30, 2019 6:42 am
by OneWayTraffic
Speaking of the sink/float and floatation issue:
I made some pontoons for my D5. They are removable, and add about 70 litres a side. I made them from fabric from this place:
https://www.diypackraft.com/
Similar to Optimist buoyancy bags. It's worth a look.
I'd at least get some polystyrene in under the seats if nothing else. Paint it with a house paint to seal it.
Re: GV10 Stop and Start Project
Posted: Wed Oct 02, 2019 1:52 am
by MikeyGnz
OneWayTraffic wrote: ↑Mon Sep 30, 2019 6:42 am
Speaking of the sink/float and floatation issue:
I made some pontoons for my D5. They are removable, and add about 70 litres a side. I made them from fabric from this place:
https://www.diypackraft.com/
Similar to Optimist buoyancy bags. It's worth a look.
I'd at least get some polystyrene in under the seats if nothing else. Paint it with a house paint to seal it.
Hi OWT.
Ultimately I will have 4 sealed buoyancy compartments, but since I want to be able to see the welds when I do the test launch I won't have fitted tops or bottoms yet. As I won't be leaving the boat ramp this shouldn't be a big deal. I should only have a sinking issue if I have missed filling any of the stitching holes, missed welding a portion of a seam, have a dodgy weld that breaks or I leave the bung out.
I don't think I will have any issues with welding the sealed compartments, it is my dad that thinks I should use coke bottles to reduce the welding requirements.
Re: GV10 Stop and Start Project
Posted: Wed Oct 02, 2019 5:31 am
by Jaysen
Why not go the other way and fill the hull with water?
Re: GV10 Stop and Start Project
Posted: Wed Oct 02, 2019 5:30 pm
by MikeyGnz
Jaysen wrote: ↑Wed Oct 02, 2019 5:31 am
Why not go the other way and fill the hull with water?
That was my first plan.
But, looking at the study plans the design displacement is 360kg of water. Looking at photos on the study plans the GV10 floats very high in the water, maybe only 15-25% of the hull volume is providing displacement. Even at a conservative guesstimate of 1/3 the volume providing this displacement it would mean to fill the hull I would need over a tonne of water, at 25% 1.5 tonnes of water would be needed, 20% would need 1.8 tonnes or 15% would need 2.4 tonnes. Since the hull would be supported on the keel and one bunk each side putting this much weight in it might be pushing the limit for strength.
I'm still planning to fill the sealed compartments to check if they are watertight but they are quite a bit smaller.
Re: GV10 Stop and Start Project
Posted: Wed Oct 02, 2019 5:44 pm
by terrulian
All good! Build on.
Re: GV10 Stop and Start Project
Posted: Wed Oct 02, 2019 6:27 pm
by Jaysen
Well, maybe I’m lazy, but don’t you only need to check the welds? Creative “tipping” would let you put a much smaller amount of water in the boat (cover the weld).
Just an idea.
Re: GV10 Stop and Start Project
Posted: Wed Oct 02, 2019 9:29 pm
by Netpackrat
I have read of using compressed air to check for leaks in aluminum boat welding. You slowly run a blow nozzle down the welded joint, while another person checks the other side for bubbles with water using a spray nozzle or low volume flow from a hose.
Re: GV10 Stop and Start Project
Posted: Thu Oct 03, 2019 5:36 pm
by MikeyGnz
Jaysen wrote: ↑Wed Oct 02, 2019 6:27 pm
Well, maybe I’m lazy, but don’t you only need to check the welds? Creative “tipping” would let you put a much smaller amount of water in the boat (cover the weld).
Just an idea.
I though a test launch was being lazy. If I put water inside I need to clean and dry before I can do any more welding. I hadn't though about tipping, this gives me a bit of a back-up for if the tides are wrong or it is raining.
Netpackrat wrote: ↑Wed Oct 02, 2019 9:29 pm
I have read of using compressed air to check for leaks in aluminum boat welding. You slowly run a blow nozzle down the welded joint, while another person checks the other side for bubbles with water using a spray nozzle or low volume flow from a hose.
Another method that would work.
Best way would probably be a proper weld test like this
https://www.weldingsupplies.co.nz/shop/ ... n+Kit.html but I'm not sure if I want to pay the $
Re: GV10 Stop and Start Project
Posted: Thu Oct 03, 2019 6:17 pm
by Jaysen
Why do it proper when you can just hope it doesn't cactus?
All us US based folks just learned about cactus from Glossyblack and barraman. Hope I used that right.
Re: GV10 Stop and Start Project
Posted: Fri Oct 04, 2019 6:02 am
by MikeyGnz
Jaysen wrote: ↑Thu Oct 03, 2019 6:17 pm
Why do it proper when you can just hope it doesn't cactus?
All us US based folks just learned about cactus from Glossyblack and barraman. Hope I used that right.
Thats aussie slang. Here in nz we would hope it doesn't turn out munted
Re: GV10 Stop and Start Project
Posted: Fri Oct 04, 2019 8:57 pm
by Fuzz
While each of the testing methods are good in their own way they all have a major flaw. That being they would deny us the on water pictures
Re: GV10 Stop and Start Project
Posted: Sun Oct 06, 2019 7:24 pm
by MikeyGnz
Fuzz wrote: ↑Fri Oct 04, 2019 8:57 pm
While each of the testing methods are good in their own way they all have a major flaw. That being they would deny us the on water pictures
You just hope to see it sink
Re: GV10 Stop and Start Project
Posted: Mon Oct 07, 2019 1:50 am
by Fuzz
Nope, don't want to see it sink at all
But the good thing is a metal boat at this point will not be hurt at all if it did happen. More just wanting a glimpse of what it looks like on the water. And of course the final powered test will be great to see.
Re: GV10 Stop and Start Project
Posted: Sat Dec 07, 2019 6:05 pm
by MikeyGnz
Had a few busy weekends followed by a few rest weekends but am now back working on the boat again. I was putting in a solid day yesterday when my welder crapped out again. I only needed a few more hours and it would have been watertight. Maybe some pictures later, too pissed off now.
Re: GV10 Stop and Start Project
Posted: Sat Dec 07, 2019 11:19 pm
by Fuzz
Sorry about the welding machine but glad to know you have been making some progress. I was wondering what was happening with this build.
Re: GV10 Stop and Start Project
Posted: Sun Dec 08, 2019 4:55 pm
by MikeyGnz
Welder dropped in for repairs. Assuming it is a simple problem it should be all ready by Friday and I can finish this weekend. In the mean time I am going to get all remaining parts cut to length ready to fit and get the wood cut and polyurethane varnished for the seats and transom.
Pics tonight/tomorrow
Re: GV10 Stop and Start Project
Posted: Mon Dec 09, 2019 2:47 pm
by MikeyGnz
Not much more to go. I still need to weld the sides of the mid frames to the side of the hull, cleats for seats, bottom stiffeners and bow seat frame but can't do this until my welder is repaired.


Since I can't weld I did some work on the woodwork last night. Mid and aft seats all cut and trimmed to size. The aft seat isn't sitting properly yet, I need to straighten out the distortion just ahead of the aft frame to make it fit.

I also cut the transom stiffener/clamping board but don't have photos of that.
Re: GV10 Stop and Start Project
Posted: Mon Dec 09, 2019 3:57 pm
by Jeff
Nice work!!!! Jeff
Re: GV10 Stop and Start Project
Posted: Tue Dec 10, 2019 9:47 am
by tcason
Based upon my experience with Garvey 13 you may want to add some "stringers" to the floor of boat to stiffren bottom (either exterior or interior).
Maybe you just haven't gottend there yet....................
I love my Garvey 13!!
Re: GV10 Stop and Start Project
Posted: Tue Dec 10, 2019 4:06 pm
by MikeyGnz
tcason wrote: ↑Tue Dec 10, 2019 9:47 am
Based upon my experience with Garvey 13 you may want to add some "stringers" to the floor of boat to stiffren bottom (either exterior or interior).
Maybe you just haven't gottend there yet....................
I love my Garvey 13!!
They are comming. I want to get the frames properly fixed in place first so I know the length. Seat tops are tempory and not fixed in place yet, I just thought I may as well work on the wood while my welder was out of action.
Re: GV10 Stop and Start Project
Posted: Mon Dec 16, 2019 3:48 pm
by MikeyGnz
So close but so far away. Looks like I'm not going to be finished in time for the Christmas holiday.
I got the remaining welds round the frames done and 2 of the 8 bottom stiffeners welded in over the weekend but there are a lot of welds I am not happy with so time to get the grinder out again. Bottom stiffeners, seat cleats, front seat/fairlead and hole filling are all that is left but no chance of having all that done by the time I go on holiday on Sat.
Welding in the bottom stiffeners it seemed easiest to sit under an upside-down boat and weld overhead. That was until drops of molten aluminium started raining on me. It is surprising how long it stays molten once it has burnt through overalls and is sitting on skin.
Re: GV10 Stop and Start Project
Posted: Mon Dec 16, 2019 4:58 pm
by Netpackrat
MikeyGnz wrote: ↑Mon Dec 16, 2019 3:48 pm
Welding in the bottom stiffeners it seemed easiest to sit under an upside-down boat and weld overhead. That was until drops of molten aluminium started raining on me. It is surprising how long it stays molten once it has burnt through overalls and is sitting on skin.
Yeah position welding sucks... I like upside down and vertical welding so much I built the following contraption for the extensive frame repairs that my MGA project needed:


Might even be possible to rig something like that at least for building a smaller boat. Maybe suspend the strongback between the stands.
Re: GV10 Stop and Start Project
Posted: Mon Dec 16, 2019 5:02 pm
by Jaysen
When my MG needs a rotisserie like that, I need to find it a new home.
My favorite way weld is to watch someone better at it cash my check. I can do it, but I suck at it almost as much as I suck at catching fish in Alaska. Glad to see you making such great progress. Looking forward to the results of on the water testing.
Re: GV10 Stop and Start Project
Posted: Sat Feb 08, 2020 4:44 am
by MikeyGnz
Jaysen wrote: ↑Mon Dec 16, 2019 5:02 pm
When my MG needs a rotisserie like that, I need to find it a new home.
My favorite way weld is to watch someone better at it cash my check. I can do it, but I suck at it almost as much as I suck at catching fish in Alaska. Glad to see you making such great progress. Looking forward to the results of on the water testing.
By no means am I a good welder, this is the little practice boat to see if I can weld well enough to build a alloy kitset boat. There are a lot of times I have gone out and seen my welds a few days later and decided the best thing I can do is get out the grinder and do over. Now that most of the visible and structural welds are done I have finally discovered settings and techniques that seem to work.
I'm now running at
150Hz AC
30% electrode positive, 70% electrode negative.
Pulsing at 0.8 pulses per second.
175A peak current for 38% of the pulse.
35A background current.
7cfm argon.
2.4mm (3/32") 2% lanthanated tungsten
2.4mm (3/32") 5356 aluminium filler rod
Base metal 2.5mm (close enough to 3/32") 5052 aluminium sheet and 3mm (1/8") 6060 extrusion.
Re: GV10 Stop and Start Project
Posted: Sat Feb 08, 2020 4:47 am
by MikeyGnz
I've finally recovered from Christmas and new years and back to work on the boat. I'm not going to try guessing when it will be done since every guess has been wrong so far.
This weekend I am focusing on the bottom stringers/stiffeners and seat cleats. Photos to come tomorrow, at the moment it is one side mostly done so will wait to get both sides done.
Re: GV10 Stop and Start Project
Posted: Sat Feb 08, 2020 9:42 am
by fallguy1000
MikeyGnz wrote: ↑Mon Dec 09, 2019 2:47 pm
Not much more to go. I still need to weld the sides of the mid frames to the side of the hull, cleats for seats, bottom stiffeners and bow seat frame but can't do this until my welder is repaired.
Since I can't weld I did some work on the woodwork last night. Mid and aft seats all cut and trimmed to size. The aft seat isn't sitting properly yet, I need to straighten out the distortion just ahead of the aft frame to make it fit.
I also cut the transom stiffener/clamping board but don't have photos of that.
All 3 plane points need mouseholes I was told.
Re: GV10 Stop and Start Project
Posted: Sat Feb 08, 2020 9:49 am
by fallguy1000
Or the boat will stress crack or have troubles of some sort.
But I ain't a welder. They just harp on it on boatdesign.net and say they are not good.
I sure like this project. You close to done?

- 032A821D-481F-4EF9-B073-3C952893B7C0.jpeg (63.56 KiB) Viewed 1943 times
Re: GV10 Stop and Start Project
Posted: Sat Feb 08, 2020 11:18 pm
by MikeyGnz
fallguy1000 wrote: ↑Sat Feb 08, 2020 9:42 am
All 3 plane points need mouseholes I was told.
fallguy1000 wrote: ↑Sat Feb 08, 2020 9:49 am
Or the boat will stress crack or have troubles of some sort.
But I ain't a welder. They just harp on it on boatdesign.net and say they are not good.
I sure like this project. You close to done?
Hi Fallguy
I like your project too, far more ambitious than what I am attempting.
The mouse/cope/limber holes have been bought up before and I did some research but I couldn't find anything that backed it up just comments on forums. I have the book Boatbuilding In Aluminium and it says to use them to get access to allow for welding but doesn't mention stress cracks.
The space between the two bulkheads at the middle seat and on either side at the aft end are going to be sealed buoyancy tanks. Between the three of them I have over 300L of flotation so even if one cracks and fills up the other two will be more than enough to keep the boat afloat. All three tanks will have drainage bungs so I can check them for water ingress which will let me know if they are leaking or not. I could go with foam for the buoyancy but it is heavy and also burns so wouldn't be good for re-welding any failures. I think I'll risk the three plane joins so far and can alwaysz cut holes and add foam if needed at a later date.
I hope to be done soon. Finding time between work and other commitments is the big issue.
Re: GV10 Stop and Start Project
Posted: Sat Feb 08, 2020 11:22 pm
by fallguy1000
It is a great looking rig.
All the best.
Re: GV10 Stop and Start Project
Posted: Sun Feb 09, 2020 7:09 am
by terrulian
Welding is something I know less about than dark matter.
But here's a local story: The Rosie the Riveter/World War II Home Front National Historical Park is located very close to where I teach sailing. It turns out most of the Rosie's who worked in the Kaiser shipyards building Victory ships while the men were away at war were welders, not riveters. The museum features a lot of exhibits and historical films, and among the footage is that of women talking about their skills. They agree--and it doesn't appear they are just being funny--that the women were better welders, and a glance could tell you whether a woman or a man did the job. However, when the men returned at the end of the fighting, the women were free to return to their homes. But many of them were not as happy about that as you may imagine. They'd gained a skill they were proud of and didn't fancy going back to housework.

Re: GV10 Stop and Start Project
Posted: Mon Feb 10, 2020 3:24 am
by MikeyGnz
I'm sure I've made some headway but it doesn't look much different.
Cleats welded on to transom

5 of the 6 stringers/bottom stiffeners welded in

Some welds there that I'm really happy with, but others that I hope you don't zoom in on.
With my changes to the design I'm not sure if I need the transom knees shown on plans or if the cleats will provide the same effect. I've put a photo of a mock-up in the questions section. See this post for more details
https://forums.bateau2.com/viewtopic.ph ... 63#p463863
Re: GV10 Stop and Start Project
Posted: Mon Feb 10, 2020 9:12 am
by fallguy1000
Fun to watch. Thanks for posting. I, too, do not weld. So every weld is better than mine!
Re: GV10 Stop and Start Project
Posted: Sun Mar 15, 2020 4:46 am
by MikeyGnz
Life has been getting in the way lately but I finally managed some build time this weekend.
Got the stringers welded in the forward section. They are only light 12x12x1.6mm angle. I needed to go light so I could bend them to the hull profile but with the stitch welds every 50mm/2" they should still add some stiffness. Bottom panels seem very stiff as is but easier to add now than later if they turn out to be needed. My only worry is the sharp corner of the angle being hard on the feet.

Last of the mid section stringers welded in. These are 20x20x3mm channel with a 3mm radius on corners so should be easy enough on the feet.

Cleats partially welded in on the rear seat. Ran out of gas so some parts only tacked while others completely welded. I still need to add cleats along the side panels but will be doing this later in the build so I have easy access to weld up the stitching holes.

The build so far. Doesn't look too different than the last time I posted but it is a lot of the little fiddly bits done. Next is to finish welding the cleats, unbolt the stiffening 3 by 2s and fill the stitch holes. Then I can do a watertightness test.

I didn't add a photo but I have also started on a launching trolley. It will be relatively heavily built with an axle held on by U bolts. In future it should be easy to unbolt the axle and add springs to turn into a road legal trailer. Would need to add lights as well.
Re: GV10 Stop and Start Project
Posted: Sun Mar 15, 2020 3:54 pm
by Fuzz
It looks like you are getting it together and still fair. That has to be a tough thing to do.
Re: GV10 Stop and Start Project
Posted: Sun Mar 15, 2020 4:32 pm
by MikeyGnz
Fuzz wrote: ↑Sun Mar 15, 2020 3:54 pm
It looks like you are getting it together and still fair. That has to be a tough thing to do.
A lot of distortion in the bottom panels but I have plans. First I need to get the holes filled and all welds ground fair then I will be attacking some areas with a power hammer.
Re: GV10 Stop and Start Project
Posted: Mon Mar 16, 2020 8:49 am
by Jeff
Really cool build!!! Jeff
Re: GV10 Stop and Start Project
Posted: Mon Mar 23, 2020 4:26 pm
by MikeyGnz
With covid-19 now hitting NZ the whole country is going into isolation for 4 weeks starting tomorrow.
Did some welding last night to use up the rest of my argon so I could get new supplies today that will hopefully be enough the finish the boat. The last little bits of the chine and keel seams are now welded, cleats that were tacked last time now welded and about 25% of the stitching holes filled.
No photos this time round, you'll all have to wit for the weekend when I do some more.
Re: GV10 Stop and Start Project
Posted: Mon Mar 23, 2020 11:22 pm
by Fuzz
Well if you are trapped at home it is good time to melt some metal
Re: GV10 Stop and Start Project
Posted: Wed Mar 25, 2020 8:12 pm
by MikeyGnz
Fuzz wrote: ↑Mon Mar 23, 2020 11:22 pm
Well if you are trapped at home it is good time to melt some metal
I wish I was free to work on the boat. I've had to take computer and everything home and set up an office there.
Re: GV10 Stop and Start Project
Posted: Sun Apr 12, 2020 5:24 am
by MikeyGnz
I've still been working on the boat while staying in my isolation bubble. All screw and stitch holes are now welded up so in theory it should be watertight.


Which means it is time to change out of my welding gear
and into my grinding gear

And now the inside all ground fair.

I slept in this morning so didn't have as much time as planned to do the grinding and I only got the inside done. Weather permitting hopefully tomorrow I can get the outside all ground fair.
Re: GV10 Stop and Start Project
Posted: Sun Apr 12, 2020 5:56 am
by cape man
I am watching with interest. Never welded anything, but find it fascinating to see what you can do with it. Looks awesome from here. Would be interesting to compare the two techniques of stitch and glue ply/epoxy against welded aluminum. Weight and cost.
Re: GV10 Stop and Start Project
Posted: Mon Apr 13, 2020 12:06 am
by Netpackrat
That looks awesome... How did you manage to do that to your helmet? I have burned my clothes/coveralls a bunch of times, but never my welding helmet.
Re: GV10 Stop and Start Project
Posted: Mon Apr 13, 2020 5:11 am
by MikeyGnz
Netpackrat wrote: ↑Mon Apr 13, 2020 12:06 am
That looks awesome... How did you manage to do that to your helmet? I have burned my clothes/coveralls a bunch of times, but never my welding helmet.
Welding in a contorted position. The only way to access a weld was with the top half of my body inside the cage/frame with the TIG torch pointing back towards me. The hot argon travels further and is hotter than I imagined. Also because I was inside the frame and it was heating up as I welded it I had long straight burns in random places. I have learnt not to do that again.
Re: GV10 Stop and Start Project
Posted: Mon Apr 13, 2020 5:14 am
by MikeyGnz
Another day with the grinder and the welds are all faired. Found one stitch hole that I missed when welding so my claims of watertightness were premature.
As visible in the photos I have some distortion from the welding. I'm going to take to it with a hammer and try and beat it out a bit but alloy doesn't panelbeat well so we'll see how I go. I learnt a lot during the process so there is far less distortion from the stringers than the bulkheads. Next boat will be better.


Next on the to do list is more work of the launching trolly so I have something to hold it steady while I fill the hull with water to check for watertightness.
Re: GV10 Stop and Start Project
Posted: Mon Apr 13, 2020 8:14 am
by Jeff
Great project and really enjoying!!! Jeff
Re: GV10 Stop and Start Project
Posted: Mon Apr 27, 2020 7:27 am
by MikeyGnz
Getting an error every time I try to upload photos so they will have to wait.
Got the bow eye welded on today, just need to drill a hole in it. Also have an eye on the inside of the transom to tie/lock motor to.
Ran out of argon after welding that up so cut a few pieces of alloy for the next step. Lockdown over tomorrow so should be able to get more gas.
Re: GV10 Stop and Start Project
Posted: Mon Apr 27, 2020 4:14 pm
by Fuzz
From what I read NZ has this virus thing whipped. Your whole nation deserves congratulations
Maybe the rest of the world needs to learn from you guys.
Re: GV10 Stop and Start Project
Posted: Sun May 10, 2020 9:39 pm
by MikeyGnz
Fuzz wrote: ↑Mon Apr 27, 2020 4:14 pm
From what I read NZ has this virus thing whipped. Your whole nation deserves congratulations
Maybe the rest of the world needs to learn from you guys.
Thanks Fuzz.
Being in such a strict lockdown has been difficult for the economy but we are now down to 0-2 new cases a day. In 2.5 hours they will announce if the lockdown is dropping from level 3 to level 2. I'm hoping to stay at level 3 for sheer laziness. Being able to rool out of bed and spend all day working from home in my pjs is very easy not to mention the savings on ironing.
Re: GV10 Stop and Start Project
Posted: Sun May 10, 2020 9:41 pm
by MikeyGnz
I got the launching trolley pretty much complete this weekend but forgot to take photos before putting everything away.
Test of different way of uploading photos. This is the bow eye plate I welded on 2 weeks ago.

Re: GV10 Stop and Start Project
Posted: Sat May 16, 2020 2:26 am
by MikeyGnz
I worked out what the problem was with all my photos. I was uploading to the old gallery instead of the new one. I've now transferred all my photos over to the new gallery and fixed the links in all my posts.
Back on the boat. I got the launching trolley mostly finished last weekend and leak tested today.


Found 1 2 ince seam that I had forgotten to weld, 1 stitch hole that I had missed and 3 pinholes in welds. The seams where I joined 2 parts of each long panel are also looking dodgy so I will reinforce them a bit as well.
Re: GV10 Stop and Start Project
Posted: Sat May 16, 2020 7:39 am
by Jeff
Really nice work!!! Also, a beautiful area in the back ground!!!! Jeff
Re: GV10 Stop and Start Project
Posted: Sun May 17, 2020 6:21 am
by Netpackrat
Now he just needs to start sanding it with progressively finer grits down to about 400 until all the scratches are gone, followed by compounding, then buffing....
Re: GV10 Stop and Start Project
Posted: Sun May 17, 2020 9:26 am
by BrianC
Netpackrat wrote: ↑Sun May 17, 2020 6:21 am
Now he just needs to start sanding it with progressively finer grits down to about 400 until all the scratches are gone, followed by compounding, then buffing....
At least there won’t be any fairing! ...or painting — two things I don’t look forward to on my built. Maybe a nice hard anodize coating in some unusual color...if there exists a tank big enough!
Re: GV10 Stop and Start Project
Posted: Mon May 18, 2020 3:59 am
by Fuzz
Hull looks to be coming along nicely! I agree with Jeff, area in the background is very interesting looking.
Re: GV10 Stop and Start Project
Posted: Mon May 18, 2020 6:53 pm
by MikeyGnz
BrianC wrote: ↑Sun May 17, 2020 9:26 am
Netpackrat wrote: ↑Sun May 17, 2020 6:21 am
Now he just needs to start sanding it with progressively finer grits down to about 400 until all the scratches are gone, followed by compounding, then buffing....
At least there won’t be any fairing! ...or painting — two things I don’t look forward to on my built. Maybe a nice hard anodize coating in some unusual color...if there exists a tank big enough!
I'm completely self taught at aluminium welding and this is my first aluminium welding project. Given the amount of distortion and how some of the welds look it will be lucky to get a once over with a flap disc in the badly scratched areas. No fairing, painting or anodizing intended.
Re: GV10 Stop and Start Project
Posted: Mon May 18, 2020 6:58 pm
by MikeyGnz
Jeff wrote: ↑Sat May 16, 2020 7:39 am
Really nice work!!! Also, a beautiful area in the back ground!!!! Jeff
Fuzz wrote: ↑Mon May 18, 2020 3:59 am
Hull looks to be coming along nicely! I agree with Jeff, area in the background is very interesting looking.
The background is Clifton Hill, a suburb of Christchurch. Just to the left where the hill drops down towards the sea is Sumner beach. At the end of the beach used to be Shag Rock, a local landmark.

But now post-earthquakes it is known as Shag Pile.

Re: GV10 Stop and Start Project
Posted: Mon May 18, 2020 7:32 pm
by Jeff
Terrible what the earthquakes have done!!!! Jeff
Re: GV10 Stop and Start Project
Posted: Sun May 24, 2020 8:37 pm
by MikeyGnz
After getting all the leaks except for the dodgy seam weld done last weekend, this weekend I focused on the seam.
Where I joined the two parts of the long panels (sides and bottom panels that would be joined with butt blocks in a ply build) together I probably should have tack-welded only and done the final welds in place while they are under tension. I ground the weld beads off before assembling and the tension from bending cracked the welds in a couple of places. I also had a lot of distortion. See below for a view of the inside showing the distortion, the cracks are mainly on the outside but I had already started welding by the time I remembered to take photos so the before photo has to be on the inside.

Starting on the outside of the hull I put a weld bead up each side of the bad part.

Then laid weld between the dams from these two beads to fill the low section and reinforce the area.

I got halfway through doing the outside before running out of gas so couldn't complete but I will be doing this on both the inside and outside of these welds. The outside will then be ground smooth or blended into the surrounding material but the inside will be left as welded.
Off to the shop for more argon and welding rods now.
EDIT: Just realized the first picture doesn't really show the distortion. It can be seen in the second pic about halfway up the panel between the 2 weld beads.
Re: GV10 Stop and Start Project
Posted: Sun May 24, 2020 9:37 pm
by cape man
I have never welded. Is the distortion because the aluminum is not thick enough?
Re: GV10 Stop and Start Project
Posted: Sun May 24, 2020 10:11 pm
by Fuzz
cape man wrote: ↑Sun May 24, 2020 9:37 pm
I have never welded. Is the distortion because the aluminum is not thick enough?
That is why it is tough to build small welded aluminium boats and keep them light. Mostly what I see is boats built with heavier skins just so they do not have to fight it so much.
Re: GV10 Stop and Start Project
Posted: Sun May 24, 2020 10:12 pm
by Netpackrat
cape man wrote: ↑Sun May 24, 2020 9:37 pm
I have never welded. Is the distortion because the aluminum is not thick enough?
That's part of it. Another big factor is the method he is using (TIG) is great for some things, but large weld areas in large, flat, thin panels is not one of them. It is a slower method than mig (wire feed) and so you are heating the panels for longer while moving more slowly, which increases distortion. I understand that he has to use the equipment that he has, but a MIG welder with a spool gun would work a lot better for most of this. Another factor may be joint design in a boat that was intended to be built with plywood, available materials (need to splice panels to get the needed length, etc).
Re: GV10 Stop and Start Project
Posted: Sun May 24, 2020 10:26 pm
by MikeyGnz
Netpackrat wrote: ↑Sun May 24, 2020 10:12 pm
cape man wrote: ↑Sun May 24, 2020 9:37 pm
I have never welded. Is the distortion because the aluminum is not thick enough?
That's part of it. Another big factor is the method he is using (TIG) is great for some things, but large weld areas in large, flat, thin panels is not one of them. It is a slower method than mig (wire feed) and so you are heating the panels for longer while moving more slowly, which increases distortion. I understand that he has to use the equipment that he has, but a MIG welder with a spool gun would work a lot better for most of this. Another factor may be joint design in a boat that was intended to be built with plywood, available materials (need to splice panels to get the needed length, etc).
It is possible to TIG thin sheets, I have seen people cut coke/beer cans to get thin sheet and weld that with no problems. MIG is the better option if available though.
I am completely self taught when it comes to welding alloy and this build is a practice project to gain skill. The distortion in these particular sheets was a mixture of insufficient separation between the 2 pieces, too much current and not enough technique.
I'm finding I am getting reasonably distortion free welds on lap and outside corners and am getting much better at butt welds but struggle with fillets/inside corners which is why I have so much distortion in the bottom from welding in the frames and stringers.
I have started using the pulse function on my welder so I only get high current for the short time period when I dip the filler rod in and that is helping a lot.
There is a reason they say that if you can weld aluminium you can weld anything. Aluminium has a very high ratio of heat expansion but does not shrink back fully once cool. Being such a good conductor aluminium needs to have a lot of heat put in to start the weld as the surrounding cold area sucks the heat away, but when the surrounding area is hot as well aluminium needs less heat than the same thickness steel so you need to constantly adjust settings as the weld progresses. Also alloy doesn't change colour before melting so if you are not paying attention it is easy to go from a solid part to a puddle on the floor.
Re: GV10 Stop and Start Project
Posted: Sun May 24, 2020 11:49 pm
by Netpackrat
Yeah, there's definitely the fact that welding aluminum is not easy in general.
I took a metalworking class once, and one of the things we got to try was welding thin aluminum with oxy-acetylene, which was pretty cool and also pretty difficult.
Re: GV10 Stop and Start Project
Posted: Sun Jul 26, 2020 5:25 pm
by MikeyGnz
Been busy with work so another break in the build but back at it this weekend.
Bad welds and pinholes all fixed. Watertight compartments theoretically sealed. Second leak test to happen tonight or tomorrow depending on when I get home from work.
Doesn't look much different from when I last posted so no pics today.
I tried beating some of the distortion out with a panel-beating dolly and a hammed attachment for an air chisel. Not enough power to do anything so I tried swinging the sledge. Thais only added hammerhead sizes dents so I'm going to leave it all as is. I will try and pull the rub-rail seat straight with clamps but the rest of the boat is as fair as it is going to get.
Re: GV10 Stop and Start Project
Posted: Wed Jul 29, 2020 5:29 pm
by MikeyGnz
Did a quick leak test of the watertight compartments and hull last night. Hull now appears watertight. 1 Pinhole in the front watertight compartment that I can easily weld. The rear watertight compartments have quite a few places where water is seeping through the welds, mainly in places where due to access I have only welded one side of the joint. Now that I have glued the drain bungs in with 5200 I don't want to put too much heat in there and in the interests of saving argon and getting in the water sooner I think I will just put a bead of 5200 along the unwelded side of each joint.
Only 7 more pieces to weld in and all metalwork will be done.
Re: GV10 Stop and Start Project
Posted: Thu Jul 30, 2020 3:15 pm
by Fuzz
Watching your build with great interest but I do not know enough about welding to be much help.
Re: GV10 Stop and Start Project
Posted: Tue Aug 04, 2020 5:26 pm
by MikeyGnz
MikeyGnz wrote: ↑Wed Jul 29, 2020 5:29 pm
Did a quick leak test of the watertight compartments and hull last night. Hull now appears watertight. 1 Pinhole in the front watertight compartment that I can easily weld. The rear watertight compartments have quite a few places where water is seeping through the welds, mainly in places where due to access I have only welded one side of the joint. Now that I have glued the drain bungs in with 5200 I don't want to put too much heat in there and in the interests of saving argon and getting in the water sooner I think I will just put a bead of 5200 along the unwelded side of each joint.
Only 7 more pieces to weld in and all metalwork will be done.
Ran out of argon so didn't get all the welding completed last weekend. Now refilled and ready to finish ASAP.
In other news, since my build has been so start/stop I'm thinking of Hop-a-long as a name.
Re: GV10 Stop and Start Project
Posted: Tue Aug 04, 2020 8:01 pm
by Fuzz
Re: GV10 Stop and Start Project
Posted: Sun Aug 16, 2020 4:57 am
by MikeyGnz
Re: GV10 Stop and Start Project
Posted: Sun Aug 16, 2020 2:18 pm
by Fuzz
Seems like you are getting all the joys of metal boat building
You will get there but it is tough, hang in there.
Re: GV10 Stop and Start Project
Posted: Mon Aug 17, 2020 12:08 am
by Netpackrat
Fun stuff. Was just checking out prices of pulse mig machines earlier, ouch. That's probably going to be out of my budget if I decide to upgrade to a multi-process mig for aluminum. The plans for an 11' aluminum dinghy that I kind of like recently became available again so I am giving it some serious thought.
Re: GV10 Stop and Start Project
Posted: Mon Aug 17, 2020 10:17 pm
by MikeyGnz
Fuzz wrote: ↑Sun Aug 16, 2020 2:18 pm
Seems like you are getting all the joys of metal boat building
You will get there but it is tough, hang in there.
Thanks Fuzz. It has definitely been a learning experience, mainly from working out how not to do it. Can't be far off finishing now.
Re: GV10 Stop and Start Project
Posted: Mon Aug 17, 2020 10:18 pm
by MikeyGnz
Netpackrat wrote: ↑Mon Aug 17, 2020 12:08 am
Fun stuff. Was just checking out prices of pulse mig machines earlier, ouch. That's probably going to be out of my budget if I decide to upgrade to a multi-process mig for aluminum. The plans for an 11' aluminum dinghy that I kind of like recently became available again so I am giving it some serious thought.
From what I've heard pulse MIG is the way to go. I'm using an AC TIG machine and it is slow going.
Re: GV10 Stop and Start Project
Posted: Tue Aug 18, 2020 10:17 am
by Netpackrat
MikeyGnz wrote: ↑Mon Aug 17, 2020 10:18 pm
From what I've heard pulse MIG is the way to go. I'm using an AC TIG machine and it is slow going.
Yeah, I would be more likely to jump on one of the multiprocess machines that offer pulse mig, except they appear to be DC only, so I would still need to keep my TIG unit around for AC. Otherwise it would be nice to only have one welder taking up floor space rather than two. I have done enough aluminum with the TIG to know that I wouldn't want to weld a whole boat that way... I think it's possible to convert my existing MIG to take a spool gun for Al, but that unit's probably a little bit light for it. I will most likely end up with something in between; it would be easier to justify the $5k+ pulse mig if I were welding professionally.
Re: GV10 Stop and Start Project
Posted: Tue Aug 18, 2020 5:25 pm
by MikeyGnz
Netpackrat wrote: ↑Tue Aug 18, 2020 10:17 am
MikeyGnz wrote: ↑Mon Aug 17, 2020 10:18 pm
From what I've heard pulse MIG is the way to go. I'm using an AC TIG machine and it is slow going.
Yeah, I would be more likely to jump on one of the multiprocess machines that offer pulse mig, except they appear to be DC only, so I would still need to keep my TIG unit around for AC. Otherwise it would be nice to only have one welder taking up floor space rather than two. I have done enough aluminum with the TIG to know that I wouldn't want to weld a whole boat that way... I think it's possible to convert my existing MIG to take a spool gun for Al, but that unit's probably a little bit light for it. I will most likely end up with something in between; it would be easier to justify the $5k+ pulse mig if I were welding professionally.
Yep Al with the TIG is slow going. The other issue is that some torches are lower rated for AC than DC and I'm running pulse TIG right at the limit of the torch. 2 Torch heads melted already. I'm thinking of upgrading to a water cooled torch if I melt another, especially if I go ahead with my next build.
I'm not a MIG fan. I know it is faster and easier but I have never got my hand in with wire speed and travel speed. MIG would have been a lot cheaper in argon though.
Re: GV10 Stop and Start Project
Posted: Fri Aug 21, 2020 7:35 am
by Netpackrat
Some more digging around and I found this...
https://store.cyberweld.com/miller-mill ... 07734.html
Still expensive, but given I have been looking at a $2k mig for aluminum, a $3k welder that adds pulse mig capability is not so much of a stretch.
Re: GV10 Stop and Start Project
Posted: Fri Aug 21, 2020 4:09 pm
by BB Sig
Re: GV10 Stop and Start Project
Posted: Wed Sep 02, 2020 5:29 pm
by Netpackrat
I have been reading good things about the HTP welders (made in Italy). They offer a pulse mig unit for only a few hundred more than the non-pulse Lincoln I was looking at.
Edit to add; I asked advice from a friend yesterday who is a professional marine welder; he said get the pulse mig and don't even consider getting a standard mig unit for aluminum. He said with the pulse units you can make near TIG quality welds in aluminum. And from what I have been seeing online, the new computer controlled units are effectively self-tuning. If you are an experienced welder you can still tweak them to perfection with manual settings, but the auto-setting features will let a near-novice pick it up and make decent welds quickly.
Re: GV10 Stop and Start Project
Posted: Sun Sep 06, 2020 5:41 pm
by MikeyGnz
Netpackrat wrote: ↑Wed Sep 02, 2020 5:29 pm
I have been reading good things about the HTP welders (made in Italy). They offer a pulse mig unit for only a few hundred more than the non-pulse Lincoln I was looking at.
Edit to add; I asked advice from a friend yesterday who is a professional marine welder; he said get the pulse mig and don't even consider getting a standard mig unit for aluminum. He said with the pulse units you can make near TIG quality welds in aluminum. And from what I have been seeing online, the new computer controlled units are effectively self-tuning. If you are an experienced welder you can still tweak them to perfection with manual settings, but the auto-setting features will let a near-novice pick it up and make decent welds quickly.
I'm in New Zealand and I haven't seen HTP here. In general based on 200A AC/DC TIG machine prices, in NZ European brands start at $4.5k with most in the $6-8k range. Cheap made in China stuff starts at about $2k but doesn't have all the features. I'm using Cigweld which is an Australian brand owned by ESAB (European welder company) producing Cigweld branded ESAB machines and cost me $2.7k. American brands (Miller, Lincoln) are about $500 more than Cigweld.
Given I am more a hobby welder I like having the versatility of the TIG and can't rationalize a pulse MIG.
Re: GV10 Stop and Start Project
Posted: Sun Sep 06, 2020 5:48 pm
by MikeyGnz
I haven't posted for a few weeks but I have been working on the boat. Lots of fiddly little bits where there is nothing really to show so I haven't bothered taking photos.
Big step this weekend was that I've finished all the welding. Only wooden seats and rub rails to go. I'll take some photos tonight.
Fathers day here yesterday so I took Dad for a jet boat run up the river. Interesting day out. Saturday night the river was looking good at 56 cumecs (cubic meters per second flow). Looks like there was a storm in the high country overnight because by the time we launched in the morning it was 102 cumecs but still boatable. An hour later halfway up the river it was 329 cumecs and still rising so turned round and went back to the trailer. Peaked at 655 cumecs at 18:10 last night.
Even at 300 (6 times normal flow) the river was very different. Pressure waves so big the jet unit was sucking air. Also a new experience to have to dodge dead cows and logs floating down the river instead of just the stationary rocks.
Re: GV10 Stop and Start Project
Posted: Sun Sep 06, 2020 7:10 pm
by Fuzz
I have had to dodge a few things while boating but dead cows is a new one
Sounds like you made a good choice to call it a day and get off the water.
Re: GV10 Stop and Start Project
Posted: Sun Sep 06, 2020 8:14 pm
by Netpackrat
Yeah that would be a little disconcerting. The possibility that always worried me was drifting down the river in my canoe, and rounding a corner to find a bear standing in the shallows. Happened once to some fellows we knew; they about dumped the canoe and I think all needed new underwear afterward.
Re: GV10 Stop and Start Project
Posted: Mon Sep 07, 2020 6:05 am
by MikeyGnz
Netpackrat wrote: ↑Sun Sep 06, 2020 8:14 pm
Yeah that would be a little disconcerting. The possibility that always worried me was drifting down the river in my canoe, and rounding a corner to find a bear standing in the shallows. Happened once to some fellows we knew; they about dumped the canoe and I think all needed new underwear afterward.
I'm glad we don't have to worry about anything like that here.
Re: GV10 Stop and Start Project
Posted: Mon Sep 07, 2020 6:13 am
by MikeyGnz
Photos of the finished hull as promised.
While I was welding I made up a couple of handles that will be bolted onto the outside of the clamping board.

Instead of having knees in the corner between the side panels and transom I have dropped them a few inches and built them into the seat tops.

I'll stop teasing now. Here is the complete hull. I have added handles and a bow roller at the front as well as the handles on the clamping board. Looking at the sides there is a bit of a wave that I hope to take out when I install the rub rails but I did manage to remove the worst of the distortion.


Plywood seat tops to be varnished and fitted. I could have stuck with alloy but it is cold and leaves black marks on skin.
There will also be a wooden clamping board on the transom and wooden rub rails around the sides. All woodwork is cut, I just need to take to a mates place and round the edges on his router table. Not long now until it is in the water.
While I am waiting for the varnish to dry I also need to rebuild the carb on my outboard. Not running at the moment, has spark and new fuel in the tank so hopefully a carb clean, new needle valve, new gaskets, etc. will fix it.
Re: GV10 Stop and Start Project
Posted: Mon Sep 07, 2020 4:55 pm
by Fuzz
I would bet that rubrails will take that wobble out of the bow area. Good move making the seat tops out of wood. Sitting on metal can get bad in a hurry.
Re: GV10 Stop and Start Project
Posted: Wed Sep 09, 2020 7:10 pm
by Evan_Gatehouse
It's hard for beginners to control distortion in aluminum boat building.
Here the bears actually chase you in the river. Skip to 0:25 seconds
https://www.youtube.com/watch?v=AVuuxqZZCRg
Re: GV10 Stop and Start Project
Posted: Wed Sep 09, 2020 11:00 pm
by OneWayTraffic
I take it that was the Waimak? That river can go from quiet to sink your 4WD in minutes. Fortunately they record rainfall and flow. I always check it before going after Salmon. No jet boat though. Spending all my $$ on the C17.
Re: GV10 Stop and Start Project
Posted: Thu Sep 10, 2020 4:21 pm
by MikeyGnz
OneWayTraffic wrote: ↑Wed Sep 09, 2020 11:00 pm
I take it that was the Waimak? That river can go from quiet to sink your 4WD in minutes. Fortunately they record rainfall and flow. I always check it before going after Salmon. No jet boat though. Spending all my $$ on the C17.
I was up the Waiau. It was a weird day. The Waiau was up from 50 to 655 cumecs, Waimak only up from 50 to 100 cumecs, Rakia only an extra 10 cumecs and Rangitata no change.
Re: GV10 Stop and Start Project
Posted: Thu Oct 01, 2020 4:48 pm
by MikeyGnz
I've been having problems posting photos so can't show the progress but I now have the clamping board and rub rails on, just waiting for a few coats of varnish before the splash.
I've got a week off and am heading up to the bach (holiday house) tomorrow. I'll put the varnish on up there and splash tues or wed.
Re: GV10 Stop and Start Project
Posted: Thu Oct 01, 2020 8:30 pm
by Fuzz
I sure hope you can post pictures from the splash. We hope it goes well for you.
Re: GV10 Stop and Start Project
Posted: Wed Oct 07, 2020 5:26 pm
by OneWayTraffic
Interesting build that has mostly convinced me I am not smart enough to build with Aluminium. Ply and epoxy is more work but easier for me to manage. I have just had my trailer sand blasted and it is currently getting dipped. Did you consider that for the jetboat trailer? It looks in need of a little TIC.
Re: GV10 Stop and Start Project
Posted: Sun Oct 11, 2020 5:45 pm
by MikeyGnz
OneWayTraffic wrote: ↑Wed Oct 07, 2020 5:26 pm
Interesting build that has mostly convinced me I am not smart enough to build with Aluminium. Ply and epoxy is more work but easier for me to manage. I have just had my trailer sand blasted and it is currently getting dipped. Did you consider that for the jetboat trailer? It looks in need of a little TIC.
With the amount of steel in a typical jet boat they are typically only ever used in fresh water. Since the trailer never sees salt water going hot-dip is a big cost with little benefit. The jet boat is actually my Dad's and since he is looking at selling it this summer we wire brushed the surface rust and painted with rust-kill enamel after I replaced the spring hangers. If we were keeping it we would probably rebuild the trailer, that one is fine for a concrete boat ramp but the 155 wide tyres combined with a drop axle mean launching on soft river banks can result in stuckness. It is for that reason most jet boat trailers wil be running falcon or commodore mags with a 225 or 255 tyre instead of the standard galv rims and light commercial tyres.
If I build my jet boat I will also do an alloy trailer. A lot of the builders building a smaller jet boat like I am planning will buy a crashed car (Suzuki Swift, Honda Vitz, or similar) for the engine but also use the hubs, wheels, etc on the trailer. Keeping an eye on Turners damaged vehicle auctions a donor car can often be picked up for less than the engine alone from a wreckers.
Re: GV10 Stop and Start Project
Posted: Sun Oct 11, 2020 5:51 pm
by MikeyGnz
Good news and bad news.
Good news is that the build is now finished. I have photos but not on this PC so I will try and upload them later.
Bad news is that the trailer I was planning on using to take the boat to the bach and splash was needed for a house move so the boat couldn't go with me in the end. Splash still to happen. I also found that the outboard I have is no longer running so wil need to do a carb clean and rebuild before I can use.
After all the trailer problems I've decided to re-do the launching trolley I made and modify it to add suspension, lights, etc. and turn it into a road legal trailer. I haven't looked at the rules yet but hopefully the certification process isn't overly strenuous. I know certification for cars is very involved but trailers have always been a bit of an afterthought.
Re: GV10 Stop and Start Project
Posted: Mon Oct 12, 2020 4:26 am
by MikeyGnz
Re: GV10 Stop and Start Project
Posted: Mon Oct 12, 2020 6:57 am
by OneWayTraffic
Looks good. Simple, functional and tough the way a kiwi boat should. How much buoyancy room did you put in it?
Re: GV10 Stop and Start Project
Posted: Mon Oct 12, 2020 10:03 am
by Jeff
Nice!!! Jeff
Re: GV10 Stop and Start Project
Posted: Mon Oct 12, 2020 10:32 am
by gstanfield
Looking good. Enjoy the splash.
Re: GV10 Stop and Start Project
Posted: Mon Oct 12, 2020 1:47 pm
by Fuzz
Looking forward to the splash and seeing how it runs.
Re: GV10 Stop and Start Project
Posted: Mon Oct 12, 2020 4:11 pm
by MikeyGnz
OneWayTraffic wrote: ↑Mon Oct 12, 2020 6:57 am
Looks good. Simple, functional and tough the way a kiwi boat should. How much buoyancy room did you put in it?
Centre seat chamber is just over 100L and each of the rear compartments slightly bigger so easily >300L total. 2 of us can lift boat and trailer quite easily and I'd guess weight to be under 100kg so even if one chamber fails there should be double the weight in buoyancy.
Re: GV10 Stop and Start Project
Posted: Mon Oct 12, 2020 4:11 pm
by MikeyGnz
Nice to have the garage back after getting 22 months into a 2 week build
Re: GV10 Stop and Start Project
Posted: Mon Oct 12, 2020 4:16 pm
by Jaysen
MikeyGnz wrote: ↑Mon Oct 12, 2020 4:11 pm
Nice to have the garage back after getting 22 months into a 2 week build
In your defense, you did call it a "Stop and Start Project".
Re: GV10 Stop and Start Project
Posted: Mon Oct 12, 2020 4:18 pm
by MikeyGnz
Jaysen wrote: ↑Mon Oct 12, 2020 4:16 pm
MikeyGnz wrote: ↑Mon Oct 12, 2020 4:11 pm
Nice to have the garage back after getting 22 months into a 2 week build
In your defense, you did call it a "Stop and Start Project".
And will be naming it Hop-A-Long
Re: GV10 Stop and Start Project
Posted: Mon Oct 12, 2020 5:22 pm
by Fair WX Pilot
MikeyGnz wrote: ↑Mon Oct 12, 2020 4:18 pm
Jaysen wrote: ↑Mon Oct 12, 2020 4:16 pm
MikeyGnz wrote: ↑Mon Oct 12, 2020 4:11 pm
Nice to have the garage back after getting 22 months into a 2 week build
In your defense, you did call it a "Stop and Start Project".
And will be naming it Hop-A-Long
Good name, I like that.
Re: GV10 Stop and Start Project
Posted: Fri Oct 30, 2020 4:14 am
by MikeyGnz
Was welding some stainless last weekend and decided to do a little side project. For those days when I just can't decide between fishing and riding.


Re: GV10 Stop and Start Project
Posted: Fri Oct 30, 2020 6:03 am
by Fair WX Pilot
Nice

you should consider marketing that.
Re: GV10 Stop and Start Project
Posted: Fri Oct 30, 2020 8:16 am
by gstanfield
It’s good to see that I’m not the only one taking a bike fishing!

Re: GV10 Stop and Start Project
Posted: Sat Oct 31, 2020 6:33 am
by MikeyGnz
I mentioned in my first post of the thread that I have an old 10hp outboard and that influenced me in my boat choice. When I first started talking about building a boat the old fella down the street said he has the perfect thing for me and gave me an outboard. It is a 1978 (one year older than me) Mercury 110 9.8hp. It has a 17.3" shaft so the transom is too tall, but I want to see if the engine runs before I cat the transom to height, otherwise I would buy a 20" shaft o/b.
Tried a few weeks ago and couldn't get it started. Plugs have spark and engine is so simple that it has to be either spark or fuel, fuel in tank was new so I ordered a carb rebuild kit. Fitted the kit and rebuilt the carb one evening this week and tried it all out today. Now running well and I have got the tuning as good as I can without taking her out and trying wot.


Was initially running very rich hence the oil leakage all around the bottom unit. This isn't so much oil leakage as half burnt oil from an extremely rich mixture.
As shown in the pictures the top of the anti-cavitation plate is 58-60mm too high. I have heard everything from 10mm above the keel height to 10mm below the keel height as the correct height. Since the engine water intake is on the underside of the anti-cavitation plate I don't want to put it too high and overheat the engine. I'm thinking of cutting back 65mm to put the anti-cavitation plate 5mm below the keel. What do you all suggest?
Re: GV10 Stop and Start Project
Posted: Sat Oct 31, 2020 5:14 pm
by Fuzz
I might just go ahead and launch it and see what happens. As long as you are getting enough cooling water the worst that will happen, hopefully, is you get cavitation. And you should be able to tell just how much the motor needs to come down instead of guessing at it.
Re: GV10 Stop and Start Project
Posted: Sat Oct 31, 2020 7:44 pm
by VT_Jeff
gstanfield wrote: ↑Fri Oct 30, 2020 8:16 am
It’s good to see that I’m not the only one taking a bike fishing!
Great minds!
Re: GV10 Stop and Start Project
Posted: Sat Oct 31, 2020 9:35 pm
by OneWayTraffic
Agree with Fuzz. Some boats ride ok with the outboard quite a bit higher than the transom.
Re: GV10 Stop and Start Project
Posted: Sun Nov 01, 2020 6:59 am
by cape man
The other thing that might help if it's marginally high is switching to a 4 blade prop. Doing so on my OD18 allowed me to raise the Jack plate all the way while running at WOT. You can hear the slight cavitation but the pump is still picking up water and the prop is grabbing well. Could not do that with a 3 blade.
Re: GV10 Stop and Start Project
Posted: Tue Dec 01, 2020 3:01 pm
by MikeyGnz
cape man wrote: ↑Sun Nov 01, 2020 6:59 am
The other thing that might help if it's marginally high is switching to a 4 blade prop. Doing so on my OD18 allowed me to raise the Jack plate all the way while running at WOT. You can hear the slight cavitation but the pump is still picking up water and the prop is grabbing well. Could not do that with a 3 blade.
Thanks for the tip Cape man. I've had a quick look and all I can find available are 2 blade 9"x9" and 3 blade 9"x7". A 4 blade prop for a 1979 outboard doesn't look like something standard and would probably have to be custom made. Since I need to drop the prop by about 65mm cutting the transom seems much easier and cheaper. Cars are back in the garage and work is a bit crazy so I'm waiting for a good weekend weather window to cut the transom and get the cuts stained and varnished.
Waiting for trailer parts at the moment, need to get it transportable before I can splash so no big hurry on the cut.
Re: GV10 Stop and Start Project
Posted: Sun Mar 21, 2021 5:10 pm
by MikeyGnz
Been a while since the last post, slowly and steadily. Trolley now has suspension and trailer couplings added to make it a proper trailer. Mudguards fabricated and fitted, cables are pulled for electrics. Only things left to do on trailer are fit and connect the lights. Hopefully I can get that done one evening this week.
After that all that remains on my list is:
- Trailer inspection and registration
- Drain and replace gear oil in outboard.
- Free up siezed shaft in the mechanism that locks the outboard down when in reverse.
Worst case scenario is that I need to strengthen up the drawbar on the trailer and replace wheel bearings. Hopefully splashed by Easter.
Was too dark when I finished last night to take photos. I'll take some photos and post them after I fit the lights.
Re: GV10 Stop and Start Project
Posted: Sun Mar 21, 2021 5:59 pm
by Fuzz
It is good to hear from you. I have been wondering how this project was coming along.
Re: GV10 Stop and Start Project
Posted: Sun Mar 28, 2021 4:41 am
by MikeyGnz
Got all the wiring done and lights fitted. It will be going in for inspection tomorrow afternoon.
Left to do:
1: Make oars
2: Finish work on motor
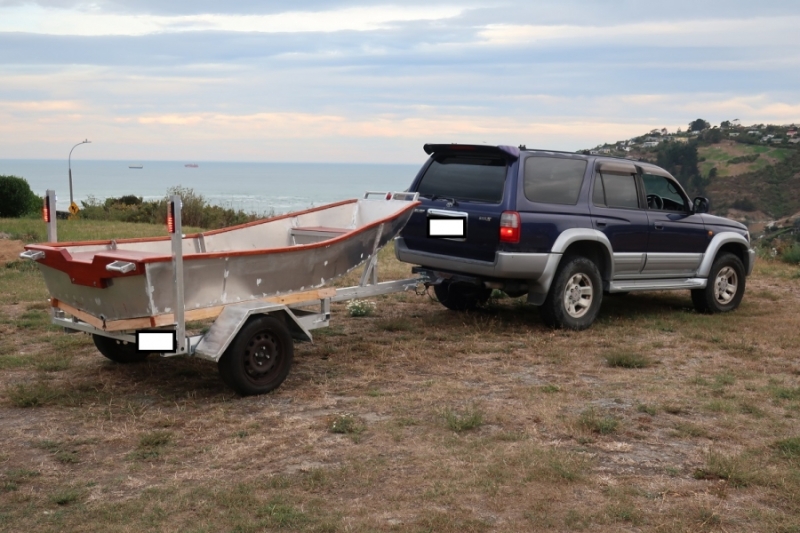
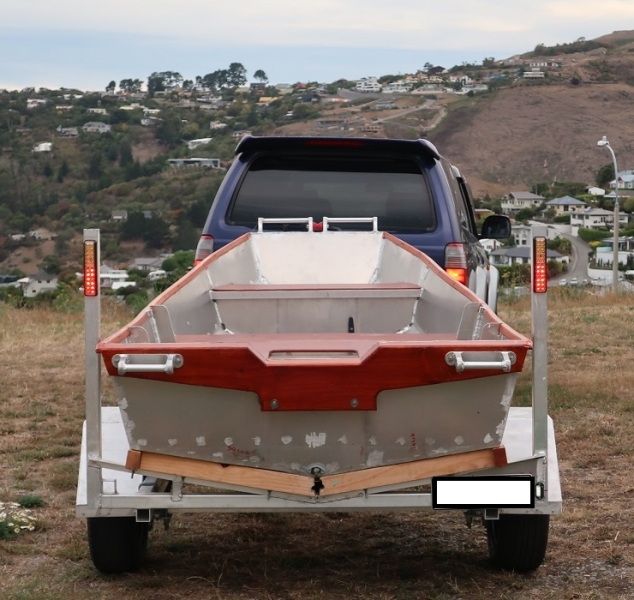
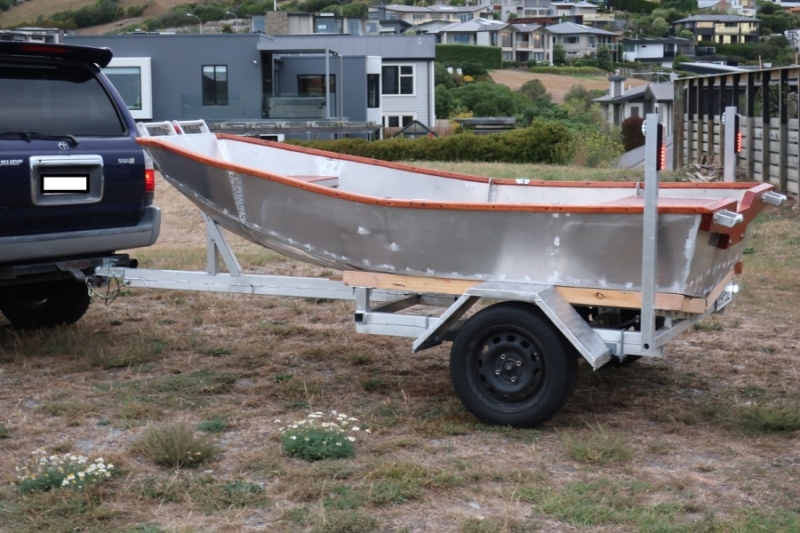

Re: GV10 Stop and Start Project
Posted: Sun Mar 28, 2021 1:33 pm
by Fuzz
Nice! Very interested in how it runs for you.
Re: GV10 Stop and Start Project
Posted: Sun Mar 28, 2021 1:58 pm
by cape man
Go baby go!
Re: GV10 Stop and Start Project
Posted: Mon Mar 29, 2021 4:25 pm
by MikeyGnz
Failed the inspection. Nothing major though, just need to replace wheel bearings. I was worried they would have issues with the structure but they didn't find anything wrong. Will try and get new bearings today, fit tonight and try again tomorrow.
Re: GV10 Stop and Start Project
Posted: Tue Mar 30, 2021 4:28 pm
by MikeyGnz
Got the bearings sorted and re-inspected. I'm now road legal.
Re: GV10 Stop and Start Project
Posted: Tue Mar 30, 2021 5:57 pm
by Fuzz
Good deal! Now you can move on to the next step.
Re: GV10 Stop and Start Project
Posted: Thu Apr 22, 2021 5:13 pm
by MikeyGnz
Next step well underway. I have built oars and they will get the final coat of varnish tonight. Outboard work unsuccessful so there is no automatic reverse lock but I have worked out how to rig a manual one. Reverse is low priority on such a small boat anyway. Long weekend starting tomorrow so I'm aiming to splash Sunday and Monday.
Re: GV10 Stop and Start Project
Posted: Mon Apr 26, 2021 12:44 am
by MikeyGnz
Ok, if you haven't realized it yet I'm cheap. Oars were going to cost $149.95 a pair and I figured I could make them cheaper. My hands were almost permanently dirty so no photos of making the oars just an after the fact explanation now.
- First off I bought 4m of 44x44 pine (dressed 2 by 2) and cut it in half.
- Using a router bit I cut a 10mm deep, 10mm wide track up opposite sides for 350mm from one end.
- Next I used a 45 degree router bit to take the square section down to an octogon
- Using a plane and sander I took the corners off the octagon to get a roughly round cross section.
- Using a flap disc in the angle grinder I made smaller diameter handles at the opposite end to the routered tracks.
- I cut blades out of scrap plywood. The blades have a 350mm long slot up the middle. Slot width is the distance across the base of the routered tracks.
- From more scrap plywood I cut two circles the outside diameter of the rowlocks. I then cut another circle the diameter of the oar out of the middle so I had two donuts.
- Using epoxy and silica glue powder powder the blades were glued on handles with the slot fitting up the tracks.
- Remembering to put the rowlocks on first, I glued the donuts onto the handles so there would be a hands with between the handle ends of the two oars while rowing.
- On the blade side of the donut I put a 300mm length of biax cloth to prevent the rowlocks wearing through the wood.
- After sanding down all the rough edges I coated the entire oar with neat epoxy to seal the wood.
- Lastly I laid down 3 coats of varnish to protect the epoxy from UV.
All up cost about $40 for the wood and $6 for 1m biax cloth. The rest all was scrap or leftovers from other projects.
Blade glued in slot in shaft.
Handle other end.
Collar and biax cloth in the middle.
Overall finished product.
Re: GV10 Stop and Start Project
Posted: Mon Apr 26, 2021 12:49 am
by MikeyGnz
I still have a little bit of finishing off to do as far as fixing the motor cowling, sorting out anchor, ropes, etc. but I got impatient so took her out for a blat yesterday. I was on my own so no action photos or video.
It floats - good first sign.
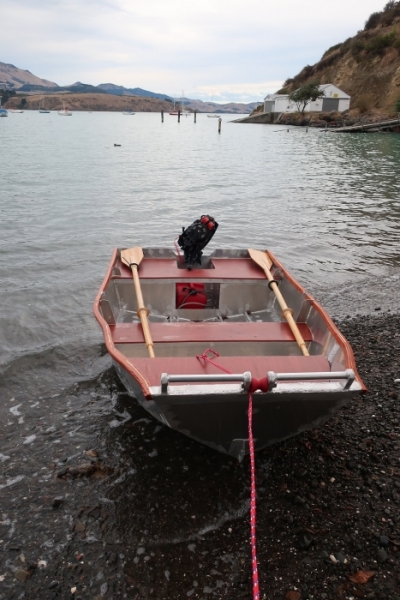
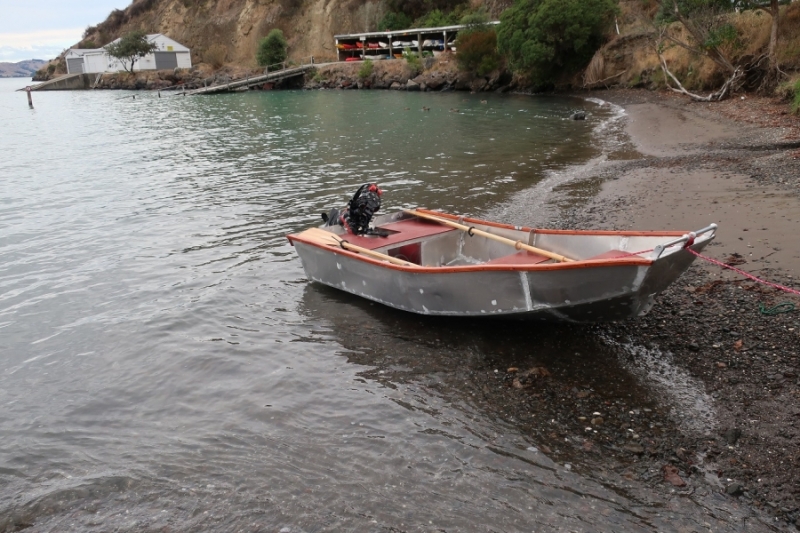
Looking forward you can't tell I am on the plane at full throttle.
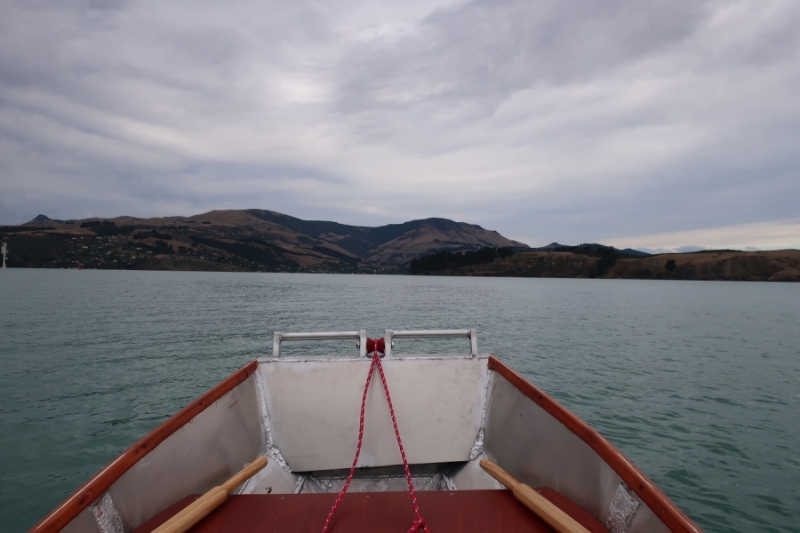
Then looking aft you see the other side of the story.

Overall I'm happy. It is a bit slow up on to the plane but I think having the motor professionally tuned will fix that.
Splash thread
HERE. It is exactly the same as this post so no real need to check it.
Re: GV10 Stop and Start Project
Posted: Thu Apr 29, 2021 12:49 pm
by VT_Jeff
MikeyGnz wrote: ↑Mon Apr 26, 2021 12:44 am
Ok, if you haven't realized it yet I'm cheap. Oars were going to cost $149.95 a pair and I figured I could make them cheaper. My hands were almost permanently dirty so no photos of making the oars just an after the fact explanation now.
- First off I bought 4m of 44x44 pine (dressed 2 by 2) and cut it in half.
- Using a router bit I cut a 10mm deep, 10mm wide track up opposite sides for 350mm from one end.
- Next I used a 45 degree router bit to take the square section down to an octogon
- Using a plane and sander I took the corners off the octagon to get a roughly round cross section.
- Using a flap disc in the angle grinder I made smaller diameter handles at the opposite end to the routered tracks.
- I cut blades out of scrap plywood. The blades have a 350mm long slot up the middle. Slot width is the distance across the base of the routered tracks.
- From more scrap plywood I cut two circles the outside diameter of the rowlocks. I then cut another circle the diameter of the oar out of the middle so I had two donuts.
- Using epoxy and silica glue powder powder the blades were glued on handles with the slot fitting up the tracks.
- Remembering to put the rowlocks on first, I glued the donuts onto the handles so there would be a hands with between the handle ends of the two oars while rowing.
- On the blade side of the donut I put a 300mm length of biax cloth to prevent the rowlocks wearing through the wood.
- After sanding down all the rough edges I coated the entire oar with neat epoxy to seal the wood.
- Lastly I laid down 3 coats of varnish to protect the epoxy from UV.
All up cost about $40 for the wood and $6 for 1m biax cloth. The rest all was scrap or leftovers from other projects.
Great work, I love hearing "I was too cheap to buy it so I made my own" stories that actually ended up saving money!
Re: GV10 Stop and Start Project
Posted: Thu Apr 29, 2021 2:01 pm
by Evan_Gatehouse
Did you ever weight the finished boat?
What size of outboard do you have?
Re: GV10 Stop and Start Project
Posted: Sun May 02, 2021 5:36 pm
by MikeyGnz
Evan_Gatehouse wrote: ↑Thu Apr 29, 2021 2:01 pm
Did you ever weight the finished boat?
What size of outboard do you have?
Hi Evan
I haven't managed to weigh the boat. Not sure how to do it without a weighbridge and they want $10 a pop over here. With one of us at each end we can lift easily. On my own I can left the whole trailer with boat and motor and walk it sideways rotating on towball (trailer reversing issues, don't ask).
My motor is a 1978 Mercury 110 9.8hp 2 stroke. Apart from replacing the original stop button with a modern one that takes a lanyard kill switch, water pump replacement and the carb rebuild it is completely original.
Re: GV10 Stop and Start Project
Posted: Mon Oct 11, 2021 5:32 pm
by MikeyGnz
Finally found tie to give the motor a tune up in the weekend.
Idle mixture was miles off but now running well after adjustment. Throttle stop was limiting it to 3400rpm at wide open throttle so no wonder I was having issues getting on the plane previously, now set to the proper 5000RPM which should give me that little bit extra top end.
I did it in a nearby river with the boat on the trailer so didn't get to see how the boat performed, probably a good thing as the starter rope snapped on me after I did all the adjustments needing the motor in-gear but before I set the max revs in neutral, etc. Better for that to happen at the ramp than out somewhere. Took it home, replaced the rope and made the final adjustments with the motor in a bucket of water.
All the foam inside the motor cowl is perished from age and petrol exposure. I will clean that up, re-glue the rubber seats in the right place and maybe replace the foam then I am finished ready for the upcoming summer.
Re: GV10 Stop and Start Project
Posted: Wed Nov 10, 2021 2:41 pm
by Evan_Gatehouse
No wonder you were having trouble getting it planing!
The engine was probably developing maybe 5 HP.
Re: GV10 Stop and Start Project
Posted: Wed Jun 29, 2022 7:49 am
by OneWayTraffic
MikeyGnz wrote: ↑Sun May 02, 2021 5:36 pm
Evan_Gatehouse wrote: ↑Thu Apr 29, 2021 2:01 pm
Did you ever weight the finished boat?
What size of outboard do you have?
Hi Evan
I haven't managed to weigh the boat. Not sure how to do it without a weighbridge and they want $10 a pop over here. With one of us at each end we can lift easily. On my own I can left the whole trailer with boat and motor and walk it sideways rotating on towball (trailer reversing issues, don't ask).
My motor is a 1978 Mercury 110 9.8hp 2 stroke. Apart from replacing the original stop button with a modern one that takes a lanyard kill switch, water pump replacement and the carb rebuild it is completely original.
If you are ever going through Amberley with it the weighbridge is free. Otherwise you can get close with kitchen scales if you balance it right. I used a spring fish scale for my dinghy. Held under one gunwale and pulled that half off the ground. Repeated other side, and added the two.


