Page 13 of 16

Re: Bob's FS18

Posted: Fri Jun 18, 2021 12:51 pm
by toadfish
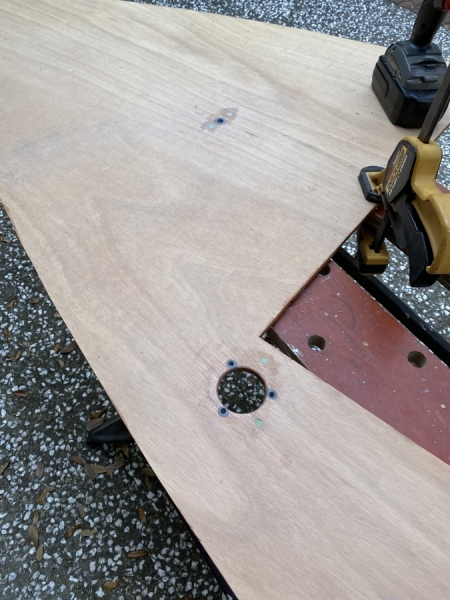
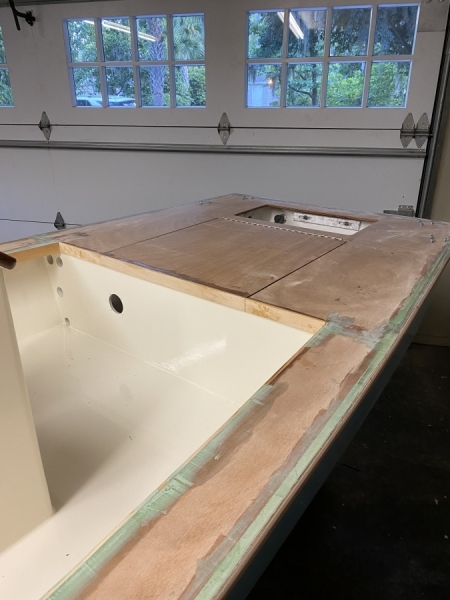
Tom, so sorry I missed replying to your post. I think the light wood you're talking about is what I've used for cleats, stringers, etc. and it's simply clear yellow pine. Browndog you sure are right that sanding and fairing takes a bunch of time and I was very happy to get back to construction. Before getting the decks and gunnels on though, I needed to work a little more on the guts of the boat while I could get to them easily.

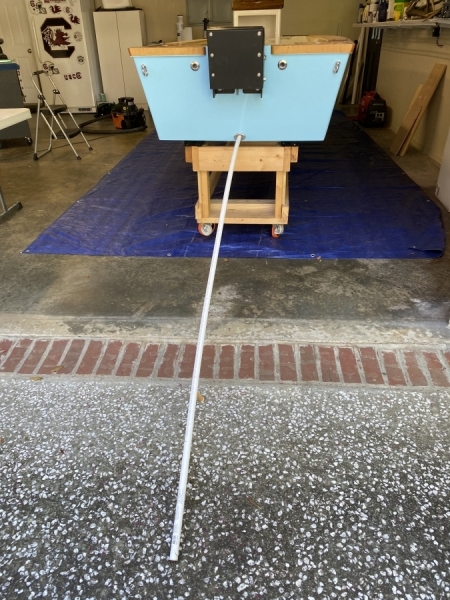
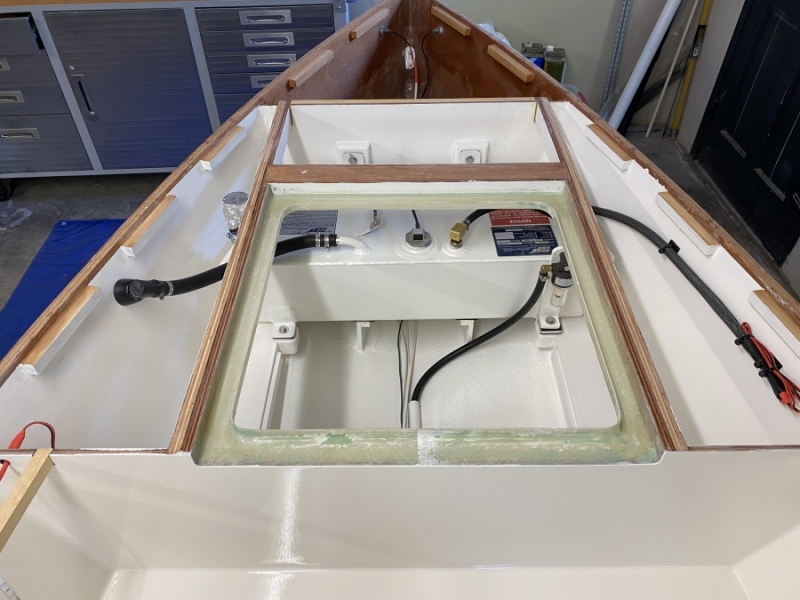
I decided to run a length of 3/4" PEX water pipe to protect and isolate the fuel line within the bilge chase. It was a 20' piece, so I snaked it through the garboard drain hole to initially measure and cut it to length.

Image

Image

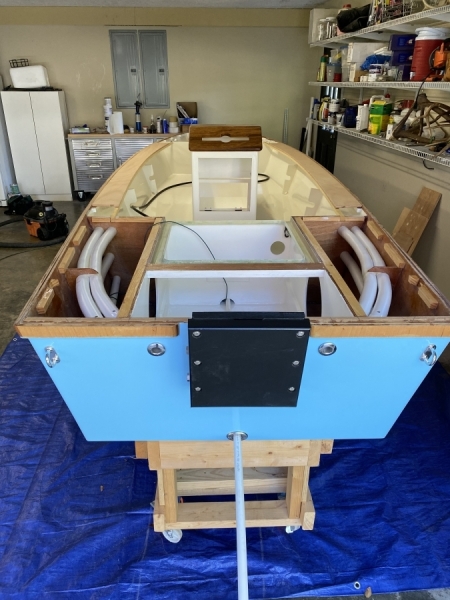
Pipe extending the length of the sole into the bow compartment. Began to pull wires and trial-fit the gunnels.

Image

Image

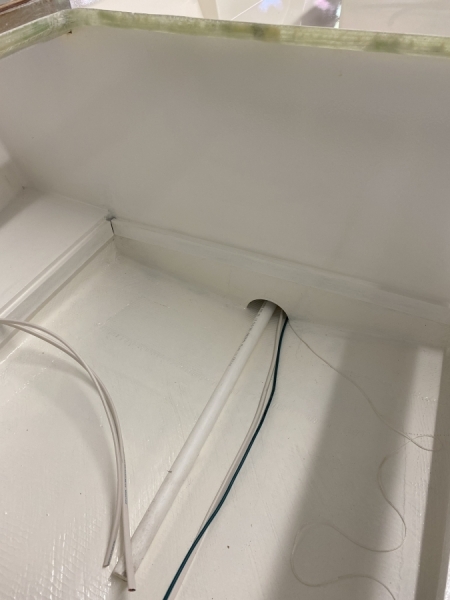
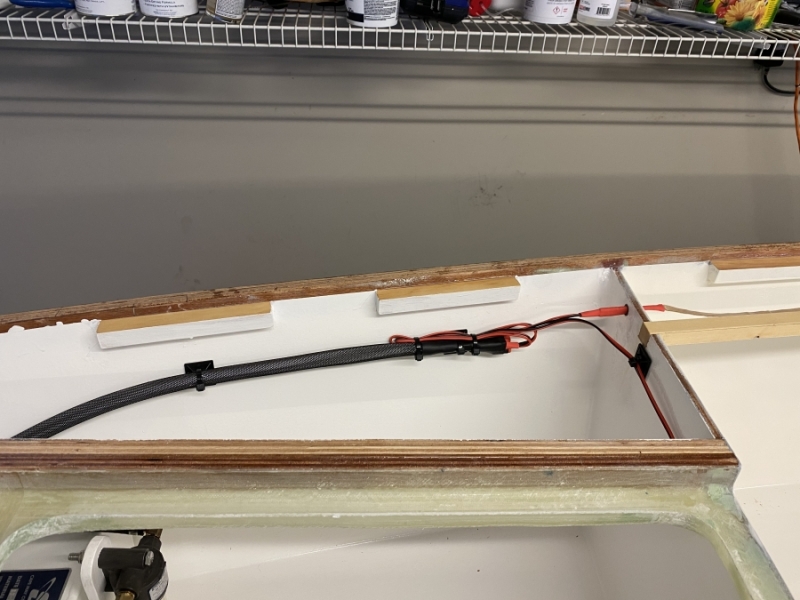
Ground wiring for the fuel fill and tank as well as wiring for the sending unit

Image

Harness for the bow navigation lights and the under-gunnel lighting. Access will still be very easy through the bow hatch.

Image

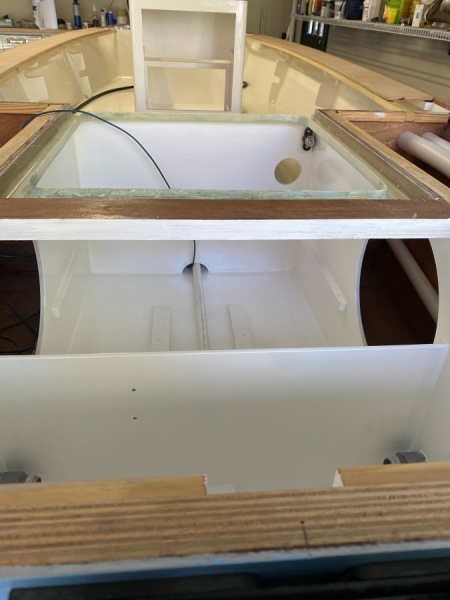
Fuel and vent lines connected.

Image

Broader view showing the waterproof LED strip lighting I'm using under the gunnels
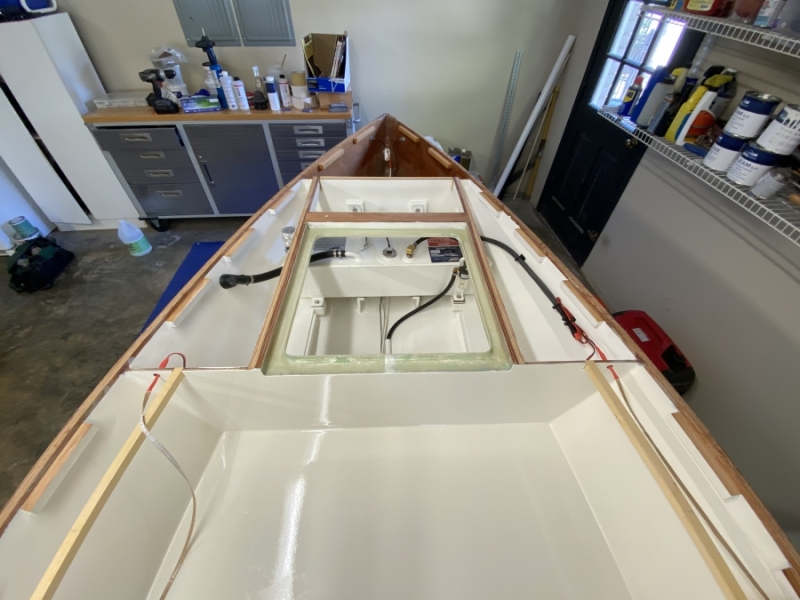
Image

Re: Bob's FS18

Posted: Mon Jun 21, 2021 11:26 am
by toadfish
Now the work began to get the fore and aft decks ready to go down. Some thought went into how the poling platform would be mounted and the fabricator actually came out to the house to help design it and position mounting pads for the best screw hole placement. The plan was to laminate aluminum backing pads to the underside of the deck that would be drilled and tapped to accept the mounting screws. Something like Tef-gel will be used to prevent corrosion between the stainless screws and the plates.

Image

A template was made to transfer the pad location and orientation to the opposite side of the deck. The template would also be used later for final hole positioning prior to tapping the backing plates. Pilot holes were enlarged to fill with epoxy later.

Image

Image

The underside of the deck coated with epoxy and the backing plates bonded to place.

Image

With the backing plates in place, the over-sized holes could now be filled with epoxy.

Image

The template was then used to mark final hole location prior to drilling through the deck and into the plates. Holes were drilled and tapped one at a time to make sure each one was centered properly.

Image

Image

The poling platform base plates screwed to place and a view of the of the tapped backing plates on the underside of the deck. You can also see where I had to shape and bevel the backing plates just a bit so that the deck would seat correctly.

Image

Image

Re: Bob's FS18

Posted: Mon Jun 21, 2021 12:26 pm
by JCW1982
Clean and precise work!

Re: Bob's FS18

Posted: Mon Jun 21, 2021 12:50 pm
by Jeff
Very nice work!!! Thank you for the update!! Jeff

Re: Bob's FS18

Posted: Mon Jun 21, 2021 1:17 pm
by VT_Jeff
Looking great. Not sure there is a poling platform guy available for house-calls in southern vt, you're pretty fortunate that way! :lol:

Re: Bob's FS18

Posted: Mon Jun 21, 2021 2:09 pm
by TomW1
You have been doing great work 0n your FS18. It will be a great boat for around Savannah.

Tom

Re: Bob's FS18

Posted: Tue Jun 29, 2021 11:49 am
by toadfish
Not as much was left to do on the forward deck to get it ready, but positioning the hole for the fuel fill was a little tricky. From the fuel fill to the tank intake is a straight shot with a very short length of hose, so the hole would require precise placement. A piece of PVC pipe, the same diameter of the tank intake, was cut to extend just to the underside of the deck. I then placed the deck, traced the pipe outline on the underside, and marked the center of the traced outline so that the hole would end up directly over the center of the intake.

Image

Image

The mounting holes for the fuel fill were then overfilled with epoxy and re-drilled. Same thing for the other hole in the picture, which is for turnbuckle hardware that will secure the forward casting platform.

Image

Decks and gunnels finally bonded in place.

Image

Image

Re: Bob's FS18

Posted: Tue Jun 29, 2021 12:47 pm
by Jeff
Nice work toadfish!!! Jeff

Re: Bob's FS18

Posted: Tue Jun 29, 2021 1:07 pm
by cape man
Looking awesome!

Re: Bob's FS18

Posted: Wed Jun 30, 2021 4:19 pm
by toadfish
With the decks and gunnels down, now was the time to get the fore and aft hatches built and temporarily in place before the gunnels and decks could be trimmed out on the inside of the cockpit. The plywood pieces that were previously cut out of the decks for the hatch openings were faired so that they fit precisely. Frame pieces were ripped to the proper height to keep the hatch surface level with the deck and laminated to place.

Image

I decided on stainless piano hinges for these hatches as well, and went through some acrobatics to get the placement just right for each one. With the hinge screwed to the hatch only, I centered each hatch in its opening using spacers made from 1/16" angle aluminum (forgot to take a picture of this but it worked well), and marked the exact hinge location on the wall of the hatch opening. I then removed the hinge from the hatch, and transferred it to the marked wall of the opening so that the pilot holes could be easily and precisely placed. The hinge was then screwed back to the hatch and the assembly to the hatch opening.

Image

Image

The fun wasn't over because I still needed to over-fill all of the holes and then re-drill the pilot holes in their previous position. This had to be done a few at a time to keep things lined up. Again, A LOT of back-and-forth...

Image

With the hatches in position, it was now possible to place the inside gunnel and deck trim

Image

Image

Image

Image

The tops of the hatches were fiberglassed and an additional piece of plywood was laminated to the underside of each hatch for stiffness (thanks for the design tips Reid). The latch for each hatch will rotate and lock against the underside of molded fiberglass gutter, so I'm not worried about wear. The cutout was just a little challenging, but it was my last official item of "construction" on the boat!

Image

Image

Ready for primer. The aft hatch (in the foreground) has a rabbet in the forward edge that will accommodate a small track to secure a seat cushion.

Image