Page 16 of 16
Re: Bob's FS18
Posted: Wed Jan 05, 2022 7:30 am
by Jeff
ToadFish, beautiful work!!! Get me some really good photos and I will put her on the cover of the website!!! Jeff
Re: Bob's FS18
Posted: Wed Jan 05, 2022 9:29 am
by VT_Jeff
Really high caliber work there, conrgats again. Damn!
Re: Bob's FS18
Posted: Wed Jan 05, 2022 9:31 am
by Mojosmantra

Fantastic work! Kind of makes me want to start over

Re: Bob's FS18
Posted: Wed Jan 05, 2022 10:43 am
by Dougster
Have to chime in: Stunning.
Dougster
Re: Bob's FS18
Posted: Wed Jan 05, 2022 11:30 am
by Mojosmantra
If you have the time or inclination, it would be great to hear about how you executed what appears to be a rope rub rail. I searched the thread and didn't see any discussion of that.
Re: Bob's FS18
Posted: Wed Jan 05, 2022 1:02 pm
by Fuzzytrout
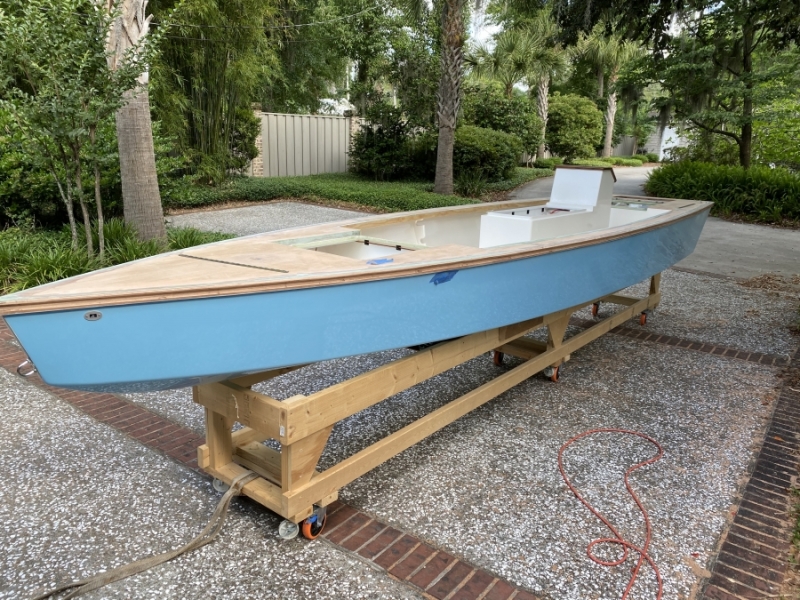
That's a beautiful boat! I'm sure you'll enjoy it for years to come! thanks for posting up so many pictures showing all your detail work!
Re: Bob's FS18
Posted: Wed Jan 05, 2022 4:40 pm
by Dan_Smullen
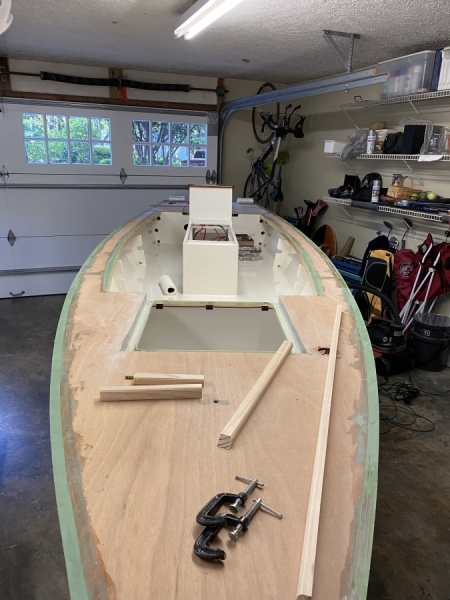
As FT said, thank you for the detailed pictures. It all looks great but I love the box in front of the console!
Enjoy your efforts and congrats!
Re: Bob's FS18
Posted: Thu Jan 06, 2022 10:20 am
by toadfish
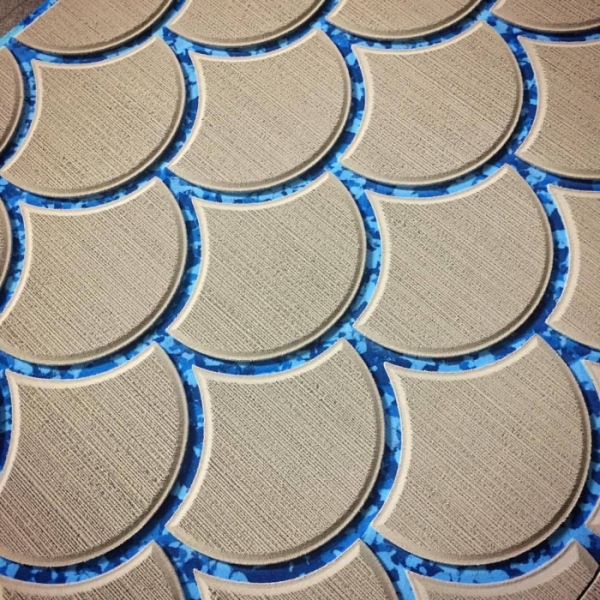
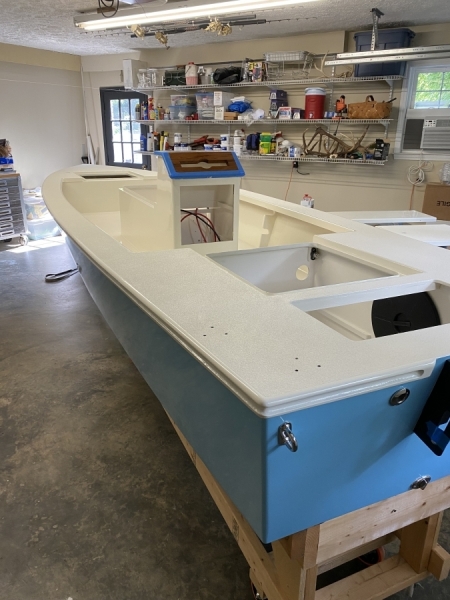
Wow, MANY thanks again to all for the compliments! Jeff I'll get you some photos when it warms up. To answer a couple of questions, the fish scale look is actually a routed pattern option with SeaDek. I'm pretty sure it is called large tarpon scale. I went with the same background as the photo, Blue Camo, to blend with the hull color.
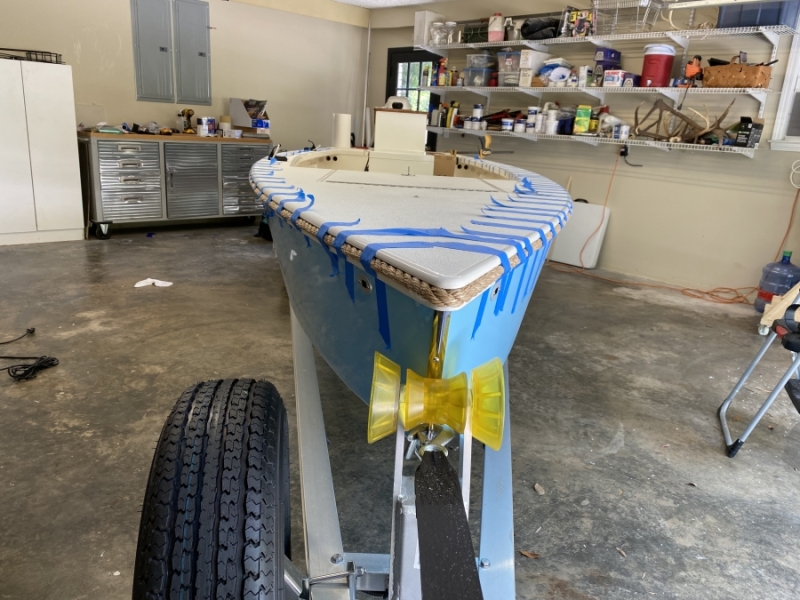
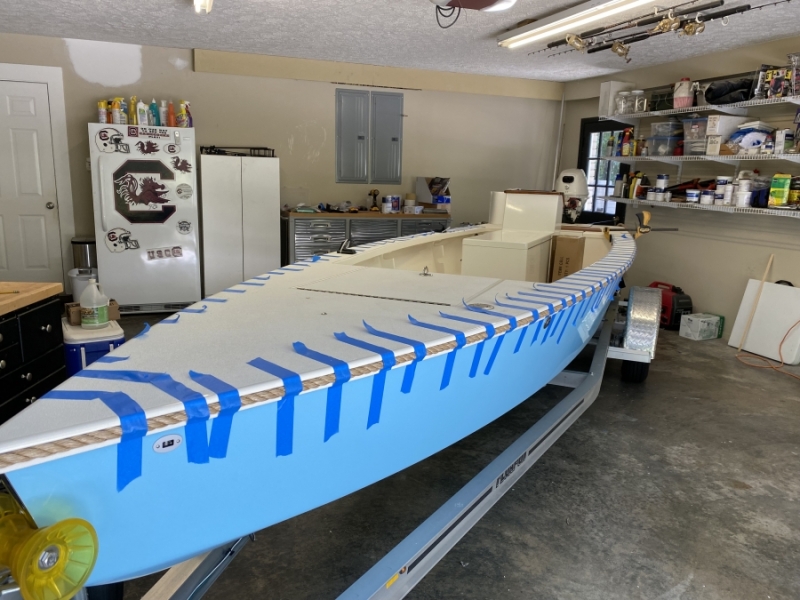
What to do about the rub rail was really a struggle, mainly because I wanted to wrap it around the bow which is such an acute compound angle. The relative flexibility and round cross section of rope solved the problem, and I decided to rout a groove in the wood rub rail to accommodate the rope. First, the junction between the deck and the rub rail had to be completely fair and sharp to guide the router.
The length of the rail was routed with guide to slightly less than the full depth of a 3/4" half round bit, the same diameter of the rope. Talk about a pucker moment! Fear and superstition kept me from taking any action shots, but after the groove was finished, the sharp junction between the deck and the wood rail was rounded over with the router as well.
View of the groove at the bow in primer.
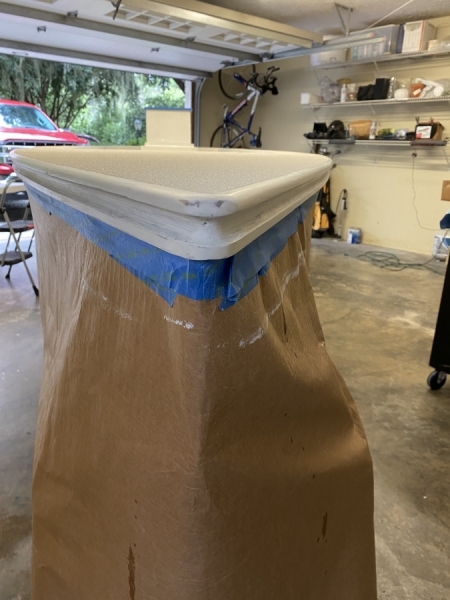
The grooved rub rail was painted along with the rest of the deck.
"Polypro" rope was used. Portions were boiled, softened, and shaped to conform not only to the bow angle, but also to the transitions from the sides to the transom. To avoid fasteners, it was epoxied in place with yet another high tech clamping system. If the rope needs replacing, I'm sure I will regret using epoxy, but it should provide for an entertaining continuation of this thread...
Re: Bob's FS18
Posted: Thu Jan 06, 2022 11:20 am
by Dougster
Taking that router to the rub rail proves you're a braver man than me .
Dougster
Re: Bob's FS18
Posted: Fri Jan 07, 2022 2:56 pm
by Mojosmantra
Thanks for the intel on the rub rail. It makes me sweat just to think about it. Was your router guide rail a store bought accessory or did you have to fashion your own?