Page 1 of 1
Bob's FS18
Posted: Tue Jul 02, 2019 11:33 am
by toadfish
OK, here we go. I've been working for a few months now, just incredibly slack about posting build progress, and will need to get caught. Ordered the FS18 CNC kit on Monday, March 11 and, because I had already been checking out build threads, the strong back was ready to go when it arrived only a few days later that Friday. What service . . . thanks Reid!


Re: Bob's FS18
Posted: Tue Jul 02, 2019 12:10 pm
by Fuzz
Hey welcome to the fun Bob

That floor looks too clean for boat building but that will soon change.
Strongback looks good for building on. You might need a couple of braces on the legs to keep it from racking.
Re: Bob's FS18
Posted: Tue Jul 02, 2019 1:33 pm
by Reid
Bob,
Welcome to the Forum! I'm confident you will get a lot of feedback as you progress thru your build, especially if you post pictures. Like Fuzz said, I would add some bracing for the legs of the strongback. I would also encourage you to add some heavy duty casters (with the ability to lock). Casters will allow you to move the boat around or outside if you choose to sand outside.
Good luck to you and I am eager to see your progress!!!
-Reid
Re: Bob's FS18
Posted: Tue Jul 02, 2019 2:10 pm
by Jeff
Bob, Welcome to the Builders Forum!!! Glad to see you starting the FS18 build!! Again, welcome, Jeff
Re: Bob's FS18
Posted: Tue Jul 02, 2019 3:10 pm
by toadfish
Thanks for the welcome! Reid and Fuzz you'll be happy to see that I've made good on your suggestions in upcoming photos.
First weekend was gluing - Laminated the transom and stringers. Also got the hull panels glued with a high tech clamping system on the garage floor. Unforced error number one: Apparently a clean garage floor doesn't mean there are not unforeseen low spots, one of which was directly under one of the bottom panel puzzle joints. It will lead to future unnecessary fairing. Turns out stupid now and extra time later are strangely proportional...


Hull panels ready to go -

P.S. This may be a duplicate post - I think I deleted one by accident - just learning the forum ropes
Re: Bob's FS18
Posted: Tue Jul 02, 2019 3:20 pm
by piperdown
Welcome to the forum!
Off to a great start, regardless of any unforeseen leveling issues and I'll definitely be following along!
Re: Bob's FS18
Posted: Tue Jul 02, 2019 3:55 pm
by Reid
Bob,
Good start! No worries about the puzzle joint panels. One cured just sand them down smooth. As long as the you have the gap between the puzzle joints filled and there are not air pockets or gaps you are fine. Keep in mind, the cleaner you work now the smoother and less fairing you will do later.
One tip that will make your life easier when applying fillets and fiberglass tape:
Apply painters tape to the inside of all the seams. This will keep the fillets from pushing thru and making more sanding work for you once you flip the hull. I like to work wet on wet when I get to this point in the build. Once the hull is stitched together and you are ready for fillets, simply make really small "spot welds" with the fillets, maybe 1" wide, just enough to hold the seams together. Once those have cured, remove the stitches and clean up the spot weld fillets. Have your fiberglass tape measured out and cut to length (being sure to follow the lamination schedule). After the tape is measured and cut, roll it up and label it based on where it will go (keel, chine, etc...).
Roll out some neat epoxy (neat refers to epoxy without any fillers added) onto all the seams, making sure to cover an area where the tape will go (3" on each side of the seam). You can let this kick off and get tacky. Next, working on one seam at a time, apply the fillets to the seam. Allow the fillet to kick off but not cure (maybe 30-40 mins). At this point the fillet should still be soft as well as the neat epoxy you rolled out. Start to roll out your fiberglass tape. Work in small sections at a time (maybe 12" lengths). Roll out tape, wet it out, make sure there are no air bubbles (use the laminating roller), and move on down to the next section. Once that seam is done move on to the next. I would start on the keel and work outwards. You don't need to get all the seams done in one day but don't fillet the seam unless you are ready to tape the seam.
By doing this, the fillet will conform to the fiberglass really well and you won't have any air bubbles from uneven fillets. If you fillet first and let it cure you may have to go back and sand the fillets to get them to the right radius so the fiberglass lays down correctly.
I would do this on the inside as well. Doing this also gives you a chemical bond between your fillet and fiberglass tape.
Sorry if that was little long winded but I have found this save a lot of time and sanding/grinding. (I really hate sanding and grinding

)
Good Luck,
Reid
Re: Bob's FS18
Posted: Tue Jul 02, 2019 4:07 pm
by toadfish
My last "catch up" post for today. While the second set of puzzle joints was curing, I got the jig ready to go.
Unforced error number two: In my enthusiasm to get started, I ended up making the strong back a little too short, so that if the transom knees were properly supported, frame "A" was not resting on anything. Had to extend the strong back to support the frame and the bow extension of the jig. Oops.


Re: Bob's FS18
Posted: Tue Jul 02, 2019 5:59 pm
by OrangeQuest
Looking good already!! FS18 is a great boat a few guys are building them now. Good luck and enjoy!
Welcome to the forum,
OQ
Re: Bob's FS18
Posted: Tue Jul 02, 2019 6:33 pm
by Aripeka Angler
Welcome aboard Bob!
You have got off to a nice start, I am looking forward to following along...
Re: Bob's FS18
Posted: Tue Jul 02, 2019 10:15 pm
by Fuzz
Don't worry over a few screw ups, we all make them. Good thing is you would have to really, really try to make that can not be fixed
Good advise from Reid. The neater you work the less you have to sand. But then again some folks seem to really like sanding

Re: Bob's FS18
Posted: Wed Jul 03, 2019 7:29 am
by toadfish
Re: Bob's FS18
Posted: Wed Jul 03, 2019 8:01 am
by Jeff
Looks like you are now building a boat toadfish!!!! Jeff
Re: Bob's FS18
Posted: Mon Jul 08, 2019 11:49 am
by toadfish
Glued! Turkey injector is the perfect tool-


Re: Bob's FS18
Posted: Mon Jul 08, 2019 12:22 pm
by Jeff
toadfish, Yes, syringes are quite handy. We have a lot of builders who buy both the small and large ones we carry!! Nice progress on your build. Jeff
Re: Bob's FS18
Posted: Mon Jul 08, 2019 12:23 pm
by Jeff
toadfish, Yes, syringes are quite handy. We have a lot of builders who buy both the small and large ones we carry!! Nice progress on your build. Jeff
Re: Bob's FS18
Posted: Mon Jul 08, 2019 4:09 pm
by toadfish
Re: Bob's FS18
Posted: Mon Jul 08, 2019 4:26 pm
by Coach
Nice work!
Re: Bob's FS18
Posted: Mon Jul 08, 2019 9:15 pm
by toadfish
First coat of QuickFair. Forgot to mention that, based forum posts, I've been measuring all epoxy products by weight (I'm using System Three that I purchased along with the CNC kit). Bought an inexpensive kitchen scale for the job and it has made life much easier.

Got the keg trial fit and glass cut for the install. Haven't yet shaped the trailing edge.

High tech clamping system again to glue it in place!

Re: Bob's FS18
Posted: Mon Jul 08, 2019 9:18 pm
by toadfish
The "skeg" trial fit. Not drinking beer on Monday night!
Re: Bob's FS18
Posted: Mon Jul 08, 2019 9:24 pm
by Jaysen
toadfish wrote: ↑Mon Jul 08, 2019 9:18 pm
The "skeg" trial fit. Not drinking beer on Monday night!
Why not? You won’t be drinking alone as long as I’m still breath!
Re: Bob's FS18
Posted: Tue Jul 09, 2019 8:40 am
by Reid
Bob,
The hull is coming along really well! Nice clean work!!! I agree with Jaysen, but finish the Skeg then go on to the Keg!
-Reid
Re: Bob's FS18
Posted: Tue Jul 09, 2019 12:18 pm
by toadfish
It's been pretty hot in Savannah this summer. Block sanding the hull has definitely required a post-game beverage or two!
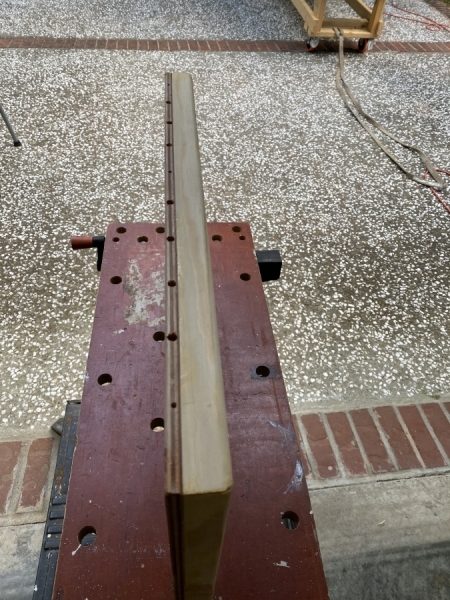
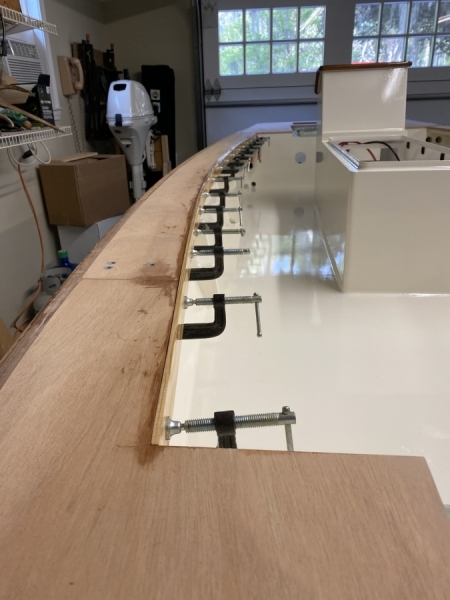
On the way back from an Everglades fishing trip in April, I made a quick stop off of the Florida Turnpike to visit Boat Builder Central for supplies (thanks Jeff and Reid!). One of the things I picked up was a 6mm Okume sheet, CNC cut for the FS 18 rubrail. I saw this on Reid’s build thread and they were generous enough to cut one for me too.
Multiple pieces of the rail ready to be laminated. I taped the hull to keep it free of glue "squish." The tape line also shows another one of my goofs. Screws were used to temporarily position the side panel when it was bonded to the transom. Thought they were backed out enough to prevent a low spot, but should have triple checked. More fairing later


Re: Bob's FS18
Posted: Wed Jul 10, 2019 9:59 pm
by toadfish
Re: Bob's FS18
Posted: Wed Jul 10, 2019 10:08 pm
by Aripeka Angler
Very nice work!!

Re: Bob's FS18
Posted: Thu Jul 18, 2019 1:42 pm
by toadfish
Sanded after the first coat of primer.


A very pesky transom fly...


Transition from the sharp to rounded rail is made about seven feet from the transom

Fuzz was right, ended up needing bracing on the middle set of legs

Re: Bob's FS18
Posted: Thu Jul 18, 2019 2:19 pm
by Jeff
Really nice progress toadfish!! Jeff
Re: Bob's FS18
Posted: Sat Jul 20, 2019 11:15 am
by Dutch1
Man you are scaring me rolling that thing around on just 2x4's. I just had to fix a strongback leg where it finally worked loose where a leg attaches to my strongback from me pushing it in and out of the garage so much. That thing is very light right now. It won't stay that way.
Believe me you don't want to see your hull laying on the ground. I had a wheel catch on something one time and when I pushed to move it the whole thing started to fall over. I was able to slow the fall but it still landed on the rub rail. Thankfully I was at the point you are now so it was nothing to pick the whole thing back up and correct everything. I ended up with a small dent in the rub rail and that was all. If it fell over now, every neighbor around me would hear it.
The boat is looking great!!
Re: Bob's FS18
Posted: Mon Jul 22, 2019 3:43 pm
by toadfish
Re: Bob's FS18
Posted: Mon Jul 22, 2019 4:19 pm
by Bogieman
Nice!
Re: Bob's FS18
Posted: Tue Jul 23, 2019 1:59 pm
by Reid
Bob,
That hull is looking really good!!!!
-Reid
Re: Bob's FS18
Posted: Tue Jul 23, 2019 9:19 pm
by Mikem59
Great looking build and great progress!
Re: Bob's FS18
Posted: Tue Jul 23, 2019 10:16 pm
by cvincent
Nice fairing job!
Re: Bob's FS18
Posted: Wed Jul 24, 2019 11:23 am
by toadfish
Re: Bob's FS18
Posted: Wed Jul 24, 2019 12:04 pm
by Aripeka Angler
That is some beautiful work.
Re: Bob's FS18
Posted: Wed Jul 24, 2019 12:32 pm
by Capt UB
Looks great, what primer are you using?
Re: Bob's FS18
Posted: Wed Jul 24, 2019 2:03 pm
by toadfish
I'm using System Three two-part epoxy primer. Amazing stuff because you can thin and clean up with just water. It levels pretty well too.
Re: Bob's FS18
Posted: Wed Jul 24, 2019 3:11 pm
by Capt UB
toadfish wrote: ↑Wed Jul 24, 2019 2:03 pm
I'm using System Three two-part epoxy primer. Amazing stuff because you can thin and clean up with just water. It levels pretty well too.
Thanks.
Used it on my FS14, did not know if you were using high build or not. The fairing looks great!
Re: Bob's FS18
Posted: Wed Jul 24, 2019 9:19 pm
by Jwhitakeriii
Looking great!
Re: Bob's FS18
Posted: Thu Jul 25, 2019 11:03 am
by Jeff
I agree, beautiful work!!! Jeff
Re: Bob's FS18
Posted: Fri Jul 26, 2019 7:39 am
by Coach
She looks great!
Re: Bob's FS18
Posted: Mon Aug 05, 2019 12:02 pm
by toadfish
Re: Bob's FS18
Posted: Mon Aug 05, 2019 2:31 pm
by BB Sig
Looks nice!
Re: Bob's FS18
Posted: Mon Aug 05, 2019 2:41 pm
by Capt UB
Boat looks great....
But, you need to throw some saw dust and epoxy on the floor!
Re: Bob's FS18
Posted: Mon Aug 05, 2019 3:30 pm
by toadfish
HA! Mom taught me to "clean as I go" in the kitchen. I guess I do the same thing in the garage...
Re: Bob's FS18
Posted: Mon Aug 05, 2019 4:05 pm
by Jeff
Very nice & well done Toadfish!!! Very good seeing you last Friday and glad you returned without a problem!!!!! Jeff
Re: Bob's FS18
Posted: Thu Aug 08, 2019 1:01 am
by Dutch1
toadfish wrote: ↑Mon Aug 05, 2019 3:30 pm
HA! Mom taught me to "clean as I go" in the kitchen. I guess I do the same thing in the garage...
I hear you there. I can't tell you how many times I've blown out the garage. Just didn't want it tracked in the house. That strongback looks good and you will like having it lower. I wish mine was about 6 inches lower that it is now.
Re: Bob's FS18
Posted: Wed Aug 28, 2019 10:34 am
by toadfish
Finally have the inside seams taped and cloth inside the hull. Unfortunately, schedule didn't allow this to be done wet on wet, so there was some sanding between steps. Tape "guidelines" helped keep the glass tape straight with a uniform overlap on the keel.


Even though there is glass cloth on the entire outside of the hull, only 6" on the inside as called for in the plans.


Initial tacking of the stringers. The knees were already placed so that they could be integrated into the taping of the transom. Don't like that epoxy puddle!

Fred Flintstone stringer clamps-

Re: Bob's FS18
Posted: Wed Aug 28, 2019 10:51 am
by Jeff
Nice work toadfish!!! Jeff
Re: Bob's FS18
Posted: Wed Aug 28, 2019 11:16 am
by Reid
Toadfish,
You really are doing some nice clean work!!!
-Reid
Re: Bob's FS18
Posted: Wed Sep 11, 2019 4:40 pm
by toadfish
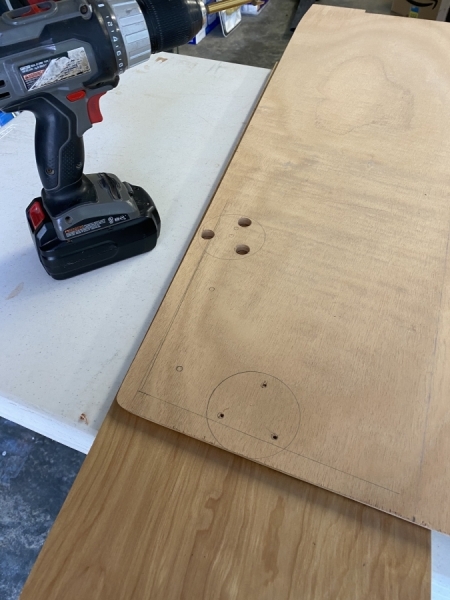
Some transom progress: Because the geography around here rarely requires running in super skinny water, I’m using a manual jack plate instead of a hydraulic one to save a little weight. Vance Manufacturing’s mini only weighs about 10 lbs.

Rather than drill/fill/drill, I decided to make a jig and over-bore the transom holes for carbon fiber tubing with the proper inside diameter to accept the mounting bolts for the plate. The tube is 10mm ID / 12mm OD, which gives a tiny bit of wiggle room for the 3/8" bolts and room for the adhesive lining the ½” holes in the transom

Must have trail-fit the plate in the jig ten times before clamping it to the transom. Definite pucker factor when the holes were drilled.


Success! The inside of the holes were coated with epoxy and gel magic was used to glue the tubes. No picture, but the tubes were stuffed with plastic wrap to keep them free of adhesive.

The excess tubing will be trimmed flush on the inside. Those ugly black streaks are where I dripped sweat on the uncured epoxy while taping the transom. Pretty gross.

Not a great picture, but very clean on the outside and just a bit proud so they'll end up completely flush with the final sanding of the primer.

Re: Bob's FS18
Posted: Mon Sep 16, 2019 10:33 am
by toadfish
Re: Bob's FS18
Posted: Mon Sep 16, 2019 11:07 am
by Jeff
toadfish, good looking trailer for that FS18!!! Jeff
Re: Bob's FS18
Posted: Tue Dec 10, 2019 3:50 pm
by toadfish
Re: Bob's FS18
Posted: Wed Dec 11, 2019 8:13 am
by Jeff
Nice progress toadfish!!!! Jeff
Re: Bob's FS18
Posted: Wed Dec 11, 2019 4:22 pm
by toadfish
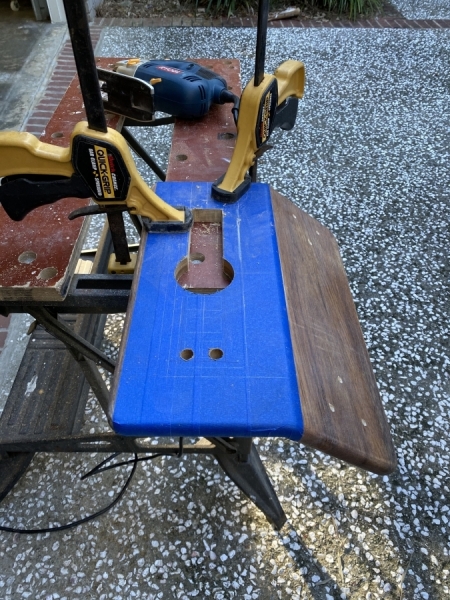
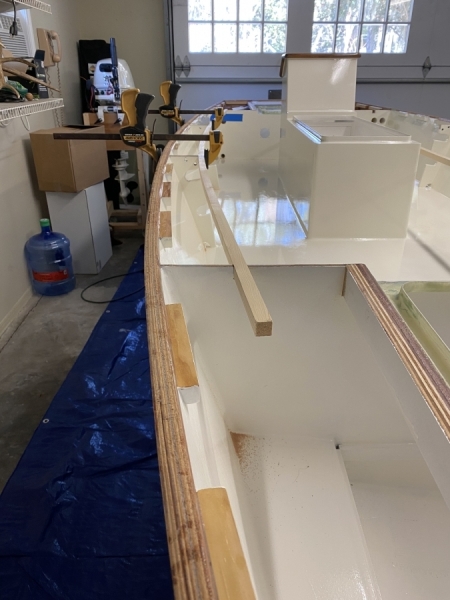
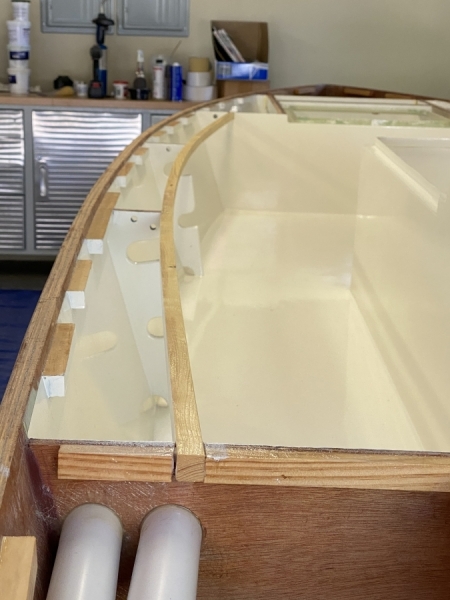
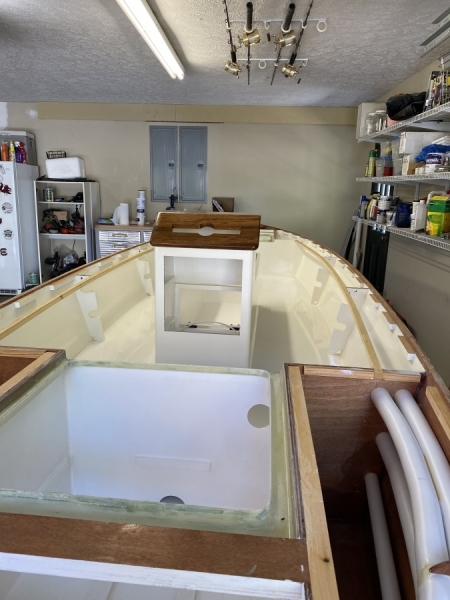
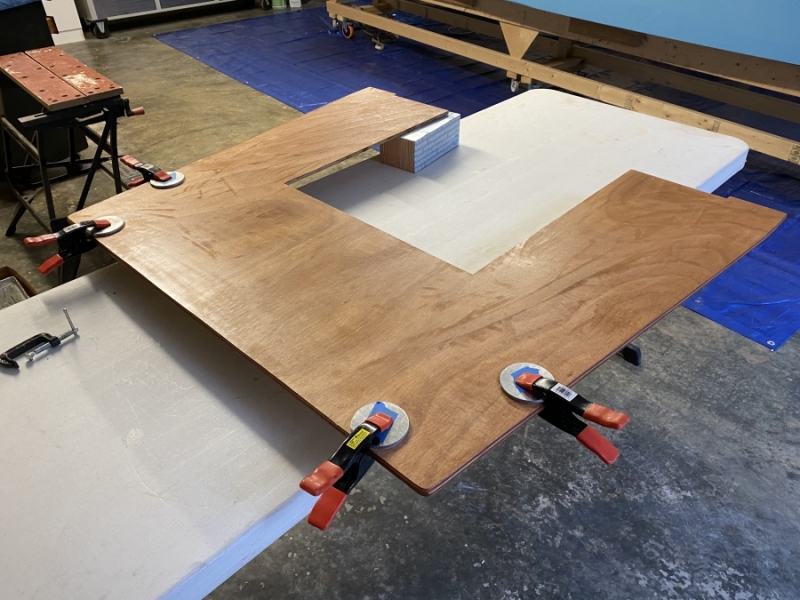
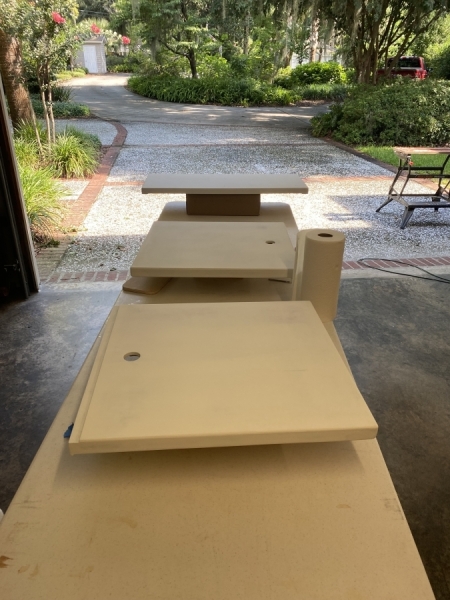
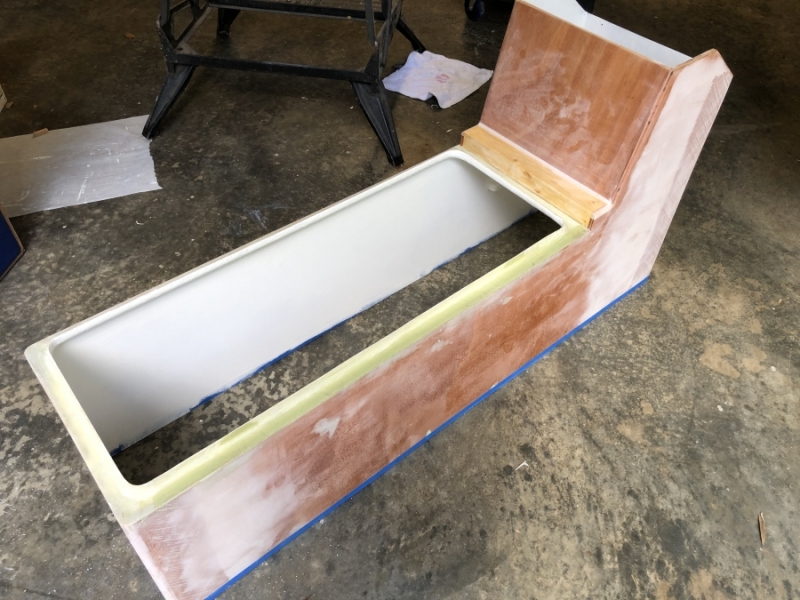
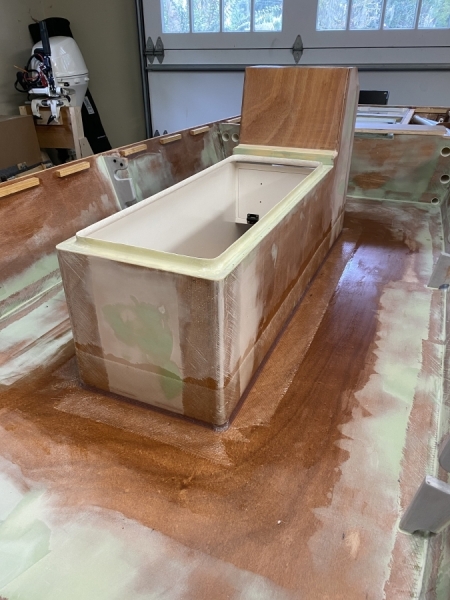
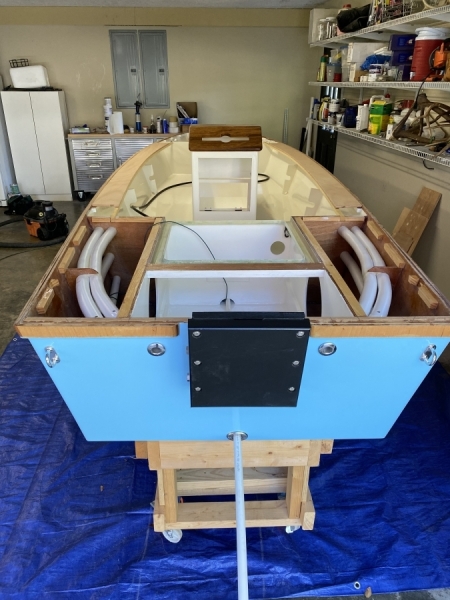
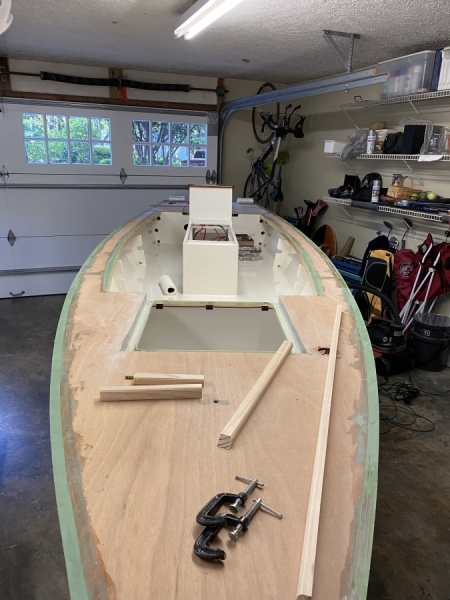
More progress, but it really slowed down for a while after flipping the hull. Plenty of decisions needed to be made before the frames were installed. Completely stole the designs for the horizontal drain slots in bulkhead E and aft storage, which required extension of the transom knees. Thanks PapaDave! I also decided on a small coffin box/grab post console and made a basic mockup out of cardboard. A jig was used to cut a 3” PVC pipe lengthwise that runs along the keel as a chase and drain for the bow compartment. It will be glassed into to place and communicate up through the floor into the console. You can see from the photos it was all kind of happening at once.
The jig let me run the pipe through the table saw once down each side.

Router setup to cut horizontal slots in the stern bulkhead. Semi-circular cutout for the PVC chase and repaired cutout visible where I changed my mind

Chase and bulkheads trial fit


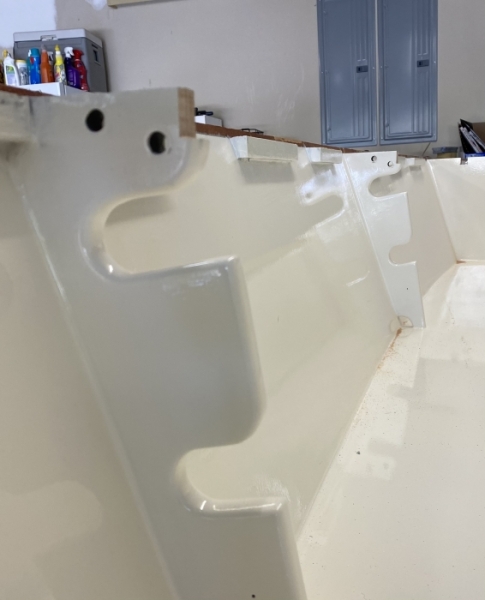
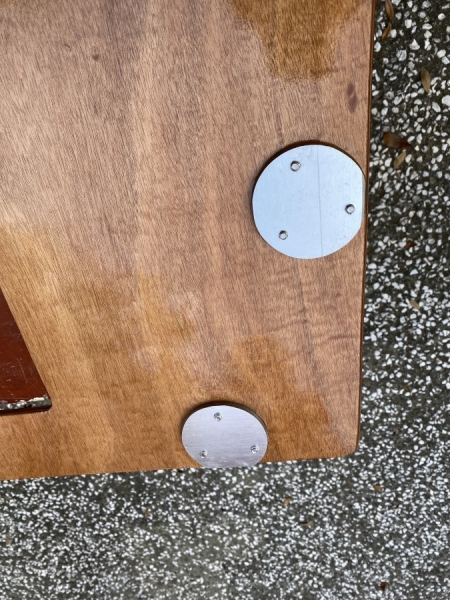
New pieces cut to extend from transom knees to the bulkhead. Circular cutouts are for deck plate access into the side compartments

Console mockup was placed to position the floor access into the chase. This was accomplished by sectioning and adding a two-way cleanout that is just visible in the last photo


Re: Bob's FS18
Posted: Tue Dec 17, 2019 9:22 am
by toadfish
Re: Bob's FS18
Posted: Tue Dec 17, 2019 2:29 pm
by Fuzz
Nice looking fuel tank! You are doing some nice work there.
Re: Bob's FS18
Posted: Tue Mar 10, 2020 12:05 pm
by toadfish
Re: Bob's FS18
Posted: Tue Mar 10, 2020 12:08 pm
by Jeff
Great progress!! Looks great as well!! Jeff
Re: Bob's FS18
Posted: Tue Mar 10, 2020 11:49 pm
by PapaDave
Your boat is coming out beautifully. Keep up the nice work.
Dave
Re: Bob's FS18
Posted: Wed Mar 11, 2020 12:13 pm
by toadfish
Re: Bob's FS18
Posted: Wed Mar 11, 2020 12:34 pm
by Jeff
Again, really nice work Bob!!!! Jeff
Re: Bob's FS18
Posted: Wed Mar 11, 2020 4:33 pm
by toadfish
Re: Bob's FS18
Posted: Wed Mar 11, 2020 8:48 pm
by Rtorres2411
Nice looking boat.
Re: Bob's FS18
Posted: Wed Mar 11, 2020 9:40 pm
by Dutch1
Beautiful!
Re: Bob's FS18
Posted: Thu Mar 12, 2020 8:03 am
by Jeff
Beautiful work!!! Jeff
Re: Bob's FS18
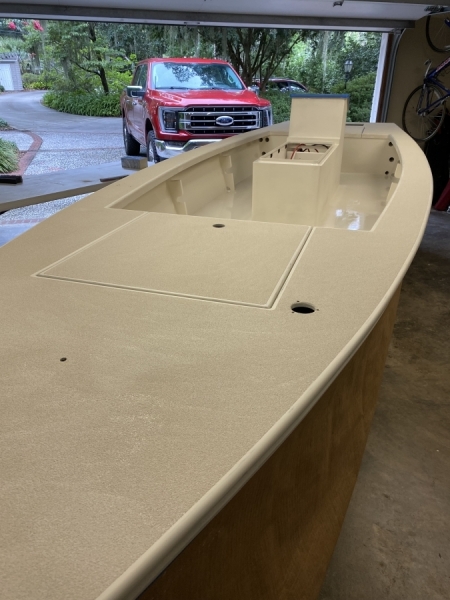
Posted: Thu Apr 02, 2020 2:55 pm
by toadfish
Re: Bob's FS18
Posted: Thu Apr 02, 2020 3:03 pm
by Jeff
Very nice work and the paint looks great!!!! Jeff
Re: Bob's FS18
Posted: Thu Apr 02, 2020 4:36 pm
by Fuzz
That is a whole bunch of dang fine looking work right there.
This is going to be a really nice boat.
Re: Bob's FS18
Posted: Thu Apr 02, 2020 4:46 pm
by Reid
Bob,
The boat is looking really nice!!! I like the paint job and the fact you left the rubrails brighwork!
-Reid
Re: Bob's FS18
Posted: Thu Apr 02, 2020 7:01 pm
by cape man
Love the wood touch.
Re: Bob's FS18
Posted: Sat Apr 11, 2020 8:29 am
by toadfish
Thanks to all for the nice comments! A couple of weeks ago we finally had a string of really warm days so I could get the foam poured under the sole. For the cells that would be foamed, I made a cover with relief holes to guide foam expansion. The idea was get complete fill with little trimming afterward, but it only kind of worked. Turns out the foam stopped expanding laterally well before it stopped expanding vertically and, though I used a lot of weight on top, it would lift the cover before coming out the relief hole. Still, I think it minimized some waste and reduced the number of secondary pours to get complete fill.

Gave an old crosscut saw a new handle for foam trimming.

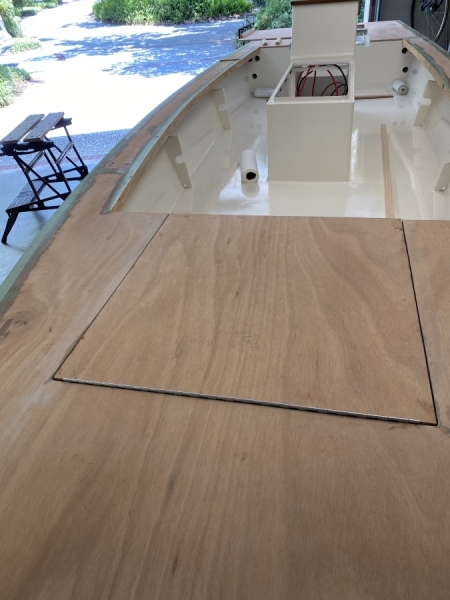
Foam sealed with epoxy and ready to go. I had gone ahead and integrated the butt block for the fore and aft sections of the sole prior to pouring

Sole is in!


Re: Bob's FS18
Posted: Sat Apr 11, 2020 9:25 am
by Rmarsh
Your workmanship is excellent. The boat looks beautiful......all the photos are great too!
Re: Bob's FS18
Posted: Tue Apr 14, 2020 8:21 am
by toadfish
Re: Bob's FS18
Posted: Tue Apr 14, 2020 8:23 am
by Jeff
Beautiful work!!! Jeff
Re: Bob's FS18
Posted: Tue Apr 14, 2020 9:29 am
by Coach
Great work!
Re: Bob's FS18
Posted: Tue Apr 14, 2020 4:38 pm
by Dan_Smullen
Nice work! A little planning and precaution goes a long way!
Re: Bob's FS18
Posted: Tue May 05, 2020 4:49 pm
by toadfish
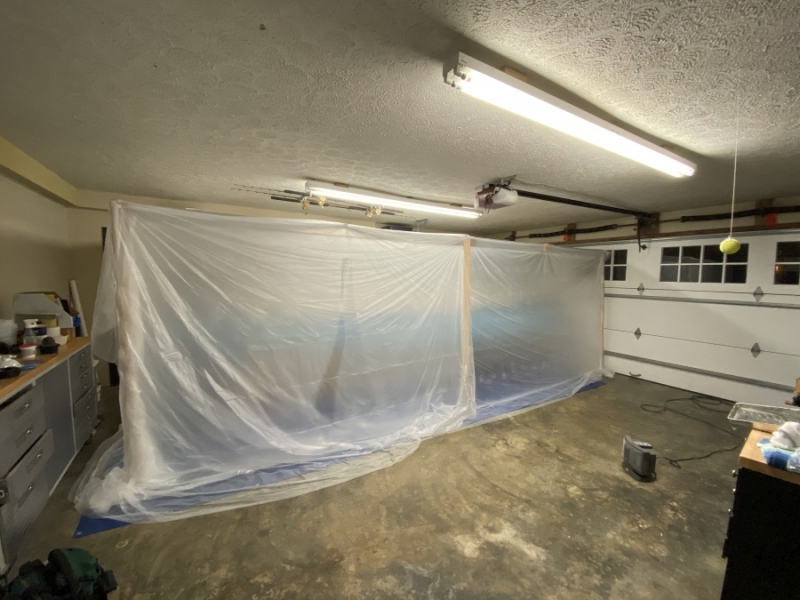
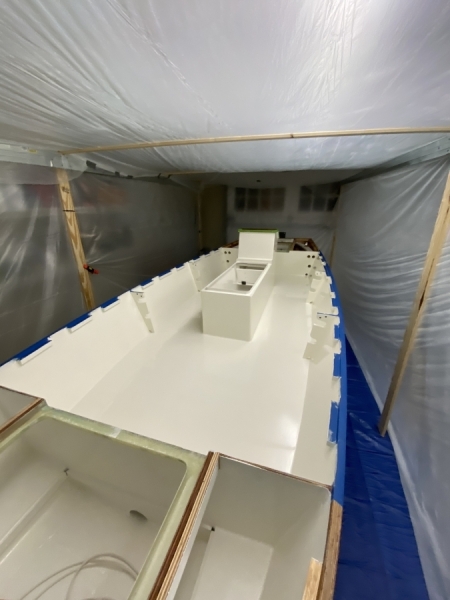
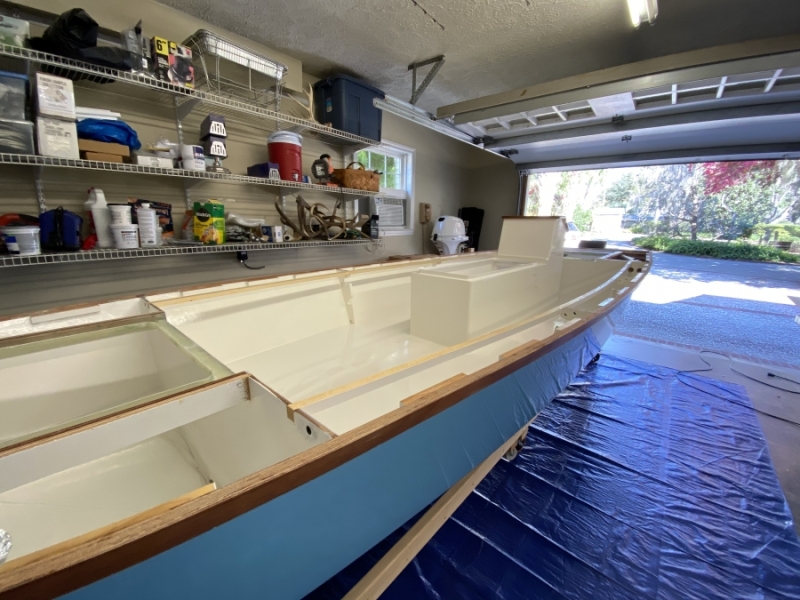
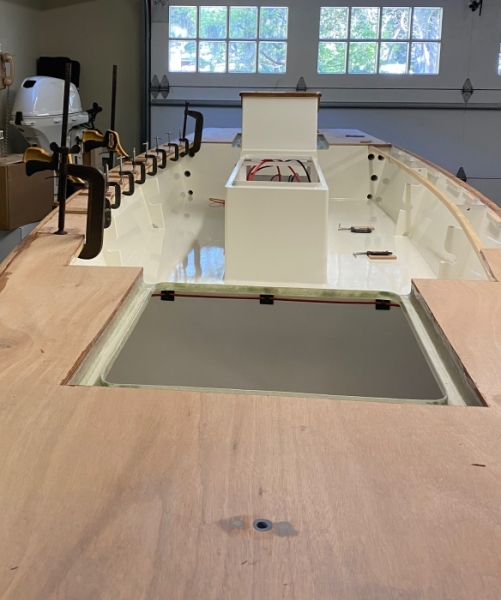
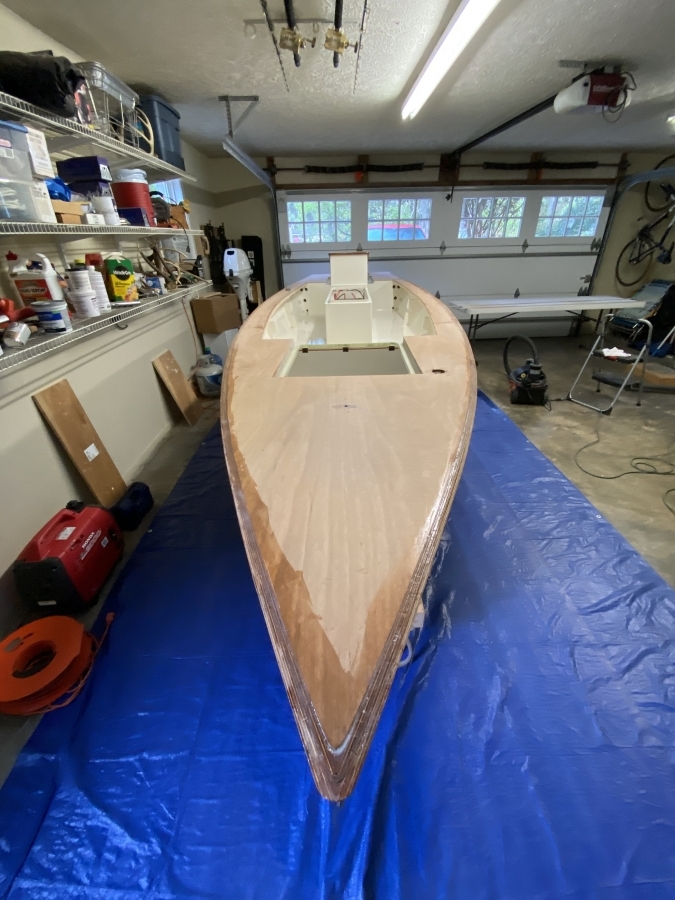
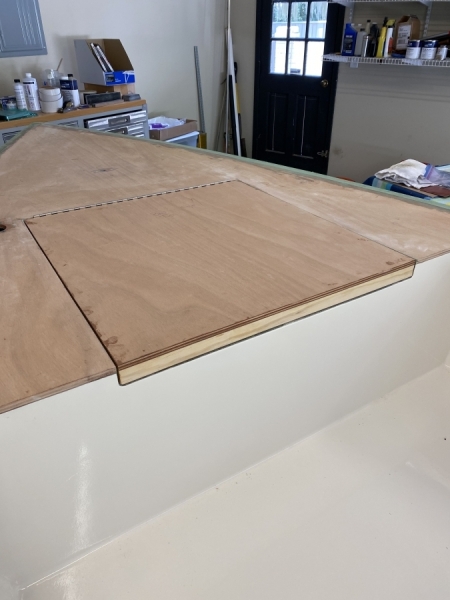
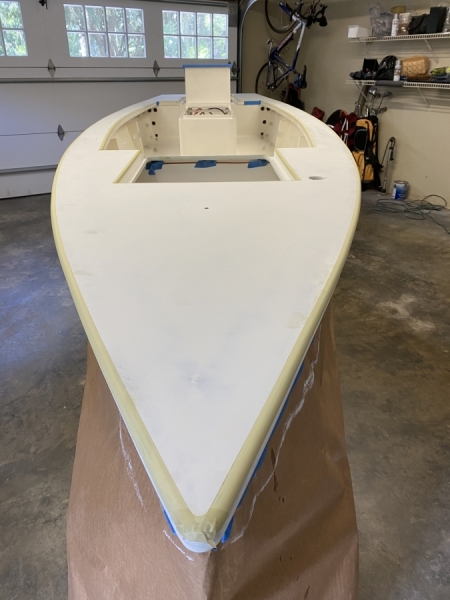
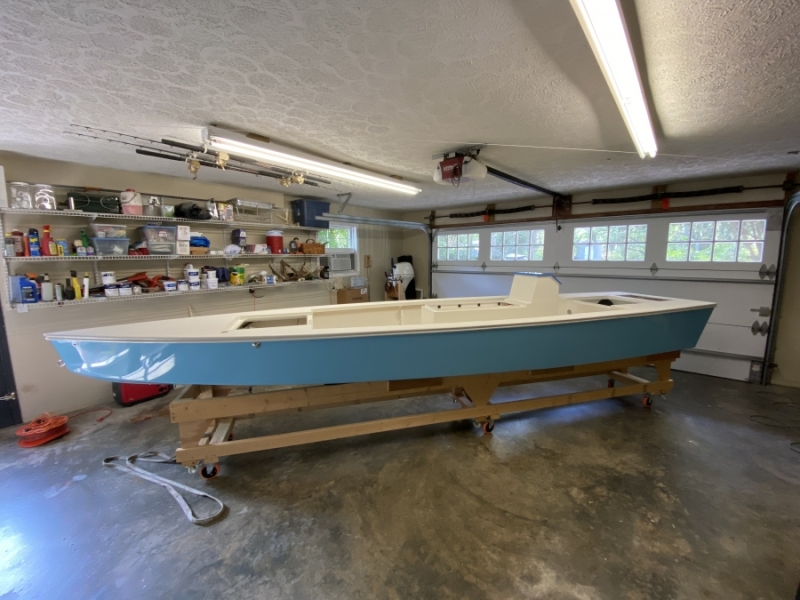
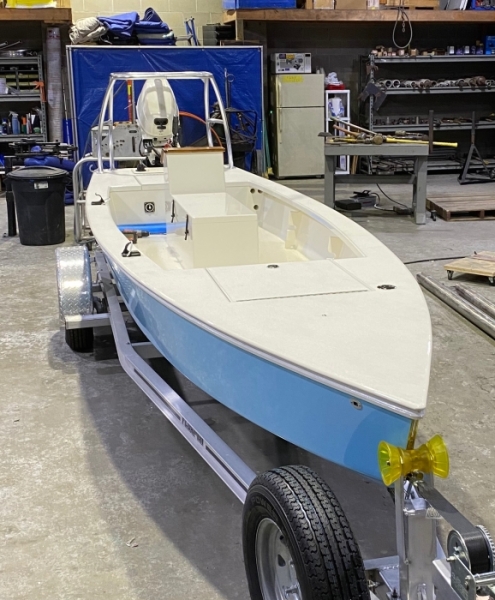
A little quarantine progress in the last few weeks. Got the fore and aft deck pieces shaped and trial fit. Starting to look like a boat...

Panoramic mode to gives the FS18 a little bit of rocker that does't exist.

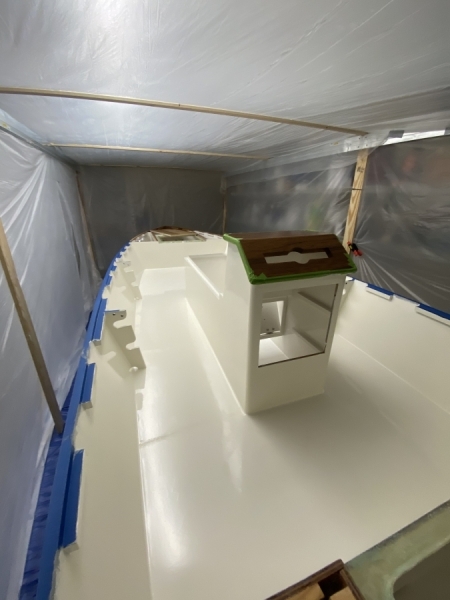
More fairing on the console and fit the gasket to make sure the hatch will function properly.

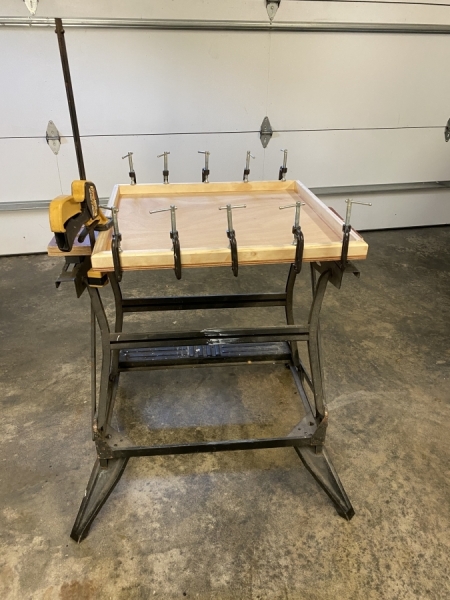
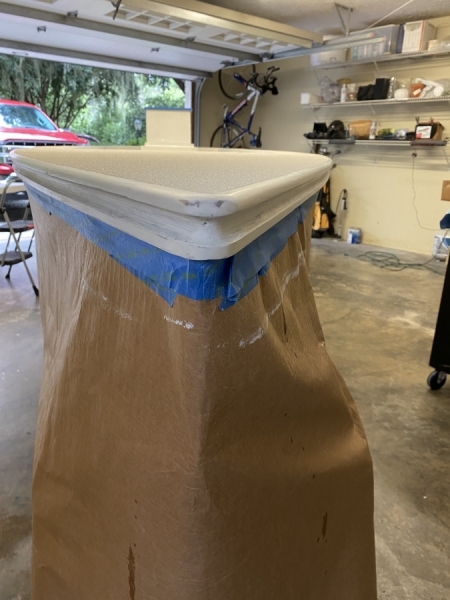
The aft hatch gutter took a bit of work. I made a mold for the fiberglass layup out of plywood and started by drilling the corners.

Cut out the rest of the interior, used a router to radius the edges, sanded smooth, and then clear packaging tape for separation.

Fiberglass layup with another very sophisticated clamp setup to make sure the saturated cloth stayed adapted to the mold

Got the gutter apart from the mold and fit to place in order to mark the cut line in frame E. The drainage will be into the sole.


Frame E notched and the gutter in place


Re: Bob's FS18
Posted: Tue May 05, 2020 7:05 pm
by PapaDave
Your boat is really looking nice. Great console design with plenty of storage and seating. I look forward to seeing it in the water.
Dave
Re: Bob's FS18
Posted: Wed May 06, 2020 7:55 am
by Jeff
Beautiful work ToadFish!!!! Jeff
Re: Bob's FS18
Posted: Wed May 06, 2020 9:02 am
by Aripeka Angler
Awesome work!
Re: Bob's FS18
Posted: Wed May 06, 2020 9:07 am
by cape man
May be copying some of your stuff... Love the drain for the hatch.
Re: Bob's FS18
Posted: Wed Aug 05, 2020 4:07 pm
by toadfish
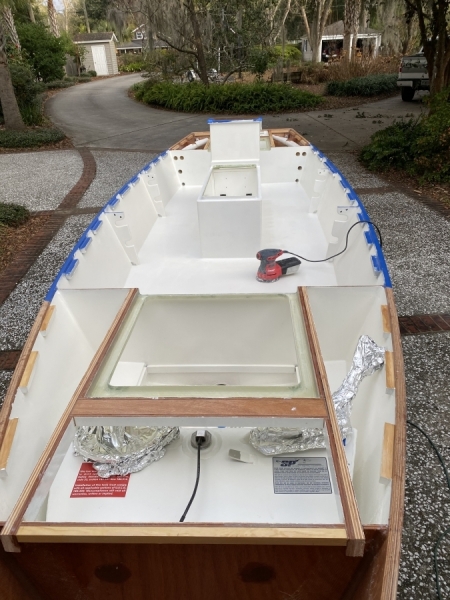
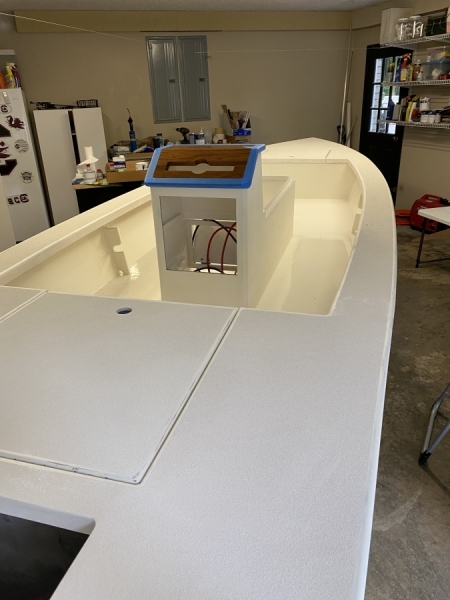
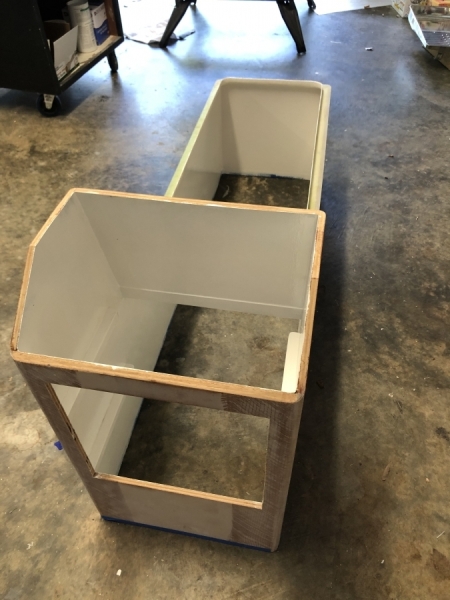
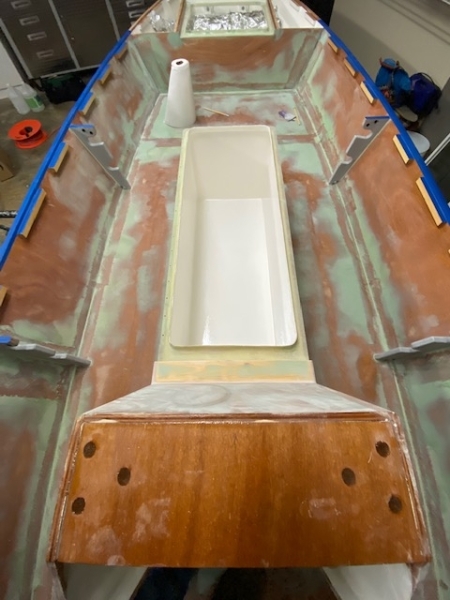
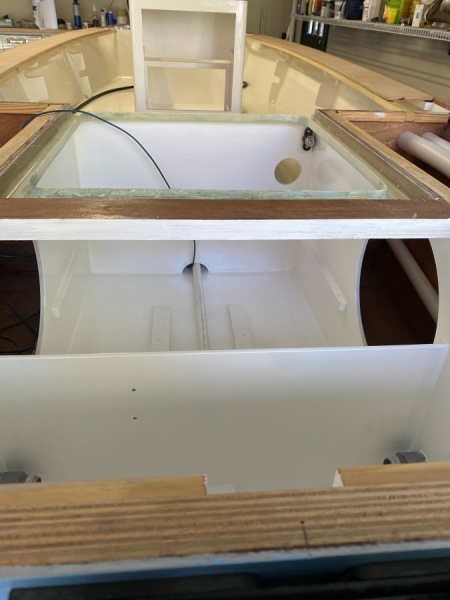
I didn't realize how long it has been since my last progress post. The focus has been on as much interior finish work as possible, before the decks and gunnels go on. This post kind of sticks to what has been done in the bow compartment.

The entire compartment between frames A and B was primed and painted with epoxy bilge paint.


A removable false floor was fit that provides "dry" storage for the compartment and easy access to the bilge below.

False floor painted and fuel tank trial bolted into place

Cuts made in frames A and B to accommodate the forward hatch framing

Laminated fore to aft hatch support frames and laid up another hatch gutter using the same mold as the stern


Lateral laminated frames and forward hatch gutter trial fit. Like the stern, it will drain into the sole. Cleats for deck and gunnel support are also in place.


Re: Bob's FS18
Posted: Wed Aug 05, 2020 9:05 pm
by Jeff
Great work, nice progress!!!! Jeff
Re: Bob's FS18
Posted: Fri Aug 07, 2020 3:36 pm
by Coach
Looking really nice!
Re: Bob's FS18
Posted: Tue Oct 13, 2020 4:19 pm
by toadfish
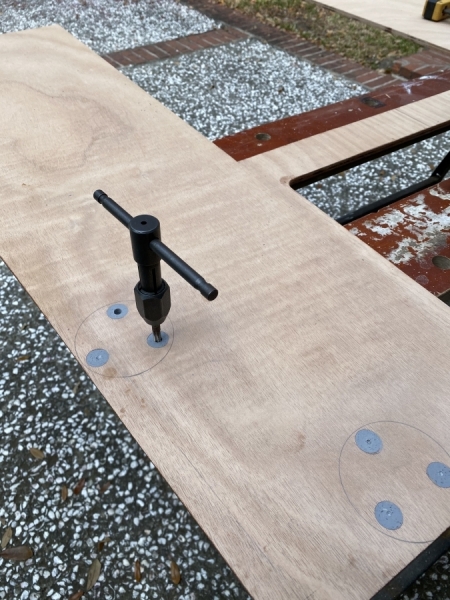
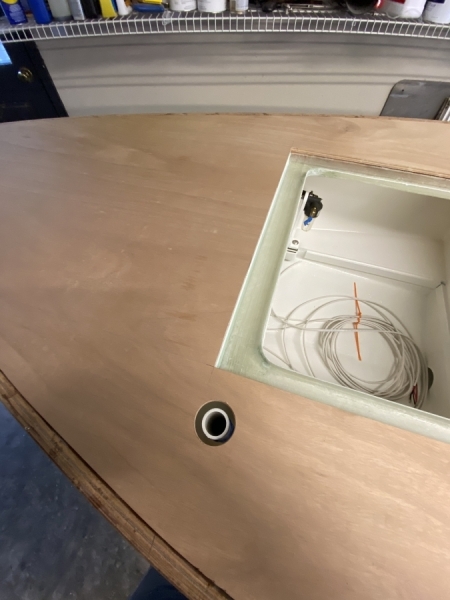
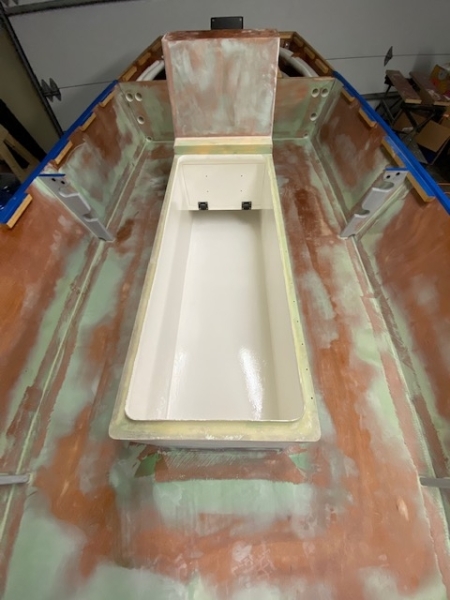
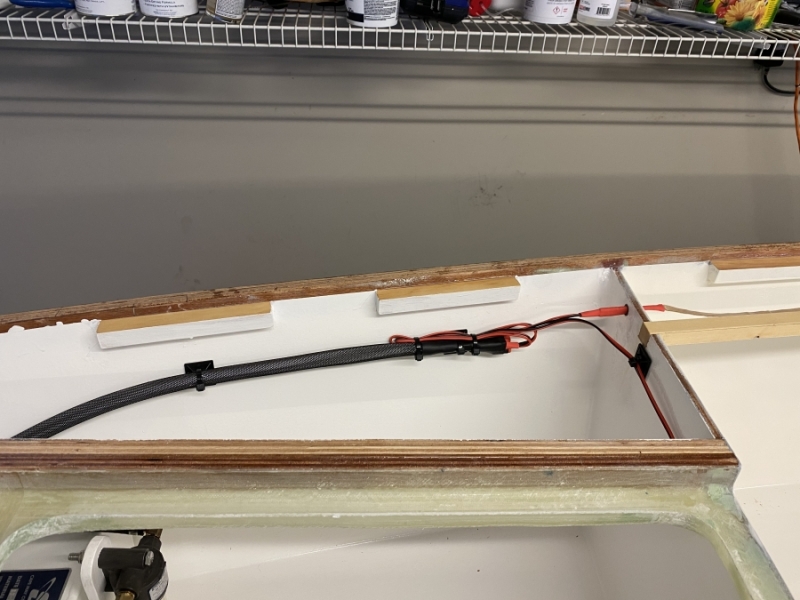
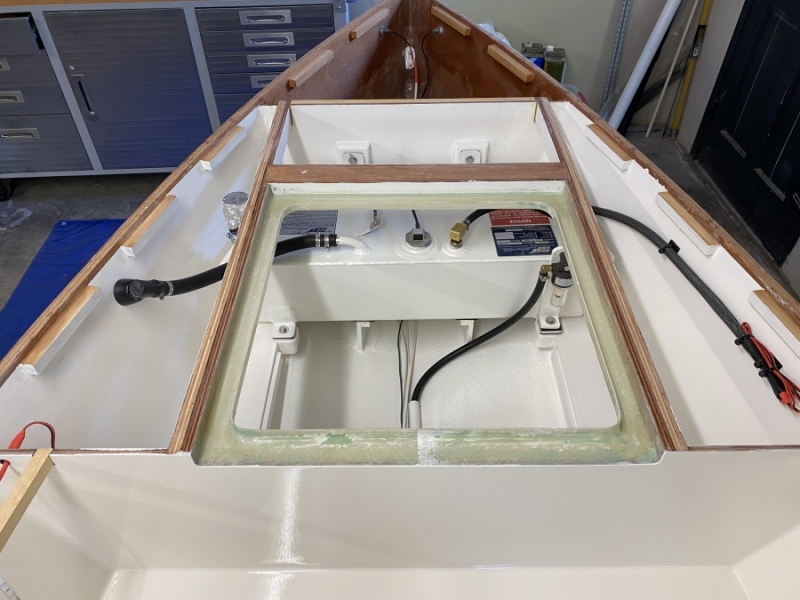
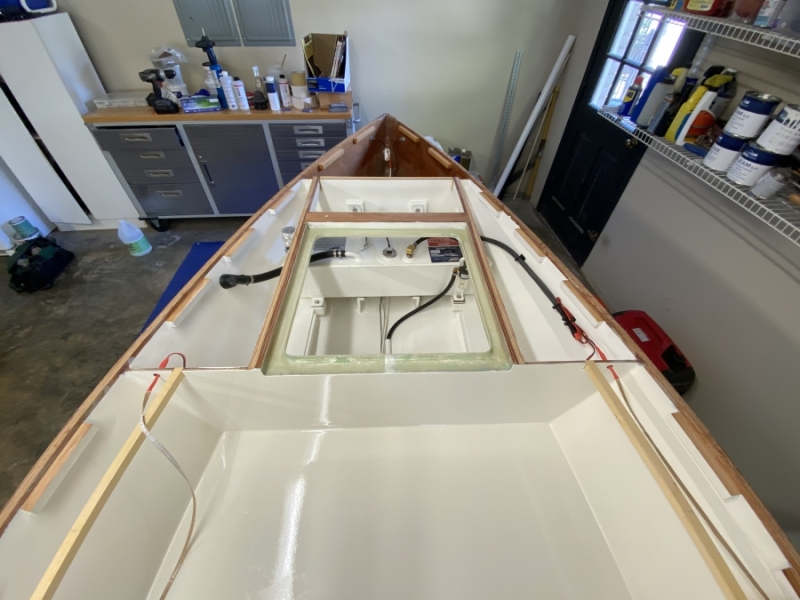
So behind on progress posts. Rather than a big one, will try to catch up with a bunch of little ones. Wanted to get the fuel tank pretty much buttoned up before laminating the forward hatch gutter in place. Used a jig to get a nice clean hole for the fuel vent.


One thing I really wanted was easy access to the fuel filter. I made a bracket to mount the filter using one of the lower mounting bolts for the fuel tank.

Tank, filter bracket, and vent line in place. The P-trap vent eliminates the need for a loop in the vent line (I hope!)

Then got to glue in the hatch gutter...

Re: Bob's FS18
Posted: Wed Oct 14, 2020 2:16 am
by Fuzz
Nice looking fuel tank and a REALLY nice job of mounting it.
Re: Bob's FS18
Posted: Wed Oct 14, 2020 11:21 am
by toadfish
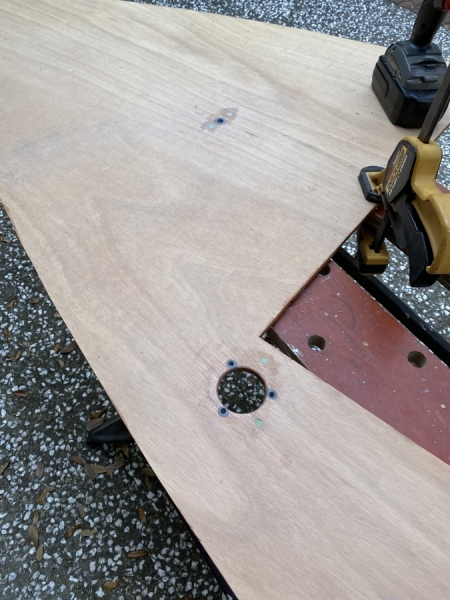
Thanks Fuzz. Here is a little more progress in the bow while I have easy access. Used a similar jig to drill the holes for the forward navigation lights.

The wire connections were soldered and double shrink-wrapped. I also added a little "cone" of epoxy putty to support the wire as it emerges from the back of the light to guard against any problem that could come with jarring of the hull that far forward.


Almost ready for the forward deck...

Re: Bob's FS18
Posted: Wed Oct 14, 2020 12:23 pm
by Jeff
Nice toadfish!!! Jeff
Re: Bob's FS18
Posted: Wed Oct 14, 2020 7:23 pm
by Dan_Smullen
Wow. It all looks amazing.
I’ve always had some mental blockage when it comes to molds, but this helps. What weight cloth did you use? Do you think not will support a person standing on it?
Re: Bob's FS18
Posted: Thu Oct 15, 2020 8:19 am
by toadfish
Dan,
The fore and aft gutters were laid up with a starting layer of finish cloth followed by six layers of 12 oz. biaxial. They are stiff by themselves, but because of the way they are laminated to frames and support beams, I'm pretty sure they are stout enough. Strength and stiffness will hopefully be further increased when the deck is bonded from above.
I'm a little worried about the stiffness of the hatches themselves, so if anyone has a suggestion on a core material to add to the underside of the 9mm plywood hatch, I'd appreciate it.
Bob
Re: Bob's FS18
Posted: Thu Oct 15, 2020 3:42 pm
by VT_Jeff
toadfish wrote: ↑Thu Oct 15, 2020 8:19 am
I'm a little worried about the stiffness of the hatches themselves, so if anyone has a suggestion on a core material to add to the underside of the 9mm plywood hatch, I'd appreciate it.
Bob
I have the same question, was thinking about maybe some diagonal bracing instead of layering to keep weight down, will be interested to see what you and on and how it works, I am a good ways from actually needing that info at the moment.
I like your nav lights, do you ave a link to those?
Re: Bob's FS18
Posted: Thu Oct 15, 2020 7:51 pm
by Dan_Smullen
Ahhh. I gotcha. Thanks, Bob.
Jeff, would a layer of 1/2” or 3/4” foam, filleted in and glasses over on the bottom side stiffen things up?
VT Jeff and I, I believe, are anxiously looking ahead to details like this while we spend our time with our heads between stringers and frames.
Re: Bob's FS18
Posted: Thu Oct 15, 2020 8:29 pm
by VT_Jeff
Dan_Smullen wrote: ↑Thu Oct 15, 2020 7:51 pm
Ahhh. I gotcha. Thanks, Bob.
Jeff, would a layer of 1/2” or 3/4” foam, filleted in and glasses over on the bottom side stiffen things up?
VT Jeff and I, I believe, are anxiously looking ahead to details like this while we spend our time with our heads between stringers and frames.
I like the foam idea, on the list of options to mull. And yes, hatches def seem a lot more interesting than stringers and frames!
Bob, boat is looking great, that fuel tank install is top notch!
Re: Bob's FS18
Posted: Fri Oct 16, 2020 6:42 am
by cape man
I used diagonal braces on the OD18 hatches made from 1/2" ply glued with the end grain. Glass on top, just epoxy and paint under.
Re: Bob's FS18
Posted: Tue Oct 20, 2020 8:08 am
by VT_Jeff
Re: Bob's FS18
Posted: Wed Oct 21, 2020 10:21 am
by toadfish
Jeff,
Sorry for going dark and not responding since last week, took a very long weekend in the deer woods to escape the craziness. Happily off the grid.
The link for the nav lights is
https://www.oznium.com/marine-led-light ... tion-light. They have been available for a while, but were only recently Coast Guard certified.
The P-trap vent has an internal baffle in the trap that water has to get past before it even gets to the vent line. Theoretically eliminates the loop.
Bob
Re: Bob's FS18
Posted: Wed Oct 21, 2020 3:39 pm
by toadfish
Catching up on more progress with the aft bilge/storage area and transom. Got the compartment faired and primed. The cleats visible are to suspend two false floor panels above the bilge floor.


Stern eyes, garboard drain, through hulls, and part of the jack plate mounted while the access was easy.

As finishing of the compartment continued, something started to really bug me and I hesitated to post this part for fear of looking like an over-thinking nut. I was happy with the simplicity of the slots that were cut in frame E to drain water from the sole directly into the aft bilge, but maybe there were unintended consequences.
The sole drainage was changed entirely by filling in the slots (sad and painful) and adding drain tubes to the aft corners of the sole, which empty into a 12v shower sump on the bilge floor. It will direct water from the sole to a smaller confined area and keep it from completely flooding the bilge. It also potentially reduces weight from a bunch of water collecting over a larger area, since the sump will only hold a small amount before the internal automatic pump clears it quickly. The nagging feeling that I’ve over-complicated this is tempered by the fact that, if it doesn’t work as planned, I’ll disconnect the sump and drain directly into the bilge, which was the original plan anyway.
Drain tube setup through frame E and the side walls of the compartment. It looks convoluted, but it is all "downhill"


Drains trial fit and connected to the sump.

Connections soldered and double shrink-wrapped.


Sump mounted and connected to a through hull fitting.

Re: Bob's FS18
Posted: Wed Oct 21, 2020 4:08 pm
by Jeff
Really nice work!!! Jeff
Re: Bob's FS18
Posted: Wed Oct 21, 2020 6:00 pm
by VT_Jeff
toadfish wrote: ↑Wed Oct 21, 2020 3:39 pm
As finishing of the compartment continued, something started to really bug me and I hesitated to post this part for fear of looking like an over-thinking nut.
If it weren't for over-thinking, I'd do no thinking at all!
Looking really great, giving me too many ideas, per usual!
Re: Bob's FS18
Posted: Wed Oct 21, 2020 9:57 pm
by joe2700
toadfish wrote: ↑Wed Oct 21, 2020 3:39 pm
Connections soldered and double shrink-wrapped.
I only mention this since you are doing such a neat wiring job you might care about doing it by the book. Your solder connections will likely be fine but according to ABYC standards you cannot use solder as the sole means of connection. You can crimp and then solder, but not just solder. The idea is that the soldered join will get brittle with the constant motion in a boat, so if you do solder after crimping you must support the joint.
I've been using the adhesive lined heat shrink crimp connectors and they work really well while adhering to the standard.
https://www.amazon.com/gp/product/B01LXTK37Y
Again, in the real world you connections will probably be fine, but just thought you might not know about this because a soldered connection is the top choice in other situations. The relevant part of ABYC E-11 is below.
11.14.5.7 Solder shall not be the sole means of mechanical connection in any circuit. If soldered, the
connection shall be so located or supported as to minimize flexing of the conductor where the solder
changes the flexible conductor into a solid conductor.
EXCEPTION: Battery lugs with a solder contact length of not less than 1.5 times the diameter of the
conductor.
NOTE: When a stranded conductor is soldered, the soldered portion of the conductor becomes a
solid strand conductor, and flexing can cause the conductor to break at the end of the solder joint
unless adequate additional support is provided.
Re: Bob's FS18
Posted: Fri Oct 23, 2020 10:00 am
by toadfish
Thanks very much Joe. Completely did not know the standard and am thankfully not too far down the road on electrical connections, so not too many to switch out. I appreciate the link to the connections you use and the advice.
Bob
Re: Bob's FS18
Posted: Fri Oct 23, 2020 6:58 pm
by joe2700
toadfish wrote: ↑Fri Oct 23, 2020 10:00 am
Thanks very much Joe. Completely did not know the standard and am thankfully not too far down the road on electrical connections, so not too many to switch out. I appreciate the link to the connections you use and the advice.
Bob
No problem, you'll probably want a crimper made for the insulated connectors if you are doing more than a few to prevent tearing the heat shrink. I see some of the connectors very similar to the ones I linked come with a crimper for a good price. I don't have personal experience with them having the ancor crimper, but it might be a good way to start if you don't want to spend a lot.
Something like this, but again I haven't tried it myself.
https://www.amazon.com/IWISS-Shrink-Con ... 07QGZFP9S/
Re: Bob's FS18
Posted: Sat Oct 24, 2020 1:40 am
by Fuzz
I have that crimper. It does a decent job. One thing I do not like is you have to close it all the way before it will open back up.
Re: Bob's FS18
Posted: Sat Oct 24, 2020 10:59 am
by joe2700
Fuzz wrote: ↑Sat Oct 24, 2020 1:40 am
I have that crimper. It does a decent job. One thing I do not like is you have to close it all the way before it will open back up.
Most ratcheting crimpers will have a small toggle to release midway so you can realign. Normally I think the intent is that if it opens again you know the crimp was tight enough.
Re: Bob's FS18
Posted: Wed Oct 28, 2020 4:51 pm
by toadfish
A little more aft compartment progress. Like the forward compartment, there is a false floor above the bilge floor for "dry" storage. So that it can be removed, the false floor is in two pieces because of its size and has a a barrier on the back edge to keep things from sliding off the back.

Here are the floor pieces in position.


The notch in the back barrier of the false floor panel has a purpose. One of the other things I really wanted was easy access to the bilge pumps, since they frequently act up and in some boats are hard to get to. The pump in the sump that drains the cockpit is easily accessed under the forward false floor panel. I wanted to figure out a way to mount the main bilge pump as well, so that it could be removed without a lot of acrobatics for maintenance or replacement. A notched bracket was made for the pump that fits into the notch on the back barrier of the floor panel and allows the pump to rest flush on the bilge floor without fasteners in the hull or transom.
Bracket shape sketched up

Trial fit

Pump is wired and mounted to the finished bracket

Drain tube just needs to be connected to the through hull


Re: Bob's FS18
Posted: Mon Nov 02, 2020 12:15 pm
by toadfish
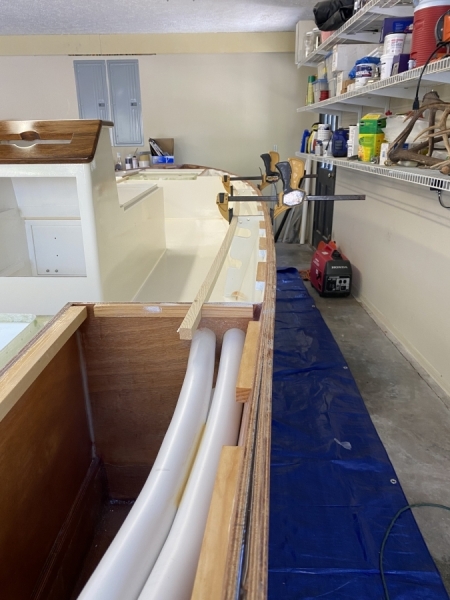
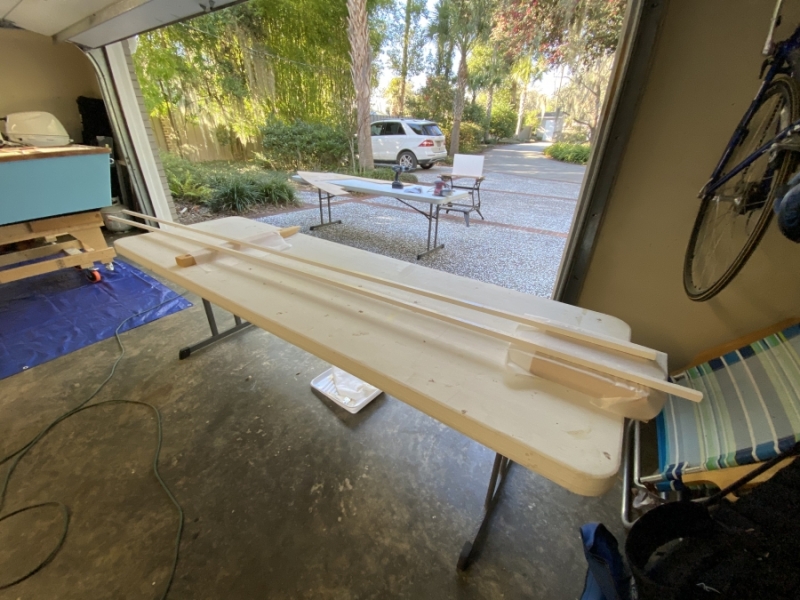
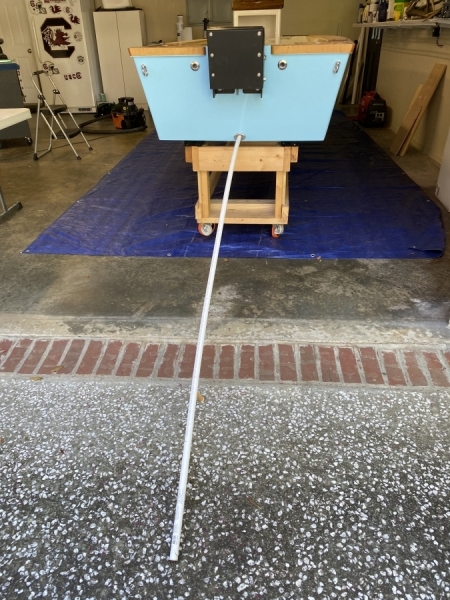
One additional thing to do before the aft deck goes down was to install rod storage tubes. I mainly have fly rods so needed the additional length, but also wanted them under the aft deck to make access easier for the angler on the bow. All are made from PVC, which is a tiny bit heavy, but I've economized on weight elsewhere so should be OK.

A heat gun was used to curve the tubes inboard. This effectively increases length, but also will flex each rod against the sidewall of the boat under the gunnel. Brackets were made to support the tubes, and are laminated and glassed to the sidewall between frame E and the transom

The tubes are actually "strapped" to the bracket with a strip of fiberglass tape.

Cut flush on the cockpit side of frame E

Ready to go

Re: Bob's FS18
Posted: Mon Nov 02, 2020 1:14 pm
by Jeff
Nice work!!! Jeff
Re: Bob's FS18
Posted: Tue Nov 03, 2020 12:05 pm
by toadfish
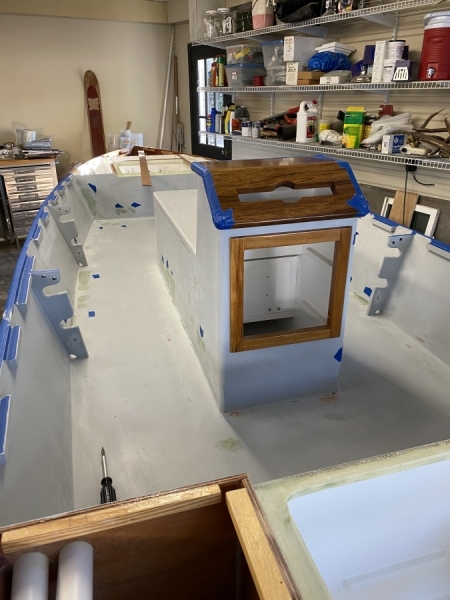
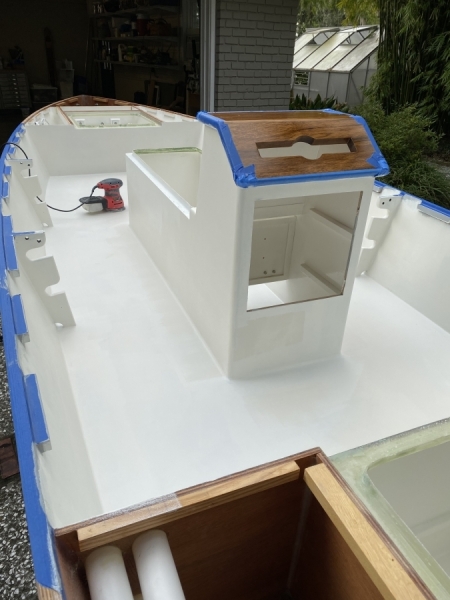
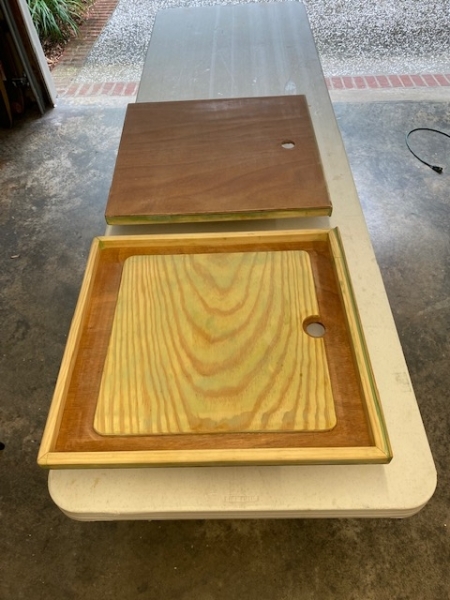
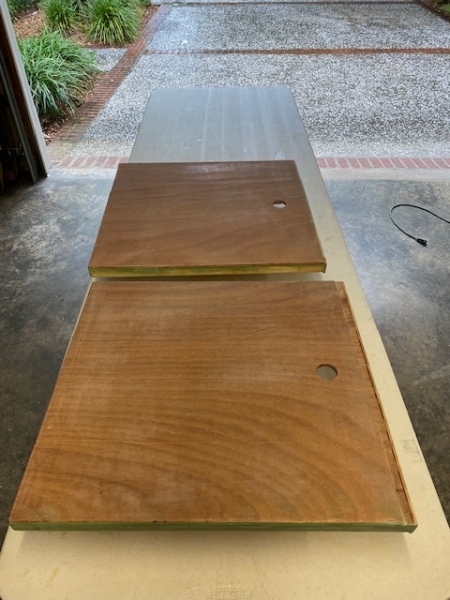
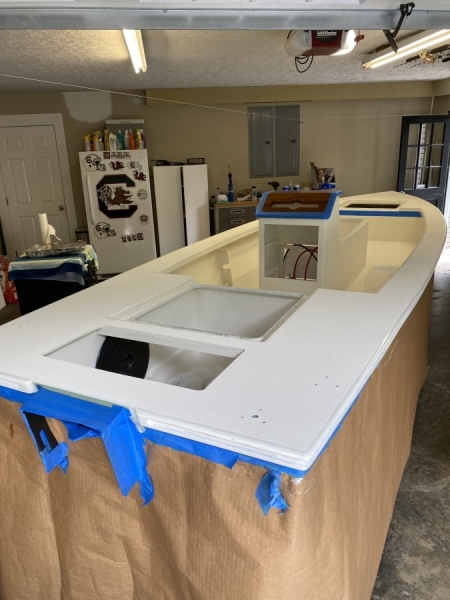
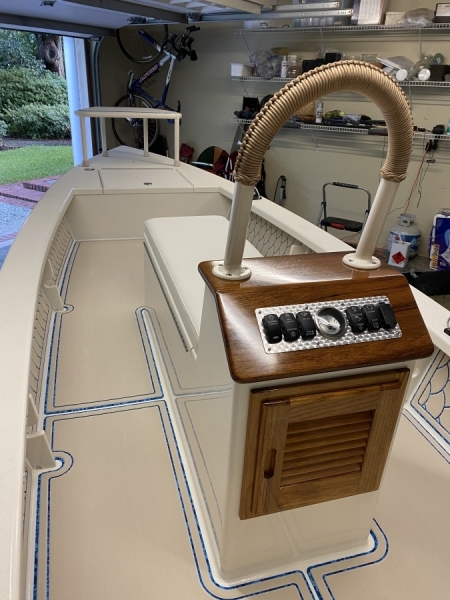
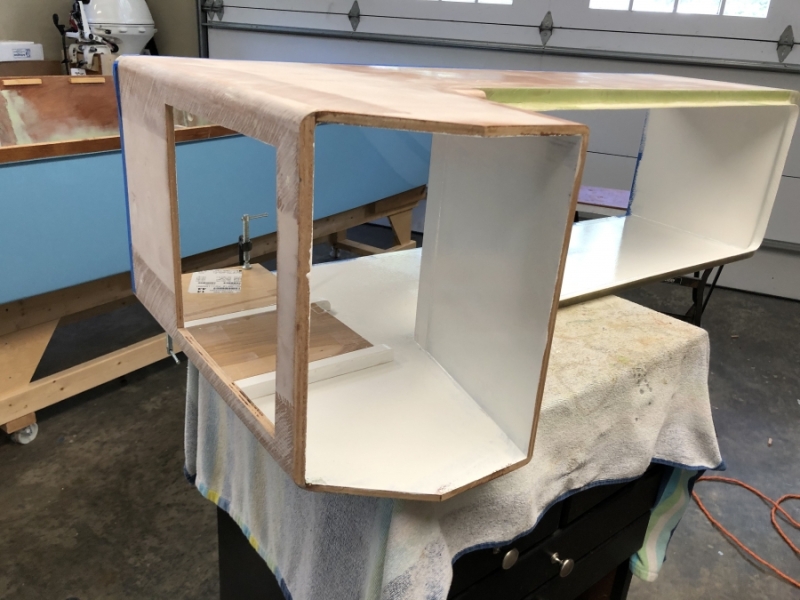
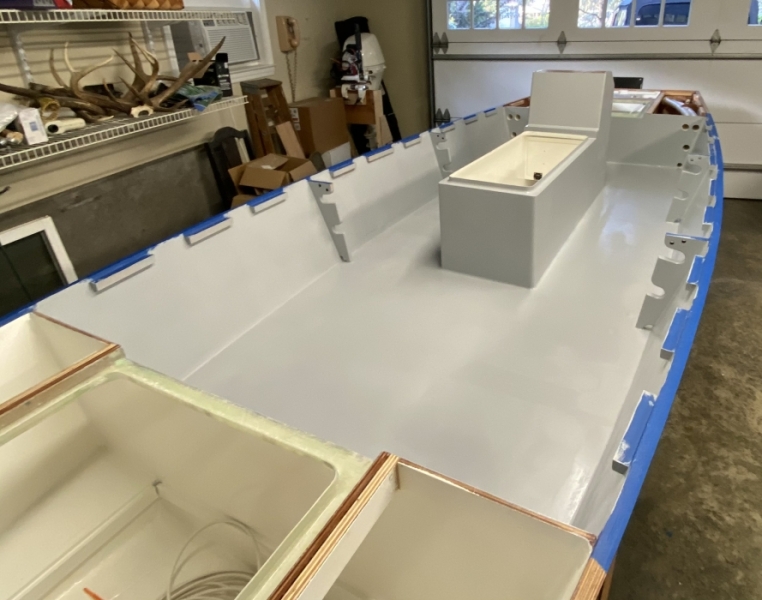
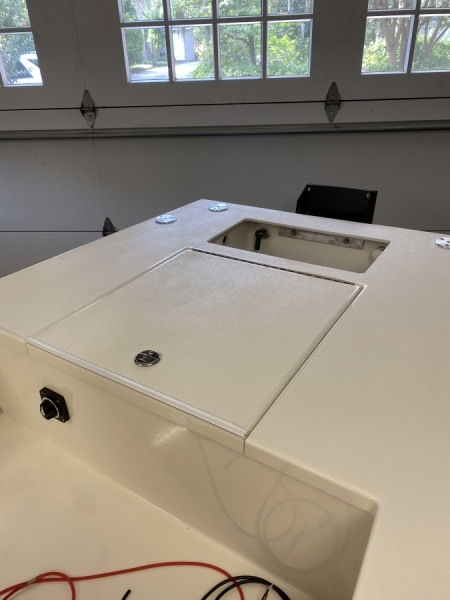
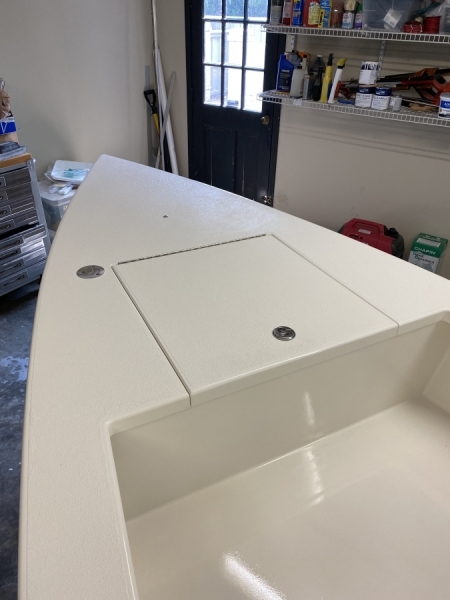
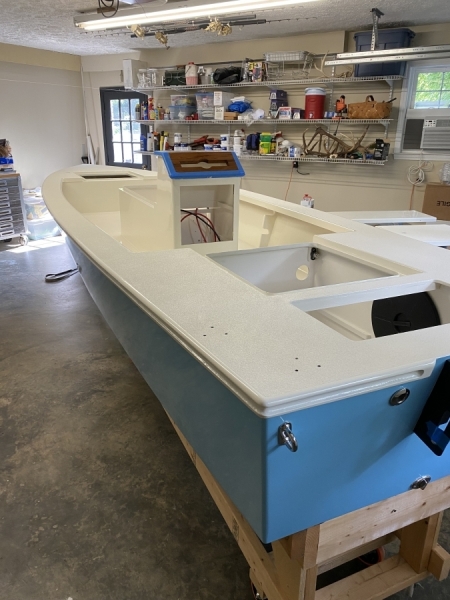
This post is long but pretty much brings me to real time. The goal was to get as much finishing done to the center console/coffin box before it was fiberglassed into place.
Console storage is accessed by a rear door, while the coffin box has a top hatch. Cleats were placed inside the console portion for two small removable shelves. Plywood spacers were used to make sure the cleats were positioned accurately. A lot of the interior fairing and painting was done at this point while access was much easier.
The grab bar was fabricated and trial fit so that screw holes could be accurately placed through the teak top and plywood underneath. The holes were then overdrilled and filled with epoxy.
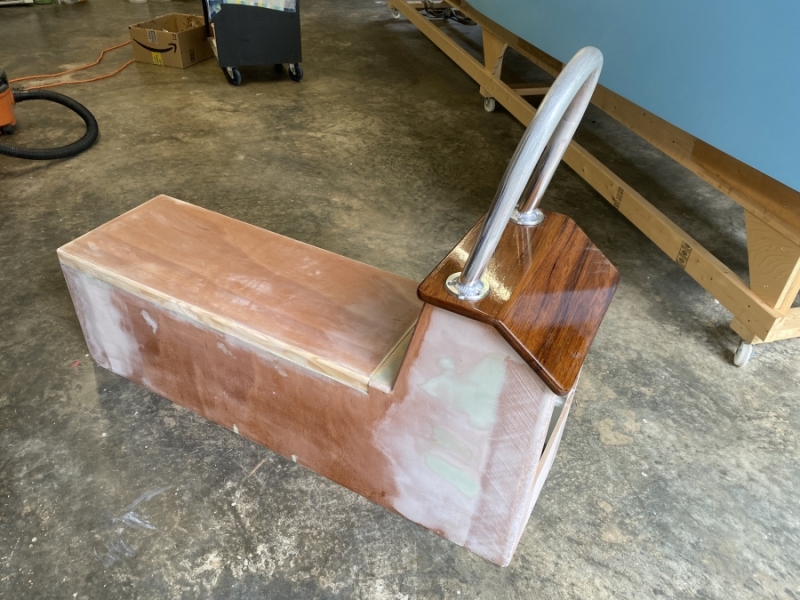
I finally decided on a stainless piano hinge for the top of the box. The rabbet was the tough part and would have been much easier to place as I was building the top, rather than after it was already together.
Hinge trial fit
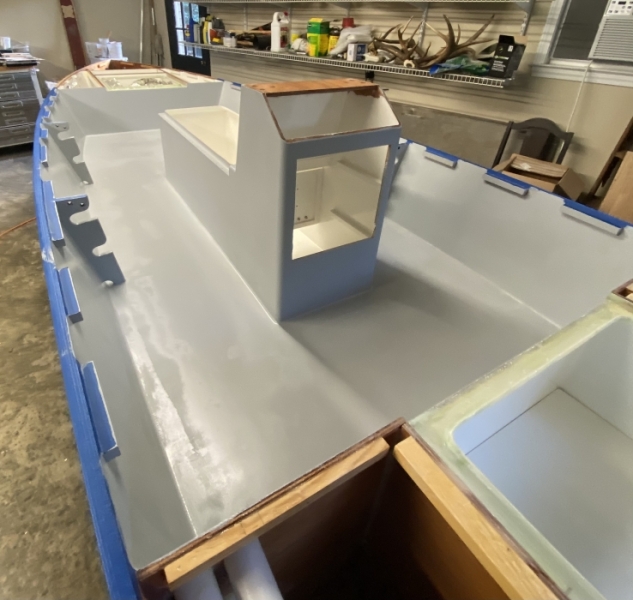
Console glassed into place
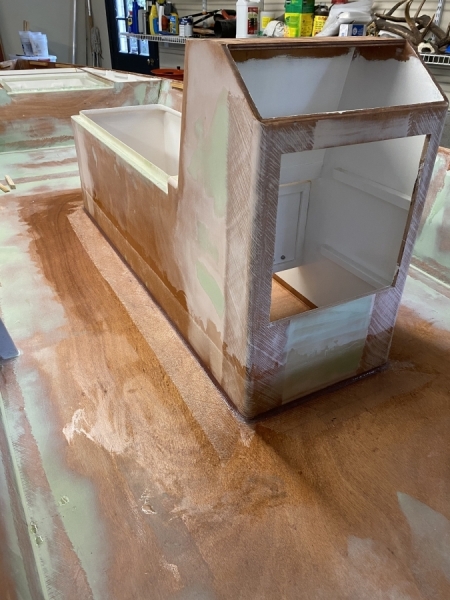
The interior of the box completely faired and painted. Epoxy filled grab bar mounting holes are visible in the plywood top. The teak top will be laminated to it later.
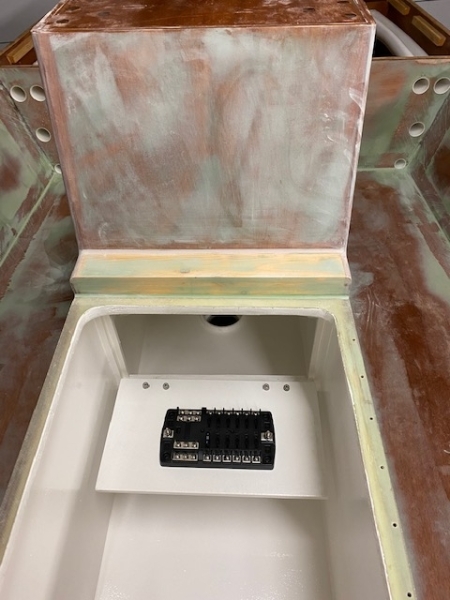
Yet another thing I want easy access to is the fuse box. The "divider" that is visible between the console and box storage areas is actually a door, to which the fuse box will be mounted. The door folds down to provide access to the box and its associated wiring, that will emerge through the chase in the floor of the console section.
Re: Bob's FS18
Posted: Tue Nov 03, 2020 12:07 pm
by Jeff
Really nice work Toadfish!!! Jeff
Re: Bob's FS18
Posted: Tue Nov 10, 2020 3:05 pm
by toadfish
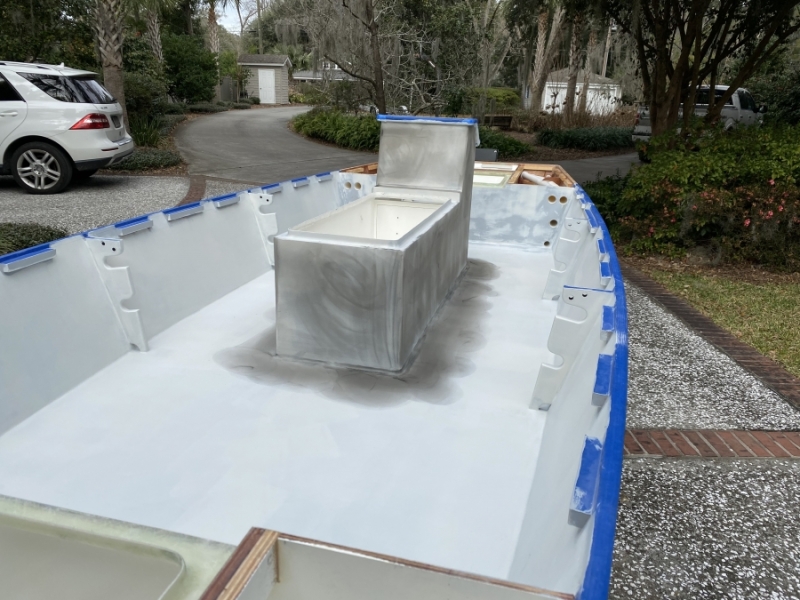
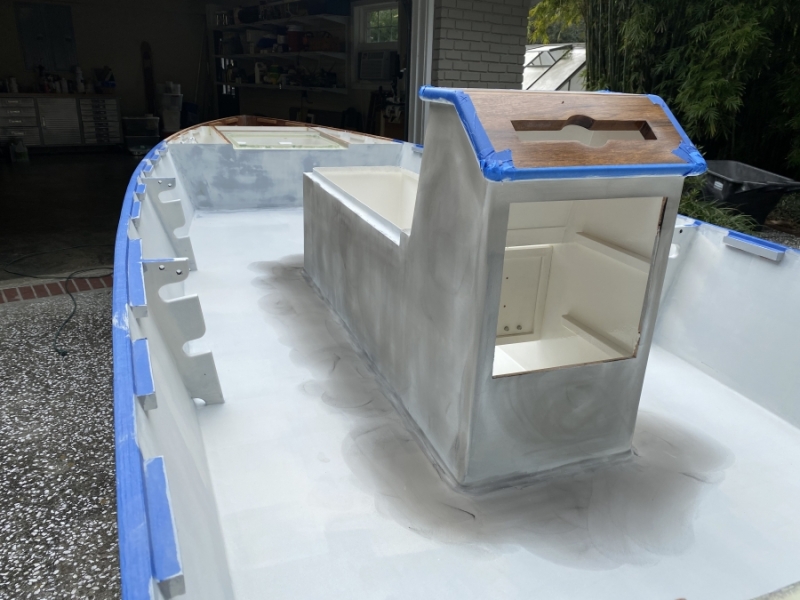
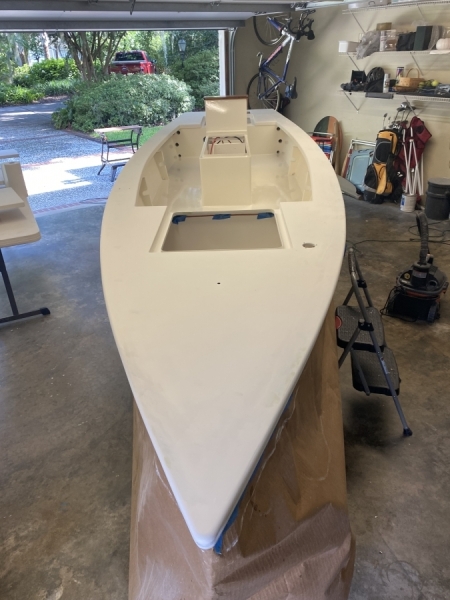
Thanks Jeff! After a bunch of fairing, I finally got the first coat of primer in the cockpit yesterday. Feels like a big milestone. My goal is to go ahead and finish the interior while I have easy access before the decks and gunnels go down.
Re: Bob's FS18
Posted: Tue Nov 10, 2020 3:15 pm
by Jeff
Good plan!!! Jeff
Re: Bob's FS18
Posted: Fri Feb 19, 2021 11:34 am
by toadfish
Re: Bob's FS18
Posted: Fri Feb 19, 2021 12:16 pm
by Jeff
Nice progress!!! She looks great!! Jeff
Re: Bob's FS18
Posted: Fri Feb 19, 2021 12:45 pm
by fallguy1000
I like the teak console. I am going to use less, but plan a teak trim board around the console.
Fairing the insides of my cabin. It is lots of work, but closing in on finishing in a week.
Re: Bob's FS18
Posted: Thu Jun 03, 2021 1:18 pm
by toadfish
Re: Bob's FS18
Posted: Thu Jun 03, 2021 1:27 pm
by Jeff
Nice work toadfish!! Thank you for catching us up!! Jeff
Re: Bob's FS18
Posted: Thu Jun 03, 2021 4:59 pm
by TomW1
Beautiful work. What is the light wood you are putting in between the teak?
Tom
Re: Bob's FS18
Posted: Thu Jun 03, 2021 5:48 pm
by Browndog
Glad to see another Coastal Georgia build on the forum.
The boat looks great!
Sanding, fairing, priming and painting take a lot of effort and time to get it right. You have succeeded.
Now you’ll be able to get back to some construction and the boat will really come to life.
Well done and keep it up!
Re: Bob's FS18
Posted: Fri Jun 18, 2021 12:51 pm
by toadfish
Tom, so sorry I missed replying to your post. I think the light wood you're talking about is what I've used for cleats, stringers, etc. and it's simply clear yellow pine. Browndog you sure are right that sanding and fairing takes a bunch of time and I was very happy to get back to construction. Before getting the decks and gunnels on though, I needed to work a little more on the guts of the boat while I could get to them easily.
I decided to run a length of 3/4" PEX water pipe to protect and isolate the fuel line within the bilge chase. It was a 20' piece, so I snaked it through the garboard drain hole to initially measure and cut it to length.
Pipe extending the length of the sole into the bow compartment. Began to pull wires and trial-fit the gunnels.
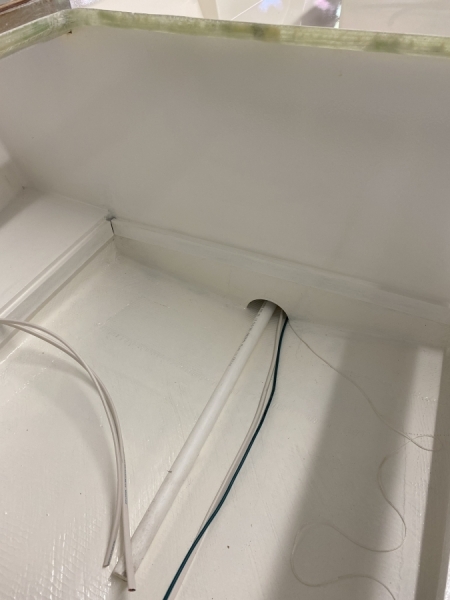
Ground wiring for the fuel fill and tank as well as wiring for the sending unit

Harness for the bow navigation lights and the under-gunnel lighting. Access will still be very easy through the bow hatch.
Fuel and vent lines connected.
Broader view showing the waterproof LED strip lighting I'm using under the gunnels
Re: Bob's FS18
Posted: Mon Jun 21, 2021 11:26 am
by toadfish
Re: Bob's FS18
Posted: Mon Jun 21, 2021 12:26 pm
by JCW1982
Clean and precise work!
Re: Bob's FS18
Posted: Mon Jun 21, 2021 12:50 pm
by Jeff
Very nice work!!! Thank you for the update!! Jeff
Re: Bob's FS18
Posted: Mon Jun 21, 2021 1:17 pm
by VT_Jeff
Looking great. Not sure there is a poling platform guy available for house-calls in southern vt, you're pretty fortunate that way!
Re: Bob's FS18
Posted: Mon Jun 21, 2021 2:09 pm
by TomW1
You have been doing great work 0n your FS18. It will be a great boat for around Savannah.
Tom
Re: Bob's FS18
Posted: Tue Jun 29, 2021 11:49 am
by toadfish
Re: Bob's FS18
Posted: Tue Jun 29, 2021 12:47 pm
by Jeff
Nice work toadfish!!! Jeff
Re: Bob's FS18
Posted: Tue Jun 29, 2021 1:07 pm
by cape man
Looking awesome!
Re: Bob's FS18
Posted: Wed Jun 30, 2021 4:19 pm
by toadfish
Re: Bob's FS18
Posted: Mon Jul 05, 2021 7:01 pm
by PapaDave
Really looking nice. I love your hatch design and execution.
Dave
Re: Bob's FS18
Posted: Sat Jul 24, 2021 5:45 pm
by Edd
Great looking boat

I read you used system 3 primer, what brand did you go with for the top coat?
Re: Bob's FS18
Posted: Sat Jul 24, 2021 10:06 pm
by TomW1
Really nice work. Tom
Re: Bob's FS18
Posted: Sun Jul 25, 2021 9:10 am
by fallguy1000
Oh thank God I'm not the only guy stuck in endless back n forth cycles.
Re: Bob's FS18
Posted: Mon Jul 26, 2021 4:57 pm
by toadfish
Re: Bob's FS18
Posted: Mon Jul 26, 2021 6:34 pm
by Jeff
Beautiful work!!! Jeff
Re: Bob's FS18
Posted: Wed Aug 25, 2021 4:16 pm
by toadfish
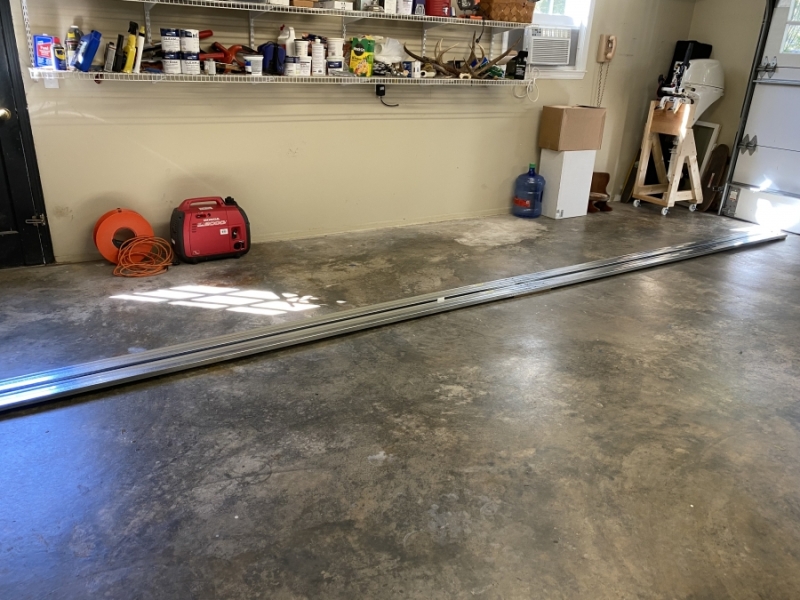
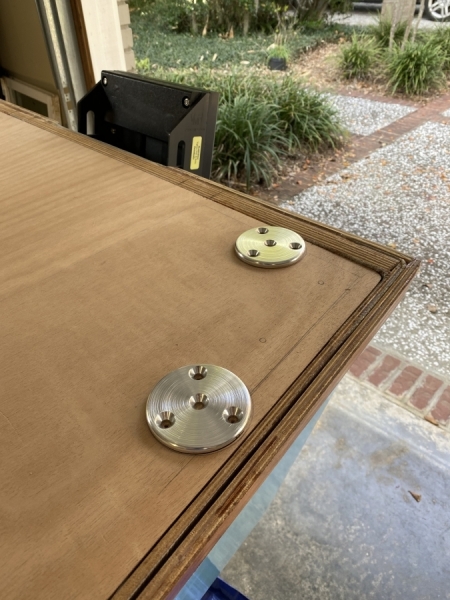
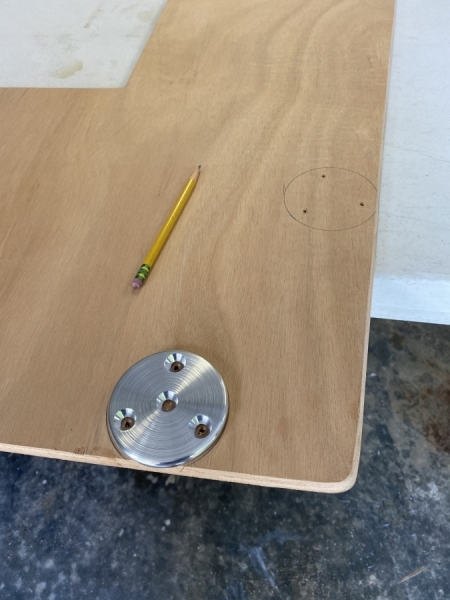
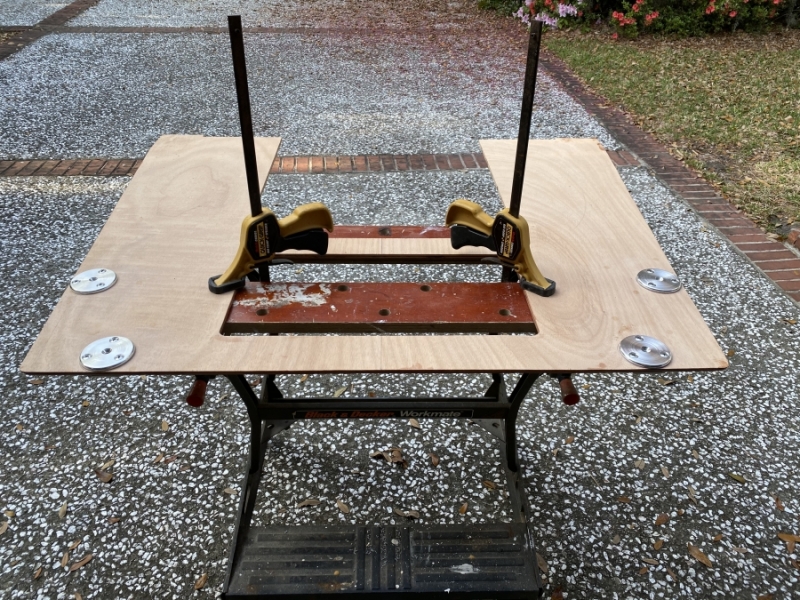
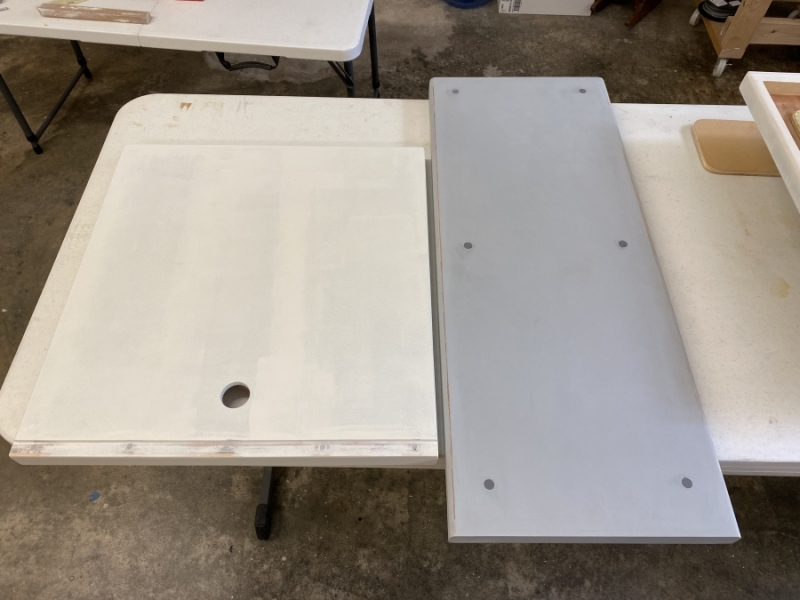
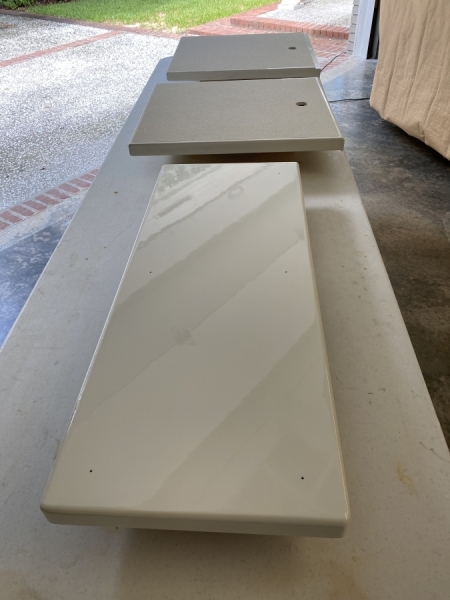
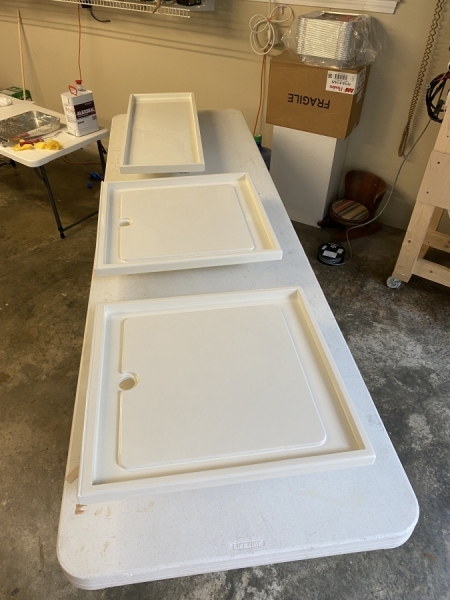
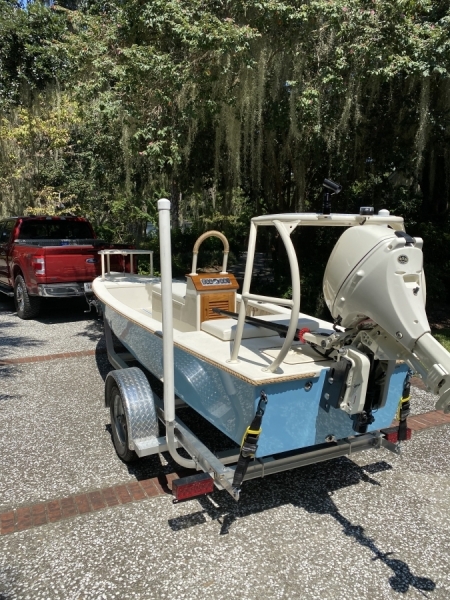
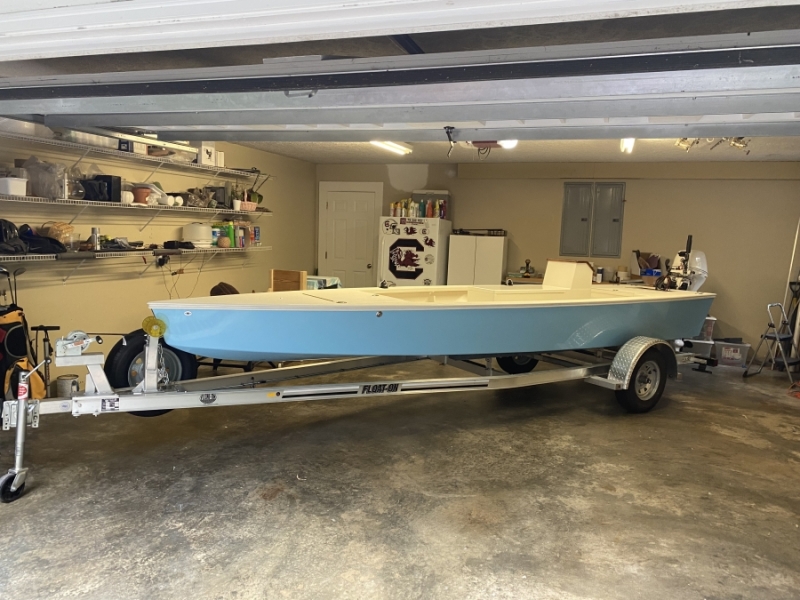
The plan to move the boat from the strongback to the trailer was postponed due to a delay at the fabricator for the poling platform. The time was used to get some of the deck hardware bedded and hatches to place.
Pads for the platform were replaced temporarily for fabrication. After the platform is made it will be removed for powder coat and then the pads bedded more permanently
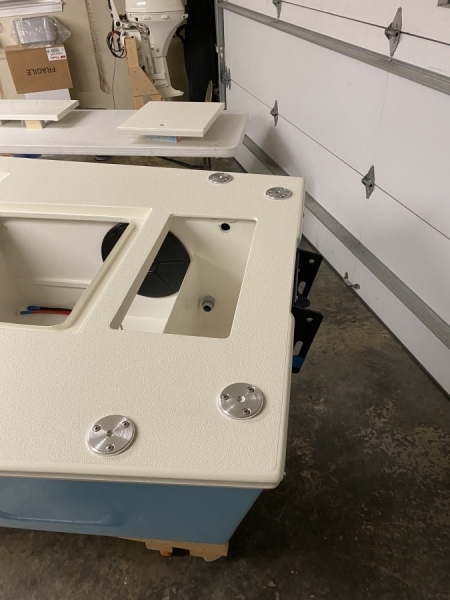
Rear hatch ready to go, with the track in place in the leading edge for the cushion bead.
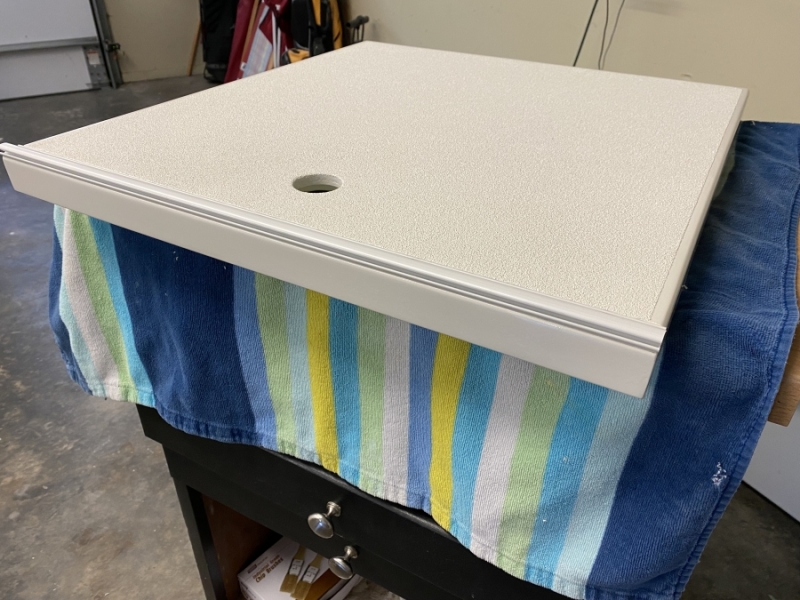
Rear hatch and battery switch mounted
Forward hatch and fuel fill in place
A piece of PVC board was fabricated as the backer for the console cushion, which will be secured with screws from the underside of the hatch into stainless T-nuts visible in the board.

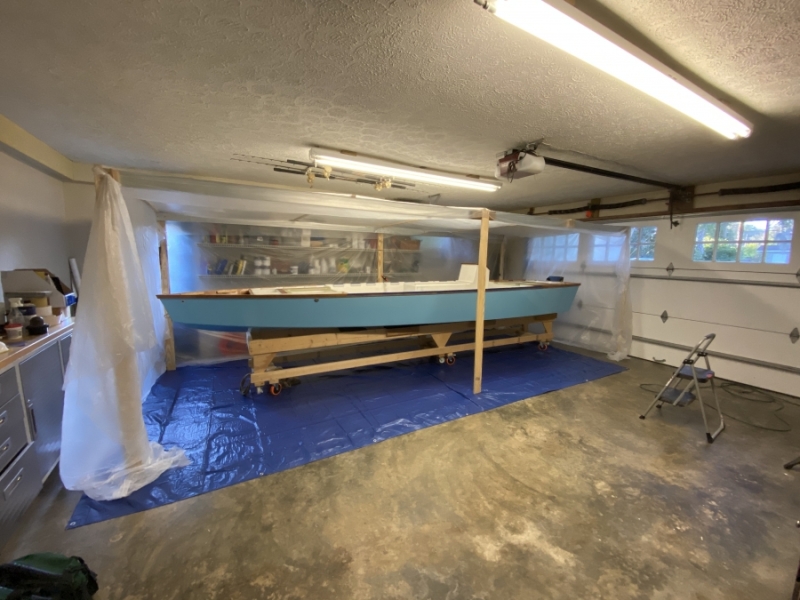
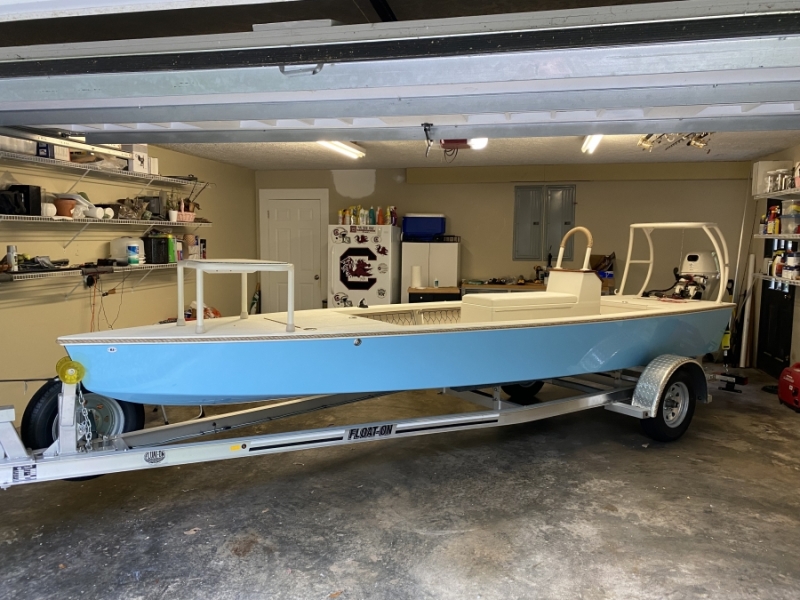
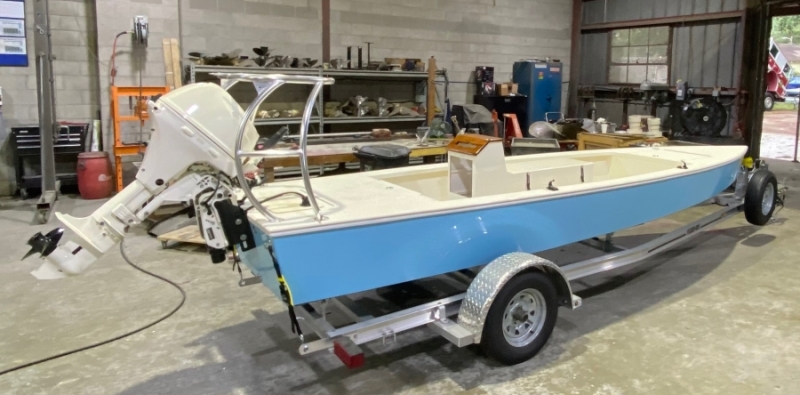
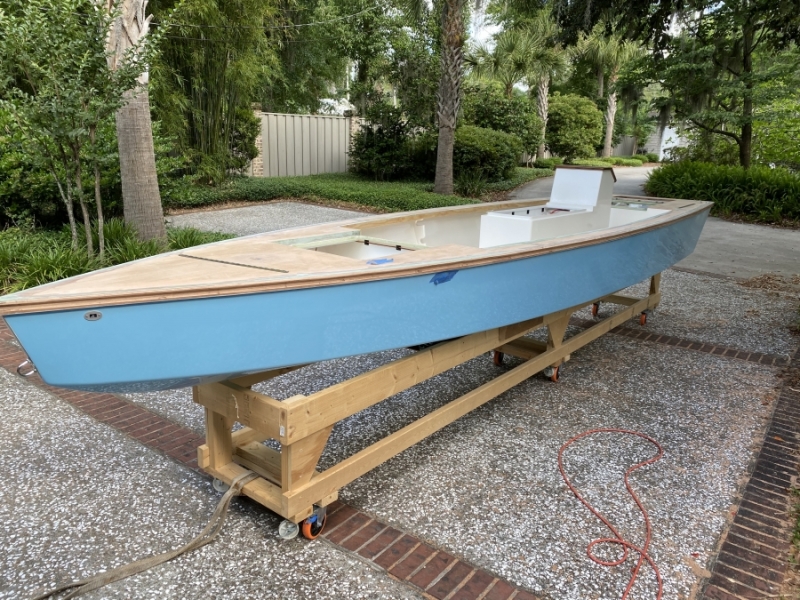
The last time for the boat on the strongback shortly before friends arrived, bribed with a cooler full of beer, to move it to the trailer.
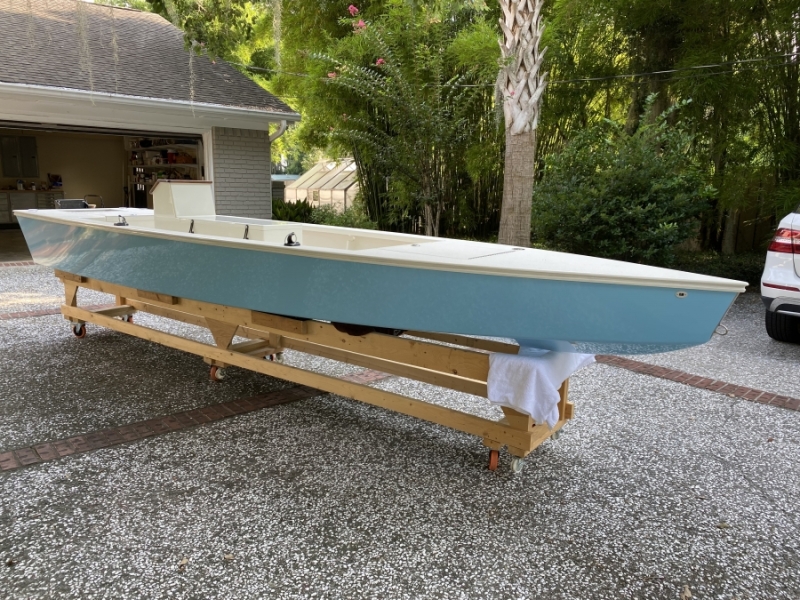
On the trailer with the motor mounted and ready to go for the poling platform.
The platform completed at the fabricator a few days ago.
Re: Bob's FS18
Posted: Wed Aug 25, 2021 5:05 pm
by Fuzz
Boat looks really nice! And lots of custom details to really set it off. You can be proud of your work.
I envy lots of you guys. From the lack of side boards on your trailers I am guessing you do not have to load in wind and current like I am used to.
Re: Bob's FS18
Posted: Wed Aug 25, 2021 5:23 pm
by Jeff
Beautiful work toadfish!!!! Jeff
Re: Bob's FS18
Posted: Thu Aug 26, 2021 6:14 am
by cape man
Oh hell yes! You should be very proud.
Re: Bob's FS18
Posted: Thu Aug 26, 2021 9:33 am
by Dougster
That's a beauty!
Dougster
Re: Bob's FS18
Posted: Thu Aug 26, 2021 11:17 am
by TomW1
Beautiful boat, you have done a great job on her.
Tom
Re: Bob's FS18
Posted: Thu Aug 26, 2021 11:29 am
by VT_Jeff
Incredible work! What a beauty!
Re: Bob's FS18
Posted: Thu Aug 26, 2021 12:57 pm
by Dan_Smullen
Wow! Sleek looking sled!
Re: Bob's FS18
Posted: Thu Aug 26, 2021 1:26 pm
by PapaDave
Really lovely and spectacular work. You will enjoy how she performs on the water.
Dave
Re: Bob's FS18
Posted: Fri Aug 27, 2021 8:58 am
by Coach
Excellent! That will turn heads! Bravo
Re: Bob's FS18
Posted: Tue Jan 04, 2022 9:01 pm
by toadfish
Re: Bob's FS18
Posted: Tue Jan 04, 2022 9:30 pm
by BarraMan
That is sweet - congratulations on your great work!
Re: Bob's FS18
Posted: Tue Jan 04, 2022 10:35 pm
by fallguy1000
Sure is pretty. How did you get the fishscale look?
Re: Bob's FS18
Posted: Tue Jan 04, 2022 11:13 pm
by Fuzz
That is just flat out amazing work!
Re: Bob's FS18
Posted: Wed Jan 05, 2022 7:30 am
by Jeff
ToadFish, beautiful work!!! Get me some really good photos and I will put her on the cover of the website!!! Jeff
Re: Bob's FS18
Posted: Wed Jan 05, 2022 9:29 am
by VT_Jeff
Really high caliber work there, conrgats again. Damn!
Re: Bob's FS18
Posted: Wed Jan 05, 2022 9:31 am
by Mojosmantra

Fantastic work! Kind of makes me want to start over
Re: Bob's FS18
Posted: Wed Jan 05, 2022 10:43 am
by Dougster
Have to chime in: Stunning.
Dougster
Re: Bob's FS18
Posted: Wed Jan 05, 2022 11:30 am
by Mojosmantra
If you have the time or inclination, it would be great to hear about how you executed what appears to be a rope rub rail. I searched the thread and didn't see any discussion of that.
Re: Bob's FS18
Posted: Wed Jan 05, 2022 1:02 pm
by Fuzzytrout
That's a beautiful boat! I'm sure you'll enjoy it for years to come! thanks for posting up so many pictures showing all your detail work!
Re: Bob's FS18
Posted: Wed Jan 05, 2022 4:40 pm
by Dan_Smullen
As FT said, thank you for the detailed pictures. It all looks great but I love the box in front of the console!
Enjoy your efforts and congrats!
Re: Bob's FS18
Posted: Thu Jan 06, 2022 10:20 am
by toadfish
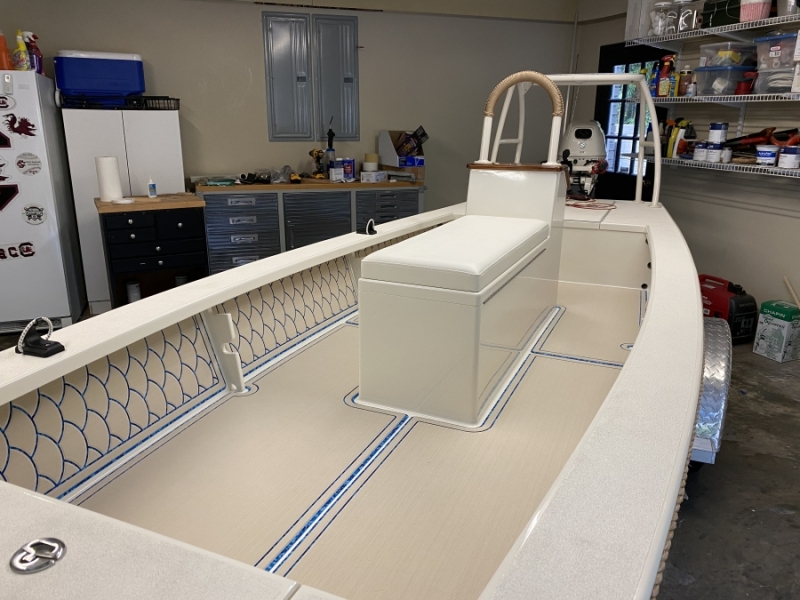
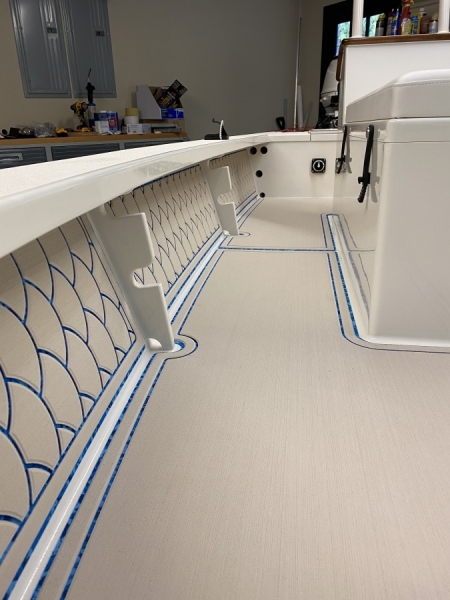
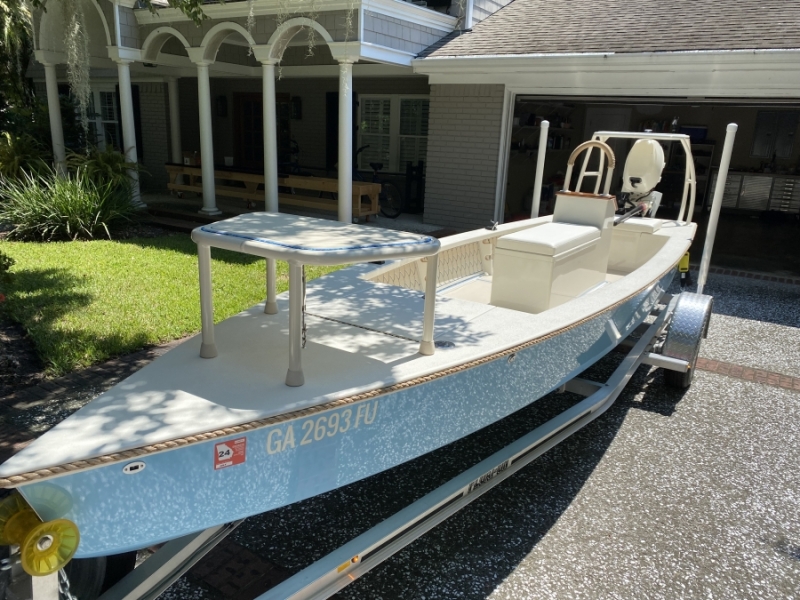
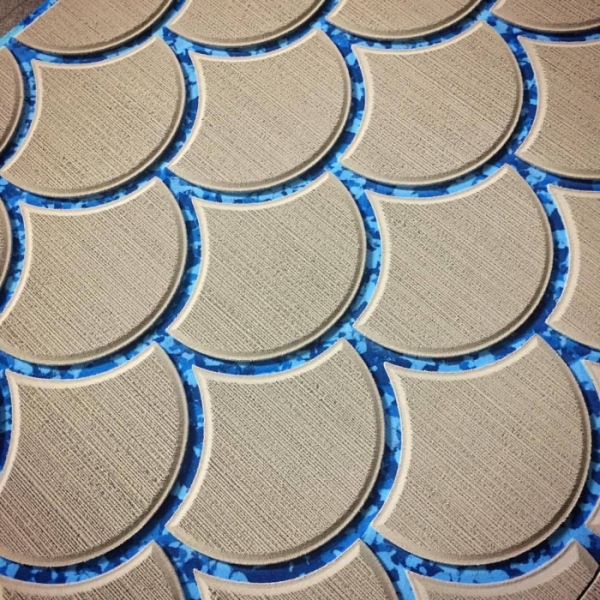
Wow, MANY thanks again to all for the compliments! Jeff I'll get you some photos when it warms up. To answer a couple of questions, the fish scale look is actually a routed pattern option with SeaDek. I'm pretty sure it is called large tarpon scale. I went with the same background as the photo, Blue Camo, to blend with the hull color.
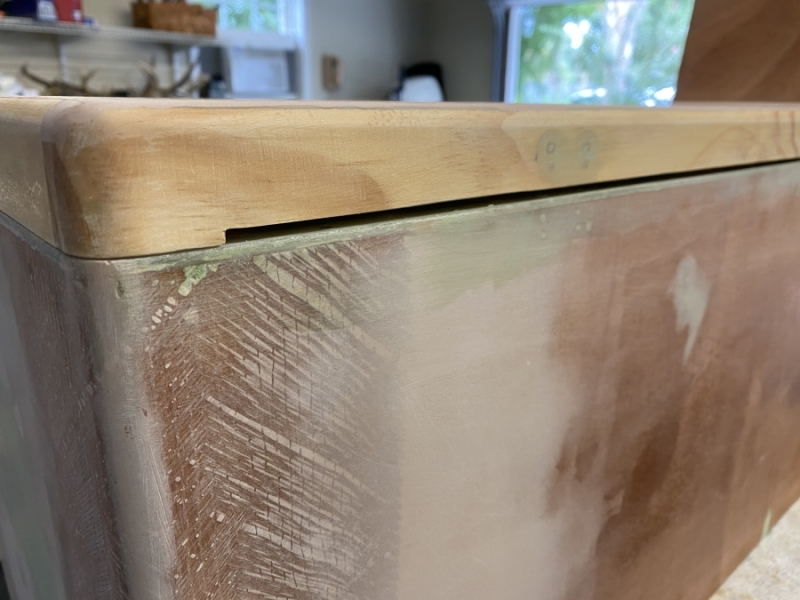
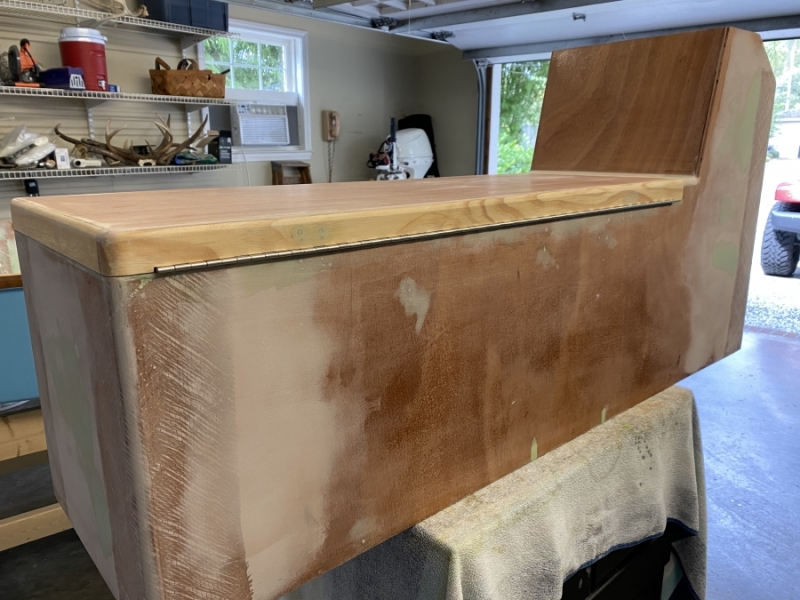
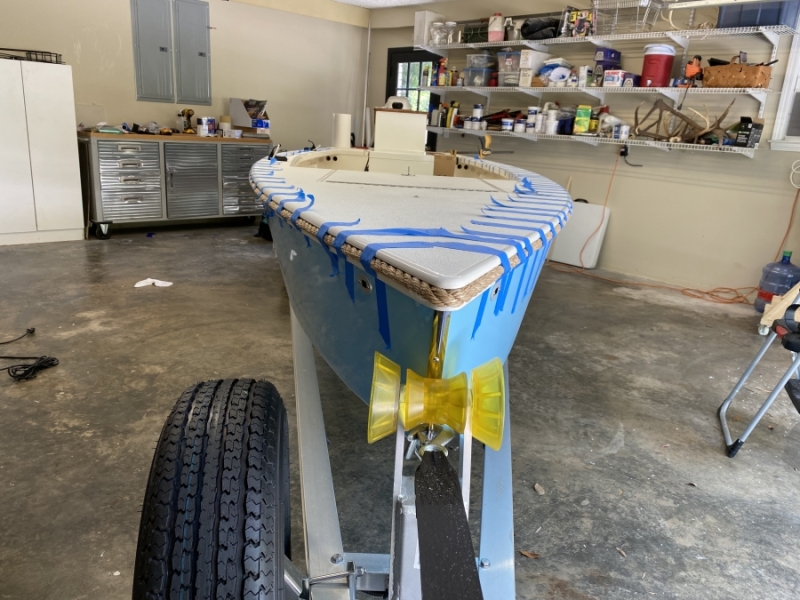
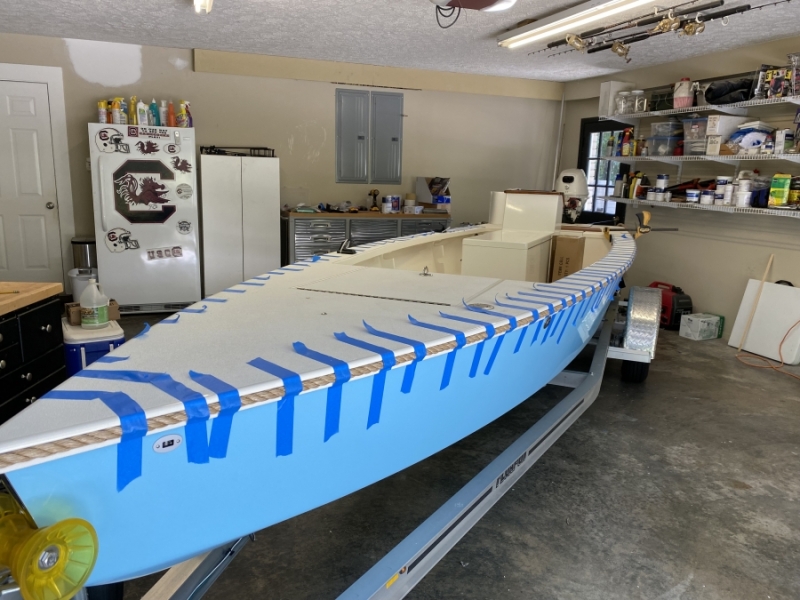
What to do about the rub rail was really a struggle, mainly because I wanted to wrap it around the bow which is such an acute compound angle. The relative flexibility and round cross section of rope solved the problem, and I decided to rout a groove in the wood rub rail to accommodate the rope. First, the junction between the deck and the rub rail had to be completely fair and sharp to guide the router.
The length of the rail was routed with guide to slightly less than the full depth of a 3/4" half round bit, the same diameter of the rope. Talk about a pucker moment! Fear and superstition kept me from taking any action shots, but after the groove was finished, the sharp junction between the deck and the wood rail was rounded over with the router as well.
View of the groove at the bow in primer.
The grooved rub rail was painted along with the rest of the deck.
"Polypro" rope was used. Portions were boiled, softened, and shaped to conform not only to the bow angle, but also to the transitions from the sides to the transom. To avoid fasteners, it was epoxied in place with yet another high tech clamping system. If the rope needs replacing, I'm sure I will regret using epoxy, but it should provide for an entertaining continuation of this thread...
Re: Bob's FS18
Posted: Thu Jan 06, 2022 11:20 am
by Dougster
Taking that router to the rub rail proves you're a braver man than me .
Dougster
Re: Bob's FS18
Posted: Fri Jan 07, 2022 2:56 pm
by Mojosmantra
Thanks for the intel on the rub rail. It makes me sweat just to think about it. Was your router guide rail a store bought accessory or did you have to fashion your own?