SOBX Little Big Boat GV15

To help other builders, please list the boat you are building in the Thread Subject -- and to conserve space, please limit your posting to one thread per boat.

Please feel free to use the gallery to display multiple images of your progress.
User avatar
BrianC
* Bateau Builder *
* Bateau Builder *
Posts: 376
Joined: Tue Dec 01, 2015 11:10 am
Location: Cedar Point, NC
Contact:

Re: SOBX Little Big Boat GV15

Post by BrianC »

Today I assembled the transom from two layers of 18 mm ply. Here they are cut out and ready to go:
6153

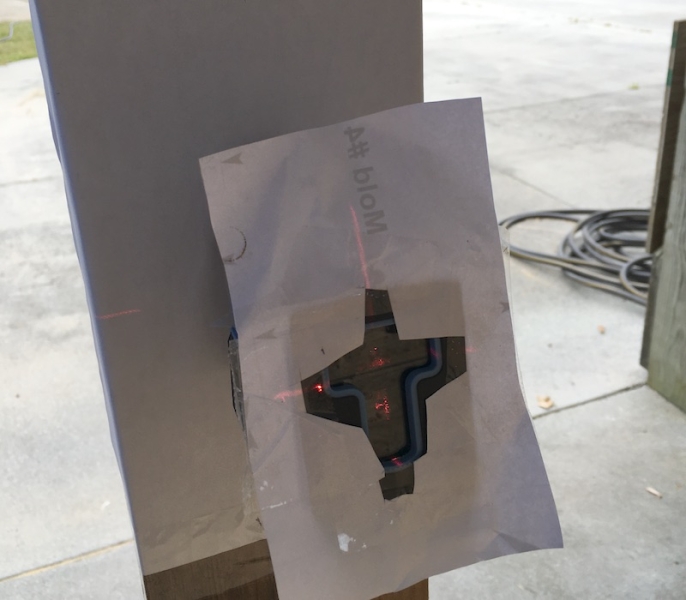
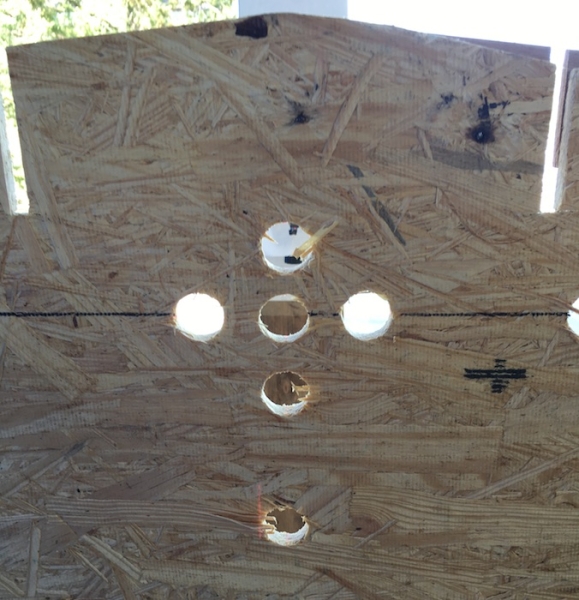
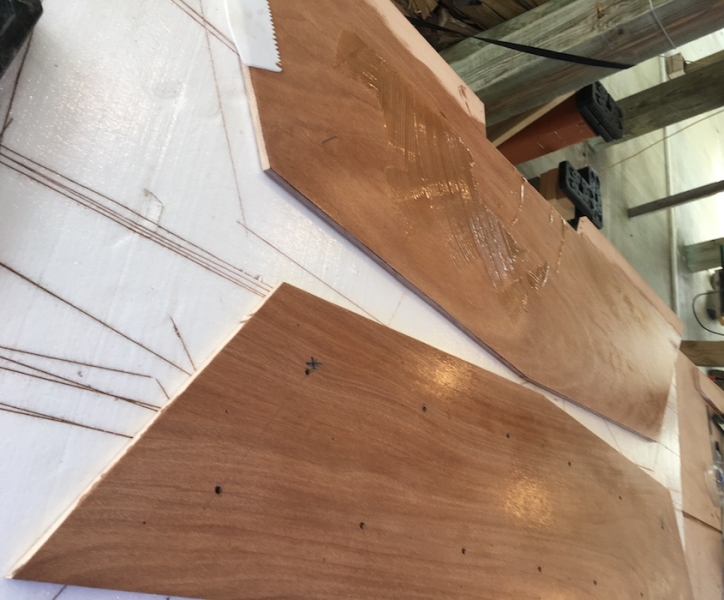
After aligning the two panels, I drilled a pair of small (~1/8”) through holes. After separating the panels, I hammered finishing nails into the two drilled holes in lower panel and over-drilled the holes in the top panel so the nails would easily pass through. I also drilled some 1/4” relief holes in the top panel so that excess epoxy and trapped air had a place to squeeze out. A handful of smaller holes were also drilled in the top panel that will be used to temporarily screw the two panels together while the ‘glue’ sets. I then applied neat epoxy to both sides to be glued. I added wood flour to the remaining epoxy and dumped that out on the bottom panel:
6154

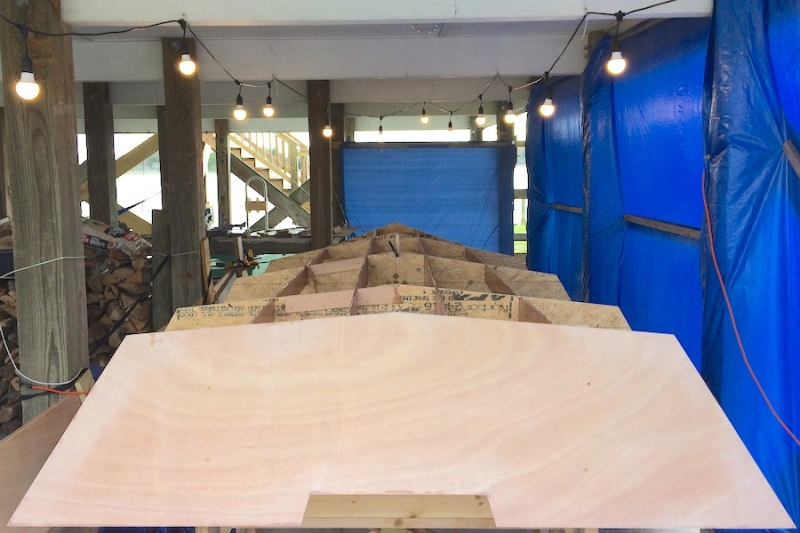
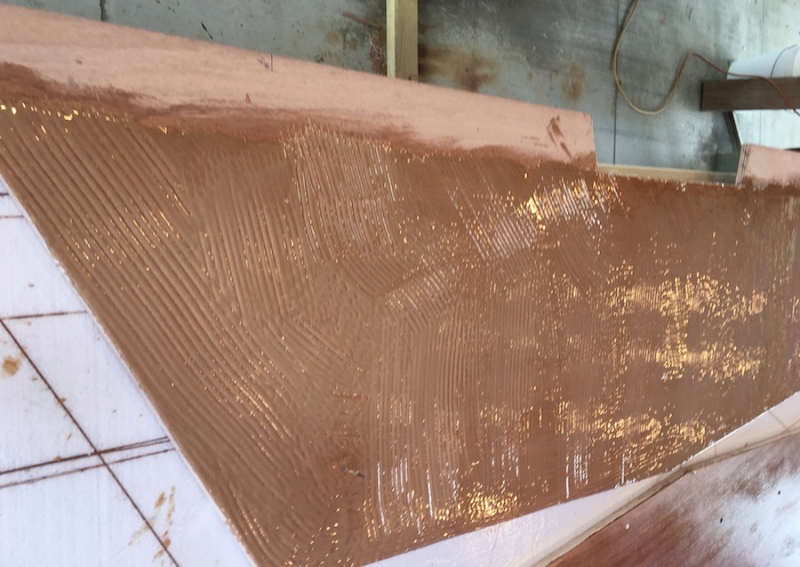
Here it is after all the glue was applied to the bottom panel:
6155

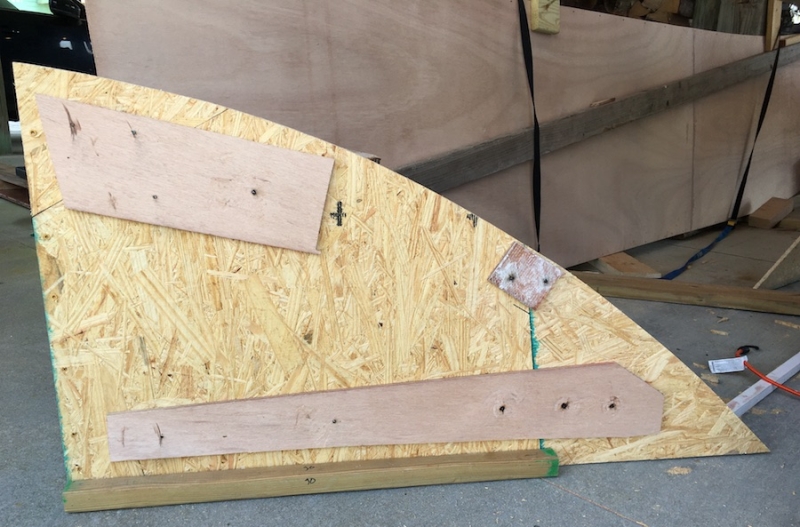
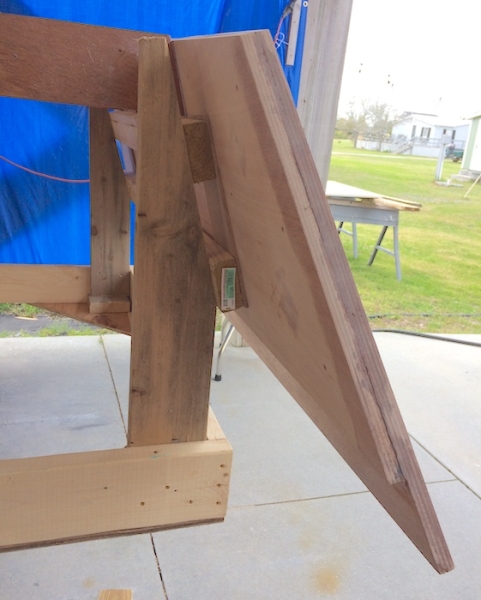
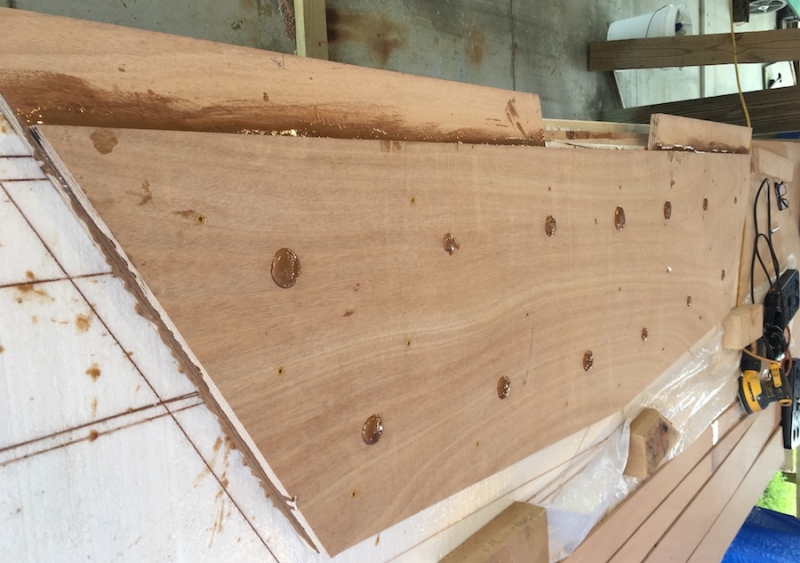
I then dropped the second layer onto the first, using the finishing nail pins to ensure proper alignment. Next, I screwed the two together making sure to not over torque the screws. You can see the excess 'glue' squeezing out the 1/4" relief holes:
6156

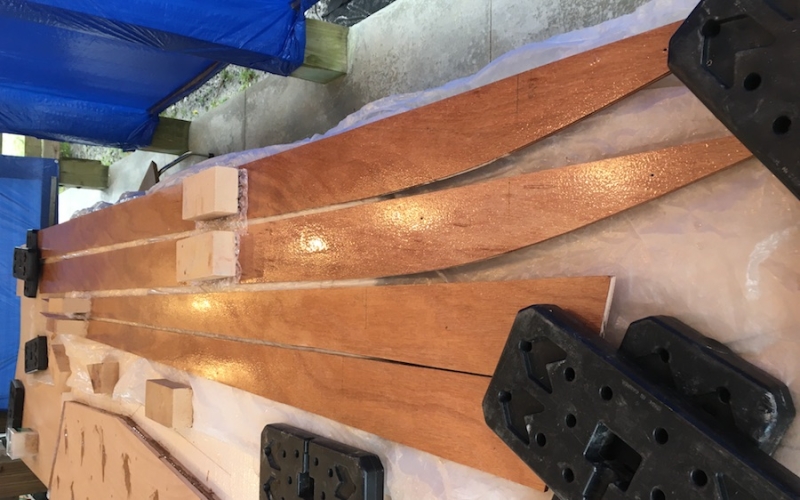
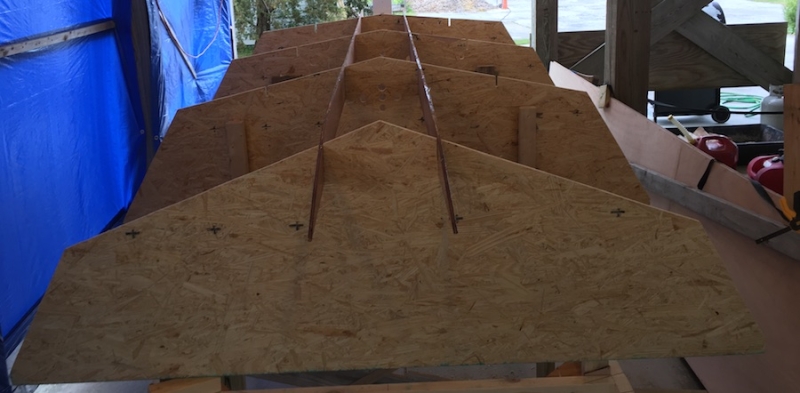
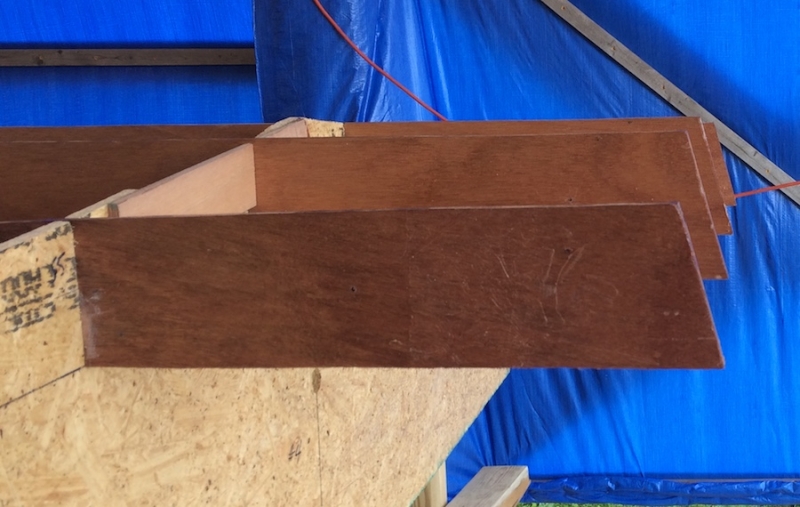
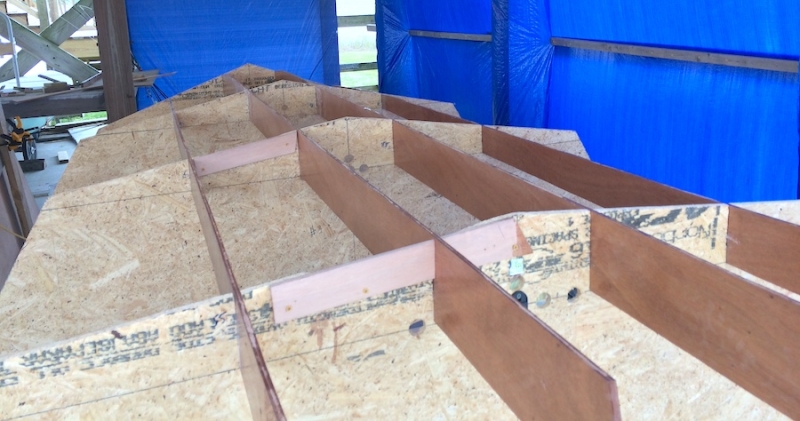
After completing the transom glue-up, I added tape to the other side of the splice on the four stringers and gave the entire surface a coat of neat epoxy:
6157
SK14 completed ——— GV15 under construction "...there is nothing - absolutely nothing - half so much worth doing as simply messing about in boats.”
The Wind in the Willows — Kenneth Grahame

User avatar
BrianC
* Bateau Builder *
* Bateau Builder *
Posts: 376
Joined: Tue Dec 01, 2015 11:10 am
Location: Cedar Point, NC
Contact:

Re: SOBX Little Big Boat GV15

Post by BrianC »

Friday's post (a few days late):

I reached a big milestone today: all hull panels cut, stringers cut, transom parts cut & glued up, all stitch holes drilled, molds all cut, stringers and molds all notched.
6200

Rather than brave the crowds at the local home store, I spliced together a Frankin-bow mold from scraps left over from the other molds:
6201

Lastly, I put legs on the strongback taking care to get it pretty level. I also marked the floor so that I can keep it in the same place while stitching.
6202

I think I might wait until Monday to start stitching up the hull panels on the strongback. We are expecting 15-20 mph winds this weekend and I don’t want to be wrestling 15-16’ long hull panels under those conditions.
6203
SK14 completed ——— GV15 under construction "...there is nothing - absolutely nothing - half so much worth doing as simply messing about in boats.”
The Wind in the Willows — Kenneth Grahame

User avatar
BrianC
* Bateau Builder *
* Bateau Builder *
Posts: 376
Joined: Tue Dec 01, 2015 11:10 am
Location: Cedar Point, NC
Contact:

Re: SOBX Little Big Boat GV15

Post by BrianC »

The weather cooperated today (not too much wind) so I got all four molds along with the two inner stringers mounted on the strongback. The laser level (one of those that projects both vertical and horizontal reference lines) used to ensure alignment is mounted on the transom end of the strongback.
6204

After getting each mold aligned with the laser's vertical and horizontal references, I used mirrors hot glued on the mold to ensure that the plane of the mold was close to perpendicular to the laser level beams. I could tell when the mold was perpendicular by looking at the position of the back reflection of the laser - when close to perpendicular, the laser comes close to reflecting back on itself. Adjustment were made by shimming between the mold and the vertical supports previously attached to the strongback. Only when I was happy with the alignment did I screw the mold in place. You can just see the red glow of the laser line on top of the black lines on the mold:
6205

I taped some white paper over the laser level so that I could better see the position of the back reflection. This picture shows the laser reflected back onto that paper from the mirrors on the mold closest to the transom:
6206

Once I finished mounting the mold closest to the transom, I removed the mirrors and drilled holes so that the laser level would project through to provide references for the next mold.
6207

After placing the first two molds, I added the innermost pair of stringers to make sure that the mold spacing matched the spacing of the notches in the stringers. I continued using the same methods to align and mount the last two molds.

Besides the laser, I also used more traditional methods to ensure alignment: verifying that diagonal dimensions are equal, and that the top of the rearmost three molds are all level with one another.

Next up: mounting the bow mold, fine tuning the notches in the molds so that the stringers sit “just so,” and adding the transom supports and the transom itself. Then I’ll be ready to drop on the hull panels and begin the stitching process.
SK14 completed ——— GV15 under construction "...there is nothing - absolutely nothing - half so much worth doing as simply messing about in boats.”
The Wind in the Willows — Kenneth Grahame

Dougster
* Bateau Builder *
* Bateau Builder *
Posts: 3301
Joined: Tue Jun 06, 2006 11:05 pm
Location: Texas

Re: SOBX Little Big Boat GV15

Post by Dougster »

Great and clever idea with the mirrors on the laser. Wish I'd known that on my other builds!

Dougster

User avatar
BrianC
* Bateau Builder *
* Bateau Builder *
Posts: 376
Joined: Tue Dec 01, 2015 11:10 am
Location: Cedar Point, NC
Contact:

Re: SOBX Little Big Boat GV15

Post by BrianC »

Dougster wrote: Tue Mar 31, 2020 10:32 am Great and clever idea with the mirrors on the laser. Wish I'd known that on my other builds!
Thanks, it works 'reasonably' well and comes for almost free if you are already using a laser level (the mirrors were $3.49 on Amazon). Since the mirrors don't mount perfectly flat on the molds (I used cheap OSB) using a dot of hot melt glue, I used a pattern of five. Three reflect the horizontal laser line, and three the vertical. Since they aren't perfectly flat, I just adjusted the tilt of the panel to the average. It seem to work well since the diagonals matched within a few mm. When it came time to remove them, a bit of heat applied to the mirror to soften the hot melt did the trick.

Adding the stringers when placing all molds after the first like is described in the plans also helps since it insures that the mold spacing is correct (assuming you cut the stringer notches correctly!).
SK14 completed ——— GV15 under construction "...there is nothing - absolutely nothing - half so much worth doing as simply messing about in boats.”
The Wind in the Willows — Kenneth Grahame

User avatar
VT_Jeff
* Bateau Builder *
* Bateau Builder *
Posts: 1857
Joined: Fri Oct 25, 2019 6:32 pm
Location: vermont

Re: SOBX Little Big Boat GV15

Post by VT_Jeff »

You are a machine, nice work!
There are only two seasons in Vermont: boating season, and boat-building season.

Completed Paul Butler 14' Clark Fork Drifter
Completed Jacques Mertens FS14LS + 10%, Build Thread
Started Iain Oughtred Tammie Norrie

Jeff
Site Admin
Site Admin
Posts: 8448
Joined: Fri Apr 29, 2016 12:17 pm
Location: Vero Beach

Re: SOBX Little Big Boat GV15

Post by Jeff »

Nice work!! Jeff

User avatar
CpnCrunch
New Poster
New Poster
Posts: 3
Joined: Thu Sep 20, 2018 12:56 pm
Location: Montreal,Qc,Canada

Re: SOBX Little Big Boat GV15

Post by CpnCrunch »

Hi Brian,

Have not built anything yet, but I have seen dozens of build thread. I'll just say that besides boatbuilding, I'm particularly commending your threadbuilding skills, you have a clean and thorough way of reporting your progress and with very neat pictures to boot. Keep up the good work, I'll be following your thread with interest.

Cheers!
Sébastien
Will someday start a PH18...

User avatar
BrianC
* Bateau Builder *
* Bateau Builder *
Posts: 376
Joined: Tue Dec 01, 2015 11:10 am
Location: Cedar Point, NC
Contact:

Re: SOBX Little Big Boat GV15

Post by BrianC »

It’s nice when it all comes together correctly. With all four stringers placed in the molds, it was great to see that they all lined up at the transom end:
6212

This really is a big boat compared to my previous build, a SK14. It is really starting to sink in how huge a project some of the other builders are tackling with their 25 foot plus hulls!
6213

Today’s big accomplishment was building and installing the transom support jig, then aligning and mounting the transom.
6214

Here it is with the transom in place:
6215
SK14 completed ——— GV15 under construction "...there is nothing - absolutely nothing - half so much worth doing as simply messing about in boats.”
The Wind in the Willows — Kenneth Grahame

User avatar
BrianC
* Bateau Builder *
* Bateau Builder *
Posts: 376
Joined: Tue Dec 01, 2015 11:10 am
Location: Cedar Point, NC
Contact:

Re: SOBX Little Big Boat GV15

Post by BrianC »

I finished installing the bow mold this morning and proceeded to place and stitch the hull panels. I stitched up the stern section of the keel seam first, using PVC pipe segments and tile shims to ensure proper spacing. Since the keel from frame 2 to 4 plus the transom is perfectly flat and horizontal relative to the sole baseline, I could stitch this up tight to ensure the panels were aligned properly. I left the bow portion of the keel seam and both chine seams loosely stitched to start.
6231
6232

I discovered a tight spot on the keel seam in the area where the keel begins to curve up to the bow. Could this be the source of the ‘hook’ that some have discovered in other GV15 builds?
6233

To ensure that the keel line was nice and fair as it sweeps up to the bow and to eliminate any potential hook, I used a saw to cut to open up the tight spot. I ended up removing about 3/16” along a 12” section of the keel seam.
6234


That done, I added PVC sections to each of the chine seam zip ties.
6235

Here is the hull mostly stitched up. I have adjustments to do tomorrow (especially on the bow end of the chine seams) and then comes taping seam undersides and glueing.
6236

My neighbor had an extra compressor left over from a work-related project and so donated it to me. I’ve never used air tools before (like sanders) so I’ll have to do a bit of research to see if it has the needed capacity. What do you guys think, will this power a sander?
6237
6238
SK14 completed ——— GV15 under construction "...there is nothing - absolutely nothing - half so much worth doing as simply messing about in boats.”
The Wind in the Willows — Kenneth Grahame

Post Reply

Who is online

Users browsing this forum: Google [Bot] and 13 guests