Page 1 of 1
Cameron's FS14LS+5%
Posted: Sun Oct 25, 2020 8:14 pm
by bamaguy0
Hey everyone. Thought I would get my build thread started. I have a thread that I was using to ask questions and get started, but now that the build is going, I figure it fitting to start one in the Builder Progress Forum.
Here the link to my pre-planning thread:
https://forums.bateau2.com/viewtopic.php?f=2&t=65270
A recap of the build so far:
Order placed for starter materials on 9/27. Built the strongback and cut the bow mold and Mold C out of some 1/2 plywood I had laying around the week leading up to driving to Ft. Pierce to pickup materials.
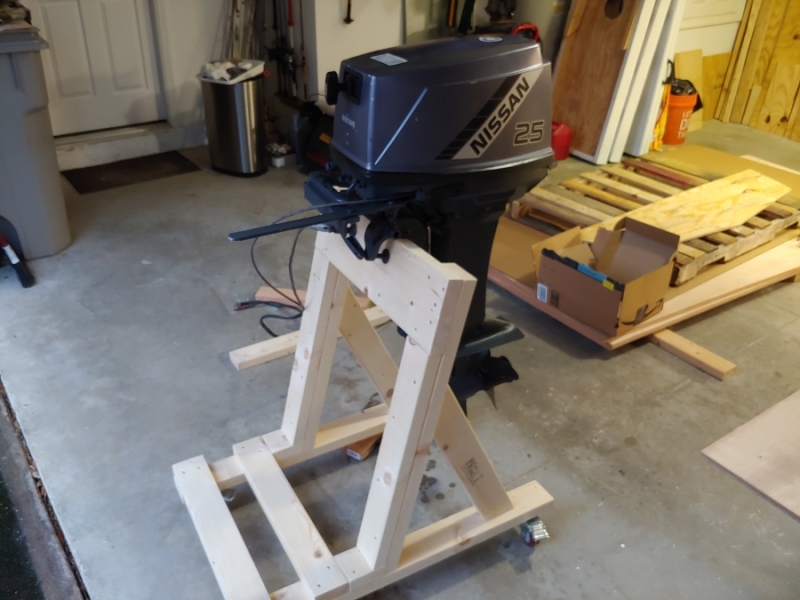
Picked up my order on 10/2. On the way home from BBC, I actually met up with a FB Marketplace seller and purchased a Tohatsu 25HP Short Shaft in pretty good shape. More on that later.
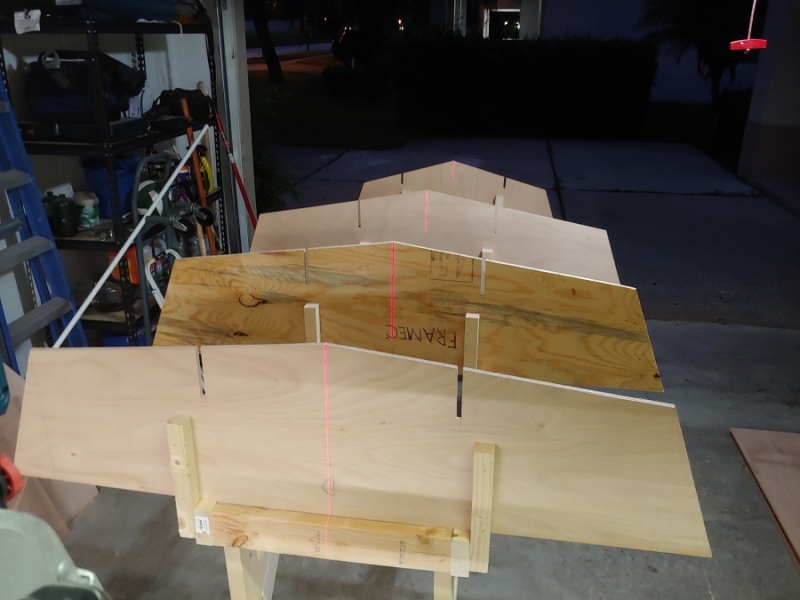
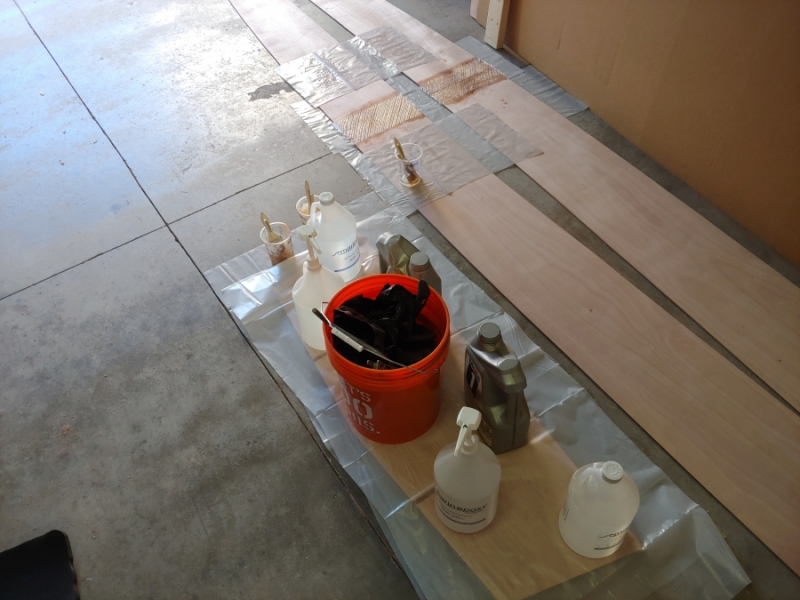
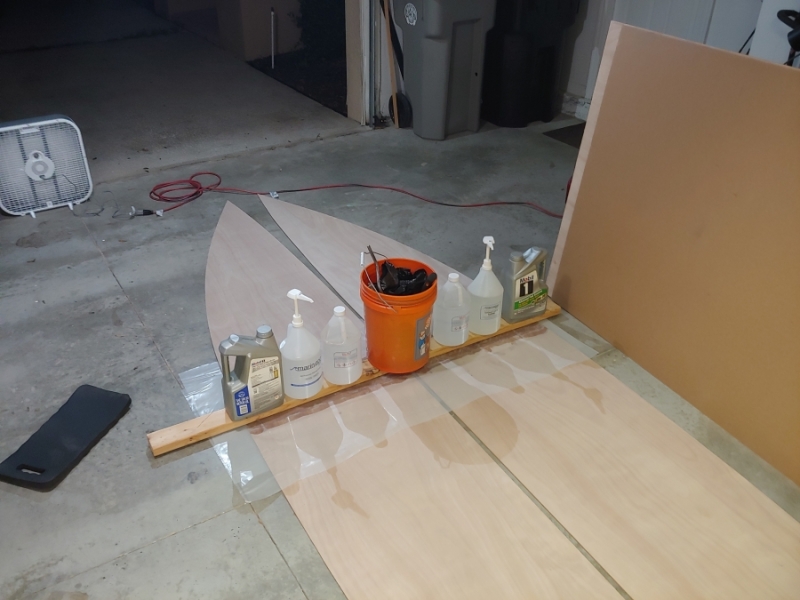
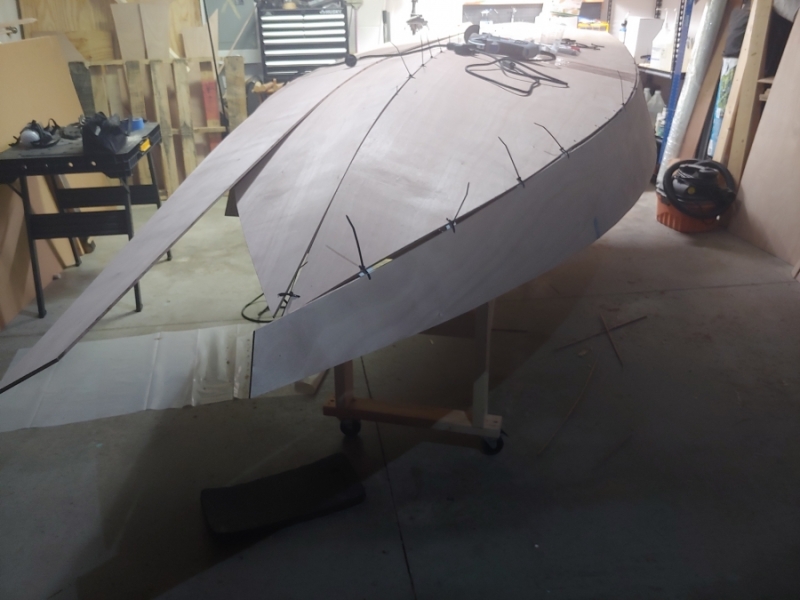
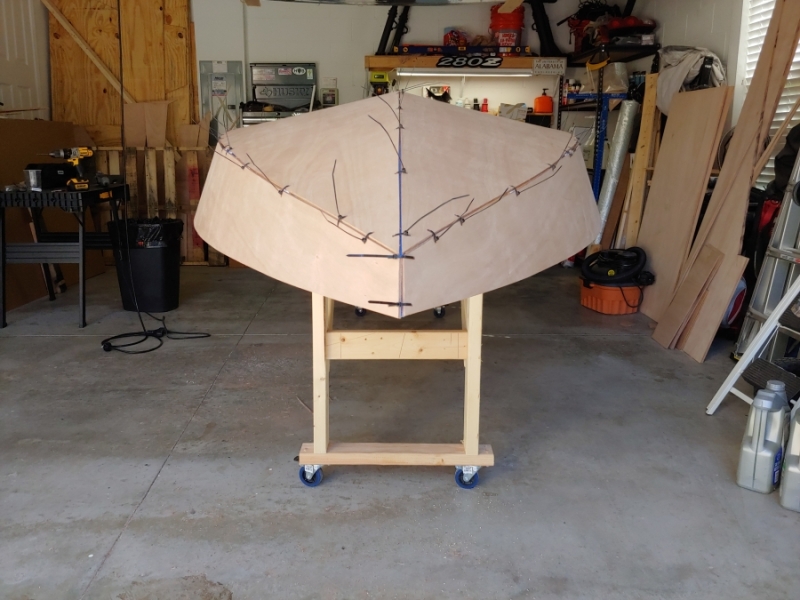
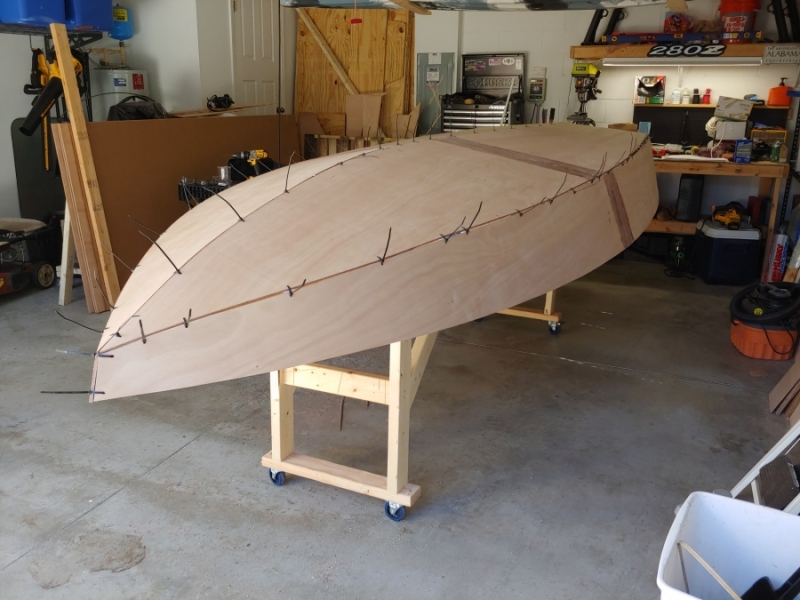
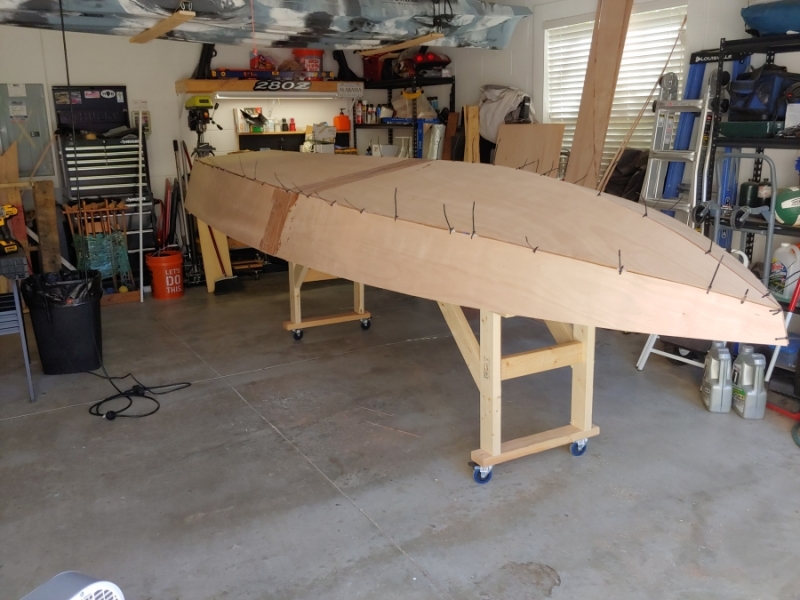
I had to travel for work the following week, so aside from getting the motor stand built, nothing really happened. I got to work as soon as I returned, though. Since I'm building this in a 2 car garage, I had to perform the next sequence a little different than what I think others had done. With my strong back in one "bay" and a few 2x4's as sacrificial cutting boards in the other, I laid out the panels on the strongback and cut them on the floor. By 10/19 I was done with cutting the hull panels, frames, transom, and stringers. The Frames were mounted onto the strongback at this point.
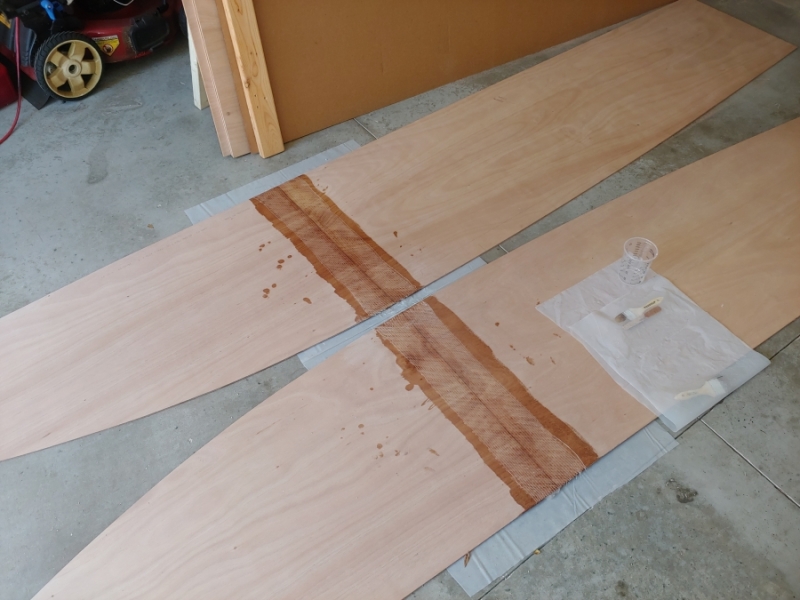
Since then, I've spliced the stringers with Butt Blocks.
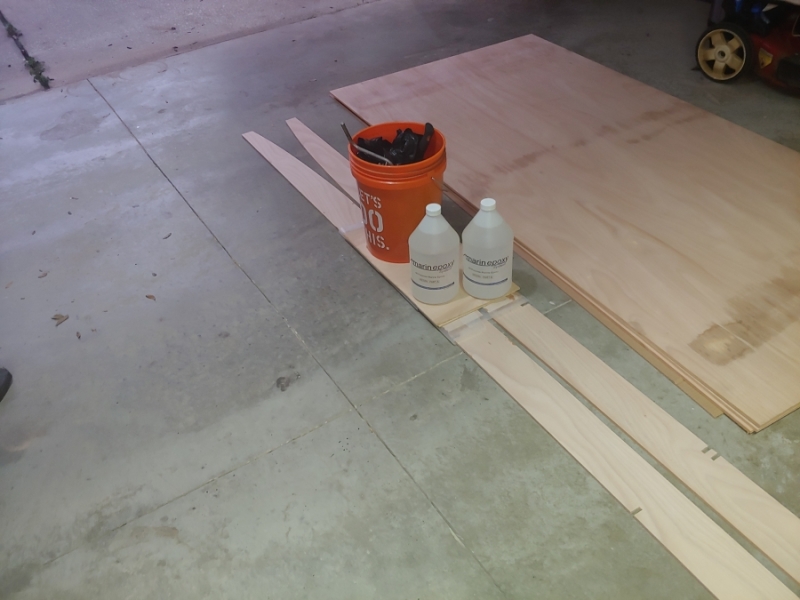
This weekend, I've spliced the side panels with fiberglass tape and bonded the 2 transom panels.
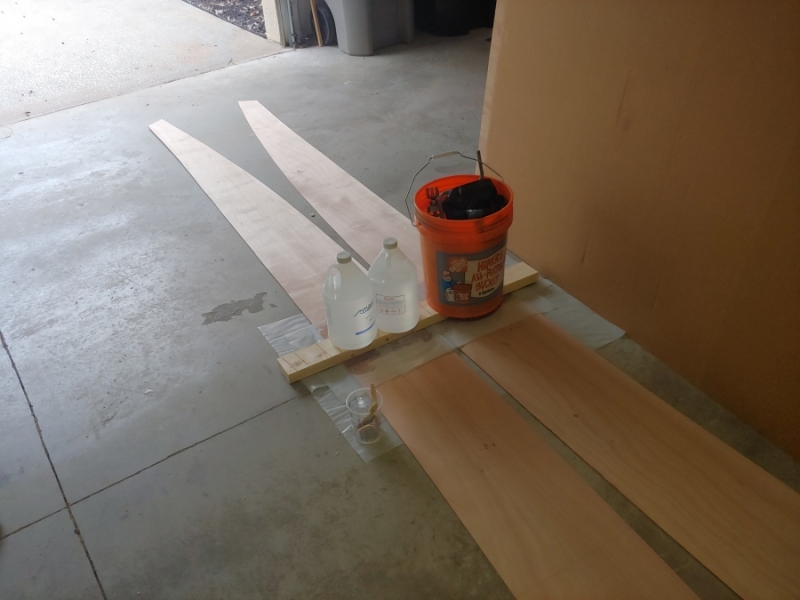
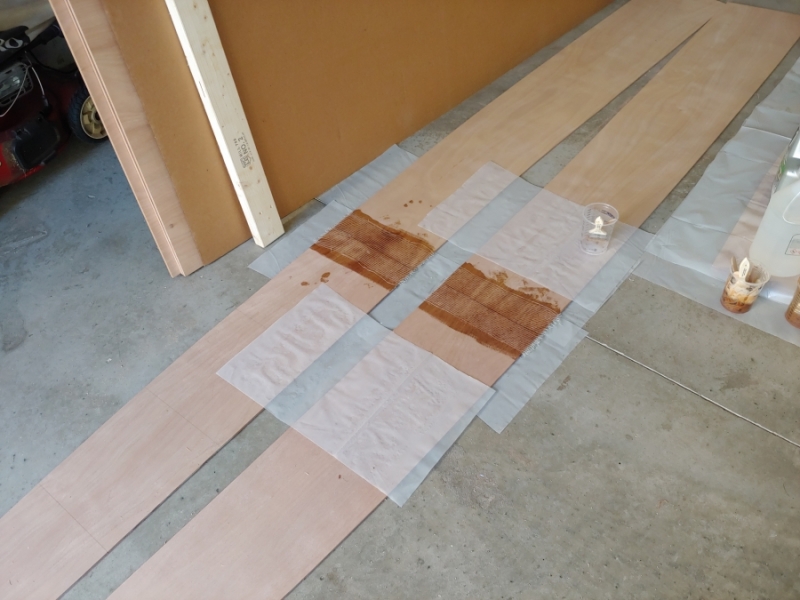
Then just last night, I started the bottom panels splice.
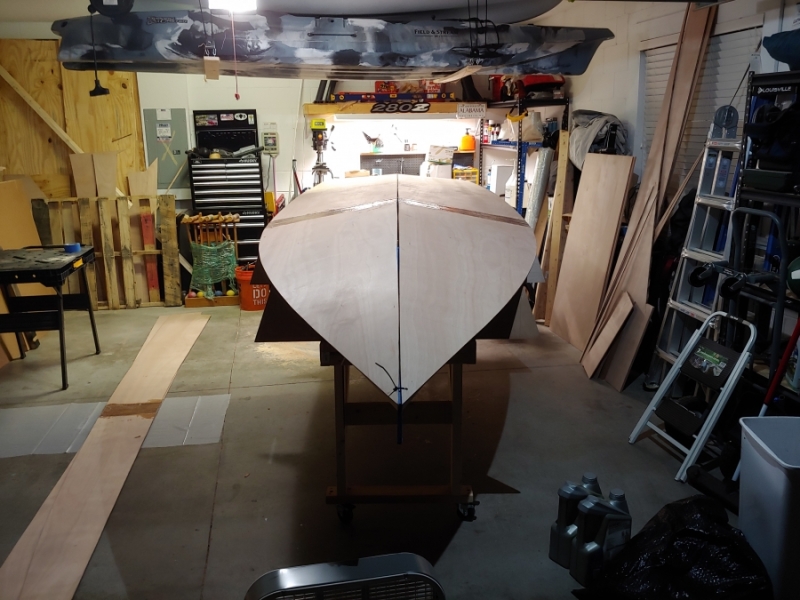
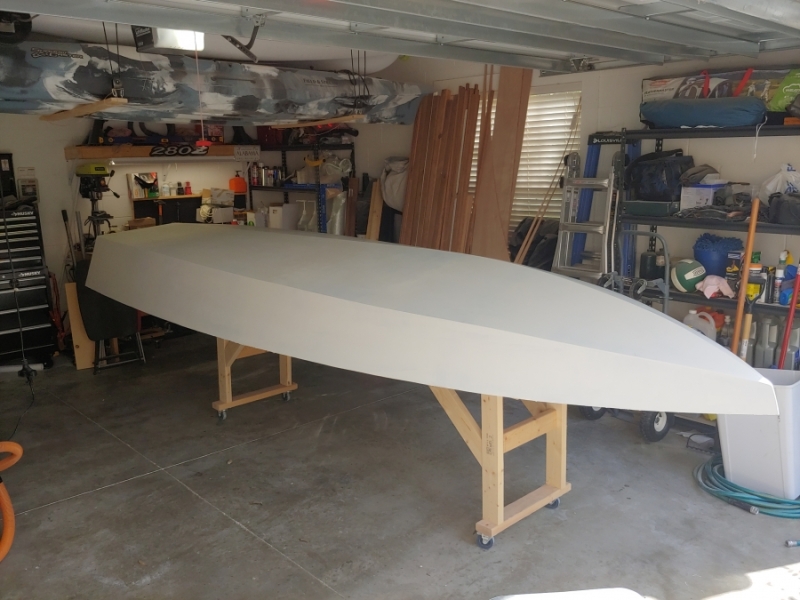
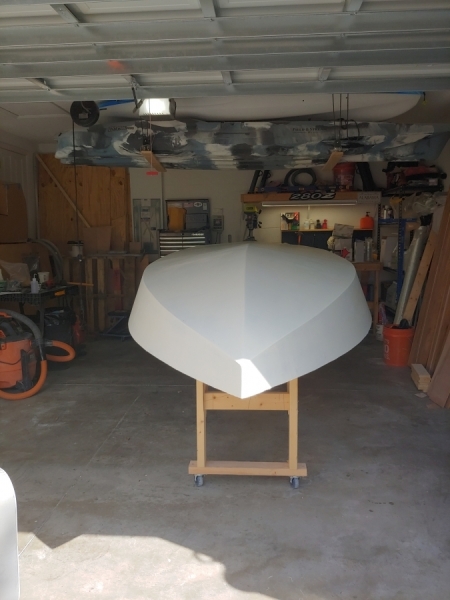
This afternoon, I flipped the panels and have applied the fiberglass tape to the other side and mounted the transom.
She's starting to take shape!

Re: Cameron's FS14LS+5%
Posted: Sun Oct 25, 2020 8:46 pm
by bamaguy0
A little on the motor. The motor cover is from a Nissan, but the model number is most definitely a Tohatsu. Circa 1996. I REALLY wanted to snag a 2 stroke Yamaha, but I couldn't beat the price.
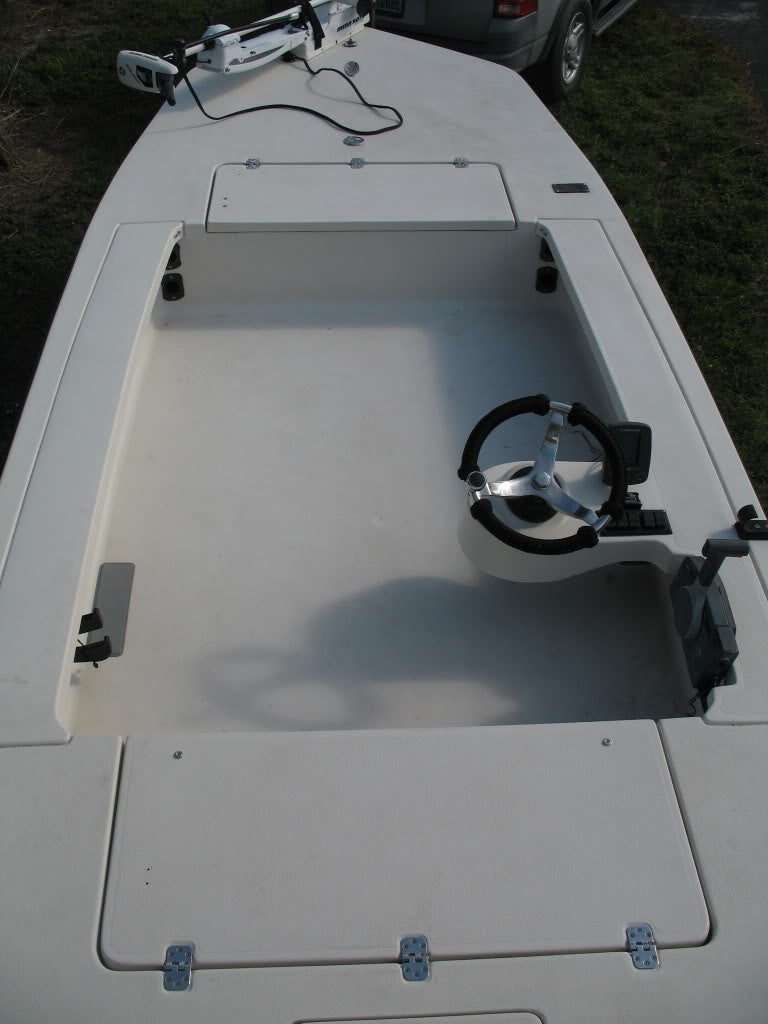
It's currently rigged as a poor man's tiller. Previous owner had fabricated a steering handle out of some angle aluminum and a flat bar with a remote throttle control. He was just reaching over the to the gear lever on the side to shift fwd and reverse. I plan to rig it properly for remote control. I want to build a small side console for the boat. I'm going to use this image as inspiration. I've already purchased a 2nd hand Nissan Remote Throttle control for it.
The motor is in pretty good shape for it's age. Good compression. The previous owner gave it a cheap rattle can spray job. Because it's main intended use is in saltwater, I want to make sure the motor is as protected as possible so over the course of the build process, I plan on stripping it down and recoating, including with the zinc primer. I'll also be giving it a once over to make sure everything is in tip-top shape. Carb rebuild, Water Pump rebuild, and possibly a lower unit seal replacement are on the list, just to be safe.
Re: Cameron's FS14LS+5%
Posted: Sun Oct 25, 2020 8:48 pm
by gstanfield
Looking good!
Re: Cameron's FS14LS+5%
Posted: Tue Oct 27, 2020 1:10 pm
by VT_Jeff
Coming along great Cameron! I'm quite keen to see how your side console works out, it's something I consider often. Once concern I had was the load(me) on one side when alone in such small boat and if it was going to make the boat list/lean/pull. I guess a few batteries on the other side could balance it out, depending on how many batteries you weigh.
I'm a novice builder and can't offer a lot of expertise but I'll tell you a few of my biggest blunders so far with my FS14LS:
1. After stitching and before gluing the side panels, ensure that they are in contact with the frames all the way 'down" to the deck(the boat being upside down). I failed to do this and ended up with a ton of splay.
2. After glassing the bottom, let it cure completely and then knock down all the stitching before starting to fair. This would have saved me a lot of time and material.
Enjoy!
Jeff
Re: Cameron's FS14LS+5%
Posted: Tue Oct 27, 2020 1:21 pm
by Jeff
Nice progress bamaguy0!! Look forward to hearing about your motor as I did not know Nissan had built outboard motors!! Jeff
Re: Cameron's FS14LS+5%
Posted: Tue Oct 27, 2020 9:20 pm
by bamaguy0
VT_Jeff wrote: ↑Tue Oct 27, 2020 1:10 pm
Coming along great Cameron! I'm quite keen to see how your side console works out, it's something I consider often. Once concern I had was the load(me) on one side when alone in such small boat and if it was going to make the boat list/lean/pull. I guess a few batteries on the other side could balance it out, depending on how many batteries you weigh.
I'm a novice builder and can't offer a lot of expertise but I'll tell you a few of my biggest blunders so far with my FS14LS:
1. After stitching and before gluing the side panels, ensure that they are in contact with the frames all the way 'down" to the deck(the boat being upside down). I failed to do this and ended up with a ton of splay.
2. After glassing the bottom, let it cure completely and then knock down all the stitching before starting to fair. This would have saved me a lot of time and material.
Enjoy!
Jeff
Good tips! I'll be sure to note that! I did notice the stitching in my panel splices and how big and rough it is. That would not be fun to fill and fair!
Regarding the side console, I plan to do some CG calulations when I'm laying out the locations of hatches and equipment. Here are a few things I've thought about so far.
I don't expect to go out alone very often, but when I do, I don't see shifting closer to the center that big of a deal. I had an old Ashcraft 14 ft boat a while back that had a side console but you kinda had to ride closer to center. It was about the same beam as well. I don't mind this. Just didn't want a full blown center console taking up floor space.
Live/baitwell. I would like to incorporate a baitwell into the boat. Maybe an ideal location is the port side aft deck. It would act as ballast when I am alone. I don't see making much more than a 5 gallon well though, so impact would be minimal.
I do intend on having a buddy or my wife ride next to me when they come along. That means I will need to plan on having as much weight forward as possible. Fuel tank and batteries will be under the forward deck and I do want to have a trolling motor so that will add some more weight forward.
If I'm way off base I'd love to be called out now before I get too far along, but I know I've seen similar sized boats with small side consoles, so I don't think I'm way out in left field on this one.
Re: Cameron's FS14LS+5%
Posted: Wed Oct 28, 2020 12:54 pm
by VT_Jeff
bamaguy0 wrote: ↑Tue Oct 27, 2020 9:20 pm
I do intend on having a buddy or my wife ride next to me when they come along.
Great point, I had not thought of that. it puts both of you fairly far back. I'm great at throwing out generally bad ideas, so, maybe move the console a little forward and use some fold-down/fold-forward jump seats to move both parties a little forward.
Re: Cameron's FS14LS+5%
Posted: Wed Oct 28, 2020 9:29 pm
by seaslug
You'll probably want to move your poling platform so the weight of the person poling is directly above, or better yet, just forward of the outboard. I've never seen or poled a flats skiff with a platform so far aft, and it could cause the boat to squat. Just something to consider. Build on. Mike
Re: Cameron's FS14LS+5%
Posted: Thu Oct 29, 2020 11:09 am
by VT_Jeff
Appreciate that feedback Mike, I had suspected it may raise some eyebrows like that. My hope is to keep the rear deck usable for casting and have a platform as well, which is why I have it so far back, but I'll look to move it forward, if it's over the engine it shouldn't take up much working room.
Re: Cameron's FS14LS+5%
Posted: Thu Oct 29, 2020 4:47 pm
by TomW1
VT_Jeff wrote: ↑Thu Oct 29, 2020 11:09 am
Appreciate that feedback Mike, I had suspected it may raise some eyebrows like that. My hope is to keep the rear deck usable for casting and have a platform as well, which is why I have it so far back, but I'll look to move it forward, if it's over the engine it shouldn't take up much working room.
I agree with seaslug keep the platform over the motor. Tom
Re: Cameron's FS14LS+5%
Posted: Fri Oct 30, 2020 4:49 pm
by VT_Jeff
Thanks Tom, I'll happily listen to the experts on this!
Re: Cameron's FS14LS+5%
Posted: Fri Oct 30, 2020 5:16 pm
by bamaguy0
Yeah, it's cool, but this is all good info that should be documented in your own build thread as well. That's a very cool looking poling platform. Are you making it all out of plywood?
Anyway, back to our regular scheduled programming.
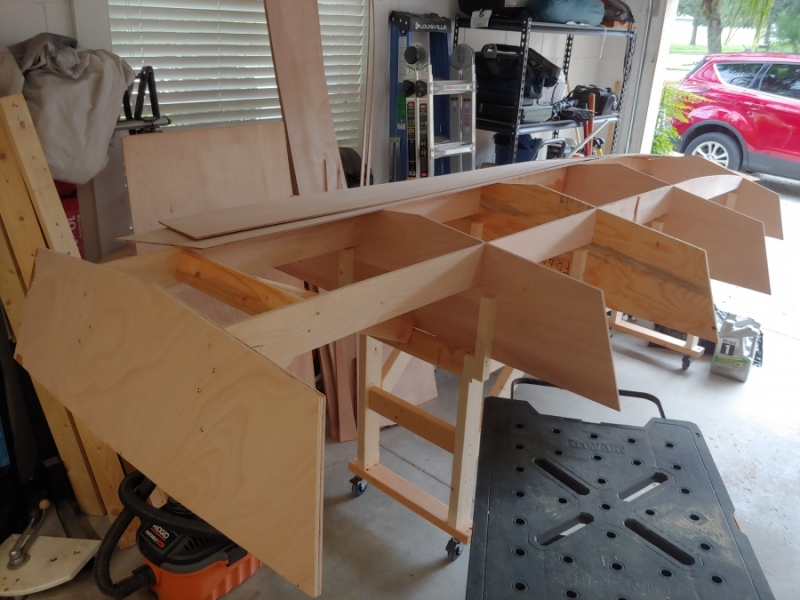
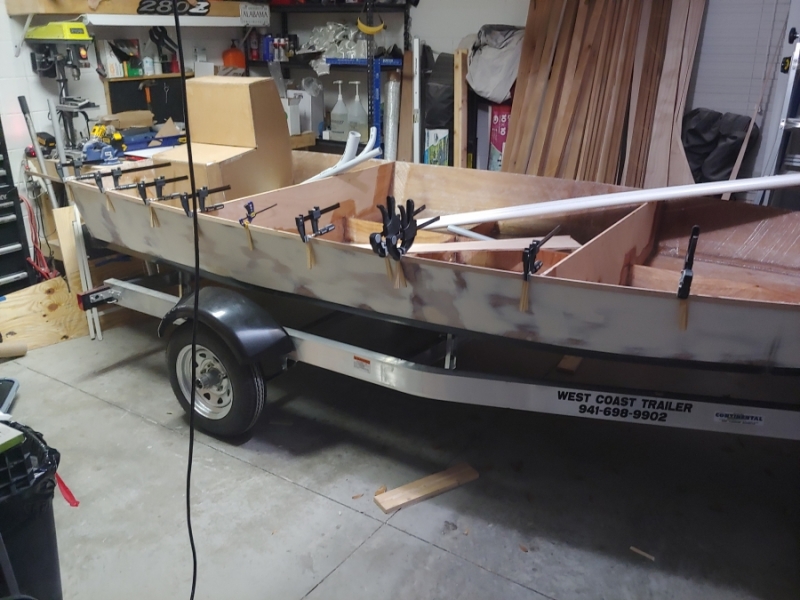
I spent this week hanging panels and checking fits. Ran into an issue, but I was about to work through it and I think everything is all good.
Earlier in the week, I got the bottom panels on.
After I hung the side panels, contours weren't matching up. First I trimmed the bottom panel to get it to match up, but they still weren't sitting just right. Spent a couple nights messing around with it. Thinking on it some more after I wrapped up for the evening yesterday, I began to suspect that I cut the side panels too long and thus, too tall as well.
I had gotten most of the contour fixed at this point, but note how much longer the panel is at the bow.
Sure enough, my side panels were about 4 inches too long. Well I trimmed it to fit the bottom panel contour on the port side then matched it back up with the starboard side panel to trim and keep it symmetric. Because I initially trimmed the port bottom panel somewhat before I realized what was going on, I trimmed the starboard bottom panel to match as well.
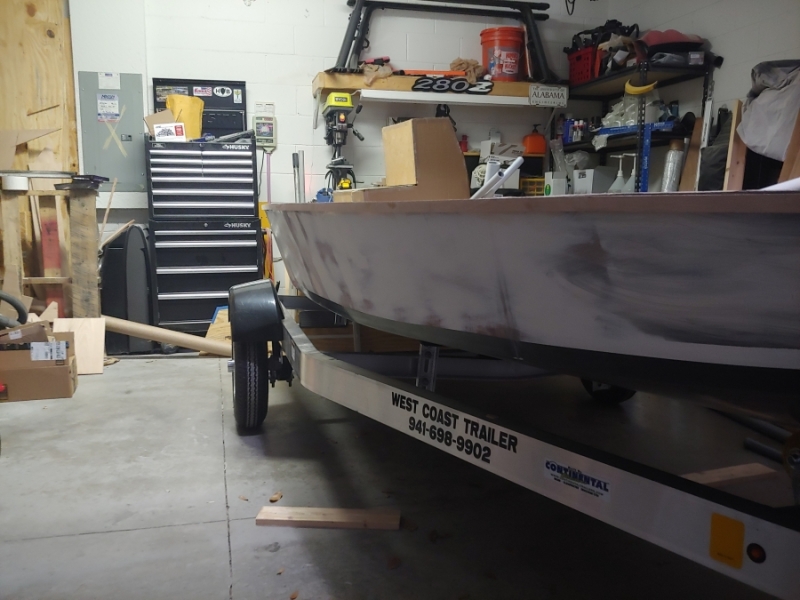
After getting everything trimmed up to match each other and a little extra shaving here and there to keep gaps everywhere, I feel comfortable saying that she's ready to proceed on.
Now I'm taping up the inside seams to prevent excess epoxy buildup and hope to have the first joint glue application by the end of the weekend.
Re: Cameron's FS14LS+5%
Posted: Fri Oct 30, 2020 5:50 pm
by VT_Jeff
bamaguy0 wrote: ↑Fri Oct 30, 2020 5:16 pm
... should be documented in your own build thread as well. That's a very cool looking poling platform. Are you making it all out of plywood?
No one reads my thread!

Plywood platform and solid wood risers. The idea is that the platform can slide in and out, theoretically.
Your results after trimming look great! Are you spacing the panels with something to create a gap? I Use framing nails every few inches
Re: Cameron's FS14LS+5%
Posted: Fri Oct 30, 2020 5:58 pm
by bamaguy0
I used small pieces of PVC on the inside of the panels. Seemed to work out OK.
You've piqued my interest with this poling platform. Depending on how much plywood I use for my console, I might have enough to try something like that as well.
Re: Cameron's FS14LS+5%
Posted: Fri Oct 30, 2020 6:55 pm
by VT_Jeff
bamaguy0 wrote: ↑Fri Oct 30, 2020 5:58 pm
I used small pieces of PVC on the inside of the panels. Seemed to work out OK.
I did the same on the advice of some folks here, made the alignment much easier!
Re: Cameron's FS14LS+5%
Posted: Fri Oct 30, 2020 6:56 pm
by VT_Jeff
bamaguy0 wrote: ↑Fri Oct 30, 2020 5:58 pm
You've piqued my interest with this poling platform. Depending on how much plywood I use for my console, I might have enough to try something like that as well.
I moved those photos to my thread, I'll let you know how it progresses!
Re: Cameron's FS14LS+5%
Posted: Fri Oct 30, 2020 9:14 pm
by bamaguy0
I got the first application of epoxy in the seams tonight.
Airshow is in town tomorrow, so I won't be working on it.
Re: Cameron's FS14LS+5%
Posted: Fri Nov 06, 2020 6:30 pm
by bamaguy0
Re: Cameron's FS14LS+5%
Posted: Fri Nov 06, 2020 6:49 pm
by VT_Jeff
Looking really nice, very neat! Check your recoat time before you sand, may not need to do any scuffing/sanding before you lay the cloth. The Silvertip gives you 72 hour re-coat time without sanding.
Re: Cameron's FS14LS+5%
Posted: Fri Nov 06, 2020 6:54 pm
by bamaguy0
Good call! I'll check on that for the MarinEpoxy. I'm going on an overnight trip tomorrow, but I'll be back Sunday. Might still have time.
Re: Cameron's FS14LS+5%
Posted: Fri Nov 06, 2020 7:12 pm
by VT_Jeff
bamaguy0 wrote: ↑Fri Nov 06, 2020 6:54 pm
Good call! I'll check on that for the MarinEpoxy. I'm going on an overnight trip tomorrow, but I'll be back Sunday. Might still have time.
Also, you can do a "hot coat" to extend your re-coat time: just brush on a thin coat of raw epoxy wherever the cloth will go to keep the surface "alive" for another cycle. Far, far, far better than waiting for cure and sanding!
Edit: and if you do end up needing to wait and sand, let it cure hard and use a good mask when you sand to avoid epoxy sensitivity, something you may want to read up on if you're not familiar.
Re: Cameron's FS14LS+5%
Posted: Fri Nov 06, 2020 7:26 pm
by bamaguy0
Yeah, I have a Honeywell half mask respirator. I lucked out and found one in stock one night on Amazon. I think they're starting to become more available again.
Re: Cameron's FS14LS+5%
Posted: Fri Nov 06, 2020 9:06 pm
by bamaguy0
Talk about peer pressure!
Just wet out the rest of the hull. Letting it get tacky then I'll be applying the cloth.
Re: Cameron's FS14LS+5%
Posted: Fri Nov 06, 2020 11:51 pm
by bamaguy0
Re: Cameron's FS14LS+5%
Posted: Sat Nov 07, 2020 9:38 am
by bamaguy0
After review this morning, I've noticed a few small bubbles formed on the chine. Ordered some 5ml syringes with needle(blunt) tips to work on injecting them to get them solid. I don't think any of them are worth grinding off and patching.
Wonder if MarinEpoxy thins with Acetone?
Re: Cameron's FS14LS+5%
Posted: Sat Nov 07, 2020 10:18 am
by joe2700
bamaguy0 wrote: ↑Sat Nov 07, 2020 9:38 am
After review this morning, I've noticed a few small bubbles formed on the chine. Ordered some 5ml syringes with needle(blunt) tips to work on injecting them to get them solid. I don't think any of them are worth grinding off and patching.
Wonder if MarinEpoxy thins with Acetone?
I would not do that, the acetone won't have any way to evaporate after you inject it. I'm pretty sure you shouldn't thin epoxy with solvent anyway, but especially in this case. You can thin it by warming it up, you'll just have to use small batches and move fast.
Re: Cameron's FS14LS+5%
Posted: Sat Nov 07, 2020 10:46 am
by bamaguy0
joe2700 wrote: ↑Sat Nov 07, 2020 10:18 am
bamaguy0 wrote: ↑Sat Nov 07, 2020 9:38 am
After review this morning, I've noticed a few small bubbles formed on the chine. Ordered some 5ml syringes with needle(blunt) tips to work on injecting them to get them solid. I don't think any of them are worth grinding off and patching.
Wonder if MarinEpoxy thins with Acetone?
I would not do that, the acetone won't have any way to evaporate after you inject it. I'm pretty sure you shouldn't thin epoxy with solvent anyway, but especially in this case. You can thin it by warming it up, you'll just have to use small batches and move fast.
I do believe most can be thinned with solvents a very small amount, but at a hit to strength. In this case I just need to fill the gap, but I do agree it would be difficult for the solvent to evaporate. Heating up the resin may be the trick...if it's even needed. Just thought that might help ensure the entire bubble is filled. If I do weep holes in the percieved extremity that should be good enough.
Re: Cameron's FS14LS+5%
Posted: Sat Nov 07, 2020 5:25 pm
by VT_Jeff
bamaguy0 wrote: ↑Fri Nov 06, 2020 11:51 pm
I think I might be a little crazy for making such a last minute decision to go ahead and apply the cloth at 9PM, but I think it turned out well.
Looks great from here, and, you just saved yourself a lot of sanding and got a better bond by taking the big bite, nice work!
Re: Cameron's FS14LS+5%
Posted: Sat Nov 07, 2020 5:27 pm
by VT_Jeff
bamaguy0 wrote: ↑Fri Nov 06, 2020 9:06 pm
Talk about peer pressure!
From total strangers no less. I could be a boat-bot!

Re: Cameron's FS14LS+5%
Posted: Sat Nov 07, 2020 9:55 pm
by bamaguy0
Hey Jeff,
I'm starting to think ahead on making my own poling platform. Since you've already designed yours, I was wondering if you'd considered any other designs before going with what you did?
Kinda thinking about fiberglass tubes. Maybe buying the braided sleeving and making some curved molds to form them on.
Re: Cameron's FS14LS+5%
Posted: Sun Nov 08, 2020 9:56 pm
by VT_Jeff
bamaguy0 wrote: ↑Sat Nov 07, 2020 9:55 pm
Hey Jeff,
I'm starting to think ahead on making my own poling platform. Since you've already designed yours, I was wondering if you'd considered any other designs before going with what you did?
Kinda thinking about fiberglass tubes. Maybe buying the braided sleeving and making some curved molds to form them on.
I considered that(FG tubes) as well. Shine with BBC did that with an FS17LS, it came out very cool.
viewtopic.php?f=12&t=16831&start=330
Somewhere there is a thread dedicated to his platform but I'm not easily finding it.
His 2-legged platform was a big insipration for my design and I toyed with the idea of stealing it more closely. In the end, I went the way I did(with the design) because I like the asthetics of the swept back legs matching the angle of the console and the transom, I like the ability to easily remove the platform, and the fact that as designed, the transom takes none of the load. I also prefer to work in wood wherever possible, so fabricating FG legs/platform was not an attractive option to me. But, FG/CF tubes with pool noodle or some other forms offer limitless possibilities, def a smart direction to be looking!
I'd personally recommend getting Fusion 360 to toy with the design, it's free for personal use and there is a great user community to help get spun up. I just started with it myself but it has made decision making far easier! Dan Smullen recommended it to me so credit to him.
Re: Cameron's FS14LS+5%
Posted: Mon Nov 09, 2020 6:17 pm
by bamaguy0
Oh yeah I use Fusion360 already. I have a 3d printer and make stuff from time to time using it. I use CatiaV5 for my day job so it's interesting jumping back and forth, but I've gotten the hang of it I think.
I've modeled the boat using F360. I made a version of the boat at nominal, plus 5%, plus 10% and even a slightly raised sheer version when I was trying to decide how far to go. I used it to do my math for me as once I laid all the panels out per the plans just adding a *1.1 or 1.05 to the dimensions scaled everything appropriately. I also used it to decide my nesting at +5% and using 9mm thick stringers. Ill be designing the side console in there as well as my deck hatch layout, and battery and tank positions.
Thanks for the info on the glass tubes. I'll definitely be looking through them.
Re: Cameron's FS14LS+5%
Posted: Mon Nov 09, 2020 8:03 pm
by VT_Jeff
Ok, I know who I'll be coming to with my f360 questions!
Re: Cameron's FS14LS+5%
Posted: Mon Nov 09, 2020 9:52 pm
by bamaguy0
I'm by no means an expert, but always willing to lend a hand.
Started sanding tonight. Got a long way to go. Been trying to rig up my vacuum to work on my electric sander and it's just been awful trying to get something to fit. Hoping my Amazon order will solve the problem. Should arrive tomorrow.
Re: Cameron's FS14LS+5%
Posted: Mon Nov 30, 2020 7:44 pm
by bamaguy0
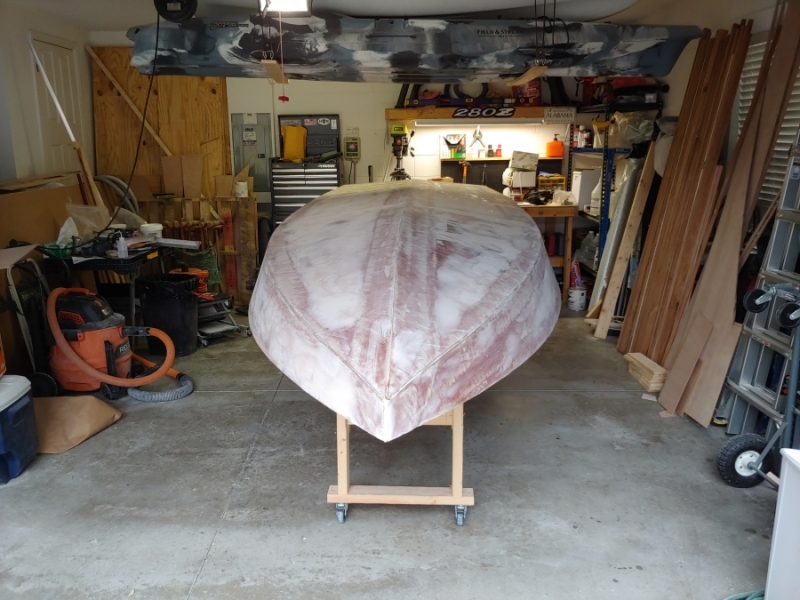
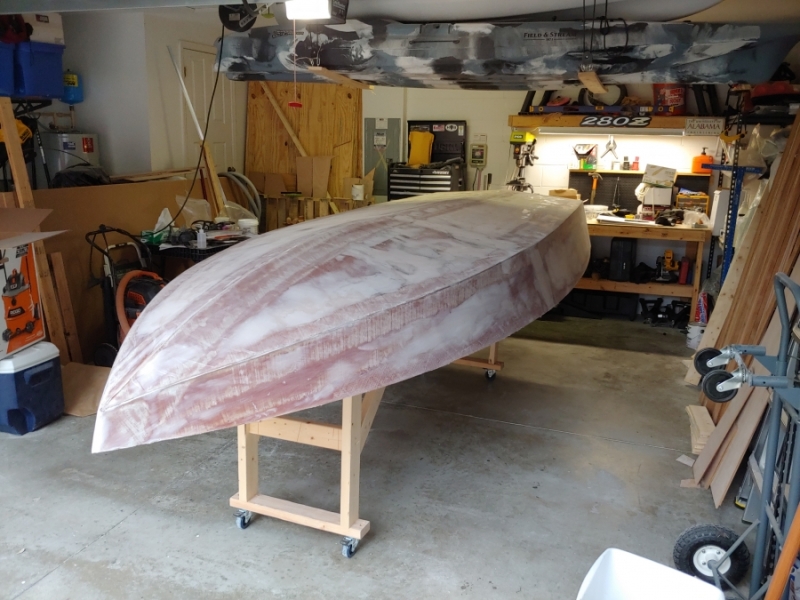
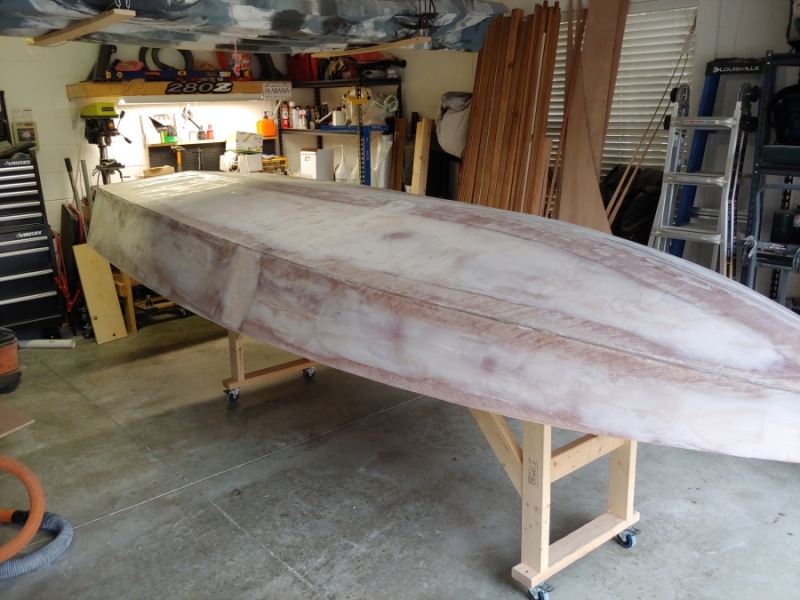
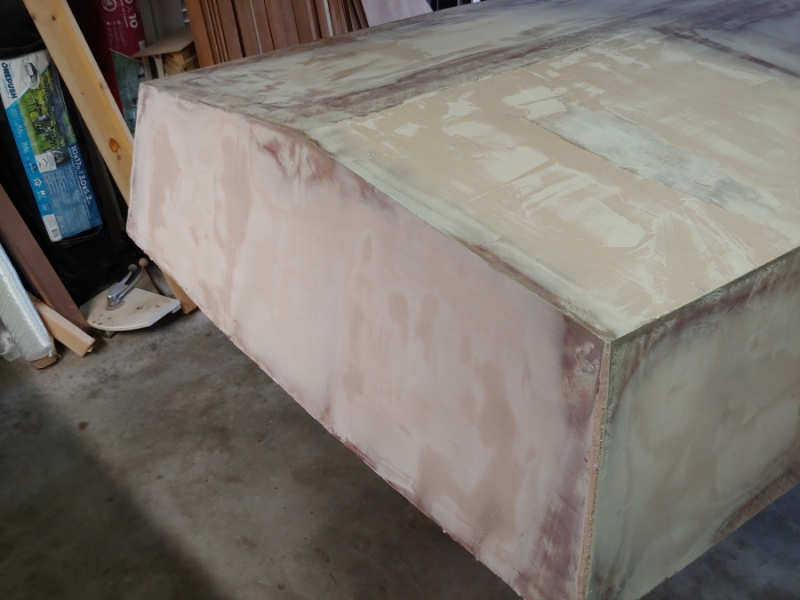
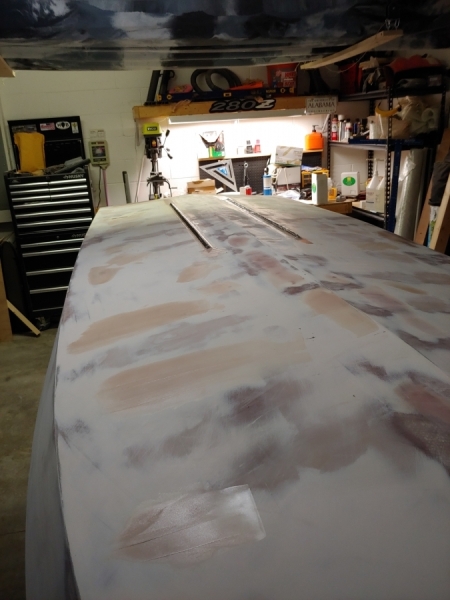
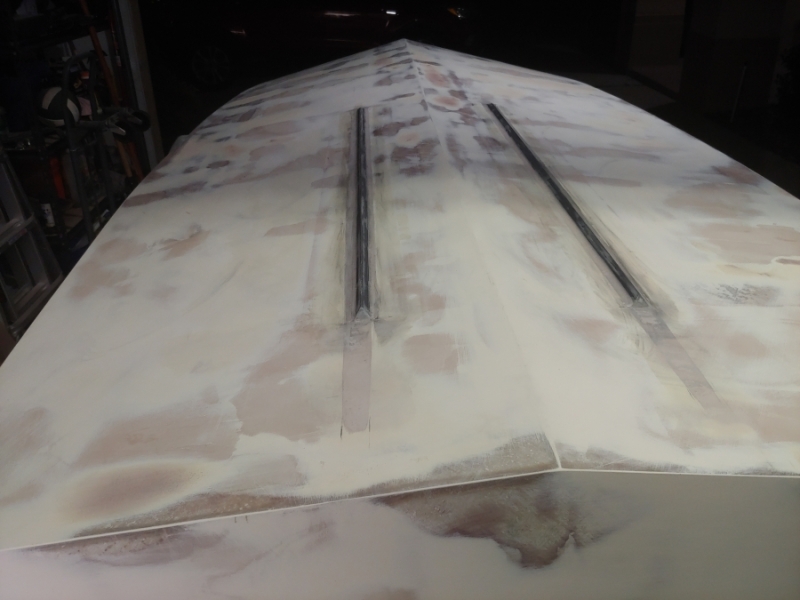
It's been a while since I posted last but I've been hard at it trying to fair the hull. I've run myself out of Blended Filler mix and I think I'll be switching over to QuickFair from here. Here are a couple of photos along the way.
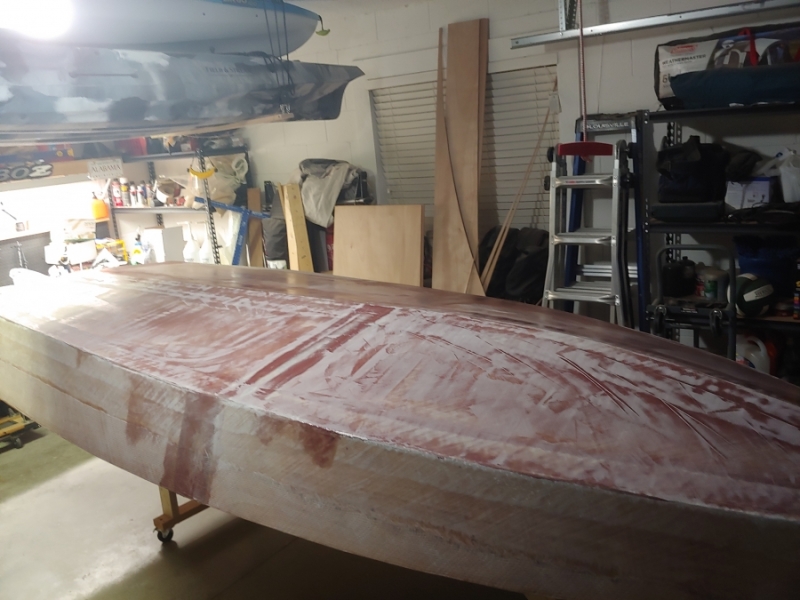
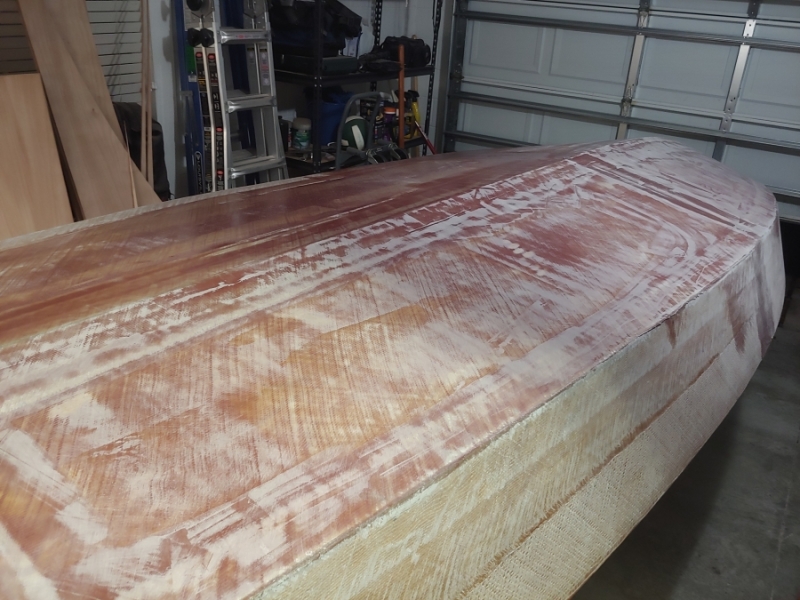
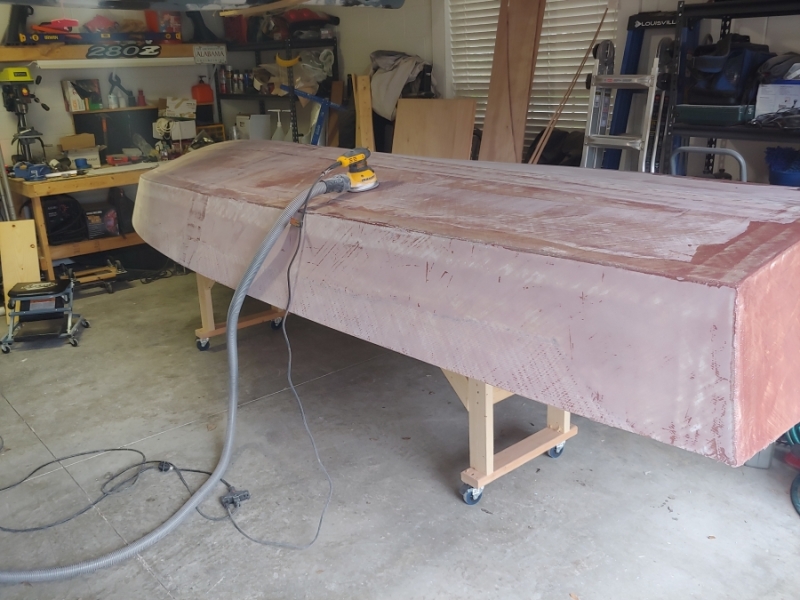
I realized after I was in too far that I probably applied too much filler in the beginning so I sanded a lot of it off with the Random Orbital.
I also decided to apply 6oz biax tape up the sides of the hull. In hindsight this ate up a lot of my filler material because of how sparce the fibers are compared to a more dense biaxial or light woven cloth. I wanted to cover the side in fiberglass and I figured why not the 6" tape since I had it on hand and it fit right in place with some minor trimming. Oh well, you live and learn.
I'm going to work on forming the sharp chine with woodflour and bonding a skeg and likely also the rubrails on at this point before I continue fairing anymore.
Last week I traveled to my parents in Alabama for Thanksgiving. I realized a couple days before I left that they had recently replaced their porch columns due to some rot that had set in from not putting them on risers off the porch floor 30 years ago. They were 4x6x8 cedar posts that only have maybe 6" or so of rot on the end at worst. Following the seaslug hatchmaking guide we took the 3 best columns of the 6 and made 6 pieces of 2 1/4 x 2, 4 pieces of 2 x 1/2, and then for sole and deck cleating we cut the remainder to 7/8 square. Ill trim them to get the rotten portions out, but I thought this was an excellent use of some cedar that would otherwise go to waste.
Re: Cameron's FS14LS+5%
Posted: Mon Nov 30, 2020 9:06 pm
by cape_fisherman
Looking good.
That RO sander probably added to your fairing woes. If you're looking for a smooth surface, the RO probably adds 1-2 extra fairing coats. Running a board is more labor intensive, but it'll give you a fair surface faster than the orbital sander...and a more fair surface period. I would suggest following up your previous fairing/sanding with at least one final pass with a 2' board. It's a good idea to have it when you move on to high-build anyway.
Re: Cameron's FS14LS+5%
Posted: Mon Nov 30, 2020 9:15 pm
by bamaguy0
That makes sense, thanks for the insight!
Re: Cameron's FS14LS+5%
Posted: Tue Dec 01, 2020 6:16 am
by cape man
Great use of the columns! Nothing like reusing old wood. Good Karma for the boat to have a piece of the family house in her.
Re: Cameron's FS14LS+5%
Posted: Sun Jan 24, 2021 10:46 pm
by bamaguy0
I know it's been a while, but I don't feel like I've had much to update on so I'm just checking in. Had a bit of a hiatus from Thanksgiving to New Years and then that carried into January a little bit. I was able to go to both the Rose Bowl game and the CFB National Championship game. They were a blast! It's fun when your team wins.
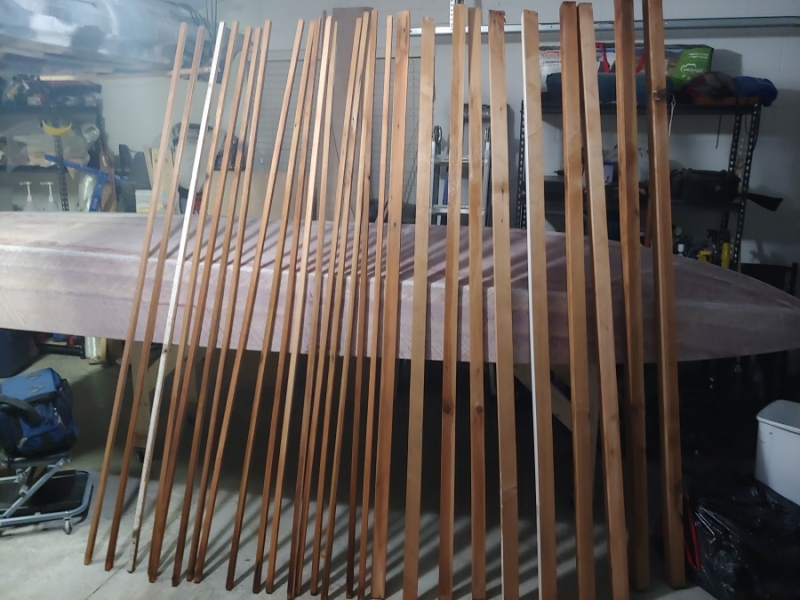
Anyway about the boat, fairing is moving along at a slow pace. I've used more Quikfair than I'd like to admit, but I'd say the vast majority of the hull is complete. I have a couple spots to level on the transom and then the rest is leveling some sags I had between the transom and Frame D. The port side was worse so I applied a milled fiber paste to build up the lowest spot and then faired from there. On the starboard side, it wasn't as bad so I'm building up with Quikfair only. I think another couple nights this week and I'll have it to a point that I'm satisfied with moving on to a couple coats of primer. I will need to make some strakes as well as I've chosen to add a couple strakes vs a skeg. It's mostly to attempt to avoid adding as much depth as possible, but still attempt to add some level of control to the hull.
I've also made some purchases for the boat. I've been watching FB marketplace for certain items to try to save a bit of money. I've gotten a poling platform and a 55lb bow mount trolling motor recently for 400 each. The poling platform is on the tall side as it came off a bigger boat, so I will probably cut it down and have pads welded back on. The trolling motor has a bad copilot module, but I plan to upgrade to ipilot anyway which removes the copilot module. As long as that's the only thing wrong with it I'll be golden. I also bought a 5gal tank from Boyd's in Ocala. Got the "custom" feature of a filler hose neck vs the stock item with a threaded cap neck. I've converged on a center console design where the tank will be under the fwd seat that will be part of the console.
Here are a few WIP pics from this weekend. I'm even closer now than I was when these were taken.
Re: Cameron's FS14LS+5%
Posted: Tue Jan 26, 2021 4:50 pm
by VT_Jeff
Those fairing photos are making me (not) nostalgic!
Progress looks great. Nice work holding out for the tank with the filler neck.
I'm not adding any strakes/keel but I considered the same thing you are planning: strakes that will not add depth. Interested to see how you do those.
Re: Cameron's FS14LS+5%
Posted: Wed Jan 27, 2021 12:40 pm
by bamaguy0
VT_Jeff wrote: ↑Tue Jan 26, 2021 4:50 pm
Those fairing photos are making me (not) nostalgic!
Progress looks great. Nice work holding out for the tank with the filler neck.
I'm not adding any strakes/keel but I considered the same thing you are planning: strakes that will not add depth. Interested to see how you do those.
It's funny the levels of enthusiasm that I've went through while trying to fair. I started the new year with a hard push to get it done, then hit a wall feeling like there was no end in sight, but now I'm so close I'm excited again!
The current plan for the strake right now will include a 1"x1"x8' angle aluminum and using that to form it. I'll probably make it out of a mixture of graphite/epoxy(for the sharp edge), milled fiber/epoxy, and strands of fiberglass to give it some longituidnal strength.
Re: Cameron's FS14LS+5%
Posted: Wed Jan 27, 2021 12:49 pm
by VT_Jeff
bamaguy0 wrote: ↑Wed Jan 27, 2021 12:40 pm
It's funny the levels of enthusiasm that I've went through while trying to fair. I started the new year with a hard push to get it done, then hit a wall feeling like there was no end in sight, but now I'm so close I'm excited again!
Nice work getting your mind right and getting back to it. I'll admit that staring at and running my hand over my smooth hull/paint job is a favorite hobby. One of my myriad shortcomings.
bamaguy0 wrote: ↑Wed Jan 27, 2021 12:40 pm
The current plan for the strake right now will include a 1"x1"x8' angle aluminum and using that to form it. I'll probably make it out of a mixture of graphite/epoxy(for the sharp edge), milled fiber/epoxy, and strands of fiberglass to give it some longituidnal strength.
I like it, that's gonna be bomber!
Re: Cameron's FS14LS+5%
Posted: Sat Jan 30, 2021 5:22 pm
by bamaguy0
I think I've gotten the boat faired as least well enough that I'm OK with it. I'll work on it a little more once I get a couple coats of primer on it, but for now I'm working on the strakes.
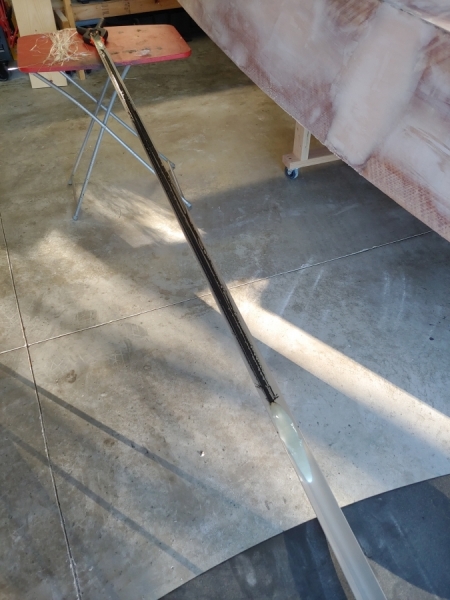
Tried making my first one last night and it did not end well for some reason.

I poured some thick milled fiber/epoxy dams on both ends and then filled the bottom of the angle with the graphite powder/epoxy mix. I'd say it was pourable but not brushable as far as thickness went. You can see the strands of fiberglass that I pulled out of scrap pieces of fabric to lay in as well. I let it gel in this setup for a couple hours.
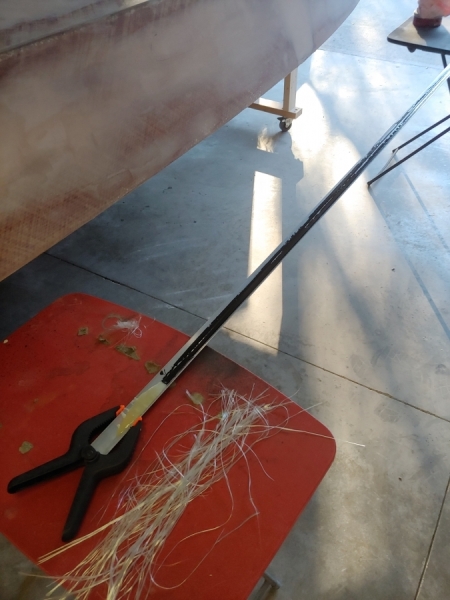
I came back and laid in the fiberglass. Not super packed, but 3-4 strands on top of the graphite/epoxy mix with generous overlap, most of the time about half the length of the next strands. After that I poured a fairly runny mix of milled fiber/epoxy over it all until I got it to a level I was happy with. Photo was a few hours after pouring and I noticed a lot of bubbles.
This morning it was solid, but tacky, like I could impress fingerprints in it still. And the bubbles were still there. I left it to sit all day. The lows last night were in the 50s and high today was 70. This afternoon, about 24 hours after I started it was still solid, but rubbery. I was able to peel it out, quite literally. It basically double backed on itself to peel out of the angle. I'll leave it to sit on the boat another day to see if it'll kick, but I think something was up with my mixture. Even the cups I mixed from were still kinda jelly. This hasn't happened to me before. I know I used the correct mixture because I have the pump heads for the jugs of epoxy. Temps weren't the most ideal for slow hardener, but I thought it would still cure at these temps and duration. Maybe not? It's been a while since I've used the epoxy for anything since I've been fairing since October/November with Quikfair.
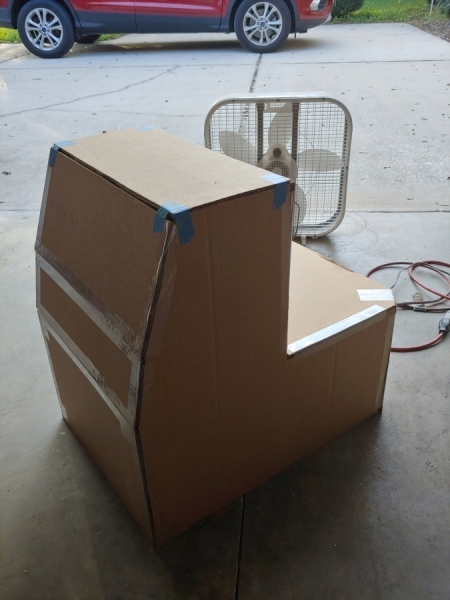
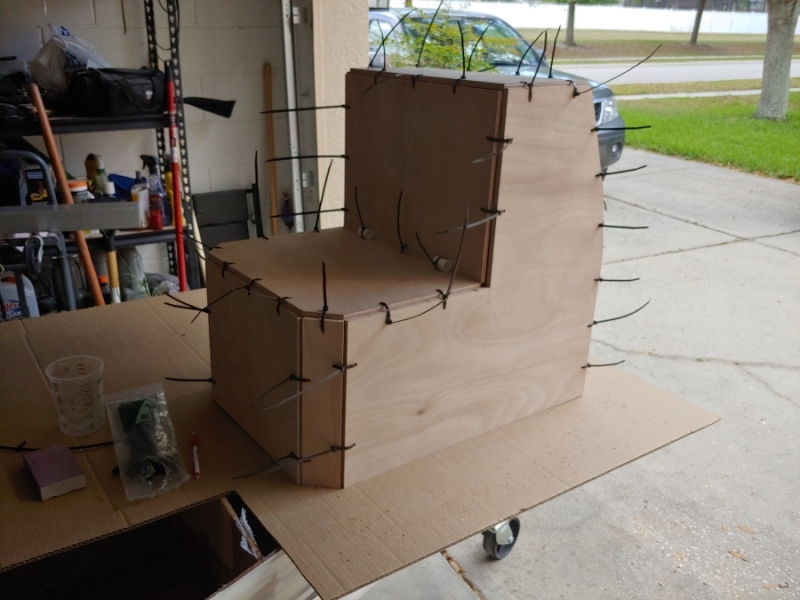
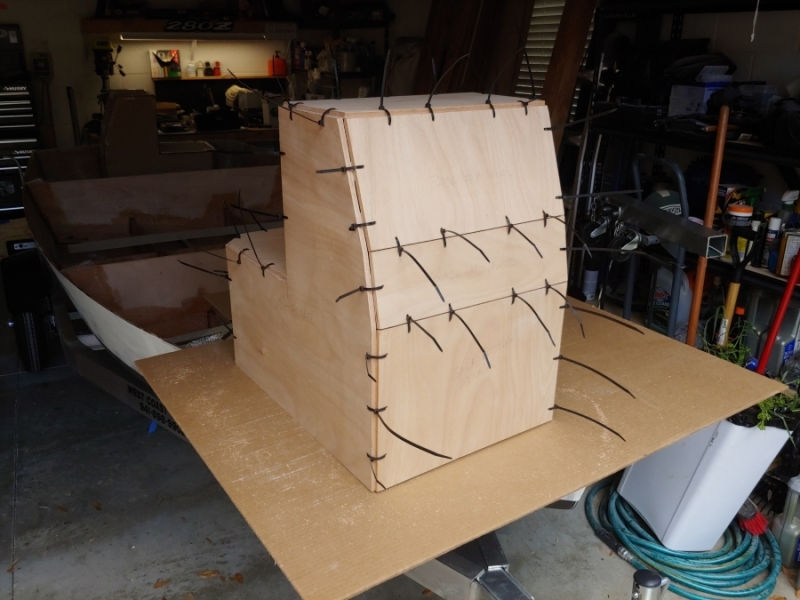
Aside from that, I mocked up the console that I designed out of cardboard. I think it will work out pretty well.
Re: Cameron's FS14LS+5%
Posted: Sat Jan 30, 2021 6:56 pm
by VT_Jeff
A heat gun may help with those bubbles.
Re: Cameron's FS14LS+5%
Posted: Sat Jan 30, 2021 7:15 pm
by bamaguy0
Yeah, I wasn't too concerned about them because that's the bonding side of the strake. Just wasn't sure if that was indicative of something gone wrong.
I'll try again closer to next weekend. The highs are supposed to be near 80 later in the week. I'll also need to get more aluminum. I bent this one trying to get the strake out.
Maybe I'll go ahead with primer application tomorrow. I plan on digging the strake bonding area out to get back to bare fiberglass anyway. I'll have to fair that back in after they're bonded.
Re: Cameron's FS14LS+5%
Posted: Sat Jan 30, 2021 7:36 pm
by VT_Jeff
Are you using packing tape on the inside of the aluminum?
Re: Cameron's FS14LS+5%
Posted: Sat Jan 30, 2021 7:52 pm
by bamaguy0
I didn't this time. I tried waxing it. I'll be using packing tape next time.

Re: Cameron's FS14LS+5%
Posted: Sat Jan 30, 2021 11:24 pm
by Fuzz
I built spray rails for my dory the same way. When I first pulled them out of the angle iron they were pretty flexible. Made it easy to fit them to the style line
I would think you are ok and they will cure more as time goes by.
Re: Cameron's FS14LS+5%
Posted: Sun Jan 31, 2021 9:47 am
by bamaguy0
It appears you are correct. It's still not completely hard but has definitely stiffened up overnight.
We'll chalk this one up as a trial run and move forward.
Re: Cameron's FS14LS+5%
Posted: Fri Feb 05, 2021 9:05 am
by bamaguy0
I was able to apply a coat of primer to the hull on Sunday. I was going for two coats, but noticed some pinholes once I started applying so I'm going to correct those before applying the 2nd coat.
Temps cooled off this week with even some frost a couple mornings. I didn't do any work outside in the evenings, but made a dent in creating a wiring diagram so I can start ordering materials for that. We'll be back in the upper 70's today so I'll be working on filling the holes and making strakes this weekend.
Re: Cameron's FS14LS+5%
Posted: Fri Feb 05, 2021 9:12 am
by VT_Jeff
bamaguy0 wrote: ↑Fri Feb 05, 2021 9:05 am
I was able to apply a coat of primer to the hull on Sunday. I was going for two coats, but noticed some pinholes once I started applying so I'm going to correct those before applying the 2nd coat.
Temps cooled off this week with even some frost a couple mornings. I didn't do any work outside in the evenings, but made a dent in creating a wiring diagram so I can start ordering materials for that. We'll be back in the upper 70's today so I'll be working on filling the holes and making strakes this weekend.
Damn, that's looking super smooth! Upper 70's? Y'all are spoiled!
Re: Cameron's FS14LS+5%
Posted: Fri Feb 05, 2021 9:41 am
by Jeff
Nice!!! Jeff
Re: Cameron's FS14LS+5%
Posted: Fri Feb 19, 2021 12:45 pm
by bamaguy0
Progress update!
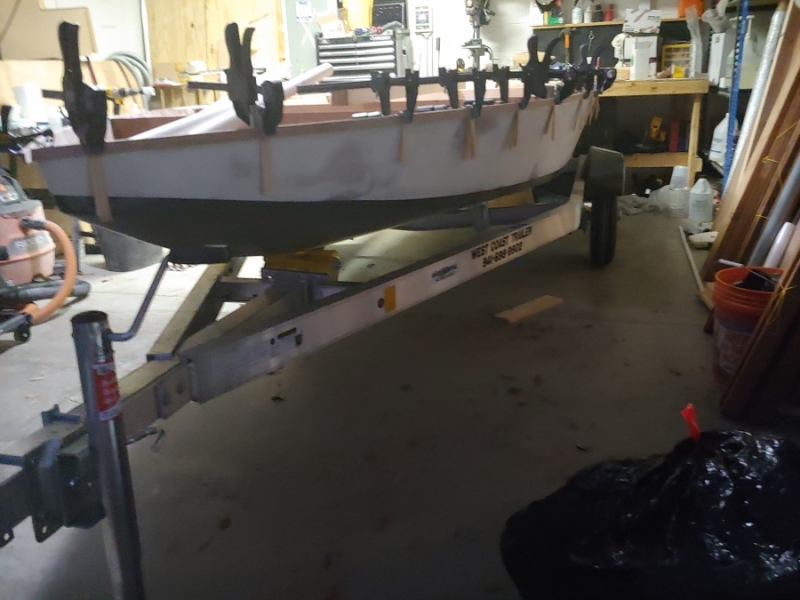
So since last update where I had 1 coat of primer, I filled some pinholes, smoothed those out, applied 2 coats of primer, sanded that smooth then bonded strakes. While the strakes cured I also filled a few low spots that were highlighted during sanding the primer. I sprayed a mist of black spray paint down and sanded that off. That really highlighted the low spots.
Because I wanted a good bond for the strakes, I first laid out an area that the strakes were going to go. I sanded that area down to ensure I was at or close to fiberglass. Since I had a significant dip between Frame D and the Transom I had to remove a good amount of filler. In order to keep the Strakes at the appropriate height, I applied a thick mixture of epoxy and milled fiber into the trough I made and let that set for a few hours. After it had started to harden, but was still tacky, I then bonded the strakes on top of it.

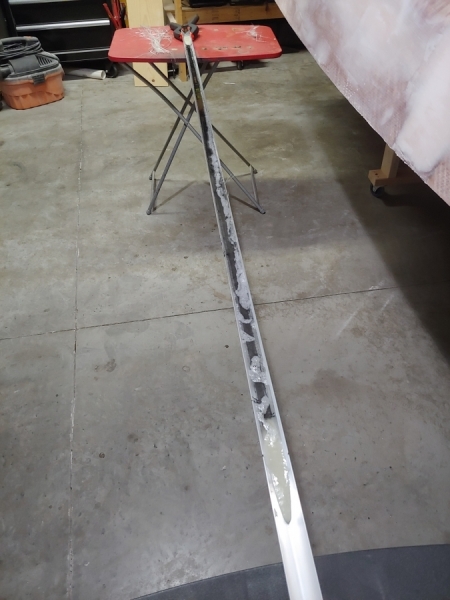
I was initially planning longer strakes. These were my 2nd attempt after the first didn't end well and cured eventually. This 2nd shot I used a 4ft section of angle aluminum. After I removed them from the aluminum, I set the aluminum up on an angle to try to make a taper section. This did not go well. After removal I just could not get them to line up with the straight sections in a manner that I thought would be worth the time and effort. I scrapped those pieces and only bonded the original straight strakes that I made. Time will tell if it's enough.
After the bond cured, I began fairing them in. I sanded away more than just the bond area, so I had to fill that back in plus just standard filleting of the strakes to the body.
Last night, I decided that the weather and temperatures this weekend wasn't going to be suitable for applying the graphite. I went ahead and powered thru it overnight and I think it turned out OK. I had a lot of roller fuzz in the graphite which I wetsanded down at least a little bit today.
Photos pre-sanding
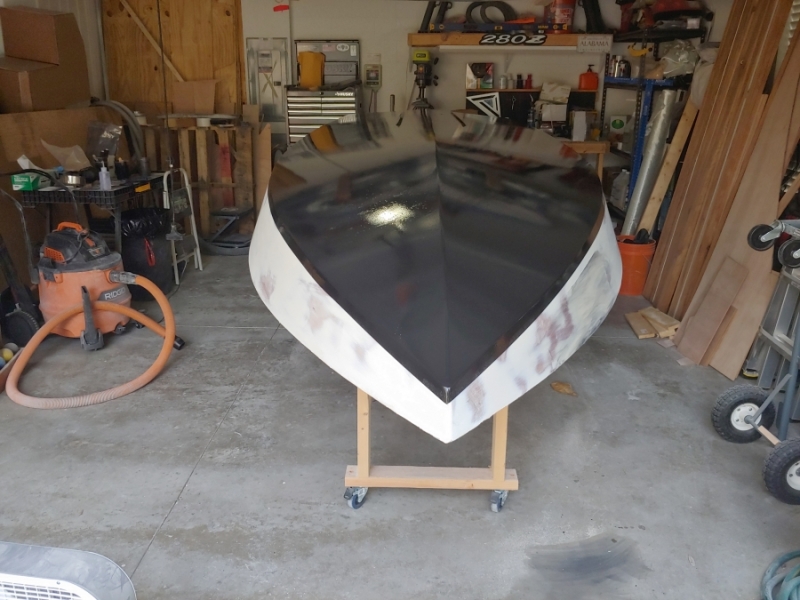
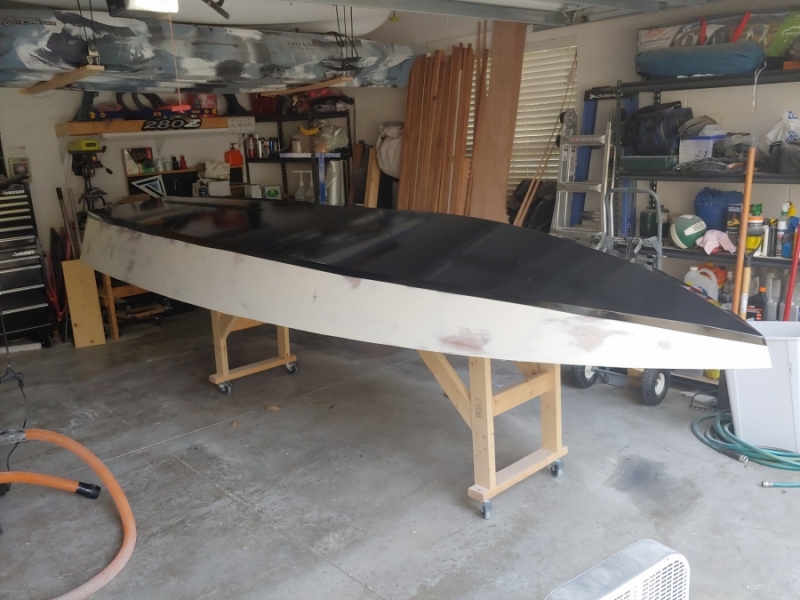
SHINEEEEE! Plus a few bits of fuzz...

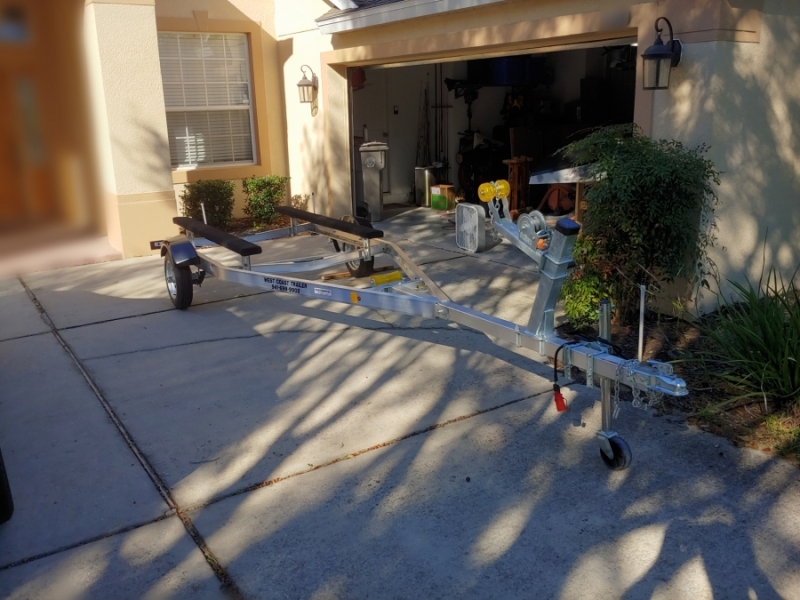
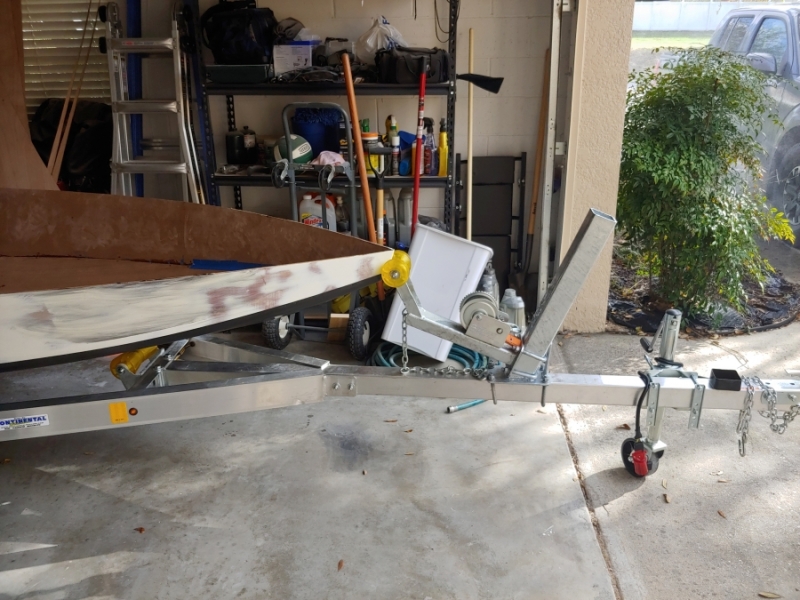
Another reason that I wanted to push through last night was that I had set a goal earlier in the week of getting the graphite done and flipping the boat this weekend. I'll be heading to Port Charlotte to pick up a brand new Continental A1515 trailer tomorrow. Will be flipping tomorrow or Sunday. We'll see!
I know I'm opening myself up for additional work by having to flip it back over later for painting, but I don't trust myself to have the outside done and pristine when I still need to apply the rubrails and work on the inside. I'm also not confident enough in my sheer line to try to apply the rubrails in this orientation. It'll be fiiiine. At least that's what I keep telling myself.
Re: Cameron's FS14LS+5%
Posted: Fri Feb 19, 2021 12:50 pm
by Jeff
Nice work!!! Jeff
Re: Cameron's FS14LS+5%
Posted: Fri Feb 19, 2021 1:41 pm
by VT_Jeff
bamaguy0 wrote: ↑Fri Feb 19, 2021 12:45 pm
Progress update!
That strake business sounds like it will be fun to look back on. I hope they perform for you for the headaches they caused. Graphite job looks great, I'll be interested to see how the wet-sanding changes/improves it, and if you'll have to add another coat afterwards.
Good news in the trailer, I'm picking mine up tomorrow as well.
Re: Cameron's FS14LS+5%
Posted: Fri Feb 19, 2021 2:46 pm
by bamaguy0
I didn't grab any photos of it after. Guess I could...
I didn't really do a full flattening of all the bumps and ridges. Just a general softening. I plan on primer/paint for the bottom at a later point. I hit it with 220 overall and what was more stubborn I came back and hit locally with 120. I used some scotchbrite after that. All with water. It just kinda has a dull glean to it now. I don't plan on applying more since it's not my finish for the bottom.
Re: Cameron's FS14LS+5%
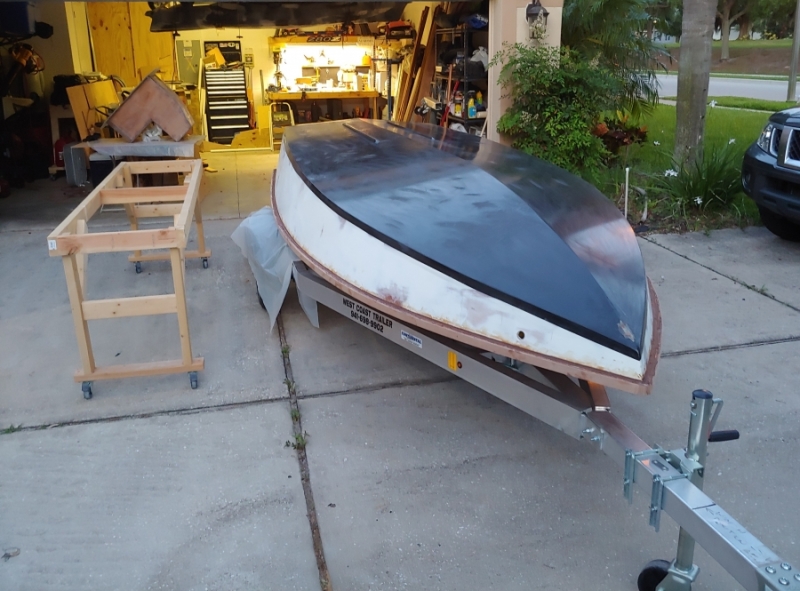
Posted: Sat Feb 20, 2021 5:05 pm
by bamaguy0
Trailer!
Flipping soon!
Re: Cameron's FS14LS+5%
Posted: Sat Feb 20, 2021 5:15 pm
by VT_Jeff
bamaguy0 wrote: ↑Sat Feb 20, 2021 5:05 pm
Trailer!
Flipping soon!
What, no salt? You got gipped!
Re: Cameron's FS14LS+5%
Posted: Sat Feb 20, 2021 5:18 pm
by VT_Jeff
We are both gonna need to turn our winch stands upside down.
Re: Cameron's FS14LS+5%
Posted: Sat Feb 20, 2021 5:33 pm
by bamaguy0
VT_Jeff wrote: ↑Sat Feb 20, 2021 5:18 pm
We are both gonna need to turn our winch stands upside down.
So I'm wondering about that. I know the winch will basically be slammed to the tongue. You put your bow eye on the more vertical edge of the bow. Im wondering if it would be better a little further aft on the other edge. I think if I do that it won't need to be flipped, but I don't know yet if that would have any other adverse side affects.
Re: Cameron's FS14LS+5%
Posted: Sun Feb 21, 2021 4:56 pm
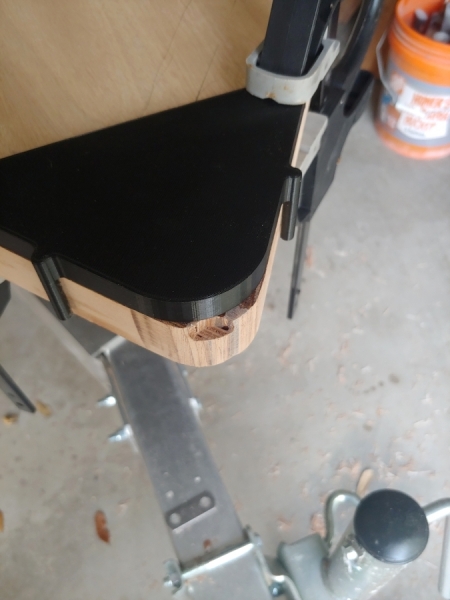
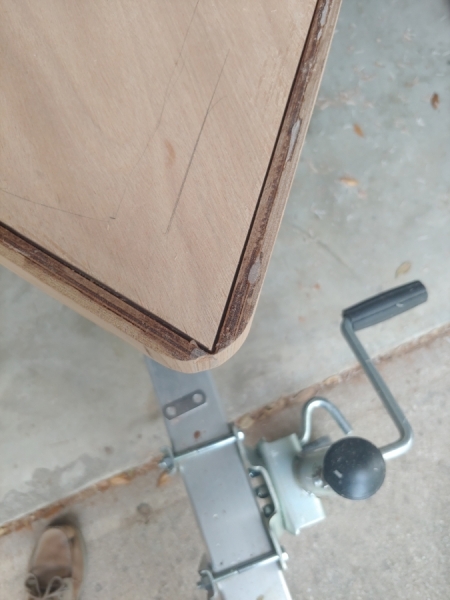
by bamaguy0
Got the boat flipped over last night so I was fiddling with that some today. A swing away hitch is a must ASAP. I think even then I'm going to have to rethink my garage layout a bit. That workbench behind the boat won't work once I hang a Tilt n Trim bracket and the motor back there. It's much too deep.
VT_Jeff wrote: ↑Sat Feb 20, 2021 5:18 pm
We are both gonna need to turn our winch stands upside down.
I think this will work. It's as low on the post as it can go. I think I can lower the roller about an inch by cutting the fork down and drilling new holes. I like this setup over flipping it over for sure.
Re: Cameron's FS14LS+5%
Posted: Sun Feb 21, 2021 5:52 pm
by VT_Jeff
bamaguy0 wrote: ↑Sun Feb 21, 2021 4:56 pm
Got the boat flipped over last night so I was fiddling with that some today. A swing away hitch is a must ASAP. I think even then I'm going to have to rethink my garage layout a bit. That workbench behind the boat won't work once I hang a Tilt n Trim bracket and the motor back there. It's much too deep.
VT_Jeff wrote: ↑Sat Feb 20, 2021 5:18 pm
We are both gonna need to turn our winch stands upside down.
I think this will work. It's as low on the post as it can go. I think I can lower the roller about an inch by cutting the fork down and drilling new holes. I like this setup over flipping it over for sure.
Congrats on the flip, that has to feel great! Roller does look good there. I'm thinking maybe remove the roller altogether and replace with 2 carpeted boards at 90 degrees like ski boat trailers use. Your idea to move the bow eye to the keel is interesting but I may worry about it catching a keel roller, you will have a better sense of that with your hull on the trailer, maybe it wont come close.
Re: Cameron's FS14LS+5%
Posted: Sun Feb 21, 2021 6:00 pm
by Jeff
Congrats on the flip!!!! Jeff
Re: Cameron's FS14LS+5%
Posted: Fri Feb 26, 2021 8:36 pm
by bamaguy0
Re: Cameron's FS14LS+5%
Posted: Fri Feb 26, 2021 10:14 pm
by VT_Jeff
Looks great from here! Marathon session to get that done?
Re: Cameron's FS14LS+5%
Posted: Fri Feb 26, 2021 10:22 pm
by bamaguy0
Yup. Been out of town for work this week, so I had nothing to do but think about it. Started around 8 this morning and finished around 5:30. I wet out the seams, applied my fillets, taped, then covered. My back's worn out that's for sure. The trailer is just a tad low for working in all day and once everything is wetted out you can't prop up with your other hand.
Going kayaking at a local spring tomorrow, so we'll see if I can even roll out of bed by Sunday.
Re: Cameron's FS14LS+5%
Posted: Fri Mar 05, 2021 11:07 pm
by bamaguy0
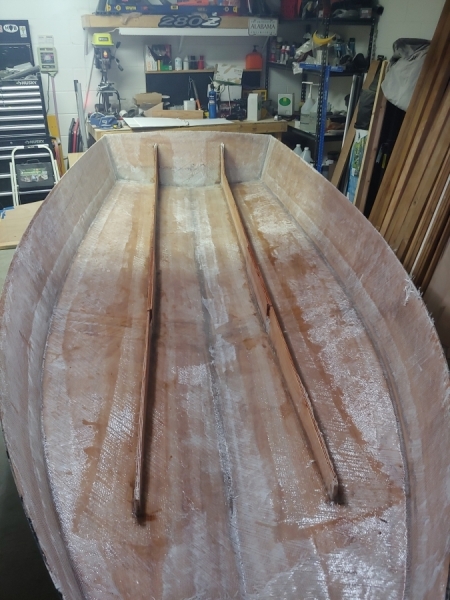
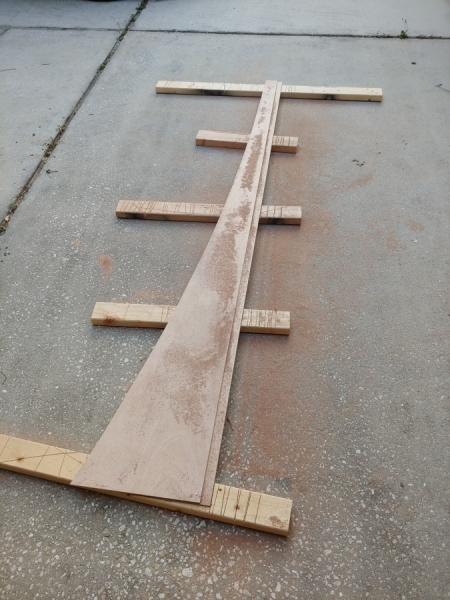
Glued and glassed the stringers in today.
Re: Cameron's FS14LS+5%
Posted: Sat Mar 06, 2021 6:43 am
by VT_Jeff
Looks great. That had to be another back breaker!
Re: Cameron's FS14LS+5%
Posted: Sat Mar 06, 2021 8:10 am
by bamaguy0
You're not wrong!
At least this time around I could put a hand down for support.
Re: Cameron's FS14LS+5%
Posted: Sun Apr 04, 2021 8:48 pm
by bamaguy0
Dang! It's been a month since I've posted an update. I think I'm just as far behind on VT_Jeff's build thread also...anyway...
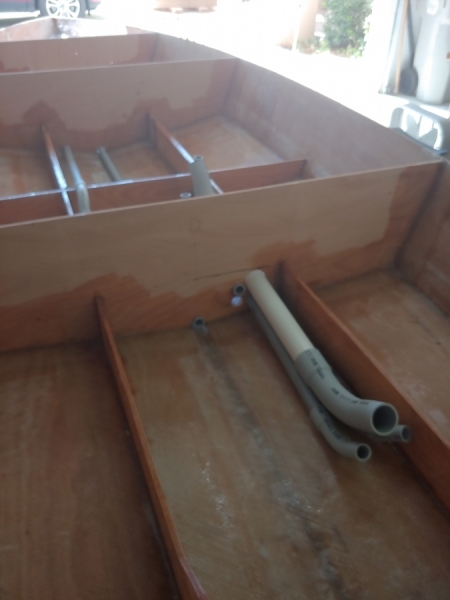
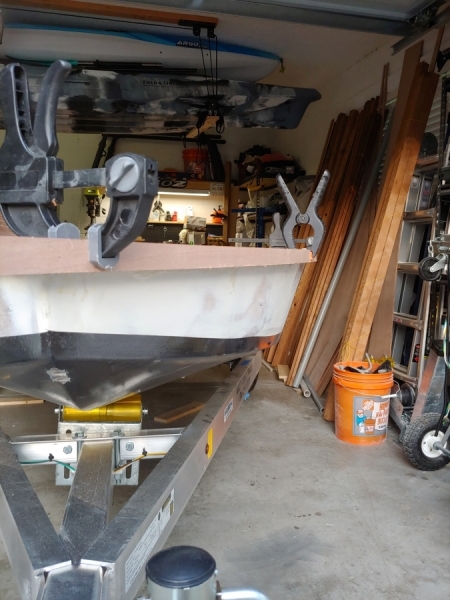
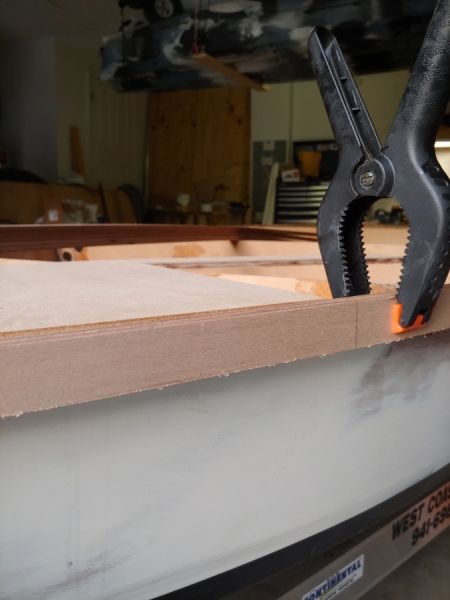
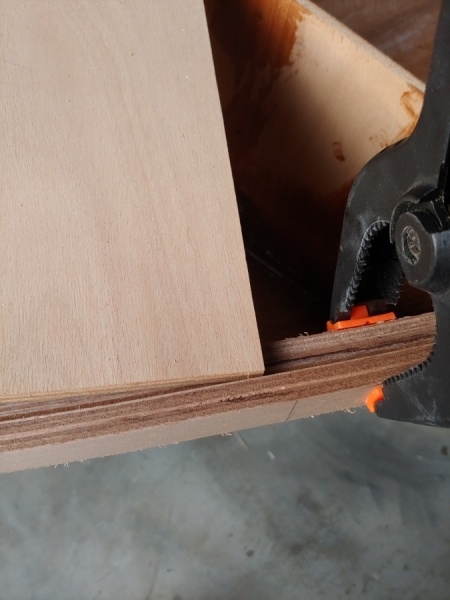
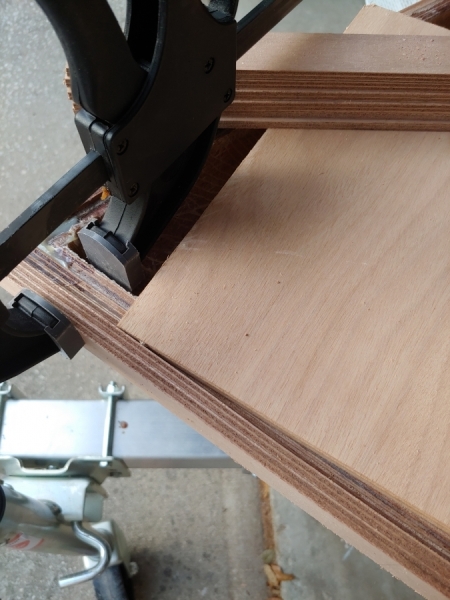
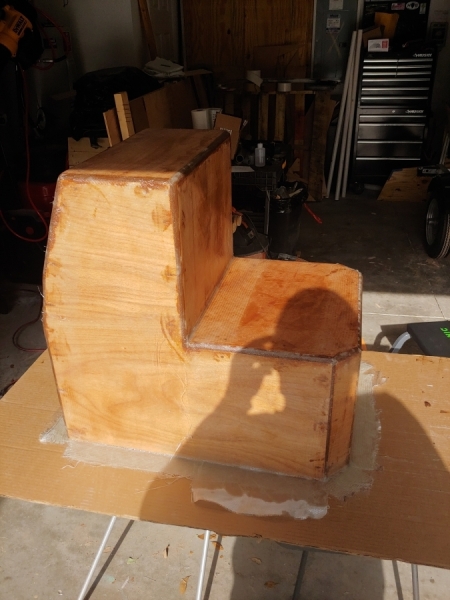
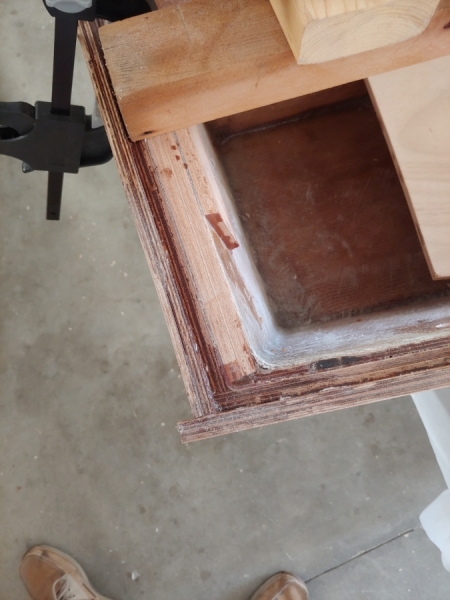
I had some family matters to attend to that took me away for 2 weeks, but I'm back at it as hard as ever. I got the Frames bonded and glassed in place. I've drilled the holes for the chase tubes to run to and fro. This weekend I also started the console. It's ready for the tack bonds and then glassing the seams. I plan to use the 6oz biax tape on the seams and then I have some 4oz woven to cover it with.
I think the next big push will be the rubrails and then flipping it back over for final paint. I'll probably work odd jobs in between.

Re: Cameron's FS14LS+5%
Posted: Sun Apr 11, 2021 8:50 pm
by bamaguy0
Good progress this week, mostly this weekend. Focus was on the rub rails, but worked on a couple other things as well.
I bonded the first layer of rubrail on each side. This was a tack bond to get it in place and then once it's all stacked up on there I'll create a generous fillet on the underside. I used Thixo Fast Cure from TotalBoat. I chose it due to the thick non sagging properties plus it's quick curing and comes in a caulk tube so it's super easy to apply. I clamped the strips in place, using construction shims to get them vertical and then spot bonded with the Thixo.
I'm very pleased with how it turned out. I used a laser level to establish a shear line reference and then laid the strip out to that on the starboard side. I know my boat is very level both directions, so then using the bonded starboard side, I set up the port side ensuring it was level across. I think this is the best I'm going to get and again I'm pretty pleased with it. I did noticed that my shear was wayyyy low in the center of the boat, so I'm glad I didn't just lay it up to the line the hull already had.

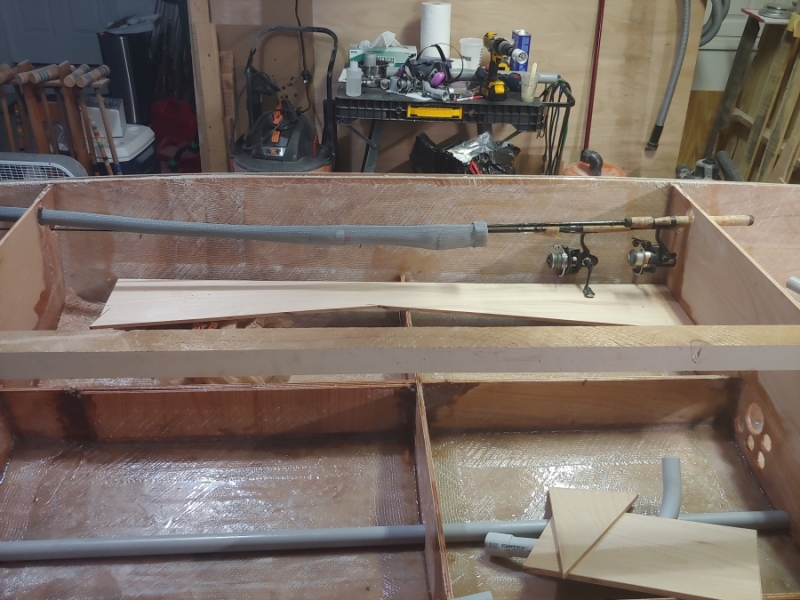
In other news, the console was taped. That didn't turn out quite as well because I got in a rush. I'm doing a little bit of rework with that before the final outside glass. Not sure if I'll glass the seams on the inside or not. I'll at least fillet but that may be as far as I go.
Decided on a rod storage method. With the shear so low it's hard to stack 2 spinning setups under the deck but I think it will be workable. I'll run 1-1/4 PVC thru the holes as rod tubes. Forward tubes will need to be heated and bent to follow the shape of the bow.
Re: Cameron's FS14LS+5%
Posted: Sun Apr 11, 2021 9:21 pm
by Dan_Smullen
Nice touch with the shims and spot bonding. I tried to do all 3 layers in one session and it was hectic as hell.
With the flat shear, did you get away with straight strips, or did they match the contour of the top edge of the side panels?
Re: Cameron's FS14LS+5%
Posted: Sun Apr 11, 2021 9:34 pm
by bamaguy0
Yeah I knew since I was trying to get it level in 2 directions plus follow the curve of the hull trying to do more than a strip at a time wasn't going to be worth the hassle.
They are straight strips. The flat sheer plus shimming them to vertical calls for that. If one or the other weren't in play then curved probably would have been needed. Although I cut them thin enough they could have probably taken a small amount of vertical curvature with enough clamps.
Re: Cameron's FS14LS+5%
Posted: Sun Apr 11, 2021 10:14 pm
by Mojosmantra
Nice work Cameron. How deep are the rubrails? And what are you planing for the final finish?
Re: Cameron's FS14LS+5%
Posted: Mon Apr 12, 2021 10:05 am
by VT_Jeff
That's a great approach to those rubrails, Cameron. With that vertical strip in place, you'll be able to throw some decking on a use a flush-trim bit to fit it exactly. My strips were not vertical so that did not work for me, resulting in the need to fill small gaps here and there where my saw was lofting/tracing/cutting were less than perfect, aka, everywhere.
Your point about the sheer being low in the middle is a great point also: with your method, small variations in the flatness/sheer height are easily fixed by the strips which want to be horizontal anyway. My sheer, after applying the shaped, traced strips, while still upside down, ended up looking like the surface of Lake Ontario after a 3-day blow: wavy. took me a lot of planing and epoxy to get it flat.
Also, these flat-sheer boats should have a vertical rub rail anyway, imo, they look much better, I think Seaslug made the same observation.
Did you measure the angle and cut the shims to match at each location or just stick a few in here and there until it looked right?
I hope future builders of this design see your post and go with your approach.
Re: Cameron's FS14LS+5%
Posted: Mon Apr 12, 2021 11:18 am
by bamaguy0
Mojosmantra wrote: ↑Sun Apr 11, 2021 10:14 pm
Nice work Cameron. How deep are the rubrails? And what are you planing for the final finish?
They're 3/4 tall. My plan is to stack 2 6mm strips at that height. From there the deck will go directly on top and then another strip the total height(roughly 1-1/8) to cap it all off. I'll do a 1/8 round over on top and then install the smallest Taco Marine vinyl rubrail (1-1/16 x 11/16) on top of it all.
Re: Cameron's FS14LS+5%
Posted: Mon Apr 12, 2021 11:29 am
by bamaguy0
VT_Jeff wrote: ↑Mon Apr 12, 2021 10:05 am
That's a great approach to those rubrails, Cameron. With that vertical strip in place, you'll be able to throw some decking on a use a flush-trim bit to fit it exactly....
...Did you measure the angle and cut the shims to match at each location or just stick a few in here and there until it looked right?
I hope future builders of this design see your post and go with your approach.
Appreciate the kind words! I just used the construction shims from Home Depot/Lowes. They come in a pack of a dozen or so for a couple dollars. I did cut them in half both length and width wise then used the thinner ends. Most locations took 2 or 3 wedged together to get it right. The trick is to not stick them in to far and separate the strip from the hull, that's why it took stacking them most places. Clamping force can be dialed in as well to adjust the strips.
It was a trial and error kinda thing. Knowing my boat was fairly level both directions i used a small level to adjust the shims until they were close to vertical. There's some small variation down the length but the goal was to keep the bubble between the lines the entire length and I believe I achieved that. Placement was focused mostly on the curvature of the hull so I tried to focus a few extra clamps forward and then opened the spacing out further aft. I probably could have had a little more control with a few more clamps, but that was all I had and felt it was adequate without having too big of a stockpile after this project is over.
Re: Cameron's FS14LS+5%
Posted: Mon Apr 12, 2021 11:46 am
by VT_Jeff
bamaguy0 wrote: ↑Mon Apr 12, 2021 11:18 am
Mojosmantra wrote: ↑Sun Apr 11, 2021 10:14 pm
Nice work Cameron. How deep are the rubrails? And what are you planing for the final finish?
They're 3/4 tall. My plan is to stack 2 6mm strips at that height. From there the deck will go directly on top and then another strip the total height(roughly 1-1/8) to cap it all off. I'll do a 1/8 round over on top and then install the smallest Taco Marine vinyl rubrail (1-1/16 x 11/16) on top of it all.
You're making me think now, which is always dangerous.
I am currently planning on using a bright strip as the cap, which causes headaches in a few ways. It would be actually easier for me to add a plywood cap with a roundover, and then just attach my bright strip to that like Coach did on his SC16. I'm going to name this boat "RubRails" by the time it's over.
Re: Cameron's FS14LS+5%
Posted: Tue Apr 13, 2021 8:07 am
by bamaguy0
VT_Jeff wrote: ↑Mon Apr 12, 2021 11:46 am
bamaguy0 wrote: ↑Mon Apr 12, 2021 11:18 am
Mojosmantra wrote: ↑Sun Apr 11, 2021 10:14 pm
Nice work Cameron. How deep are the rubrails? And what are you planing for the final finish?
They're 3/4 tall. My plan is to stack 2 6mm strips at that height. From there the deck will go directly on top and then another strip the total height(roughly 1-1/8) to cap it all off. I'll do a 1/8 round over on top and then install the smallest Taco Marine vinyl rubrail (1-1/16 x 11/16) on top of it all.
You're making me think now, which is always dangerous.
I am currently planning on using a bright strip as the cap, which causes headaches in a few ways. It would be actually easier for me to add a plywood cap with a roundover, and then just attach my bright strip to that like Coach did on his SC16. I'm going to name this boat "RubRails" by the time it's over.
I can dig it! Seems like it'll make it a little cleaner.
Re: Cameron's FS14LS+5%
Posted: Sat Apr 17, 2021 8:23 pm
by bamaguy0
Progress this week was here and there. Working on several different little tasks mostly.
Earlier in the week, the 2nd rubrail layer went on. I ground a flat surface at the bow for the bow eye. After establishing a flat surface, I created a wider flat surface with epoxy using a trimmed popsicle stick wrapped in packing tape for the shape. When I flip it over, I'll smooth out the transition a bit.
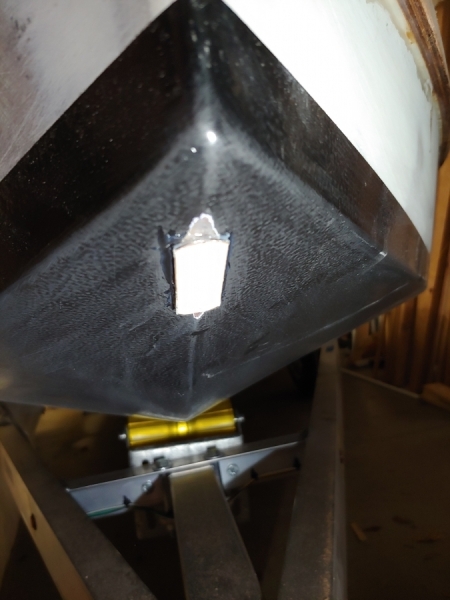
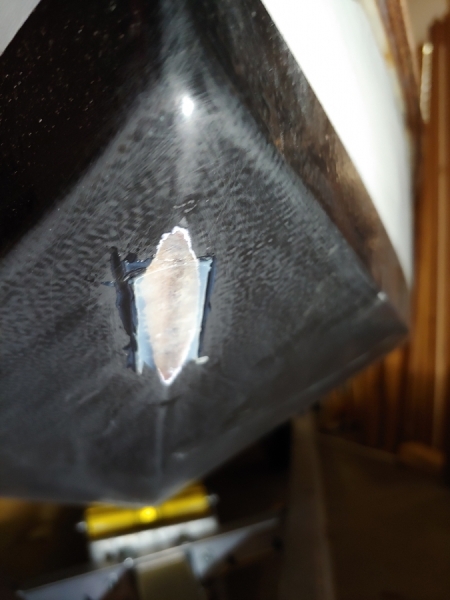
Friday was a "holy day" where I started putting holes in the boat. Drain plug, baitwell fittings, transom and bow eyes, and 4 holes for a PT-35 Tilt n Trim bracket. Bilge pump fitting and nav lights are all that's left.
I did set the motor on the transom for a bit while trying to figure out where to locate the Tilt n trim setup. Had to snap a photo.
Also got the repairs on the console smoothed out mostly, and trimmed and darted a piece of 4oz woven fabric to cover it with.
Today the wife and I took a trip over to Kennedy Space Center for the day so I didn't get to do a whole lot, but I did cutout the deck pieces and ripped the next stack of rubrail strips. I decided to go with 2 more layers so I'll have a full inch off the hull sides. I like the flared look and maybe it'll help keep the ride a little drier as well.
I know Trent was interested to see what my rubrail stackup would look like finished so I mocked it up for some photos. I had already put the deck pieces away so a scrap piece will suffice for a show n tell.
Thought I'd show off what I'm working with here. Table saw is something that I haven't had the luxury of owning. Sure would have been nice while ripping the rubrail strips, but an extra piece with a known straight edge and a few nails will work in a pinch.
Goals for Sunday will be to drill the bilge pump thru hull fitting and nav light holes, start bonding the next layer of rub rail, and cover the console with the 4oz glass. Probably have to work in some yard work as well.
Targeting the flip for next weekend.
Re: Cameron's FS14LS+5%
Posted: Sun Apr 18, 2021 7:16 pm
by bamaguy0
Remainder of the holes drilled and started the next layer of rubrail on the starboard side. That's enough for today.
If I can get the holes filled back in with epoxy and all of the rubrail pieces on then I should be good for the flip this weekend.
Question: Anyone blended in paint edges? What's the best way to make sure it looks smooth and continuous? I'm starting to realize that my work around the transom won't be done until the deck is installed and glassed. I feel like I'm going to be better off not painting the whole transom and painting it with the deck later. I'm trying to figure out whats the best to keep from having a step where the original paint ends and where newer paint would begin. Is the topside paint easily sandable? Could I taper blend it?
Re: Cameron's FS14LS+5%
Posted: Sun Apr 18, 2021 7:24 pm
by VT_Jeff
bamaguy0 wrote: ↑Sun Apr 18, 2021 7:16 pm
Remainder of the holes drilled and started the next layer of rubrail on the starboard side. That's enough for today.
If I can get the holes filled back in with epoxy and all of the rubrail pieces on then I should be good for the flip this weekend.
Question: Anyone blended in paint edges? What's the best way to make sure it looks smooth and continuous? I'm starting to realize that my work around the transom won't be done until the deck is installed and glassed. I feel like I'm going to be better off not painting the whole transom and painting it with the deck later. I'm trying to figure out whats the best to keep from having a step where the original paint ends and where newer paint would begin. Is the topside paint easily sandable? Could I taper blend it?
Great progress Cameron. I'm interested to see how the mounting of the bow eye ultimately works out, its bold!
I am patching paint on my transom and had the same concern about steps. I feathered it way back and hit it with some quickfair to ensure a smooth transition. I'll let you know how it ends up.
Re: Cameron's FS14LS+5%
Posted: Sun Apr 18, 2021 8:48 pm
by bamaguy0
As things are starting to come together I have had to work in some audibles on the transom.
First was the shape. My Tohatsu 25's short shaft comes in at 17. I built the transom based on that. Well I later decided to pick up a power tilt n trim setup because fishing in the flats I will need to lift the motor a good bit I imagined. Manually lifting it will get old, especially with a poling platform in the way.
The PT-35 raises the motor 3-11/16" above the transom and has a 5" setback. I was ok with an inch or so rise above the bottom of the hull with a 5" setback, but not a nearly 4" rise.
So trimming I went. The transom height is now below deck level. Luckily I was already planning a motorwell, so I'll have a dip at the motorwell, but the rest of the transom will be deck height.
This is where my predicament comes in. I think now in order to properly transition the deck to the transom, I need to wrap the rubrail around at least until the dip in the transom. This will also ensure I can hide the transition of the hull color and the deck color behind the vinyl rubrail.
Most importantly is the deck glassing because that will need to wrap around slightly and if the rubrail is there then I can terminate it how I plan to everywhere else along the deck.
It's more work, and might set me back another week, but I think I need to try this out and see how it looks.
Oh, in my trimmings I cut the deck portion parallel to the deck and in the dip, tried cutting square to the transom. That didn't go as well as planned. So now I have a transom that's cut a little too shallow on the inside. I wasn't planning on adding the clamping board any longer since I'm adding the power tilt setup, but it seems the easiest way to restablish the transom shape I'm looking for. It will only be the width of the motorwell though. I'll get some photos of my boo boo and how I plan to fix it in the coming days.
Re: Cameron's FS14LS+5%
Posted: Mon Apr 19, 2021 4:03 pm
by Mojosmantra
Nice work Cameron and great progress. I really appreciate the rubrail/deck photos - really helps to see it. I was expecting that it might extend the bow some similar to seaslug's method, but I guess laying them vertical averted that. I think the 4-ply will turn out to be a good move.
I will have a similar bow eye placement as yours - mainly because mine needs to connect to the deck cleat so I can use the cleat to lift the boat with a davit. I need some depth to make that connection work.
Looking forward to the transom photos because I'm having some difficulty visualizing what's going on there.
Re: Cameron's FS14LS+5%
Posted: Mon Apr 19, 2021 4:36 pm
by VT_Jeff
Mojosmantra wrote: ↑Mon Apr 19, 2021 4:03 pm
I will have a similar bow eye placement as yours - mainly because mine needs to connect to the deck cleat so I can use the cleat to lift the boat with a davit. I need some depth to make that connection work.
Very interesting idea!
Mojosmantra wrote: ↑Mon Apr 19, 2021 4:03 pm
Looking forward to the transom photos because I'm having some difficulty visualizing what's going on there.
Very Ditto! I can't picture it without pictures.
Re: Cameron's FS14LS+5%
Posted: Mon Apr 19, 2021 6:15 pm
by bamaguy0
Let's see if this works...a summary until I snap some photos.
Previously, my transom was above the deck so the outcome would be more like this.

But now I think it's gonna end up looking more like this.

Re: Cameron's FS14LS+5%
Posted: Mon Apr 19, 2021 7:36 pm
by VT_Jeff
Got it. Pretty similar to any of the larger designs here. I have to think you could scab some wood on your bad deck cut if you wanted to avoid adding a transom double, but either is a fine choice.
Re: Cameron's FS14LS+5%
Posted: Mon Apr 19, 2021 9:10 pm
by bamaguy0
Yeah I thought about an epoxy paste buildup, but adding the 3rd piece that would otherwise be the "clamping board" is going to be easiest in this case.
Re: Cameron's FS14LS+5%
Posted: Mon Apr 19, 2021 9:28 pm
by bamaguy0
Port side rubrail 3rd strip bonded on tonight.
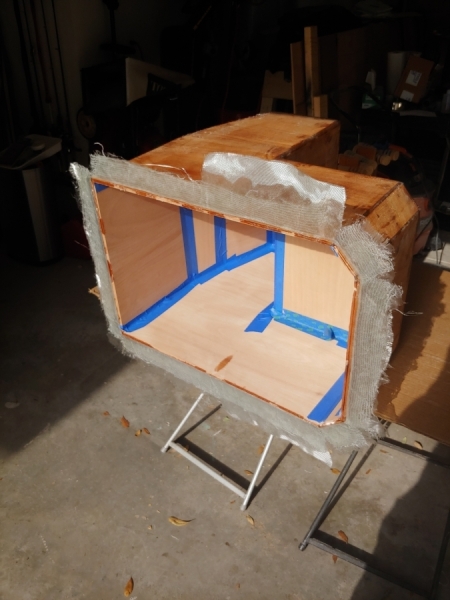
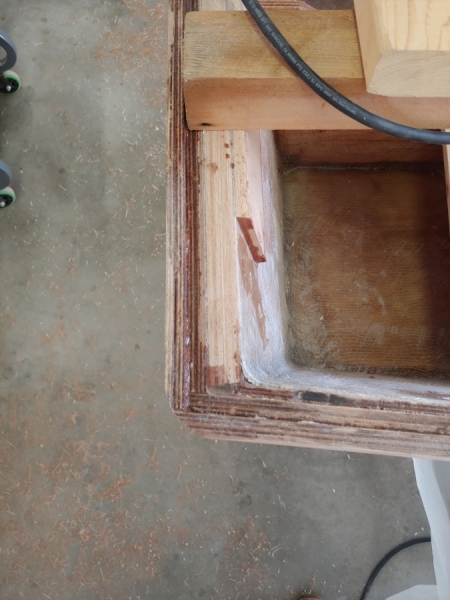
Also glassed the console with 4oz woven fabric. We'll see how that turns out tomorrow. I tried forming a flange on the bottom by glassing it on top of some plastic and running it long. I put strips of 12oz biaxial down along the bottom first to give it a little bit of structure and then the 4oz on top of it.
Re: Cameron's FS14LS+5%
Posted: Tue Apr 20, 2021 7:46 pm
by bamaguy0
Final starboard side rubrail strip went on!
Thought my console turned out pretty good as well. Covered the entire thing with 1 continuous piece of 4oz woven. That was a feat! I'll fillet the inside and do a full coat of epoxy then work on building up the flange some more with some chopped strand mat I have lying around. Theres a little waviness in the flange so I'll have to do some sanding to smooth it out once built up. Nothing I can't handle though.
Re: Cameron's FS14LS+5%
Posted: Tue Apr 20, 2021 9:34 pm
by TomW1
Looking good, smart move with the 12oz. Tom
Re: Cameron's FS14LS+5%
Posted: Wed Apr 21, 2021 3:30 pm
by VT_Jeff
bamaguy0 wrote: ↑Tue Apr 20, 2021 7:46 pm
Final starboard side rubrail strip went on!
Thought my console turned out pretty good as well. Covered the entire thing with 1 continuous piece of 4oz woven. That was a feat! I'll fillet the inside and do a full coat of epoxy then work on building up the flange some more with some chopped strand mat I have lying around. Theres a little waviness in the flange so I'll have to do some sanding to smooth it out once built up. Nothing I can't handle though.
Great idea/execution. You going with wheel steering or is this just a grab-console/seat? I know we talked about it but don't recall the final decision on it.
Re: Cameron's FS14LS+5%
Posted: Wed Apr 21, 2021 3:52 pm
by bamaguy0
Yeah full blown steering and throttle.
Have a Seastar NFB helm and Seastar Xtreme Throttle already.
Even modeled them up in Fusion360 to help size the console.
Re: Cameron's FS14LS+5%
Posted: Wed Apr 21, 2021 4:09 pm
by VT_Jeff
bamaguy0 wrote: ↑Wed Apr 21, 2021 3:52 pm
Yeah full blown steering and throttle.
Have a Seastar NFB helm and Seastar Xtreme Throttle already.
Even modeled them up in Fusion360 to help size the console.
Shifter or just throttle?
Re: Cameron's FS14LS+5%
Posted: Wed Apr 21, 2021 4:12 pm
by bamaguy0
Oh yes throttle and shift control.
Re: Cameron's FS14LS+5%
Posted: Wed Apr 21, 2021 4:26 pm
by VT_Jeff
bamaguy0 wrote: ↑Wed Apr 21, 2021 4:12 pm
Oh yes throttle and shift control.
Wow. The honda units I've looked at are huge compared to that. Good to know!
Re: Cameron's FS14LS+5%
Posted: Wed Apr 21, 2021 9:02 pm
by Dan_Smullen
bamaguy0 wrote: ↑Wed Apr 21, 2021 3:52 pm
Even modeled them up in Fusion360 to help size the console.
DIY Builder’s secret weapon!
Re: Cameron's FS14LS+5%
Posted: Wed Apr 21, 2021 9:12 pm
by bamaguy0
Dan_Smullen wrote: ↑Wed Apr 21, 2021 9:02 pm
bamaguy0 wrote: ↑Wed Apr 21, 2021 3:52 pm
Even modeled them up in Fusion360 to help size the console.
DIY Builder’s secret weapon!
Yup, I bought them way early in the build process just so I could model them.
Re: Cameron's FS14LS+5%
Posted: Thu Apr 22, 2021 10:28 am
by VT_Jeff
bamaguy0 wrote: ↑Wed Apr 21, 2021 9:12 pm
Yup, I bought them way early in the build process just so I could model them.
I'm going to need to take a fresh look at converting my tiller motor to remote controls. All I'm doing out of the gate is remote steering.
Re: Cameron's FS14LS+5%
Posted: Thu Apr 22, 2021 7:06 pm
by bamaguy0
Rubrails are DONE! At least the sides are that is. I'm bonding the Transom Clamp board in place and then I'll work on bonding the strips around the back.
Have to drill 2 more stern eye holes because the rub rail will now be in the way.
Paint ordered. Got the EZPoxy from Petit with a can of the Performance Enhancer. Going with a Platinum hull and white deck. I think it's gonna look a little something like this.
Probably also work on the console in the mean time as well.
Photos later.
Re: Cameron's FS14LS+5%
Posted: Thu Apr 22, 2021 8:30 pm
by bamaguy0
Re: Cameron's FS14LS+5%
Posted: Thu Apr 22, 2021 10:55 pm
by Mojosmantra
Lookin' good Cameron. Wondering why you chose to go with EZPoxy? Paint has been one of the most confusing things for me.
Re: Cameron's FS14LS+5%
Posted: Thu Apr 22, 2021 11:45 pm
by TomW1
Looking good guy. The two part EZPoxy is supposed to be a good paint. Tom
Re: Cameron's FS14LS+5%
Posted: Fri Apr 23, 2021 7:08 am
by bamaguy0
Mojosmantra wrote: ↑Thu Apr 22, 2021 10:55 pm
Lookin' good Cameron. Wondering why you chose to go with EZPoxy? Paint has been one of the most confusing things for me.
It started with a color choice that I couldn't find anywhere else. Ocean Blue and Seattle Grey. That was my plan for a while, so I bought Petit primer and brushing thinner when I was fairing. After I decided to change colors I figured it would just be easiest to stick with Petit since I already have some Petit brand materials. I could have went anywhere for Platinum(kingston grey in other brands).
The other reason I liked the idea of EZPoxy was the additive that you can get with it. It doesn't really make it a true 2 part polyurethane since it's not required, but seems to get it closer to that performance level.
Cost is another factor. I really wanted to use the EMC Quantum paint, but couldn't justify the significant cost increase. Maybe next time around when I'm more experienced.
Re: Cameron's FS14LS+5%
Posted: Fri Apr 23, 2021 9:58 am
by VT_Jeff
bamaguy0 wrote: ↑Thu Apr 22, 2021 8:30 pm
Photos!
Well done on the rub rails, those really stack up nice, should give you some spray protection I would think. I may have some trailer envy as well. I wanted a sweet Alum trailer like that but cheap me said no way.
Re: Cameron's FS14LS+5%
Posted: Fri Apr 23, 2021 10:12 am
by bamaguy0
Brand new was 1220 out the door! I had similar sized Magic-Tilt galvanized quoted at like 1400. It was a no brainer for me. I had to go over 2 hours away to get it. Boat trailers are scarce in FL.
I will say I am not enthused about some of the welds or the wiring, but for the price I couldn't say no.
It's not that the welds are bad, but they made structural welds and then simply because there was a gap between the 2 channel pieces(diff size stock) they just filled it. I'm sure people who don't know any better asked for it, but what they don't realize is a glop of weld just to fill a gap like that will be more likely to crack than a simply functional one.
I'm considering rewiring the thing or at least wrapping the existing wiring with some chafing protection.
Re: Cameron's FS14LS+5%
Posted: Fri Apr 23, 2021 10:36 am
by Jaysen
On the EMC front... any idiot can make it look good by accident. That stuff is the “Pillsbury cinnamon roll” of paints. As a confirmed idiot I managed to get a solid finish by just following the directions. The times I tried to improve on the directions it went to hell-in-a-handbasket. If I ever get the nerve to paint the “big” boat I’ll wind up dropping the $$ on EMC again.
That said, once seen some stellar finish from Pettit and Interlux. I’m just too stupid to do those well.
Re: Cameron's FS14LS+5%
Posted: Fri Apr 23, 2021 10:56 am
by bamaguy0
Maybe I should have splurged then...A painter I am not.
Re: Cameron's FS14LS+5%
Posted: Fri Apr 23, 2021 11:33 am
by VT_Jeff
bamaguy0 wrote: ↑Fri Apr 23, 2021 10:12 am
Brand new was 1220 out the door! I had similar sized Magic-Tilt galvanized quoted at like 1400. It was a no brainer for me. I had to go over 2 hours away to get it. Boat trailers are scarce in FL.
I will say I am not enthused about some of the welds or the wiring, but for the price I couldn't say no.
It's not that the welds are bad, but they made structural welds and then simply because there was a gap between the 2 channel pieces(diff size stock) they just filled it. I'm sure people who don't know any better asked for it, but what they don't realize is a glop of weld just to fill a gap like that will be more likely to crack than a simply functional one.
I'm considering rewiring the thing or at least wrapping the existing wiring with some chafing protection.
I like to rewire my trailers with outdoor extension cords, has worked well for my util trailer that has crossed the continent maybe 6- times.
Re: Cameron's FS14LS+5%
Posted: Fri Apr 23, 2021 1:12 pm
by VT_Jeff
bamaguy0 wrote: ↑Fri Apr 23, 2021 10:12 am
Brand new was 1220 out the door! I had similar sized Magic-Tilt galvanized quoted at like 1400. It was a no brainer for me. I had to go over 2 hours away to get it. Boat trailers are scarce in FL.
I will say I am not enthused about some of the welds or the wiring, but for the price I couldn't say no.
It's not that the welds are bad, but they made structural welds and then simply because there was a gap between the 2 channel pieces(diff size stock) they just filled it. I'm sure people who don't know any better asked for it, but what they don't realize is a glop of weld just to fill a gap like that will be more likely to crack than a simply functional one.
I'm considering rewiring the thing or at least wrapping the existing wiring with some chafing protection.
My galvanized karavan 1200# was $1500 and I was stoked to get it, they were getting very hard to find. They are not the commodity up here that they are down there.
Re: Cameron's FS14LS+5%
Posted: Fri Apr 23, 2021 8:48 pm
by bamaguy0
Today was kind of a short day workwise because I got my first COVID vaccine around midday. Spent the morning modeling on the computer.
I have a 3d printer and I've been racking my brain this whole build trying to find something that the printer could be of use for. It finally hit me a while back...router guides! First one on the list was to round off the bow. I drew 3 up. A 1" radius, a 1.25" radius, and a 1.5" radius. Printed the 1" radius first and it worked like a charm.
Until my pluge base decided to stick on me and then release itself when I wasn't clear of the part. Oooof.
That's ok. It's too tight of a bend for the Taco Marine rubrail anyway. Printing the 1.25" radius and I'll run it tomorrow...with the fixed base this time. It should remove most of that and some wood putty will fill the rest in. If I go to 1.5" it'll definitely get removed.
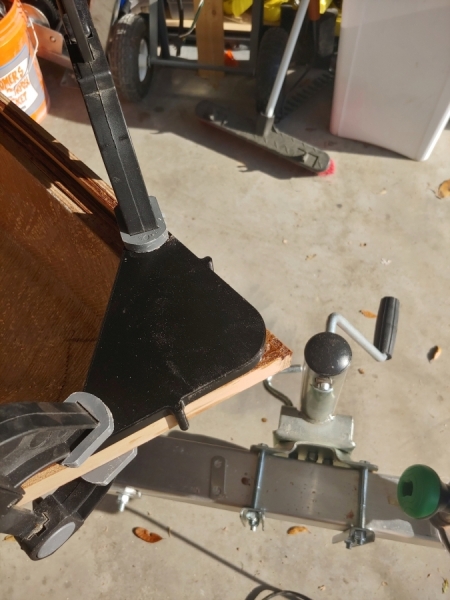
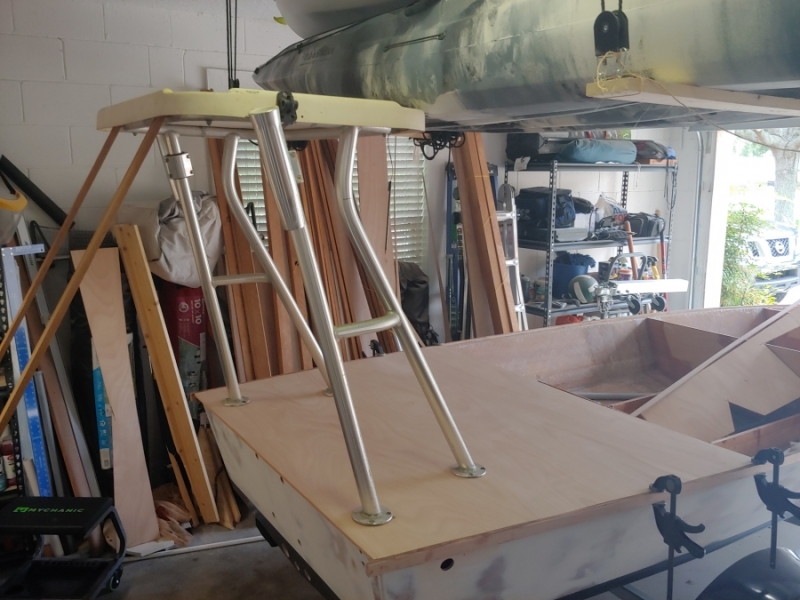
Also worked on getting the transom squared away. Had to adjust the deck piece I cut previously to move slightly further aft. Took the opportunity to sit the poling platform on there. It's gonna get it's legs shortened for sure. It came off of an 18' boat. I like the platform size, but it's definitely too tall. The feet are partially corroded away also, so I'll use it as an opportunity to make new feet and get them welded on.
And a shot of the transom now with the proper dip for the PT-35 and the rest at the same level as the rubrail so the rubrail will now wrap around to the dip. First rubrail layer going on tonight. I think I'll at least do 2 layers at once tomorrow. It's a lot easier as a straight 14" long piece.
Re: Cameron's FS14LS+5%
Posted: Sun Apr 25, 2021 8:52 pm
by bamaguy0
Not a lot to write home about the rest of the weekend. Worked on a few different things here and there. Not many photos either.
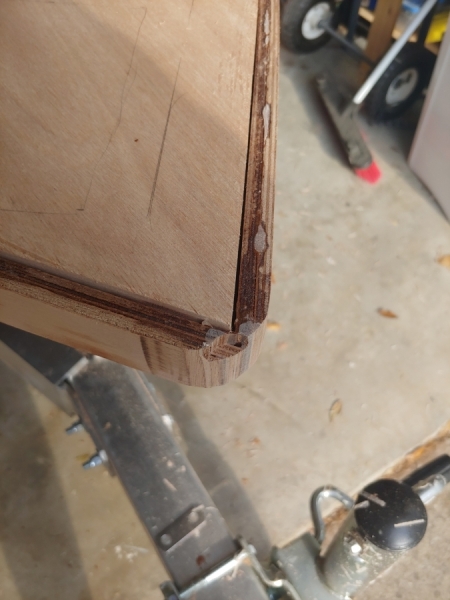
The 1.25" radius guide cleared out most of my oopsie. I think I'm gonna go with this shape. I think the Taco Marine rubrail will wrap around it just fine with a little heat.
Finished the Transom rubrails. After bonding the first earlier, I was able to stack the next 3 in one shot. It's nice not having to work around a bend.
I filled all the thru hull holes with epoxy and had to do some backfilling tonight where apparently I didn't pack the holes well enough. I'll work on drilling those out this week and smoothing them back out to the surrounding structure. Bonded some cedar strips on the B and D frames. I plan on supporting the boat by those frames when I flip it so I figured I should shore that up a bit in preparation.
Added another layer of 12oz biaxial to the bottom side of the console flange. Now I'll give the whole thing a good sanding and trim the flange to final-ish width. At that point I'll analyze the wavy areas and figure out how to level them. Probably with some of the chopped strand mat i have lying around.
Goal is to flip it back over on Friday, but we have plans nearly every night this week, so we'll see if I make it or not. I at least what the holes redrilled before I flip. Could probably stand to at least have a small fillet on the rubrails because I know they'll get handled pretty heavily during the flip. Might have to wait another week.
Re: Cameron's FS14LS+5%
Posted: Mon Apr 26, 2021 9:51 am
by VT_Jeff
Where is the link to upload drawings for the routing templates I need?
Re: Cameron's FS14LS+5%
Posted: Mon Apr 26, 2021 1:16 pm
by bamaguy0
VT_Jeff wrote: ↑Mon Apr 26, 2021 9:51 am
Where is the link to upload drawings for the routing templates I need?
Shoot me a PM. What you got in mind?
Re: Cameron's FS14LS+5%
Posted: Mon Apr 26, 2021 1:20 pm
by VT_Jeff
bamaguy0 wrote: ↑Mon Apr 26, 2021 1:16 pm
VT_Jeff wrote: ↑Mon Apr 26, 2021 9:51 am
Where is the link to upload drawings for the routing templates I need?
Shoot me a PM. What you got in mind?
JK, but if something comes up I will def check with you first. What a great resource(a 3d printer) to have for this type of work!
Re: Cameron's FS14LS+5%
Posted: Mon Apr 26, 2021 1:31 pm
by bamaguy0
VT_Jeff wrote: ↑Mon Apr 26, 2021 1:20 pm
bamaguy0 wrote: ↑Mon Apr 26, 2021 1:16 pm
VT_Jeff wrote: ↑Mon Apr 26, 2021 9:51 am
Where is the link to upload drawings for the routing templates I need?
Shoot me a PM. What you got in mind?
JK, but if something comes up I will def check with you first. What a great resource(a 3d printer) to have for this type of work!
It's usefulness comes and goes. I go through periods of making stuff and then it collects dust for a while. I really want to experiement with some more robust materials because the easy to print stuff isn't the best strength-wise. For a one-off router guide it works just fine though.
Re: Cameron's FS14LS+5%
Posted: Mon Apr 26, 2021 9:24 pm
by Mojosmantra
Looks like a lot of good progress to me. Good find on the poling platform. Just noticed that your deck is set inside of your rub rails. Was that because of your low shear line issue that you resolved with the rub rails? Or some other reason?
Re: Cameron's FS14LS+5%
Posted: Mon Apr 26, 2021 9:37 pm
by Mojosmantra
Also, since you and Jeff are also using the Boyd's fuel tank - wondering how you guys have resolved venting the tank? I went the same route as Jeff and ordered the off-the-self version where the filler cap will be inside the hatch. I had this set-up in a past boat, but the tank was near the transom and I ran the vent up the poling platform. Black hose on black post wasn't really noticeable. Not really an option with this build since I'm not planning on a poling platform and my tank will be forward of frame B. Running it to the side of the hull seems iffy with such a low shear. A last resort would be to run it up the grab bar - but that's not really an "overboard" location and I'm afraid would seem like an afterthought.
Re: Cameron's FS14LS+5%
Posted: Mon Apr 26, 2021 9:41 pm
by bamaguy0
No that was the intent the whole time. Idea is the lower set pieces act as the bonding surface for the deck. Jacques says you either need the rubrail outward or strips inside the hull to give the same support. I just decided to cap it off with additional strips to build it out some more. Once the decks are glued in I'll do a roundover on the top and then put the vinyl rubrail on. End result should be something similar to this.
Re: Cameron's FS14LS+5%
Posted: Mon Apr 26, 2021 9:50 pm
by bamaguy0
Mojosmantra wrote: ↑Mon Apr 26, 2021 9:37 pm
Also, since you and Jeff are also using the Boyd's fuel tank - wondering how you guys have resolved venting the tank? I went the same route as Jeff and ordered the off-the-self version where the filler cap will be inside the hatch. I had this set-up in a past boat, but the tank was near the transom and I ran the vent up the poling platform. Black hose on black post wasn't really noticeable. Not really an option with this build since I'm not planning on a poling platform and my tank will be forward of frame B. Running it to the side of the hull seems iffy with such a low shear. A last resort would be to run it up the grab bar - but that's not really an "overboard" location and I'm afraid would seem like an afterthought.
I'm hiding mine inside my center console just forward of Frame C. The filler cap that I'll put on the side of the console also has a vent. I need to check and make sure it vents when closed...if it doesn't I'll just put a P trap vent on the side.
Placing the tank forward of Frame B I think I would place a vent as high and centered on the Frame as you can stand it. One of the ones with a top shield so water rolling off the deck wouldn't flood it is probably the best bet.
I don't think there's really a good overboard option with these small boats. At least we're not forced to conform to ABYC. I'd say I'm at least trying to conform for my design in the console. There will be a wall in the console between the tank area and the rest of the console. Basically aligned with Frame C. The only electrical running into that area will be the fuel sending unit and that will be thru a bulkhead fitting.
Re: Cameron's FS14LS+5%
Posted: Mon Apr 26, 2021 10:12 pm
by VT_Jeff
Mojosmantra wrote: ↑Mon Apr 26, 2021 9:37 pm
Also, since you and Jeff are also using the Boyd's fuel tank - wondering how you guys have resolved venting the tank? I went the same route as Jeff and ordered the off-the-self version where the filler cap will be inside the hatch. I had this set-up in a past boat, but the tank was near the transom and I ran the vent up the poling platform. Black hose on black post wasn't really noticeable. Not really an option with this build since I'm not planning on a poling platform and my tank will be forward of frame B. Running it to the side of the hull seems iffy with such a low shear. A last resort would be to run it up the grab bar - but that's not really an "overboard" location and I'm afraid would seem like an afterthought.
I sweated this for a while and did a lot of research and hemmed and hawed and then just vented it out the side near the tank. Non-siphoning vent, supposedly. No water separator either, definitely living dangerously.
It could theoretically suck water, but it's pretty unlikely.
Edit: I wont be going very far in rough water with this boat and smooth water should not be an issue. That's my thinking anyway.
Re: Cameron's FS14LS+5%
Posted: Fri Apr 30, 2021 9:45 pm
by bamaguy0
Couple things accomplished today.
Rounded the stern rubrail corners. 3d printed router guides are definitely the way to go.
Worked on leveling the fiberglass flange of the console with a layer of chopped strand mat. Will have to apply more layers strategically to get it completely leveled out.
Flipped the hull over to begin paint prep work. Gonna put the nice sized radius under the rub rail, clean up a few epoxy runs, maybe another coat of graphite/epoxy, then primer and paint.
Re: Cameron's FS14LS+5%
Posted: Tue May 04, 2021 6:14 pm
by bamaguy0
Summer is here in Central Florida! 90+ degrees. Sweaty PPE and short pot lifes abound! And once it cools off and the sun goes away the mosquitos show up. You just can't win.
Working on the fillet of the rubrail underside. Using PVC as a guide I just finished up with about a .75" radius. Once that's cured I'll give it a good sanding and then go to about an inch. It's the female end of a 1.5" conduit that I'm gonna use, so it's about 2.2".
Re: Cameron's FS14LS+5%
Posted: Tue May 04, 2021 8:23 pm
by Mojosmantra
Just had the same thought. My build is under the house but otherwise exposed - mosquitos are starting to swarm in low light conditions. I think they’re fond of the epoxy smell. No-see-ums are starting in full force too. At least we have a nice breeze right now, but come June...
I was hoping to flip soon for paint, but I think I may have missed that opportunity.for the foreseeable future.
Re: Cameron's FS14LS+5%
Posted: Tue May 04, 2021 8:33 pm
by VT_Jeff
I'm just the opposite from you guys, I'm just getting to where its warm enough to paint.
Cameron, are you dragging the pvc through the fillet to form the radius or using a long piece as an actual mold? I have to do the same task, but right side up.
Re: Cameron's FS14LS+5%
Posted: Tue May 04, 2021 8:50 pm
by bamaguy0
Just dragging a short piece through.
Re: Cameron's FS14LS+5%
Posted: Tue May 04, 2021 8:52 pm
by bamaguy0
Mojosmantra wrote: ↑Tue May 04, 2021 8:23 pm
Just had the same thought. My build is under the house but otherwise exposed - mosquitos are starting to swarm in low light conditions. I think they’re fond of the epoxy smell. No-see-ums are starting in full force too. At least we have a nice breeze right now, but come June...
I was hoping to flip soon for paint, but I think I may have missed that opportunity.for the foreseeable future.
Yeah I was telling my wife this evening that we're probably gonna need to get up at the buttcrack of dawn to do the painting. That way temps aren't too out of control. She's gonna roll and I'm gonna tip...at least that's what we're going to attempt.
I'm in my garage, but I have to stick the nose out a bit to get around the back side between the transom and work bench. I bought one of those garage door nets I aim to put up and maybe be able to work a little later. Haven't put it up yet though.
Re: Cameron's FS14LS+5%
Posted: Wed May 05, 2021 7:43 am
by Mojosmantra
Cameron/Jeff - my fuel tank arrives today and I have a question about how you are running your fuel line. I think we’re all placing the tank forward of frame B. Are you running your fuel line “high” or “low”? Meaning, are you running it “high” below the gunnel - or - “low” below the sole? If “high”, are you including anti-siphon and fuel demand valves? If “low”, I think there’s no question that you need the valves.
Re: Cameron's FS14LS+5%
Posted: Wed May 05, 2021 8:03 am
by bamaguy0
I'm just forward of C and will be running under the floor. Have not worked out the valving/fittings yet. That will come after flipping back over after painting.
Looks like I definitely need anti-siphon, though.
Re: Cameron's FS14LS+5%
Posted: Wed May 05, 2021 8:33 am
by VT_Jeff
Mojosmantra wrote: ↑Wed May 05, 2021 7:43 am
Cameron/Jeff - my fuel tank arrives today and I have a question about how you are running your fuel line. I think we’re all placing the tank forward of frame B. Are you running your fuel line “high” or “low”? Meaning, are you running it “high” below the gunnel - or - “low” below the sole? If “high”, are you including anti-siphon and fuel demand valves? If “low”, I think there’s no question that you need the valves.
I'm running high, no valves. Not sure what they are for but I'm all ears.
Re: Cameron's FS14LS+5%
Posted: Wed May 05, 2021 8:50 am
by Mojosmantra
Jeff - my understanding is that if there is a break in the line, the anti-siphon prevents fuel from siphoning out of the tank and into the boat. It is a USCG (and EPA?) requirement if your fuel line is below the tank at any point or runs downhill (not sure I’m stating that with 100% accuracy). The fuel demand valve only allows fuel to flow to the motor when the motor demands it. I think it’s use is primarily for portable tanks and evolved after the EPA stopped allowing those tanks to be vented. Hope that helps. Attwood has a decent YouTube video showing the two valves working in conjunction.
I’m sure there are folks around here that have a more precise understanding, but I think that’s the gist of it.
Re: Cameron's FS14LS+5%
Posted: Wed May 05, 2021 8:52 am
by Mojosmantra
Re: Cameron's FS14LS+5%
Posted: Wed May 05, 2021 9:02 pm
by bamaguy0
I do know that the fuel demand valve is needed for ventless portable tanks. They puff like a balloon if left in the sun, and without that, you'll flood a carb because that's the only place for the tank to vent. I'm not sure it's needed for a vented permanent tank.
My stupid gas cans are the same way. I went to vent one the other day because it had puffed in the garage and it was pointing towards my fishing rods. Still a good 2 feet away, but pointed toward them. Didn't expect it to actually SPEW gas. I was just expecting to burp it, but nope. Doused my rods and reels in gas...2 stroke oil-mixed gas at that. I rinsed them off, but time will tell if they're OK. Maybe I'll get new fishing gear to go with a new boat.
I hate ventless fuel containers...
Anti-siphon will definitely be needed for me and could still be a good plan for you guys too. One more thing to clog up and starve the motor, though.
Re: Cameron's FS14LS+5%
Posted: Thu May 06, 2021 9:51 am
by Mojosmantra
Agree that the fuel demand valve is not needed with a properly vented tank.
Regarding the anti-siphon valve, I was hoping to find an elbow version. No luck - possibly doesn’t exist because of the internal mechanism. Also was hoping to find a 3/8” NPT x 5/16” barb version. No luck there either. My understanding is that a 5/16” fuel line is preferable for a small outboard. 3/8” is Ok, but 5/16” would be better.
Re: Cameron's FS14LS+5%
Posted: Thu May 06, 2021 10:52 pm
by TomW1
Guys buy a quality tank from Moeller 3-24 top side tanks you will not have any problems as they meet al EPA, ABYC and USCG Regs. I and Cracker Larry researched all the ins and outs of this when the new rules came out many years ago. If you need a larger aluminum tank there are a couple of dealers that the members use. The main thing is have a shut off near the tank and a loop that is higher than the tank to the motor. The loop is the anti-syphon preventer. Go with a 3/8 hose it is the standard size these days and will not flood your motor. If your not sure check with your dealer and see what your fuel intake size is. 3/8 is almost pretty much the standard these days, except for larger motors.
Tom
Re: Cameron's FS14LS+5%
Posted: Sat May 08, 2021 2:18 pm
by bamaguy0
Progress is slow, but I've wrapped up the fillet underneath the rubrail. Just applied a generous coat of neat resin to seal everything up to make sure no bare wood is still exposed. Once that cures I'll go back with some Quickfair and smooth out the humps and bumps. I'm also finalizing the flat surface for the boweye. That will also get a swipe or so of Quickfair to blend into the hull.
After the Quickfair I'll do another coat of graphite/epoxy, then a couple coats of primer, a final fairing sand, probably another coat or 2 of primer, then she'll be ready for paint.
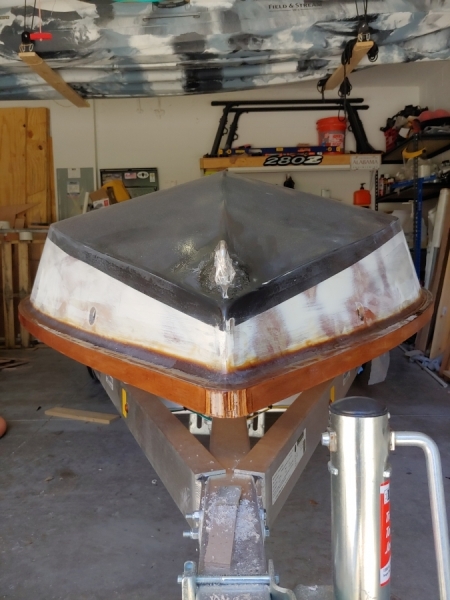
Re: Cameron's FS14LS+5%
Posted: Tue May 11, 2021 8:55 pm
by bamaguy0
On Sunday I Quikfaired the rubrail fillet and started sanding on that. I'm about halfway thru sanding it down and I think I'll have to touch up a few spots. I'd say the application got me 90% there.
Also added another layer of CSM to the console flange. I flipped it over and let it cure allowing gravity to do it's thing to try to level it all out. It did an OK job, but I'm taking it one final step further tonight. I layed out new plastic and marked the outline of the flange. I removed the console from the plastic and then applied a thick mixture of milled fiber and fumed silica around the perimeter then set the console back down on top. This should form a shim to level it out the rest of the way assuming all goes as planned. I'm happy with the thickness, so I just need to get it somewhat level and then I can move on and start fairing it. Would be nice to be able to get some coats of primer on that when I do the final prime of the hull.
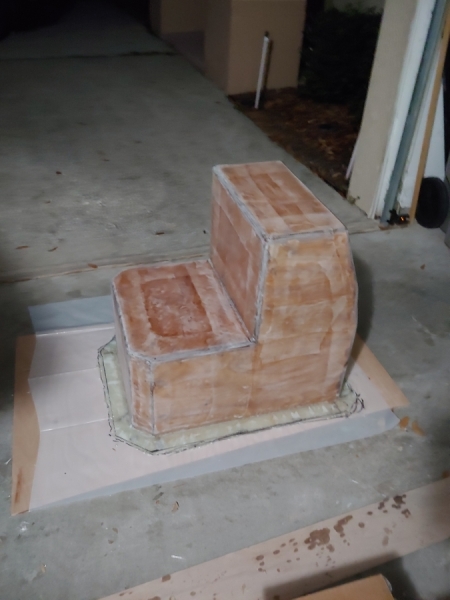
I think with the way things are going so far my goal is to get the additional layer of graphite/epoxy on the hull by the end of this upcoming weekend. Then maybe, just maybe I could be ready to paint by the next weekend. Unfortnately this weekend would be better for painting temp-wise, but I'm just not there.
2nd covid shot on Friday. Here's to hoping that doesn't put me down for a day or so!
Re: Cameron's FS14LS+5%
Posted: Tue May 11, 2021 10:30 pm
by VT_Jeff
Way to keep the candle burning!
Are you going to paint over the graphite? Your epoxy/quickfair/sand/prime/quickfair/sand/graphite/prime/sand/paint plan has my head spinning, it's good you got it recorded for reference!
Re: Cameron's FS14LS+5%
Posted: Tue May 11, 2021 10:41 pm
by bamaguy0
Yeah I plan to paint over the graphite. I'm ok with some scuffing on the hull paint as long as the graphite underneath protects the glass.
The priming again after the graphite is for a re-fair basically. Just to make sure I've got it as good as I can. I did have to sand some runs and stuff in a couple spots plus the bumps in the graphite that I cleaned up, so I'd like to smooth that out with a couple coats of primer before finally painting.
It is probably excessive.
Re: Cameron's FS14LS+5%
Posted: Thu May 13, 2021 7:54 pm
by troutbum69
Mojosmantra wrote: ↑Thu May 06, 2021 9:51 am
Agree that the fuel demand valve is not needed with a properly vented tank.
Regarding the anti-siphon valve, I was hoping to find an elbow version. No luck - possibly doesn’t exist because of the internal mechanism. Also was hoping to find a 3/8” NPT x 5/16” barb version. No luck there either. My understanding is that a 5/16” fuel line is preferable for a small outboard. 3/8” is Ok, but 5/16” would be better.
Hey mojo here’s a 5/16 stem to 3/8 male npt
https://www.hydraulics-etc.com/205-106/ ... ey=205-106
Re: Cameron's FS14LS+5%
Posted: Thu May 13, 2021 8:25 pm
by bamaguy0
Completed the sanding of the first Quikfair pass for the rubrail fillet. As I suspected it was about 90% good enough. Applied a little bit more in a few spots tonight and I think she'll be ready for primer tomorrow.
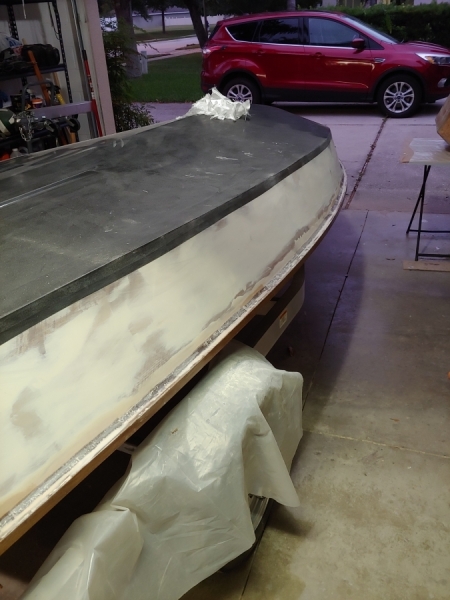
Decided to forego the extra graphite layer. I don't think it's gonna add much value and I'm gonna try to paint next weekend.
The shim on the console flange worked...ok. It wasn't quite thick enough in some areas so I'm going to have to backfill the gap. Ordered some syringes better suited for that than what I have. Once I do that I'll give it a good sanding and then apply a layer of 4oz woven to that bottom side and call it done and ready for fairing.
Re: Cameron's FS14LS+5%
Posted: Fri May 14, 2021 7:44 am
by Mojosmantra
Re: Cameron's FS14LS+5%
Posted: Fri May 14, 2021 10:10 am
by VT_Jeff
Free idea of the day:
Cut the top of the seat off the console and replace it with a slightly oversized bright piece on hinges to give you some simple storage under there or at least access to whatever will live under there.
Re: Cameron's FS14LS+5%
Posted: Fri May 14, 2021 10:33 am
by bamaguy0
Yeah I gotta work out how to do that. That's where my fuel tank will live...walled off from the rest of the console of course.
. Definitely want to have access there to maintain hoses and the level sender.
I also plan on working out an opening on the seat back as well to get to the back side of the instrument panel and whatnot. Probably should have angled it slightly, but I am where I am.
Re: Cameron's FS14LS+5%
Posted: Fri May 14, 2021 5:36 pm
by bamaguy0
1 coat of primer down. Should be able to get another one on this evening.
Re: Cameron's FS14LS+5%
Posted: Fri May 14, 2021 8:03 pm
by bamaguy0
2 coats of primer done. It's highlighted a couple spots in my rubrail fillet that may need a smear or so of Quikfair. I'll take care of that tomorrow and giver her a good sanding to smooth it out.
You'll notice some bits in the coat...I couldn't get all of the solids to remix. I think I used it last time without all the solids fully mixed and so now I have a surplus which would result in little chunks. No worries though because she's gonna get a good fairing sand. If I leave enough primer on for paint then we'll move right along, but if I end up needing to take most of it off we'll apply another coat afterwards.
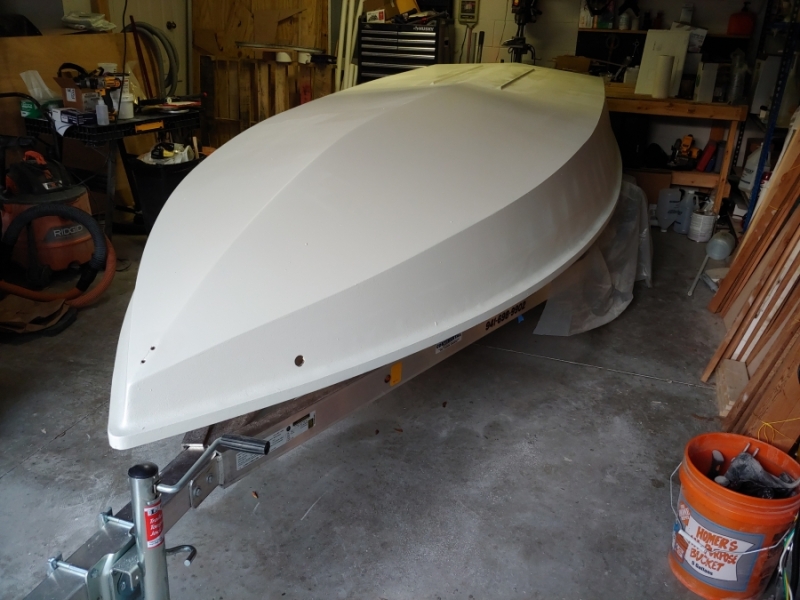
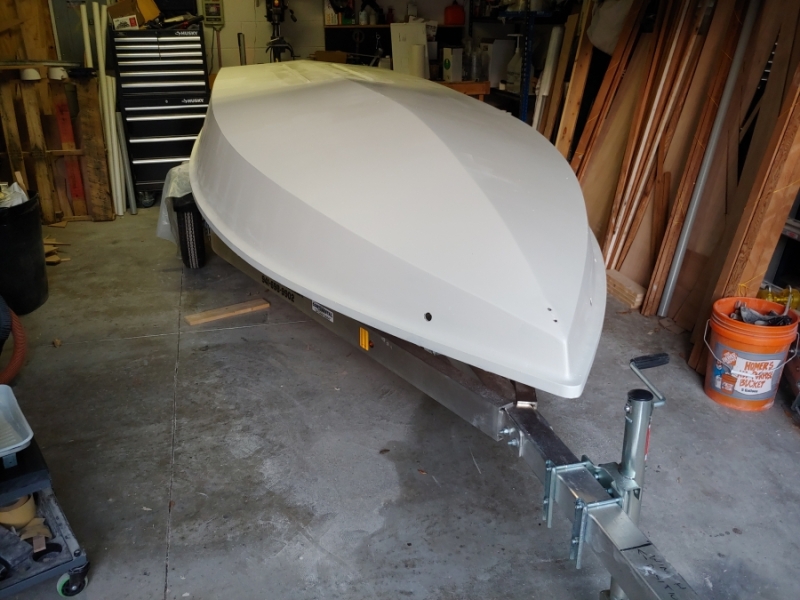
Re: Cameron's FS14LS+5%
Posted: Sat May 15, 2021 5:48 am
by Browndog
Nice!
Re: Cameron's FS14LS+5%
Posted: Sat May 15, 2021 9:56 pm
by bamaguy0
Couple touchup areas of primer needed tomorrow and she'll be ready for color! I think I'm gonna target Tuesday evening for first coat. I have to admit I'm getting nervous. I really hope it turns out well.
I got FoamPro 1/8" nap foam rollers, some 3" wide badger hair brushes. I'm gonna go get a piece of glass so I can tune the amount of thinner. I think I'm doing everything I can to get it right.
Re: Cameron's FS14LS+5%
Posted: Sat May 15, 2021 10:32 pm
by VT_Jeff
Looks great so far, good luck for tue.
I'm working on deck painting myself, not one of my fortes.
Re: Cameron's FS14LS+5%
Posted: Tue May 18, 2021 8:15 pm
by bamaguy0
We have paint! Pretty happy with how it's looking so far. I forewent tipping because it was leaving streaks. Maybe it wasn't thin enough? I got excited and didnt test it on the glass piece I bought. Maybe I'll try that on coat 2. The 1/8 nap roller wasn't leaving many bubbles and it was leveling out pretty quickly so I just
rolled with it.
Not glass smooth because I didn't sand the primer underneath to glass smooth. Was hoping the paint would fill that in a little bit. Thinking I'll do a 2nd coat, assess the slickness and then go from there. Either roll with it or give it a more aggressive sanding and apply another coat.
Paint du jour is Pettit EZPoxy Platinum color with Performance Enhancer.
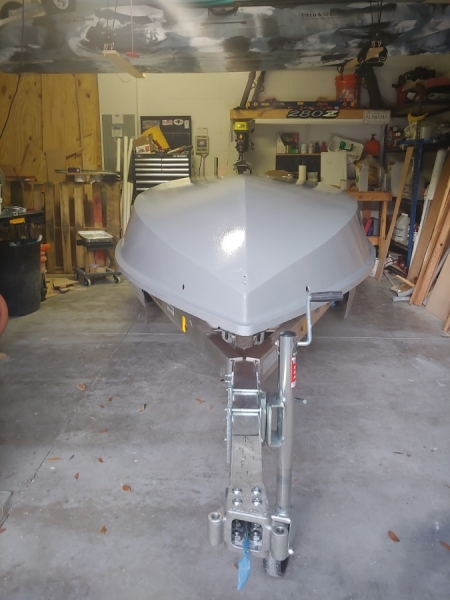
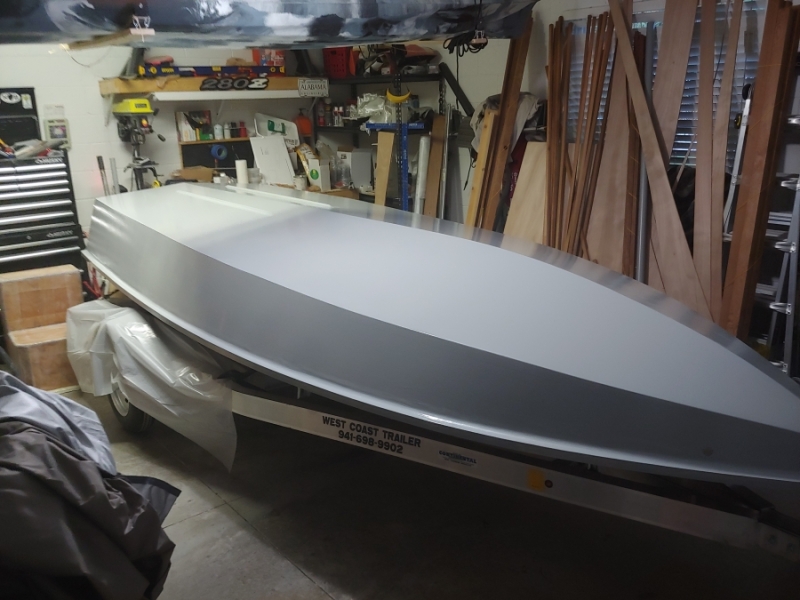
Re: Cameron's FS14LS+5%
Posted: Tue May 18, 2021 9:23 pm
by VT_Jeff
Wow, looks pretty dang smooth from here! I'll be interested in how long you have to wait before sanding and recoat, I'm going on 5 days now.
Re: Cameron's FS14LS+5%
Posted: Tue May 18, 2021 9:32 pm
by bamaguy0
According to the Data Sheet I can recoat in 8 hours at 90F or 16 at 70F. Low tonight is 68F. I don't usually work on it on Wednesdays anyway so we'll see what it's like on Thursday. Definitely should be good to scuff 'er up by then.
I checked on it an hour later and it appears to have smoothed out some more. I think after 2 coats she'll be pretty smooth. I'll get some close ups prior to scuffing. It's easy to look good from 10 feet, but 6 inches is another thing all together.
I'm gonna have to get another quart anyway because I think I want the console to be hull color instead of white, so I might just do a 3rd coat with that batch to make sure they match.
Re: Cameron's FS14LS+5%
Posted: Wed May 19, 2021 7:54 am
by pee wee
I've never had luck getting a smooth finish without starting with a smooth finish- paint just changes the color!
Re: Cameron's FS14LS+5%
Posted: Wed May 19, 2021 9:02 am
by bamaguy0
pee wee wrote: ↑Wed May 19, 2021 7:54 am
I've never had luck getting a smooth finish without starting with a smooth finish- paint just changes the color!
Yeah I'm learning that's the case. Now I'm wondering if I sand now or sand later.
Coating is definitely dry to the touch this morning. Not sure I'd go sanding on it just yet, but it's definitely dry and not sticky. Here's a few close ups showing the texture. It is no doubt glossy, just a reflection of the underlying substrates. I used a non foam roller for primer and thats where the orange peel texture is coming from. 2nd photo is an area where trying to tip left streaks. Not bad, but slightly visible.

Re: Cameron's FS14LS+5%
Posted: Wed May 19, 2021 8:28 pm
by bamaguy0
Well Jeff, it was definitely sandable today.
I might have cried a bit as I did this, but I have a surface finish goal and it's only going to be easier if I start back over. Even at this level of sanded there are still low spots of orange peel that have glossy paint still in them. Ill finish sanding her back down tomorrow night and probably into Friday. Probably do a coat of primer with the same 1/8 nap foam roller on Friday. Sand smooth Saturday. Maybe a coat of paint Saturday or Sunday. Should be able to work a 2nd coat in next week and I'll still be ready for the flip by Memorial Day weekend.
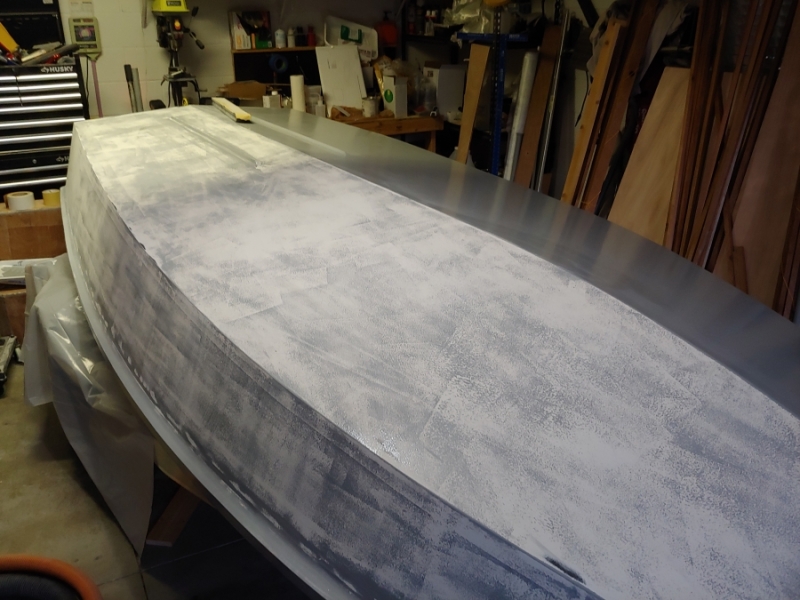
Re: Cameron's FS14LS+5%
Posted: Wed May 19, 2021 10:07 pm
by VT_Jeff
Ouch.
Good call rewinding, you wont miss a week in the years you'll have the boat.
Surface contaminated? Too smooth? Dry too fast?
Re: Cameron's FS14LS+5%
Posted: Wed May 19, 2021 10:10 pm
by bamaguy0
Nah it was a perfectly good coat adhesion-wise. I just left the primer with too much texture in it.
Re: Cameron's FS14LS+5%
Posted: Fri May 21, 2021 11:12 am
by bamaguy0
It's like deja-vu all over again!
She is no doubt smoother this go-around.
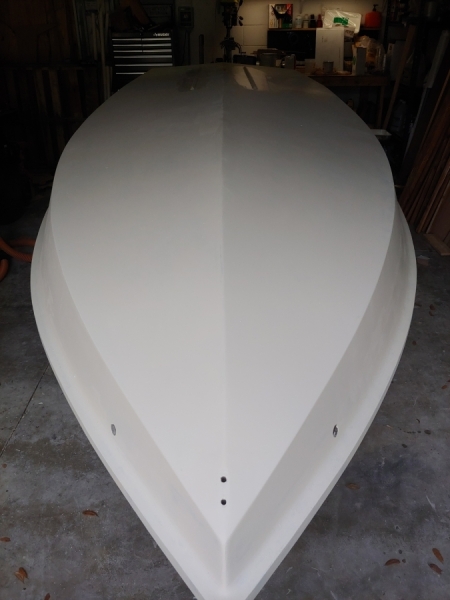
Re: Cameron's FS14LS+5%
Posted: Sat May 22, 2021 11:54 am
by bamaguy0
Much better!
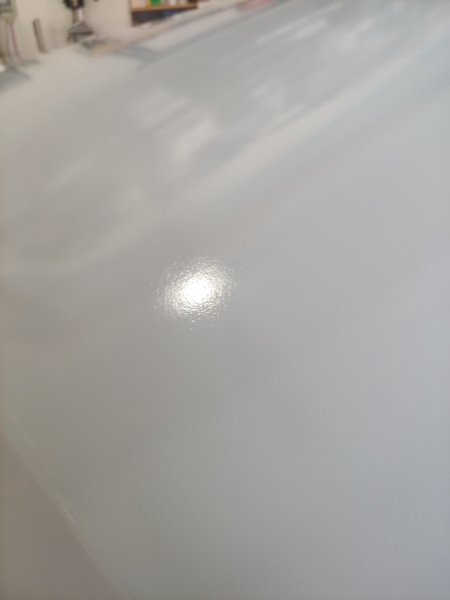

Re: Cameron's FS14LS+5%
Posted: Sun May 23, 2021 3:22 pm
by OneWayTraffic
I had similar issues with the POR15 primer I used on my C17. I haven't sanded it yet, but will when the weather warms up a bit. (It's late Autumn here).
For the record though I don't think anyone but you would ever notice a small amount of texture. Even mine, which is a substandard finish at present seems smooth and fair as soon as I step back for a photo.
On the inside I consider texture to be a feature, not a bug. Don't want sun glare on the eyes.
Re: Cameron's FS14LS+5%
Posted: Sun May 23, 2021 3:37 pm
by bamaguy0
OneWayTraffic wrote: ↑Sun May 23, 2021 3:22 pm
I had similar issues with the POR15 primer I used on my C17. I haven't sanded it yet, but will when the weather warms up a bit. (It's late Autumn here).
For the record though I don't think anyone but you would ever notice a small amount of texture. Even mine, which is a substandard finish at present seems smooth and fair as soon as I step back for a photo.
On the inside I consider texture to be a feature, not a bug. Don't want sun glare on the eyes.
You're right and it was the same for me. From a distance you could see the reflection of other stuff in the garage even with the orange peel texture. I just had an expectation and I didn't want to compromise. I may have lost a few days, but I think it's worthwhile in the long haul.
That is a good point on the deck side, I probably should have gotten the semi-gloss white vs regular white, but I will be applying anti-skid texture to a large portion of the deck so I think that will knock the majority of the glare down. I know Pettit mentions a flattening agent you can add in their data sheets, but I can't seem to find anyone selling it anymore.
Re: Cameron's FS14LS+5%
Posted: Wed May 26, 2021 8:36 pm
by bamaguy0
Scuffed the last layer up with 220. Removed paint in some places, some others not so much. Got the next coat of paint on. I have to say I'm really happy with how it's looking so far. There are a couple scratches still showing through, so we'll try to work on those before the next coat.
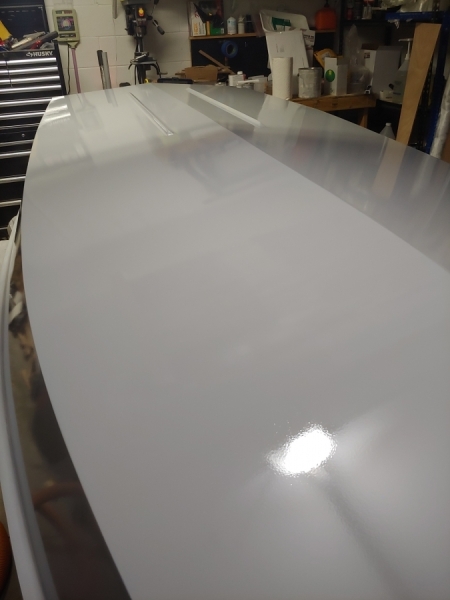
Re: Cameron's FS14LS+5%
Posted: Sat May 29, 2021 8:56 pm
by Mojosmantra
It’s looking great Cameron. No mosquitoes or gnats? That would be a triumph on it’s own.
Re: Cameron's FS14LS+5%
Posted: Sat May 29, 2021 10:56 pm
by VT_Jeff
That does look amazing! be a shame to put that light under a bushel but I suspect the boat wont plane upside down......
Re: Cameron's FS14LS+5%
Posted: Sun May 30, 2021 7:36 am
by bamaguy0
Mojosmantra wrote: ↑Sat May 29, 2021 8:56 pm
It’s looking great Cameron. No mosquitoes or gnats? That would be a triumph on it’s own.
I have had some very tiny ones unfortunately. I don't think they affect the outcome too much, though. The ones that have gotten stuck are so small they don't leave much of a spot and just wipe off once it's dried.
VT_Jeff wrote: ↑Sat May 29, 2021 10:56 pm
That does look amazing! be a shame to put that light under a bushel but I suspect the boat wont plane upside down......
This last coat I did in a rush, so I have a couple runs on the edges, and didn't cover a couple holidays. Gonna clean the runs up and give it one final coat to call it done. First coat I didn't thin at all. This one I think I thinned too much. It definitely leveled even better with a little bit of thinner.
Re: Cameron's FS14LS+5%
Posted: Sun May 30, 2021 7:49 am
by VT_Jeff
I'm having the same issue with trying to get the right thinness. I probably need to start weighing like I do with epoxy, but it seems like the deeper down the can you get, the more thinner it needs. It's a real challenge.
Re: Cameron's FS14LS+5%
Posted: Mon May 31, 2021 9:07 pm
by bamaguy0
Was out of town this weekend, so not much progress made. I did get all the runs sanded down and I think I'm ready for another coat. If it turns out well enough I expect it to be the final color coat.
With that in mind, I've been considering keel guard options. I was looking at the stick on variety, but they seem kinda bulky and then you still run the risk of it peeling off at some point.
Another one is the 3M stick on car bra material. It's about 8mils thick, so lower profile and even available in clear. Considering the locales that I plan on using this boat, I'm not sure that would be enough if I misjudge the depth over an oyster bed or decide to beach in a shell-rich area. I do think I'll be getting some of this material for the bow where the winch roller comes into contact. Seems like a good use there.
I've noticed on other forums that Line-X has been getting more popular as a keel guard option. They seem to have been able to get it a little smoother than what I'm used to in truck beds. I don't think I want to go that far, but I do have some graphite powder left over and could easily run a strip of graphite/epoxy down just the keel. I think this is my path forward barring any dissenting opinions that may come this week.
I do already have 3ish coats of graphite/epoxy under the paint, so maybe I'm a but too overly cautious, but I'd rather not scuff the paint if I can stand it. I was thinking 3 layers at a 2", 3", and 4" widths would be enough to build and step out so it's not too bulky.
Re: Cameron's FS14LS+5%
Posted: Tue Jun 01, 2021 9:13 pm
by bamaguy0
Got a coat of paint on this afternoon.
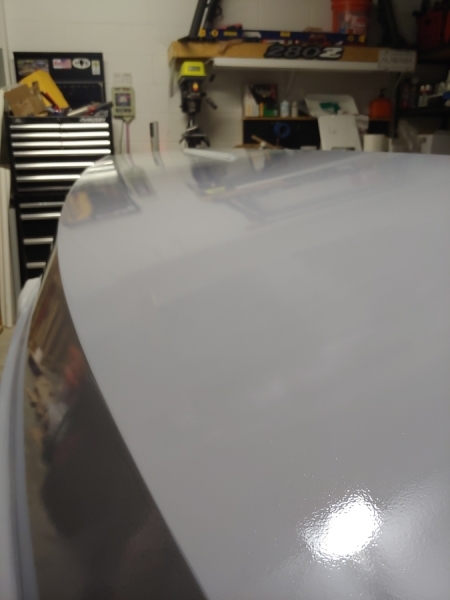
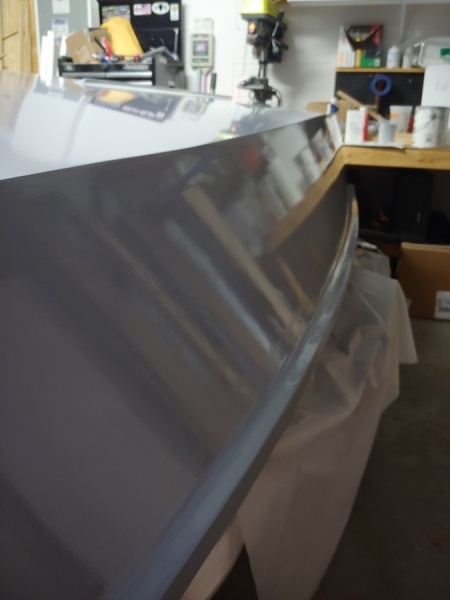
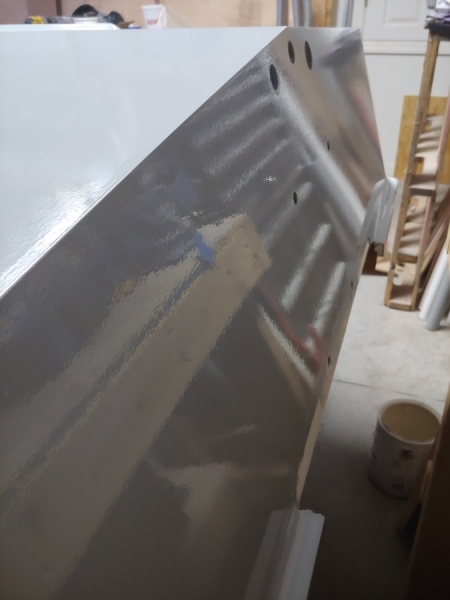
Had one hiccup trying to fix a light area.
That being said, I think we're in the realm of "Better is the enemy of good enough." Barring any additional issues I find in the sunlight tomorrow, she's done. No more paint.
On to the keel guard. I'll let her dry thru tomorrow since I usually don't do much with her on Wednesdays due to other commitments and then start laying out the graphite masking on Thursday.
Re: Cameron's FS14LS+5%
Posted: Tue Jun 01, 2021 10:50 pm
by VT_Jeff
Looks really nice Cameron! I'd be extremely pleased.
On the graphite strip, how/where are you going to terminate it at the bow/stern ends? Seems like it has the potential to be a cool aesthetic feature as well as functional. I'm a sucker for functional ashtetics.
Re: Cameron's FS14LS+5%
Posted: Wed Jun 02, 2021 10:52 am
by bamaguy0
Plan will be to round it off just below the bow eye. We'll see if my tape cutting skills are on par with yours!
Re: Cameron's FS14LS+5%
Posted: Wed Jun 02, 2021 8:48 pm
by bamaguy0
Noticed today that Pettit recommends waiting 7 days after paint application before polishing or waxing to ensure full hardness of the paint.
Think I'll wait that before working on the keel guard. That means this weekend shifts to side projects. We'll see how far along I can get the center console and maybe look at starting the baitwell with some insulation foam.
Re: Cameron's FS14LS+5%
Posted: Wed Jun 02, 2021 9:18 pm
by VT_Jeff
bamaguy0 wrote: ↑Wed Jun 02, 2021 8:48 pm
Noticed today that Pettit recommends waiting 7 days after paint application before polishing or waxing to ensure full hardness of the paint.
Think I'll wait that before working on the keel guard. That means this weekend shifts to side projects. We'll see how far along I can get the center console and maybe look at starting the baitwell with some insulation foam.
Forced wait times can be great productivity inducers. But I would think you only need to scuff the area you're adding graphite to, is that not so?
Re: Cameron's FS14LS+5%
Posted: Wed Jun 02, 2021 9:20 pm
by bamaguy0
Yeah, but covering that area with epoxy may not allow that area to properly outgas/evaporate all solvents. That would leave the area underneath perpetually soft.
Unintended material incompatibilities have been a big deal in my line of work, so I don't want to risk anything.
Re: Cameron's FS14LS+5%
Posted: Sat Jun 05, 2021 8:42 am
by bamaguy0
Side project. Paracord wrapping the steering wheel. I thought about grey to match the boat, but figured I could use this to add a bit of flair. Found this pattern that's very close to houndstooth. Being a Univ. of Alabama fan(and graduate), I had to have it!
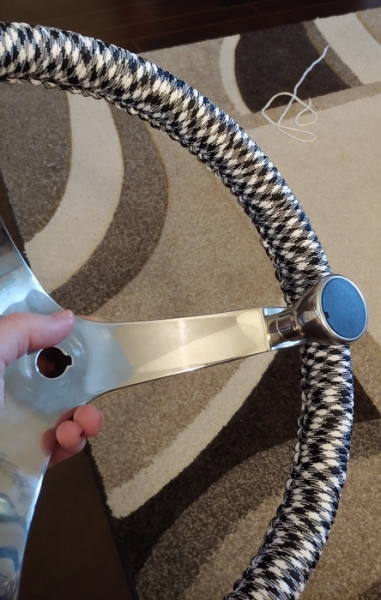
Don't mind the cat toy in the background.
Re: Cameron's FS14LS+5%
Posted: Sat Jun 05, 2021 8:05 pm
by bamaguy0
No pics, but made some progress today.
Trimmed out the flange on the console to final size. Should be getting close to putting a coat of primer on. We'll see how it goes tomorrow.
Started my baitwell. Cut out the pieces and glued the walls to the base. It's gonna come out to 5ish gallons. It's gonna go in the port side under the aft deck. Should be fine for a few shrimp or pinfish.
Well I got a splash of Acetone on the hull this weekend. I think my heart stopped a bit, but it did nothing to the paint. I think the paint is good and hard. I'll start laying out the keel guard tomorrow and plan for the first application on Monday evening.
Re: Cameron's FS14LS+5%
Posted: Sun Jun 06, 2021 1:08 am
by TomW1
bamaguy0 wrote: ↑Sat Jun 05, 2021 8:42 am
Side project. Paracord wrapping the steering wheel. I thought about grey to match the boat, but figured I could use this to add a bit of flair. Found this pattern that's very close to houndstooth. Being a Univ. of Alabama fan(and graduate), I had to have it!
Don't mind the cat toy in the background.
Dang guy can't you leave the man in peace? He has been long gone and buried. New regime has been doing a pretty darn good job.
Tom
Re: Cameron's FS14LS+5%
Posted: Mon Jun 07, 2021 9:03 am
by VT_Jeff
bamaguy0 wrote: ↑Wed Jun 02, 2021 9:20 pm
Yeah, but covering that area with epoxy may not allow that area to properly outgas/evaporate all solvents. That would leave the area underneath perpetually soft.
Ah, understood. That's smart thinking.
Re: Cameron's FS14LS+5%
Posted: Mon Jun 07, 2021 7:29 pm
by bamaguy0
First coat of the graphite/epoxy keel guard down. 2nd coat will cover everything exposed in this photo. 3rd will be about 4 inches wide.
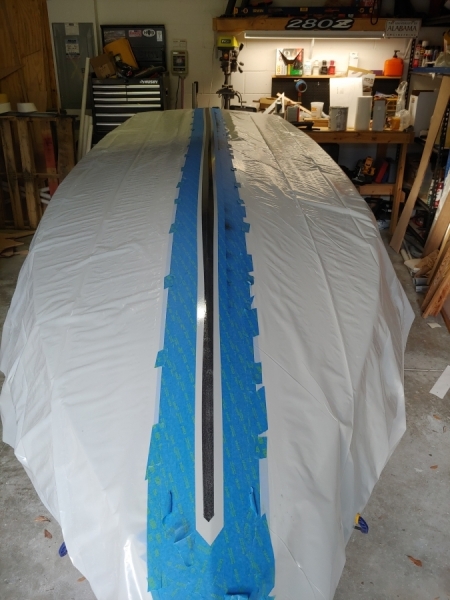
Not the straighest of tape lines, but I didn't put a ton of effort into it. For what it is, I think it'll be fine.
Re: Cameron's FS14LS+5%
Posted: Wed Jun 09, 2021 8:37 pm
by bamaguy0
Keel Guard application complete. Ready for the flip back rightside.
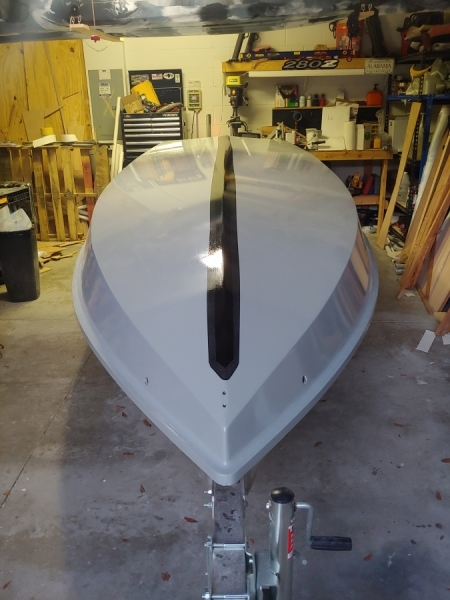
Re: Cameron's FS14LS+5%
Posted: Thu Jun 10, 2021 6:33 am
by VT_Jeff
Cameron, that's a great idea and looks like flawless execution. Your bottom looks pretty perfect, great work. I suspect some future builders will be borrowing that concept.
Re: Cameron's FS14LS+5%
Posted: Thu Jun 10, 2021 6:35 am
by bamaguy0
Thanks! The lines weeble wobble around a bit...Could have been prevented with a laser level, but it'll be mostly inconspicuous once flipped over.
Re: Cameron's FS14LS+5%
Posted: Thu Jun 10, 2021 7:39 am
by Mojosmantra
That’s a really interesting move. I’ve been researching the epoxy/graphite subject and haven’t come across a narrow “keel guard” approach like that. If I recall, you also have full bottom coverage under the paint too, right?
Re: Cameron's FS14LS+5%
Posted: Thu Jun 10, 2021 7:43 am
by Jeff
Nice work!!! Jeff
Re: Cameron's FS14LS+5%
Posted: Thu Jun 10, 2021 8:54 am
by bamaguy0
Mojosmantra wrote: ↑Thu Jun 10, 2021 7:39 am
That’s a really interesting move. I’ve been researching the epoxy/graphite subject and haven’t come across a narrow “keel guard” approach like that. If I recall, you also have full bottom coverage under the paint too, right?
Yeah the whole bottom is covered under the paint, but didn't want an entirely black bottom.
Re: Cameron's FS14LS+5%
Posted: Sat Jun 12, 2021 9:21 am
by bamaguy0
First coat of primer on the console.
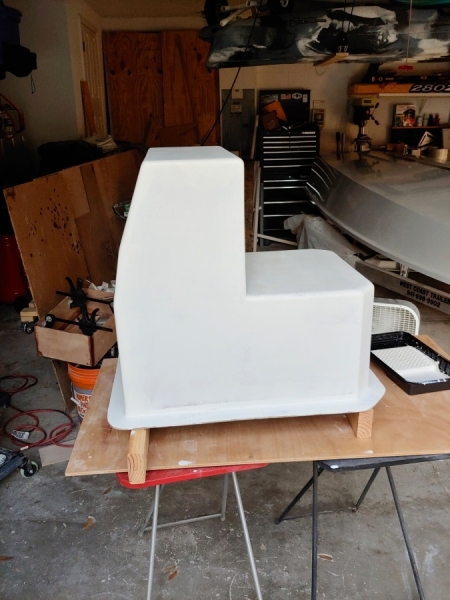
My buddy that has helped with flips has been out of pocket, so I convinced my wife to help with the flip. Things got a little hairy about halfway, but we were able to get her back over in one piece.
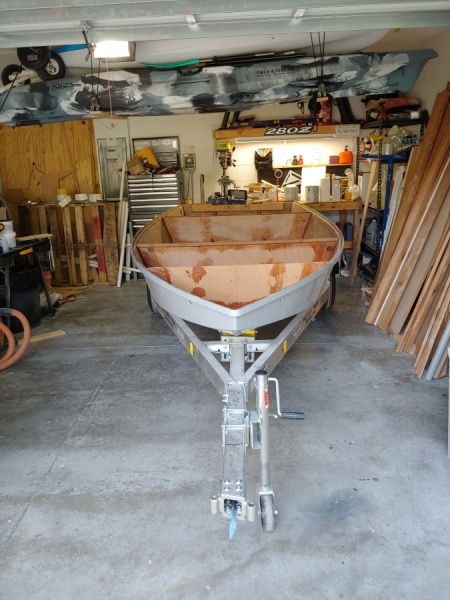
Onwards and upwards!
Re: Cameron's FS14LS+5%
Posted: Fri Jun 18, 2021 8:52 pm
by bamaguy0
Progress has been slow this week.
On the boat, I cut and installed 50% of the sole cleats. Mostly got all the easy ones out of the way before the ones along the Frames B and D that have no real reference for positioning. I made some chase tube supports, just need to get those bonded in place.
Most of the time spent this week was on the console and figuring out where all the holes needed to go. Cut it all out today. I still have the round one on the seat bottom to finish opening up to size.
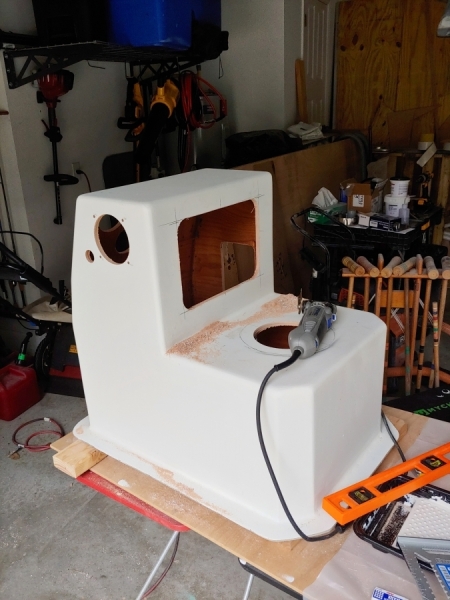

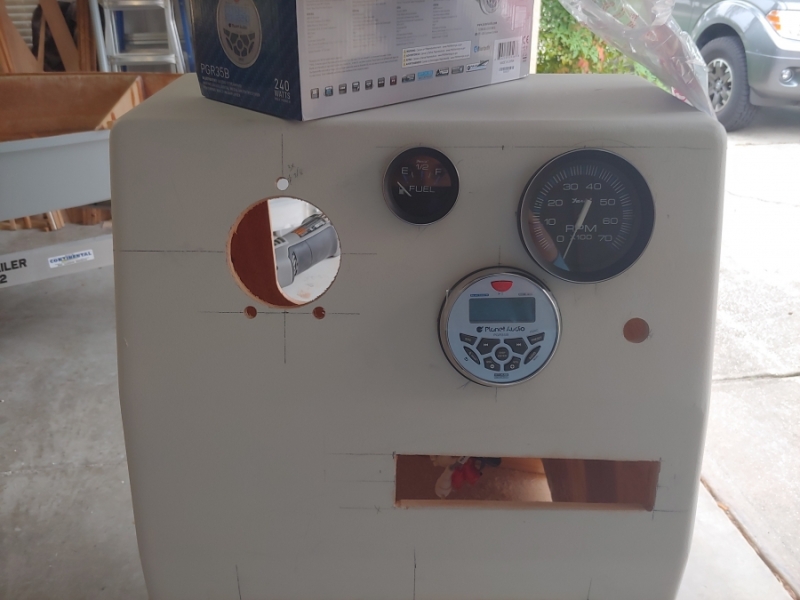
Left side opening is a fire extinguisher cabinet. Right side is the throttle, the forward seat back is just an access to the inside for electrical connections. Seat bottom is fuel tank access and the back bottom is a hatch to access the fuze block and battery switch.
Re: Cameron's FS14LS+5%
Posted: Fri Jun 18, 2021 9:41 pm
by TomW1
Looking good guy. Tom
Re: Cameron's FS14LS+5%
Posted: Mon Jun 21, 2021 8:18 am
by Mojosmantra
That’s like a whole other project to figure out and keep you busy. It’s looking real good.
Re: Cameron's FS14LS+5%
Posted: Mon Jun 21, 2021 8:24 am
by Jeff
Nice work bamaguy0!!! Jeff
Re: Cameron's FS14LS+5%
Posted: Tue Jun 22, 2021 10:47 pm
by bamaguy0
No progress made Saturday as we entertained some of my wife's family from the Tampa area. Smoked some pork butts and a good time was had by all.
Last minute work trip had me fly out of town on Sunday afternoon and I got home late Monday night.
Amazon Prime day resulted in me ordering some NOCO Genius battery chargers. Got a 10 amp for my trolling motor battery and a 5 amp for the cranking battery. Will mount them close to their respective batteries with an AC plug in the console and a split cable on the inside routing to the two. With the split battery setup that's the best I could come up with. The chargers don't allow extensions on the 12V side due to temperature sensing capabilities unfortunately. It will require some additional chase tubes because the 1" pvc for my 12VDC wiring is too small to fit a 3 prong AC cord through. I think it's also good practice (probably ABYC requirement) to keep DC and AC power separate anyway. Added another hole in the console for that. Also finished taking the round tank access hole in the console to size. At this point there should be no more access holes added to the console.
I did a fit check with the tank in position and the console over it. I didn't account for the sole cleat on the forward side of Frame C. That made tank clearance inside the console very tight. I trimmed the cleat around the tank so that I can get it closer to the Frame and have a little more air space all around inside the console.
Problem 2 was noticed as well. I designed the width of the console slightly less than the stringer spacing width. That means my original plan of tee nuts in the sole for fastening down the console won't fly because I would need to place clearance notches in the stringers for the screws to run through. Doesn't seem wise. My current solution will be adhesive bonded studs on the bottom side of the sole. With a forstner bit I can make a shallow pocket, bond the stud in place flush with the bottom side and then use nuts on the top side to secure the console. I might get creative and use barrel nuts so it looks like screws still, but I need to check the stackup and see if that will work or not. Not a crazy problem to overcome, just requires specialty hardware. More to come on this. It's back of the mind at least for another week or so.
Main focus the rest of the week will be to get the chase tubes finalized and glued in place. From there I can finish the sole cleats. Hopefully by this weekend I can start work on the fuel tank mounts and the forward bulkhead/closeout for the tank opening in the sole.
Re: Cameron's FS14LS+5%
Posted: Sun Jun 27, 2021 9:12 pm
by bamaguy0
Don't think I made as much progress as my last update had hoped for, but it's progress nonetheless.
Worked out fuel tank mounts using some of the cedar strips my father and I cut out back at Thanksgiving, I don't have to do anything fancy but bond them level. Their thickness sets the tank just above the drain tube and the thickest part of the bond joint will be about .25". Made a hardware order this weekend, so that will be in Tuesday more than likely and I can get that installed.
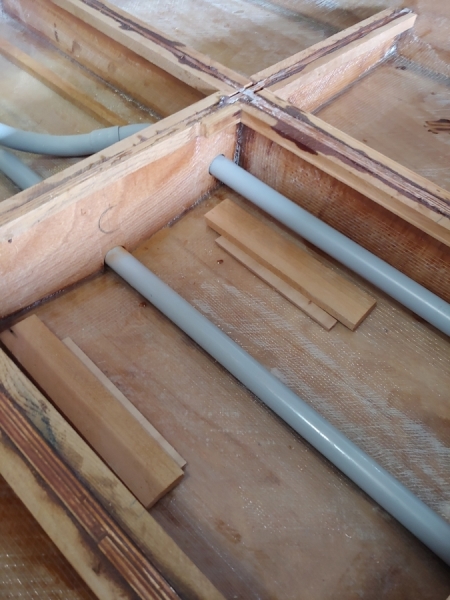
Glued in most of the tubes for wiring and cabling. I ran out of the epoxy Friday so i had to wait on another kit to arrive today. Isn't Amazon wonderful?(Don't answer that)

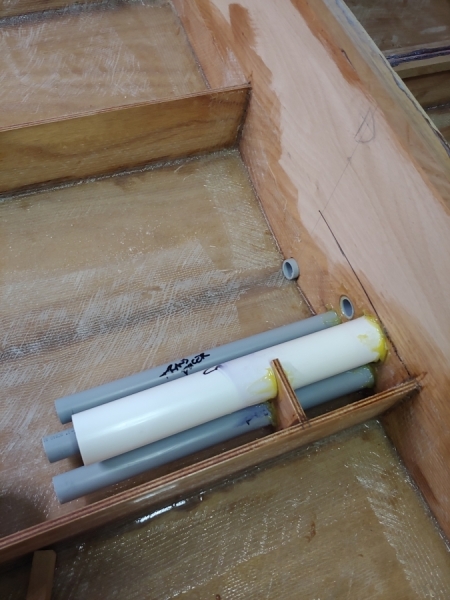
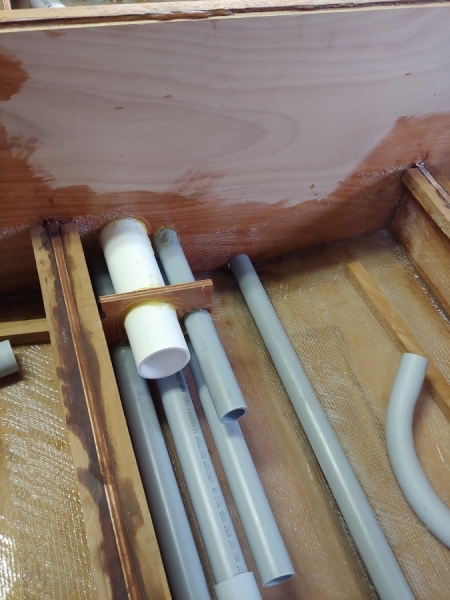
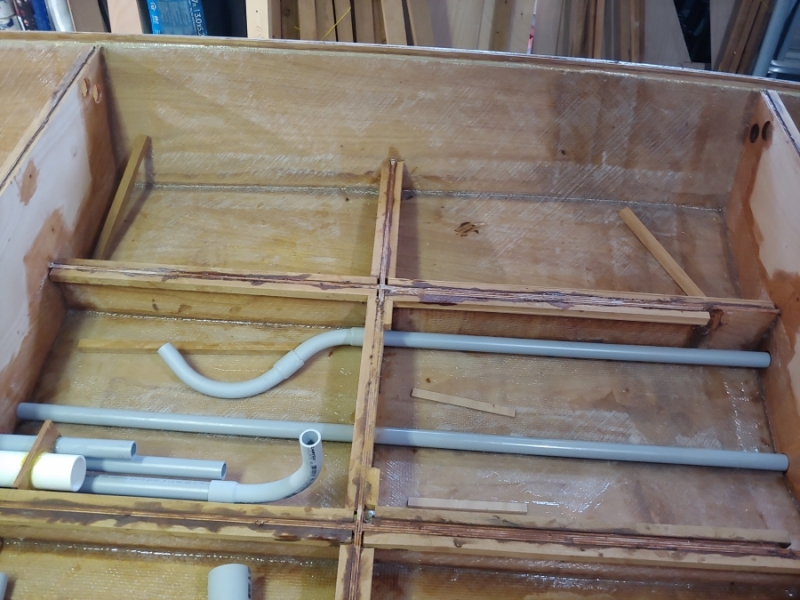
I used West Systems G/Flex 655 as some internet research indicated it was one of the better options for adhesion to PVC. The tubes got a good 60 grit roughing followed by solvent wipe of Acetone. The instructions said you COULD flame treat, but wasn't necessary for PVC.
One of the other "problems" that I realized I created was I put a drain tube from the forward deck area under the sole to the aft, but didn't plan on a drain for the fuel tank cavity forward of Frame C. What I noticed was my Frame cutouts for the drain tube all were cut vertically after the hole was drilled so I had additional passages that could be utilized. I went a size up on PVC and then cut out about a 15 degree section.
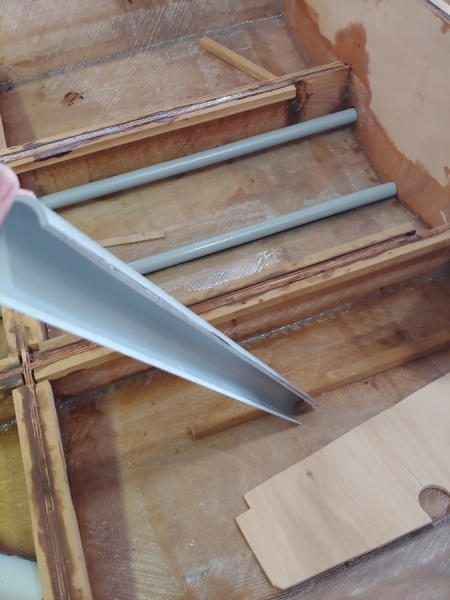
Then I glued that piece over the tube running between Frames C and D. I ensured that the side passages remained clear when gluing down the original drain tube and then applied some epoxy down the spine of the tube as well. After placing the larger tube over the top I made generous fillets down each side. I plan on testing this sooner rather than later just to make sure it works as intended. I obviously don't expect to accumulate water around the fuel tank since it's covered by the console, but I didn't want to not have a plan for it either.
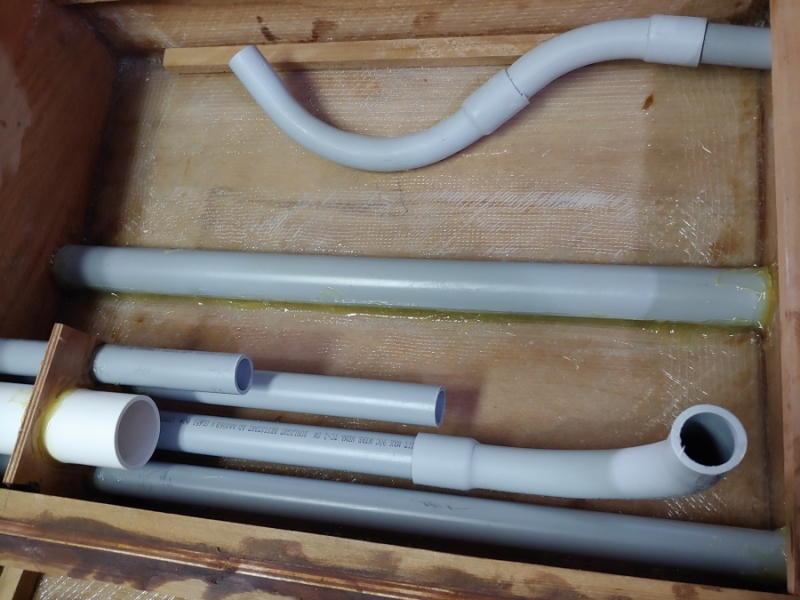
Did a little work on the livewell, although that's a tertiary task for now. I glassed the ouside seams and then bonded on the secondary floor for the drain area. From here I'll smooth out that transition a little more and then glass the inside.
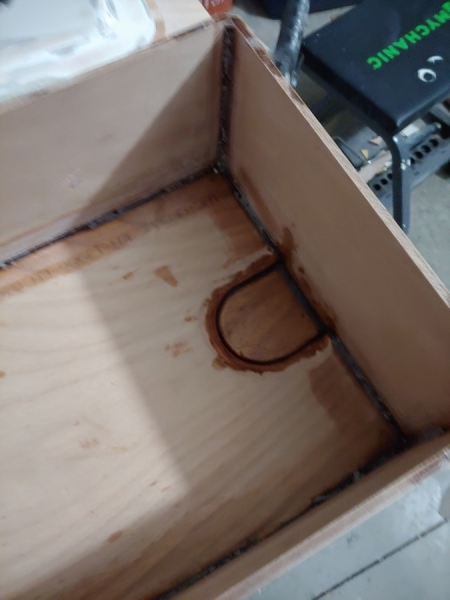
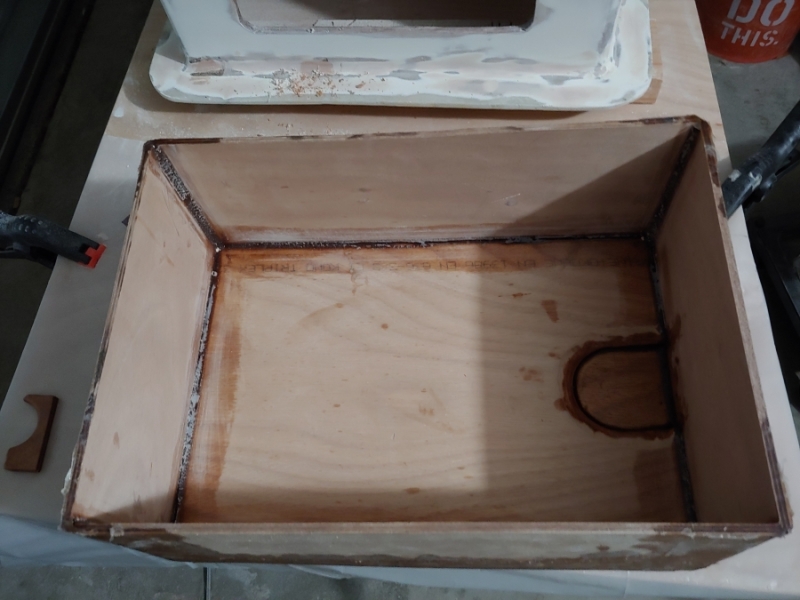
Console work has been slow. Just filling pits and pinholes missed initally and smoothing out the transition on the flange. Hindsight being 20/20, I would have done something different for creating the flange on the console. I found what appears to be a better method that I will use for the livewell. Anyway, I should be ready for another coat of primer on the console tomorrow. We'll see if I'm pleased well enough after this last touch up of filler.
I feel like I'm in the home stretch of finishing out the sole area. I have the 2 AC cord tubes to glue in and then cement all the elbows and trim them to sole height. Gotta bond the tank mount down and close out the tank cavity. Some final cleat work, and then she'll be ready for foam I think.
Re: Cameron's FS14LS+5%
Posted: Sun Jun 27, 2021 9:32 pm
by Jeff
Great progress!! Jeff
Re: Cameron's FS14LS+5%
Posted: Fri Jul 02, 2021 11:20 am
by bamaguy0
Decent progress this week.
I glued all of the elbows in place. Realized I made a mistake with my steering and throttle cable tube. Originally I had planned on making 1.5" PVC, but realized I needed to step it up to 2" once I tried running the steering cable through. When I did that I did not add any additional length to the tube so the point where the elbow starts to come up thru the floor shifted aft. This was right where the back flange of the console sits.
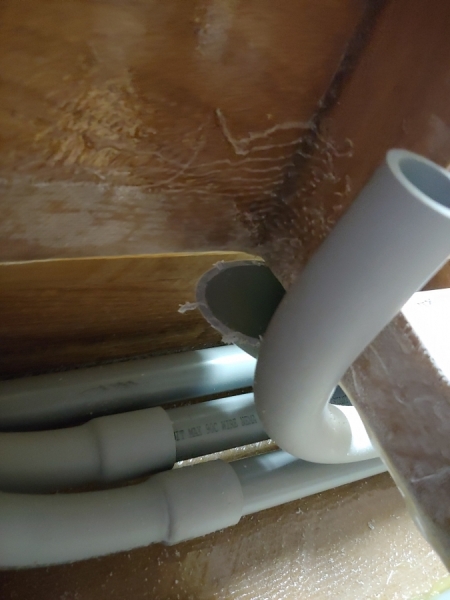
I trimmed the elbow back to where it's basically a short straight extension then added another elbow to that. That seemed to have shifted it forward just enough.
Once my fuel tank mount hardware came in, I glued in the carriage bolts and then then next day bonded the mounts into the hull. I used some scrap rubrail pieces to maintain spacing and to keep them somewhat level to each other.
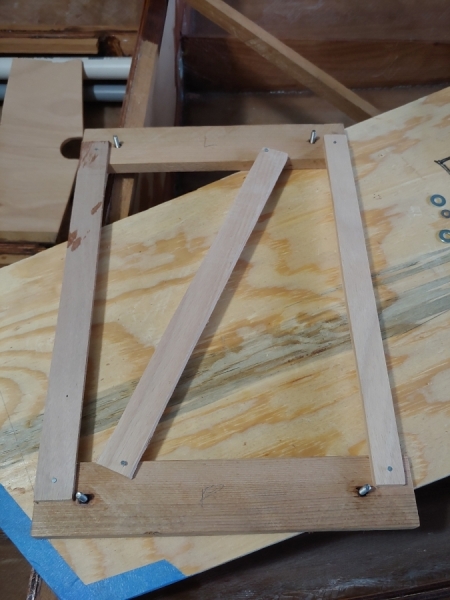
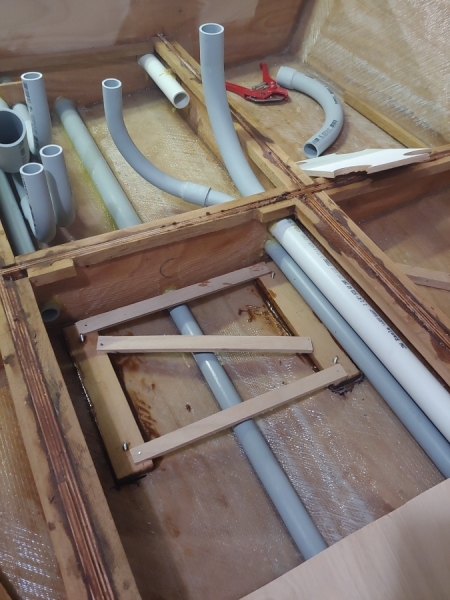
After that cured, I finished the mounts up with a coat of epoxy and a good fillet around the outside and then bonded in the tank compartment bulkhead.
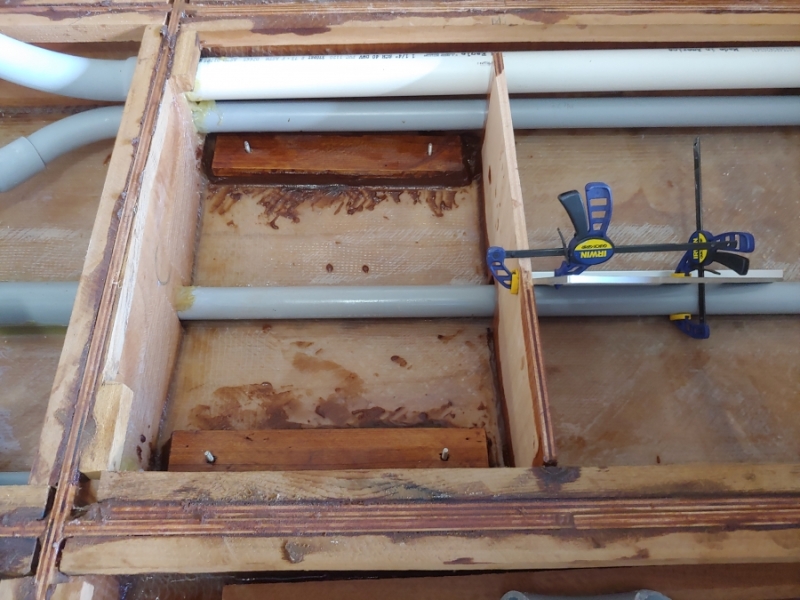
I've made a checklist at this point to finish out the sole. If y'all notice anything missing let me know.
Re: Cameron's FS14LS+5%
Posted: Fri Jul 02, 2021 12:04 pm
by Jeff
Nice progress!!! Jeff
Re: Cameron's FS14LS+5%
Posted: Sun Jul 04, 2021 9:08 pm
by bamaguy0
Progress from today:
Got all the elbows trimmed close to sole level. I planned for them to be a tad long and will trim down as needed once the sole is down. Remainder of the sole cleats are in and curing. Ill start working with the sole halves tomorrow and getting the cutouts located so it drops right in. You can see my reworked cable tube. I tried using a torch to heat it up and flex it down a bit, but the torch was a bit too hot. I abandoned that idea and will just roll with it.

Also glassed the inside of the live well.
Happy 4th!
Re: Cameron's FS14LS+5%
Posted: Mon Jul 05, 2021 8:40 am
by Jeff
Nice progress bamaguy0!!! Jeff
Re: Cameron's FS14LS+5%
Posted: Mon Jul 05, 2021 4:52 pm
by Mojosmantra
Looking good Cameron.
I don’t have console and therefore haven’t had to deal with chase tubes penetrating the sole vertically. I’m sure it’s common practice, but I’m curious how you deal with potential water intrusion into the tubes if they are cut flush with the sole? Is the console itself designed to prevent that? If water does happen to get in - is there a way for it to get back out?
Re: Cameron's FS14LS+5%
Posted: Mon Jul 05, 2021 9:05 pm
by bamaguy0
Off work today, so I was hard at it. Made some great progress I think. I just need to foam the inside and join the sole together. I've heard/read that the foam works better in lower humidity, so that will likely wait at least until Elsa passes by. I'm not in the path, but I anticipate plenty of rain over the next few days. Low humidity and Florida summers don't go together, but I'll give it the best chance it's got.
Most of the work today involved getting the soles cut out with all the various and sundry holes for tubes and the fuel tank and console.
First was the chase tubes. The cable tube was a bugger as anticipated. Had to do some filing on the bottom side to get it to clear.
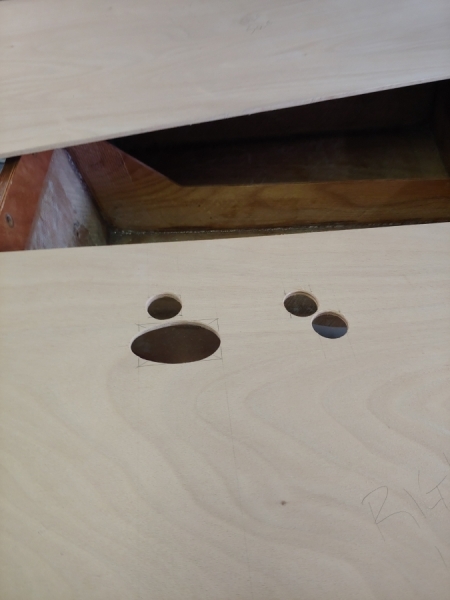
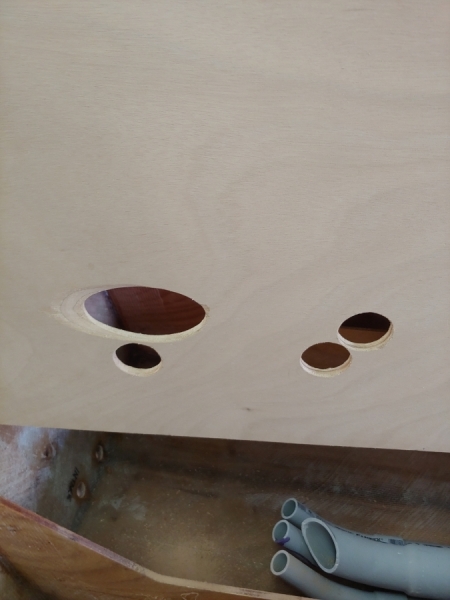
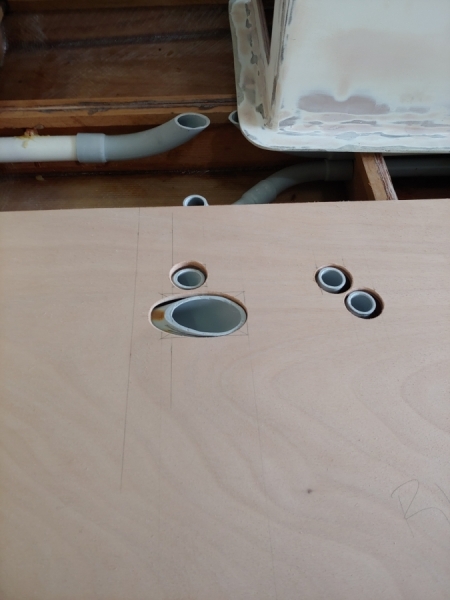
Here you can see both sides completed.
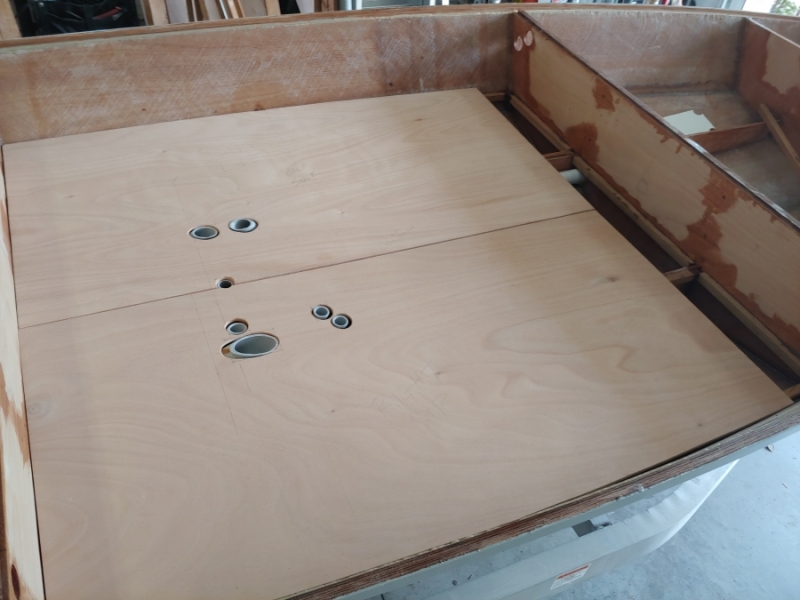
Next was the cutout for the fuel tank.
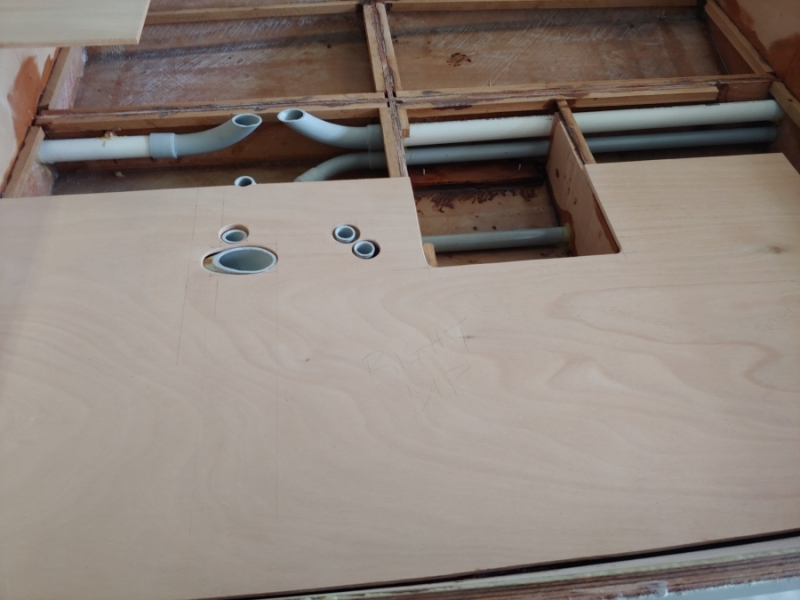
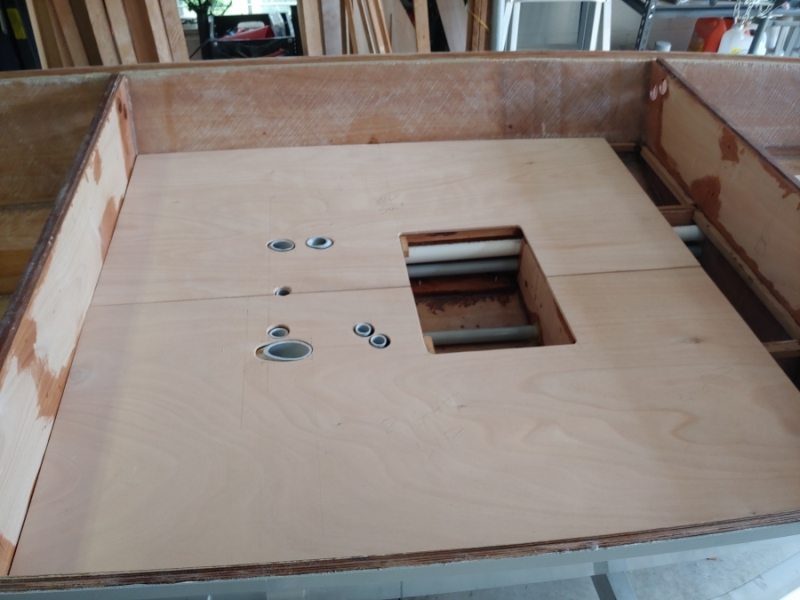
At this point I sat the console in place and marked it on the sole pieces. Also staged the aft deck for this photo. Just wanted to see how it all looked. I have to admit I got a little giddy at this point. Now remember the deck is long here, yet to be trimmed to Frame D.
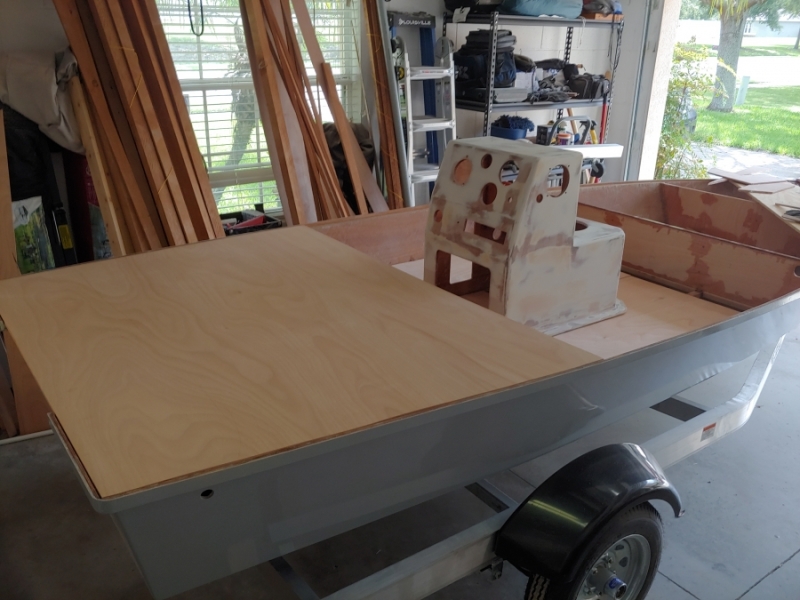
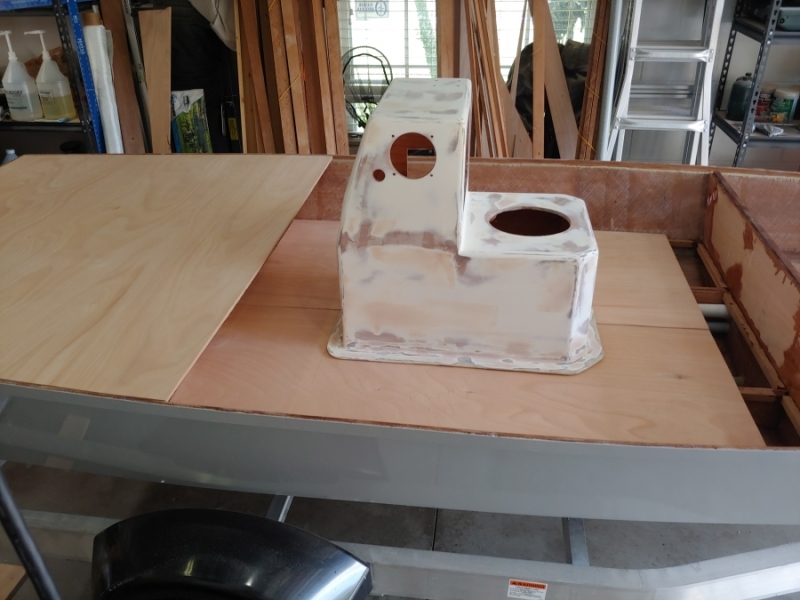
After these pics, I drilled mounting holes into the console then sat it back down onto the sole. I used the same size bit to "punch" marks into the sole to identify hole locations to drill. Drilled those out, and from here will join the sole together. After the sole is joined, I'm going to install carriage bolts underneath the sole. The observant among you will notice a gap in the front. That gap is because I cut out the sole halves in the initial cut of pieces and later decided to move Frame B forward to give the console more room. I'll have to make a 3rd piece to fill that in.
I also glued in a "septum" for the console to isolate the fuel tank area from the rest of the console. The septum aligns with Frame C and will be sealed down to it to avoid any potiental vapors from migrating over to my electrical bits.
Re: Cameron's FS14LS+5%
Posted: Mon Jul 05, 2021 9:12 pm
by bamaguy0
Mojosmantra wrote: ↑Mon Jul 05, 2021 4:52 pm
Looking good Cameron.
I don’t have console and therefore haven’t had to deal with chase tubes penetrating the sole vertically. I’m sure it’s common practice, but I’m curious how you deal with potential water intrusion into the tubes if they are cut flush with the sole? Is the console itself designed to prevent that? If water does happen to get in - is there a way for it to get back out?
So my intention was that the tubes be slightly proud of the sole and I would run a fillet of glue around them, but as you can see in my latest update that didn't happen. I'm thinking I'll build up a small ring around each hole with epoxy. I might even have enough PVC left over in each size to glue one down. I plan to 4200 the console down to the sole so I would not expect water intrusion, but even then I plan to do something. They will not be flush.
Re: Cameron's FS14LS+5%
Posted: Thu Jul 08, 2021 10:54 pm
by bamaguy0
I got antsy and foamed tonight. Once I got in a rhythm it went pretty smoothly. I'd say it's probably 80%, but I wanted to stop and trim before going any further. That used up nearly an entire 2 gallon kit. I think I have about a half gallon left, so I want to be strategic in my next pours.
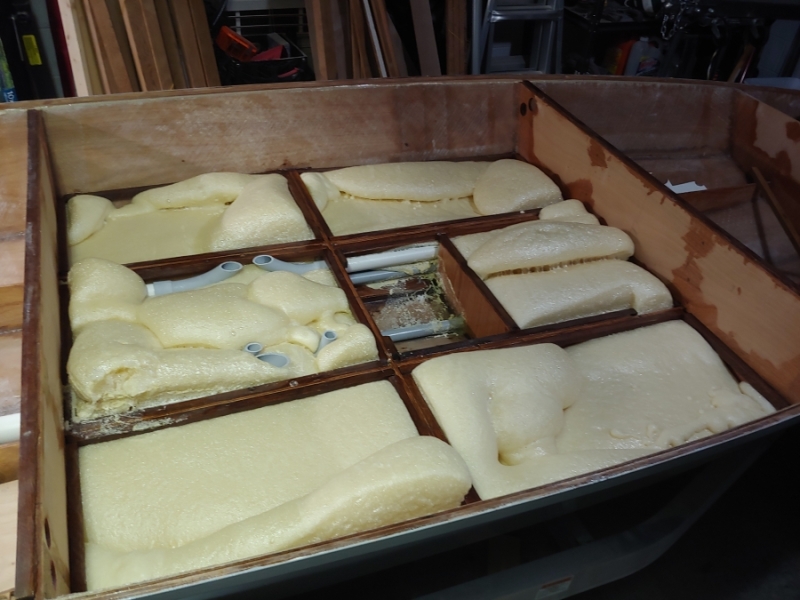
You'll notice a mess in the tank cavity...
I was originally going to make a closeout for the frame around the pipes, but then I thought...ya know the foam will fill that void and I can just epoxy it from the inside to really ensure it's sealed up. So I poured some in the corner and it expanded well into the cavity beyond what I expected. I scooped a lot of it up before it set, but will have to clean up a little bit more mechanically. That forward carriage bolt was entirely covered with foam. I at least got that cleaned up and useable. That was my only panic event with the foam so far.
Re: Cameron's FS14LS+5%
Posted: Sat Jul 10, 2021 3:39 pm
by bamaguy0
Didn't do much with the boat yesterday except I found a pretty good facebook deal on a 6ft Power Pole. Drove up to Dunnellon to get that. The pump is pretty old and rusty, but I was thinking about replacing with an electric actuator anyway...I've found some IP68 actuators that should drop right in. Doesn't seem like anyone has tried it though.
Trimmed up the foam and that was about it.
Today I start fit checking. Mostly making sure there's foam clearance for the butt blocks holding the sole together, then I went back and filled some areas that were a little thin. This has expended a full 2 gallon kit, but I will say that if I had been a little more strategic with my pours on Thursday night I probably wouldn't have wasted quite as much.
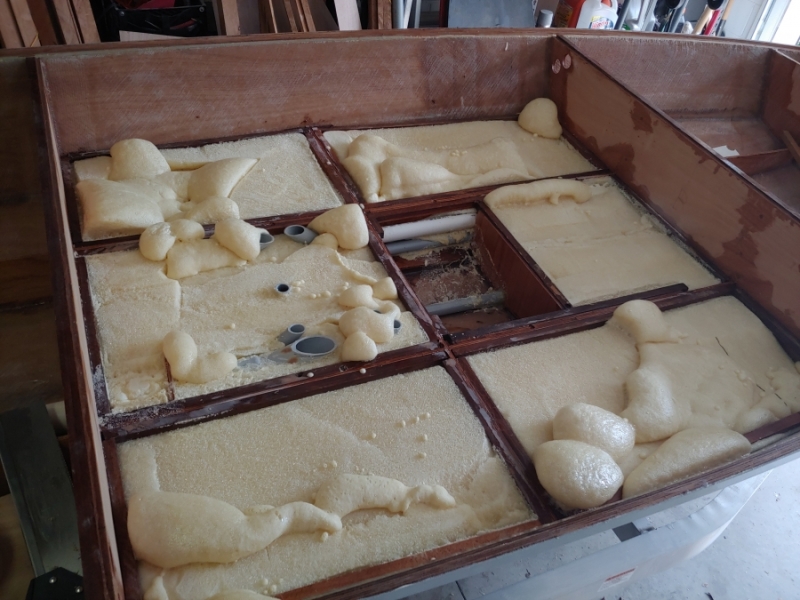
Epoxy coated the underside of the sole as well. I'll tap in the Carriage bolts after it sets for a little bit.
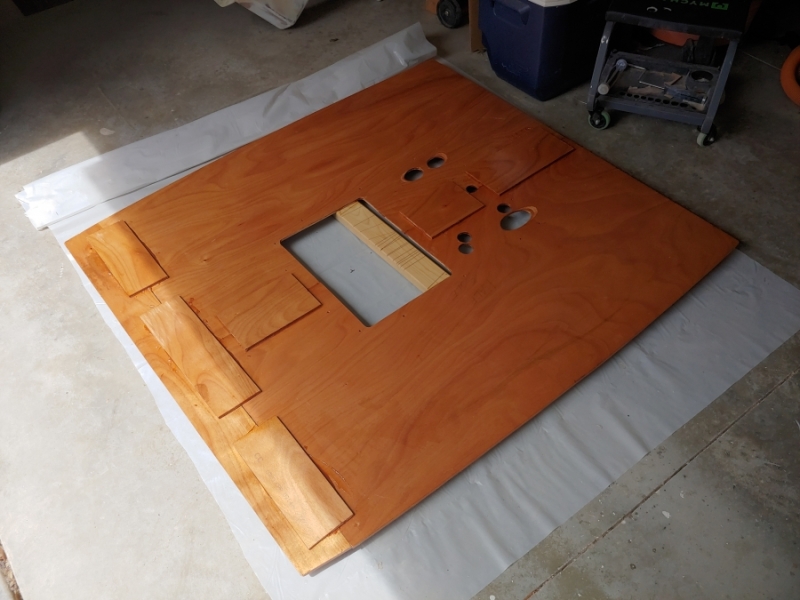
Re: Cameron's FS14LS+5%
Posted: Sat Jul 10, 2021 5:31 pm
by VT_Jeff
Man, you are on a roll! Riding that wave while its up!
All that plumbing seems like a ton of work, looks great though.
Smart move moving that frame forward. That's one of my regrets.
Where I needed to come up through the sole, I built a 4" high dam around it out of plywood and capped it so that standing water would not work directly on the through-sole joint. So far seems to work.
If you keep rolling at this rate what do you figure for a splash date, any goal in mind?
Re: Cameron's FS14LS+5%
Posted: Sat Jul 10, 2021 5:47 pm
by bamaguy0
VT_Jeff wrote: ↑Sat Jul 10, 2021 5:31 pm
Man, you are on a roll! Riding that wave while its up!
All that plumbing seems like a ton of work, looks great though.
Smart move moving that frame forward. That's one of my regrets.
Where I needed to come up through the sole, I built a 4" high dam around it out of plywood and capped it so that standing water would not work directly on the through-sole joint. So far seems to work.
If you keep rolling at this rate what do you figure for a splash date, any goal in mind?
Thanks! I have to say your progress has helped fuel my efforts.
All of the tubing is within the console so I'm not super concerned, but I will build something up around them just in case after the sole is down. I might experiement a little.
My goal all along has been a year which would be late September. I don't think I'll be there because once the sole is done, I'll have hatches and stuff to do. I think that will slow me down because I'm not a very skilled woodworker and that needs to be precise to look good. At this point I'll be happy to be done by the end of the year. Not gonna say much just yet, but I have a hard stop in January with some other projects that are gonna start coming up before that.

Re: Cameron's FS14LS+5%
Posted: Sat Jul 10, 2021 7:08 pm
by TomW1
bamaguy0 wrote: ↑Sat Jul 10, 2021 5:47 pm
VT_Jeff wrote: ↑Sat Jul 10, 2021 5:31 pm
Man, you are on a roll! Riding that wave while its up!
All that plumbing seems like a ton of work, looks great though.
Smart move moving that frame forward. That's one of my regrets.
Where I needed to come up through the sole, I built a 4" high dam around it out of plywood and capped it so that standing water would not work directly on the through-sole joint. So far seems to work.
If you keep rolling at this rate what do you figure for a splash date, any goal in mind?
Thanks! I have to say your progress has helped fuel my efforts.
All of the tubing is within the console so I'm not super concerned, but I will build something up around them just in case after the sole is down. I might experiement a little.
My goal all along has been a year which would be late September. I don't think I'll be there because once the sole is done, I'll have hatches and stuff to do. I think that will slow me down because I'm not a very skilled woodworker and that needs to be precise to look good. At this point I'll be happy to be done by the end of the year. Not gonna say much just yet, but I have a hard stop in January with some other projects that are gonna start coming up before that.
Hope you get her done by your hard stop Cameron. Wish you had asked about cutting off your tubes most leave them up about 4-6 above the deck. Oh well to late now. Sounds like you are figuring a way to solve the problem.
Tom
Re: Cameron's FS14LS+5%
Posted: Sun Jul 11, 2021 8:55 am
by bamaguy0
Intent was about 1/2" above the deck, but I missed the mark a bit. I shall overcome!
Re: Cameron's FS14LS+5%
Posted: Sun Jul 11, 2021 5:25 pm
by bamaguy0
Re: Cameron's FS14LS+5%
Posted: Sun Jul 11, 2021 8:56 pm
by bamaguy0
Opinions solicited!
So I have been thinking about how I want to drain my hatches. I do not want to bother with tubing and draining each individual gutter somewhere. I have seen some boat designs with gutters built into the deck. I think I'd like to try to recreate that. Here's an example. This shows the foredeck area, but the aft does the same into the motor/splashwell.
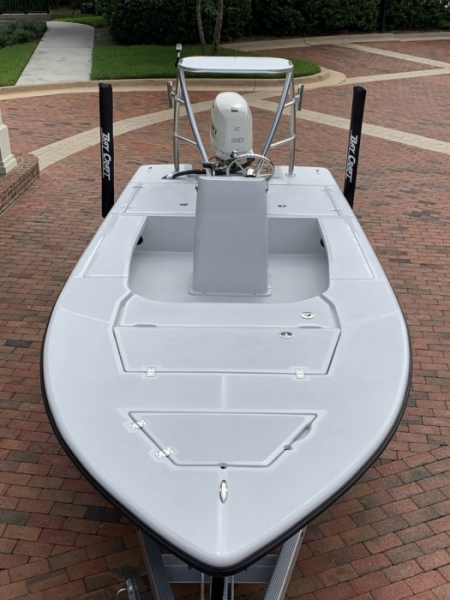
The best idea I have this far is this. I have plenty of cedar that I will be using for the hatch gutters, I'll just add additional lengths to run to the aft end of Frame B in the front and to the splashwell in the aft. My deck becomes basically pieces between where the gutters run. I'll notch out Frames A and B for the gutters to run.
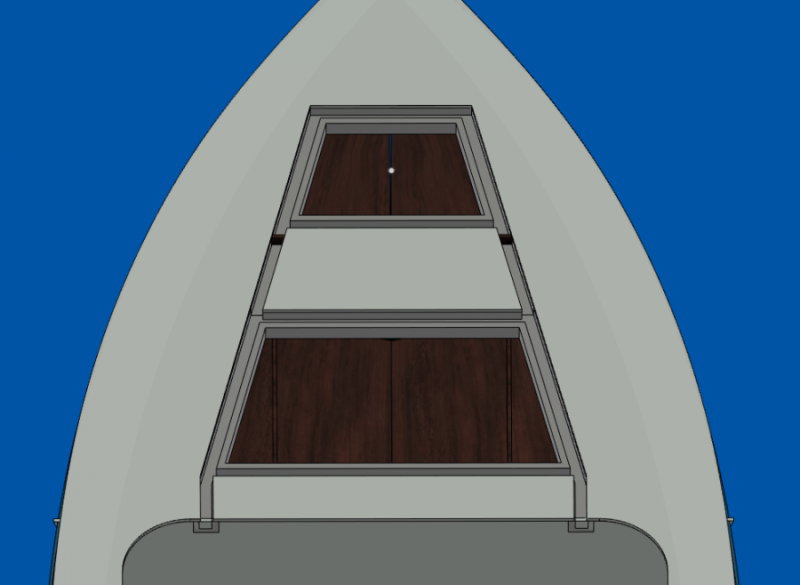
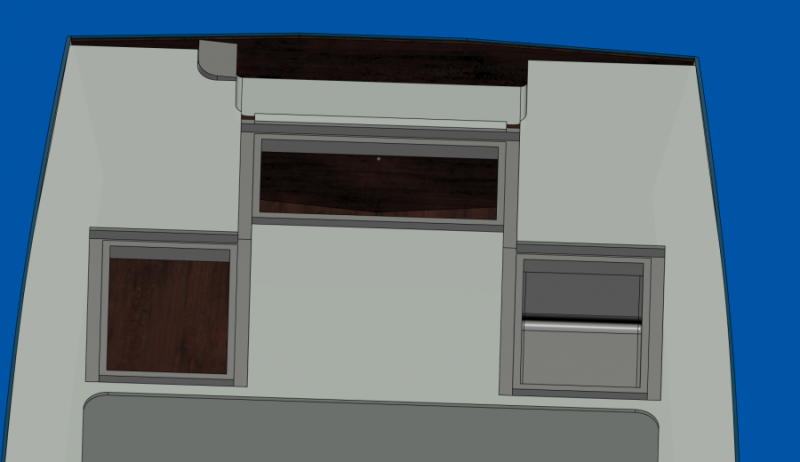
Thoughts?
Re: Cameron's FS14LS+5%
Posted: Mon Jul 12, 2021 12:08 am
by Fuzz
I like it! Does the KISS thing real well
Re: Cameron's FS14LS+5%
Posted: Mon Jul 12, 2021 8:47 am
by Jeff
Me too!!! Jeff
Re: Cameron's FS14LS+5%
Posted: Mon Jul 12, 2021 9:19 am
by VT_Jeff
I'm a fan of that as well. Are they going to be visible or invisible?
Re: Cameron's FS14LS+5%
Posted: Mon Jul 12, 2021 2:30 pm
by bamaguy0
Finished out and painted it would just appear as channels in the deck like the photo of the Baycraft. Thought about closing it up and having them run all stealthy-like but I'm concerned with moisture and adhesive squeezeout blocking them up.
Re: Cameron's FS14LS+5%
Posted: Sat Jul 17, 2021 1:14 pm
by Mojosmantra
I think the gutters are a really nice idea. Don’t see why that wouldn’t work out well. You’ve gotten my wheels turning since this is something I haven’t addressed yet. And bravo on the sole. I imagine that making sure you cut all those holes in the right place was a bit of a pucker moment
Re: Cameron's FS14LS+5%
Posted: Sat Jul 17, 2021 1:22 pm
by bamaguy0
Mojosmantra wrote: ↑Sat Jul 17, 2021 1:14 pm
I think the gutters are a really nice idea. Don’t see why that wouldn’t work out well. You’ve gotten my wheels turning since this is something I haven’t addressed yet. And bravo on the sole. I imagine that making sure you cut all those holes in the right place was a bit of a pucker moment
Measure thrice!
Re: Cameron's FS14LS+5%
Posted: Fri Jul 23, 2021 7:30 pm
by bamaguy0
Been on vacation this week. Camping trip with my wife's family. They don't fish, so I bring a buddy of mine along. This year we were at Douglas Lake near Sevierville, TN. Being this close to the Smoky Mtns, I couldn't not go trout fishing. Gave my buddy a beginner premier on fly fishing and to the mountains we went.


My buddy was able to catch 3 rainbows. This being the biggest of them.

I struck out but was estatic seeing him catch something.
In other news...my wife and I are expecting our first child in Jan '22!
The pressure's on to finish the boat!
Re: Cameron's FS14LS+5%
Posted: Fri Jul 23, 2021 10:34 pm
by Mojosmantra
Congrats Cameron! That’s awesome. And yes, you best finish up that boat - it’s a life changing event like no other. Mine just turned 14 and it flys by at a snails pace.
Re: Cameron's FS14LS+5%
Posted: Sat Jul 24, 2021 3:26 am
by Fuzz
Mojosmantra wrote: ↑Fri Jul 23, 2021 10:34 pm
Congrats Cameron! That’s awesome. And yes, you best finish up that boat - it’s a life changing event like no other. Mine just turned 14 and it flys by at a snails pace.
x2 Boy is life going to change for you.l
Re: Cameron's FS14LS+5%
Posted: Sat Jul 24, 2021 11:36 am
by TomW1
X3 Cameron best wishes to you and your wife. Make sure you finish your boat before the young one comes. You won't have much time after.
Tom
Re: Cameron's FS14LS+5%
Posted: Wed Jul 28, 2021 9:45 pm
by bamaguy0
Back to the grind this week. Unfortunately I'm mostly back in the office now for work, so I have an extra 30-45 minute commute to deal with that cuts into boat working time in the evenings.
Before my vacation I built the lip for the baitwell and glued it on. This is what will bond to the bottom side of the hatch once that's built.
This is what I wish I had done with my console flange.
First I did a layup of 2 layers of CSM to make the lip. Top and bottom layers were staggered in the corners to tie them together.
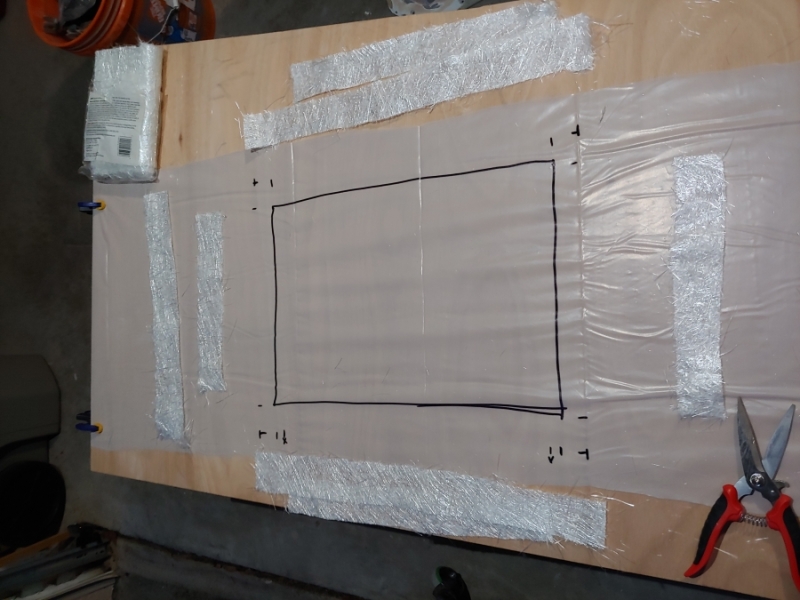
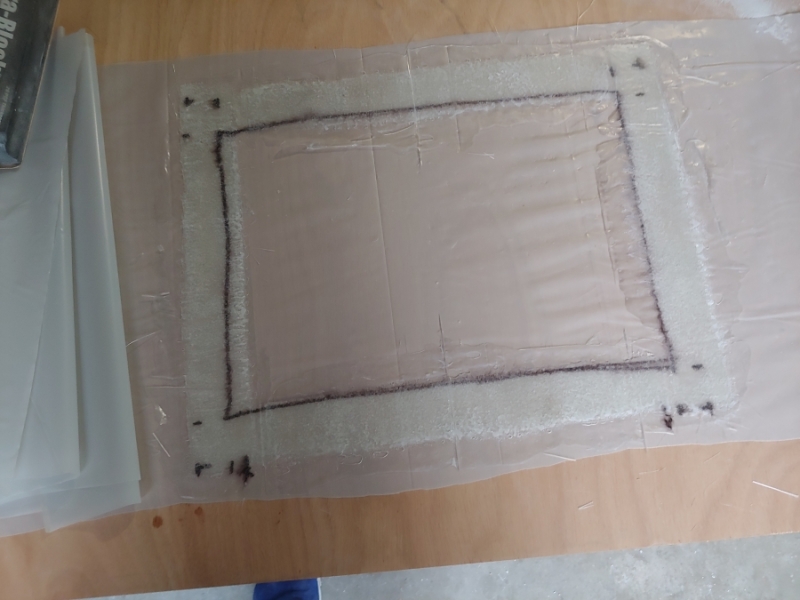
After this was done, I placed a sheet of plastic over it with a board and some weight to get it nice and flat.
After that, I pulled it free from the plastic and bonded the baitwell down to it. Then came back and tabbed it all together with some 4oz woven.
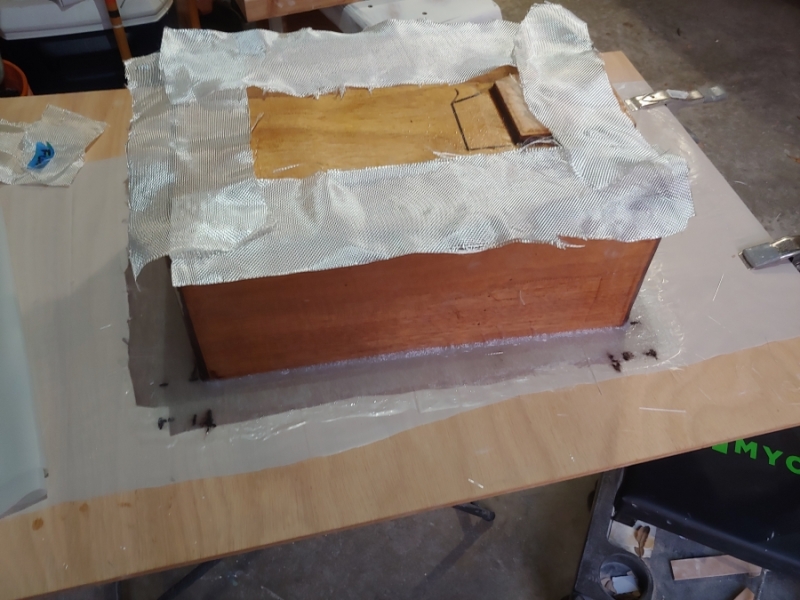
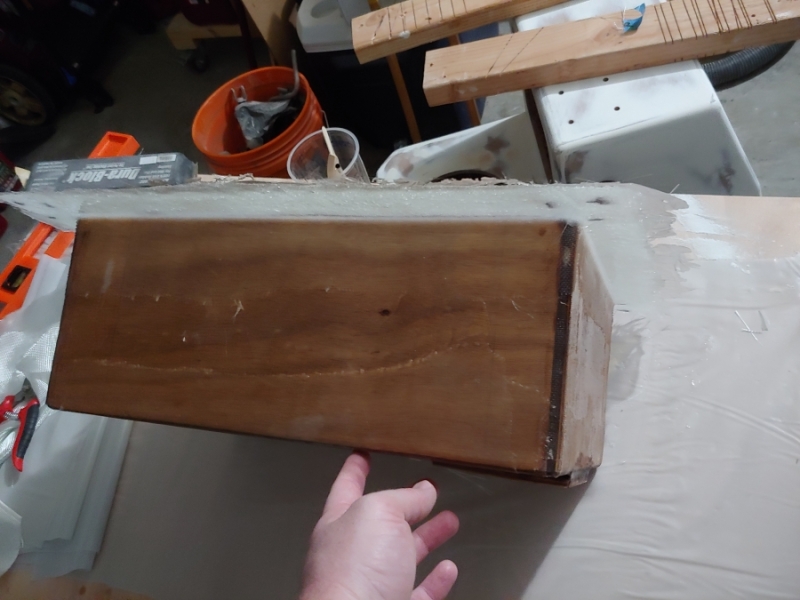
Once cured I had a mess to clean up on the inside.
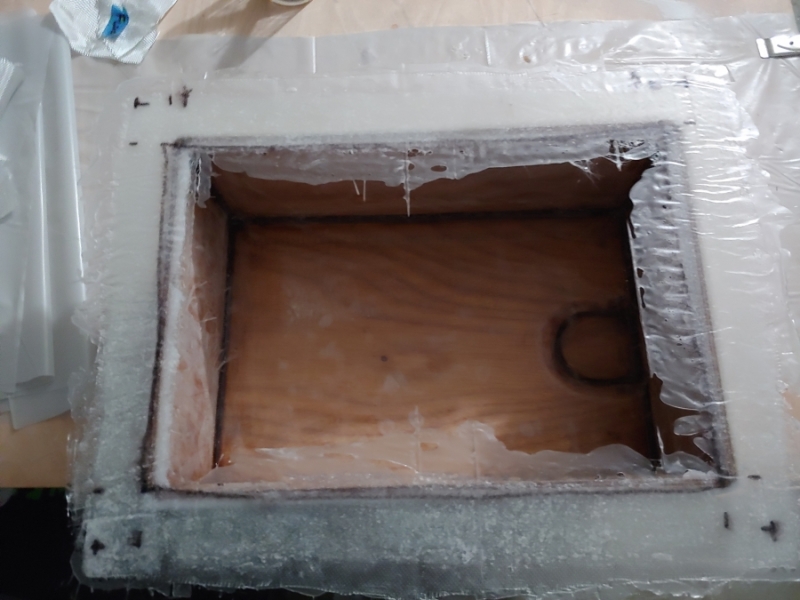
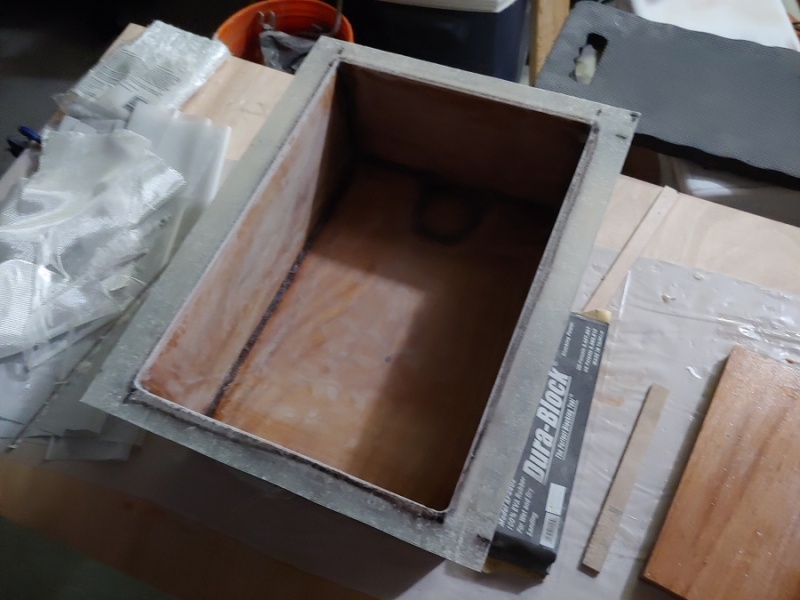
At this point, I'm waiting on a couple more things to get to a point where I can apply a coat of quikfair to the inside and prime it. I dont plan on making the inside super perfect, but one pass of fairing to smooth out the roughness and then primer and bilge paint should be sufficient.
Work this week has been mostly on the forward locker area. First I wanted to close off the spaces outside the stringers in front of Frame B. I bonded on cleats at a slight angle so any water than gets inside will run down to the drain in the middle.
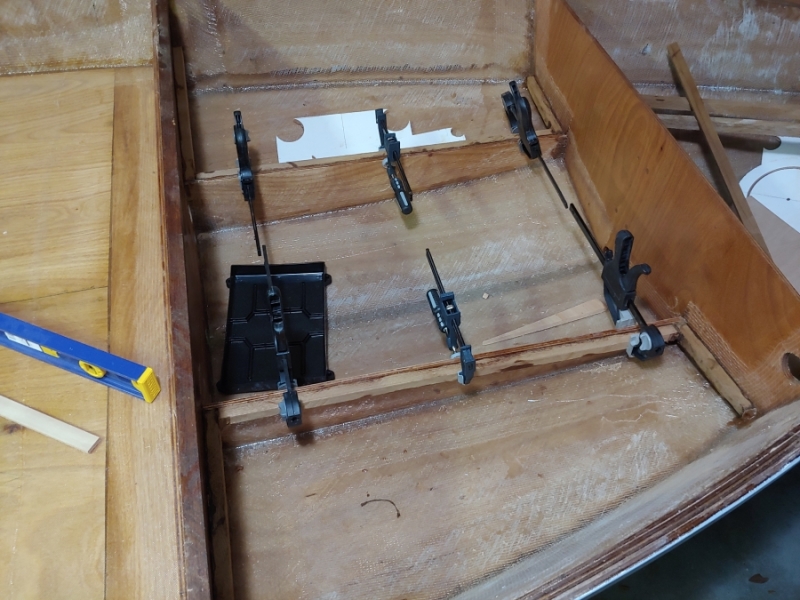
And I've foamed the cavities.
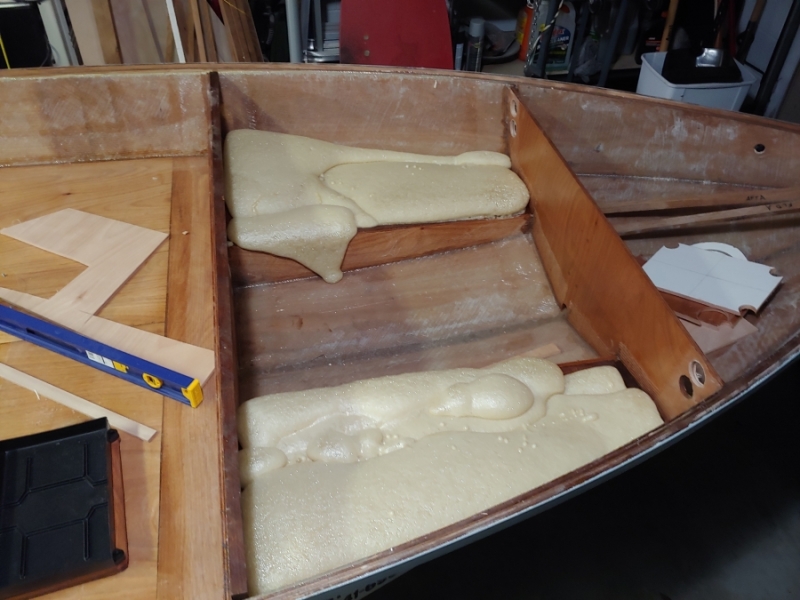
Next I'll clean up the foam and install panels over top. I'm thinking I'll just use some leftover 6mm ply since that won't really have to withstand much.
I also fabbed and epoxy coated a battery tray mount. That will go in the center just in front of Frame B. This is for my trolling motor battery.
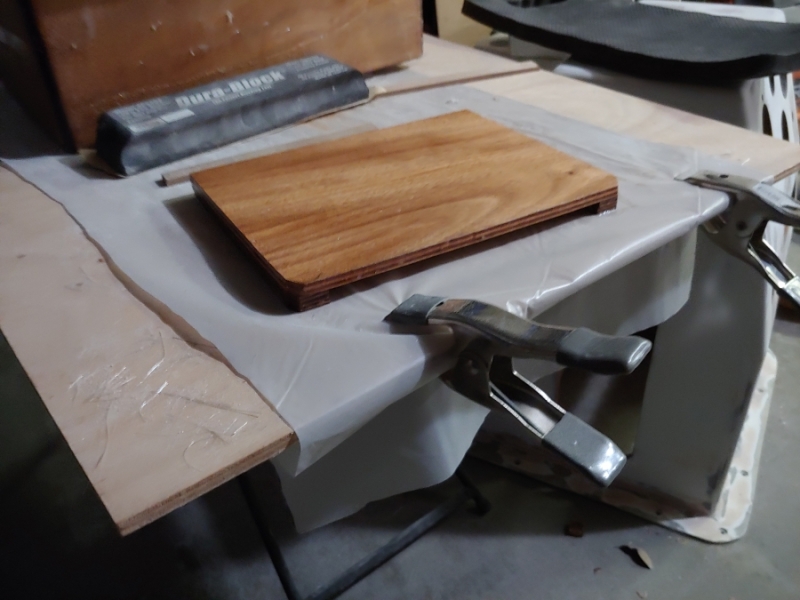
I borrowed a benchtop planer from a buddy, so I'll start working on the hatch gutters this weekend. That's going to become the big project over the next few weeks I believe.
Re: Cameron's FS14LS+5%
Posted: Fri Jul 30, 2021 12:14 pm
by VT_Jeff
bamaguy0 wrote: ↑Fri Jul 23, 2021 7:30 pm
In other news...my wife and I are expecting our first child in Jan '22!
The pressure's on to finish the boat!
Congrats on amazing news Cameron! Nothing like an impending birth to keep the pressure on!
Re: Cameron's FS14LS+5%
Posted: Fri Jul 30, 2021 12:47 pm
by Jeff
Congratulations, that is great news!!! Jeff
Re: Cameron's FS14LS+5%
Posted: Fri Aug 06, 2021 9:19 pm
by bamaguy0
Been working on building hatch gutters and getting the decks cut out.
First I planed the cedar boards down to 2 x 1-7/8. I built the aft hatches first because they're square and easy so I could learn on those with minimal reprocussions for mistakes. Didn't snap any photos of the hatch gutter itself, but after completed I laid it on the deck, centered it up and marked it's inside perimeters. I measured out .5 inches for the seal, an inch for the gutter, and then back in .25 inches for the gap between deck and hatch.
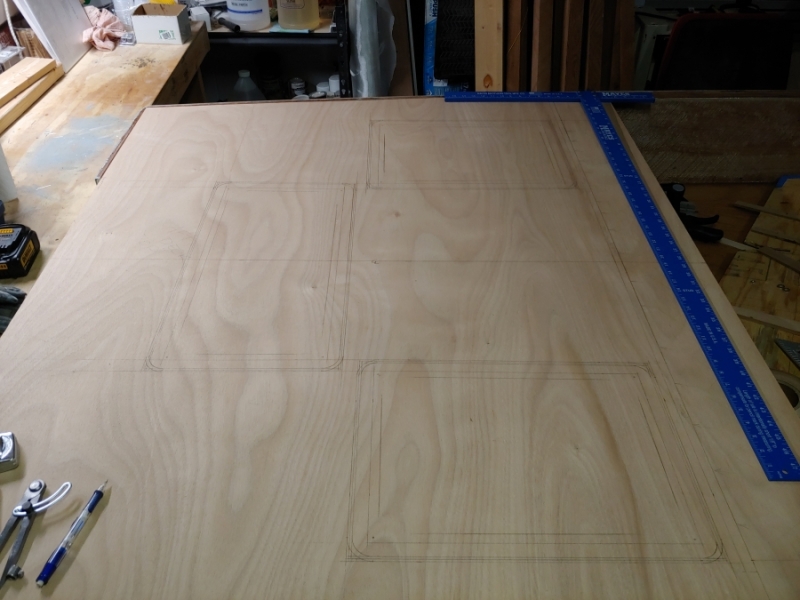
Drilled a bunch of holes midway in the gap region and cut the hatches out.
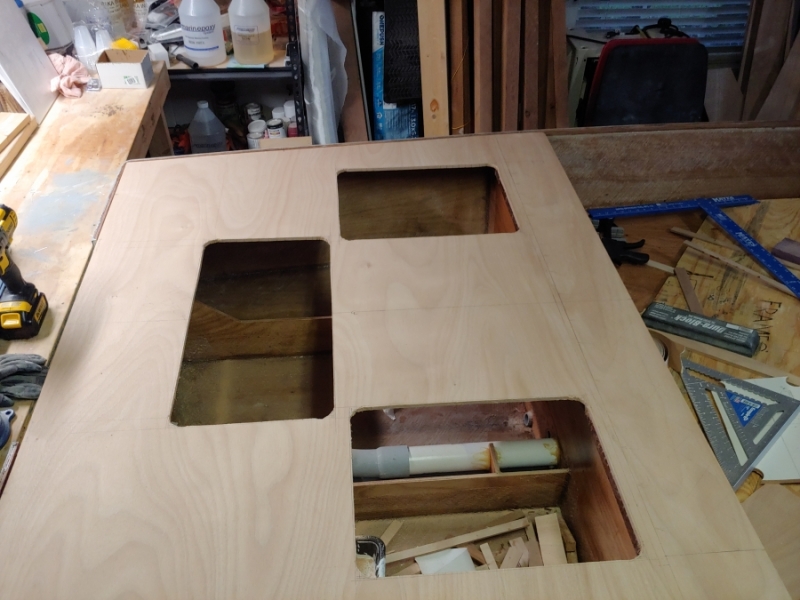
Cleaned up the deck cutouts now so that's ready for the hatch gutter to finish up then I'll glue them on.
Here's the forward hatch gutters dry fit.
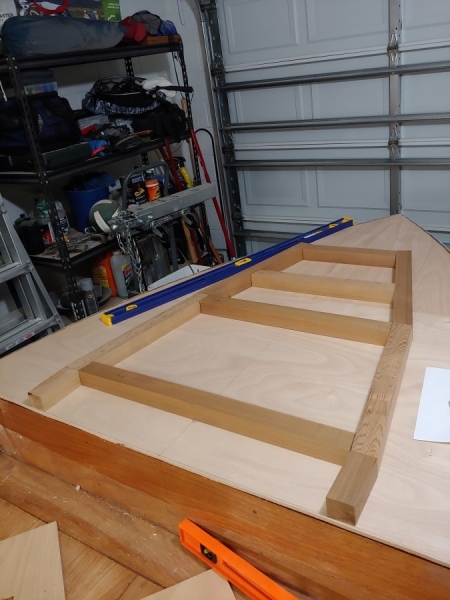
And glued together. I first glued it in 2 pieces, a bottom section and top section, then after that set I glued it all together how you see in this photo.
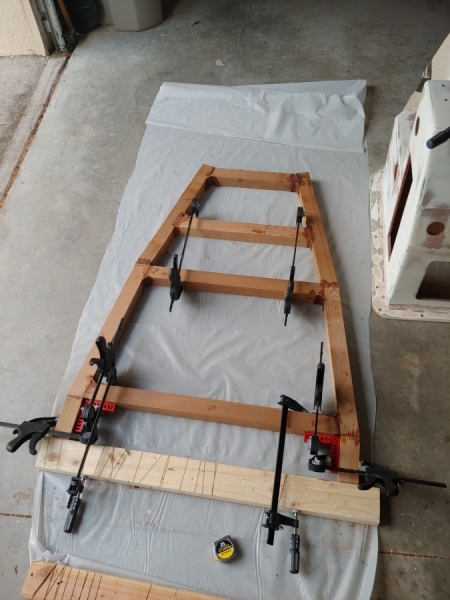
Re: Cameron's FS14LS+5%
Posted: Sun Aug 08, 2021 10:01 pm
by bamaguy0
And got the fore deck cut out.
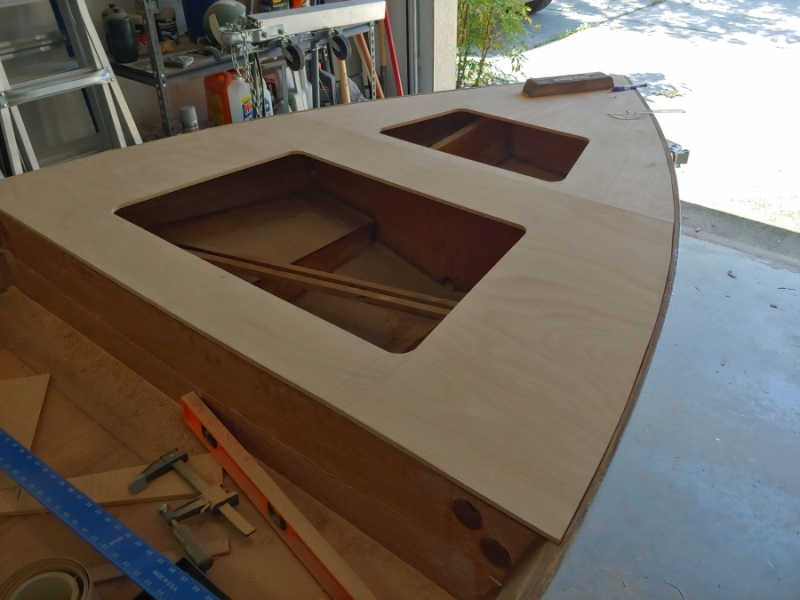
Going out of town for a work trip. No progress this upcoming week.

Re: Cameron's FS14LS+5%
Posted: Mon Aug 09, 2021 6:37 am
by bamaguy0
I realized I never posted anything about the floor in the fore locker area after foaming it in. Here's the completed work.
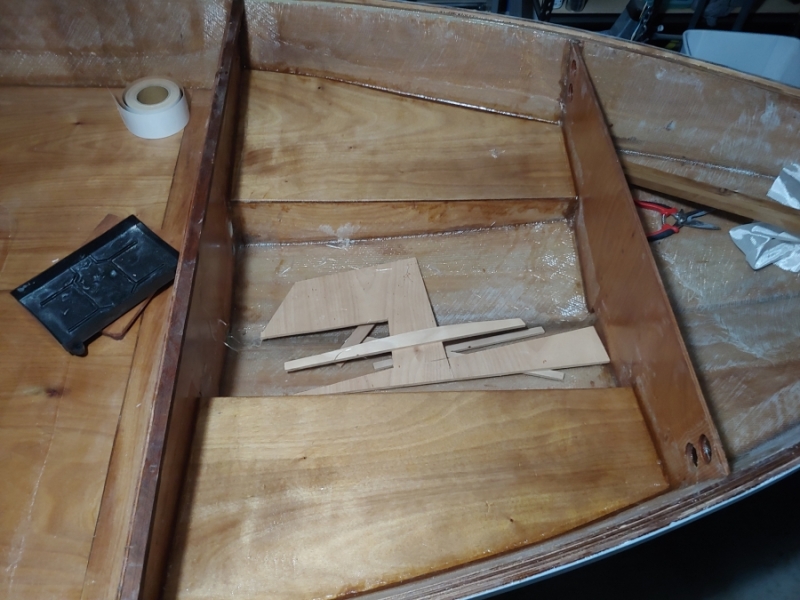
I think as far as the fore locker area goes I just need to bond some mounting plates for some electrical terminal blocks, bus bars, circuit breaker, and battery charger then get some coats of primer on and see how she looks. Ill probably do a little bit of filling after primer, but I don't intend on spending a whole lot of time on it.
Re: Cameron's FS14LS+5%
Posted: Mon Aug 09, 2021 9:13 am
by VT_Jeff
Those cutout corners look perfect from the photos! I was so sure I would mess those up that I just cut squares and glued radius pieces back in. I'm sure many would like to know your method on that. Are the cut out pieces usable as the lids?
On the gutters, one thing I never grasped from Seaslugs build was how he got the deck supports to line up perfectly with the outside of gutters, this seemed like black magic to me. I've read his descriptions but my reading comprehension skills are not up to the task and that piece wasn't really highlighted.
All is looking great, nice work!
Re: Cameron's FS14LS+5%
Posted: Mon Aug 09, 2021 4:13 pm
by Mojosmantra
The deck looks great and I think the fore locker floors are a great approach. Kind of wish I would have thought of that since it checks a lot of my boxes.
Re: Cameron's FS14LS+5%
Posted: Mon Aug 09, 2021 5:38 pm
by bamaguy0
VT_Jeff wrote: ↑Mon Aug 09, 2021 9:13 am
Those cutout corners look perfect from the photos! I was so sure I would mess those up that I just cut squares and glued radius pieces back in. I'm sure many would like to know your method on that. Are the cut out pieces usable as the lids?
I drew the radii in when I laid out the offsets from the inside of the gutters. In the corners i drilled as many small holes as I could fit along the radius to knock it mostly out.
I did the cutout with a Dremel Oscillating tool(most used power tool of this whole project at this point I think...). When I got to the corner I did get a little chatter trying to cut thru what was left, but I think a roundover will blow most of it away. I setup for a 1/4" gap deck to lid so I had a decent amount of room to make a chattery mess and still clean up both edges. I used a piece of PVC with sandpaper stuck to it to clean up the inside radii of the deck and my short fairing block for the straights. I'll get some close in photos once I get home later in the week since you're curious, but yeah the cut out pieces are definitely lid worthy!
VT_Jeff wrote: ↑Mon Aug 09, 2021 9:13 am
On the gutters, one thing I never grasped from Seaslugs build was how he got the deck supports to line up perfectly with the outside of gutters, this seemed like black magic to me. I've read his descriptions but my reading comprehension skills are not up to the task and that piece wasn't really highlighted.
I'd be lying if I told you I had it all figured out, but I do have some ideas! I do know my integrated deck gutter scheme is a blessing and a curse in that it's all tied together, but seaslug used deck framing to frame his individual hatch gutters as well. I definitely have some work to do. It will complicate the rear one moreso than the fore. Since I have to notch the frames out on the fore deck for the gutter to run thru the gutter itself will be some of the support. That's not the case aft since it's running aft to the motorwell and not foreward to the cockpit. Although it is kinda butted up with Frame D.
One of the smarter things I did was mark the deck and rubrail in a couple strategic locations so I can ensure that they go back to the same location every time. I think I can use the openings in the deck plus offsets for gutter width to outline where framing can go at least and then run marks out to the top of the rubrail. I can then use that for locating framing underneath probably +/- 1/16", definitely +/- 1/8". Anything else is just grind to fit, paint to hide.
I will say I'm on the fence about the process sequence...do I glue the gutters in the boat with deck supports and then glue the deck down on top or do I glue the gutters to the deck and install it all together after supports are put in. I think for framing ease, gluing the gutters in first would be easier, but it would be much easier on my body if I glued the gutters into the deck and finished that out before it was on the boat. I'm leaning towards the latter, BTW. A cheap borescope might be on my tool list in the near future so I can make sure when I do glue the deck down that the supports are indeed helping support.
Re: Cameron's FS14LS+5%
Posted: Mon Aug 09, 2021 5:44 pm
by bamaguy0
Mojosmantra wrote: ↑Mon Aug 09, 2021 4:13 pm
The deck looks great and I think the fore locker floors are a great approach. Kind of wish I would have thought of that since it checks a lot of my boxes.
Thanks, I said the same thing about your foamed-in butt block for the sole!
Re: Cameron's FS14LS+5%
Posted: Thu Aug 12, 2021 6:02 pm
by bamaguy0
Couple pics on the deck and hatches that were cut out.
Here's what good looks like.

This is probably one of the worst edge chips. I'll have to do a small fill job before I round the edge over.
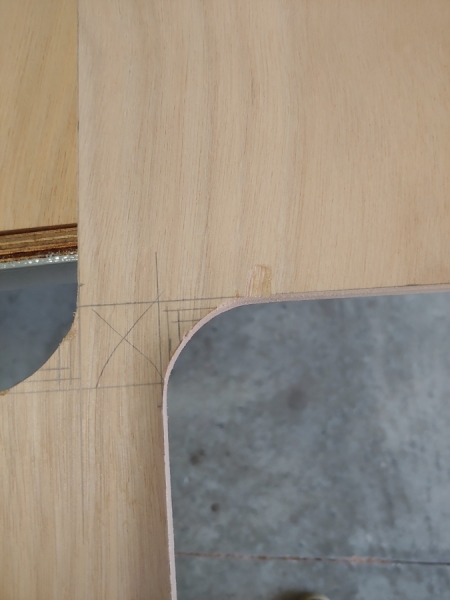
Here's a random selection of the hatch edges. You can see some of the chattering. I might have to fill a little bit, but I think they're definitely passable!
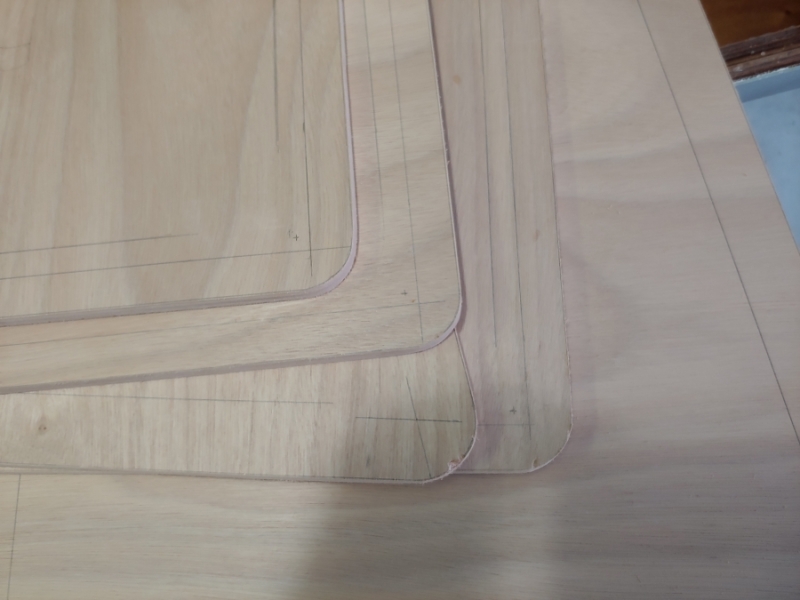
Re: Cameron's FS14LS+5%
Posted: Thu Aug 12, 2021 8:23 pm
by VT_Jeff
Those look great, chips and all. Rounding may add a few more chips, though I'm a bit hopeless with a router, you may have better skill/luck.
.
Re: Cameron's FS14LS+5%
Posted: Thu Aug 12, 2021 8:25 pm
by bamaguy0
It would definitely be luck if so!
Re: Cameron's FS14LS+5%
Posted: Sat Aug 14, 2021 8:54 pm
by bamaguy0
Progress for this weekend. I think my forelocker areas are ready for prime and paint! TBD on if I care to fair them out any. I think I'll wait and see what a couple coats of primer look like on them before making the call.
I got my rod tubes bent and set them out of the way.
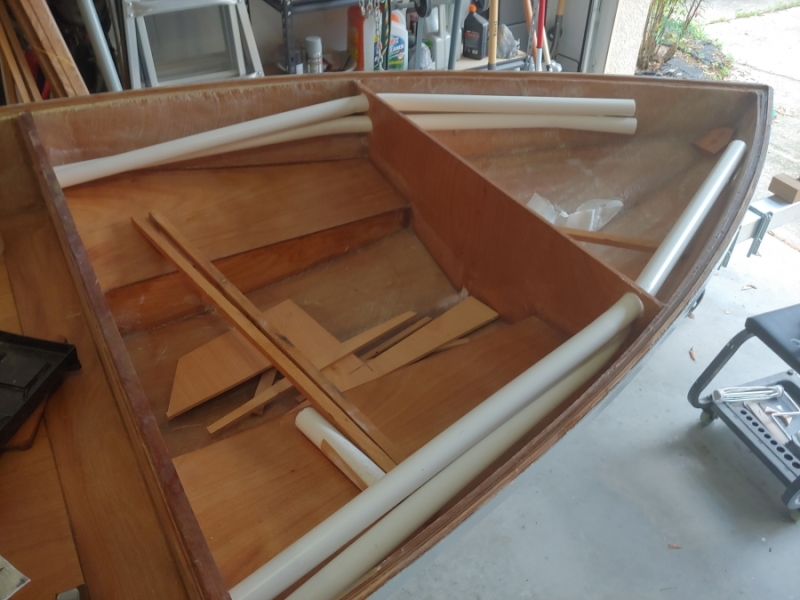
Here's an inprocess photo of getting the hatch gutters situated into the frames.
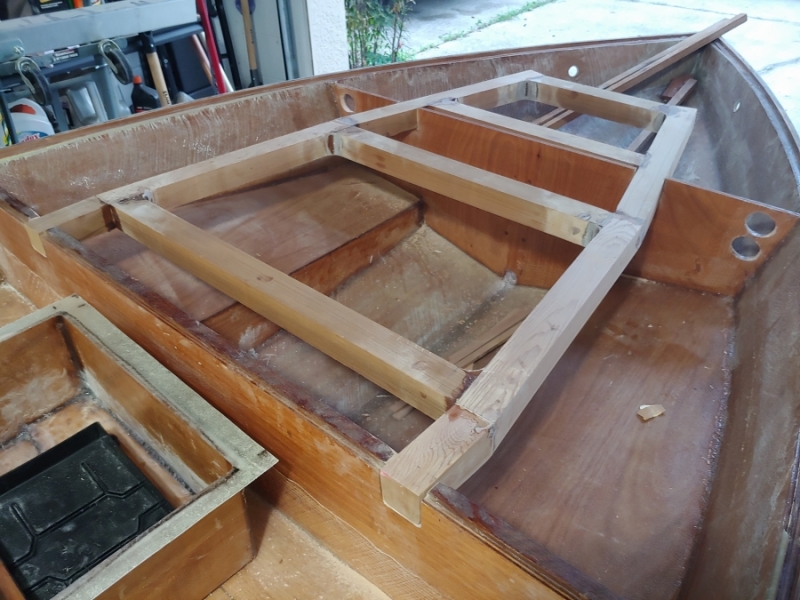
I cut out a little more than needed so I can kinda bed them into the epoxy adhesive and ensure they're level to the deck cleating. I also rounded the corners of the frame cutouts. Squares are stress risers and although the epoxy will weld it all back together, I just decided to err on the side of caution. I rounded the bottom edges of the gutters to match.
Here's the rest of the holes cut out. Speakers, lights, and rod tubes are what all the holes are for.

Found the aftmost location of the aft hatch gutter system and am putting in deck support to tie in there. This will also be the fore end of the motorwell. I also notched the deck cleats at Frame D to locate the hatches as far forward as I can.
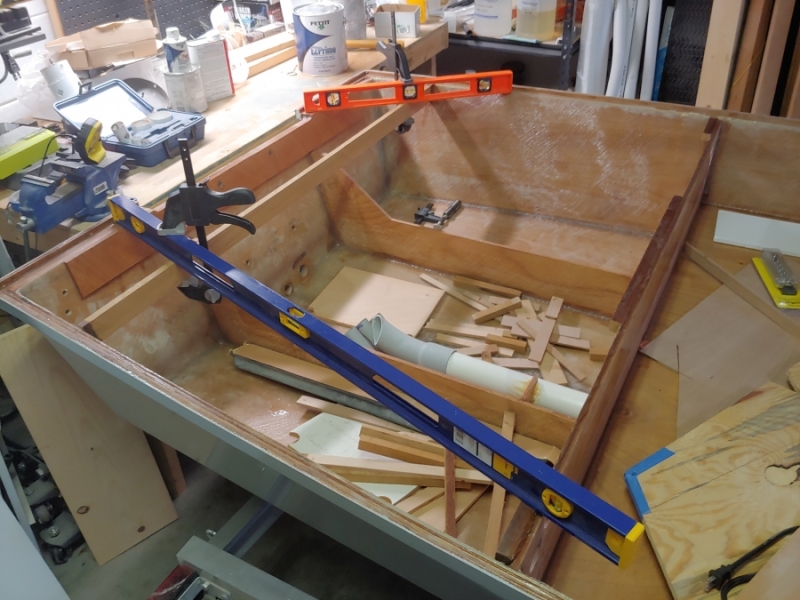
And as far as side projects go I finally got around to putting some primer down on the console after fairing and the livewell. Console outside is good 'nuff. I'm gonna flip it over and paint the inside with bilge paint then flip it back over and paint the outside hull color. Livewell will get a 2nd coat of primer and then I'll decide if anything needs fairing or if it's good 'nuff too. I really need to wrap up these side projects so I can start a couple others.
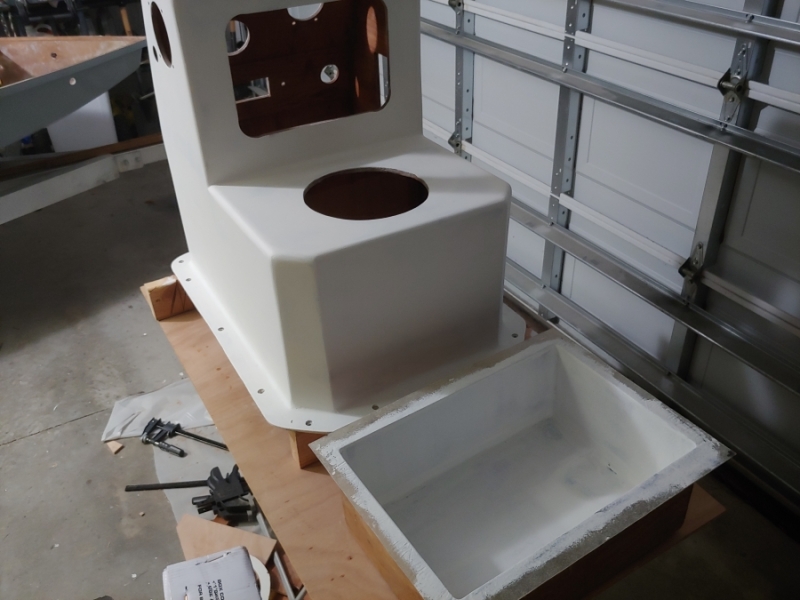
Flying out for another work trip tomorrow. Should be back Wednesday and I'll be mostly working from home again so more time on the boat.
Re: Cameron's FS14LS+5%
Posted: Tue Aug 17, 2021 3:21 pm
by VT_Jeff
Who needs deck framing with hatch gutters like that! Stout! You and CR can start a support group for those who feel the need to fair components that don't technically need to be faired.
That console looks great! I'd like to see something in the photo for scale.
Safe travels.
Re: Cameron's FS14LS+5%
Posted: Tue Aug 17, 2021 3:30 pm
by bamaguy0
The gutters are thick, but it's really surprising how light the cedar is. I see why seaslug likes to use it for his hatches.
I'll get another photo of the console with something for scale. The front seat is about 13" deep by 18" wide and the back is about 13" tall as well. Im going to dismantle a folding fishing seat and attach the cushions to it as that's about as close to the size as I could find without going full on custom.
Trip ended early. I got what I thought would take 2 days done in about a half a day, so I'm actually already back home.
Re: Cameron's FS14LS+5%
Posted: Tue Aug 17, 2021 5:21 pm
by Mojosmantra
To me, to fair or not fair the lockers is all about cleaning in the future and how easy you want that to be. I’d fair them because I hate little crevices that I can’t get clean.
Re: Cameron's FS14LS+5%
Posted: Tue Aug 17, 2021 6:48 pm
by VT_Jeff
Mojosmantra wrote: ↑Tue Aug 17, 2021 5:21 pm
To me, to fair or not fair the lockers is all about cleaning in the future and how easy you want that to be. I’d fair them because I hate little crevices that I can’t get clean.
Please never look inside my lockers, unless it's dark out and you're wearing sunglasses.
Re: Cameron's FS14LS+5%
Posted: Tue Aug 17, 2021 7:22 pm
by bamaguy0
Mojosmantra wrote: ↑Tue Aug 17, 2021 5:21 pm
To me, to fair or not fair the lockers is all about cleaning in the future and how easy you want that to be. I’d fair them because I hate little crevices that I can’t get clean.
Kinda where I'm at. Doesn't have to be perfect but at least a little continuity will help.
VT_Jeff wrote: ↑Tue Aug 17, 2021 6:48 pm
Please never look inside my lockers, unless it's dark out and you're wearing sunglasses.
Re: Cameron's FS14LS+5%
Posted: Tue Aug 17, 2021 8:02 pm
by Mojosmantra
Please never look inside my lockers, unless it's dark out and you're wearing sunglasses.
Your boat, your lockers and I don’t have to clean them. Works for me. I actually envy people that can let stuff like that slide. Wish I could.
Re: Cameron's FS14LS+5%
Posted: Tue Aug 17, 2021 8:11 pm
by Mojosmantra
Kinda where I'm at. Doesn't have to be perfect but at least a little continuity will help.
From my experience, the biggest PITA was where two inside corners meet. Otherwise is was pretty simple.
Re: Cameron's FS14LS+5%
Posted: Tue Aug 17, 2021 8:20 pm
by bamaguy0
First coat of primer. So far I'm thinking I'll go 2nd coat and then minimal fairing, then a final primer coat and then bilge paint.
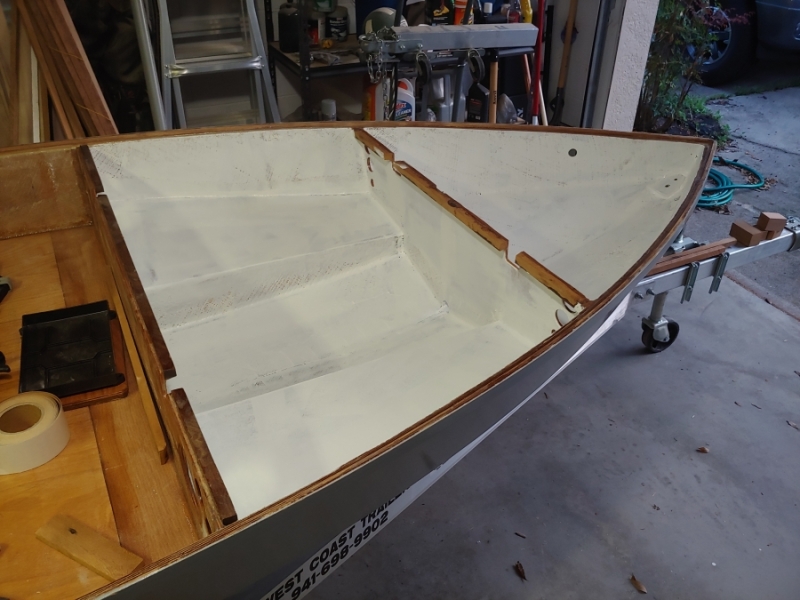
Re: Cameron's FS14LS+5%
Posted: Sat Aug 21, 2021 1:13 pm
by bamaguy0
Alright, looking for advice here. I think I know what to do, but I'd like more experience to weigh in as well.
This is to accomodate my livewell drain. It comes off the bottom and although the well is above the stringer, the drain is slightly below. I planned for this and I just want to make sure what I'm doing is kosher.
I'm going to put a floor in on the outside of the stringers at stringer height except between the 2 marks shown below.
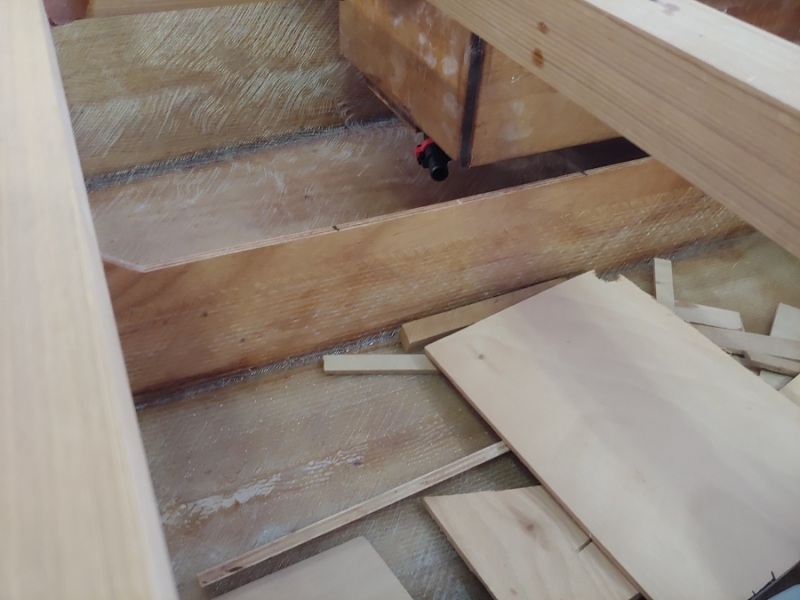
There, I'll dip the floor shallow in order to route the hose off the drain fitting. What I'll need to do is place I think at least 2 holes in the stringer. One for the hose to run through and the other to drain the low area. You can see how low we're talking below.

I don't anticipate needing to cut to the top of the stringer, but I will definitely be less than 1X the Diameter away from the top edge.
I think what I'll need to do is build a doubler on the floor side of the stringer that follows the contour of the floor dip and follows the top edge. That gives me more effective thickness. I'm wondering if that's sufficient or if I need to reinforce the other side as well? Maybe a layer of 12oz biax?
Re: Cameron's FS14LS+5%
Posted: Sat Aug 21, 2021 2:47 pm
by TomW1
bamaguy0 wrote: ↑Sat Aug 21, 2021 1:13 pm
Alright, looking for advice here. I think I know what to do, but I'd like more experience to weigh in as well.
This is to accomodate my livewell drain. It comes off the bottom and although the well is above the stringer, the drain is slightly below. I planned for this and I just want to make sure what I'm doing is kosher.
I'm going to put a floor in on the outside of the stringers at stringer height except between the 2 marks shown below.
There, I'll dip the floor shallow in order to route the hose off the drain fitting. What I'll need to do is place I think at least 2 holes in the stringer. One for the hose to run through and the other to drain the low area. You can see how low we're talking below.
I don't anticipate needing to cut to the top of the stringer, but I will definitely be less than 1X the Diameter away from the top edge.
I think what I'll need to do is build a doubler on the floor side of the stringer that follows the contour of the floor dip and follows the top edge. That gives me more effective thickness. I'm wondering if that's sufficient or if I need to reinforce the other side as well? Maybe a layer of 12oz biax?
Question for you why are you not going straight out the transom?
Tom
Re: Cameron's FS14LS+5%
Posted: Sat Aug 21, 2021 2:59 pm
by bamaguy0
It's a flow-rite system, so that goes back to the valve which is connected to both the transom and the livewell pump. I placed the transom openings at the lowest point I could.
They're the left and right of center holes. The overflow is on the left and the pickup for the flow rite valve is on the right.
Re: Cameron's FS14LS+5%
Posted: Sat Aug 21, 2021 9:08 pm
by bamaguy0
Came across this thread and the debate that ensued within.
viewtopic.php?f=12&t=64446&hilit=Hole+i ... &start=280
I think I can drill the hole and run the hose just a little lower and essentially hit the center third of the stringer and call it good. Floor will still have to dip down, but I've come to grips with that already because I do not want to embed it in case of leaks in the future.
Re: Cameron's FS14LS+5%
Posted: Sat Aug 21, 2021 9:18 pm
by VT_Jeff
If there is any concern in the end, a doubler on one or both sides will cost about nothing in terms of time or weight. I suspect you only need to double the space above the hole, but I'm not an engineer, so my suspicions should be treated with suspicion.
Re: Cameron's FS14LS+5%
Posted: Sat Aug 21, 2021 9:33 pm
by bamaguy0
Lots of good progress this weekend.
Friday I got the first coat of bilge paint on the fore locker and live well.
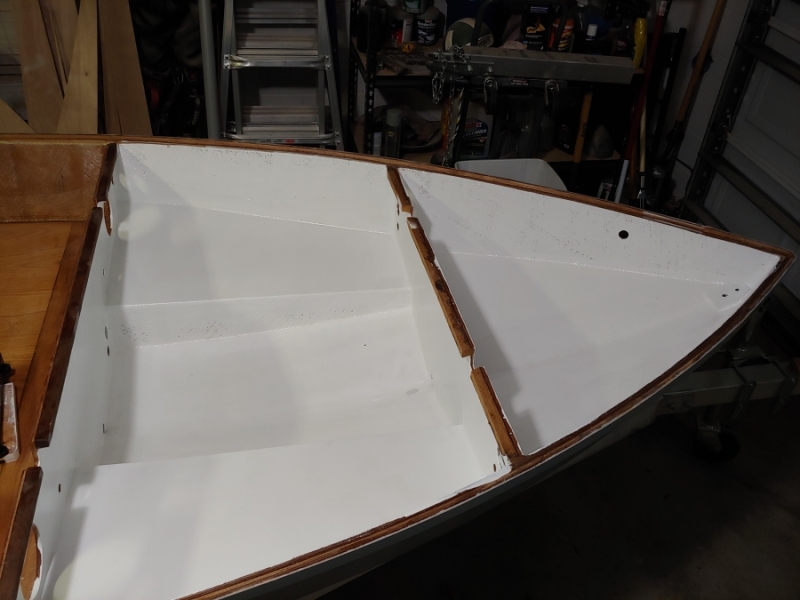
I also put a single coat of bilge paint inside the console. Flipped the console around and put the first coat of paint on as well. Gonna have it match the hull.
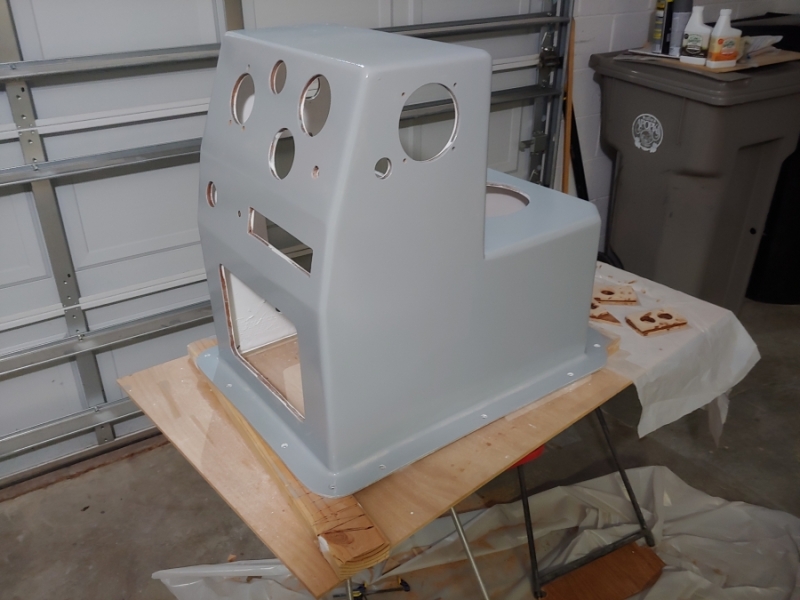
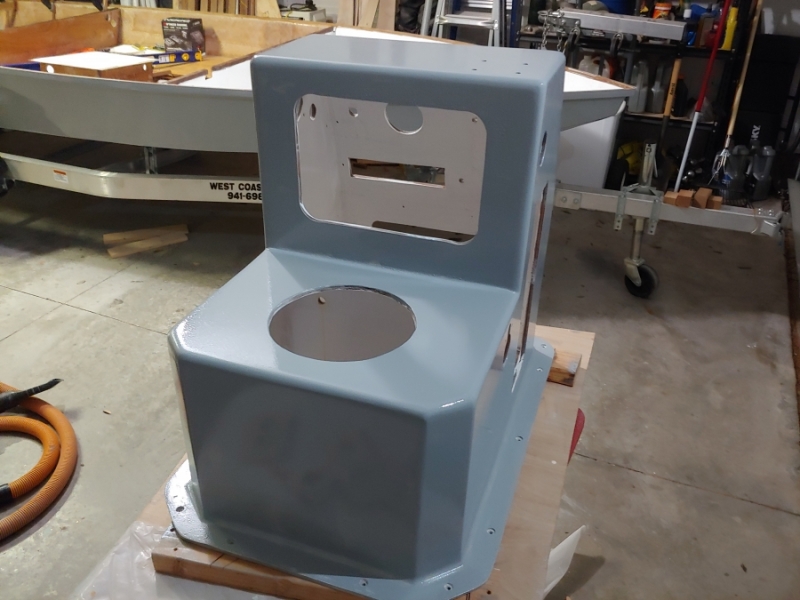
I made some risers for the chase tubes to prevent water from intruding. I glued 2 pieces of 3/8 ply together. Ill give them their final shape then glue them in over the tubes.
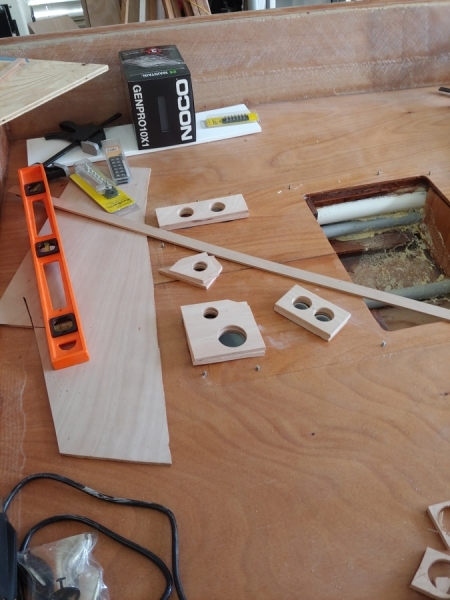
While I was trying to figure out the hose routing I snapped a pic of the hatch layout in the rear with the livewell in place.
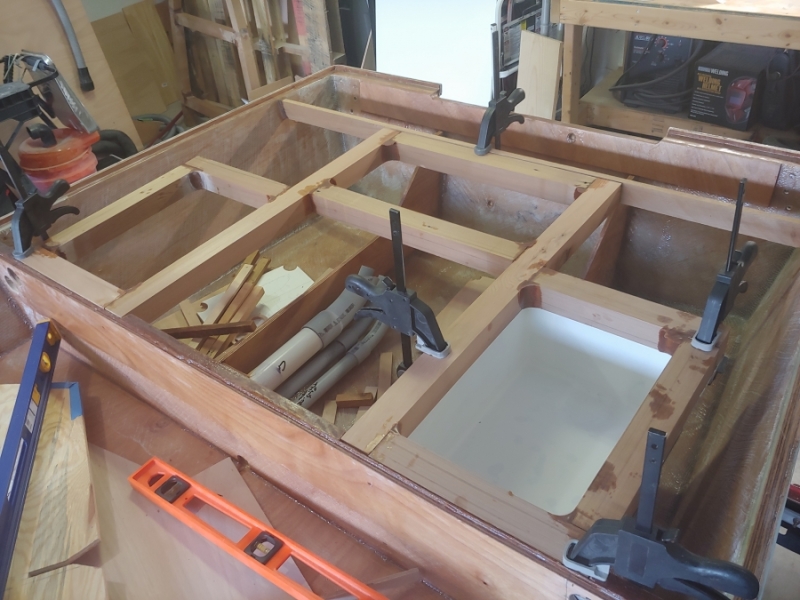
Unfortunately, I also realized I had made a slight miscalculation with my hatches and rod storage tubes. Guess I only get 1 tube per side going rear.
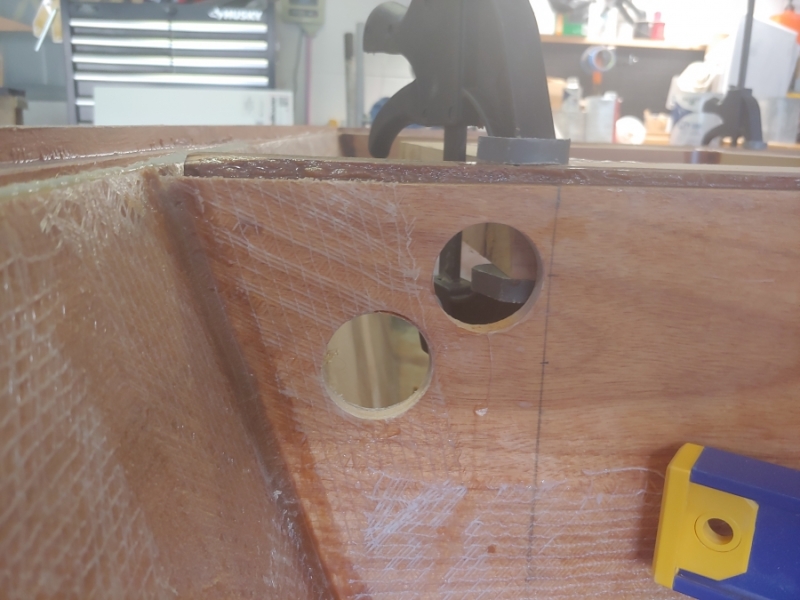
And I glued the sole cleats for the rear locker floor in place. For the rear I inset the soles 3/8 so the floor won't sit on top of the stringer but flush with them. Between the marks on the left side I didn't apply any epoxy so it should trim right out and then I'll set it lower. Seemed eaiser trying to get it level that way.
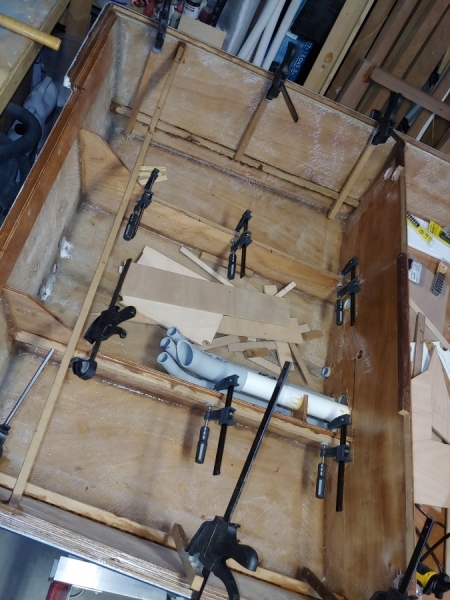
And Jeff, you were wanting to see some scale of the console so I snapped some pics with my tape measure nearby.
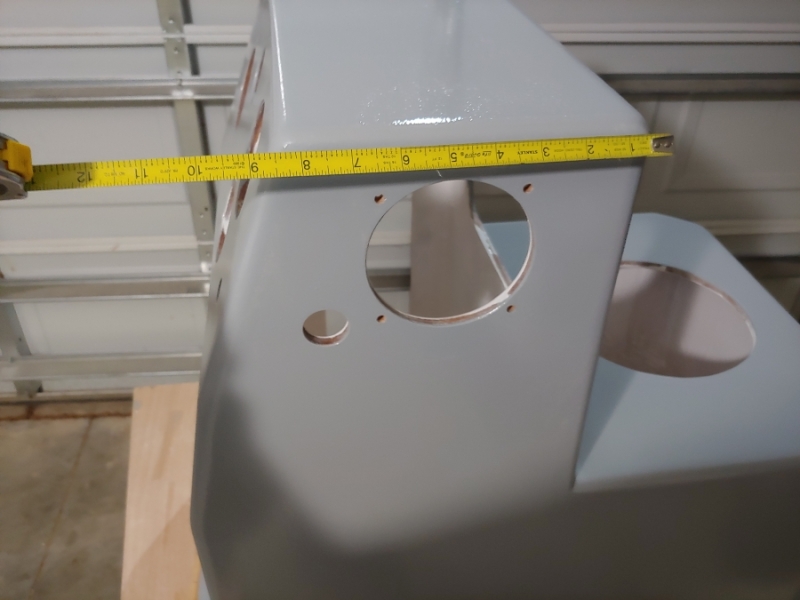
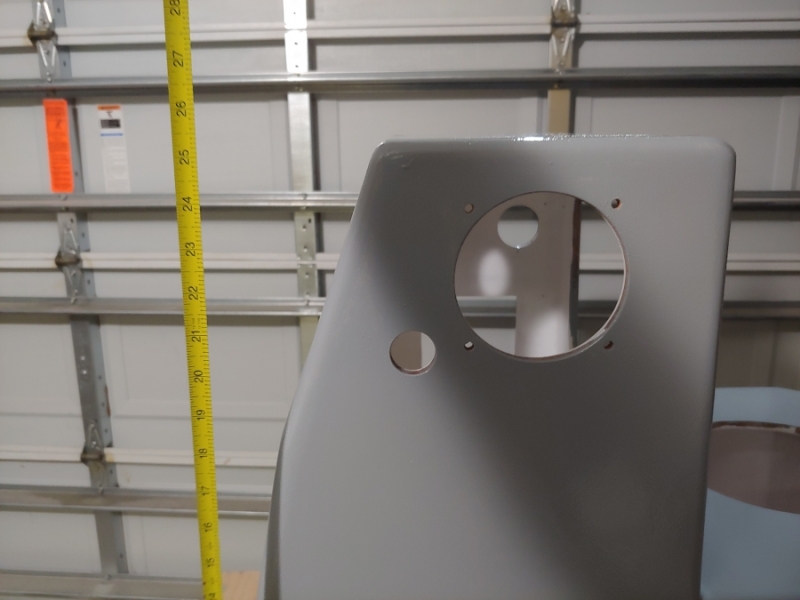
Re: Cameron's FS14LS+5%
Posted: Sun Aug 29, 2021 10:15 pm
by bamaguy0
Made some progress on the fore and aft locker areas this week. Also a couple other things.
Got a folding chair in. Dismantled it to see how it would fit on the console. I think this will do. I'll need to build a frame to stand it off the hatches that they'll cover. I'll get back to that later...
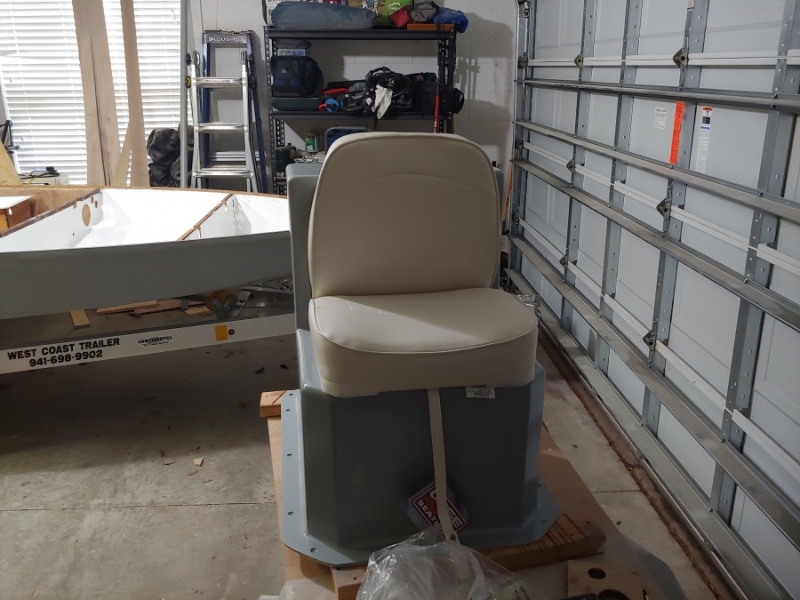
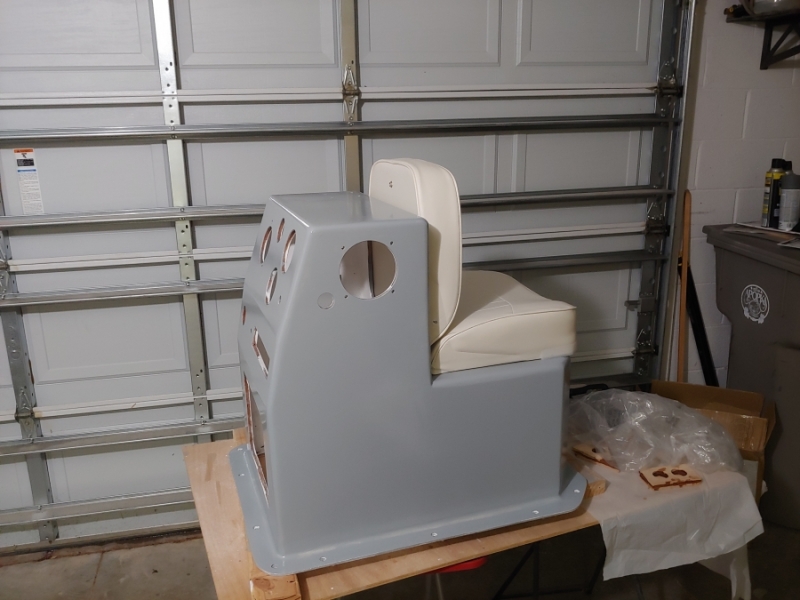
Earlier in the week I glued down the battery box shelf.
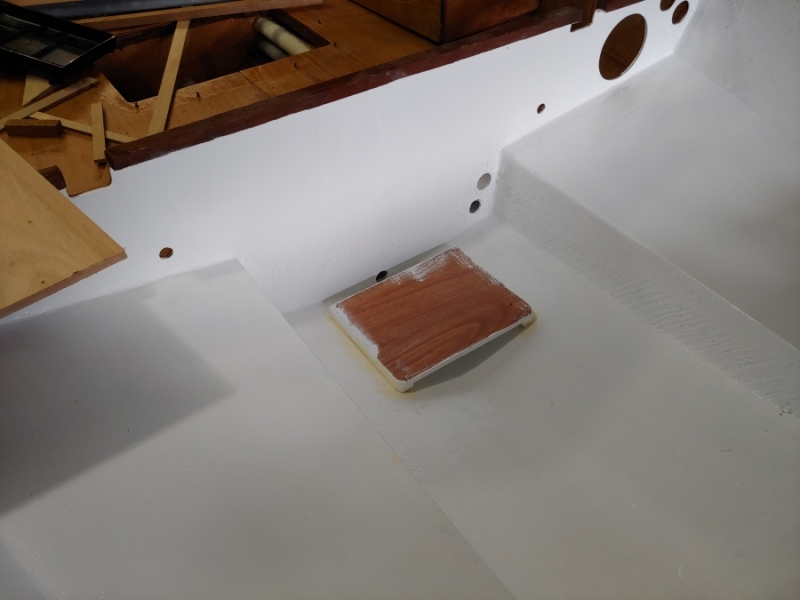
A lot of the foreward work consisted of working on the hatch gutters. First I laid out the deck openings back on top of the gutters to mark the edges of the gutter. I offset those lines inward 1/2" to mark the CL of the gutter, then made marks every 1/2" or so to drill 1/2". I kept with 1/2" vs going larger because I could set a drill stop. I didnt wanna try to finagle the entire gutter under the press. Time will tell if this makes the routing job a chore. So I drilled a bunch of 1/2" holes. The raw cedar broke out a bunch between holes so it actually cleared out more than just where I drilled.
Next thing was prepping the deck pieces for gluing to the gutter. The outside will serve as the path guide for the gutter. At least on the outside. I have 3/4" router bits so I will have to make a guide for the inside as well.
Cut out the gutter tracks in the deck. This basically leaves two side panels on the aft portion and will leave a big U in the foreward bit.
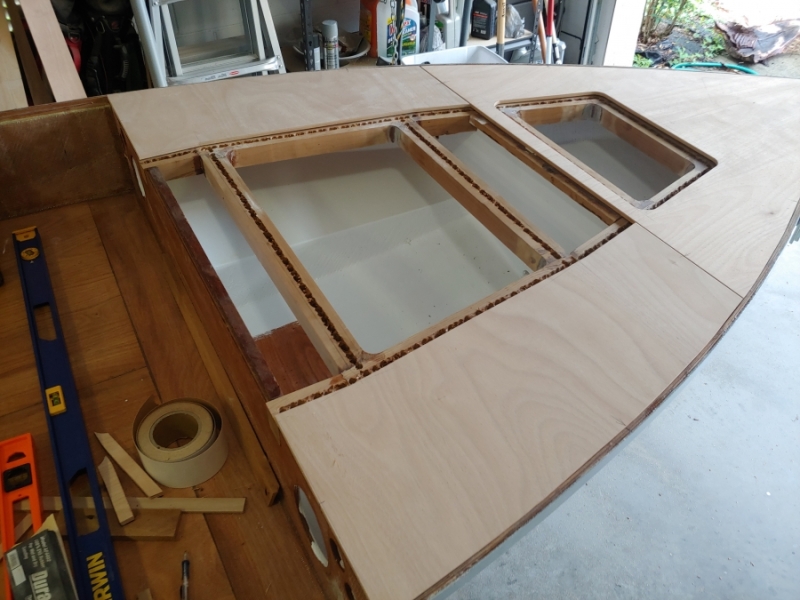
Before I completely dismantled the deck pieces I made markings on other pieces and the rubrail to try to ensure that everything aligns again. Here I used the fore deck piece to make sure I set the aft pieces in the right location for bonding.

Here is after the aft side pieces were cured and the rest of the deck was cut out for gutter tracks. I laid the filler pieces back in to get a visual on how it will look. I like it!
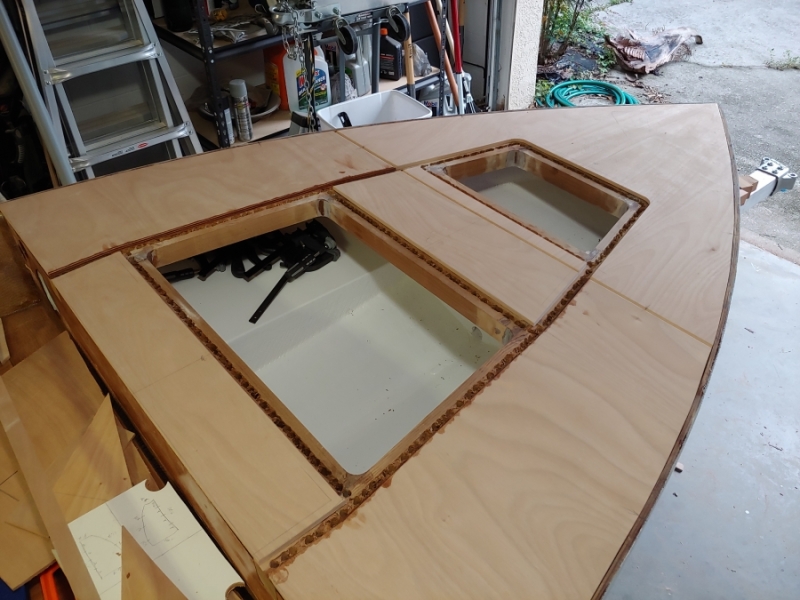
And with the hatches themselves.
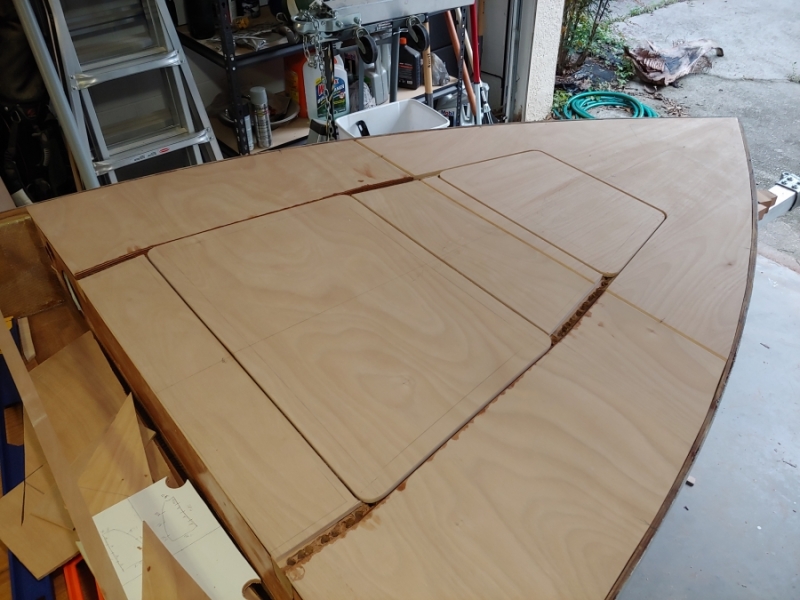
Also installed another deck support forward of the gutters.
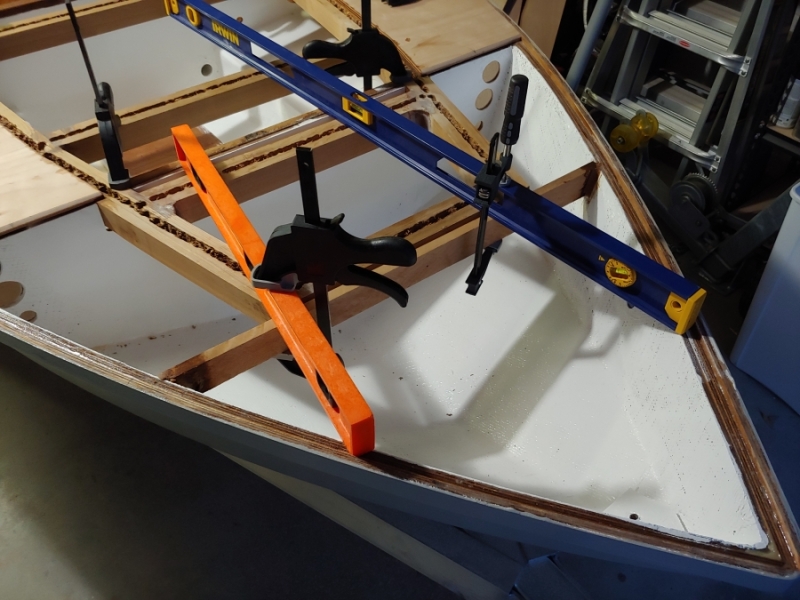
Moving to the rear...worked on getting the dead space outside the stringers ready for foam and flooring. I fabri-cobbled the dip in the floor on the port side. This will be to accommodate routing the livewell drain hose thru the center 1/3 of the stringer height. It's ugly now, but I think it will clean up alright. I went ahead and put the dip in so I wouldn't have to shape that in the foam.
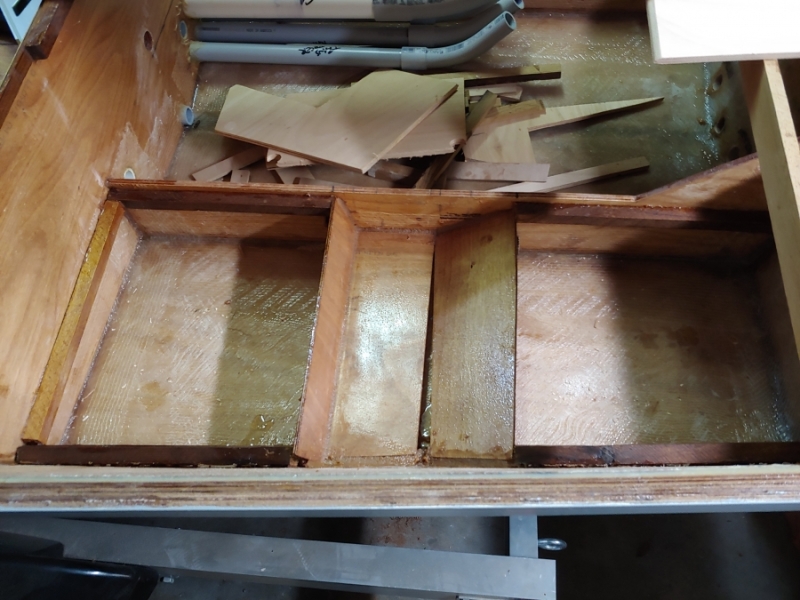
Foam!
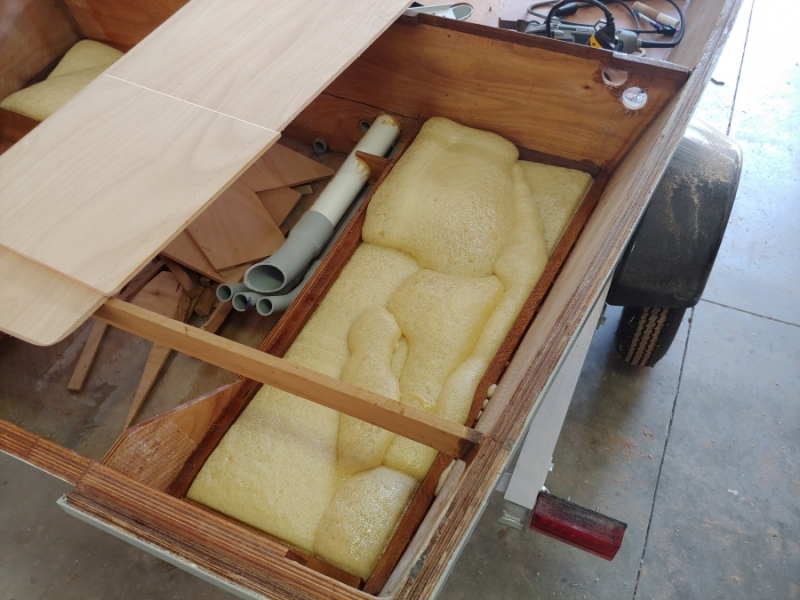
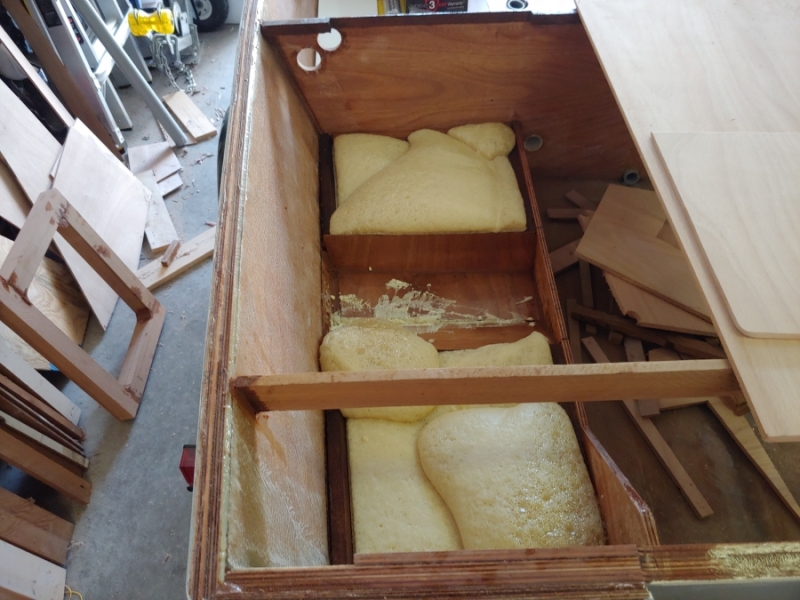
Back to the fore. Home Depot down here stocks 1/2" King Starboard in 2'x4' pieces. Figured that would make good mounting surfaces for componentry. First one to go in is on Frame B behind the battery. This one will hold the charger, circuit breaker, bus bar, and a terminal block for the fore area wiring.
You may say that you can't bond HDPE, but I have ways!
Ever heard of Stern Savers? It's a piece of HDPE you glue to your transom for your transducer mount. The trick? Tapped holes. The glue itself creates plugs that secure the board to the surface.
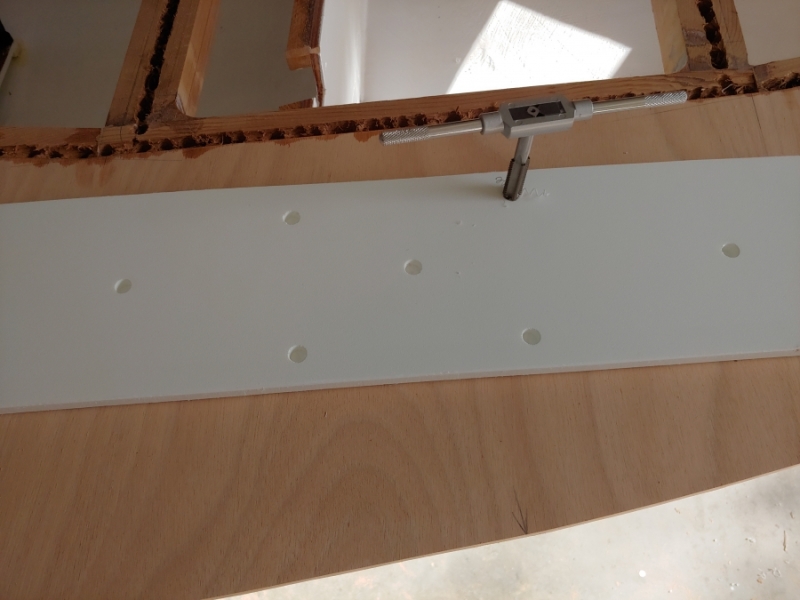
Here's a mockup of it's location.
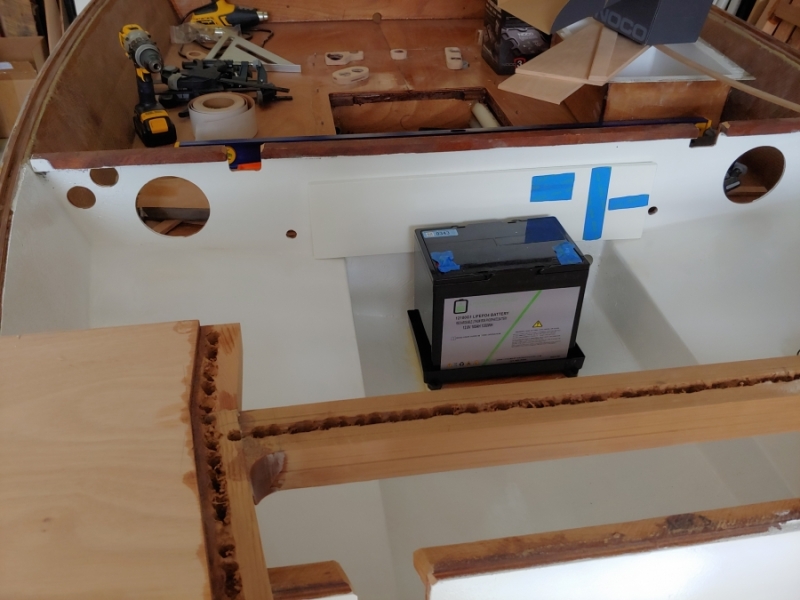
And bonding...I did also flame treat it as well which improves adhesion. I used GFlex G655 which advertises pretty decent HDPE bond strength with a flame treated surface, so we will see how this holds up.
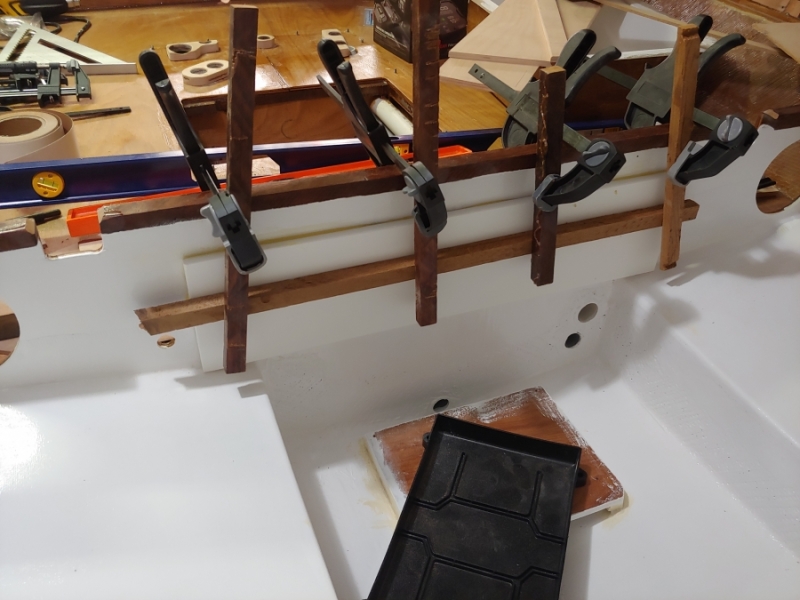
This week I will be gluing the fore deck and the inner pieces to the fore hatch gutter and sanding down the foam in the aft and gluing in the floor.
Re: Cameron's FS14LS+5%
Posted: Mon Aug 30, 2021 8:26 am
by Jeff
Excellent progress!!! Jeff
Re: Cameron's FS14LS+5%
Posted: Mon Aug 30, 2021 9:56 am
by pee wee

It's hard to tell from the photo, but did you remove the bilge paint where you bonded the battery shelf to the hull? If you did, it's a very neat job!
Great progress on your build, thanks for sharing.
Re: Cameron's FS14LS+5%
Posted: Mon Aug 30, 2021 10:00 am
by bamaguy0
pee wee wrote: ↑Mon Aug 30, 2021 9:56 am
It's hard to tell from the photo, but did you remove the bilge paint where you bonded the battery shelf to the hull? If you did, it's a very neat job!
Great progress on your build, thanks for sharing.
Yeah I scuffed it back down so that the fiberglass was visible in the bonding area. Also used fumed silica to thicken vs wood flour to not contrast so bad. I will touch up the bilge paint when I paint the aft lockers also.
Re: Cameron's FS14LS+5%
Posted: Mon Aug 30, 2021 8:59 pm
by bamaguy0
Remainder of the deck panels bonding to the hatch gutters.
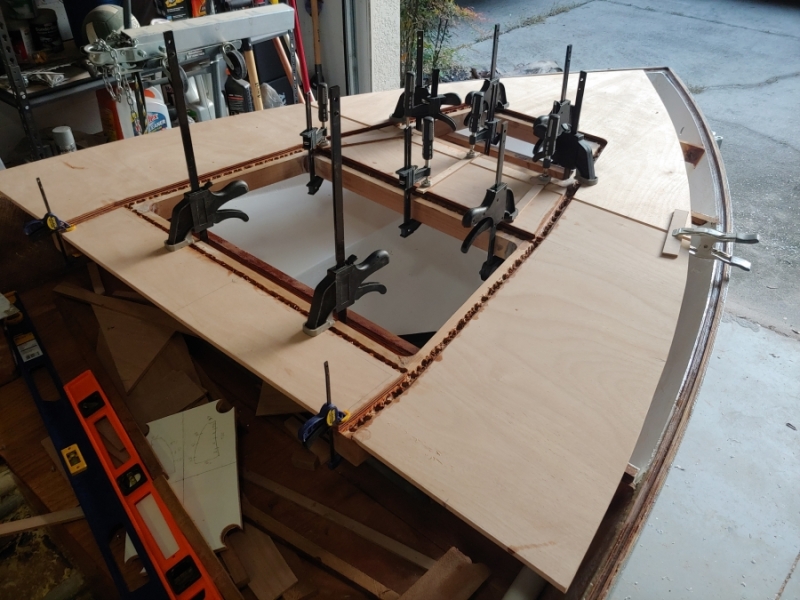
TBD on how long it takes for me to work up the courage to route out the gutter!
Re: Cameron's FS14LS+5%
Posted: Tue Aug 31, 2021 2:24 pm
by VT_Jeff
Once again, great progress and great post! I just saw some of those transom-savers on a boat here at the marina, looking to do someth8ing similar for a permanent mount for my depth transducer, which is currently just clamped on.
Console size clear now, appreciate that. Your guest will appreciate the extra back support of that seat, mine is always bitching about the lack of support on the one I built.
Gutters look like they're coming along great, good luck on the routing!
Re: Cameron's FS14LS+5%
Posted: Tue Aug 31, 2021 8:16 pm
by bamaguy0
Luck was with me tonight. I simulated what I had done with the holes on a scrap piece of cedar to get comfortable and off I went.
Here's before
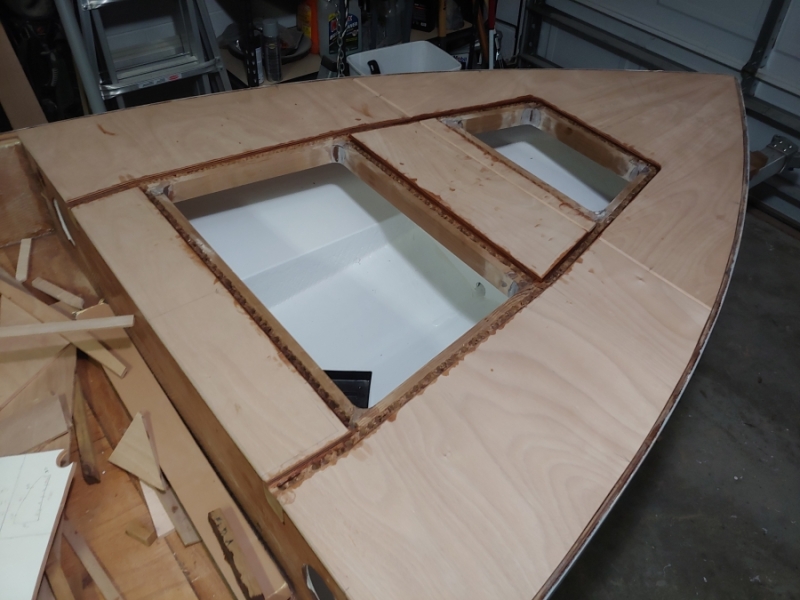
And after
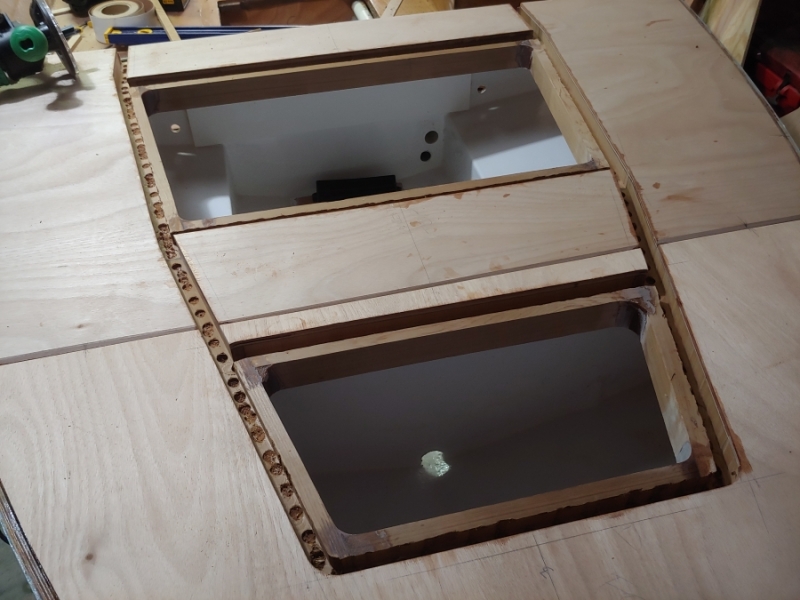
Still not done. I need to fabricate the hatch doublers, so what I'm going to do is cut them big to use as the template for routing the rest of the gutter and then I'll trim them to size for bonding on the inside of the hatches. After that I'll run a round nose bit thru the gutters to get it to final depth and form. This was just bulk removal.
Re: Cameron's FS14LS+5%
Posted: Fri Sep 03, 2021 10:59 am
by bamaguy0
Continuing with the hatch gutters, I made the inner guides for the hatch openings. I placed the hatch panels back in place and measured what it would take to get an inch in from the deck edge. This turned out to be about a .8" inset. I then traced the hatch panels on the plywood, inset .8 inches, made new lines, marked my corner radii and cut. It still wasn't right on the sides for some reason, but from that point I could set the templates in the hatch openings and just make marks and recut. No big deal, just took a little longer to get it right.
I then nailed them down in the corners and off I went!
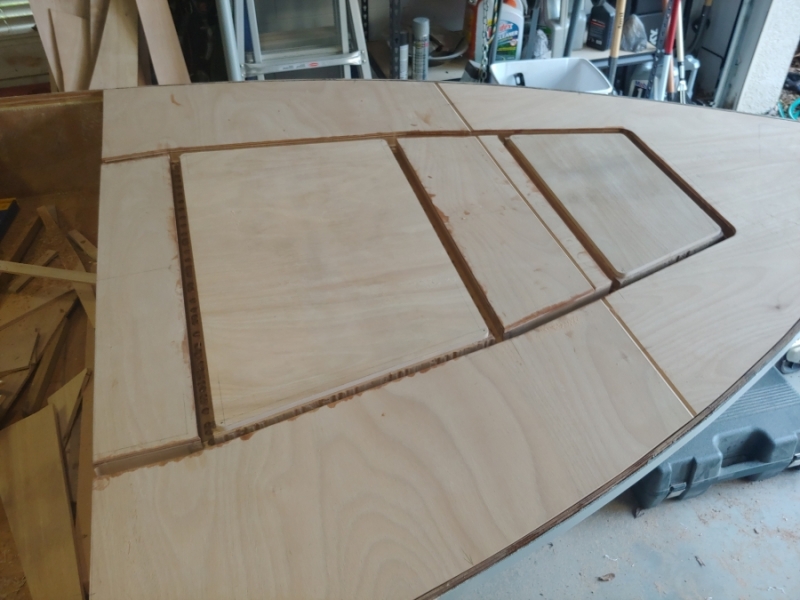
And the result
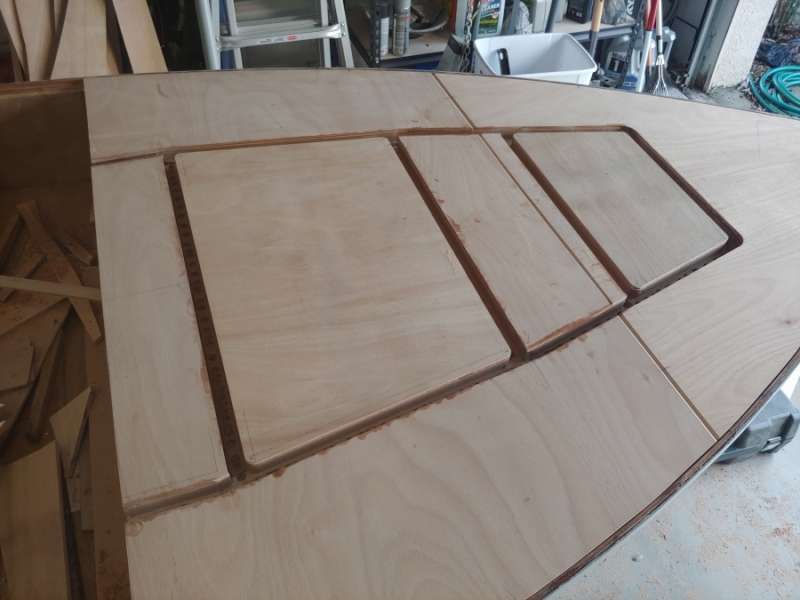
At this point my bulk removal is done. I did have a couple chipped spots that I want to repair before going down the sides with the router because these defects would definitely propagate if I dont.
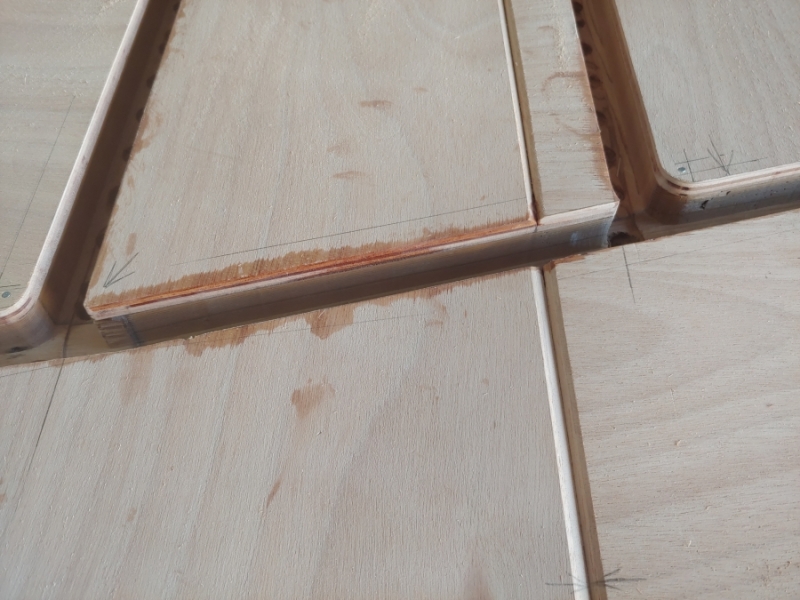
So they'll get an epoxy fill and a retrace with the router before I keep going down and into the bottom with a round nose bit.
Also got the aft floor in and curing. It feels good to be done with the foam. I'd rather fair a thousand hulls than sand that foam.
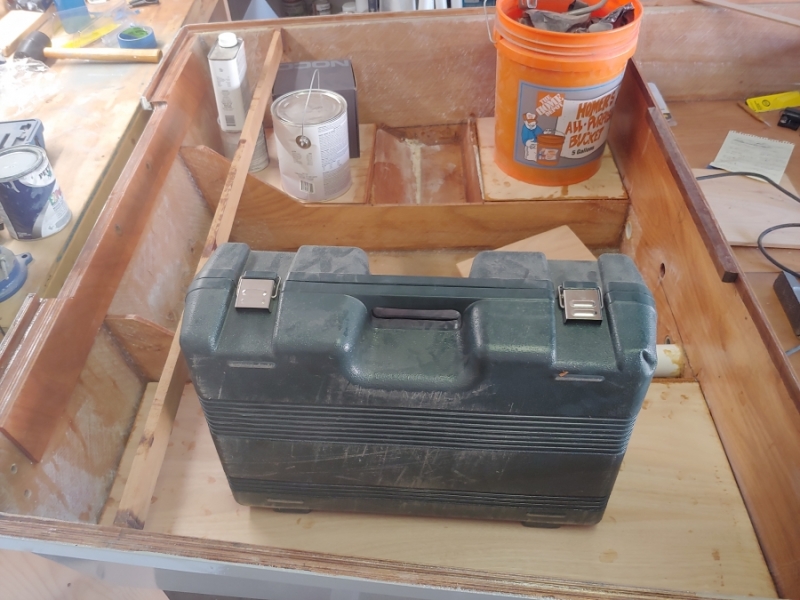
Re: Cameron's FS14LS+5%
Posted: Fri Sep 03, 2021 12:06 pm
by Jeff
Nice work bamaguy0!!! Jeff
Re: Cameron's FS14LS+5%
Posted: Thu Sep 09, 2021 9:28 pm
by bamaguy0
Lots of things happening! Massive post incoming!
Spent the weekend in Atlanta for the first Alabama game of the season. We also found out the gender of the baby, so we used that as an opportunity to reveal the gender.
Back home on Monday. Took the week off so I've been hard at it.
Glassed the rear floor in.
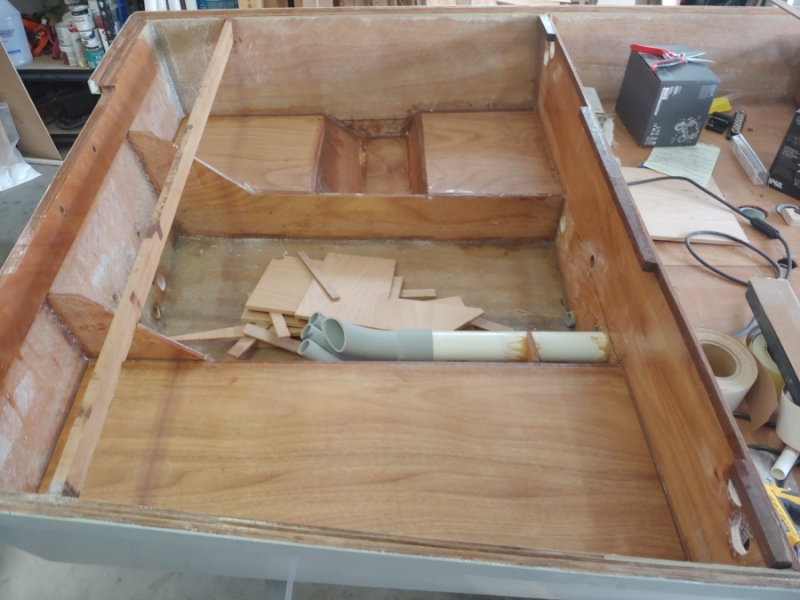
Continued work on the forward deck/hatch gutters...
Took the gutters to full depth with a round end bit.
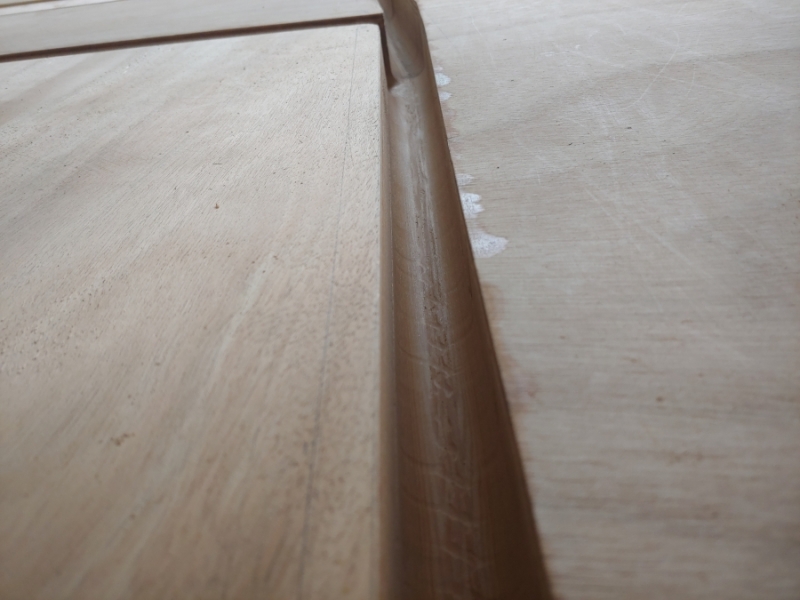
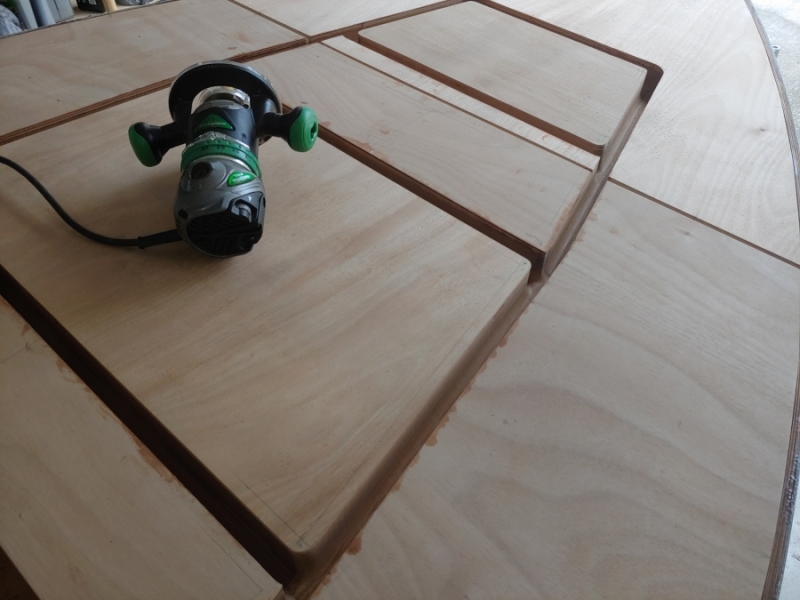
Then I took the inner guides off to route the inside lip down a bit to make room for a gasket. That didn't go great, but it will work.
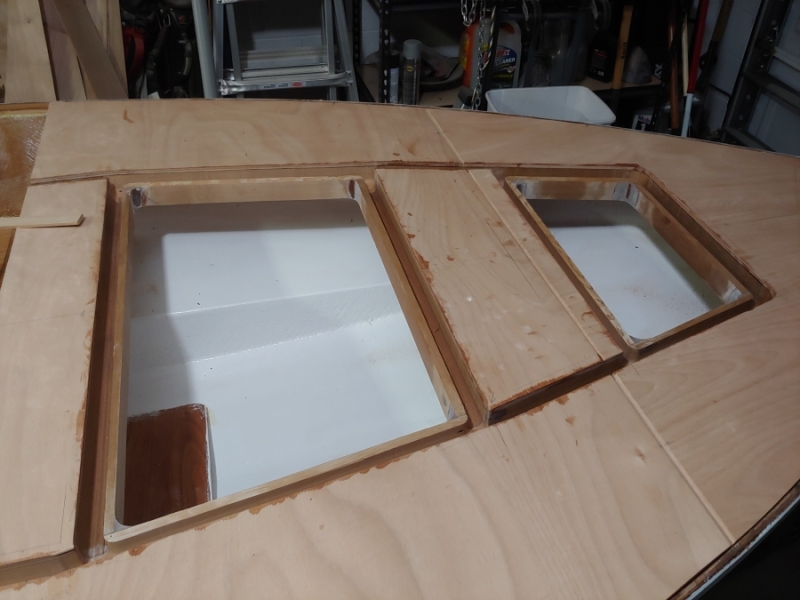
I did make a small booboo. No big deal, I filled it with epoxy and used a popsicle stick wrapped in clear tape to dam it up.
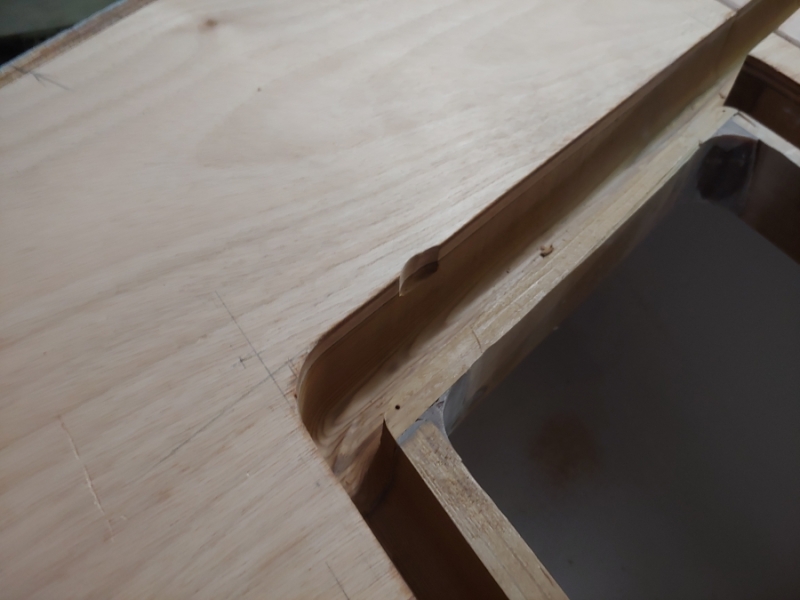
I rounded over the edges of the hatch gutters using a 1/8 bit. I think I want to go 1/4.
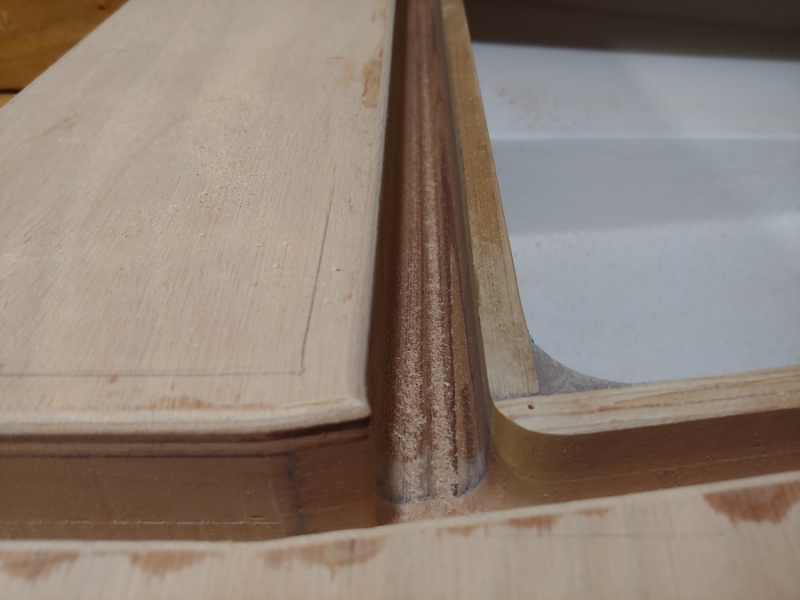
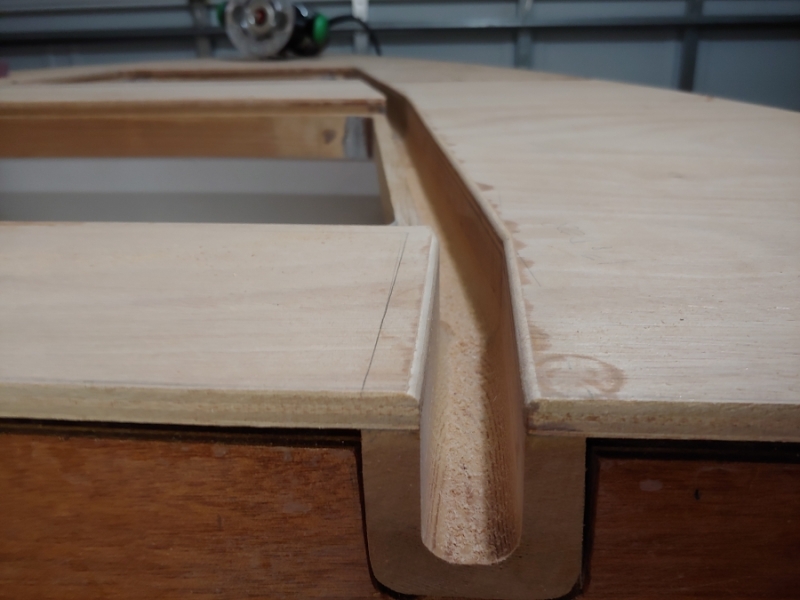
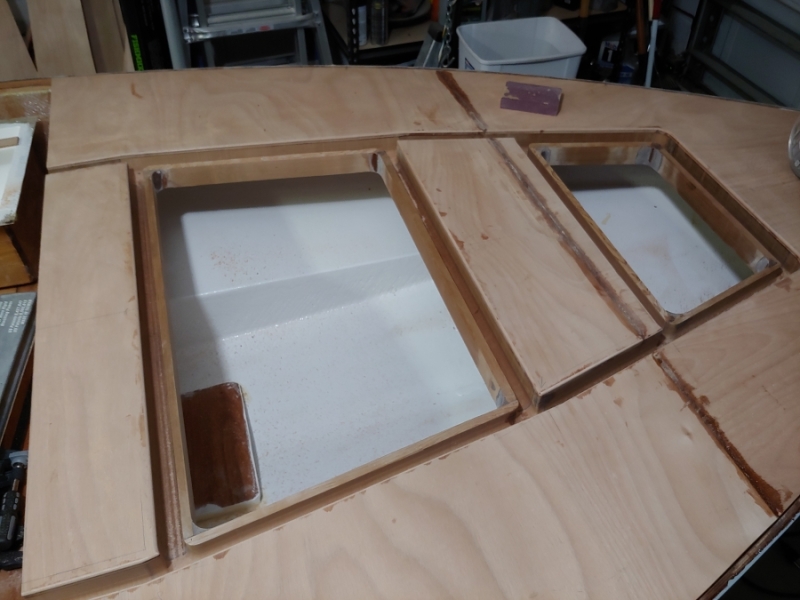
I put the rod tubes in the front.
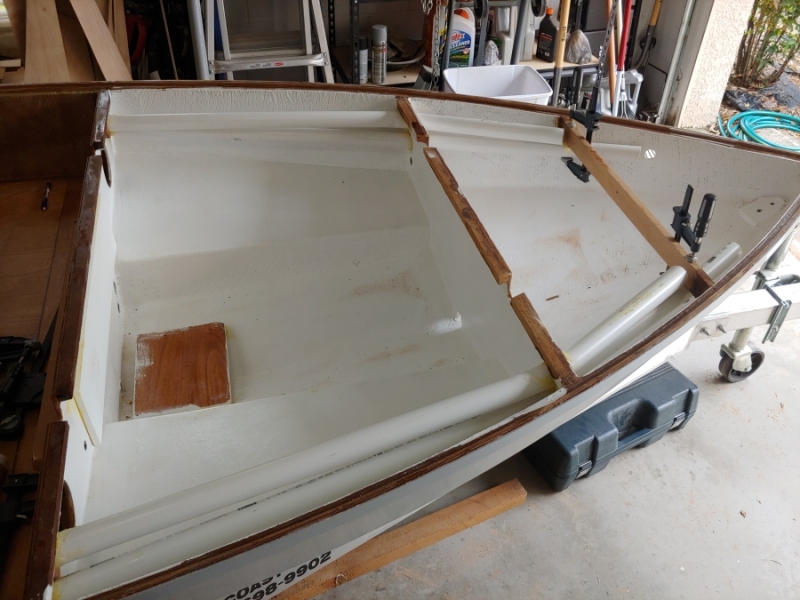
I made the basic shape of the splashwell. I will glue this in after painting the aft locker area.
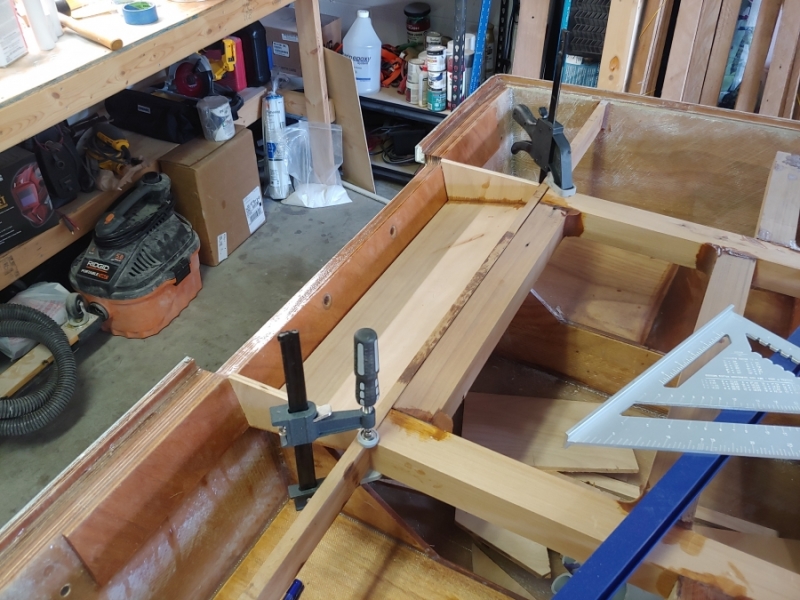
I made and glued in the standoffs to go around my thru floor tubes. It looks weird without the console.
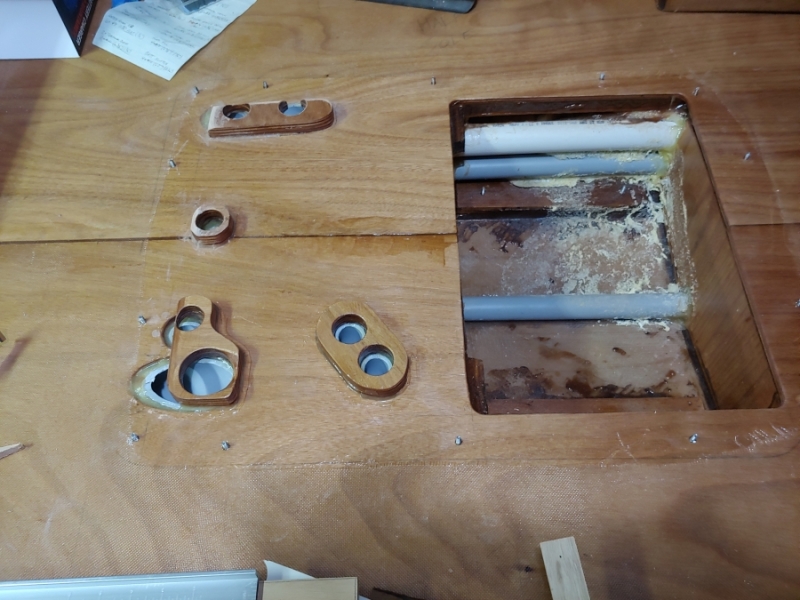
But makes sense with the console in place. Ill just goop between them and the console once installed.
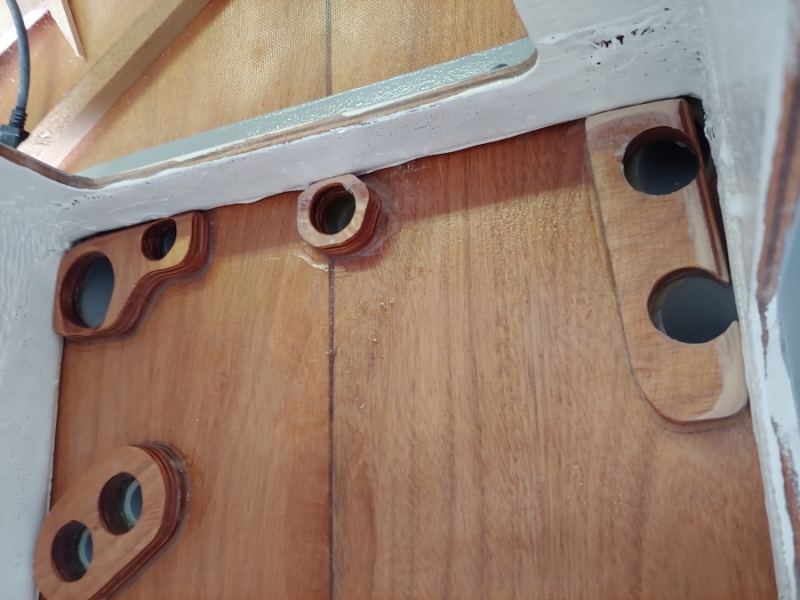
The aft deck has been racking my brain. Trying to come up with ways to support it. This is my first attempt to support the center section between the hatches.
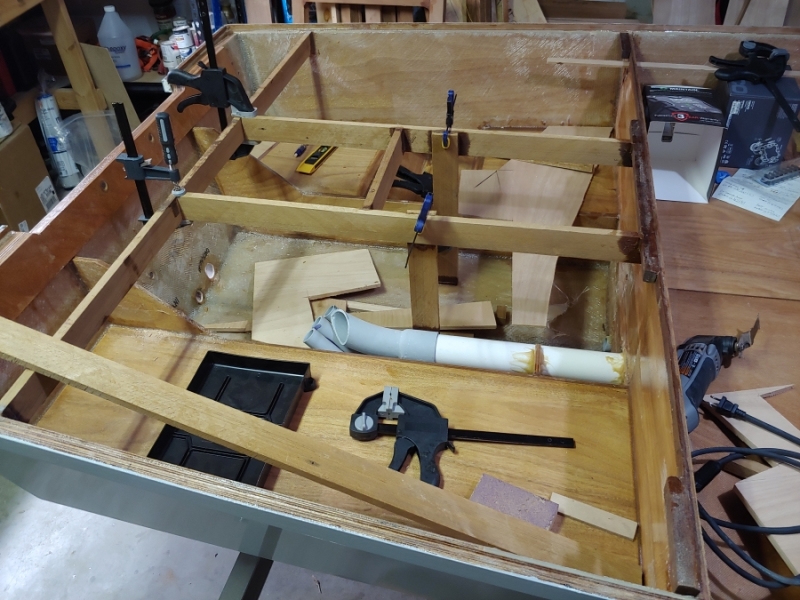
It's not bonded to the rear cross support, just used that to keep it level. I'll trim that at the cross bar. I need to do some more reading up on how seaslug and VT_Jeff supported the aft deck. My tied together hatch gutters definitely complicates things. I really have to make sure this center section is supported because I'm installing a short seat pedestal there as a micro leaning post. More to come on this.
I'm close to calling the aft locker ready for prime and bilge paint. Going to start installing components for wiring the fore locker area as well.
Re: Cameron's FS14LS+5%
Posted: Thu Sep 09, 2021 11:36 pm
by VT_Jeff
More incredible hatch work and documentation! You are really making me wish I added gutters, looks like "fun"!
I slotted aft frame for the deck supports to sit in. Bad idea. I think Reid showed where he just edge glued in the supports, said it's all that's needed.
Re: Cameron's FS14LS+5%
Posted: Fri Sep 10, 2021 7:36 am
by Jeff
Congrats guys!!! I am sure you can't wait for that little Alabama Girl!!!! Jeff
Re: Cameron's FS14LS+5%
Posted: Fri Sep 10, 2021 7:59 am
by bamaguy0
VT_Jeff wrote: ↑Thu Sep 09, 2021 11:36 pm
More incredible hatch work and documentation! You are really making me wish I added gutters, looks like "fun"!
I slotted aft frame for the deck supports to sit in. Bad idea. I think Reid showed where he just edge glued in the supports, said it's all that's needed.
I'll say that so far the hatch gutters have been one of the more easy and enjoyable jobs on this boat. At least to me. It's also been fun because I don't have a lot of wood working skill, so learning new tools and techniques is always fun for me.
Yeah I've edge glued the supports to the frame and sides so far. Layout is tough because I can't run one between the two side hatches and the center rear. I just had an idea as I'm typing this out though...I'll post more on it if I go that route. It has to do with making a "false" frame. Not sure I have enough plywood though.
Re: Cameron's FS14LS+5%
Posted: Fri Sep 10, 2021 8:28 am
by Mojosmantra
Cameron - that’s great progress and it looks really good. I’ve never used a “round” bit and am struggling to understand how you “guided” it. Can you share a little more on what bit you used and that methodology?
Re: Cameron's FS14LS+5%
Posted: Fri Sep 10, 2021 8:30 am
by bamaguy0
Jeff wrote: ↑Fri Sep 10, 2021 7:36 am
Congrats guys!!! I am sure you can't wait for that little Alabama Girl!!!! Jeff
Thanks!
Re: Cameron's FS14LS+5%
Posted: Fri Sep 10, 2021 8:37 am
by bamaguy0
Mojosmantra wrote: ↑Fri Sep 10, 2021 8:28 am
Cameron - that’s great progress and it looks really good. I’ve never used a “round” bit and am struggling to understand how you “guided” it. Can you share a little more on what bit you used and that methodology?
If you're talking about to round the bottom, it just has a rounded end instead of a square cut. Still has the bearing on the shank side to guide you.
This is the bit I used.
https://www.amazon.com/dp/B078HMD7S2/re ... UTF8&psc=1
Re: Cameron's FS14LS+5%
Posted: Fri Sep 10, 2021 8:59 am
by Mojosmantra
Oh - I see. A round nose pattern bit. Didn’t know that existed. Thanks a lot.
Re: Cameron's FS14LS+5%
Posted: Fri Sep 10, 2021 9:01 am
by bamaguy0
Sorry I'm not up on my router bit terminology
Yeah I think I searched rounded bit with bearing or something like that. Not many come up. Lowes and Home Depot don't carry them in stores. Even Rockler Woodworking had one but it was online only.
Re: Cameron's FS14LS+5%
Posted: Fri Sep 10, 2021 9:35 am
by bamaguy0
I will add that the round nose is not without it's downfalls. It's 3/4 dia and I'm making a 1" wide slot. That means I run it on both sides and get a small ridge in the middle. It's not really noticeable, but you can definitely feel it. I'll probably try to sand on it a little to smooth it out,but for the most part I'm just rolling with it.
Re: Cameron's FS14LS+5%
Posted: Fri Sep 10, 2021 9:42 am
by Jaysen
Woodworking tip on this one...
Assuming you used a guide to make your 3/4" wide gutter.
Move the guide in by 1/8" and lower the bit by 1/8" (increase depth of cut).
Run down the gutter.
That should give you a slightly stepped but smooth final groove to hold your gasket.
Sanding down there will be very hard.
Re: Cameron's FS14LS+5%
Posted: Fri Sep 10, 2021 10:11 am
by bamaguy0
Jaysen wrote: ↑Fri Sep 10, 2021 9:42 am
Woodworking tip on this one...
Assuming you used a guide to make your 3/4" wide gutter.
Move the guide in by 1/8" and lower the bit by 1/8" (increase depth of cut).
Run down the gutter.
That should give you a slightly stepped but smooth final groove to hold your gasket.
Sanding down there will be very hard.
Hey Jaysen, I'm not following on this one. I picked a gasket that is just a D shape with PSA to stick down to the top of the inside lip. Is that no good?
Re: Cameron's FS14LS+5%
Posted: Fri Sep 10, 2021 10:32 am
by VT_Jeff
bamaguy0 wrote: ↑Fri Sep 10, 2021 9:35 am
I will add that the round nose is not without it's downfalls. It's 3/4 dia and I'm making a 1" wide slot. That means I run it on both sides and get a small ridge in the middle. It's not really noticeable, but you can definitely feel it. I'll probably try to sand on it a little to smooth it out,but for the most part I'm just rolling with it.
Seaslug talked about letting the epoxy collect at the bottom of the gutter when coating the sides, it will self-level and probably hide that ridge.
Re: Cameron's FS14LS+5%
Posted: Fri Sep 10, 2021 11:02 am
by bamaguy0
VT_Jeff wrote: ↑Fri Sep 10, 2021 10:32 am
bamaguy0 wrote: ↑Fri Sep 10, 2021 9:35 am
I will add that the round nose is not without it's downfalls. It's 3/4 dia and I'm making a 1" wide slot. That means I run it on both sides and get a small ridge in the middle. It's not really noticeable, but you can definitely feel it. I'll probably try to sand on it a little to smooth it out,but for the most part I'm just rolling with it.
Seaslug talked about letting the epoxy collect at the bottom of the gutter when coating the sides, it will self-level and probably hide that ridge.
Good point! It probably will.
Re: Cameron's FS14LS+5%
Posted: Fri Sep 10, 2021 12:45 pm
by Jaysen
bamaguy0 wrote: ↑Fri Sep 10, 2021 10:11 am
Hey Jaysen, I'm not following on this one. I picked a gasket that is just a D shape with PSA to stick down to the top of the inside lip. Is that no good?
Nothing wrong with the gasket. I’d use the method VT Jeff suggested and just leave the ridge if you can.
If you need to reduce the ridge, don’t lower the bit after you move the guide. That will center the nose on the ridge leaving two small ridges that would easily cover with epoxy via Jeff’s method.
Re: Cameron's FS14LS+5%
Posted: Fri Sep 10, 2021 10:20 pm
by bamaguy0
Went ahead and did the 1/4" roundover around the hatch openings. I like that much better than the 1/8". Didn't snap a pic though.
Flipped the deck over and bonded in some doubler plates. This one is for one of them fancy retractable deck cleats and the trolling motor mount. The kick out is mainly from the shape of the scrap plywood I had, but it works out because the trolling motor mount needs that. Also added another between the 2 hatches for a pedestal seat mount. I don't know if I'll use it, but I wanted to put one in.
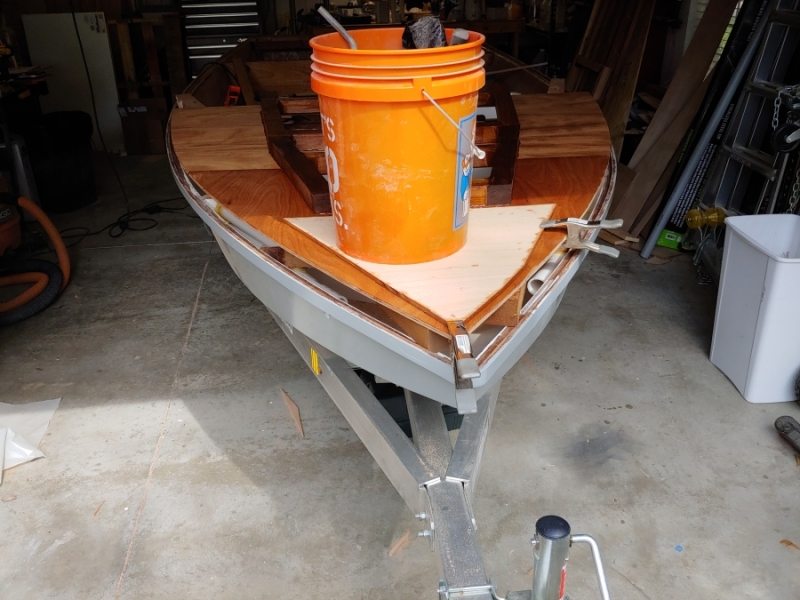
Mostly worked on the aft deck supports today.
Here you can see how the inital center support will work out.
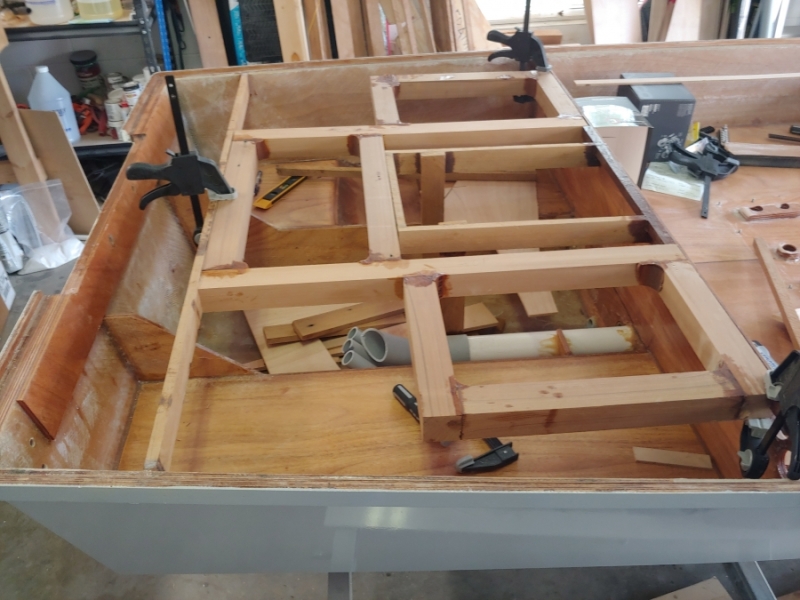
I wanted to mount the battery on the starboard side to counteract the livewell weight, but the clearance just isn't there. Looks like this is my best option. This is for the cranking/house battery which will be a Dakota Lithium 60AH/1000CCA dual purpose battery. In the photos are the 100AH deep cycle lithium I got for the trolling motor. Plenty of juice on this boat!
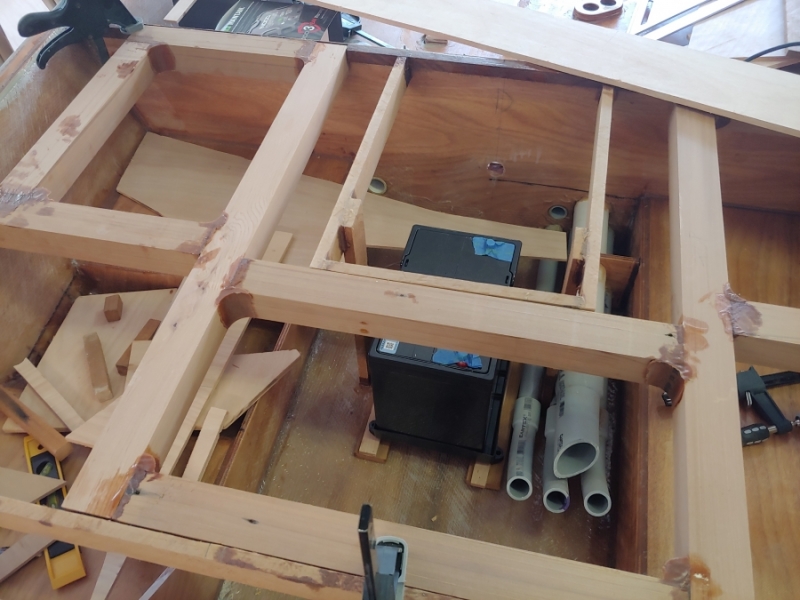
So the plywood false frame idea fell thru because the best place for it clashed with my overflow on the livewell. Had I not already drilled the holes I would have went forward with that. Oh well. What I did come up with is using the supports I already had to add additional cleating underneath to support the frame as well. My biggest fear was only the deck being supported and the hatch gutters breaking free. I added a lip to the underside of both the aft span and the center support as well as glued in another cleat on the aft end of Frame D. This gives the hatch gutters themselves some support and can share the load a little better.
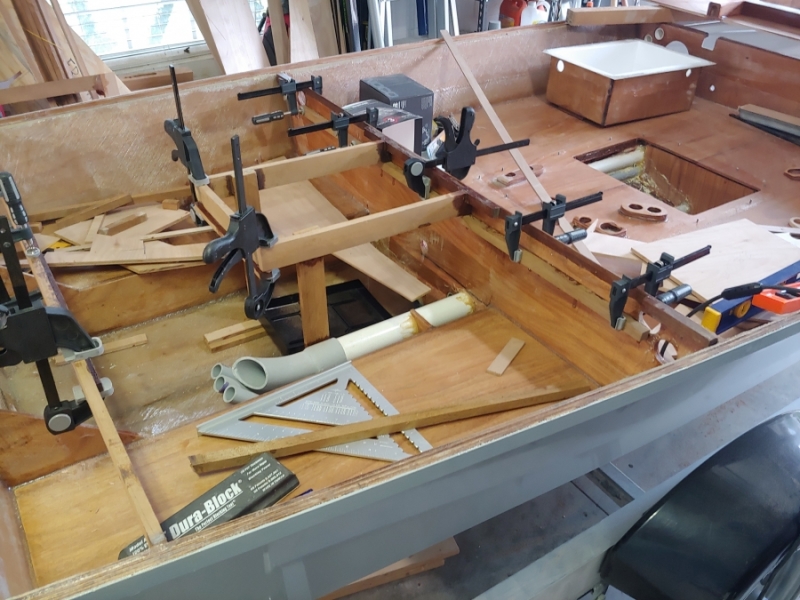
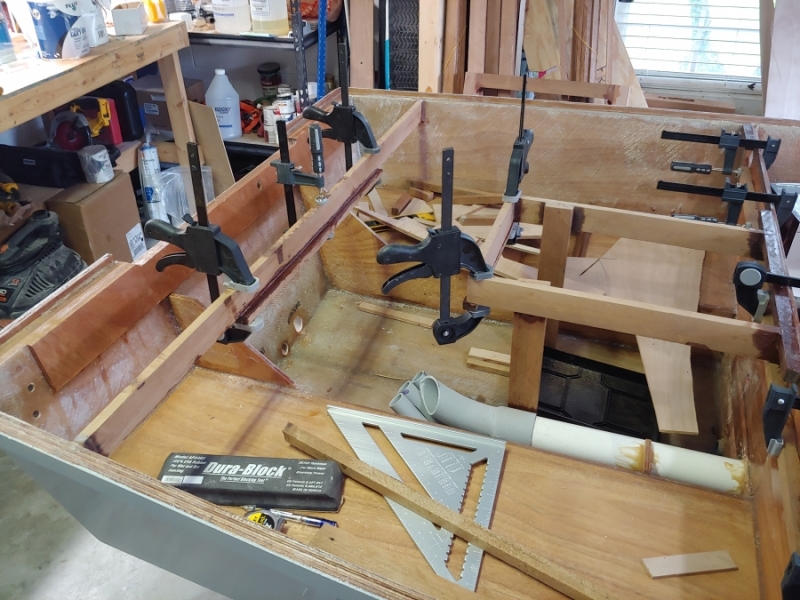
And now I can sit the hatch frame in place with no clamps to get things flush. I'm happy with this.
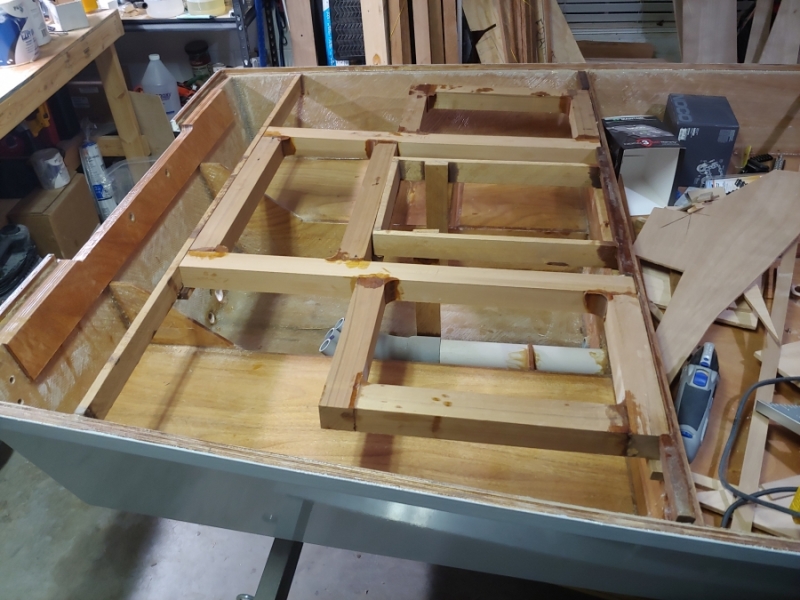
And now getting it all overcoated in preparation for prime and paint. Gonna put the first coat of primer down tomorrow.
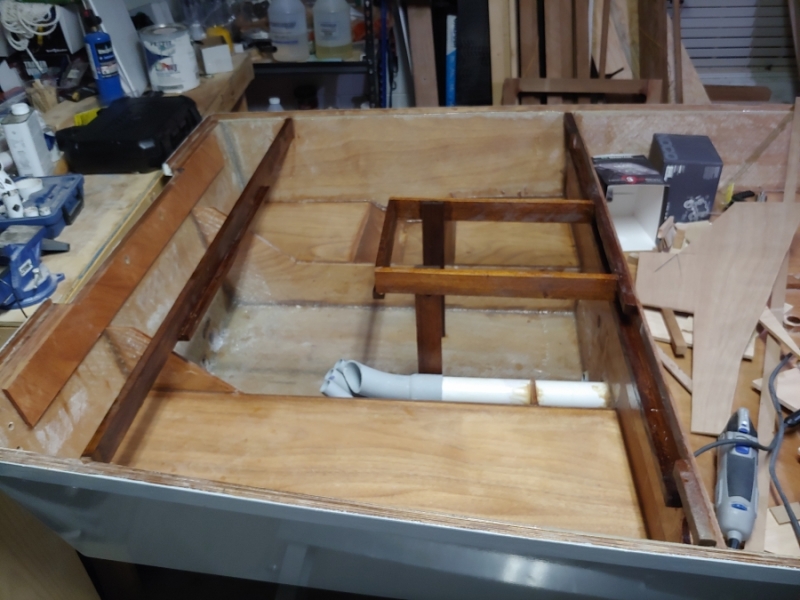
Re: Cameron's FS14LS+5%
Posted: Thu Sep 16, 2021 8:56 pm
by bamaguy0
Work this week's evenings have been a little slow. Mostly focused on getting what I need for electricals figured out.
I did prime the aft locker area. I'll put first bilge paint coat on tomorrow.
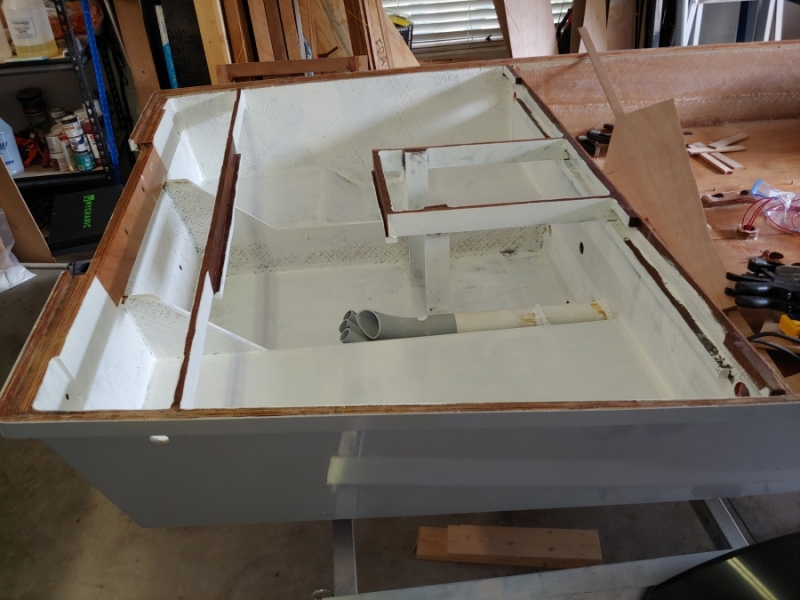
And as far as forward locker wiring, here's kinda how it's started.
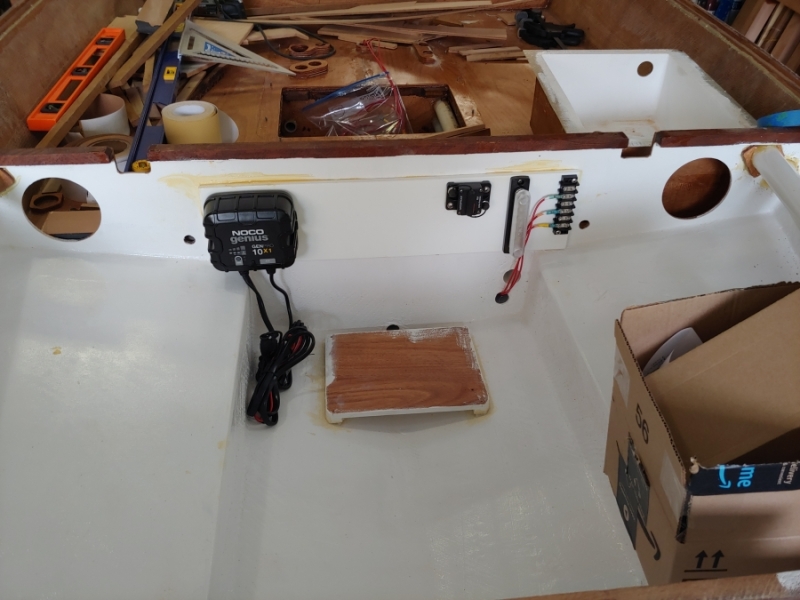
And how it's going.
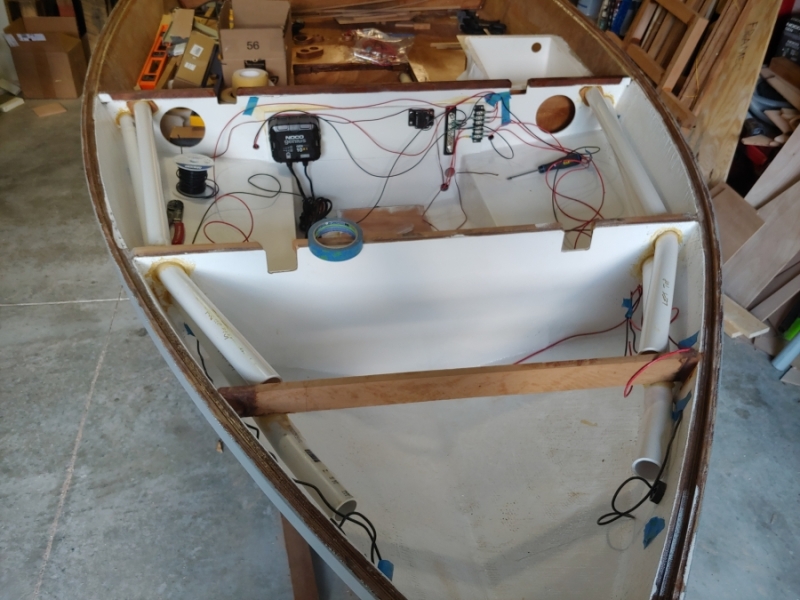
It's a rats nest now, but I just stuck in tie plates and will begin tidying up, covering with cable sleeving, and tying up the wiring now.
Re: Cameron's FS14LS+5%
Posted: Thu Sep 16, 2021 10:19 pm
by VT_Jeff
Looking good. I learned the hard way that led lights require correct polarization and that the wire colors arent the most obvious. The nav lights were easy but I messed up the under deck lights.
Re: Cameron's FS14LS+5%
Posted: Thu Sep 16, 2021 10:33 pm
by bamaguy0
VT_Jeff wrote: ↑Thu Sep 16, 2021 10:19 pm
Looking good. I learned the hard way that led lights require correct polarization and that the wire colors arent the most obvious. The nav lights were easy but I messed up the under deck lights.
Ooops! Fortunately my under deck LED wires are color coded.
Re: Cameron's FS14LS+5%
Posted: Sat Sep 25, 2021 8:50 pm
by bamaguy0
Finished the front deck wiring this week...well got it to a point where I couldn't do any more without moving on.
Here's a few more in process shots. Didn't take any final shots.
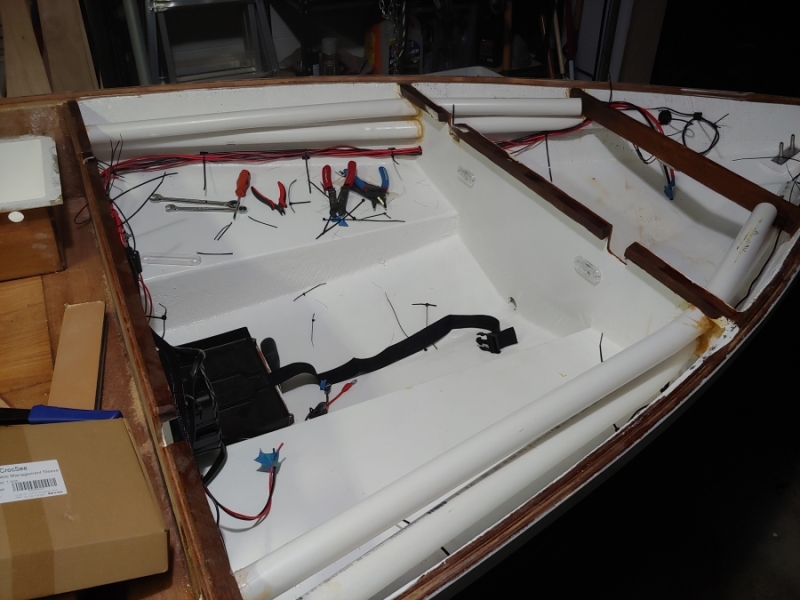
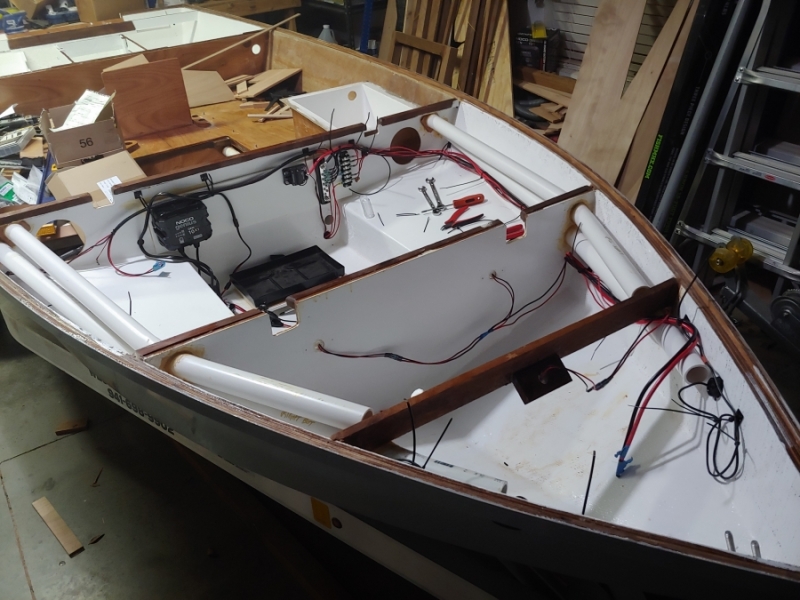
I fit checked some of my console electrical stuff to build the battery cables. Apparently my switch is a bit taller than I planned.
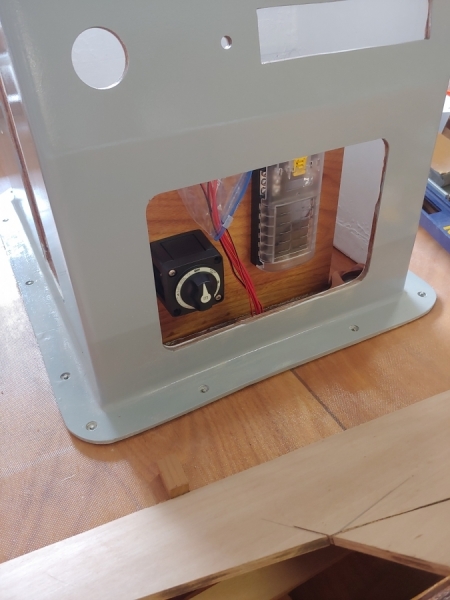
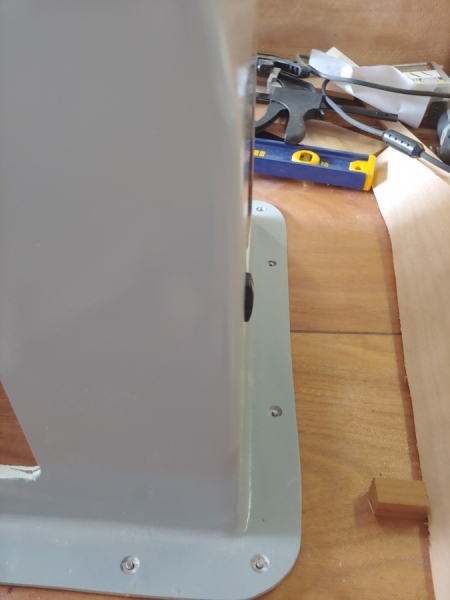
Nothing a Dremel can't overcome.
I bonded in starboard pieces for the battery tray, bilge pump, and livewell pump.
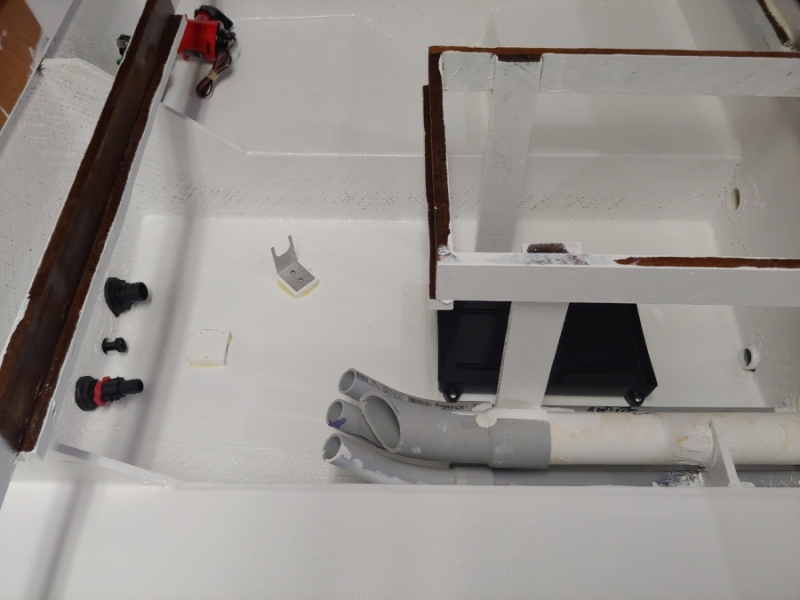
And I glued on the front deck.
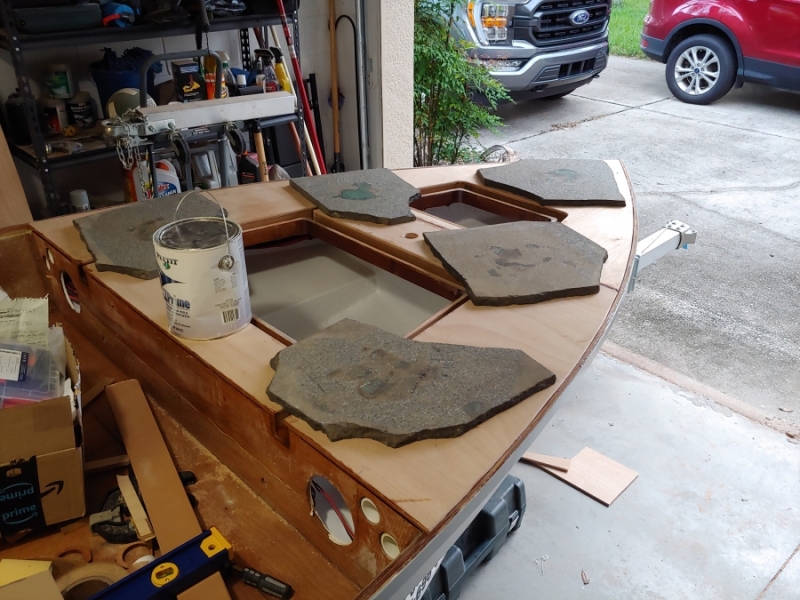
Re: Cameron's FS14LS+5%
Posted: Sun Sep 26, 2021 7:10 pm
by VT_Jeff
Holy moly! All that hard work covered up, never to be seen again(ideally).
Congrats on a huge milestone Cameron!
Re: Cameron's FS14LS+5%
Posted: Sun Sep 26, 2021 7:22 pm
by bamaguy0
VT_Jeff wrote: ↑Sun Sep 26, 2021 7:10 pm
Holy moly! All that hard work covered up, never to be seen again(ideally).
Congrats on a huge milestone Cameron!
Thanks! That's the plan!
Next up is to do the same thing I did for the front deck hatches on the aft. Maybe it'll go just as smoothly!
Re: Cameron's FS14LS+5%
Posted: Fri Oct 01, 2021 8:32 pm
by bamaguy0
Work this week has been focused on the aft deck hatch gutters.
Bonding the deck to the hatch frame.
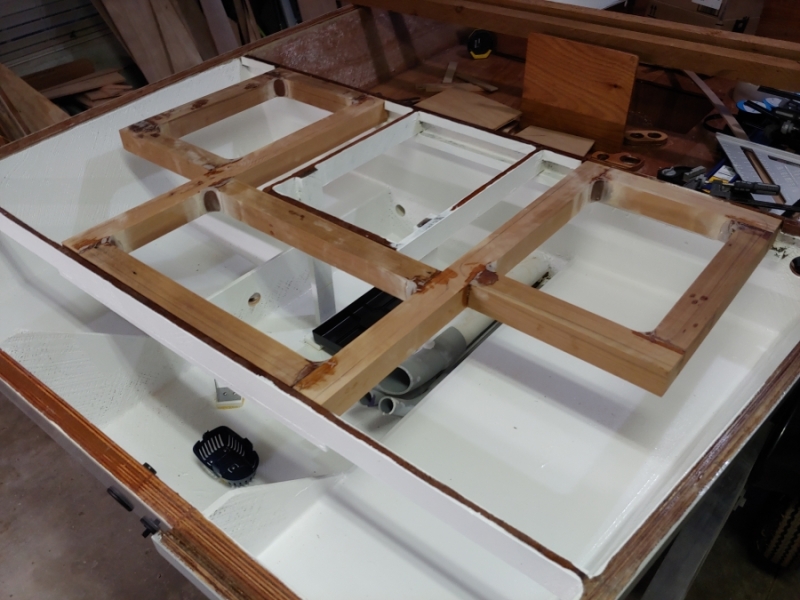
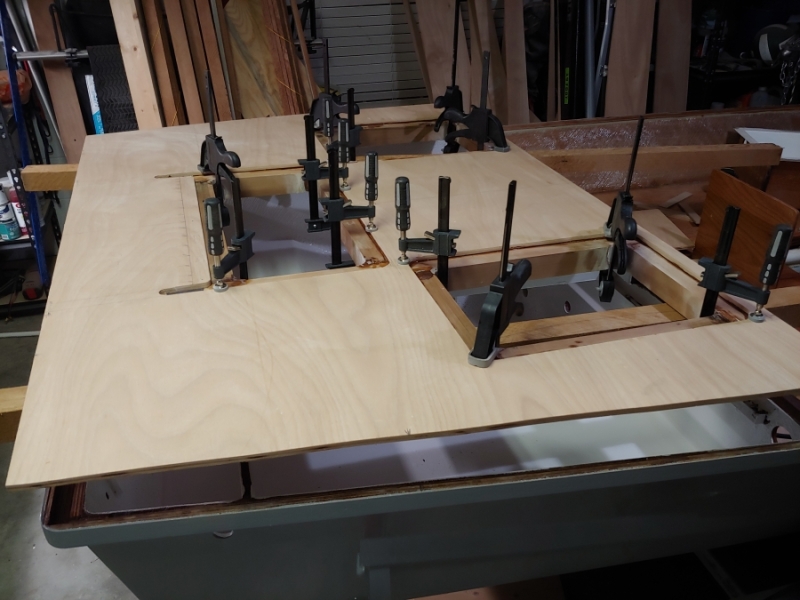
Initial route out of the gutter. I didn't predrill all the holes to remove material in advance. It still worked OK, but lots of chattering and dimming of the lights in the garage
I think I would recommend predrilling in the future.
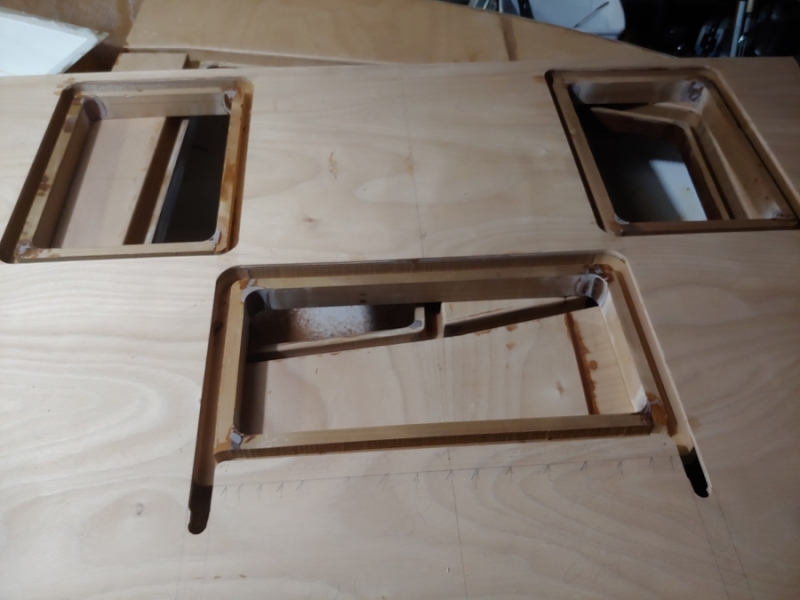
Some extra cleating for the motorwell.
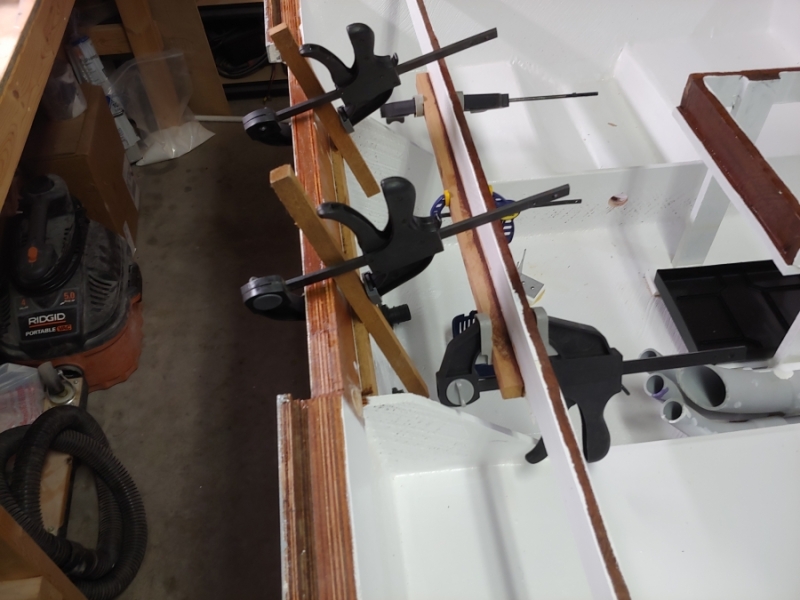
Aft deck with the hatches in place. Just getting a visual for how it will look.
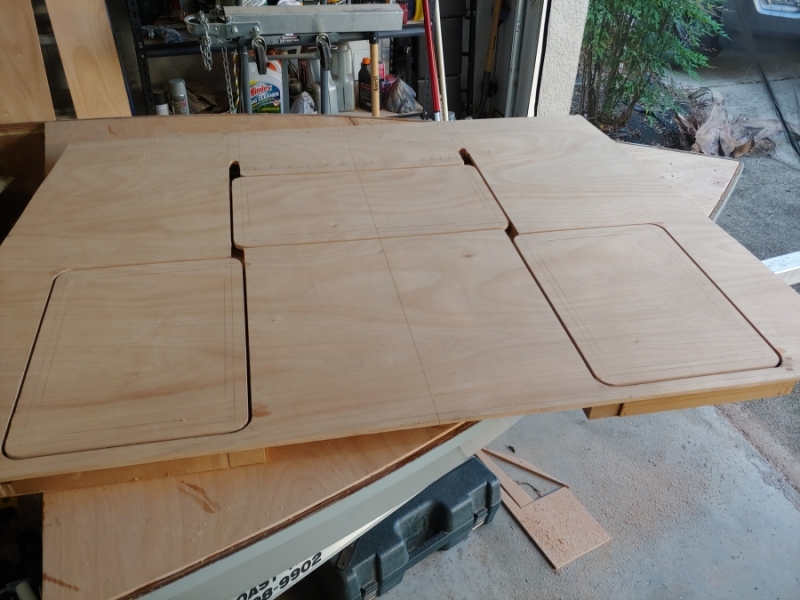
And like before, I made some smaller panels and nailed them down to the frame openings as an interior guide. Once removed they get cut down just smaller than the frame openings to be the doubler piece for the hatches.
This is after the gutters are taken to full depth. Note the motorwell bonded in place as well.
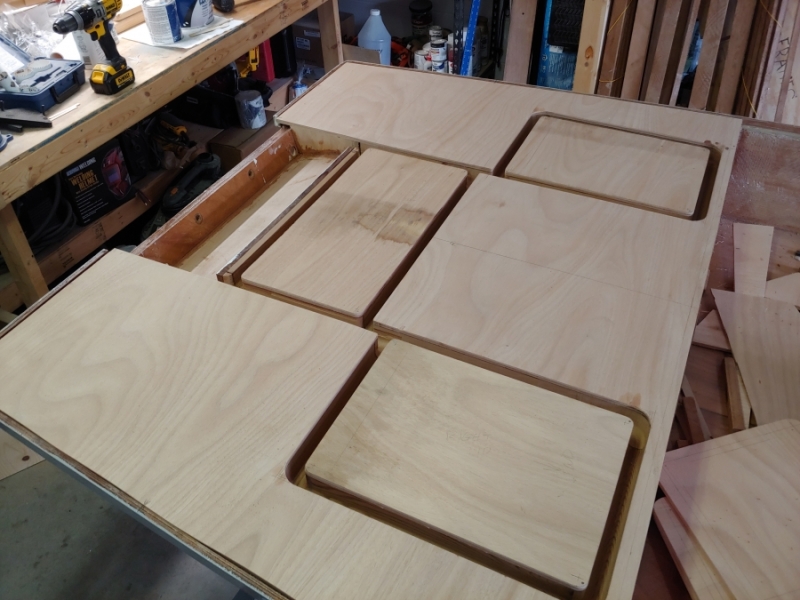
Had one little strip to glue back on between the center hatch and the motorwell. It
should be wide enough for my hinges. We'll see. This is after rounding the outer edges over and knocking down the inner lip to a depth for the gasket.
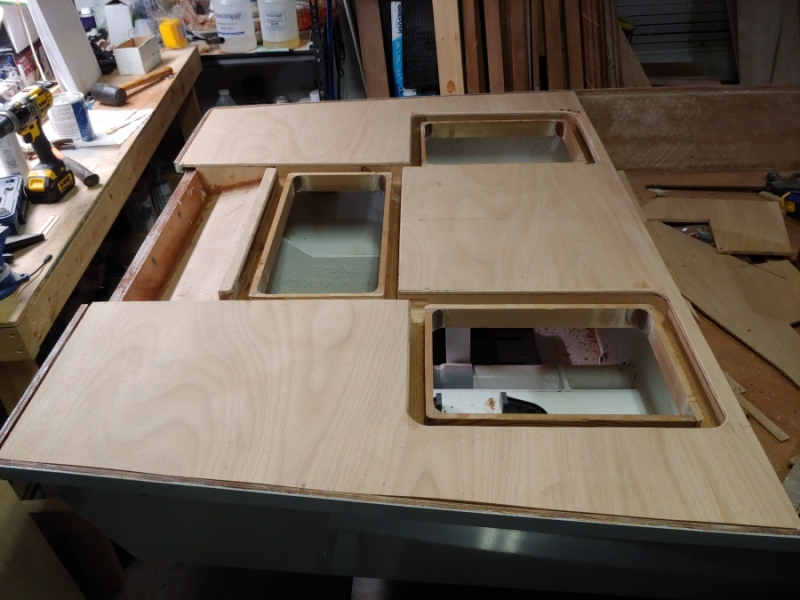
All that's left is a little hand sanding and chip fills and I'm onto finishing out the locker area.
Re: Cameron's FS14LS+5%
Posted: Tue Oct 05, 2021 9:23 pm
by Mojosmantra
Dang - looks like you got that all figured out and it looks great. I'm curious about the aft "cantilevered" hatch frames - are those simply serving the gutter function, or are they acting as deck support?
Re: Cameron's FS14LS+5%
Posted: Tue Oct 05, 2021 9:39 pm
by bamaguy0
The gutter itself isn't cantilevered off any one thing as there is cleating supporting the hatch gutters where I've drawn in blue. That's how it's able to sit in place.
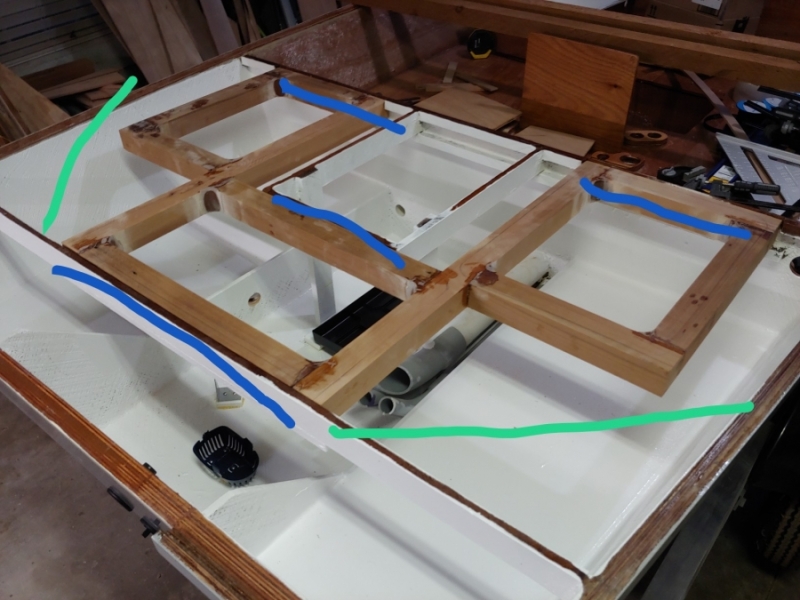
I am considering an additional deck support where I've drawn in green to ensure the point-ish loads of the poling platform feet have some nearby supports, but I haven't pulled the trigger just yet. It only really concerns me because of the way I glued the gutters back there. The aft lip of the side hatches are just butt bonded off the center common run with no support around. That is a cantilever, but the deck helps tie it together.
I've always been taught "When in doubt, make it stout." But I struggle with the balancing act of not weighing the boat down too much.
Re: Cameron's FS14LS+5%
Posted: Tue Oct 05, 2021 9:47 pm
by Mojosmantra
mostly curious about the areas in "red"...

Re: Cameron's FS14LS+5%
Posted: Tue Oct 05, 2021 9:52 pm
by bamaguy0
Yeah i see what you're saying. I was editing my post somewhat. Not sure what you saw or didn't. I've been studying that a lot. I think my green cross braces would support that pretty well.
If I had to do it again, I would have redesigned the joint locations for this aft hatch gutter setup. I threw it together with little to no consideration for how it was going to be supported.
Re: Cameron's FS14LS+5%
Posted: Tue Oct 05, 2021 9:59 pm
by bamaguy0
I've actually got 2 trains of thought.
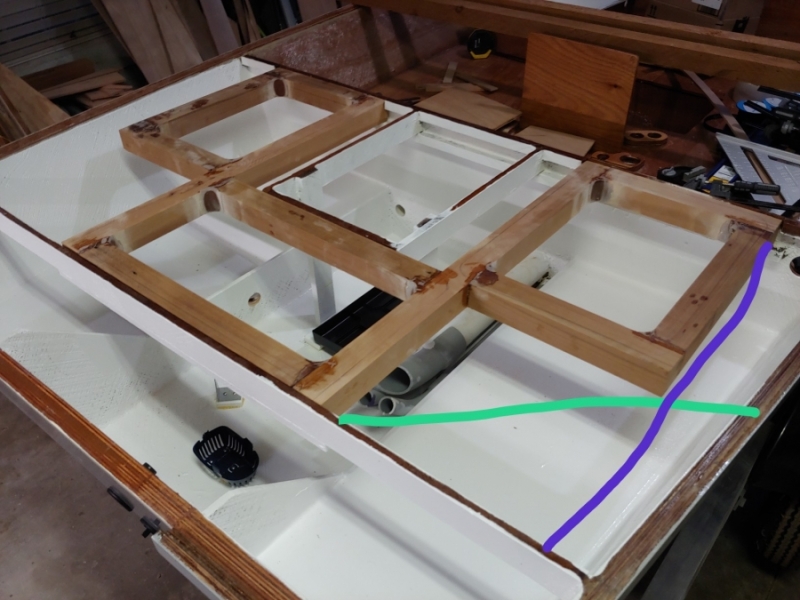
I lean towards green because it's a shorter run, so effectively stiffer, lighter, and still provides support.
Re: Cameron's FS14LS+5%
Posted: Tue Oct 05, 2021 10:09 pm
by Mojosmantra
I was thinking of a support perpendicular to your "purple" line, sistered onto the hatch frame and extending to the gunwhale...not sure what you think about that. It looks to me that that particular cantilever has no back span and the moment connection is only glue...I think the sister would work nicely unless there is a layout issue that's keeping you from doing that.
Re: Cameron's FS14LS+5%
Posted: Tue Oct 05, 2021 10:12 pm
by Mojosmantra
This is what I'm trying to describe...

Re: Cameron's FS14LS+5%
Posted: Tue Oct 05, 2021 10:16 pm
by bamaguy0
That's an option too, but my thought on that is it isn't much better because it's then just cantilevered out off the gunwale, right? I felt that option required another vertical post to the floor.
Re: Cameron's FS14LS+5%
Posted: Tue Oct 05, 2021 10:21 pm
by Mojosmantra
It would be glued at both ends - so not cantilevered - but still just glue. The angle of the gunwhale would play in your favor. Your purple line is the same concept but does have more opportunity for a positive connection (dowels?) if you felt like that was needed. Either one would resolve it I think.
Re: Cameron's FS14LS+5%
Posted: Tue Oct 05, 2021 10:30 pm
by bamaguy0
I think I'm starting to see where you're coming from.
I'll mock some pieces up this weekend...
Good discussion. I've stared at that area almost every night for the few weeks that I've been working this aft hatch stuff and had internal dialogue about whether it's fine or not. I had begun to convince myself it was fine, but if someone else shows concern then that's enough to sway my vote.
The answer is something must be done, all that's left is deciding how to do it!
Re: Cameron's FS14LS+5%
Posted: Tue Oct 05, 2021 10:38 pm
by Mojosmantra
I was just imagining standing on that point and wondering what keeps it from flexing. Should be a simple fix - looks like you have a few options.
Re: Cameron's FS14LS+5%
Posted: Tue Oct 05, 2021 10:41 pm
by Mojosmantra
And it could very well be that the plywood alone can handle that span and I'm making something out of nothing...
Re: Cameron's FS14LS+5%
Posted: Tue Oct 05, 2021 10:44 pm
by bamaguy0
Mojosmantra wrote: ↑Tue Oct 05, 2021 10:41 pm
And it could very well be that the plywood alone can handle that span and I'm making something out of nothing...
That is what I was hanging my hat on, but with the way the gutter pieces are simply butt bonded together, any flexing will result in cracks over time. I have to limit the amount the deck flexes, that much is true. Adding support helps that. Better to add a little more now than wish I had later.
Re: Cameron's FS14LS+5%
Posted: Tue Oct 05, 2021 10:56 pm
by bamaguy0
In other news...
Because I'm bolting on a PT35 Tilt n Trim bracket, I designed a mounting plate for the transom bolts in the motor well. All the cool boats have them!
Btw the same font I'm going to also use to make some vinyl decals to go on the side.
My uncle has a 3 axis CNC in his garage and will be machining it for me. He finished the path planning and sent me a photo of it. Should be making a wooden trial piece this weekend before trying to cut the aluminum.
Re: Cameron's FS14LS+5%
Posted: Tue Oct 05, 2021 11:10 pm
by TomW1
Cameron just double the piece with a piece of 3/4" you are over thinking this. Tom
Re: Cameron's FS14LS+5%
Posted: Sun Oct 10, 2021 7:59 pm
by bamaguy0
Progress is slow, but coming along. Just detailing the aft locker area. Getting wiring/plumbing situated.
Laying out hoses for the baitwell tank.
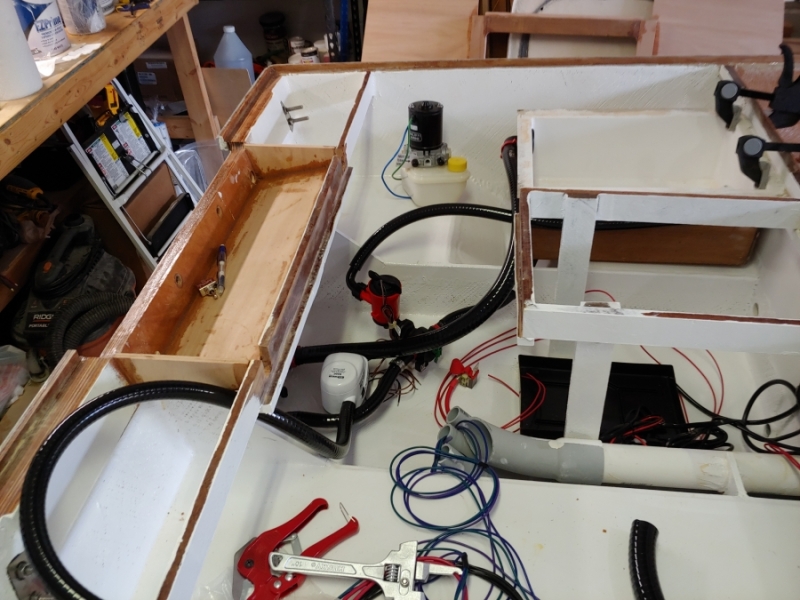
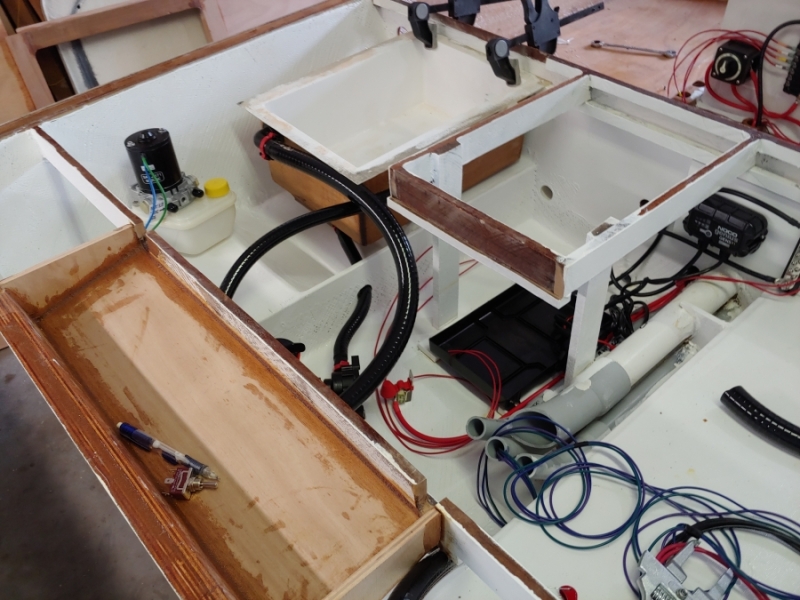
Made a mount for my Power Pole Anchor pump.
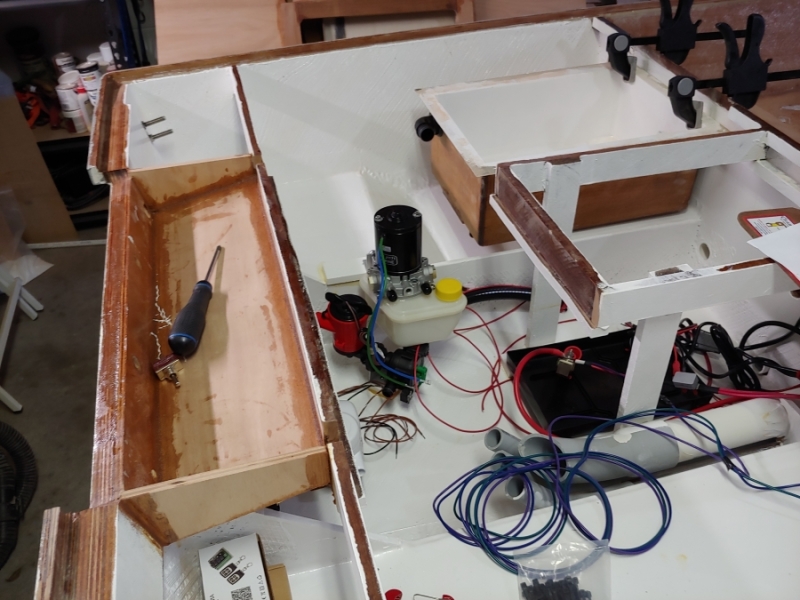
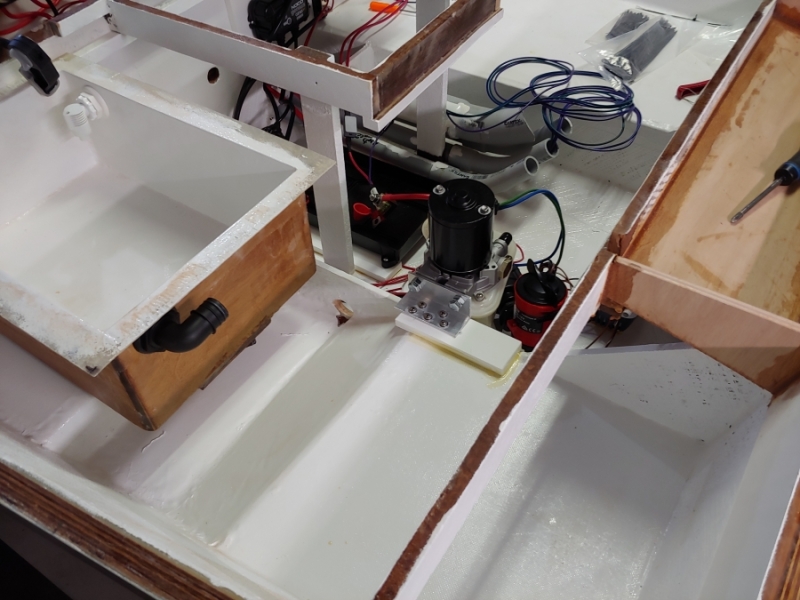
Working the wiring for the pump. It's a polairty switching motor so you need a 2 relay setup that flips power and ground. Power Pole has one for about 130 bucks...or 2 relays for 10 bucks a piece and some wiring and you have the same thing.
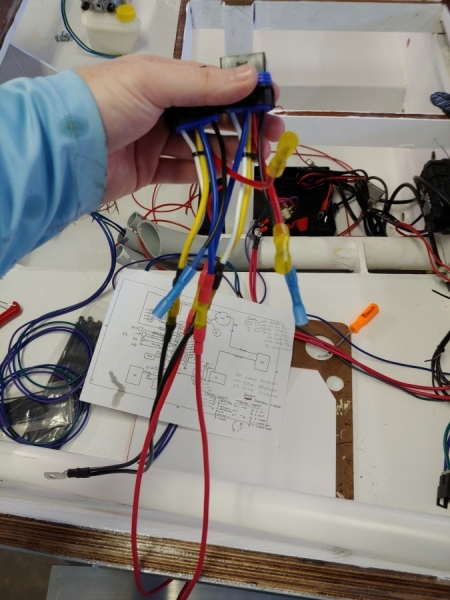
The PT35 Tilt N Trim bracket does the same thing, so I'm using it for guidance as well.
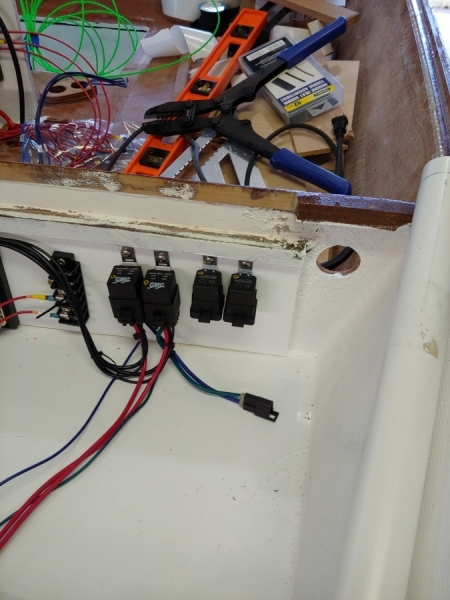
My uncle ran my transom bracket on a piece of wood this weekend. I think it looks good! Now for an aluminum one.

And how I left it tonight. Got some extra colors of wiring coming in this week to make my pump wiring a little more clear. Should be in soon. I'll wrap that up, tie everything up, and then figure out where to put lighting.
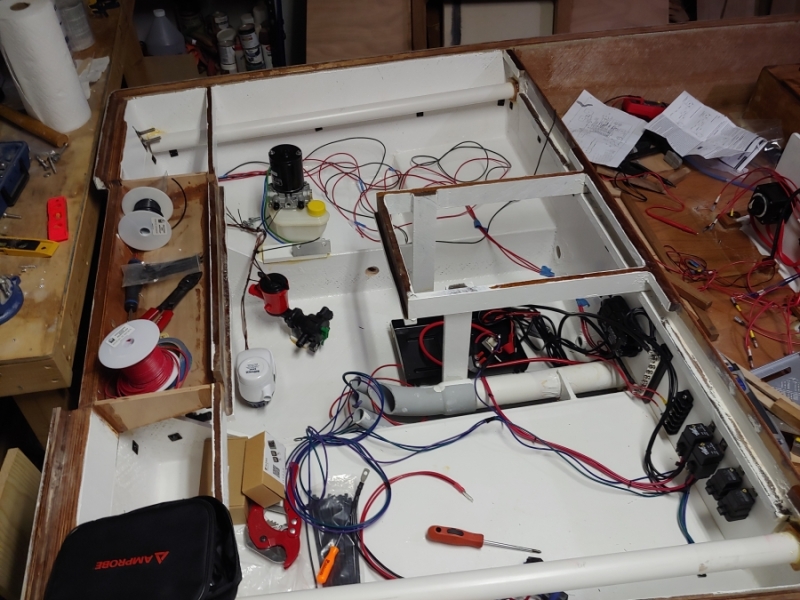
Re: Cameron's FS14LS+5%
Posted: Mon Oct 11, 2021 3:00 am
by bamaguy0
He ended up making the aluminum one overnight as well.
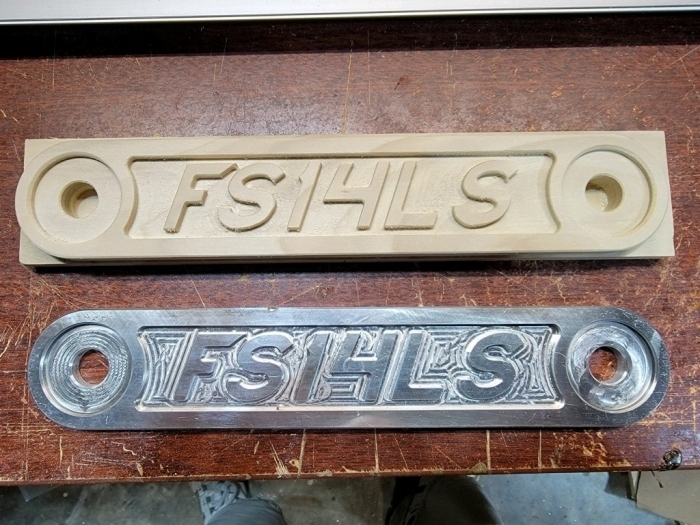
Re: Cameron's FS14LS+5%
Posted: Mon Oct 11, 2021 10:00 am
by VT_Jeff
bamaguy0 wrote: ↑Mon Oct 11, 2021 3:00 am
He ended up making the aluminum one overnight as well.
That is flipping SLICK!
Re: Cameron's FS14LS+5%
Posted: Mon Oct 11, 2021 10:05 am
by Jeff
Nice work!!! Jeff
Re: Cameron's FS14LS+5%
Posted: Mon Oct 11, 2021 10:20 am
by VT_Jeff
bamaguy0 wrote: ↑Tue Oct 05, 2021 10:44 pm
Mojosmantra wrote: ↑Tue Oct 05, 2021 10:41 pm
And it could very well be that the plywood alone can handle that span and I'm making something out of nothing...
That is what I was hanging my hat on, but with the way the gutter pieces are simply butt bonded together, any flexing will result in cracks over time. I have to limit the amount the deck flexes, that much is true. Adding support helps that. Better to add a little more now than wish I had later.
If there's still time to weigh in, I like the vertical post idea if it's not going to be too much of a storage nuisance and the floor under that spot is supported. Otherwise, I think I like the transom-to-frame support since both ends will be fully supported and the connection is simpler than the diagonal.
Re: Cameron's FS14LS+5%
Posted: Fri Oct 15, 2021 6:57 pm
by jonnymac
bamaguy0 wrote: ↑Mon Oct 11, 2021 3:00 am
He ended up making the aluminum one overnight as well.
That is awesome! these are the details that make boat building fun!
Re: Cameron's FS14LS+5%
Posted: Sat Oct 16, 2021 2:32 pm
by Fuzz
I just keep thinking "man that is a lot of stuff packed in a 14 foot boat"
That is going to be one nice boat
Re: Cameron's FS14LS+5%
Posted: Sat Oct 16, 2021 2:54 pm
by cape man
I want an uncle like that!
Re: Cameron's FS14LS+5%
Posted: Sat Oct 16, 2021 7:38 pm
by bamaguy0
Not a lot to show off this week. Mostly been wiring. Also added doublers under the deck where the poling platform and center seat/leaning post will be.
I ordered some blue and green wire last weekend and it still hasn't shown up. That's all I'm waiting on to finish out the hydraulic pump relay harness. I'm afraid USPS has lost the package.
Had an uh oh happen today...
So with the hatch design that connects gutters the entire length of the deck, the shallow spot in the gutter is a weak spot. It's been flexible and I've been meaning to reinforce it. Well after installing the doublers and making the deck heavier, the same way I've been handling it resulted in a CRACK...ugh.
Well I doubled it up with a strip of 6mm ply. Seems to be much stiffer now. I'll need to work on the crack some once I epoxy coat the top side, but I think it'll be fine going forward.
And I decided how to support the deck/hatch where it's kinda hanging out in no man's land. Bonding that in place now.
Tomorrow might be a cleanup day...it's getting bad.
Re: Cameron's FS14LS+5%
Posted: Sat Oct 16, 2021 7:43 pm
by bamaguy0
Fuzz wrote: ↑Sat Oct 16, 2021 2:32 pm
I just keep thinking "man that is a lot of stuff packed in a 14 foot boat"
That is going to be one nice boat
Yeah...we'll see how she sits in the water once complete. Might have to put 'er on a diet after the maiden. Though I have seen Gheenoes loaded with just as many features or more so I feel like I'll be OK.
Re: Cameron's FS14LS+5%
Posted: Sat Oct 16, 2021 8:46 pm
by Dan_Smullen
6mm laminated on the back of that will be bomb proof.
Better to have that opportunity to beef it up now rather than later.
I scrolled back a few pages to see how you molded the live well, but couldn’t find it. Sorry if I missed it.
Did you pull it from a mold or laminate over plywood?
Re: Cameron's FS14LS+5%
Posted: Sat Oct 16, 2021 8:49 pm
by bamaguy0
It was laminated over plywood. I thought about making a foam plug and then molding it, but just decided to keep it simple.
Re: Cameron's FS14LS+5%
Posted: Tue Oct 19, 2021 9:37 pm
by bamaguy0
I said I would clean up and I did! Tossed most of the scrap wood underneath the trailer and out of the way. Put some tools up. We'll see how long it takes to get messy again.
Poling platform is off getting new feet welded on the trimmed legs, so I thought I'd start working on the platform deck. There were a bunch of holes in the side for the white all around light. Thought I'd clean that up first. I countersunk the holes a little to give them more surface area for a filler to bite to then mixed up some epoxy with milled fiber and fumed silica to get a good fibrous paste.
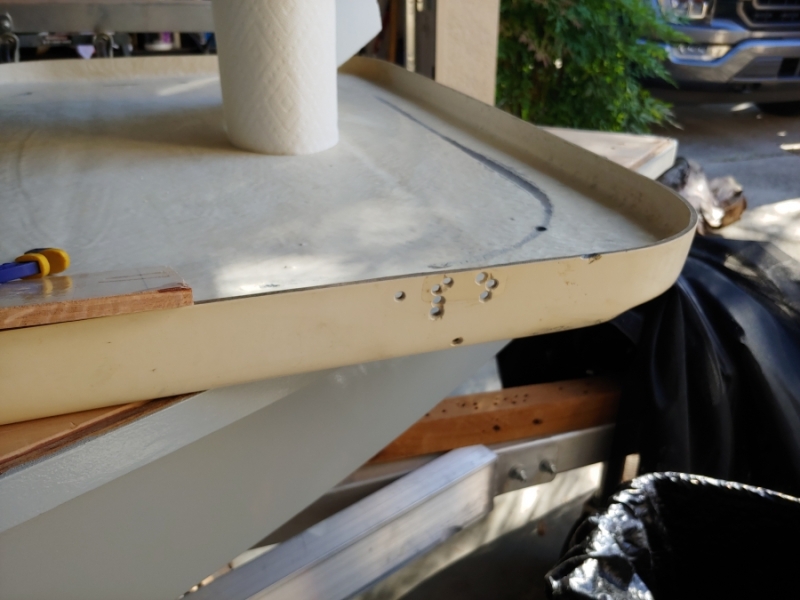
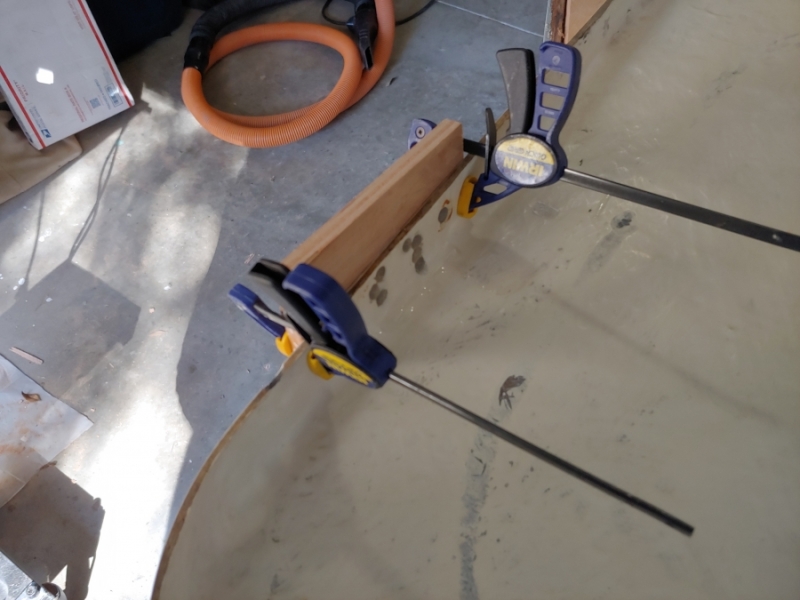
I'm gonna clean the whole thing up, sand this repair flush, apply some quikfair over a few places, then prime and paint the same hull grey color.
Worked on the seat mounting a bit. Ordered some mushroom attachment disks...i think that's what they're called. It's kinda like hook and loop except both sides are the same style and they interlock. Its pretty strong! For the back I mounted them straight to the back and they line up with the perimeter of the access hatch frame. Just screwed them into the plastic.
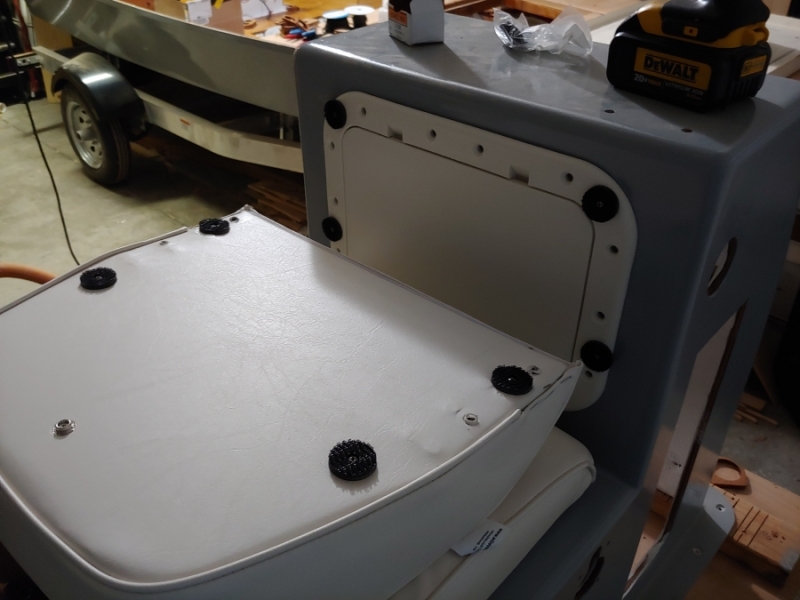
For the seat bottom, I made 2 frame pieces that I'll screw to the seat bottom. This spaces it off the console and clear the round hatch. I'll attach the discs directly to the frame and the console. I epoxy coated these already so I'll just need to prime and paint these to match the console.
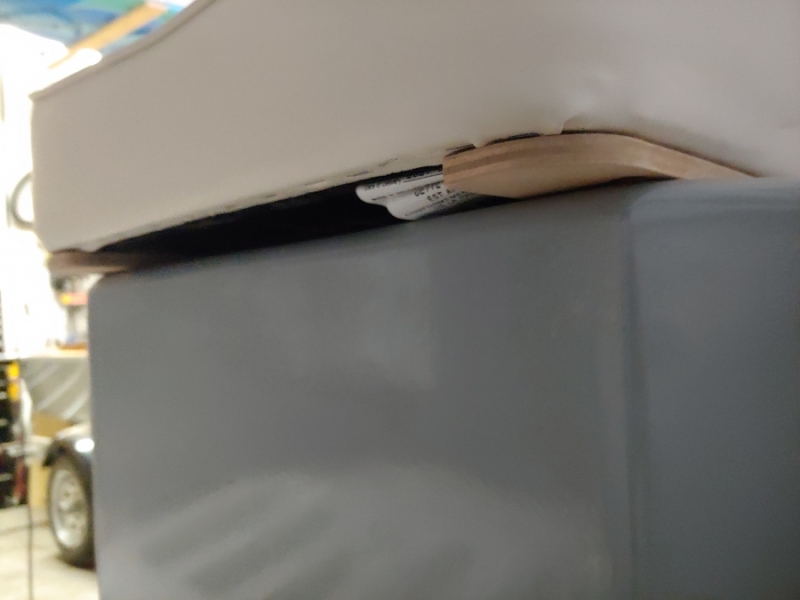
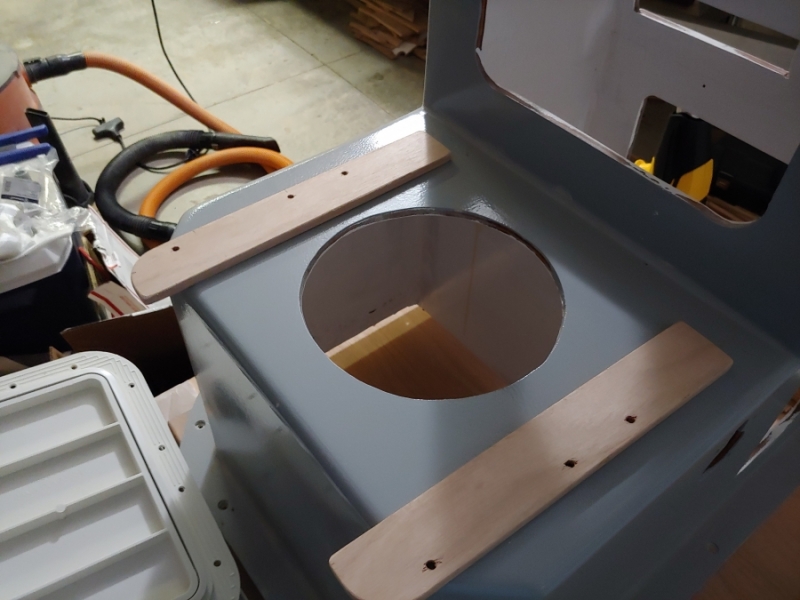
And my wire order came in yesterday! Went from nowhere to be found on 10/11 to my mailbox yesterday. It's a halloween miracle!
Ran the wires for the anchor hydraulic motor and now working on the switch system. I'm putting in a wireless relay board so I can deploy the anchor and trim the motor with a wireless fob. I'll also have trim on the throttle control and I'm going to hide a switch for the anchor control under the deck near the box as a manual override if the wireless relay fails. It is an Amazon special afterall...
I did at least power it on and cycle the relays a few times to make sure which button on the remote corresponded to which relay and to verify mode of operation. You can set it to operate in 3 different ways depending on how 3 pins are shorted together. Momentary, which is what I'm using, latching, and another one that I didn't quite understand.
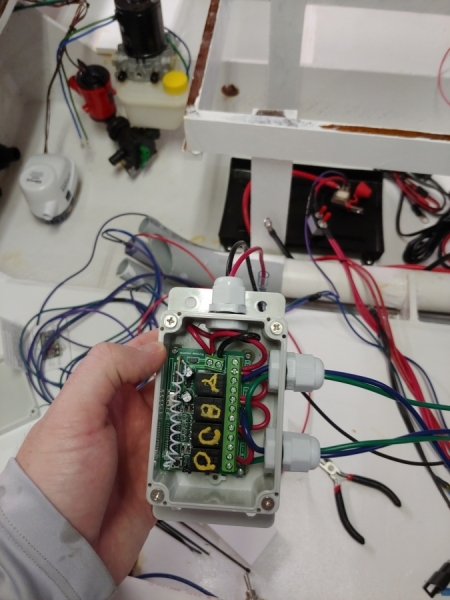
Re: Cameron's FS14LS+5%
Posted: Wed Oct 20, 2021 1:45 pm
by VT_Jeff
You are completely unchallenged for the Whizbang award! Great stuff!
Re: Cameron's FS14LS+5%
Posted: Wed Oct 20, 2021 6:26 pm
by bamaguy0
VT_Jeff wrote: ↑Wed Oct 20, 2021 1:45 pm
You are completely unchallenged for the Whizbang award! Great stuff!
Let's hope it all works!
Re: Cameron's FS14LS+5%
Posted: Wed Oct 20, 2021 8:00 pm
by Mojosmantra
Can you come over and wire my nav lights for me? This three way switch has me puzzled.
Re: Cameron's FS14LS+5%
Posted: Wed Oct 20, 2021 8:07 pm
by bamaguy0
Mojosmantra wrote: ↑Wed Oct 20, 2021 8:00 pm
Can you come over and wire my nav lights for me? This three way switch has me puzzled.
Not sure how much you're joking vs serious, but the ticket is a DPDT switch where the white all around is tied to both poles and the R/G nav are only tied to one.
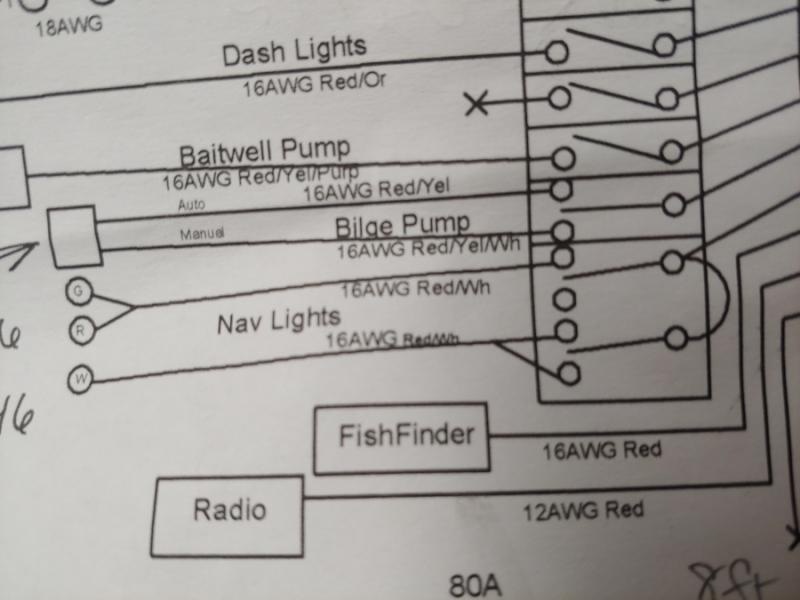
Admittedly it's a little easier said than done because you still need to stack wires on terminals. These multi stack terminal connectors make it a little easier.
https://www.amazon.com/dp/B000NI3DGW/re ... UTF8&psc=1
I'm using those to tie 2 switch signals into one relay trigger point for the tilt n trim and power pole anchor relays as well.
Re: Cameron's FS14LS+5%
Posted: Wed Oct 20, 2021 8:13 pm
by Mojosmantra
I was partly joking. I am electrically challenged and your work is blowing my mind.
Re: Cameron's FS14LS+5%
Posted: Wed Oct 20, 2021 8:30 pm
by bamaguy0
My Google-Fu is strong!
And a little bit of trial and error...
I'm willing to help out where I can. If there's anything that anyone would like more detail on I can try to make a more instructional post.
Re: Cameron's FS14LS+5%
Posted: Wed Oct 20, 2021 9:09 pm
by bamaguy0
Attached the waterproof box to some starboard and in the process of gluing the starboard to that leg of the deck support.
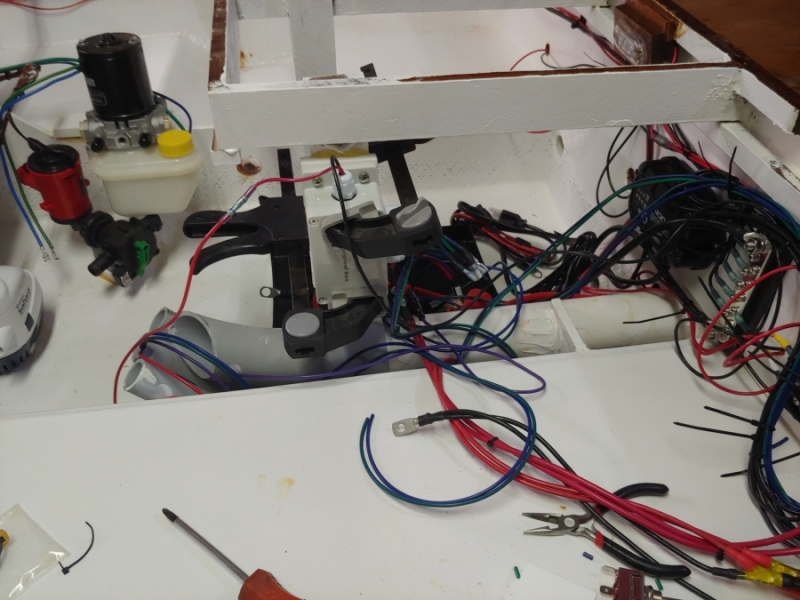
I just need to run by West Marine and pick up a couple more electrical connectors and I'll have everything wired up shortly after.
Finally ordered and received a fuel level sending unit so I can outfit my tank finally. Need to pick up some vent hose so I might do that while at West Marine as well. I got some three ways, a schrader valve, and a gauge to do a leak check on the tank once I install all the fittings and sending unit.
I think this weekend is going to be where I temp mount the tilt n trim with the engine and all the bracketry and make sure I can route the control cables how I expect to. It's a small boat with tight quarters. Plus I packed it with gadgets and gizmos. This has been my biggest fear. I'll use the time to figure out where they'll come out of the deck and head toward the motor as well.
Re: Cameron's FS14LS+5%
Posted: Thu Oct 21, 2021 2:00 pm
by Mojosmantra
bamaguy0 wrote: ↑Wed Oct 20, 2021 8:30 pm
My Google-Fu is strong!
And a little bit of trial and error...
I'm willing to help out where I can. If there's anything that anyone would like more detail on I can try to make a more instructional post.
Since you offered...my electrical is really simple and I've sized all my wiring, which ends up being mostly in the 16 -14 AWG range. Pretty standard stuff. There's only one wire that I'm stuck on and am probably overthinking. I'm using a battery switch (Blue Sea 6006) which is recommended, but optional, to control my fuse panel (Blue Sea 4304) and house loads. These include the bilge pump, livewell pump, nav and anchor lights. It's really just a master power switch for me and the engine and bilge pump will bypass it. Conservatively, that's a max 10 amp draw. However, the switch specs call for a 4/0

wire "to meet ratings". I'm assuming that this is for when you're using it to control the engine starter, which I am not. Even then - holy crap that's a big wire
. Anyway, wiring tables would say I only need 14 - 12 AWG. Would you agree with that - or is there something about battery switches that I don't know?
Re: Cameron's FS14LS+5%
Posted: Thu Oct 21, 2021 6:41 pm
by bamaguy0
So the statement of 4/0 to meet ratings just means that if you were to max out the amperage of the switch you'd need to be using 4/0. You can size the cable going from the batt to the switch appropriately for the expected loads. I would recommend going up just a little bit to account for growth. When you run wires at their current limit, they get warm, have a higher resistance, get warmer, have a higher resistance, etc until a fire starts. The tables like the one below consider that, but for supply lines I think it's best to step up a little bit more than you need.
http://assets.bluesea.com/files/resourc ... hartlg.jpg
In my case, I have 6AWG running from each batt to the switch and swirch to fuse block. I don't plan on trying to use my switch to carry cranking loads. I only wanted it to be able to power house loads with my trolling motor batt in case something happened with my house/cranking batt.
Don't forget to put a fuse or breaker on the line going from the battery to switch also. Usually around the limit of the size cable you use or just below.
Re: Cameron's FS14LS+5%
Posted: Thu Oct 21, 2021 7:58 pm
by TomW1
Cameron, while the tables only say that I would go higher. You definitely don't need to ogo to 4/0, but I would go to a 10 or 8 AWG in case you ever add any thing. What about a trolling motor in the future, any thoughts of adding one? Thein you will need the 4/0 as most are 6 or 8 guage.
Re: Cameron's FS14LS+5%
Posted: Thu Oct 21, 2021 8:05 pm
by bamaguy0
I am wiring in a trolling motor, but it won't be run thru the main switch. It's getting it's own 8AWG branch with breaker straight off the trolling motor batt in the front locker area.
If trolling motor batt dies then I just won't have one. Didn't want the hassle of trying to make the house power it just in case.
If I were, I'd agree due to the lengths...I'd probably be in the 2AWG, maybe 0AWG range.
Re: Cameron's FS14LS+5%
Posted: Thu Oct 21, 2021 9:27 pm
by Mojosmantra
Good discussion - helpful to me. I am also wiring in a trolling motor (6 AWG) but it's straight to the battery with a dedicated 60 amp breaker.
I hear ya on the bigger wire for future loads. I suppose that would also apply to the terminal wire for the ground bus bar?
Re: Cameron's FS14LS+5%
Posted: Thu Oct 21, 2021 9:40 pm
by bamaguy0
Yeah you want your ground wire size to match.
In my system I have 2 remote bus bars. One in the front locker, one in the aft. They're both tied to the local battery with 6AWG cable and then also have a 6AWG cable running from the remote bus bars to the fuse block's ground bar at the console.
Local load grounds, like hatch lights or nav lights terminate at the local bus bars instead of having to go back to the fuse block's ground bar.
Re: Cameron's FS14LS+5%
Posted: Fri Oct 22, 2021 5:01 pm
by bamaguy0
Temp mounted the Tilt and Trim Bracket to hang the motor tomorrow so I thought I'd check out my wireless controller.
https://youtu.be/iI2-L4JkWb8
Re: Cameron's FS14LS+5%
Posted: Fri Oct 22, 2021 9:01 pm
by Mojosmantra
Sweet!
Re: Cameron's FS14LS+5%
Posted: Sat Oct 23, 2021 2:53 pm
by bamaguy0
Well it appears it will work out ok.
The steering cable really wants to come thru the deck right where the poling platform base is, but I am able to pull it up and in a bit to a better location. Getting it installed for the final time might be a little tough, but I tried holding it in place where it would come thru the deck when pulling it back out of the motor tube and it seemed ok.
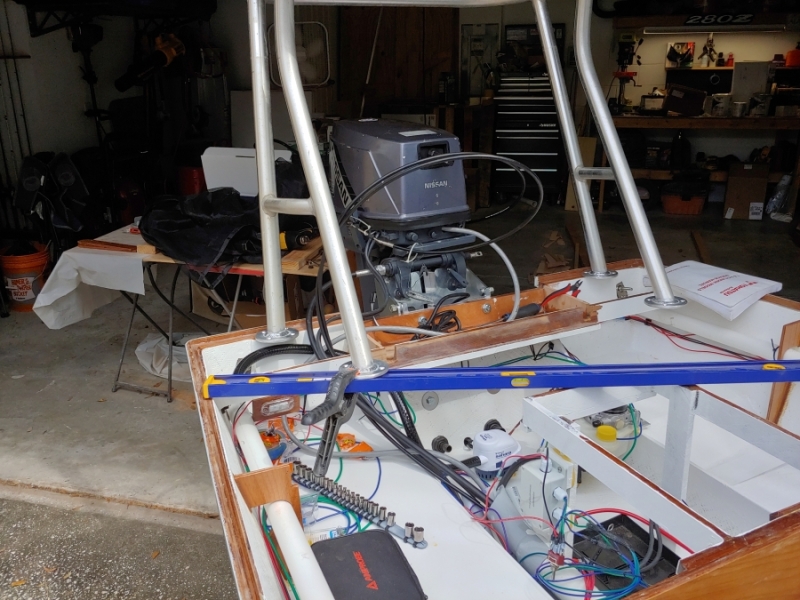
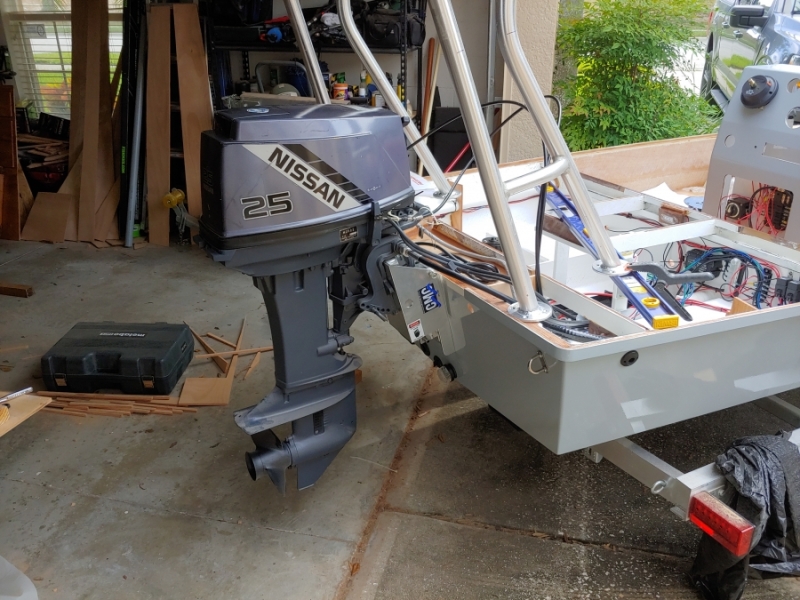
I don't need hydraulic steering...I don't need hydraulic steering...I don't need hydraulic steering
Re: Cameron's FS14LS+5%
Posted: Sat Oct 23, 2021 4:25 pm
by TomW1
No You Don't, No You don't, No you don't, no you don't.
Tom
Re: Cameron's FS14LS+5%
Posted: Sat Oct 23, 2021 7:27 pm
by VT_Jeff
I found the cable steering cable no stiffer than rebar, not sure what the big fuss is all aboot!
Re: Cameron's FS14LS+5%
Posted: Sun Oct 24, 2021 8:50 pm
by bamaguy0
VT_Jeff wrote: ↑Sat Oct 23, 2021 7:27 pm
I found the cable steering cable no stiffer than rebar, not sure what the big fuss is all aboot!
You'd think with all these new materials and whatnot they would figure out a way to make those cables more flexible. I guess the new thing is hydraulic control. Only peasants use mechanical steering now a days.
Re: Cameron's FS14LS+5%
Posted: Mon Oct 25, 2021 1:31 pm
by VT_Jeff
bamaguy0 wrote: ↑Sun Oct 24, 2021 8:50 pm
VT_Jeff wrote: ↑Sat Oct 23, 2021 7:27 pm
I found the cable steering cable no stiffer than rebar, not sure what the big fuss is all aboot!
You'd think with all these new materials and whatnot they would figure out a way to make those cables more flexible. I guess the new thing is hydraulic control. Only peasants use mechanical steering now a days.
I didn't even look into hydraulic steering, I guess I assume it was out of price range etc, maybe I should have, have you?
Re: Cameron's FS14LS+5%
Posted: Mon Oct 25, 2021 1:59 pm
by TomW1
Guys here is the BayStar Hydraulic system including a chart of motors and there systems that would fit the motor.
http://www.seastarsolutions.com/product ... w/baystar/ Hope this helps you out. You will have to go to a vendor to find out what it will cost. Seriously it will be in the $600+ range. Also very few for 25HP motors.
Tom
Re: Cameron's FS14LS+5%
Posted: Mon Oct 25, 2021 6:47 pm
by bamaguy0
The problem with 25hp and under is that they use a clamp style attachment with optional bolts in the lower portion of the bracket. The way the ram attaches to the pivot tube can cause issues with hitting the clamp knobs when tilting.
There are some cheaper options on amazon under 500, but it's a crapshoot on if it'd actually work reliably assuming the ram actually clears the clamps.
I think I'd be ok with my separate tilt and trim bracket, but it's a tough sell at 600 bucks.
Re: Cameron's FS14LS+5%
Posted: Fri Oct 29, 2021 6:56 am
by bamaguy0
I hit another major milestone this week! Aft deck is in!
First up, I needed to bond the livewell tank to the deck. Unfortunately in my rush to reinforce the flexing gutter, I glued the strip of ply right over top of where the flange of my livewell was going to be bonded. Ooops
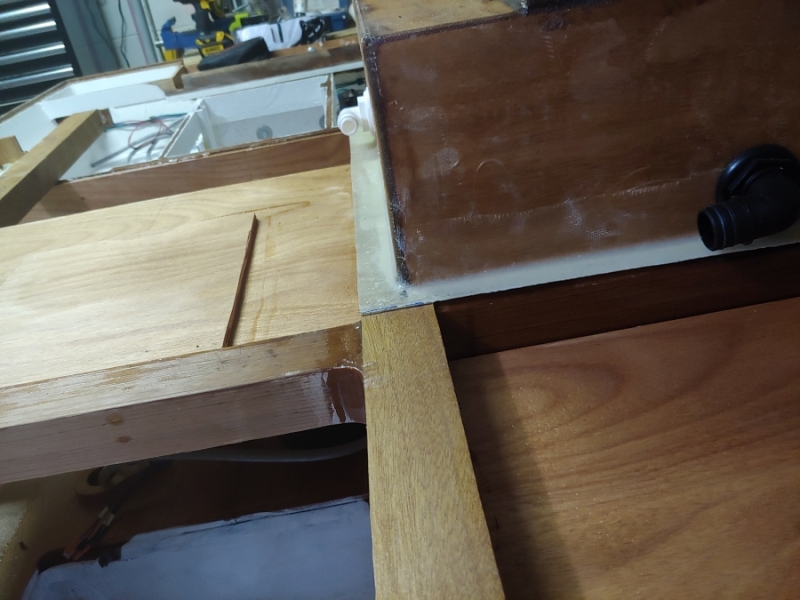
So I marked how much needed to be removed and pulled out the router.
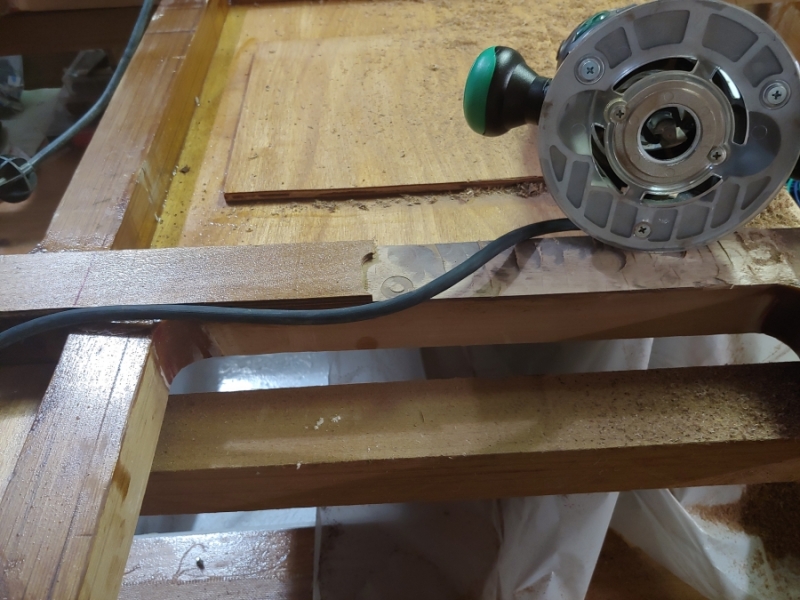
Done with the bulk removal.
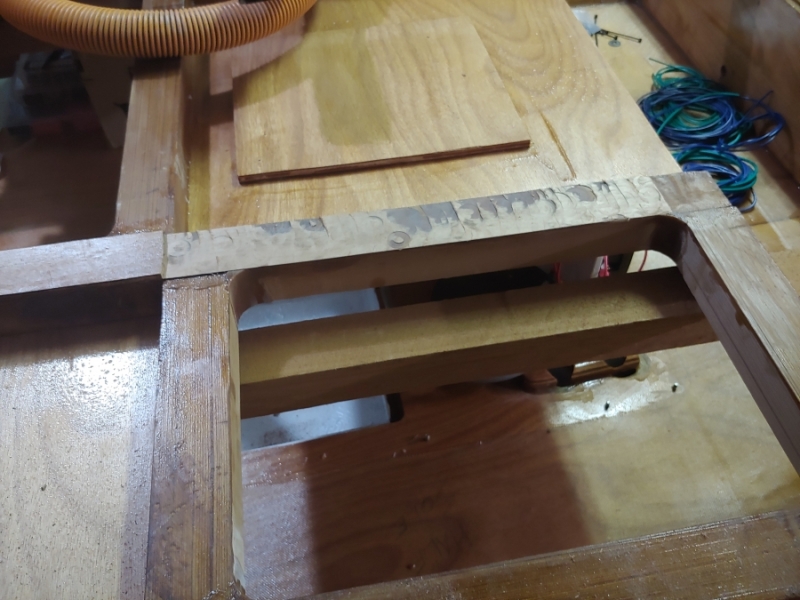
And sanded a little smoother.
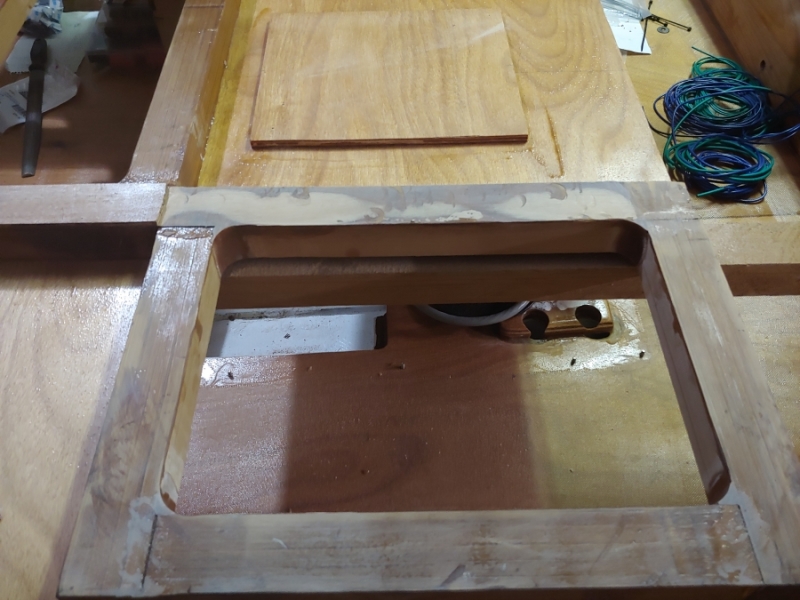
Apparently I didn't take any photos of gluing the livewell in. I supported the deck with some extra boards spanning across the front deck and Frame D. I did it upside down and just cleaned up the squeezeout into the livewell from underneath.
Then I bonded down the aft deck. Granite comes in handy once again to apply even pressure for the curing.
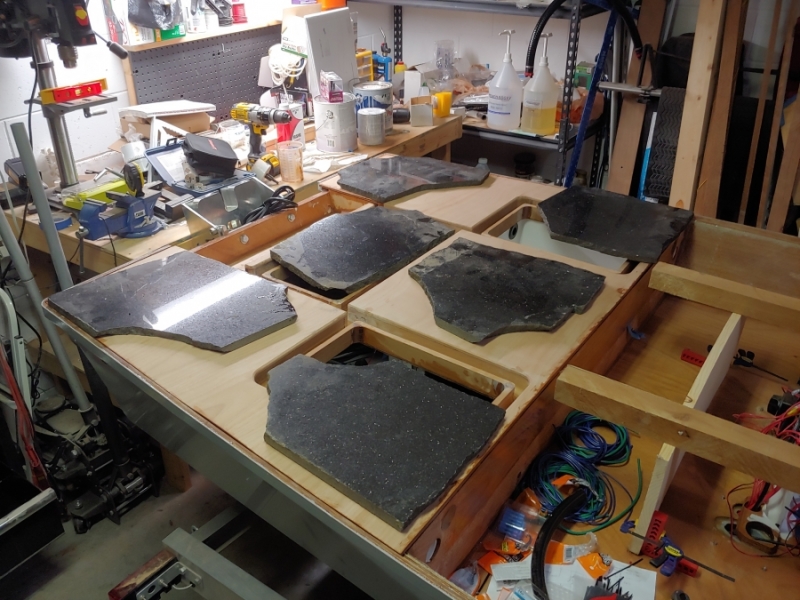
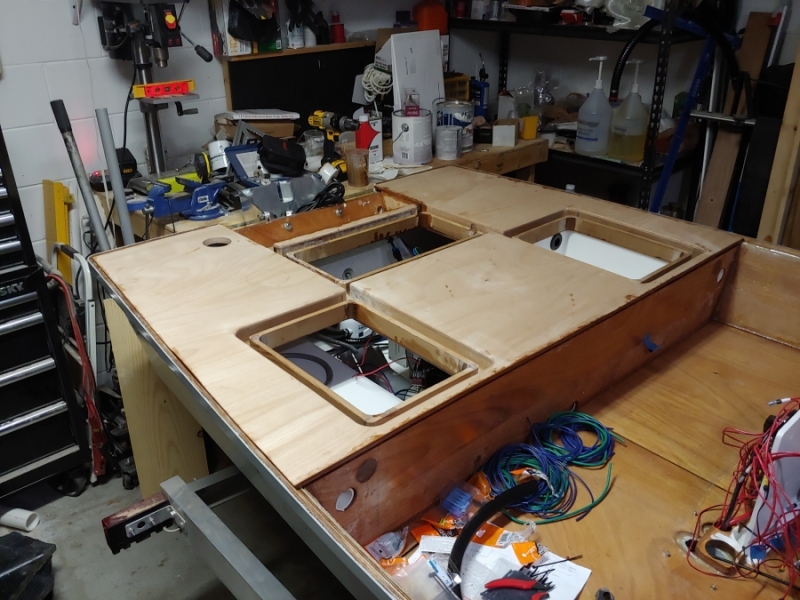
Re: Cameron's FS14LS+5%
Posted: Fri Oct 29, 2021 10:58 am
by VT_Jeff
bamaguy0 wrote: ↑Fri Oct 29, 2021 6:56 am
I hit another major milestone this week! Aft deck is in!
Way to crush it Cameron, work looks great. I'll go ahead and assume that you ran in the kitchen with a sledge hammer, smashed apart the counters, at 1:15 AM, screaming "I need more weight!!!!". Build at all costs!
How's the critical path looking? BTW, I have a (very corny) boat name idea for you, assuming the boat is done slightly before the kid is born:
"The Maternity Ward"
Wife calls, screaming "Cameron, Where the !@#$ are you, I'm in frigging labor!!!!"
"Honey, I'm right here, in The Maternity Ward"
Re: Cameron's FS14LS+5%
Posted: Fri Oct 29, 2021 11:20 am
by bamaguy0
VT_Jeff wrote: ↑Fri Oct 29, 2021 10:58 am
Way to crush it Cameron, work looks great. I'll go ahead and assume that you ran in the kitchen with a sledge hammer, smashed apart the counters, at 1:15 AM, screaming "I need more weight!!!!". Build at all costs!
Hah! They are actually pieces used as part of the centerpieces for the dining tables at our wedding. The planner let us keep some. They were at my parent's house until last Thanksgiving when my dad told me to take them or else. I didn't really want them, but my wife did...so I found a use for them
How's the critical path looking? BTW, I have a (very corny) boat name idea for you, assuming the boat is done slightly before the kid is born:
"The Maternity Ward"
Wife calls, screaming "Cameron, Where the !@#$ are you, I'm in frigging labor!!!!"
"Honey, I'm right here, in The Maternity Ward"
That's great!
I honestly go through waves of confidence I can finish and uncertainty. I think I need to map it out, but in general the next few steps will be to do some prep work in the cockpit area before I put the gunwale deck pieces on.
The motorwell needs some work to finish that out now that the deck is on.
Electrical is good, just need to get the console on and wire up the switches.
Fuel tank is basically ready to go in.
All the hatch lids are doubled, just need to round edges, cut hole for latch and route pockets for hinges.
At my work we have a tongue-in-cheek saying if we're working on a design and have to pass it off for someone else to finish: "The design is done, you just have to detail it." Knowing good and well detailing takes just as much if not more time. I feel like I'm in a similar situation here: The building is done, I just have to finish it.
Re: Cameron's FS14LS+5%
Posted: Sun Nov 14, 2021 8:33 pm
by bamaguy0
Man, it's been half a month since I posted an update. Seems like an eternity compared to my other posts. One weekend was occupied by traveling back to Alabama for a family reunion, but the rest I've been hard at it.
One perk of heading home to 'Bama is I got my transom bracket from my uncle. It looks great! I'm thinking of doing a black epoxy fill on the inset.
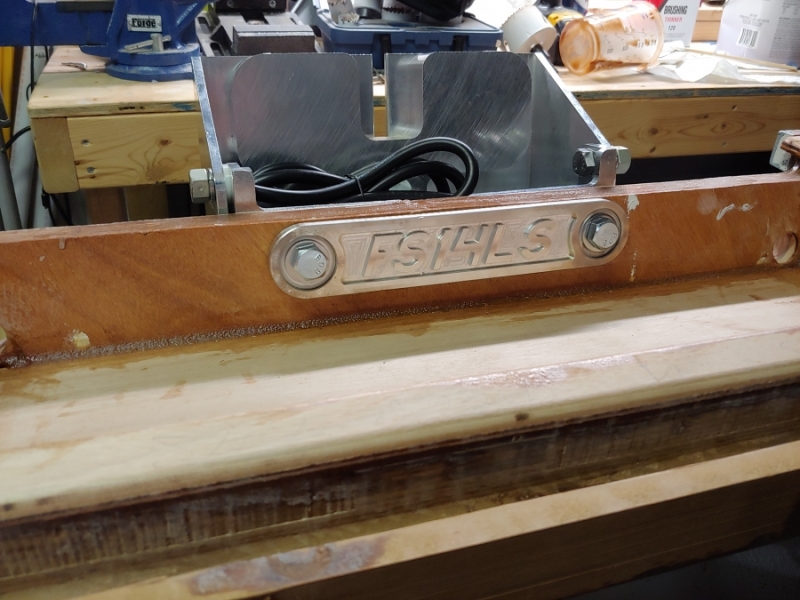
First thing after coming back was to finish out the motor well to transom transition after installing the deck. Somehow or somewhere I changed the width and so I had to make it all line up.
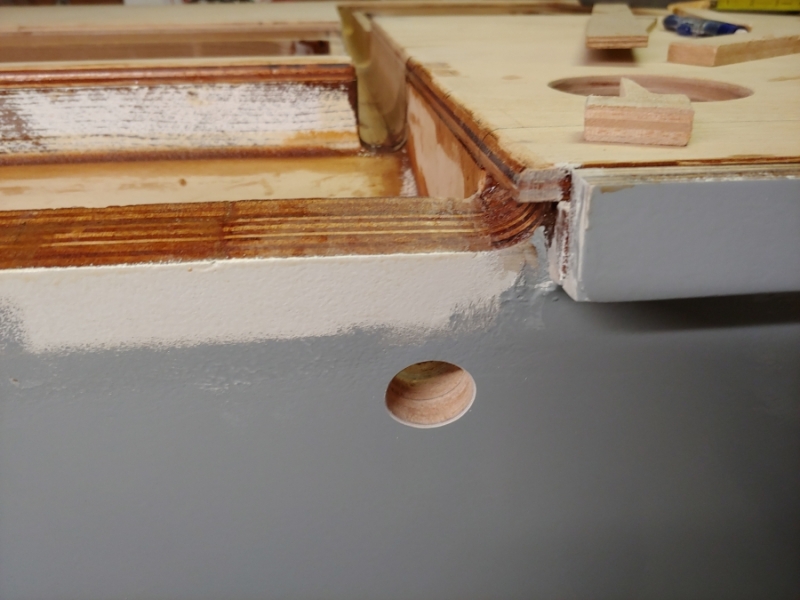
Fortunately it was right at 3/8" so I massaged a piece to fit and fill in the void.
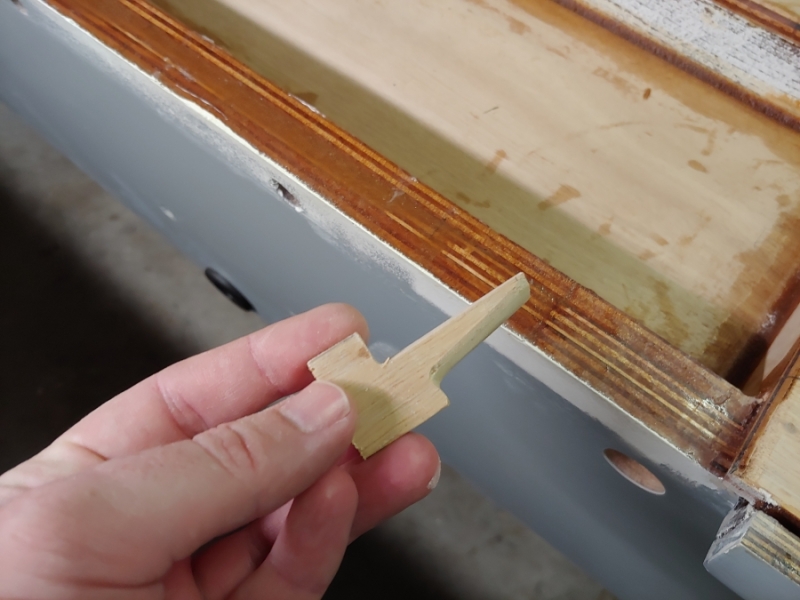
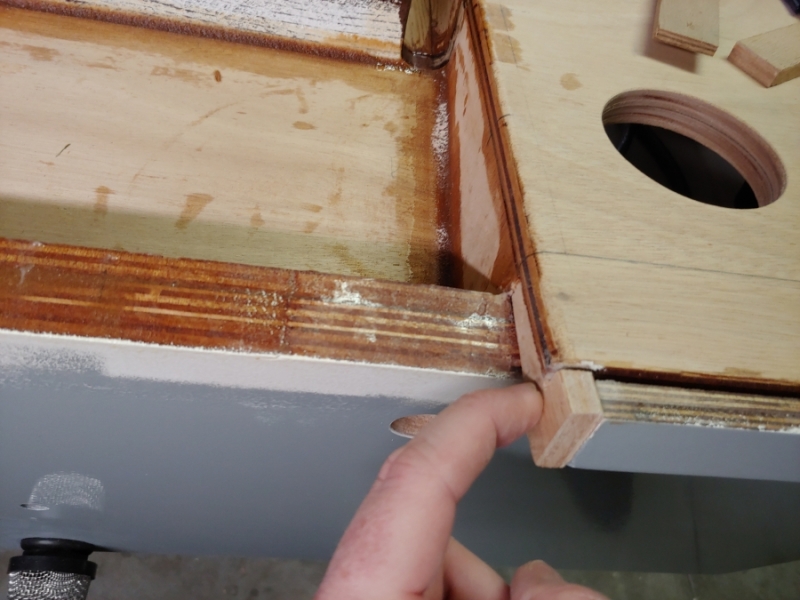
After they were glued in I reformed the radius to blend it to the transom.
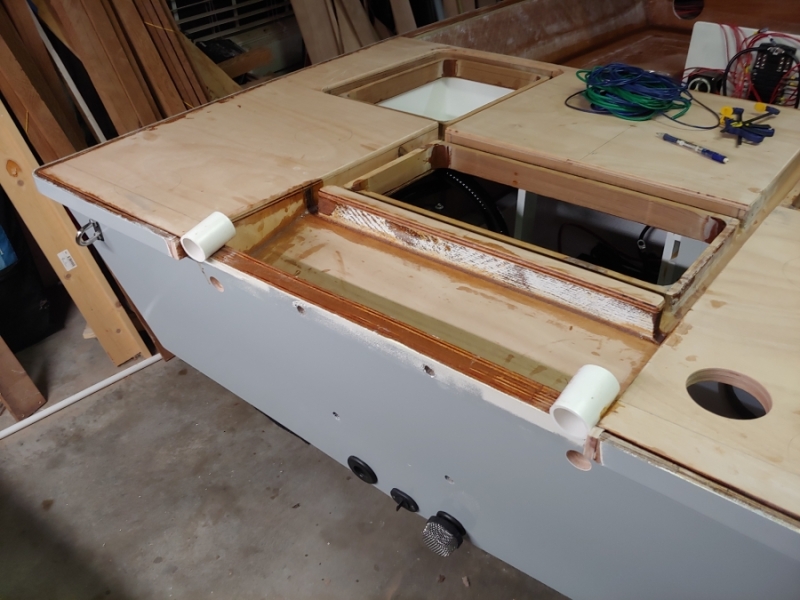
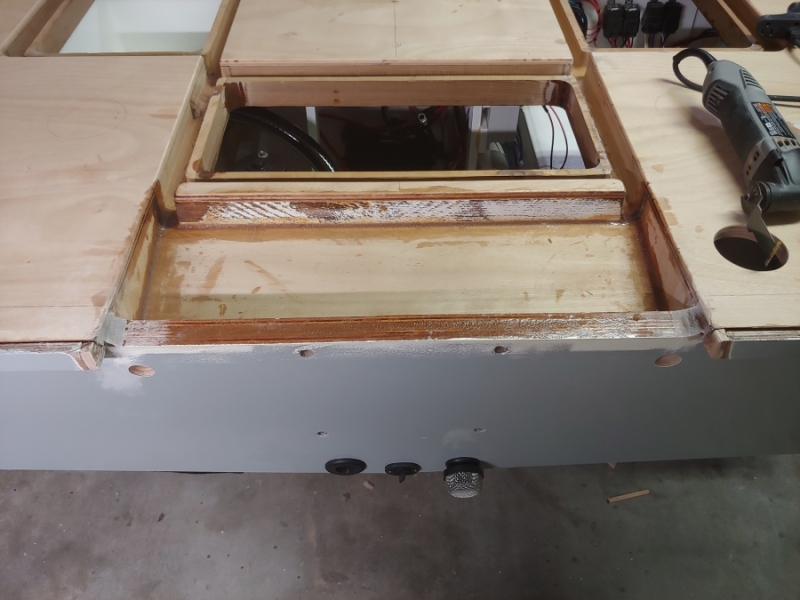
Then I had to radius the rub rail to terminate it.
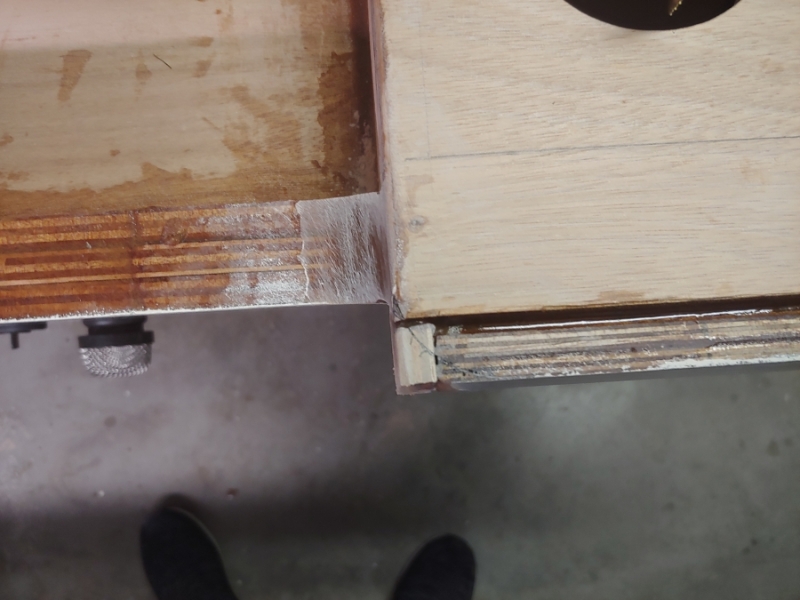
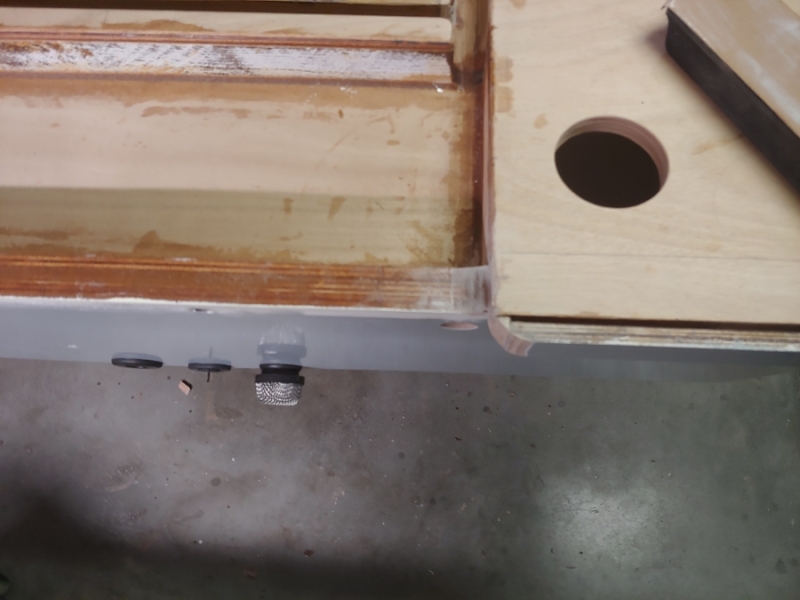
I'm pretty happy with how it turned out.
Also got the poling platform and console painted. Went with the same grey as the hull.
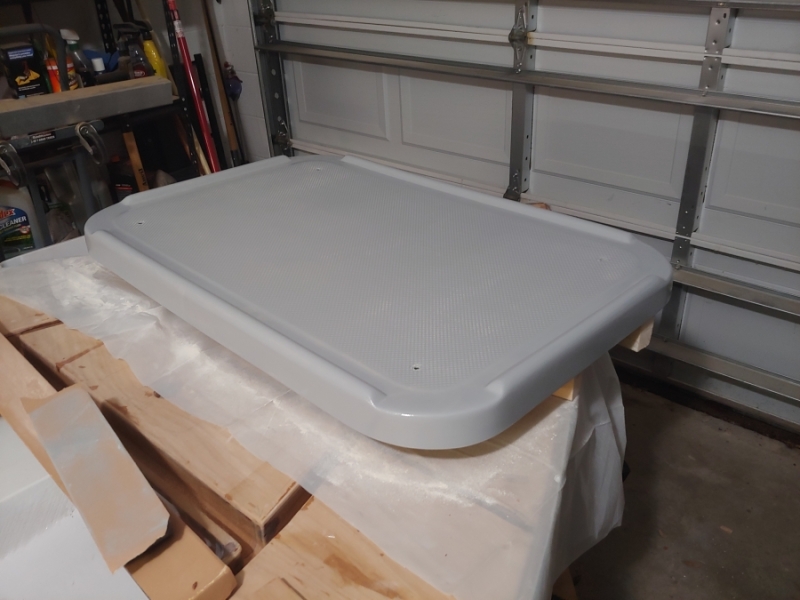
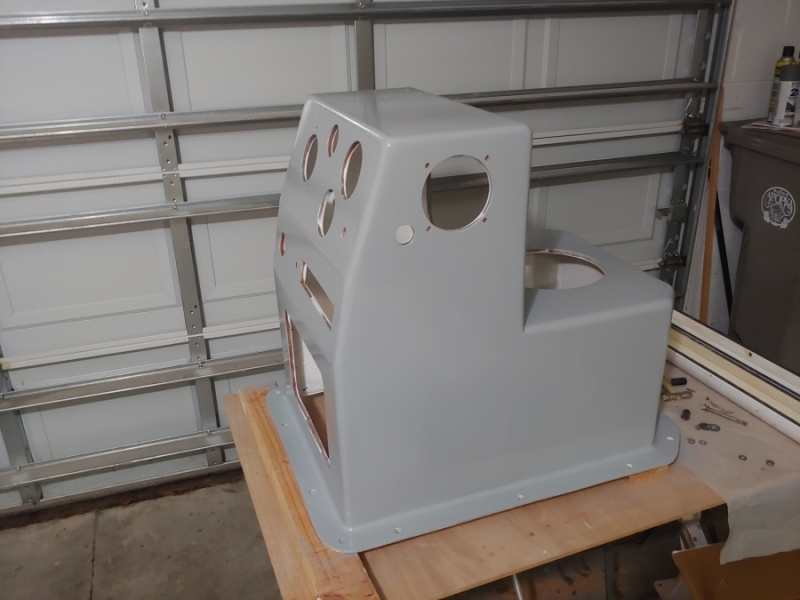
I also think I'm going to do the inside walls of the cockpit in the same grey and then the floor and deck in white. Gotta figure out the transitions though.
Next I worked on getting the gunnel deck pieces in. I made up a center support that will also align with the rod holders.
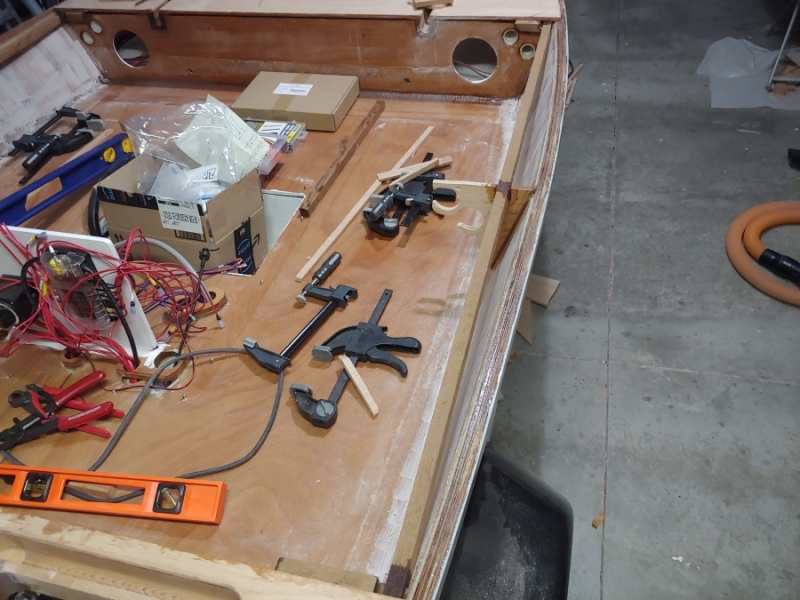
Decided to make some smaller ones to bridge the span between the deck and the center support. Here I'm checking the clearance of my support to some rods. Also just barely cleared the floor. I seemed to have done alright in positioning them.

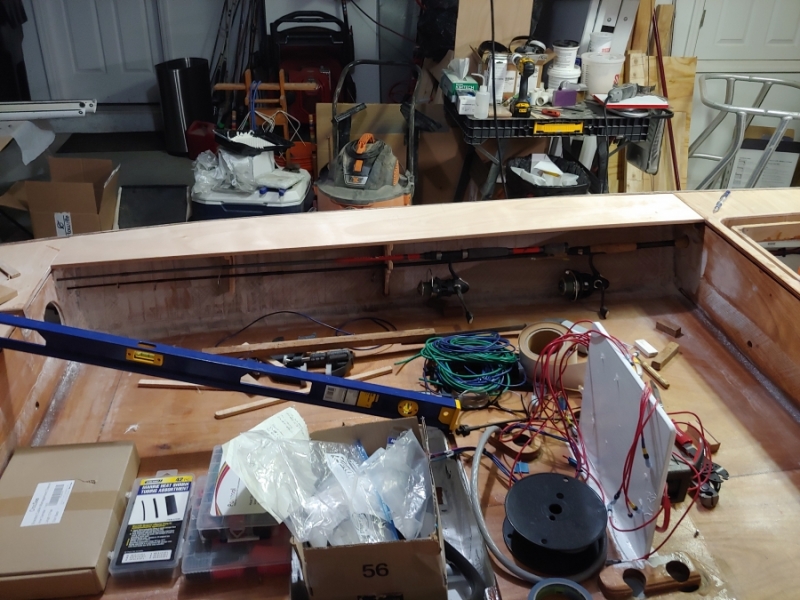
And then they went in for good.
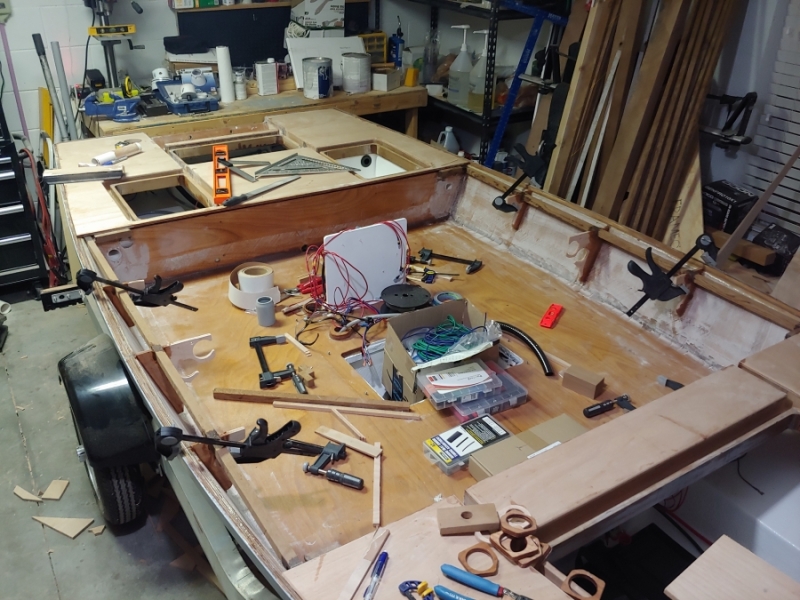
In order to try to get rid of some of the boxes taking up space that is quickly becoming a premium due to baby stuff I assembled the parts that I could into the console. Everything else will go in once installed in place.
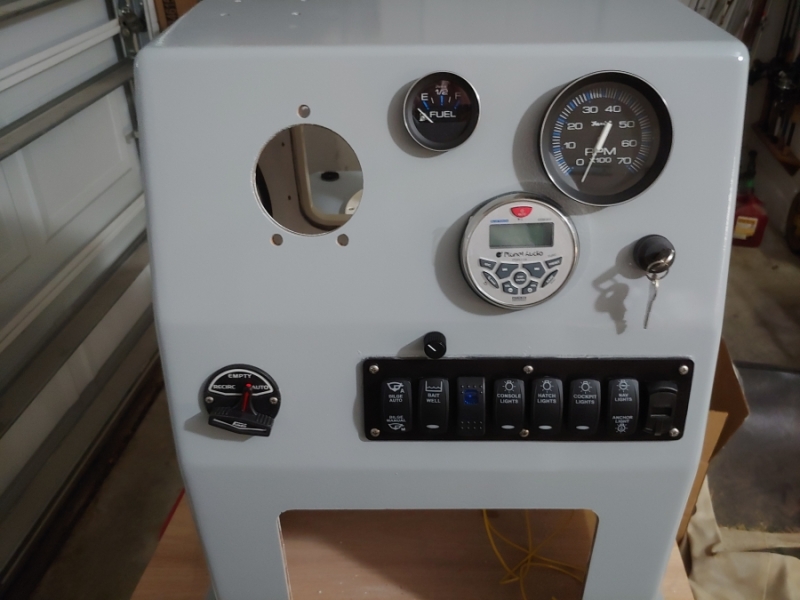
And now the gunnel decks going in.
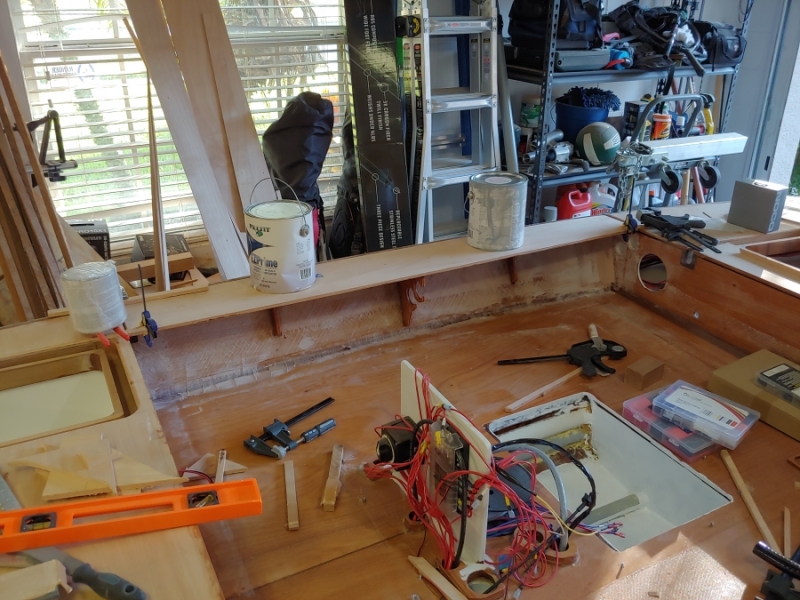
Re: Cameron's FS14LS+5%
Posted: Mon Nov 15, 2021 9:15 am
by Jeff
Nice work!!! Jeff
Re: Cameron's FS14LS+5%
Posted: Mon Nov 15, 2021 9:45 am
by VT_Jeff
I like the "build a boat as a means to clear the garage of boxes" mentality. Dan S is building a boat as a means to clear a parking space for his Mrs. Whatever it takes!
So, couple thoughts:
Great progress Cameron! Your poling platform looks a lot like mine. I like the raised edges, I may try to incorporate something similar.
The name plate looks great on the boat, that's a sweet detail.
Good question on how to transition the white sole to the grey sides/console, that's a brain-teaser for sure! I like personally the "rand" look where the sole color comes a few inches up the walls all the way around, maybe including the console. I did something similar on my drift boat, I'll try to dig up a pic.
Re: Cameron's FS14LS+5%
Posted: Mon Nov 15, 2021 1:13 pm
by bamaguy0
Yeah I'd like to see what you mean.
Im thinking along the sole floor I could do it inboard of the transition, basically where it appears that only the anti skid is white. My bigger concern is the roll off from the deck to the cockpit. I'm not gonna do any bright trim, but I might create a small lip the same height as the gunnel deck thickness.(It's not done yet, but I'm gonna double the thickness around the inside edge so it looks thicker.) There I can break the color up at the lip kinda like on the rub rail along the outside. I just won't have a rubrail to hide any messiness so it will have to be pristine.
Or I just paint it all white and not worry about it.
Re: Cameron's FS14LS+5%
Posted: Mon Nov 15, 2021 4:46 pm
by Dan_Smullen
I'd love to discuss over some beers or VT apple brandy the best way to terminate paint in the cockpit. Good news is that there is no wrong answer.
Finish on the platform and the console looks amazing. Is that Easy-Poxy? I love the gray, and searching for the same color, but not gloss.
Re: Cameron's FS14LS+5%
Posted: Mon Nov 15, 2021 4:52 pm
by bamaguy0
Yeah it's Petit EZ-Poxy in Platinum with the Performance Enhancer(mmm isocyanates) on the final coat.
Petit used to have a flattening additive but I don't think they market it anymore.
Edit: I think some other brands call it whisper grey.
Re: Cameron's FS14LS+5%
Posted: Mon Nov 15, 2021 5:01 pm
by VT_Jeff
Not a great photo, boat is stashed for the season, but you can see how the blue floor comes up the side a few inches. Same on the rowers seat.
Grey except for the non-skid could be very cool, would that be on the deck as well?
Re: Cameron's FS14LS+5%
Posted: Mon Nov 15, 2021 5:03 pm
by VT_Jeff
Dan_Smullen wrote: ↑Mon Nov 15, 2021 4:46 pm
I'd love to discuss over some beers or VT apple brandy
Now your talking! I'm gettin.low, better hide yours!
Re: Cameron's FS14LS+5%
Posted: Mon Nov 15, 2021 5:10 pm
by bamaguy0
VT_Jeff wrote: ↑Mon Nov 15, 2021 5:01 pm
Not a great photo, boat is stashed for the season, but you can see how the blue floor comes up the side a few inches. Same on the rowers seat.
Grey except for the non-skid could be very cool, would that be on the deck as well?
I see, that might be a fall back plan.
Nah entire deck will be white, but I may do grey seadek in some strategic locations. I'm thinking on the fore deck hatch lids at least.
Re: Cameron's FS14LS+5%
Posted: Mon Nov 15, 2021 8:44 pm
by bamaguy0
So here's my plan for the corners.
Aft corner is just a simple radius.
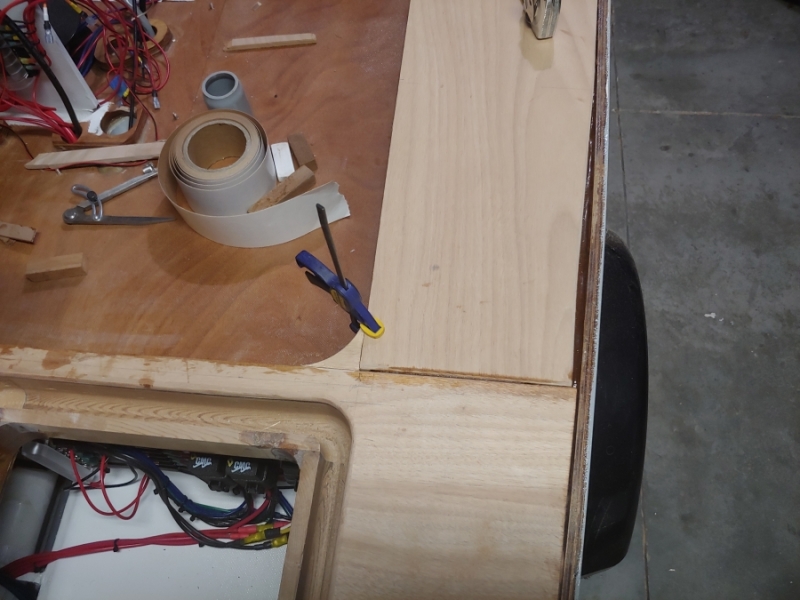
Forward I am planning this angle with radius blends.
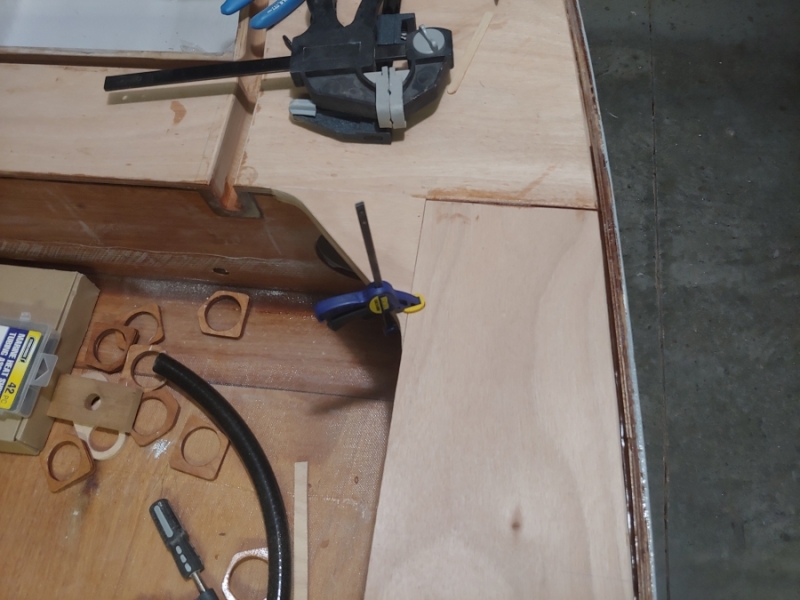
It'll also be deeper too. Ill also run a strip under the entire deck to make it appear thicker as well.
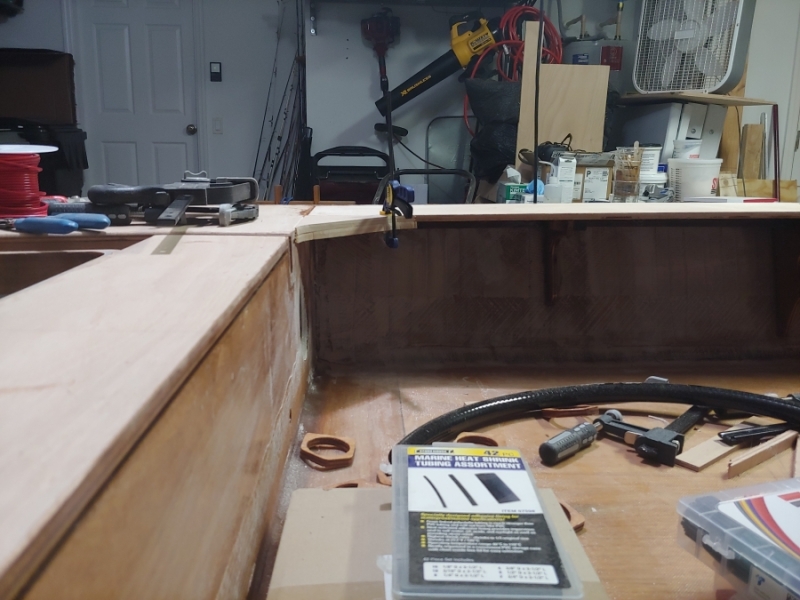
Option would be to add this strip like so. I could use the strip to be the break in color. It would be white then under it would be grey. I'd have to have to break it up because of the hatch gutter. I think that's why I don't like this idea.
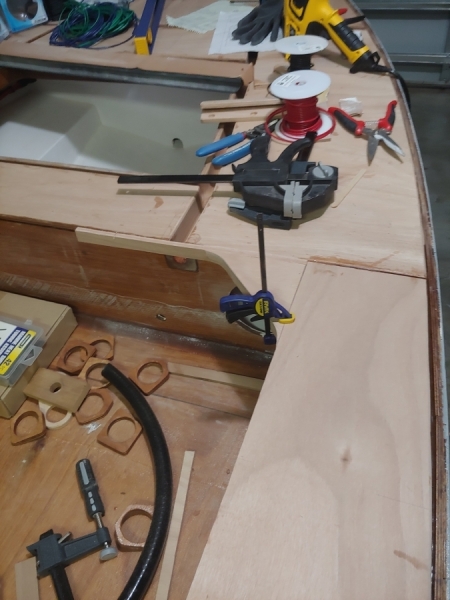
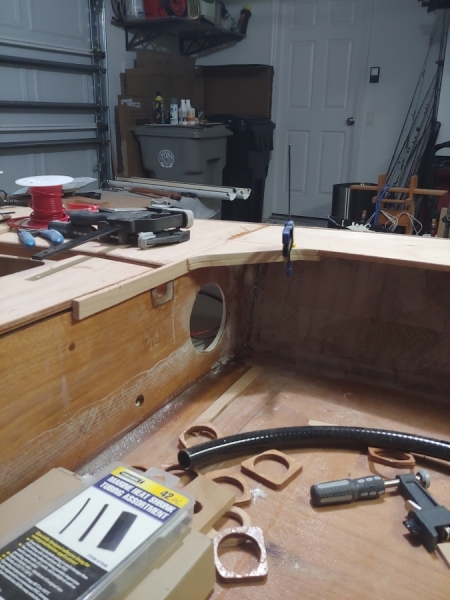
Re: Cameron's FS14LS+5%
Posted: Tue Nov 16, 2021 9:09 am
by pee wee
bamaguy0 wrote: ↑Mon Nov 15, 2021 5:10 pm
VT_Jeff wrote: ↑Mon Nov 15, 2021 5:01 pm
Not a great photo, boat is stashed for the season, but you can see how the blue floor comes up the side a few inches. Same on the rowers seat.
Grey except for the non-skid could be very cool, would that be on the deck as well?
I see, that might be a fall back plan.
Nah entire deck will be white, but I may do grey seadek in some strategic locations. I'm thinking on the fore deck hatch lids at least.
I see you are located in Florida. Light colors are best for the deck because they don't get as hot in the sun, but pure white will be hard on the eyes. I would go with at least an off-white. Just a suggestion.
Re: Cameron's FS14LS+5%
Posted: Tue Nov 16, 2021 9:17 am
by bamaguy0
pee wee wrote: ↑Tue Nov 16, 2021 9:09 am
bamaguy0 wrote: ↑Mon Nov 15, 2021 5:10 pm
VT_Jeff wrote: ↑Mon Nov 15, 2021 5:01 pm
Not a great photo, boat is stashed for the season, but you can see how the blue floor comes up the side a few inches. Same on the rowers seat.
Grey except for the non-skid could be very cool, would that be on the deck as well?
I see, that might be a fall back plan.
Nah entire deck will be white, but I may do grey seadek in some strategic locations. I'm thinking on the fore deck hatch lids at least.
I see you are located in Florida. Light colors are best for the deck because they don't get as hot in the sun, but pure white will be hard on the eyes. I would go with at least an off-white. Just a suggestion.
Hmm good to know. Even with antiskid texture? I understand its more of a reflection thing, right? Maybe semigloss white?
Re: Cameron's FS14LS+5%
Posted: Tue Nov 16, 2021 9:24 am
by pee wee
It's like so many other things, compromise. Glossy paint holds up better in weather, as the flatting agents (my father-in-law worked for a paint company and instructed me that it's not flattening agent, it's flatting. Whatever.

) used to reduce gloss allow moisture into the paint film. You are right about the non skid softening the glare, maybe you'd be okay with that . . . I still would avoid bright white paint- for both being easier on the eyes and for not showing dirt as much! As long as you don't stray too far from white, it will still look white in contrast to your second color.
Re: Cameron's FS14LS+5%
Posted: Tue Nov 16, 2021 9:29 am
by bamaguy0
pee wee wrote: ↑Tue Nov 16, 2021 9:24 am
It's like so many other things, compromise. Glossy paint holds up better in weather, as the flatting agents (my father-in-law worked for a paint company and instructed me that it's not flattening agent, it's flatting. Whatever.
) used to reduce gloss allow moisture into the paint film. You are right about the non skid softening the glare, maybe you'd be okay with that . . . I still would avoid bright white paint- for both being easier on the eyes and for not showing dirt as much! As long as you don't stray too far from white, it will still look white in contrast to your second color.
Good points. Thanks!
Re: Cameron's FS14LS+5%
Posted: Tue Nov 16, 2021 2:22 pm
by VT_Jeff
pee wee wrote: ↑Tue Nov 16, 2021 9:24 am
As long as you don't stray too far from white, it will still look white in contrast to your second color.
Agreed here: I thought that my oyster white was going to look beige but it looks......white.
Re: Cameron's FS14LS+5%
Posted: Tue Nov 16, 2021 2:27 pm
by bamaguy0
Good to know. The quart I bought when I thought that was going to be enough is pure white. I'm thinking maybe I go buy a quart of more off white or cream and mix them together. Maybe that will still be enough off white to not be super bright, and still make use of the quart of white I do have.
Re: Cameron's FS14LS+5%
Posted: Tue Nov 16, 2021 2:29 pm
by VT_Jeff
bamaguy0 wrote: ↑Mon Nov 15, 2021 8:44 pm
I'd have to have to break it up because of the hatch gutter. I think that's why I don't like this idea.
I think it would not be
too much work to make the trim follow that hatch gutter but I also don't think breaking it up would look bad, esp if the trim was radiused into the gutters like you did on the transom with the rubrail. Worth mocking up?
Re: Cameron's FS14LS+5%
Posted: Tue Nov 16, 2021 2:31 pm
by bamaguy0
VT_Jeff wrote: ↑Tue Nov 16, 2021 2:29 pm
bamaguy0 wrote: ↑Mon Nov 15, 2021 8:44 pm
I'd have to have to break it up because of the hatch gutter. I think that's why I don't like this idea.
I think it would not be
too much work to make the trim follow that hatch gutter but I also don't think breaking it up would look bad, esp if the trim was radiused into the gutters like you did on the transom with the rubrail. Worth mocking up?
Yeah I think I will tonight.
Re: Cameron's FS14LS+5%
Posted: Tue Nov 16, 2021 6:14 pm
by bamaguy0
Eureka! I think I've gotten it.

This one is a little shorter, but the depth of the gutter is 1-7/8", so I'll make it 2" tall and fully notch out the gutter with a nice radius all around. Then the strip and everything above it will be white. Everything below is grey. On the sides I cant make a 2" tall strip all the way around so I'll transition it to 1" in the corners and do a little blend underneath where no one will see unless they look for it. I think it'll look pretty good!
I will have to make a notch to clear my speakers but that's only a minor inconvenience.
Re: Cameron's FS14LS+5%
Posted: Sat Nov 20, 2021 7:20 pm
by bamaguy0
Got everything glued up under the gunnel deck this week. Worked today at cleaning it all up. Also building up the rub rail a bit in some areas to get it level with the deck. Couple areas where the rub rail strips were about 1/8" below the deck level. Just filling that with thicknened epoxy to get the bulk built up. Probably won't be perfectly smooth so I'll do a skim of quickfair as needed. Also had a couple spots where the gunnel deck didn't align with the fore and aft deck on the right side. That will need some work to flush it up before glassing.
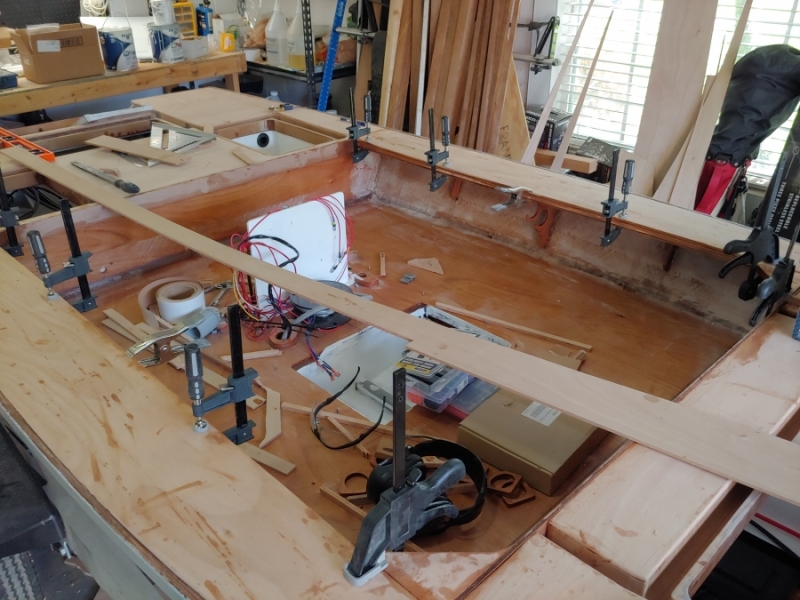
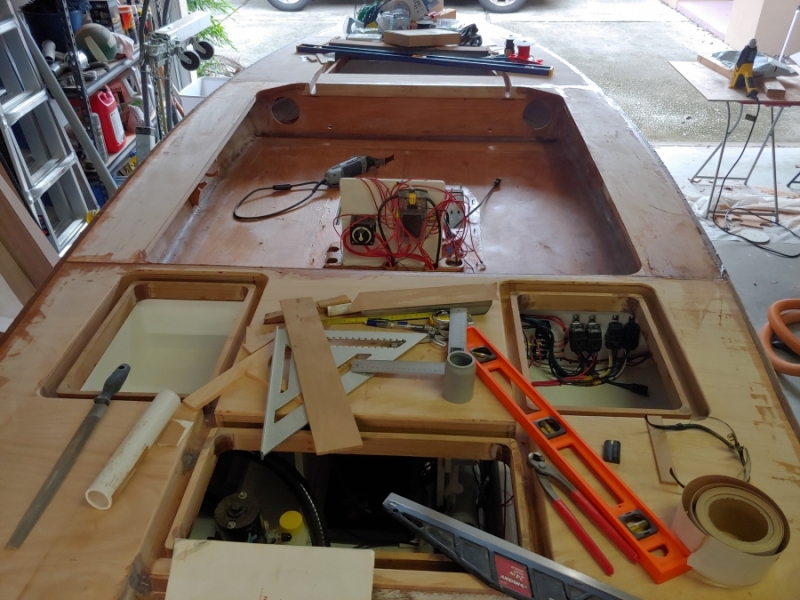
I'll be sanding tomorrow to see where I stand. Hopefully I'm close and can work in a glass job before Thanksgiving.
Re: Cameron's FS14LS+5%
Posted: Sun Nov 21, 2021 6:13 pm
by bamaguy0
Worked the roundover on all the edges this afternoon. Checked it with a clipping of my rub rail. Looks like my math worked out.
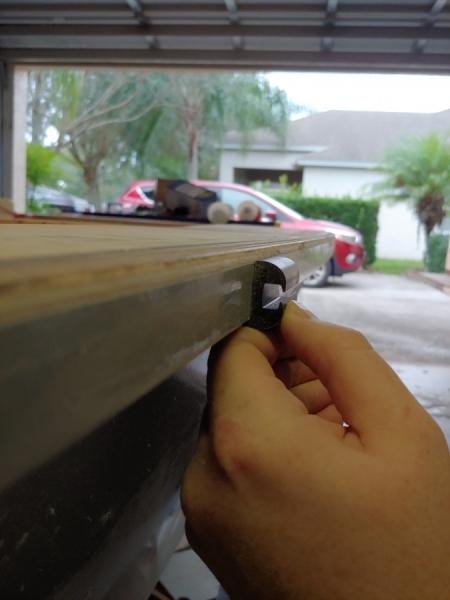
Got everything cleaned up and had to step back for a minute to admire my work so far. Been 1 year and 2 months. It's starting to hit me that I've built an actual boat...and the darn thing might actually work!
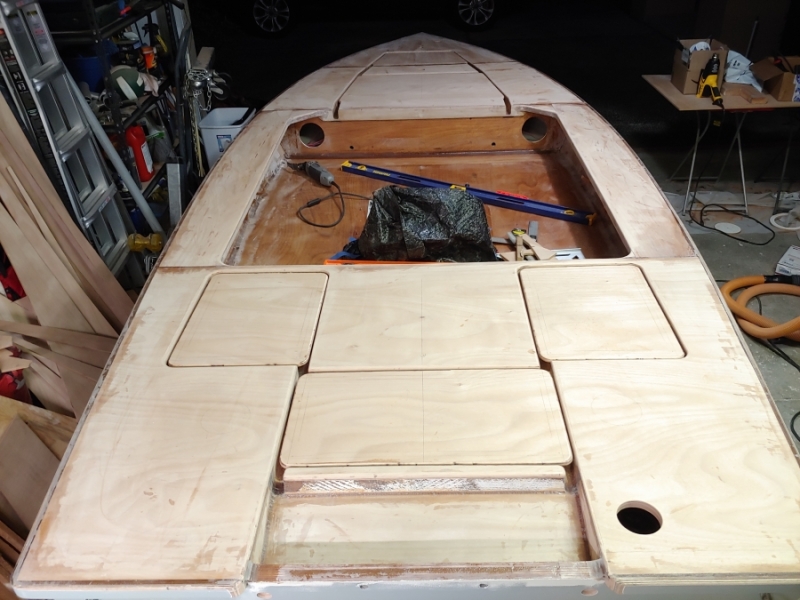
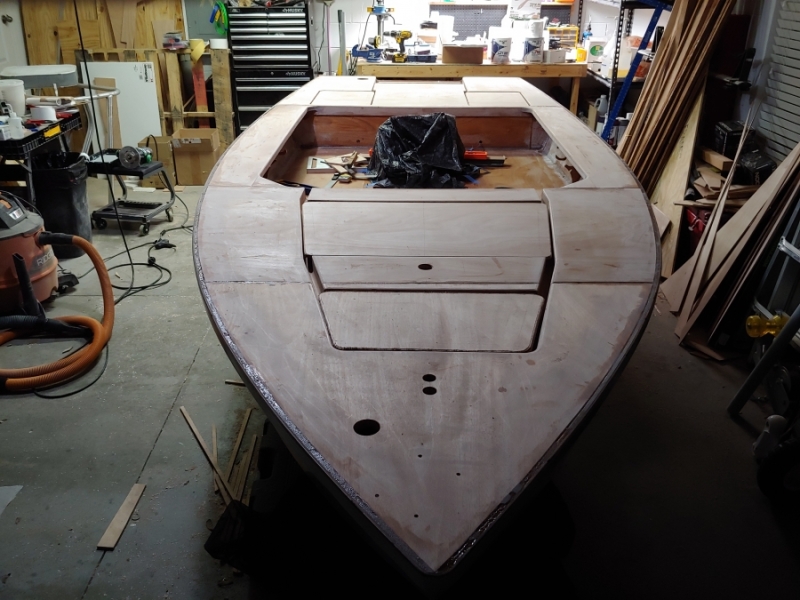
Dunno if I'm glassing tonight, but I think I'll be able to tomorrow. I'll probably take tonight to make sure everything is in order.
Re: Cameron's FS14LS+5%
Posted: Mon Nov 22, 2021 6:54 pm
by TomW1
Looking good Cameron nice big decks front and rear to cast from. Tom
Re: Cameron's FS14LS+5%
Posted: Mon Nov 22, 2021 7:43 pm
by Mojosmantra
Look’s great Cameron. The finish line is getting closer - what’s that due date again? I know you haven’t thought about it in a while, so I thought I would remind you.

The rub rail looks perfect. I’m afraid that I didn’t get mine nearly as close. That’s the 1-1/16” taco, right? Do you mind giving me the dimension from of the inside face, not including the “lip”. You know - the most critical dimension that Taco doesn’t provide on their drawing.

Re: Cameron's FS14LS+5%
Posted: Mon Nov 22, 2021 8:10 pm
by bamaguy0
Mojosmantra wrote: ↑Mon Nov 22, 2021 7:43 pm
Look’s great Cameron. The finish line is getting closer - what’s that due date again? I know you haven’t thought about it in a while, so I thought I would remind you.
The rub rail looks perfect. I’m afraid that I didn’t get mine nearly as close. That’s the 1-1/16” taco, right? Do you mind giving me the dimension from of the inside face, not including the “lip”. You know - the most critical dimension that Taco doesn’t provide on their drawing.
Yeah it's the Taco 1-1/16 x 11/16. The thickness of that bottom lip is about 3/32". It's also not as square as the cartoon makes it out to be. It's only actually 1-1/16" tall about in line with that inner face of the tube cutout. It's about 1" tall at the interface. All that to say what you're looking for is about 29/32" or 31/32" if you assume the nominal height square to the back face.
And yeah...that's why I bought my kit before I glued the rubrails on because there were no good dimensions available. If I hadn't done that I probably wouldn't have been close.
Due date is Jan 18! I'm in good shape inside. Crib and dresser are built(Assembled...
). No painting needed. Just need to hang some decorations and probably put together a stroller and highchair. I also have the week between Christmas and New Years as a work holiday and I usually take another week on top of that. I'm in decent shape as long as the baby doesn't come early! It may not be completely rigged and "hitch up and go" ready, but I'm gaining confidence that the boat itself could be done in time.
Re: Cameron's FS14LS+5%
Posted: Mon Nov 22, 2021 8:42 pm
by bamaguy0
Got 'er glassed this afternoon!
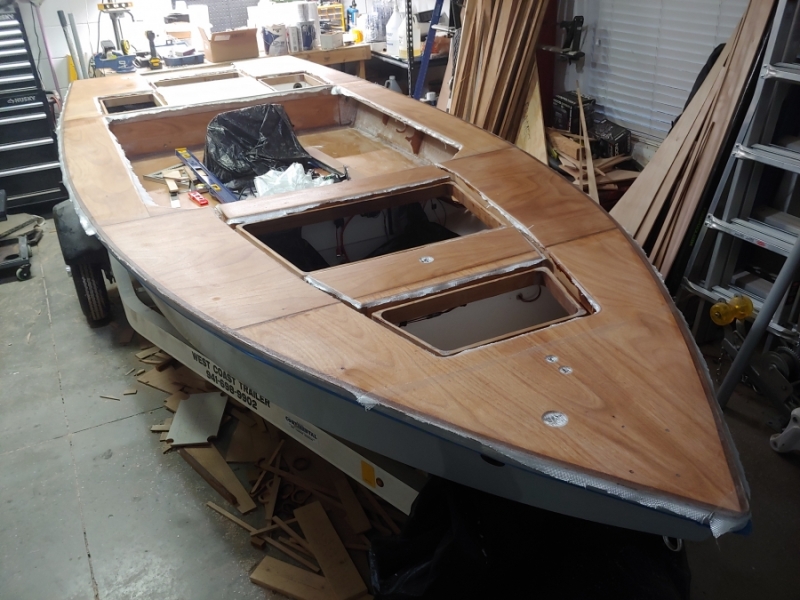
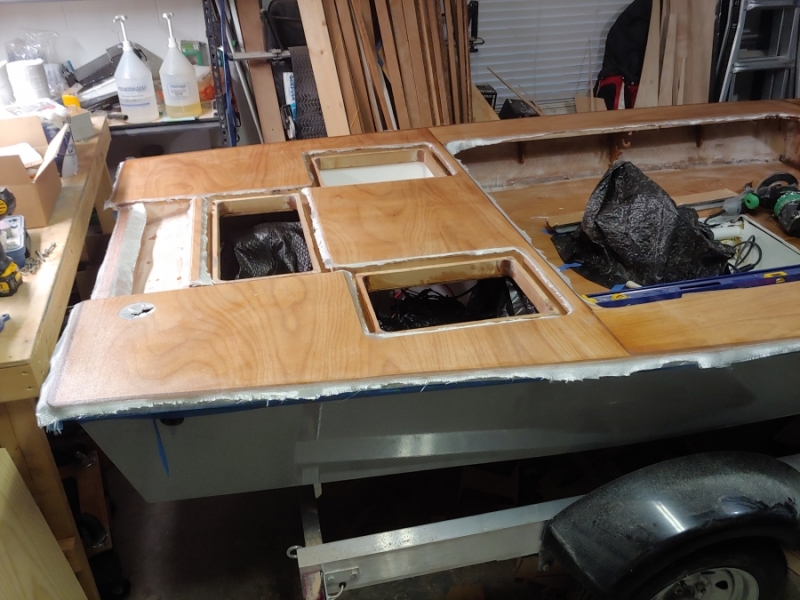
Re: Cameron's FS14LS+5%
Posted: Tue Nov 23, 2021 2:04 am
by jonnymac
looks good!
Re: Cameron's FS14LS+5%
Posted: Tue Nov 23, 2021 9:14 am
by VT_Jeff
Sweet glass job! That must be a nice feeling to have that behind you, all go smooth and easy?
A little less than 2 months before the big day with a few weeks off? No problem, esp at your current rate of production! Excited to see it painted/assembled, as I'm sure you are. My eyes are glued, build on!
Re: Cameron's FS14LS+5%
Posted: Tue Nov 23, 2021 9:22 am
by Jeff
Nice work!!! Jeff
Re: Cameron's FS14LS+5%
Posted: Tue Nov 23, 2021 9:24 am
by bamaguy0
Yeah it went really smoothly. Easiest glass job so far for me. I dunno if it's just my experience growing or just a big flat area, but I was pleasantly surprised how quickly I was able to knock it out.
Re: Cameron's FS14LS+5%
Posted: Sun Dec 05, 2021 9:33 pm
by bamaguy0
I don't have a lot to show this check in, but I've been hard at it. After fairing the seams in the deck, I got everything sanded then went to work with locating holes for all the gadgets and gizmos in the deck. Poling platform, helm seat/leaning post, fore deck seat mount, push pole holders, and trolling motor mount. Couple things already had holes, so I just cleaned them out. I glassed the hatches also.
The biggest effort was cleaning up and fairing the transition from the hull and frames to the sole. I had previously filleted it, but it needed a lot of help. Its not perfect, but passable I think. We'll see once she gets a coat of paint.
Got the hinge locations recessed and I cut out holes in the hatches for the latches. I wanted to recess those a bit, but decided against it after realizing the easiest thing to do that with required buying yet another hole saw to make one jig...it'll be fine...
Finished up that rubrail transition at the transom. Not the prettiest, but passable I think.
Did one last coat of epoxy over everything and I'll be starting primer tomorrow!
Photo dump from the last 2 weeks...honestly all but 2 are from today. Guess I've been more focused on work than documenting progress!
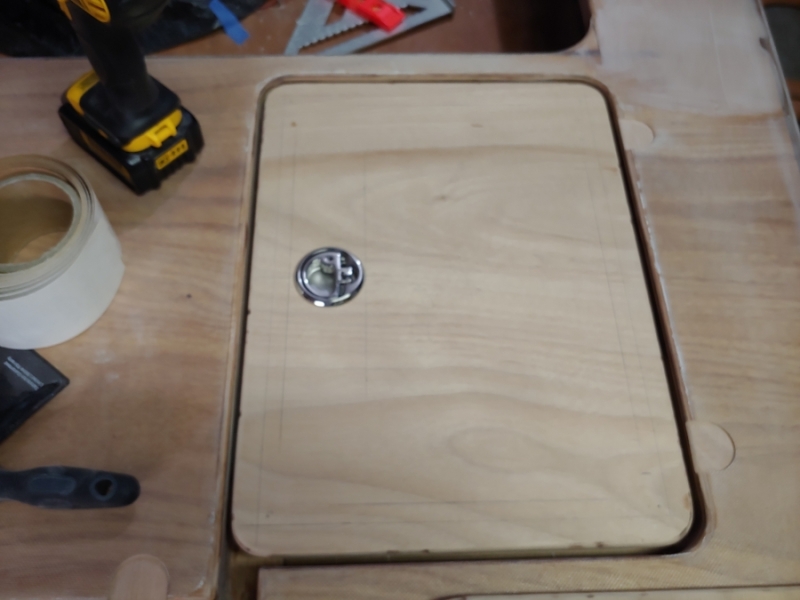

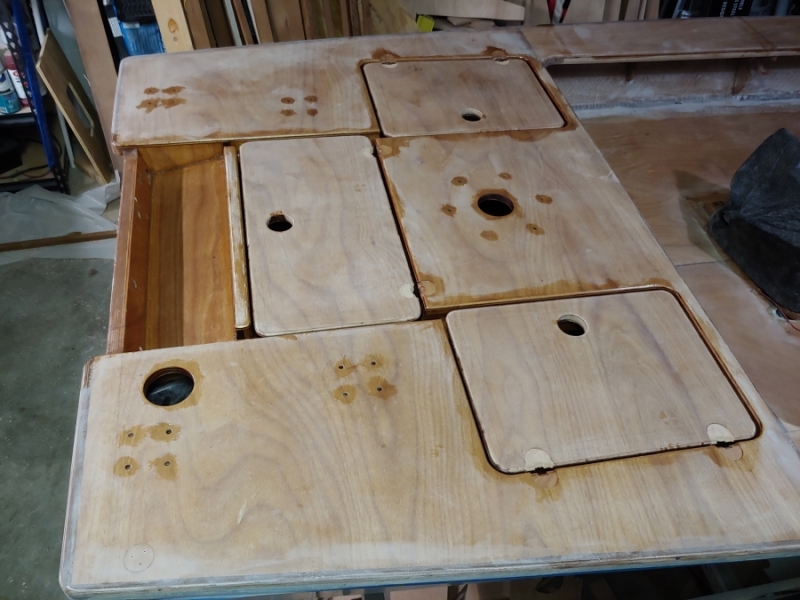
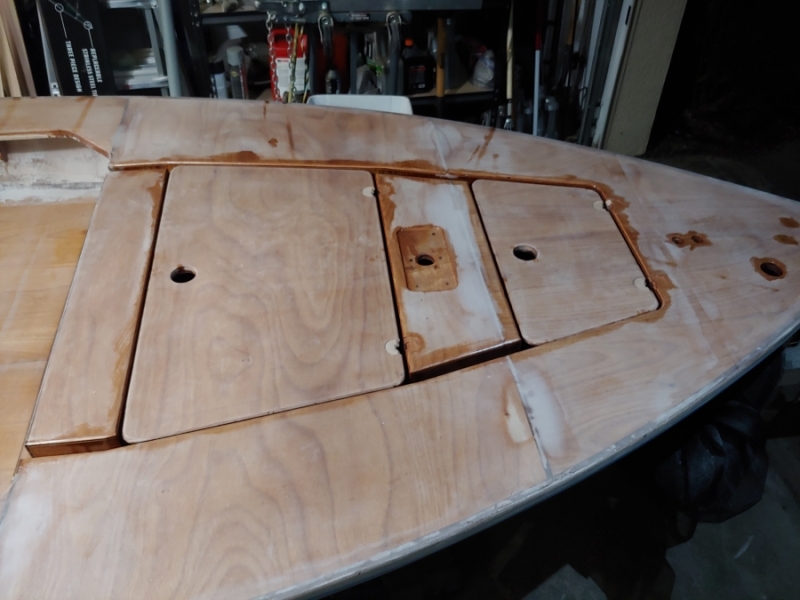
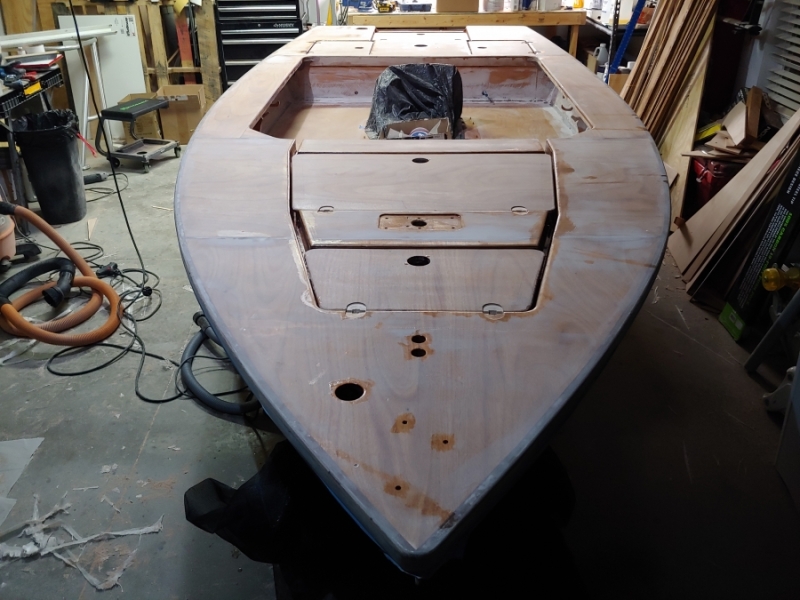
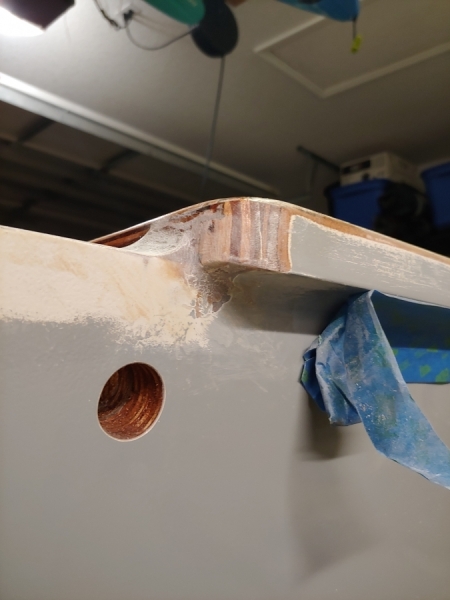
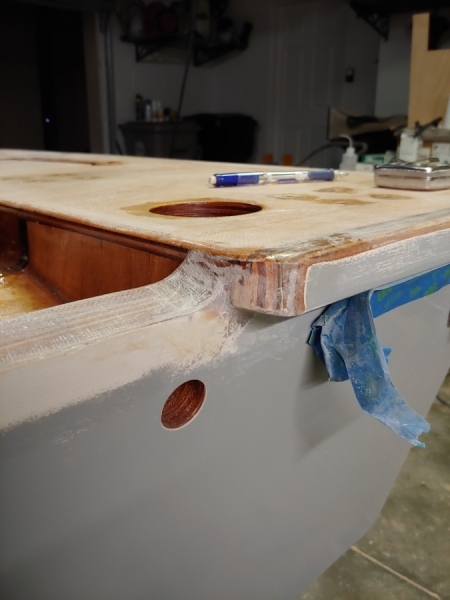
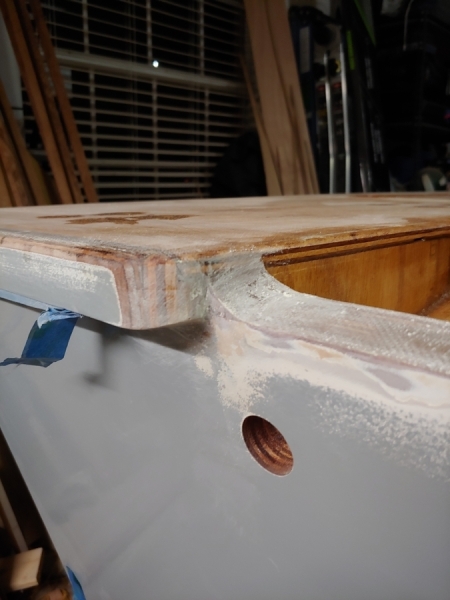
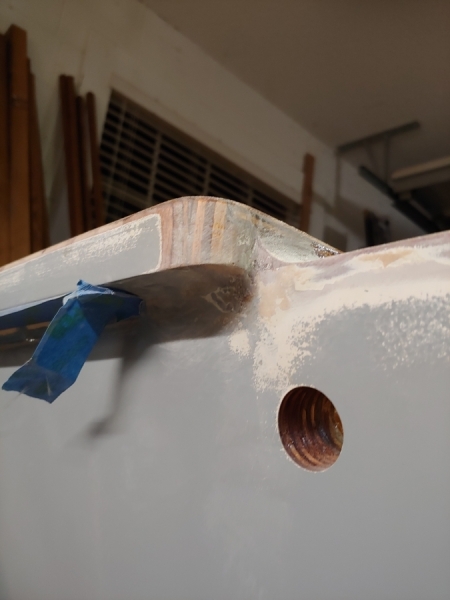
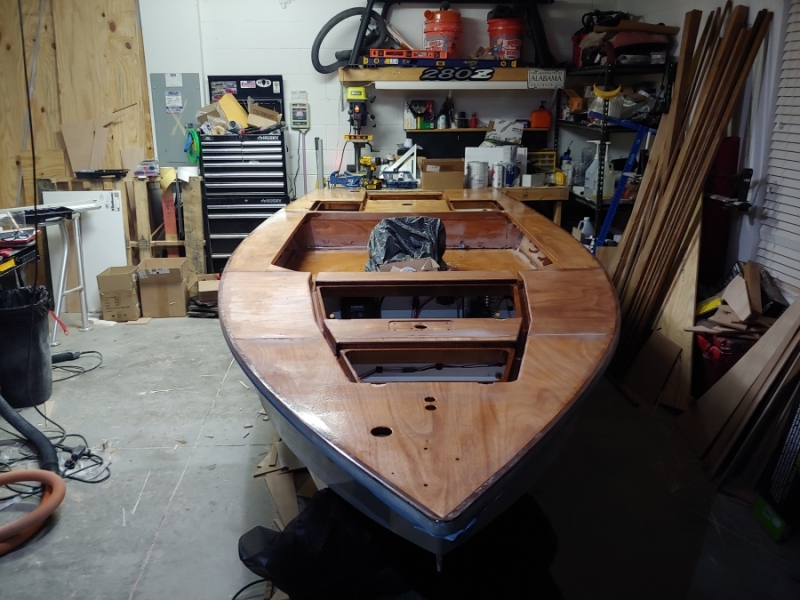
Re: Cameron's FS14LS+5%
Posted: Mon Dec 06, 2021 9:20 am
by VT_Jeff
Hole-y cow, that's a lotta drilling! What size hole-saw do you need for the hatch lock recesses?
Here's a random question: are you going to be able to close your anchor locker with a line coming out of it, like if you're anchoring in shallow water and most of the rode will be in the locker? I ended up moving my hinges to one side because of that concern, interested to see if you managed it some other way. I'm thinking you may be able to run it out of the drain maybe?
On your hinge recesses, it looks like you cut through the deck glass, is that right? That's what I did. Seaslug cut the recesses first and then pressed the deck glass into the recesses, I wasn't that organized. But it did present a small challenge for me getting those recesses rounded over, interested to see how that goes for you.
Re: Cameron's FS14LS+5%
Posted: Mon Dec 06, 2021 2:22 pm
by bamaguy0
VT_Jeff wrote: ↑Mon Dec 06, 2021 9:20 am
Hole-y cow, that's a lotta drilling! What size hole-saw do you need for the hatch lock recesses?
Here's a random question: are you going to be able to close your anchor locker with a line coming out of it, like if you're anchoring in shallow water and most of the rode will be in the locker? I ended up moving my hinges to one side because of that concern, interested to see if you managed it some other way. I'm thinking you may be able to run it out of the drain maybe?
On your hinge recesses, it looks like you cut through the deck glass, is that right? That's what I did. Seaslug cut the recesses first and then pressed the deck glass into the recesses, I wasn't that organized. But it did present a small challenge for me getting those recesses rounded over, interested to see how that goes for you.
I actually realized I need at least one more hole. Gonna put in a mounting provision for a forward casting platform turnbuckle. I may not use it, but I'll have one in case I do.
The OD on the flange of the latch is about 2-3/8. I have a 2-1/2 that would work, but I just convinced myself I would rather them sticking up than have an overly large recess. The flange has a complete 45deg chamfer around it as well so it would look even bigger because there's not even a full diameter thickness that I could recess and only have the chamfered portion stick above the surface. It'll be fine...the one that will be most in the way, the big fore hatch, I'm planning to seadek anyway so that will recess it for the most part.
Good question on the anchor line. I have noticed some hatches with a notch for the line to come out and a side hinge like what you did. I decided not to complicate that. My best answer is we will see. I hope to not have to anchor much with a power pole and spot lock trolling motor. Worst case I run it in the gutter and pile the extra in the cockpit area.
Yeah I saw seaslugs method of glassing into the recesses and said...nah I'm good. I didn't see an advantage to that. I cut them out after glassing and they just got epoxied with the rest of the overcoat I did and then they'll get primer and paint with the rest of the deck. As far as rounding, I just broke the edge with some sandpaper to clean up the fiberglass frays that the router didn't get cleanly.
Re: Cameron's FS14LS+5%
Posted: Mon Dec 06, 2021 4:20 pm
by Mojosmantra
For what it's worth, I also decided to not recess my deck latch flanges. They aren't very thick and I decided it would be cleaner to leave them proud. I felt a recess would have needed to be slightly larger to accommodate epoxy, primer and paint buildup, which is guesswork that may have ended up worse than just leaving it be. I envisioned making it slightly too large and having a leftover space that would hold water and eventually fill up with crud. On the other hand, I did recess for my hinges, which are cast and are quite thick. However, I did not glass the recesses for the same guesswork reasons above - only this time for thickness. No anchor rode "notch" for me. I like nothing about anchors and only carry one only for safety. It's all spot-lock and anchor pin for me.
Re: Cameron's FS14LS+5%
Posted: Tue Dec 07, 2021 8:38 am
by VT_Jeff
I need to up my anchor game, I'm in the dark ages!
I was too cheap to spring for the hatch locks and I now have some hatch warping, so it was probably a bad place to save money.
Anyway, deck is looking great Cameron, keep up the excellent work!
Re: Cameron's FS14LS+5%
Posted: Tue Dec 07, 2021 1:06 pm
by bamaguy0
VT_Jeff wrote: ↑Tue Dec 07, 2021 8:38 am
I need to up my anchor game, I'm in the dark ages!
I was too cheap to spring for the hatch locks and I now have some hatch warping, so it was probably a bad place to save money.
Anyway, deck is looking great Cameron, keep up the excellent work!
That's what Christmas is for!
How did the lack of hatch locks contribute to warping? I'm not following that one.
Re: Cameron's FS14LS+5%
Posted: Tue Dec 07, 2021 1:10 pm
by VT_Jeff
bamaguy0 wrote: ↑Tue Dec 07, 2021 1:06 pm
VT_Jeff wrote: ↑Tue Dec 07, 2021 8:38 am
I need to up my anchor game, I'm in the dark ages!
I was too cheap to spring for the hatch locks and I now have some hatch warping, so it was probably a bad place to save money.
Anyway, deck is looking great Cameron, keep up the excellent work!
That's what Christmas is for!
How did the lack of hatch locks contribute to warping? I'm not following that one.
I think if they were held down by the locks they'd be less prone to warping. As it is they are free to "move" as they wish. I did have an idea for some poor-mans locks but never implemented. The wraping isn't too bad, yet.
Re: Cameron's FS14LS+5%
Posted: Tue Dec 07, 2021 1:19 pm
by Mojosmantra
I happen to have some extra cam locks (3 I think) if you're interested. They're the "MxEol" if you want to look them up on amazon.
Re: Cameron's FS14LS+5%
Posted: Tue Dec 07, 2021 3:29 pm
by VT_Jeff
Mojosmantra wrote: ↑Tue Dec 07, 2021 1:19 pm
I happen to have some extra cam locks (3 I think) if you're interested. They're the "MxEol" if you want to look them up on amazon.
Hmmm, that's pretty compelling! I would need 6 total, 2 each for the long hatches, so that would get me halfway there.....!
Are you guys over-drilling, filling and re-drilling or just drilling and sealing?
Re: Cameron's FS14LS+5%
Posted: Tue Dec 07, 2021 3:38 pm
by Mojosmantra
For the latches, just drilling, 2 coats of epoxy, 2 coats of primer; 2-3 coats of paint and then the latch itself will get bedded in 3M 4000 UV. Seems like enough for me.
Re: Cameron's FS14LS+5%
Posted: Tue Dec 07, 2021 4:07 pm
by VT_Jeff
Mojosmantra wrote: ↑Tue Dec 07, 2021 3:38 pm
For the latches, just drilling, 2 coats of epoxy, 2 coats of primer; 2-3 coats of paint and then the latch itself will get bedded in 3M 4000 UV. Seems like enough for me.
Agreed, that sounds fine.
I think I'm gonna bite, I'll hit you on the other line.
Re: Cameron's FS14LS+5%
Posted: Tue Dec 07, 2021 5:08 pm
by VT_Jeff
Mojosmantra wrote: ↑Tue Dec 07, 2021 3:38 pm
For the latches, just drilling, 2 coats of epoxy, 2 coats of primer; 2-3 coats of paint and then the latch itself will get bedded in 3M 4000 UV. Seems like enough for me.
Sent a PM.
Re: Cameron's FS14LS+5%
Posted: Tue Dec 07, 2021 6:39 pm
by bamaguy0
I wasn't planning to paint down in the holes as the epoxy and then sealant should be enough in my mind.
We'll find out eventually!
Re: Cameron's FS14LS+5%
Posted: Tue Dec 07, 2021 6:50 pm
by Mojosmantra
bamaguy0 wrote: ↑Tue Dec 07, 2021 6:39 pm
I wasn't planning to paint down in the holes as the epoxy and then sealant should be enough in my mind.
We'll find out eventually!
Don't disagree. It's not like it's below the waterline and if it is - send pictures
Re: Cameron's FS14LS+5%
Posted: Wed Dec 08, 2021 9:55 am
by pee wee
VT_Jeff wrote: ↑Tue Dec 07, 2021 1:10 pm
bamaguy0 wrote: ↑Tue Dec 07, 2021 1:06 pm
How did the lack of hatch locks contribute to warping? I'm not following that one.
I think if they were held down by the locks they'd be less prone to warping. As it is they are free to "move" as they wish. I did have an idea for some poor-mans locks but never implemented. The wraping isn't too bad, yet.
I know wood, even plywood, will move with changes of moisture in the air, but aren't your hatches completely encapsulated in epoxy and fiberglass? Seems like they must not be. At any rate, it's a moot point now. Hold down latches will keep hatch lids from rattling, too.
Re: Cameron's FS14LS+5%
Posted: Wed Dec 08, 2021 10:16 am
by VT_Jeff
pee wee wrote: ↑Wed Dec 08, 2021 9:55 am
VT_Jeff wrote: ↑Tue Dec 07, 2021 1:10 pm
bamaguy0 wrote: ↑Tue Dec 07, 2021 1:06 pm
How did the lack of hatch locks contribute to warping? I'm not following that one.
I think if they were held down by the locks they'd be less prone to warping. As it is they are free to "move" as they wish. I did have an idea for some poor-mans locks but never implemented. The wraping isn't too bad, yet.
I know wood, even plywood, will move with changes of moisture in the air...
Interesting topic peewee, hopefully worth the hijack.
I'm not convinced that air exchanges are the only cause for movement, though I've heard people say that it's true. Here's my theory: If the top of the hatch is heated in the sun while the bottom is not ( which happens every day while the boat is sitting outside) even if no air or moisture actually moves through the barrier, the cells in the top layer of wood are going to expand/contract at a pretty different rate than the cells on the bottom, or even the cells in the next ply, and this could lead to warpage. The air already trapped in the top layer of "straws" (as I was taught to picture would grain) will expand due to the heat, the extra volume of air in those straws can't escape due to the barrier, and so they deform/warp. That's the way I picture it.
Re: Cameron's FS14LS+5%
Posted: Wed Dec 08, 2021 10:33 am
by bamaguy0
Interesting discussion...I'll allow it!
Re: Cameron's FS14LS+5%
Posted: Thu Dec 09, 2021 10:35 am
by pee wee
Thanks, Bamaguy0!
I can't find any source that agrees that temperature causes wood movement, only a couple statements that say it's not temperature (but unreliable sources).
The fact remains that VTJeff's hatches did warp, and assuming they were thoroughly sealed with epoxy, I have my doubts that moisture is the cause, even what is already inside the plywood. Maybe it's not balanced from face to back with the same amounts of fiberglass and epoxy? Do they return to flat when the sun goes down? At any rate, big hatches are going to be more prone to objectionable warping, and hold-downs are a good answer to the problem.
Re: Cameron's FS14LS+5%
Posted: Thu Dec 09, 2021 4:30 pm
by jonnymac
there are multiple factors for wood movement, moisture, species, tensions in the plywood from factory, glass on one side or both, etc.
The reality is that no one wants to spend the extensive testing to prove their theories, so you see many opinions, and then their are supply challenges where you don’t know exactly what you are getting because few people want to pay the prices that guarantee you are getting what you expect.
I wouldn’t expect a flat plywood panel to stay flat without something holding it that way across all temperature ranges and conditions.
Re: Cameron's FS14LS+5%
Posted: Thu Dec 09, 2021 10:40 pm
by bamaguy0
Jeff, which direction is it warping? Center up or ends up?
Going to try to get the boat titled and registered in the morning. Wish me luck!
Re: Cameron's FS14LS+5%
Posted: Fri Dec 10, 2021 8:08 am
by Mojosmantra
Very interested to see how that goes
Re: Cameron's FS14LS+5%
Posted: Fri Dec 10, 2021 8:43 am
by VT_Jeff
jonnymac wrote: ↑Thu Dec 09, 2021 4:30 pm
I wouldn’t expect a flat plywood panel to stay flat without something holding it that way across all temperature ranges and conditions.
I agree, that seems like a big ask.
bamaguy0 wrote: ↑Thu Dec 09, 2021 10:40 pm
Jeff, which direction is it warping? Center up or ends up?
Ends up.
bamaguy0 wrote: ↑Thu Dec 09, 2021 10:40 pm
Going to try to get the boat titled and registered in the morning. Wish me luck!
Good luck!
Re: Cameron's FS14LS+5%
Posted: Fri Dec 10, 2021 10:42 am
by bamaguy0
Great success! After 30 mins and a couple trips of the clerk consulting with the supervisor, I have a HIN, title, and registration!
Re: Cameron's FS14LS+5%
Posted: Fri Dec 10, 2021 11:01 am
by Jeff
Congrats!!! Always good news!!! Jeff
Re: Cameron's FS14LS+5%
Posted: Fri Dec 10, 2021 11:02 am
by VT_Jeff
Congrats!
Re: Cameron's FS14LS+5%
Posted: Fri Dec 10, 2021 12:02 pm
by Mojosmantra
bamaguy0 wrote: ↑Fri Dec 10, 2021 10:42 am
Great success! After 30 mins and a couple trips of the clerk consulting with the supervisor, I have a HIN, title, and registration!
Awesome Cameron! Do you mind expounding on what info you had to provide?
Re: Cameron's FS14LS+5%
Posted: Fri Dec 10, 2021 1:19 pm
by bamaguy0
Yeah so it was pretty straight forward.
I filled out
HSMV 87002 and brought my reciepts. Basically they want the HULL, DECKS/RIGGING, and MACHINERY/ENGINES filled out to correlate with the vendors of the reciepts you've brought. Basically all the receipts prove is you paid tax on the materials that you claim went into the fabrication of the hull. I didn't have to submit it to FWC for inspection because it is under 16ft. No photos had to be provided.
I did leave engine blank and stated that I haven't decided on a motor yet. I have one, but I've been on the lookout for a newer (than 1996) model 2 stroke Yamaha. They questioned me on that a bit because they said they could not proceed without knowing the engine type and fuel. I said that it would most definitely be a gas outboard and there was no way it could be anything else. They accepted that and moved forward.
The guidance states to bring HSMV 82040 as well, and I did, but they did not use my copy because they already have the necessary info from the first form.
All in all it was pretty straight forward. This was in Orange County, FL, so of course your mileage may vary.
Re: Cameron's FS14LS+5%
Posted: Sun Dec 12, 2021 4:02 pm
by bamaguy0
Better is the enemy of good enough! Done with priming and on to painting!
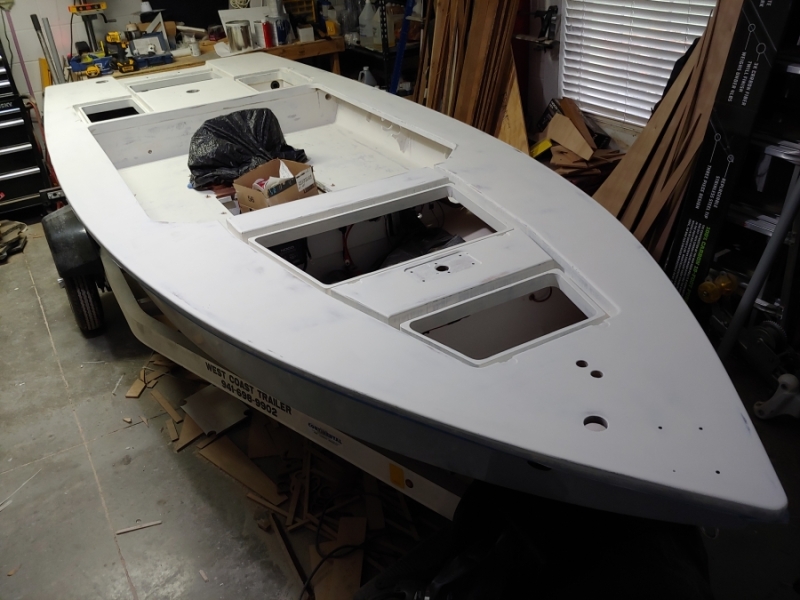
Re: Cameron's FS14LS+5%
Posted: Sun Dec 12, 2021 4:26 pm
by Mojosmantra
Dang - that looks like a boat and a pretty nice one at that. Must feel really good to see it all coming together. Did you figure out your two-tone transitions or are you going to stay with one color?
Re: Cameron's FS14LS+5%
Posted: Sun Dec 12, 2021 9:16 pm
by bamaguy0
Mojosmantra wrote: ↑Sun Dec 12, 2021 4:26 pm
Dang - that looks like a boat and a pretty nice one at that. Must feel really good to see it all coming together. Did you figure out your two-tone transitions or are you going to stay with one color?
I have a plan for two-tone. We'll see how it plays out in the coming weeks.
Re: Cameron's FS14LS+5%
Posted: Tue Dec 14, 2021 10:46 pm
by bamaguy0
First coat on!

Now I'm in the process of masking for anti skid. Got lots of stuff to go around.
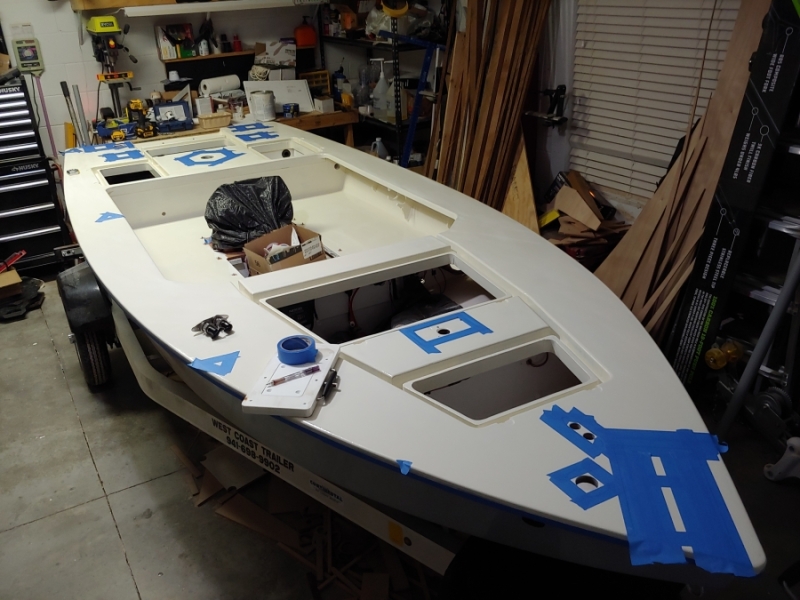
Re: Cameron's FS14LS+5%
Posted: Wed Dec 15, 2021 12:12 am
by VT_Jeff
Awesome! How'd it go?
Re: Cameron's FS14LS+5%
Posted: Wed Dec 15, 2021 6:58 am
by bamaguy0
Still masking. Got everything marked off except the poling platform so I have to mark the feet, then offset everything and cut the tape out. Then I'll run the mask on the inside and outside of the deck and floor. Then I'll work transitions where stuff overlaps. At this rate I'll be applying antiskid on Thursday or Friday.
I did mix some of the additive into extra paint that I poured out when doing the first coat as a small test. I'm happy with what I'm able to produce so I think it will turn out alright mixing in vs sprinkling on after applying neat paint.
Re: Cameron's FS14LS+5%
Posted: Fri Dec 17, 2021 5:01 pm
by bamaguy0
Re: Cameron's FS14LS+5%
Posted: Sun Dec 19, 2021 8:17 pm
by bamaguy0
Aside from touchups around the transom and painting the underside of the hatches, I'm calling painting done! Decided against the two tone interior simply because I'm ready to wrap this up. I think I could have made it look OK, but it's just not worth it to me. I will probably get Grey seadek on the sides as well as the large hatch so that will break it up a bit.
Got an engraved aluminum plate for my HIN.
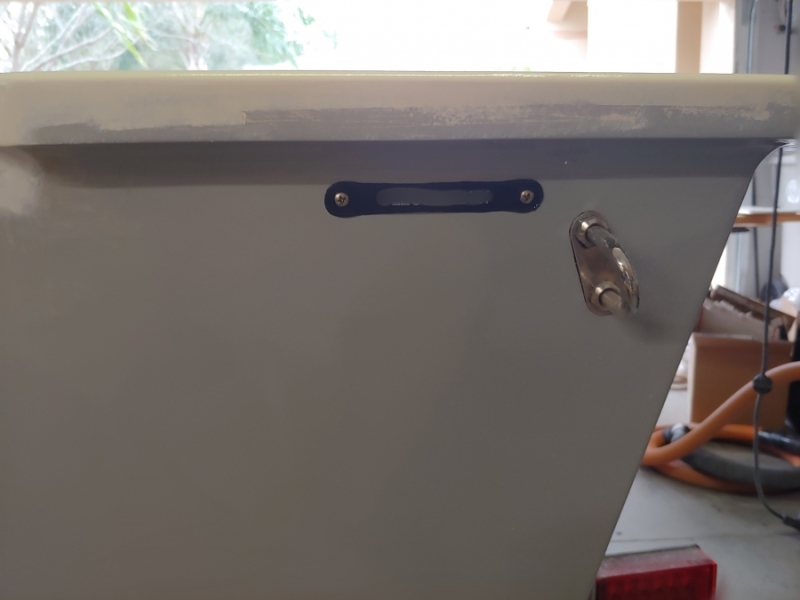
And now we're off to the races! First wave of parts installed this evening. Got a thru deck fitting for the power pole lines, the motor control cable boot, the push pole holders, front seat pedestal mount, TM mount and plug, bow cleat, and helm seat post all mounted and 4200'd in place.
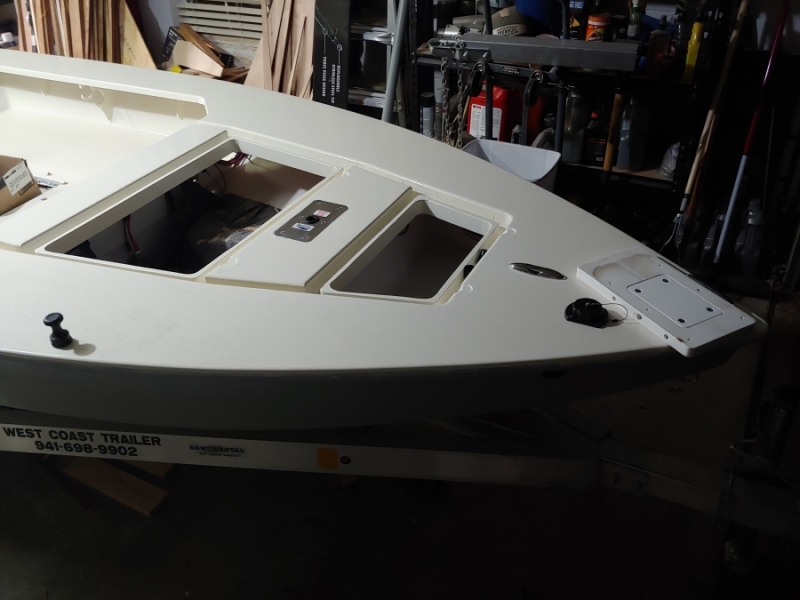
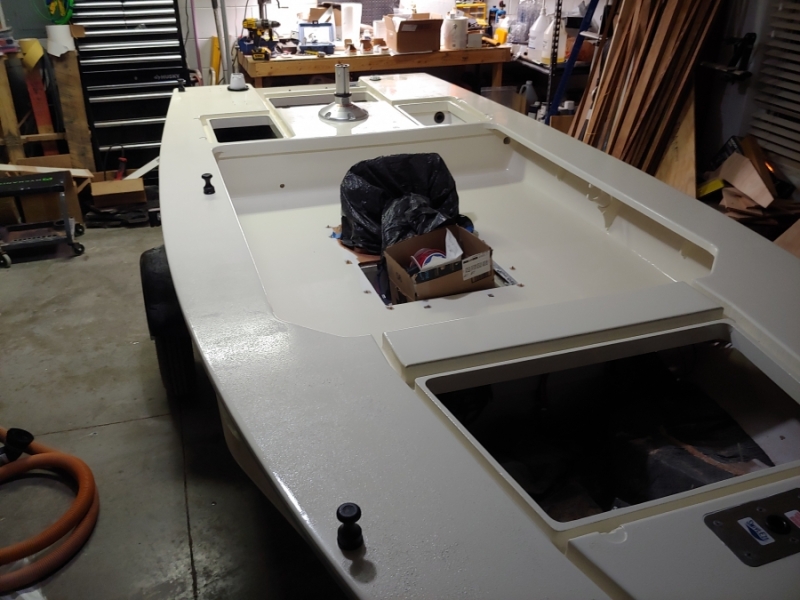
Taking this upcoming week off from work so I should be in pretty good shape by the weekend. Will work on the sole lighting and speakers next.
Re: Cameron's FS14LS+5%
Posted: Sun Dec 19, 2021 9:07 pm
by VT_Jeff
Really impressive Cameron, you are super organized! Mask job and non skid look pro. Bolting stuff on is the instant gratification portion, enjoy!
Re: Cameron's FS14LS+5%
Posted: Mon Dec 20, 2021 8:08 am
by Jeff
Very nice job!!! Jeff
Re: Cameron's FS14LS+5%
Posted: Mon Dec 20, 2021 8:31 am
by bamaguy0
Thanks guys! It feels good getting to this stage in the game.
On another note, if anyone needs Stainless wood screws hit me up. I bought packs of diff sizes of the 316 stainless from Mcmaster Carr. Minimum package sizes run from 25 to 100 depending on screw size, so I have plenty.
Re: Cameron's FS14LS+5%
Posted: Fri Dec 24, 2021 9:27 pm
by bamaguy0
Feel like I got a lot done, but I feel like I have just as much to go. Just been chipping away this week at getting everything installed.
Speaker and cockpit lighting went in.
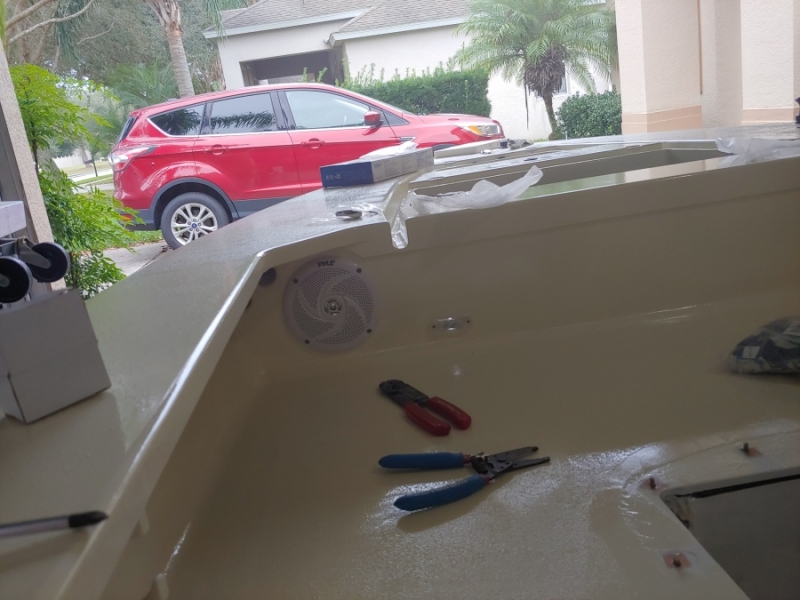
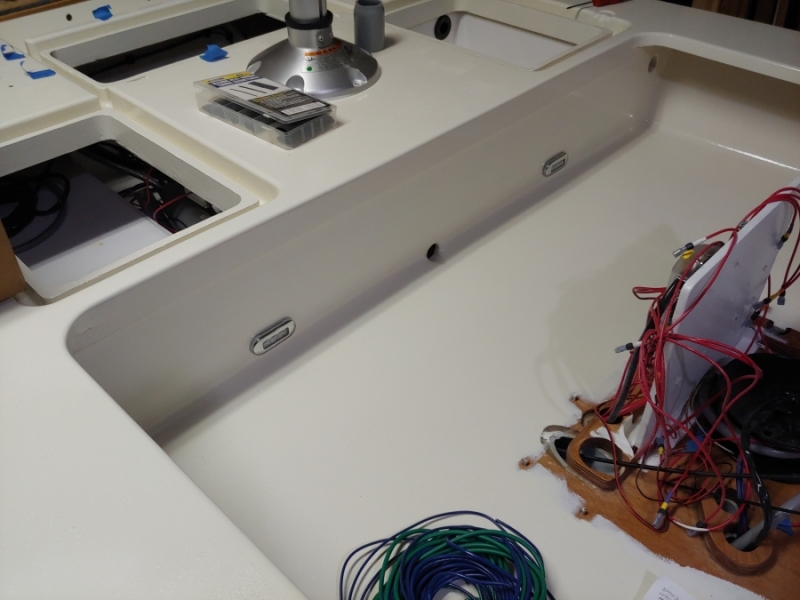
I don't know what to call these other than strike plates. My hatch latches aren't really the striking kind, but I wanted to protect the gutter underside, so I made 4" pieces of angle aluminum and screwed them into place.
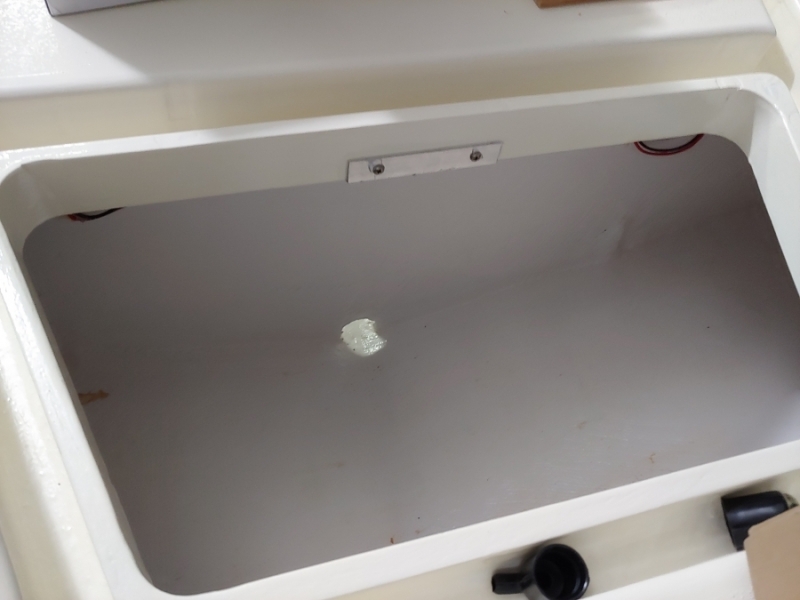
I temp installed the console and tidied up the wire routing, made sure my runs from fuse to switch and then switch out were all good. I terminated a few more wires. The rest will have to wait until I install the console for good. This will definitely help speed things up when I get to that point...and I'm close.
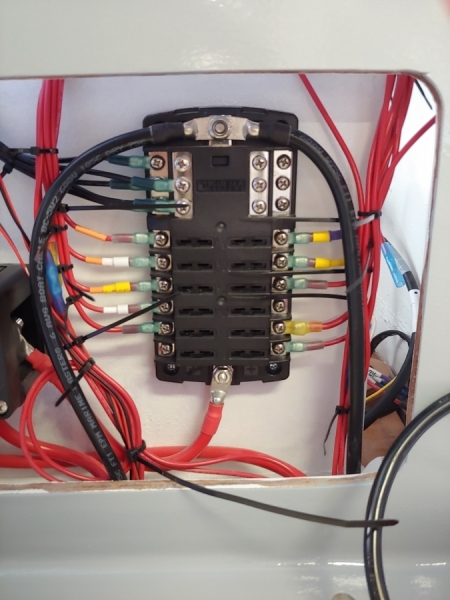
After I took the console back out I decided to test out my circuitry. I used alligator clip jumpers to act at the switches. I connected the house battery and checked my lights and pumps out. Everything seems to work as it should.
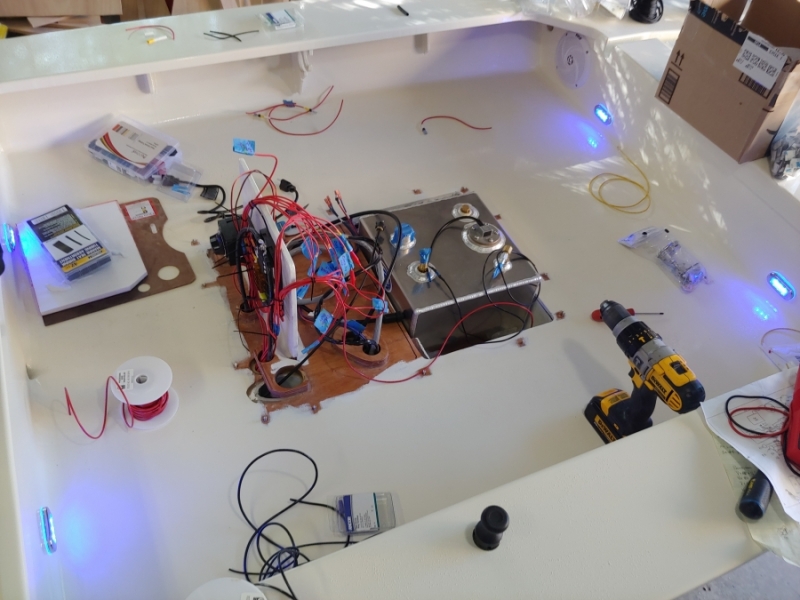
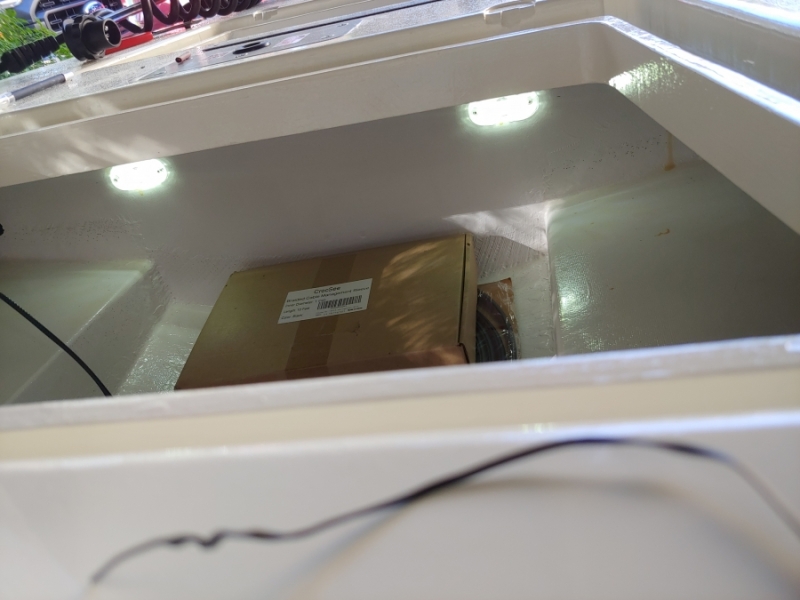
Started working on finishing off the hatches. Got my seal in place. I like the size and design. Its a D shape. I notched pieces in it to make the corner bends.
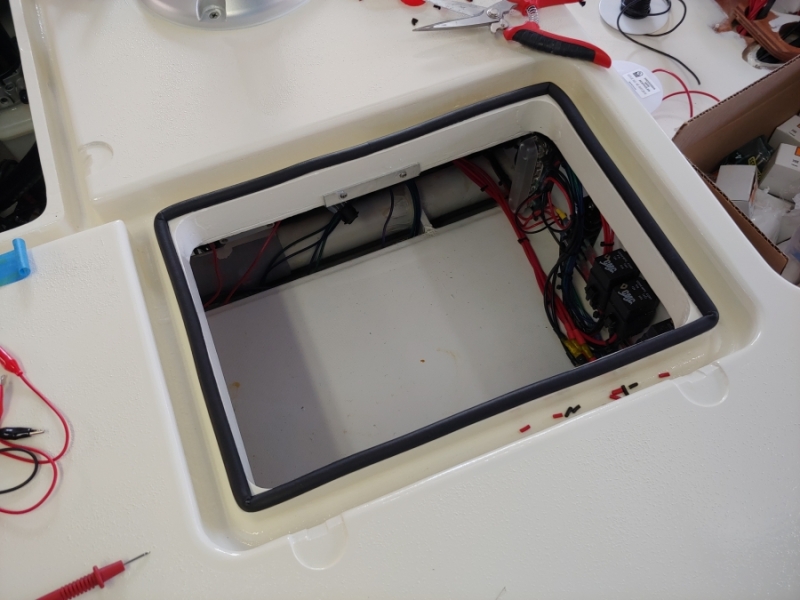
Got latches installed and set.
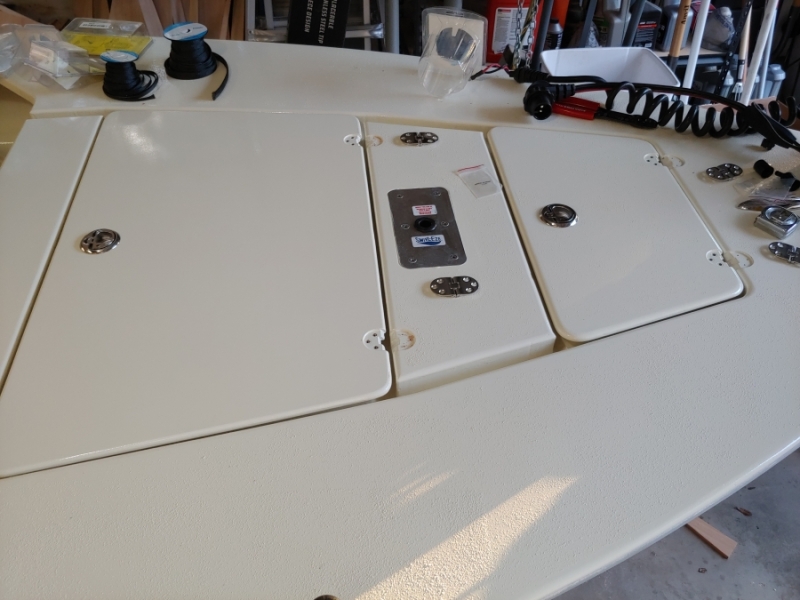
And I got hinges on the front hatches installed.
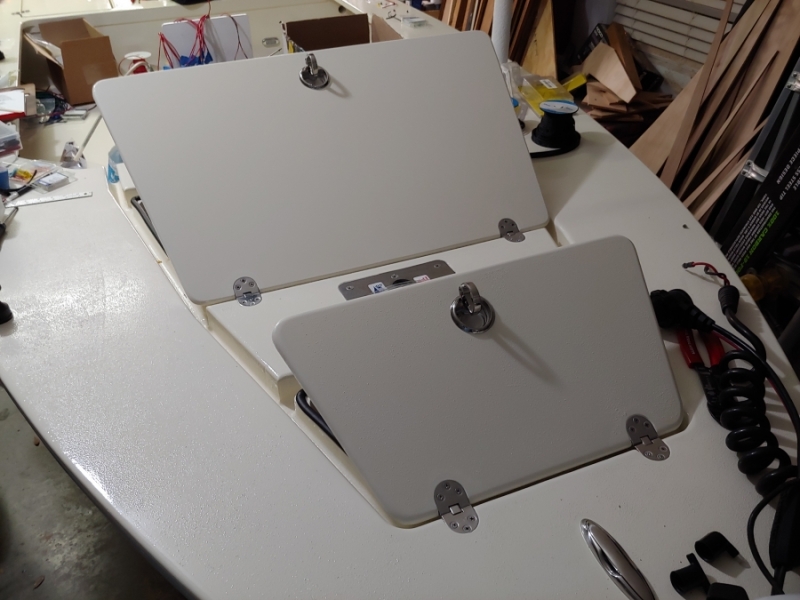
Hope everyone has a Merry Christmas tomorrow. It's been a little different for us this year because we would either be in Houston or Alabama, but with my wife so far along traveling was out of the picture. Taking tomorrow off for a day trip and then I'm sure I'll be back at it on Sunday.
Re: Cameron's FS14LS+5%
Posted: Fri Dec 24, 2021 10:29 pm
by VT_Jeff
Nice progress! I was just wondering about strike plates myself and had a similar idea, I think I'll move forward with them.
Merry Christmas!
Re: Cameron's FS14LS+5%
Posted: Sat Dec 25, 2021 12:35 am
by Fuzz
That is some mighty fine work on those hatches. Level of craftsmanship on many of the builds here is amazing.
Re: Cameron's FS14LS+5%
Posted: Sat Dec 25, 2021 6:22 am
by cape man
Wow!
Re: Cameron's FS14LS+5%
Posted: Sat Dec 25, 2021 8:58 am
by Mojosmantra
bamaguy0 wrote: ↑Fri Dec 24, 2021 9:27 pm
Feel like I got a lot done, but I feel like I have just as much to go. Just been chipping away this week at getting everything installed.
Speaker and cockpit lighting went in.
I don't know what to call these other than strike plates. My hatch latches aren't really the striking kind, but I wanted to protect the gutter underside, so I made 4" pieces of angle aluminum and screwed them into place.
I temp installed the console and tidied up the wire routing, made sure my runs from fuse to switch and then switch out were all good. I terminated a few more wires. The rest will have to wait until I install the console for good. This will definitely help speed things up when I get to that point...and I'm close.
After I took the console back out I decided to test out my circuitry. I used alligator clip jumpers to act at the switches. I connected the house battery and checked my lights and pumps out. Everything seems to work as it should.
Started working on finishing off the hatches. Got my seal in place. I like the size and design. Its a D shape. I notched pieces in it to make the corner bends.
Got latches installed and set.
And I got hinges on the front hatches installed.
Hope everyone has a Merry Christmas tomorrow. It's been a little different for us this year because we would either be in Houston or Alabama, but with my wife so far along traveling was out of the picture. Taking tomorrow off for a day trip and then I'm sure I'll be back at it on Sunday.
Looking great Cameron.
Merry Christmas to everyone!
Re: Cameron's FS14LS+5%
Posted: Sat Dec 25, 2021 10:56 am
by joe2700
Looking great, wiring is one of my favorite parts, so satisfying!
Re: Cameron's FS14LS+5%
Posted: Fri Dec 31, 2021 4:34 pm
by bamaguy0
Good progress on getting her together. Not quite ready yet though, but the list is getting smaller.
Hatches are all done. I do need to get the spring holders to keep them open. I may even put a gas piston on the large one. We'll see.
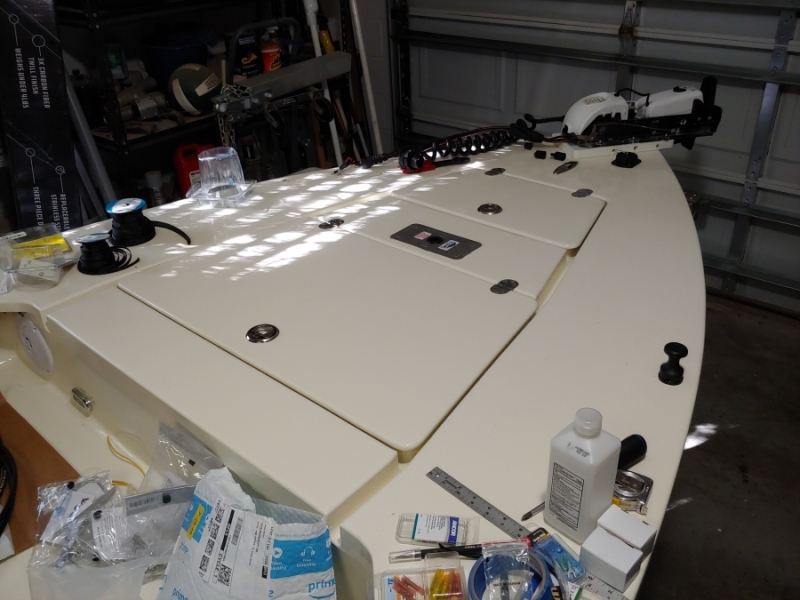
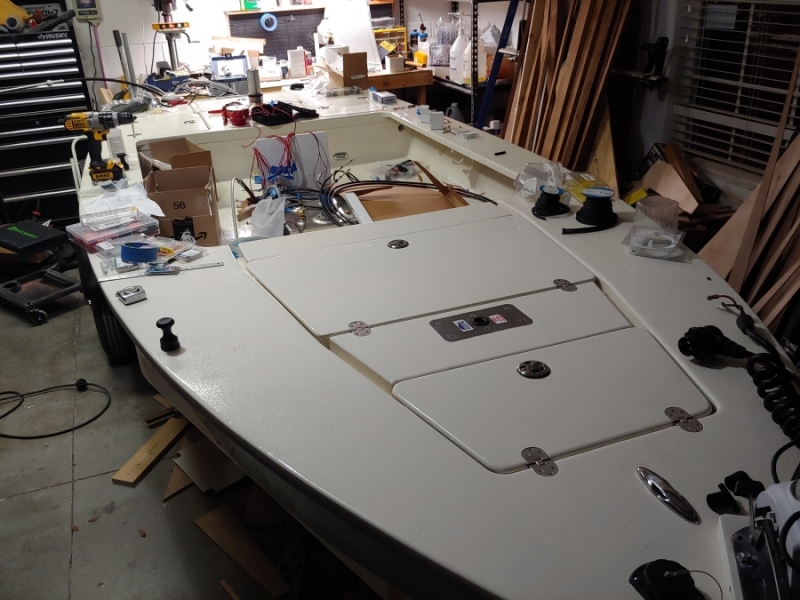
Then I got the console mounted. Wiring it all up took a few days.
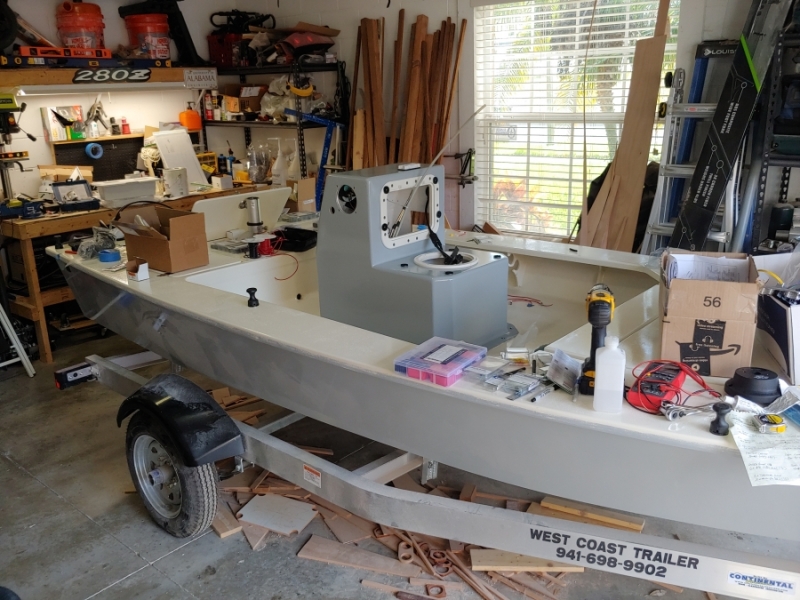
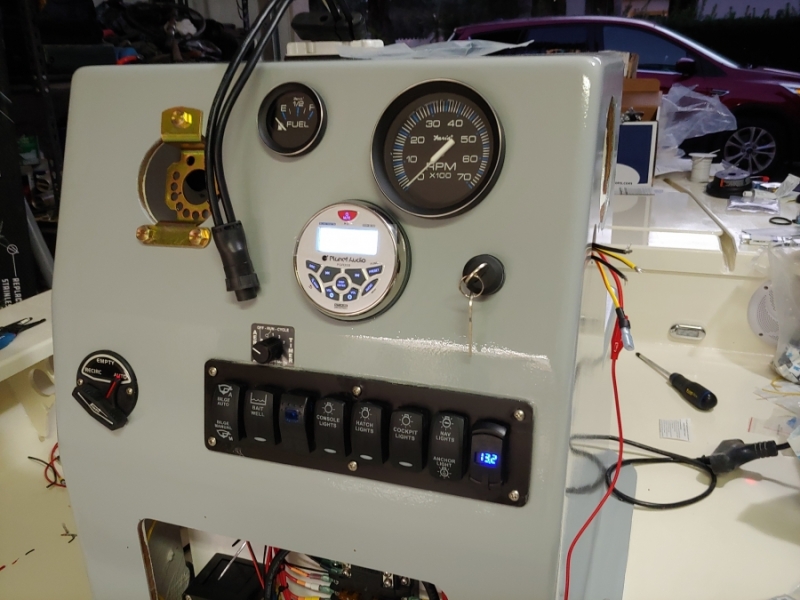
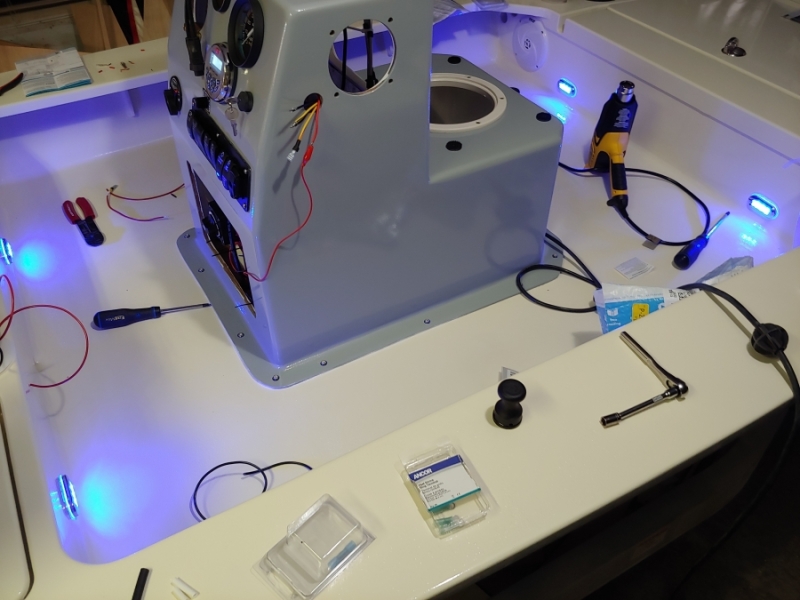
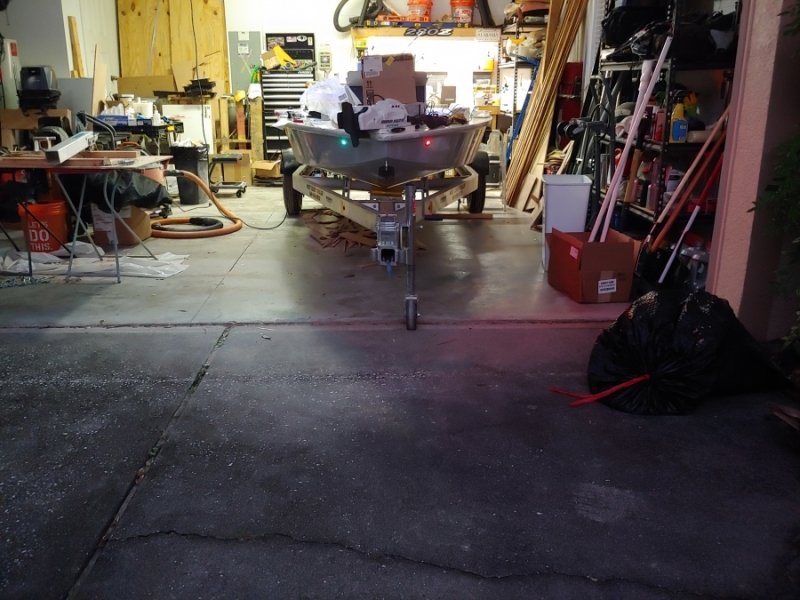
I made a quick vid of the radio and electrics. Not bad for a $70 radio and $20 speakers.
https://youtu.be/d6nYF-xOtn4
Then I got the helm and throttle controls installed. I honestly thought getting the steering installed was going to be my "pucker factor" moment, but it was actually a breeze.
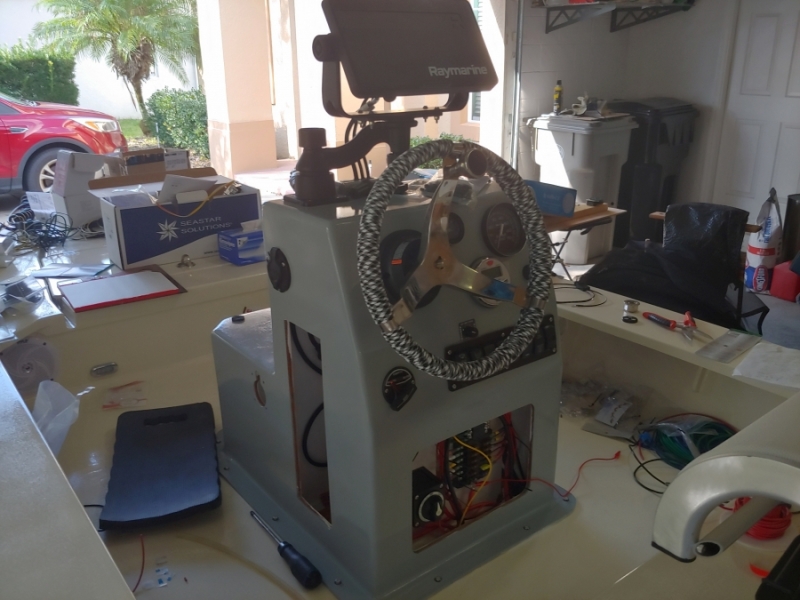
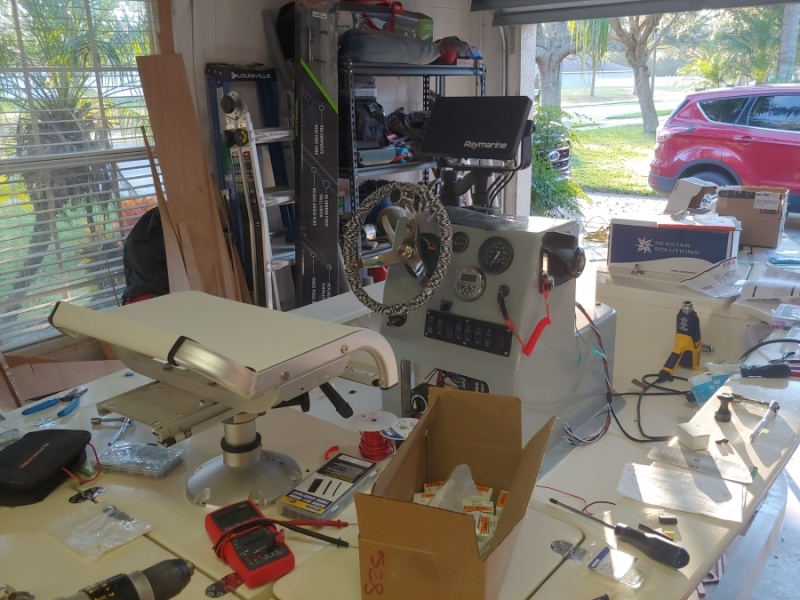
I didn't like the incandecent gauge backlights, so I got some blue LEDs for it.
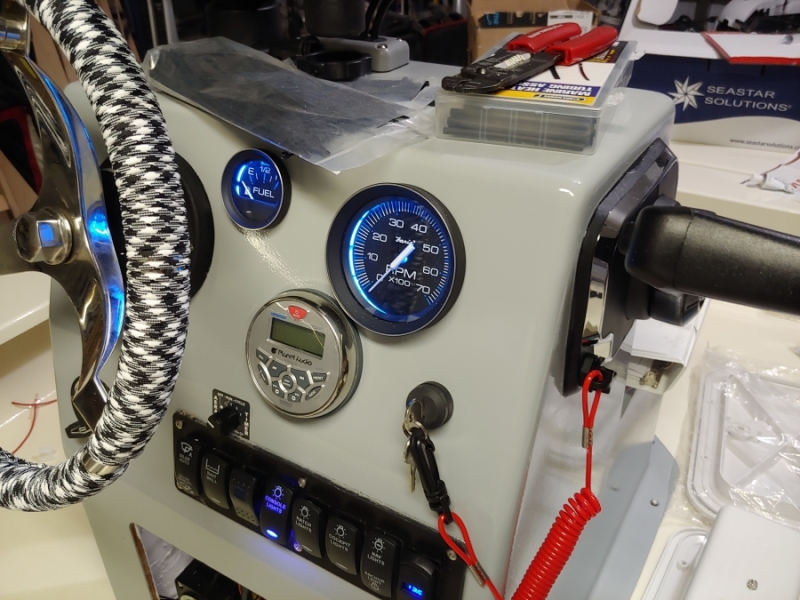
I think I mentioned a while back that my motor didn't pee the last time I ran it, so I dropped the lower unit to do a waterpump change. Found some interesting things while I tore into it. The impeller had a lobe that was half flipped and gaskets were in the wrong locations. I ended up needing more parts than the standard pump kit because the lower housing was gross and the upper housing was cracked so I was waiting on parts to arrive. Got all that back together and now I'm getting the motor installed.
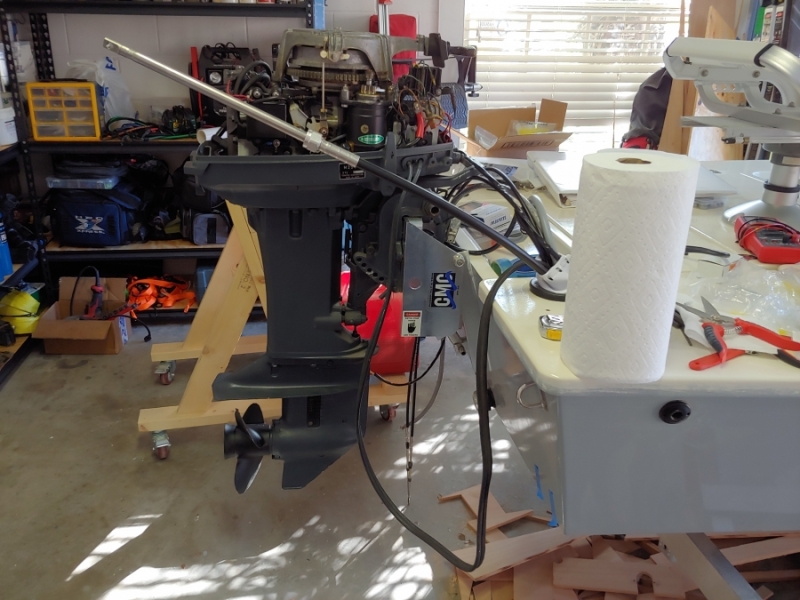
This motor was a jerry-rigged remote setup when I bought it. Somehow had a remote throttle with an aluminum bar for steering. I'm installing the real Tohatsu remote kit now.
Also had to take a couple days to rearrange the garage to accomodate the boat with the motor, so that's now done as well.
Re: Cameron's FS14LS+5%
Posted: Fri Dec 31, 2021 7:31 pm
by Fuzz
I am still amazed at the amount of stuff you have in that boat. Pretty sure I have 32 foot boats that are simpler.
Re: Cameron's FS14LS+5%
Posted: Fri Dec 31, 2021 7:59 pm
by bamaguy0
Fuzz wrote: ↑Fri Dec 31, 2021 7:31 pm
I am still amazed at the amount of stuff you have in that boat. Pretty sure I have 32 foot boats that are simpler.
...I'm hoping I don't regret it...
I've seen some similarly loaded Gheenoe LT25s. Seems like we would have about the same buoyancy seeing as they're narrower, but longer.
My Power Pole anchor parts are still at the powdercoater. Maybe I go float it before mounting it and see how she sits.
Re: Cameron's FS14LS+5%
Posted: Sat Jan 01, 2022 5:00 pm
by bamaguy0
Well I thought I was at least gonna try to take her out tomorrow and putt around a bit at least.
Buuuuut, I broke the hose nipple on the fuel pump changing out the fuel lines...guess we'll be waiting till next week.
Re: Cameron's FS14LS+5%
Posted: Sat Jan 01, 2022 6:48 pm
by VT_Jeff
Heartbreaker! The longest timespan is the one between your boat being splash-ready and your boat getting splashed! Looking forward to launch pics/video!
Re: Cameron's FS14LS+5%
Posted: Sat Jan 01, 2022 6:59 pm
by bamaguy0
I did push through the disappointment and got the motor wired up to the console.
I had to at least check it out.
https://youtu.be/S0AWsFT3IaY
Also got the hoses connected to the fuel tank. I almost let the filler neck hose beat me, but after a few cramps and some blood letting I was victorious.
Rub rail and poling platform is all that's left. Was gonna forego that for a first splash, but I guess we'll push on and she'll be done-done when she gets wet.
Re: Cameron's FS14LS+5%
Posted: Fri Jan 07, 2022 12:43 pm
by VT_Jeff
This is a cliffhanger, any status update? Are you a Dad yet?
Re: Cameron's FS14LS+5%
Posted: Fri Jan 07, 2022 1:03 pm
by bamaguy0
VT_Jeff wrote: ↑Fri Jan 07, 2022 12:43 pm
This is a cliffhanger, any status update? Are you a Dad yet?
Well I was trying to hold out for a splash post on Saturday....but we had a change of plans after our Dr. visit yesterday. They decided to direct admit her and start the process due to a stackup of conditions that were starting to pop up. They're doing fine, just waiting around for baby now!
This is how the boat sits...and probably will for a little bit.
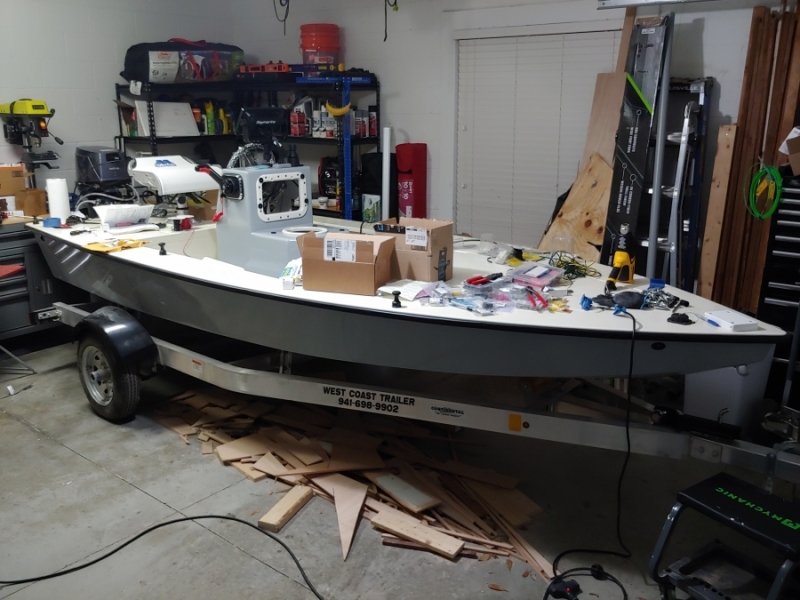
I have half the rub rail insert installed, and have the poling platform, fire extinguisher locker, and electrical panel hatch left to install.
Motor runs with the new fuel pump and the water pump change got her peeing again. Had to adjust the idle speed a bit, but she purrs about as well as any '96 2 smoke motor would.
Re: Cameron's FS14LS+5%
Posted: Fri Jan 07, 2022 1:10 pm
by VT_Jeff
Understood! Best of luck all around and keep us posted!
Re: Cameron's FS14LS+5%
Posted: Fri Jan 07, 2022 1:45 pm
by Jeff
Best to you and your wife bamaguy0!!! Jeff
Re: Cameron's FS14LS+5%
Posted: Fri Jan 07, 2022 2:04 pm
by Fuzz
Yep your life is about to take a major change, but it is a good change
I must of missed it but what hp is that engine?
Re: Cameron's FS14LS+5%
Posted: Fri Jan 07, 2022 5:55 pm
by bamaguy0
Thanks for the support guys!
It's a 25hp, but it appears tuned for 30. This model, the M25C2/M30A3 only differ on how advanced the WOT timing is allowed to go(and because it's a linkage, how open the carb is allowed to be).
I'll need to get a new prop at some point. The one it has has a decent nick in one of the blades. I planned to take her to the scales so we can try to size one for it.
Re: Cameron's FS14LS+5%
Posted: Thu Jan 13, 2022 5:09 pm
by bamaguy0
Well my little first mate was born in the wee hours of Jan 8th. She and momma are doing well. We came home on Sunday and have been getting settled in with the help of my Mother in Law.
My friend cut out my registration decals for me. This is the same font that I'm using for a logo and the model number on the Transom Bracket. It's the regulation 3" tall, but a little on the long side for such a small boat, so I made a revision to shorten it by about 6 inches. We'll see how that turns out when they get around to cutting it for me.
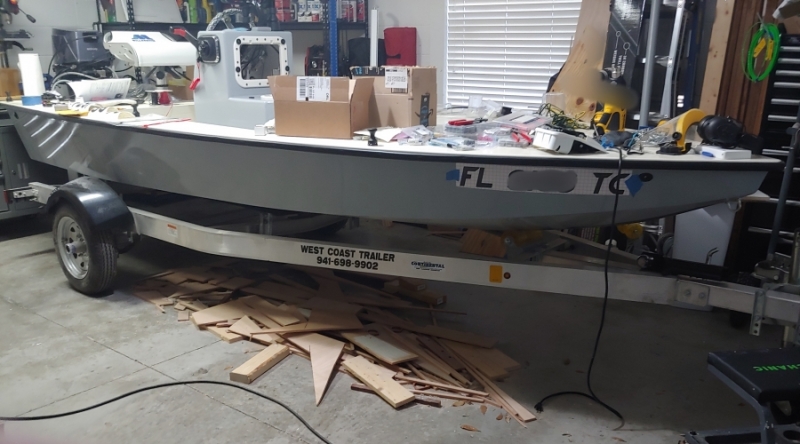
Re: Cameron's FS14LS+5%
Posted: Thu Jan 13, 2022 5:20 pm
by Jeff
Congratulations BamaGuy0!!!!!!!! Jeff
Re: Cameron's FS14LS+5%
Posted: Thu Jan 13, 2022 10:32 pm
by VT_Jeff
Re: Cameron's FS14LS+5%
Posted: Thu Jan 13, 2022 10:35 pm
by bamaguy0
My parents are also coming to town tomorrow night. I'm thinking between two grannys, me and the wife won't hardly get any baby time anyway!
I'm sure I'll be able to drag my dad to the garage to help knock out a few things. This is their first grandchild though, so they are pretty excited!
Re: Cameron's FS14LS+5%
Posted: Thu Jan 13, 2022 10:57 pm
by Fuzz
Unless you are nothing like me I am afraid the baby business is never over.
Re: Cameron's FS14LS+5%
Posted: Fri Jan 14, 2022 8:16 am
by VT_Jeff
Fuzz wrote: ↑Thu Jan 13, 2022 10:57 pm
Unless you are nothing like me I am afraid the baby business is never over.
None of my own but I've heard it can be nearly as tine-consuming as boat building! And potentially even more rewarding!
Re: Cameron's FS14LS+5%
Posted: Sat Jan 15, 2022 1:58 pm
by TomW1
bamaguy congrats on the new helper coming into the family. Glad all went well and mother and baby is home are home. Any pics? The boat looks great.
Tom
Re: Cameron's FS14LS+5%
Posted: Sat Jan 15, 2022 4:41 pm
by Mojosmantra
Congrats Cameron! What’s her name? And yes, I mean both of them
Re: Cameron's FS14LS+5%
Posted: Tue Jan 18, 2022 8:59 pm
by bamaguy0
Her name is Rebekah. Think I'll hold off on photos for now. Maybe in the future when she's able to take a ride out on the boat.
Can't say I have an official boat name, but one of my favorite movies is Forrest Gump, so I jokingly say the boats name is "Jenny".
Got the updated registration numbers applied, and have been knocking out all the little tasks to tidy her up with my dad this past weekend and into today. I think with what we've been able to do she is ready to get wet tomorrow! Will post some pics then. I have a new trolling motor unit and shaft to install. Gonna go set her in the water to see if I can cut the 48" shaft down to 42" or even 36". After a short dockside checkout and measure, I'll load her up, bring her home, finish that out and then go back out for a first run. We might get all that in tomorrow, but I think we're scheduled to get some family photos in tomorrow as well while my sis is in town also.
Be on the lookout for a wall of photos!
Re: Cameron's FS14LS+5%
Posted: Tue Jan 18, 2022 11:34 pm
by VT_Jeff
Standing by!
Re: Cameron's FS14LS+5%
Posted: Wed Jan 19, 2022 8:16 pm
by bamaguy0
Re: Cameron's FS14LS+5%
Posted: Wed Jan 19, 2022 8:24 pm
by Mojosmantra
Dancing emoji!
Looks great man. Big month for you that you’ll always remember. Good for you and congrats.
Re: Cameron's FS14LS+5%
Posted: Wed Jan 19, 2022 9:17 pm
by VT_Jeff
Huge congrats Cameron! Boat looks totally professional, great great work! How did the stability and feel compare to your expectations?
Re: Cameron's FS14LS+5%
Posted: Wed Jan 19, 2022 9:28 pm
by bamaguy0
Thanks guys! Can't wait to open her up tomorrow. I'll also go to the scale tomorrow as well.
Stability isn't too bad. It's obviously a small boat, but I can stand anywhere in the boat. I definitely make slow and deliberate movements to limit the jerkiness, but I think it will be easy to get used to.
I think I will get a grab bar hoop fabricated for the console. I had a tendency to grab the depth finder unit for stability while walking around and I know that's not a good habit to get into.
Re: Cameron's FS14LS+5%
Posted: Wed Jan 19, 2022 10:29 pm
by bamaguy0
On another note, it took nearly submerging the entire fenders to get the boat off the trailer. I think that was to be expected, but I'd like to improve that. Will be looking at ways to lower the bunks and maybe torsion axles which typically lower the frame as well vs leaf spring axles.
Re: Cameron's FS14LS+5%
Posted: Thu Jan 20, 2022 9:11 am
by Dougster
Beautiful little machine. I have that same Riptide trolling motor on my SK14 and love it. Spotlock is terrific. Did you say you're going to shorten the shaft? I'd be curious how to do that.
Dougster
Re: Cameron's FS14LS+5%
Posted: Thu Jan 20, 2022 9:39 am
by Mojosmantra
Dougster - I have to shorten the shaft on my TM too. It's pretty simple, with the trickiest part being not to damage the wires inside. There are at least half a dozen youtube videos on the subject that you can check out - and I think some of them are specific to the Powerdrive, although it really doesn't matter - the process is the same for all.
Re: Cameron's FS14LS+5%
Posted: Thu Jan 20, 2022 12:57 pm
by bamaguy0
Dougster wrote: ↑Thu Jan 20, 2022 9:11 am
Beautiful little machine. I have that same Riptide trolling motor on my SK14 and love it. Spotlock is terrific. Did you say you're going to shorten the shaft? I'd be curious how to do that.
Dougster
Mine is a 2011 CoPilot model that I bought cheap because the copilot module had burnt up. That's why you see some burn marks on it. I upgraded to IPilot because it replaces CoPilot and wanted spotlock.
I ended up refurbishing it further by replacing the shaft and motor as well. That made shortening the shaft much easier on a fresh one. In general though, you'll need to remove the head and cut it down and redrill for the head bolt. It will be easier if you unscrew the motor from the shaft as well so you don't run the risk of nicking the wires, but it's loctited in with permanent red.
Re: Cameron's FS14LS+5%
Posted: Thu Jan 20, 2022 1:05 pm
by bamaguy0
Well I took her back out today and with both my dad and I we managed 27mph around 5500rpm. We both go 270-280lbs so I was pretty impressed. The lake was much busier today so there was a lot of general chop and boats to dodge on such a small lake. I didn't push it any further, but I feel like 30 was possible.
Went by a scale on the way back from the lake and she weighed in at 740lbs. I'll have to do some figuring a little later to see how that fared to my estimate.
Re: Cameron's FS14LS+5%
Posted: Thu Jan 20, 2022 5:48 pm
by VT_Jeff
Man, that's incredible speed! My wife and I combine to #300 and max out at 25. What hp?
Re: Cameron's FS14LS+5%
Posted: Thu Jan 20, 2022 5:56 pm
by bamaguy0
VT_Jeff wrote: ↑Thu Jan 20, 2022 5:48 pm
Man, that's incredible speed! My wife and I combine to #300 and max out at 25. What hp?
It's a 25hp tuned for 30 from what I can tell.
Re: Cameron's FS14LS+5%
Posted: Fri Jan 28, 2022 3:33 pm
by bamaguy0
Upgrades!
Found a steal of a deal on a 2020 F25 that I couldn't pass up. It's got a couple scuffs and scratches and water stains, but she's immaculate on the inside.
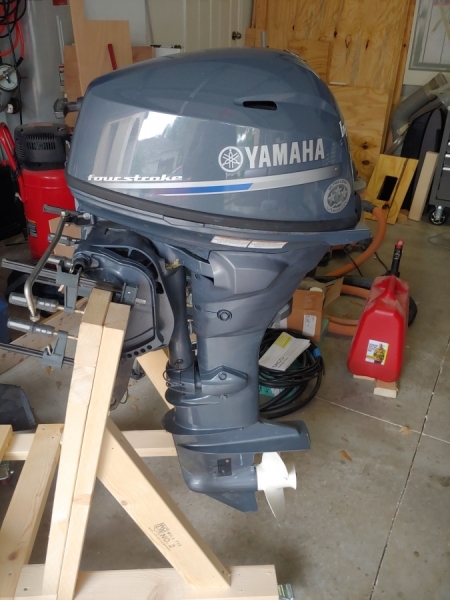
Will be working to swap the '96 Tohatsu and PT35 tilt n trim out for this and a jackplate as it has integrated power trim and tilt.
Anyone interested in a PT35???
Re: Cameron's FS14LS+5%
Posted: Fri Jan 28, 2022 6:25 pm
by VT_Jeff
Awesome sauce!
Re: Cameron's FS14LS+5%
Posted: Fri Jan 28, 2022 9:21 pm
by Dan_Smullen
The motor she deserves. Count it!
Re: Cameron's FS14LS+5%
Posted: Sat Feb 05, 2022 11:05 pm
by bamaguy0
So I want to level set the room for the developing saga that is mounting this new motor on my boat. Hang on. It's gonna be a doozy.
The Tohatsu short shaft is not 15". It's 17". So in setting it up as I did, I knew that a long shaft motor with jackplate would be in my future when I upgraded. Even then, my Tohatsu I had the cav plate tucked about 1-2 inches above the bottom of the hull. I set it up that way on the chance that I ran it for longer than I actually did. This would have made putting on a normal short shaft (15") a very difficult task.
Because I like gadgets and features, I wanted a particular model Yamaha 25, the F25LWTC. That's what I got and why I jumped on it at a moments notice. I even had to go to BELLE GLADE to get it. That and Pehokee were interesting places. Sugar as far as the eye can see...lol.
What I did not realize, because none of the Yamaha stock photos show it, is that this model upgrades the mounts to a larger size. I guess it's the integrated power tilt and trim option simply due to size of the assembly.
This means I'm no longer in "micro", clamp style jackplates. I'm in big boy jackplates. I went with a Vance MFG manual jackplate that is rated for 40-225 hp. It dwarfs the ol PT-35.
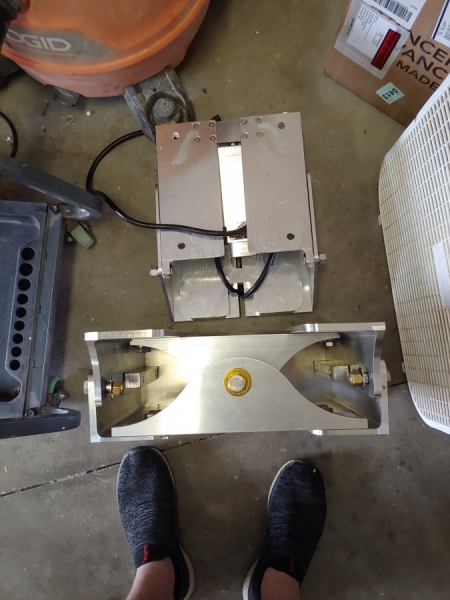
But we press on. There are plenty of relatively small boats with large motors. Mine just happens to be a small motor that plays like a bigger motor.
Remove the PT-35 tilt assembly and starred removing the 4200. I came across a spray on solvent called "Anti-Bond 2015" that seemed to soften up the 4200 pretty well. Removal was not too difficult.
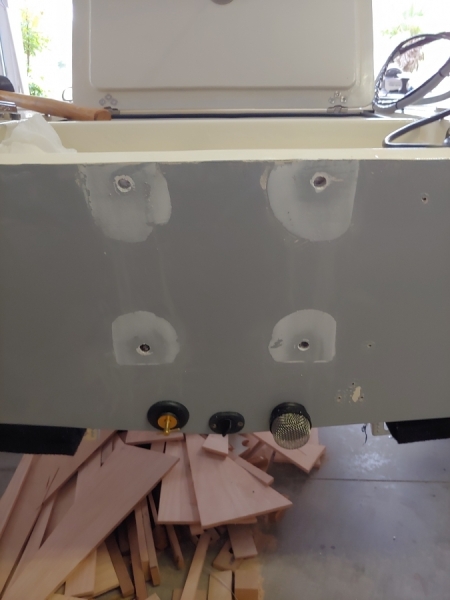
Then I tried cleaning up the 4200 as best I could. Got it super thin and then just scuffed the entire area. Oh, because the jackplate has to be so massive, i have to relocate my transducer as well...that's the 3 holes on the bottom right and then the other 2 up the side were cable clamps.
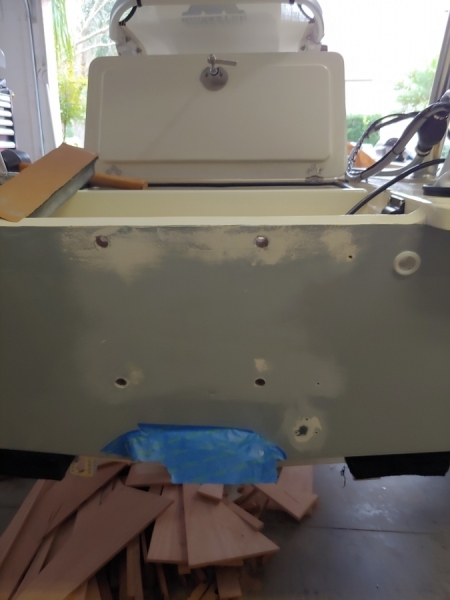
And now off to drill new holes. I thought I'd try this nifty jig intended for locating holes in cabinet drawers for mounting pulls and such. I liked it.
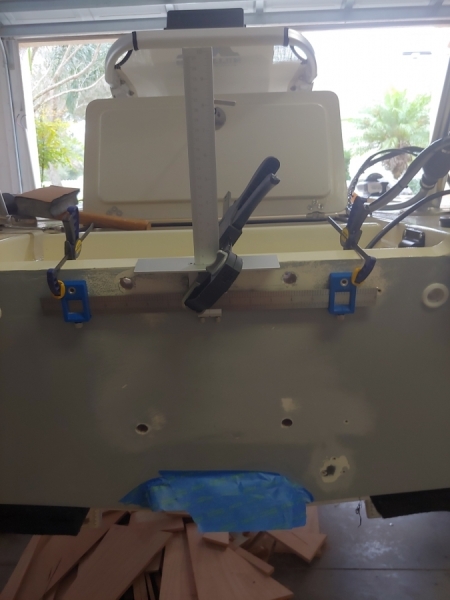
After the holes were drilled, I did a fit check. All is well. It just takes up nearly the entire transom, and just barely clears the pickup strainer for the livewell. I opted for an additional plate on the bottom of the jackplate to keep water from flowing up between the 2 halves. I think this turned out to be wise with how it sits. I might need to put a small relief in for the strainer. We'll see. I don't have a photo yet, but I might reshape the plate slightly. You guys will see why when I highlight it, but it has a bit of a turndown at the end further aft from the transom. If I'm able to jack the motor up like I want I think that downturn will actually work against me in keeping water flowing toward the motor. There's room to bend the plate up to follow the bottom of the jackplate better. I think I will end up massaging that a bit.
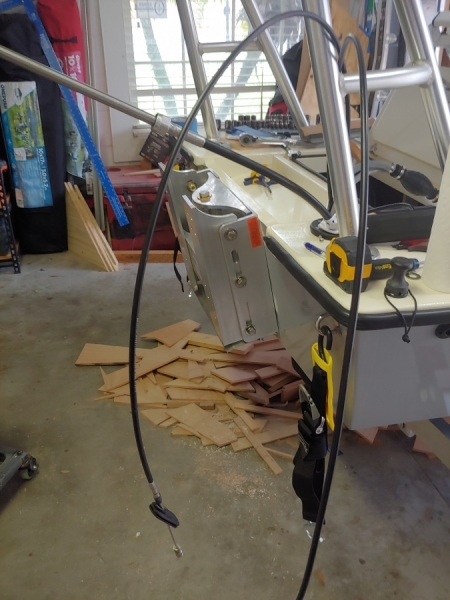
In other news, after dropping off in mid December, my Power Pole parts are back from the powdercoater with a fresh coat of gloss white. The transom mount and "tubes" are what I had done. I bought a new knuckle that has the bolt method vs press fit style for the spike which is what it originally had. This thing got a total overhaul with new hardware kit and piston. Im basically at a brand new Power Pole at this point.
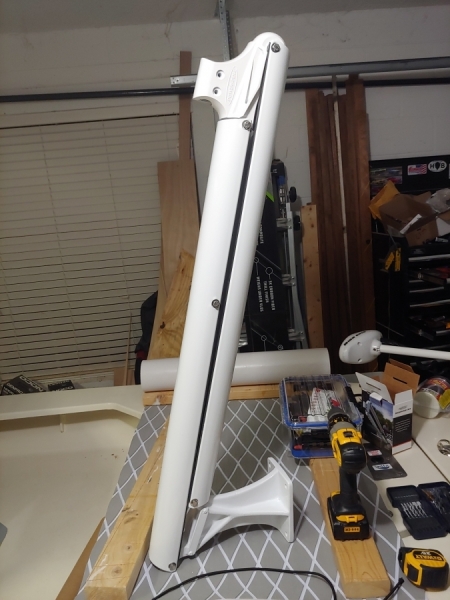
So what all this new jackplate stuff has spurred is the fact I can now mount my PowerPole without drilling holes in the transom. The guy that sold me the PowerPole actually gave me one that's just bent Stainless Steel plate, but it's set up for the starboard side and can't be flipped. I've modeled some of the mount options from PowerPole in Fusion360 with my boat model to see which one suits the best. Main concern is getting it clear of the poling platform.
Next up, decide on and order PowerPole mount and fill all the transom holes.
Re: Cameron's FS14LS+5%
Posted: Mon Feb 07, 2022 4:27 pm
by VT_Jeff
I may be looking for a jack plate at some point, I'll be interested to see how that all works out for you. I was a little worried about the extra weight and then the extra-extra weight from moving the engine back 4-6 inches. You've got, now, a 4-stroke 25, jackplate, SS poling platform with, if I recall, a pretty heavy deck on it, powerpole and not sure what else all on/near the transom , I'm interested to see how that all trims out. I'm moving my motor back an inch right now to make clearance for the steering cable with the poling platform and I'm wondering if that's going to sag me any, we'll see in a few weeks or so.
Re: Cameron's FS14LS+5%
Posted: Mon Feb 07, 2022 4:51 pm
by bamaguy0
VT_Jeff wrote: ↑Mon Feb 07, 2022 4:27 pm
I may be looking for a jack plate at some point, I'll be interested to see how that all works out for you. I was a little worried about the extra weight and then the extra-extra weight from moving the engine back 4-6 inches. You've got, now, a 4-stroke 25, jackplate, SS poling platform with, if I recall, a pretty heavy deck on it, powerpole and not sure what else all on/near the transom , I'm interested to see how that all trims out. I'm moving my motor back an inch right now to make clearance for the steering cable with the poling platform and I'm wondering if that's going to sag me any, we'll see in a few weeks or so.
The 4 stroke is only ~30lbs heavier than the Tohatsu. That's why I've been looking for the newer Yamahas. In 2017 they updated and shed a bunch of weight. The jackplate trades out with the PT-35 tilt n trim bracket I removed pretty evenly at least to my "arm scale". I should weigh it to confirm...The Tohatsu hung back 4 inches as well. I thought I ordered a 4 inch jackplate, but when it came in it was all of 6. I double checked my order and sure enough I ordered 6. I was bouncing back and forth, guess I deleted the wrong one out of my cart when I pulled the trigger. So, 2 more inches...Poling platform is aluminum, but yeah it's big for the boat. The deck on it is heavier than the frame I think. It's a big foam cored deck splashed out of a mold.
We'll see how she rides. I've noticed lot of these skiffs sit aft heavy, so that I'm not super worried about. I do have some Bennet Smart Tabs(the spring ones, not the fancy hydraulic ones) sitting in a box. Might need that plus a 4 blade prop to try to get the back end to rise how I'd like.
Worst case, I may not be able to pole on the platform by myself or I bring a cooler full of water to sit on the fore deck in order to be able to.
Re: Cameron's FS14LS+5%
Posted: Mon Feb 07, 2022 4:56 pm
by VT_Jeff
bamaguy0 wrote: ↑Mon Feb 07, 2022 4:51 pm
VT_Jeff wrote: ↑Mon Feb 07, 2022 4:27 pm
I may be looking for a jack plate at some point, I'll be interested to see how that all works out for you. I was a little worried about the extra weight and then the extra-extra weight from moving the engine back 4-6 inches. You've got, now, a 4-stroke 25, jackplate, SS poling platform with, if I recall, a pretty heavy deck on it, powerpole and not sure what else all on/near the transom , I'm interested to see how that all trims out. I'm moving my motor back an inch right now to make clearance for the steering cable with the poling platform and I'm wondering if that's going to sag me any, we'll see in a few weeks or so.
The 4 stroke is only ~30lbs heavier than the Tohatsu. That's why I've been looking for the newer Yamahas. In 2017 they updated and shed a bunch of weight. The jackplate trades out with the PT-35 tilt n trim bracket I removed pretty evenly at least to my "arm scale". I should weigh it to confirm...The Tohatsu hung back 4 inches as well. I thought I ordered a 4 inch jackplate, but when it came in it was all of 6. I double checked my order and sure enough I ordered 6. I was bouncing back and forth, guess I deleted the wrong one out of my cart when I pulled the trigger. So, 2 more inches...Poling platform is aluminum, but yeah it's big for the boat. The deck on it is heavier than the frame I think. It's a big foam cored deck splashed out of a mold.
We'll see how she rides. I've noticed lot of these skiffs sit aft heavy, so that I'm not super worried about. I do have some Bennet Smart Tabs(the spring ones, not the fancy hydraulic ones) sitting in a box. Might need that plus a 4 blade prop to try to get the back end to rise how I'd like.
Worst case, I may not be able to pole on the platform by myself or I bring a cooler to sit on the fore deck in order to be able to.
I suspect it will snap onto plane easy enough, was more wondering about self-bailing at the dock and underway, at least on my boat. I had a few inches to spare before the motor moved back and the poling platform was added, we'll see what's in reserve now.
Re: Cameron's FS14LS+5%
Posted: Mon Feb 07, 2022 5:00 pm
by bamaguy0
Oh mines not setup to self-bail. I researched on that and decided it wasn't worth trying with all the stuff I wanted to try to make work on it. Deck drains to the bilge and the bilge pump should take care of it. Outlet is just below the rub rail. I'd have to be pretty swamped for it to not pump out.
Didn't quite get enough water inside to turn the pump on when I filled my livewell and it was pouring into the bilge due to the Flow rite fittings leaking. Maybe I should have let it fill up a bit more to check it.
Re: Cameron's FS14LS+5%
Posted: Mon Feb 07, 2022 6:06 pm
by Mojosmantra
Cameron - you had me a bit concerned for a long moment because I'm set up for the Vance micro plate (can't recall the model #)
- until I realized I have the F25 LWHC, tiller and sans power tilt & trim. I'm sure I double checked everything - but that was a while ago and I had to do a double take. Anyway, very interested to see how the F25 performs for you. You did make me look up the PT-35. If I understand correctly, it only serves the T&T function and not as a jack plate, right?
Re: Cameron's FS14LS+5%
Posted: Mon Feb 07, 2022 7:12 pm
by bamaguy0
Yeah if you don't have integrated PT&T then you can use a smaller jackplate for clamping motors. The PT&T upgrades the bracket and it no longer clamps. The Vance model I got is JPL4500.
PT-35 only does power tilt and trim, but the motor side is raised a small amount from the transom side, maybe an inch or so, it just isn't adjustable. I desired tilt and trim over jackplate on the initial motor selection because I've had a manual tilt motor before and tilting it up under the poling platform anytime I wanted to get skinny just sounded awful.
Re: Cameron's FS14LS+5%
Posted: Thu Feb 10, 2022 7:18 pm
by bamaguy0
Well I got the new holes overdrilled, all of the holes filled, and then drilled out the new holes again. Coat of primer was applied today.
I did pick out a PowerPole bracket. Went with the jackplate mount. Here's what it looks like temporarily installed.
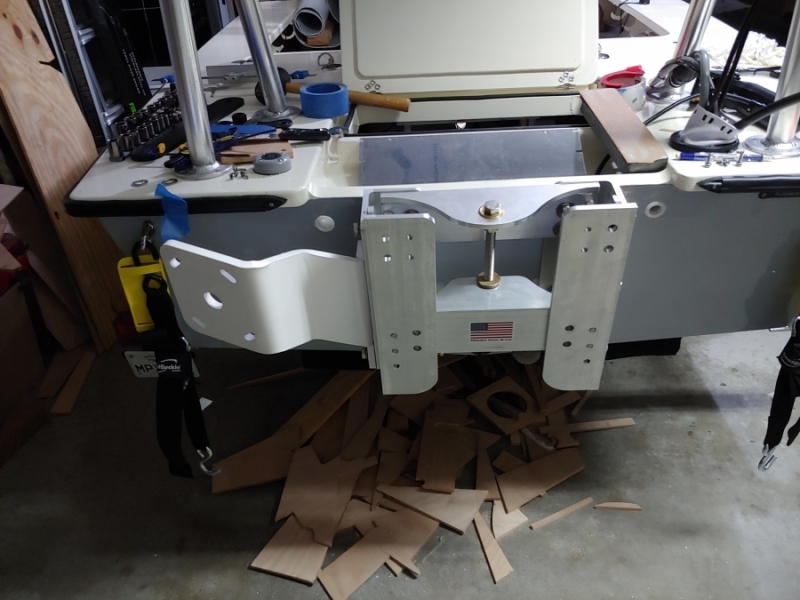
Last remaining parts for getting the motor installed should be arriving in the next few days. I'm hoping by Sunday I will be ready to mount the jackplate for good and then I can start getting the rest of the boat ready for the new engine. Gotta install a new cable harness, wire in a NMEA2000 network(to get engine data on plotter), install a fuel filter, and then she'll be good to mount. I think the plan will be to mount the engine by next weekend.
One point of concern that I will be watching closely is my steering cable length. It was
just long enough for the last setup. I'm afraid that introducing the jackplate and running it at the height I want will be too much. If I have to swap a steering cable out, the console might have to come off.
That might just be enough to send me to hydraulic...
Re: Cameron's FS14LS+5%
Posted: Thu Feb 10, 2022 9:13 pm
by VT_Jeff
Uh oh......Scope creep! I have a similar concern about my throttle and shift cable being too short, won't know until my new motor arrives sometime in early 2029 by the looks of things.....
Re: Cameron's FS14LS+5%
Posted: Thu Feb 10, 2022 10:34 pm
by Fuzz
I sure hope you are a little fella. If not I am not sure that baby will float all the stuff it is packing around
Re: Cameron's FS14LS+5%
Posted: Thu Feb 10, 2022 11:51 pm
by bamaguy0
VT_Jeff wrote: ↑Thu Feb 10, 2022 9:13 pm
Uh oh......Scope creep! I have a similar concern about my throttle and shift cable being too short, won't know until my new motor arrives sometime in early 2029 by the looks of things.....
Ooof.. That bad huh? What motor are you looking for?
Fuzz wrote: ↑Thu Feb 10, 2022 10:34 pm
I sure hope you are a little fella. If not I am not sure that baby will float all the stuff it is packing around
I definitely ain't a little fella so we'll see. Push come to shove, the Power Pole comes back off. That was one reason I was wanting to avoid bolting it straight to the transom.
Re: Cameron's FS14LS+5%
Posted: Fri Feb 11, 2022 7:24 am
by VT_Jeff
bamaguy0 wrote: ↑Thu Feb 10, 2022 11:51 pm
VT_Jeff wrote: ↑Thu Feb 10, 2022 9:13 pm
Uh oh......Scope creep! I have a similar concern about my throttle and shift cable being too short, won't know until my new motor arrives sometime in early 2029 by the looks of things.....
Ooof.. That bad huh? What motor are you looking for?
I'm trading my nearly new honda 20 tiller for a brand new honda 20 remote. It was supposed to be here in November but got pushed to spring orders, I'm trying to keep my expectations in check. I did get the remote and cables and installed those so it looks a little funky: non-functional, massive honda remote on my puny console, tiller motor. Par for the course for me. I didn't mind the weird tiller/wheel combo but Elaine was not comfortable with it and I want her to be able to use the boat on her own. That's my rationale for spending the extra money, and those things are not cheap!
Re: Cameron's FS14LS+5%
Posted: Fri Feb 11, 2022 7:31 am
by bamaguy0
Nice. There are some pretty solid aftermarket/universal remote options, but they're not much cheaper either. I was fortunate with my motor swap that I didn't have to change positions for cables on my throttle. Apparently Tohatsu and Yamaha use similar configurations and throw lengths.
I will say I have noticed some folks down this way advertising Suzuki and Yamaha 20s in stock...
I'm betting they're mostly tiller though.
Re: Cameron's FS14LS+5%
Posted: Fri Feb 11, 2022 8:01 am
by VT_Jeff
bamaguy0 wrote: ↑Fri Feb 11, 2022 7:31 am
Nice. There are some pretty solid aftermarket/universal remote options, but they're not much cheaper either. I was fortunate with my motor swap that I didn't have to change positions for cables on my throttle. Apparently Tohatsu and Yamaha use similar configurations and throw lengths.
I didn't see much available for Honda, not sure how universal they are.
bamaguy0 wrote: ↑Fri Feb 11, 2022 7:31 am
I will say I have noticed some folks down this way advertising Suzuki and Yamaha 20s in stock...
I'm betting they're mostly tiller though.
I'm kind of locked in to Honda. We spend much of the summer in a rental cottage at a marina on Lake Ontario and that marina is a Honda dealership and authorized honda service shop. The mechanic and manager are both good friends of ours, have helped me innumerably over the years yada yada, so Honda it is. Pricey and heavy but they are nice motors, no doubt.
Re: Cameron's FS14LS+5%
Posted: Fri Feb 11, 2022 8:27 am
by bamaguy0
All good reasons to stick with Honda!
I do believe my throttle has a Honda setup in the manual, but that's not very useful anymore if you already have yours in and setup. Press on!
Re: Cameron's FS14LS+5%
Posted: Fri Feb 11, 2022 4:33 pm
by bamaguy0
So mainly for curiousity sake, I weighed out everything I'm swapping in and out. Except motors...going by spec weights on those.
96 Tohatsu 25hp-115lbs
20 Yamaha 25hp-146lbs edit: it's actually 143, but I'm not worried about that difference.
Net +31lbs
PT-35 Tilt n Trim Bracket-24.5lbs
Vance JPL4500 Jackplate-25.5lbs
Net +1lbs
6ft Power Pole-16.5lbs
PP Mount-6lbs
Net +22.5lbs
All in all I will be adding ~55lbs to the back end. She will no doubt sit lower in the back, but I don't think that will be the end of the world. Only time will tell!
In other news, got a coat of paint on the transom.
In other other news, I can't recall if I alluded to this after my first outing, but there was a clear need for a grab bar while walking around. I tended to grab the chartplotter or the seat back that's only velcro'd to the console and neither are good habits to have. Found a fabricator down in Boynton Beach who makes some standard size ones and this seemed to fit pretty well. Gonna trim the edges of the mounting plate up a bit before installing, but I'm pleased with it.
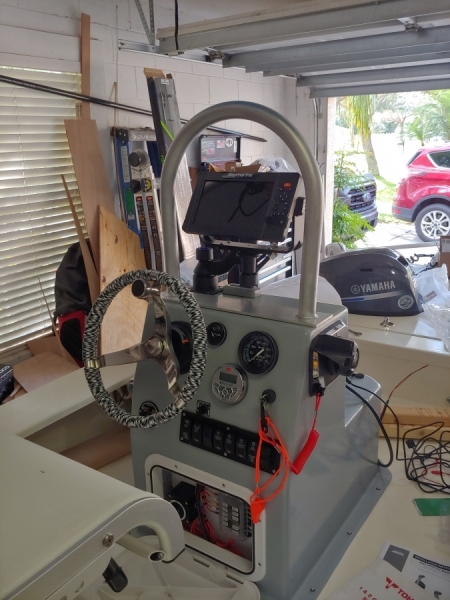
Re: Cameron's FS14LS+5%
Posted: Fri Feb 11, 2022 6:40 pm
by VT_Jeff
Love that grabrail,! Hmmmmmm.......
Re: Cameron's FS14LS+5%
Posted: Fri Feb 11, 2022 6:53 pm
by bamaguy0
This is the place! I saw them on Amazon first then found their website and the prices are a little cheaper directly thru them vs thru Amazon.
www.marinefiberglassdirect.com
Re: Cameron's FS14LS+5%
Posted: Thu Feb 17, 2022 7:50 pm
by bamaguy0
New motor is mounted! Steering cable fit! So glad that worked out.
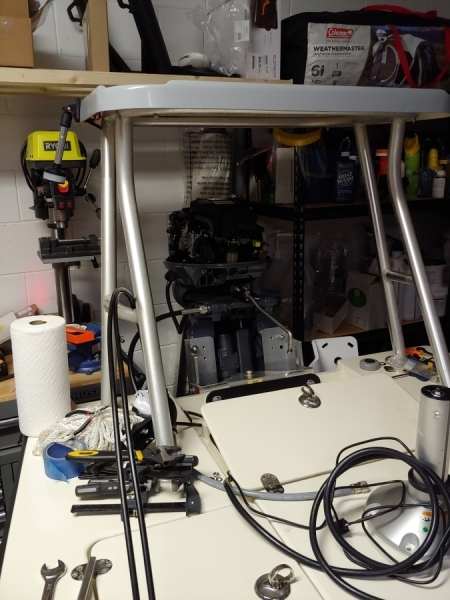
Crappy pic, but it was getting dark and the mosquito hoardes were emerging. Had to put 'er up and get out of the garage. I'll get some more photos tomorrow.
Mostly been working on adapting the Yahama main engine harness to my setup at the console. Pulled out the relay harness for the old tilt n trim as that's no longer needed. I relocated the wireless relay box to the console as well to try to simplify things a bit. I had a spare switch in my panel, so instead of having a hidden switch for the power pole if my wireless fob craps out, I'll just have a control for it at the console. The momentary on-off-on rocker and custom cover should be in tomorrow.
Tomorrow I'll tidy up the console wiring and try to empty the fuel tank of 2stroke gas as much as I can and then try to get the fuel filter installed.
Re: Cameron's FS14LS+5%
Posted: Fri Feb 18, 2022 7:36 pm
by bamaguy0
Better photos!
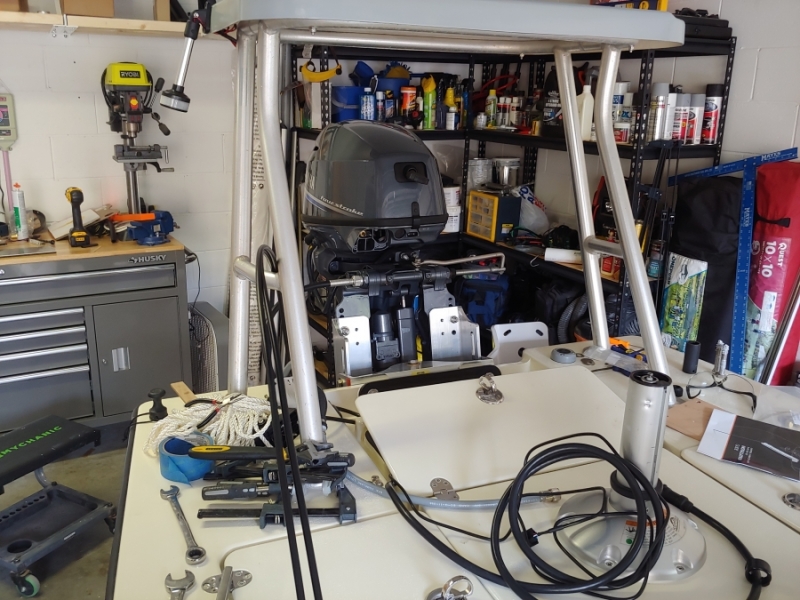
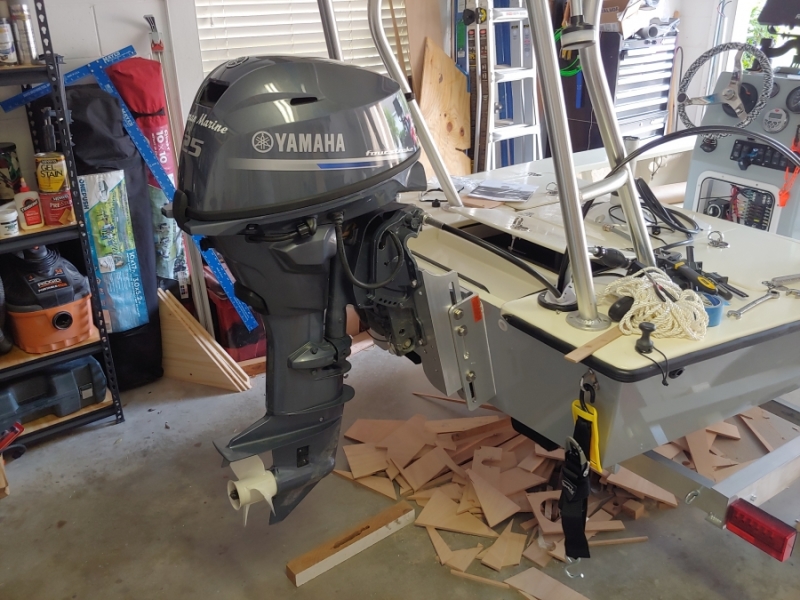
Had to work some today, but I got the fuel filter mounted and a couple other odds and ends jobs done. Fortunately, there's an inlet and outlet on each side of the housing so I glued a piece of starboard to the "knee" of the stringer at the transom and then screwed the housing into the starboard. Fuel line will route very similar to how it was already.
Apparently I ordered a non-momentary rocker switch for my Power Pole. Doh! Now to wait a few more days to get the correct switch and finish that one up.
Re: Cameron's FS14LS+5%
Posted: Sat Feb 19, 2022 8:25 am
by VT_Jeff
Lookin good Cameron!
Re: Cameron's FS14LS+5%
Posted: Sat Feb 19, 2022 9:26 am
by Mojosmantra
You probably already detailed this, but how much lift does that jack give you?
Re: Cameron's FS14LS+5%
Posted: Sat Feb 19, 2022 7:56 pm
by bamaguy0
Mojosmantra wrote: ↑Sat Feb 19, 2022 9:26 am
You probably already detailed this, but how much lift does that jack give you?
The motor side is 1.5" higher than the transom side in it's lowest, and it can lift 4" for a total of 5.5" of lift. Im probably going to use every bit of it also. I'll at least run it this way first and see how she does. With the NMEA2000 network I should be able to see water pressure and temp to make sure I'm still getting what I need. May put a Shawing on if I need to. I really want the motor as high as possible. All the photos so far are with the jackplate at it's high limit. You may notice I'm also using the highest holes on the motor bracket as well. Just eyeballing I think I have the cav plate in about the same position as the old motor with it jacked all the way up. The Tohatsu seemed to enjoy it, so we'll see what the Yamaha thinks.
Got 'er rigged up today. Everything went pretty smoothly. I bought the factory service manual for it and that had rigging instructions. That definitely helped to make sure this new fangled machine was set up the way she needed to be. Gave her a bump to make sure starter worked and she even started up! Didn't take much! The bulb wasn't even primed. That was just from the residual in the motor from the test run when I bought it. Luckily I had my chartplotter on and running so I got a flash of the NMEA2000 data before I killed it since I wasn't expecting to run it. The seller told me they estimated it had about 50 hours. Well it reported 36.1! I'll take it!
I tried tidying up the cables and wiring harnesses as much as I could. I think it looks pretty spiffy! I did have to flip the throttle cable from a pull to a push. The Seastar instructions lie! That was a pucker factor trying to get that redone without taking the entire throttle back out. Luckily throttle was the easy one. If I had to reconfigure shift I would've been in a world of hurt!
The motor even clears the poling platform by about an inch in this highest position. I don't think I could have done any better if I tried.
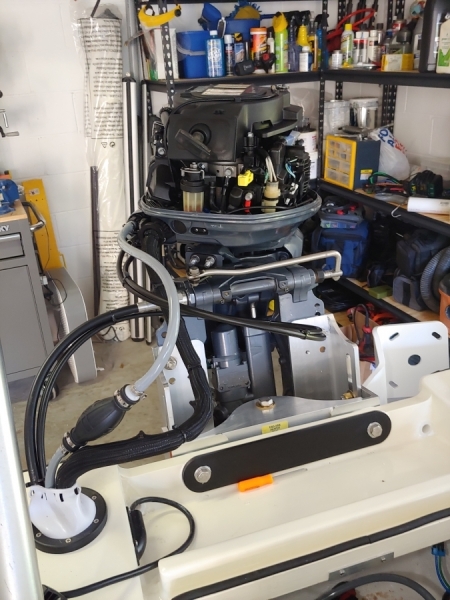
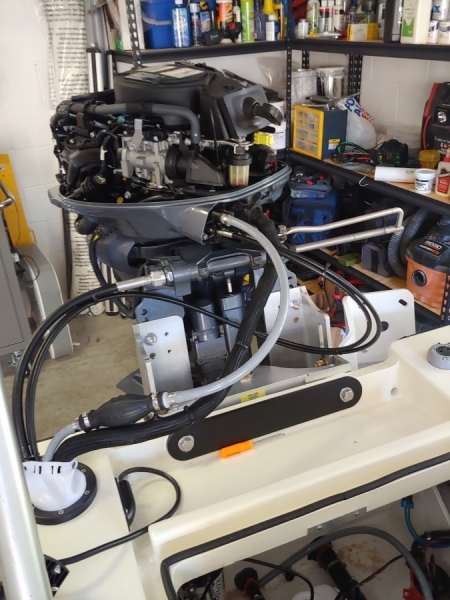

Tomorrow I need to do a little tidying up in the console and then pump out the rest of the 2stroke gas I can then take her over to Wawa and fill the tank with some fresh ethanol free gas. After that my focus is going to be on the leaky livewell fittings. I want to do that before I mount the Powerpole as that will make it more difficult to access that side of the bilge.
Re: Cameron's FS14LS+5%
Posted: Sun Feb 20, 2022 5:28 pm
by TomW1
Looking good. I do have one concern and that is with the poling platform being set behind the rear end of the end of the boat. With the FS14LS being such a small boat I would have ended even with the transom.
Tom
Re: Cameron's FS14LS+5%
Posted: Sun Feb 20, 2022 5:43 pm
by bamaguy0
TomW1 wrote: ↑Sun Feb 20, 2022 5:28 pm
Looking good. I do have one concern and that is with the poling platform being set behind the rear end of the end of the boat. With the FS14LS being such a small boat I would have ended even with the transom.
Tom
That's valid, for sure. I haven't gotten up there yet so time will tell. The platform came off another boat, not custom so if you're right I'll just have to look at getting one made and make sure it's further forward.
Re: Cameron's FS14LS+5%
Posted: Sun Feb 20, 2022 5:52 pm
by VT_Jeff
My platform also extends slightly behind my transom. We can have a wheelie contest!
Re: Cameron's FS14LS+5%
Posted: Sun Feb 20, 2022 5:56 pm
by bamaguy0
Re: Cameron's FS14LS+5%
Posted: Sun Feb 20, 2022 6:19 pm
by bamaguy0
Measuring the depth of the platform, it's 25" deep and about 8" extends aft of the deck.
Re: Cameron's FS14LS+5%
Posted: Sun Feb 20, 2022 6:27 pm
by VT_Jeff
There's some nightmare fuel!
Re: Cameron's FS14LS+5%
Posted: Sun Feb 20, 2022 6:29 pm
by VT_Jeff
bamaguy0 wrote: ↑Sun Feb 20, 2022 6:19 pm
Measuring the depth of the platform, it's 25" deep and about 8" extends aft of the deck.
OK, your 8" definitely wins whatever measuring contest we may have. Mine is probably 1-2.....

Re: Cameron's FS14LS+5%
Posted: Sun Feb 20, 2022 6:43 pm
by bamaguy0
Well I definitely won't be hanging 2 people much less 3 back there, so I'm not too concerned. Like I've said before I may be limited to getting on the platform only if I have a partner or if I load up the front with a cooler full of water or something.
Re: Cameron's FS14LS+5%
Posted: Sun Feb 20, 2022 8:31 pm
by VT_Jeff
I have 0 doubt that your machine will perform flawlessly. Looking forward to observing it first hand. The time is drawing near!
Re: Cameron's FS14LS+5%
Posted: Sun Feb 20, 2022 8:34 pm
by bamaguy0
Btw you still need to send me your plans!
Re: Cameron's FS14LS+5%
Posted: Thu Feb 24, 2022 6:53 pm
by bamaguy0
Not a lot of progress this week as dad duties have taken priority.
One of the bigger accomplishments was troubleshooting the baitwell. If you recall I believe I mentioned it leaked in the first checkout on the water. The design utilizes the FlowRite QwikLok system which are locking quick disconnects. I had a small drip at the transom side of the overflow line that was noted shortly after putting in and once I filled the baitwell up, had significant water intrusion into the bilge area. Well in setting out to troubleshoot it I removed the overflow fitting on the transom side and the tank side just fell off. I think that explains the major intrusion as I never checked the bilge area until the well was full and recirculating with extra spilling out. I filled the well half full and ran the recirc pump for a few minutes with no leaks. I then made sure to grease the overflow fittings up real good (which is what I thought all the transom side needed to fix the small drip), reconnected, then filled to the point of overflowing. I plugged the outlet at the transom to make sure the hose filled up and no leaks were present. Seems like problem solved!
I wanted to get this resolved before installing the PowerPole because of access to the bilge from outside the boat. Seems I'm on a go path to get the PowerPole hung this weekend!
Re: Cameron's FS14LS+5%
Posted: Fri Feb 25, 2022 8:42 am
by VT_Jeff
bamaguy0 wrote: ↑Thu Feb 24, 2022 6:53 pm
I removed the overflow fitting on the transom side and the tank side just fell off.
I don't know much(anything) about baitwells but that sounds like a problem!
Re: Cameron's FS14LS+5%
Posted: Fri Feb 25, 2022 8:52 am
by bamaguy0
VT_Jeff wrote: ↑Fri Feb 25, 2022 8:42 am
bamaguy0 wrote: ↑Thu Feb 24, 2022 6:53 pm
I removed the overflow fitting on the transom side and the tank side just fell off.
I don't know much(anything) about baitwells but that sounds like a problem!
Yup! That quick disconnect was a blind mate and I could have sworn that I double and triple checked it when I put all the hoses on, but mistakes happen and it was an easy one to resolve. I'll take those anyday!
Re: Cameron's FS14LS+5%
Posted: Fri Feb 25, 2022 8:12 pm
by bamaguy0
Got the Power Pole mounted today. Had a leak at one of my fittings that I thought might have been attributed to an overpressure from the pump check valves not working, but ended up just being the fittings itself. Swapped fittings and all was well. The correct momentary On-Off-On switch also came in today, so got that put in.
https://youtu.be/X0qUbYalyTA
Jackplate mount had loosened up, that's why it was shaky at the end.
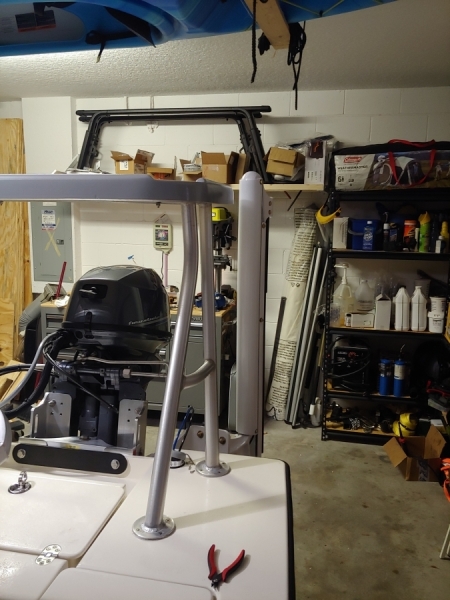
That about wraps up the big stuff. Gonna try to get the new motor fired up tomorrow for a bit, and start work on mounting the grab bar...baby permitting.
Re: Cameron's FS14LS+5%
Posted: Fri Feb 25, 2022 9:19 pm
by cape man
That is one tricked out boat right there!
Re: Cameron's FS14LS+5%
Posted: Sat Feb 26, 2022 5:07 pm
by TomW1
I totally agree. Tom
Re: Cameron's FS14LS+5%
Posted: Sat Feb 26, 2022 5:43 pm
by bamaguy0
It all looks kinda silly if I can't get fish in the boat, so we'll see. Been working on getting gear ready for the first real outing as well. Looking like that will be 3/19 at the latest while my parents are in town for the weekend to see baby girl.
Took her to the gas station today for a proper fillup to dilute any remaining 2stroke gas. Got home to fire her up and the primer bulb didn't have enough suck to fill the water separator filter I pulled the filter and filled it with what lawnmower gas I had left and had to supplement with some of the 2stroke. From what I've read it doesn't really affect much. After filling the filter and reinstalling it didn't take long to get it primed. Fired her up and ran on muffs for a few minutes. Everything seems to be looking good. NMEA2k network is reporting data to the chartplotter so that's cool. Now I just need to get going on mounting the grab bar and all the big things are done.
Re: Cameron's FS14LS+5%
Posted: Sat Feb 26, 2022 8:45 pm
by Fuzz
You might already know this but I found holding the primer bulb vertical makes a huge difference. That lets the check valve work with gravity. Learned this after two of us squeezed the bulb till our forearms cramped.
Re: Cameron's FS14LS+5%
Posted: Sat Feb 26, 2022 8:54 pm
by bamaguy0
I saw that suggestion elsewhere as well, but that still wasn't enough to get fuel into the filter initially. Seems like filling new filters with gas before installation is a common practice.
Re: Cameron's FS14LS+5%
Posted: Sun Feb 27, 2022 7:16 pm
by bamaguy0
Re: Cameron's FS14LS+5%
Posted: Sun Mar 06, 2022 5:21 pm
by bamaguy0
Got a few updates to make.
Installed guide poles for the trailer. Maybe some people think they're sissy sticks or something, but I like them and find them beneficial in numerous ways.
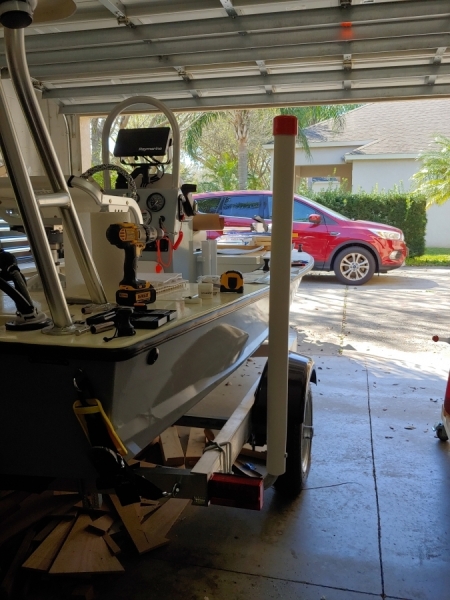
Got the foam decking finished on the hatch and deck area. I have some cut out to go on the gunwale under the deck to keep reels from slapping the sides. I'll put those on this week.
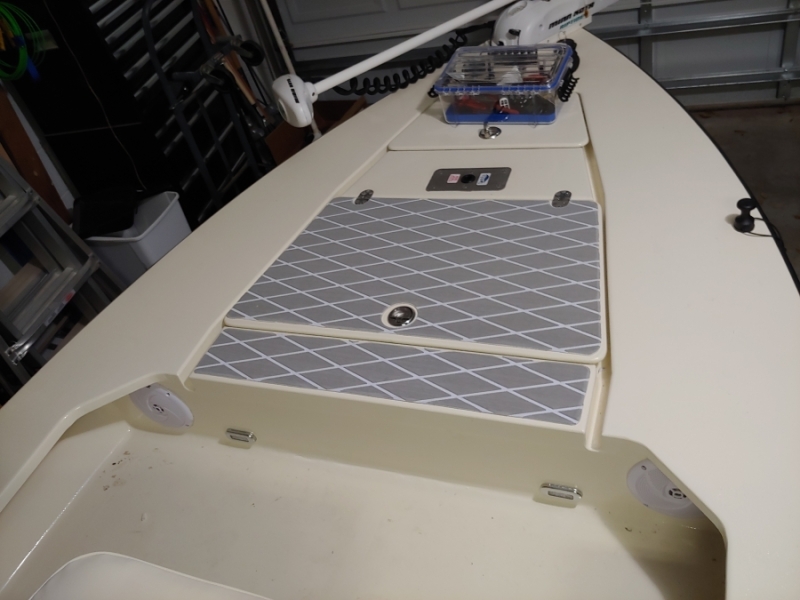
I put in some rubber tiles in the big front locker. This is to allow water to drain through from the anchor locker in front without getting whatever I have in there wet. They were 5 bucks a square at Bass Pro and I had to trim slightly to fit.
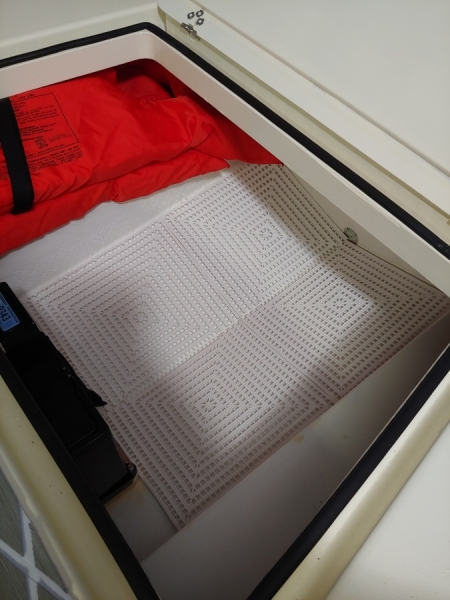
And just this afternoon I took her out to see how the new setup works. Being a fairly novice boater I used the opportunity to practice launching and retrieving alone as well. I'd say that aspect went mostly ok. Having the power pole and wireless control is pretty sweet because I can let the boat slide off, anchor down to stop the drift and then use a bow line to pull it over to the dock. Seems to work well.
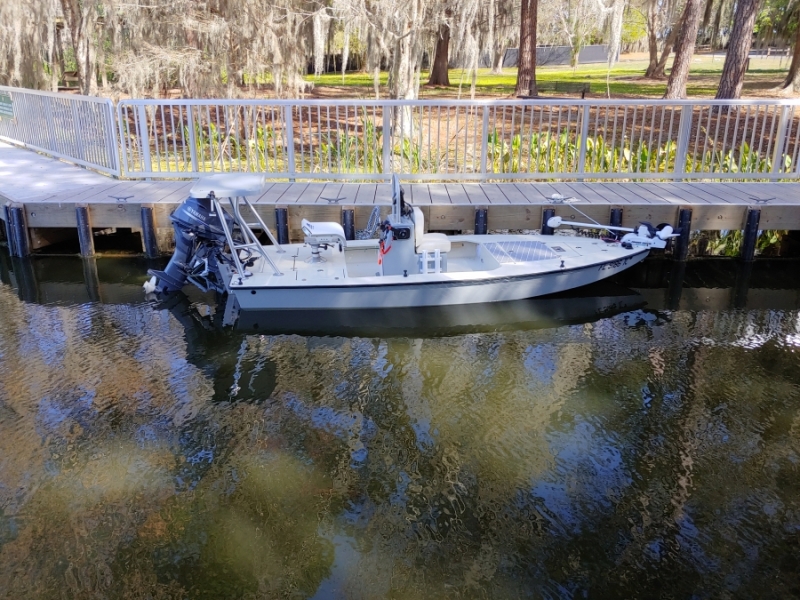
Here's how she sits in the water. I'd honestly say without me on it there's not really a noticeable difference, but once I get on board it is noticeable. I did try sitting up on the platform and without some front ballast I don't think I'll be hopping up there alone. No biggie as I may end up with a front casting platform before it's all said a done. Maybe next year.
She topped out at around 26-27 at 5700rpm. I do need to bring the motor down somewhat. The only way she ran well was with the motor trimmed all the way down and anything above that she would porpoise pretty good. We'll see if we can fix it with motor height. Worst case I have some of the Bennet Smart Tabs (spring kind) that are sitting in a box that I could install.
All in all I'm pleased! Got a few little accessories left to install, but I think I'm about ready to be taking her out on the regular...assuming the wife and baby let me get away occasionally!
Re: Cameron's FS14LS+5%
Posted: Sun Mar 06, 2022 5:52 pm
by Fuzz
Congratulations the boat looks absolutely great! Sounds like it runs pretty good too.
About the sissy sticks they can sure make life easier. I must be a total wimp as all my trailers have full length side boards. All I have to do is get the nose in close to straight and it will center it's self. Our rivers are pretty swift so messing around when loading causes problems. Even loading in salt water it is normal to be fighting wind and current with our 30 plus foot of tidal range.
Re: Cameron's FS14LS+5%
Posted: Sun Mar 06, 2022 6:52 pm
by Mojosmantra
I love “sissy sticks” (never heard that term before), but mostly for trailering/backing up - especially with a small boat that you can hardly see in the rear view mirror.
I hope the baby is a good sleeper - mine was not. That makes all the difference in the world. Your wife will be happier and let you go fishing once in a while
Re: Cameron's FS14LS+5%
Posted: Sun Mar 06, 2022 6:59 pm
by Jaysen
Sissy sticks my buttocks!!
You don’t have those things here can you’ll be picking your boat up off the side of ramp when it rolls off the side of trailer when you pull it out. The current at the ramps here pretty much guarantees missing the bunks unless you’ve a big V. It’s a blast watching folks with flat bottoms trying to center on the trailer in the parking lot.
We even put them on the lifts here. Smart money prefers getting the boat on the bunks right.

Re: Cameron's FS14LS+5%
Posted: Sun Mar 06, 2022 7:05 pm
by bamaguy0
Mojosmantra wrote: ↑Sun Mar 06, 2022 6:52 pm
I love “sissy sticks” (never heard that term before), but mostly for trailering/backing up - especially with a small boat that you can hardly see in the rear view mirror.
I hope the baby is a good sleeper - mine was not. That makes all the difference in the world. Your wife will be happier and let you go fishing once in a while
I made it up. Figured someone at some point might have called them that. You're 100% right though, they're great!
She sleeps pretty good at night. We get up twice a night pretty much to feed and take care of her. My parents are in town weekend after next so I know I'll get a day in with my dad. Weekend after that I'm meeting up with VT_Jeff as he makes his FL tour, and then my in laws come in for 3-4 weeks the week after that. Should be able to get away a time or two then as well. My FIL may want a trip in there too.
Re: Cameron's FS14LS+5%
Posted: Sun Mar 06, 2022 7:08 pm
by bamaguy0
Jaysen wrote: ↑Sun Mar 06, 2022 6:59 pm
Sissy sticks my buttocks!!
You don’t have those things here can you’ll be picking your boat up off the side of ramp when it rolls off the side of trailer when you pull it out. The current at the ramps here pretty much guarantees missing the bunks unless you’ve a big V. It’s a blast watching folks with flat bottoms trying to center on the trailer in the parking lot.
We even put them on the lifts here. Smart money prefers getting the boat on the bunks right.
I've taken a charter out of Charleston before, I've seen what that current is like. My dad has went diving in the tidal rivers around there. I think they were pretty much allowed to be down only during the time right around slack tide.
Re: Cameron's FS14LS+5%
Posted: Sun Mar 06, 2022 8:13 pm
by bamaguy0
It looks like my theory on porpoising may be off. Lowering may not help but actually hurt. Drawing the force vectors in my head I think I understand why. I saw a little bit of cavitation as well trimmed up slightly so I think dropping it some will help in that regard. I'm just gonna have to find the happy median and then treat the porpoising if still present. This is really going to only be a problem when I'm alone I suspect, but for the near term that's probably going to be the majority of my use case.
It seems the internet is keen on trim tabs. I'm guessing it seems to come up a lot when folks repower from 2strokes to heavier 4strokes.
Re: Cameron's FS14LS+5%
Posted: Mon Mar 07, 2022 12:57 am
by TomW1
If you do have proposing on a small boat like yours a Doel-Fin or similar attached to the motor should take care of it for about $50.
Tom
Re: Cameron's FS14LS+5%
Posted: Mon Mar 07, 2022 1:33 am
by Fuzz
bamaguy0 wrote: ↑Sun Mar 06, 2022 8:13 pm
It looks like my theory on porpoising may be off. Lowering may not help but actually hurt. Drawing the force vectors in my head I think I understand why. I saw a little bit of cavitation as well trimmed up slightly so I think dropping it some will help in that regard. I'm just gonna have to find the happy median and then treat the porpoising if still present. This is really going to only be a problem when I'm alone I suspect, but for the near term that's probably going to be the majority of my use case.
It seems the internet is keen on trim tabs. I'm guessing it seems to come up a lot when folks repower from 2strokes to heavier 4strokes.
When I rebuilt my Sintes 21 and added a bracket she ended up being too tail heavy. Even when I took my 240 pounds all the way to the bow it did not stop it. The only way I got control of things was with trim tabs. It needs some tab at any speed but at least now she will run 40 without porpoising.
Re: Cameron's FS14LS+5%
Posted: Wed Mar 16, 2022 9:41 pm
by bamaguy0
Been working on some final touches after the last test run.
First I finished putting down the foam decking. Got a ruler design that fit between the speakers on bulkhead B.

And I placed what I had left on the gunwale walls to prevent reels from knocking around.
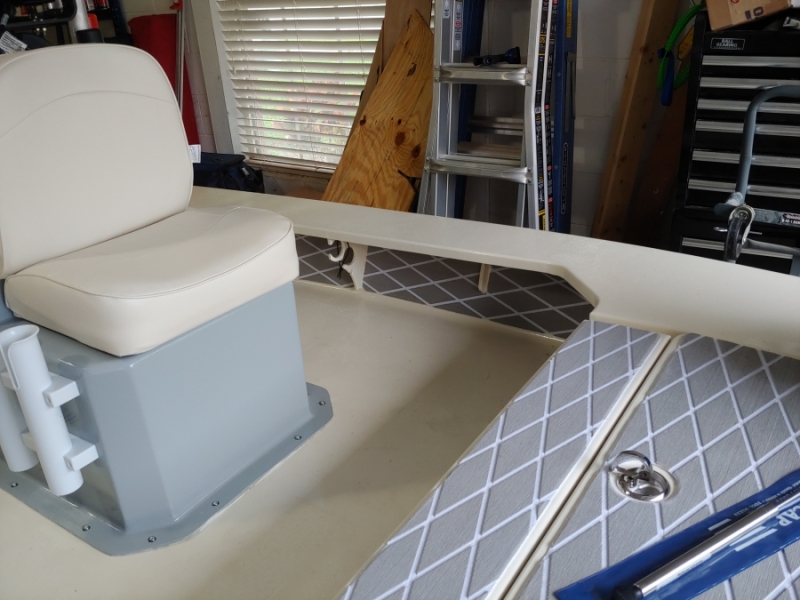
Got spring hatch supports for 3 of the hatches.
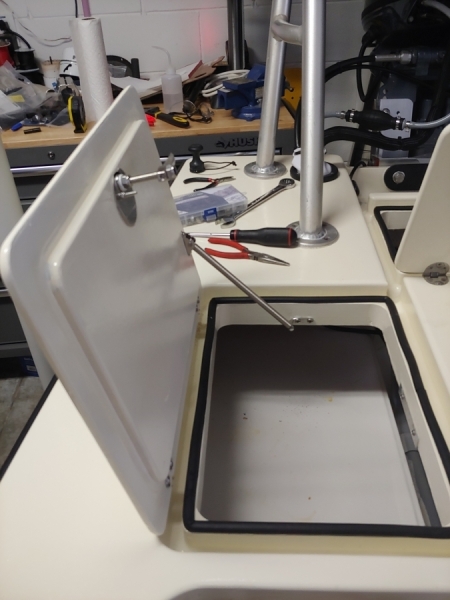
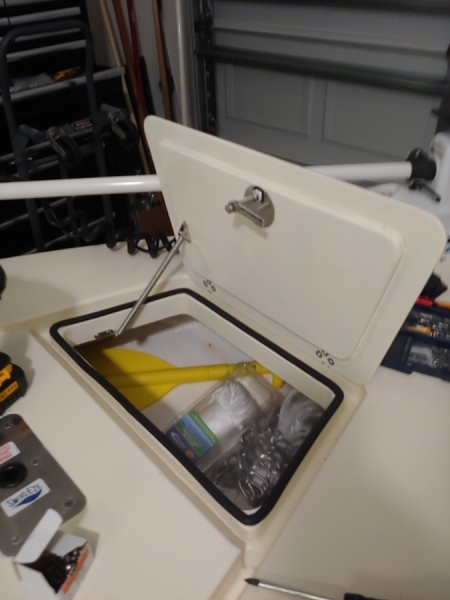
3rd being the bilge hatch.
I have a gas strut for the big fore locker hatch, but I'm waiting on the end pieces to come in. Maybe tomorrow.
And I went ahead and mounted my Bennett SLT spring loaded trim tabs.
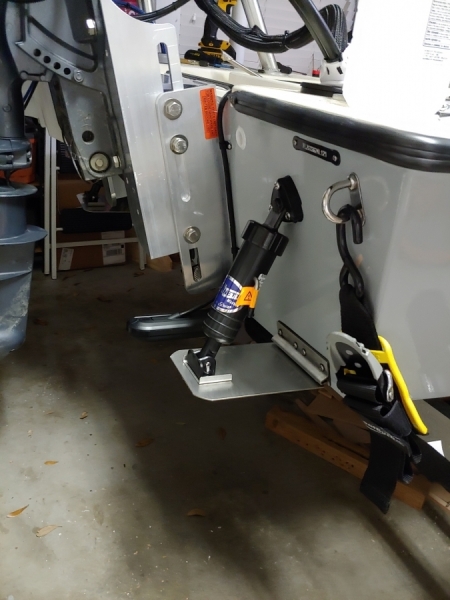
One of the other projects I had to do was after the last run I noticed a leak at the water separator fuel filter I put in. First I removed and resealed a fitting that I thought was the culprit. That didn't fix it, so I got a new kit and completely replaced it. I didn't want to spend the time troubleshooting. Finished install on that kit and no leaks to be seen. I'll double check in the morning and we'll call it good. That's why I hadn't installed the 3rd hatch support so I had more room to work in the bilge area.
I did place an order for a Permatrim cavitation plate, but after a week of waiting on any info I was told they didn't have Yamaha grey in stock. SIM Yamaha is the only US distributor and they're waiting on a stock replenishment. I cancelled the order and ordered an OZ Hydrofoil on ebay. They are both very similar aluminum plates with turn downs on the side to help keep water funneled over the prop. The nice part is they're powdercoated in typical outboard colors so it looks about as factory as it can get. It claims it will arrive in about a week even from Australia, so we'll run without for now.
I also found an aluminum Solas Amita 4 blade prop on clearance at Overton's website for dirt cheap today. Figured it was worth a shot to see how it performs. If I like it I may order a SS prop after a season or so. I'm hoping I can get the OZ Hydrofoil and 4 blade on before my trip the following weekend with VT_Jeff, but we'll see.
All in all, I think she's ready for a real trip now. My parents are coming in Friday night and my dad and I will head out to Mosquito Lagoon on Saturday and put her to the real test as well as attempt to get the first fish landed from it. I want to do some poling and see how that goes. Should be exciting even if no fish are caught.
Re: Cameron's FS14LS+5%
Posted: Thu Mar 17, 2022 6:28 am
by cape man
Hope the trim tabs do the trick!
Re: Cameron's FS14LS+5%
Posted: Thu Mar 17, 2022 2:39 pm
by TomW1
Some very nice work, also hope the Bennett tabs work for you, have heard good things about them.
Tom
Re: Cameron's FS14LS+5%
Posted: Thu Mar 17, 2022 5:19 pm
by Dan_Smullen
Man, that's all clean as a whistle. Looks great!
Re: Cameron's FS14LS+5%
Posted: Thu Mar 17, 2022 6:31 pm
by Mojosmantra
The time has come...go get some fish slime on that deck!
Re: Cameron's FS14LS+5%
Posted: Fri Mar 18, 2022 10:24 am
by VT_Jeff
I looked at hatch openers but what I found was crazy pricey, would be interested in what you got, so if they rust etc I can blame you instead!
Boat looks great, go go gadget skiff!
Re: Cameron's FS14LS+5%
Posted: Fri Mar 18, 2022 4:43 pm
by Mojosmantra
Jeff - I assume you are referring to hatch stays or gas struts. I looked at both options and yes, struts (SS) for my 3 hatches was going to run about $200. I chose to go with the spring stays since I don’t really need any lift assist and I just want the lid to stay open - and not accidentally get forced too open to where something has to give. I think I paid $15 each for the stays (304 SS) from boat outfitters (really like this company). Just received them and they appear to be high quality. I wish they were 316, but we’ll see.
Re: Cameron's FS14LS+5%
Posted: Fri Mar 18, 2022 5:13 pm
by bamaguy0
My spring stays are Sea Dog 304 stainless at about 15 each. The gas strut is Whitecap stainless body at just under 40. Then I had to find stainless gas strut brackets. Those are Sea Dog as well.
Re: Cameron's FS14LS+5%
Posted: Sat Mar 19, 2022 1:22 pm
by joe2700
For keeping a hatch open I went with the friction hinges from gemlux:
https://gemlux.com/collections/marine-f ... e-2-75x1-5
I really like them as they are 316 stainless and keep the hatch open in whatever position you leave it.
One thing to watch out for is that they will apply way more force where your hinge attaches to the hatch. For thin plywood hatches I think this would be a problem. I embedded a piece of g10 to drill and tap everywhere a hinge attaches to a hatch to spread the load.
You can see the g10 inserts in this pic of my hatches

And how it hold the hatch here

Re: Cameron's FS14LS+5%
Posted: Sat Mar 19, 2022 6:20 pm
by bamaguy0
The friction hinges are no doubt sweet. I couldn't justify the cost. All in all it wouldn't have made a hill of beans I think. Oh well. Live and learn.
Speaking of learning...I'd have to say I learned a lot today. No fish unfortunately, but we had a good time nonetheless.
Here's the view from the ramp. We put in at Biolab Boat Ramp in the Merritt Island Wildlife Refuge.
One of the reasons I decided to try the south end was the SLS rocket for Artemis I was rolled out to the pad this week. I wanted to get a sneak peek.
I was able to get up on the platform for a bit. With my dad on the front we were balanced pretty well.
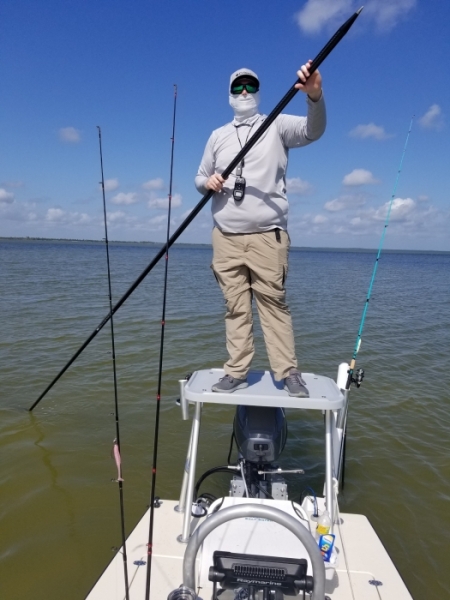
I did fall off once
Was fighting the wind a good bit with where I decided to try poling and at one point to stop the drift I was gonna put the power pole down. We'll I guess it was shallower than I thought because I didn't bump it down gently but rammed it into the sand. The back end lurched up and basically flung me off. I gracefully landed in the cockpit behind the console while grabbing on to my grab bar. My landing caused the back end of the boat to dip a bit and my dad fell backwards when that happened. He landed on the gunwale deck and almost rolled out but caught himself. We got to do this in front of a live studio audience cause I had just turned around as we had met another boat poling toward the same point.
Shortly after that we decided to call it a day and made the ride back to the ramp.
Now the findings. Since I had about a 30 min ride to where we were fishing from the ramp I had a chance to check things out while running a bit. I found one of the culprits to my cavitation issues. That's the power pole and mount. It's in the water enough as it is that I think it's causing enough of a turbulence close enough to the prop such that the prop doesn't get adequate bite. I have basically zero hole shot but if I ease into it I can get up on plane and run it OK. I can raise it about 1-1.5 inches I think on the jackplate so I'll do that and see if that helps. I think the OZHydrofoil cavitation plate I have on order will help as well and try to keep water funneled over the prop.
Hatches seemed to seal ok and the gutters shedded plenty of water on the trip. We had some rough water going out and then coming back the cross wind made sure we caught every bit of the spray the boat was putting out. Never accumulated enough to activate the bilge, but I can definitely see the allure of self bailing now.
I think the highest speed I saw was 22.5 but I was not trying for speed. That was definitely not WOT, but about the most I was willing to get in unfamiliar territory.
Re: Cameron's FS14LS+5%
Posted: Sun Mar 20, 2022 5:14 pm
by bamaguy0
I shifted the power pole mount up. Ended up with a about a 3 inch shift. My Solas Amita 4 also came in. It's a 10x11 4 blader. Put it on and headed to the local lake for a trial run. The power pole bracket is out of the water now so no big cavitation from that even with just me in the boat.
By myself I was able to hit 26, nearly 27mph @ 5800rpm and no porpoising. I could also trim the motor up so it was running much more efficiently with no porpoising. Seems some combination of the tweaks have helped with that. With my dad on we hit 23 almost 24 at about 5400rpm.
Looking at the motor height while on plane, I think it's pretty good. I can just see the top of the cavitation plate with it on plane and trimmed out.
While riding around I took a run over to one of the canal that connects the lake we were on with another. As with most canals it's slow speed, minimum wake. Well a boat coming the other way obviously doesn't know what that means...maybe they just can't read, but their wake was bigger than the waves I was hitting yesterday. Turned into them and took the first one, but I couldn't get the bow up by the second. Took the entire wake over the deck. Found out my bilge pump works though!
Re: Cameron's FS14LS+5%
Posted: Sun Mar 20, 2022 6:32 pm
by TomW1
bamaguy0 wrote: ↑Sun Mar 20, 2022 5:14 pm
I shifted the power pole mount up. Ended up with a about a 3 inch shift. My Solas Amita 4 also came in. It's a 10x11 4 blader. Put it on and headed to the local lake for a trial run. The power pole bracket is out of the water now so no big cavitation from that even with just me in the boat.
By myself I was able to hit 26, nearly 27mph @ 5800rpm and no porpoising. I could also trim the motor up so it was running much more efficiently with no porpoising. Seems some combination of the tweaks have helped with that. With my dad on we hit 23 almost 24 at about 5400rpm.
Looking at the motor height while on plane, I think it's pretty good. I can just see the top of the cavitation plate with it on plane and trimmed out.
While riding around I took a run over to one of the canal that connects the lake we were on with another. As with most canals it's slow speed, minimum wake. Well a boat coming the other way obviously doesn't know what that means...maybe they just can't read, but their wake was bigger than the waves I was hitting yesterday. Turned into them and took the first one, but I couldn't get the bow up by the second. Took the entire wake over the deck. Found out my bilge pump works though!
Nice report. The only thing a SS prop will gain you is 3-4mph in top speed. Since you don't run at top speed all the time it may or not be worth it. Those Amita 4 blades are very efficient, somewhere between a high end aluminum and a SS. How are the trim tabs working for you?
Tom
Re: Cameron's FS14LS+5%
Posted: Sun Mar 20, 2022 7:19 pm
by bamaguy0
TomW1 wrote: ↑Sun Mar 20, 2022 6:32 pm
Nice report. The only thing a SS prop will gain you is 3-4mph in top speed. Since you don't run at top speed all the time it may or not be worth it. Those Amita 4 blades are very efficient, somewhere between a high end aluminum and a SS. How are the trim tabs working for you?
Tom
I do want to go to SS eventually mainly for durability. Where I plan to fish I think I'll be doing a lot of learning the ways around by feeling...
Overton's had this particular size and pitch Amita 4 on clearance for 45 bucks I think it was. Seemed like a no brainer to get to try a new prop out for that cheap.
It seems some combination of the trim tabs and the 4 blade prop has solved my porpoising problem, so I'd say they're doing good. Remember they're the SLT tabs so only spring loaded, but I do have them set in the weakest position of the 3 setting options.
Re: Cameron's FS14LS+5%
Posted: Tue Mar 22, 2022 10:18 am
by VT_Jeff
Mojosmantra wrote: ↑Fri Mar 18, 2022 4:43 pm
Jeff - I assume you are referring to hatch stays or gas struts. I looked at both options and yes, struts (SS) for my 3 hatches was going to run about $200. I chose to go with the spring stays since I don’t really need any lift assist and I just want the lid to stay open - and not accidentally get forced too open to where something has to give. I think I paid $15 each for the stays (304 SS) from boat outfitters (really like this company). Just received them and they appear to be high quality. I wish they were 316, but we’ll see.
Thanks Trent, appreciate that, I'll start hunting those down. That's exactly what I wanted, just something to hold them open, no lift-assist needed.
Re: Cameron's FS14LS+5%
Posted: Tue Mar 22, 2022 5:49 pm
by TomW1
bamaguy0 wrote: ↑Sun Mar 20, 2022 7:19 pm
TomW1 wrote: ↑Sun Mar 20, 2022 6:32 pm
Nice report. The only thing a SS prop will gain you is 3-4mph in top speed. Since you don't run at top speed all the time it may or not be worth it. Those Amita 4 blades are very efficient, somewhere between a high end aluminum and a SS. How are the trim tabs working for you?
Tom
I do want to go to SS eventually mainly for durability. Where I plan to fish I think I'll be doing a lot of learning the ways around by feeling...
Overton's had this particular size and pitch Amita 4 on clearance for 45 bucks I think it was. Seemed like a no brainer to get to try a new prop out for that cheap.
It seems some combination of the trim tabs and the 4 blade prop has solved my porpoising problem, so I'd say they're doing good. Remember they're the SLT tabs so only spring loaded, but I do have them set in the weakest position of the 3 setting options.
Okay when you are ready to go to a SS let me know and I will run it through my prop calc. You should only need to change pitch by an inch or two. And you might want to change the tabs to the med. setting for the increased speed. But lets not worry about this now.
Tom
Re: Cameron's FS14LS+5%
Posted: Tue Mar 29, 2022 6:42 pm
by Mojosmantra
bamaguy0 wrote: ↑Fri Dec 10, 2021 1:19 pm
Yeah so it was pretty straight forward.
I filled out
HSMV 87002 and brought my reciepts. Basically they want the HULL, DECKS/RIGGING, and MACHINERY/ENGINES filled out to correlate with the vendors of the reciepts you've brought. Basically all the receipts prove is you paid tax on the materials that you claim went into the fabrication of the hull. I didn't have to submit it to FWC for inspection because it is under 16ft. No photos had to be provided.
I did leave engine blank and stated that I haven't decided on a motor yet. I have one, but I've been on the lookout for a newer (than 1996) model 2 stroke Yamaha. They questioned me on that a bit because they said they could not proceed without knowing the engine type and fuel. I said that it would most definitely be a gas outboard and there was no way it could be anything else. They accepted that and moved forward.
The guidance states to bring HSMV 82040 as well, and I did, but they did not use my copy because they already have the necessary info from the first form.
All in all it was pretty straight forward. This was in Orange County, FL, so of course your mileage may vary.
Hey Cameron - I'm filling out this paperwork now. Form 87002 indicates that receipts must contain the signature of the seller. That makes no sense. Did you have to provide that? How many receipts did you provide? My filing system (the console of my truck) was recently broken into and for some reason, they took all my receipts. I do have the original "kit" receipt from BBC. I assume that, since you didn't have a motor at the time of your registration, you didn't need a receipt for that, correct?
Interesting that they didn't require form 82040 - that is a much more complicated form.
Re: Cameron's FS14LS+5%
Posted: Tue Mar 29, 2022 6:53 pm
by bamaguy0
They didn't say anything about signatures. I used mostly printouts of order confirmation emails. Just made sure it showed who it was from and showed taxes paid. That's what they're looking for.
I definitely did not provide every single reciept, but the bigger ticket items like plywood, fiberglass, resin, and paint. The things that truly make up the hull and deck are what I used.
Regarding the motor they accepted my statement saying that it was definitely set up for a gas outboard and that was good enough for filling out that field on the title. If you have a reciept or bill of sale I would definitely include it.
82040 will be filled out by them based on the information in the completed 87002 and the hull number they assign you.
Re: Cameron's FS14LS+5%
Posted: Tue Mar 29, 2022 7:49 pm
by Mojosmantra
Did you list Amazon as the "Deck/Rigging" supplier?
Re: Cameron's FS14LS+5%
Posted: Tue Mar 29, 2022 7:53 pm
by bamaguy0
Lol nope! Just picked one of my reciepts I had printed out and told them it was for that. From my standpoint I had stuff to cover the deck, and the fact it has bow eyes or cleats or hinges and latches makes no difference for the purposes of titling and registering a functional hull.
My advice is to take the bare minimum information that you feel comfortable saying constitutes the boat you just built. If they push back you can obviously go to the nth degree, but I really didn't see them caring that much.
There are people retitling Gheenoes without titles as homebuilts everyday. If they're not stopping that, then not having every 5 dollar Amazon reciept isn't the end of the world.
Re: Cameron's FS14LS+5%
Posted: Sun May 08, 2022 5:23 pm
by bamaguy0
Well it's been a while since I posted anything. I've been able to make 2 trips out since my last postings. Once by myself to Mosquito Lagoon and then the other to meet up with VT_Jeff out at Yankeetown. The boat has performed flawlessly so far, the only thing lacking is my ability to find fish!
I did decide to switch up depth finders from the Raymarine Element unit to a Lowrance Elite Ti2. This was driven by the desire to get the Florida Marine Tracks map card to help with navigating the shallows. I'll say this is money well spent so far. Especially since I am new to this game and don't know my way around very well. I will definitely make sure any boat I have hereon has a Lowrance or Simrad unit so I can run those maps.
Aside from the charts, I am quite pleased with how everything is performing. I can't really think of anything else that I would change. Maybe make it bigger, but more on that later...

My console seat cushion attachments have failed me. They popped loose on the trip with my dad and I guess it messed up the "velcro" type attachment. Instead of hook and loop sides they're both mushroom tips that interlock. Well some got smashed down in the process so it doesnt secure anymore. I think longer strips vs the 1" dia dots to give it more holding power will be the key there.
Re: Cameron's FS14LS+5%
Posted: Sun May 08, 2022 6:33 pm
by bamaguy0
Don't have a lot of new photos except what Jeff took of me when I met him at Yankeetown.
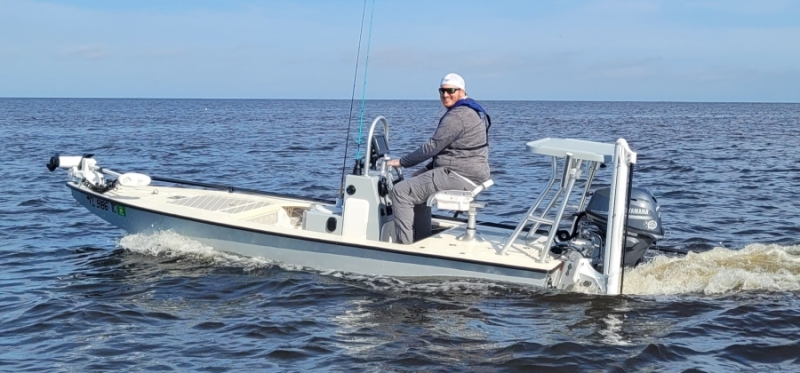
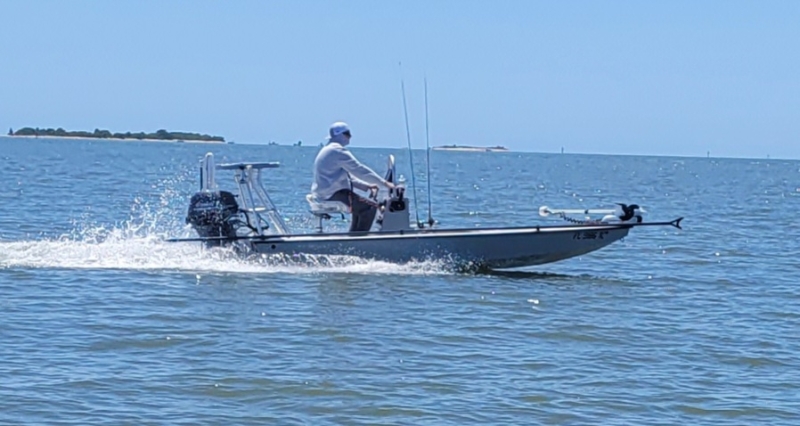
Here's a video I took on the way back to the ramp. Tried panning back to show Jeff in trail.
https://youtu.be/ZA5mdKQoW2c
Re: Cameron's FS14LS+5%
Posted: Sun May 08, 2022 9:40 pm
by Mojosmantra
I have the Florida Marine Tracks on the bay boat - one of the best Invesments I ever made.
Re: Cameron's FS14LS+5%
Posted: Mon May 09, 2022 8:18 am
by bamaguy0
Mojosmantra wrote: ↑Sun May 08, 2022 9:40 pm
I have the Florida Marine Tracks on the bay boat - one of the best Invesments I ever made.
Yeah no doubt! I first started looking to see what map cards I could get with the Raymarine that had satellite images and just use that, but then I found their youtube channel and they walked around the entire state showing the differences between their charts and Navionics and I think C-Maps. That sold me in an instant! The differences in satellite image resolution and even nav marker placements were astounding.
When I was out with Jeff I made one weird zig zag track and he pulled up beside me after we got in a big open space and asked me if we ran over an island. Nope we took a cut that ran through one. At high tide it didn't matter much, but you could tell how tight it was at low tide. Jeff's chart just showed it as just one island (more like a sandbar).
Re: Cameron's FS14LS+5%
Posted: Thu Jul 07, 2022 1:09 pm
by bamaguy0
Well I was finally able to take the boat out since meeting up with VT_Jeff.
I took some time off work this week so I made a short trip out to Mosquito Lagoon and was able to get some slime on the boat! Landed my first redfish from the FS14LS! Made the near 100degree temps totally worth it!
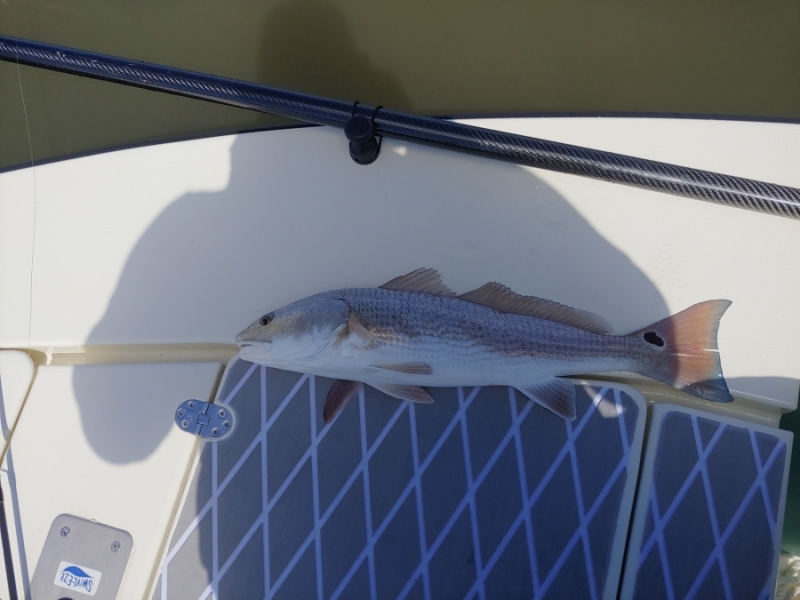
I saw and spooked a handful more. I definitely have some work to do on casting accuracy.
Re: Cameron's FS14LS+5%
Posted: Thu Jul 07, 2022 1:11 pm
by Jeff
Congrats!! More fish will follow!! Jeff
Re: Cameron's FS14LS+5%
Posted: Thu Jul 07, 2022 4:16 pm
by TomW1
Nice fish. Take some targets like jugs out in the back yard and cast to them with a weight of the lure you use, you'll soon improve. I have had to do that for every rod & reel change I have made. Tom
Re: Cameron's FS14LS+5%
Posted: Mon Aug 08, 2022 7:22 am
by bamaguy0
Well I decided to embark on a new project. Little smaller scale.
I've been interested in the carbon fiber casting platforms, but the $800-$1000 price tag has been less interesting. Most standard sizes I've seen have been a bit big unless I place it further back on the deck and not right up front.
So I came up with the size that would work for me. It's 24" wide for the aft 6" then the forward 12" tapers to 16" wide in the front. Placing the front legs on the fore hatch gets me where I want and still clears the trolling motor. I made a mockup out of some cardboard, but that's not very exciting.
I decided I was gonna to whole hog with this and make a plug, then a mold, and then make parts. If the first couple platforms turn out well I may start marketing them
Started with 2 pieces of 1" thick insulation project panels (24" square) and glued them together with some 3M 77 spray adhesive, then cut out the rough shape.
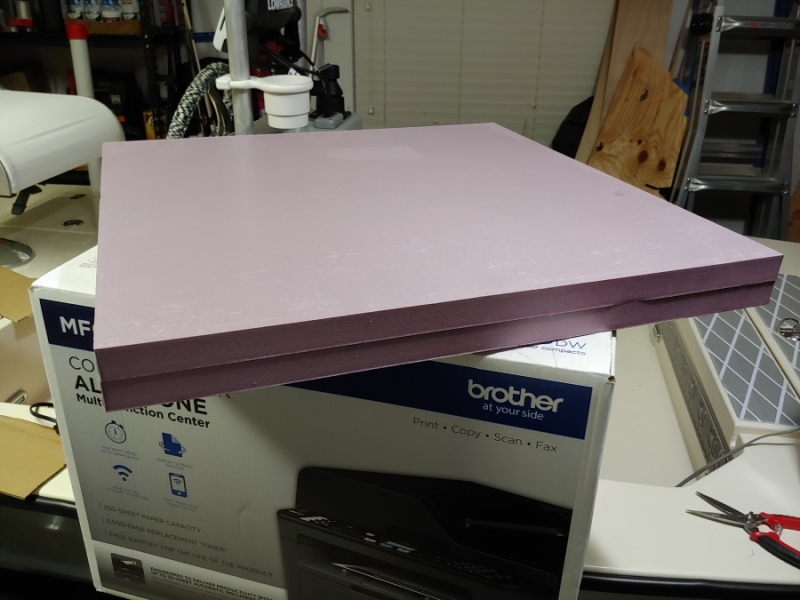
From there I rounded the corners by hand and then used a 3/4" router bit to round the top edge down. After that, a little hand sanding to smooth everything out and she was ready for glass.

Having some epoxy and 6oz woven glass left over from the boat project, I covered the top of the foam.
Up next is to trim the edges and then give it a once over sanding. From there I'll fair it out, couple coats of primer, more sanding, and then it should be ready to become a mold.
Re: Cameron's FS14LS+5%
Posted: Mon Aug 08, 2022 8:06 am
by wpstarling
Ooh this looks fun, can't wait to see how it goes. Good luck with it
Re: Cameron's FS14LS+5%
Posted: Sat Sep 10, 2022 6:35 pm
by bamaguy0
Got my dad a small Mosquito Lagoon Red while my parents visited over Labor Day weekend. We found plenty of grass but it was later in the day. Gonna have to go back to those areas once it cools off.
Re: Cameron's FS14LS+5%
Posted: Sun Sep 11, 2022 2:24 am
by Fuzz
Good move taking dad fishing! Seems he raised you right
Re: Cameron's FS14LS+5%
Posted: Sun Sep 11, 2022 3:38 am
by bamaguy0
I also took my father in law out two weeks before that. No fish on that trip. I’ve been going somewhere different each trip trying to learn about different areas of the Lagoon and where fish may hold. Saw plenty, just no bites.
My parents live near Lake Guntersville in Alabama and my dad has a Triton bass boat. We try to go anytime I go to visit. It’s nice being able to reciprocate that now.
Re: Cameron's FS14LS+5%
Posted: Sun Sep 11, 2022 11:55 am
by cape man
My father is gone but one of my best days was taking him out for the first time on the boat I built. We caught our limit of Mangrove snapper his favorite fish. Good times.
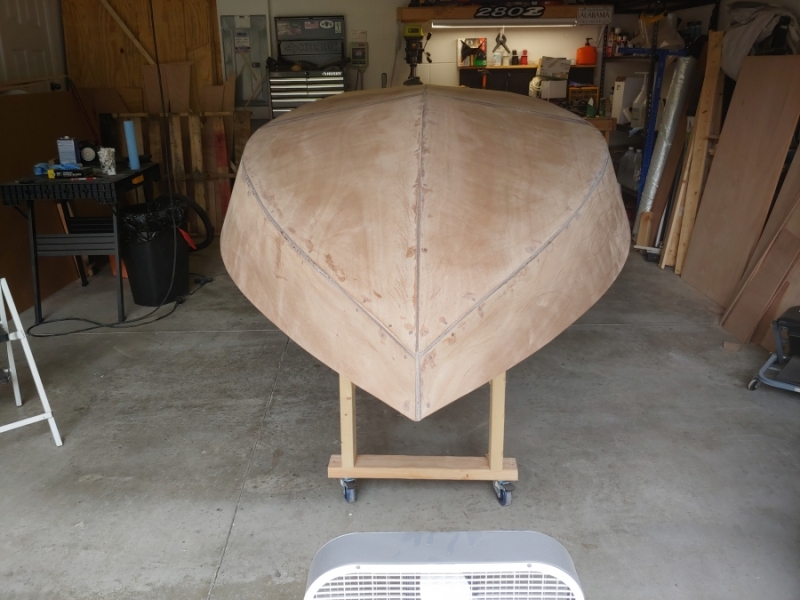
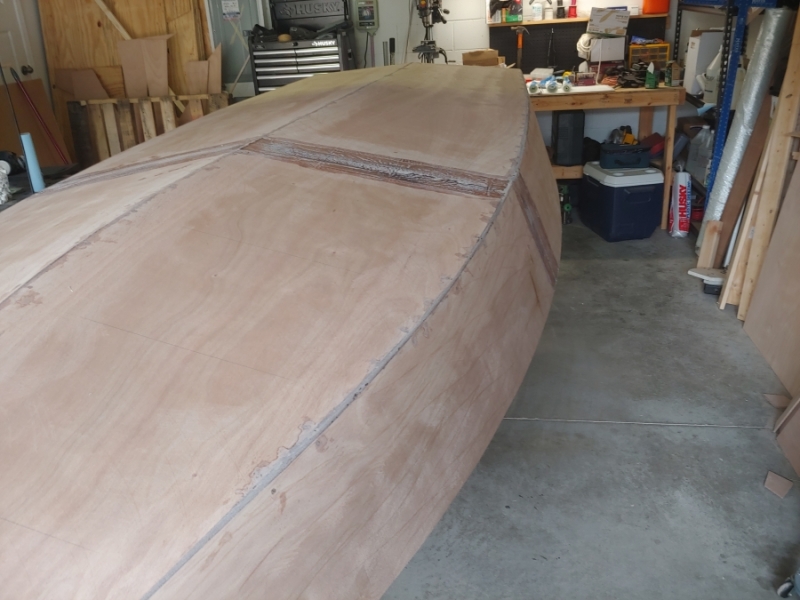
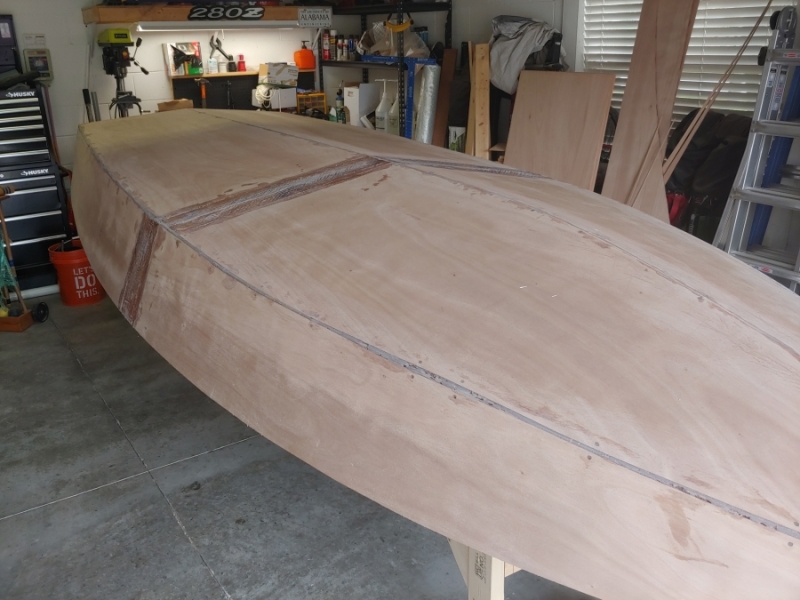
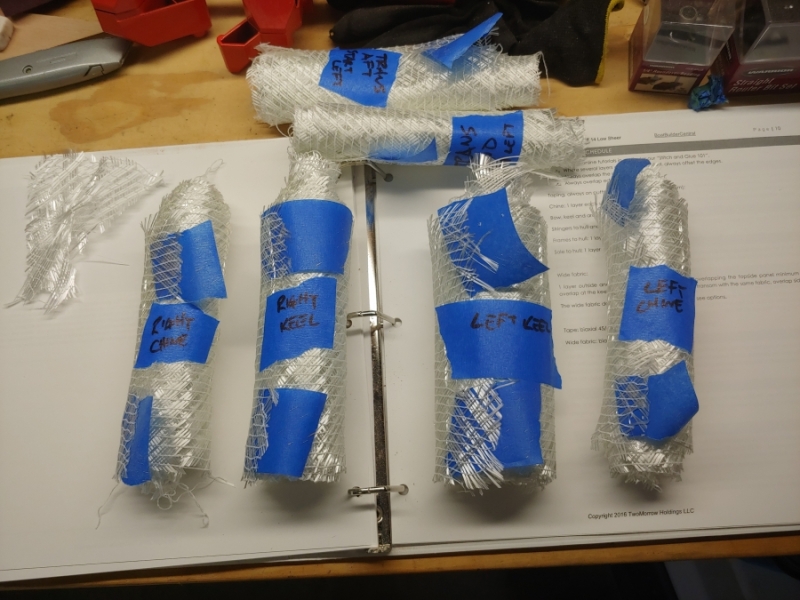
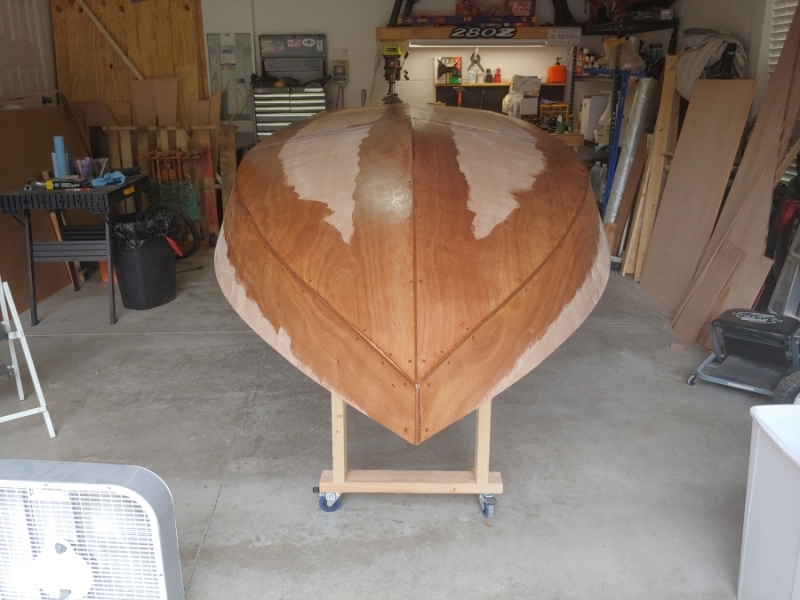
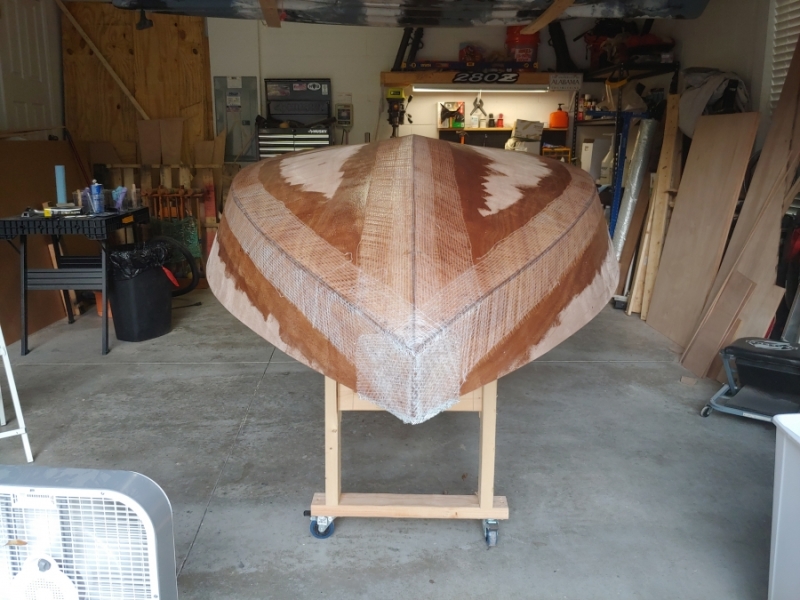
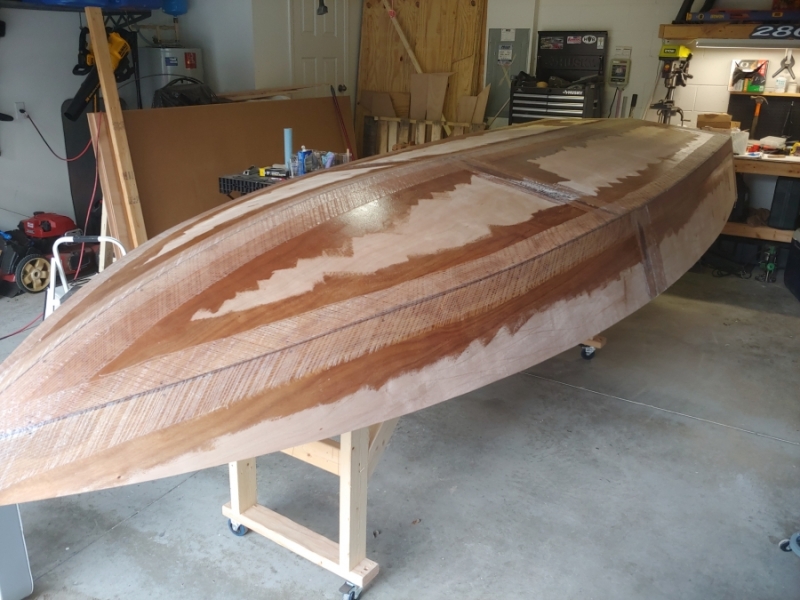
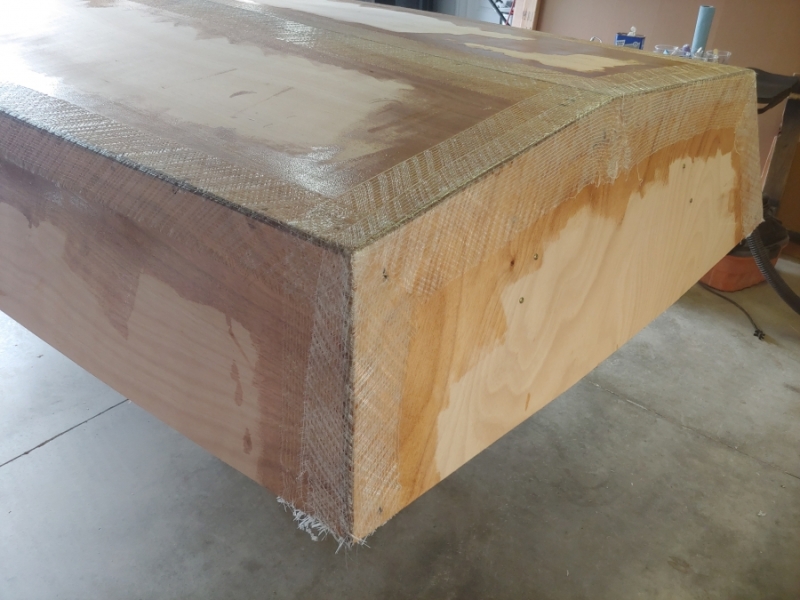
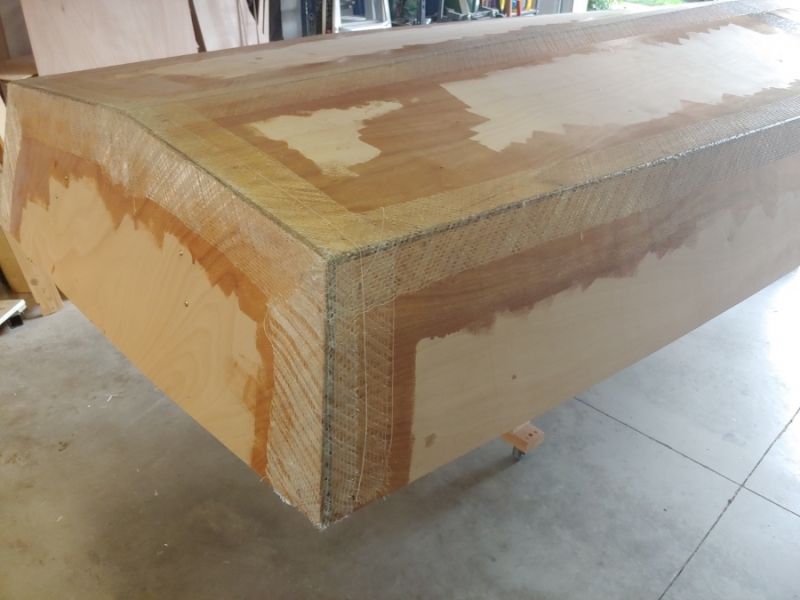
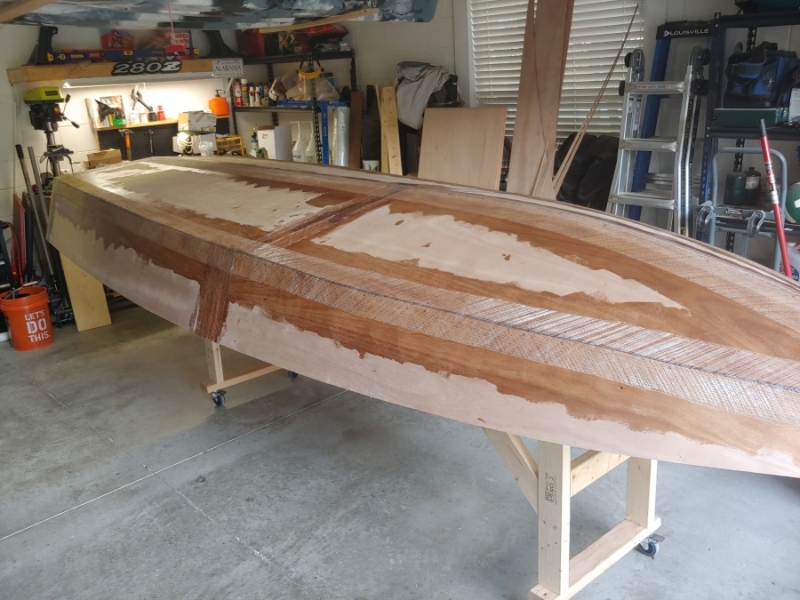
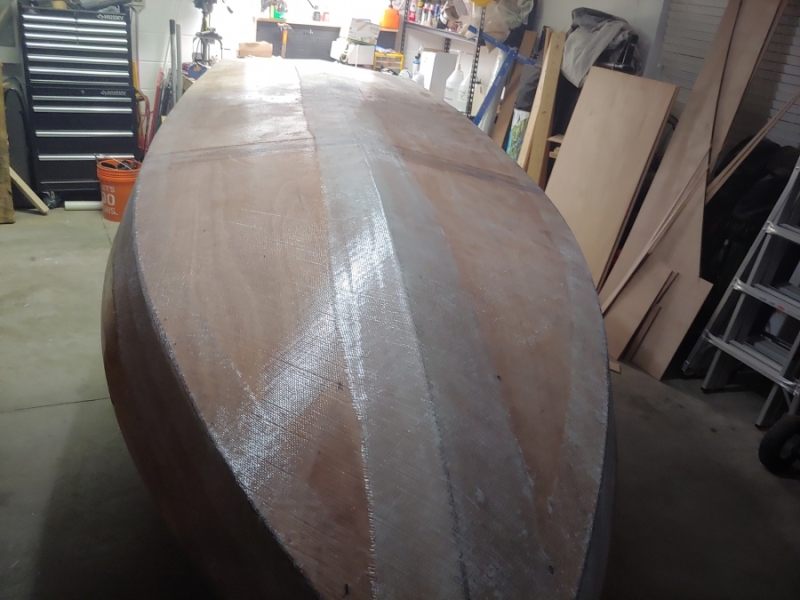
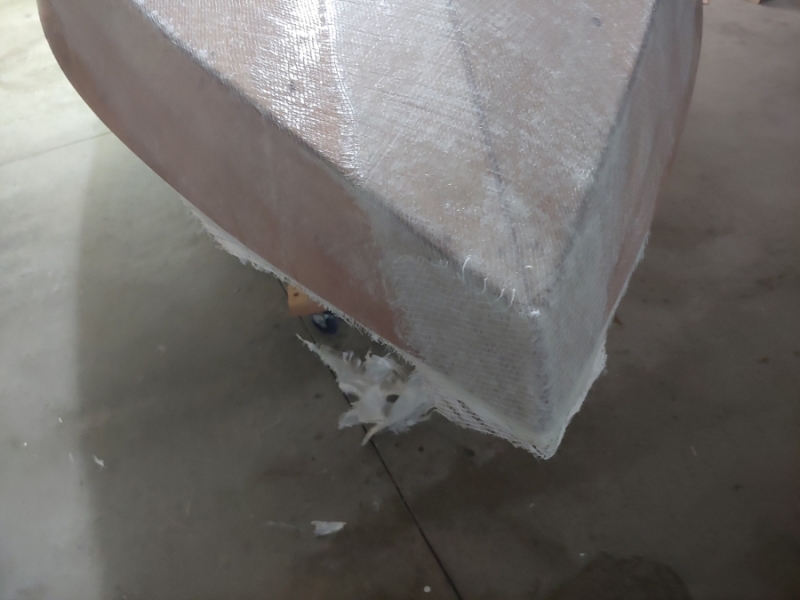
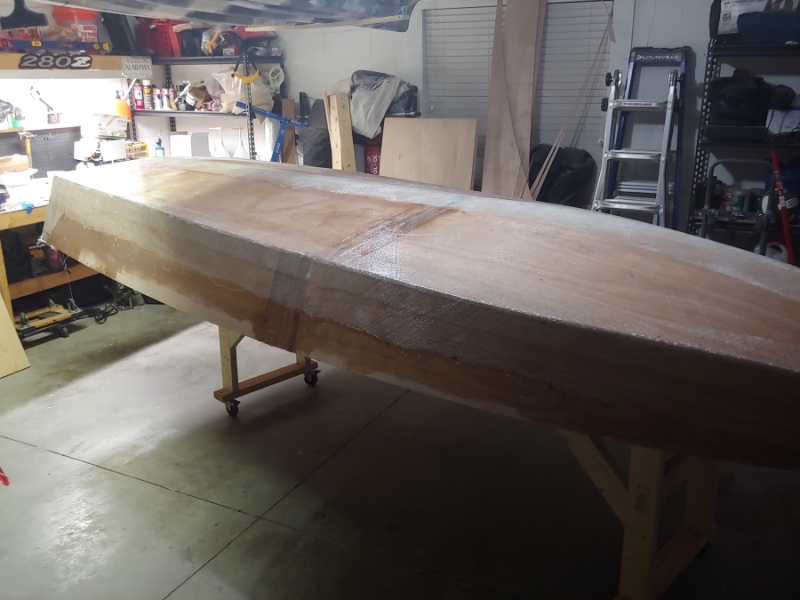
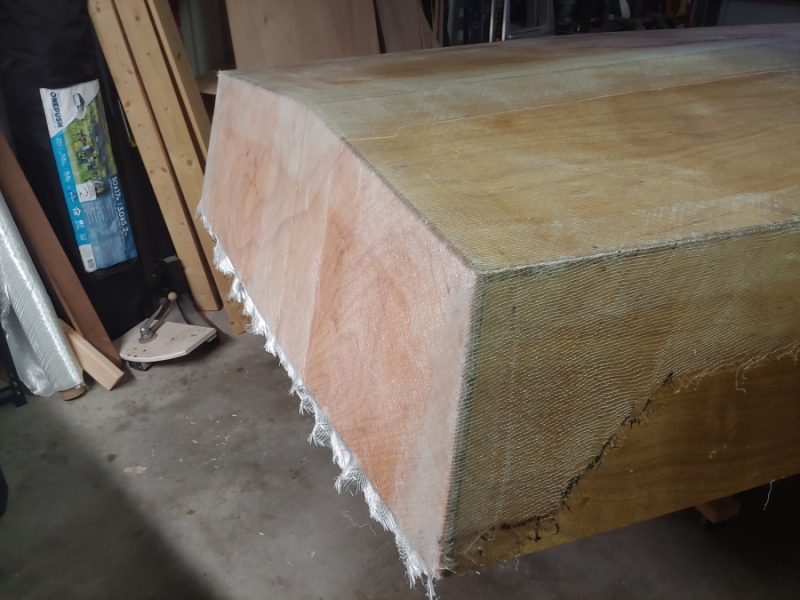
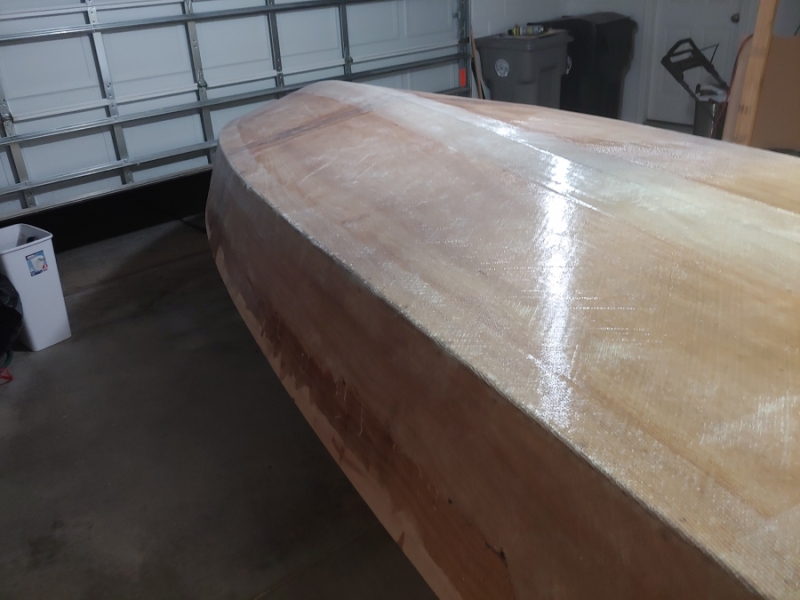
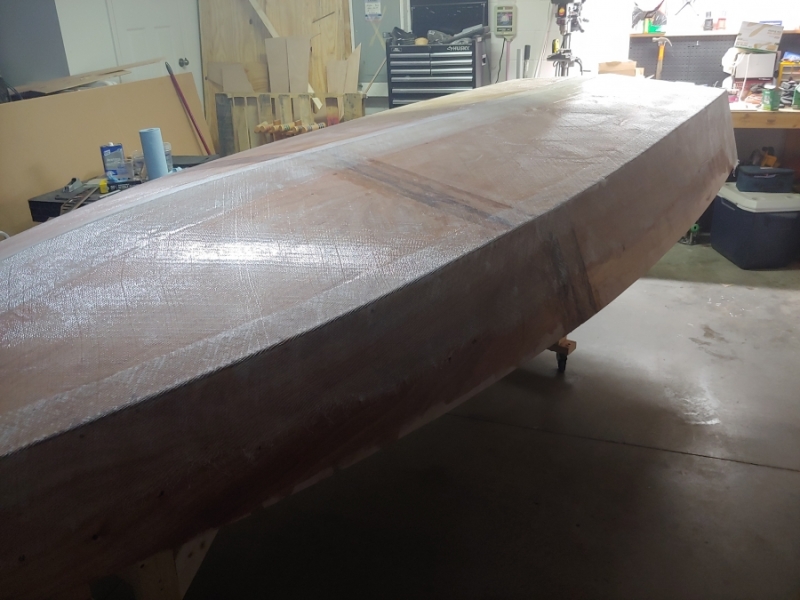
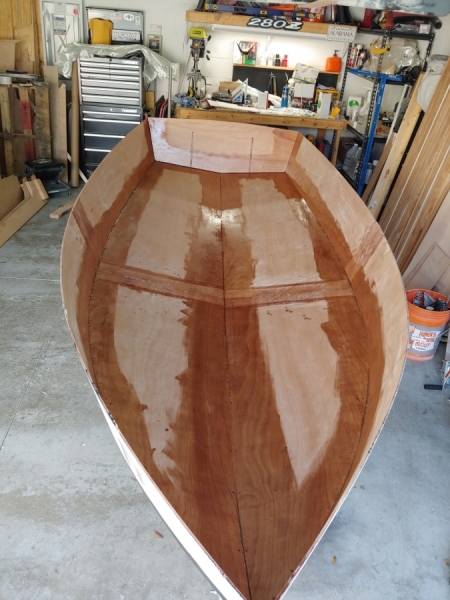
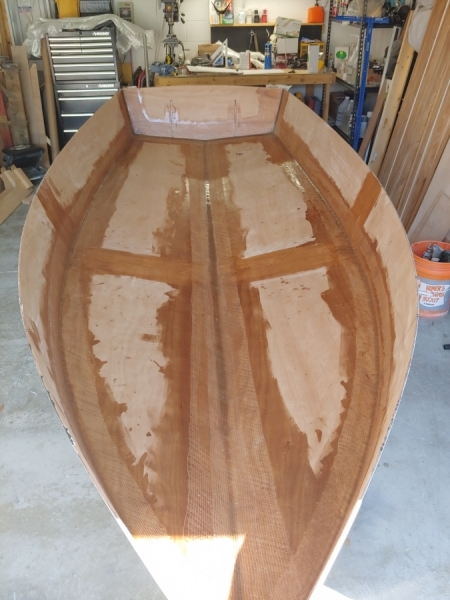
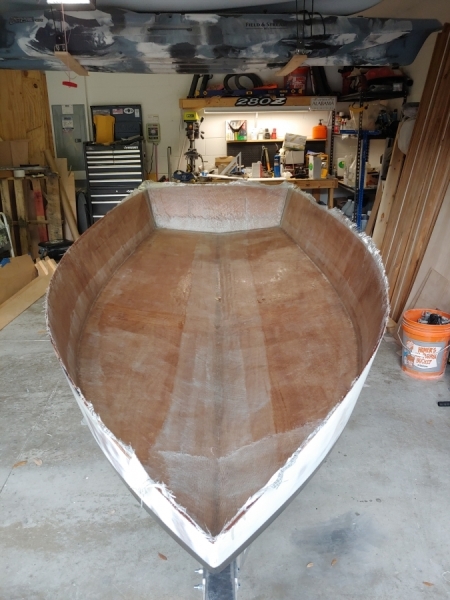
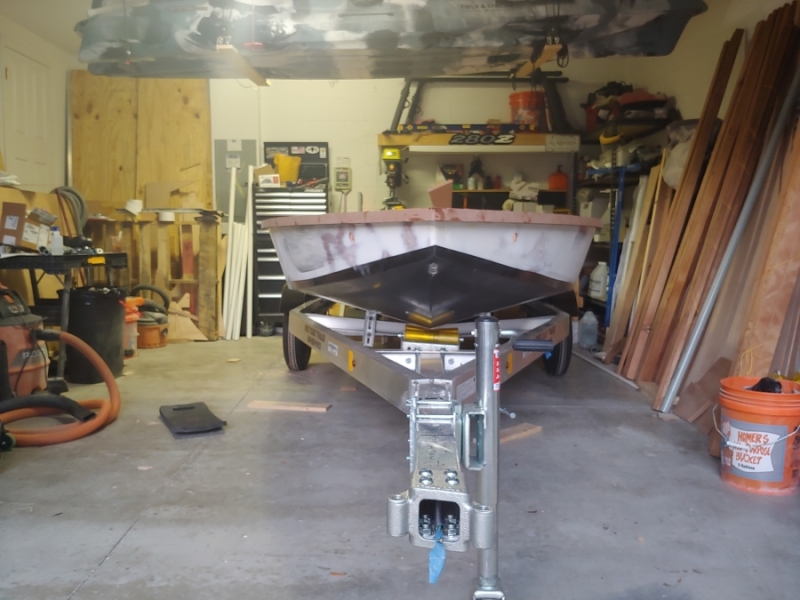

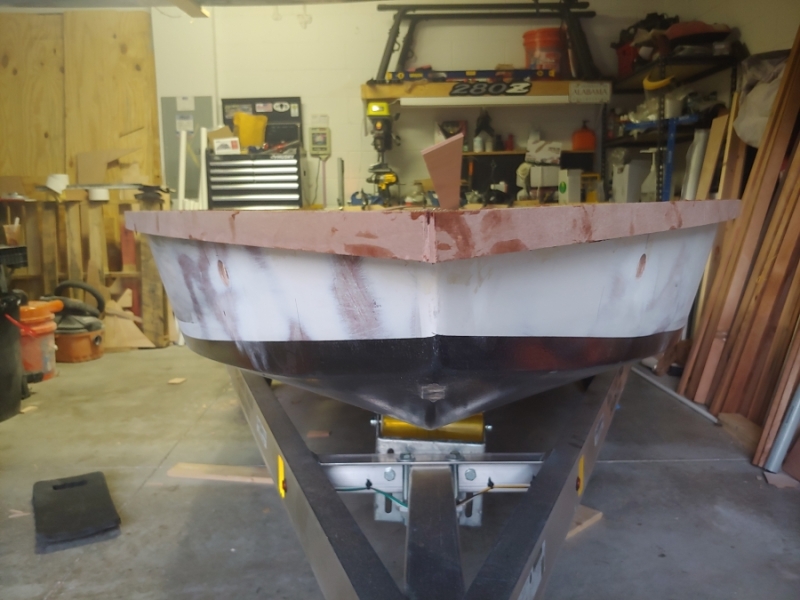
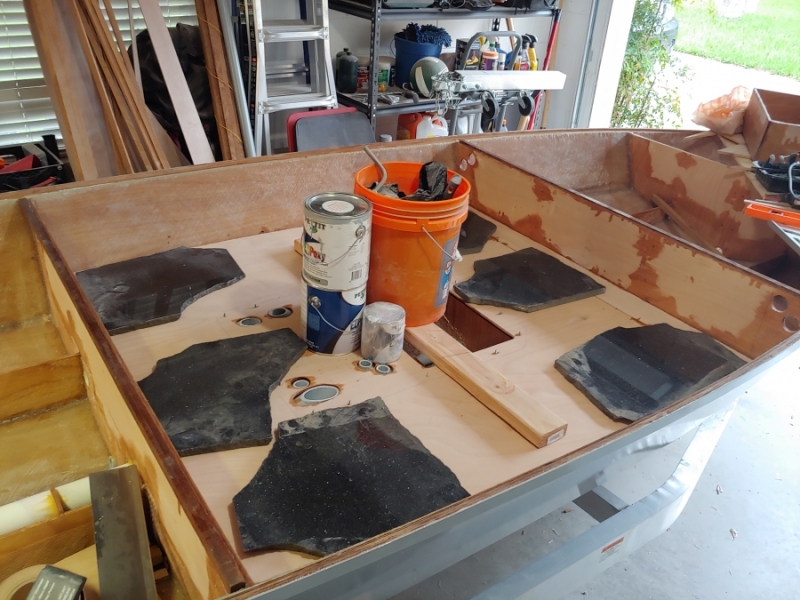
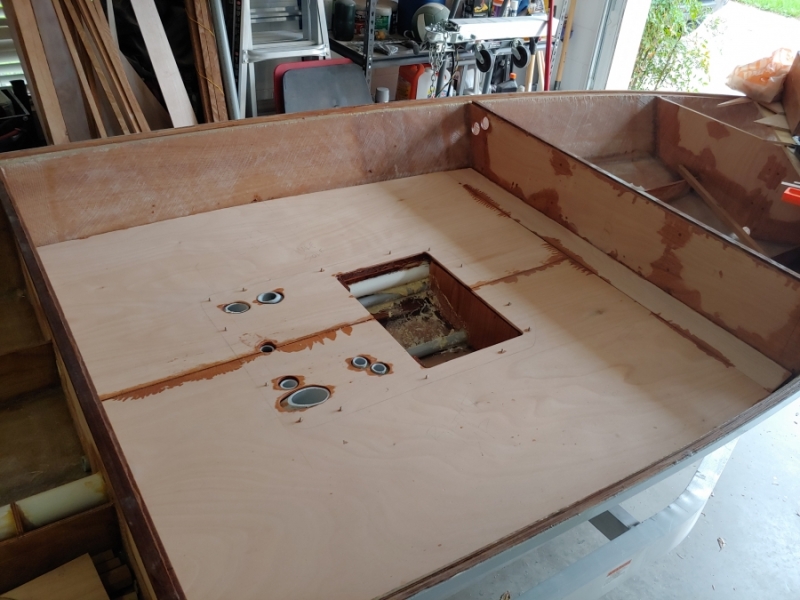
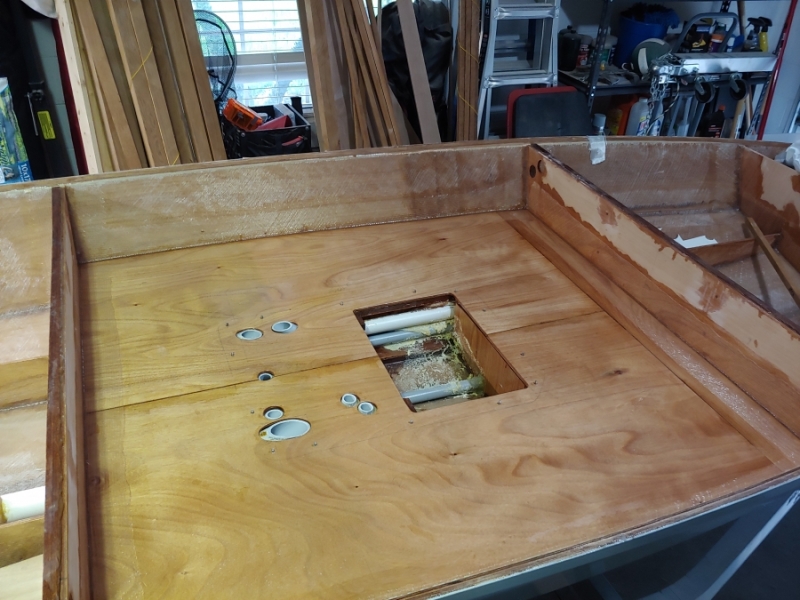
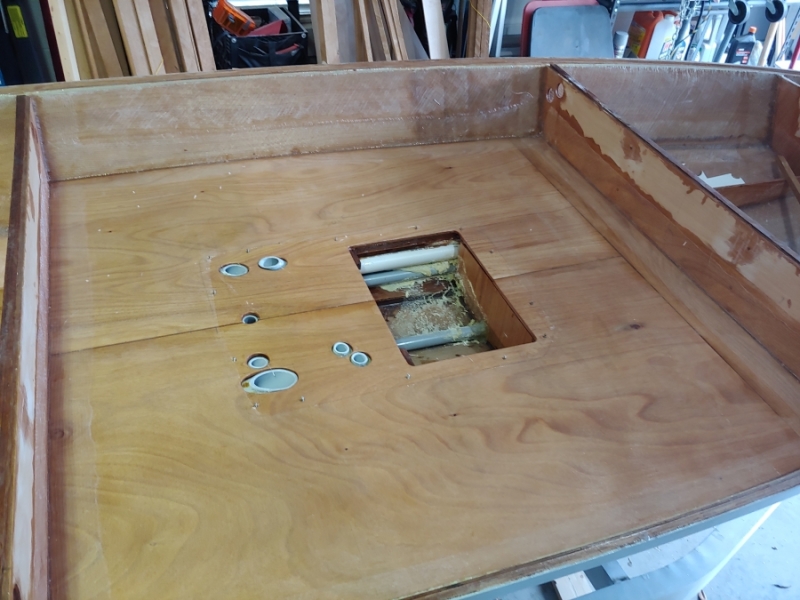


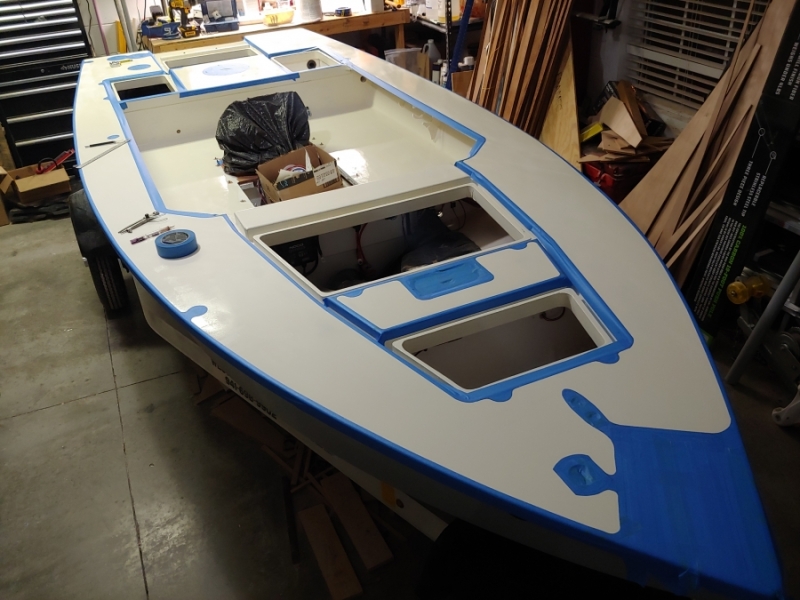
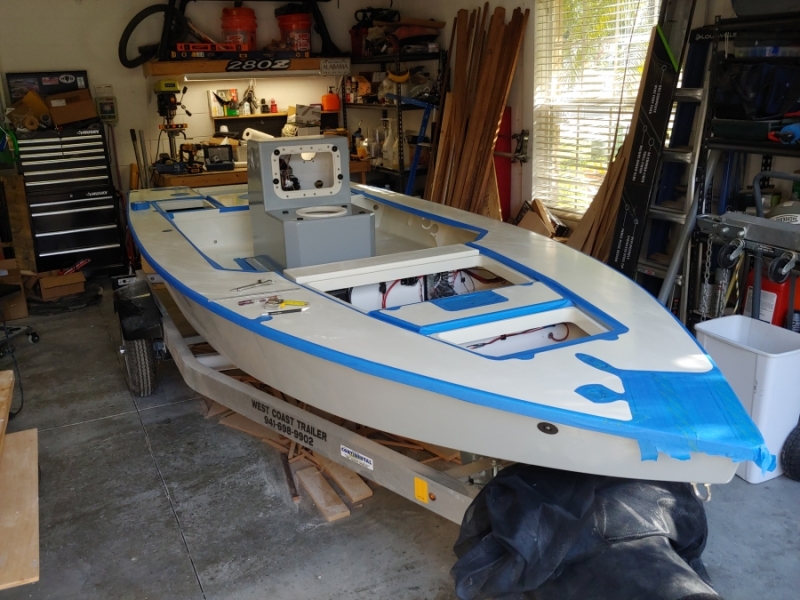
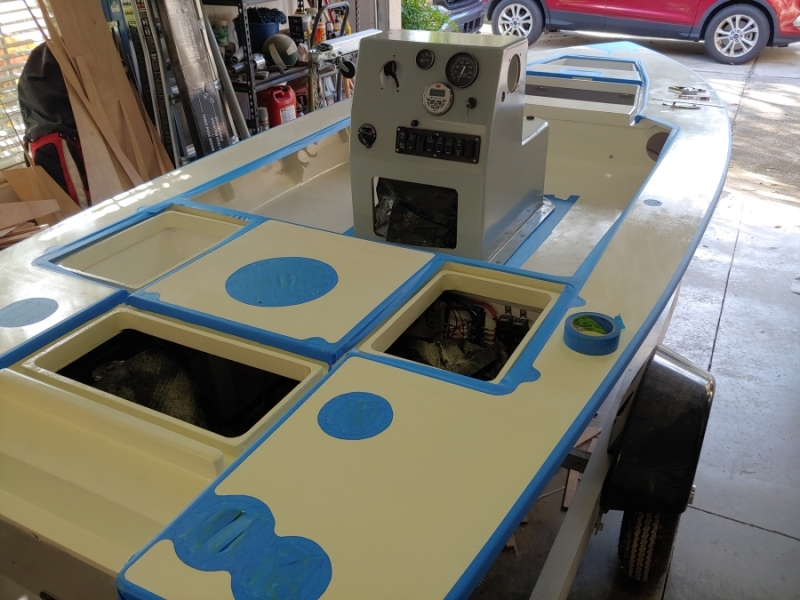
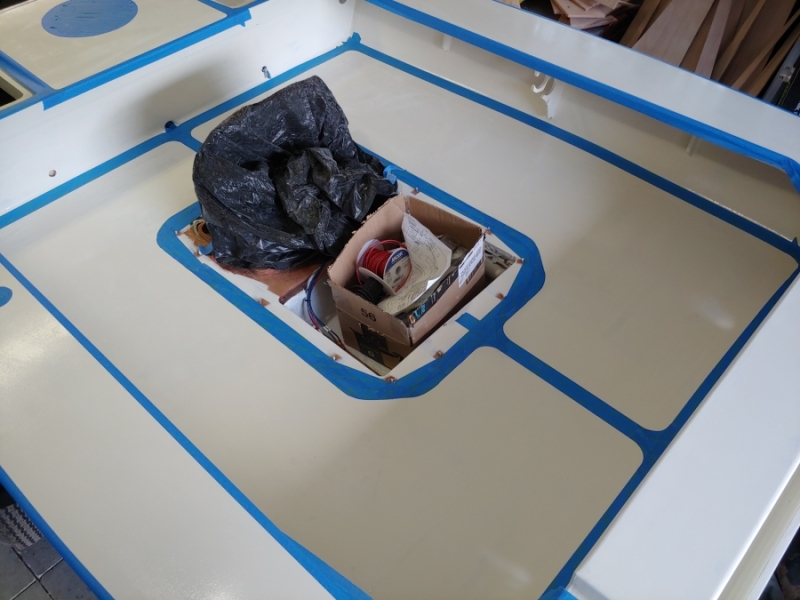
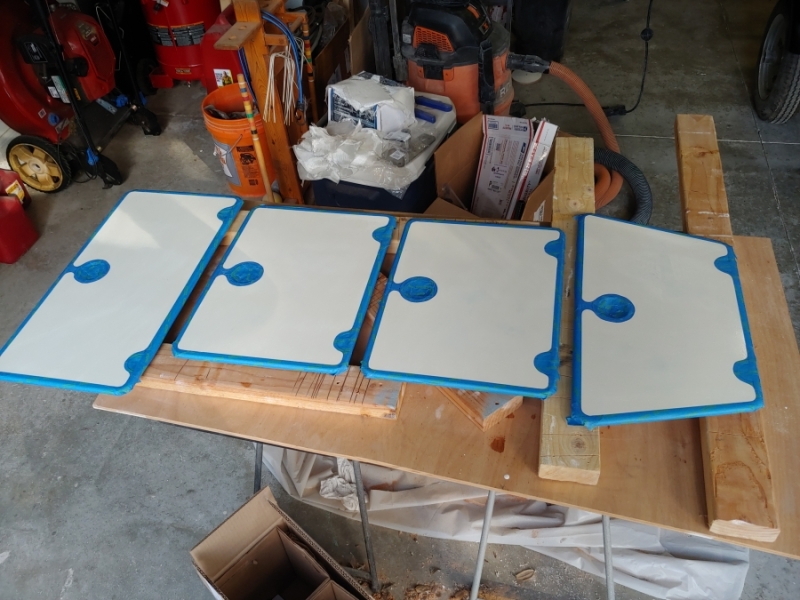
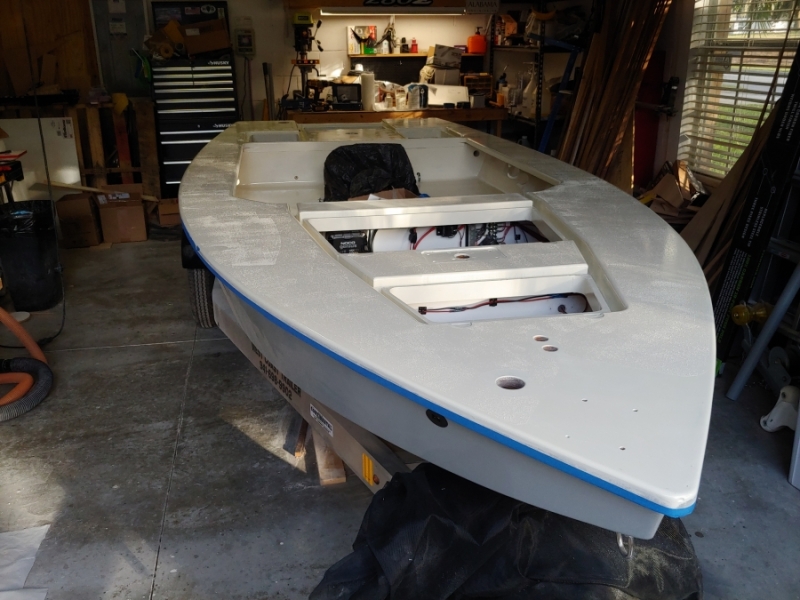
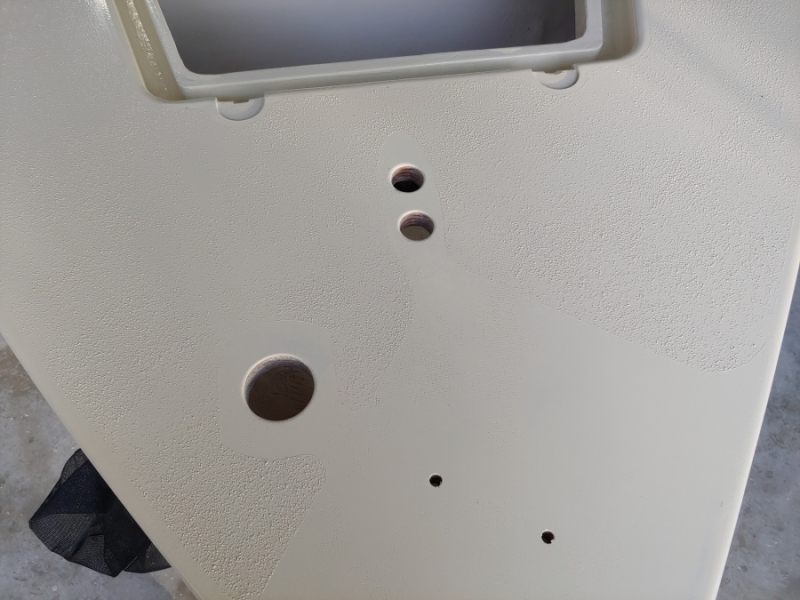
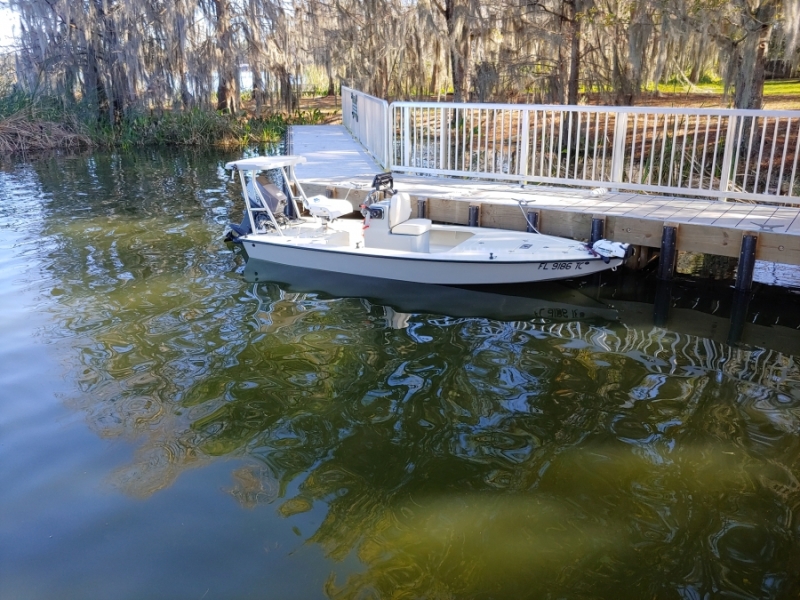
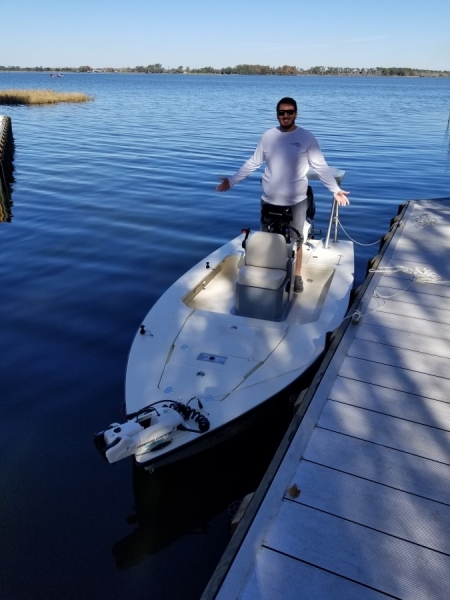
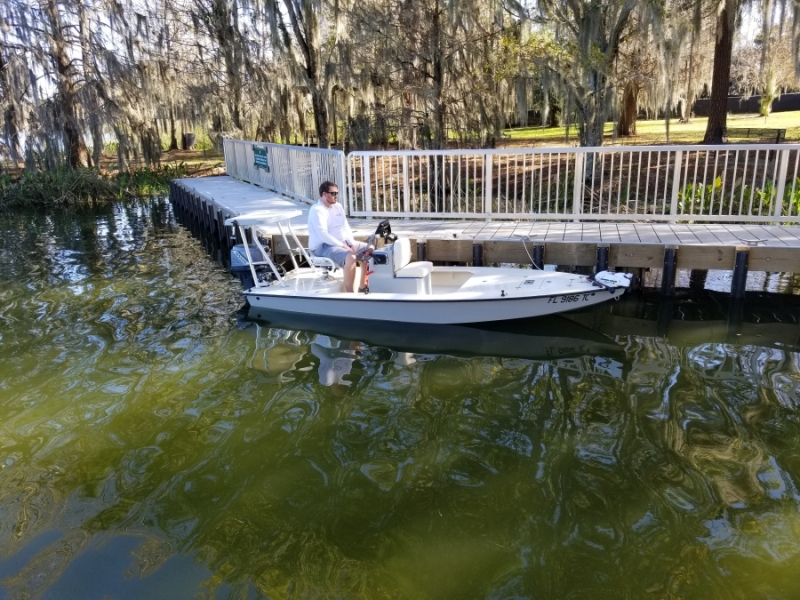
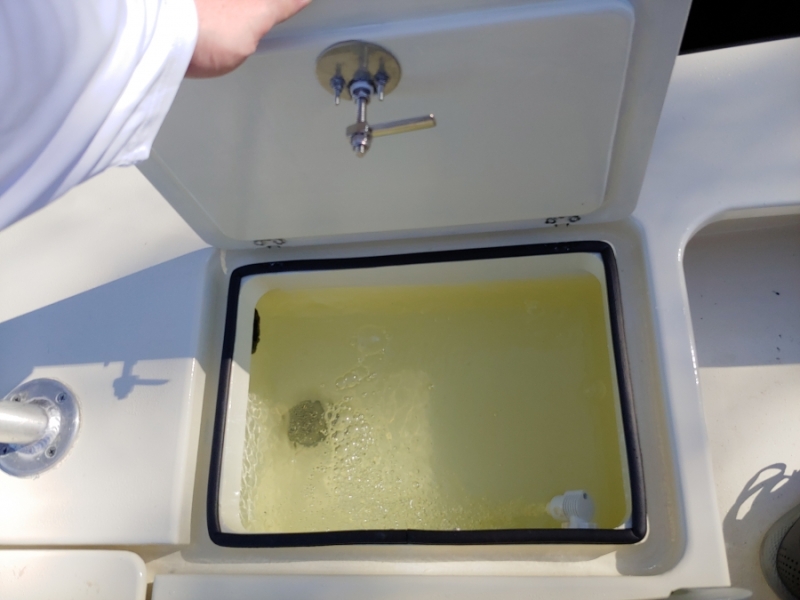
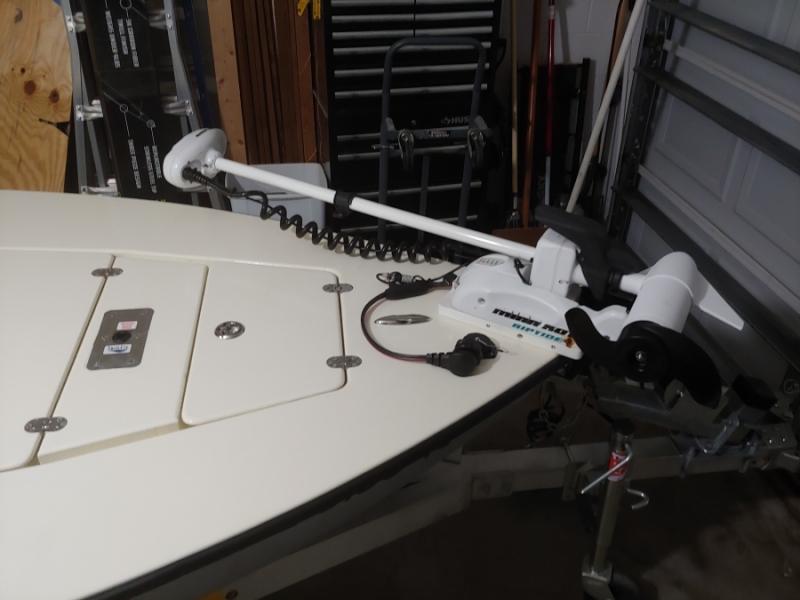
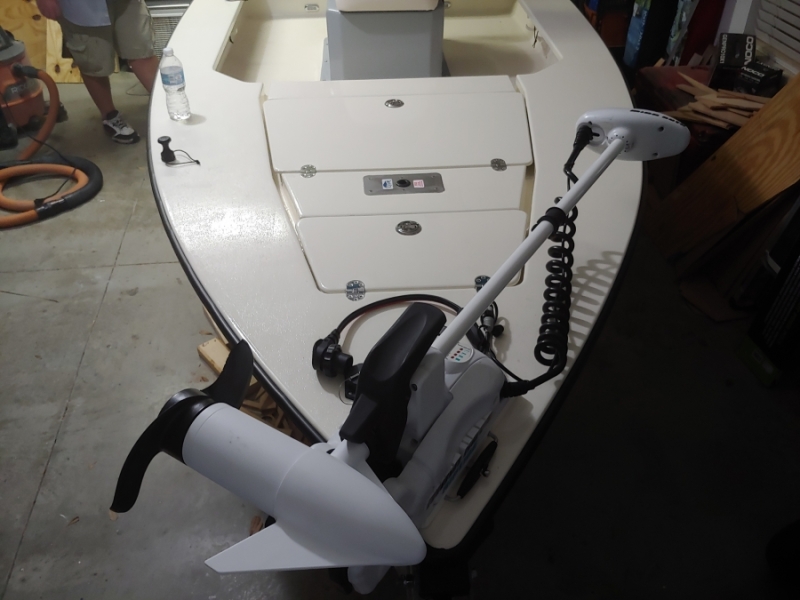
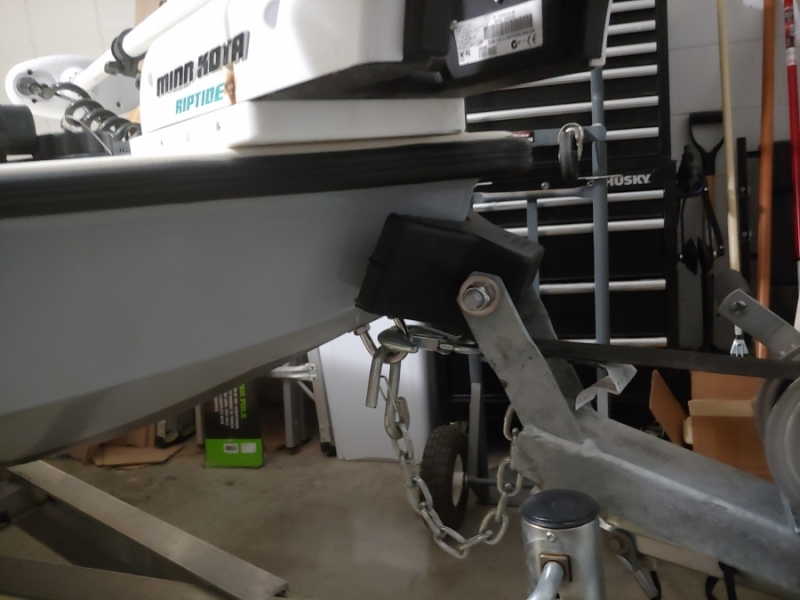
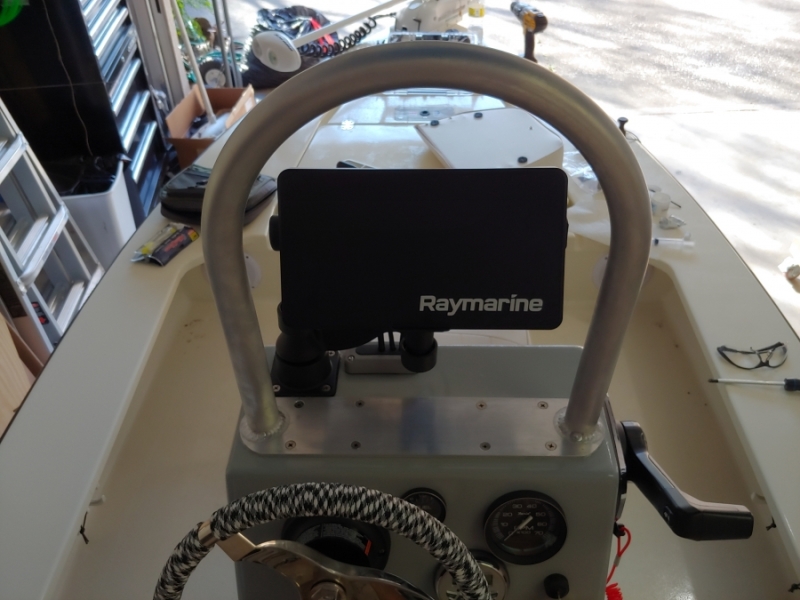
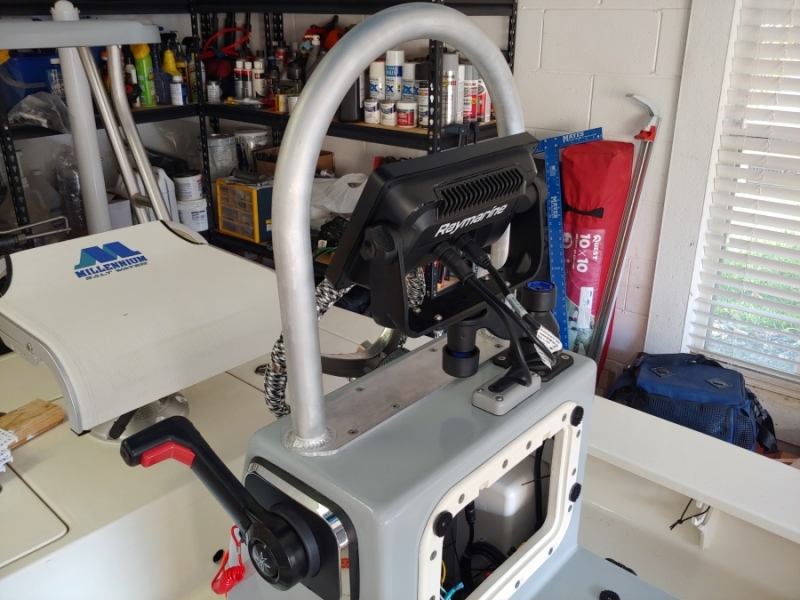
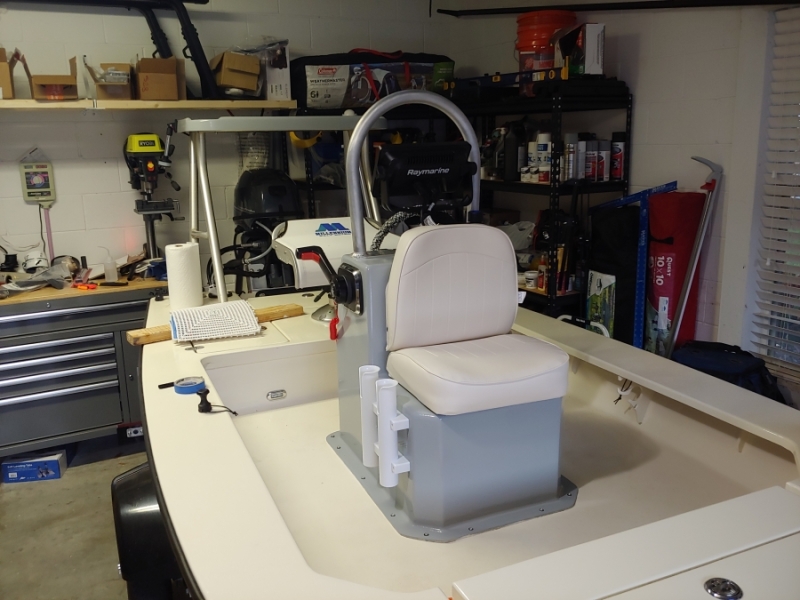
